
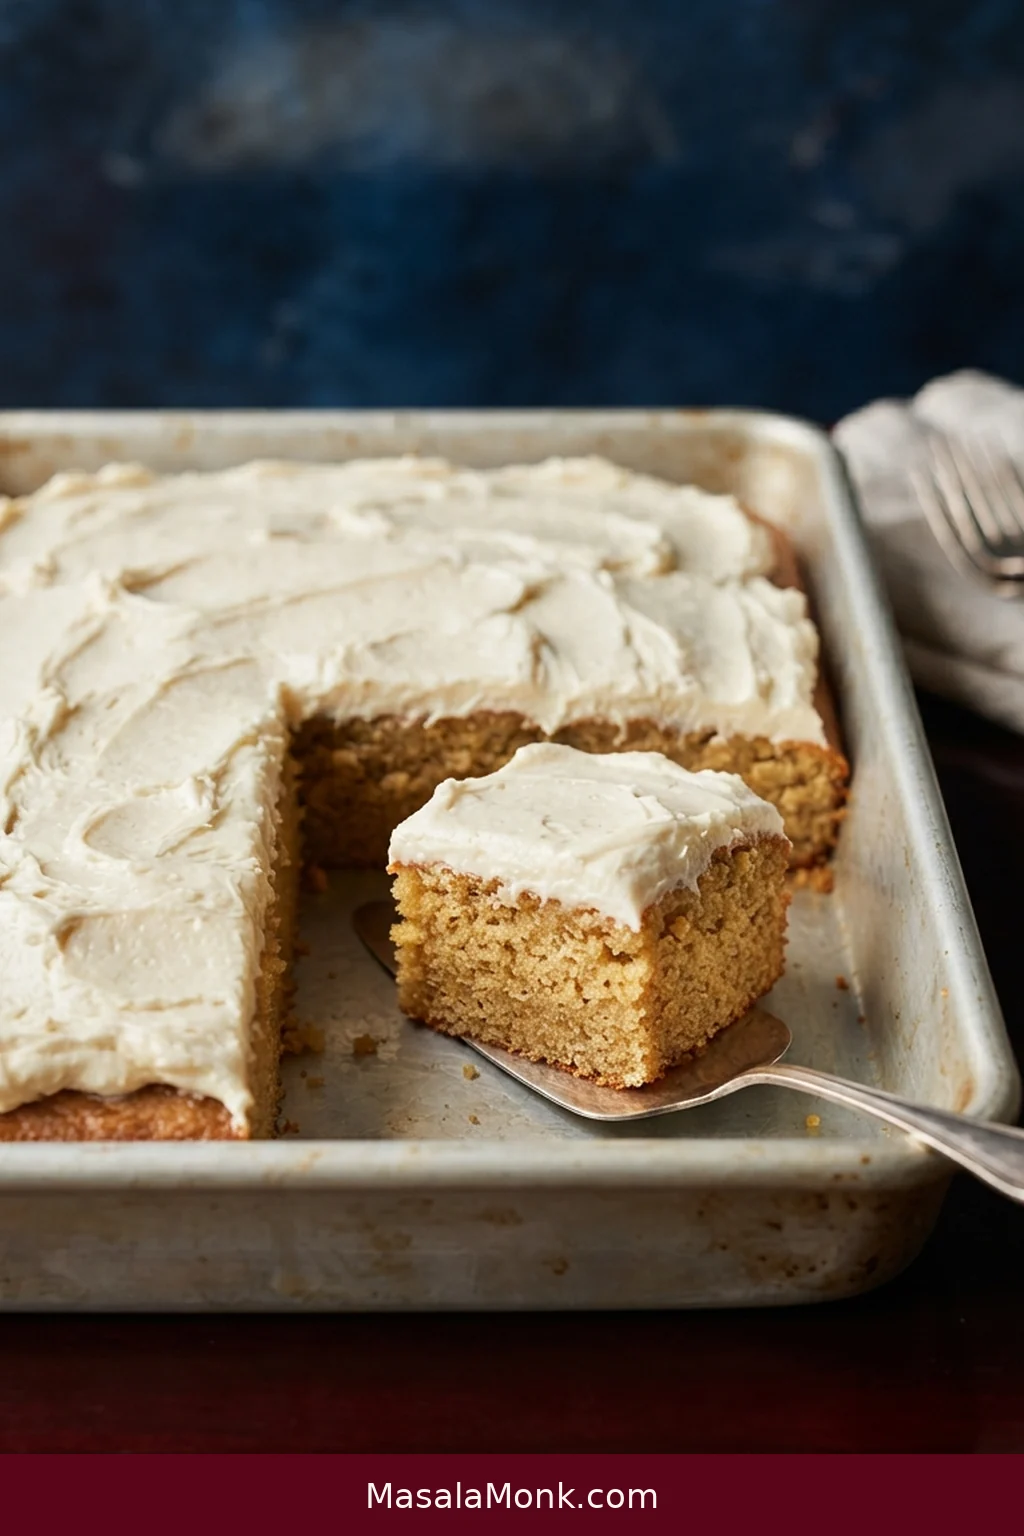
A good banana cake has a particular balance: ripe-banana flavor in every bite, a soft crumb that breaks easily under a fork, and tangy cream cheese frosting that keeps the finish from feeling too sweet. The banana is what makes the cake worth baking, but it is also the ingredient that can make the texture heavy if too much goes into the bowl. If the crumb is your main concern, start with what keeps banana cake light.
This is a straightforward 9×13-inch cake made with all-purpose flour, butter, a little neutral oil and buttermilk. There are no layers to stack or elaborate decorations to worry about. The aim is a tender, cake-like slice with enough lift to feel like dessert, even with plenty of ripe banana in the batter.
Here, fluffy means soft and well aerated, not dry or sponge-cake light.
Measure the Mash. Build the Air. Bake the Center.
- Measure the mash. Three bananas can mean very different amounts. Weigh the mashed fruit.
- Build the air. Beat the butter and sugars until they are visibly paler and fluffier. Once the flour goes in, mix gently enough to keep that air.
- Bake the center. Banana cake browns readily. The top may brown before the middle is ready. Use the visual and tactile cues, not the timer alone.
Reference pan: 9×13×about 2 inches / 23×33×5 cm, preferably light-colored metal.
Banana Cake Recipe
A moist, tender 9×13 banana cake with a fine, well-aerated crumb and tangy cream cheese frosting that lets the banana come through.
- Pan: 9×13×about 2 in / 23×33×5 cm light-colored metal pan
- Oven: 350°F / 175°C conventional / about 160°C fan
- Prep: about 25 minutes
- First check: 40 minutes
- Expected bake: about 40–50 minutes; the visual cues below are the final guide
- Cooling: about 2 hours, or until completely cool
- Total elapsed time: about 3–3½ hours, including cooling and frosting
- Yield: 12 generous or 16 smaller pieces
Equipment
- 9×13-inch light-colored metal cake pan, about 2 inches deep
- Digital kitchen scale, strongly recommended
- Hand mixer or stand mixer
- Two mixing bowls, a whisk and a flexible spatula
- Wire cooling rack
For the Banana Cake
- 360 g / 12.7 oz / about 3 cups all-purpose flour
- 1½ teaspoons baking powder
- 1 teaspoon baking soda
- 1 teaspoon fine salt
- ½ teaspoon ground cinnamon
- 150 g / 5.3 oz / about ⅔ cup unsalted butter, softened
- 170 g / 6 oz / about ¾ cup + 1½ tablespoons granulated sugar
- 90 g / 3.2 oz / about ⅓ cup + 1½ tablespoons packed light brown sugar
- 3 large eggs, preferably at room temperature
- 60 ml / ¼ cup (about 55 g) neutral oil, such as canola, sunflower, vegetable or grapeseed
- 2 teaspoons vanilla extract
- 380 g / 13.4 oz / about 1⅔ cups mashed very ripe banana, usually about 3 large or 4 medium bananas
- 160 ml / 5.4 fl oz / ⅔ cup buttermilk, preferably at room temperature
For the Cream Cheese Frosting
This makes about 2 cups for a moderate, tangy layer. For a thicker classic sheet-cake finish, make 1½ batches.
- 113 g / 4 oz / ½ cup unsalted butter, softened but not greasy
- 240 g / 8.5 oz / about 2 cups powdered sugar, sifted if clumpy
- ⅛ teaspoon fine salt
- 1 teaspoon vanilla extract
- 226 g / 8 oz full-fat block cream cheese, cool and slightly firm
Method
Mix and Make the Batter
- Prepare the oven and pan. Heat the oven to 350°F / 175°C conventional / about 160°C fan. Lightly grease the pan and line the base with parchment.
- Mash and weigh the bananas. Mash very ripe bananas until mostly smooth. Tiny soft pieces are fine; large chunks can leave wet pockets. Weigh out 380 g / 13.4 oz / about 1⅔ cups.
- Mix the dry ingredients. Whisk the flour, baking powder, baking soda, salt and cinnamon until evenly distributed.
- Cream the butter and sugars. Beat the butter, granulated sugar and brown sugar on medium-high speed for 3–4 minutes, scraping the bowl when needed. The mixture should look paler, creamier and noticeably fluffier. Give it time; a quick blend is not the same as proper creaming.
- Add the eggs and remaining wet ingredients. Beat in the eggs one at a time. Mix in the oil and vanilla, then the measured banana. The mixture may look a little less smooth after the banana goes in; that is fine.
- Add the flour and buttermilk. With the mixer on its lowest speed, add one-third of the dry ingredients, then half the buttermilk. Add another third of the dry ingredients, followed by the remaining buttermilk. Finish with the last third of the dry mixture. Stop while a few flour streaks remain.
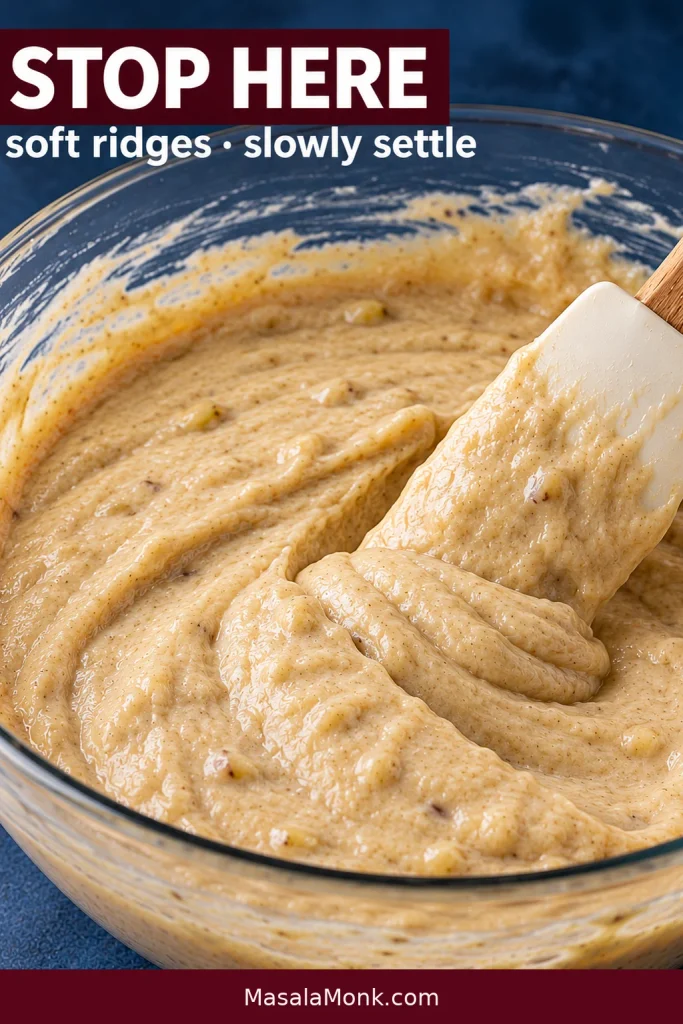
- Finish by hand. Fold gently with a spatula, scraping the bottom and sides, until the last dry pockets disappear. The batter should be thick, cohesive and softly spreadable. Once it looks even from top to bottom, stop mixing.
Bake, Cool and Frost
- Fill the pan. Spread the batter evenly into the corners. A gentle side-to-side shake is enough to level the surface.
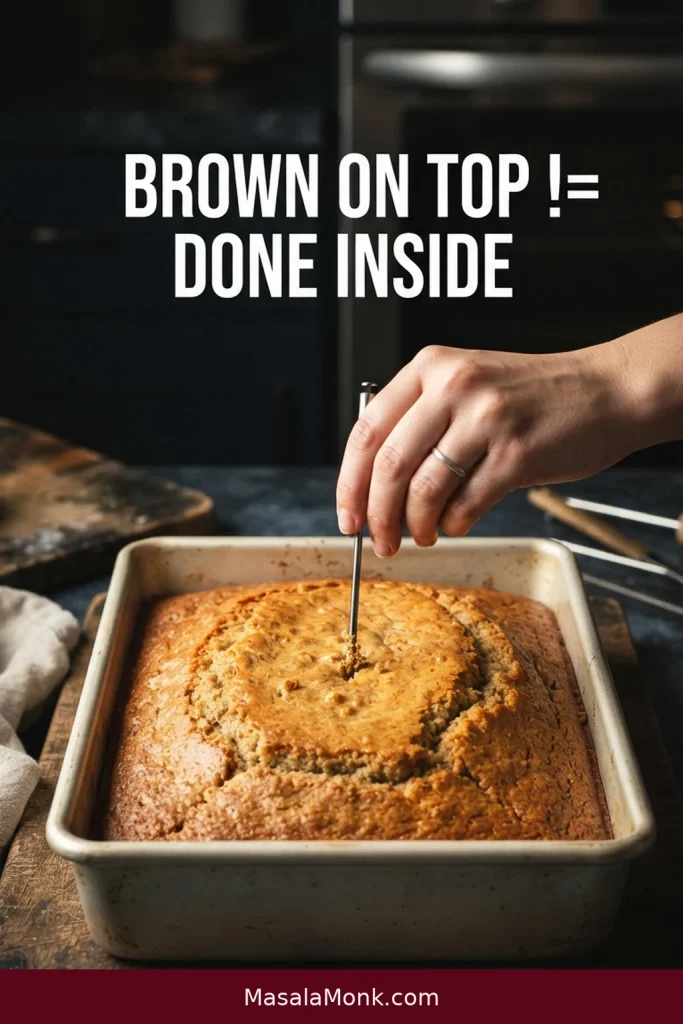
- Bake. Start checking at 40 minutes. The center should look set, show no wet wobble and spring back gently when pressed. A tester near the middle may carry a few moist crumbs; shiny liquid batter means it needs longer. The likely bake window is 40–50 minutes.
- Protect the top if needed. If the color looks right before the center is ready, loosely tent the cake with foil and keep baking. The center matters more than hitting the shortest time in the range.
- Cool completely. Set the pan on a wire rack. Wait until the center is fully cool before frosting, usually around 1½–2 hours.
- Make the frosting. Beat the butter until smooth. Add the powdered sugar and salt in two or three additions, then mix in the vanilla. Add the cream cheese in several pieces and mix only until the final streaks disappear.
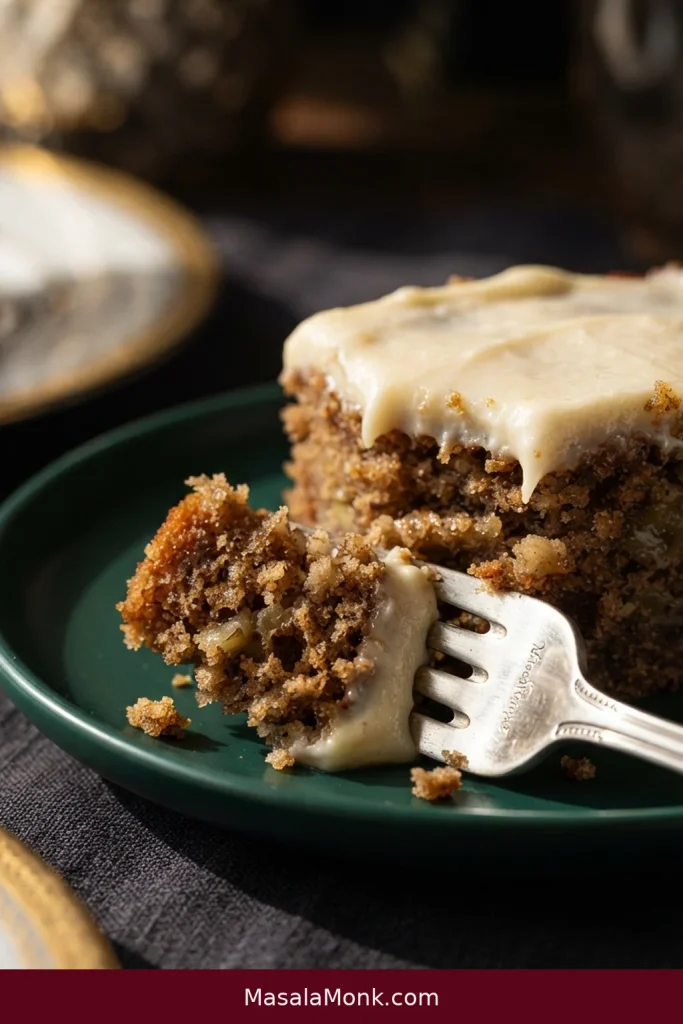
- Frost and serve. Spread the frosting over the cool cake and cut into 12–16 pieces. The finished square should hold together on a fork, then break softly when you bite into it.
Recipe Notes
- Bananas: the count helps with shopping; the scale decides how much goes into the bowl.
- Flour: weigh it if possible. If measuring by cups, spoon flour in loosely and level the top.
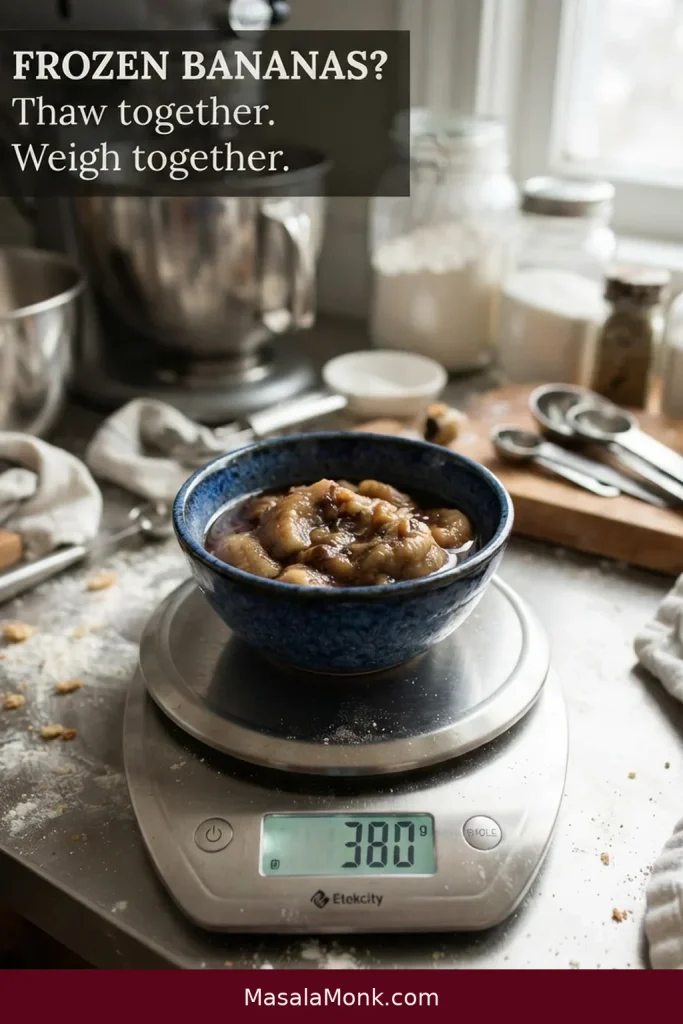
- Frozen bananas: thaw completely, mash the fruit with its released liquid, and weigh 380 g of the resulting mixture. Do not add extra liquid by guesswork.
- Buttermilk substitute: put 2 teaspoons lemon juice or distilled white vinegar in a measuring jug, then add whole milk to reach 160 ml / ⅔ cup. Stir and leave for 5–10 minutes before using.
- Cream cheese: use full-fat block or brick cream cheese. Spreadable tub cream cheese gives a softer, less predictable frosting.
- Recipe note: this is a research-led recipe drawing on established banana-cake methods and recurring baker troubleshooting. MasalaMonk has not kitchen-tested this exact batch. Treat the bake window as an estimate and use the visual cues alongside the clock.
If yours is already in the oven, you have the essentials.
Why Banana Cake Turns Heavy—and How to Keep It Light
Crumb & Baking
- Banana Cake vs Banana Bread
- Ripeness, Weight and Frozen Bananas
- Measuring 380 g of Banana
- What Keeps the Crumb Light
- Build the Air, Then Stop Mixing
- Bake the Center, Not the Brown Top
Finish, Fix & Store
Banana Cake vs Banana Bread: The Crumb Is the Difference
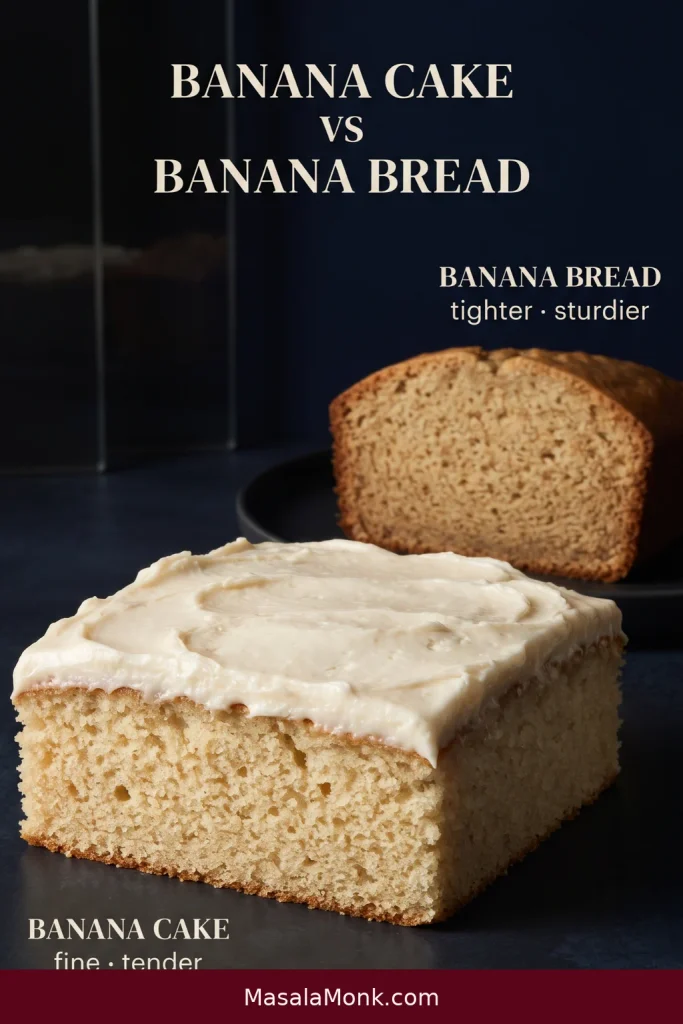
Banana cake and banana bread can share most of their ingredients and still eat very differently. A good banana loaf can be soft yet sturdy, with enough strength for neat slices. Cake should feel finer and more delicate, with little pockets of air throughout the crumb.
Extra baking powder alone will not turn one into the other. Mashed banana adds water, sugar, fiber and weight. Keep adding fruit and eventually the batter has more to carry than its flour, eggs and aeration can comfortably support.
What we want is enough very ripe banana to taste unmistakably banana while keeping the crumb soft and even from the top of the slice to the base.
If you want something more wholesome and loaf-like, our wholewheat jaggery banana tea cake sits much closer to that side of the family. This one is built as a soft, frosted dessert cake.
The Banana Variable: Ripe Enough, but Not Unlimited
If the bananas look a little too ugly for the fruit bowl but still smell sweet and clean, they are usually heading in the right direction for cake.
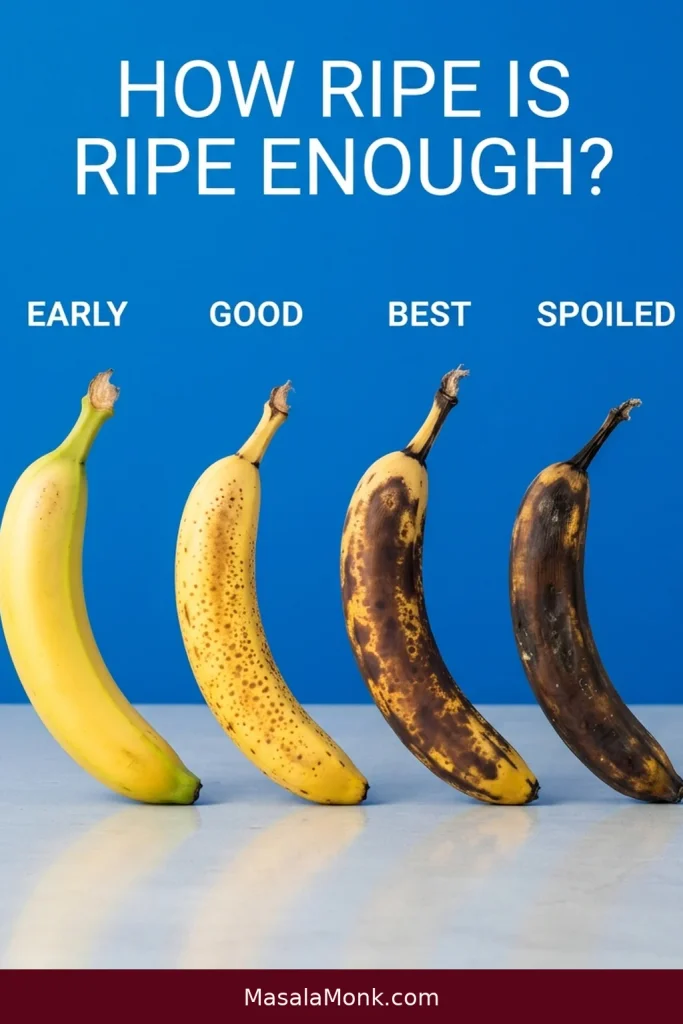
What “Very Ripe” Looks Like
- Firm yellow or slightly green: too early for the fullest flavor.
- Yellow with plenty of brown freckles: good.
- Soft and heavily brown-spotted: ideal.
- Very dark peel with sound, sweet-smelling flesh: still excellent.
- Moldy, badly leaking from decay or smelling unpleasantly fermented: discard.
As bananas ripen, they become sweeter and more aromatic. Heating an underripe banana can soften it, but softness alone does not recreate all the flavor that develops during natural ripening.
Short on Time? Soften Bananas in the Oven
Place unpeeled bananas on a parchment-lined baking sheet and heat them at 350°F / 175°C until the skins darken and the fruit softens, usually about 10–15 minutes depending on their size and ripeness. Let them cool completely before peeling and mashing; the insides can be very hot. This is a useful emergency method, but naturally ripened bananas still give the fullest flavor.
If you have a day or two, place firm bananas in a loosely closed paper bag at room temperature and check them daily. That gives them time to ripen naturally. For the best banana flavor, planning ahead is still better than trying to hurry the fruit along at the last minute.
Let the Scale Decide How Much Goes In
Three small bananas and three very large ones can produce very different amounts of mash. For this cake, use 380 g / 13.4 oz / about 1⅔ cups. The approximate count is there to help with shopping.
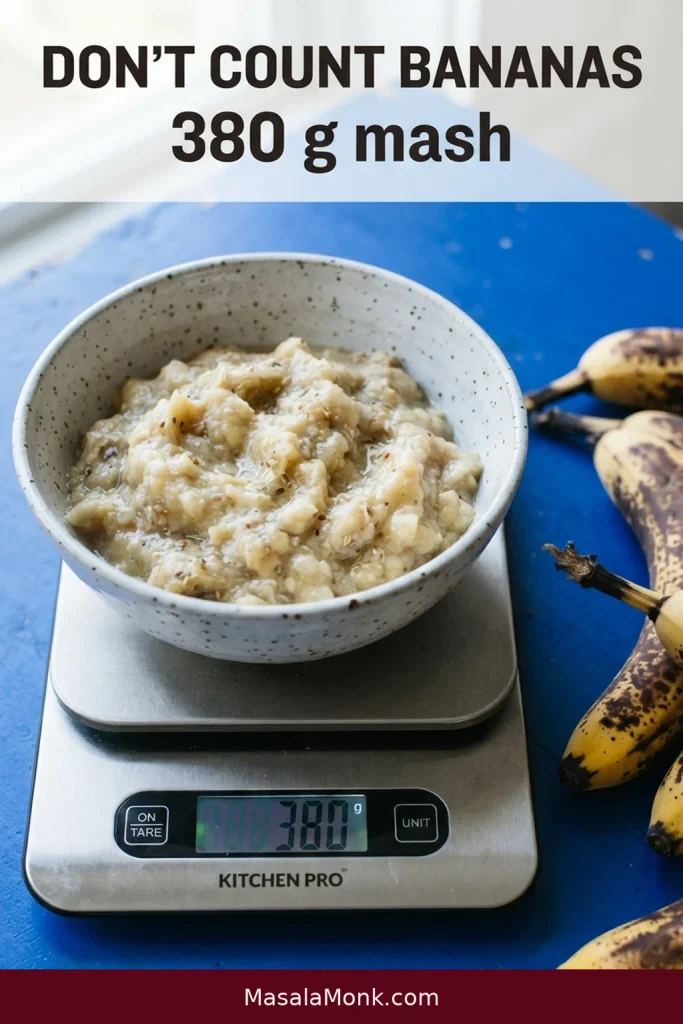
If your bananas are huge and you have mash left over, that’s fine. Save it instead of squeezing every last spoonful into the batter. A batch of banana oatmeal muffins is an easy place to use the extra.
Frozen Bananas Work Too
Thaw them completely first. Freezing breaks down the fruit’s structure, so bananas may release thin liquid as they thaw. Mash the fruit with its released liquid, then weigh out 380 g of the combined mixture; do not squeeze the bananas dry or add extra liquid by guesswork.
What Keeps the Crumb Light
With 380 g of banana already bringing moisture and weight, the flour measurement matters.
What a Tender Crumb Feels Like
After the cake has cooled, a bite should separate softly under a fork without smearing into paste. This is a better texture check than judging the cake while it is still warm and settling.
Butter Builds Air; Oil Keeps Things Soft
Softened butter traps tiny pockets of air when beaten with sugar. That is why the creaming step lasts several minutes instead of stopping as soon as everything looks combined. If you have ever rushed this stage because the bowl looked mixed after 30 seconds, this is one place where waiting pays off.

The eggs are easier to mix in when they are not refrigerator-cold. Cold eggs can make the softened butter firm up in little flecks, so set them out while you measure the other ingredients. If the mixture looks a little uneven after the banana is added, don’t panic; the flour and buttermilk still need to go in, and the final batter is the more useful checkpoint.
Buttermilk Keeps the Batter Tender
Buttermilk adds moisture and acidity while staying much more fluid than thick sour cream or Greek yogurt. The acidity works with the baking soda, and baking powder supplies additional lift. The eggs help the batter hold together as it rises; together, these ingredients need to stay in balance with the banana.
A thick dairy product is not a direct swap, and adding extra milk by feel can throw off the balance. A batter that looks a touch thicker than another cake batter is not automatically too dry. It should spread with a spatula and settle gradually in the pan.
Build the Air, Then Stop Mixing
“Don’t overmix” only tells half the story. Early in the recipe, mixing is useful: the butter and sugars need enough beating to become aerated, and adding eggs one at a time helps the mixture stay smooth as more liquid enters the bowl.
Once the flour goes in, slow down. Vigorous beating at that stage develops more gluten and works against some of the air you have built. Keep the mixer low and finish the last streaks with a spatula.
Read the bowl: visible dry flour means another few folds are needed. Once the batter looks even from top to bottom, stop. It should spread easily with a spatula but hold soft ridges for a moment before settling.
What the Finished Batter Should Look Like
Look for a thick, cohesive batter that spreads with a spatula but does not immediately flow flat. If it looks thicker than pancake batter, that alone is not a reason to add milk.
Bake the Center, Not the Brown Top
Banana cake browns early, and that can fool you. The surface may look beautifully finished while the deeper middle is still setting.
Look for several signs to agree. The center should appear set rather than glossy. Give the pan a gentle movement; there should be no wet wobble. A light press should spring back, and a tester near the middle should carry soft crumbs instead of liquid batter.
If the top reaches the color you want first, cover it loosely with foil and let the center continue baking. The 40-minute mark is a first check, not a deadline.
Why the Timing Can Move
A cool-running oven, glass bakeware, a deeper pan or an unusually wet batter can all stretch the bake. If cakes regularly take much longer than expected in your kitchen, checking the oven with a separate thermometer is more useful than immediately changing the recipe.
For more on combining visual, tactile and tester cues, King Arthur Baking has a useful guide to telling when a cake is done.
Cooling Changes the Crumb Too
A warm banana cake is still releasing steam and settling internally. Cut it too early and the knife can compress or smear the crumb, making a properly baked cake look wetter than it really is.
Once cool, the crumb should look even from top to bottom. It should feel moist but not slick, with no dark wet band near the base.
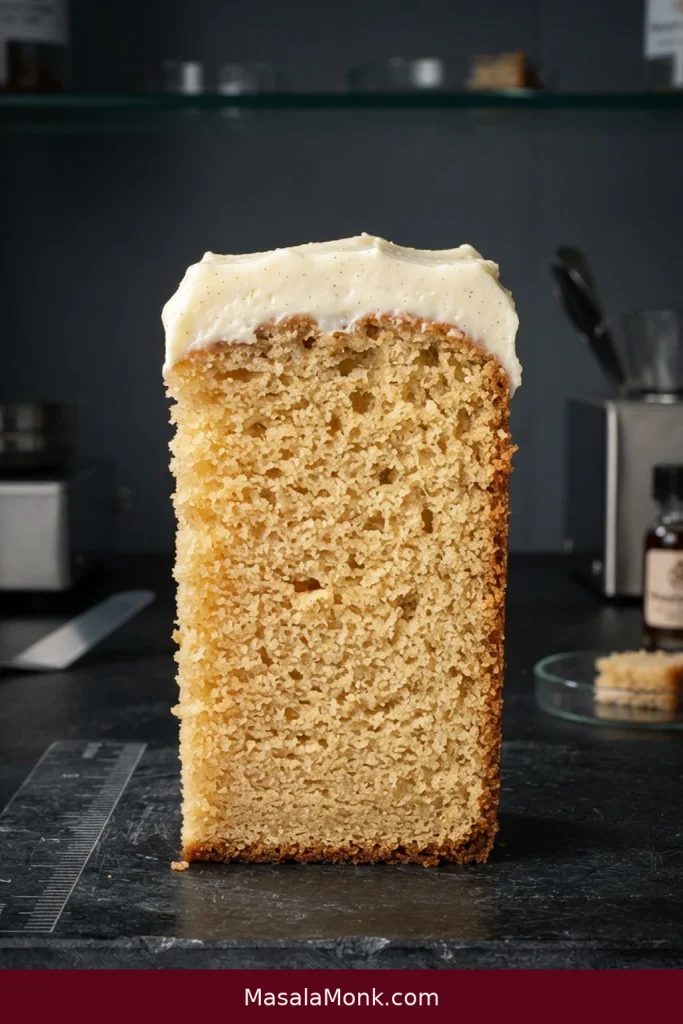
Cream Cheese Frosting That Still Tastes Tangy
Once the cake itself is right, the frosting should stay in its lane. Cream cheese works beautifully with banana because its tang cuts through ripe fruit, butter and brown sugar. A moderate layer gives you cream cheese in each bite without hiding the banana.
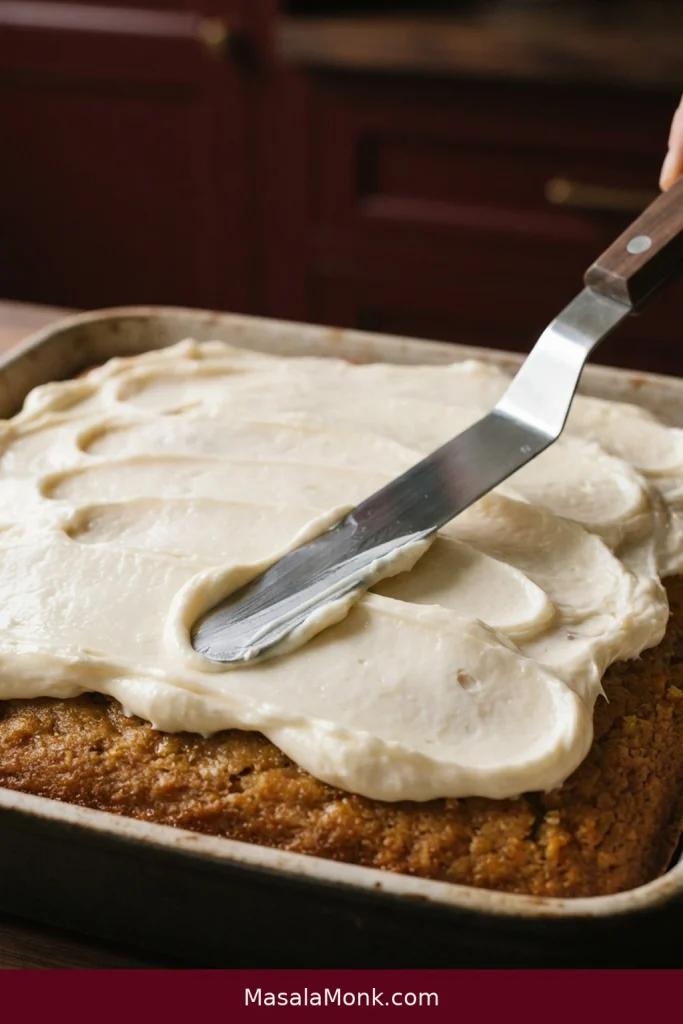
Use full-fat block or brick cream cheese. Spreadable tubs are softer and can contain more moisture, which makes it harder to keep the frosting firm enough to spread cleanly.
Smooth the butter first, work in the powdered sugar and salt, add the vanilla, then add the cream cheese in pieces. Stop once the final streaks disappear. If the frosting tastes right but looks a little soft, chill it before reaching for more sugar.
When Cream Cheese Frosting Is Too Soft
The frosting should hold a soft ridge instead of running flat. Chill it briefly, then reassess the consistency before adding more powdered sugar.
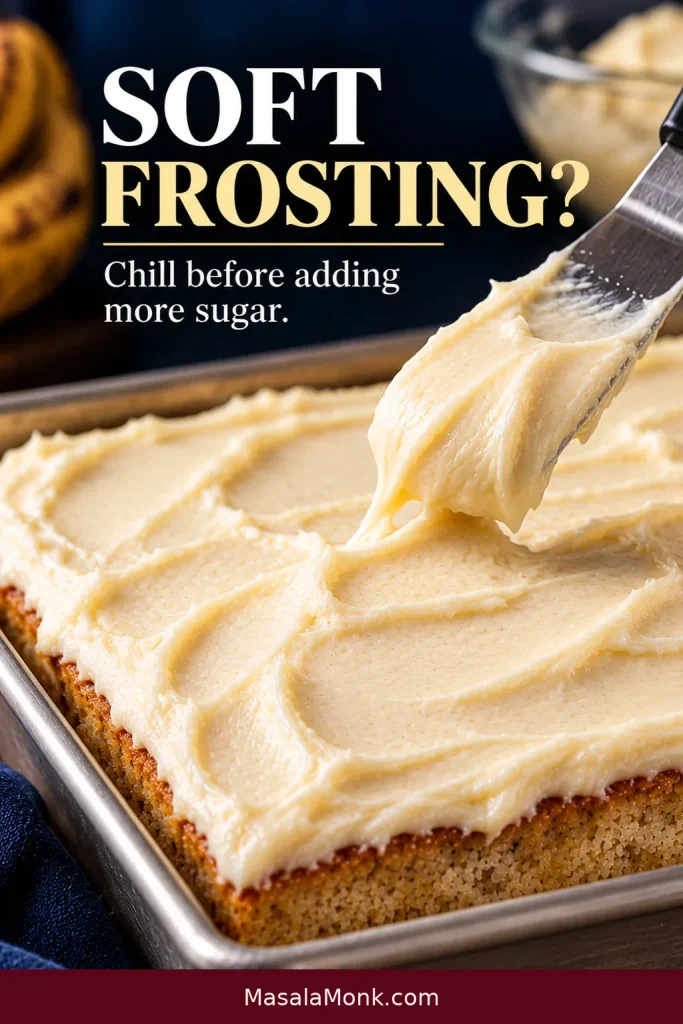
For consistency fixes, piping guidance and the full method, use our cream cheese frosting recipe.
Pan Size and Batter Depth
The recipe is simple; the pan is one of the easiest ways to change it without meaning to. A shallow sheet, a deep rectangular dish and a jelly-roll pan can hold batter at very different depths.
The reference here is a 9×13×about 2-inch / 23×33×5 cm light-colored metal pan. The suggested timing belongs to that setup.
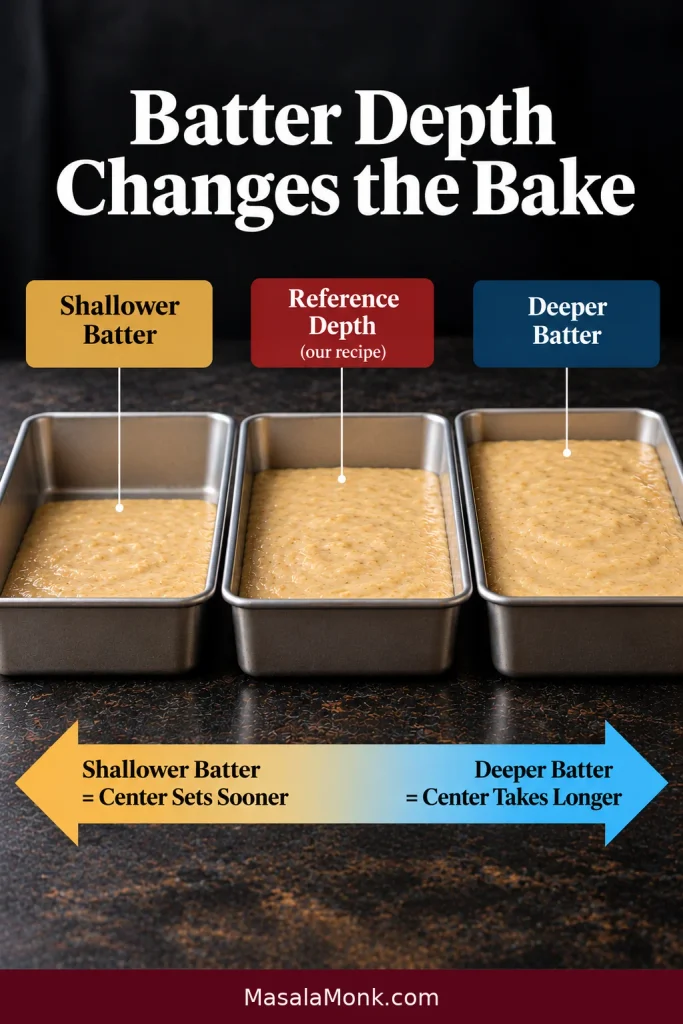
| Pan Change | What Happens | What to Do |
|---|---|---|
| Shallower, wider pan | The batter cooks faster. | Begin checking much earlier. |
| Smaller, deeper pan | The center takes longer to heat through. | Scale the batter instead of forcing the full batch into a small square pan. |
| Glass 9×13 | Heat behaves differently from metal. | Follow the center cues and allow the timing to move. |
| Round layers | The batter becomes shallower. | The sheet-cake timing no longer applies. |
| Cupcakes | Individual portions bake much faster. | Use cupcake timing rather than the 9×13 clock. |
| Bundt pan | The cake becomes much deeper around a central tube. | Use a banana cake designed for Bundt baking. |
| Loaf pan | You are moving into a deep loaf format. | Make banana bread with applesauce when a loaf is what you want. |
King Arthur Baking’s guide to baking pans is useful if you often switch between glass, light metal and darker bakeware.
What You Can Change Without Throwing Off the Cake
Small flavor additions are easier to accommodate than changes to the amount of liquid, fat or structure.
No Buttermilk?
Put 2 teaspoons lemon juice or distilled white vinegar in a measuring jug, then add whole milk until the total reaches 160 ml / ⅔ cup. Stir and leave for 5–10 minutes before using. It is a practical substitute, although cultured buttermilk and acidified milk are not identical.
Nuts
Fold in up to 100 g / 3½ oz / about 1 cup chopped toasted walnuts or pecans with the final few folds.
If banana, toasted pecans and cream cheese frosting are your favorite combination, our hummingbird cake takes that idea further with pineapple and a true layer-cake format.
Chocolate Without Rebuilding the Batter
Fold in up to 120 g / 4¼ oz / about ¾ cup semisweet chocolate chips for pockets of chocolate through the cake. For a chocolate-forward finish, try chocolate cream cheese frosting.
A true chocolate banana cake needs its own balance of cocoa, flour, sugar and liquid. Stirring cocoa straight into this batter would change too much at once.
Prefer Buttercream?
A classic vanilla buttercream gives the cake a sweeter, more vanilla-forward finish if cream cheese is not your thing.
What About Eggless Banana Cake?
For eggless banana cake, use a recipe built that way from the start. The three eggs here help hold the cake together, keep the butter mixture stable and support the rise; replacing all three with one simple substitute changes several things at once.
Banana Cake Troubleshooting
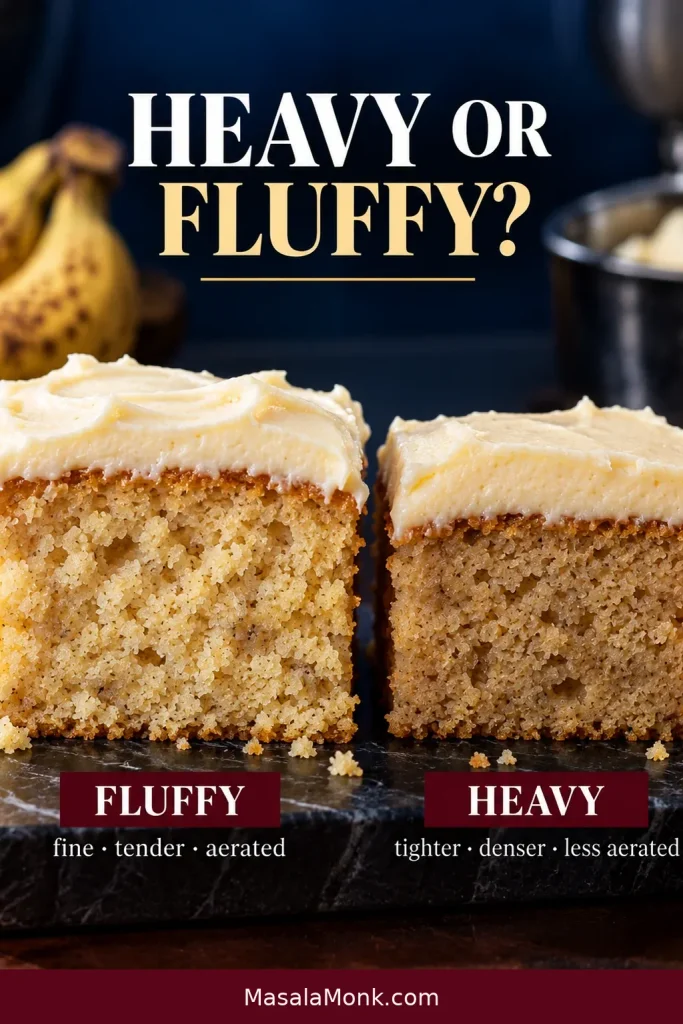
A good crumb looks even from top to bottom, feels tender rather than wet and breaks cleanly when you pull a fork through it. When yours doesn’t, start with what you can see.
When Banana Cake Is Dense Throughout
A dense cake has tight crumb across most or all of the slice. Before changing the liquid or adding more banana, check the flour weight, the creaming stage, the freshness of the leaveners, and how much the batter was mixed after flour went in.
Quick Checks for Common Banana Cake Problems
| What You See | Likely Cause | Check First |
|---|---|---|
| Heavy throughout | Too much flour or banana; weak aeration; stale leaveners; too much final mixing | Flour and banana weights, creaming, leavener freshness |
| Wet/gummy strip at the bottom | Too much moisture; lower crumb not fully baked; deep pan; sliced too warm | Banana amount, thaw liquid, pan depth, center doneness |
| Greasy crumb or oily patches | Uneven mixing, excess moisture or an underbaked center | Banana weight, batter consistency and center doneness |
| Rose, then sank | The center was still too soft to hold the rise as the cake cooled | Center doneness, oven temperature, moisture load |
| Brown top, wet middle | The surface browned before the center finished | Cover the top and keep baking |
| Dry crumb | Too much flour or too much oven time | Flour measurement and first-check time |
| Rubbery/tough crumb | Too much mixing after flour went in | Low-speed mixing and final hand-fold |
| Weak banana flavor | Bananas were not ripe enough, or cake is being served very cold | Ripeness and serving temperature |
| Feels more like banana bread | The crumb is too tight or fruit-heavy | Banana amount, aeration, flour and mixing |
| Runny frosting | Tub cream cheese, warmth or too much mixing | Cream cheese type, temperature and mixer time |
| Frosting gets sweeter but stays loose | Extra sugar is masking a temperature or moisture problem | Stop adding sugar; chill and reassess |
| Cake feels firm from the refrigerator | The butter is cold | Let the slice lose some chill before judging it |
A Gummy Stripe at the Bottom
A gummy stripe is different from a moist crumb: it looks darker and compressed, sometimes slightly translucent, and may smear when sliced.
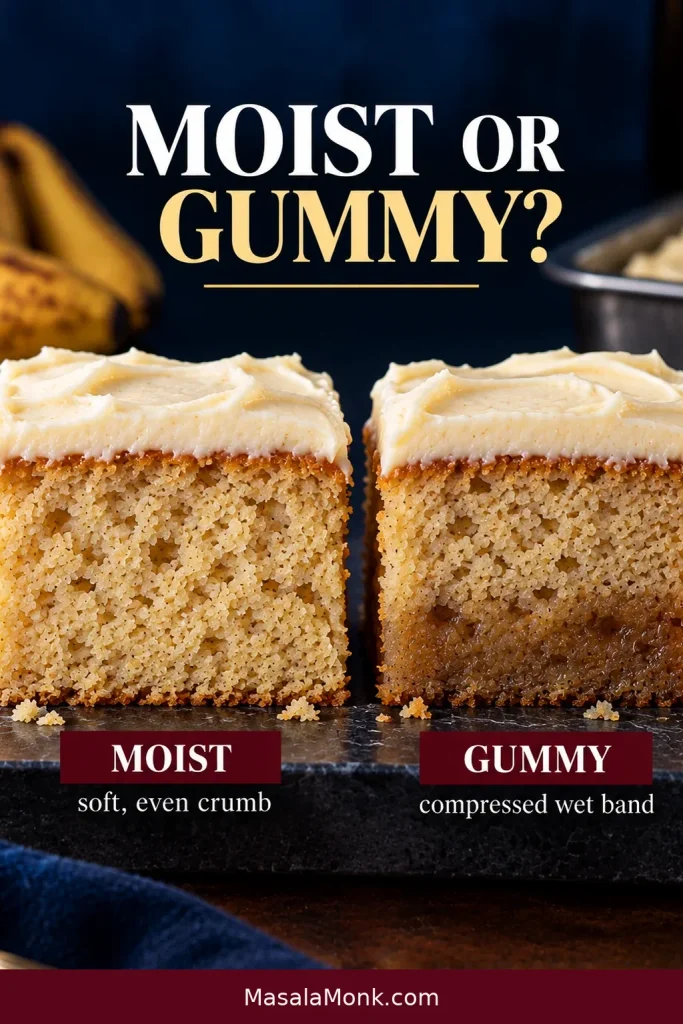
Check the banana and flour measurements first. If you used frozen fruit, think about how much thaw liquid went into the bowl. Then look at the bake: a brown top does not prove the lower center was ready. Pan depth and a cool-running oven can make the same problem worse.
A Greasy or Oily Crumb
A greasy crumb or oily patches point to a different problem from a gummy stripe. The cake may look shiny in places or leave a greasy feel on the fingers instead of breaking into soft crumbs.
Check that the wet ingredients were mixed evenly, the banana was measured, and the center was fully baked. Because this recipe deliberately uses both butter and oil, don’t assume the oil is automatically the culprit; look for excess moisture, uneven mixing or a center that has not set before changing the fat balance.
The Cake Rose and Then Fell
If the cake rises well and then sinks as it cools, first check whether the center had fully set. A soft middle can rise in the oven but lack enough structure to hold that height afterward. If the center appeared properly baked and the problem keeps happening, check the actual oven temperature and make sure the baking powder and soda are reasonably fresh.
The Top Is Done Long Before the Middle
Cover the top loosely once the color looks right and give the center more time. If the gap is extreme every time, check the pan depth and oven temperature.
↑ Back to the recipe card · ↑ Back to top
Banana Cake Is a Good Day-Before Cake
Once completely cool, the cake slices more cleanly, and the banana flavor may seem more settled the following day.
Making It Ahead
If you plan to frost the cake the next day, let it cool completely and keep the unfrosted cake tightly covered at cool room temperature. Refrigerate it instead if your kitchen is particularly warm.
Make the Frosting Ahead
You can make the cream cheese frosting up to 2–3 days ahead and keep it covered in the refrigerator. Before spreading, let it sit at room temperature until workable, usually 15–30 minutes, then mix briefly until smooth. If it is still firm, give it more time to soften before adding anything to it. Avoid warming it until greasy; it should be pliable enough to spread while still holding its shape.
Once the frosting is on the cake, keep the cake covered in the refrigerator.
Refrigerating
Use refrigerated leftovers within about 4–5 days. Keep the frosted cake chilled when it is not being served instead of leaving it out for extended periods.
Freezing
The cake freezes most neatly before frosting. Cool it completely, wrap the whole cake or individual pieces well and freeze for up to about 3 months.
Thaw it while wrapped in the refrigerator, then let it warm slightly before frosting or serving.
Serving a Chilled Slice
For the best texture, let a refrigerated slice lose some of its chill before serving. The fats soften as the cake warms slightly, making the crumb feel more tender and allowing the banana aroma to come through.

↑ Back to the recipe card · ↑ Back to top
A Few Remaining Banana Cake Questions
Can I Reduce the Sugar?
A modest reduction is possible if you strongly prefer a less-sweet cake, but sugar affects tenderness and moisture too. The amount here is already fairly restrained, especially when you consider the frosting as part of the same bite.
Can I Skip the Cream Cheese Frosting?
Yes. Serve the cake plain or add a light dusting of powdered sugar. The frosting is the classic finish, but the cake does not need it to hold together.








