Yes, summers are here, and the scorching heat is unbearable. Our natural instinct is to grab something cold and what better way to beat the heat than an ice-cream. It’s cool, creamy, delicious and triggers dopamine rush. It gives a cooling sensation on the tongue; the flavour and overall sweetness contributes to the positive experience of enjoying this treat. It is hard to pass that feeling of instant pleasure. But before you grab that ice-cream, know the science behind what an ice-cream does to your body heat, so that next time when you require something to cool yourself, you’ll make a better choice.
How our body heat works?
To understand what ice-cream does to our body, we first need to know a bit about how our body controls temperature in different environments. The process of maintaining optimal body temperature by our body is called thermoregulation. Humans are warm blooded which means we can control our body temperature. Our body can constantly produce heat as a byproduct of internal chemical processes which is done by our metabolism. Our metabolism is responsible for correct functioning of our body. From breaking down food to absorbing nutrients to transporting them to different cells and then converting it into energy, metabolism makes it all possible. The heat this process generates is useful when outside temperature is cold but in summers, we need to avoid overheating.

How will Ice-Cream work once it gets digested?
It may seem logical to have something cold like an ice-cream in summers to cool yourself, however, once the components of the ice cream start to break down, the cooling effect is diminished. Its initial cooling effect is rapidly replaced by heat which is generated when the digestion process of ice cream starts. When the body needs to digest calorie rich foods, it produces a lot of heat to digest it which leads to increase in body temperature. Milk, sugar and all the cream added in an ice-cream are rich in calories. This will generate more heat in the body when outside temperature is already high. So, instead of having a cooling effect, it will have the opposite effect. The same goes for high calorie soft drinks- aerated drinks, packed juices. All of this will provide only a momentary respite from the heat but will not cool your body in the truest sense.
What can you actually do to keep your body cool in summers?
While it’s is ok to enjoy an ice-cream once in a while but as the mercury rises opt for a more balanced approach to beat the heat. Some of the best summer coolers are:
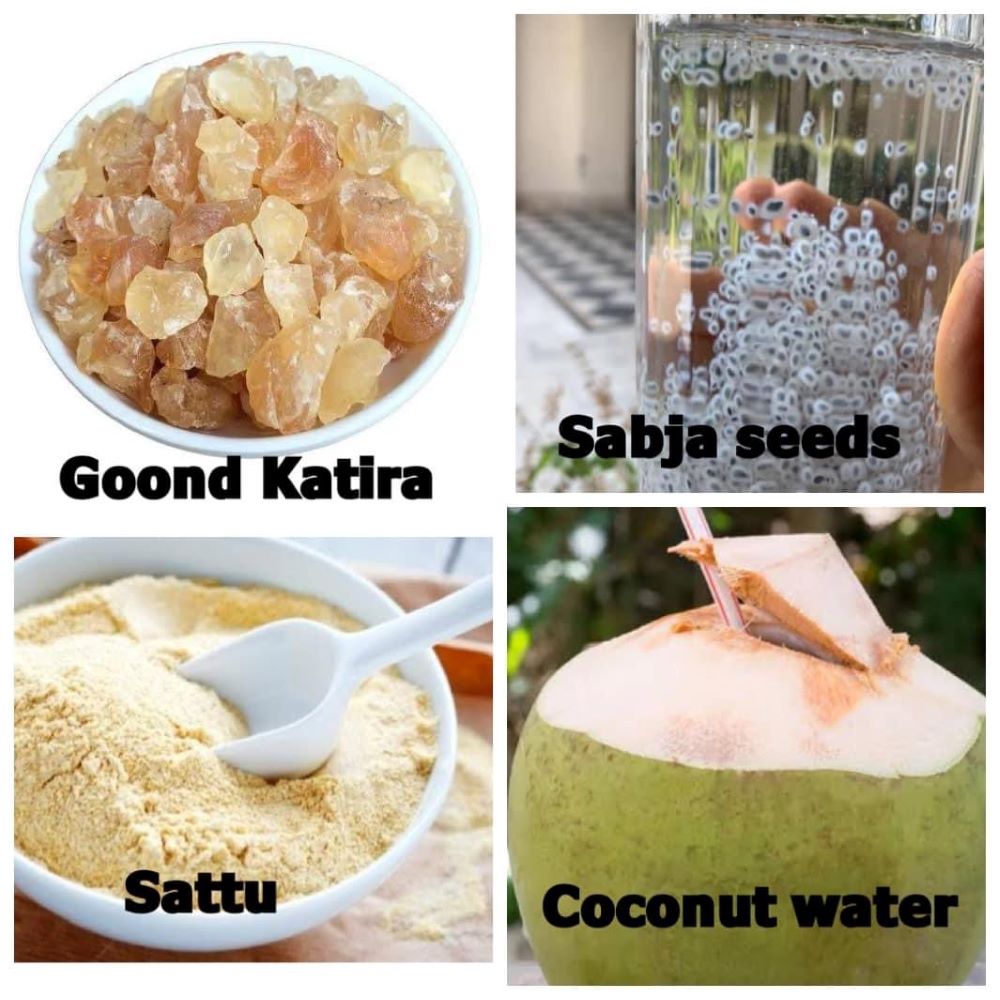
- Coconut Water
- Lemon Water
- Sabja seeds (Basil Seeds)
- Mint leaves
- Jal jeera (Cumin Water)
- Cucumber
- Homemade Badam (Almond) Sherbet
- Homemade Thandai
- Sattu
- Buttermilk
- Goond Katira (Almond Gum or Tragacanth Gum)
Apart from this, warm beverages surprisingly are a good way to keep yourself cool. Drinking hot beverages cause your body to sweat which allows your body to cool down. Sweating is the most effective natural way for our body to lose heat.
Eating spicy foods such as ginger, cayenne pepper and red chili peppers can cause you to perspire. When you eat spicy food, you might initially feel hot, but it triggers sweat response causing you to perspire and when the perspiration evaporates, it cools your body temperature.
Lastly and most importantly, keep yourself hydrated. Drinking enough water is essential to maintain overall well-being and is one of the best ways to keep yourself cool.
Ayurvedic Perspective:
According to Ayurveda, ice-cream has dampening qualities. It is cold, heavy, too sweet and lacks fire element. Fire or Agni in Ayurveda is referred to as digestive fire- energy that we all need for smooth digestion. Now imagine, pouring something cold and heavy on a blazing fire. Yes, exactly! The fire will diminish. Having too much of cold, sweet and heavy foods creates an imbalance in our body triggering conditions like excess mucus, lethargy, weight gain, allergies, indigestion, bloating and constipation.
But if you really have a strong urge to grab that ice-cream cup, Ayurveda has some ways in which you can make this food little friendly for your body.
- Consume your ice-cream around noon time, from 12:00 to 2:00 pm. This is the time when digestive fire is at its strongest. You will have plenty of time throughout the day to digest it.
- Go for ice-cream that has a bit of spice like cinnamon, nutmeg, ginger or even cayenne pepper. This gives your body some digestive support.
- Cardamom flavoured icecream is considered to be one of best antidotes to icecream. When cardamom is added to dairy products, it aids digestion and helps to reduce excess mucus production caused by dairy.
Bottomline
Cold treats can be satisfying when the temperature is soaring however, it does have an opposite effect on your body. Instead of cooling your body, it will generate more heat. You can enjoy cold summer treats but remember moderation and maintaining a balance is the key to good health. Fix on better and natural summer coolants and remember to stay hydrated.
I hope this post helped you and next time when you get the craving, do remember this post. It will help you make informed choices. Stay happy and stay healthy! 🙂