
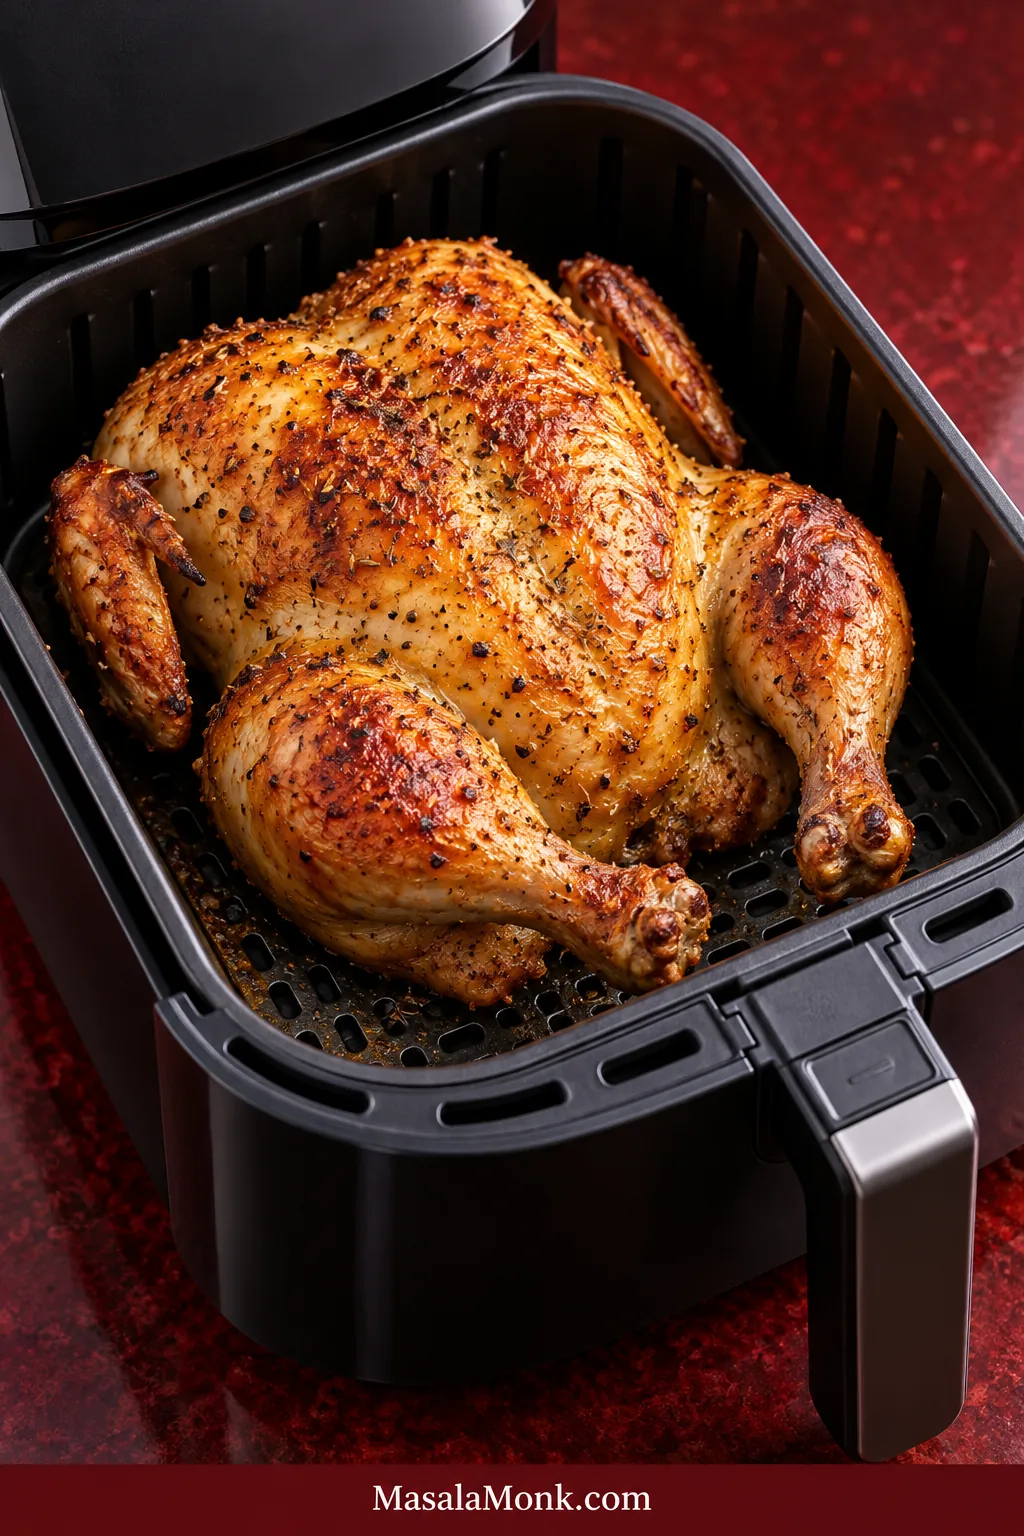
A good air fryer whole chicken should give you everything you want from roast chicken: deeply browned skin, juicy slices of breast meat and tender dark meat underneath. You get that roast-chicken result without heating a full-size oven, but a whole bird asks more from an air fryer than wings, thighs or chicken breasts do.
For a 4-pound / 1.8 kg chicken, plan on about 50–60 minutes at 350°F / 177°C, and begin checking the internal temperature around 45–50 minutes. The top of the bird sits close to fierce upper heat while the thick breast, thighs and joints take longer to cook through, so this method starts breast-side down, flips once, then finishes breast-side up.
Before You Season It, Put the Chicken in the Basket
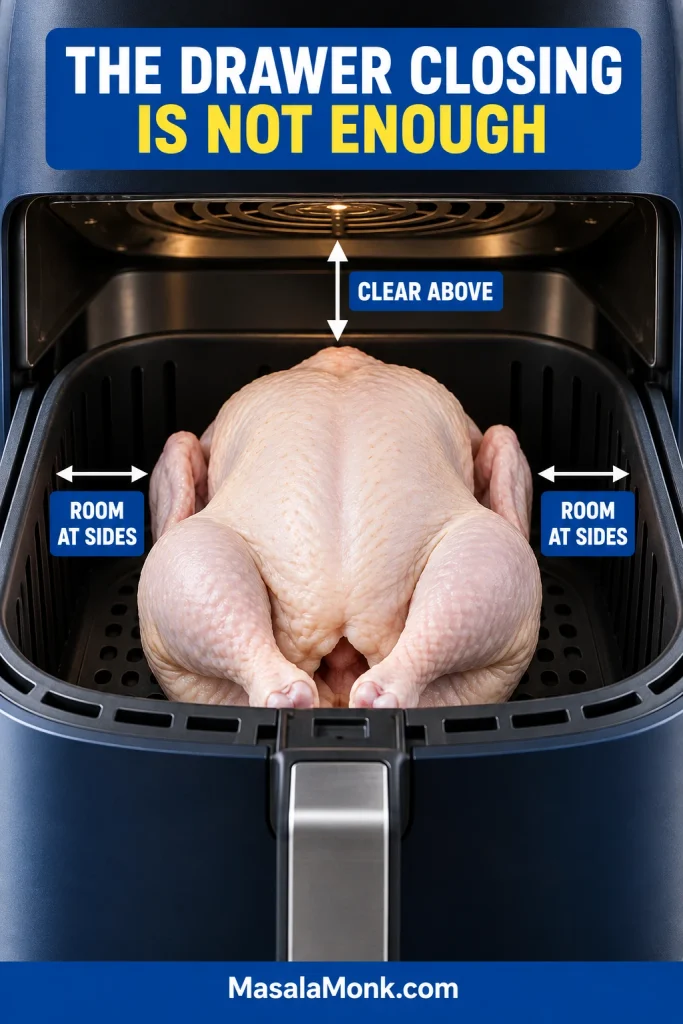
Do this before your hands, cutting board and chicken are covered in oil and spices. Put the unseasoned chicken into the cold air fryer basket and close the drawer.
For many basket-style air fryers, a 3½–4½ pound / 1.6–2 kg chicken is the easiest range to work with. Room around and above the bird matters more than the quart capacity printed on the box.
The chicken should have space around the sides, and the highest point of the breast or wings needs clearance beneath the heating element. If it barely squeezes in, use a smaller bird.
Once the bird fits and your thermometer is ready, the actual cooking is straightforward.
Air Fryer Whole Chicken Recipe
Start the chicken breast-side down, flip it once, then finish with the breast facing up so the skin can brown and crisp. This version is written for a bird around 4 lb / 1.8 kg.
Equipment
- Basket-style air fryer with enough usable height and width for the chicken
- Instant-read meat thermometer
- Sturdy kitchen tongs
- Wide spatula or turner
- Cutting board or platter
- Paper towels
Ingredients
- 1 whole chicken, about 4 lb / 1.8 kg, fully thawed
- 1 tbsp / 15 mL olive oil or avocado oil
- 7 g fine sea salt, about 1¼ tsp depending on crystal size
- 2 tsp sweet or regular paprika
- 1 tsp garlic powder
- 1 tsp onion powder
- ½ tsp freshly ground black pepper
- ½ tsp dried thyme
Check the label before adding salt. Self-basting, pre-brined, seasoned or solution-added chickens may already contain substantial sodium. Reduce or omit the 7 g salt accordingly. For an unseasoned bird, 7 g by weight is the most reliable measure. If you substitute kosher salt, weigh it instead of relying on a teaspoon conversion because brands vary widely by volume.
Instructions
Prep the Chicken
- Check the fit. Set the unseasoned chicken in the cold basket. Make sure the drawer closes normally and that the breast and wing tips have clearance beneath the heating element. Take the chicken back out.
- Prepare the bird. Remove the neck and giblet packet, checking both cavities. Do not rinse the chicken. Pat it very dry inside and out, tuck the thin wing tips underneath, and leave the legs loose. You do not need to truss them unless their position is causing a fit problem.
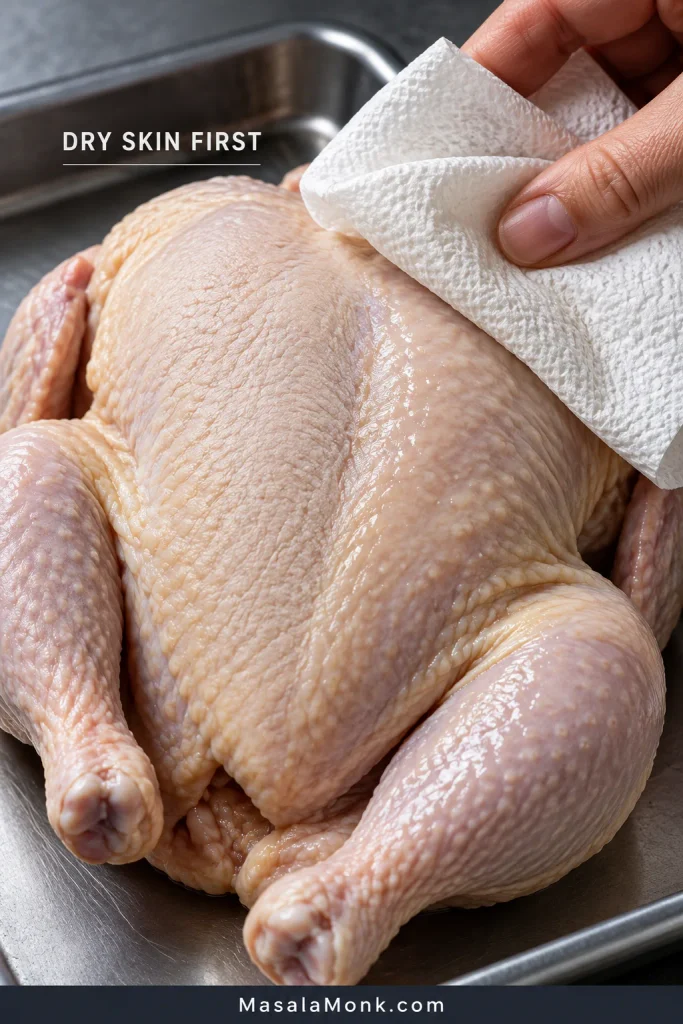
Why no rinsing? Washing raw chicken can spread poultry juices around the sink and nearby surfaces. USDA advises against rinsing raw chicken.
- Mix the seasoning. Stir together the salt, paprika, garlic powder, onion powder, black pepper and thyme.
- Season the skin. Rub the oil over the chicken, then distribute the seasoning over the breast, thighs, legs and back, working it across all the exposed skin.
Air Fry and Flip
- Preheat if your fryer calls for it. Set it to 350°F / 177°C. If the controls move in 10°C increments, use 180°C.
- Cook breast-side down. Place the rounded breast against the bottom of the basket with the backbone facing upward. Air fry at 350°F / 177°C for 30 minutes.
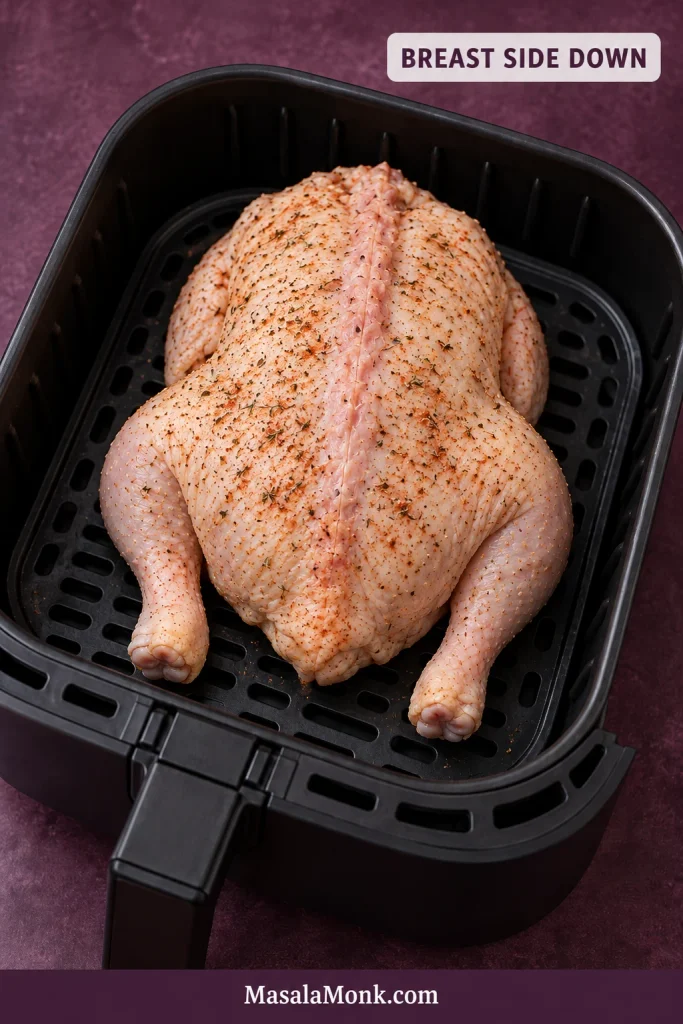
- Flip once. A hot four-pound chicken can be awkward to turn, so let the spatula carry most of the weight. Slide it underneath, steady the bird with sturdy tongs and turn it slowly until the breast faces upward. There is no prize for making the flip look elegant; keeping the skin intact matters more.
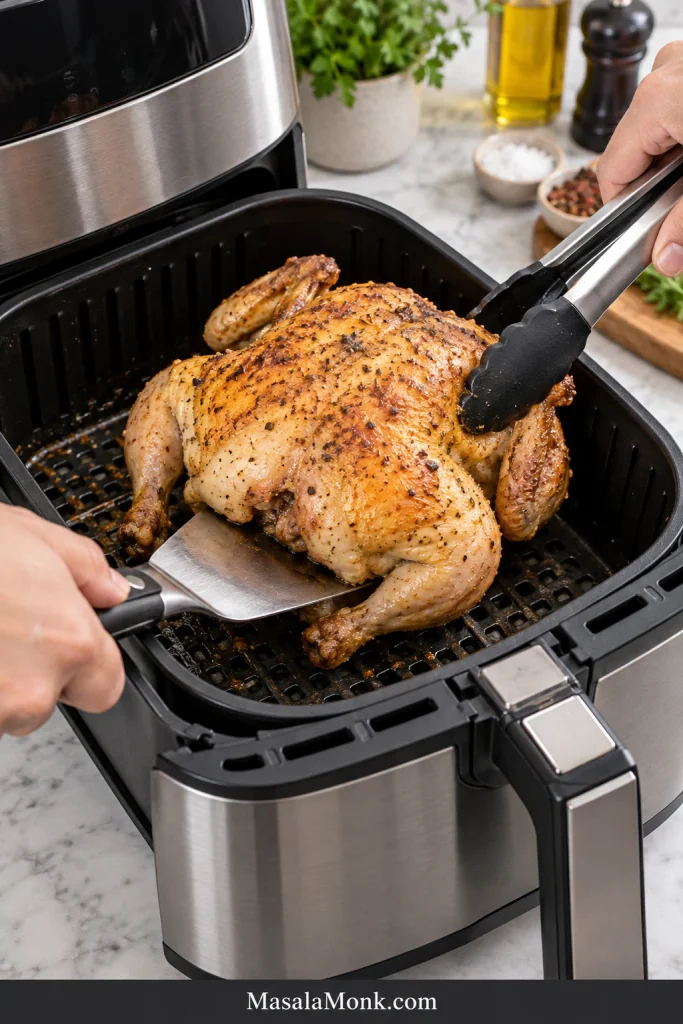
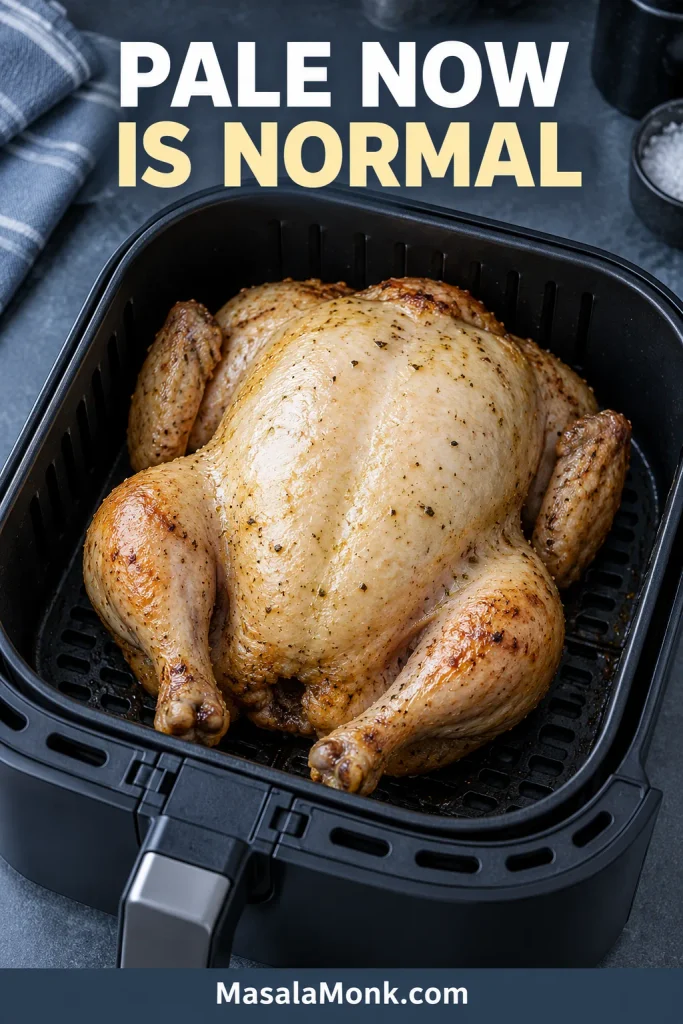
- Finish breast-side up. Continue at 350°F / 177°C. Do not worry if the breast still looks a little pale immediately after the flip; most of its color develops during this final stretch. For a 4-pound chicken, start checking around 45 to 50 minutes total cooking time.
Check Doneness and Finish
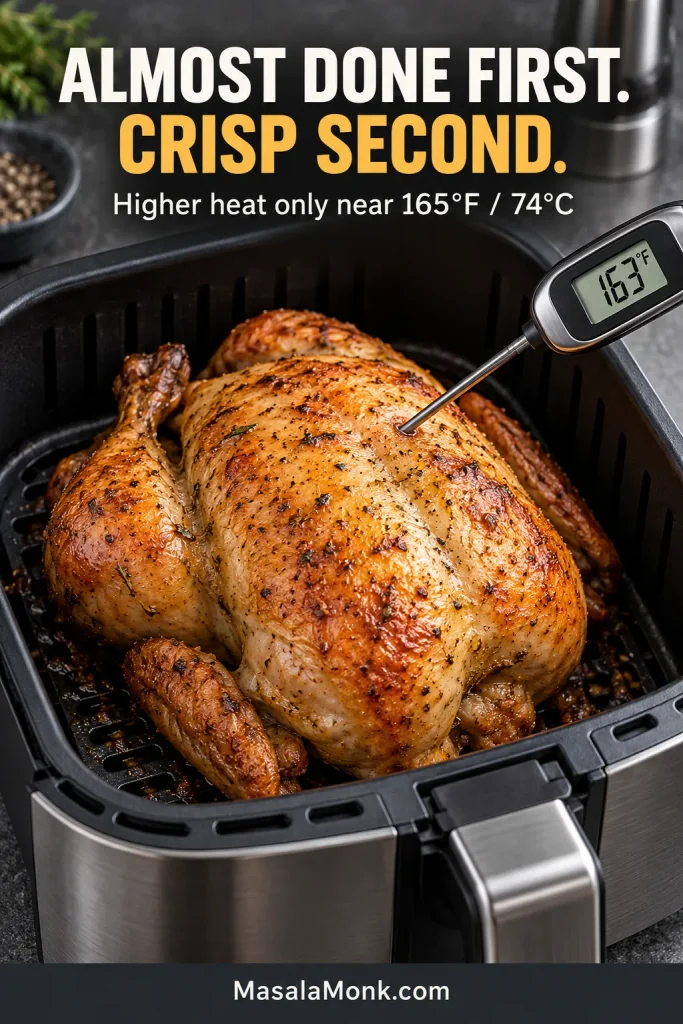
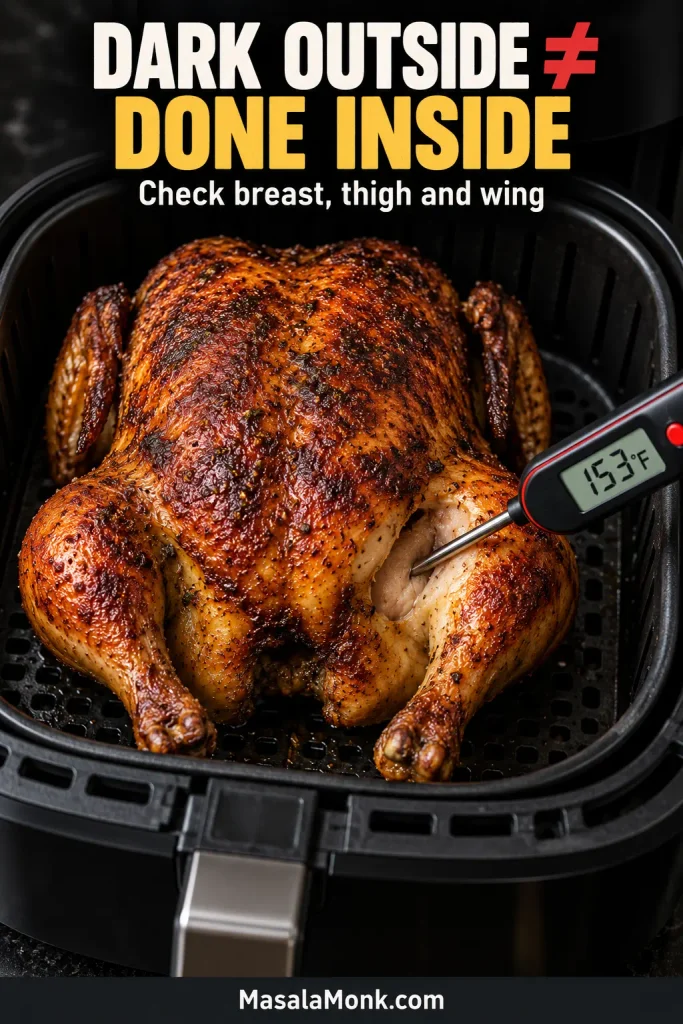
- Check three places. Measure the thickest part of the breast, the innermost part of the thigh and the innermost part of the wing without touching bone. Continue cooking and recheck every few minutes until each area has reached at least 165°F / 74°C.
- Give the skin a hotter finish only near the end. First make sure the breast, thigh and wing are all almost at 165°F / 74°C. If the skin still needs more color, raise the fryer to 390–400°F / 200–205°C for a few minutes and watch closely. Higher heat is for crisping the skin, not finishing an undercooked center.
- Rest uncovered. Transfer the chicken to a board or platter and leave it for about 10 minutes. Keeping it uncovered lets steam escape instead of softening the skin.
Recipe Notes
- Use a fully thawed chicken straight from the refrigerator while you prep it. There is no need to leave raw poultry sitting out to come to room temperature.
- A wireless probe is useful for an early warning. Finish with an instant-read thermometer in several places instead of trusting one sensor location.
- For even crisper skin, season the chicken several hours or overnight in advance and refrigerate it uncovered. It is an optional upgrade, not a requirement.
- Add sugary glazes late. Honey, brown sugar and sweet barbecue sauces can darken quickly in concentrated air-fryer heat.
The Result You’re Looking For
More Air Fryer Whole Chicken Help
Fix & Finish It
Will Your Whole Chicken Fit in the Air Fryer?
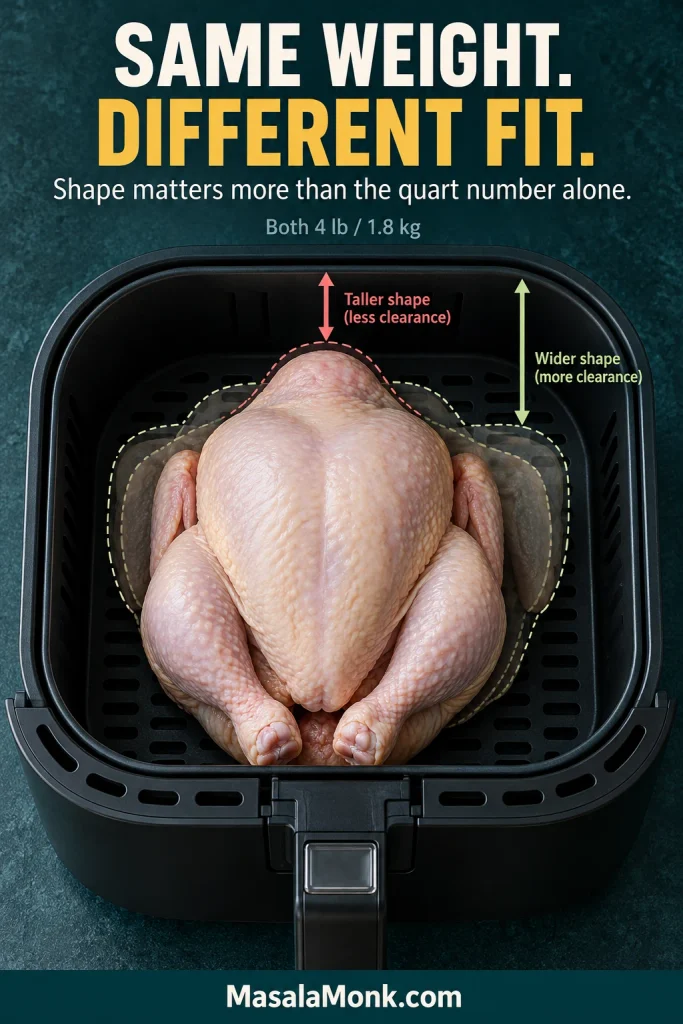
Chicken weight helps, but shape decides whether a bird really fits. A 6-quart fryer can be wide and shallow, tall and narrow, or divided into two smaller drawers, so the number printed on the box tells only part of the story.
What to Look for During the Dry Fit
- Above the chicken: the breast and wing tips should have room beneath the heating element.
- Around the sides: the bird should not be tightly wedged against the basket walls.
- At the drawer: it should close normally without compressing the chicken.
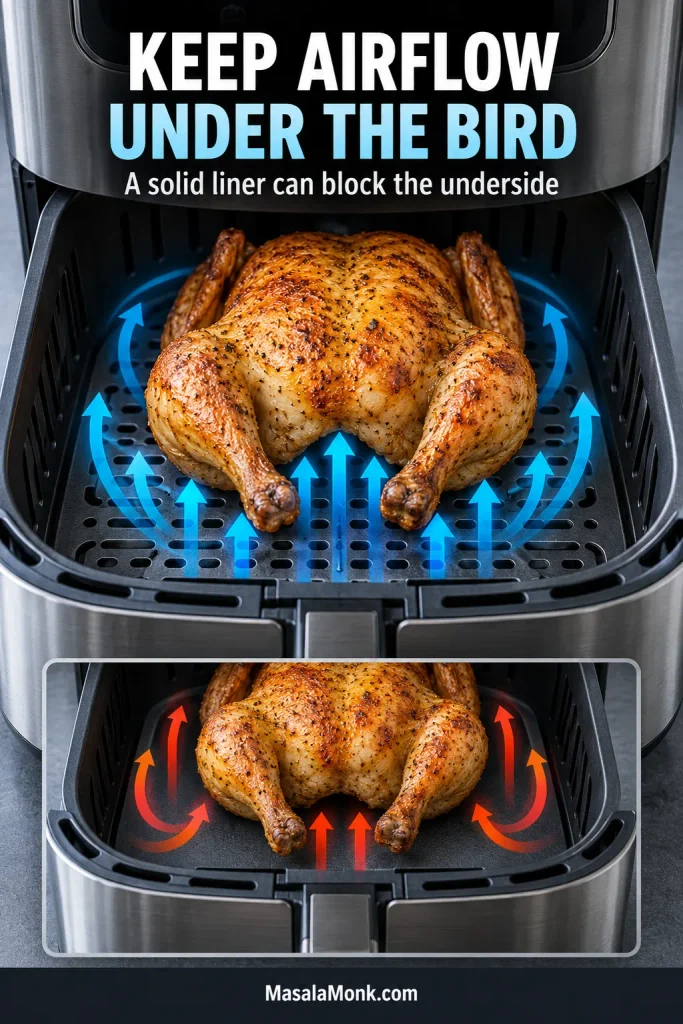
- Underneath: keep the normal crisper plate or rack in place when the bird fits safely with it.
Some models gain extra height when the crisper plate is removed, but that is not a universal fix. The plate often keeps the chicken above rendered fat and lets hot air reach the underside, so only alter the normal setup when your appliance instructions allow it.
The drawer closing is not enough. If the breast sits close to the upper heating element, the skin can darken or scorch while the thigh still needs more time.
A bird that is simply too large needs a different plan. Halving or spatchcocking changes the cooking time enough to become another method. Still want to keep it whole? A whole chicken in a crock pot is far less fussy about height.
For smaller pieces with the same crisp-skin appeal, try air fryer chicken thighs.
Next: Time & Temperature by Weight · Back to Recipe
Air Fryer Whole Chicken Time and Temperature by Weight
The ranges below assume 350°F / 177°C; use 180°C if your fryer adjusts in 10°C increments. Smaller birds can finish quickly, while a larger chicken may run beyond the estimate, so the most useful number is when to start checking.
Using a smaller chicken? The 30-minute breast-down stage belongs to the 4-pound bird. A substantially smaller chicken may need to be turned and checked sooner.
| Chicken weight | Start checking | Typical total range |
|---|---|---|
| 3 lb / 1.4 kg | 40 min | about 45–50 min |
| 3½ lb / 1.6 kg | 40–45 min | about 45–55 min |
| 4 lb / 1.8 kg | 45–50 min | about 50–60 min |
| 4½ lb / 2 kg | 50 min | about 55–65 min |
| 5 lb / 2.3 kg | 55 min | about 60–75 min |
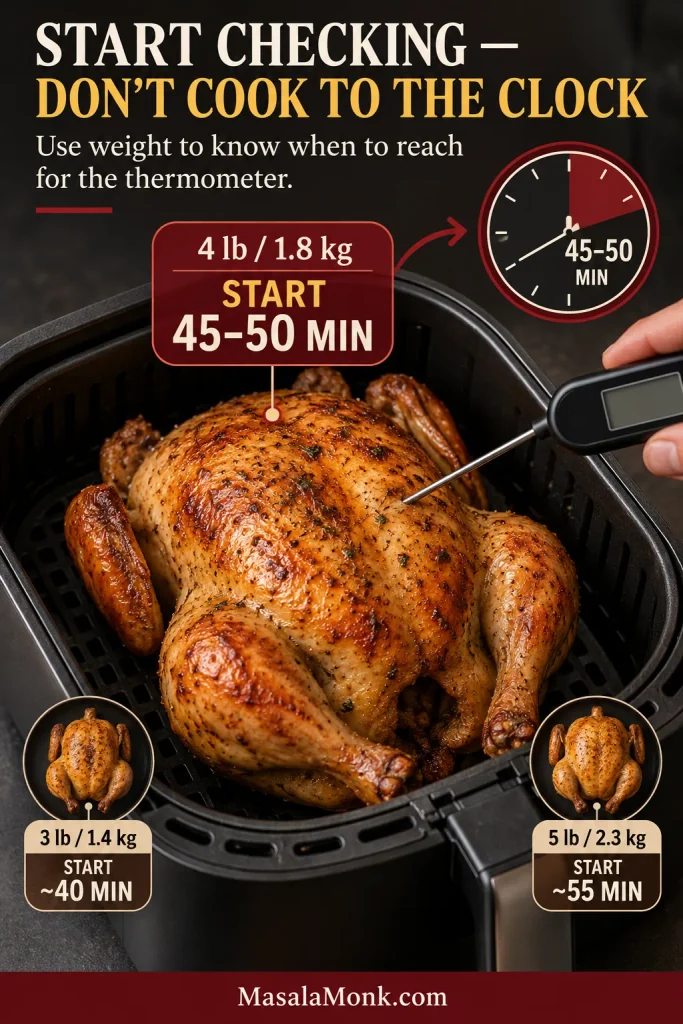
A five-pound chicken belongs in the fryer only when it still has enough room around the top and sides. Five or ten minutes behind the chart is not a problem.
Use the weight to choose when you start checking. Use the thermometer to choose when you stop cooking.
Why Minutes per Pound Only Gets You So Far
There is no reliable universal minutes-per-pound rule for whole chicken in an air fryer. Basket depth, heater distance, airflow and bird shape vary too much for one formula to work reliably across different fryers.
Jump to: Check Doneness in Three Places · Back to Recipe
What Changes with Different Air Fryers?
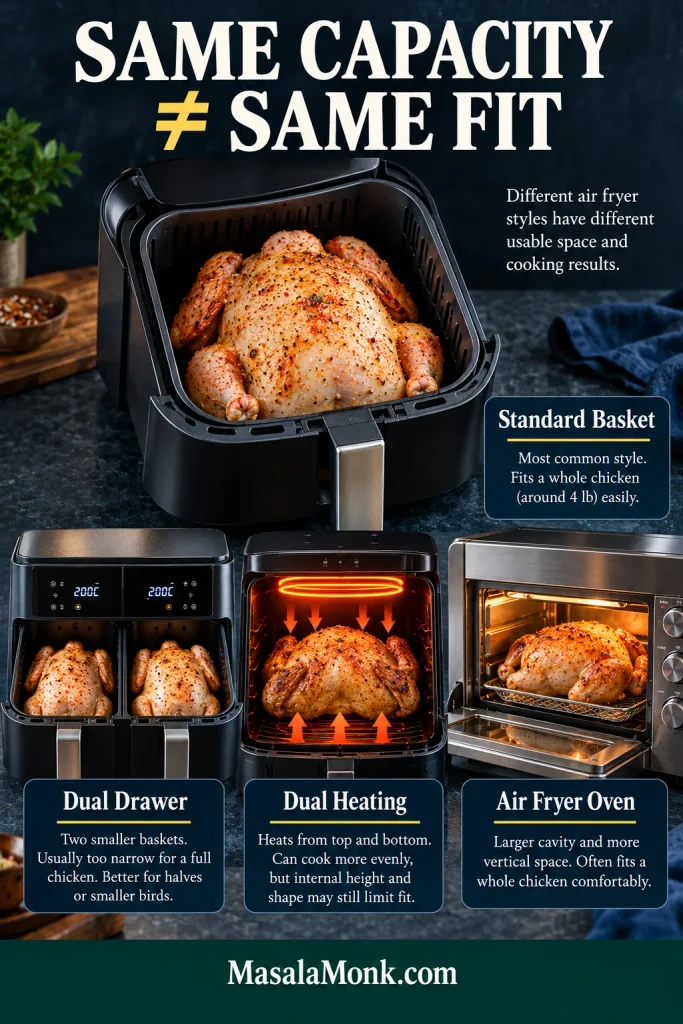
Two air fryers with the same advertised capacity can cook the same chicken differently. Basket shape, heater position, usable height and airflow matter more than the brand name.
| Air fryer style | What to watch |
|---|---|
| Standard basket | Closest match to the basket timing above. |
| Dual basket / dual zone | Measure one drawer. Combined advertised capacity can be misleading for a whole bird. |
| Dual heating | Extra heat from below can change both browning and cooking speed. |
| Air-fryer oven / toaster oven | The larger cavity and different airflow can shift the timing. |
Pressure-cooker/air-crisp hybrids, rotisserie spits and full-size ovens with an Air Fry mode behave differently enough that the countertop timing above should not be transferred unchanged. Follow the appliance instructions for those setups.
Why Start the Chicken Breast-Side Down?
Breast-side-up cooking can work, but starting the bird upside down gives the breast some distance from the strongest upper heat during the first part of the cook. After the flip, the breast faces up for the stretch when its skin does most of the browning.
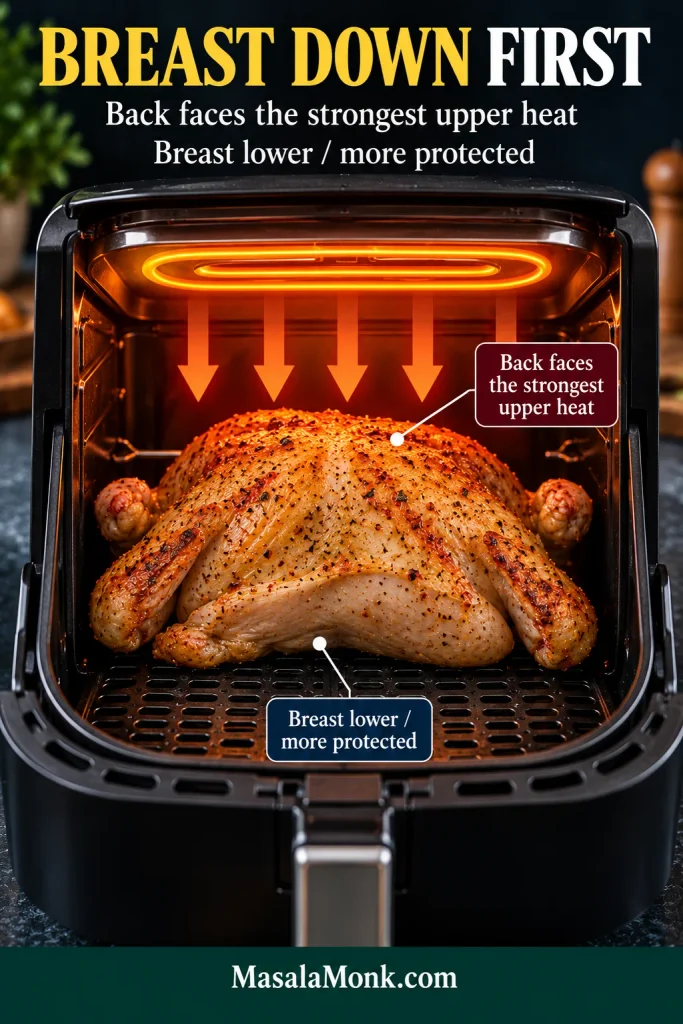
One flip is enough. Repeatedly wrestling a hot, slippery chicken out of the basket costs heat and makes torn skin more likely without offering much in return.
Check Three Places, Not One
A beautifully browned breast can still hide an underdone thigh or wing joint. Before removing the chicken, check:
- Breast: the thickest part;
- Thigh: the innermost part;
- Wing: the innermost part.
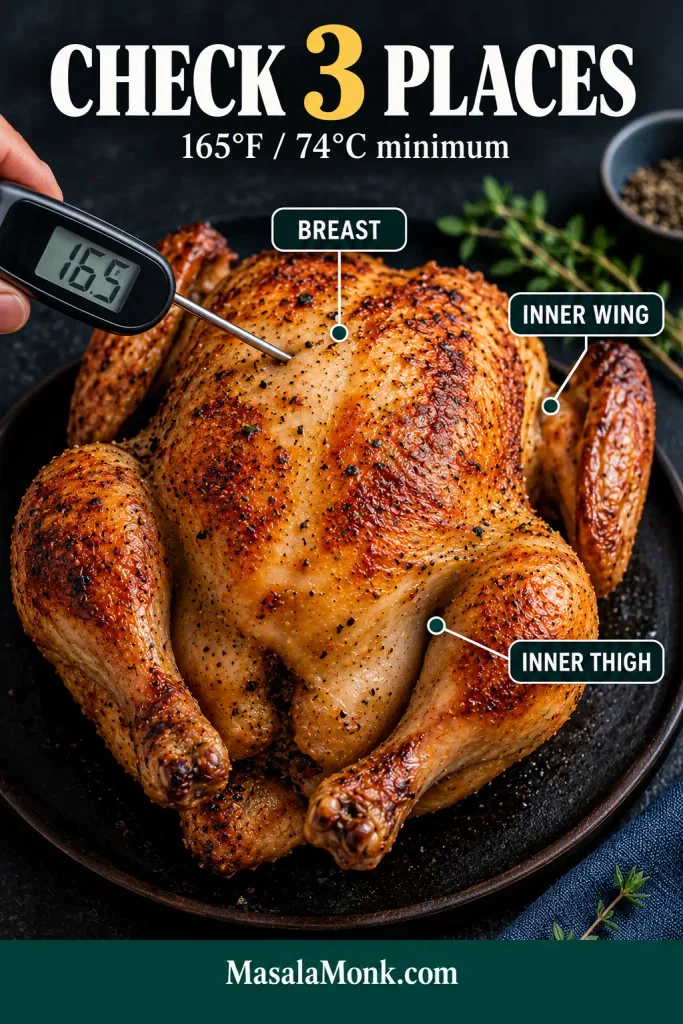
Keep the thermometer tip in the meat and clear of bone. USDA’s safe-temperature guidance calls for whole poultry to reach at least 165°F / 74°C, checked in the thickest breast and innermost thigh and wing.
Don’t chase identical numbers in every part of the bird. The breast may be at 165°F while the thighs are already somewhere in the 170s°F, and that is perfectly normal. Dark meat tolerates the extra heat well, and many cooks prefer the softer texture it develops in that range.
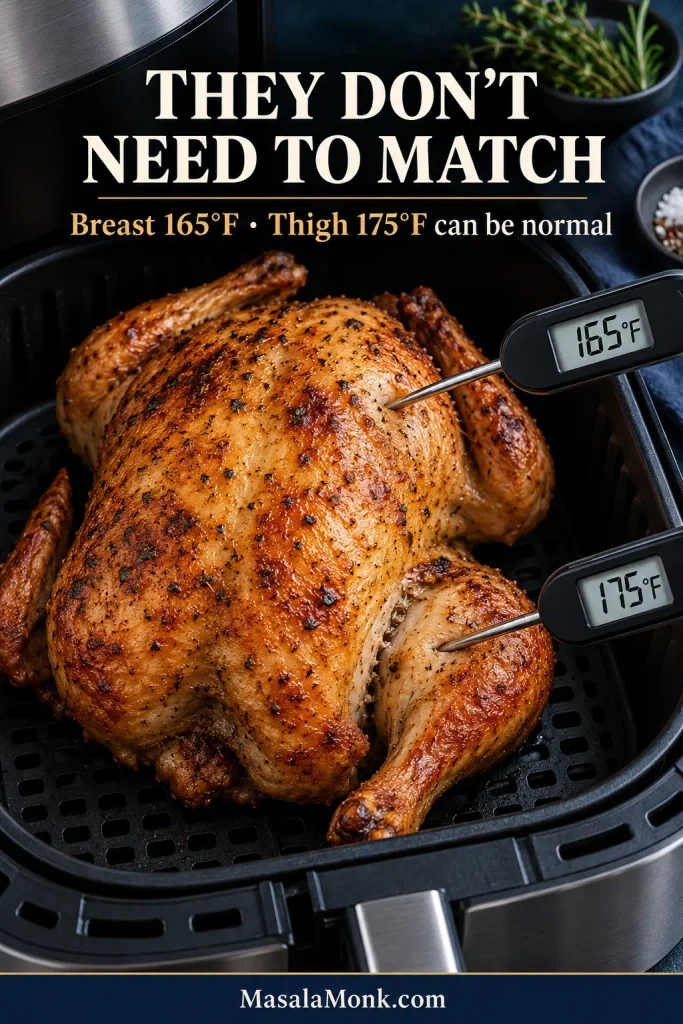
Trust temperature over appearance. Deeply browned skin does not prove the center is ready, and properly cooked poultry can sometimes retain some pink color.
Crisp Skin, Juicy Breast Meat
Dry skin is where good crisping starts. Pat the chicken thoroughly, leave enough room around it for hot air to move, and keep the normal crisper plate in place when the bird fits safely. In many basket fryers, a solid liner beneath the chicken can interfere with airflow reaching the underside.
Read the Finish, Then Protect the Breast
Most of the cook stays at 350°F so the center has time to catch up while the outside browns. After the flip, the breast skin should gradually move from pale gold toward a richer roast-chicken brown. By the end of cooking, it should look deep golden and dry, not tacky.
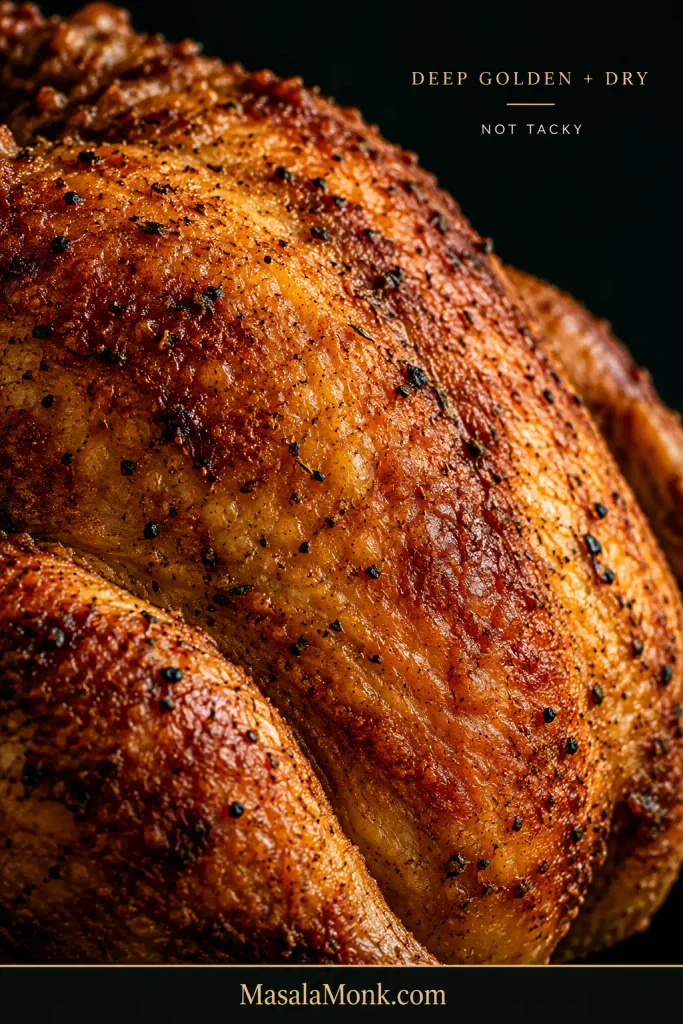
Breast meat needs restraint. Once it reaches its safe temperature, extra cooking only dries it out. If you only need breast meat, air fryer fried chicken breast is a much quicker cook than a whole bird.
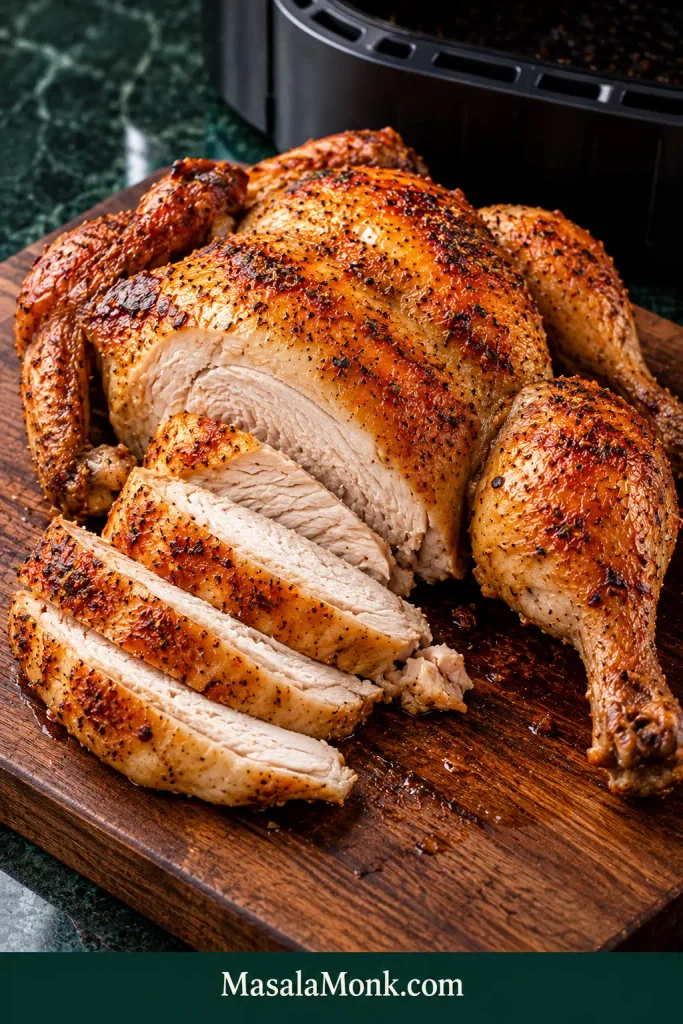
Rest the finished chicken uncovered so steam can escape. After about 10 minutes, the skin should still offer a little crisp resistance under the knife while the breast looks moist when sliced, not dry or chalky. Keep carved pieces skin-side up so they do not sit in pooled juices.
Frozen or Stuffed Chicken: This Timing Does Not Apply
Frozen chicken. Use a fully thawed bird here. A frozen chicken is difficult to season evenly, and its exterior can race ahead while the deepest meat is still coming up to temperature.
Stuffed chicken. Keep the cavity free of dense bread or dressing-style stuffing. A few loose aromatics are different, but compact stuffing slows heat through the center and gives you another temperature to monitor. Cooking stuffing separately keeps both dishes much easier to control. If you do cook the bird stuffed, the center of the stuffing must also reach 165°F / 74°C.
Air Fryer Whole Chicken Troubleshooting
A whole bird gives you plenty of clues. Read what is happening before automatically adding another 15 minutes.
Doneness and Browning Problems
| What you see | Likely reason | What to do |
|---|---|---|
| Top is very dark but the thigh temperature is still low | The surface is racing ahead of the center. | Now: lower the temperature slightly if needed and give the thigh more time. Next time: use a smaller bird or give it more room above the breast. |
| Breast is ready but the inner thigh is behind | The thighs simply need longer than the breast. | Now: give the thigh a few more minutes and check again. Next time: begin multi-point checks earlier. |
| Wireless probe says done but another area is below target | The probe shifted or is sitting in a warmer patch. | Now: check breast, thigh and wing with an instant-read thermometer. Next time: use the leave-in probe as an alert, not the only final reading. |
| Timing is far ahead of or behind the chart | Your bird or fryer is behaving differently from the chart. | Follow the internal temperature instead of trying to finish the suggested clock time. Note the difference for your machine next time. |
| Breast is dry but the thighs are good | The breast got too far ahead of the thighs. | Now: add moisture in a sandwich, salad or sauced dish; these chicken sandwich ideas are useful for cooked chicken. Next time: check the breast sooner. |
| Skin is pale or soft | Surface moisture, weak airflow or a gentler fryer. | Now: once every checked area is nearly done, use a brief hotter finish. Next time: dry the bird thoroughly and keep the airflow clear. |
Skin, Airflow and Fryer Problems
| What you see | Likely reason | What to do |
|---|---|---|
| Skin was crisp but softened while resting | Steam or hot juices re-wet the surface. | Now: keep pieces skin-side up and re-crisp individual portions if needed. Next time: rest the bird uncovered. |
| Underside is rubbery | The bird is sitting in rendered fat or airflow underneath is blocked. | Now: re-crisp affected portions. Next time: keep the normal crisper plate in place and skip unnecessary solid liners. |
| The seasoning turns very dark | Sugar, fresh garlic or excessive heat is scorching. | Now: lower the heat if the chicken still needs time. Next time: keep the main rub dry and add sweet glazes late. |
| Wing tips burn | The thin tips are exposed to concentrated upper heat. | Tuck them beneath the bird before cooking next time. |
| The fryer starts smoking | Rendered fat, old residue or a bird sitting too close to the element. | Now: stop and inspect the fryer before continuing. Next time: start with a clean machine and follow its grease-management instructions. |
Change the Flavor, Keep the Method
Garlic-Herb Butter Chicken
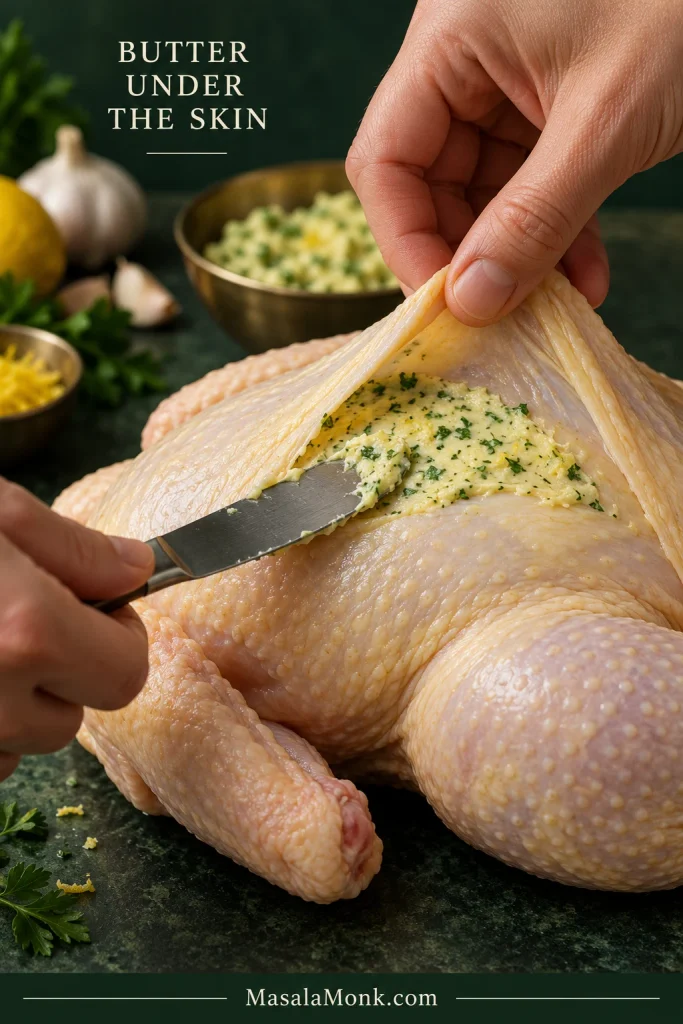
Mix 2 tablespoons / 28 g softened unsalted butter with 1 small finely grated garlic clove, 1 teaspoon finely chopped parsley and ½ teaspoon finely grated lemon zest. Loosen the skin over the breast and spread the butter underneath before oiling and seasoning the outside.
Keep most of the butter under the skin, where it can flavor the breast without leaving the milk solids exposed to hot circulating air for the entire cook.
Lemon-Rosemary Chicken
Add the finely grated zest of 1 lemon to the seasoning and replace the ½ teaspoon thyme with ¼ teaspoon dried thyme plus ¼ teaspoon finely crushed dried rosemary. The zest gives the chicken fresh lemon aroma without adding the surface moisture that juice would.
Serving, Drippings and Leftovers
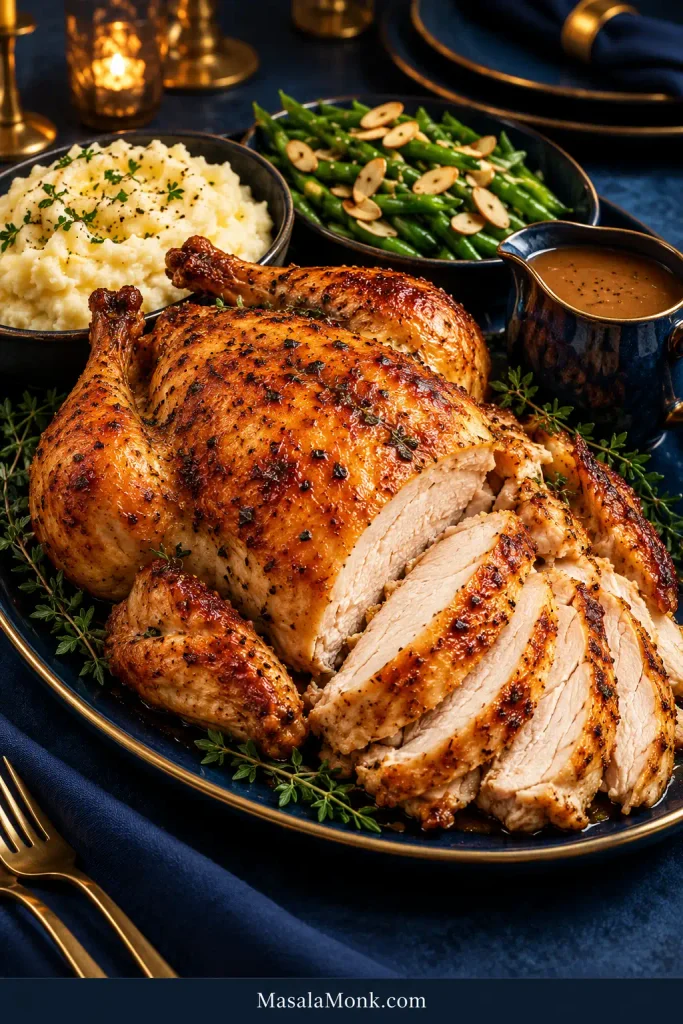
Carve the breast across the grain and keep the crispest pieces of skin facing up so they do not soak in the juices on the board. If you make gravy from the drippings, spoon it beside the chicken when you want the skin to stay crisp.
Garlic mashed potatoes give the gravy somewhere to go, while green beans almondine add crunch and something fresh beside the rich chicken.
Save the Drippings and the Carcass
If the drippings beneath the chicken have not burned, save them. They can add flavor to gravy, potatoes, rice or vegetables—just taste before adding more salt, especially if the chicken was pre-brined or solution-added.
Save the carcass and wing bones too. They can deepen a pot of stock, while leftover meat can go straight into chicken noodle soup.
Store and Reheat Leftovers
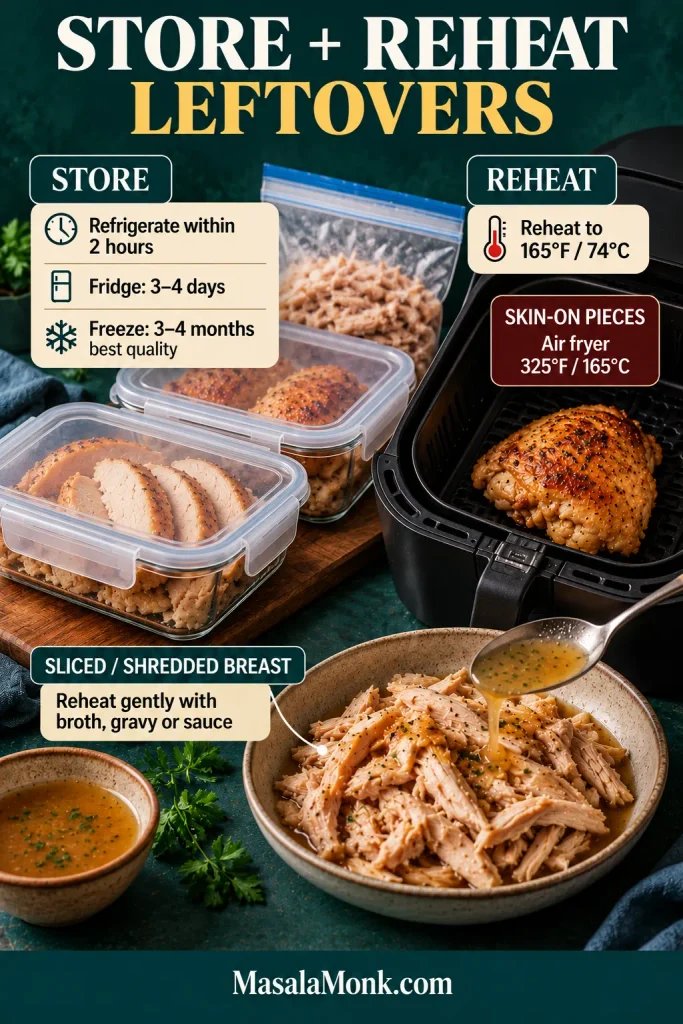
Carve the remaining meat from the carcass and refrigerate it in shallow covered containers within 2 hours of cooking. Use refrigerated chicken within 3 to 4 days. For longer storage, freeze it; quality is generally best within about 3 to 4 months.
Reheat leftovers to 165°F / 74°C. For skin-on pieces, an air fryer around 325°F / about 165°C works well: heat just until the center is hot and the skin has crisped again. Sliced or shredded breast meat stays juicier when reheated gently with a spoonful of broth, gravy or sauce.
Make the Leftovers Feel Like Another Dinner
If there is plenty left, resist shredding everything at once. Larger pieces give you more options the next day: a crisp reheated thigh, neat slices of breast, or picked meat for soup, rice or pasta.
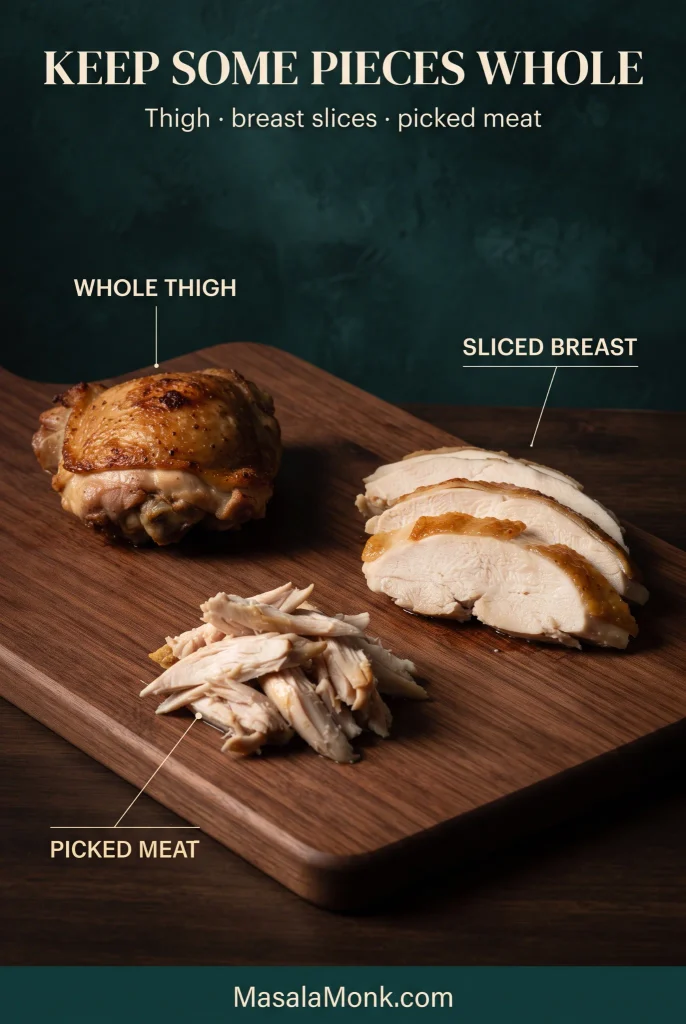
Chopped cooked chicken can go into fried rice near the end, just long enough to heat through. For a creamier second meal, chicken tetrazzini turns the leftovers into a baked pasta dinner that feels completely different from the roast chicken you started with.
Recipe development note: This recipe is research-derived from published air-fryer whole-chicken methods, manufacturer guidance, food-safety recommendations and recurring problems reported by home cooks. MasalaMonk has not independently kitchen-tested this exact formula.
Made it in your air fryer? Tell us the chicken weight, your fryer model or style, and roughly how long it took. Those details are especially useful to someone cooking the same size bird in a similar fryer.








