
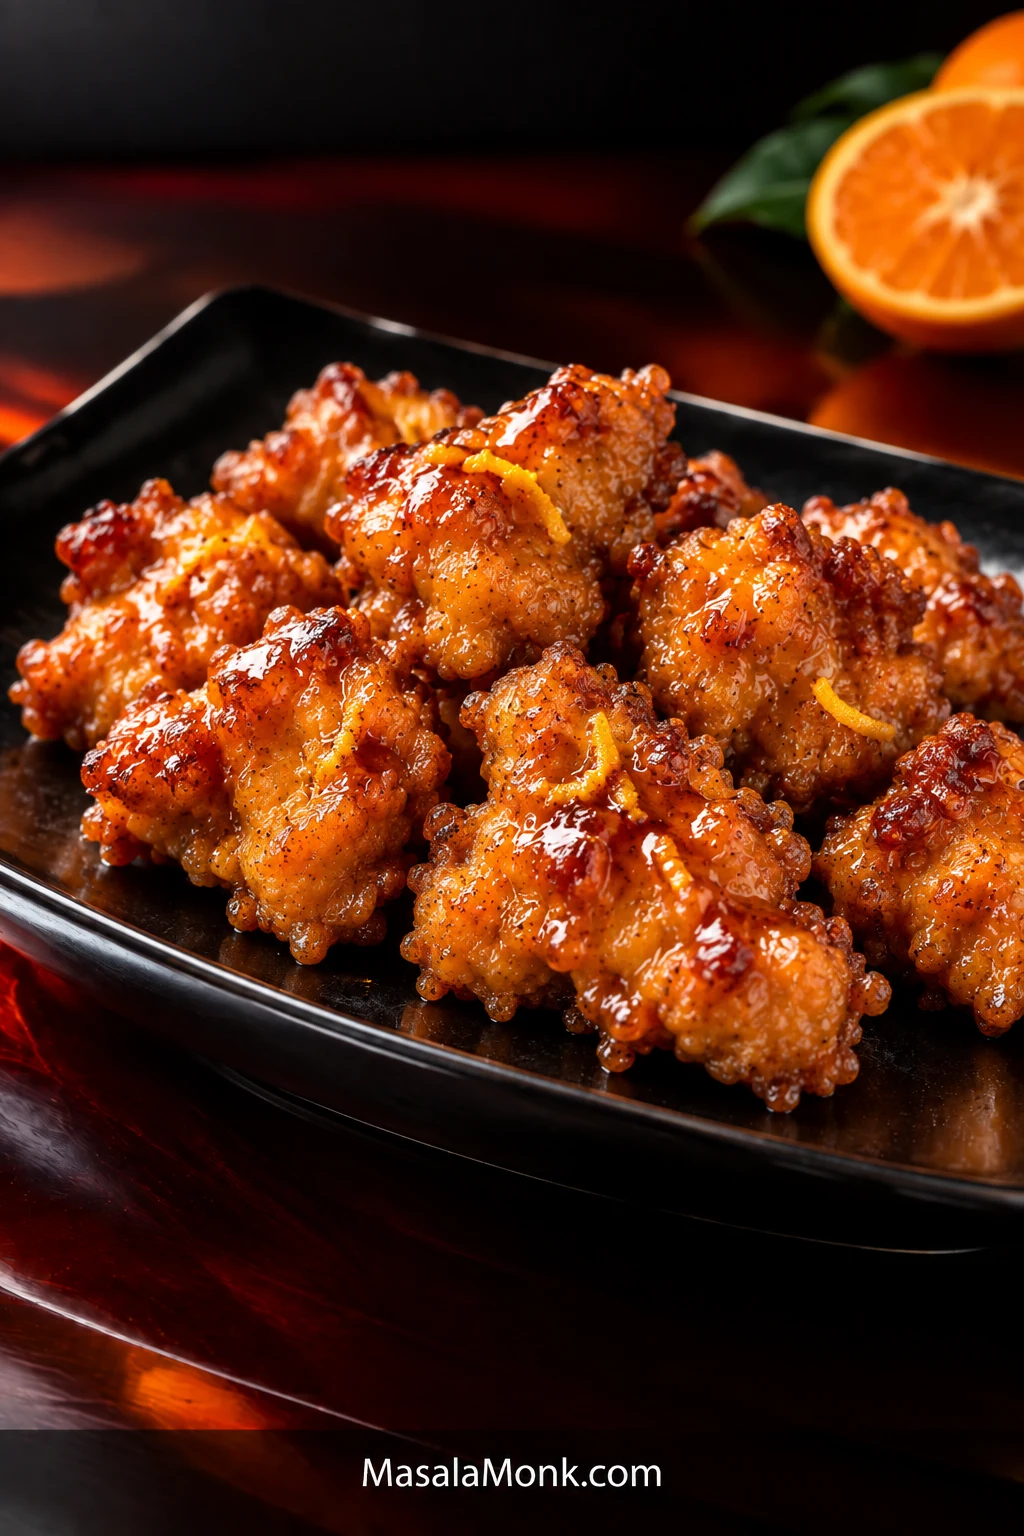
Orange chicken has a built-in problem: the sauce needs to reach every crisp ridge, but the moment that wet glaze touches the crust, the crust starts to soften.
When it lands properly, though, the first bite still has a crisp edge under the glaze, the chicken stays juicy inside, and the orange arrives before the sweetness does. That bright citrus smell matters just as much as the sticky finish.
This is Chinese-American takeout-style orange chicken, but it isn’t built as a restaurant copycat. The goal is fresh orange, a manageable shallow fry and just enough glossy sauce to coat the crust.
Coat
Tacky chicken, pressed starch, shaggy surface.
Fry
Hot oil, roomy batches, rack between batches.
Glaze
Thicken first, coat lightly, toss 15–20 seconds.
Crispy Homemade Orange Chicken Recipe
Crisp first. Glaze last. Keep the fried chicken and finished orange sauce apart until serving.
Equipment: 12-inch / 30 cm heavy skillet, wok or similar wide pan; wire rack set over a tray; fine grater or zester; instant-read thermometer if available; heatproof container for used oil if reusing the frying pan.
Chicken
- 1½ lb / 680 g boneless skinless chicken thighs
- 1 tbsp / 15 ml regular or light soy sauce, not dark or sweet soy
- 1 tbsp / 15 ml Shaoxing wine or dry sherry
- ¼ tsp ground white pepper
Crisp Coating
- ¾ cup plus 2 tbsp cornstarch / about 105 g total, divided
- Neutral high-heat frying oil, enough for about ¼ inch / 5–6 mm depth in the pan
Fresh Orange Sauce
- About 3 medium oranges, or enough to yield ¾ cup / 180 ml fresh orange juice
- 2 tbsp / 30 ml water
- ⅓ cup / about 65 g granulated sugar
- 2 tbsp / 30 ml regular or light soy sauce
- 2 tbsp / 30 ml unseasoned rice vinegar
- ¼–½ tsp red pepper flakes, or omit for mild
- 2 tsp neutral oil, if using a clean pan for the sauce
- 3 garlic cloves / about 9 g, finely minced
- 2 tsp / about 4–5 g finely grated fresh ginger
- 2 tsp packed / about 4–5 g finely grated orange zest, colored skin only
- ½ tsp / 2.5 ml toasted sesame oil, optional
Cornstarch Slurry
- 1½ tbsp / about 12 g cornstarch
- 2 tbsp / 30 ml cold water
Optional Finish
- Thinly sliced scallions
- Sesame seeds
1. Season the chicken
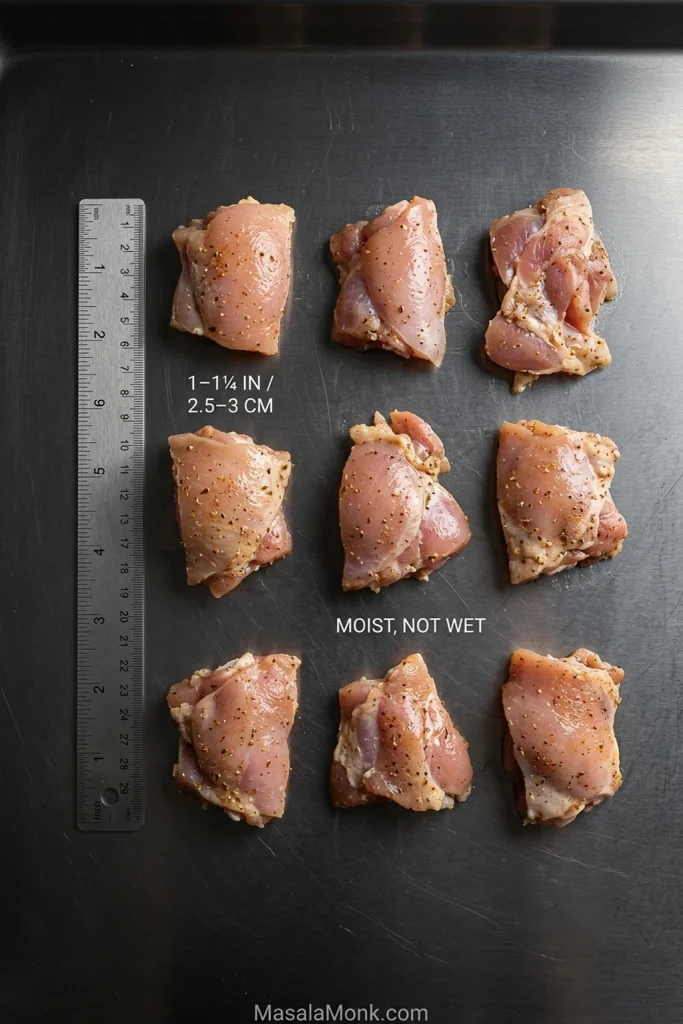
Cut the thighs into fairly even 1 to 1¼-inch / 2.5–3 cm pieces. Toss with 1 tablespoon soy sauce, the Shaoxing wine and white pepper. Leave for 15 minutes while you prepare the sauce ingredients.
You’re looking for moist chicken with no puddle at the bottom of the bowl. Drain off any obvious excess before coating.
2. Mix the sauce and slurry
Zest the oranges before juicing them. Then squeeze enough juice to measure ¾ cup / 180 ml.
Whisk the orange juice with the water, sugar, 2 tablespoons soy sauce, rice vinegar and red pepper flakes. Keep the measured zest and optional sesame oil aside.
In a second bowl, stir the cornstarch into the cold water. Mix the sauce now, but wait until the chicken is fried before cooking and thickening it.
Before you start frying, have the sauce mixture, slurry, zest, wire rack and serving plate ready. Once the chicken is done, the rest moves quickly.
3. Coat the chicken
Add 2 tablespoons cornstarch directly to the seasoned chicken and toss until the surface feels lightly tacky.
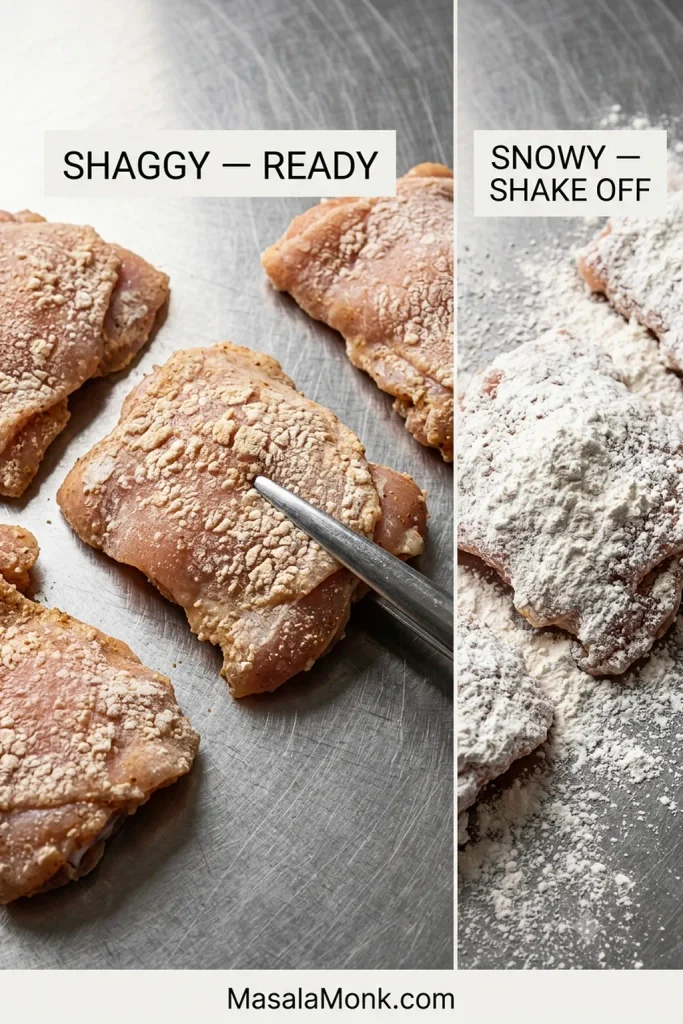
Put the remaining ¾ cup / about 90 g cornstarch in a wide bowl or shallow dish. Press each piece firmly into the starch, then shake away whatever does not stick.
A good coating looks rough, dry and a little shaggy. Fry it once the oil is ready.
4. Shallow-fry in batches
Pour about ¼ inch / 5–6 mm neutral oil into a 12-inch / 30 cm heavy skillet, wok or similar wide pan. Heat to roughly 350–360°F / about 175–180°C.
Lower each piece into the oil away from you and leave visible space between the pieces. A high-sided pan helps contain splatter; a splatter screen is useful if you have one. Listen for a steady, lively sizzle. A suddenly quiet pan means it is time to stop adding chicken and let the oil recover.
Let the first side cook undisturbed until the crust has set before turning. If it still feels soft or wants to cling to the pan, give it a few more seconds. Fry in 2–3 batches; each batch will usually need about 3½–5 minutes total, until crisp and cooked through.
Check one of the larger pieces: poultry should reach 165°F / 74°C in the center. Move each batch to a wire rack rather than piling it into a bowl.
Finish all the frying before you cook the sauce. The chicken can wait on the rack for those few minutes.
The crust should now feel dry, set and crisp under the tongs instead of dusty or soft. At this point, it should already be crisp enough to make you want to steal a piece. That’s a good sign.
For extra crunch: Once every piece has completed the first fry, raise the oil to about 375°F / 190°C and fry the chicken again for 45–90 seconds. Stop once the crust looks drier and feels more brittle. Allow about 5 extra minutes for this optional step.
5. Cook the orange sauce
Using a clean pan? Heat 2 teaspoons neutral oil over medium. Reusing the frying pan? Carefully transfer the excess frying oil to a heatproof container, leaving about 2 teaspoons in the pan, and remove any loose dark starch bits. Never pour frying oil down the sink.
Add the garlic and ginger and cook for 20–30 seconds, until fragrant. A little color is fine; burnt garlic is not.
Stir the orange-juice mixture, pour it in and bring it to a lively simmer for 1–2 minutes. Taste it now. Orange should lead, sweetness should sit behind it, and enough acidity and soy should remain to keep the sauce from tasting like candy.
Stir the slurry again and start with about two-thirds. Let it bubble for a few seconds and look at the sauce before adding more. Still thin? Add a little more. You may not need the rest.
The glaze should coat the back of a spoon or spatula in a thin shiny film. Drag the spatula through the pan as a second check: the trail should stay visible for about one second before closing.
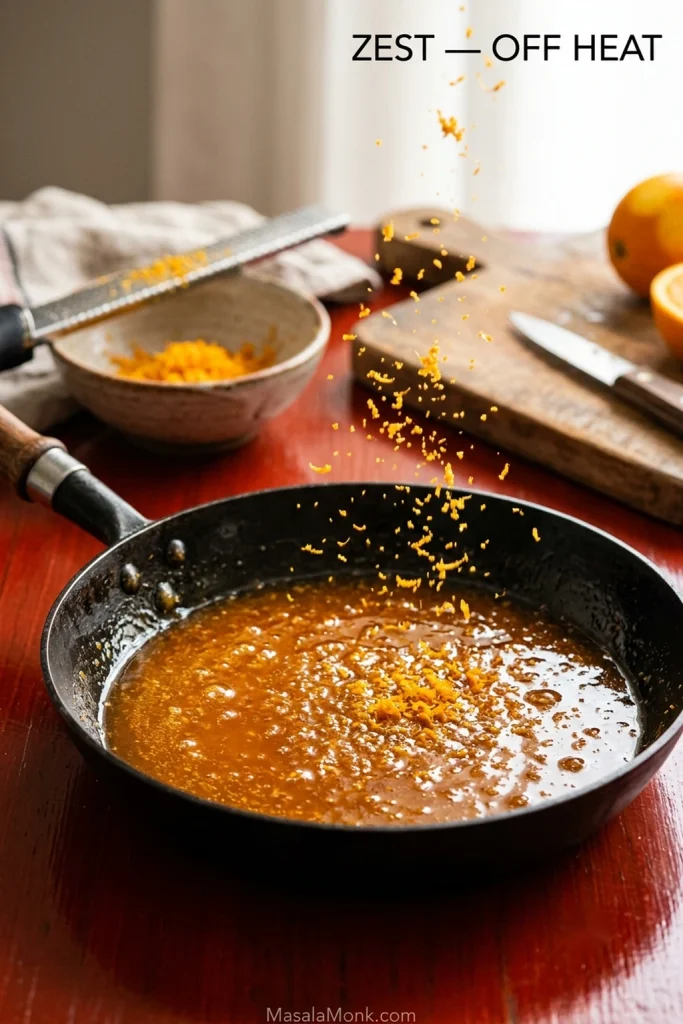
Turn off the heat and stir in the orange zest. Almost immediately, the sauce should smell fresher and unmistakably more orange. Add the optional sesame oil if you want a faint toasted note.
If the glaze tightens before you’re ready to toss the chicken, loosen it over low heat with 1 tablespoon water. Nothing is ruined.
6. Glaze and serve
If there is visibly more sauce in the pan than you need for a thin coating, spoon a little out now and save it for rice. The chicken needs a lacquer, not a bath.
Add the fried chicken and toss for only 15–20 seconds, just until glossy. Plate immediately and finish with scallions and sesame seeds, if using.
Recipe Notes
- Chicken breast: works, but it dries faster than thigh, so start checking it earlier.
- Soy sauce: use regular/light soy rather than dark or sweet soy, which can overpower the citrus and darken the glaze.
Cooking now? You can stop here. The rest of the guide is for the moments when the coating falls off, the oil cools down, or the sauce somehow still does not taste orange enough.
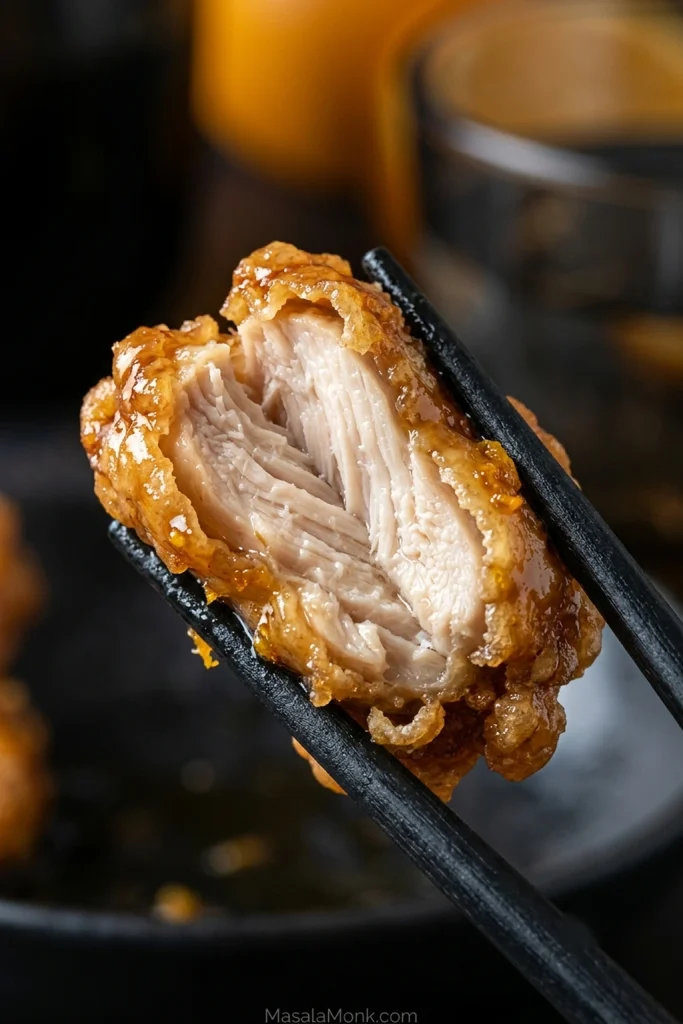
The finished bite is the test for everything above: a thin crisp shell should still give way to juicy chicken underneath, even after the glaze has reached the crust.
In This Guide
Before the Oil: Make the Coating Stay Put
Your coating can start failing before the chicken ever reaches the oil. Too much surface liquid weakens the starch layer and gives it less to hold onto.
Keep the pieces around 1 to 1¼ inches / 2.5–3 cm. That gives you plenty of crisp surface without shrinking the chicken into tiny nuggets that dry out too quickly.
Season first, but don’t soak the surface
The short soy, Shaoxing and white-pepper rest gives the meat some flavor of its own. Liquid collecting at the bottom of the bowl is your cue to drain it before the starch goes on.
Why cornstarch?
A pressed-on starch coating fries into a thin, crisp crust. The first small addition of cornstarch makes the seasoned chicken tacky; the remaining starch then has something to hold onto.
A heavier flour-and-starch dredge, like our hot honey chicken tenders use, creates a much craggier crust. For this shallow-fry method, keep the starch shell lighter.
Look before you fry. The starch should sit in little rough patches that stay put when you lift a piece. Shake away any powder that showers off. Once the coating looks shaggy rather than snowy, you’re there. Those rough ridges are exactly where the glaze will catch later.
In the Oil: Control the Heat
How do you keep orange chicken crispy? Fry in small batches, let the crust set before turning, drain the chicken on a rack, and finish the sauce before the final toss.
A wide high-sided skillet gives you room for batches and some protection from splatter. A wok or Dutch oven works too.
The sound gives you an early warning before a thermometer does. When the steady sizzle fades sharply, check the oil; once it drops much below about 325°F / 165°C, pause before adding more chicken and let the heat recover.
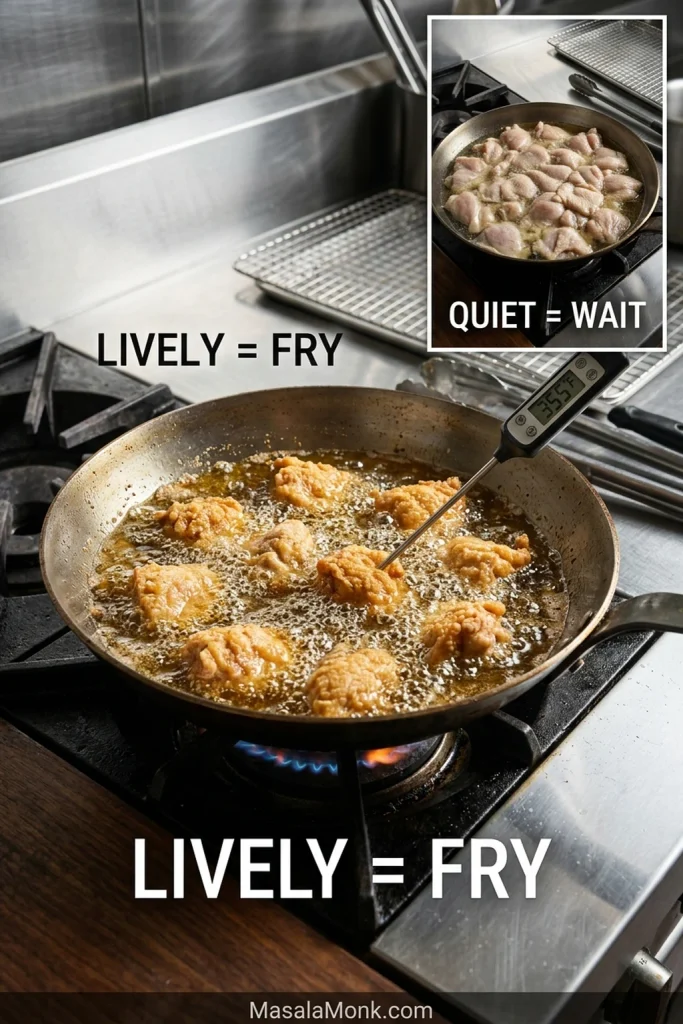
Move each batch straight to a wire rack. Hot chicken keeps giving off steam, and a bowl traps that moisture against the crust.
When is a second fry worth it?
For orange chicken that is going straight from pan to plate, one good fry is usually enough. Use the optional second fry for maximum crunch or when the fried chicken needs to sit longer than the few minutes it takes to finish the sauce.
The second fry drives off a little more surface moisture, leaving the coating harder, drier and noticeably more brittle.
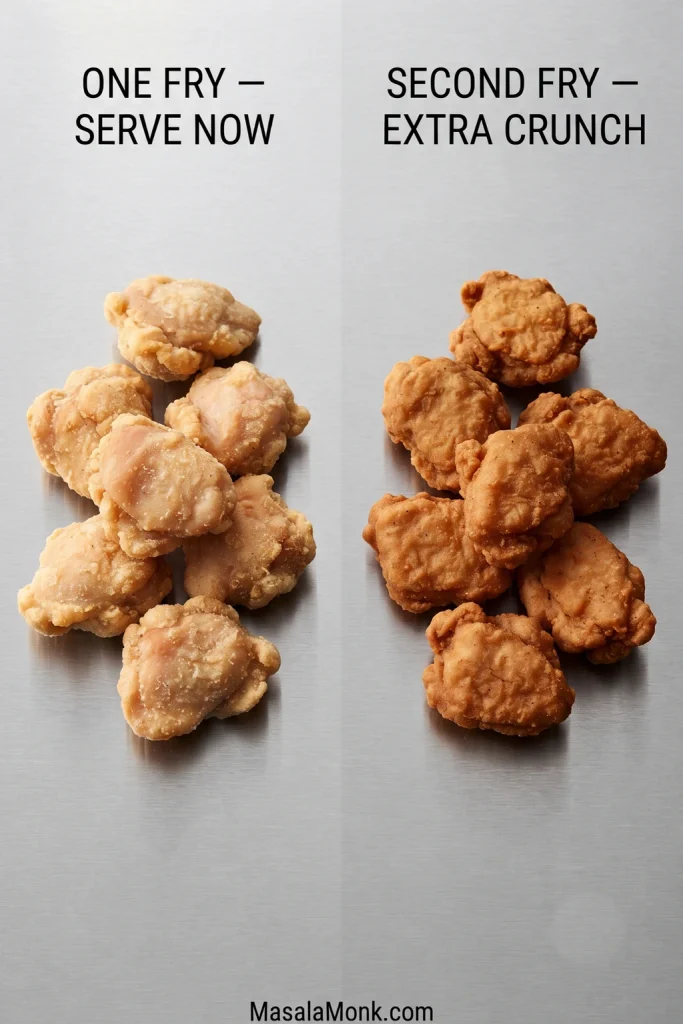
Check the Crust Before You Move On
Break open one larger piece if you want a final pre-sauce check. The coating should be thin and crisp, while the chicken inside stays juicy. Once that contrast is there, the slow part is behind you. Now build the sauce.
Build an Orange Sauce, Not an Orange-Juice Sauce
More juice does not always make a sauce taste more orange. Once the sauce is already loose enough, another splash can dilute it faster than it improves the aroma.
Orange juice brings sweetness, acidity and the base citrus flavor. Fresh zest supplies the concentrated aromatic oils that make the finished glaze smell unmistakably orange.
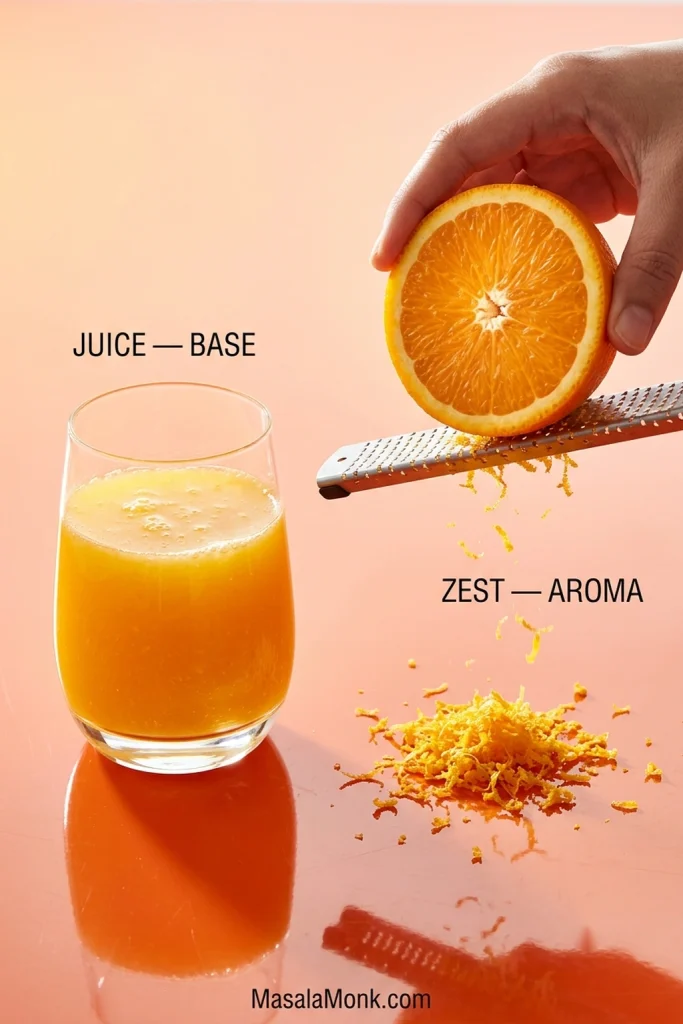
Taste before you thicken
Balance the sauce while it is still fluid. Once it is thickened, adding water, vinegar or soy also changes its texture, so settle the sweet-sour-savory balance first. If something still tastes off, fix the flavor before thickening.
Fix the Flavor Before the Chicken Goes In
Small corrections are enough.
| If the sauce tastes… | Try this |
|---|---|
| Too sweet | Add unseasoned rice vinegar, 1 tsp at a time, then taste again. |
| Too sharp | Add 1 tsp sugar, dissolve it, then taste again. |
| Too salty | Add warm water, 1 tbsp at a time, then taste again. Thicken only after the balance is right. |
| Flat or one-note | Try ½ tsp soy plus ½ tsp rice vinegar, then taste again. |
| Sweet but not orange enough | Finish thickening first. Once the heat is off, add extra zest ¼ tsp at a time until the aroma lifts. |
Once the balance tastes right, check the glaze thickness before the chicken goes in.
How Thick Should Orange Chicken Sauce Be?
Thickness matters most once the sauce reaches the crust.
Too thin: it runs straight off the crust and gathers underneath, carrying more water into the coating.
Right: it still moves easily in the pan but leaves a translucent, glossy layer across the rough surface of the chicken.
Too thick: it begins sitting on the chicken in sticky blobs instead of flowing over the ridges, and the glaze can turn gummy as it cools.
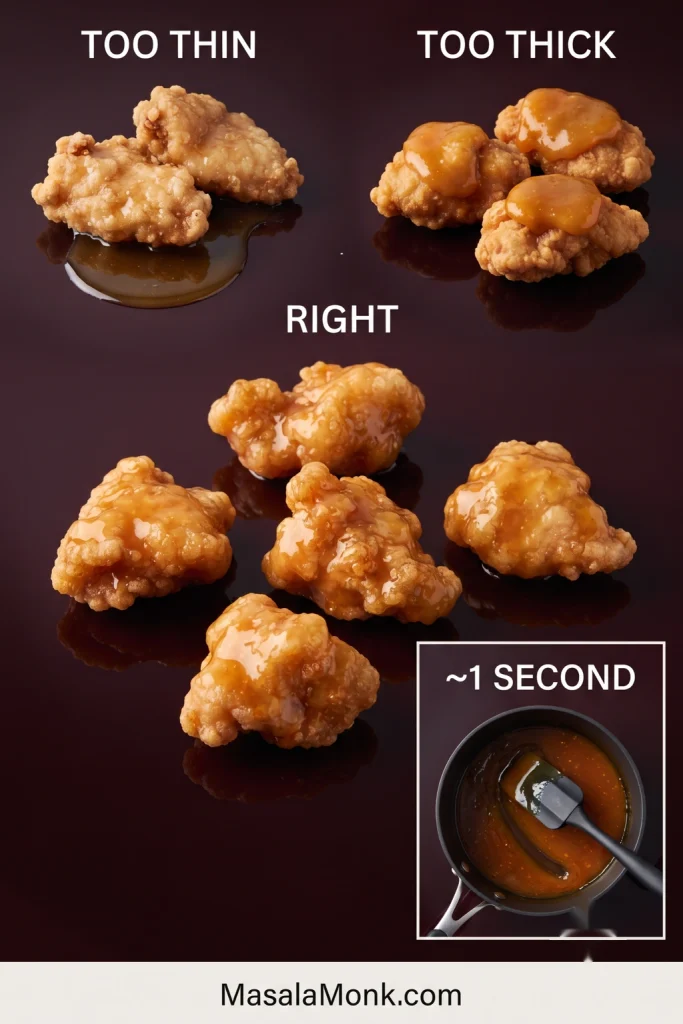
The exact amount of slurry can vary because pan width, simmer intensity and reduction time change how much liquid cooks off. Start with most of it, then let the texture in the pan decide whether the rest is needed.
Once the glaze is where you want it, turn off the heat and stir in the orange zest. The aroma should brighten almost immediately. Add the optional sesame oil now if you want a faint toasted note.
Glaze ready? Go to the final toss.
The 15–20 Second Window
By now the chicken is crisp and the sauce is finished. Nothing needs more cooking.
Add only enough glaze to coat the chicken thinly and toss for about 15–20 seconds. Then get it onto the plate.
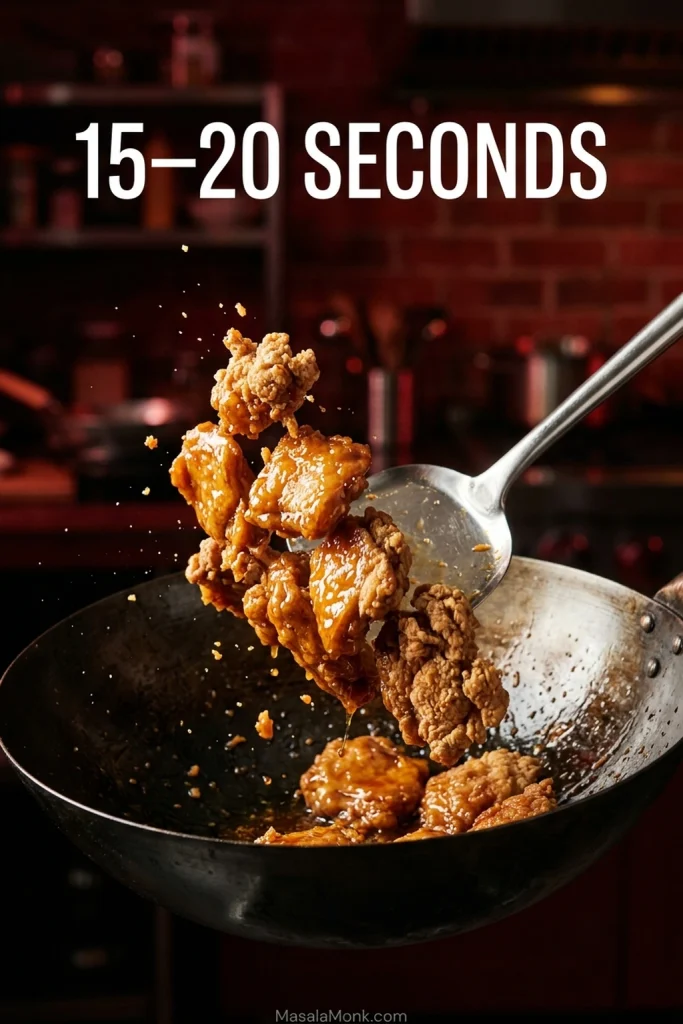
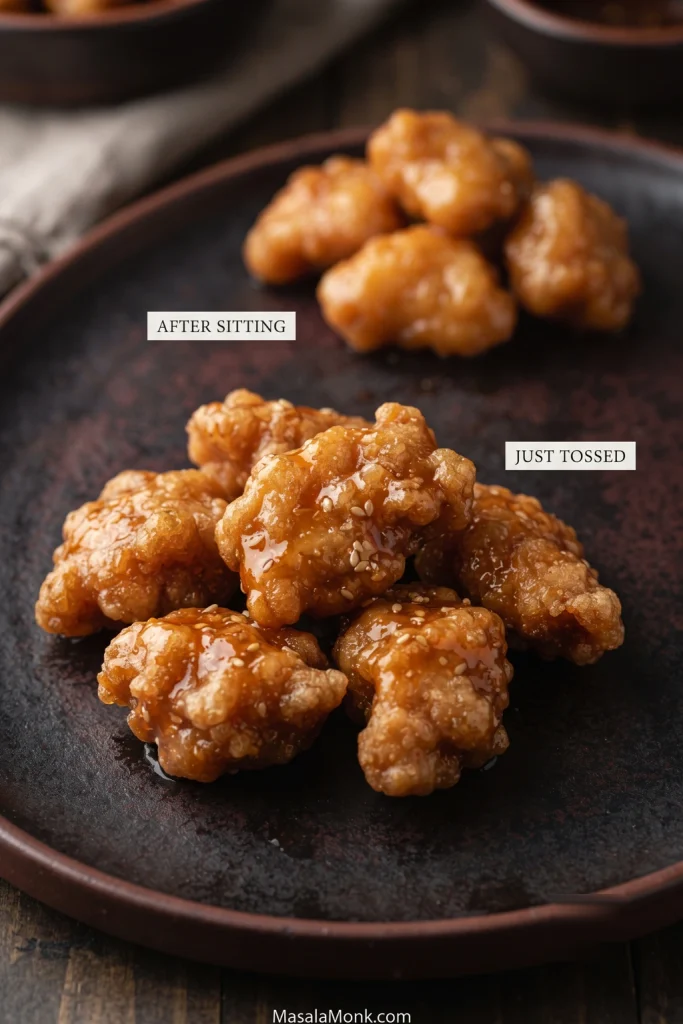
A wet glaze will eventually soften any starch crust, so those first few minutes are the reward: crisp edges beneath a thin sticky coating, juicy chicken inside, and fresh orange aroma still sitting above the sweetness.
Need the quantities or numbered method again? Back to the recipe card.
Orange Chicken Troubleshooting
If a batch goes sideways, don’t change everything at once. Think back to the first moment it looked wrong. That usually tells you what to fix.
Chicken and Coating Problems
| Problem | Likely cause | What to do |
|---|---|---|
| Coating looks wet and pasty | Too much surface liquid | Drain obvious liquid before coating. If the starch is already pasty, press on more dry starch until the surface looks rough rather than wet. |
| Loose starch keeps falling off | Coating is not firmly attached | Press it on, then shake away the excess. |
| Coating falls off in the oil | Moisture, weak adhesion or turning too early | Let the crust set before turning, handle the pieces gently, and revisit the coating cues if the starch never attached well. |
| Chicken is pale or greasy | Oil stayed too cool | Reduce the batch size and let the oil recover before adding more chicken; see the frying-oil cues. |
| Outside darkens too fast | Oil too hot or pieces too large | Lower the heat slightly and keep the pieces close to the recipe size. |
Sauce, Glaze and Serving Problems
| Problem | Likely cause | What to do |
|---|---|---|
| Sauce stays watery | Not enough simmering or slurry | Bring it back to a simmer and add a little more freshly stirred slurry, using the sauce-thickness cues as your target. |
| Sauce turns gummy | Too much starch or too much reduction | Whisk in warm water, 1 tbsp at a time, until it flows again; compare it with the correct glaze consistency. |
| Sauce tastes bitter | Too much white pith or scorched aromatics | Mild pith bitterness may soften with a little water and sugar. If the garlic or ginger is genuinely burnt and acrid, remake the sauce. |
| Chicken loses its crispness too quickly | Too much sauce, sauce too thin or toss too long | Use less glaze, finish thickening it first and keep the final toss brief. |
| Chicken is dry inside | It cooked too long | Check the larger pieces earlier and stop once they reach 165°F / 74°C. Breast has less margin than thigh. |
Once you’ve fixed the problem, return to the recipe card and pick up from the step you need.
Swaps That Work Here
Chicken and coating
Chicken breast can replace thigh; start checking it earlier. Potato starch is also a good coating alternative if you already have it, with a slightly more brittle finished crust.
Sauce ingredients
Dry sherry is the easiest substitute for Shaoxing wine; if you have neither, leave it out. Unsweetened bottled orange juice can work, although fresh zest still matters. Orange marmalade brings sugar, peel and pectin together, so it needs its own balanced sauce rather than a straight swap for fresh juice. For more heat, add extra red pepper flakes or a little chile paste.
Air Fryer and Unbreaded Options
For an unbreaded version, brown seasoned bite-size chicken in a lightly oiled skillet and finish it with the orange sauce. Our hibachi chicken recipe goes deeper into pan-browning chicken without a coating.
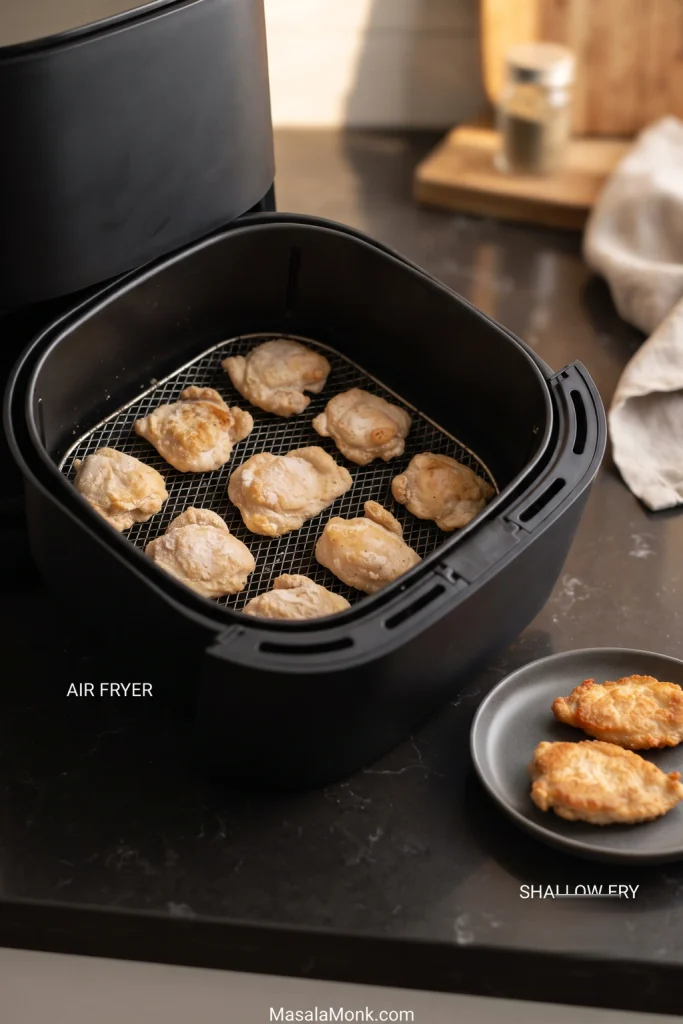
For an air-fryer adaptation, use the same cornstarch-coated chicken and coat the surface thoroughly but lightly with oil so dry starch does not remain chalky. Arrange the pieces in a single layer and air fry at 400°F / 205°C, turning halfway.
Start checking around 10 minutes; exact timing varies with the air fryer and piece size. Cook until the edges look crisp and the largest pieces reach 165°F / 74°C. Finish the sauce separately and toss only at the end. Expect the crust to be lighter and a little less evenly craggy than the shallow-fried version.
What to Serve with Orange Chicken
Because the chicken is sticky, sweet and rich, plain rice and something green are usually all it needs.
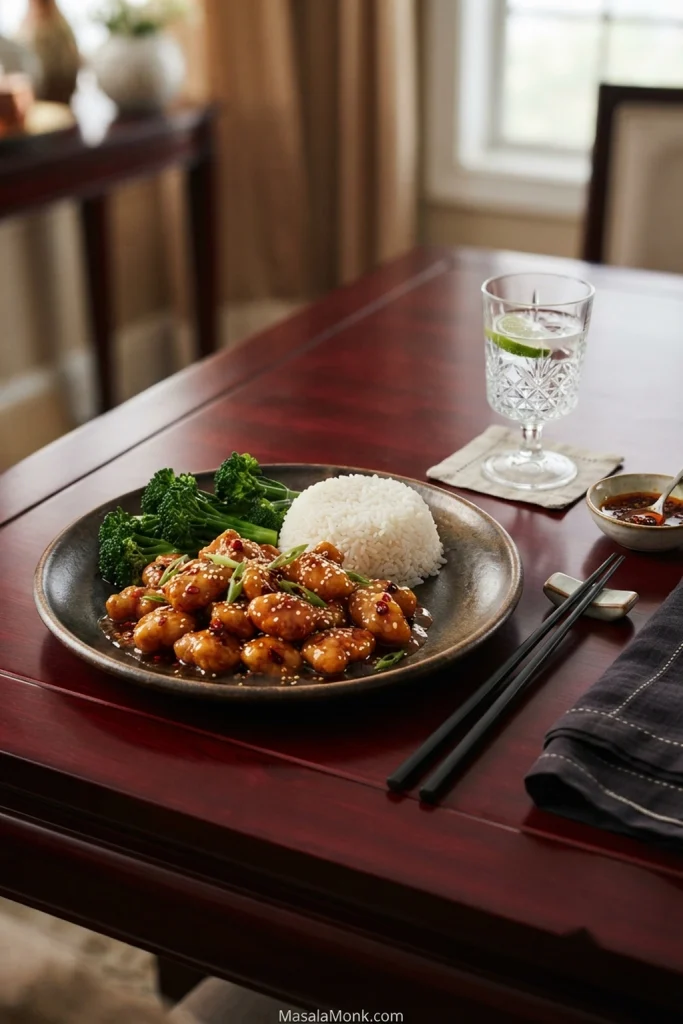
- Steamed jasmine rice: simple and excellent for catching the little bit of glaze left on the plate. Our guide to cooking jasmine and other white rice has stovetop ratios and texture cues if rice is the part you tend to second-guess.
- Broccoli, bok choy or stir-fried greens: something fresh and slightly bitter works well against the sweet citrus glaze.
- Fried rice: good when you want a fuller takeout-style meal; keep its seasoning relatively restrained so the orange chicken remains the main event.
If you want the same contrast of crisp chicken and glossy sauce with a toasted-sesame profile, our sesame chicken takes it in that direction.
Store, Freeze and Reheat Orange Chicken
If you expect leftovers, leave the portion you will not serve immediately unsauced and keep the chicken and sauce separate. That gives the crust a much better chance of coming back later.
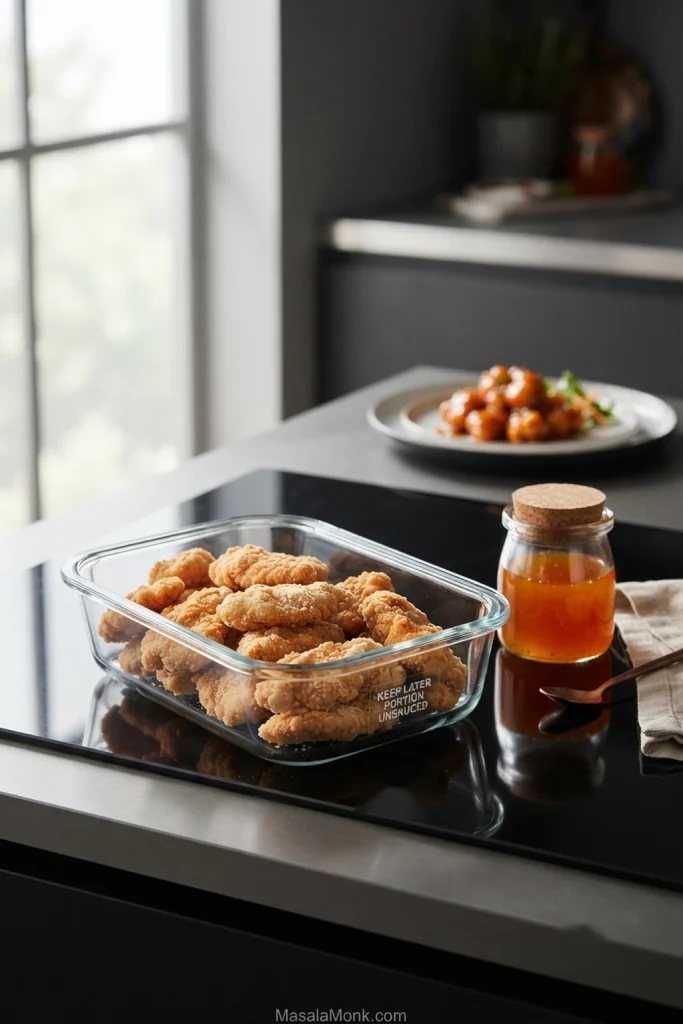
For make-ahead cooking, mix the sauce ingredients in advance but keep the zest and slurry separate. Cut the chicken ahead if needed, then coat it close to frying time.
Refrigerate leftovers promptly, within 2 hours of cooking. Store them in shallow covered containers and use refrigerated leftovers within 3–4 days.
For longer storage, keep the chicken and sauce in separate shallow containers and chill them promptly. For best quality, freeze for up to 3 months. Reheat the chicken until hot and crisp again, warm the sauce separately, and toss only when you’re ready to eat.
An oven or air fryer gives the crust the best chance to dry out again. A skillet works for smaller portions. The microwave is fastest, and sometimes that’s what works tonight—just expect a softer coating. Reheat leftovers thoroughly to 165°F / 74°C.
Back to the recipe card · Back to top
When it is time to eat, the finished plate should still look like fried chicken underneath the sauce: glossy enough to catch the light, but textured enough that the crust has not disappeared.
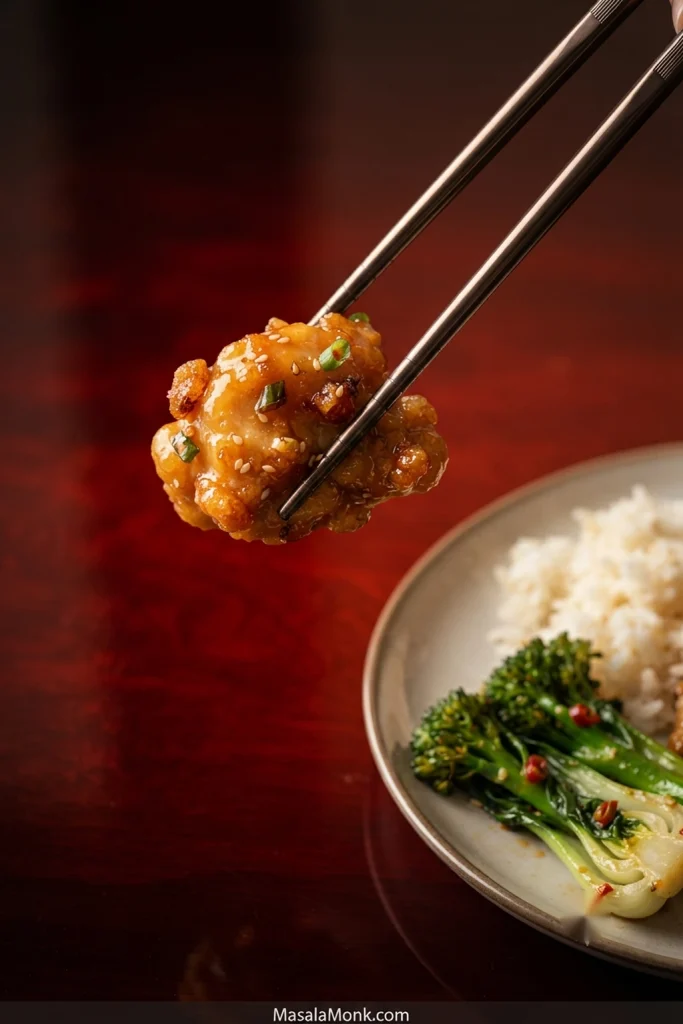
The sauce should taste unmistakably orange, cling in a thin glossy layer and leave very little liquid behind in the pan. Once the chicken is crisp and the glaze is there, don’t linger. Toss, plate and eat.








