
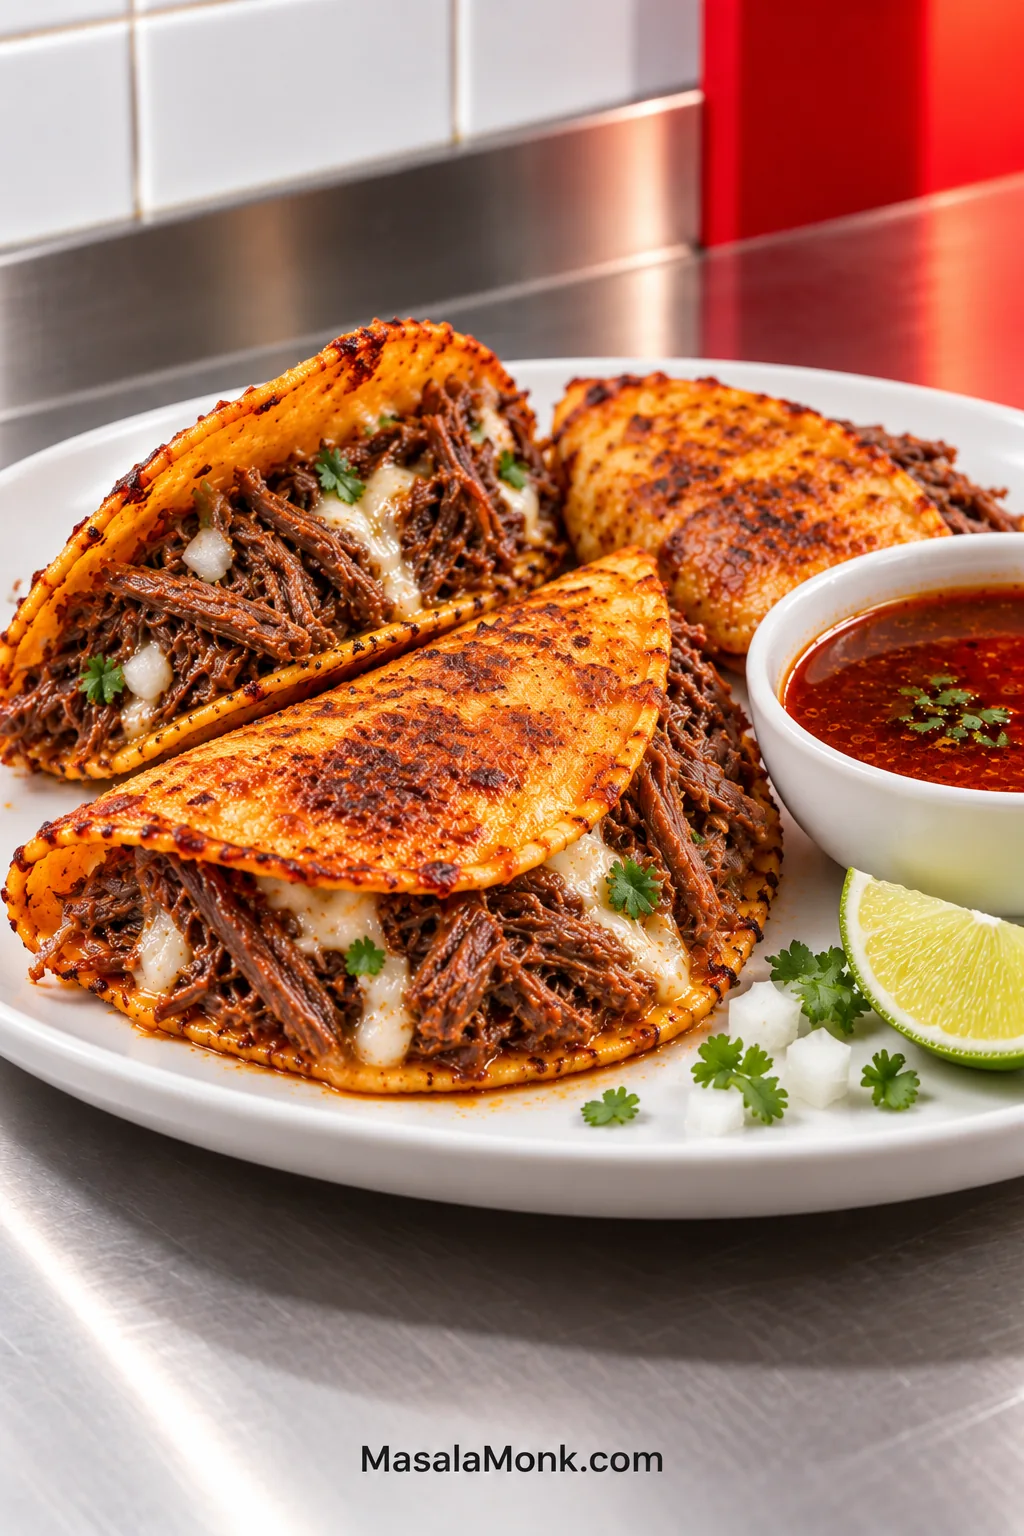
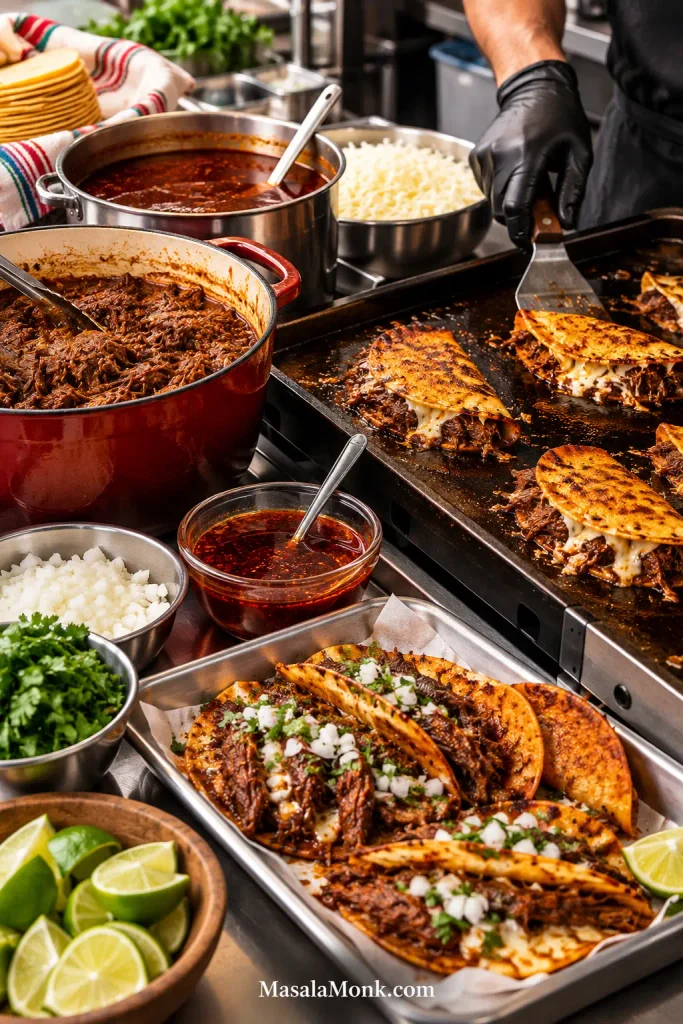
Pull a good birria taco apart and several things happen at once. The corn tortilla cracks at the crisp edge, melted cheese stretches away from the fold, and the shredded beef underneath stays juicy without pouring broth down your hand. Then the whole thing gets dipped into hot, deeply savoury consommé with white onion, cilantro and lime.
They look like a restaurant project, and there is a long braise involved. At home, though, most of that time is waiting. The real work happens before the beef goes into the oven and after it comes out tender.
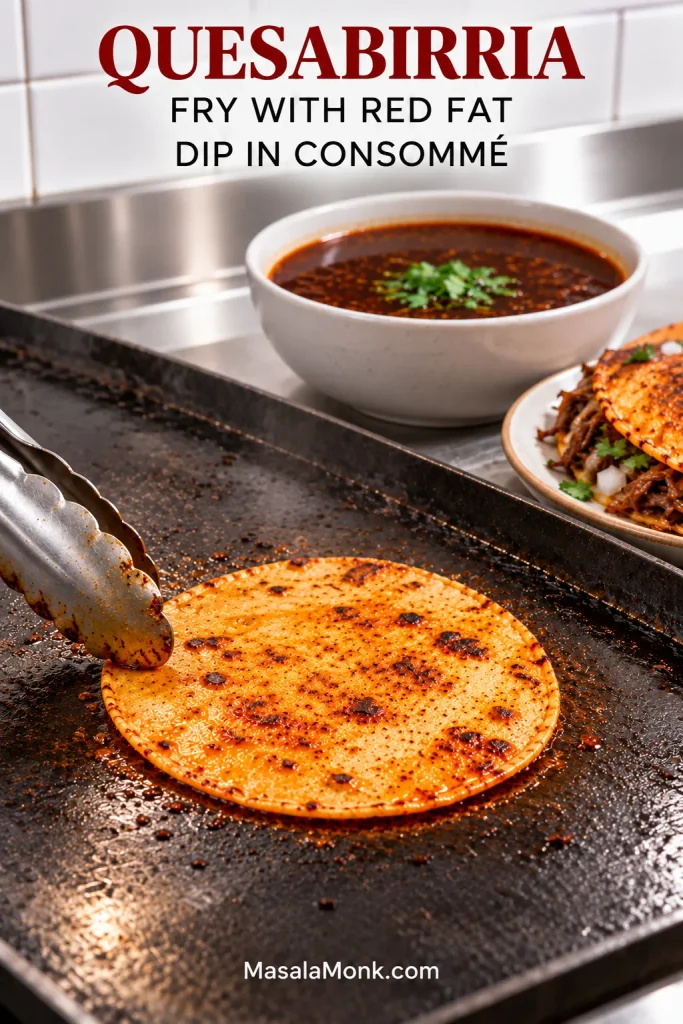
Birria tacos are corn tortillas filled with slow-braised, chile-seasoned meat; quesabirria adds melting cheese. In this version, the tortillas are crisped with the red fat from the beef braise and served with the finished consommé for dipping.
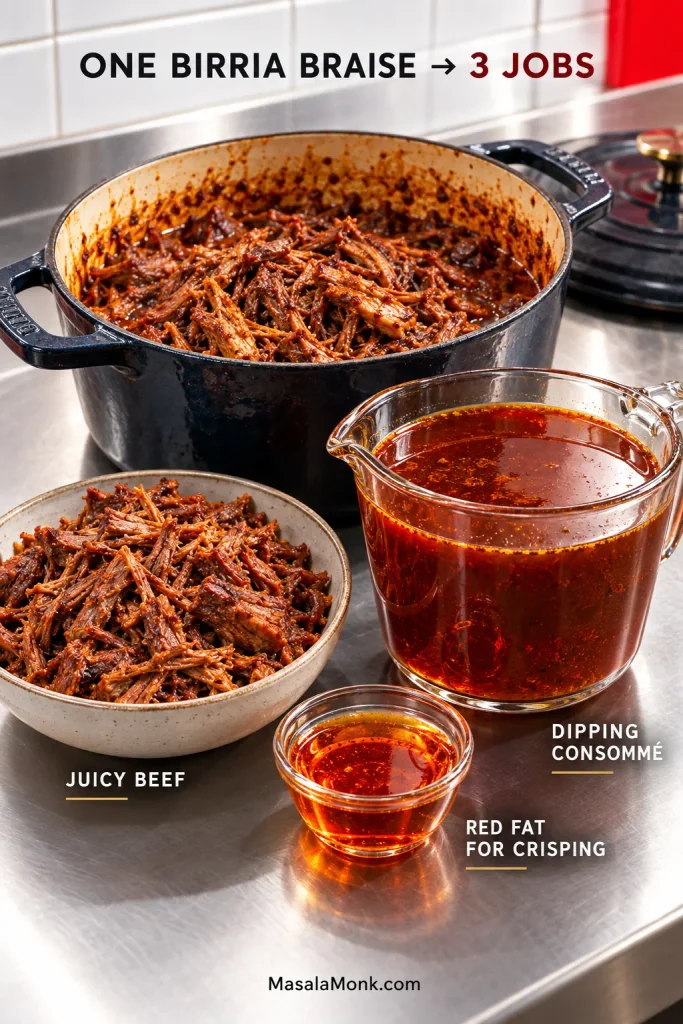
A finished braise gives you three useful things: seasoned beef, consommé and chile-stained red fat. The beef needs to stay succulent without soaking the tortilla. The consommé should taste concentrated while still pouring like broth. The red fat gets saved for the skillet, where a thin film helps the tortilla turn crisp and deeply coloured.
For this birria tacos recipe, chuck roast supplies most of the shreddable beef, while a smaller bone-in cut adds gelatin and rendered fat. Guajillo and ancho build the dried-chile flavour; chile de árbol is there only when you want more heat.
Allow about 5–6 hours from start to finish. The beef spends 3½–4 hours quietly braising, while total hands-on work comes to roughly 1½ hours.
How the Pot Becomes Birria Tacos
Once you see the pot as beef, consommé and red fat, the rest becomes much easier to follow.
- Build the birria sauce. Soften the dried chiles, blend them with tomatoes, aromatics and spices, then taste before the beef goes in.
- Braise the beef. Cook until the chuck is genuinely tender. The timer tells you when to start checking; the meat tells you when to stop.
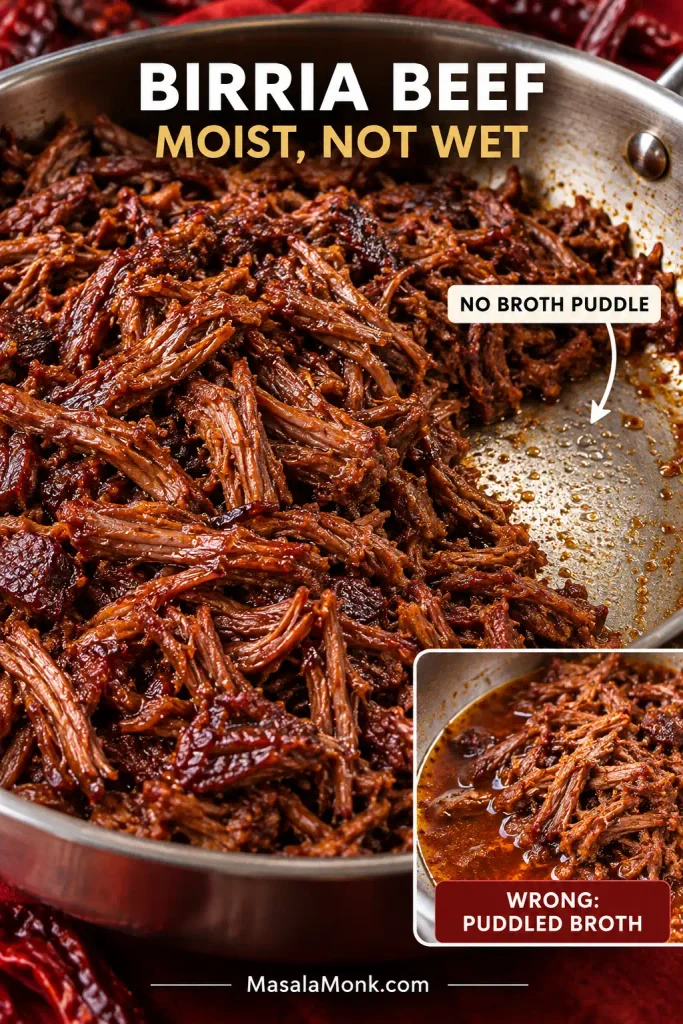
- Finish the shredded beef. Return some concentrated birria liquid, then cook away the loose moisture until the meat is moist, not wet.
- Adjust the consommé. Reduce it if weak, loosen it if overly concentrated, then season once the flavour is right.
- Save the red fat. The chile-stained surface fat is what you want for the tortillas.
- Fry the quesabirria. Warm tortilla, thin film of fat, cheese, beef, hot griddle, plate.
Birria Tacos Recipe with Beef, Cheese and Consommé
This batch makes about 18 generously filled small quesabirria tacos and serves roughly six people at three tacos each. Short ribs and shank vary in how much edible meat they carry, so you may finish with some extra birria beef.
Recipe at a Glance
Same-day rhythm: sauce and browning → 3½–4 hour braise → finish the beef and consommé → fry the tacos in batches.
Primary method: covered Dutch-oven braise at 300°F / 150°C.
Ingredients
For the Beef
- 3 lb / 1.36 kg boneless beef chuck roast, cut into roughly 3-inch / 7.5-cm pieces
- 1 lb / 454 g bone-in beef short ribs or beef shank
- 1½ teaspoons / about 9 g fine sea salt, plus more for finishing
- 1 teaspoon freshly ground black pepper
- 1 tablespoon / 15 ml neutral cooking oil
For the Birria Sauce
- 8 guajillo chiles (dried), about 60 g / 2.1 oz before stemming and seeding
- 4 ancho chiles (dried), about 45 g / 1.6 oz before stemming and seeding
- 1–2 chiles de árbol (dried), about 1–2 g, optional for heat
- 3 medium Roma tomatoes, about 300 g / 10.5 oz, quartered
- 1 large white onion, about 250 g / 8.8 oz, quartered
- 8 garlic cloves, about 30 g / 1 oz, peeled
- 2 teaspoons Mexican oregano; regular oregano can work in a pinch, using slightly less
- 1½ teaspoons ground cumin
- ½ teaspoon ground cinnamon
- ¼ teaspoon ground cloves
- 2 tablespoons / 30 ml apple cider vinegar or distilled white vinegar
- 5 cups / 1.18 litres low-sodium beef broth, divided, plus extra as needed
- 2 bay leaves
Use the chile weights when you can. Dried peppers vary enormously in size. If eight guajillos or four anchos do not come close to the weights above, let the gram/ounce measurements guide the batch.
For the Quesabirria
- 20 small fresh corn tortillas, 5–6 inches / 13–15 cm across, giving you two spares
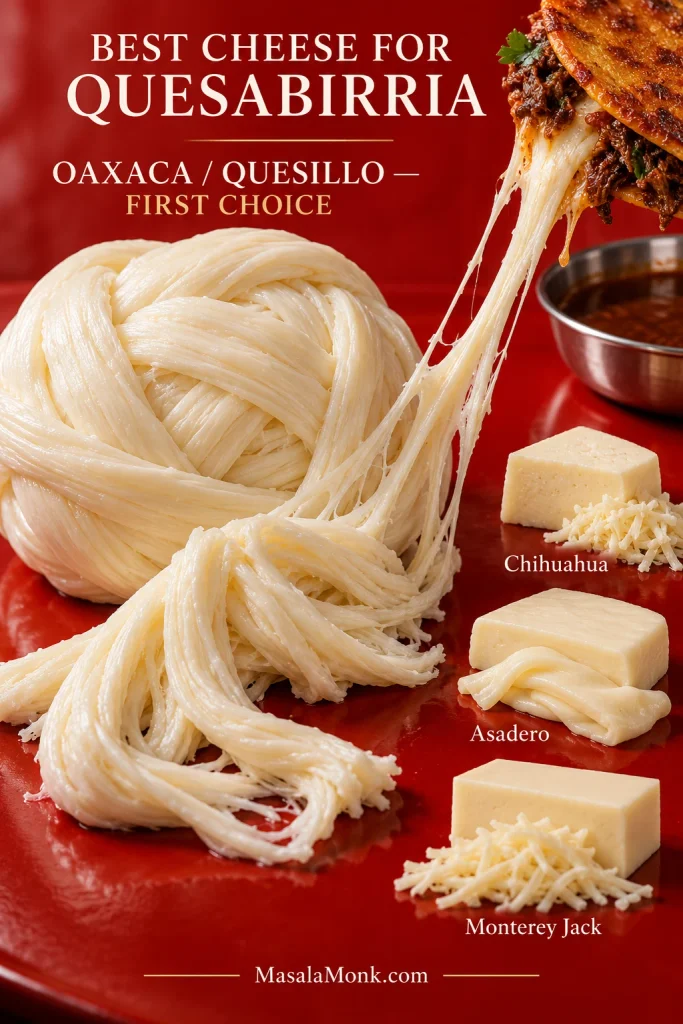
- 16 oz / 454 g Oaxaca (quesillo), Chihuahua, Asadero or Monterey Jack cheese
- About 6 tablespoons / 90 ml reserved red birria fat
- 1 small white onion, about 100 g / 3.5 oz, finely diced
- ½ cup / about 15–20 g chopped fresh cilantro, plus more if wanted
- 3 limes, cut into wedges
Oaxaca (quesillo) is the first choice when you can get it: mild, stretchy and excellent for melting. Chihuahua and Asadero work beautifully too; Monterey Jack is the easiest widely available substitute. Whichever you use, shred it finely so the cheese melts before the tortilla gets too dark.
Equipment
- 6- to 7-quart / 5.7- to 6.6-litre Dutch oven or another heavy oven-safe pot with a lid
- Medium saucepan
- Blender
- Fine-mesh strainer
- Large bowl or tray for the cooked beef
- Wide skillet, cast-iron pan or griddle
- Tongs, ladle and heatproof spoon
- Small heatproof bowl or jug for the red fat
- Instant-read or probe thermometer for checking the beef, optional
- Infrared thermometer for checking the griddle surface, optional
Phase 1: Make the Birria Sauce
1. Warm and Soften the Dried Chiles
Wipe the dried chiles clean, remove the stems and shake or scrape out most of the seeds.
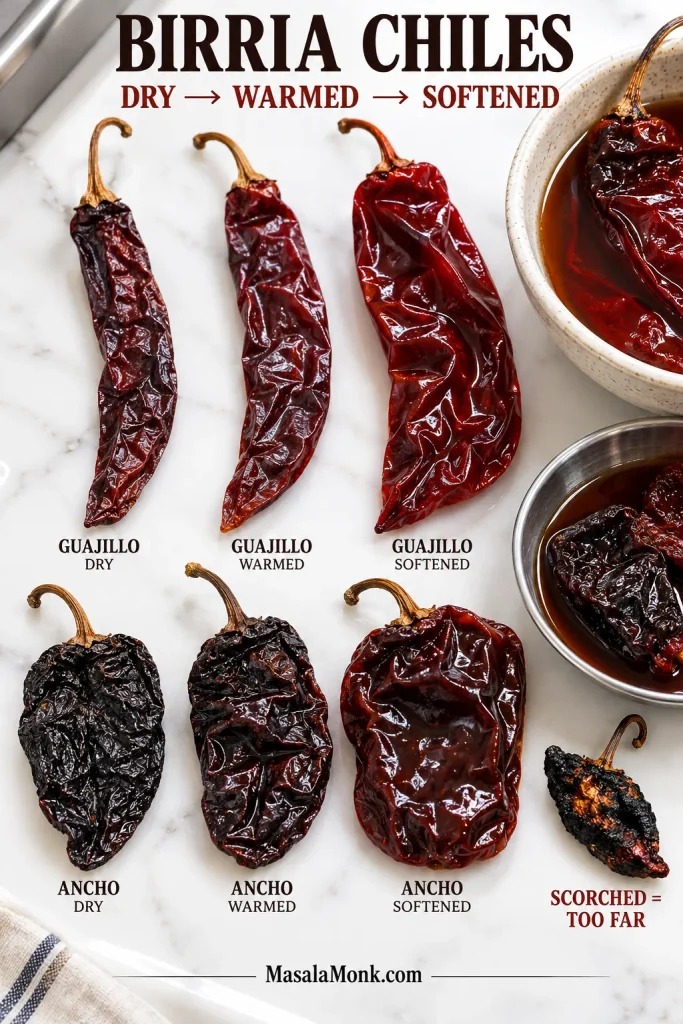
Set a dry skillet over medium-low heat. Warm the guajillo and ancho chiles briefly, 10–15 seconds per side, until their aroma strengthens and the skins become more flexible. Chile de árbol needs even less time.
Pull them as soon as they smell fuller and fruitier. Smoke, an acrid smell or black scorched patches mean the heat has gone too far.
Cover the warmed chiles with very hot water and leave them for 15 minutes. They are ready when the skins bend easily and the softened flesh no longer feels brittle. Drain and discard the soaking water.
2. Soften the Tomatoes and Aromatics
Put the tomatoes, onion, garlic and 2 cups / 475 ml of the beef broth into a medium saucepan. Bring to a gentle simmer and cook for 10 minutes, until the tomato and onion have softened.
Let the mixture cool for several minutes before blending. If your blender is not designed for hot liquids, cool it further. Otherwise, follow the manufacturer’s instructions for venting steam safely and begin at low speed.
3. Blend, Strain and Taste
Transfer the softened chiles to the blender with the tomatoes, onion, garlic and their cooking broth. Add the Mexican oregano, cumin, cinnamon, cloves and vinegar. Blend until smooth.
As the mixture smooths out, it should turn a deep red-brown and smell distinctly of dried chile and warm spice rather than raw onion or garlic.
In this recipe, the birria sauce is the blended dried-chile, tomato, onion, garlic and spice base in which the beef braises. It is different from the finished consommé served beside the tacos.
Pour the sauce through a fine-mesh strainer, pressing with a flexible spatula. Once what remains is mostly fibrous chile skin and pulp, discard or compost the residue. A powerful blender may leave very little behind.
The strained sauce should pour in a steady stream. If yours sits like paste, loosen it with extra low-sodium broth.
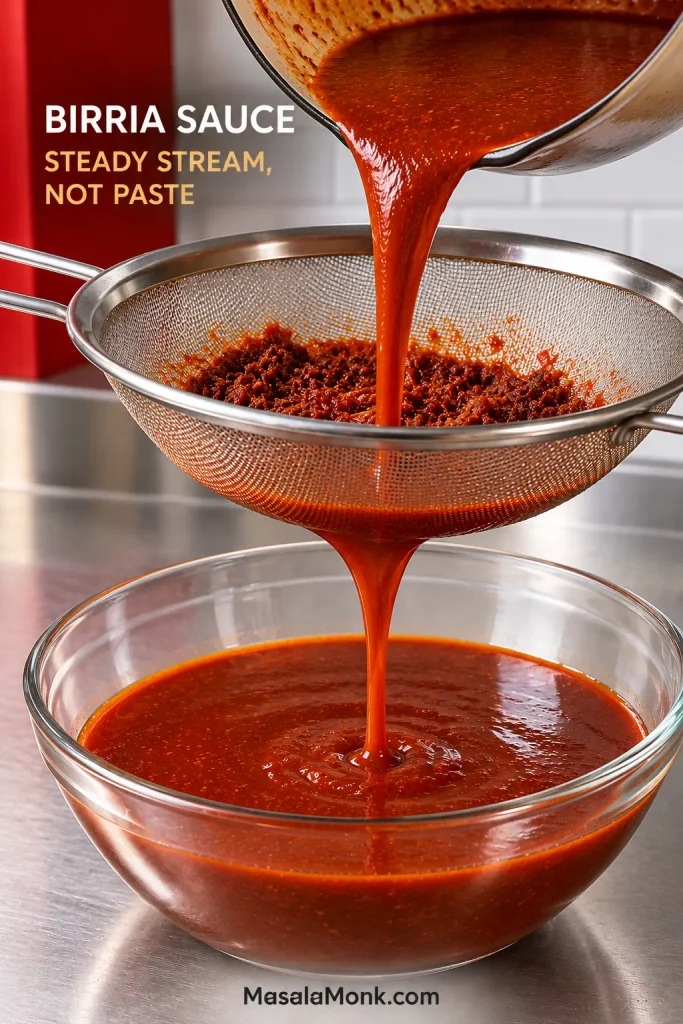
Taste it now. It should be intense, fruity, earthy and savoury. A clearly scorched or acrid sauce is worth remaking before several pounds of beef go into it.
Phase 2: Braise the Beef
4. Brown the Beef
Heat the oven to 300°F / 150°C.
Pat the chuck and short ribs or shank reasonably dry. Season with the measured salt and black pepper.
Heat 1 tablespoon / 15 ml neutral oil in the Dutch oven over medium-high heat. Brown the meat in batches so the pieces have room to make contact with the pot.
A few properly browned surfaces are enough. The next few hours will do far more for the beef than chasing a perfect crust on every side.
5. Cover the Pot and Let the Beef Get Tender
Return all the beef to the Dutch oven. Pour in the birria sauce, the remaining 3 cups / 710 ml broth and the bay leaves.
Once everything settles, the liquid should reach about halfway to two-thirds of the way up the larger pieces. A particularly wide pot may need extra low-sodium broth.
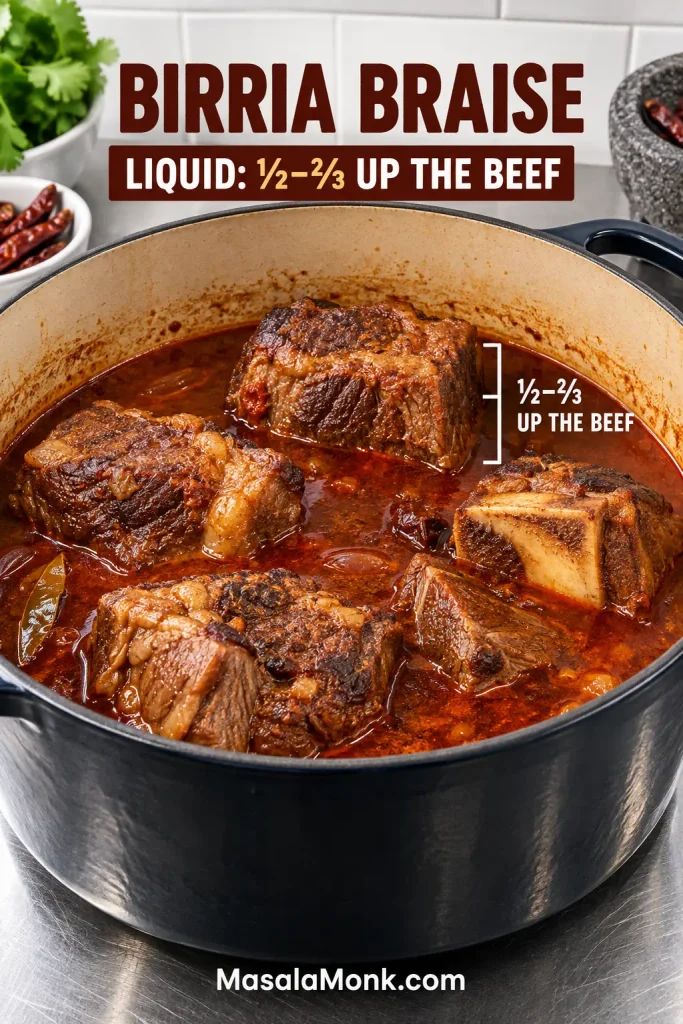
Bring the liquid just to a simmer on the stovetop, cover the pot and put it in the oven.
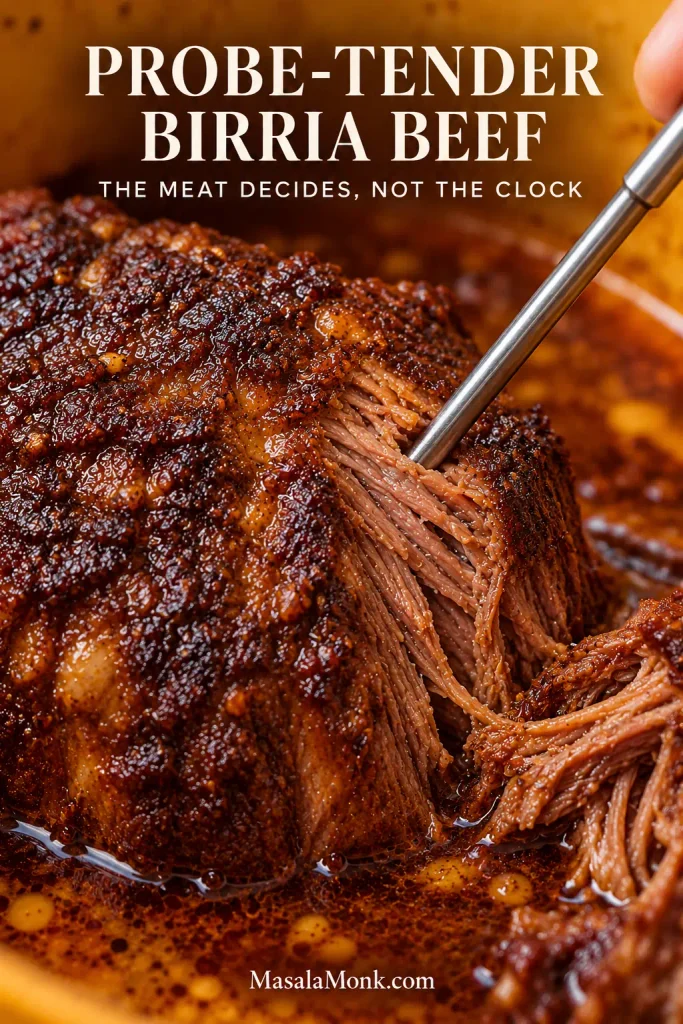
Now there is not much to do. Start checking at 3 hours; most batches need 3½–4 hours.
The beef is done when a fork, skewer or probe slides into the chuck with almost no resistance and the meat pulls apart easily. Beef in this kind of braise often reaches the low 200s°F / mid-90s°C around the time it becomes tender, but the probe test decides when it is ready.
When the probe finally slips in without a fight, the long part is done. If the beef is still stubborn, close the pot and give it more time.
Phase 3: Finish the Beef, Consommé and Red Fat
Use about 1 cup / 240 ml of the cooking liquid to finish the shredded beef. After that, aim to have roughly 3½–4½ cups / 830 ml–1.06 litres of consommé left for serving, plus about 6 tablespoons / 90 ml red fat for the 18 tacos.
Exact yield varies with the beef, pot and amount of reduction, so let flavour and texture guide the final adjustment.
6. Lift Out the Beef and Skim the Fat
Transfer the tender meat to a large bowl or tray and remove the bay leaves. Once the bone-in pieces are cool enough to handle, discard the bones and any tough pieces of gristle.
Let the pot sit for several minutes. Orange-red fat will gather over the darker consommé. Carefully skim about 6 tablespoons / 90 ml into a small heatproof bowl or jug.
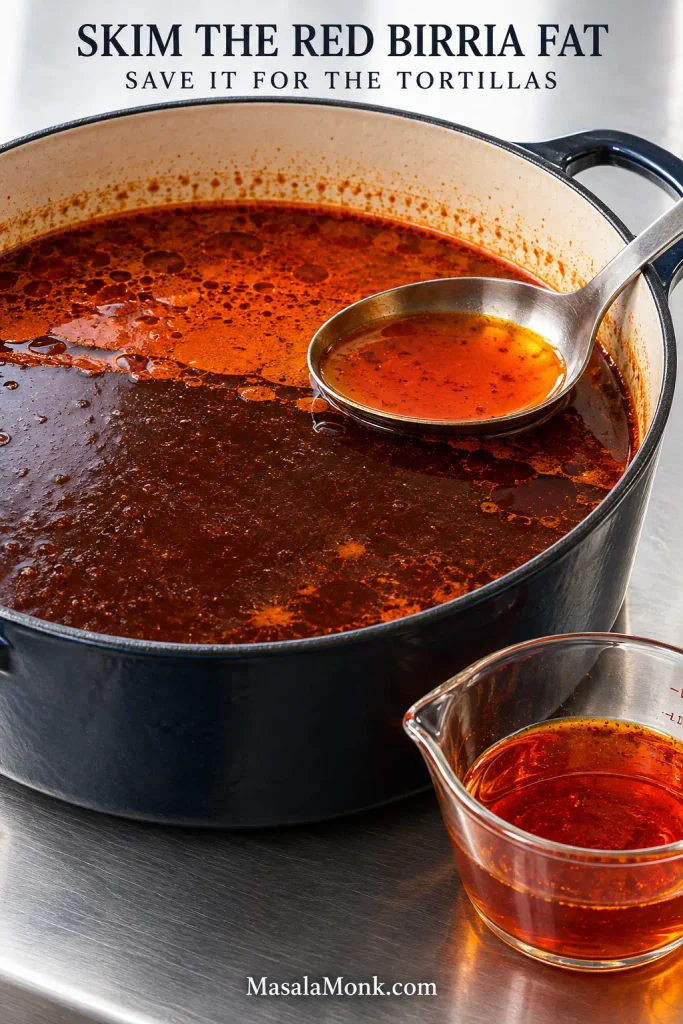
That little bowl of red fat is worth protecting. It is what turns pale corn tortillas into the crisp red shells you are after.
A leaner batch may give you less. Save what you have and supplement it with enough beef tallow or neutral oil to coat the tortillas lightly.
7. Shred and Season the Beef
Shred the chuck and the usable meat from the short ribs or shank.
Transfer it to a wide skillet or saucepan with about 1 cup / 240 ml of the birria cooking liquid. Cook over medium heat for 5–8 minutes, tossing occasionally.
At first, broth will move around the bottom of the pan. Keep going until that puddle disappears and the beef looks glossy. Push some meat aside with your tongs: the surface underneath should be damp, not flooded.
Taste a strand. It should already be good enough to steal from the pan. If the beef itself tastes flat, add a small pinch of salt.
8. Taste and Adjust the Consommé
Good birria consommé should taste concentrated and beefy while remaining thin enough to drink like broth.
A light-looking broth is not automatically weak. If the beef, chile and spice flavours are already pronounced, leave it alone. If it tastes diluted, simmer uncovered until the flavour deepens.
A broth that has gone too far can be loosened gradually with unsalted broth or water. Once the strength is right, make the final salt adjustment.
Gelatin may make the consommé firm when cold; while hot, it should still pour easily from a ladle.
9. Check the Reserved Fat
Heat a small spoonful in the skillet. Normal sizzling is fine. Violent sputtering usually means watery consommé came along with the fat; warm it gently until that water cooks away.
Phase 4: Fry the Quesabirria
This is the fast part. Have the beef hot, cheese shredded, tortillas ready and consommé waiting before you begin.
10. Warm the Tortillas
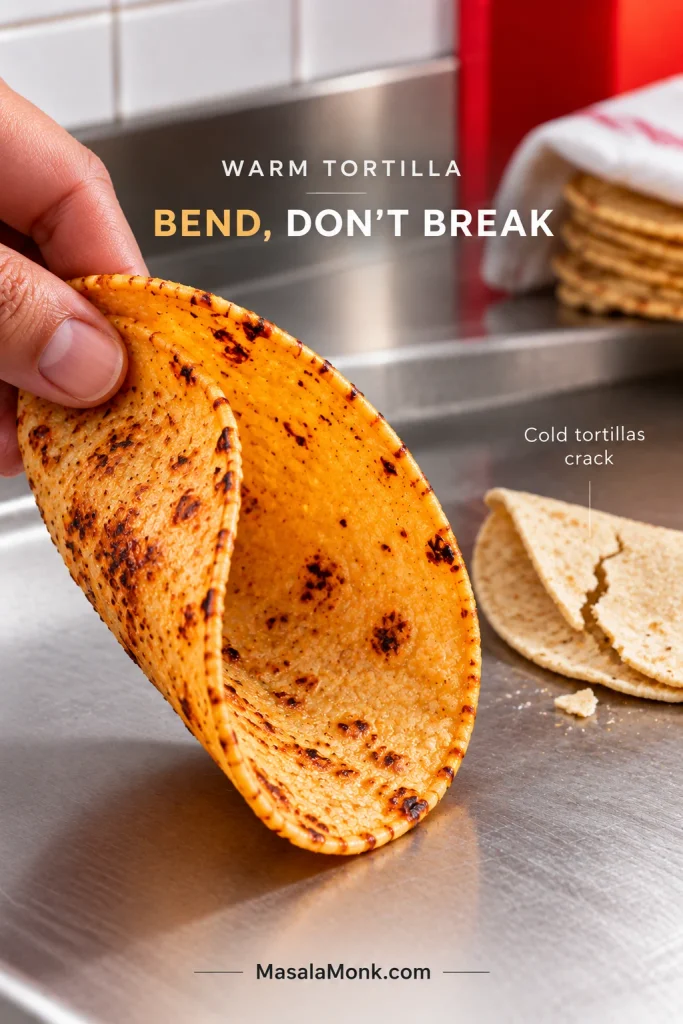
Warm the corn tortillas briefly on a dry skillet or griddle until pliable, 10–20 seconds per side. Refrigerated tortillas especially need this head start before they are folded.
11. Portion the Filling
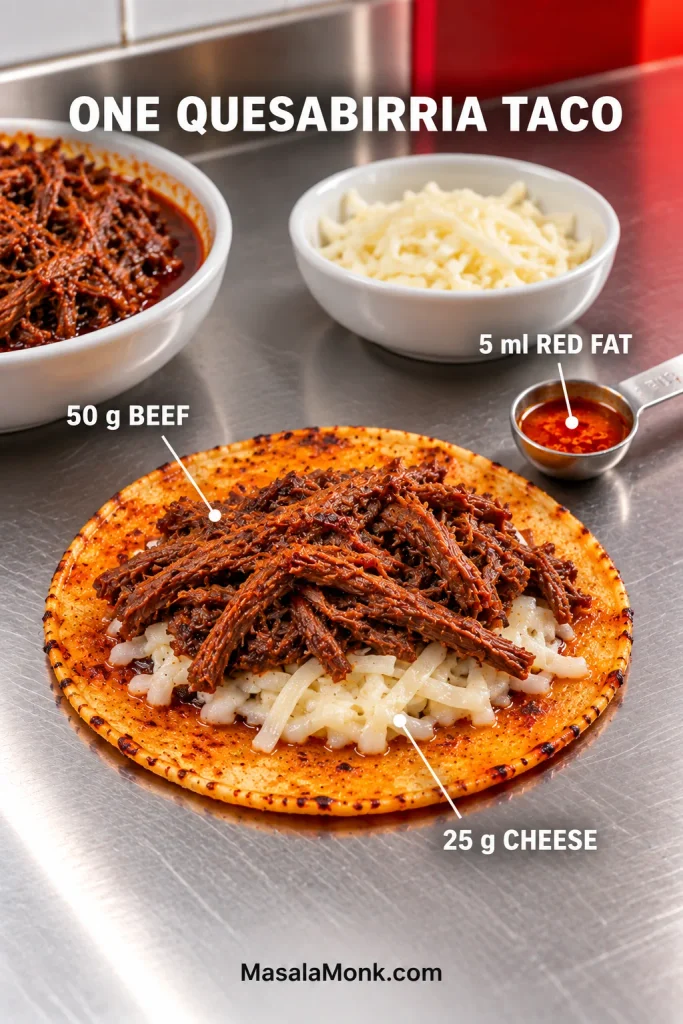
For each 5- to 6-inch / 13- to 15-cm tortilla, start with:
- 1 teaspoon / 5 ml red birria fat
- 25 g / a scant 1 oz finely shredded cheese
- 1¾ oz / 50 g shredded birria beef
That gives you a generous taco without turning it into a stuffed pouch that barely touches the skillet.
12. Coat, Fill and Crisp
Heat a large skillet or griddle over medium to medium-high heat. A surface around 350–375°F / 177–191°C is a useful working range if you use an infrared thermometer.
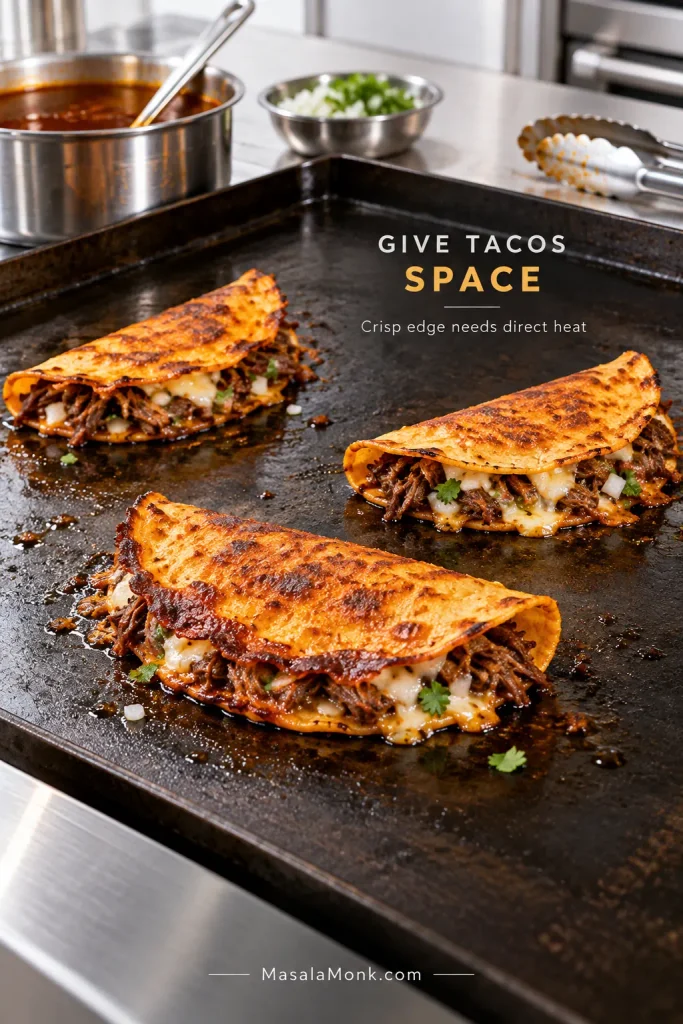
Work two or three tacos at a time unless you are using a large flat-top. Crowding makes them awkward to flip and can cool the cooking surface.
Add about 1 teaspoon / 5 ml red fat, then swipe a warm tortilla through it so the side against the pan gets a thin chile-red film.
Give it 15–30 seconds. Cheese over one half. Beef on top. Fold.
Then leave it alone long enough for the first side to turn red-golden and begin releasing from the pan, usually around 1½–2 minutes. Flip and crisp the second side until firm and browned.
The cheese should be melted and the shell should feel firm rather than floppy. A pale, damp tortilla simply needs more time against the heat.
The first taco tells you whether the pan is right: crisp edge, melted centre, and no stream of broth running out when you lift it.
13. Serve Them Hot
Start with about ½–⅔ cup / 120–160 ml consommé per person and keep the rest hot for refills. Add diced white onion, cilantro and lime to taste.
Dip each taco just before you bite rather than letting it sit in the consommé; you get the hot broth without giving the crisp shell time to turn soggy.
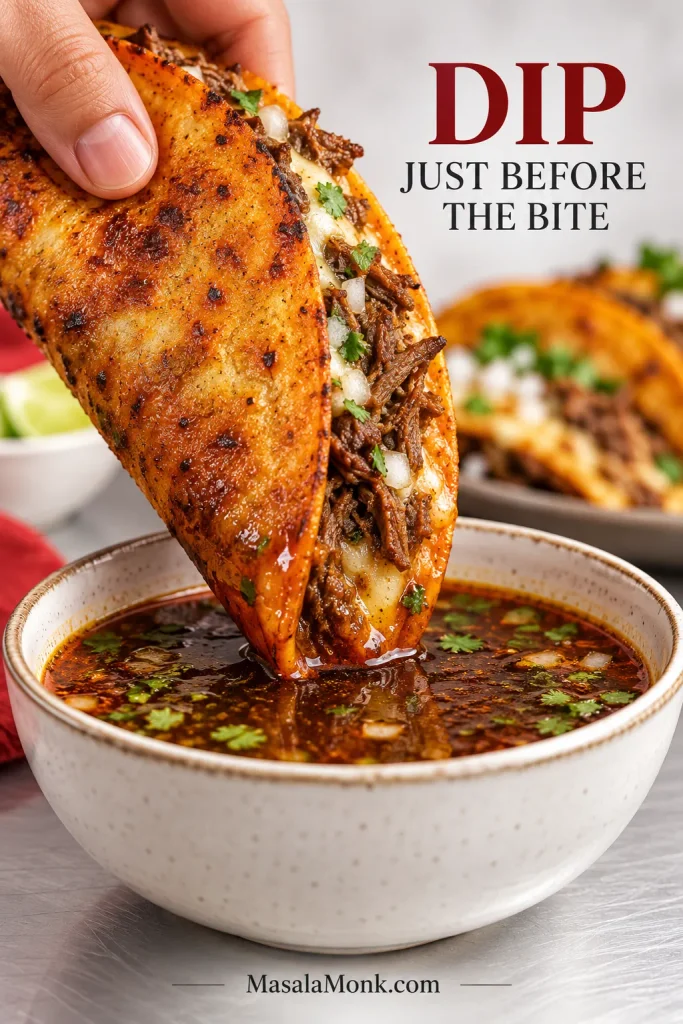
Send the tacos straight from the griddle to the table. Steam and meat juices start softening the shell almost immediately, so this is not a meal that improves while waiting under foil.
If dinner is already underway, you can stop here. The guide below is for the questions that only matter when you are choosing a different cut, planning tomorrow’s batch or staring at a pot that is doing something you did not expect.
Birria Guide
Choosing the Beef and Chiles
For this beef birria tacos recipe, chuck roast is the most practical main cut for most home cooks. It is widely available, gives a good yield of actual meat and contains enough connective tissue to become succulent after several hours of gentle cooking.
The smaller bone-in cut has a different job. Short ribs contribute fat and gelatin; shank brings connective tissue and bone. Oxtail gives you plenty of richness too, though comparatively little meat for the price.
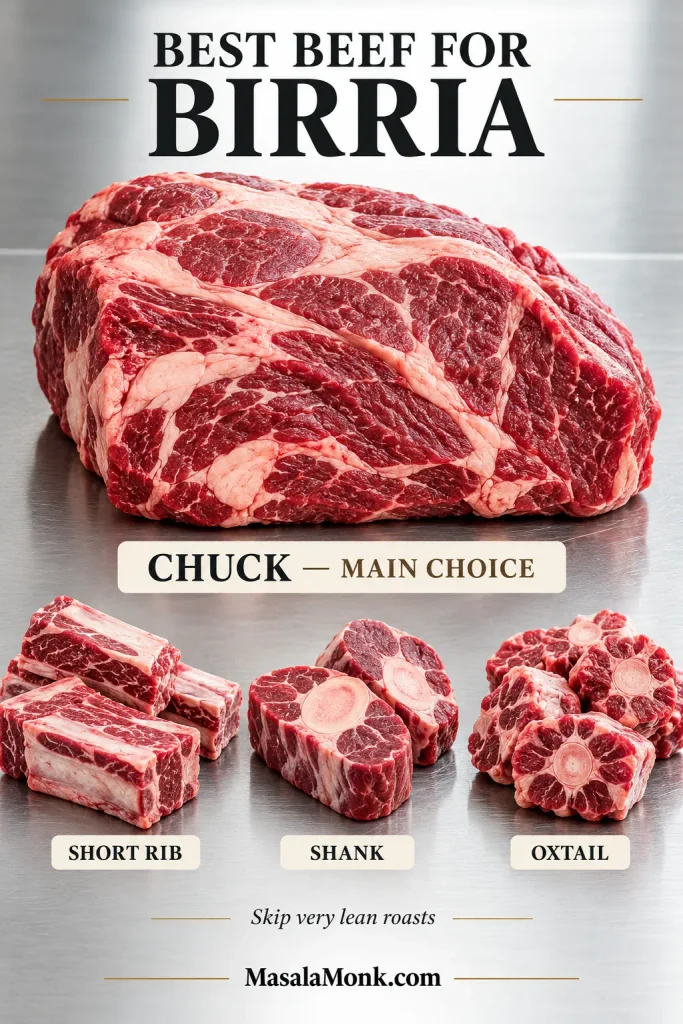
| Cut | What it contributes | How to use it here |
|---|---|---|
| Chuck roast | High meat yield, beef flavour, shreddable texture | Main cut |
| Bone-in short rib | Fat, gelatin and bone | Rich secondary cut |
| Beef shank | Gelatin, connective tissue and bone | Excellent short-rib alternative |
| Oxtail | Rich gelatin and fat | Useful when cost and lower meat yield are acceptable |
| Brisket | Beef flavour and shreddable texture | Works, though chuck is simpler here |
Avoid very lean steak or roasting cuts; they lack the connective tissue and fat that help this long braise produce succulent shredded beef and a fuller consommé.
Chuck alone works too. Choose a well-marbled roast; the consommé will generally be a little less gelatin-rich than when a bone-in cut joins the pot.
Whichever cut you choose, don’t use temperature alone to decide when it is done. Collagen-rich beef needs enough time at temperature to become tender, so the fork or probe test still matters; the ThermoWorks guide to birria temperatures has a useful deeper explanation of that relationship.
Guajillo and Ancho Build the Base; Árbol Controls the Heat
| Chile | What it brings | Heat |
|---|---|---|
| Guajillo | Red colour, fruity and earthy dried-chile character | Mild |
| Ancho | Darker fruitiness, sweetness and depth | Mild |
| Árbol | Sharper chile heat | Hotter |
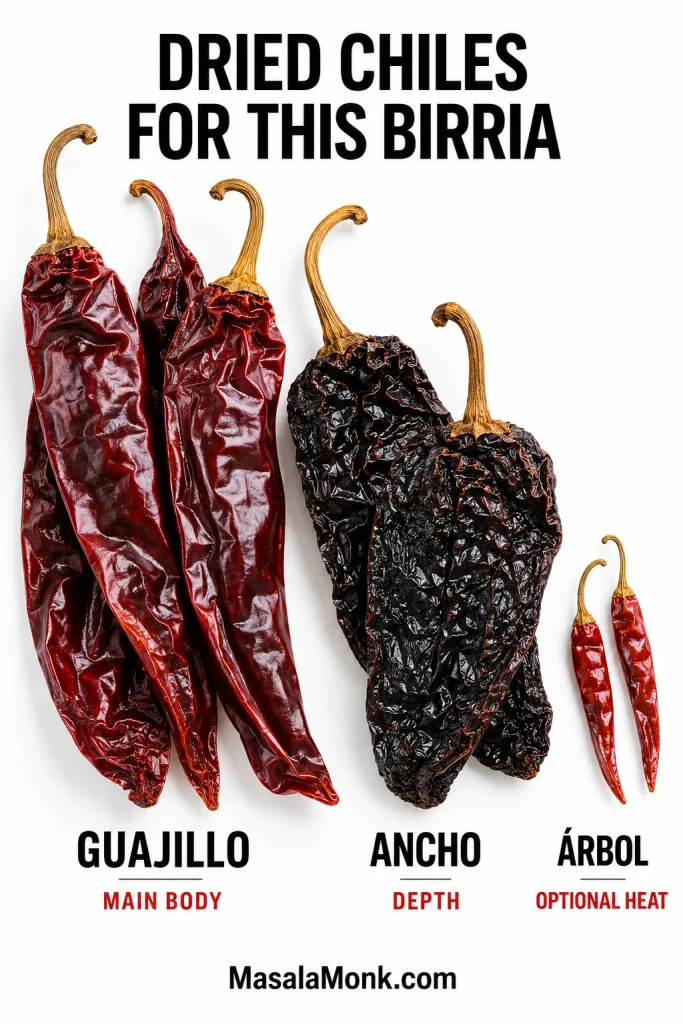
A pile of dried peppers makes birria look much fiercer than it has to be. Most of the weight here comes from guajillo and ancho. Leave the árbol out for a mild batch, use one for gentle warmth, or two when you want the heat to show up more clearly.
Look for dried chiles that still bend slightly and smell fruity and earthy. Very brittle, dusty-smelling peppers usually bring less character to the pot.
Birria, Tacos de Birria and Quesabirria
Birria is the chile-seasoned meat dish; tacos de birria put that meat into tortillas, while quesabirria—sometimes written quesa birria—adds melting cheese. The version here is beef quesabirria served with consommé.
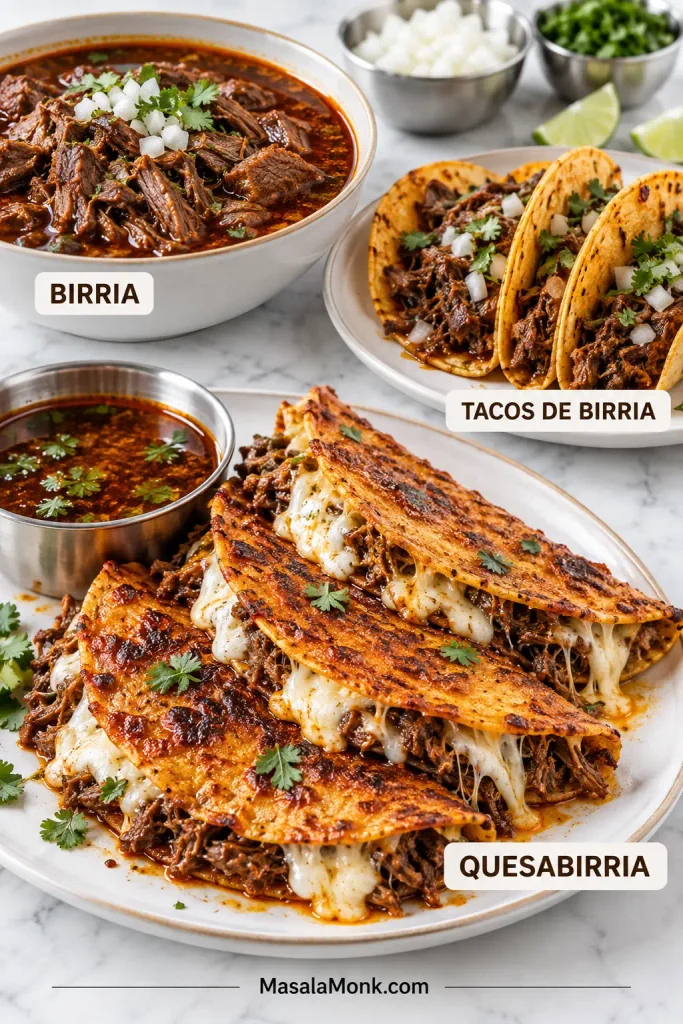
Birria has especially deep roots in Jalisco, where goat is strongly associated with older regional preparations. Beef birria, or birria de res, developed its own traditions too, and Tijuana became especially known for beef birria tacos and eventually the cheese-filled quesabirria style. Food writer Bill Esparza’s history of birria tacos in Tijuana and the United States traces some of the people and migrations behind that evolution.
So the tacos in this recipe belong to the modern beef-and-cheese quesabirria style rather than representing every older regional form of birria.
Keeping Quesabirria Crisp
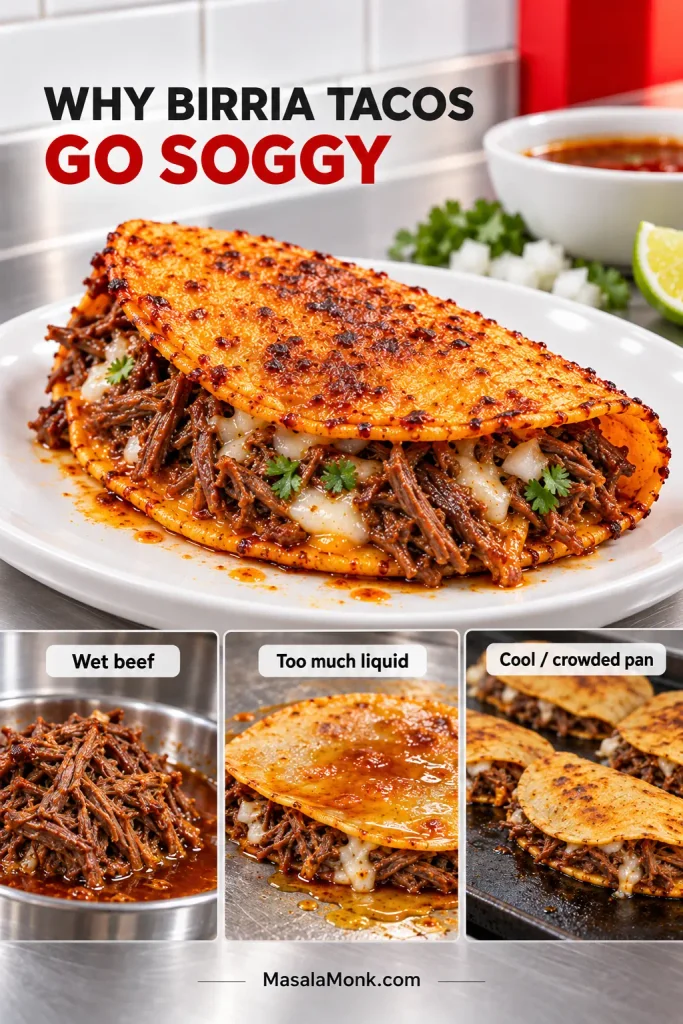
Birria tacos usually turn soggy for three reasons: the beef is too wet, watery consommé ends up on the tortilla, or the pan is not hot enough. Overfilling and holding finished tacos too long make those problems worse.
Warm cold corn tortillas until they bend easily before the fat and filling go on. If you make your own, our homemade corn tortilla recipe goes deeper into the hydration and resting cues that keep masa tortillas flexible.
Then resist the urge to pile them high. Around 50 g beef and 25 g cheese is enough for a small tortilla. Heavier filling means less tortilla against the pan and more steam trapped in the middle.
Fresh corn tortillas are easiest to work with. Very dry tortillas are more likely to split even after warming. Flour tortillas work too, though they give you a softer, chewier taco rather than the firmer corn shell used here.
Most importantly, fry in small waves. A taco can leave the skillet crisp and still soften ten minutes later as steam from the meat and cheese works into the shell.
Birria Is Often Easier the Next Day
Yes—birria is an excellent make-ahead meal. Braise and chill the beef and consommé a day or two ahead, then reheat the components and crisp the tacos just before serving.
Overnight chilling also firms the rendered fat at the surface, where you can lift it away cleanly instead of chasing it around a hot pot with a spoon.
Day 1
- Make the sauce and braise the beef until tender.
- Remove the beef, bay leaves and bones.
- Shred the beef while it is still warm and toss it with just enough consommé to keep the meat juicy.
- Transfer the beef and remaining consommé to separate shallow containers.
- Refrigerate the cooked food within 2 hours.
If convenient, leave most of the rendered fat with the consommé overnight. It will firm into an easy-to-remove layer once chilled.
Day 2
The next day is the easy part. The beef is already shredded, the fat is firm on top and dinner is mostly reheating, seasoning and crisping.
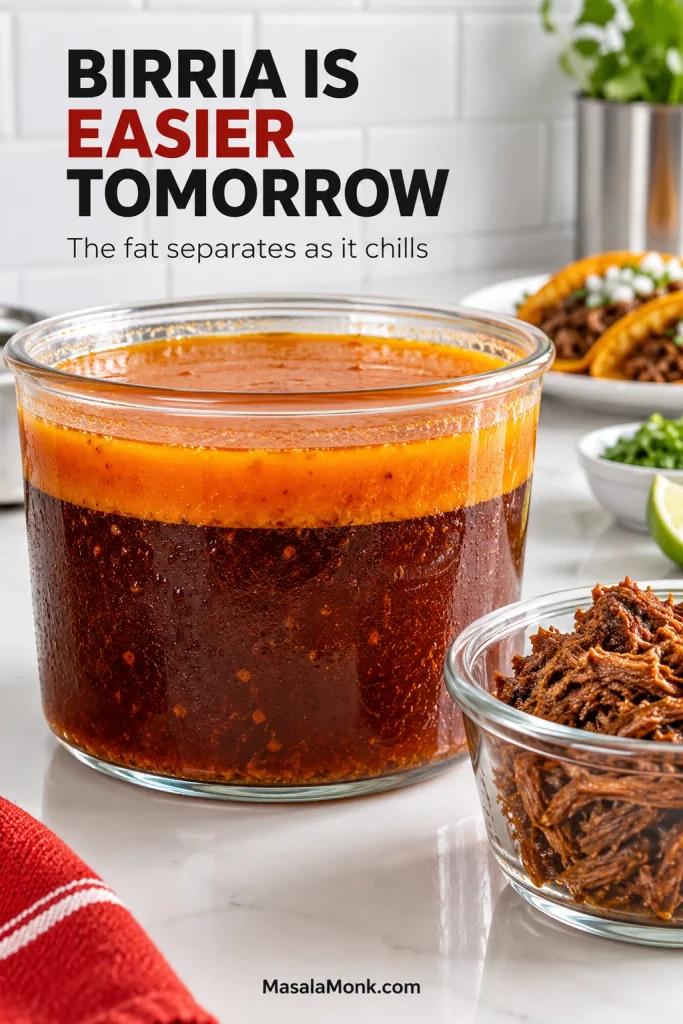
Lift off enough fat for the tortillas. Reheat the beef gently, adding consommé if it needs moisture, then let any loose liquid cook away. Warm the remaining consommé separately and melt the red fat gently before the tortillas hit the skillet.
Slow Cooker, Stovetop and Instant Pot Birria
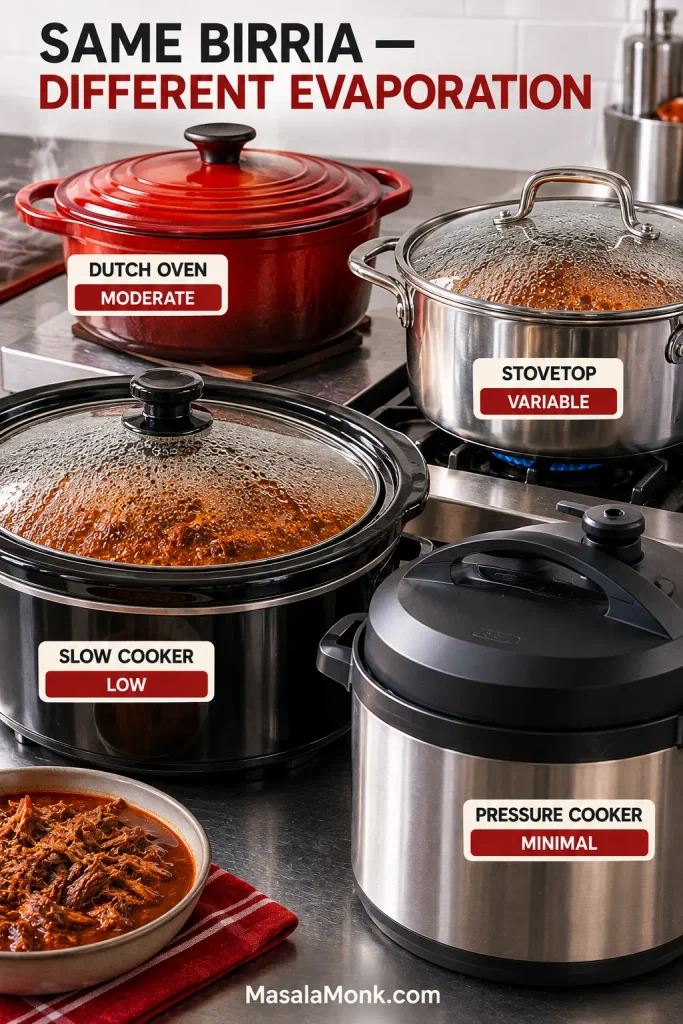
Make the sauce and brown the beef as written. What changes from here is the cooking time and how much water each cooker lets escape.
| Method | Timing and main difference |
|---|---|
| Dutch oven | 300°F / 150°C for 3½–4 hours; moderate evaporation |
| Stovetop | Gentle covered simmer for 3–3½ hours; check the liquid periodically |
| Slow cooker | LOW for 7–8 hours; very little evaporation |
| Instant Pot / pressure cooker | HIGH for 55 minutes + about 15 minutes natural release; very little evaporation |
Slow Cooker
Prepare the sauce as written, using 2 cups / 475 ml broth in the sauce. Transfer it to the slow cooker with the browned beef, then add only 2 more cups / 475 ml broth. That gives you 4 cups / 950 ml total broth for the slow-cooker batch.
Cook on LOW for 7–8 hours. Once the beef is tender, take it out and taste the broth. Slow cookers lose little water, so a short uncovered reduction on the stove may make the consommé much better.
Instant Pot or Other Pressure Cooker
Use 2 cups / 475 ml broth while making the sauce, then add another 2 cups / 475 ml with the beef for 4 cups / 950 ml total.
This is a large pressure-cooker batch. Do not exceed your appliance’s maximum pressure-cooking fill line; divide the batch if necessary.
Cook at HIGH pressure for 55 minutes, followed by about 15 minutes of natural release. After 15 minutes, release any remaining pressure according to your cooker’s instructions before opening the lid.
Probe the chuck. Tight meat gets another 10–15 minutes at high pressure. Because almost no water has escaped, the consommé may still need reducing after the beef comes out.
Stovetop
Keep the covered pot at the gentlest steady simmer you can manage. Begin checking the beef at three hours, and add hot low-sodium broth if the pot gets too dry before the meat softens.
On nights when a four-hour braise is unrealistic, ground beef tacos get a taco dinner onto the table in about 20 minutes.
What to Serve with Birria Tacos and How to Feed a Crowd
Good sides for birria tacos either cut through the rich beef and cheese or make the meal more substantial without overwhelming the consommé. Keep diced onion, cilantro and lime on the table; a bowl of roasted salsa verde gives the tacos a tart green contrast, while creamy refried beans round out the meal without competing with the main event.
For a party, make the birria ahead and save your attention for the griddle. Keep the beef hot in one pan, consommé hot in another, tortillas wrapped and warm, cheese within reach and the red fat beside the cooking surface.
A standard skillet usually handles two or three tacos comfortably; a wide griddle handles more. Serve in waves and let people start eating. The tacos are better fresh from the skillet than waiting for the whole batch to finish.
If people are grazing before the first tacos come off the pan, a cold 7 layer dip can already be on the table without tying up the stove.
When the Birria Doesn’t Behave
Start with the stage you are standing in. A scorched chile sauce needs a different fix from tough beef, and neither has much to do with a tortilla that refuses to crisp.
Before the Braise
The birria sauce tastes bitter or burnt: birria usually turns bitter when dried chiles, garlic or spices scorch. If the flavour is clearly burnt rather than simply intense, remake the sauce before adding the beef.
The sauce is too thick: dried chiles vary in size and dryness. Add low-sodium broth gradually until the sauce pours easily.
The heat got away from you: chile de árbol is usually responsible for the sharpest burn. Before the beef goes in, extra tomato and broth can spread that heat through a larger volume. Next time, reduce or omit the árbol.
After the Braise
The beef is still tough: it usually needs more cooking time. As long as it has enough braising liquid, keep going until the fibres loosen and a probe slides in easily.
The consommé tastes weak: remove the tender meat and reduce the broth uncovered. Finished beef does not need another twenty minutes in the pot just because the liquid needs concentration.
The consommé is too salty: add unsalted broth or water gradually until the balance returns.
There is hardly any red fat: some cuts simply render less. Save whatever chile-stained fat you have and extend it with beef tallow or neutral oil.
The skimmed fat spits violently: water probably came with it. Heat the fat gently until that water evaporates and the aggressive sputtering settles.
At the Griddle
| What you see | Likely cause | What to do |
|---|---|---|
| Tortilla tears | Cold, dry or brittle tortilla | Warm until pliable before coating and folding |
| Birria taco is soggy or won’t crisp | Wet beef, watery tortilla coating or cool pan | Dry the filling further, use red fat rather than broth and let the skillet heat properly |
| Shell feels greasy | Too much fat | Use a thinner film; about 1 teaspoon / 5 ml is enough for a small tortilla |
| Cheese is slow to melt | Thick shreds, cold filling or overloaded taco | Finely shred the cheese and lighten the filling |
| First tacos were crisp; platter is soft | Trapped steam | Serve smaller waves and avoid stacking or sealing under foil |
Storing, Freezing and Reheating Birria
Birria stores best when the beef, consommé and red fat are kept separately. Those components reheat well; an assembled crisp taco does not.
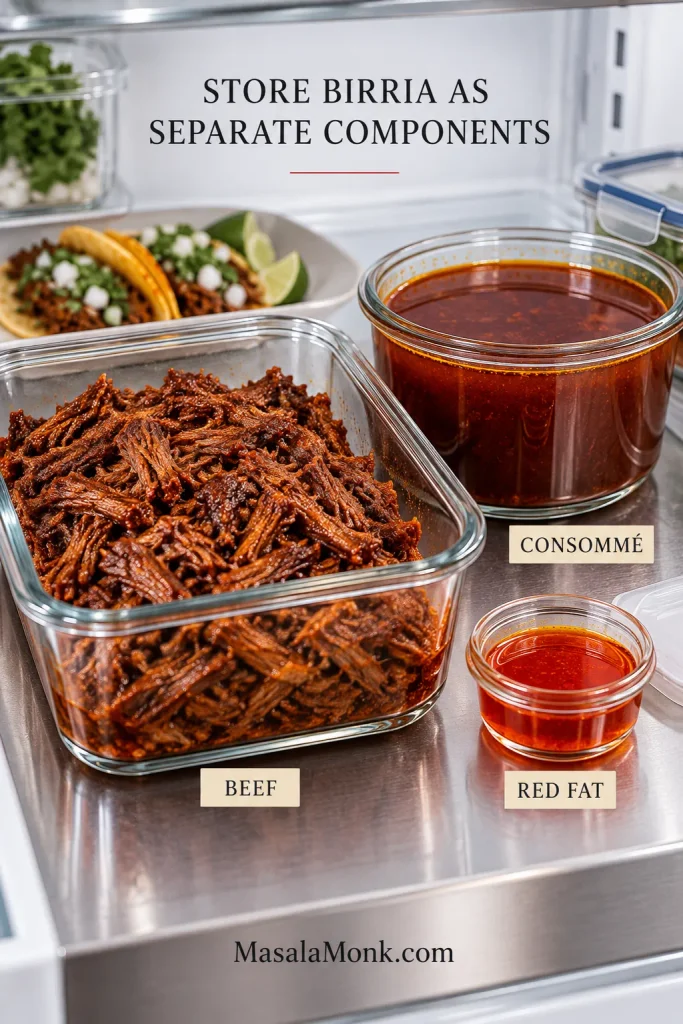
Divide the beef and consommé into shallow containers and refrigerate within 2 hours. Keep the refrigerator at 40°F / about 4°C or colder and use refrigerated cooked birria within 3–4 days. The USDA leftovers guidance has more detail on cooling and storing cooked food safely.
For longer storage, freeze the shredded beef and consommé rather than assembled tacos. Using them within 2–3 months gives the best quality.
Reheat leftover beef to 165°F / 74°C. Bring the consommé to a rolling boil, then lower the heat and keep it hot for serving. If the meat needs moisture, warm it with some consommé and let any loose liquid cook away before filling the tortillas.
An already cooked taco is best reheated in a dry skillet or air fryer rather than the microwave.
A Long Braise, Then a Very Fast Taco
The slow work happens in the pot; once the beef is tender, everything moves quickly.
Eat the tacos while the cheese is still melted, the red edges are crisp and the bowl of consommé beside you is still steaming.








