In the ancient science of Ayurveda, our bodies are governed by three dynamic energies known as doshas: Vata, Pitta, and Kapha. Each person has a unique combination of these doshas — a personal blueprint known as their prakriti.
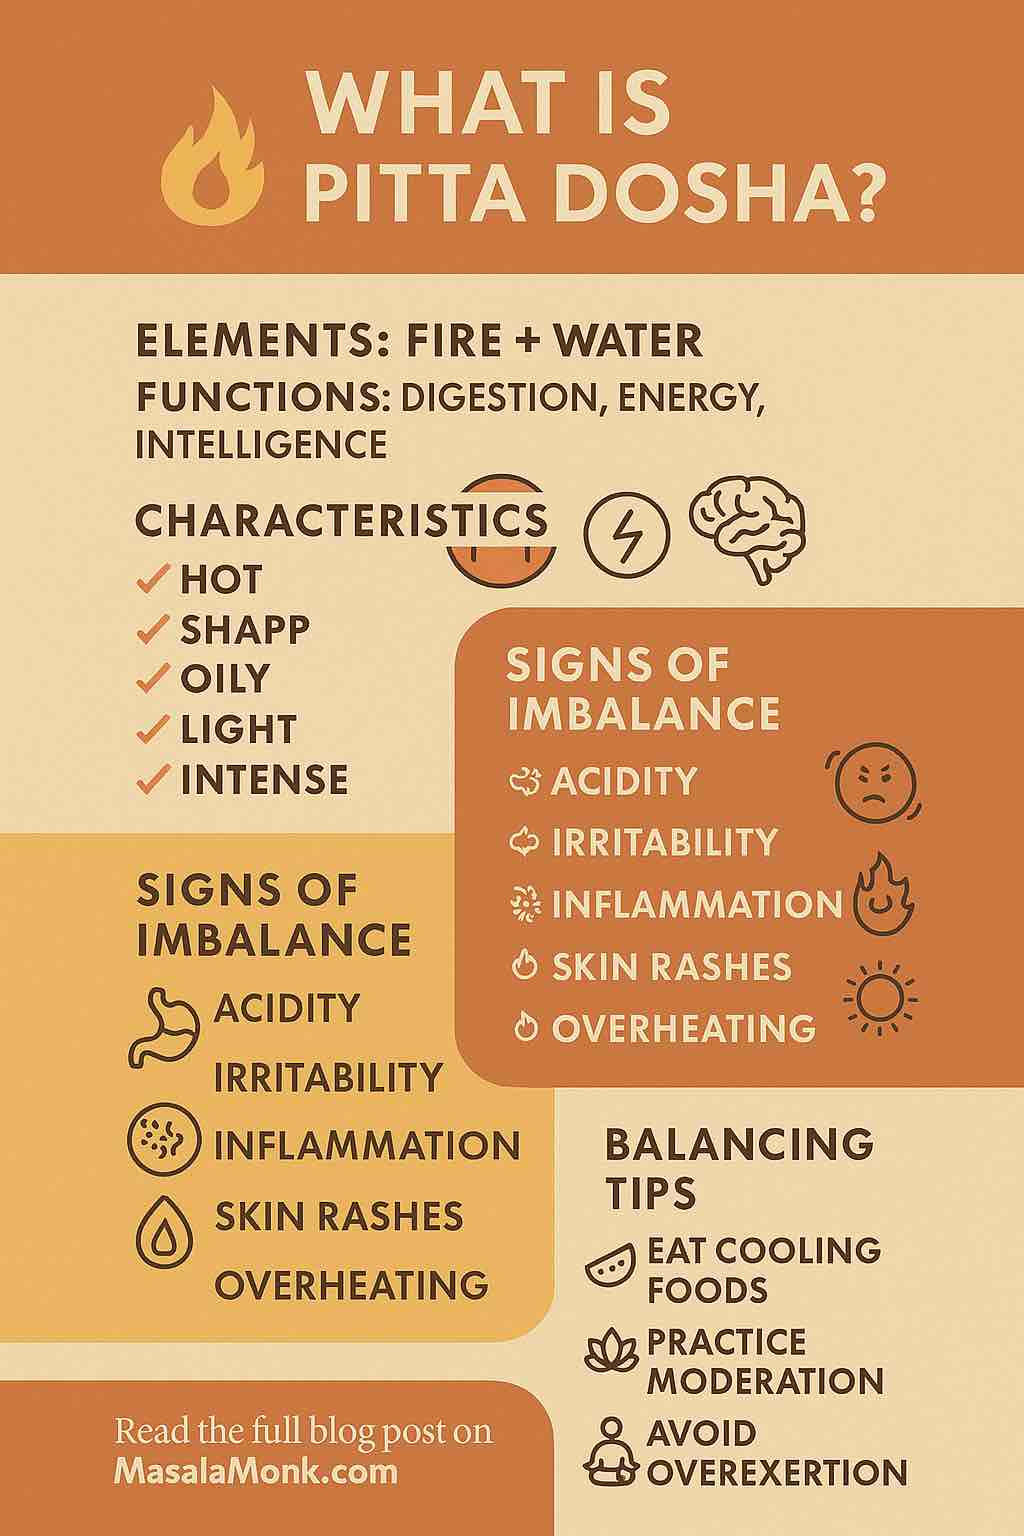
Pitta Dosha is composed of the elements fire and water. It governs:
- Digestion and metabolism
- Vision and clarity
- Temperature regulation
- Intelligence and ambition
- Transformation on all levels — physical, mental, and emotional
In balance, Pitta gives us focus, drive, warmth, and leadership.
Out of balance, it brings irritability, inflammation, anger, and burnout.
👀 Is This You? Signs You’re Pitta-Dominant
If you’re unsure about your constitution, here are some typical Pitta-dominant traits:
| Physical | Mental/Emotional | Behavioral |
|---|---|---|
| Medium, muscular build | Highly focused and intelligent | Goal-oriented, likes structure |
| Warm body temperature | Can be impatient or irritable | Strong opinions, perfectionistic |
| Prone to oily skin/acne | Competitive and intense | Easily overheated or agitated |
| Strong appetite | Driven, can burn out | Difficulty relaxing or letting go |
Does this sound familiar? You may be a Pitta type, or going through a Pitta aggravation phase — especially common in summer, stressful jobs, or high-performance lifestyles.
💥 What Happens When Pitta Is Imbalanced?
When Pitta flares, the inner fire becomes too intense, leading to:
- Acid reflux, ulcers, excessive hunger
- Inflammatory skin conditions (acne, eczema)
- Red or burning eyes
- Anger, judgment, resentment
- Sleep disturbances
- Overworking and inability to relax
Often, people don’t even realize these signs are symptoms of imbalance. You may just think “I have sensitive digestion,” or “I’m just a passionate person.” But Ayurveda shows us how to decode these signs — and cool the fire.
🌿 Practical Guide to Balancing Pitta
Here’s where it gets practical. Balancing Pitta is about cooling, calming, softening, and grounding.
✅ 1. Eat for Your Dosha: The Pitta Diet
Favor:
✔ Cooling, watery, sweet, bitter, and astringent foods
✔ Raw or lightly cooked vegetables
✔ Fruits like melon, pears, grapes, mangoes
✔ Coconut water, herbal teas (mint, fennel, rose)
✔ Cooling grains: basmati rice, oats, barley
✔ Legumes like mung beans, red lentils
Avoid:
🚫 Spicy, oily, sour, salty, or fermented foods
🚫 Tomatoes, garlic, onions, vinegar
🚫 Alcohol, red meat, fried food
🚫 Overeating or skipping meals (both irritate Pitta)
💡 Pro Tip: Start your day with warm water and a spoon of aloe vera juice. It’s a gentle liver cleanser and Pitta soother.
🧘 2. Create a Cooling Lifestyle
Pitta types often push themselves hard. Burnout is real. Here’s how to restore balance:
- 🌅 Wake early — but avoid rushing.
- 🧘 Gentle yoga (moon salutations, twists, forward bends)
- 🧊 Avoid midday sun and hot showers
- 🌳 Spend time in nature — trees and water help ground you
- 🛀 Evening routine with coconut oil massage (abhyanga) and lavender tea
💡 Pitta types feel relief from slowing down — give yourself permission to rest.
🧠 3. Master the Mental Fire
Pitta governs the intellect (buddhi) and the ego (ahamkara). When aggravated, it turns into perfectionism, criticism, and over-control.
Try this instead:
- ✨ Practice Sheetali or Nadi Shodhana breathing
- 🧘 Meditate on water or moon imagery
- 🎧 Listen to soft classical or nature music
- ✍️ Journal: Let go of the need to “fix” and simply witness your thoughts
💡 Repeat this affirmation: “I soften. I cool. I trust.”
🪷 4. Seasonal Wisdom: Pitta and Summer
Pitta naturally increases in summer (Grishma and Sharad seasons). Be especially mindful from late spring through early autumn.
Seasonal tips:
- Stick to lighter meals
- Hydrate with cooling herbal teas
- Avoid overexposure to heat, screens, and bright lights
- Embrace routine and downtime
💡 Make summer your time to retreat, not hustle. Let the sun shine, but keep your inner fire cool.
💬 Real-Life Voices: What People Say About Pitta
“Once I started eating for my Pitta dosha, my chronic acidity disappeared. I used to get hangry all the time. Now, I eat on time and feel way more stable.” — Reddit user
“I used to overwork, overthink, and then crash. Learning I was Pitta-dominant helped me stop glorifying productivity and start honoring my limits.” — Journal blog reader
“The hardest part was letting go of spicy food! But now, I love mint chutney and coconut rice. I feel lighter, calmer, and surprisingly more focused.” — Wellness forum post
🧪 Bonus: Ayurvedic Herbs for Pitta
| Herb | Function |
|---|---|
| Amalaki (Indian Gooseberry) | Cools and strengthens digestion without aggravating |
| Brahmi | Soothes the mind and enhances clarity |
| Shatavari | Calms emotions, supports hormones |
| Licorice root | Anti-inflammatory and soothing to gut and throat |
| Guduchi | Immune balancer and pitta-reducing rejuvenator |
Always consult a qualified practitioner before starting herbs, especially if on medications.
🧭 Your 7-Day Pitta Balancing Challenge
Day 1: Start the day with aloe vera juice and cooling pranayama
Day 2: Cook a Pitta-pacifying meal (try mung dal with fennel + coconut rice)
Day 3: Do 15 minutes of moon salutations
Day 4: Write about something you usually try to control — then release it
Day 5: Try mint + rose tea in the afternoon instead of coffee
Day 6: Skip screen time after sunset and go for a walk instead
Day 7: Journal how you feel — body, mind, and emotions
🧘 In Closing: Channel the Fire, Don’t Burn Out
Pitta is a gift. It gives us the ability to transform, to lead, to digest and to shine. But like fire, it must be contained and respected.
Learning to honor your limits, cool your intensity, and embrace softness doesn’t dim your power. It makes you radiant without burning out.
Let your Pitta be a gentle flame, not a forest fire.
Cool the inner heat. Find your calm. That’s the Ayurvedic way.
❓ Frequently Asked Questions (FAQs)
1. How do I know if my Pitta is out of balance?
If you experience symptoms like acid reflux, anger, rashes, excessive sweating, or irritability—especially during summer or under stress—you may have an aggravated Pitta. Emotional signs like perfectionism, impatience, and burnout are also strong indicators.
2. Can I be both Pitta and something else?
Yes! Most people are dual-doshic (e.g., Pitta-Vata or Pitta-Kapha). Your primary dosha is dominant, but the secondary one influences how imbalances appear. For example, a Pitta-Vata may get both acidity and anxiety.
3. I love spicy food—do I have to give it up completely?
Not necessarily. Ayurveda encourages moderation. You can reduce frequency, use milder spices (like coriander and fennel), and pair spicy dishes with cooling elements like yogurt or mint to offset the heat.
4. What’s the best time of day for Pitta types to work or exercise?
Pitta time is between 10 a.m. – 2 p.m., when digestive fire is strongest—ideal for meals and focused work. Avoid intense workouts during midday heat; exercise early morning or evening for balance.
5. How long does it take to balance Pitta?
It depends on the severity of the imbalance and consistency of lifestyle changes. Minor issues may ease within days or weeks. Chronic conditions may take months. Stick with small, sustainable changes.
6. Can I balance Pitta without herbs or supplements?
Yes! Diet, daily routine, mental habits, and sleep are the foundation. Herbs are supportive, but not mandatory. Many people see great results just by modifying food, routine, and mindset.
7. Is coconut oil good for all Pitta types?
Generally yes—it’s cooling and soothing. Use it for oil massage (abhyanga), scalp care, or cooking. However, if you have a coconut allergy or certain Kapha-related conditions, consult a practitioner.
8. Can Pitta imbalance affect my sleep?
Definitely. Overheated bodies and overactive minds often cause insomnia or vivid dreams in Pitta individuals. Try cooling herbs, calming nighttime rituals, and avoiding screens before bed.
9. How does Pitta relate to modern stress and burnout?
Pitta governs ambition, intensity, and transformation—traits that often lead to overwork and emotional burnout in today’s world. Ayurveda helps manage this by emphasizing cooling, slowing down, and self-care.
10. What’s the best season to focus on Pitta balancing?
Summer and early autumn (Sharad Ritu) are when Pitta naturally rises. Even if you’re not Pitta-dominant, everyone benefits from cooling practices during these hot seasons.