Posted on 2 Comments

Natural Oils for Skin: Benefits, Best Types & How to Use Them

Best Natural Oils for Skin

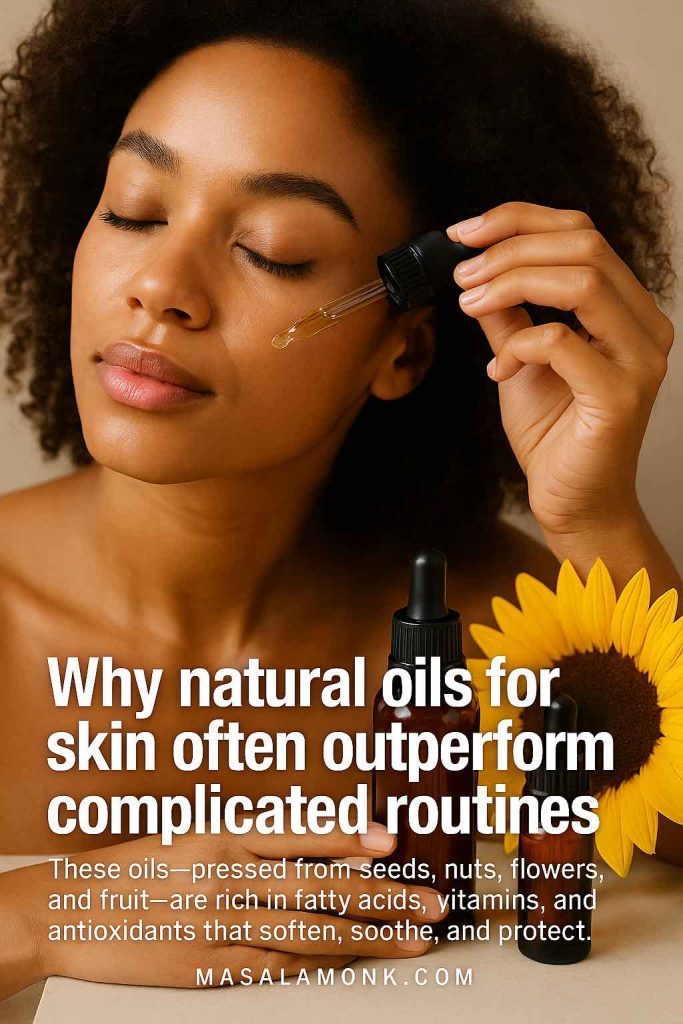
If you’ve ever stared at a crowded bathroom shelf and thought, there has to be a simpler way, you’re absolutely right. Skincare doesn’t have to be complicated to be effective. In fact, when you pick the right natural oils for skin, you can build a routine that is gentle, affordable, and beautifully minimal. These oils—pressed from seeds, nuts, flowers, and fruit—are rich in fatty acids, vitamins, and antioxidants that soften, soothe, and protect. Moreover, they play nicely with what you already own. Add a few drops after your serum, mix a little into your cream, or massage them onto damp skin post-shower and call it a day.

In this long, friendly guide, we’ll explore why natural oils for skin work so well, how to choose them for different concerns, and exactly how to use them so you feel glowy—not greasy. Along the way, you’ll find tiny recipes, day-to-night routines, and myth-busting tips that keep things honest and practical. Ready? Let’s turn your routine into something softer, calmer, and more you.


Why natural oils for skin often outperform complicated routines

First, a quick primer. Skin loses water to the air all day (that’s transepidermal water loss). Humectants like glycerin pull water in; natural oils for skin help seal it there. In other words, they don’t hydrate on their own—they lock hydration in place and smooth the tiny spaces between skin cells so your barrier feels comfortable again. Consequently, your face looks bouncier, your body feels less itchy, and everything in your routine works better because your barrier isn’t fighting fires. (DermNet — Occlusives reduce evaporative water loss).

Woman applying natural face oil with dropper to highlight why oils outperform complicated skincare routines.
Plant oils seal hydration, support the skin barrier, and bring antioxidants—without a 12-step routine.

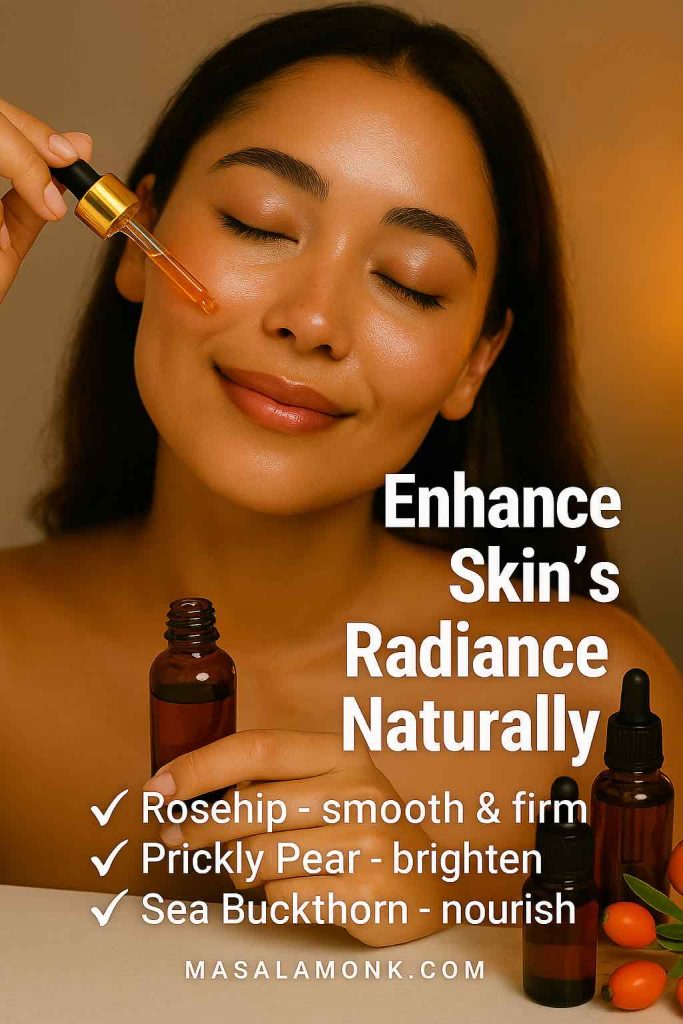
Additionally, plant oils bring bonus nutrients. Linoleic-rich options (sunflower, safflower, rosehip) replenish barrier lipids. Antioxidant-heavy picks (sea buckthorn, prickly pear, marula) help skin look brighter and more resilient. Calming macerates (calendula, aloe) visibly quiet down cranky cheeks. And yes, when you choose wisely, they do this without the sting or fragrance burn many people get from complicated formulas.

Most importantly, oils invite a slower pace: palms, breath, pressure. That 30-second massage at night isn’t just skincare; it’s a tiny nervous-system break you’ll actually look forward to.

Do read out latest post on : Turmeric Benefits for Skin and Face


Warning: This is general education article and not medical advice or professionally approved piece, kindly be careful, patch test, or consult qualified professionals before testing out anything you find in this post.


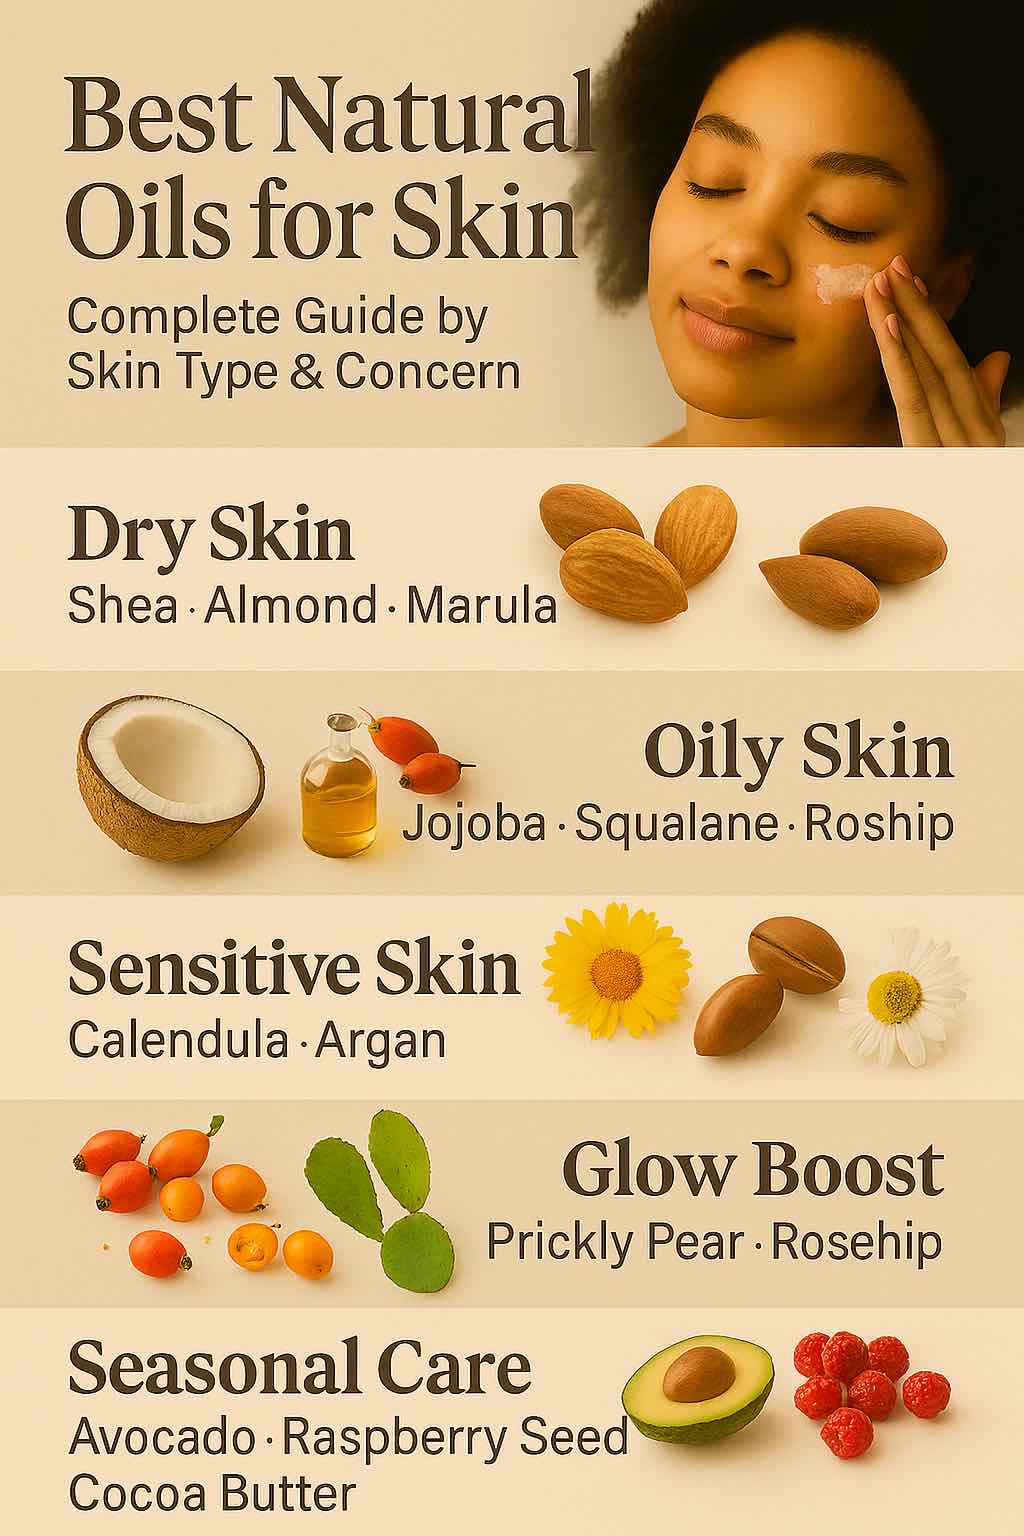
How to pick natural oils for skin by skin type (quick cheat sheet)

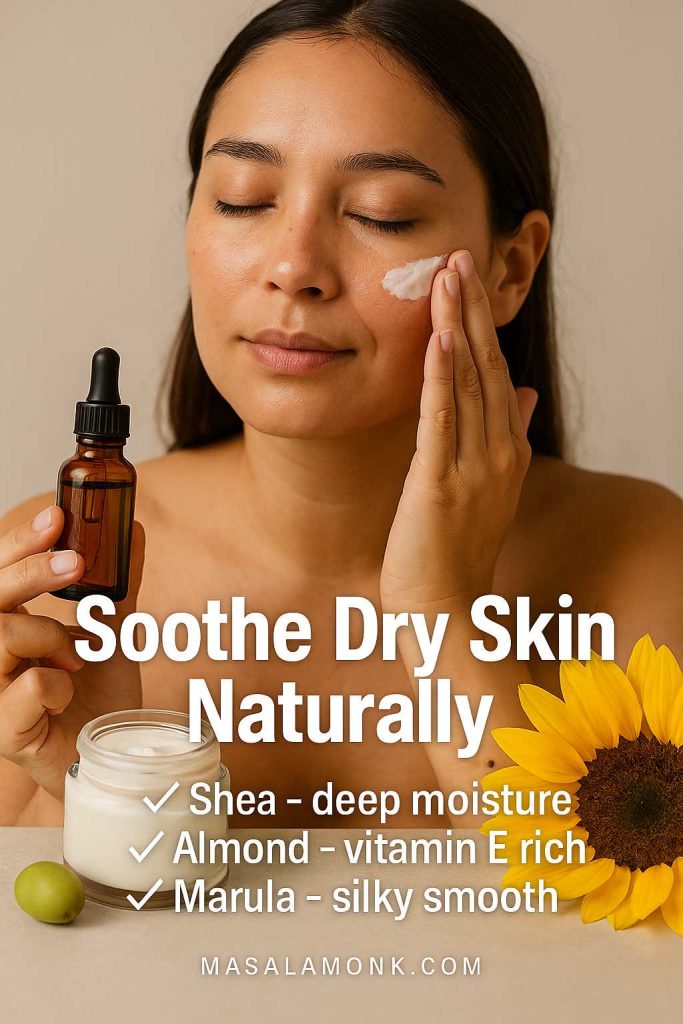
  • Dry/tight: shea butter (body), cocoa butter (body), olive, almond, marula, squalane (face).
  • Oily/acne-prone: jojoba, squalane, rosehip, black cumin seed; tea tree diluted for spots.
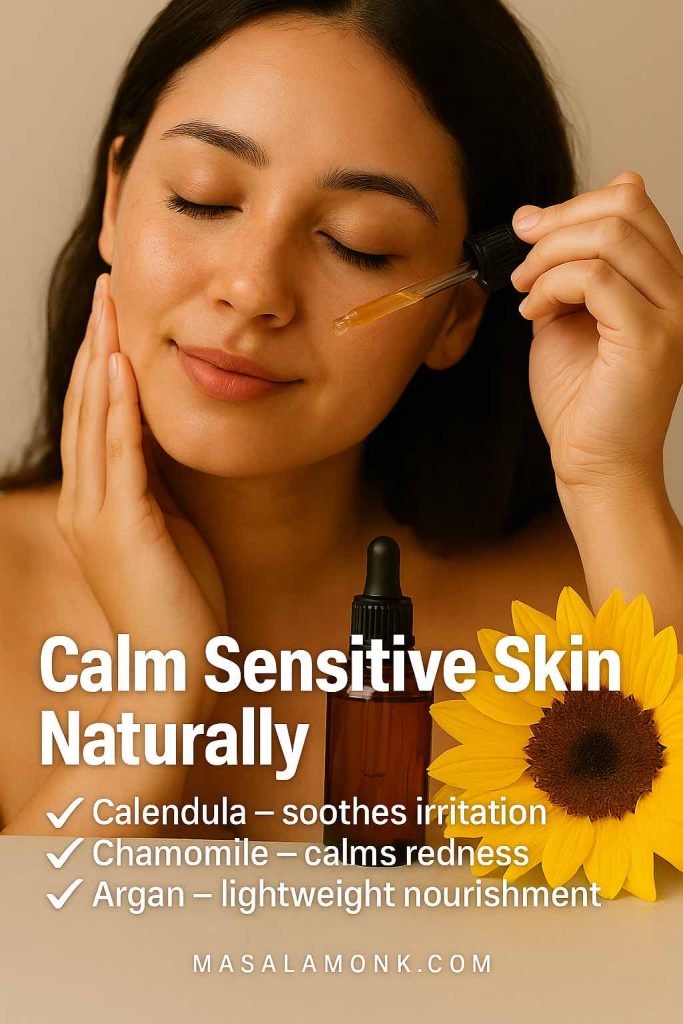
  • Sensitive/reactive: squalane, sunflower; try calendula macerate and patch test.
  • Eczema-prone: shea (body), sunflower, squalane (face), calendula; lanolin on rough, cracked areas.
  • Dull/uneven tone: rosehip, sea buckthorn, prickly pear; optionally carrot seed (always sunscreen by day).
  • Large pores/shine: jojoba and squalane balance sebum; lightweight textures help makeup sit better.
Woman applying shea butter face cream with avocado and squalane oil for winter dryness rescue skincare.
Winter dryness rescue with Shea for deep moisture, Avocado for nutrients, and Olive Squalane for protection.

We’ll go long on the individual oils next; keep this list handy.

Note: In adults, sunflower preserved barrier and improved hydration, while olive oil damaged barrier with repeated use—so favor olive for cleansing or body only if you tolerate it. (PubMed — Sunflower preserved barrier; olive oil impaired it (Danby 2013)).


Meet the heroes: best natural oils for skin (what they do & how to use them)

Shea Butter — Natural Oil for Deep Moisture & Eczema-Prone Skin

Thick, plush, and soothing, shea butter behaves like a comforting blanket for thirsty skin. Thanks to stearic and oleic acids plus vitamins A and E, it softens rough texture while visibly easing dryness and itch. Because it’s occlusive, it excels on bodies—legs, elbows, heels—and on faces that tolerate richer textures in winter. (DermNet — Occlusives & moisturisers explained).

How to use: After bathing, when skin is still damp, warm a pea-size in your palms and press into dry zones. For a lighter feel, blend 2 parts shea with 1 part jojoba or squalane and whip briefly.
Good for: Dry, ashy limbs; eczema care; hands that wash often.

Also Read: Shea Butter for Scalp Psoriasis


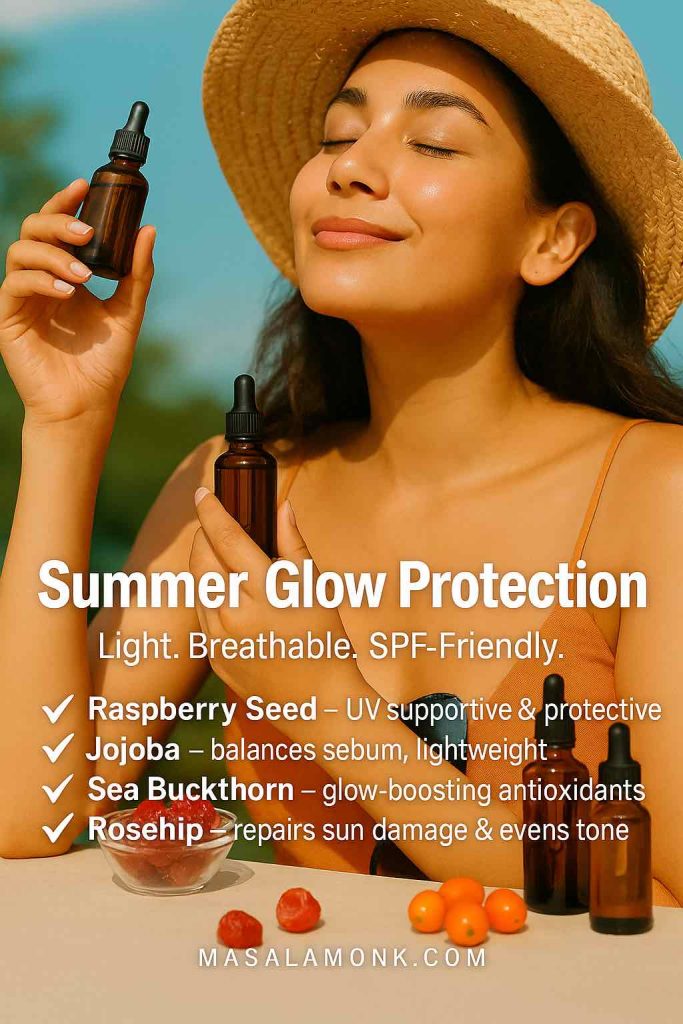
Jojoba Oil — Best Natural Face Oil to Balance Oily or Acne-Prone Skin

Technically a liquid wax, jojoba’s wax-ester profile closely resembles human sebum, which explains its quick, light feel and “balancing” reputation. (NIH/PMC — Jojoba in dermatology (review)). Moreover, it makes a stellar makeup remover and the ideal carrier oil for tea tree oil.

How to use: For daily moisture, press 2–3 drops onto damp skin. For oil cleansing, massage 1 teaspoon over a dry face for 60 seconds, emulsify with damp hands, and remove with a warm cloth.
Good for: Combination and oily skin, congested T-zones, anyone who wants “light but effective.”

Here you might want to read more about Jojoba Oil for Skin.


Squalane — Lightweight Natural Oil for All Skin Types

Plant-derived squalane is the “disappearing act” of natural oils for skin: weightless, elegant, and widely tolerated—even by reactive complexions. It cushions dehydrated skin without a film and layers under sunscreen seamlessly. (NIH/PMC — Squalene/squalane: background & stability).

How to use: Press 2–4 drops over your hydrating serum or gel cream, morning or night.
Good for: Absolutely everyone; especially those who dislike the feel of oil.


Rosehip — Brightening Natural Face Oil for Tone & Texture

This linoleic-rich, quick-absorbing oil supports a more even look over time. With steady use, post-blemish marks soften and fine lines appear less prominent.

How to use: At night, apply 2–3 drops before or after moisturizer.
Pro tip: Pair morning vitamin C (or niacinamide) with evening rosehip for a simple, effective glow plan.

Interested knowing more about Rosehip Oil? Do read our post: Rose Hip Seed Oil: Unlock the Beauty and Wellness Benefits for Your Skin.


Sea Buckthorn — Antioxidant-Rich Plant Oil for Resilient Skin

Naturally orange from carotenoids, sea buckthorn lends that “I sleep and hydrate” glow. It supports elasticity and helps calm visible redness, making complexions look more alive. (NIH/PMC — Sea buckthorn oil: bioactive profile & antioxidants).

How to use: Mix a tiny drop into your night oil or cream (it can stain).
Good for: Dull, wind-exposed, or mature skin; chapped lips.

Learn more about What is Seabuckthorn? All Your Questions Answered.


Prickly Pear Seed — Luxury Natural Oil for Eyes, Fine Lines & Glow

Ultra-high in vitamin E and polyphenols, this silky elixir feels refined, not greasy. Consequently, it’s a favorite for the delicate eye area and for softening the look of fine lines. (NIH/PMC — Opuntia seed oil: tocopherols & phytosterols).

How to use: Pat one drop under each eye; or smooth two drops across the face at night.
Good for: Dehydrated zones that need plushness without weight.


Coconut — Classic Natural Body Oil for Very Dry Skin

Rich in lauric acid, coconut is wonderfully occlusive on the body, sealing in moisture and easing roughness. However, faces prone to clogging may find it too heavy. (PubMed — Virgin coconut oil vs mineral oil in AD).

How to use: After showering, massage a small amount into damp arms and legs; use as a pre-shampoo hair mask when ends feel crispy.
Skip for: Acne-prone facial skin.

Here we should point you towards Coconut Oil for Skin: Frequently Asked Questions


Olive — Heritage Natural Oil for Body Hydration & Oil Cleansing

Extra-virgin olive oil brings antioxidants and a plush feel to organic body oil routines. Additionally, it dissolves makeup beautifully when used as a cleansing step. (PubMed — Olive vs sunflower on adult skin barrier).

How to use: A teaspoon for oil cleansing; a thin sheen on damp shins. If it feels heavy, cut 1:1 with squalane.
Good for: Dry limbs, quick DIY scrubs (olive oil + sugar).

6 Health Benefits of Olive oil for Skin is where we cover more about this one. Do read.


Sweet Almond — Gentle Natural Oil for Sensitive Skin & Massage

Light, smooth, and packed with vitamin E, almond oil is a crowd-pleaser for easily irritated skin. It slides well for facial massage and blends effortlessly with creams.

How to use: Massage 2–3 drops into damp skin; or add a few drops to your body lotion to increase richness.
Note: Avoid if you have nut allergies.

Wanna learn more about Almond Oil for Skin? Do not miss reading our blog post on the same.


Calendula Infused Oil — Soothing Natural Oil for Irritated, Red Skin

Calendula petals macerated in a carrier (like sunflower) create a calm-inducing oil that feels like a sigh of relief. Therefore, it’s perfect after waxing, shaving, or long sun-and-wind days.

How to use: Tap a few drops over areas that look flushed; or blend 20–30% calendula into your daily oil.
Good for: Eczema-prone patches; post-shave sting.


Sunflower Seed — Barrier-Repairing Natural Oil for Eczema & Everyday Use

High in linoleic acid, sunflower supports a resilient skin barrier and rarely feels greasy. It’s baby-safe and deeply versatile across face and body. (PubMed — Sunflower improved hydration; olive impaired)

How to use: For body, a teaspoon on damp skin post-shower; for face, 2–3 drops at night.
Pairs with: Calendula for a simple, fragrance-free comfort blend.

Btw, as it’s a edible oil as well, know more about Sunflower Seeds Benefits for Weight Loss: Harnessing Nature’s Power.


Sesame — Ayurvedic Natural Body Oil for Warmth & Circulation

A traditional favorite for abhyanga (self-massage), sesame feels grounding and restorative. It’s slightly heavier, yet deeply nourishing.

How to use: Warm a small pool between palms; apply long strokes toward the heart. Shower or towel-blot after if you prefer a lighter finish.
Good for: Night rituals, colder seasons, tight shoulders.

Liquid Gold: 5 Benefits of Sesame Oil for Skin Care is where we explore more about Sesame Oil and its role in skin care.


Marula — Silky Natural Oil for Smooth Makeup Days

Marula offers slip without shine, so foundation glides on and clings better. It also softens flaky spots that sabotage base products.
How to use: One or two drops pressed in before sunscreen and makeup.
Good for: Normal to dry skin that wants a refined, non-greasy glow.


Babassu — Breathable Natural Oil for Summer & Combo Skin

Think of babassu as coconut’s airy cousin—melts on contact but leaves less residue. As a result, it suits faces that dislike heavy occlusives.
How to use: Swap for coconut anywhere you want a lighter touch; lovely for summer body care.
Good for: Combo skin; humid climates.


Black Cumin Seed — Clarifying Natural Oil for Blemish-Prone Skin

With thymoquinone and an earthy profile, this plant oil brings a calming, balancing vibe to fussy pores and flaky scalps. Emerging evidence—including an RCT—suggests topical Nigella sativa preparations can help mild-to-moderate acne. (PubMed — Topical black seed oil helpful in acne).

How to use: Blend one drop into jojoba or squalane and smooth a thin layer at night; can also be massaged into the scalp before washing.
Good for: Oil-heavy T-zones, stubborn little bumps.


Pumpkin Seed — Fortifying Natural Oil for Transitional Seasons

Mid-weight and quietly nourishing, pumpkin seed oil offers vitamin E comfort without heaviness. It’s a reliable “shoulder season” pick when skin can’t decide.

How to use: Mix 1 drop pumpkin with 2 drops squalane for a balanced finish.
Good for: Normal/combination skin; autumn and spring.

Learn more about The Benefits of Pumpkin Seeds for Weight Loss and Blood Sugar Control.


Lanolin (or Lanolin Oil) — Natural Occlusive for SOS Dry Spots

Although not a plant oil, lanolin earns a place in natural oils for skin routines for its unrivaled moisture-locking power. (DermNet — Contact reactions to lanolin).

How to use: Over damp skin, tap a grain-of-rice amount on cracked knuckles, lips, or heels; leave overnight.
Note: Not vegan; patch test if sensitive.


Cocoa Butter — Natural Body Butter for Long-Lasting Protection

Firm at room temp, cocoa butter melts into a rich, protective layer. It’s a winter workhorse and a classic in stretch-mark care. A classic occlusive seal—great over damp skin in winter. (DermNet — Occlusives & moisturisers explained).

How to use: Melt between palms and press onto damp skin. For a lighter whip, blend with babassu.
Good for: Legs that drink lotion and still ask for more.


Carrot Seed (Essential) — Antioxidant Natural Oil Add-In (Always Diluted)

Carrot seed essential oil is potent and best viewed as an add-in, not a base. It lends subtle radiance over time when used sparingly.

How to use: Keep face leave-ons at 0.5–1% (≈1–2 drops per 2 tsp carrier oil).
Important: Despite the rumors, it’s not a sunscreen. Wear broad-spectrum SPF 30+. (American Academy of Dermatology — How to select a sunscreen).


Tea Tree (Essential) — Antimicrobial Natural Oil Add-In for Blemish Spots

Tea tree is the classic plant extract for targeted blemish care. Nevertheless, it’s strong—so dilution is non-negotiable. A randomized trial supports 5% tea tree gel for mild–moderate acne; always dilute and use only on spots. (PubMed — 5% tea tree gel improved acne).

How to use: For tiny spots only: 1 tablespoon jojoba + 6 drops tea tree; dab once daily max.
Skip for: Broken skin or undiluted use on the face.

Read about Tea Tree Oil for Scalp Eczema and Psoriasis.


Aloe Infused Oil — Cooling Natural Oil for Post-Sun & Sensitivity

An aloe macerate brings a gentle, cooling glide to natural face oil blends. It doesn’t replace aloe gel; instead, it adds comfort to oils that might otherwise feel too plain.
How to use: Add 10–20% aloe macerate to jojoba or sunflower; press onto warm, damp skin after a day outdoors.
Good for: Mild after-sun care, fussy cheeks.


Vitamin E Oil — Antioxidant Booster for Any Natural Face Oil

Think of vitamin E as your blend’s bodyguard and soft-focus filter. It helps stabilize oils and adds a hint of cushion.
How to use: Add just 0.5–1% to DIY blends; more can feel tacky.
Good for: Extending freshness of rosehip/sea buckthorn mixes.


Argan — Everyday Natural Oil for Shine, Softness & Frizz Control

Beloved for hair, argan is also a steady everyday face oil: not too heavy, not too light.
How to use: 2 drops for face at night; smooth a half-drop across hair ends to tame frizz.
Good for: Normal/dry skin, multitaskers who want one bottle for face + hair.


Kukui — Lightweight Natural Oil for Sun-Parched Skin

Hawaiian kukui absorbs quickly and comforts skin that feels tight after sun or wind.
How to use: Press 2–3 drops on damp skin; mix with rosewater first for a soft, cushiony finish.
Good for: Travelers, beachgoers, anyone in dry wind.


Concern-Based Picks: Best Natural Oils for Skin by What’s Bugging You

Because skin behaves differently under stress, it helps to match natural oils for skin to the exact problem you’re seeing. Below, you’ll find, step-by-step routines (AM/PM), easy blends, timing expectations, and gentle do’s/don’ts.

Patch-test new products first using an open-application method. (DermNet — Open application (ROAT) test).


Eczema, Dermatitis, or “My Skin Is Mad at Me” (Calm + Repair)

When flares hit, natural oils for skin should be barrier-first and fragrance-free. Think comfort over excitement.

Why these help (briefly):

  • Sunflower seed oil (linoleic-rich) supports the lipid matrix, so moisture stays in.
  • Squalane cushions without sting or heaviness.
  • Calendula infused oil visibly soothes the look of redness and itch.
  • Lanolin locks in water on tiny cracked zones.

AM flow (gentle and quick):

  1. Rinse with lukewarm water only (no foaming cleansers on flare days).
  2. Mist or pat on a hydrating toner (optional but helpful).
  3. Press 2–3 drops squalane (face) or sunflower (face/body) onto still-damp skin.
  4. Finish with your unscented cream if you need more cushion; then SPF.

PM flow (comfort ritual):

  1. Short, warm—not hot—shower.
  2. Pat skin barely dry; leave it dewy.
  3. Mix 4 parts sunflower seed oil + 1 part calendula in your palm; press over face/body.
  4. Finally, dot lanolin only on cracks (lips, knuckles, heels). Pajamas on. Sleep.

Tiny weekly rhythm:

  • Nightly oils for 7 days → assess. Often the “angry” look softens by day 4–5.
  • Afterwards, maintain with PM oils 3–5 nights/week.

Do / Don’t:

  • Do keep formulas bland for now.
  • Don’t use undiluted essential oils on the face during a flare.
  • Do patch test wrist or behind ear first.
  • Don’t over-exfoliate “to smooth flakes”—you’ll poke the bear.

Quick blend (fragrance-free): 8 mL sunflower + 6 mL squalane + 6 mL calendula macerate. Shake; press 3–5 drops where needed.

Suggested read to understand: Eczema vs Psoriasis vs Dermatitis


Oily, Shiny, or Skincare for Large Pores (Balance + Clarity)

It feels counterintuitive, yet a touch of the right natural face oil can tell overactive sebaceous glands to relax.
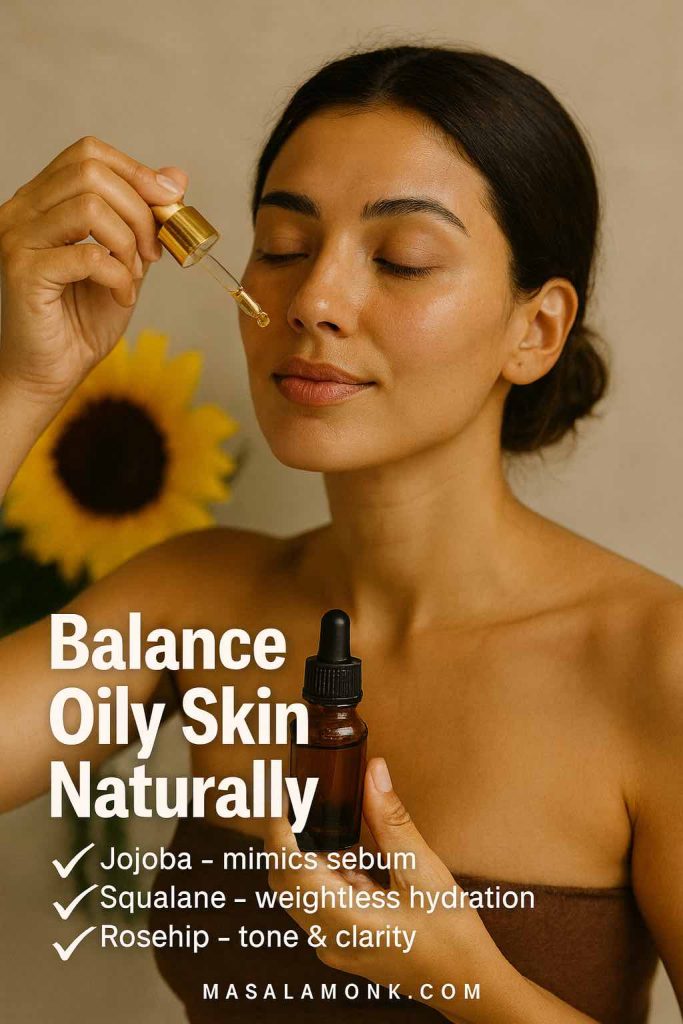
Woman applying jojoba, squalane, and rosehip oils to balance oily skin naturally.
Balance oily skin naturally with Jojoba (mimics sebum), Squalane (weightless hydration), and Rosehip (tone & clarity).

Why these help:

  • Jojoba oil mimics sebum, which often reduces midday shine.
  • Squalane hydrates weightlessly, so skin doesn’t overcompensate.
  • Rosehip oil supports smoother look and tone over time.
  • Tea tree essential oil (diluted) is for spot duty only.

AM flow (keep it light):

  1. Cleanse with a gentle gel.
  2. Optional niacinamide serum.
  3. Press 1–2 drops jojoba or squalane over damp skin.
  4. Matte-friendly SPF.

PM flow (balanced and simple):

  1. Cleanse; on 2–3 nights/week, use a BHA (salicylic) after cleansing.
  2. Press 2 drops squalane all over;
  3. Then tap 1 drop rosehip across areas with uneven tone.
  4. Dab a pin-prick of tea tree in carrier directly on a blemish (never neat).

Seven-day expectations:

  • Day 3: T-zone looks less glassy at noon.
  • Week 2: Fewer “sticky” clogged areas; makeup sits better.

Do / Don’t:

  • Do apply oils on damp skin so they spread sheer.
  • Don’t layer heavy butters on the T-zone.
  • Do stick to pea-sized amounts—more is not better.
  • Don’t chase every new active while you’re testing oils; change one thing at a time.

Spot blend (safe, tiny): 1 Tbsp jojoba + 6 drops tea tree. Shake; dab with a cotton tip on the blemish once daily max.


Dullness, Uneven Tone, or “I Miss My Vacation Glow” (Radiance + Elasticity)

To revive a flat complexion, combine antioxidants by day and replenishing natural oils for skin at night.

Woman applying rosehip oil with dropper for glowing skin alongside prickly pear and sea buckthorn oils.
Rosehip, Prickly Pear, and Sea Buckthorn—antioxidant-rich oils to restore glow and elasticity.

Why these help:

  • Rosehip gently supports tone/texture.
  • Sea buckthorn brings carotenoids for a healthy, cushy glow.
  • Prickly pear seed delivers silk and bounce around eyes and fine lines.

AM flow (bright but calm):

  1. Cleanse or rinse.
  2. Vitamin C or niacinamide serum.
  3. 1 drop squalane for slip; then SPF.
  4. Optional: mix ½ drop prickly pear into concealer for a smoother under-eye laydown.

PM flow (glow routine):

  1. Cleanse.
  2. Press 2 drops rosehip all over.
  3. Add the tiniest smear of sea buckthorn (a pin head) into your rosehip in the palms for cheeks; it stains, so go slow.
  4. Pat 1 drop prickly pear under each eye.

Timeline you can feel:

  • Week 2: less “chalky” look; makeup needs less highlighter to come alive.
  • Week 4: tone appears more even; fine lines look cushioned.

Do / Don’t:

  • Do keep sea buckthorn microscopic—just enough to tint your blend.
  • Don’t skip sunscreen; radiance work without SPF is two steps forward, two back.
  • Do give it 2–4 weeks; brightness is cumulative.

Glow blend (night): 6 mL rosehip + 3 mL prickly pear + 1 mL sea buckthorn. Two drops max; protect your pillowcase.


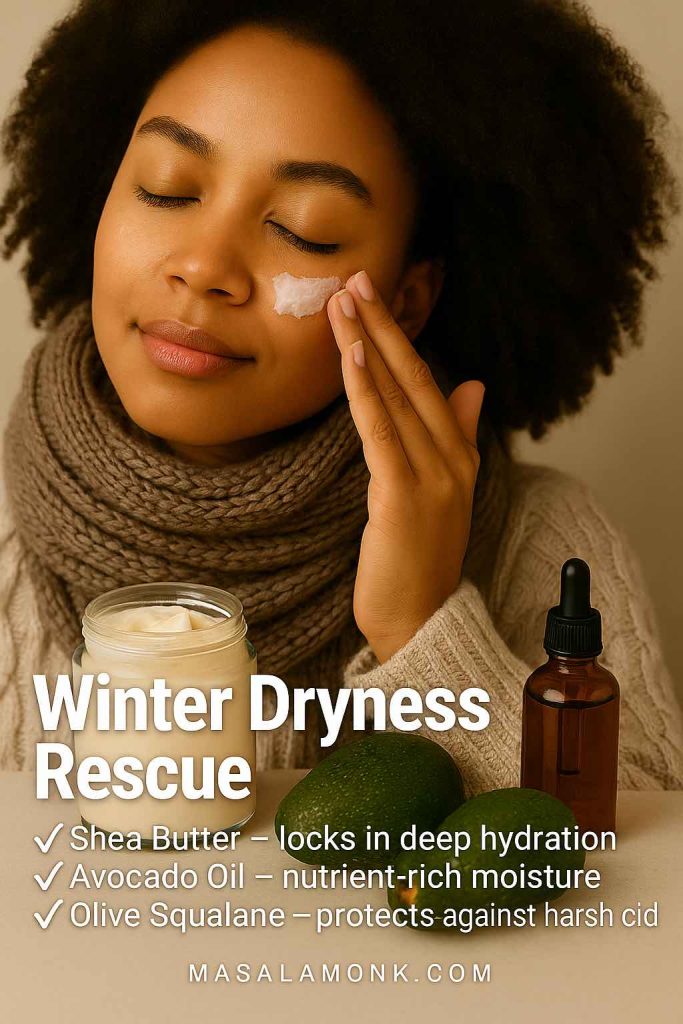
Very Dry Body Skin That “Drinks Lotion and Still Wants Dessert” (Seal + Soften)

For thirsty limbs, the secret is layering water, then natural body oil, then a seal. Consequently, you wake up satin-soft.

Woman moisturizing with shea butter and almond oil while holding marula oil dropper bottle.
Shea, Almond, and Marula oils—classic trio to soothe and soften very dry skin.

Why these help:

  • Sunflower seed oil spreads easily and feeds the barrier.
  • Shea or cocoa butter lock in the comfort for hours.
  • Lanolin rescues cracks overnight.

After-shower flow (takes 90 seconds):

  1. End with warm—not hot—water.
  2. Pat so skin is damp, not dripping.
  3. Palm-mix 1 tsp sunflower and sweep over legs, arms, torso.
  4. Follow with a thin veil of shea or cocoa over the driest zones.
  5. Dab lanolin on heels, cuticles, or knuckles. Pajamas on.

Weekly rhythm that works:

  • Do the full stack nightly for 5–7 nights.
  • Then maintain 3–4 nights/week, or just on cold/windy days.

Do / Don’t:

  • Do switch to cotton or bamboo PJs—they help oils stay on you, not your sheets.
  • Don’t scald skin in the shower; heat steals moisture.
  • Do exfoliate gently (washcloth or soft mitt) once weekly so oils can sink in.

Body butter cloud (easy DIY): Equal parts melted shea + cocoa + a splash of babassu; whip as it cools. Apply on damp legs for a velvet finish.


Sensitive Souls Who React to Everything (Reset + Rebuild)

When your skin side-eyes every product, simplicity is medicine. Therefore, reach for the most boring, elegant natural oils for skin and give your barrier two quiet weeks.

Woman using calendula and chamomile infused oil with argan oil to calm sensitive, irritated skin.
Calendula, Chamomile, and Argan—gentle oils that calm redness and soothe sensitive skin naturally.

Why these help:

  • Squalane is famously inert and comfy.
  • Sunflower is light, baby-safe, and barrier-friendly.
  • Calendula can be introduced later for extra calm.

Two-week reset (yes, it’s minimal):

  • AM: Lukewarm rinse → 2 drops squalane on damp skin → SPF.
  • PM: Gentle cleanse → 2–3 drops sunflower (or squalane again) → optional bland cream.

After week 2:

  • If skin is steadier, add calendula at 20% into sunflower every other night.
  • If things stay calm, test a single new step (like niacinamide) for another two weeks.

Do / Don’t:

  • Do patch test new oils behind the ear for two nights first.
  • Don’t stack fragrance or essential oils on the face during a reset.
  • Do log changes (what/when), so you can spot patterns.
  • Don’t judge your skin in overhead office lighting—no one looks good there.

Comfort blend (ultra-simple): 9 mL squalane + 9 mL sunflower. Shake; use 2–3 drops AM/PM.


Quick Reference: Matching Concerns to Natural Oils for Skin

  • Eczema/dermatitis: sunflower, squalane, calendula; lanolin on cracks.
  • Oily/large pores: jojoba, squalane, rosehip; tea tree (diluted) for spots.
  • Dull/uneven tone: rosehip + a whisper of sea buckthorn; prickly pear under eyes.
  • Very dry body: sunflower base + shea/cocoa seal; lanolin on heels/hands.
  • Ultra-sensitive: squalane or sunflower for two quiet weeks; add calendula later.

These aren’t strict rules; they’re starting points. Your skin will tell you what it likes—especially when you change just one thing at a time.


Little Nudge

Because routines only work when you actually do them, choose one concern and one tiny change from above. For example, try jojoba at night for shine control, or go all-in on that sunflower-plus-shea stack for body softness. Then, reassess in a week. If you’re calmer, softer, or glowier, you’re winning.


Exactly how to apply natural oils for skin so they feel like a treat (not a film)

  1. Add water first. Mist, toner, or just leave skin slightly damp from cleansing.
  2. Use the “pea test.” Start with 2–4 drops for the face, a teaspoon for the body.
  3. Press, don’t rub. Warm between your palms, then press over cheeks, forehead, chin.
  4. Layer logically. Serums → cream → oil at night. In the morning, oil first, then wait a minute before SPF.
  5. Mix when you want. If straight oil feels heavy, blend 1–2 drops into your moisturizer for a “custom oil-in-cream.”

Moreover, if makeup pills over oil, shift your oil to nights only or reduce the amount. A single drop mixed into foundation can add glow without slip.


Oil cleansing (the five-minute reset)

Makeup heavy day? Sunscreen layered? Here’s a gentle reset that doesn’t strip:

  • Massage 1 tsp jojoba or olive over your dry face for a full 60 seconds.
  • Wet hands and keep massaging to lightly emulsify.
  • Remove with a warm, wrung-out cloth.
  • Optionally follow with a tiny amount of your regular cleanser (double cleanse).
  • Finish with a mist + your favorite light oil (squalane is perfect).

You’ll feel clean, soft, and strangely peaceful.


Tiny recipes (fast, safe, easy to love)

  • Balancing face drops: 6 mL squalane + 6 mL jojoba + 3 mL rosehip (optional +3 mL prickly pear).
  • Comfort oil for red cheeks: 8 mL sunflower + 6 mL squalane + 6 mL calendula macerate.
  • Body butter cloud: Equal parts melted shea + cocoa + a splash of babassu; whip as it cools.
  • Spot-only blemish dab: 1 Tbsp jojoba + 6 drops tea tree (~1%): dab once daily max. For essential-oil safety, keep face leave-ons around 0.5–1%; body up to ~2%; and spot treatments up to ~5% on tiny areas. (Tisserand Institute — Essential-oil dilution chart).

Patch test new mixes behind the ear or on inner forearm for 2–3 nights. If it stays quiet, you’re good. (DermNet — Open application (ROAT) test)


Safety & smart habits (because “natural” still needs nuance)

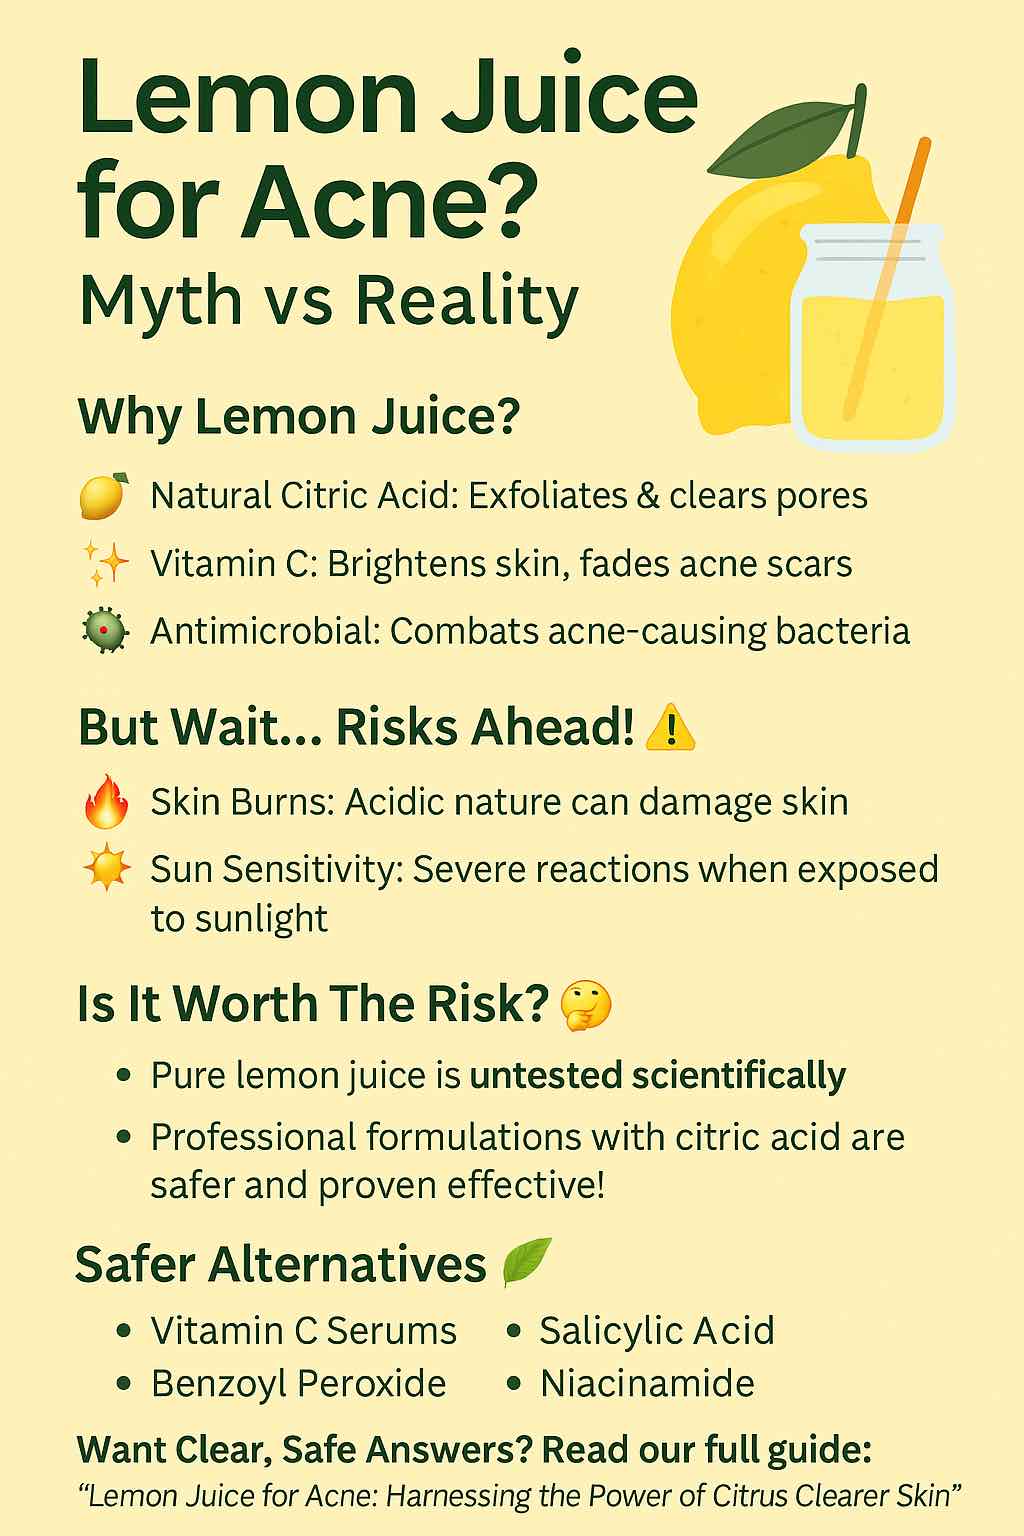
Dilution matters: Follow conservative essential-oil dilutions; be mindful that expressed citrus oils (e.g., lemon/lime) can be phototoxic on sun-exposed skin unless below thresholds or furanocoumarin-free. (Tisserand Institute — Phototoxicity: essential oils, sun & safety; IFRA/RIFM — Guidance for IFRA Standards)

SPF is non-negotiable: Use a broad-spectrum SPF 30+ daily; oils are not sunscreen. (American Academy of Dermatology — How to select a sunscreen)

Lanolin & nut oils: Excellent occlusives, but patch-test if you’re sensitive or allergic. (DermNet — Lanolin contact reactions).


Troubleshooting (real skin, real fixes)

  • Still dry? Add a water step before oil (mist or hydrating serum), then consider sealing with a cream on top.
  • Too shiny? Cut your amount in half and switch to squalane or jojoba. Apply on damp skin so it spreads thin.
  • Breaking out? Pause heavier oils (coconut, butters). Use squalane solo for two weeks, then reintroduce one oil at the perimeter first.
  • Makeup won’t sit? Keep oils for night; by day, use one drop mixed into foundation or apply oil 10–15 minutes before SPF.
  • Eczema flare? Simplify. Sunflower + calendula on damp skin; tiny dot of lanolin where cracked. Give it consistent nights for a week.

Routines you can copy (AM/PM, one week to calmer skin)

The Minimalist (all skin types):

  • AM: Rinse → serum (if you like) → 2 drops squalane → SPF.
  • PM: Gentle cleanse → 2 drops rosehip or marula → cream if needed.

The Balancer (oily/large pores):

  • AM: Cleanse → niacinamide → 2 drops jojoba → SPF.
  • PM: Cleanse → BHA 2–3x/week → 2 drops squalane → spot tea tree diluted if needed.

The Comforter (sensitive/eczema-prone):

  • AM: Lukewarm water → 2 drops squalane → SPF.
  • PM: Short shower → sunflower + calendula on damp face/body → lanolin dot on cracks.

The Glow Seeker (dull/uneven):

  • AM: Cleanse → vitamin C → 1 drop squalane → SPF.
  • PM: Cleanse → 2 drops rosehip + a whisper of sea buckthorn → cream.

Myths, kindly debunked (and why they matter)

  • “Oil replaces moisturizer.” Sometimes, but not always. Oils seal; moisturizers hydrate. Dry-dehydrated skin often loves both.
  • “All oils clog pores.” Not true. Jojoba, squalane, and rosehip are generally friendly; coconut and thick butters can be risky on acne-prone faces.
  • “Carrot seed oil is sunscreen.” It is not. It’s an antioxidant add-in, not UV protection. Wear SPF.
  • “Natural means safe for everyone.” Also not true. Nature is potent. Patch testing keeps you in the “ahh” zone, not the “oh no” zone.

Extra credit: thoughtful add-ons & pairings

  • Rosewater (organic) + oil: Mist first, then oil. The glow is immediate yet soft.
  • Beeswax (for balms): Add a small amount to create a salve for elbows and heels; it locks in oil and reduces rub-off.
  • Lavender essential oil (skin): Pleasant but optional; keep it low if you’re sensitive, or skip entirely.
  • Lemon/orange peel oils: Smell lovely yet can irritate; keep to body products at low percentages, and avoid sun post-application on exposed areas.
  • Kumkumadi lepam: An Ayurvedic classic featuring saffron; if you try it, patch test and reserve for night to keep things gentle.
Woman enjoying sun while holding natural face oils like raspberry seed, jojoba, rosehip, and sea buckthorn for summer glow.
Summer glow protection with Raspberry Seed (UV supportive), Jojoba (balancing), Sea Buckthorn (antioxidant-rich), and Rosehip (repairs sun damage).

The gentle bottom line on natural oils for skin

You don’t need a 12-step routine to have happy skin. Instead, choose one or two natural oils for skin that fit your current season and your current mood. Maybe it’s squalane in the morning for a weightless, makeup-friendly finish. Perhaps it’s rosehip at night for tone and texture. Or possibly it’s sunflower for the body right after a shower, followed by a little shea or cocoa on the driest spots. Layer water first, then a few drops of oil, then breathe.

Consistency wins. So does kindness. And while this guide covered a lot of ground, your best routine will be the one you’ll actually do—calm, quick, and quietly effective. If you want, tell me your skin type, climate, and what’s already on your shelf; I’ll sketch a 7-day AM/PM plan that uses exactly what you have and plugs in just the right oils.

Your skin will thank you—softly, steadily, and in its own time.

Posted on 1 Comment

Lemon Juice for Acne: Harnessing the Power of Citrus for Clearer Skin

Lemon Juice for Acne?

Acne, a stubborn and often frustrating skin issue, has driven people toward countless DIY remedies in the quest for clearer skin. Among these, lemon juice stands out as a popular home remedy—but is it truly effective, or is it just another skincare myth?

Let’s explore the science, the reality, and practical tips if you’re curious about using lemon juice for your skin.

Understanding the Appeal of Lemon Juice

Lemon juice is appealing for several reasons:

  • Citric Acid: A natural exfoliant (alpha-hydroxy acid or AHA), it can remove dead skin cells and unclog pores.
  • Vitamin C: Known for brightening the skin and fading dark spots, it holds potential for acne marks.
  • Antimicrobial Properties: Lemon juice’s acidity can combat bacteria that might worsen acne.

What Does the Latest Research Say?

While lemon juice itself hasn’t been the subject of extensive human trials, ingredients like citric acid have been studied in professional skincare formulations. Recent research suggests:

  • Triple-Acid Peels: Combining citric acid with salicylic and mandelic acids significantly reduces acne and hyperpigmentation safely when applied professionally.
  • Formulated Serums: Serums blending citric acid with other acids have shown a reduction in oil production and acne marks.

Pure lemon juice, however, remains untested in formal studies, and its effectiveness on acne-prone skin is largely anecdotal and theoretical.

Risks and Precautions

Despite potential benefits, lemon juice can be harmful if misused:

  • Skin Irritation and Burns: Lemon juice is highly acidic (pH ~2–3) and can lead to redness, irritation, or even chemical burns.
  • Sun Sensitivity (Phototoxicity): Exposure to sunlight after applying lemon juice can cause severe burns or discoloration (phytophotodermatitis).

Practical Tips for Trying Lemon Juice Safely

If you’re determined to give lemon juice a try, follow these guidelines:

  1. Dilute the Lemon Juice: Mix 1 part lemon juice with at least 3–4 parts water, honey, or aloe vera.
  2. Patch Test First: Apply diluted juice to a small area (like your inner arm) and observe for reactions over 24 hours.
  3. Nighttime Only: Use lemon juice exclusively at night, thoroughly rinsing your face afterward to prevent phototoxic reactions.
  4. Short Contact Time: Limit application to 5–10 minutes, followed by gentle cleansing and moisturizing.
  5. Sunscreen is a Must: Always apply sunscreen the next day to protect sensitive skin from sun damage.

Safer Alternatives for Acne Treatment

If you’re hesitant about lemon juice but still seeking clear skin, consider dermatologist-approved treatments:

  • Vitamin C Serums: Offer controlled doses of vitamin C without irritation.
  • Salicylic Acid Products: Penetrate and exfoliate pores effectively and gently.
  • Benzoyl Peroxide: Proven antibacterial treatment targeting acne-causing bacteria directly.
  • Niacinamide: Helps manage inflammation and reduces redness.

The Bottom Line

While lemon juice holds theoretical promise for treating acne, the real-world risks often outweigh potential benefits. Professional skincare formulations containing citric acid offer safer, proven alternatives. If you choose to experiment with lemon juice, do so cautiously, following the practical guidelines above.

Ultimately, clearer skin comes from consistent, safe skincare practices, professional advice, and proven ingredients. Citrus may have its appeal, but when it comes to your skin, safety and evidence-based choices should always lead the way.

🍋 FAQs: Lemon Juice for Acne

1. Can lemon juice really help clear acne?
Pure lemon juice has anecdotal support, but lacks scientific proof. Its acidic nature might exfoliate, but risks irritation or burns.

2. Is lemon juice safe for all skin types?
Not really. Sensitive, dry, or damaged skin can react badly, causing redness, irritation, or chemical burns.

3. How do I safely apply lemon juice on my skin?
Dilute it (1:3 with water or aloe), apply at night, patch test first, and limit use to 5–10 minutes.

4. Why does lemon juice sometimes cause skin discoloration?
Lemon juice contains compounds that cause phototoxic reactions when exposed to sunlight, leading to discoloration.

5. Can lemon juice lighten acne scars?
Potentially, due to Vitamin C content—but safer, formulated serums are more effective and less risky.

6. What are safer alternatives to lemon juice for acne?
Vitamin C serums, salicylic acid, benzoyl peroxide, niacinamide, and professionally formulated chemical peels.

7. Can lemon juice make acne worse?
Yes, if it irritates your skin, damages the skin barrier, or triggers an allergic or phototoxic reaction.

8. How often can I safely use lemon juice on my face?
Very sparingly—no more than once or twice a week, always diluted, and never before sun exposure.

9. What immediate steps should I take if my skin reacts badly to lemon juice?
Rinse thoroughly with water, apply soothing moisturizers or aloe vera gel, and avoid sun exposure. Consult a dermatologist if irritation persists.

10. What’s the best takeaway regarding lemon juice and acne?
It’s a risky DIY remedy with theoretical benefits but real safety concerns. Dermatologist-approved treatments are always safer and more reliable.

Posted on 1 Comment

Watermelon: The Hydration Hero for Your Skin – Benefits, Myths, and 5 Quenching Recipes for Dewy Skin

WATERMELON for Skin

When the summer sun is blazing, nothing refreshes quite like a cold slice of watermelon. But did you know that this juicy fruit is more than just a picnic staple? Watermelon is fast becoming a darling of the skincare world—earning its stripes as the “hydration hero” for glowing, dewy skin. From antioxidant-packed flesh to nourishing seed oil and hydrating rind, watermelon works inside and out to keep your skin at its best.

But can it really deliver on all those glowing promises? Let’s dive into the science, debunk the myths, and get practical with recipes you can sip, snack on, or even slather on your skin.


Why Watermelon Is a Skin Superstar

1. Unmatched Hydration Power

Watermelon is about 92% water—making it one of nature’s most effective hydrators. Eating or drinking watermelon helps your skin stay plump and elastic, fighting off dryness and fine lines from the inside out.

2. Antioxidant Arsenal

This fruit is loaded with lycopene, vitamin C, beta-carotene, and citrulline. These antioxidants fight oxidative stress, help prevent signs of premature aging, and support skin repair.

3. Collagen Boosting

Vitamin C in watermelon is a crucial player in collagen production. More collagen means firmer, more resilient skin and faster healing from daily stressors.

4. Calms and Soothes

Watermelon naturally contains anti-inflammatory compounds, including vitamin A and citrulline, that help soothe redness and calm irritated skin.

5. Gentle Exfoliation

It also has small amounts of malic and citric acids (AHAs) which help gently exfoliate dead skin, revealing a brighter complexion.


What the Research Says

  • Topical Watermelon Works:
    A study found that applying watermelon juice to skin significantly boosted hydration compared to water alone. Another preclinical trial using watermelon rind extract cream improved hydration, elasticity, and sebum in skin, thanks to its potent bioactive compounds.
  • Internal Benefits:
    Regularly eating watermelon or drinking its juice improves skin moisture and may lower oxidative stress, supporting your skin’s glow from within.
  • Rind and Seed Oil:
    Watermelon rind has a higher phenolic and citrulline content than the flesh—making it an excellent (and often wasted) resource for topical DIY recipes. The oil from watermelon seeds (Kalahari melon oil) is rich in linoleic acid and vitamin E, supporting the skin’s barrier and locking in moisture.

Watermelon Myths—Busted

MythFact
Watermelon alone can cure dry skin.It hydrates, but best results come with a balanced skincare and nutrition routine.
DIY watermelon masks are always safe.Not everyone’s skin agrees; patch test first, especially if sensitive.
Watermelon can replace your moisturizer or sunscreen.It supports hydration but doesn’t replace barrier creams or SPF.
Only the red flesh is useful.The rind and seeds are skin-friendly superstars too!

5 Quenching Watermelon Recipes for Dewy Skin

Here are five recipes—three edible, two topical—to flood your skin with hydration and nutrients.


1. Watermelon Glow Juice

Ingredients:

  • 2 cups watermelon cubes
  • ½ cucumber
  • 1 lime, juiced
  • 3-4 fresh mint leaves

Instructions:
Blend all ingredients until smooth. Strain if desired. Drink chilled for an instant skin-refreshing boost.

Why it works:
Hydrates and provides vitamin C, lycopene, and antioxidants to fight skin dullness.


2. Dewy Skin Watermelon Salad

Ingredients:

  • 1 cup watermelon cubes
  • ½ cup cucumber slices
  • Âź cup feta cheese (optional)
  • A handful of fresh mint
  • 1 tablespoon olive oil
  • Juice of ½ lemon

Instructions:
Mix all ingredients in a bowl. Drizzle with olive oil and lemon juice. Eat as a hydrating snack or meal side.

Why it works:
This combo of water-rich produce and healthy fats nourishes skin from the inside out.


3. Watermelon-Aloe Skin Soother (Topical Serum)

Ingredients:

  • 2 tbsp fresh watermelon juice
  • 1 tbsp aloe vera gel

Instructions:
Mix and apply to clean face for 10–15 minutes. Rinse with cool water.

Why it works:
Aloe calms irritation while watermelon hydrates and soothes, perfect for post-sun or irritated skin.


4. Watermelon Ice Facial

Ingredients:

  • Fresh watermelon juice

Instructions:
Pour juice into an ice cube tray and freeze. Glide a cube gently over clean skin for 30–60 seconds, then pat dry.

Why it works:
Cools, tightens pores, boosts microcirculation, and leaves your face looking instantly refreshed.


5. Watermelon-Yogurt Glow Mask

Ingredients:

  • 2 tbsp watermelon puree
  • 1 tbsp plain Greek yogurt
  • 1 tsp honey

Instructions:
Mix and apply to your face. Leave on for 10–15 minutes, then rinse.

Why it works:
Yogurt contains lactic acid for mild exfoliation, honey adds moisture, and watermelon brings hydration and glow.


Practical Tips for Maximum Results

  • Patch Test First: Always patch test new topical recipes, especially if you have sensitive skin.
  • Fresh is Best: Use fresh, ripe watermelon for the highest nutrient content.
  • Don’t Forget the Rind: Save and blend the white rind for even more skin benefits—especially in topical masks.
  • Balance Is Key: Watermelon is wonderful, but skin health thrives with a combination of sleep, hydration, sun protection, and a nutrient-rich diet.

Takeaway

Watermelon truly is a hydration hero for your skin—inside and out. Whether you’re sipping it, snacking on it, or making a mask, you’re flooding your cells with water, antioxidants, and vital nutrients. Just remember: it’s not a cure-all, but a delicious, science-backed addition to your skincare and wellness routine.

So, next time you slice into a watermelon, think beyond the fruit bowl. Your skin will thank you!


Ready to try these recipes? Or want to learn about other food-based skin heroes? Let me know in the comments!

Frequently Asked Questions (FAQs)

1. Is watermelon good for all skin types?
Yes, watermelon is generally safe for all skin types. However, if you have sensitive or allergy-prone skin, always patch test any topical recipe before full use.

2. Can watermelon actually hydrate my skin from the inside?
Absolutely. Because watermelon is 92% water, eating or drinking it helps maintain your body’s hydration, which directly benefits skin moisture and plumpness.

3. Are watermelon-based skincare products better than DIY recipes?
Commercial products often contain stabilized and concentrated extracts for consistent results. DIY recipes are effective but may vary in potency and freshness. Use both for best results if you enjoy home remedies.

4. What are the benefits of using watermelon rind or seed oil?
The rind contains higher amounts of citrulline and phenolics, great for soothing and moisturizing skin. Seed oil is rich in linoleic acid and vitamin E, supporting the skin barrier and locking in moisture.

5. How often can I use watermelon masks or topical recipes?
2–3 times a week is safe for most people. If you have sensitive skin, start with once a week and increase as tolerated.

6. Can watermelon treat acne or just provide hydration?
Watermelon helps hydrate and soothe inflammation, which can indirectly help with acne. However, it’s not a substitute for targeted acne treatments.

7. Does eating watermelon help reduce wrinkles?
Watermelon’s antioxidants and vitamin C support collagen production and fight free radicals, which may help reduce signs of aging when combined with a healthy lifestyle.

8. Can I leave watermelon juice on my face overnight?
It’s not recommended, as watermelon is watery and can cause irritation if left too long. Rinse off topical recipes after 10–20 minutes.

9. Will watermelon lighten my skin?
There’s no strong evidence that watermelon lightens skin tone. It can brighten and even out skin by boosting hydration and gentle exfoliation.

10. Are there any side effects of using watermelon on the skin?
Side effects are rare, but mild irritation or allergic reaction can occur in sensitive individuals. Discontinue use if you notice redness, itching, or discomfort.


Posted on Leave a comment

Clove for Skin Health: Nourish, Soothe, and Rejuvenate with Nature’s Beauty Secret

CLOVE FOR SKIN HEALTH

In a world overflowing with skincare fads and “miracle” ingredients, it’s easy to overlook the natural wonders tucked away in your spice cabinet. Clove—the aromatic flower bud from Syzygium aromaticum—is one such gem, cherished for centuries in Ayurvedic, Chinese, and folk medicine. But it’s not just tradition or folk wisdom; modern science is catching up, and the results are stunning.

If you want skin that is clear, resilient, youthful, and glowing—without the harsh chemicals—let’s unlock the power of clove together. This blog post explores how clove supports skin health, what the latest research reveals, how you can use it at home, and the real-world precautions you must know.


The Science of Clove: What Makes It Special?

The Secret Compounds

  • Eugenol: The dominant compound in clove oil (70–90%), eugenol is a powerhouse antioxidant, anti-inflammatory, and antimicrobial agent. It’s the reason dentists use clove for numbing and why your grandma might have reached for it for a toothache.
  • β‑Caryophyllene: A lesser-known, but potent, anti-inflammatory compound also found in black pepper and cannabis.
  • Other Phytochemicals: Flavonoids, tannins, and triterpenoids—offering skin-protective, wound-healing, and calming effects.

These compounds act together to fight microbes, tame inflammation, soothe itching, and even support the skin’s natural healing and anti-aging processes.


Clove for Skin: Evidence-Based Benefits

1. Acne and Breakout Control

  • How it works: Clove oil is a natural enemy of Cutibacterium acnes and Staphylococcus aureus—the bacteria that cause pimples and inflamed breakouts.
  • Real use: Mix a single drop of clove oil into a teaspoon of jojoba or coconut oil, and dab it gently onto active spots. Clinical studies show a significant reduction in redness and swelling within days.
  • Bonus: Its antifungal properties also help with conditions like athlete’s foot or fungal acne.

2. Soothing Itch and Irritation

  • Clinical insight: A 2024 study confirmed that diluted clove oil outperformed petroleum jelly in relieving chronic itch (pruritus), making it a natural alternative for those with eczema, dermatitis, or even bug bites.
  • How to try: Blend a few drops into your favorite unscented moisturizer and use as needed on itchy patches (avoid broken skin).

3. Wound Healing and Repair

  • Latest research (2025): Cutting-edge nanotechnology is now used to deliver clove oil in “nanosponges,” which offer sustained release and zero skin irritation—unlike pure, undiluted clove oil, which can sting. Animal and cell studies show these gels accelerate healing, reduce inflammation, and minimize scarring.
  • Practical takeaway: While these advanced gels may not be widely available in stores yet, you can use well-diluted clove oil for minor cuts and scrapes at home.

4. Anti-Aging and Skin Rejuvenation

  • Lab evidence: Clove oil suppresses enzymes that break down collagen and trigger wrinkling. Studies show it boosts procollagen (the precursor to collagen), fights UV-induced damage, and brightens uneven tone.
  • How to use: Add a tiny amount to homemade serums or masks, always with a carrier oil and never directly on the skin.

How to Use Clove for Skin—Safely and Effectively

The Rules of the Game

  1. Dilute, Dilute, Dilute: Never apply clove oil neat! Use at a concentration of 0.5–1%—that’s about 1–2 drops per tablespoon of carrier oil (e.g., jojoba, almond, coconut).
  2. Patch Test: Even diluted, clove oil is potent. Apply to a small spot on your forearm and wait 24 hours before using widely.
  3. Avoid Sensitive Areas: Do not use on lips, around the eyes, or on mucous membranes. Never use on infants, and consult a doctor if you’re pregnant, nursing, or have sensitive skin conditions.
  4. Combine Wisely: For pain or severe itching, you can blend clove oil with traditional remedies (like lidocaine gel)—but only with medical guidance.

Practical DIY Recipes

1. Clove Spot Acne Treatment

Ingredients:

  • 1 drop clove essential oil
  • 1 teaspoon jojoba or coconut oil

How to Use: Mix well, dip a cotton swab, and apply directly to pimples after cleansing. Use once daily.


2. Soothing Clove Itch Relief Balm

Ingredients:

  • 2 drops clove oil
  • 1 tablespoon shea butter
  • 1 teaspoon sweet almond oil

How to Use: Whip all ingredients together, store in a small jar, and use on itchy, irritated areas as needed.


3. Gentle Clove Face Mask for Brightening

Ingredients:

  • 1 teaspoon clove powder (not oil)
  • 1 tablespoon honey or plain yogurt

How to Use: Mix, apply to clean face for 5–10 minutes, then rinse. Use weekly.


Advanced: What’s New and Exciting?

  • Nanosponges and Gels: The future of clove in skincare lies in slow-release formulations, offering all the benefits with virtually zero irritation. Watch for these ingredients in next-gen skincare products.
  • Clove + Conventional Treatments: Blends of clove and lidocaine are already being used clinically for pain management, showing improved results over lidocaine alone.

Frequently Asked Questions

1. Is clove oil safe for direct application to the skin?
No. Clove oil is very potent and should never be used undiluted on the skin. Always mix it with a carrier oil (like coconut, almond, or jojoba oil) at a concentration below 1% before topical use.


2. How can clove help with acne and pimples?
Clove oil is naturally antibacterial and anti-inflammatory. When diluted, it can reduce redness, swelling, and kill acne-causing bacteria. Apply only on affected areas for best results.


3. Can clove oil help with dark spots or hyperpigmentation?
Clove’s antioxidants may help fade dark spots and even out skin tone with regular use. However, results vary, and it’s best used as a supplement to—not a replacement for—sun protection and other brightening agents.


4. What’s the safest way to patch test clove oil before using it on my face?
Dilute the oil as directed, apply a small amount to the inside of your forearm, and wait 24 hours. If no redness or irritation appears, it’s likely safe to use elsewhere.


5. Can I use clove oil on sensitive or eczema-prone skin?
Exercise caution. Clove oil can irritate sensitive or broken skin. Consult a dermatologist before using it if you have eczema or other skin conditions.


6. Is clove oil effective for itch relief?
Yes. Studies have shown diluted clove oil can effectively relieve itching (pruritus), especially for chronic cases, and works better than petroleum jelly in some cases.


7. Are there any side effects to using clove on the skin?
Possible side effects include burning, irritation, allergic reaction, and sensitization with prolonged use or if undiluted. Always dilute and patch test first.


8. Can I make my own clove-infused skincare at home?
Absolutely! You can add a drop or two of clove oil to your homemade serums, balms, or masks—but always follow proper dilution guidelines. Avoid direct contact with eyes and mucous membranes.


9. Are there ready-made skincare products with clove available?
Yes, some natural and Ayurvedic skincare brands include clove in spot treatments, balms, and creams—often blended with other soothing botanicals. Check labels for concentration and do a patch test.


10. Can pregnant or breastfeeding women use clove oil on their skin?
It’s best to avoid essential oils, including clove, during pregnancy and breastfeeding unless approved by a healthcare provider, as some compounds can be absorbed through the skin.


Final Thoughts: Nature’s Beauty Secret, But Handle With Care

Clove is much more than a holiday spice—it’s a clinically validated, multi-functional skincare ally that can help you conquer acne, soothe irritation, support healing, and keep skin looking younger for longer. But respect its potency: Always dilute, patch test, and don’t go overboard.

As science continues to refine how we use clove—think nanotechnology and advanced gels—the future looks bright for this natural wonder.


Ready to Try?

Share your experience with clove in the comments! Want recommendations for ready-made clove skincare products, or guidance on building your own safe, effective routine? Drop your questions below.


Stay radiant, stay natural!

Posted on 1 Comment

Avocado: The Green Goddess of Skincare – Benefits, Myths, and 5 Natural Recipes for Luminous Skin

Avocado: The Green Goddess of Skincare

There are few fruits that have earned such reverence in both the culinary and skincare world as the mighty avocado. Known for its creamy texture and rich nutritional profile, avocado has long been hailed as a superfood. But beyond your morning toast or smoothie bowl, this “green goddess” offers transformative benefits for your skin, both from the inside out and topically.

This post dives deep into the latest research, debunks common myths, and offers five practical, dermatologist-informed DIY recipes you can use today to experience the luminous, supple skin that avocado can help achieve.


🌿 The Science of Avocado in Skincare

1. Nutritional Powerhouse for Skin Health

Avocados are packed with:

  • Oleic Acid (Omega-9): Deeply hydrating, supports skin barrier
  • Linoleic Acid (Omega-6): Helps regulate sebum and reduce inflammation
  • Vitamin E: A potent antioxidant that combats oxidative stress
  • Vitamin C: Boosts collagen production and brightens skin tone
  • Phytosterols & Carotenoids: Natural anti-inflammatory and UV-protective compounds
  • Lecithin: Improves absorption of nutrients into the skin

These components combine to nourish, hydrate, and protect the skin from damage and aging.


2. What Does the Research Say?

Recent clinical and animal studies confirm:

  • Increased skin elasticity: A 2022 trial found that women who consumed one avocado daily for eight weeks experienced firmer, more elastic skin.
  • Wound healing & inflammation reduction: Topical application of avocado oil accelerated wound closure and decreased inflammation in animal models.
  • Antioxidant protection: Avocado oil neutralizes reactive oxygen species (ROS) that lead to premature aging.

Researchers suggest avocado’s unique lipid profile and antioxidants work synergistically to support skin renewal, especially when used regularly.


🚨 Avocado Myths: What You Need to Know

Myth 1: “Avocado Oil Clogs Pores”

Truth: Pure, cold-pressed avocado oil is mildly comedogenic (rating ~2). For most people, it does not clog pores, especially when used in moderation.

Myth 2: “Avocado Can Replace Sunscreen”

Truth: While avocado contains UV-protective compounds, it is not a substitute for broad-spectrum SPF. Use it as a complement, not a replacement.

Myth 3: “Only the Pulp is Useful”

Truth: The seed and peel contain bioactive compounds that show antioxidant and anti-inflammatory activity. Seed extracts are emerging in anti-aging formulations.

Myth 4: “It’s Just a Trend”

Truth: Indigenous and Ayurvedic traditions have used avocado pulp and oil for centuries to treat dry skin, sunburn, and wounds.


🥞 5 Avocado-Based DIY Skincare Recipes

💧 1. Deep Hydration Mask (Dry, Flaky Skin)

Ingredients:

  • 1/2 ripe avocado (mashed)
  • 1 tablespoon raw honey
  • 1 teaspoon olive oil How to Use: Mix well and apply to clean skin for 15-20 minutes. Rinse with lukewarm water.

✨ 2. Brightening Mask (Pigmentation & Dullness)

Ingredients:

  • 1/2 ripe avocado
  • 1 tablespoon plain yogurt
  • 1 teaspoon lemon juice (optional; patch test first) How to Use: Blend ingredients, apply for 10-15 minutes. Rinse thoroughly.

🔥 3. Soothing Anti-Inflammatory Mask (Redness & Sensitivity)

Ingredients:

  • 1/2 ripe avocado
  • 1 tablespoon aloe vera gel
  • 1 teaspoon ground oatmeal How to Use: Mix and apply for 15 minutes. Rinse with cool water.

🔍 4. Acne Control Spot Treatment

Ingredients:

  • 1 teaspoon avocado oil
  • 1 drop tea tree essential oil How to Use: Dab gently on blemishes at night. Wash off in the morning.

👶 5. Anti-Aging Overnight Balm

Ingredients:

  • 1 teaspoon avocado oil
  • 2 drops rosehip oil
  • 1 capsule Vitamin E (punctured) How to Use: Apply a light layer before bed. Wake up to glowing, plump skin.

⚠️ Usage Tips & Patch Test Guide

  • Always use fresh avocado to prevent bacterial contamination.
  • Store avocado oil in a cool, dark place to prevent rancidity.
  • Patch test any new recipe on your wrist or jawline.
  • If you have a latex allergy, consult your dermatologist before using avocado-based products.

📈 Final Thoughts

Avocado is more than a health food—it’s a holistic skincare ally backed by tradition and modern science. From its barrier-restoring oils to its antioxidant-rich extracts, this fruit nourishes your skin deeply and sustainably.

Whether you’re looking to restore radiance, calm irritation, or reduce signs of aging, avocado offers a versatile, natural solution. And with the DIY recipes above, you can bring the magic of the green goddess into your skincare routine today.

Glowing skin is only an avocado away.

🔍 Frequently Asked Questions (FAQs)

  1. Can I use avocado on my face every day?
    Yes, you can use avocado-based skincare daily, especially avocado oil. For masks with active ingredients (like lemon juice or tea tree oil), limit to 2–3 times per week to avoid irritation.
  2. Is avocado oil good for oily or acne-prone skin?
    Avocado oil is mildly comedogenic (rating 2) but rich in linoleic acid, which can help balance sebum in oily/acne-prone skin. Always patch test and avoid overuse if you’re breakout-prone.
  3. What type of avocado oil is best for skincare?
    Look for cold-pressed, unrefined, organic avocado oil. It retains more nutrients and is free from chemical processing.
  4. Can avocado help with dark spots or hyperpigmentation?
    Yes, avocado contains vitamin C and E which can brighten the skin and fade dark spots over time, especially when paired with ingredients like lemon or yogurt.
  5. How long does it take to see results from avocado skincare?
    Visible improvements—like smoother texture or reduced dryness—can occur within a week. Collagen and elasticity improvements take several weeks with consistent use (4–8 weeks).
  6. Are avocado masks suitable for sensitive skin?
    Absolutely. Avocado is naturally soothing. Just avoid recipes with lemon juice or essential oils unless you’ve patch-tested them, as these can trigger irritation.
  7. Can I store leftover avocado masks?
    No. Fresh avocado oxidizes quickly and can grow bacteria. Always make and use the mask fresh. If needed, store for no more than 24 hours in the fridge in an airtight container.
  8. Is there a difference between eating avocado and applying it topically?
    Yes. Eating avocado supports skin from within (collagen, elasticity, hydration), while topical use hydrates, soothes, and protects the outer skin barrier. Best results come from combining both.
  9. Can avocado reduce wrinkles and fine lines?
    Yes, it’s rich in antioxidants (like vitamin E and lutein) and fatty acids that reduce oxidative stress and support collagen. Avocado oil-based night treatments can improve skin texture over time.
  10. Is it safe to use avocado-based products around the eyes?
    Avocado oil is generally safe for the eye area due to its mildness, but avoid direct contact with eyes. A tiny amount under the eyes at night can help with hydration and fine lines.