Posted on Leave a comment

Top 5 Aam Ka Achar or Indian Mango Pickle Recipes from Youtube

Dry mango pickle made of original Ramkela mangoes.

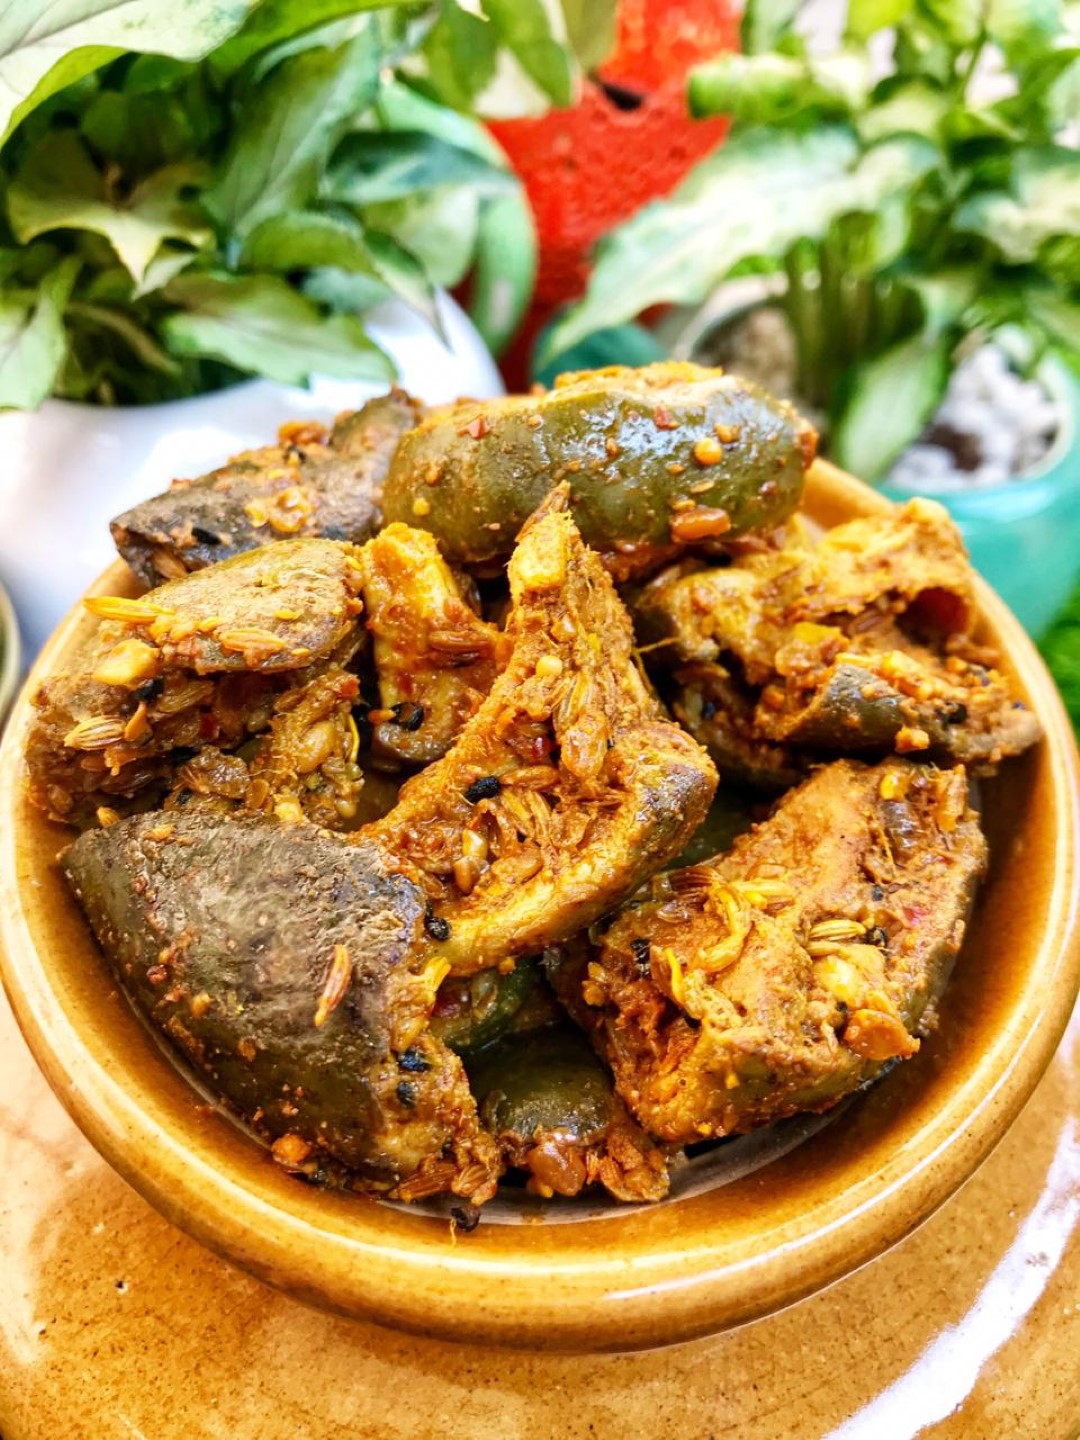
Today, we’re taking a deep dive into the world of Indian pickles, specifically focusing on the tangy and delightful Aam Ka Achar, also known as Indian Mango Pickle. This traditional Indian condiment, with its burst of flavors, is a staple in households across the country. It’s a perfect accompaniment to a variety of meals, adding that extra zing that elevates the dining experience.

Making Aam Ka Achar is a culinary adventure in itself. It’s a process that involves patience, precision, and a passion for flavors. Whether you’re a seasoned cook or a newbie in the kitchen, making your own Aam Ka Achar is a journey worth embarking on.

Delicious Aam Ka Sookha Achar
Ramkela mangoes mixed with finest ingredients and handcrafted to perfection

Before we delve into the world of Aam Ka Achar, we’d like to extend an invitation to you to join our foodie community at Eatlo. It’s a vibrant space where food lovers from all over the world share their recipes, cooking tips, and food experiences. It’s a place to learn, share, and celebrate the love for food.

Now, let’s embark on our Aam Ka Achar journey!

🥭 1. Grandma’s Mango Pickle Recipe by ‘Grandma’s Recipes’: This recipe takes you back to the roots of traditional Indian cooking. It’s a classic take on the Indian mango pickle, using raw mangoes, mustard oil, and a blend of spices like fenugreek seeds, fennel seeds, nigella seeds, and turmeric. The simplicity of this recipe makes it perfect for beginners. The detailed instructions and the use of easily available ingredients make this recipe a great starting point for your Aam Ka Achar journey.

🥭 2. Aam Ka Achar by ‘CookingShooking’: This recipe brings a unique twist to the traditional Aam Ka Achar. The use of jaggery instead of sugar gives the pickle a unique flavor, adding a hint of sweetness that beautifully balances the tanginess of the mangoes. The process involves marinating the mangoes in salt and turmeric, then cooking them with jaggery and spices. This recipe is a testament to the fact that a little experimentation can lead to delightful results.

🥭 3. Mango Pickle Recipe by ‘Punjabi Cooking’: This recipe stands out for its use of a large quantity of mustard oil, which gives the pickle a distinct flavor. The recipe also includes a variety of spices like kalonji, fennel seeds, and red chili powder. The detailed step-by-step instructions make it easy to follow, and the end result is a flavorful pickle that packs a punch.

Sun-cooked to preserve the nutrients and taste
Dry Mango Pickle by Masala Monk

🥭 4. Aam Ka Achar by ‘Harman Khosa’: This recipe is unique not just for its flavors but also for its presentation. It includes sweet and funny Punjabi dialogues along with the cooking process, making the video enjoyable to watch. The ingredients are similar to other recipes, but the presentation and the humor infused in the video make it a standout.

🥭 5. Aam Ka Achar by ‘Kabita’s Kitchen’: This recipe stands out for its detailed explanation and practical tips on how to store the pickle for a long duration. The recipe uses mustard oil, fenugreek seeds, fennel seeds, and other spices. Kabita’s Kitchen provides a comprehensive guide to making and storing Aam Ka Achar, making it a valuable resource for both beginners and experienced cooks.

Summation: Each of these recipes brings something unique to the table. From the use of jaggery in CookingShooking’s recipe to the large quantity of mustard oil in Punjabi Cooking’s version, there’s a lot to learn and experiment with. The diversity in these recipes reflects the diversity of Indian cuisine itself, where the same dish can have numerous variations, each with its own unique flavor profile.

Our Analysis: From our analysis, we’ve noticed that while the basic ingredients remain the same, each recipe has its own unique touch. This variety is what makes Indian cuisine so diverse and exciting. The use of different spices, the method of preparation, and even the type of mango used can significantly alter the taste of the final product. It’s this diversity and the opportunity to experiment that makes cooking such a rewarding experience.

Tips and Learnings: The key to a great Aam Ka Achar is patience and the right balance of flavors. Here are a few tips we’ve gathered from our analysis:

  1. Quality of Mangoes: Always use fresh, raw mangoes for the best results. The mangoes should be firm and green, with no soft spots or blemishes.
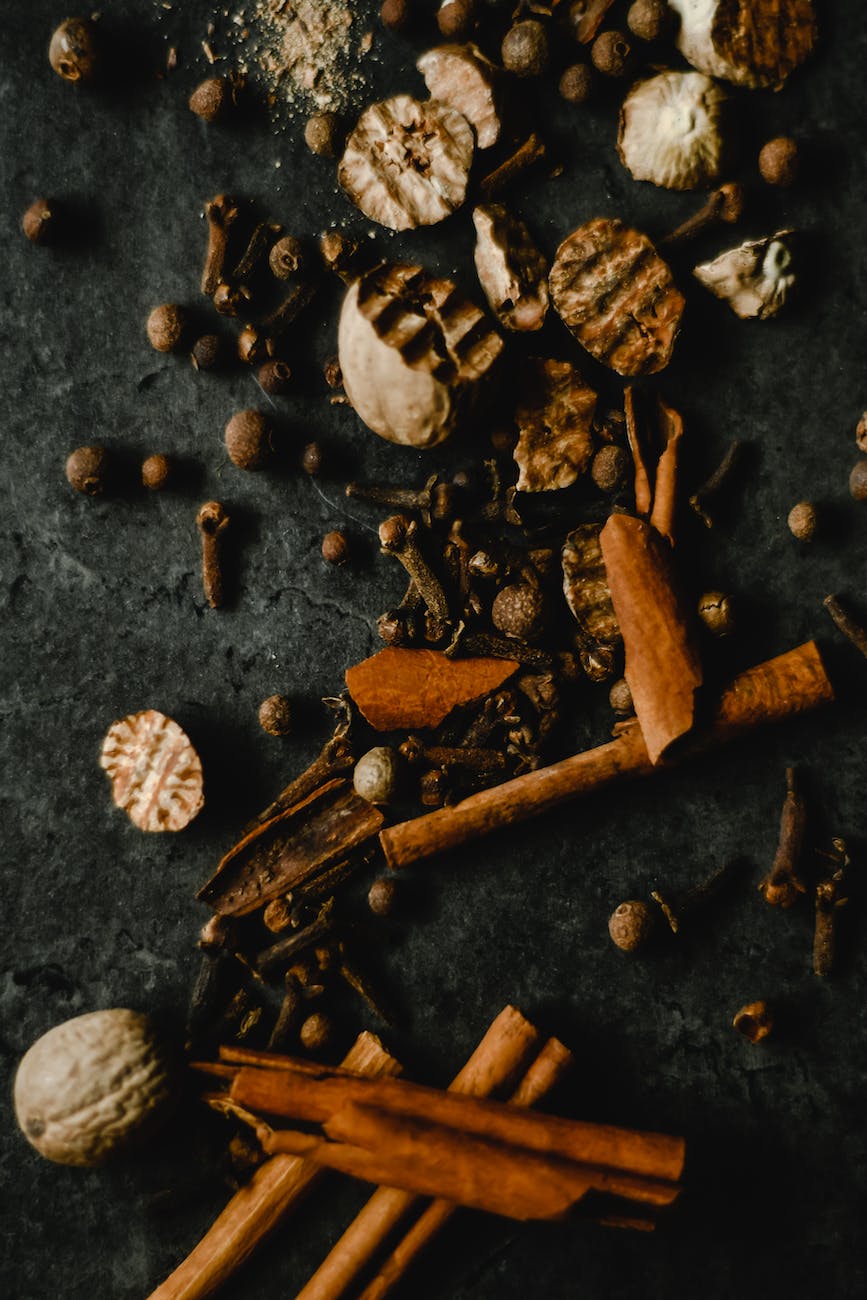
  2. Use of Spices: The spices used in the pickle not only add flavor but also act as preservatives. Fenugreek seeds, mustard seeds, and asafoetida are commonly used in most recipes. However, feel free to experiment with other spices as well.
  3. Sun Drying: Sun drying the mangoes after cutting and salting them is a crucial step. It helps in reducing the moisture content, which in turn increases the shelf life of the pickle.
  4. Mustard Oil: Mustard oil is another key ingredient in Aam Ka Achar. It acts as a preservative and gives the pickle its unique flavor. Some recipes call for a large quantity of oil, while others use it sparingly. Adjust the quantity based on your preference.
  5. Patience is Key: Making Aam Ka Achar is not a quick process. It takes time for the flavors to develop and for the pickle to reach its full potential. So, be patient and let the pickle mature before you start using it.

We hope you found this post helpful and are now excited to try making your own Aam Ka Achar. Remember, cooking is all about experimenting and having fun. So, don’t be afraid to tweak these recipes to suit your taste. Happy cooking! 🥭🌶️🥣

And don’t forget to join our foodie community at Eatlo for more exciting food discussions and recipe exchanges.

Posted on 2 Comments

Homemade Ice Cream Without A Machine

selective focus photography of person holding ice cream

Hello, Eatlo community! 🍽️👋 We’re back with another exciting video for all the dessert lovers out there. This time, we’re bringing you a fantastic recipe from America’s Test Kitchen, titled “How to Make Homemade Ice Cream Without A Machine”.🍨🥥

About America’s Test Kitchen 🎥🍴

America’s Test Kitchen is a renowned platform that features a plethora of recipes, cooking tips, and equipment reviews. Located in Boston’s Seaport District, it is the home of Cook’s Illustrated magazine and Cook’s Country magazine, and is the workday destination for more than 60 test cooks, editors, and cookware specialists. Their mission is to test recipes over and over again until they understand how and why they work and until they arrive at the best version.

The Magic of No-Churn Ice Cream 🍦✨

In this video, the hosts introduce us to the magic of making homemade ice cream without a machine. The recipe is based on a traditional method found in a grandmother’s recipe box, and it’s been updated with a modern twist. The result is a soft, scoopable ice cream that you can customize with your favorite flavors.

The Recipe 📝🍨

The recipe starts with whipping two cups of heavy cream in a blender until it forms stiff peaks. This process incorporates air into the mixture, similar to how an ice cream maker churns.

Next, they add a cup of sweetened condensed milk, which keeps the ice cream soft and scoopable in the freezer. A quarter cup of corn syrup (or caramel sauce for the salted caramel coconut flavor) is added, followed by a quarter cup of whole milk. The mixture is then flavored with extracts, such as vanilla or peppermint, and a bit of salt.

For the mint Oreo flavor, they stir in a half cup of chopped chocolate sandwich cookies. For the salted caramel coconut flavor, they add a quarter cup of toasted coconut and drizzle a third cup of caramel on top, lightly swirling it in with a fork.

The mixture is then poured into a loaf pan, covered with plastic wrap directly on the surface to prevent ice crystals, and frozen for about six hours until firm.

Join the Conversation! 🗣️👥

This video is a must-watch for anyone who loves ice cream and enjoys making homemade desserts. The recipe is simple, customizable, and doesn’t require any special equipment.

Don’t forget to join our Facebook community for more discussions on food, recipes, and well-being. We’d love to hear your thoughts on this video and any experiences you’ve had with making homemade ice cream. See you there! 😊

Posted on Leave a comment

The Ultimate Guide to Buying, Storing, and Organizing Spices

dried herbs and spices on black surface

Hello, culinary enthusiasts! 🙌 Today, we’re embarking on a flavorful journey into the world of spices. Spices are the heart and soul of our dishes, providing depth, complexity, and a world of flavors to our meals. But how do we buy, store, and organize them effectively? We’ve found an incredible guide by Ethan Chlebowski on his YouTube channel, which has garnered over 1.2 million views! We highly recommend checking it out for a comprehensive visual guide. 🎥

Ethan is a home cooking nerd who loves to find better ways to cook and share them with all of us. His channel is a treasure trove of cooking tips, tricks, and recipes that are sure to inspire you in the kitchen.🌶️🍃

1. Understanding Spices 🌿

Spices are plant materials used primarily as flavorings in relatively small amounts. Each spice has an aroma compound that gives it its characteristic flavor. For example, the compound that makes fresh ground pepper smell and taste like fresh ground pepper is different from the aroma compounds that make oregano smell and taste like oregano.

2. Ground vs Whole Spices 🌰

Whole spices will keep well for a year or more, while pre-ground spices will start to degrade in flavor after just three to six months. The fine particles of ground spices have a large surface area and lose their aroma molecules to the air much more rapidly. So, if you want to keep your spices fresh for longer, it’s best to buy them whole and grind them as needed.

3. Storing Spices 🏺

The most optimum storage for maintaining flavor life would be an opaque glass container stored in the freezer. However, for convenience, Ethan stores his spices in clear bottles in a drawer to the left of his stove. This way, he can quickly grab his spices whether he’s prepping food or cooking at the stove.

4. Buying Spices 💰

The question of what spices you should buy is completely personal. Ethan suggests starting with the basics like coarse kosher salt and black peppercorns. His top five used spices include cumin seeds, chili powder, turmeric, smoked paprika, and oregano. With just these five spices, you can make all sorts of dishes from Mexican cuisine, Indian cuisine, Italian, Mediterranean, and more.

5. Saving Money on Spices 💸

Spices can quickly get expensive, especially if you’re picking up those 1-ounce glass bottles at the grocery store. Ethan suggests finding a store that sells spices in bulk so you can buy exactly how much you want and don’t have to pay for the packaging. Another great and cheaper option is to find an international grocery store near you. They’ll typically have a large selection of spices in bags and containers that are much cheaper than your typical big box grocery store.

We hope you found these tips helpful and that they inspire you to explore new ways to use, store, and organize your spices. If you have any other spice tips or tricks, we’d love to hear them. Join our vibrant community on Facebook and share your insights. We’re always looking for new ways to make the most of our kitchen tools. 🎉

Happy cooking, everyone! 🍽️

Posted on Leave a comment

Master Your KitchenAid Mixer: 5 Essential Tips and Tricks

yellow kitchenaid stand mixer

Hello, culinary enthusiasts! 🙌 Today, we’re diving deep into the world of KitchenAid mixers, a versatile kitchen gadget that has become a staple in homes around the world. Known for its power, precision, and stylish design, the KitchenAid mixer is not just a tool—it’s a culinary partner that helps you create delicious meals and treats with ease.🍴🎉

Our guide for today comes from Stephanie, the creative mind behind the YouTube channel Martinmade. Stephanie and her husband James have a passion for DIY, cooking, and sharing their knowledge with others. Their video “5 Tips and Tricks For Your KitchenAid” has garnered over 310,000 views, making it a favorite among KitchenAid users. We highly recommend checking it out for a comprehensive visual guide. 🎥

1. Cord Management 🧹

The first hurdle you might encounter with your KitchenAid mixer is the pesky cord. But don’t worry, Stephanie has a neat trick! Use a command strip attached directly to the mixer itself. This way, the cord moves along with the mixer, making it much more convenient and less of a nuisance. It’s a small change, but it makes a world of difference! 🌟

2. Beater Storage 🗄️

The KitchenAid mixer comes with three beaters, each with its own purpose. Stephanie suggests hanging them on command hooks attached to the inside of a cabinet door. This keeps them easily accessible and neatly out of the way. No more rummaging through drawers to find the right beater! 🙌

3. Homemade Butter 🧈

Your KitchenAid mixer can turn you into an artisan butter maker! Just add whipping cream and a pinch of salt to the mixer, then let it do its magic. Blend until it starts splashing buttermilk, then drain it off. Blend a bit more, drain again, and voila! You have homemade butter. It’s a fun and satisfying process, and the result is absolutely delicious! 🍞

4. Effortless Meat Shredding 🍗

Your KitchenAid mixer can also be your secret weapon when it comes to shredding meat, such as chicken or turkey. Simply switch out the beater to the metal one, add your cooked meat, and shred away! It’s fast, efficient, and saves you from the tedious task of hand shredding. 🌮

5. Cheese Shredding Made Easy 🧀

Last but not least, your KitchenAid mixer can be a lifesaver when it comes to shredding cheese. If you often buy large blocks of cheese, consider getting a shredder attachment for your mixer. It’s a game-changer that saves you from the time-consuming task of hand shredding. Plus, who doesn’t love freshly shredded cheese? 🍕

We hope you found these tips helpful and that they inspire you to explore new ways to use your KitchenAid mixer. If you have any other KitchenAid tips or tricks, we’d love to hear them. Join our vibrant community on Facebook and share your insights. We’re always looking for new ways to make the most of our kitchen tools. 🎉

Happy cooking, everyone! 🍽️

Posted on Leave a comment

Secret Tips for Aamras, Aamrakhand, and Pooris with Chef Ranveer Brar

Mango, the king of fruits, is not just a fruit in India, it’s a cultural phenomenon. Celebrated across the country in numerous delightful dishes, mangoes add a unique flavor and richness that is unmatched. Today, we’re going to explore three such dishes – Aamras, Aamrakhand, and Pooris, based on the engaging video by Chef Ranveer Brar on his YouTube channel.

Aamras: The Sweet Mango Pulp 🥭

Aamras is a popular Indian dessert made from the pulp of ripe mangoes. The name ‘Aamras’ literally translates to ‘mango juice’. It is a simple yet delicious dish that is loved by people of all ages. Here’s how you can prepare it:

  1. Select Your Mangoes: The first step is to choose the right mangoes. Chef Ranveer suggests using a mix of mango varieties for a balanced flavor. Pro Tip: if you’re using 6 Kesar or Chaunsa mangoes, add 2 Alphonso mangoes to it. The sweetness and aroma of Alphonso mangoes complement the taste of other varieties.
  2. Prepare the Pulp: Peel the mangoes and dice them into small cubes. Blend the mango cubes with some sugar to make a smooth pulp. The pulp should be thick and creamy.
  3. Preserve the Aamras: Another Pro Tip, inspired by Gujarati’s trick to preserve Aamras for a long time is to submerge the mango seeds into the Aamras. This way, you can freeze it and enjoy it even after a year!

Aamrakhand: The Mango-infused Shrikhand 🍨

Shrikhand is a traditional Indian sweet dish made from strained yogurt. Aamrakhand is a variant of Shrikhand, where mango pulp is added to the yogurt. It’s a perfect summer dessert that combines the creaminess of yogurt with the sweetness of mangoes. Here’s how you can prepare it:

  1. Prepare the Hung Curd: Hang the curd in a muslin cloth overnight to drain all the liquid. The resulting product should be similar to cottage cheese.
  2. Mix the Ingredients: Add some sugar and prepared Aamras to the hung curd. Mix it thoroughly with your hand until it becomes fluffy. The key is to mix it well so that the sugar is completely dissolved and the mixture becomes light and airy.
  3. Add Saffron: Add some saffron strands for an enhanced flavor. However, avoid adding cardamom powder or nutmeg powder as they can overpower the delicate flavor of mango.

Pooris: The Perfect Accompaniment 🍽️

Pooris are deep-fried bread made from unleavened wheat flour. They are the perfect accompaniment to Aamras and Aamrakhand. Here’s how you can prepare them:

  1. Prepare the Dough: Make a soft dough from wheat flour. The dough should be kneaded well so that the pooris puff up nicely when fried.
  2. Roll and Fry: Roll out small, round pooris from the dough. Deep fry the pooris in hot oil until they puff up and turn golden brown. The oil should be hot enough so that the pooris puff up immediately as they are dropped in the oil.

Remember, if you don’t prefer deep-fried food, you can pair Aamras and Aamrakhand with chapatis as well!

Embrace the Diversity of Mangoes 🌍

India is a land of diverse mango varieties. Each state has its own favorite variety – Dasheri in Lucknow, Alphonso in Mumbai, Kesar in Surat, and Langra in Moradabad. Embrace this diversity and try out different types of mangoes this season!

And remember, as Chef Ranveer Brar says, “Every time is mango time!” So, go ahead and enjoy the delight of the mango season to its fullest!

Join the Community 🤝

For more mango recipes like mango phirni and various other mango dishes, check out Chef Ranveer Brar’s YouTube channel. Also, join our secret group on Facebook, Eatlo to share your own recipes, experiences, and love for mangoes!

Remember, the joy of cooking is in the process, not just the end result. So, have fun experimenting with these recipes and enjoy the delicious outcomes!