
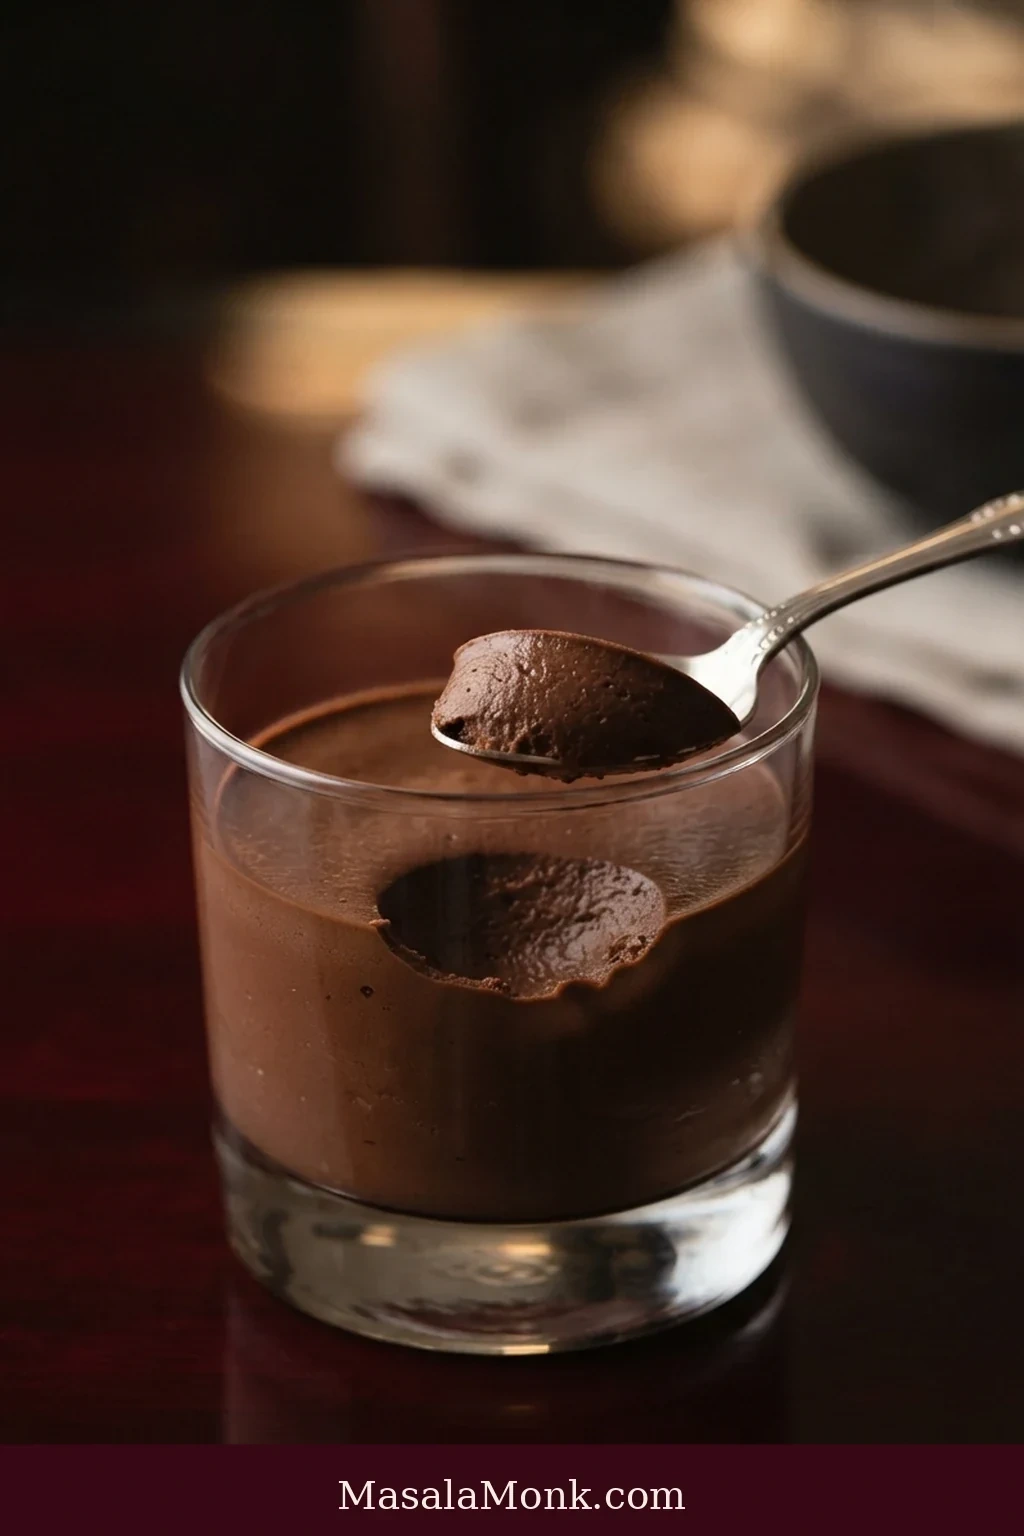
A good chocolate mousse feels richer than its weight suggests. The spoon slips easily through the cool, silky mousse, and inside you can still see fine air pockets rather than the solid interior of ganache or truffle filling. It tastes deeply of chocolate, yet the texture stays light enough that another spoonful feels entirely reasonable.
The ingredient list is short. Most problems happen when the ingredients meet: the yolks can overcook, the chocolate can cool into a thick paste, and the whipped cream can lose its air if the mixture takes too much work to combine.
This version uses cooked egg yolks for richness and whipped cream for lift. There are no raw eggs in the finished mousse, no separate egg-white meringue and no gelatin. It sounds more technical written down than it feels at the stove: make a cooked chocolate base, whip the cream, combine them in two stages, then chill.
Three Checkpoints to Watch
You do not need to memorize a long list of pastry rules. Keep an eye on three things as you work:
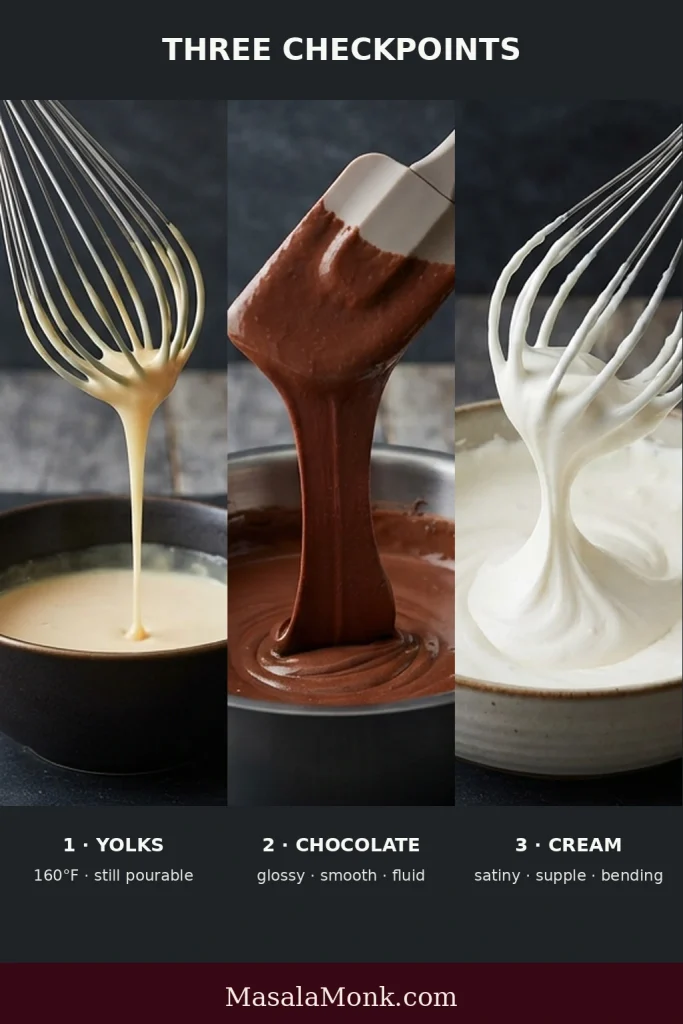
- Yolk base: it reaches 160°F / 71°C, thickens slightly and remains pourable.
- Chocolate: it becomes smooth and glossy and still flows freely when the cream is ready to go in.
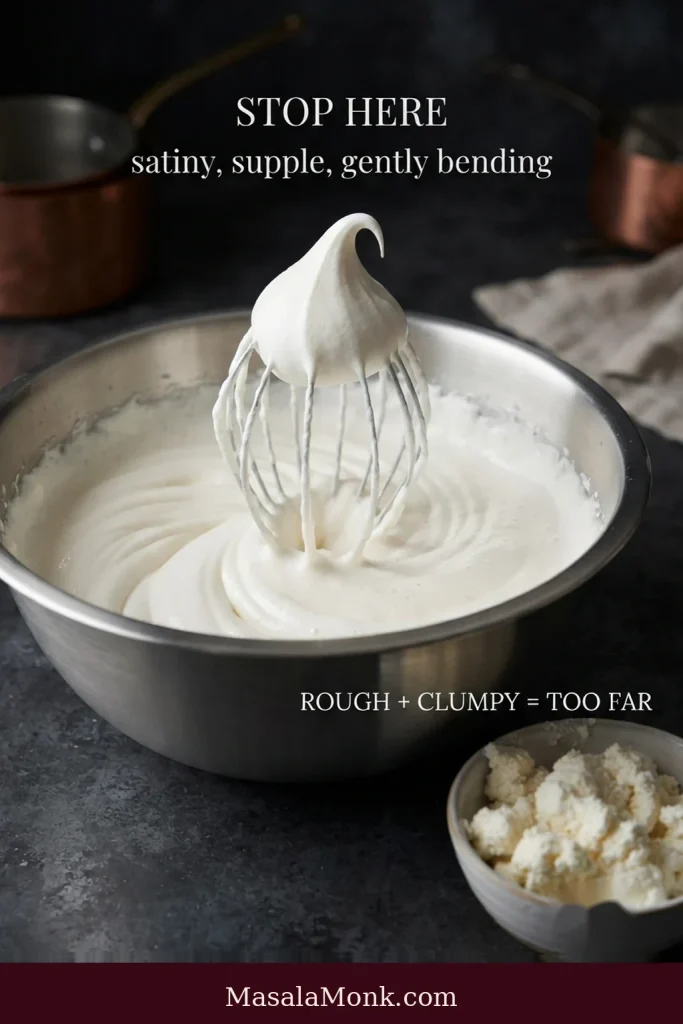
- Whipped cream: it holds a gently bending peak while the surface remains smooth and supple.
That’s the whole control system. Everything else is ordinary mixing, whipping, folding and chilling. If one stage looks wrong, fix it before adding the next component.
Chocolate Mousse Recipe
Rich, Silky Chocolate Mousse
A rich chocolate mousse made with a cooked egg-yolk base and whipped cream. It sets softly in individual glasses, with deep chocolate flavor and enough air to keep the texture light on the spoon.
Equipment
- Small saucepan
- Medium heatproof bowl
- Whisk
- Fine-mesh strainer
- Electric hand mixer or stand mixer
- Flexible silicone spatula
- Instant-read thermometer
- Six small dessert glasses or ramekins
Ingredients
- 6 oz / 170 g semisweet or bittersweet chocolate, preferably 60–66% cacao, finely chopped
- 3 large egg yolks
- 2 tablespoons + 2 teaspoons granulated sugar (about 33 g)
- ½ cup / 120 ml heavy cream or whipping cream, for the yolk base
- 1 cup / 240 ml cold heavy cream or whipping cream, ideally around 35–36% fat, for whipping
- 1 teaspoon / 5 ml vanilla extract
- ⅛ teaspoon fine salt
- ½ teaspoon instant espresso powder, optional
Method
Prepare the Chocolate Base
- Set up first. Put the chopped chocolate in the heatproof bowl. Measure the cream into its two portions and set out the strainer, spatula, thermometer, mixer and serving glasses. Once the chocolate base is made, it will keep changing as it cools, so have everything within reach.
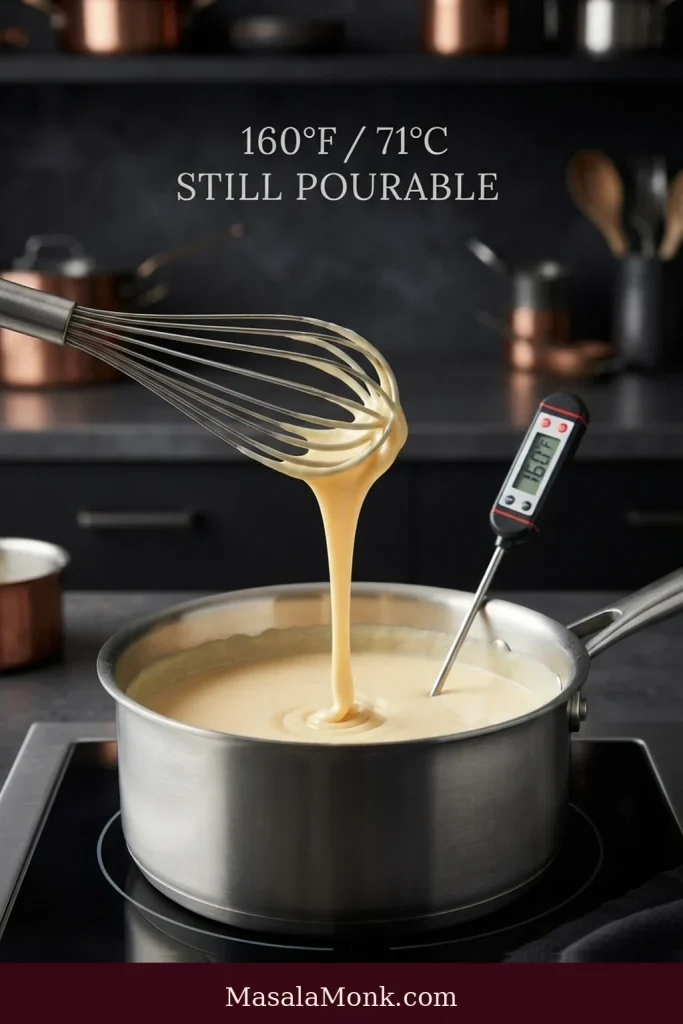
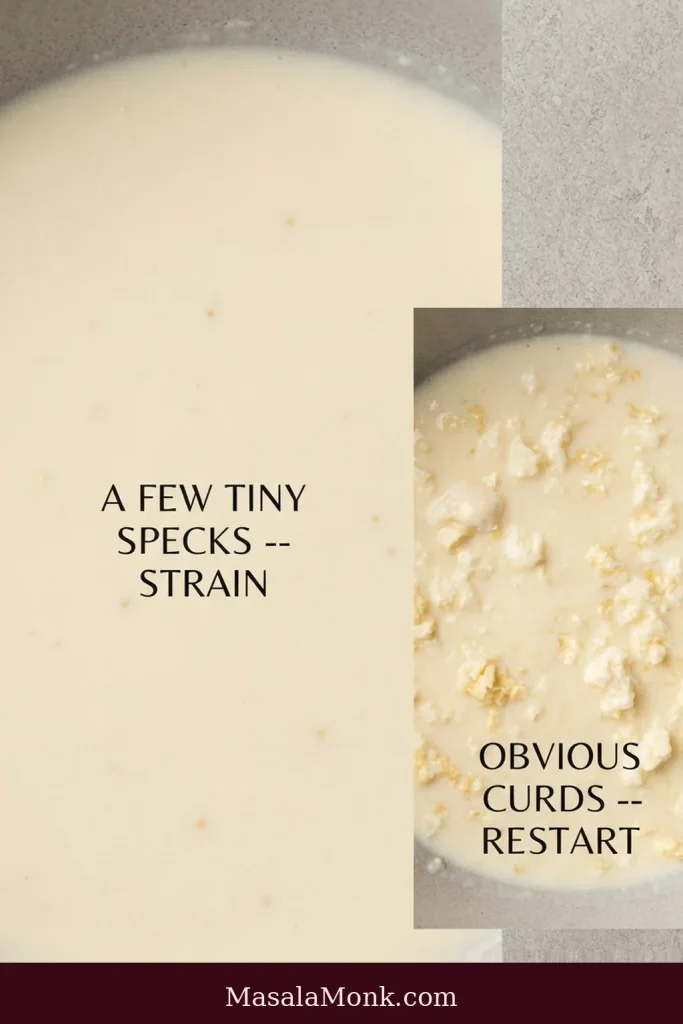
- Cook and check the yolk base. Whisk the egg yolks, sugar and ½ cup / 120 ml cream together in the saucepan before turning on the heat. Cook over medium-low heat, whisking constantly and reaching into the corners, until the mixture reaches 160°F / 71°C. Keep the thermometer tip in the mixture rather than touching the pan. It should thicken slightly but remain pourable. A few tiny cooked specks can be strained out; obvious curds or visibly scrambled egg mean it is better to restart. For a visual guide, see how to cook the yolk base gently and how to distinguish specks from curds.
- Strain and emulsify. Pour the usable yolk mixture through the fine-mesh strainer directly over the chopped chocolate. Leave for about 1 minute, then stir in small circles at the center, gradually widening them as the mixture comes together. Stop when it is smooth and glossy. Stir in the vanilla, salt and espresso powder, if using. If the chocolate looks oily, use the broken-emulsion guidance below before adding whipped cream.
Bring the Base to Folding Temperature
- Check the chocolate’s temperature. Around 95–104°F / 35–40°C is a useful working range for this style of mousse. Let a hotter base cool, stirring occasionally. When it is in range and flows easily from the spatula, carry on; there is no need to wait just to follow a timer. A base that holds a mound or thickens around the edge has cooled too far. Compare the signs in the chocolate texture guide before folding.
- Whip the cold cream. As the chocolate approaches its working range, beat the remaining cream until the whisk leaves clear tracks and a lifted peak bends slightly at the tip. Stop while the surface is smooth and satiny. A slightly softer peak is easier to incorporate than dry, over-whipped cream. See the whipped-cream stop point if you are unsure what the peak should look like.
Fold the Remaining Cream
- Loosen the chocolate. Add roughly one-third of the whipped cream. Don’t worry about dividing it exactly; this first scoop lightens the dense base. Stir or whisk it in confidently. Some air will be lost, and that is fine. The reason for this first addition is explained in Why the First Third Is Different.
- Fold in the rest. Add the remaining cream in two additions. Cut down through the center, sweep along the bottom, lift the chocolate over the cream and rotate the bowl. Stop once the color is even, then give the bottom one final sweep. You should not need to keep mixing once the white streaks have disappeared. See the folding explanation for the full movement and stop point.
Portion, Chill and Serve
- Portion and chill while soft. Divide the mousse among six dessert glasses. It should look aerated and spoonable. At this stage, it is supposed to be softer than the finished dessert. Cover without letting the covering touch the surface and refrigerate for at least 4 hours. Around 6 hours gives a fuller set; overnight works well, too. See why the mousse changes as it chills.
- Serve cool rather than icy cold. Let each portion stand at room temperature for about 10 minutes if you prefer a softer spoon texture and fuller chocolate aroma.
About this recipe: We developed this version by comparing established mousse ratios, professional chocolate techniques, food-safety guidance and problems home cooks commonly report. MasalaMonk has not independently kitchen-tested this exact formula, so the guidance is based on that research rather than our own test kitchen.
Use the recipe card above to get started. Below, the guide explains how to choose the chocolate, understand the ingredients and recognize the right texture as you work. You do not need to memorize it all before cooking; return to the relevant section when a question comes up.
In This Guide
Choosing Ingredients and Controlling Texture
- Three Checkpoints to Watch
- Choosing Chocolate for This Mousse
- Get the Cream Right Before You Start
- Read the Mousse Before You Continue
- Keep the Chocolate Smooth and Fluid
- Why the First Third Is Different
- Soft Going In, Set Coming Out
Troubleshooting and Serving
Choosing Chocolate for This Mousse
For this recipe, choose a semisweet or bittersweet chocolate bar around 60–66% cacao. It gives the mousse a strong chocolate flavor and a useful starting point for its chilled texture.
The percentage on the wrapper is a shopping guide, not a complete description of the chocolate. Cocoa solids, cocoa butter and sugar all contribute to flavor and set, so two bars with the same cacao percentage can still behave differently.
A 70% bar can make excellent mousse, but with these proportions it is likely to taste darker and may set more firmly. Milk chocolate tends to produce a sweeter, softer mousse. White chocolate has a different balance and needs proportions designed specifically for it.
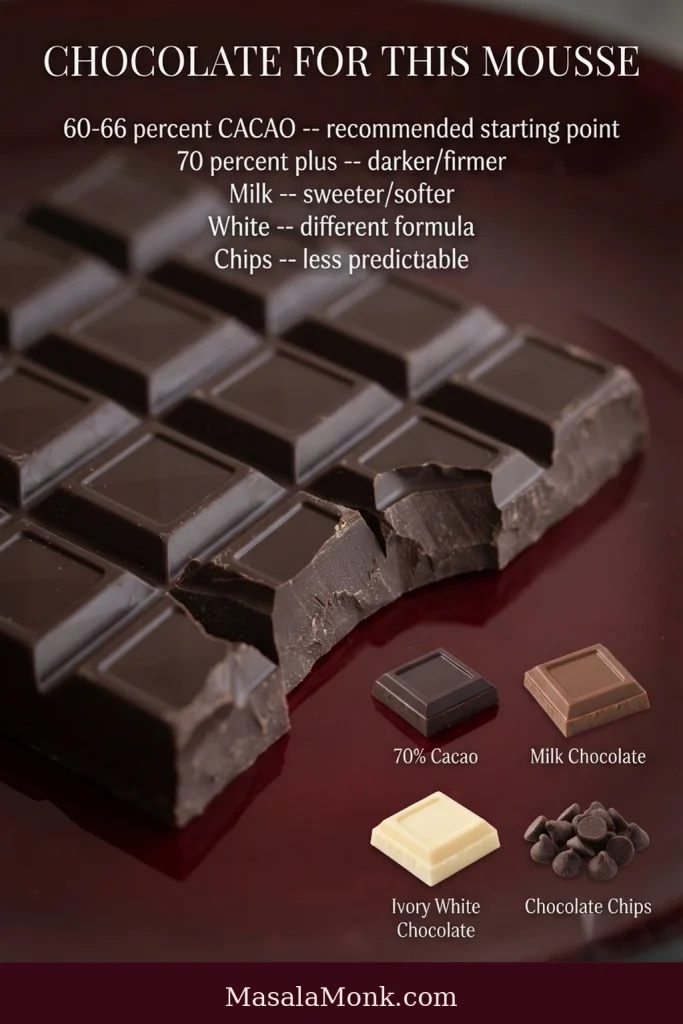
Only have chocolate chips? They may work, but they are not our preferred starting point for this formula because their composition and melt behavior vary by brand. A bar with a stated cacao percentage is the more predictable choice.
For a chocolate dessert that is deliberately dense and fudgy instead of aerated, our flourless chocolate cake heads in that direction.
Return to the recipe card · Check the texture cues
Get the Cream Right Before You Start
Use heavy cream or whipping cream that whips reliably, ideally around 35–36% fat. Cream names and fat levels vary by country; lighter cream may not hold the same stable foam. Aerosol whipped cream won’t replace the cream you whip and fold into this mousse.
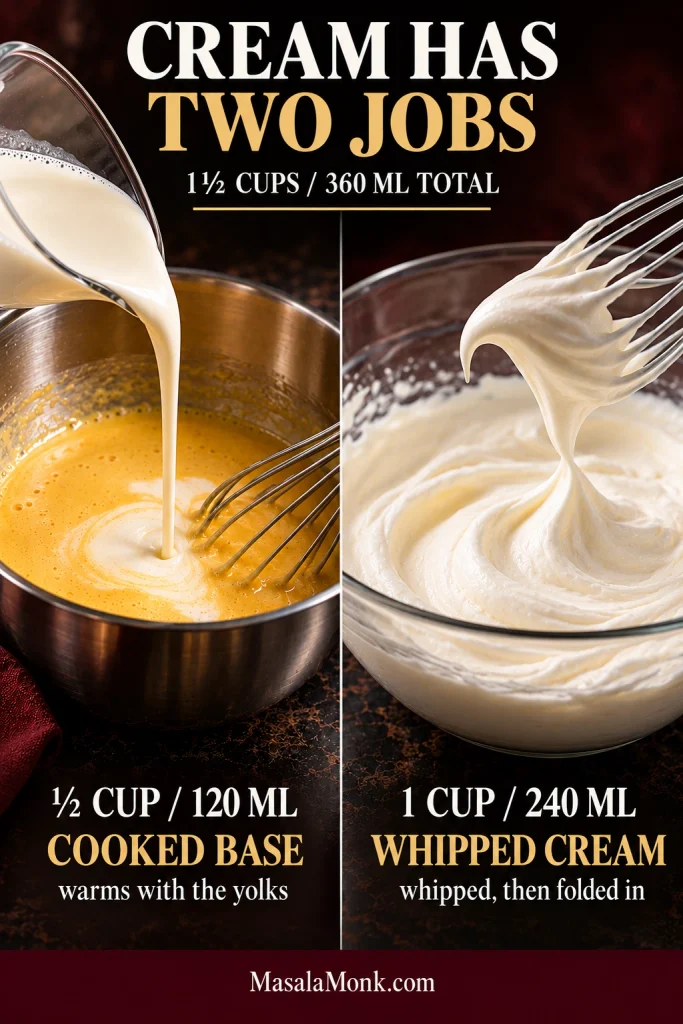
Use ½ cup / 120 ml of cream with the yolks and sugar to make the cooked base. The remaining 1 cup / 240 ml is whipped separately and folded in to carry air, so keep that portion cold until needed.
The yolks add richness and body, while the sugar balances the bitterness of the chocolate. Vanilla rounds out the flavor, salt keeps it from tasting flat, and the optional espresso powder deepens the chocolate note. Leave the espresso out if you prefer; the mousse will set the same way.
Return to the recipe card · Review the three checkpoints
Read the Mousse Before You Continue
The thermometer gives you a clear endpoint for the yolk base. For the later stages, use the mixture’s movement, surface and consistency to judge whether it is ready for the next step.
| Ready State | What to Look For |
|---|---|
| Yolk base | At 160°F / 71°C, slightly thickened but still pourable |
| Chocolate base | Glossy, uniform and flowing from the spatula |
| Whipped cream | Clear whisk tracks and a peak that bends softly at the tip |
| Folded mousse | Even in color, aerated and soft enough to spoon into glasses |
Cook the Yolk Base Gently
The 160°F / 71°C endpoint is the important checkpoint for this cooked egg mixture. It should thicken slightly, but it does not need to become a thick pastry custard. Stop cooking at the stated endpoint rather than chasing a heavier coating on the spoon.
A few tiny cooked specks are not a disaster; the strainer will catch them. Larger curds mean the yolks have gone too far. Once the mixture is visibly scrambled, restarting gives you a much better chance of a silky result.
The FDA’s egg-safety guidance recommends heating egg-containing mixtures used in foods such as chocolate mousse to 160°F / 71°C when adapting a raw-egg preparation.
Keep the Chocolate Smooth and Fluid
Two problems can look similar but need different responses. An oily ring points to separation; a smooth mixture that is turning thick usually means it has cooled too far.
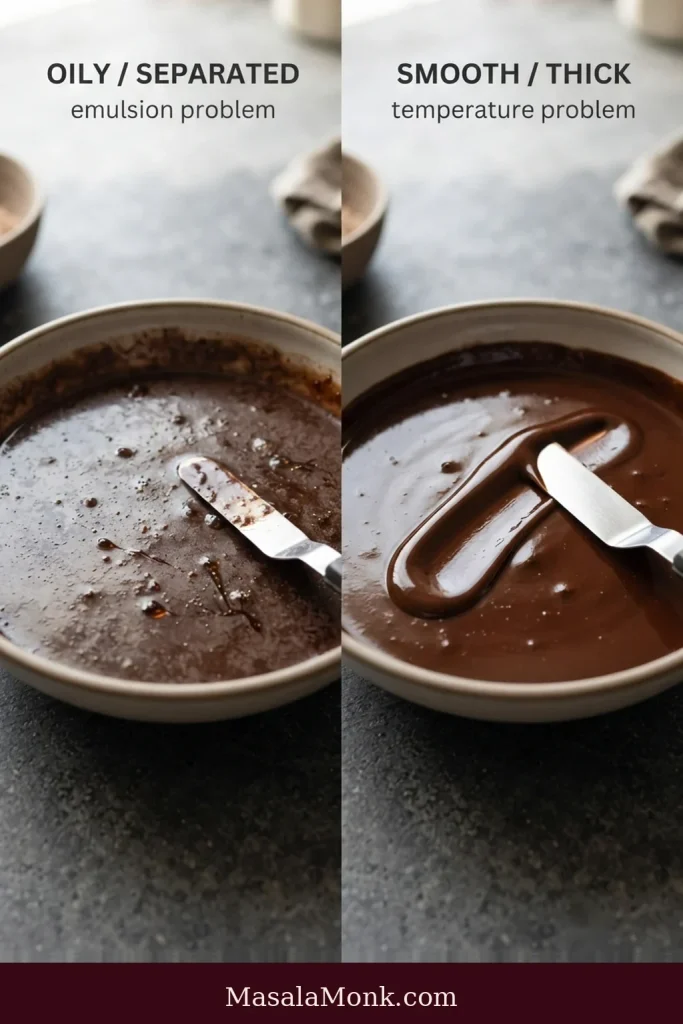
If the base looks oily, stop before adding whipped cream and follow the rescue steps in the troubleshooting section. A smooth but thickening base is different; gentle warming may be enough to restore its flow.
Around 95–104°F / 35–40°C is a useful working range. More importantly, the chocolate should flow from the spatula without holding a mound or thickening around the bowl.
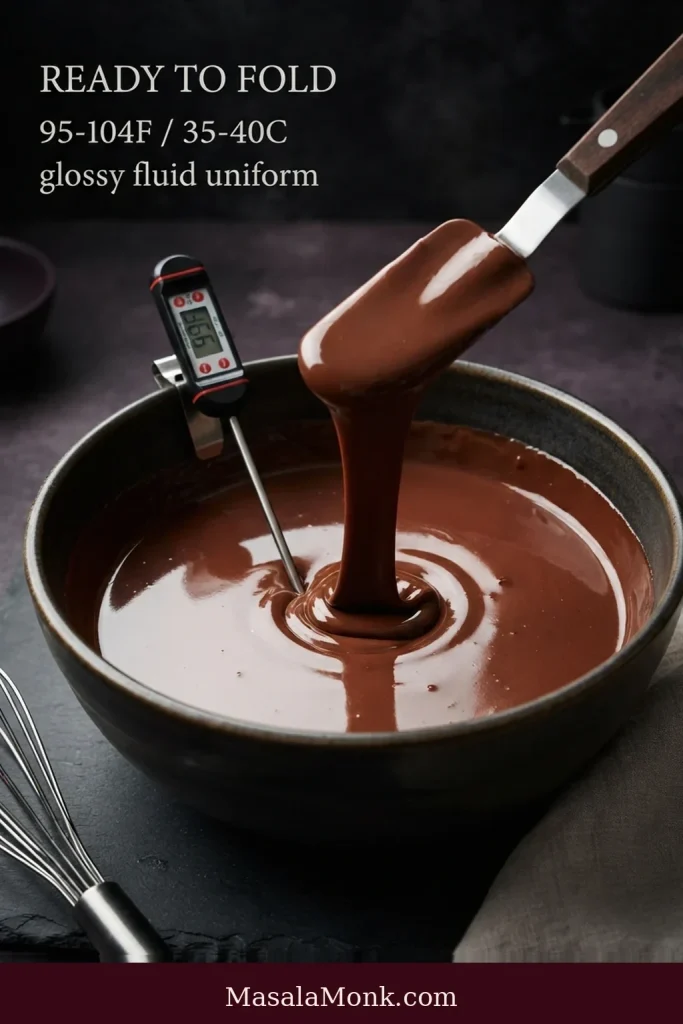
Callebaut’s professional mousse guidance uses a similar range for crème-anglaise-based mousse. If the chocolate starts setting before cooler cream is added, small lumps can form.
When the base stays fluid, the cream incorporates with fewer folds. That helps preserve the fine bubbles that keep the finished mousse light rather than dense.
Why the First Third Is Different
“Fold gently” is sensible advice, but it is not the best way to start this particular mixture. The chocolate base is much denser than whipped cream. Trying to combine them with tiny, cautious folds from the beginning can mean more mixing by the time you’re finished.
Stir roughly one-third of the whipped cream into the chocolate with some confidence. This first addition loosens the dense base. You’ll lose a little air, and that’s fine; the remaining cream will be much easier to fold in.
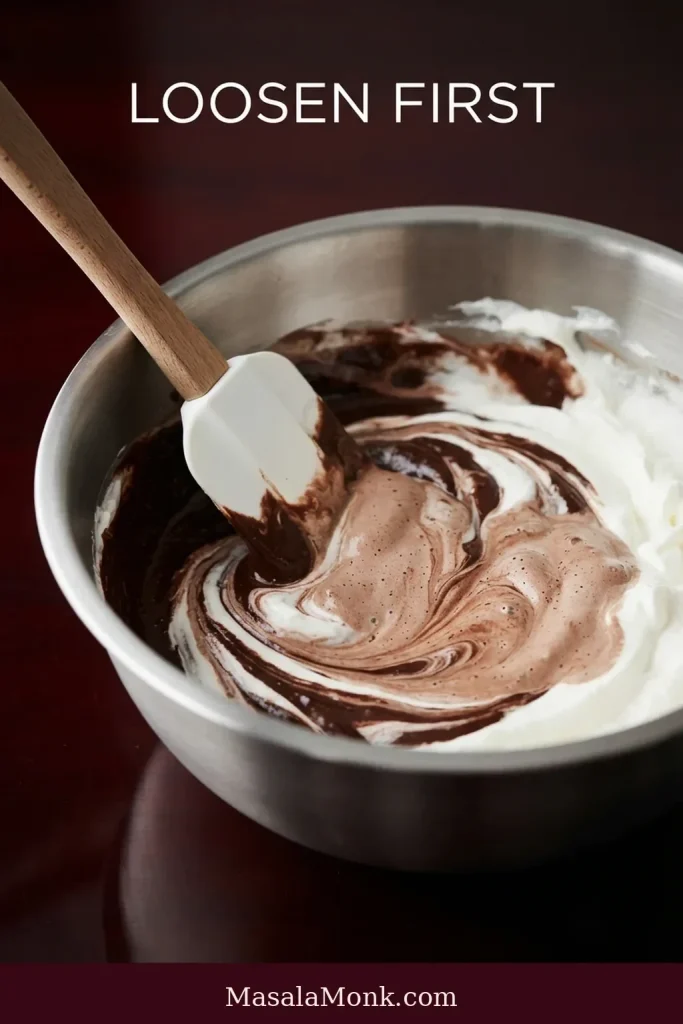
Add the remaining cream in two additions. Cut down through the center, sweep along the bottom, lift the chocolate over the cream and rotate the bowl. Stop when the white streaks have disappeared and the mixture is even in color. You should feel the mixture becoming easier to fold as the dense chocolate lightens.
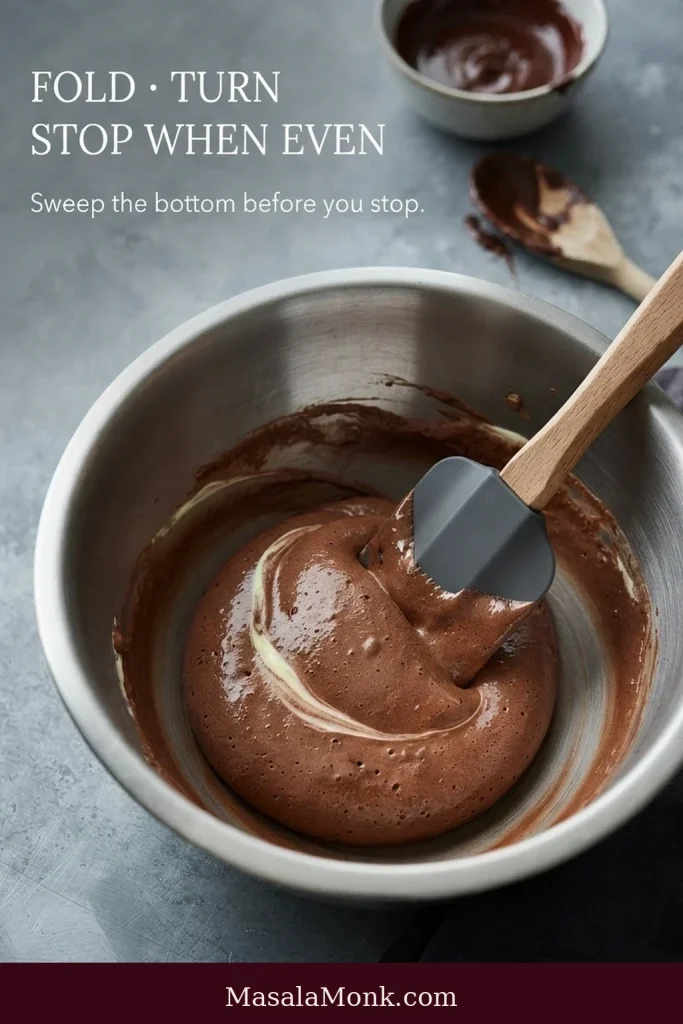
Loosen first. Fold second.
Return to the recipe card · Find a troubleshooting fix
Soft Going In, Set Coming Out
Fresh mousse should be soft when it goes into the refrigerator. If it looks softer than the dessert you pictured serving, that is normal. The refrigerator still has work to do.
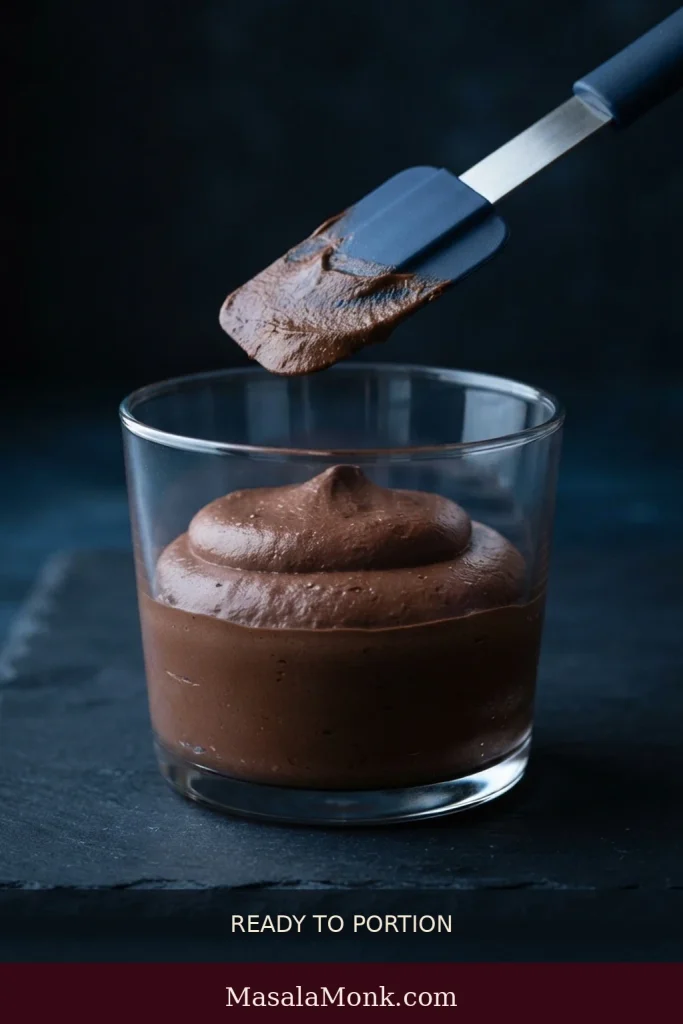
As it chills, the cocoa butter in the chocolate firms and helps the mousse hold its shape. Four hours is the minimum target here; around six gives a fuller set. Overnight works especially well when dessert needs to be ready before guests arrive.
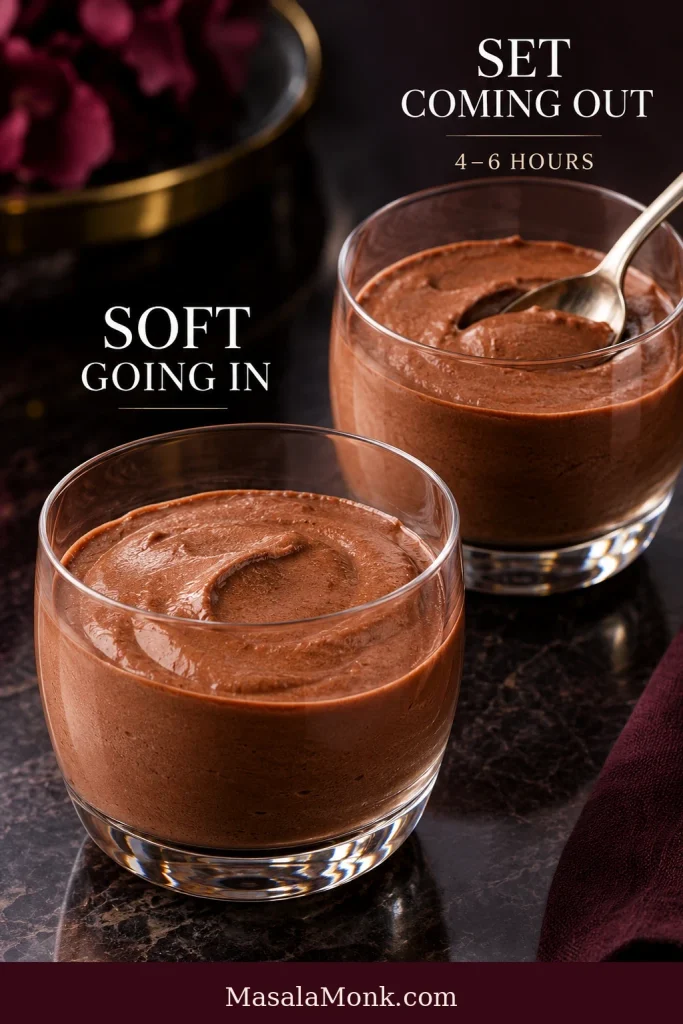
The following day the mousse may feel slightly firmer. Letting it stand for about 10 minutes before serving softens the spoon texture and brings out more of the chocolate aroma.
Chocolate Mousse Troubleshooting
When a mousse goes wrong, ask one question first: when did the texture change? A grainy base before the cream goes in points to a different problem from a smooth base that develops flecks when it meets cold cream.
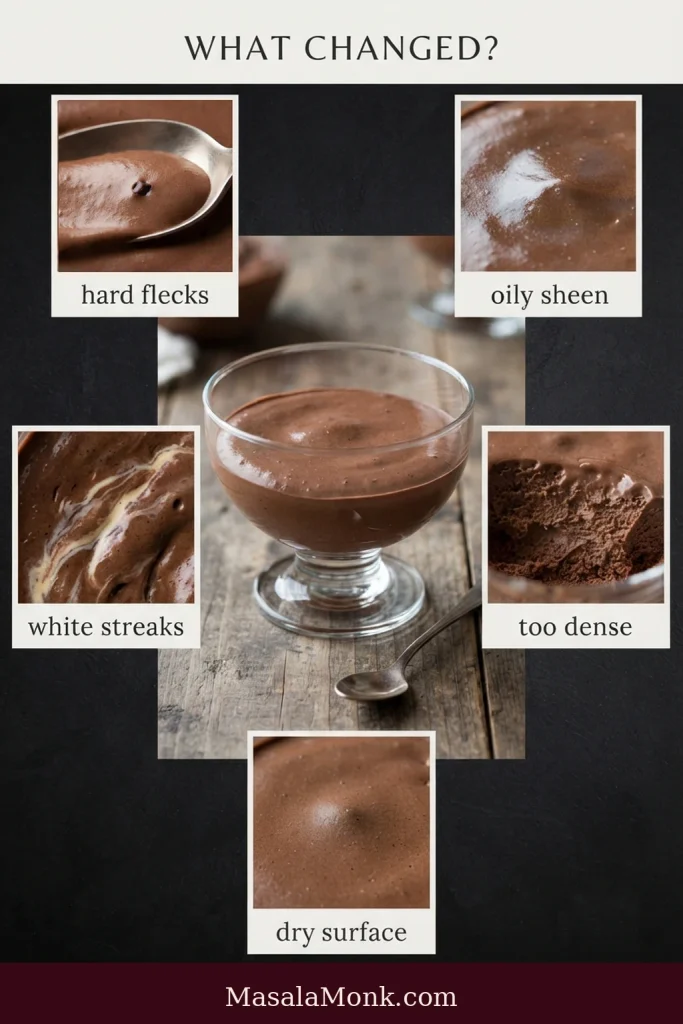
| Problem | Likely Cause | First Move |
|---|---|---|
| A few egg specks in the cooked base | Small amount of overcooking | Strain before adding chocolate |
| Oily chocolate base | Separation in the emulsion | Try the limited rescue below |
| Chocolate turns into thick paste | Base cooled too far | Warm gently until fluid |
| Firm flecks appear during folding | Chocolate too cool when cream entered | Keep the base fluid next time |
| Dense mousse | Too much mixing or a difficult fold | Check the base and cream peaks |
| Still very soft after chilling | Insufficient chilling, weak cream peaks or a different chocolate | Check the stages before adding a thickener |
| Too firm to spoon easily | Chocolate choice or serving temperature | Let it stand briefly before serving |
| White streaks or a heavy layer underneath | Incomplete final fold | Sweep the bottom before portioning |
| Dry surface | Uncovered storage | Cover before chilling |
Why Is My Chocolate Mousse Grainy?
Tiny firm flecks that appear only when the cold cream enters usually point to chocolate that had cooled too far. Some cocoa butter began setting as the temperature dropped.
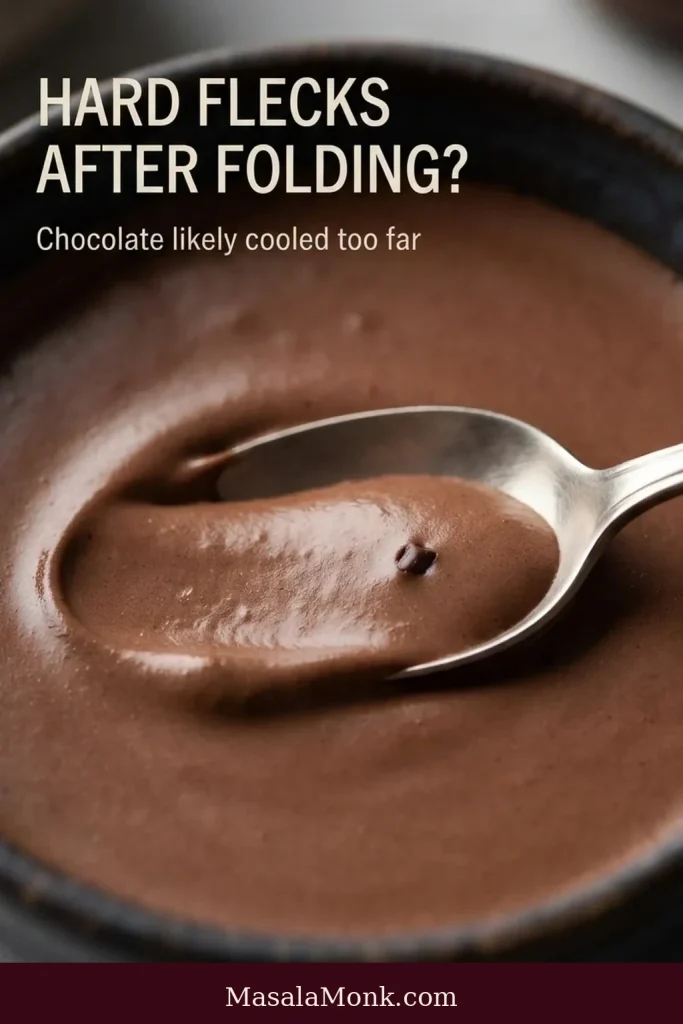
Rough whipped cream creates a different kind of graininess. If the chocolate base was already oily before the cream entered, the emulsion was unstable from the start. The timing helps tell these problems apart.
Once hard flecks are scattered through the finished mousse, beating harder usually knocks out more air than it saves texture. This problem is much easier to prevent than to repair.
Fixing an Oily Chocolate Base
Stop before adding whipped cream. Keep the bowl gently warm and stir firmly from the center outward. If needed, take up to 1 tablespoon / 15 ml from the measured cream reserved for whipping, warm it and add 1 teaspoon / 5 ml at a time. Stir after each addition and stop as soon as the mixture becomes smooth and uniform again.
Use the cream that remains for whipping; a small reduction is preferable to adding extra unmeasured liquid. If the base stays oily after the measured tablespoon, restarting is the more reliable choice. The rescue is an attempt, not a guarantee.
When Chocolate Thickens Before Folding
The base has cooled too far. Warm it gently, stirring, until it flows from the spatula again. Take it off the heat as soon as that happens; you only need to restore fluidity.
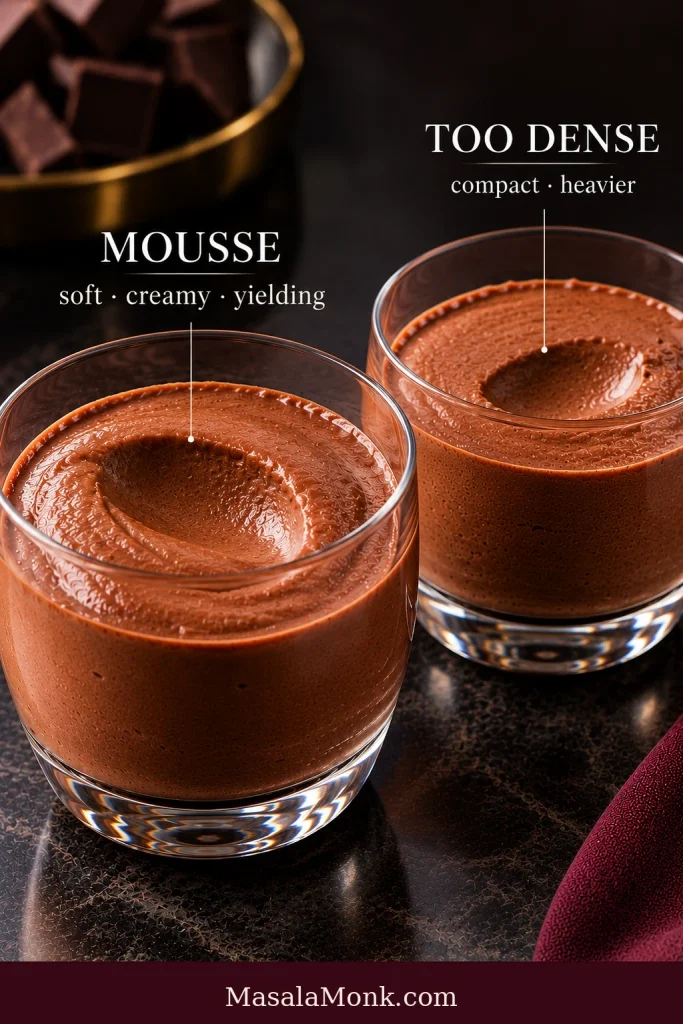
What Makes Chocolate Mousse Dense?
A cold, thick base takes more work to combine with whipped cream, and that extra mixing costs air. Very stiff cream can cause the same problem because it resists folding.
Next time, make sure the chocolate is still fluid before the cream goes in. Use the first third to loosen the base, then fold the rest only until the mixture is even in color and no heavy chocolate remains at the bottom.
Why Won’t My Chocolate Mousse Set?
First give it the full chilling time. Fresh mousse is supposed to be soft before refrigeration, and a batch that has chilled for only an hour is too early to judge.
If it is still unusually loose after several hours, check what you can observe: did the cream hold a soft peak, did you use a chocolate close to the recommended 60–66% range, and has the mousse had the full chill? Those clues are more useful than adding gelatin without understanding what happened.
When Chocolate Mousse Feels Too Firm
Give it about 10 minutes out of the refrigerator before deciding something is wrong. Chocolate naturally firms as it sits cold.
After a short rest, test the mousse with a small spoon. A smooth, rounded trail is the texture to look for; a dry, ragged track suggests a different problem.
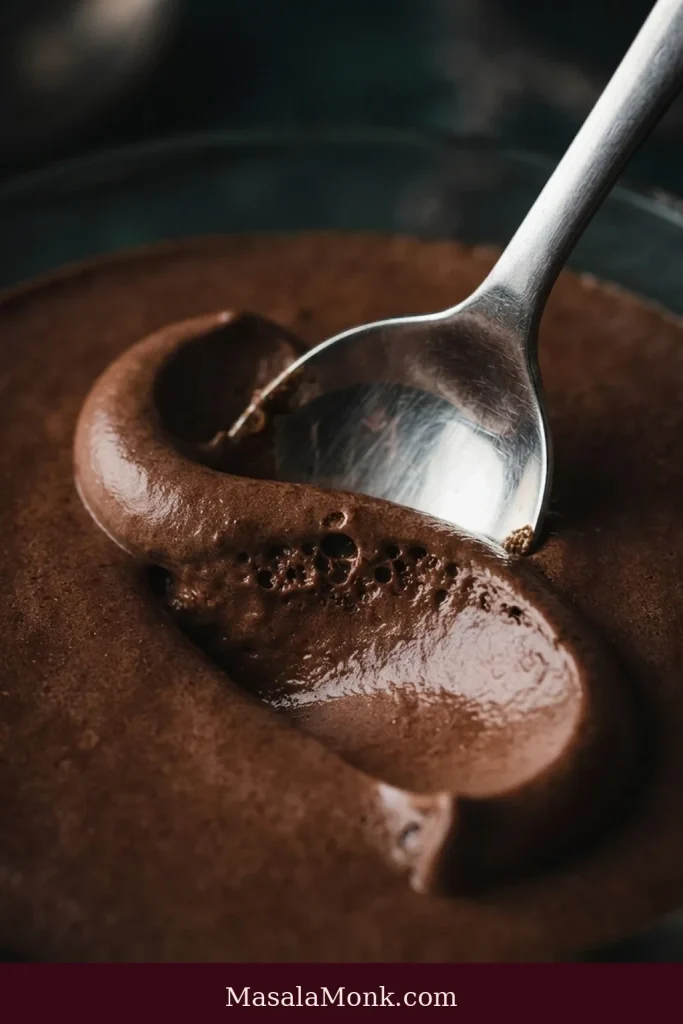
If the mousse repeatedly lands closer to truffle filling than spoon-soft mousse, look at the chocolate. Cacao percentage is a useful guide, but brands with the same percentage can have different compositions and behave differently in a recipe.
Return to the recipe card · Back to the top
Can You Adapt This Recipe?
Can I Make Chocolate Mousse Without Eggs?
Yes. A common eggless method combines chocolate or ganache with whipped cream. The result is usually closer to aerated ganache than the cooked-yolk mousse here, so it needs a formula of its own rather than simply leaving out the yolks.
Our avocado chocolate mousse offers another route if you want a genuinely different eggless dessert.
Can I Use Cocoa Powder Instead of Chocolate?
Not as a direct swap. Cocoa powder can make excellent mousse, but replacing the chocolate bar also removes its cocoa butter, which helps this recipe set. A cocoa-powder version needs its liquid, fat and structure balanced around cocoa from the beginning.
How Can I Add Other Flavors?
Vanilla and a little espresso powder are already accounted for. Finely grated orange zest is another simple option because it adds aroma without adding much liquid.
Rum, Cointreau and coffee liqueur need more care. Extra liquid changes the balance, and we have not validated a universal liqueur quantity for this formula. A recipe developed around the flavoring is more reliable than adding a generous splash by eye. Fruit purées bring water and often acidity, so they are better handled in a mousse built around the fruit.
Using Chocolate Mousse in a Cake
This mousse is made to sit in a glass and give way easily to a spoon. Mousse inside a tall cake has a harder job: it may need to support layers, slice neatly and stay stable while the cake is assembled and served.
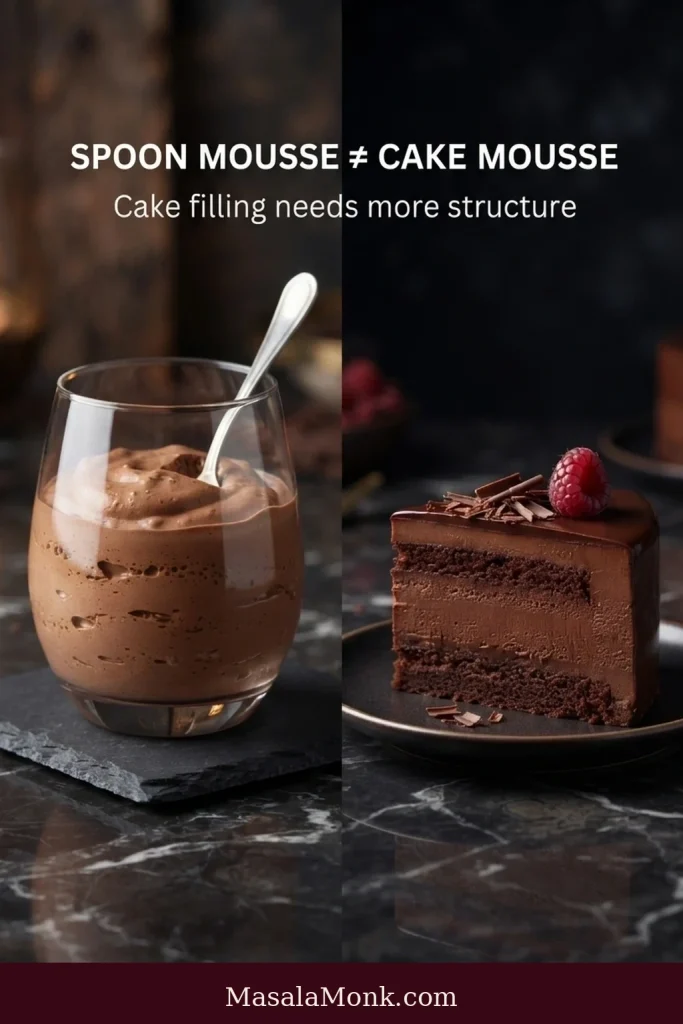
Those desserts may need different proportions or added stabilization. Gelatin is useful in some mousse cakes, entremets and moulded preparations, but it is unnecessary for the spoon mousse here because the chocolate firms as it chills.
For a conventional stackable layer cake, our chocolate cake recipe is designed to take filling and frosting cleanly.
We wouldn’t use this exact mousse as the structural filling for a tall mousse cake without adjusting it for that purpose.
Return to the recipe card · Back to the top
Scaling Chocolate Mousse for a Crowd
For a large dinner, make two normal batches instead of one enormous four-times batch. A huge bowl takes longer to fold, gives the chocolate more time to cool and makes it easier to leave a heavy layer at the bottom.
Weigh the ingredients when scaling and keep the same cooking and texture checkpoints. Simply multiplying the time on the stove will not help.
Plan on six servings per batch; the exact finished volume varies with how much air remains after whipping and folding.
Make Ahead, Storage and Serving
Chocolate mousse is an easy dessert to finish before dinner. Make it the evening before, cover the glasses and let the refrigerator do the rest.

Keep the portions covered so the surface does not dry into a firmer skin. For the best texture, aim to serve it within 24–48 hours. Keep the mousse refrigerated at 40°F / 4°C or below and use it within 3 days. As a perishable dairy-and-egg dessert, it should not sit at room temperature for more than 2 hours—or 1 hour when the temperature is above 90°F / 32°C. These refrigeration and room-temperature limits follow the FDA’s safe food-handling guidance.
A properly set spoonful should give easily rather than cut like a truffle. Inside, you should still see fine bubbles instead of a solid chocolate interior. On the tongue, it should feel silky first and soften quickly.
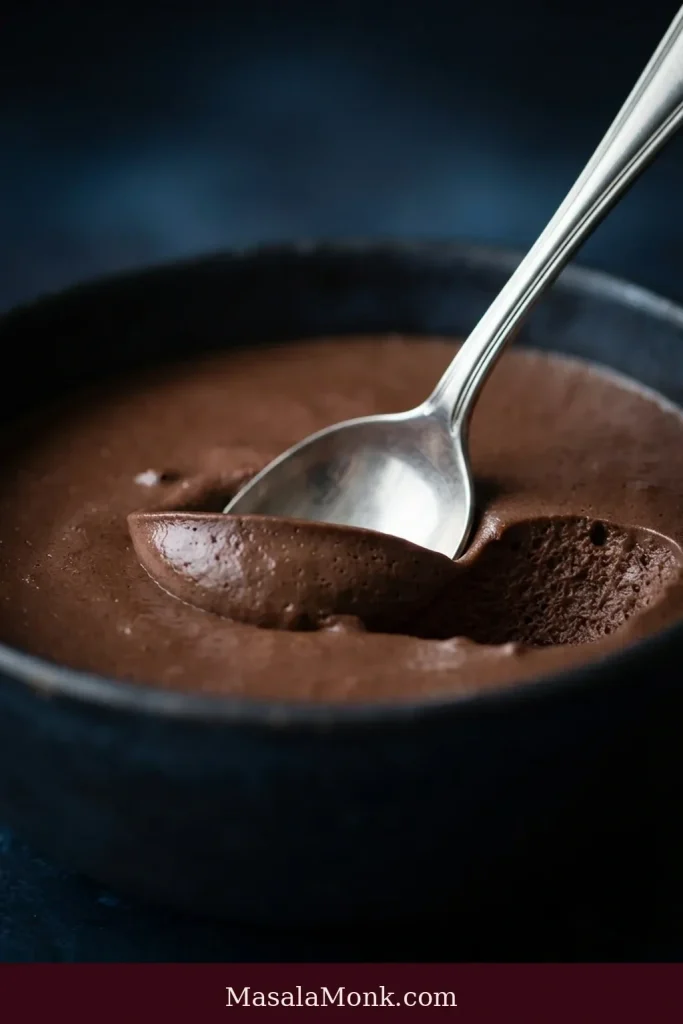
Serve it plain, or add a small spoonful of softly whipped cream, a few raspberries or strawberries, or a little shaved dark chocolate just before it reaches the table. Keep the garnish restrained; the mousse should still be the thing you taste first.
And when you want the opposite chocolate experience—warm rather than chilled, with a flowing center instead of an aerated set—our chocolate lava cakes take you there.








