
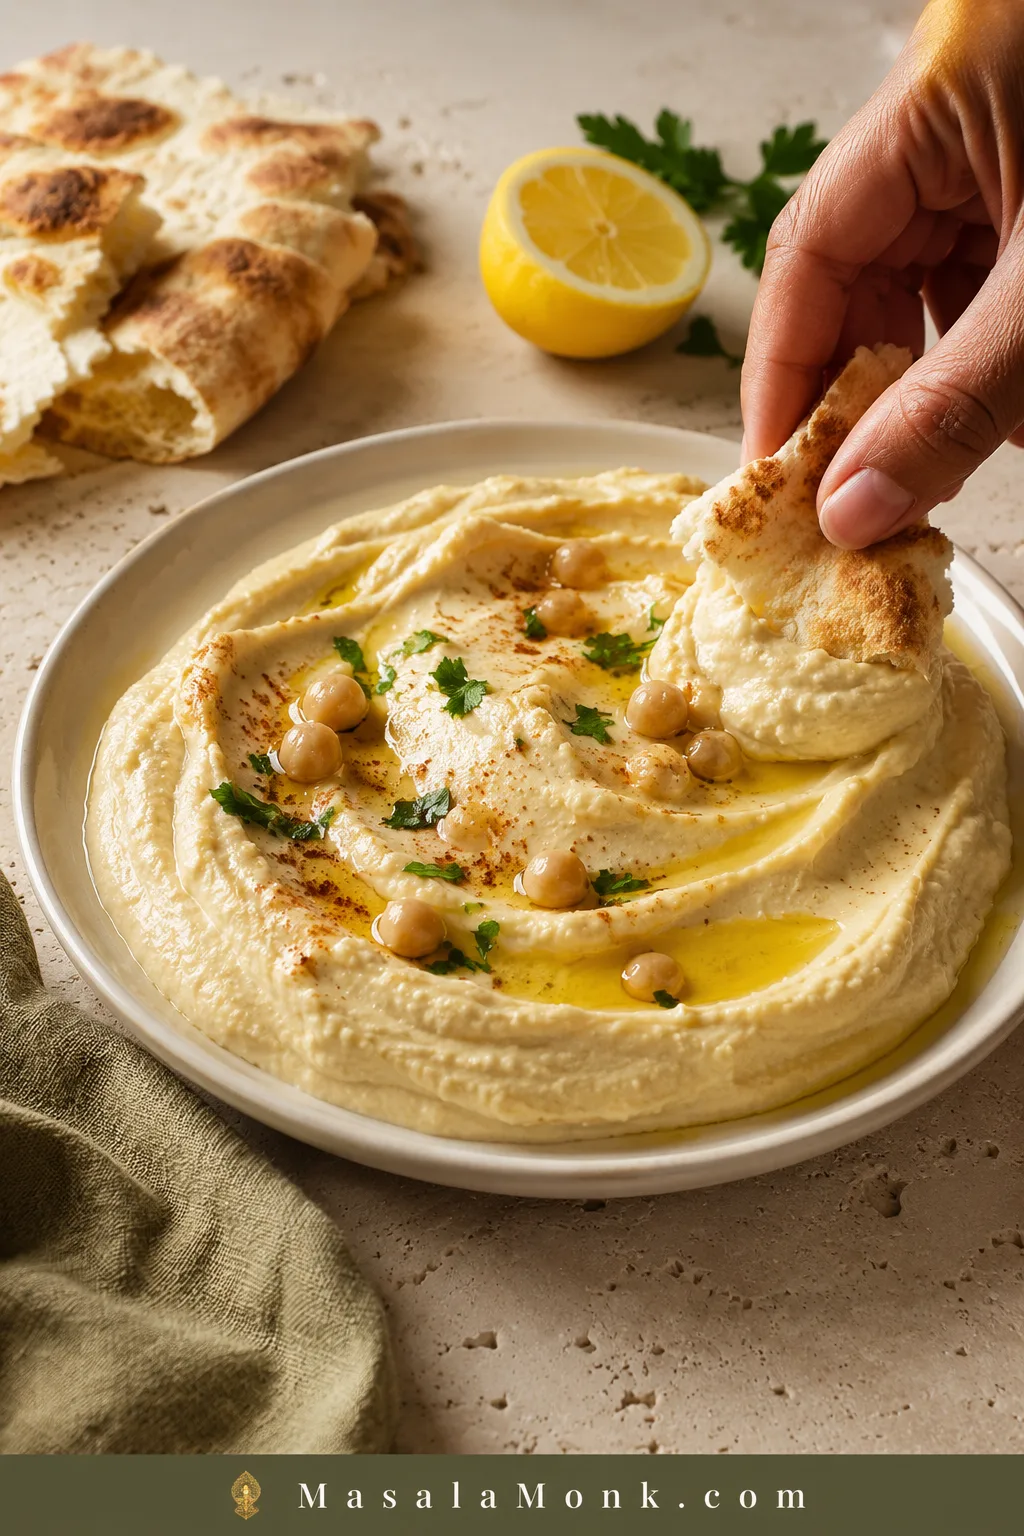
A good bowl of hummus without tahini should still feel generous. The spoon should leave a smooth trench, the surface should fold back softly, and the first bite should taste bright with lemon and garlic—not dry, sandy or strangely oily.
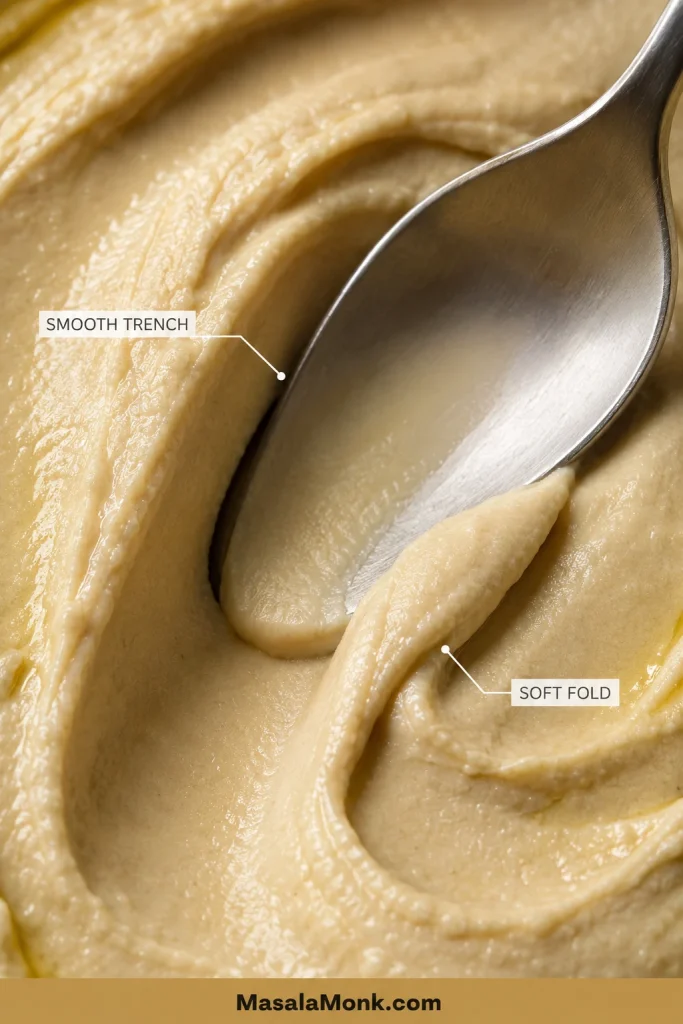
If your last tahini-free batch turned loose but somehow stayed grainy, adding more water was probably never going to fix it. Smoothness starts with the chickpeas themselves.
Tahini normally brings toasted sesame flavor, richness and body. Leave it out without adjusting the method and the chickpeas can become a heavy paste that never quite turns creamy. Fortunately, you do not need peanut butter, yogurt, seed butter or another specialty substitute to make the recipe work.
This homemade version is for days when the tahini jar is empty, tahini is difficult or expensive to find, you dislike its flavor or you need a dip made without sesame ingredients. It tastes lighter and more chickpea-forward than classic hummus, with the lemon and garlic coming through more clearly.
The MasalaMonk rule: softness decides whether the chickpeas can become creamy; liquid decides whether that creamy hummus ends up thick, spoonable or loose.
How Do You Make Hummus Creamy Without Tahini?
If you came here looking for a tahini substitute, the simplest answer may be the best one: you do not need one.
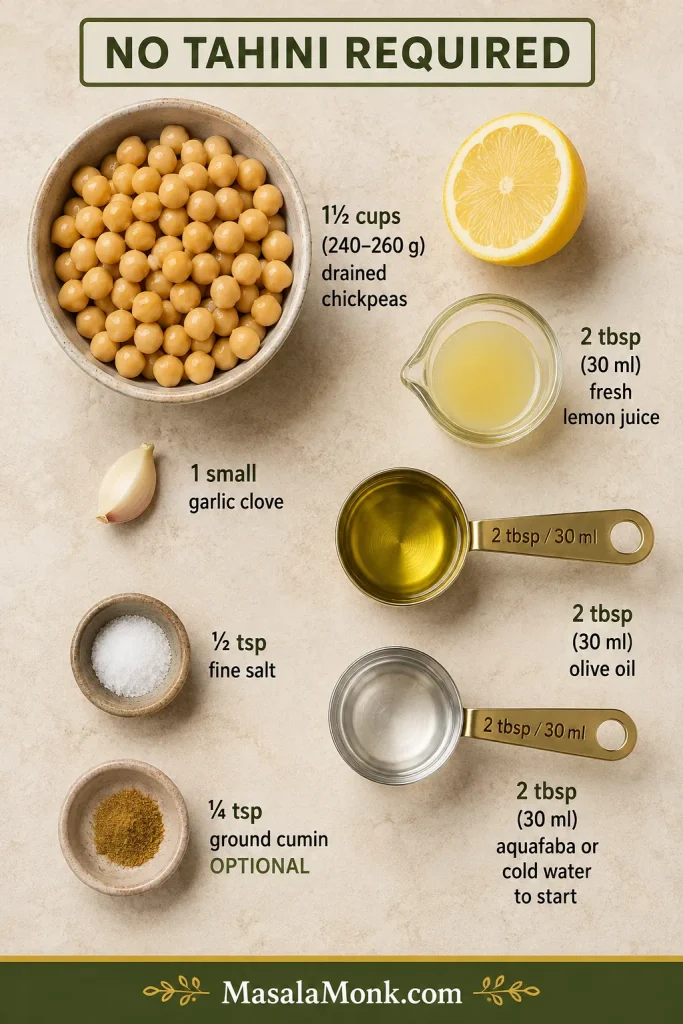
For one standard can, blend about 1½ cups (240–260 g) drained chickpeas with 2 tablespoons (30 ml) fresh lemon juice, 1 small garlic clove, ½ teaspoon fine salt, 2 tablespoons (30 ml) olive oil and 2 tablespoons (30 ml) reserved chickpea liquid or cold water.
Process for several minutes, stopping to scrape underneath the blade. Add more liquid only 1 tablespoon (15 ml) at a time. If a chickpea does not flatten easily between your fingers, simmer the drained chickpeas in fresh water before blending.
The hummus is ready when the mixture follows the blade in a soft wave and a spoon leaves a smooth ridge rather than a cracked or sandy trail.
Hummus Recipe Without Tahini
This base contains no tahini, sesame seeds or sesame oil. Chickpeas provide the body, olive oil adds restrained richness, and aquafaba or cold water lets you choose the final thickness.
Recipe at a glance
- Yield: about 1½ cups, depending on the final consistency
- Serves: 4–6 as a dip or spread
- Preparation: about 10 minutes
- Cooking: none when the canned chickpeas are already soft
- Total time: about 10 minutes, or roughly 15–30 minutes when the chickpeas need softening
- Dietary notes: vegan; no tahini, sesame ingredients, dairy, peanuts or tree nuts are used in the base recipe. No gluten-containing ingredients are added, but check packaged ingredients when needed.
Equipment
A food processor is the easiest option for a thick, controlled texture. A full-size blender, personal blender, Indian mixer-grinder or stick blender can also work with a few adjustments.
Ingredients
- Chickpeas: 1 can, 14–15 oz (400–425 g) before draining, usually yielding about 8½–9 oz (240–260 g), or roughly 1½ cups
- Fresh lemon juice: 2 tablespoons (30 ml)
- Garlic: 1 small clove, about 2–3 g after peeling; use ½ clove for a milder version
- Fine salt: ½ teaspoon, about 2½–3 g depending on the salt, plus more after tasting
- Ground cumin: ¼ teaspoon, optional
- Extra-virgin olive oil: 2 tablespoons (30 ml)
- Reserved chickpea liquid or cold water: start with 2 tablespoons (30 ml), then add up to 3 tablespoons (45 ml) more as needed
Optional for serving: a small drizzle of olive oil, paprika or sumac, chopped parsley, whole chickpeas, chili flakes or finely chopped herbs.
Instructions
Build the hummus base
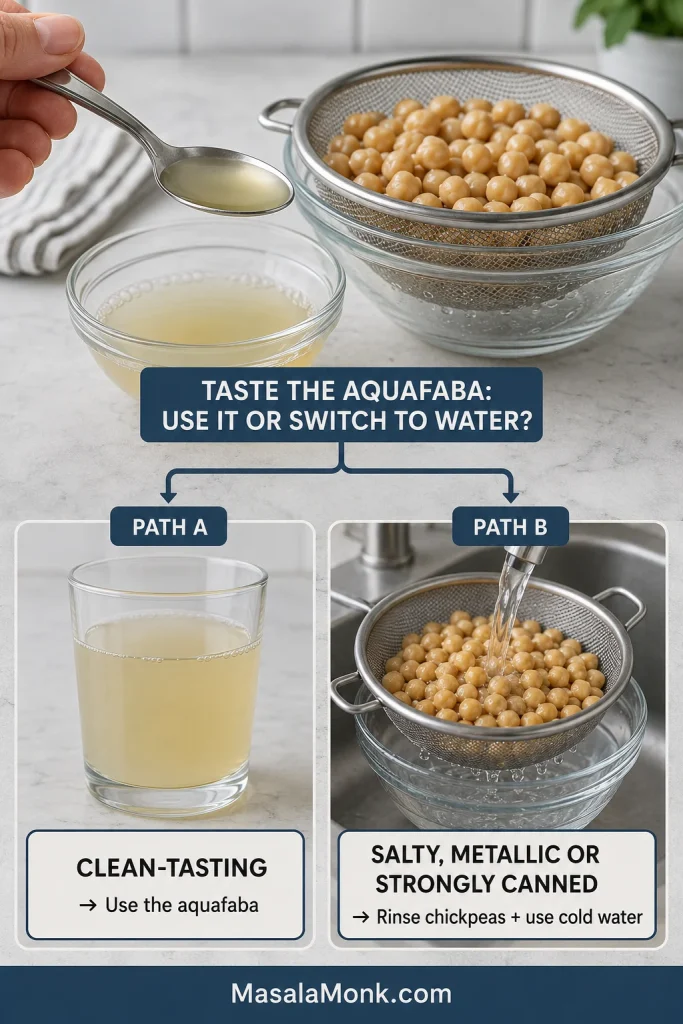
- Reserve and taste the chickpea liquid. Drain the chickpeas over a bowl, keeping at least ½ cup of the liquid. Taste a drop. If it tastes very salty, metallic or strongly canned, rinse the drained chickpeas briefly and use cold water for blending instead.
- Check the chickpeas. Press one between your fingers. It should flatten easily through the center. If it feels springy, firm or chalky, soften the batch using the simmering method later in the guide.
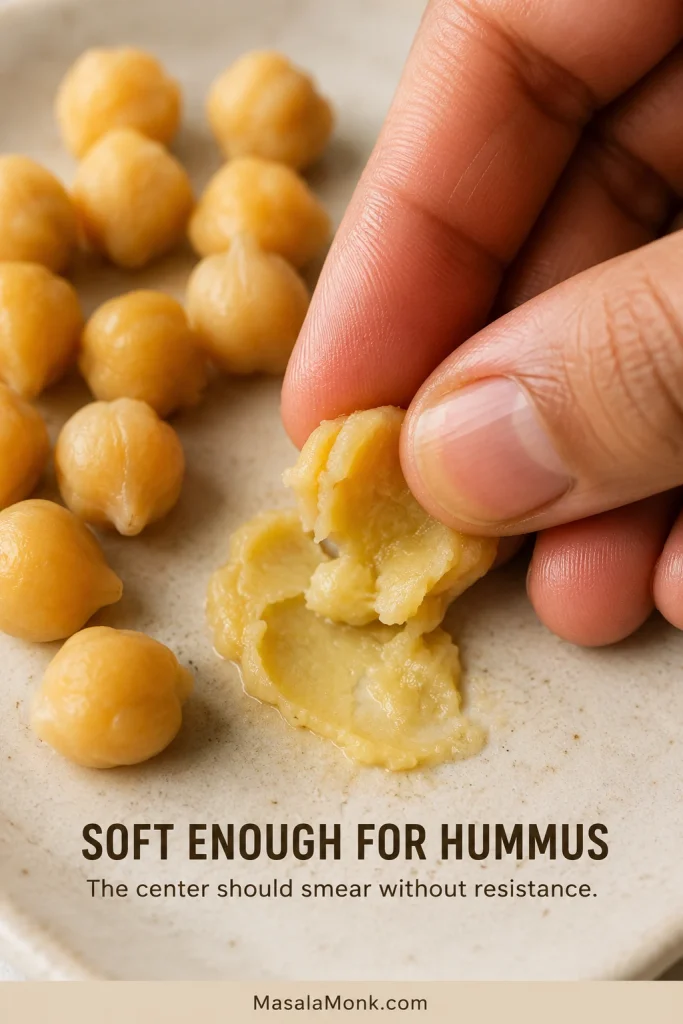
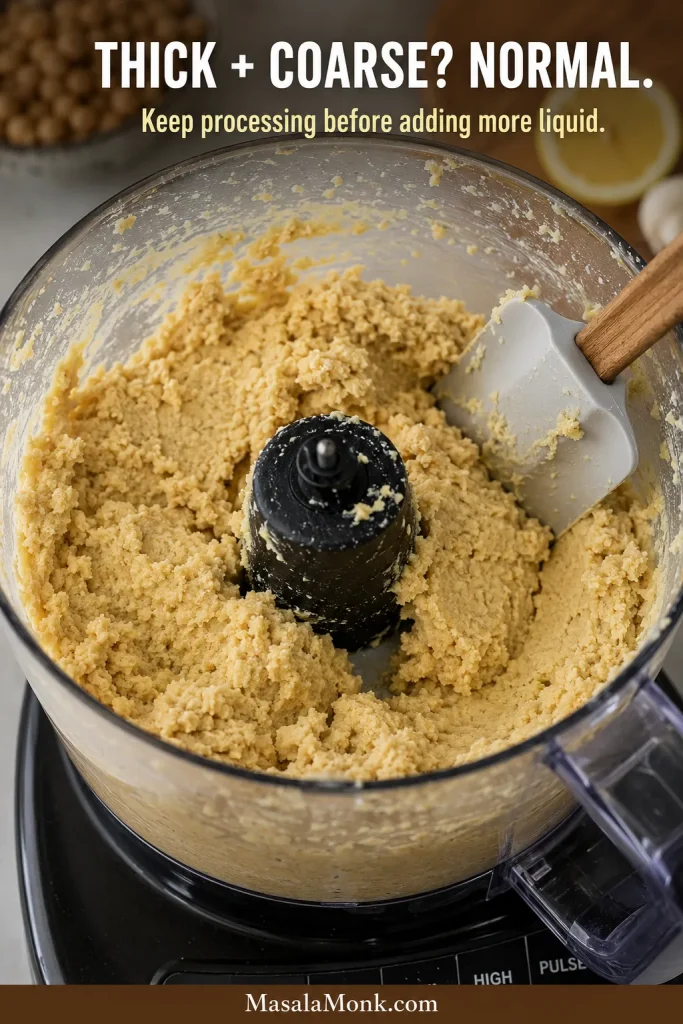
- Start the paste. Add the chickpeas, lemon juice, garlic, salt and optional cumin to a food processor. Process for 45–60 seconds, then scrape the sides, bottom and area beneath the blade. It may look alarmingly thick and coarse at this point; do not fix it yet. Give the chickpeas more time in the processor first.
- Add the olive oil. Run the processor and pour in the oil gradually. Process for another 45–60 seconds, then stop and scrape again.
Loosen, smooth and finish
- Loosen it slowly. Add 2 tablespoons (30 ml) aquafaba or cold water. Process for 30–45 seconds before deciding whether it needs more. Continue 1 tablespoon (15 ml) at a time.
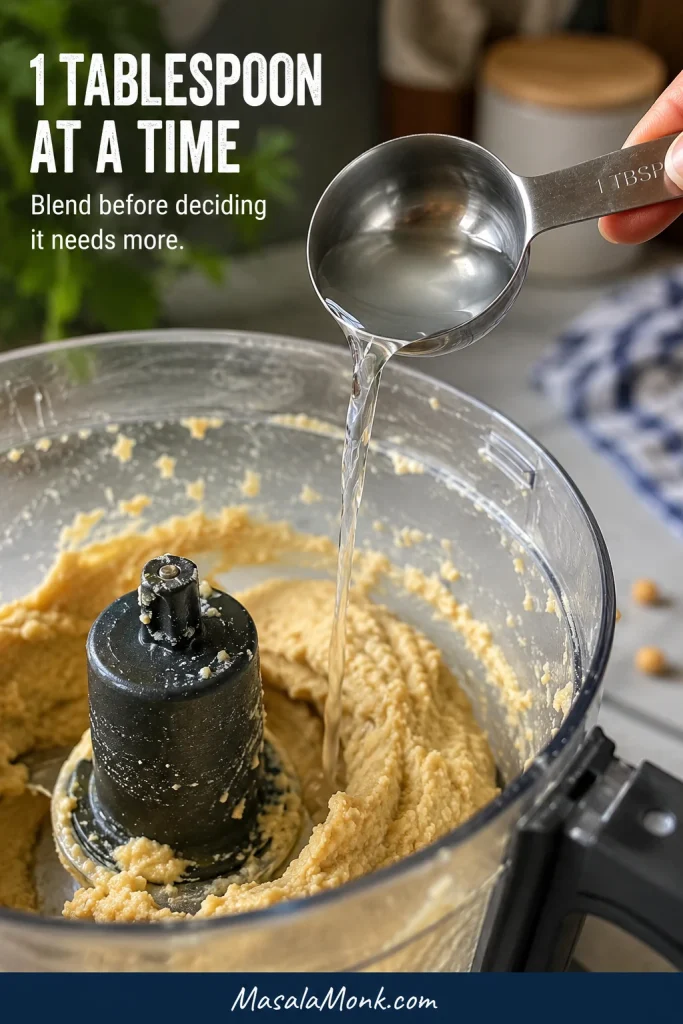
- Watch the movement. Keep processing until the visible graininess disappears and the hummus follows the blade in a smooth wave. Most food-processor batches need about 3–5 minutes in total, including pauses for scraping.
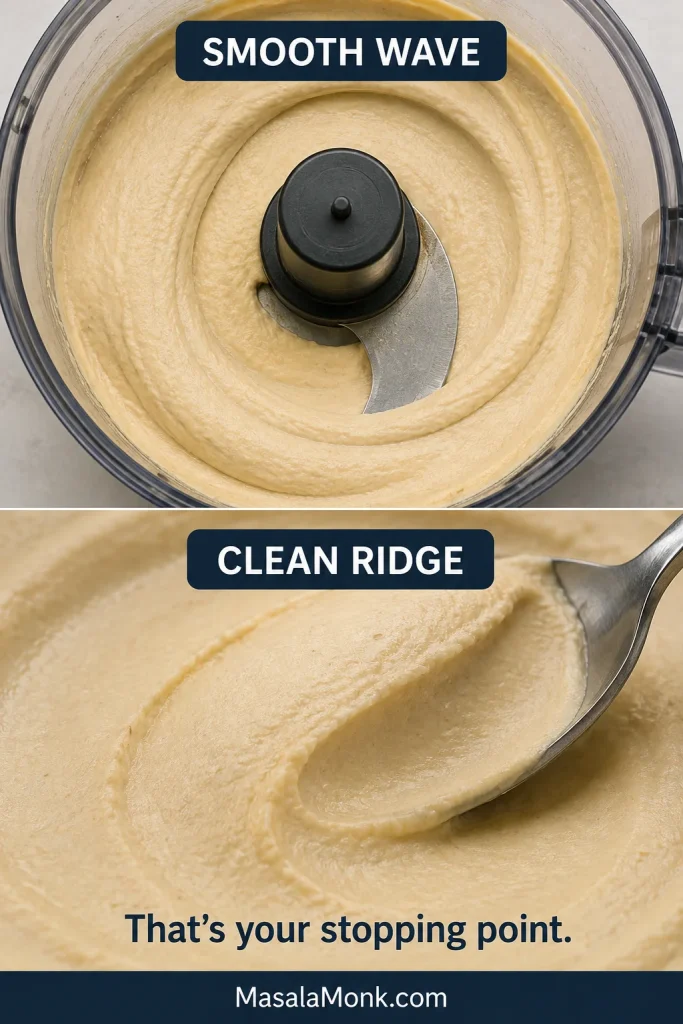
- Taste and serve. Make the final salt, lemon and texture adjustment, then serve immediately. If time allows, let the hummus rest for 5–10 minutes and taste once more before serving; the garlic and acidity become easier to judge after a short rest. Taste it with the bread, vegetables or crackers you plan to serve, because the right thickness is easier to judge in context than from the spoon alone.
Blender and personal-blender adjustments
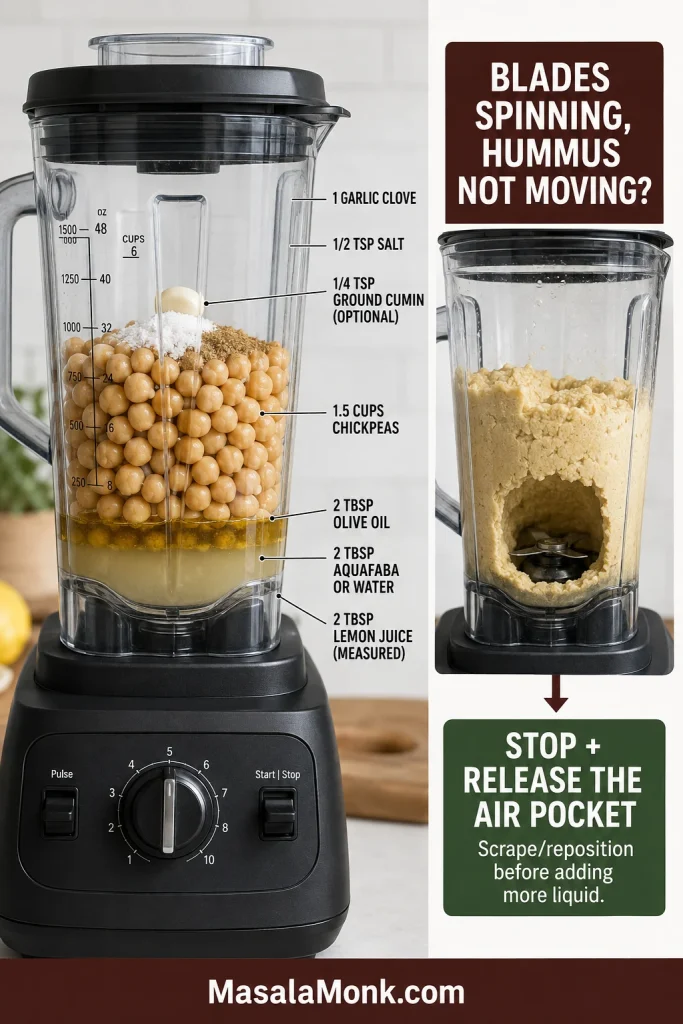
Place the lemon juice, olive oil and first 2 tablespoons of aquafaba or water near the blades, then add the chickpeas and seasonings. Stop and release trapped air before adding more liquid. Let simmered chickpeas cool before placing them in a sealed personal-blender cup, and never blend hot ingredients in a sealed container unless the manufacturer specifically says it is safe.
Recipe notes
- Hold back the remaining liquid until the first 2 tablespoons have been fully incorporated. A thick mixture is much easier to loosen than an over-thinned one is to repair.
- Cumin is optional. Leaving it out changes the flavor, not the texture.
- A strongly peppery olive oil can taste bitter after prolonged high-speed blending. Use a milder oil in the mixture and save the stronger one for serving.
Hummus Without Tahini Guide
- Choose the version that fits
- Tahini-free versus sesame-free
- Why the recipe works
- Extra-smooth canned chickpeas
- Find the right texture
- Garlic from mild to bold
- Food processor, blender or mixer-grinder
- Canned or dried chickpeas
- Substitutes and variations
- Troubleshooting
- Storage and make-ahead
- Serving ideas
Choose the Version That Fits
- The tahini jar is empty: make the standard recipe. Nothing else has to replace it.
- Not a tahini fan: let the chickpeas, lemon and garlic lead, and keep the cumin light or leave it out.
- Avoiding sesame: use the base recipe and check packaged ingredients, accompaniments and shared equipment carefully.
- Skipping added oil: use the aquafaba-led oil-free variation.
- Want something richer: yogurt or a suitable nut or seed butter can change the flavor deliberately, but none is required for the base recipe.
Fast canned or extra smooth?
| Method | What to do | What you get |
|---|---|---|
| Fast canned | Drain, check the softness and blend as written | Creamy everyday hummus in about 10 minutes |
| Extra smooth | Simmer firm canned chickpeas before blending | A softer, finer texture without peeling every skin |
| Oil-free | Replace the oil with additional aquafaba or cold water | A lighter dip with no added oil |
| Dried chickpeas | Soak and cook kabuli chana until completely crushable | More control over tenderness, salt and cooking liquid |
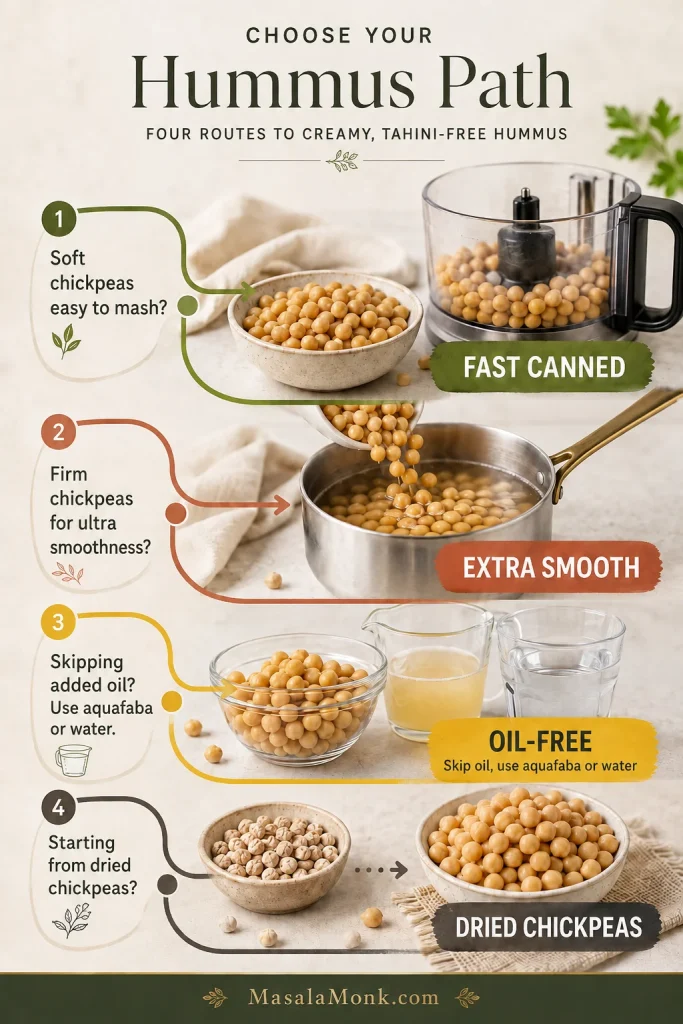
Recipe ↑ · Extra-smooth method ↓ · Oil-free variation ↓
Tahini-Free and Sesame-Free Are Different Promises
Tahini is made from sesame seeds. A recipe can leave out the prepared paste while still using sesame oil or whole sesame seeds. That recipe may be tahini-free, but it still contains sesame.
The base recipe here contains no tahini, sesame seeds or sesame oil. It also avoids yogurt, peanut butter, tree-nut butter and sunflower butter, so skipping tahini does not automatically introduce another ingredient you may also need to avoid.
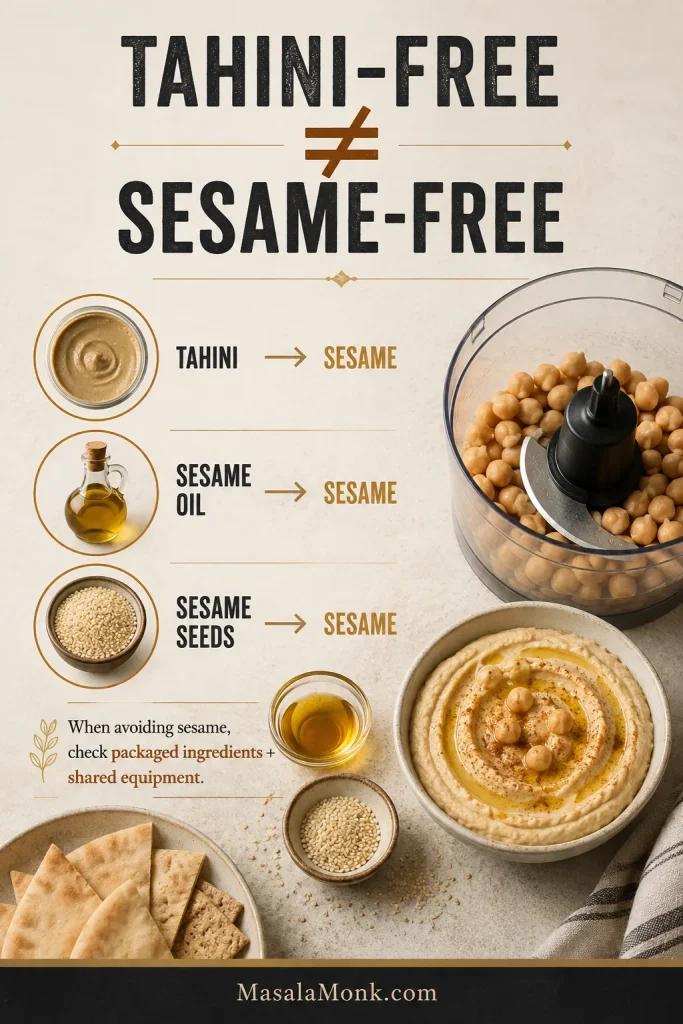
When sesame avoidance is allergy-related, check the labels on the chickpeas, spices, bread, crackers and seasonings, and consider cross-contact from shared appliances and utensils. In the United States, the FDA requires sesame to be declared as a major allergen on packaged foods.
Classic hummus commonly contains tahini, so do not assume restaurant or packaged hummus is free from sesame ingredients unless you have verified it.
Why the Recipe Works
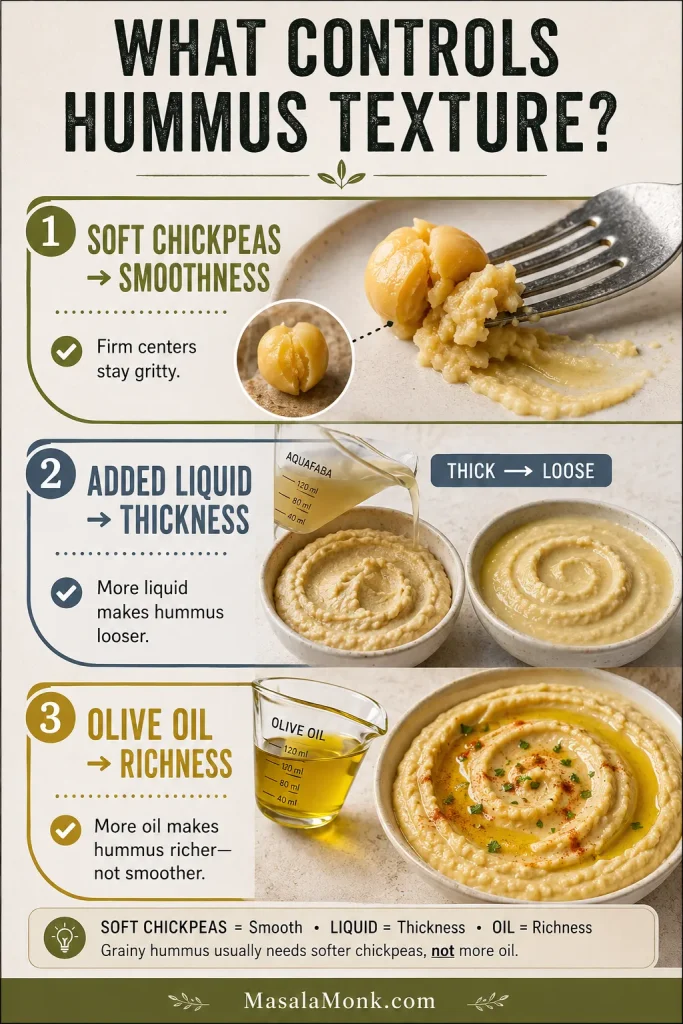
Three qualities that often get lumped together are different: soft chickpeas create smoothness, added liquid controls thickness, and olive oil adds richness. Once those jobs are clear, the recipe becomes much easier to adjust.
Soft chickpeas make a smoother paste
A soft chickpea collapses under the blade. A firm one breaks into tiny gritty pieces. That is why hummus can become increasingly watery while stubbornly remaining grainy.
If the chickpeas are still firm, more liquid simply makes those gritty pieces easier to move around.
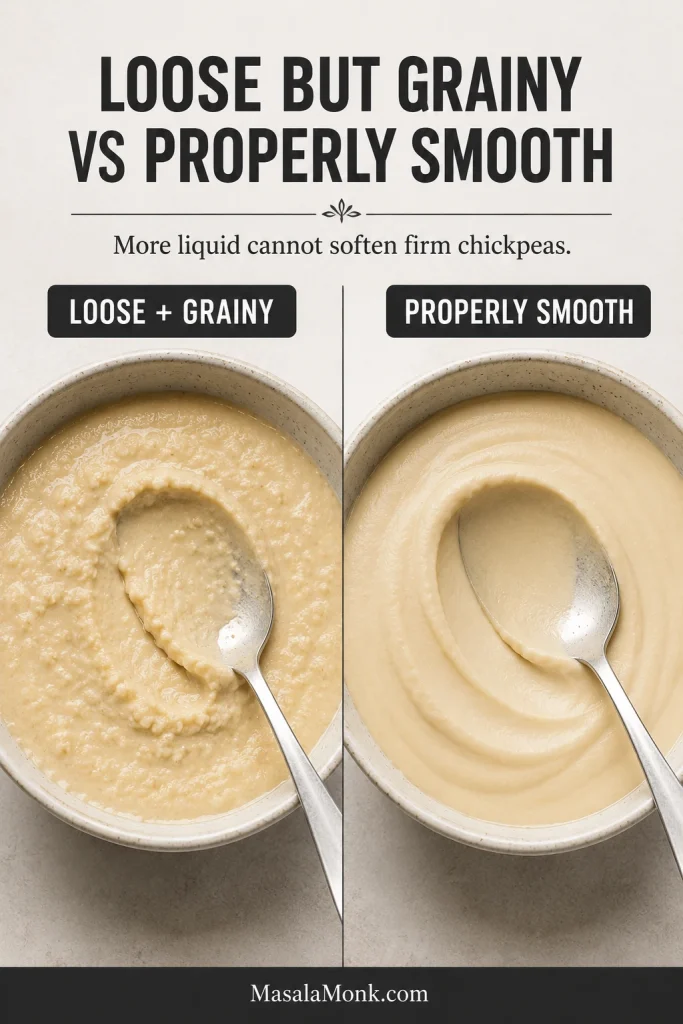
Aquafaba helps the mixture move
Aquafaba is the liquid from canned or home-cooked chickpeas. It helps a dense chickpea paste circulate around the blade while contributing some chickpea body of its own. Firm centers still need softening.
Cold water works too, and it can be the better choice when canned aquafaba tastes overly salty, metallic or strongly canned.
Olive oil makes the hummus richer
Olive oil carries the garlic and cumin and gives the hummus a rounder mouthfeel. More oil will make it richer, but it will not smooth firm chickpea centers.
How the flavors should land
The finished hummus should taste of chickpeas first, followed by lemon and garlic. Salt brings those flavors into focus, while cumin adds optional warmth rather than taking over.
Fresh lemon juice gives the cleanest flavor. Bottled juice can work in a pinch, but it may taste flatter or more sharply acidic, so add it gradually.
Let this version be its own thing: a bright, smooth chickpea dip rather than an imitation of tahini hummus.
The Extra-Smooth Canned-Chickpea Method
Peeling every chickpea can refine the finish, but it turns an easy recipe into a fiddly project. Softening the whole batch usually makes a larger difference for much less effort.
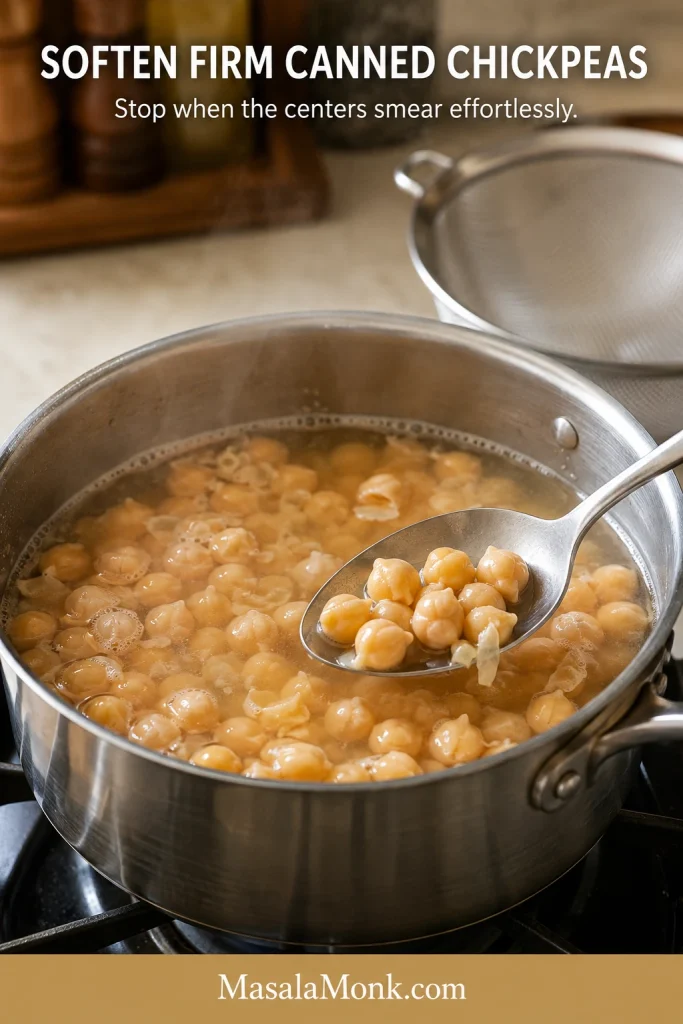
Plain-water softening
- Place the drained chickpeas in a small saucepan and cover them with fresh water.
- Bring to a steady simmer. Without baking soda, check after 10 minutes and continue for up to about 20 minutes if the centers still feel firm.
- Stop when the chickpeas look swollen and smear immediately between your fingers, with no firm center.
- Drain thoroughly. If a few skins float free, remove them. There is no need to turn dinner into a chickpea-peeling project.
- Process the chickpeas while they are warm in a food processor or suitable vented blender. Cool them before using a sealed personal-blender cup.
Faster baking-soda softening
For roughly 1½ cups drained chickpeas, simmer them in fresh water with ½ teaspoon baking soda and start checking at about 5 minutes. Around 5–7 minutes is often enough to make canned chickpeas very soft; once the centers smear effortlessly, drain and rinse them thoroughly before blending. Longer cooking can make the chickpeas begin to break apart, which is unnecessary once they are already soft enough for hummus.
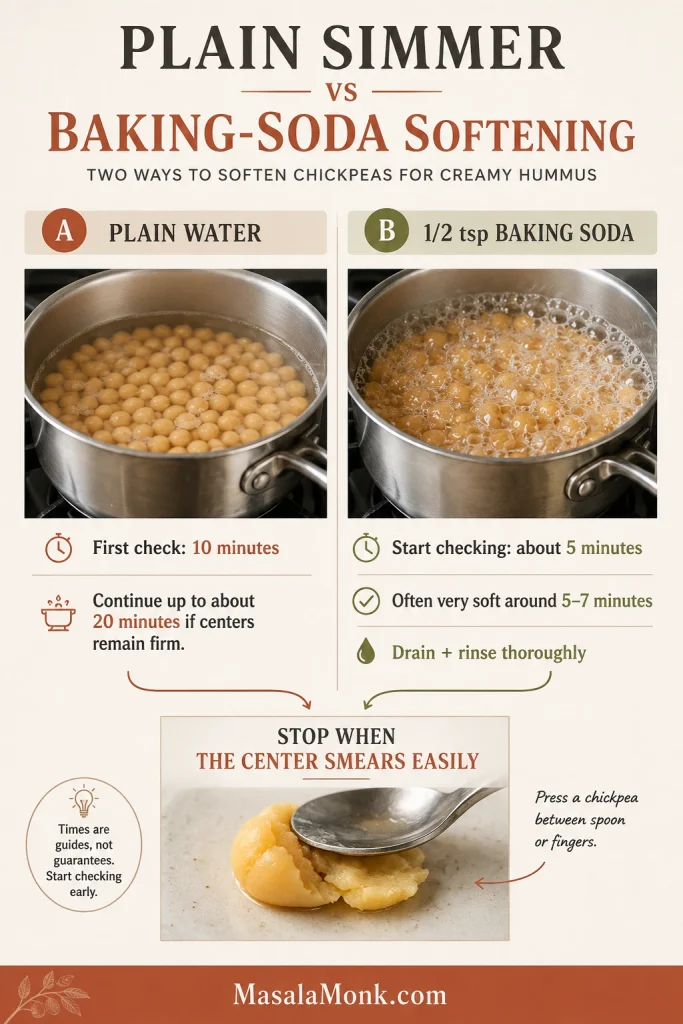
When the chickpeas already crush effortlessly, skip the extra simmer. This step earns its place only when the beans need help.
Properly softened chickpeas let the spoon glide through the hummus instead of dragging across a cracked, grainy surface.
Recipe ↑ · Find your texture ↓ · Troubleshooting ↓
Find the Right Hummus Texture
The right consistency depends on how you plan to eat it. A wrap needs firmer hummus than a mezze plate, and neither version is wrong.
| Finish | Typical total added liquid | Best use and visual cue |
|---|---|---|
| Thick spread | About 2–3 tablespoons (30–45 ml) | Holds a firm ridge for sandwiches, wraps and toast |
| Everyday dip | About 3–4 tablespoons (45–60 ml) | Holds a soft swirl while letting pita pass through easily |
| Loose plated hummus | About 4–5 tablespoons (60–75 ml) | Settles slowly after swirling for falafel plates and grain bowls |
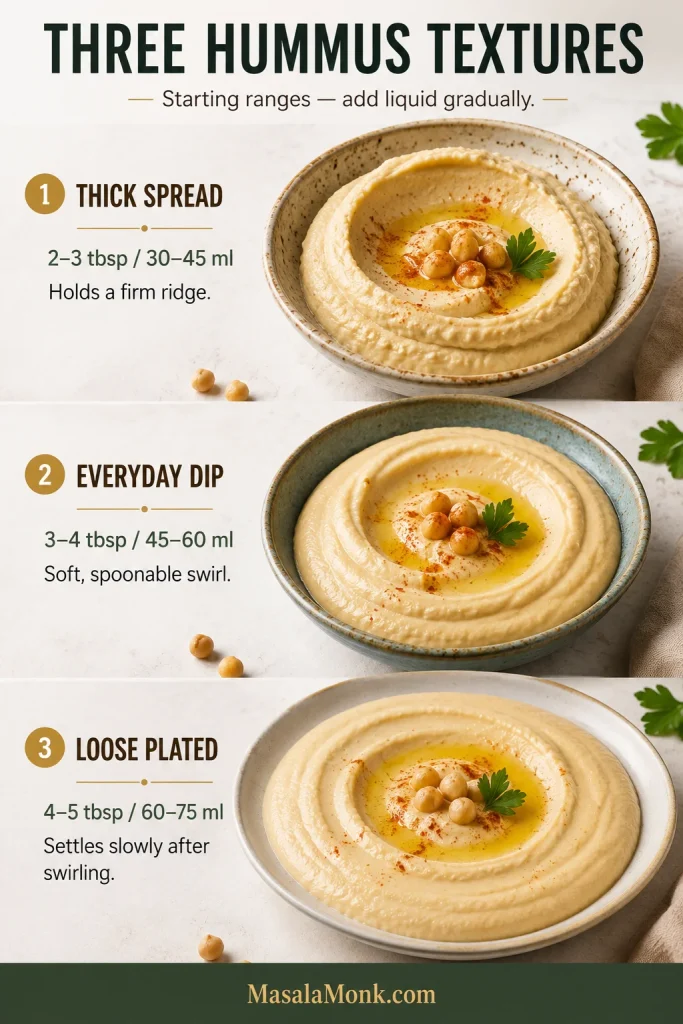
These are starting ranges for the total aquafaba or water added to the batch. Warm chickpeas may need less; a narrow blender may need slightly more before the mixture begins circulating.
If tonight’s hummus is going into a sandwich, stop while it still holds a firm ridge. A loose restaurant-style swirl is useful only when that is the texture you want.
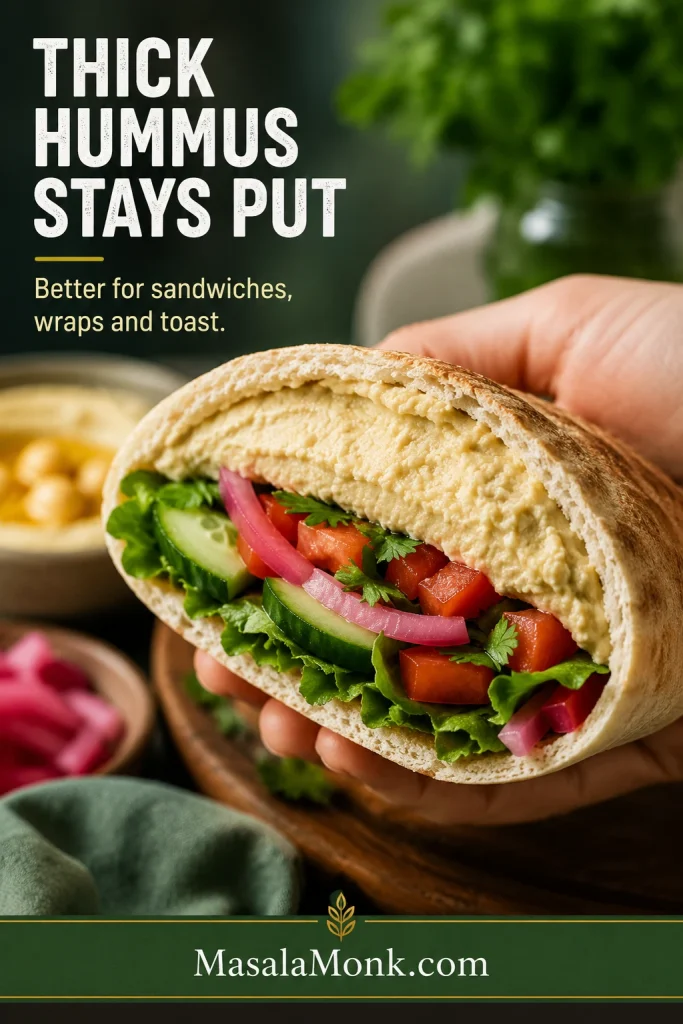
For dipping, aim for the middle texture and serve it with warm wedges from this homemade pita bread recipe. The hummus should yield easily without running off the bread.
Garlic: Mild to Bold
Garlic stands out more clearly when tahini is absent. A large raw clove can become sharp, especially after the hummus has rested overnight.
One clove is a surprisingly loose measurement: a tiny clove and a large one can produce completely different results.
| Style | Amount per standard can | How it tastes |
|---|---|---|
| No garlic | None | Clean, lemony and chickpea-forward |
| Gentle | ½ small clove | Mild, with very little raw-garlic bite |
| Balanced | 1 small clove, about 2–3 g | Clear garlic flavor without excessive burn |
| Garlicky | 2 small cloves | Bold raw-garlic hummus |
| Lemon-mellowed | 1–2 cloves rested in the measured lemon juice for 10 minutes | Raw garlic flavor with a softer immediate edge |
| Roasted | 3–5 soft roasted cloves | Sweet, mellow and deeper |
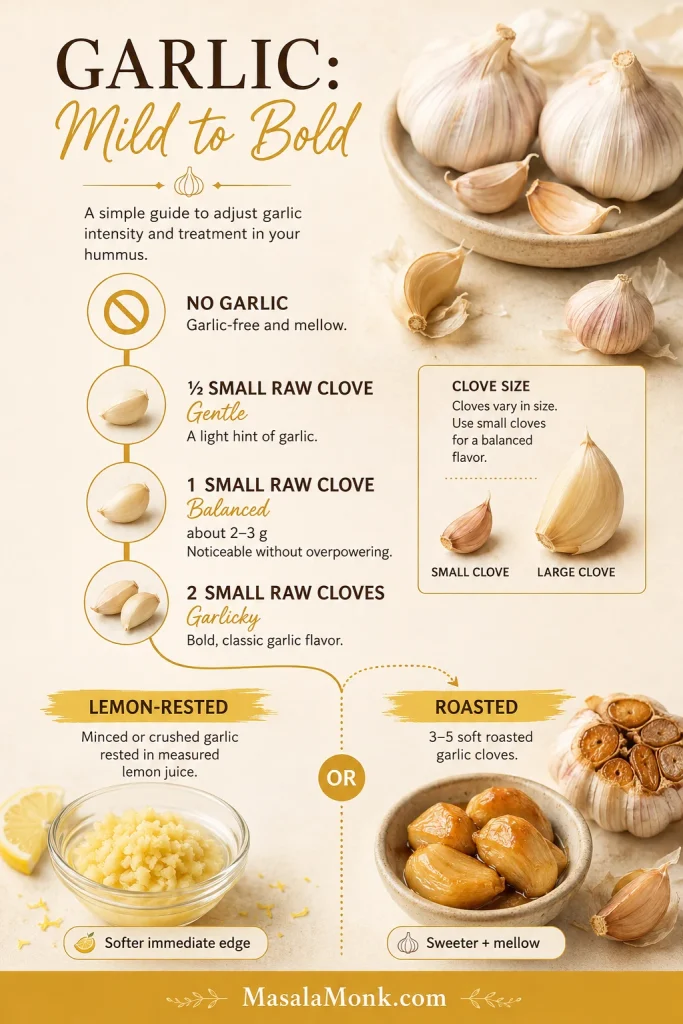
When preparing the hummus ahead, choose one level gentler than you think you need. Garlic preparation changes its strength, too: our garlic aioli guide compares grated, pressed, minced and roasted garlic and explains how a short lemon rest softens its bite.
Food Processor, Blender or Mixer-Grinder?
Every machine needs enough movement to smooth the chickpeas without forcing you to pour in unnecessary liquid. The loading order, batch size and amount of scraping are what change.
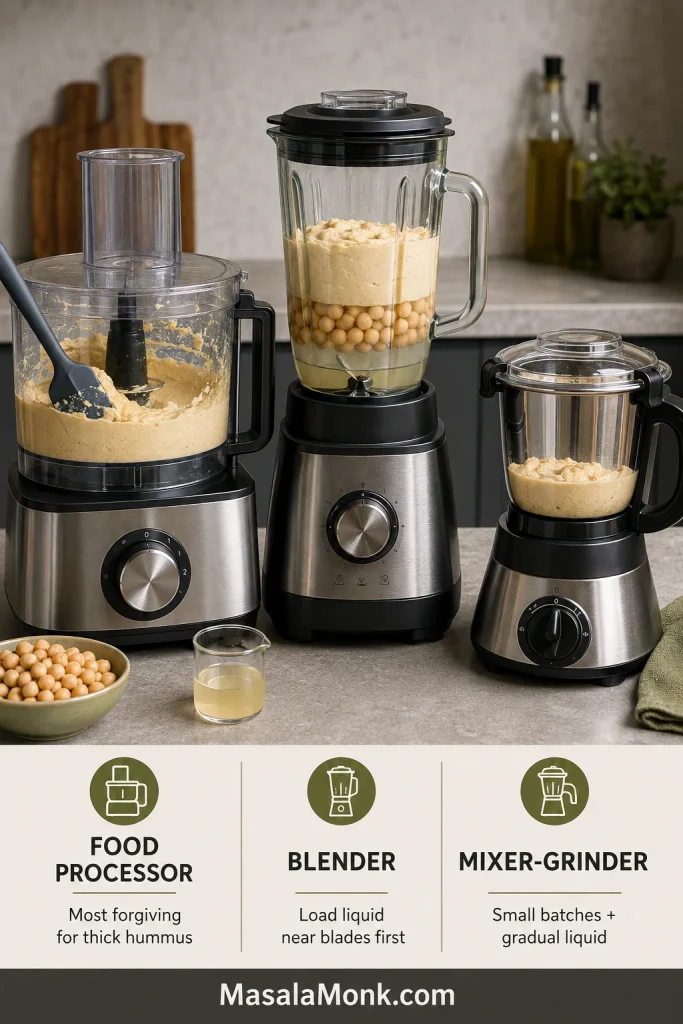
How each machine behaves
- Food processor: the most forgiving choice for thick hummus. Start with the chickpeas and flavorings, then add the oil and liquid gradually. Scrape beneath the blade when dense paste gathers there.
- Full-size blender: put the lemon, oil and starting liquid near the blades first. When a hollow pocket forms, stop and release the trapped air before deciding it needs more water.
- Personal blender: place liquid nearest the blade and make half a batch when the cup is narrow. Use short runs, redistribute the mixture and never seal hot ingredients inside.
- Stick blender: use very soft chickpeas in a tall, narrow vessel and move the blender around the container rather than holding it in one place.
- Fork or masher: warm chickpeas can become a satisfying rustic spread, but the texture will stay coarser than machine-blended hummus.
Indian mixer-grinder technique
Use a wet-grinding jar and work in manageable batches. Pulse first, add liquid gradually and pause when the jar becomes hot.
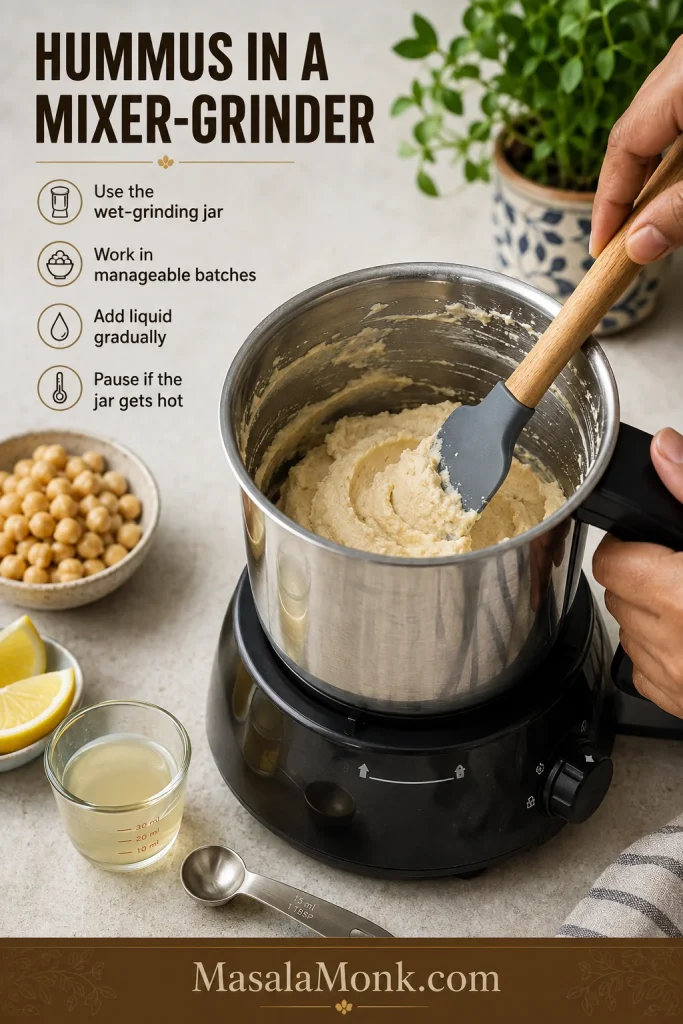
A powerful blender may finish much faster than a food processor. Once the hummus is smooth, there is no benefit in running the motor simply to match a written time.
Recipe ↑ · Canned or dried chickpeas ↓ · Troubleshooting ↓
Canned Chickpeas or Dried Kabuli Chana?
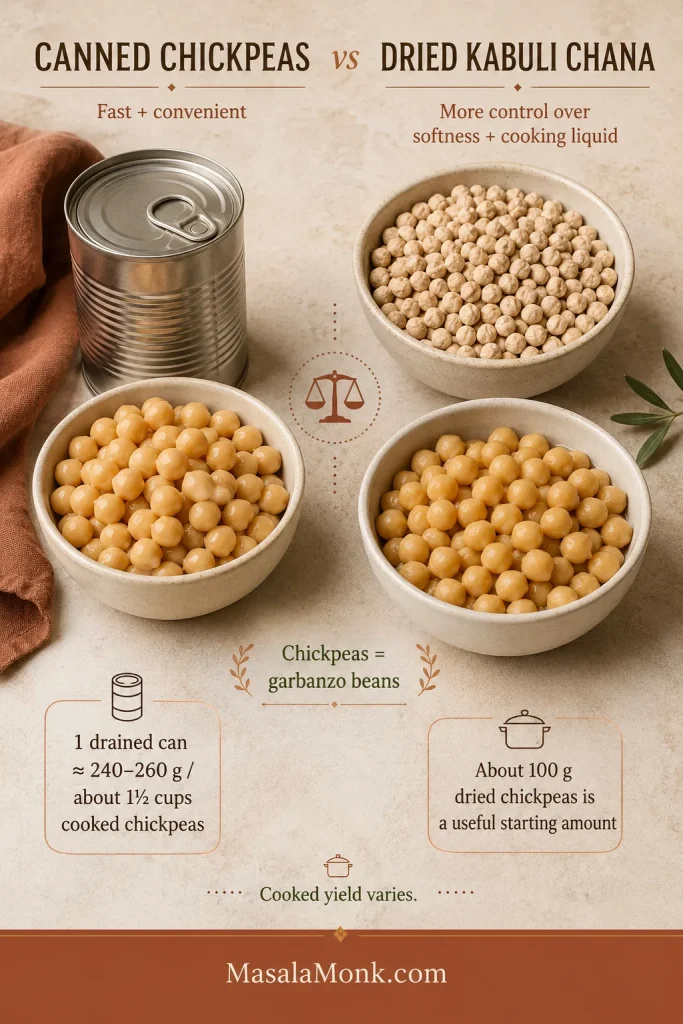
Chickpeas and garbanzo beans are two names for the same legume. In India, the large pale chickpeas commonly used for hummus are usually sold as kabuli chana.
Canned chickpeas are the weeknight answer. Dried kabuli chana takes longer, but you control exactly how soft and salty the chickpeas become and how the cooking liquid tastes.
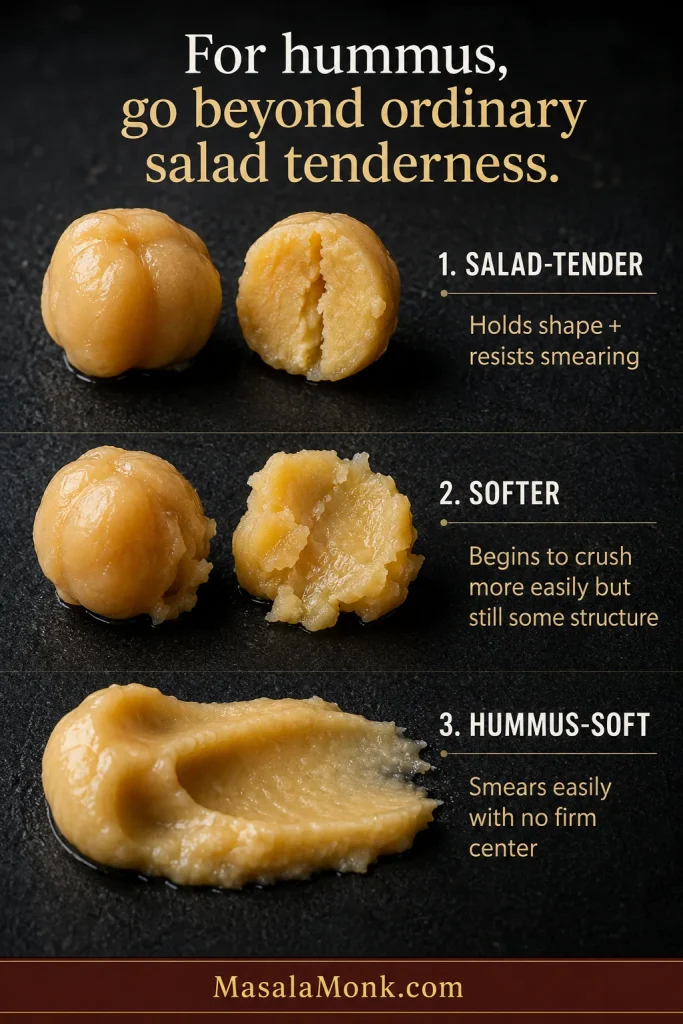
For hummus, take chickpeas beyond ordinary salad tenderness. The center should crush into a smooth paste without resistance. Use the timings below as first checks; the chickpea itself decides when it is soft enough.
One drained can can be replaced with 8½–9 oz (240–260 g), or about 1½ cups, cooked chickpeas. About 3½ oz (100 g), or a little over ½ cup, dried chickpeas is a useful starting amount, although the final cooked yield varies with age, soaking and cooking.
Falafel can begin with soaked, uncooked chickpeas; hummus needs them fully cooked and soft. If you are making both, this homemade falafel guide explains the different texture and handling.
Choose a cooking method
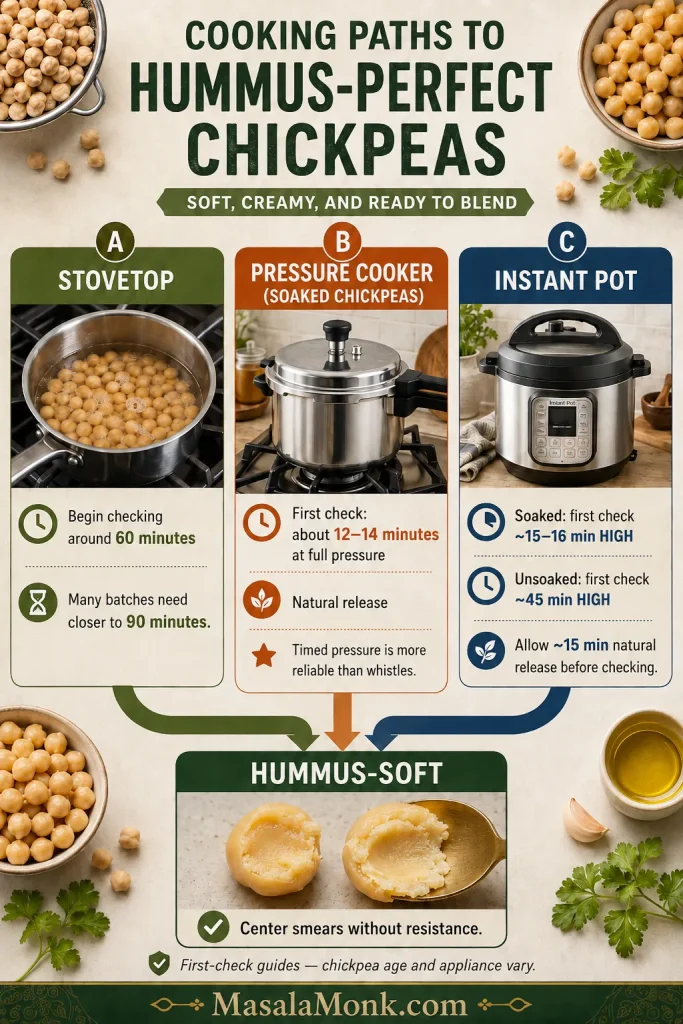
Stovetop
- Soak the chickpeas in plenty of water for 8–12 hours.
- Drain, rinse and cover with several inches of fresh water.
- Bring to a boil, then simmer. Begin checking around 60 minutes; many batches need closer to 90 minutes, and older chickpeas can take longer.
- Reserve some cooking liquid, then drain and weigh the chickpeas once they pass the softness test above.
Indian stovetop pressure cooker
For about 3½ oz (100 g) soaked kabuli chana, add enough fresh water to cover the chickpeas by about 1½ inches (4 cm). As a first check, cook for about 12–14 minutes at full pressure, then allow a natural release. Continue for another few minutes under pressure if the centers still resist crushing.
Timed pressure is more dependable than whistle count because burner strength, cooker design and operating pressure vary.
Instant Pot
Place the chickpeas in the inner pot and cover them with fresh water by at least 2 inches (5 cm), while meeting the minimum liquid requirement for your model.
For chickpeas deliberately cooked soft enough for hummus, begin checking soaked chickpeas after about 15–16 minutes on high pressure, followed by about 15 minutes of natural release. For unsoaked chickpeas, begin around 45 minutes on high pressure, again allowing about 15 minutes of natural release before checking. Cooker models and chickpea age vary, so give them additional pressure time when the centers still feel firm.
Substitutes and Easy Variations
What Can I Use Instead of Tahini in Hummus?
Nothing has to replace it. Soft chickpeas, olive oil and enough aquafaba or water already produce a creamy dip. Other ingredients can add richness or change the flavor, so use them because you want what they bring.
| Option | What it changes | Dietary note |
|---|---|---|
| No substitute — base recipe | Olive oil and aquafaba or water keep the flavor light and chickpea-forward | Vegan; the base contains no sesame ingredients |
| Greek yogurt | Softer, creamier and tangier | Contains dairy and is not vegan |
| Peanut butter | Rich and distinctly nutty | Contains peanuts |
| Cashew or almond butter | Smooth and mildly nutty | Contains tree nuts |
| Sunflower butter | Thick and seed-forward | Contains sunflower seed |
| Sesame oil or sesame seeds | Restores sesame aroma and flavor | Contains sesame |
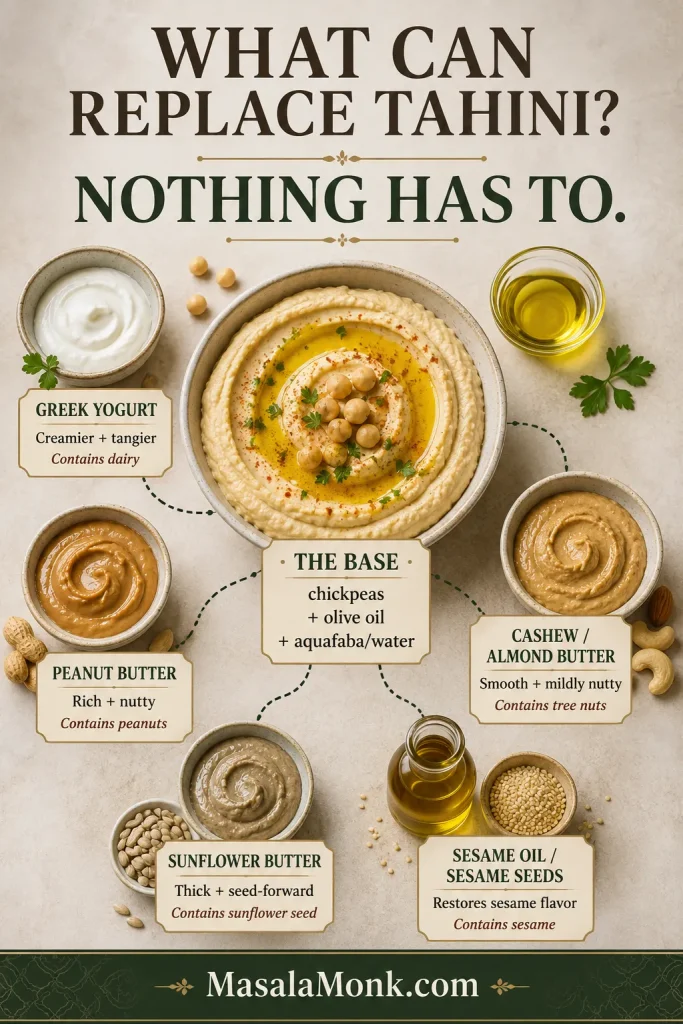
A substitute is only useful if you like what it does to the hummus.
Oil-free hummus without tahini
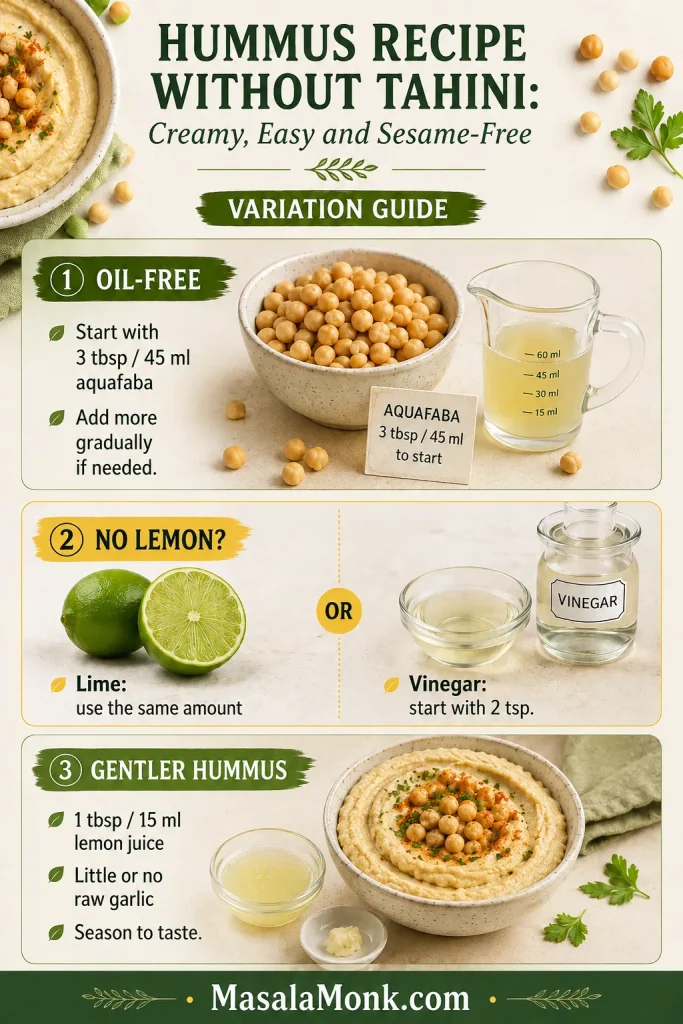
Leave out the olive oil and add 3 tablespoons (45 ml) aquafaba first. Process fully, then add more aquafaba or cold water 1 tablespoon (15 ml) at a time. The finish will be lighter, so chickpea tenderness and seasoning become even more noticeable.
Hummus without lemon
Lime juice can replace the lemon in the same amount, but the citrus flavor will be noticeably different. For apple-cider or white-wine vinegar, start with 2 teaspoons, then blend and taste before adding more.
Mild hummus without garlic or cumin
Leave out the garlic for a cleaner, gentler dip, or omit the cumin for a brighter lemon-and-chickpea flavor. For an especially gentle version, use 1 tablespoon (15 ml) lemon juice and little or no raw garlic, then season to taste.
Greek-yogurt hummus
Add 1–2 tablespoons thick plain Greek yogurt after the chickpeas have become smooth. Hold back some aquafaba and adjust the thickness afterwards. The result is softer and tangier, but no longer vegan or dairy-free.
When you want yogurt and cucumber to lead rather than chickpeas, make this Greek tzatziki sauce recipe instead.
Peanut, nut or sunflower-butter hummus
Add 1–2 teaspoons smooth unsweetened peanut, cashew, almond or sunflower butter first. Blend and taste before using more. None disappears completely into the hummus, so choose the one whose flavor you want.
Recipe ↑ · Troubleshooting ↓ · Storage ↓
Fix Grainy, Thick or Bland Hummus
If the hummus looks wrong, change one thing at a time and let it work before tasting again.
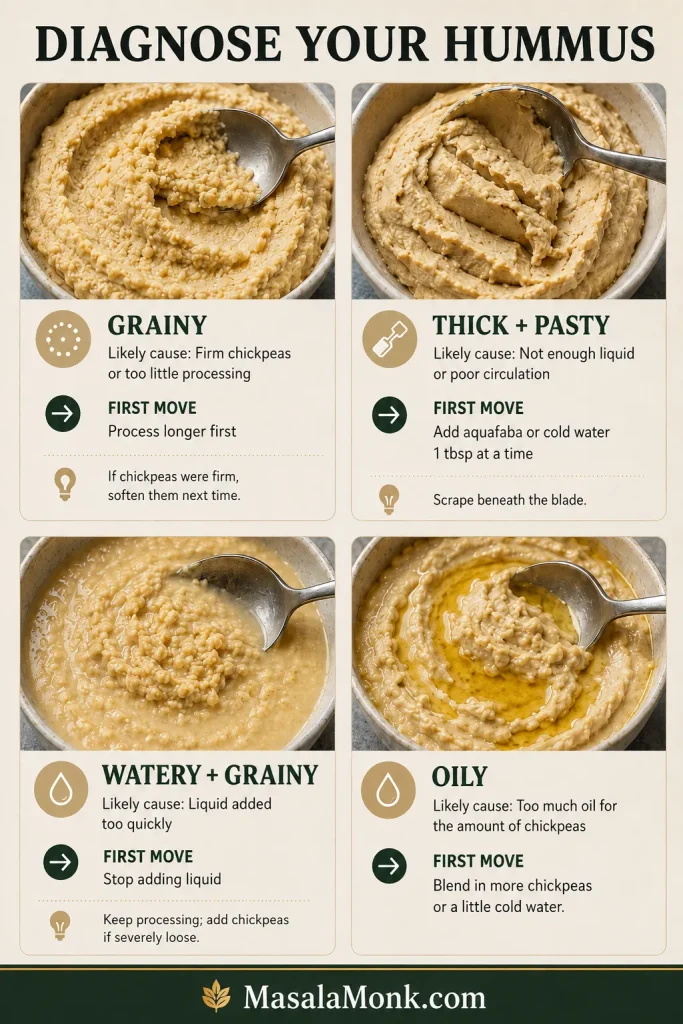
| Problem | Likely cause | What to do |
|---|---|---|
| Grainy | Firm chickpeas or too little processing | Process longer; soften firm chickpeas before the next batch |
| Thick and pasty | Not enough liquid or poor circulation | Add aquafaba or cold water 1 tablespoon at a time and scrape beneath the blade |
| Watery but grainy | Liquid was added too quickly | Stop pouring and keep processing; blend in more chickpeas if it is severely loose |
| Oily | Too much oil for the amount of chickpeas | Blend in more chickpeas or a little cold water |
| Bitter | Peppery oil, too much cumin or heat from prolonged blending | Cool the batch and use a milder oil next time |
| Harsh garlic | The clove was large or the hummus rested overnight | Dilute with more chickpeas; use less or rest the garlic in lemon next time |
| Too lemony | Too much acid for the amount of chickpeas | Add chickpeas, a little oil or cold water |
| Too salty | Salty chickpeas or aquafaba | Add unsalted chickpeas when possible; otherwise loosen with water and a little lemon |
| Bland | Salt or acidity is too low | Adjust the salt first, rest briefly, then decide whether it needs more lemon |
| Blender stalls | The batch is too large or liquid is not near the blades | Stop, scrape, reduce the batch and reposition the liquid |
If the blender gets hot: pause. Heat can intensify bitterness in some olive oils, so let the jar cool before running it again.
Return to the recipe ↑ · Guide contents ↑
Storage, Freezing and Make-Ahead
Cold hummus almost always feels thicker than freshly blended hummus, but it usually needs only a good stir and a little water to come back to life. Raw garlic can also become more noticeable as the dip rests.
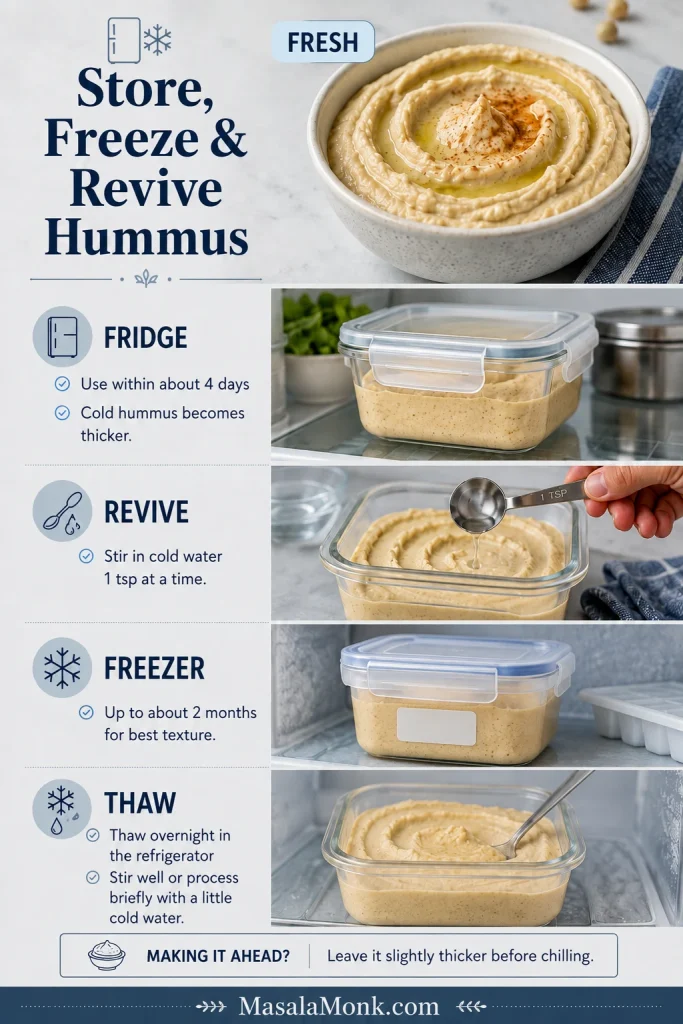
Transfer the hummus to a clean airtight container and refrigerate it promptly. For a conservative home-storage window, use it within about four days. The USDA’s general leftovers guidance recommends keeping refrigerated cooked leftovers for about three to four days.
If the hummus becomes too thick, stir in cold water 1 teaspoon at a time. A dry surface usually means too much air exposure; smooth the hummus into a smaller airtight container before refrigerating it.
Freeze plain hummus in small airtight portions for up to about two months for the best texture. Leave a little room for expansion, thaw overnight in the refrigerator, then stir vigorously or process briefly with a spoonful of cold water.
Versions containing yogurt, fresh herbs or watery vegetables may thaw less evenly than the plain base. When making the hummus a day ahead, leave it slightly thicker and make the final adjustment after chilling.
Recipe ↑ · Serving ideas ↓ · Back to top ↑
Frequently Asked Questions
Can hummus really be made without tahini?
Yes. Soft chickpeas, enough time in the processor and gradually added liquid can produce creamy hummus. Without tahini, the flavor is lighter and more directly of chickpeas, lemon and garlic.
Can I use water instead of aquafaba?
Yes. Cold water is especially useful when the canned chickpea liquid tastes very salty, metallic or strongly flavored by the can. In that case, rinse the drained chickpeas briefly as well.
Do I need to peel the chickpeas?
No. Very soft chickpeas and enough processing provide a large improvement without the extra work. Remove skins that loosen naturally after simmering if convenient.
Can I make hummus in a blender or NutriBullet?
Yes. Put the liquid near the blades, reduce the batch when the jar is narrow and stop to redistribute the mixture. Let warm chickpeas cool before placing them in a sealed personal-blender cup.
Serving Ideas
Warm pita against cool hummus; crisp cucumber adds snap, while a sharp pickle cuts through the chickpeas and olive oil. Those contrasts are often more satisfying than piling on extra toppings.
For a fresher mezze plate, add this parsley-heavy tabbouleh recipe. Its lemon, tomato and herbs balance the creamy hummus and keep the plate bright rather than heavy.
- Dipping: warm pita, cucumber, carrots, radishes, peppers or crackers
- Lunch: sandwiches, wraps, toast or stuffed pita
- Dinner: falafel plates, grain bowls and roasted vegetables
- Dressing: thin with cold water and lemon until it falls from a spoon in a steady ribbon
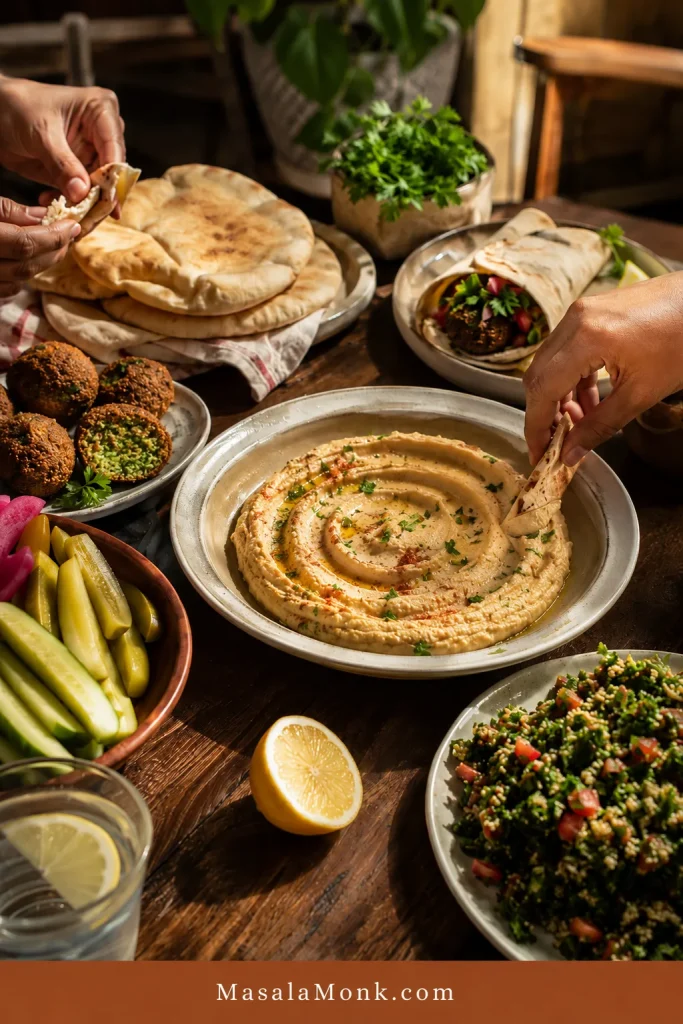
To plate it, spoon the hummus into a shallow dish and push outward with the back of the spoon. Finish with just enough olive oil, herbs or paprika to complement the flavor while the surface is still soft and freshly swirled.
Give the hummus one final stir, then taste it with the bread, vegetables or crackers you plan to serve. A texture that seems slightly loose on the spoon may feel exactly right once warm pita passes through it.
If the chickpeas are soft, the seasoning is balanced and the texture suits the meal, the hummus has already done its job.
The tahini jar can stay empty tonight.








