
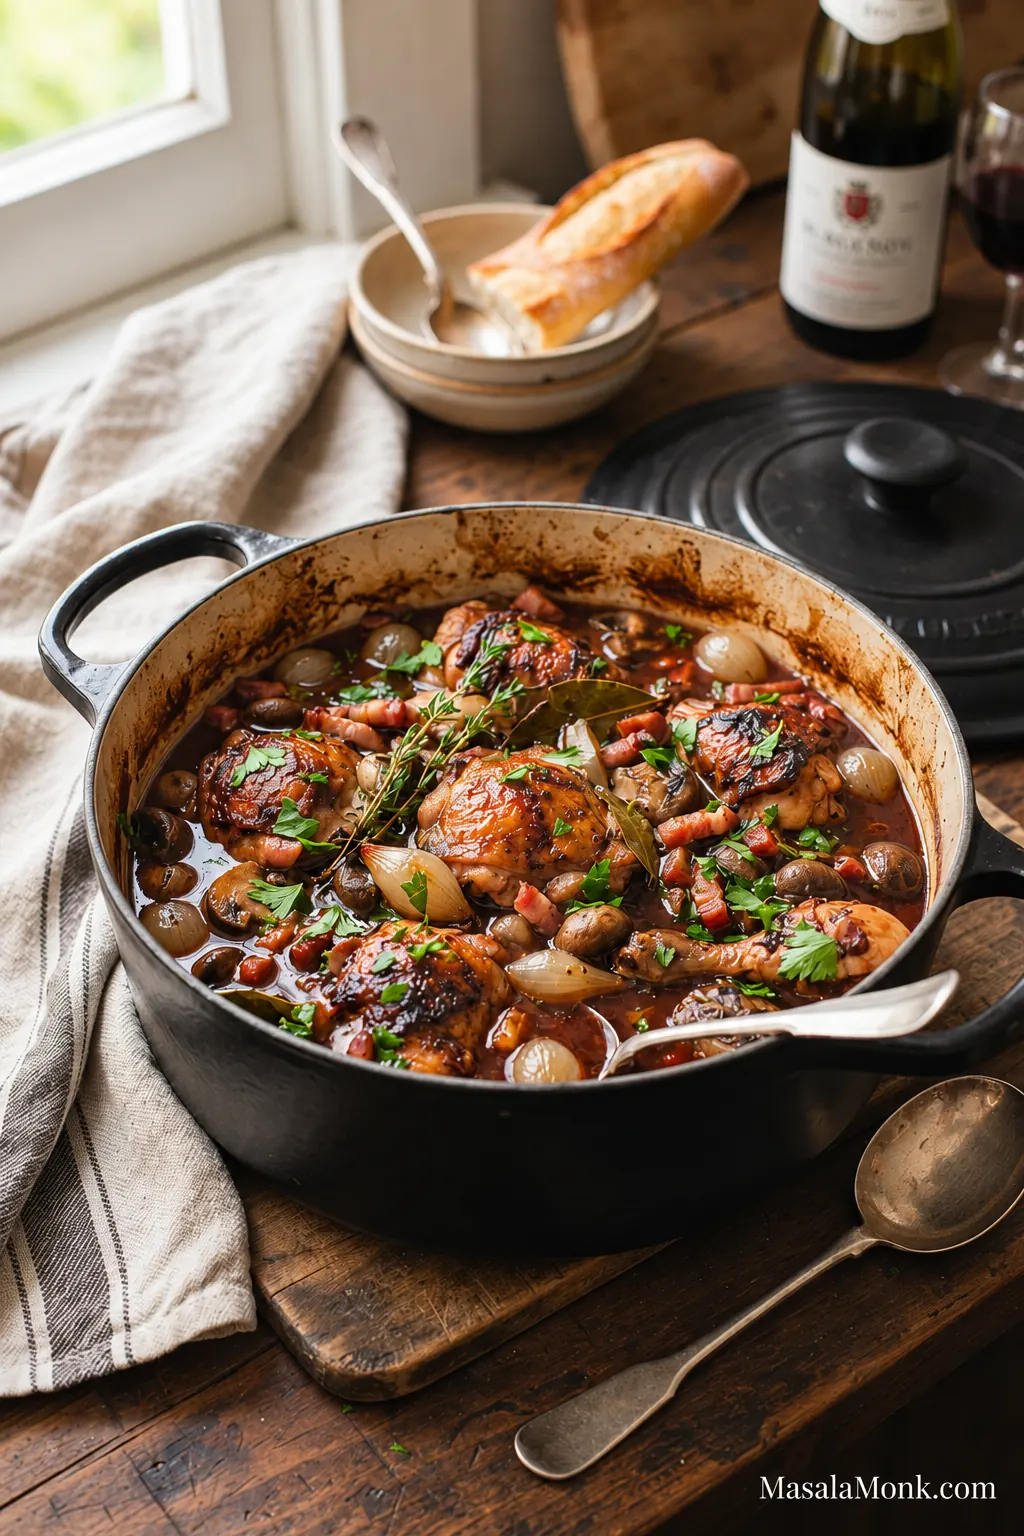
The sauce is what makes coq au vin worth the effort. Red wine loosens the browned bits left behind by bacon and chicken, gathering their flavour into a savoury braise with thyme and sweet pearl onions. Add mushrooms browned in butter, and you have a French chicken dinner made for mashed potatoes, crusty bread, and a leisurely meal around the table.
This coq au vin recipe brings the traditional flavours of French chicken in red wine into a practical home-kitchen method. Bone-in thighs and drumsticks cook gently until tender, with no overnight marinade required. Allow 2½–3 hours from preparation to serving; much of that time is oven braising while you brown the mushrooms and get the sides ready.
Jump to Recipe · Choose the Wine · Fix a Cooking Problem
Classic Coq au Vin Recipe
Chicken braised until tender in a red-wine sauce with bacon, pearl onions, thyme, and browned mushrooms. It’s savoury, gently tangy, and generous enough for four.
Recipe at a Glance
- Serves: 4 generous portions
- Preparation: 30–40 minutes
- Cooking: Approximately 1 hour 45 minutes–2 hours 15 minutes
- Total: Allow 2½–3 hours, with mushroom browning overlapping the oven braise
- Oven: 165°C / 325°F, conventional
- Marination: Not required
The schedule below separates preparation, stovetop browning and oven braising. Use it to plan when to prepare the mushrooms and begin checking the chicken.
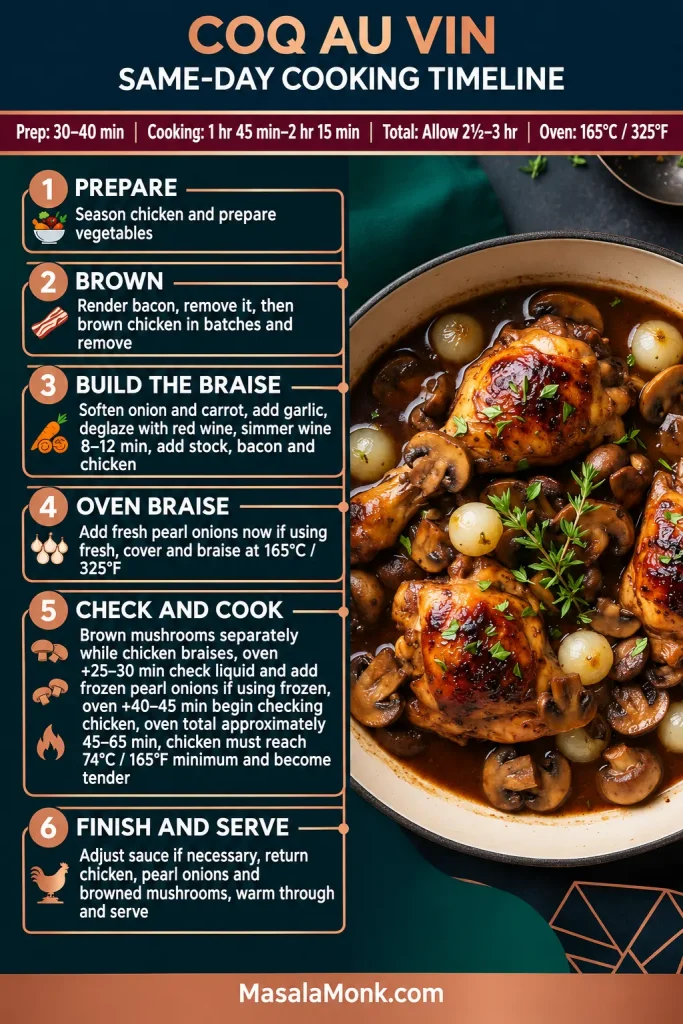
Equipment: A wide, heavy 5–6 qt (4.7–5.7 L) Dutch oven or oven-safe lidded casserole, a wide skillet, tongs, a wooden spoon, and an instant-read thermometer. Eight bone-in chicken pieces take up space; a wide casserole is easier to work with than a narrow pot of equal capacity. Brown the pieces in uncrowded batches. A little overlapping is fine during the covered braise.
Ingredients
The ingredient groups correspond to different stages of this French chicken braise: first browning, then the wine-stock cooking liquid, and finally the mushroom and sauce finish.

Chicken, Bacon, and Aromatics
- 1.4–1.6 kg (about 3–3½ lb) bone-in, skin-on chicken, ideally 4 thighs and 4 drumsticks
- 120 g (about 4 oz) unsmoked lardons or unsmoked/lightly smoked bacon, diced
- 1 medium yellow onion, diced
- 1 medium carrot, diced into approximately 1 cm (⅜-inch) pieces
- 200 g (7 oz) peeled pearl onions, fresh or frozen, or small peeled shallots
- 3 garlic cloves, finely chopped
- 10 g (about 2 tsp) tomato paste, optional
- 3–4 fresh thyme sprigs, or ½ tsp dried thyme
- 1 bay leaf
- 7 g fine salt, preferably weighed
- ½ tsp freshly ground black pepper
- 1 tbsp (15 ml) neutral oil, plus up to 1 tsp more if needed, for chicken and mushroom browning
Unsmoked lardons or lightly smoked bacon let the wine and chicken remain the main flavours. Strongly smoked bacon will give the sauce a different, smokier character.
Red Wine and Stock
- 500 ml (about 2⅛ US cups) dry red wine, preferably Pinot Noir or another balanced red
- 350 ml (about 1½ US cups) low-sodium chicken stock
- 125–250 ml (about ½–1 US cup) extra low-sodium stock or water to keep available, only if needed
The extra liquid is a reserve, not an automatic addition. Start with the measured wine and 350 ml stock; the braising-liquid visual shows when a splash of reserve stock may be useful.
Mushrooms and Sauce Finish
- 250 g (about 9 oz) cremini or button mushrooms, halved or quartered
- 15 g (1 tbsp) unsalted butter, for the mushrooms
- 10 g softened unsalted butter, optional, for sauce thickening
- 10 g all-purpose flour, optional, for sauce thickening
- 2 tbsp chopped flat-leaf parsley
- Extra salt and freshly ground black pepper, to taste
The optional 10 g butter and 10 g flour make a beurre manié, a smooth paste used to give a sauce a little more body. Keep them separate from the butter for the mushrooms.
How to Make Coq au Vin
1. Prepare the Chicken and Vegetables
Trim large loose flaps of chicken skin and excess fat. Pat the pieces dry with paper towels, then season with the 7 g fine salt and black pepper. Don’t rinse raw chicken; splashing water can spread bacteria around the kitchen.
Dice the bacon and yellow onion, cut the carrot, chop the garlic, and prepare the mushrooms. Measure the wine and stock separately.
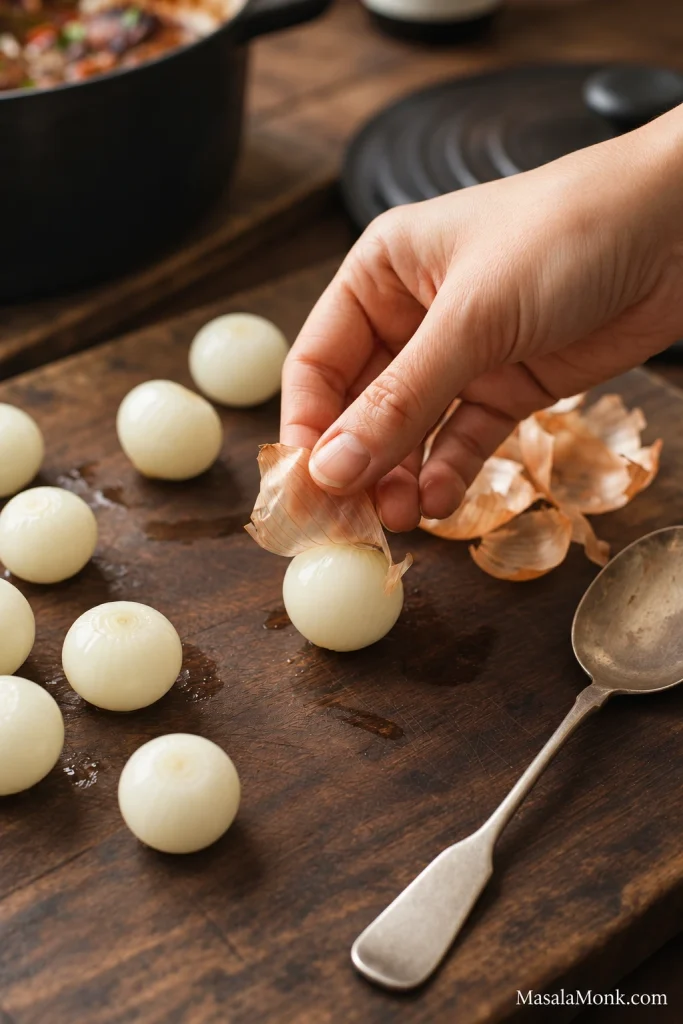
For fresh pearl onions, trim the ends and peel them. To make peeling easier, blanch in boiling water for about 1 minute, cool briefly in cold water, and slip off the skins. Frozen peeled pearl onions can stay frozen until needed.
2. Brown the Bacon and Chicken
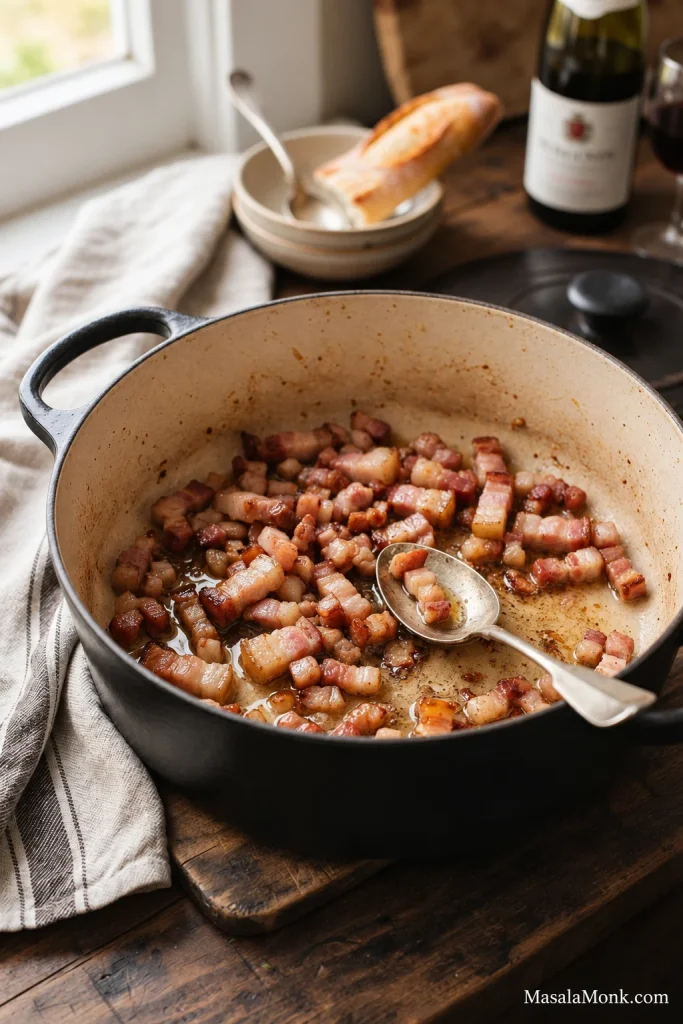
Place the Dutch oven over medium heat. Add the bacon or lardons and cook for 5–8 minutes, stirring occasionally, until the fat renders and the edges turn golden. Remove with a slotted spoon and set aside. Leave about 1 tbsp of rendered fat in the pot; spoon off the rest.
Brown the Chicken Without Crowding
Increase the heat to medium-high, adding a little of the neutral oil if the pot looks dry. Place 2–4 chicken pieces skin-side down, with space between them. Brown for 4–6 minutes, until deep golden patches form.
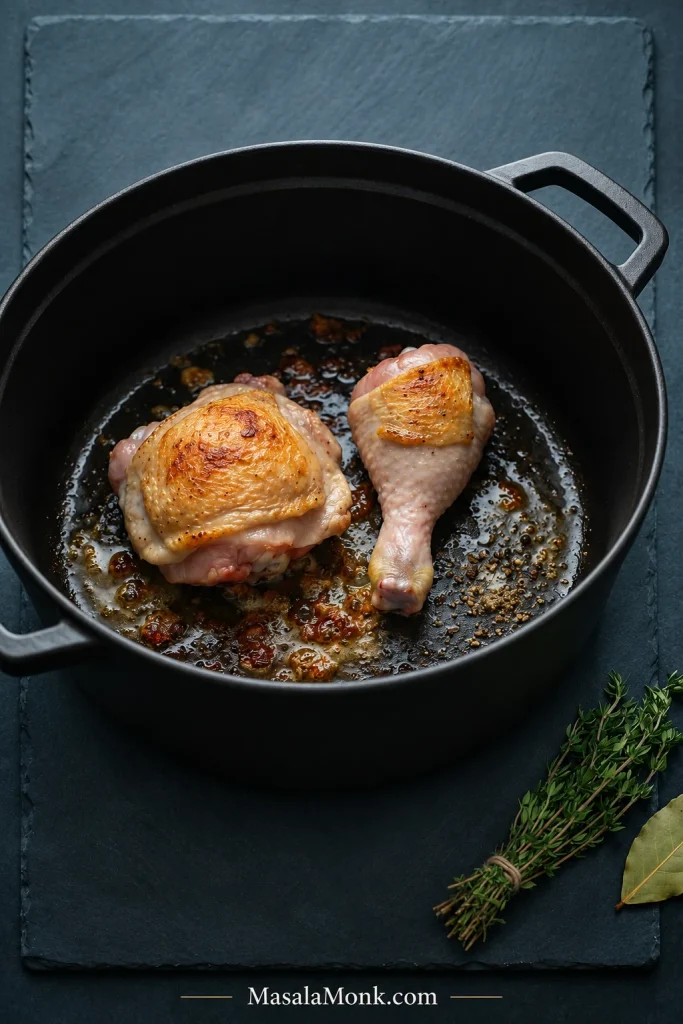
Turn and brown the second side for 2–4 minutes. Transfer the chicken to a plate and repeat with the remaining pieces. Don’t force stuck skin off the pot; it usually releases more easily once properly browned. Keep the golden-brown deposits on the bottom, but lower the heat if they turn black or smell burnt.
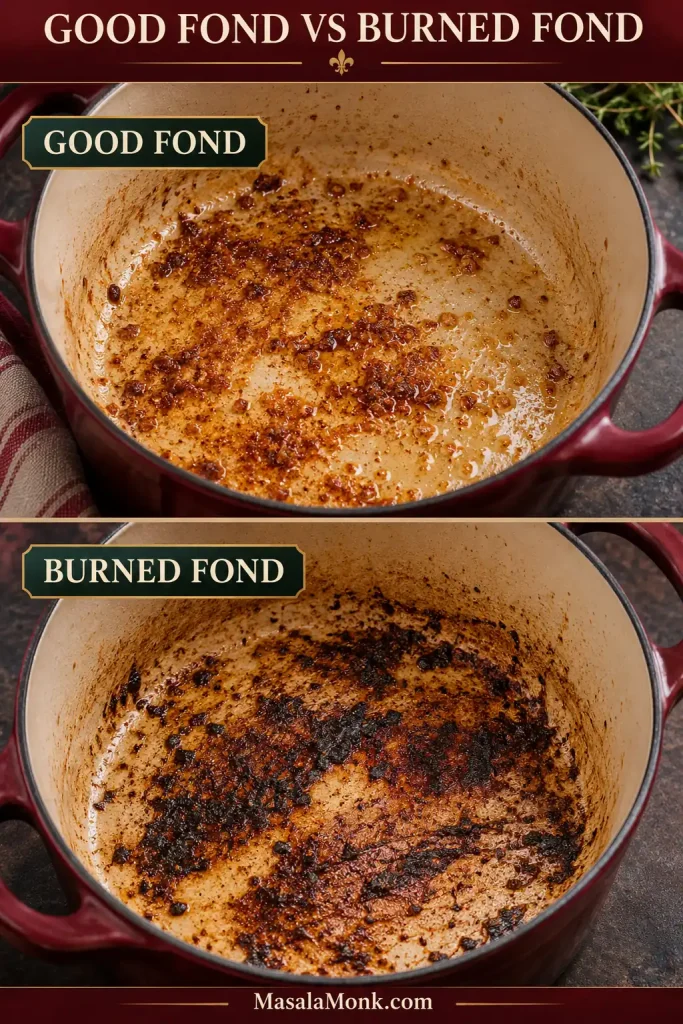
The chicken is still raw in the middle. It will finish during braising. Keep the plate and utensils that touched these partially cooked pieces separate from clean serving equipment.
3. Cook the Aromatics and Add the Wine
Preheat the oven to 165°C / 325°F, with a rack near the middle, as you begin this stage.
If the chicken has rendered more fat, spoon it off so roughly 1 tbsp remains. Reduce the heat to medium. Add the diced onion and carrot and cook for 5–7 minutes, until the onion softens and begins to colour.
Next, add the garlic and cook for 30 seconds. Stir in the optional tomato paste, if using, and cook for another minute.
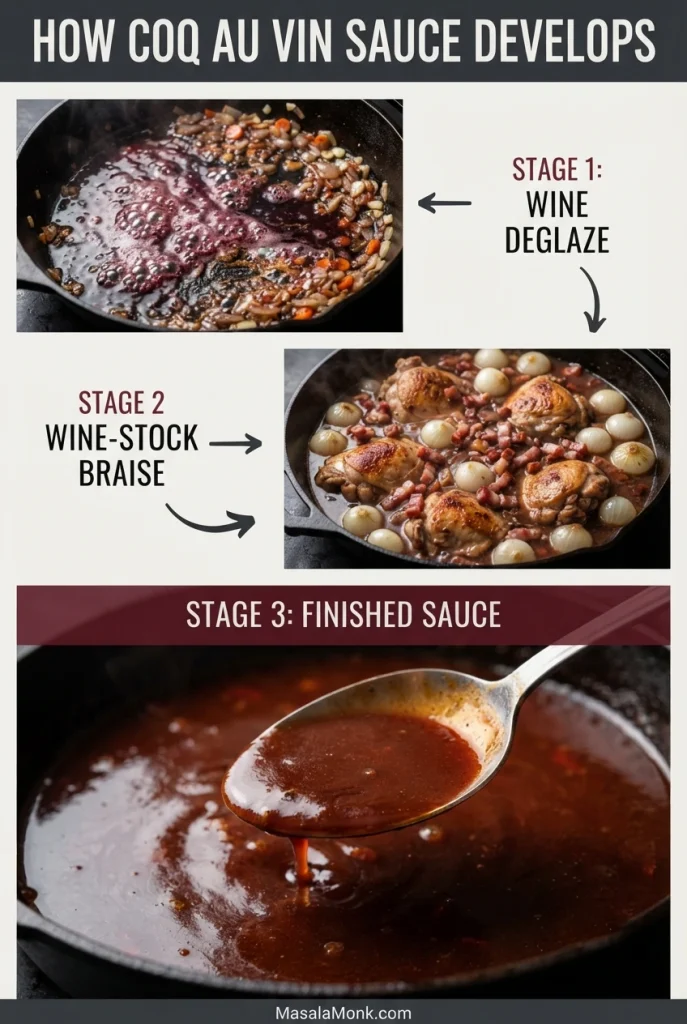
Pour in the 500 ml red wine and scrape up the browned deposits with a wooden spoon. Simmer uncovered for 8–12 minutes, stirring occasionally. The wine should bubble steadily, with plenty of liquid remaining around the vegetables.
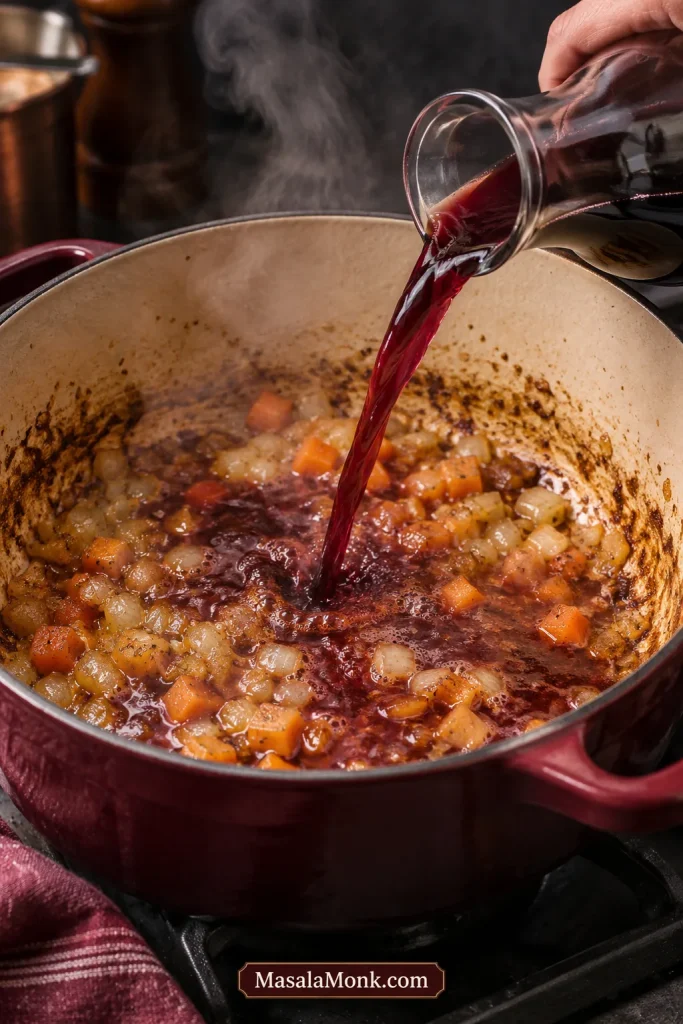
Add the 350 ml low-sodium chicken stock, thyme, bay leaf, and reserved bacon. Stir and bring the liquid back to a gentle simmer.
4. Braise the Chicken and Brown the Mushrooms
Return the chicken and any accumulated juices to the Dutch oven. Arrange the pieces snugly, skin-side up where practical. A little overlapping is fine during braising.
Set the Braising Liquid and Add the Onions
Add fresh pearl onions or small shallots now, tucking them into the liquid. If you’re using frozen peeled pearl onions, leave them out until the first oven check.
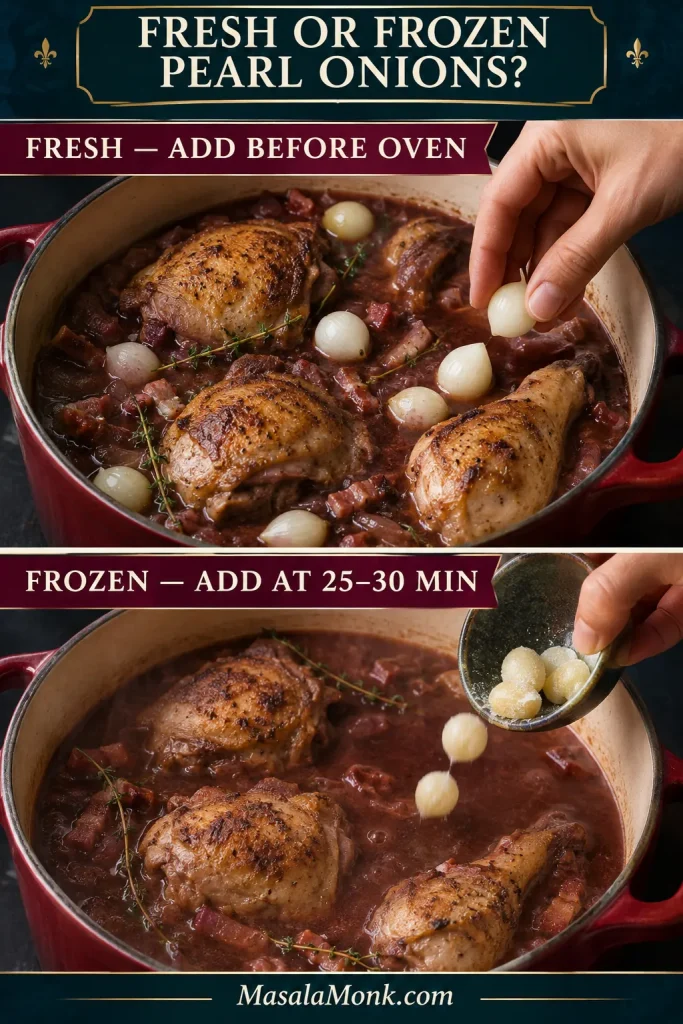
The wine and stock should surround the lower portions of the chicken while leaving the upper surfaces partly exposed. Add reserved stock only if the cooking liquid is unusually low; the exact depth is not a fixed measurement.
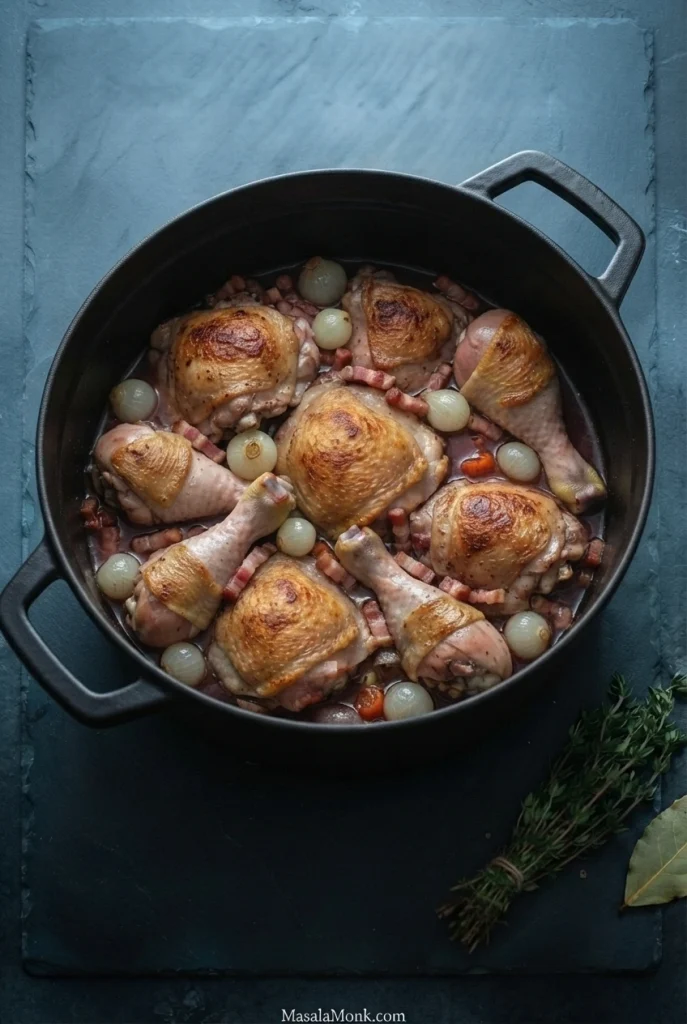
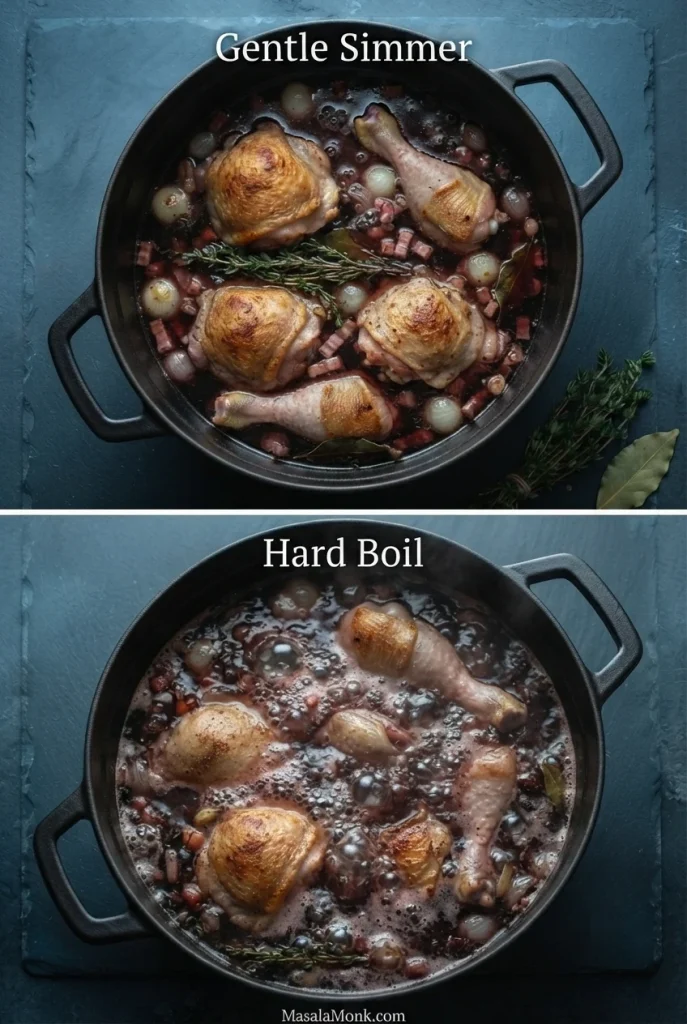
Bring the pot to a gentle simmer, cover, and transfer it to the oven. Start timing when the covered pot enters the oven.
Brown the Mushrooms Separately
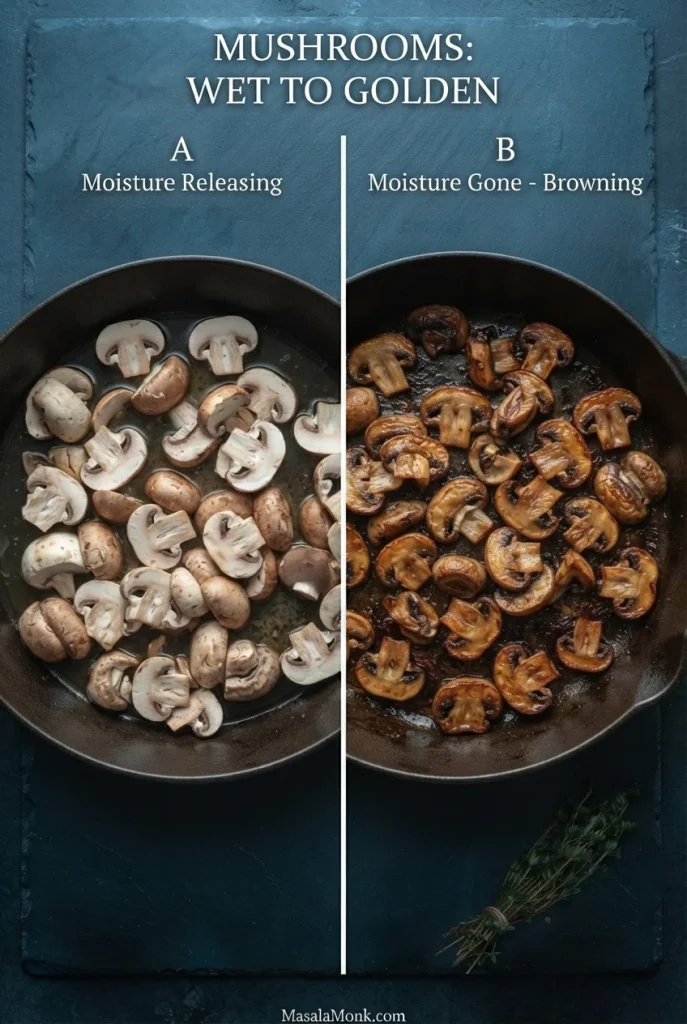
While the chicken braises, brown the mushrooms. Heat the 15 g butter in a wide skillet over medium to medium-high heat. Use a little of the reserved neutral oil at the start if the pan needs it. Add the mushrooms in an uncrowded layer, working in batches if necessary.
Cook for approximately 6–10 minutes per batch, turning occasionally. The mushrooms may release water at first. Once the pan stops looking wet, they’ll sizzle more sharply and develop browned edges. Lower the heat if the butter begins to scorch. Set the mushrooms aside. Browning them separately gives them better texture and a more concentrated flavour than simmering them from raw in the wine sauce.
Check the Braise and Chicken Doneness
After 25–30 minutes in the oven: Check that the liquid is gently bubbling and isn’t running dry. Add a splash of warm stock or water if needed, and rearrange overlapping pieces only if some are cooking unevenly. If using frozen pearl onions, separate any clumps, tuck them into the liquid, and cover the pot again.
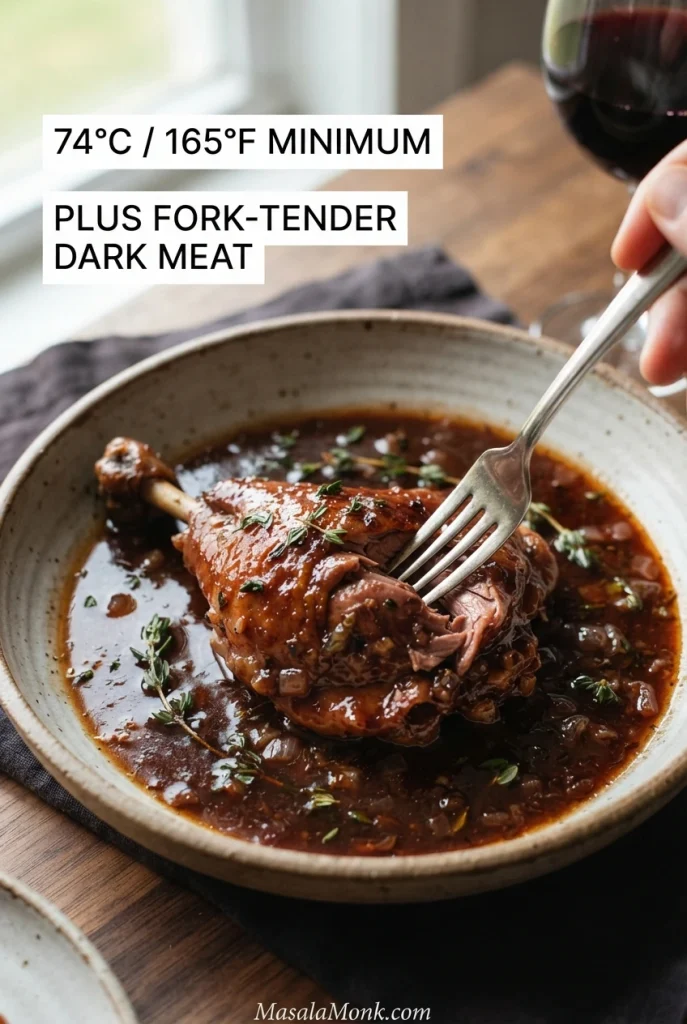
After 40–45 minutes in the oven: Begin checking smaller chicken pieces with an instant-read thermometer in the thickest part, away from bone. The chicken will usually take approximately 45–65 minutes of oven braising altogether; larger pieces may need longer.
Chicken must reach at least 74°C / 165°F internally. Thighs and drumsticks often benefit from additional gentle cooking as their connective tissue softens. A fork should enter easily and the pieces should still hold together when lifted. Check each size of piece rather than relying on one reading.
Test the pearl onions with a knife; they should be tender through the centre. If some chicken finishes first, move those pieces to a clean covered dish while the others or the onions finish. Keep this pause brief. Wash any plate or utensil that touched the partially cooked chicken before using it for fully cooked food.
5. Finish the Red-Wine Sauce
Transfer any chicken still in the pot to the clean covered dish. Lift out tender pearl onions, then discard the bay leaf and woody thyme stems. Keep the chicken warm during the brief sauce finish; for a substantial delay, hold it safely hot at 60°C / 140°F or above, or refrigerate it promptly instead of leaving it on the counter.
Set the Dutch oven over medium heat. Skim off obvious excess fat, then taste the sauce. The chicken and bacon should give it savoury depth, with a pleasant tang from the wine.
Judge the Sauce Before Adjusting It
Look for a glossy, pourable sauce that lightly coats a spoon, rather than a thick gravy.
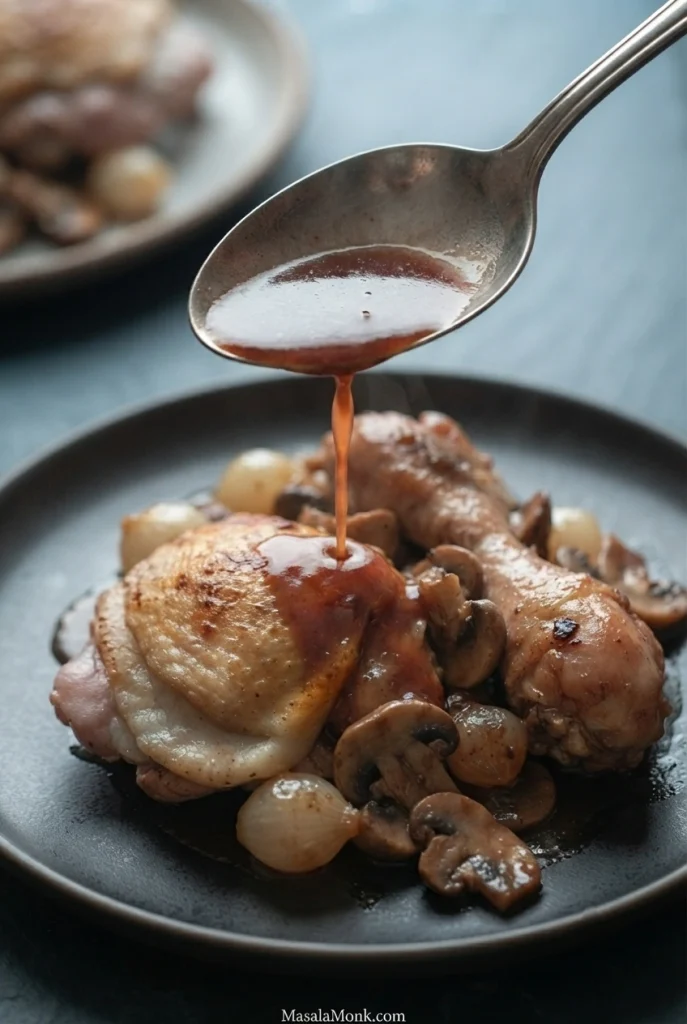
- Already rich and lightly coating a spoon? It’s ready. Leave it as it is.
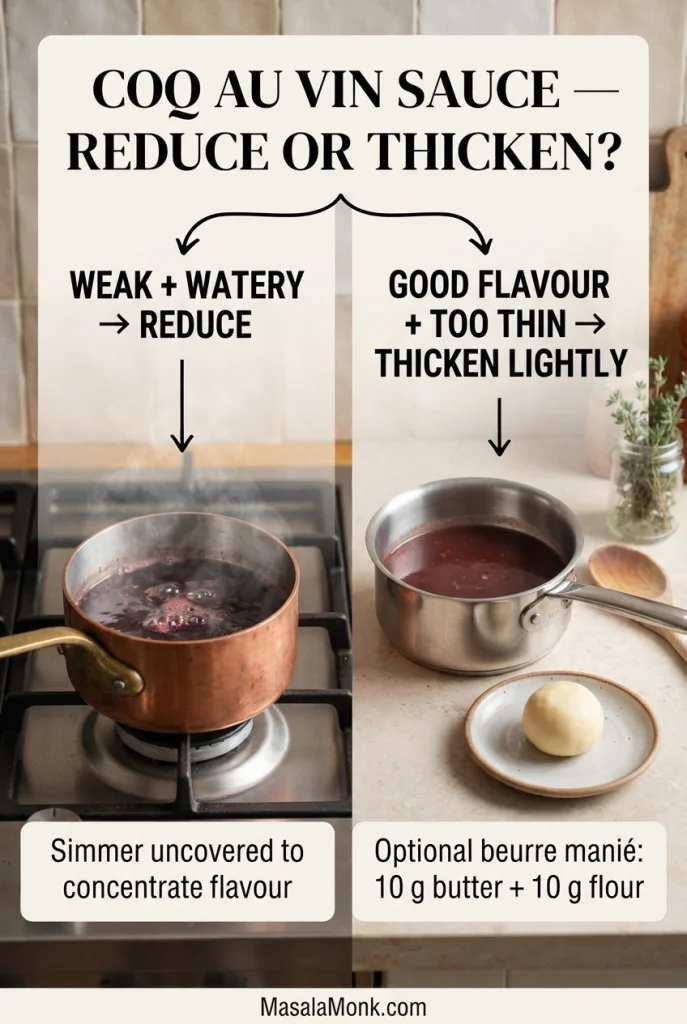
- Weak and watery? Simmer uncovered for about 5 minutes, taste again, and reduce a little longer if necessary.
- Good flavour but too thin? Mash the optional 10 g softened butter and 10 g flour into a smooth paste. Whisk in half (roughly 5 g of each), simmer for 2–3 minutes, then add more only if needed. Simmer for another 3–4 minutes to cook the flour through.
Loosen an overly thick sauce with a splash of warm unsalted or low-sodium stock. Once the texture is right, taste for salt and black pepper.
Choose reduction for a weak sauce, or a little beurre manié when the flavour is already balanced but the texture is too thin.
6. Bring Everything Together and Serve
Return the chicken, tender pearl onions, and browned mushrooms to the sauce. Spoon the liquid over the pieces and warm gently until everything is thoroughly hot. Avoid vigorously boiling already-tender chicken.
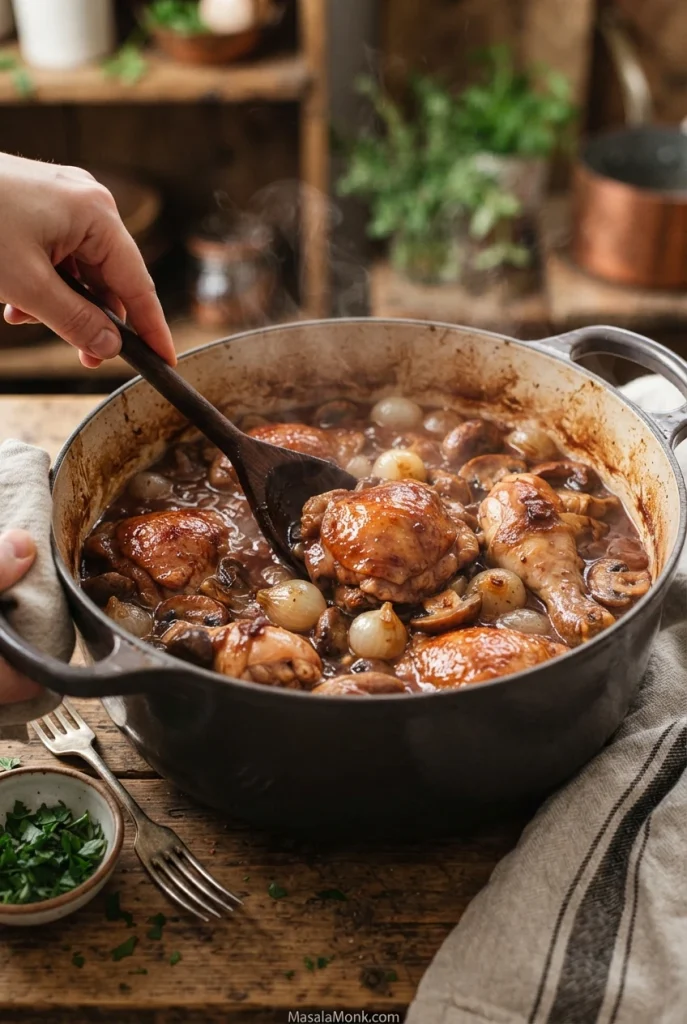
Scatter over the parsley. Serve with creamy mashed potatoes, buttered egg noodles, or crusty bread, giving each portion some onions, mushrooms, bacon, and plenty of red-wine sauce.
Set the hot Dutch oven on a sturdy heatproof trivet, or transfer everything to a warm serving dish. Keep a ladle nearby for anyone who wants more sauce.
Recipe Notes
- One-pot option: Brown the mushrooms in the Dutch oven after the chicken and before the aromatics. Set them aside, skip the separate skillet instructions in Step 4, and return them in Step 6.
- Salt: The 7 g is a starting amount for seasoning the chicken. Bacon and stock vary in saltiness, so adjust the sauce only after tasting it.
- Chicken skin: The browned skin softens during covered braising. That’s normal for this dish.
- Stovetop option: Use a heavy covered pot over low heat, maintaining a quiet simmer and checking occasionally for scorching or excess evaporation.
- Timing: The total allowance assumes mushroom browning and side-dish preparation overlap with oven braising. Fresh pearl onions or additional browning batches may add time.
For adjustments, see common cooking problems and fixes.
Coq au Vin Cooking Guide
Want to choose a different wine, understand why the sauce behaves as it does, or plan this dish ahead? The guide below covers those decisions, traditional variations, and quick fixes for common cooking problems.
- What Is Coq au Vin?
- Choosing the Chicken
- Best Red Wine for Coq au Vin
- Getting the Sauce Right
- Three Checks Before Serving
- Troubleshooting
- Substitutions and Variations
- What to Serve with Coq au Vin
- Make Ahead and Storage
- Frequently Asked Questions
What Is Coq au Vin?
The name means “rooster in wine.” Traditionally, coq au vin made use of mature, tougher birds that needed long, gentle cooking. Modern chicken becomes tender much sooner, bringing the dish within reach of a home cook with an afternoon to spare.
Coq au vin is a French dish of poultry braised in wine, often with lardons, onions, mushrooms, and herbs. The familiar red-wine preparation is especially associated with Burgundy. Le Cordon Bleu’s Coq au Vin recipe demonstrates a more traditional approach involving marination and separately prepared garnishes.
This version keeps the techniques that contribute the most flavour: browning the chicken well, cooking it gently in wine, and adding browned mushrooms near the end. The overnight marinade is optional, making the dish practical for same-day cooking. If planning ahead, see the covered overnight marinade method.
Choosing the Chicken
Bone-in thighs and drumsticks are the best fit for this recipe. Their dark meat becomes tender during gentle braising and holds together well when served.
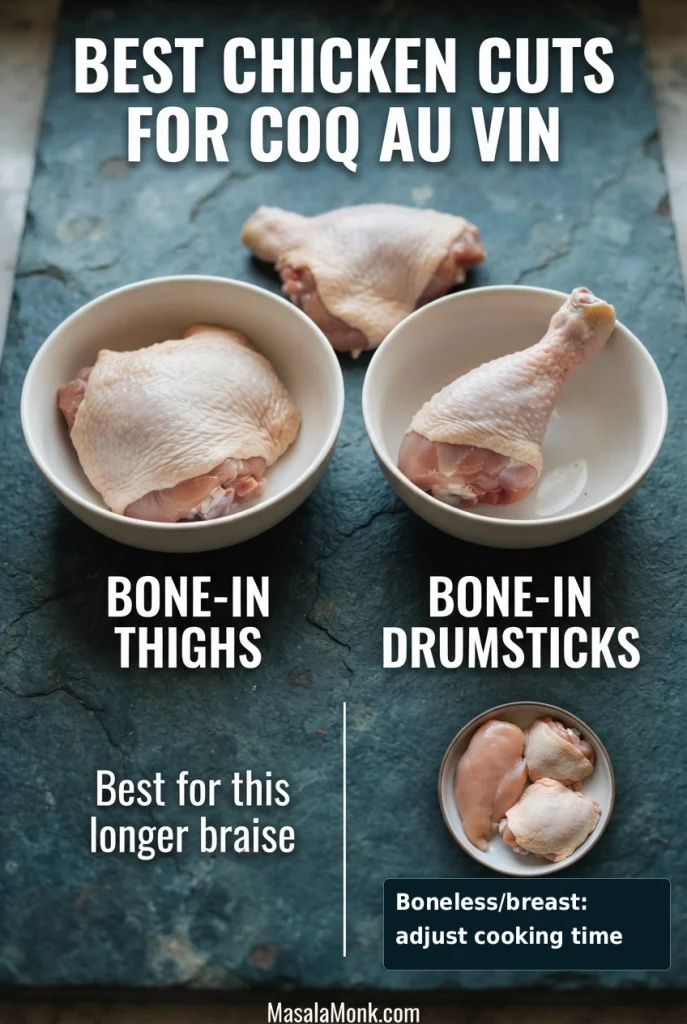
A whole chicken cut into portions also works, but the breasts usually finish before the legs. Remove breast pieces when safely cooked and allow the dark meat more time if needed.
Boneless thighs cook faster; start checking them sooner, around 20–25 minutes of braising, and follow the thermometer and tenderness cues rather than the bone-in schedule. Chicken breasts are less forgiving in a long braise and require different timing; this method is designed for thighs and drumsticks. For thin breast cutlets, a quicker skillet dish such as chicken piccata may be a better choice.
All chicken must reach at least 74°C / 165°F internally. Use a thermometer rather than colour or elapsed time alone. See the FoodSafety.gov safe minimum internal temperatures for official poultry guidance.
Best Red Wine for Coq au Vin
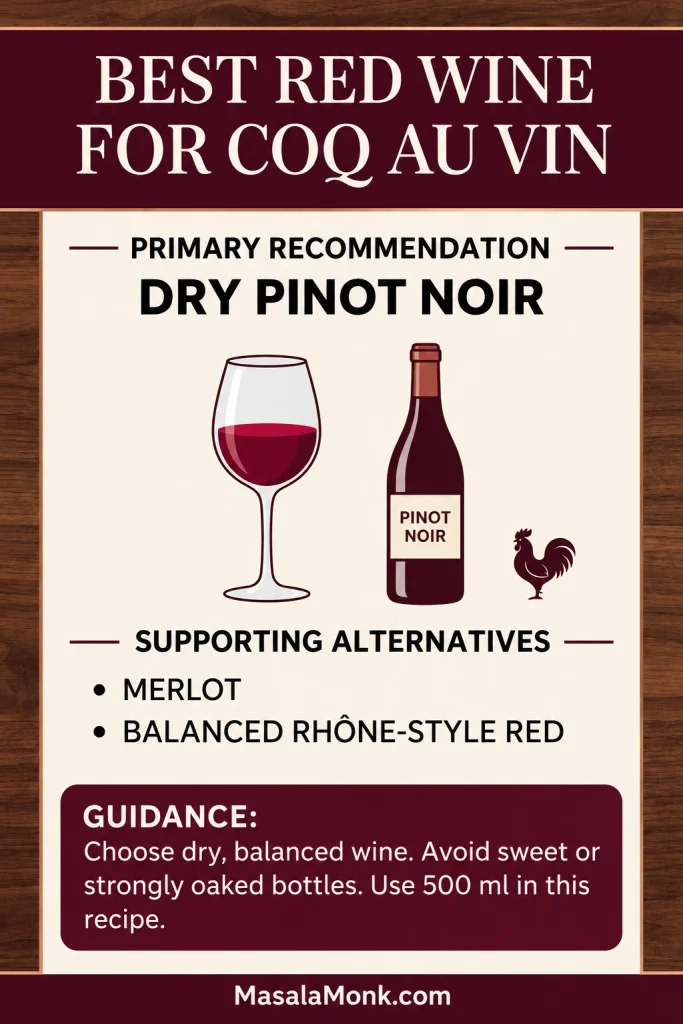
Pinot Noir is the first choice for this version. Its fruit and relatively gentle tannins work well with chicken and bacon. Merlot or a balanced Rhône-style red is also suitable.
Choose a dry wine that tastes pleasant rather than chasing an expensive Burgundy. Very sweet, heavily oaked, bitter, or aggressively tannic wines are less appealing once concentrated into a sauce.
For a different chicken-and-wine dinner, Chicken Marsala uses fortified Marsala in a quicker mushroom sauce. Coq au vin uses dry red wine and a longer, gentler braise.
Should you reduce the wine before braising? Some traditional preparations reduce it separately and more extensively. This recipe simmers the wine briefly with aromatics before adding stock, retaining enough liquid for the chicken to cook.
Getting the Sauce Right
Why Is the Sauce Watery?
A tight-fitting lid traps most of the moisture, so the sauce can look surprisingly thin even when the chicken is tender. Stock matters too: gelatin-rich stock adds natural body, while a lighter commercial stock often leaves a thinner finish.
Thinness and weak flavour aren’t the same thing. A sauce can taste deeply savoury yet remain quite fluid. The method explains how to distinguish a sauce that needs gentle reduction from one that only needs a little body.
Why Does It Taste Sour or Harsh?
Red wine contributes acidity, tannins, and fruit flavour. Cooking concentrates those elements, so an especially sharp wine or excessive reduction can leave a sauce too sour or bitter.
Some tang is part of coq au vin’s character. The browned chicken, bacon, stock, and vegetables provide the savoury foundation that balances it. If the finished sauce tastes unpleasantly sharp, go to troubleshooting rather than reducing it further.
How Thick Should the Sauce Be?
For this version, aim for a glossy, pourable sauce that lightly clings to the chicken. Some traditional preparations are thicker or more concentrated; the method here deliberately keeps thickening optional. If your sauce needs adjustment, return to the reduce-or-thicken decision in the recipe.
Three Checks Before Serving
Chicken, onions, and sauce don’t always finish at precisely the same time. Check all three before bringing the dish together.
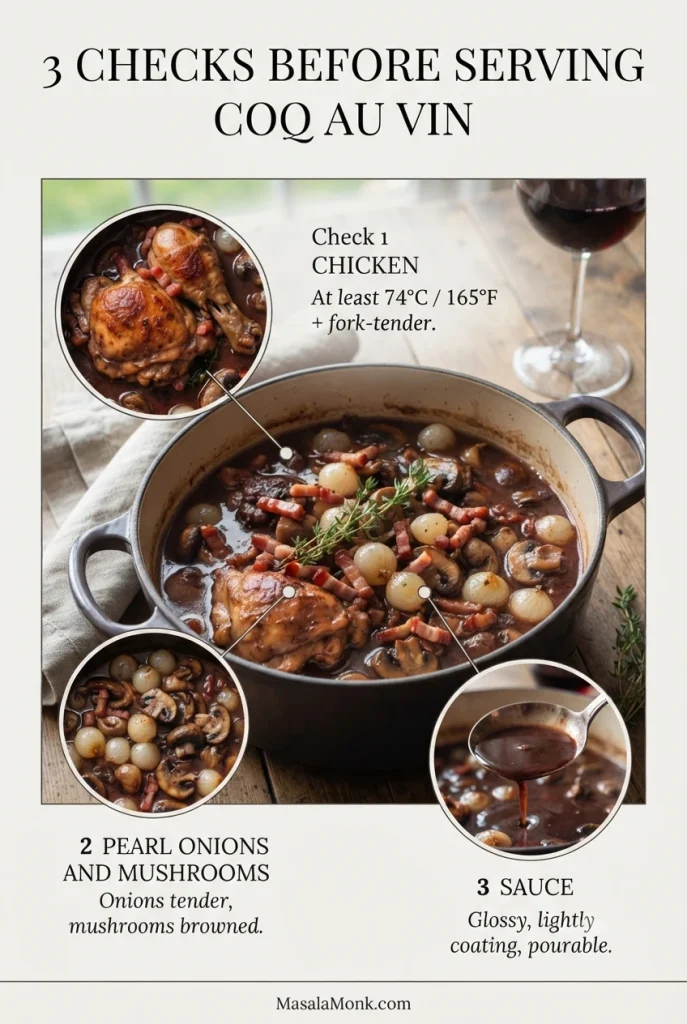
- Chicken: At least 74°C / 165°F internally, tender under a fork, and holding together when lifted.
- Garnishes: Pearl onions tender through the centre and mushrooms nicely browned.
- Sauce: Savoury, pleasantly wine-flavoured, and lightly coating a spoon.
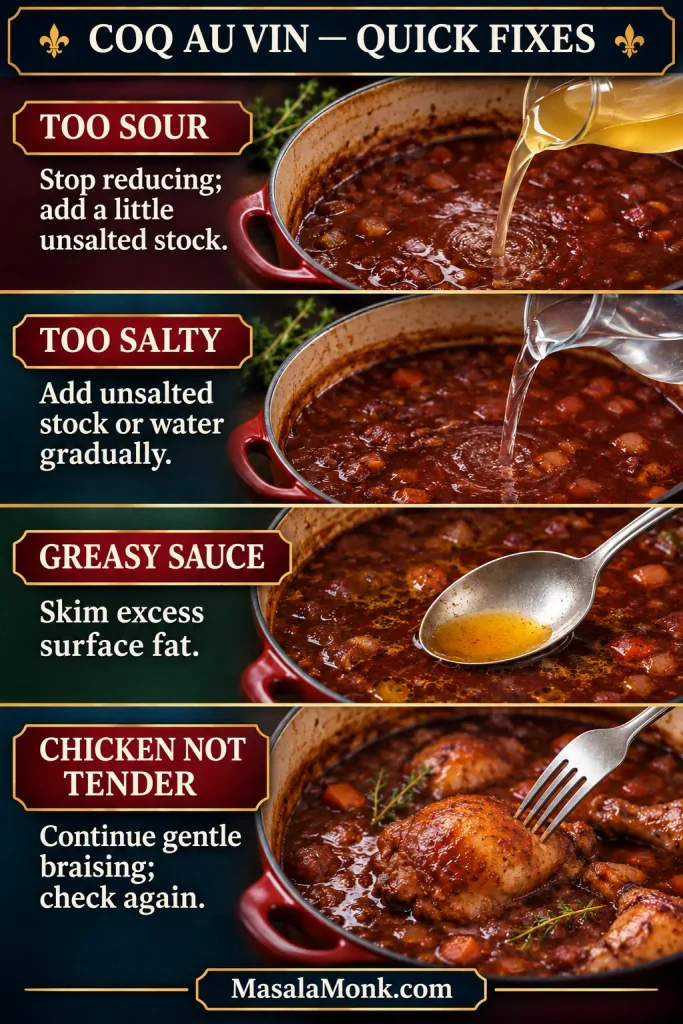
Troubleshooting: Quick Fixes
| Problem | First move |
|---|---|
| Sour sauce | Stop reducing and add a little unsalted stock. |
| Watery sauce | Reduce if weak; thicken lightly if flavourful. |
| Greasy sauce | Skim off excess fat. |
| Salty sauce | Add unsalted liquid and avoid further reduction. |
| Tough dark meat | Check temperature, then braise gently for longer if needed. |
| Dry chicken | Stop cooking and serve with sauce. |
| Firm pearl onions | Remove cooked chicken; simmer onions until tender. |
| Watery mushrooms | Cook in an uncrowded skillet until moisture evaporates. |
Why Does the Chicken Taste Bland When the Sauce Is Good?
A flavourful sauce doesn’t necessarily season the centre of a thick piece of chicken. Salting before browning helps. If the meat tastes underseasoned when served, add a small amount of salt to the exposed meat rather than oversalting the entire sauce.
Why Does the Chicken Look Purple or Grey?
Pigments in red wine can colour chicken skin and exposed meat purple or grey-brown. Appearance varies with the wine and cooking method. A thermometer, not colour, confirms safe cooking.
Ready to cook? Back to the recipe. If the chicken is already finished, choose what to serve with it.
Substitutions and Variations
Optional Overnight Wine Marinade
Choose the same-day method when you want coq au vin without advance preparation. An overnight wine marinade offers a more traditional-style approach. Allow an additional 8–12 hours of refrigerated marination before the recipe begins.
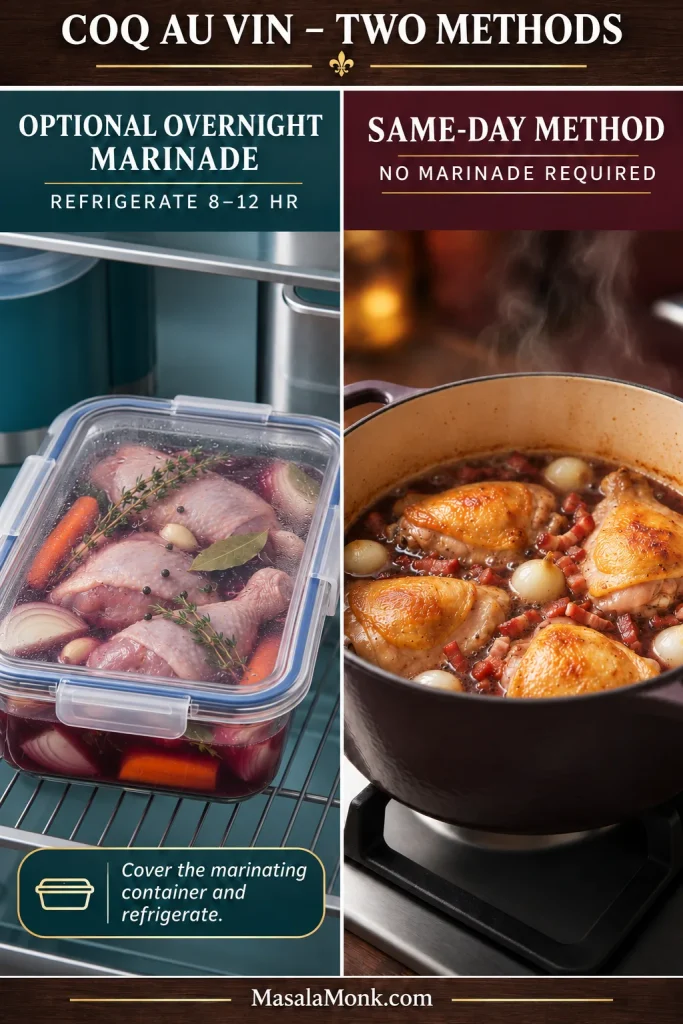
For the optional overnight marinade, place the chicken in a snug, nonreactive container with the measured 500 ml red wine. Add the recipe’s diced onion, carrot and thyme sprigs if you want the aromatic marinade shown in the photograph. Cover and refrigerate for 8–12 hours, turning occasionally if the chicken is not fully submerged. Use the same wine and aromatics later in cooking; do not double the ingredient quantities.
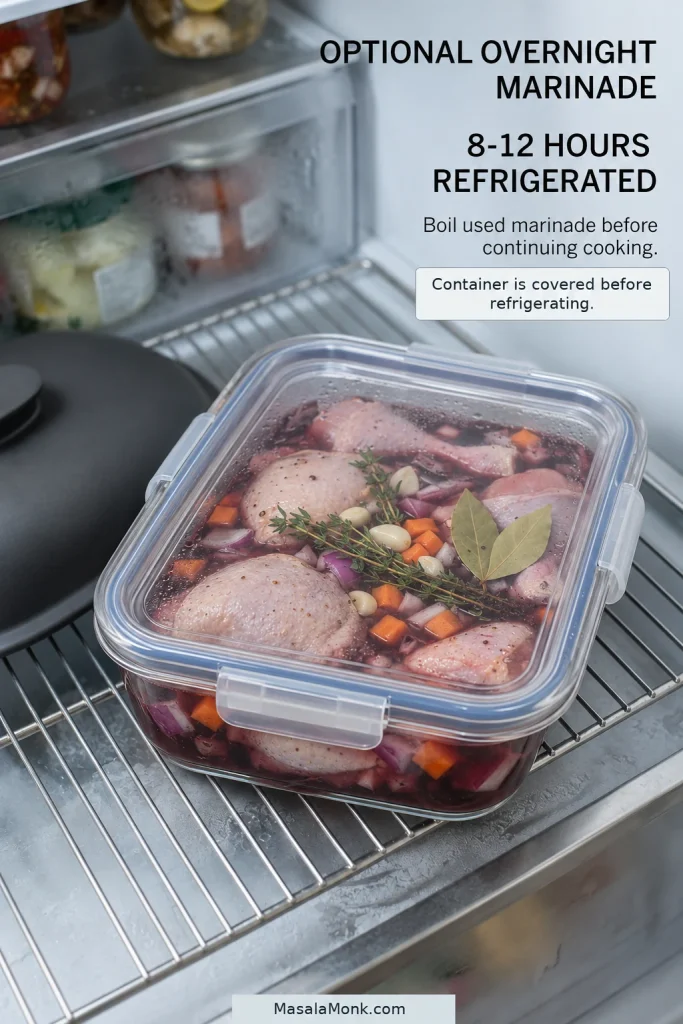
Use the Marinade Safely in the Braise
Remove the chicken from the marinade and pat it thoroughly dry before browning. Strain and keep the used wine refrigerated until Step 3. If you added the diced onion and carrot to the marinade, drain them well and cook those same vegetables in Step 3 instead of adding another batch. Add the reserved thyme when the stock goes in. The marinade wine replaces the recipe’s 500 ml cooking wine; it is not an additional quantity.
Because the marinade has touched raw poultry, bring it to a full boil when adding it to the aromatics, then continue with the simmer and braise. Never use uncooked poultry marinade as a finishing sauce.
Simple Ingredient Substitutions
- No bacon: Use a little extra neutral oil for browning. The sauce will lose some cured-pork flavour.
- No pearl onions: Use small peeled shallots, halving larger ones.
- No mushrooms: Leave them out for a simpler sauce.
- No tomato paste: Omit it; the browned chicken, wine, bacon, and aromatics supply the main flavour.
Gluten-Free Coq au Vin
Check that the bacon, stock, and other packaged ingredients are gluten-free. The main braise uses no wheat flour, so omit the optional beurre manié.
To thicken the sauce if needed, mix 1 tsp (about 3 g) cornstarch with 2 tsp (10 ml) cold water. Whisk in a little at a time while the sauce simmers, stopping once it has enough body.
Slow Cooker and White-Wine Versions
Slow cookers retain more moisture than oven braises, so they require different liquid amounts and cooking times. Use a dedicated slow-cooker method for that appliance.
Coq au vin blanc and Alsatian coq au Riesling use white wine; the Riesling preparation may also include cream. Both are related French dishes with a different sauce character.
What to Serve with Coq au Vin
A bowl of buttery mashed potatoes is hard to beat with coq au vin. Spoon the red-wine sauce over both, add green beans or a crisp salad, and the meal needs little else.
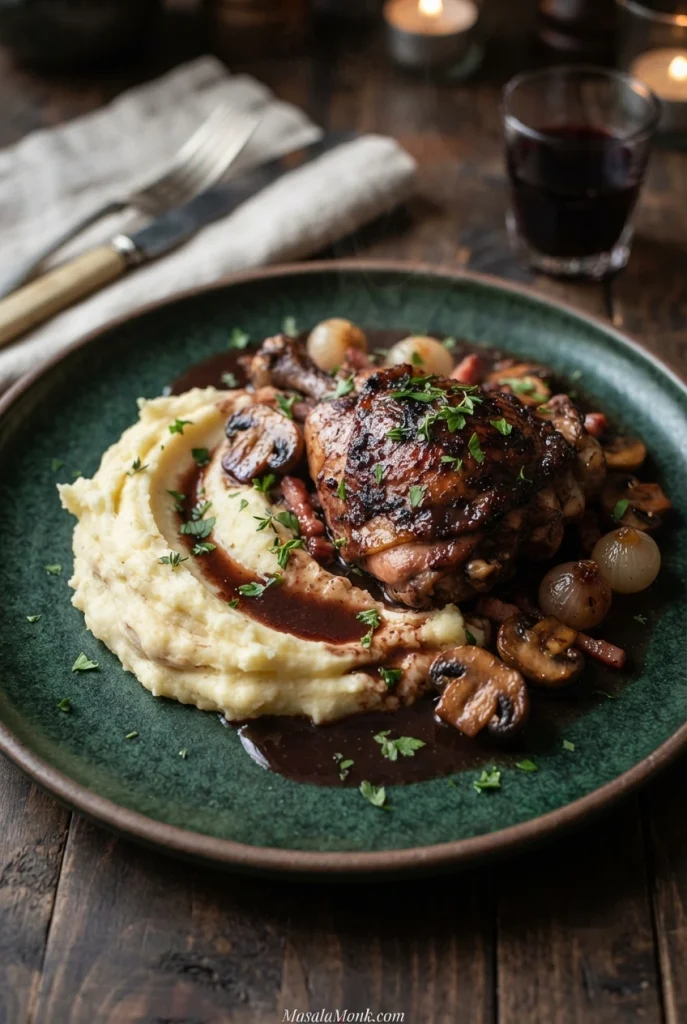
- Mashed potatoes: For four generous portions, start with approximately 800 g–1 kg (1¾–2¼ lb) potatoes before peeling.
- Buttered egg noodles: A comforting alternative prepared shortly before serving.
- Crusty bread: A baguette or rustic loaf for the sauce left on the plate.
- Green beans: Green beans almondine brings lemon and toasted almonds to the meal.
- Green salad: Lightly dressed leaves provide a fresh contrast to the braise.
Other Sides for Coq au Vin
Buttered egg noodles are a convenient serving option when you want to prepare the accompaniment shortly before dinner.
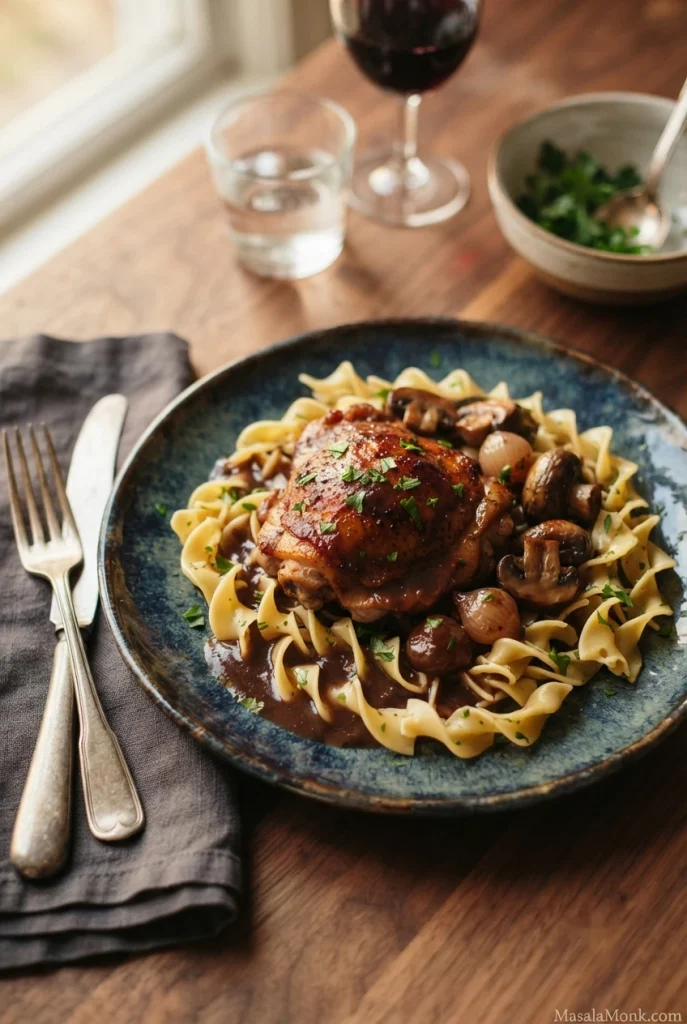
Green beans almondine offer a fresh, crisp contrast to the wine-braised chicken and its rich sauce.

Planning the Meal
Start roughly three hours before serving. While the chicken braises, brown the mushrooms and prepare the mashed potatoes or vegetables. Buttered noodles and a simple salad are convenient when you want a relaxed final few minutes.
For a crisp potato side, roasted potatoes work well. They need a hotter oven than the braise. Use a second oven or plan to roast them after the Dutch oven comes out; the latter adds time beyond the advertised 2½–3 hours, and the cooked chicken must be held safely hot.
Make Ahead, Storage, and Reheating
Can You Make Coq au Vin a Day Ahead?
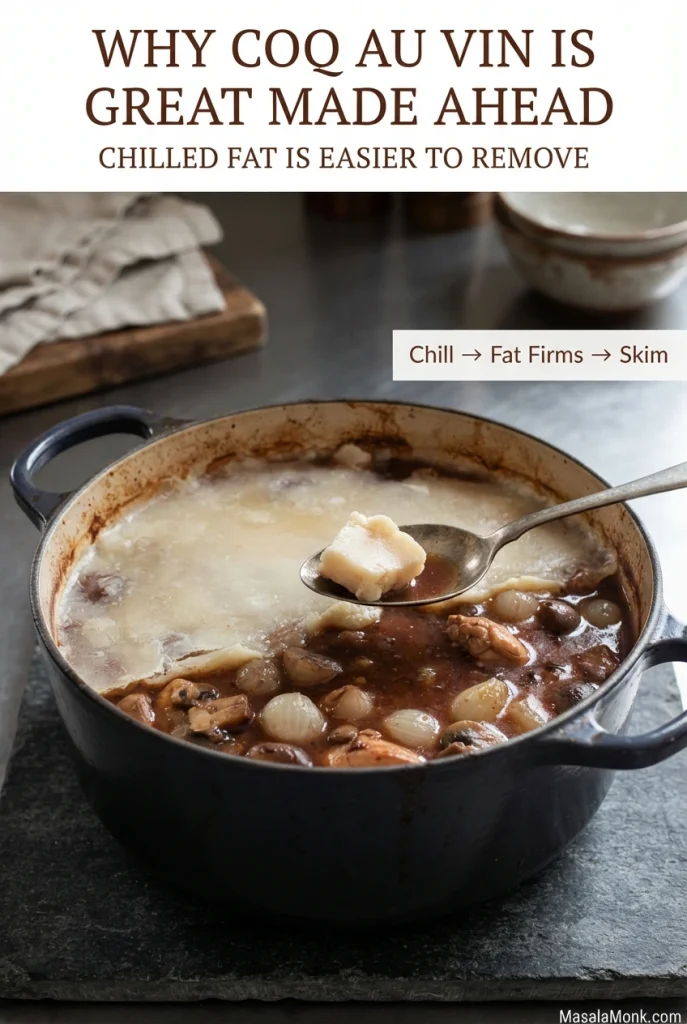
Yes. The chicken and sauce can be cooked a day ahead, leaving less to do when guests arrive. Chilling also lets excess fat firm up on the surface, making it easier to remove before reheating.
Transfer chicken and sauce to shallow containers and refrigerate promptly. For the best mushroom texture, brown the mushrooms closer to serving and add them during reheating.
Refrigerating and Freezing
Refrigerate cooked food within two hours, or within one hour when the surrounding temperature is above 32°C / 90°F. Divide large quantities into shallow containers to help them cool quickly.
Keep refrigerated at 4°C / 40°F or colder and eat leftovers within 3–4 days. For longer storage, freeze portions in airtight containers at −18°C / 0°F. Aim to use frozen portions within 2–3 months for the best flavour and texture.
Reheating Without Drying the Chicken
Thaw frozen portions in the refrigerator. Bring the sauce to a boil during reheating, then lower the heat and add the chicken. Warm gently until the meat reaches 74°C / 165°F throughout.
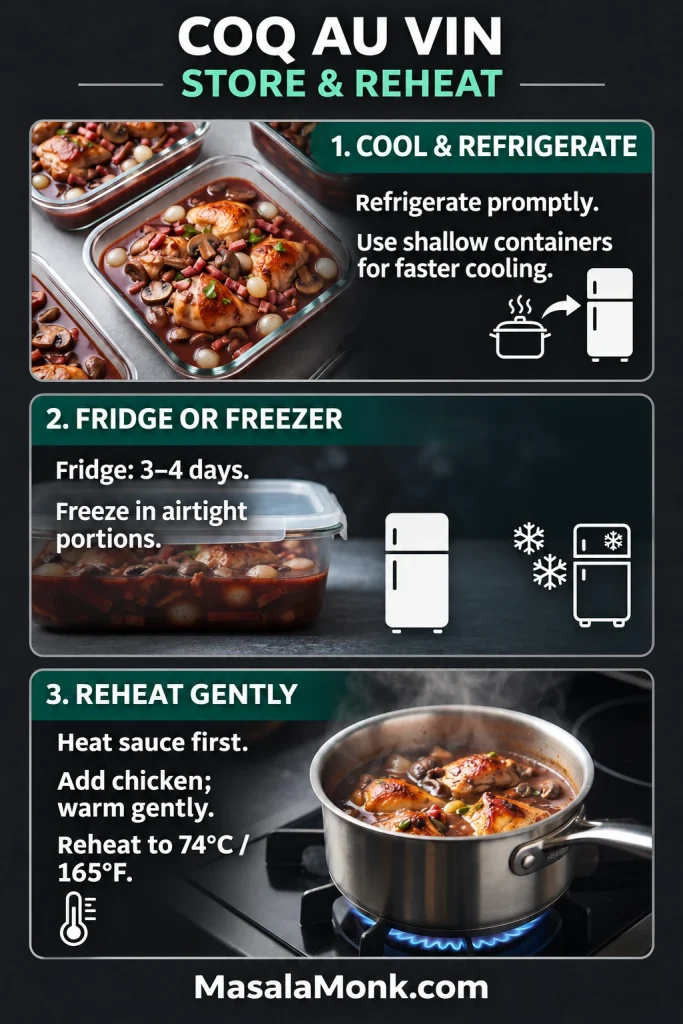
Loosen the sauce with a splash of low-sodium stock if needed. Serve promptly once everything is hot. If dinner is delayed, keep the food safely hot or refrigerate it instead of leaving it at room temperature.
Frequently Asked Questions
Is Coq au Vin Difficult for Beginners?
The most hands-on part is browning the bacon and chicken in batches. After that, the oven handles much of the cooking. Watch the simmer, chicken tenderness, and final sauce consistency, using the checkpoints in Step 4.
Can You Make Coq au Vin Without a Dutch Oven?
Yes. A wide, heavy oven-safe casserole with a lid works well. You can also braise in a heavy covered pot on the stovetop, maintaining a gentle simmer and checking occasionally for scorching.
Does All the Alcohol Cook Off?
No. Cooking reduces alcohol in wine but doesn’t reliably eliminate every trace. The amount remaining depends on time, temperature, liquid volume, and vessel. Anyone who needs to avoid alcohol entirely should choose an alcohol-free chicken braise.
Can You Make Coq au Vin Without Red Wine?
You can make a chicken braise with stock, bacon, onions, mushrooms, and herbs, but it will taste different from red-wine coq au vin. A wine-free recipe designed around that different liquid and seasoning balance is a more reliable choice.
What’s the Difference Between Coq au Vin and Beef Bourguignon?
Both are French wine-braised dishes that often include bacon, onions, mushrooms, and herbs. Coq au vin uses poultry, while beef bourguignon uses beef and generally requires a longer braise.
Did you use the same-day method or marinate overnight? Tell us how your sauce turned out—and what you’d do differently next time.








