
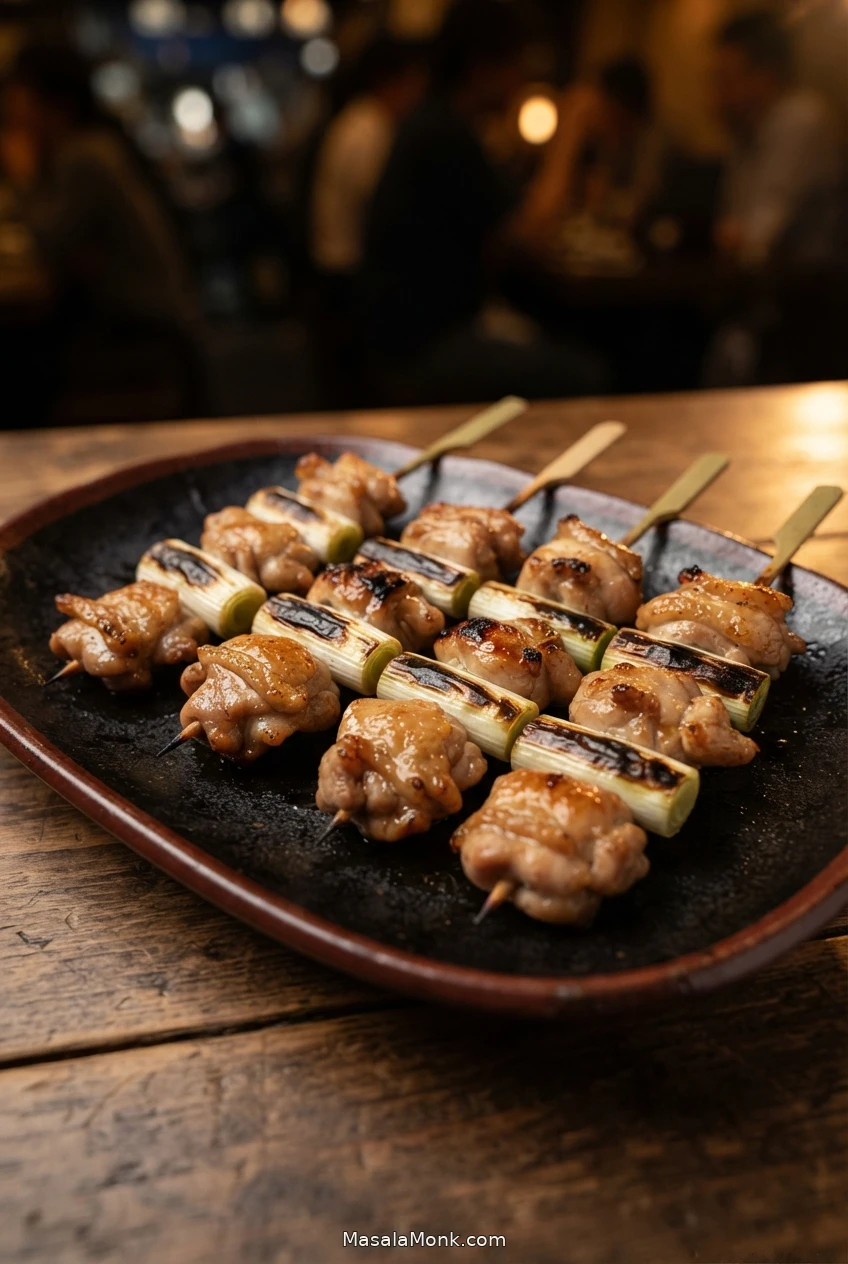
There’s a reason chicken and scallions belong on the same yakitori skewer. The thigh meat browns at the edges while the onion softens and turns sweet, giving you two textures in each bite. Brush on tare near the end and the sauce catches on the browned chicken, rather than burning before the meat has cooked.
This chicken yakitori recipe makes negima, Japanese chicken-and-scallion skewers, with a homemade sauce of soy sauce, mirin, sake and sugar. The main method uses an oven broiler, so you can make browned skewers without a charcoal grill. You’ll also find options for outdoor grilling, a frying pan, an air fryer and a conventional oven.
There’s no overnight marinade. You’ll prepare the sauce while the skewers soak, fold the chicken thighs into manageable pieces and cook by what the meat is doing—not by the timer alone.
Jump to the complete chicken yakitori recipe
In This Guide
- Recipe and Ingredients
- What Is Yakitori?
- Homemade Tare Sauce
- Threading Skewers
- Five Cooking Methods
- Troubleshooting
- Substitutions
- Shio vs Tare
- Serving and Rice Bowls
- Storage and Reheating
Chicken Yakitori Recipe with Homemade Tare Sauce
Serves: 4 | Yield: 10 standard skewers or about 15 compact skewers. Prep: 25–30 minutes, overlapping with bamboo soaking and sauce preparation. Tare simmering: about 10–18 minutes. Broiler cooking: about 12–16 minutes per batch. Estimated total: 50–65 minutes for one batch, including setup and preheating. Add cooking and handling time for further batches.
Chicken and Scallion Ingredients
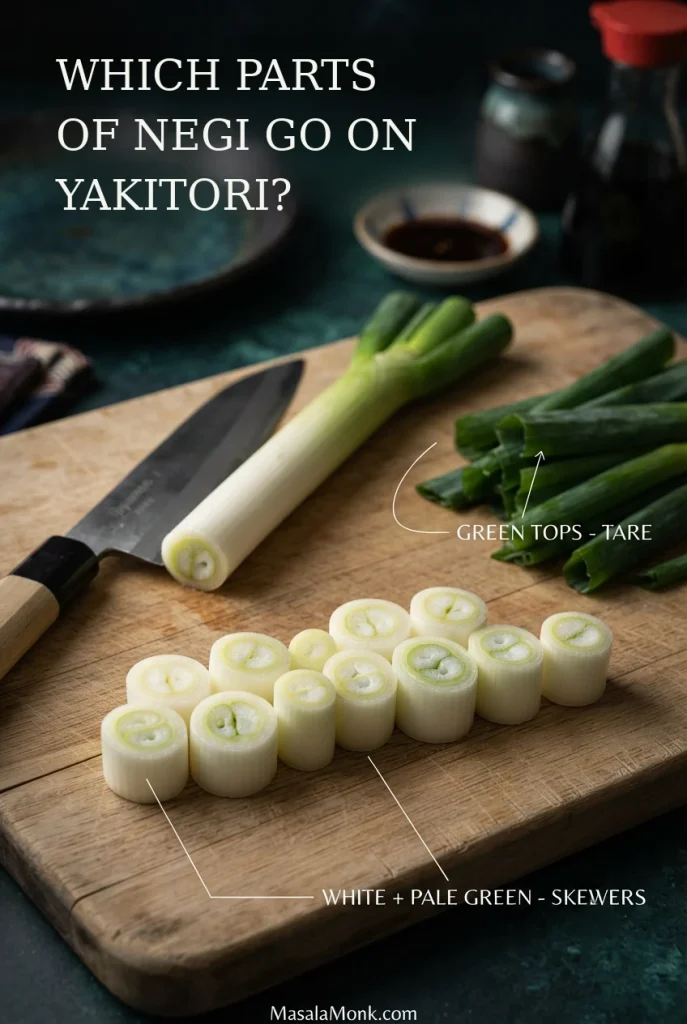
Chicken thigh remains moist through broiling, while firm white and pale-green negi sections can blister without collapsing. Use the flexible scallion tops to flavour tare instead of trying to thread them.
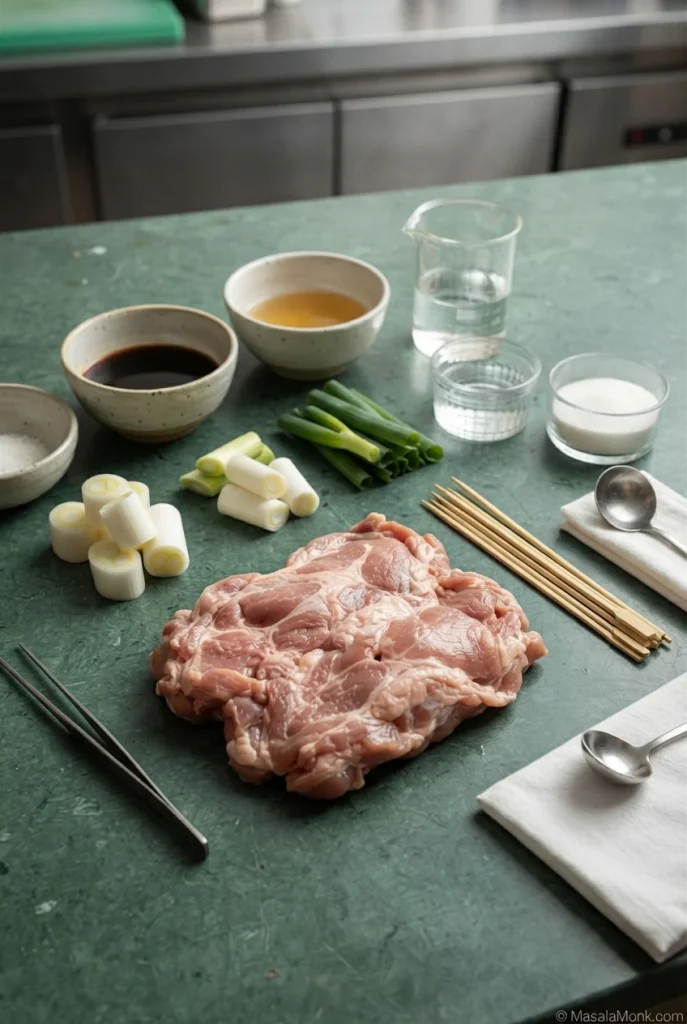
- 600 g (1 lb 5 oz) boneless, skinless chicken thighs
- 100–150 g (3½–5¼ oz) prepared Japanese negi or firm spring-onion/scallion whites and pale-green sections, enough for 20 pieces
- 10 ml (2 tsp) neutral oil, for lightly greasing the cooking surface
- Shichimi togarashi, sansho pepper or lemon wedges, optional, to serve
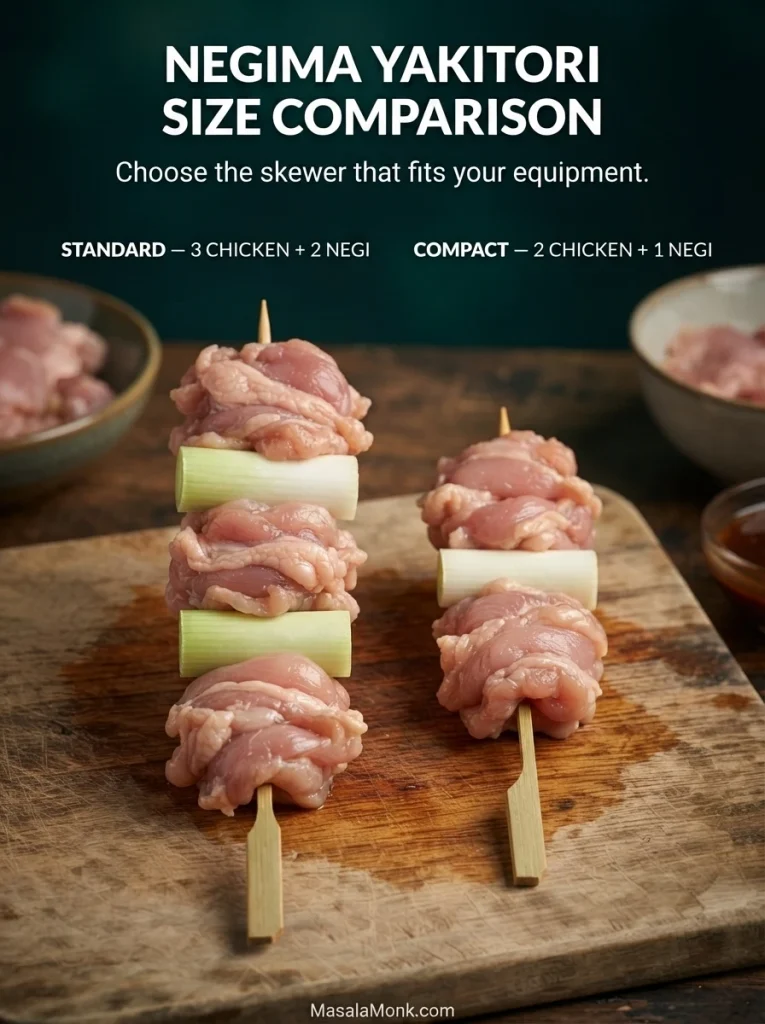
For 10 standard skewers: Cut 30 chicken pieces and 20 scallion sections. Each stick gets three pieces of chicken and two of scallion. For 15 compact skewers: Use two chicken pieces and one scallion section on each stick; cook the five leftover scallion pieces alongside or save them for another dish.
Homemade Yakitori Tare Ingredients
The soy sauce, mirin and sake contribute different kinds of saltiness, sweetness and aroma. Follow the measured formula before adapting it; an overly salty or sugary substitute can become stronger as the tare reduces.
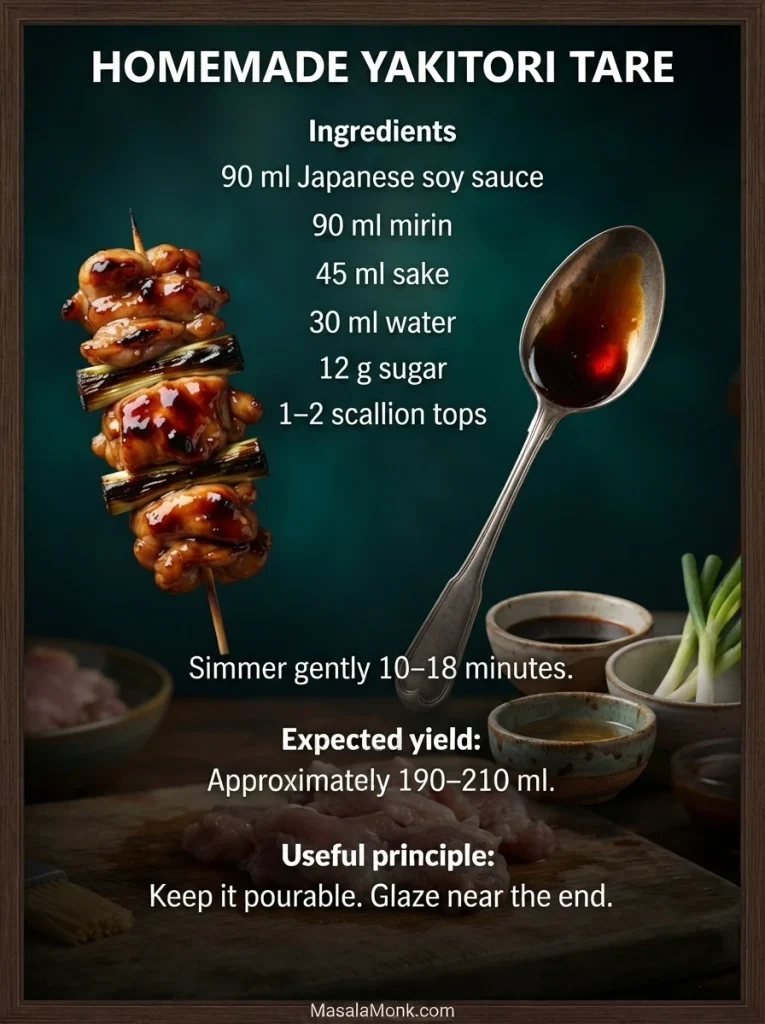
| Ingredient | Metric | US measure |
|---|---|---|
| Regular Japanese soy sauce | 90 ml | 6 tbsp |
| Mirin | 90 ml | 6 tbsp |
| Sake | 45 ml | 3 tbsp |
| Water | 30 ml | 2 tbsp |
| Granulated sugar | 12 g | About 1 tbsp |
| Green scallion tops | 1–2 pieces | 1–2 pieces |
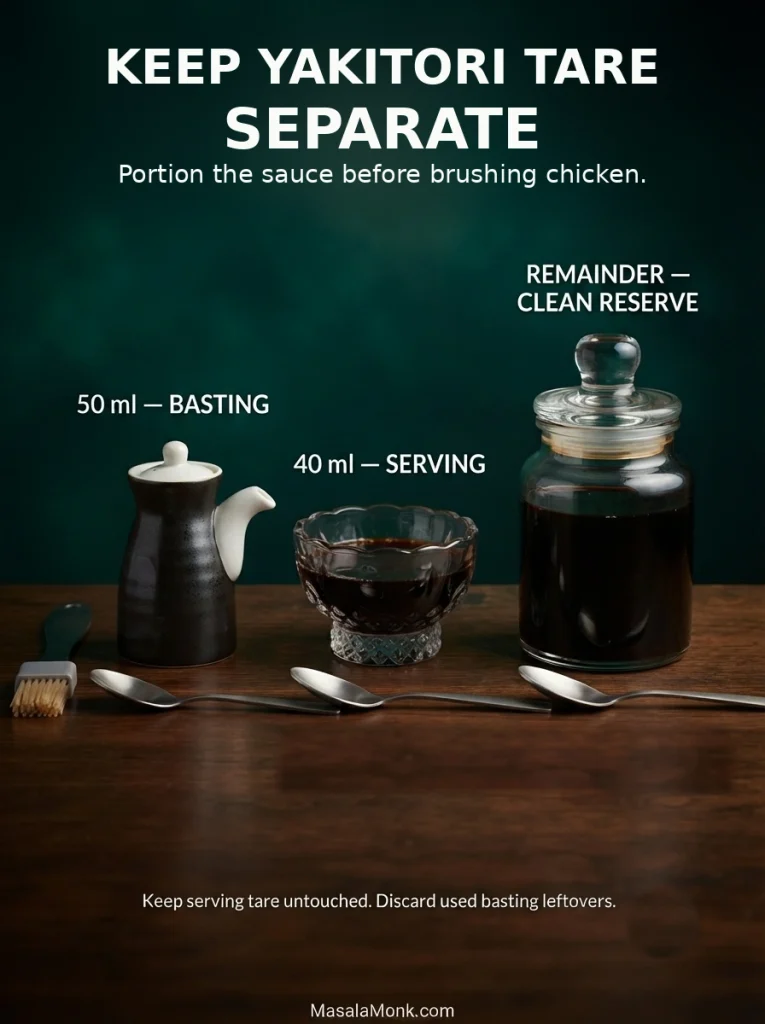
Expected tare yield: about 190–210 ml, intentionally more than you need. Put 50 ml in the initial basting bowl and keep 40 ml untouched for serving. Leave the remainder clean. If you need more basting sauce, pour a little from the clean surplus into the used basting bowl—never the other way around. For fully cooked skewers that need a finishing brush, pour a small amount of clean surplus into a separate finishing bowl; keep the table portion separate. Refrigerate or freeze unused clean tare.
Divide the cooked tare before beginning raw-chicken preparation. Once a brush touches partly cooked chicken, that portion is for basting only; untouched sauce is available for serving or a final off-heat brush.
Equipment
Use a saucepan, knife, cutting board, 10 standard skewers or 15 shorter skewers sized to your equipment, tongs, a basting brush and a thin-tipped instant-read thermometer. The broiler method also needs a rimmed baking tray and an oven-safe wire rack rated for broiler heat. Prepare separate bowls for basting, finishing cooked chicken and serving so raw-chicken contact never reaches the clean sauce. If a broiler is unavailable, compare the five cooking methods for yakitori before choosing your skewers.
How to Make Chicken Yakitori
- Soak the skewers. If using bamboo, soak for about 30 minutes while preparing the sauce and ingredients. Soaking may slow scorching, but exposed ends can still burn near the broiler or flames.
- Start the tare. Add soy sauce, mirin, sake, water, sugar and scallion tops to a small saucepan. Bring to a light boil, stirring to dissolve the sugar, then lower to a gentle simmer.
- Reduce and divide. Simmer uncovered for about 10–18 minutes. Aim for roughly 190–210 ml of a savoury-sweet sauce that still pours easily; taste a cooled spoonful before deciding to reduce further. It may look thin while hot. Checking volume in a heat-safe jug is optional. Remove the scallion tops. Before touching raw chicken, portion 50 ml for basting, 40 ml for serving and the remainder into a clean container. Cool and refrigerate unused sauce promptly.
Prepare and Thread the Chicken
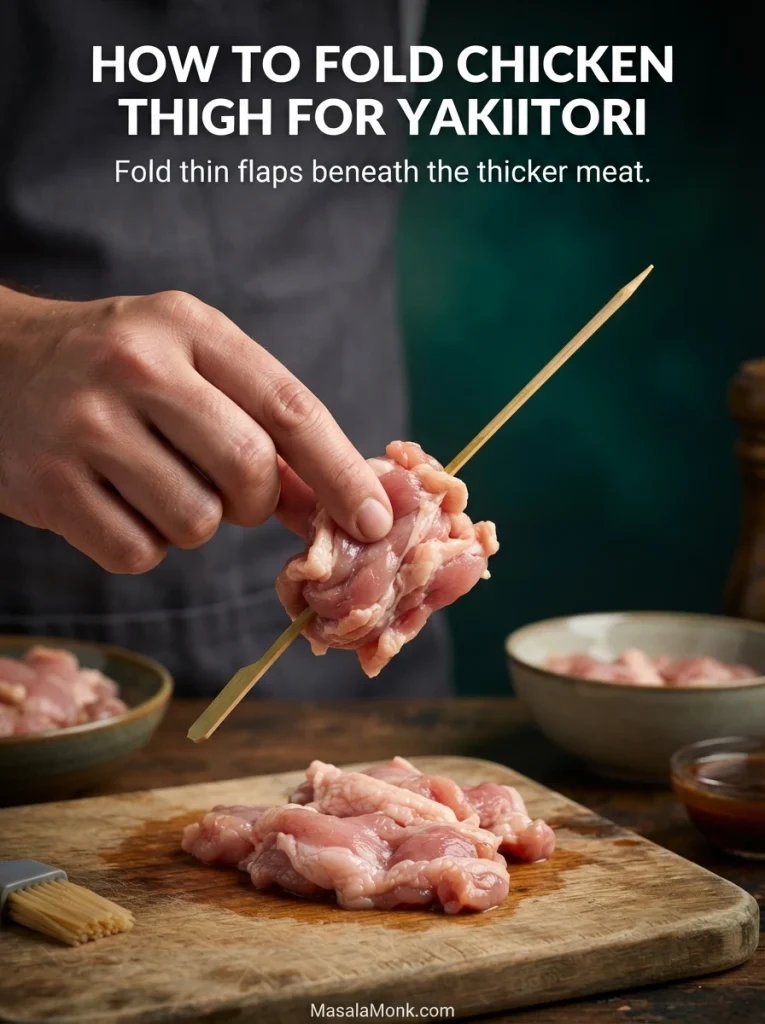
- Cut the chicken. Pat the chicken thighs dry with paper towels. Trim large loose pieces of fat or connective tissue. Divide the 600 g thighs into about 30 pieces averaging 18–22 g. Fold thin flaps underneath; aim for reasonably similar thicknesses rather than perfect cubes.
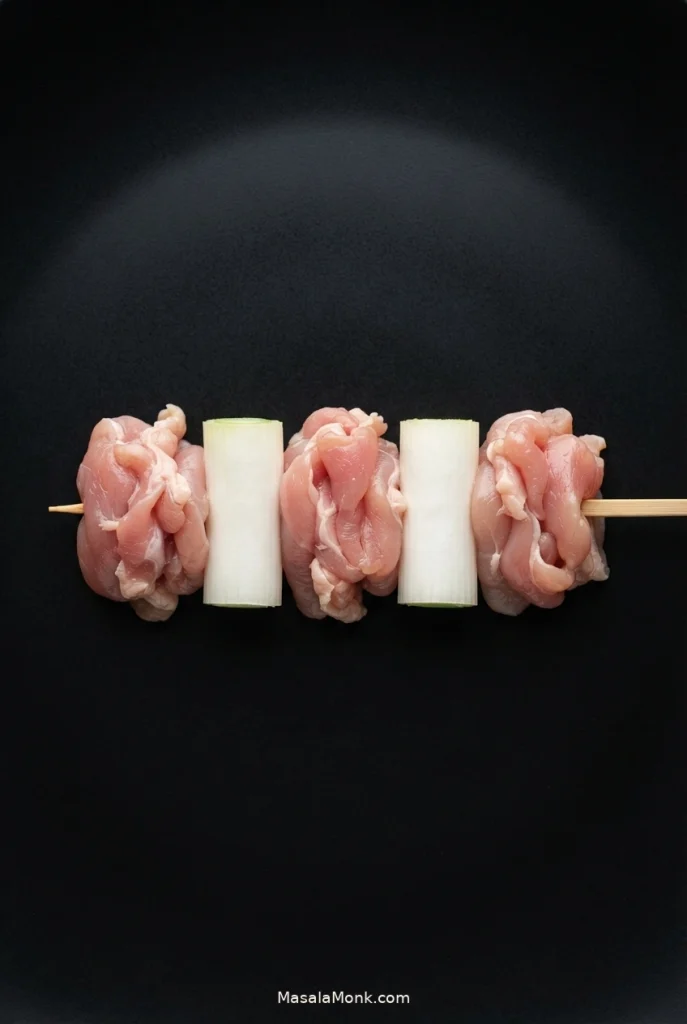
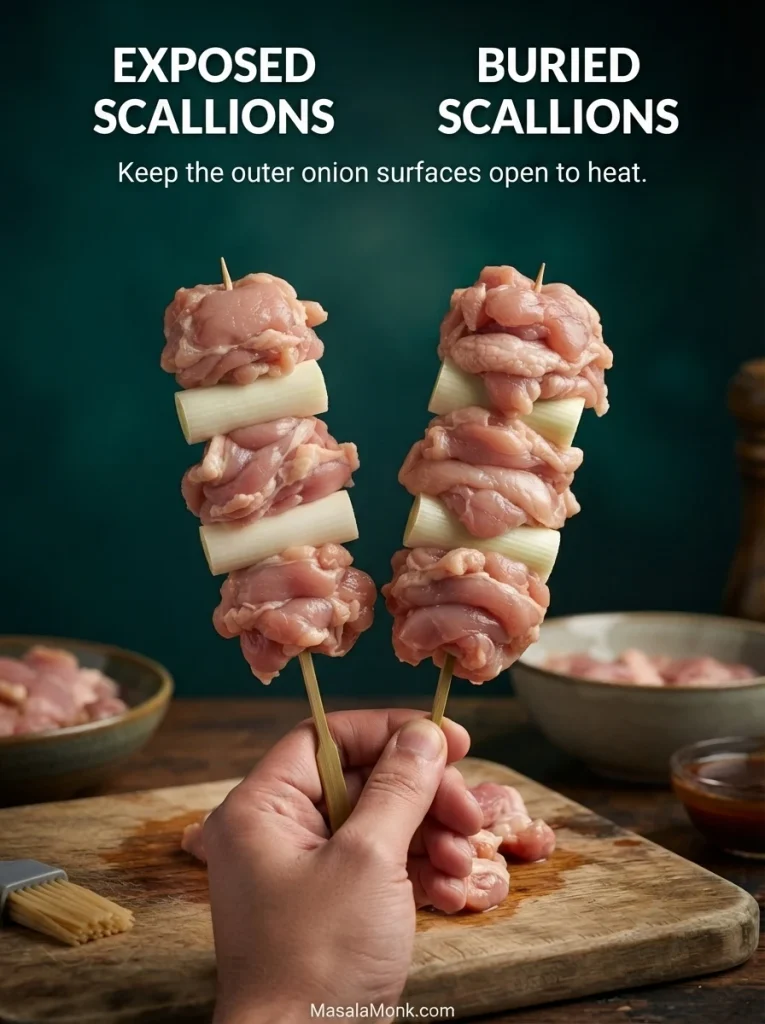
- Thread chicken and scallions. Cut 20 firm scallion sections about 2–2.5 cm long. For ten standard skewers, alternate chicken → scallion → chicken → scallion → chicken. Pierce the folded centre of each piece of thigh. Keep the scallions close but with their outer sides exposed; don’t bury them beneath large chicken folds.
A thigh has thin ends and thicker folds. Tuck a loose flap beneath the thicker part, then pierce both layers so the skewer holds them in place without squeezing the meat into a dense cube.
Thread three chicken-thigh portions with two substantial negi cylinders between them. Check the arrangement from the side before cooking: the onion should not disappear beneath the chicken folds.
Broil the Skewers: Setup and First Browning
- Preheat the broiler. Line a rimmed tray with foil, set a lightly oiled broiler-safe rack above it and preheat on high. Arrange the skewers in an uncrowded single layer about 15–20 cm (6–8 inches) below the element where your oven allows. Shield exposed bamboo handles from direct heat without letting foil touch the element.
- Brown the first side. Broil about 5–6 minutes, until the chicken turns opaque and begins developing browned patches. The scallions should begin colouring on their outer surfaces.
The broiler heats from above, so a rack over a rimmed, foil-lined tray exposes the upper surfaces and collects drips below. Use a rack explicitly rated for broiling, and check the space below the heating element.
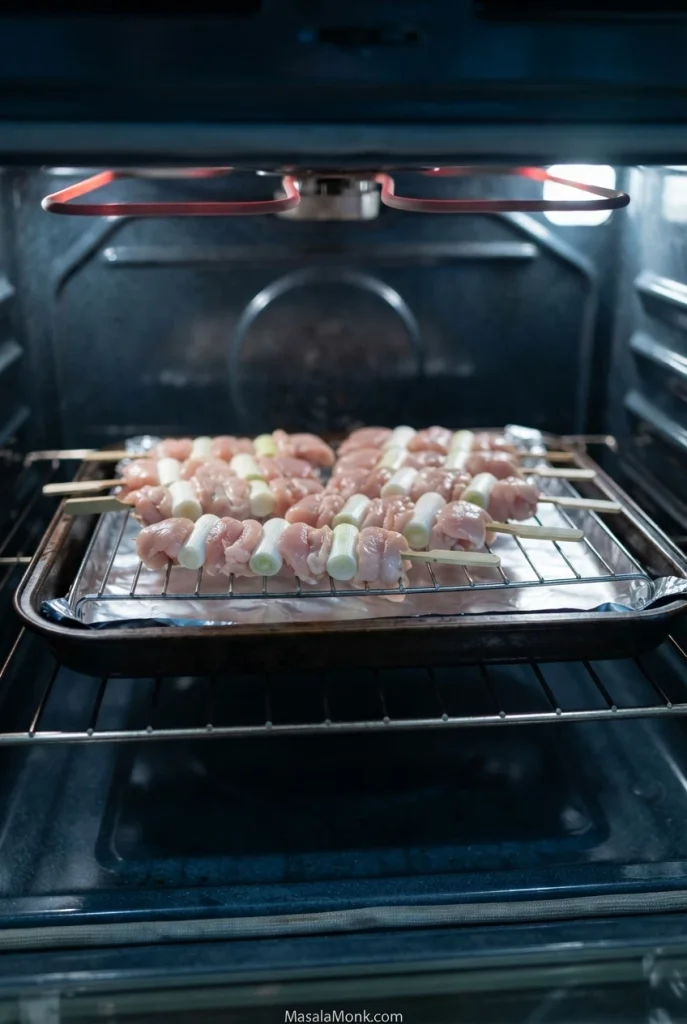
Judge the first broiling stage by opaque meat and developing brown patches, not by a uniformly dark surface. Raised folds colour before recessed areas; turning gives the paler side its chance to brown.
Turn, Check and Glaze
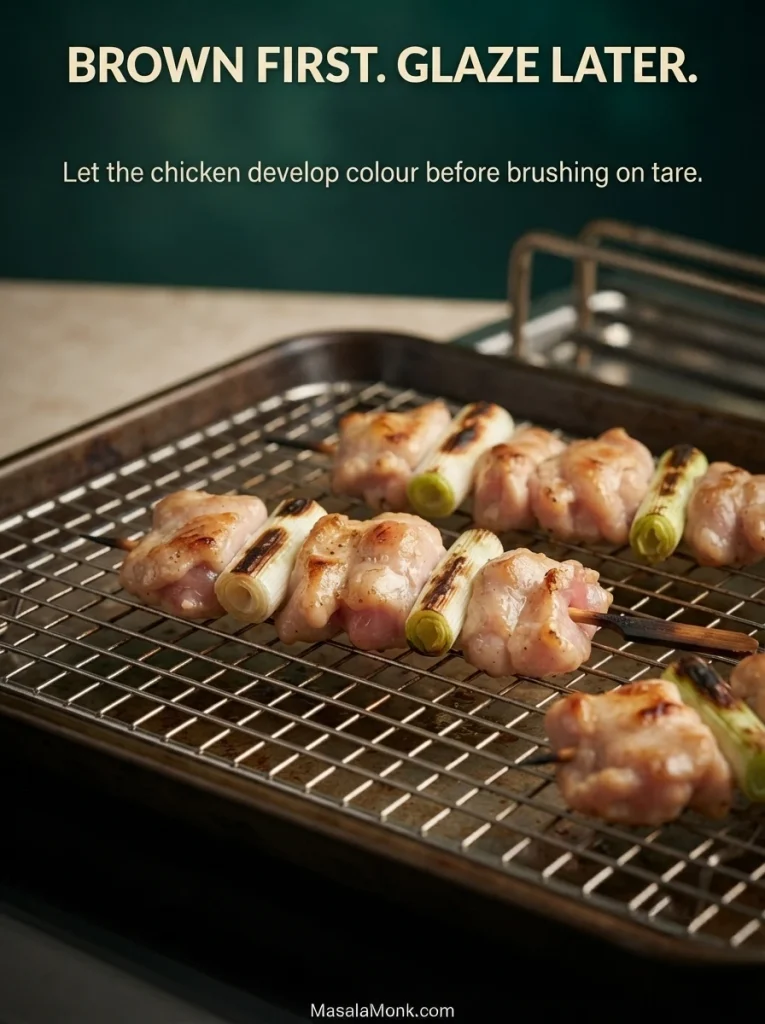
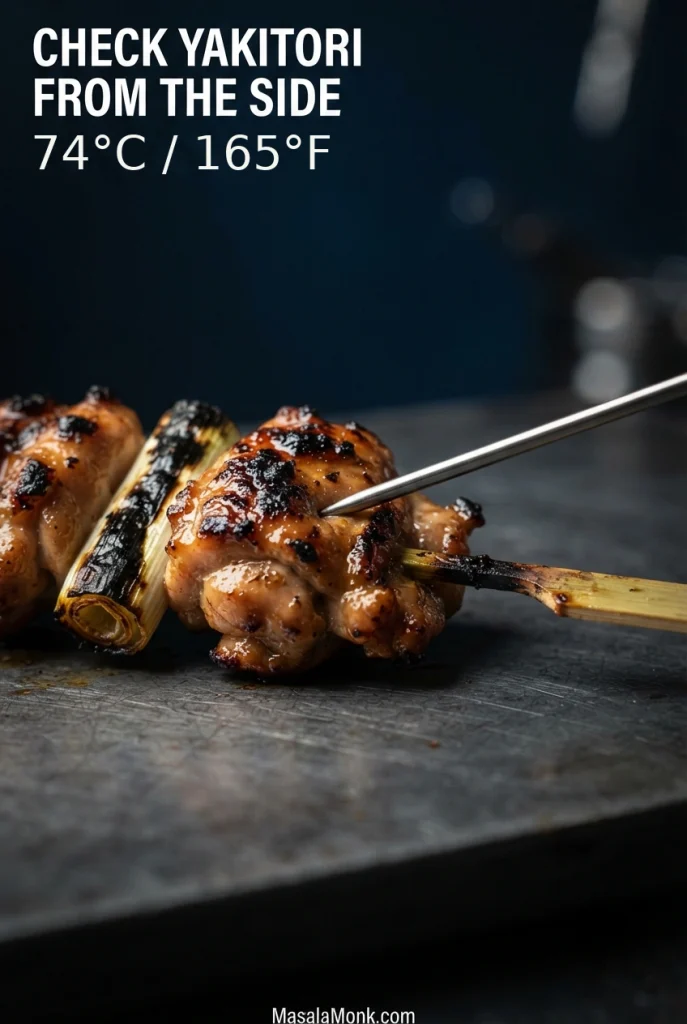
- Turn and check. Turn with tongs and broil roughly 4–5 minutes more, checking sooner if browning quickly. Slide a thin-tipped thermometer sideways into the thickest part of a large chicken piece, avoiding the skewer.
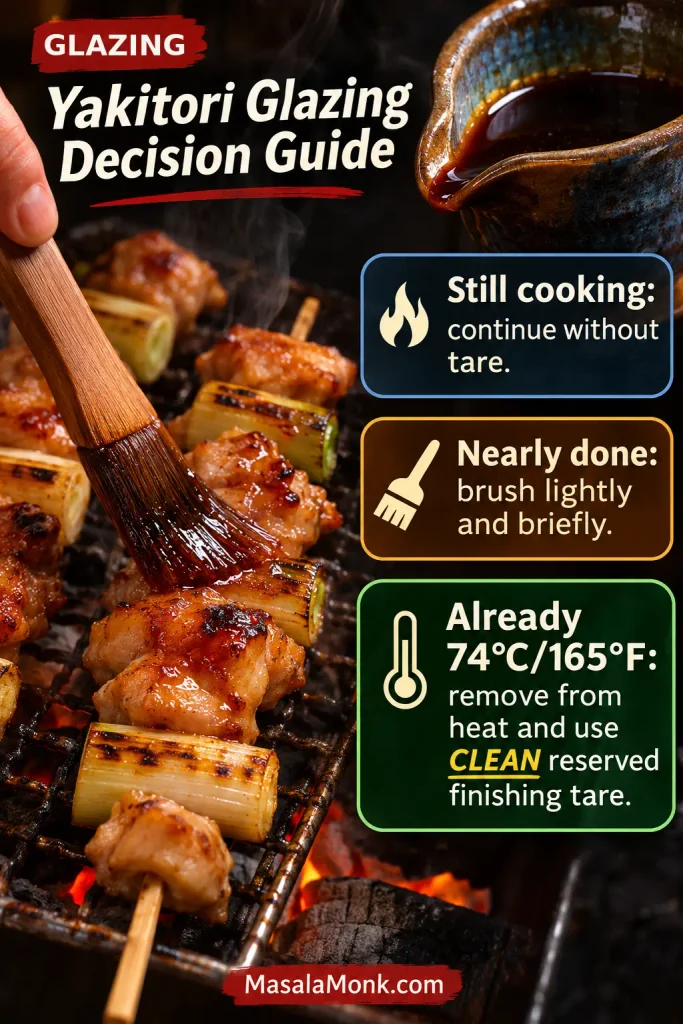
- Decide when to glaze. Still needs several minutes? Continue cooking without sauce, using gentler heat if the outside is already dark. Only a brief finish remains? Brush lightly with basting tare, broil about 1 minute, turn, glaze the second side and finish to 74°C / 165°F. Already at 74°C / 165°F? Remove from the heat and brush with clean tare from the separate finishing portion. Don’t keep cooking merely for a darker glaze. Never put a brush that touched undercooked chicken into clean sauce.
A small piece of thigh may be no wider than the probe is long. Insert a thin-tipped thermometer from the side through the thickest meat, clear of the skewer, and wait for the reading to settle.
The timing of your last brush depends on the chicken’s internal temperature. Keep cooking without tare if it needs several minutes; use a very brief glaze only when nearly done, or clean tare off heat if already cooked.
Finish and Serve
- Serve hot. Confirm the centre of the thickest piece reaches 74°C / 165°F. If the outside colours too fast, move away from the element or finish with gentler oven heat. Transfer to a clean plate and serve with the untouched serving tare.
Cooking in Batches and Food Safety
Batch note: Cook only as many skewers as fit comfortably. Serving successive batches as they finish is simplest. If holding cooked chicken for a shared meal, use reliable equipment that maintains at least 60°C / 140°F; a covered plate on the counter is not hot holding.
Food safety: Discard sauce left in a basting bowl after contact with raw or partly cooked chicken. Keep clean sauce, cooked skewers and serving utensils separate. The FoodSafety.gov safe minimum temperatures chart lists 74°C / 165°F for poultry.
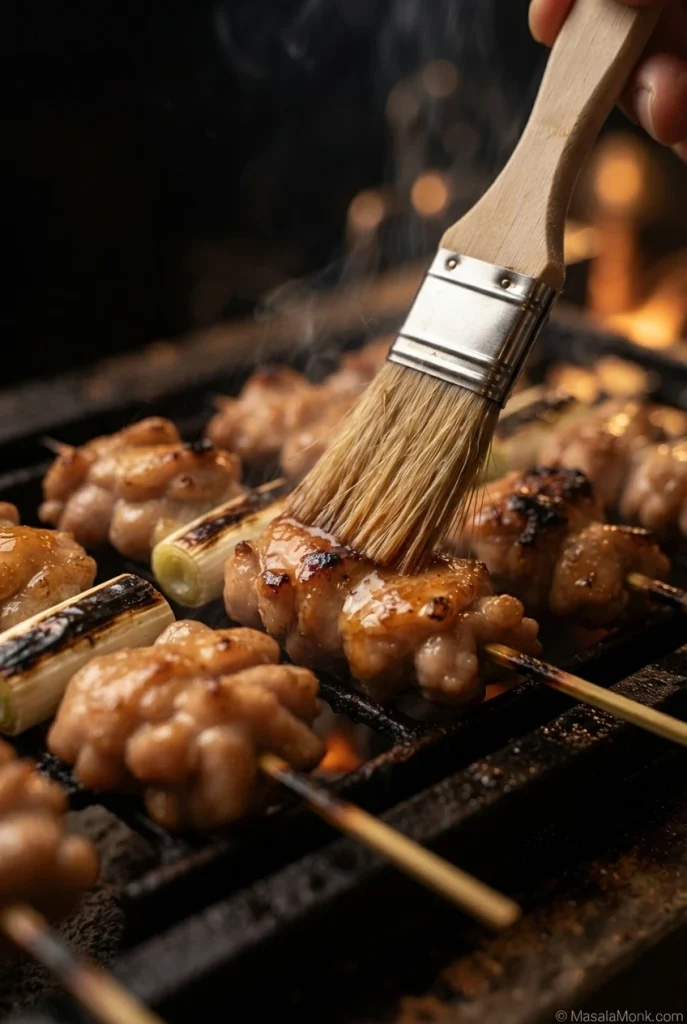
A thin last-minute layer of tare brings shine to browned chicken. Leave enough uncovered surface to see the meat’s texture, and avoid dripping excess sauce into strong heat.
What Is Yakitori?
Yakitori (焼き鳥) is Japanese grilled chicken, typically served in bite-sized pieces on skewers. At yakitori shops and casual izakaya, diners can order different chicken cuts in small portions, usually seasoned with shio (salt) or tare (soy-based sauce). Negima pairs chicken with Japanese long onion, or negi.
Traditional charcoal yakitori cooking exposes supported skewers to radiant heat. Watch the meat and negi individually; the pieces can brown at different rates.
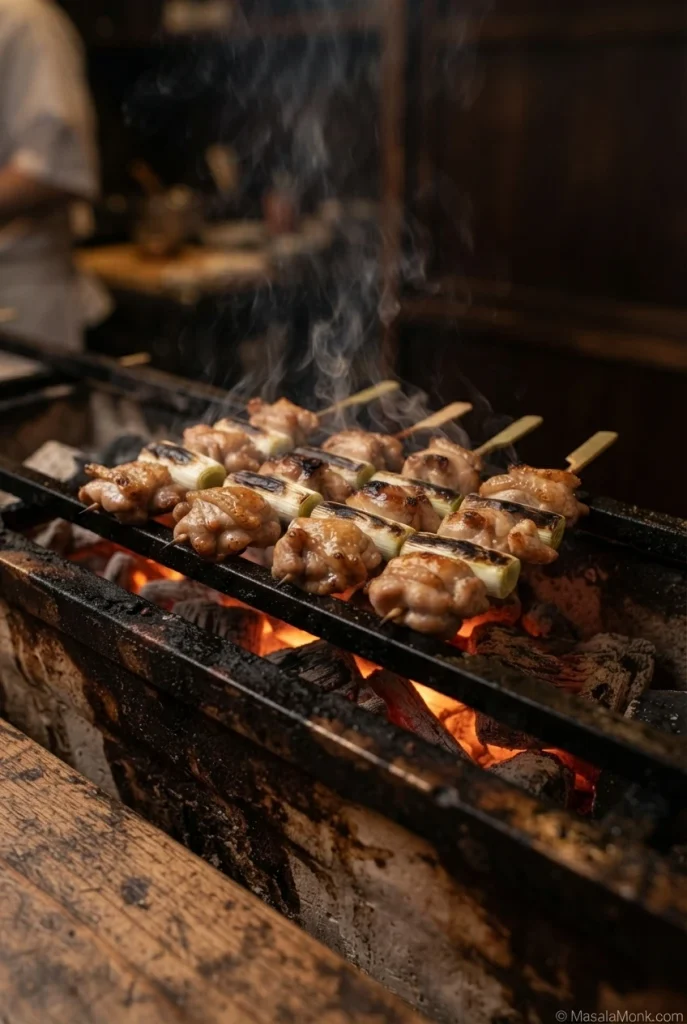
Charcoal supplies the characteristic grilled aroma of traditional yakitori. For fire management and turning, see the charcoal and gas grilling method. A home broiler browns the surface effectively without reproducing exactly the same flavour. The Japan National Tourism Organization’s yakitori guide offers further context on the dish and its varieties.
Yakitori refers to the chicken preparation, which may be salted or glazed; teriyaki is a broader sweet-savoury glazing style. The techniques can share ingredients without being interchangeable.
Yakitori Tare Sauce: Ingredients, Consistency and Fixes
There is no single tare thickness used by every yakitori cook. Some preparations are reduced quite deeply. Here, a lighter sauce suits the short final glaze and keeps the chicken’s browning visible.
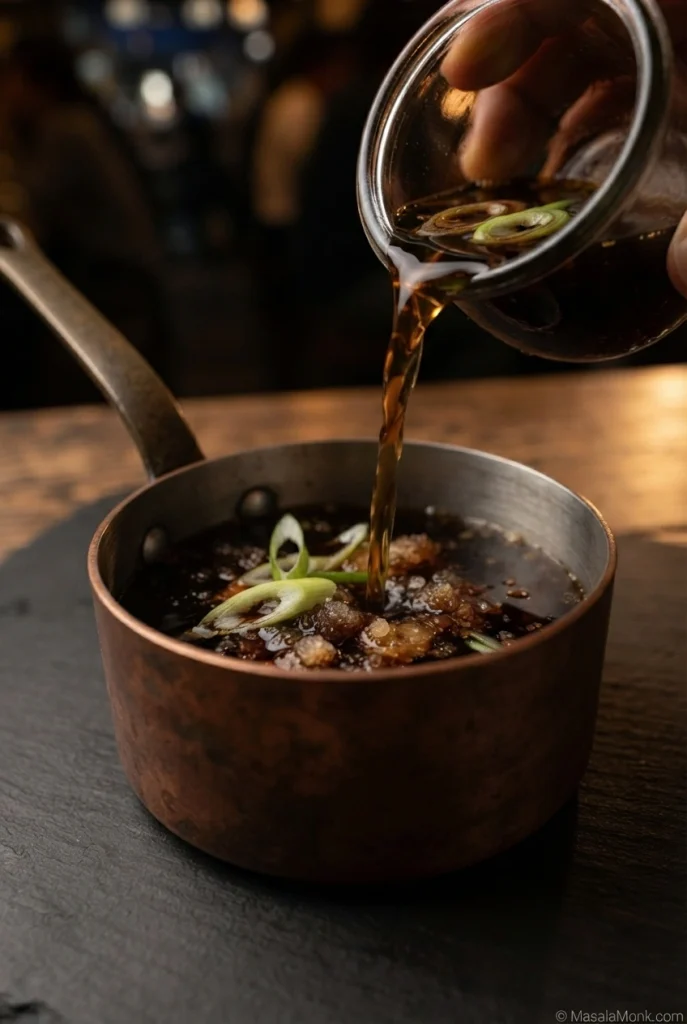
Preparing homemade tare calls for steady evaporation rather than an aggressive boil. Stir early to dissolve sugar before the sauce starts concentrating.
Choosing Soy Sauce, Mirin and Sake
Soy sauce carries most of the seasoning, so choose a regular Japanese koikuchi where available. Mirin adds sweetness and depth, while sake brings aroma. Check cooking sake for added salt: simmering concentrates that salt along with the sauce. Mirin-style seasonings can also differ in sweetness. When either ingredient is missing, see the yakitori substitution options. Our guide to soy sauce varieties explains why regular Japanese soy sauce, dark soy sauce and sweet soy sauce behave differently.
How Thick Should Yakitori Tare Be?
Let a spoonful cool slightly, then lift it above the saucepan. The main recipe needs tare that falls back in a thin stream; it is not intended to be a sticky, syrup-like coating.
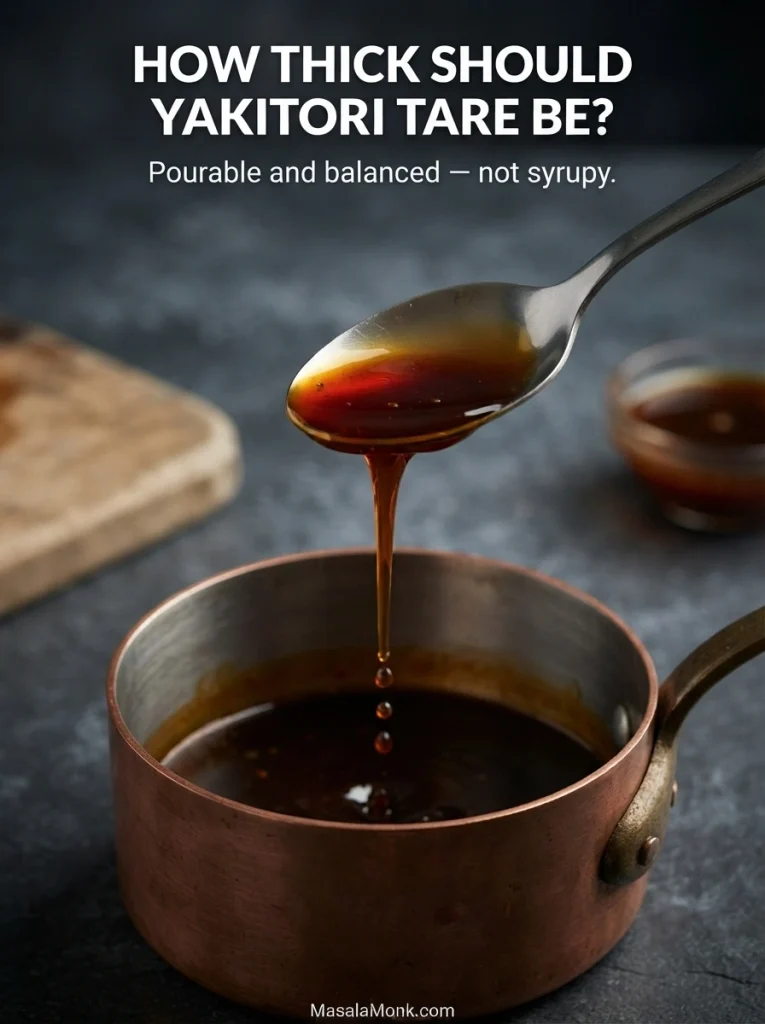
A sauce can taste balanced while looking fairly thin. Cool a spoonful before tasting. If the flavour is right, stop reducing; prolonged simmering will concentrate the salt further. For this particular formula, the starting measured liquids total 255 ml and a finished yield around 200 ml is a useful guide, not a requirement to chase syrupy thickness.
What If the Tare Is Too Thin?
These coatings solve different preferences. The original thinner tare lets chicken browning show; an optional thickened glaze clings more strongly.
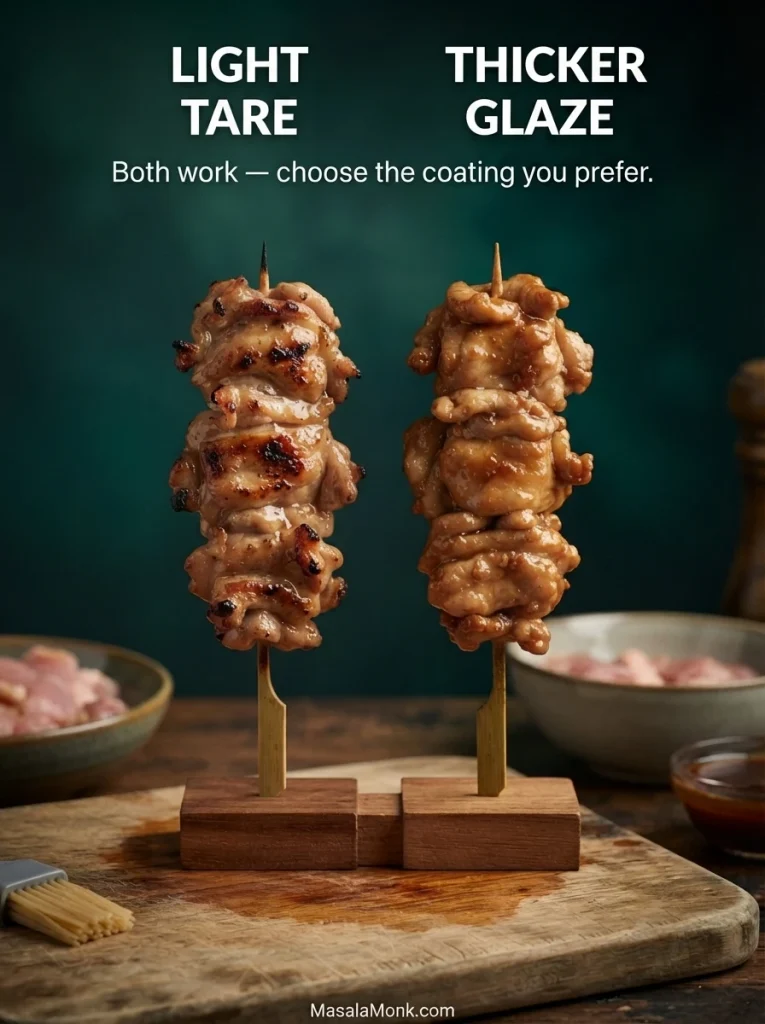
If the flavour is weak, simmer briefly and taste again. For a thicker coating when the flavour is already balanced, take about 100 ml from the clean reserve. Mix ½ tsp cornstarch with 1 tsp cold water, stir the slurry gradually into the warm tare and simmer gently until it coats a spoon. This is an optional variation; keep the 40 ml serving portion untouched. Our homemade teriyaki sauce recipe offers another thicker sweet-savoury finish.
How to Fix Tare That Tastes Too Salty
Add 1–2 tsp water, warm gently and taste a cooled spoonful. Repeat in small amounts as needed. More sugar can make the sauce taste sweeter, but it does not remove the salt.
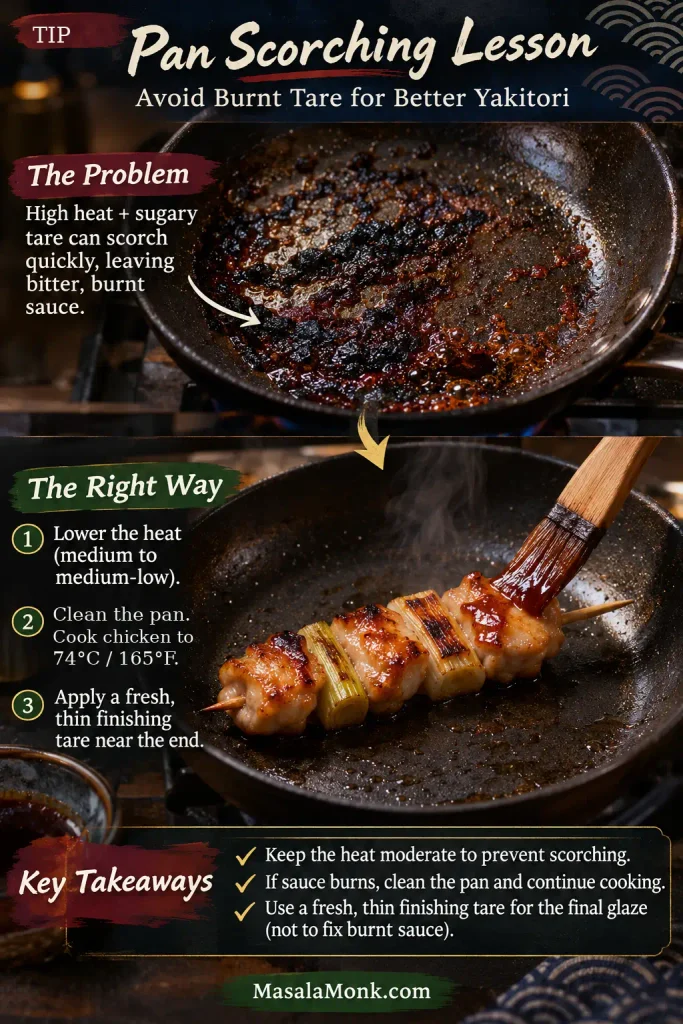
Why Does Yakitori Tare Burn?
A few charred flecks are not the same as burnt sugar. Compare the glossy late glaze with widespread blackened tare before deciding whether to reduce heat.
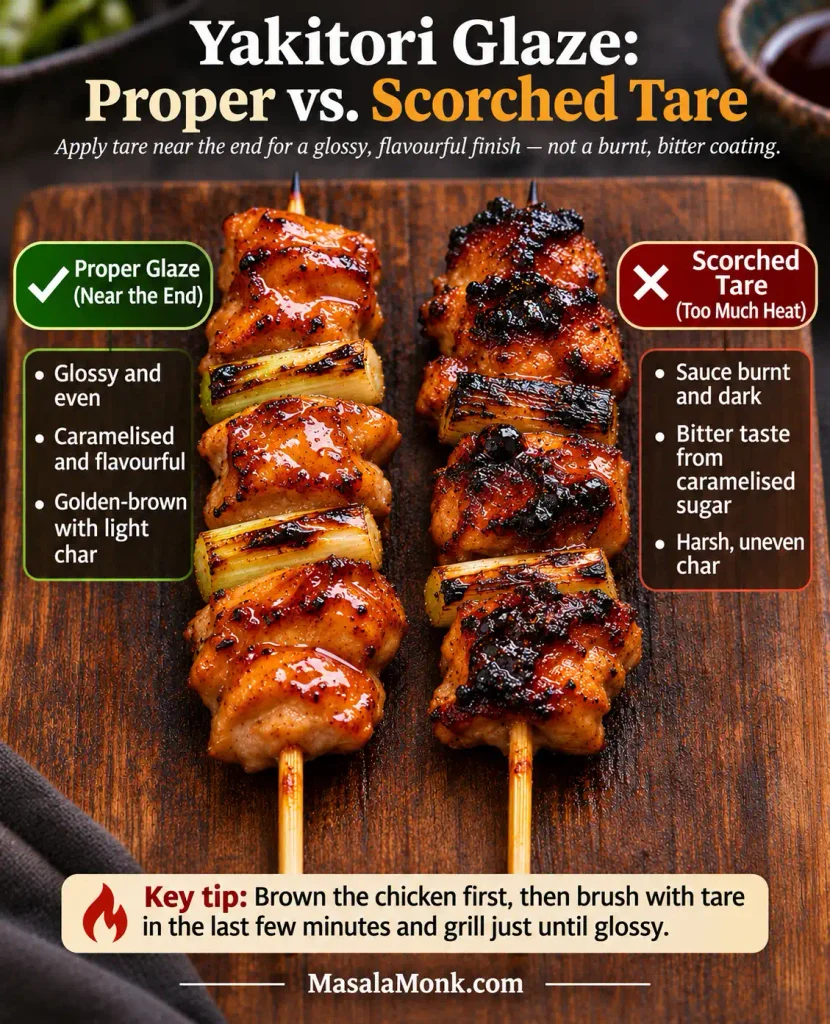
Sugar in the tare darkens quickly under strong heat. Let the meat brown before glazing and give the sauce only a brief finish. Lower the heat before saucing in a pan; move skewers away from flare-ups over charcoal. If the sauce has already burned onto the pan, see how to clear scorched tare.
How to Thread Chicken and Scallion Yakitori Skewers
Chicken thighs don’t cut into neat cubes, and they don’t have to. Their folds help create browned edges without needing uniform cubes. The main preparation steps show how to fold and pierce them; here, the key is exposing the scallions and making the skewer easy to turn.
Keep Negi Exposed and Skewers Stable
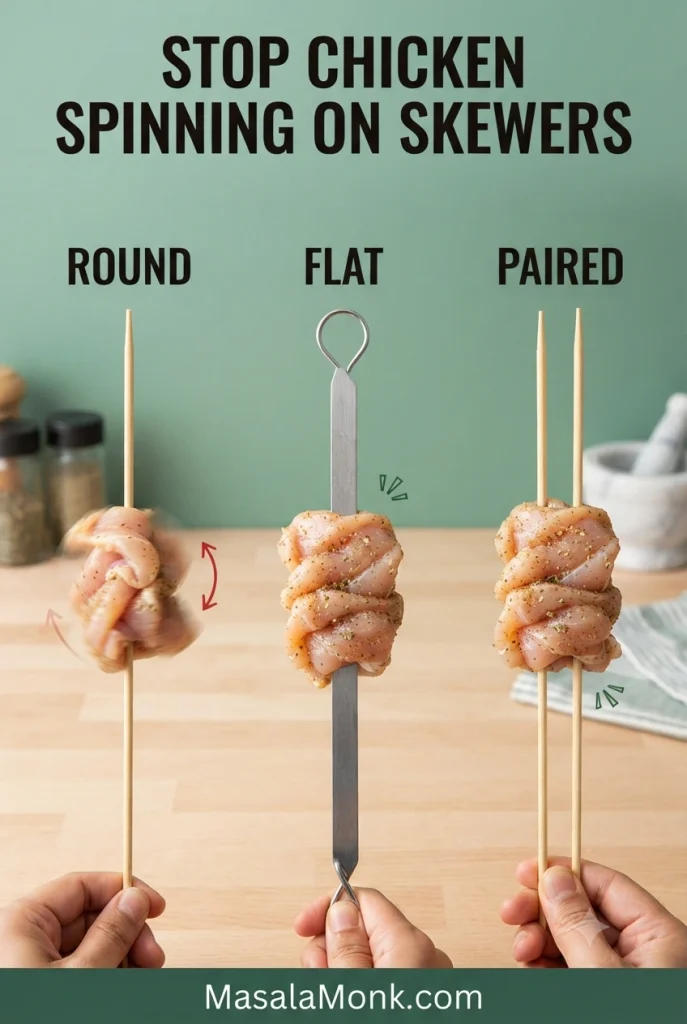
For standard negima, alternate three chicken pieces and two scallion sections. Keep the scallions close enough for a compact skewer, but leave their outer faces exposed so the chicken folds don’t shield them from browning. Flat skewers resist spinning; with round bamboo, pierce through substantial meat. Two thin parallel sticks can help if the chicken turns around a single skewer.
The onion’s exposed outer face should receive heat as readily as the chicken. Covering it with a large thigh fold leaves a pale, steamed section even when the surrounding chicken is properly cooked.
Choose sturdy white and pale-green negi for skewer sections; reserve flexible dark-green tops for the tare rather than trying to thread them.
What Skewer Length Works Best?
Around 18–23 cm (7–9 inches) suits many standard five-piece skewers, but check your actual tray, pan or air fryer basket before selecting sticks. Compact skewers need fewer ingredients, not a universal length. Leave enough handle to turn safely. Bamboo can scorch despite soaking; metal skewers become hot along their full length.
Fit the skewer to your appliance. Standard negima uses three chicken pieces and two onion sections, while compact skewers use two chicken pieces and one onion section.
A round stick gives chicken one axis to rotate around. If the meat will not stay oriented when turning, a flat or paired skewer helps stabilize it.
How to Cook Yakitori: Five Methods for Home Kitchens
If you have charcoal and are comfortable managing a fire, use it for the traditional aroma. A gas grill offers outdoor browning with simpler heat adjustment. Indoors, start with the broiler for the strongest surface browning; choose a frying pan for a small batch, an air fryer for compact skewers or loose pieces, and a conventional oven when broiling isn’t available.
Compare methods by batch capacity as well as cooking time. A basket or pan may require multiple batches even when each individual batch is quick.
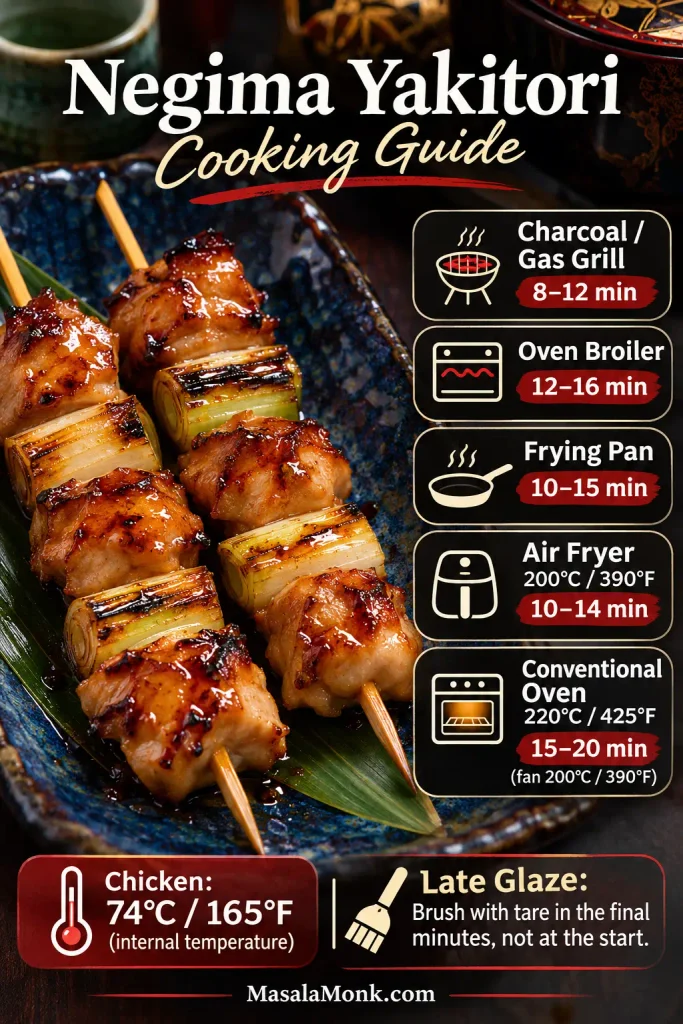
| Method | Approx. time per batch | Best reason to use it |
|---|---|---|
| Charcoal or gas grill | 8–12 min | Outdoor grilling; charcoal adds a distinct aroma |
| Oven broiler | 12–16 min | Strong indoor browning |
| Frying pan | 10–15 min | Close stovetop control |
| Air fryer | 10–14 min | Compact batches |
| Conventional oven | 15–20 min | Even roasting |
Times are per-batch estimates for chicken pieces about 2.5–3 cm across. All methods require 74°C / 165°F in the thickest piece. Glaze near the end, and keep serving tare separate from sauce used with undercooked chicken.
Charcoal or Gas Grill Yakitori
Prepare medium-high to high heat with a cooler zone available. Charcoal should be burning steadily without tall flames; on a gas grill, lower or switch off a burner to create a gentler area.
Set up a cooler area before you start grilling. It gives you somewhere to move skewers when dripping fat flares or the meat browns faster than the centre cooks.
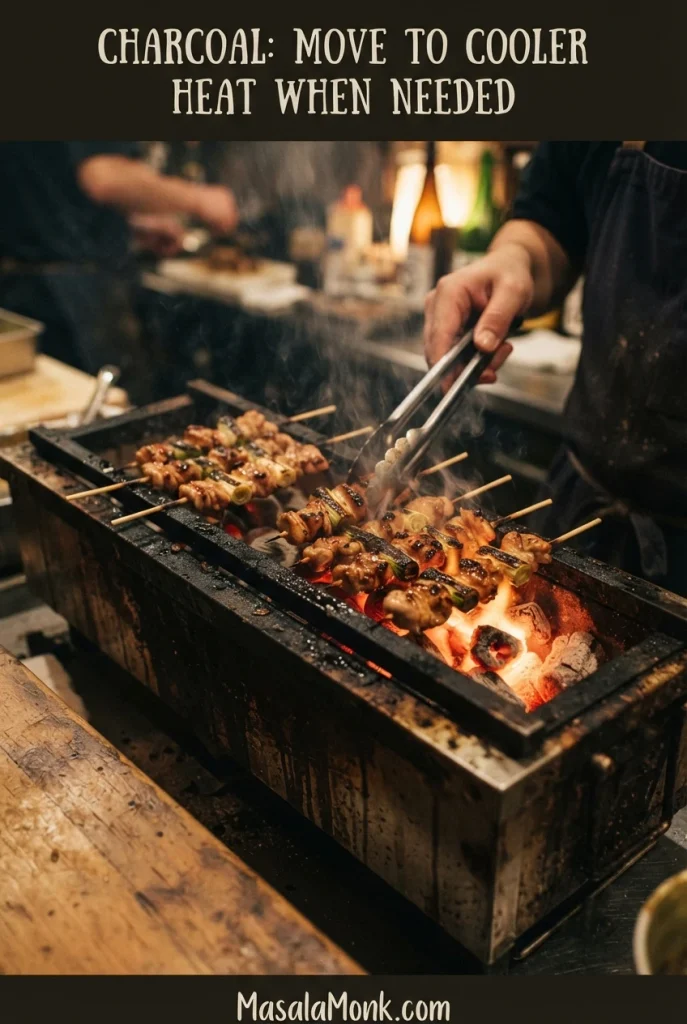
Gas grilling uses adjustable burner heat rather than a bed of charcoal. Reserve part of the grate for a gentler finish if browning accelerates.
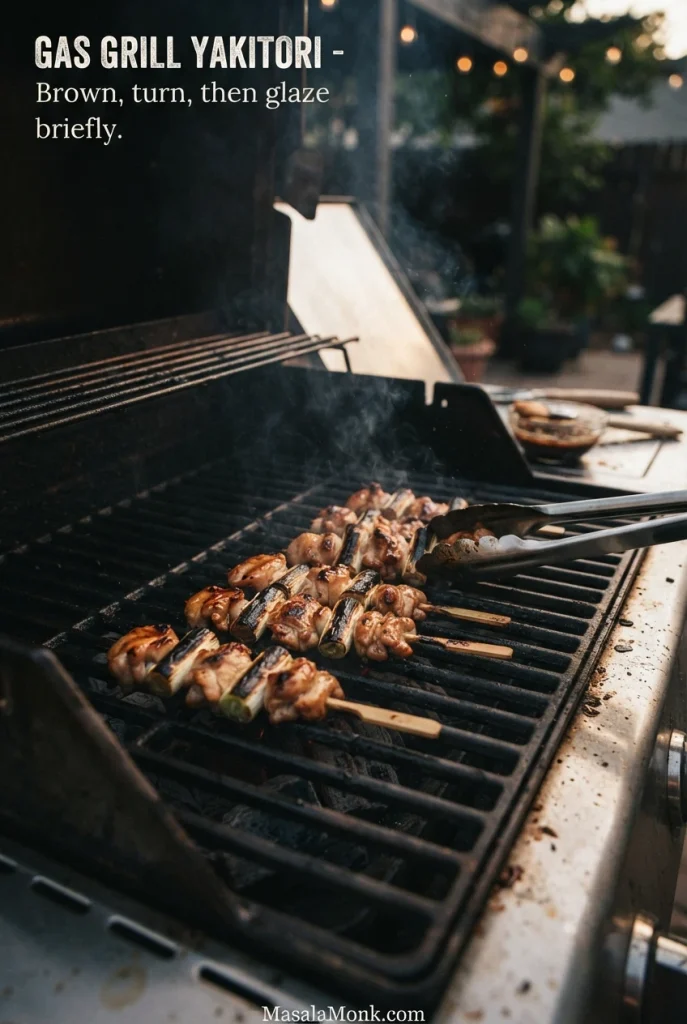
- Place the skewers over direct heat with room to turn.
- Grill about 3–4 minutes, turn and cook the other side about 3–4 minutes.
- Check the thickest piece. Continue without sauce if it needs several more minutes; when a brief finish remains, brush with tare and turn for another 1–3 minutes as needed.
- Finish at 74°C / 165°F. If already cooked before glazing, remove from heat and brush with clean finishing tare. Move skewers to the cooler zone whenever fat causes flare-ups.
Oven Broiler Yakitori
Home-broiled yakitori can finish with amber edges and pale folds without charcoal smoke. Prioritize measured doneness over an artificially uniform dark crust.
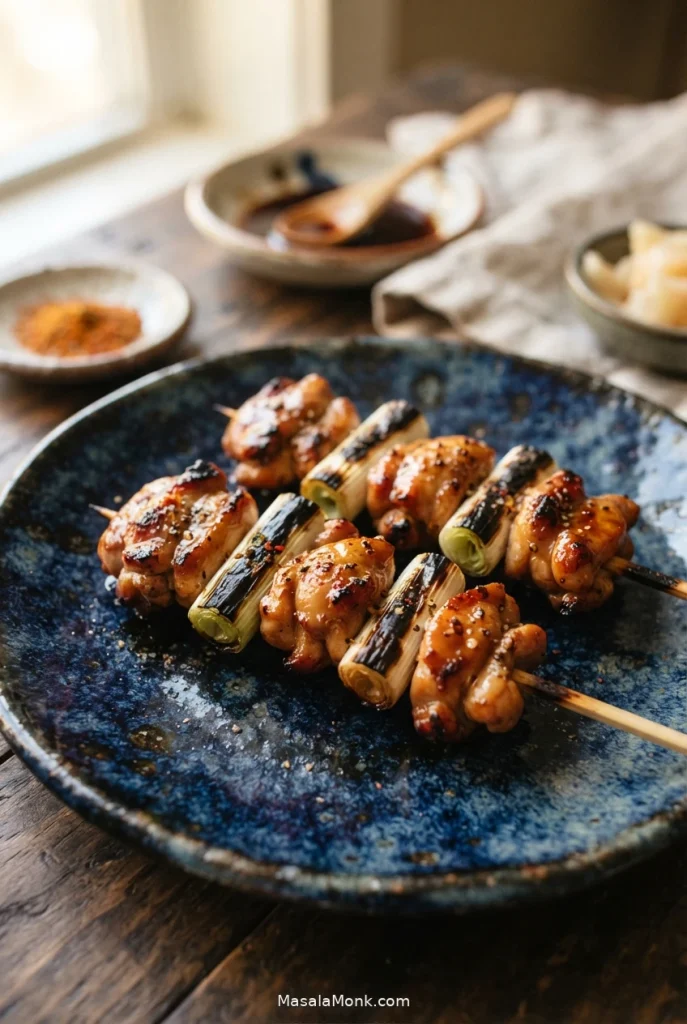
The main recipe gives the complete broiler sequence. For small pieces, review the sideways thermometer technique before judging doneness. Rack distance matters: start around 15–20 cm (6–8 inches) from the top element where your oven allows. Move farther away when the outside darkens before the centre is ready; check preheating and rack height if the surface stays pale.
Stovetop Yakitori in a Frying Pan
Choose sticks short enough to lie flat in the pan. If they don’t fit, cook the chicken and scallions loose, turning the pieces individually. They won’t have the skewer presentation, but they can still brown and take the tare.
Try an empty skewer against your frying pan before assembling the batch. Food that cannot rest against the hot surface will brown less effectively.
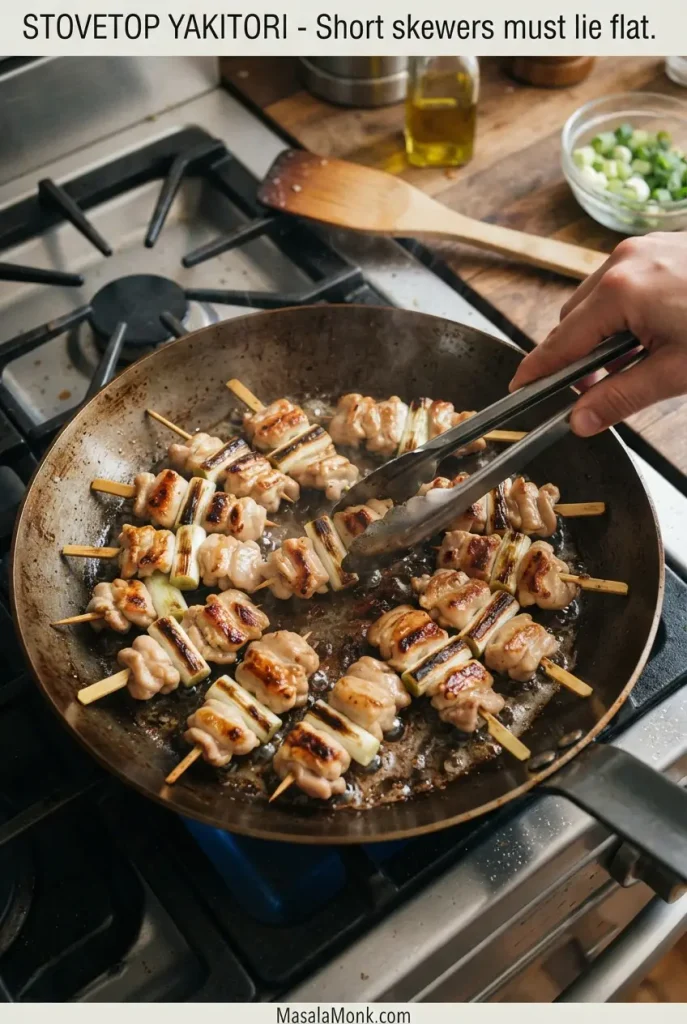
Without skewers, turn chicken and negi separately. Brief contact with the pan helps colour their cut surfaces before you move them.
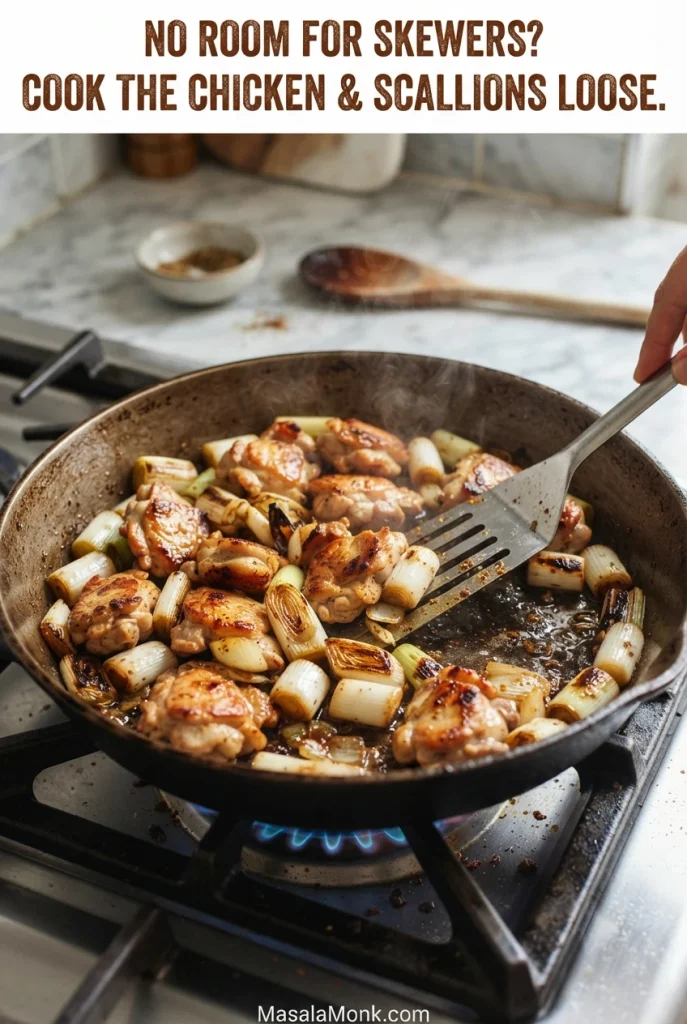
Brown, Cover and Finish in the Pan
- Heat a little neutral oil over medium to medium-high heat.
- Brown the skewers or loose pieces for about 3 minutes, turn, then cook the other side for about 3 minutes.
- Lower the heat. If the chicken needs more cooking, add 1–2 tbsp water, cover and cook gently for 2–4 minutes.
- Uncover and let the water evaporate. When a brief finish remains, add 1–2 tbsp tare from the basting portion and turn the chicken to coat.
- Confirm 74°C / 165°F in the thickest piece. If already done, skip further frying and use clean finishing tare.
For loose pieces only, lift out scallions that soften before the chicken and return them for the final glaze. If the sauce has already scorched, follow the pan-tare recovery guidance instead of painting over burnt residue. With intact skewers, lower the heat rather than trying to remove threaded onions.
Air Fryer Chicken Yakitori
Use compact skewers only if your appliance permits them and they fit without touching the element or restricting airflow. Otherwise, air-fry loose chicken and scallion pieces, turning each piece individually. The standard-versus-compact skewer comparison can help you plan a basket-sized batch.
Check basket clearance before switching on the air fryer. Even compact skewers are unsuitable if handles obstruct airflow or approach the heating element.
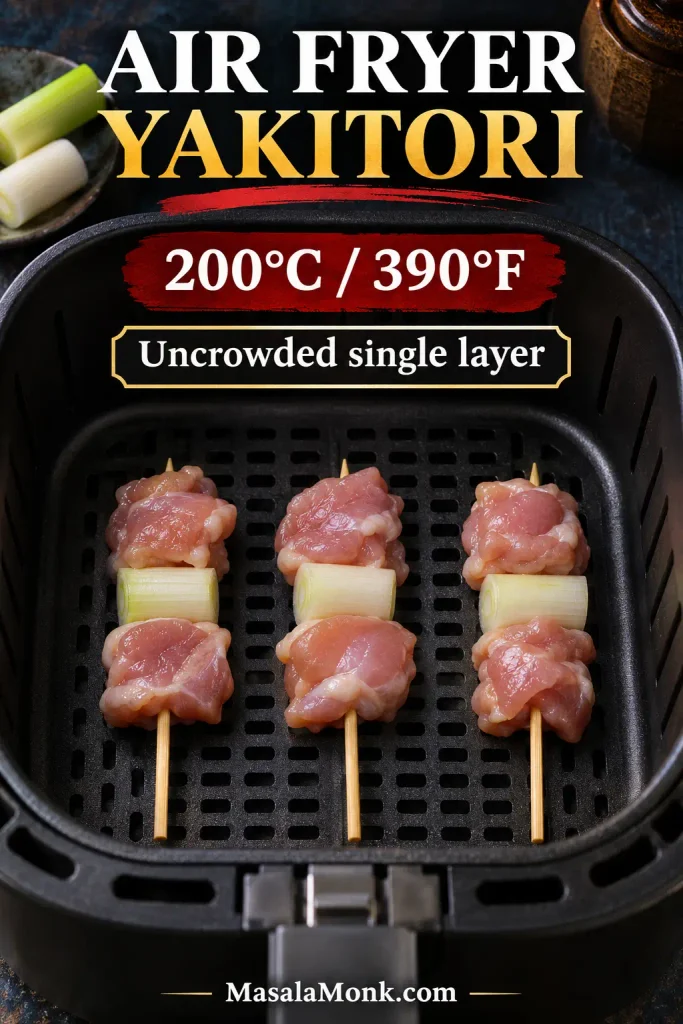
- Preheat to 200°C / 390°F if recommended by your appliance manufacturer.
- Spread chicken and scallions in one uncrowded layer.
- Cook around 6 minutes, turn, then cook another 3–5 minutes.
- When a brief finish remains, brush with tare and cook another 1–2 minutes to set the glaze.
- Check the thickest piece for 74°C / 165°F. If already cooked, use clean finishing tare off the heat.
A compact basket may take two or three batches for 600 g chicken. Avoid stacking; airflow is essential for browning. Our air fryer chicken thighs recipe covers other thigh preparations.
Yakitori in a Conventional Oven
Preheat to 220°C / 425°F, or about 200°C / 390°F for a fan-forced oven. Expect even roasting and milder surface browning than under a broiler.
Roasting gives gentler, more even heat than broiling. Consequently, the chicken can reach its safe centre temperature before it develops deep char.
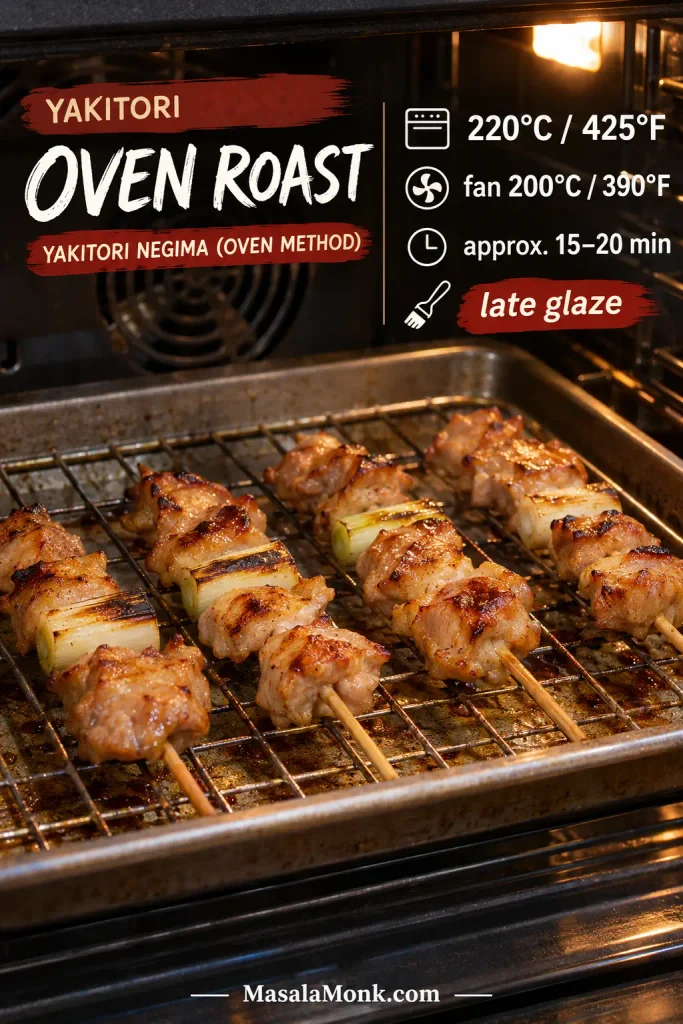
- Arrange skewers on a lightly oiled oven-safe rack above a rimmed tray.
- Roast about 8–10 minutes, then turn.
- Continue another 4–6 minutes, checking the thickest chicken piece.
- If only a brief finish remains, brush with tare and roast another 2–4 minutes as needed to reach 74°C / 165°F. If already cooked, brush with clean finishing tare and serve.
A short broiler finish can add colour if the chicken is still approaching doneness; watch closely once the sauce begins darkening.
Cooking another batch? Return to the complete chicken yakitori recipe, or go back to the guide contents.
Yakitori Troubleshooting
| Problem | What to do |
|---|---|
| Chicken dark outside, undercooked inside | Move to gentler heat and continue to 74°C / 165°F. |
| Chicken is dry | Serve with clean tare and rice; check temperature sooner next time. |
| Glaze turning black | Move away from strong heat; don’t paint over badly burnt sauce. |
| Scallions stay pale or steamed | Next time expose their outer sides instead of hiding them under chicken folds. |
| Tare too salty | Dilute with water a little at a time; warm and taste. |
| Sauce scorching in pan | Lower the heat, remove burnt sauce and finish with a fresh small portion. |
| Chicken spins on sticks | Pierce folded meat more securely or use parallel skewers. |
| Chicken remains pale | Improve exposure and avoid crowding without overcooking for colour. |
A heavy pan stays hot after the burner is lowered. Lift the food away from burnt residue before adding a small amount of clean, fresh tare.
Yakitori Ingredient Substitutions
Choose the replacement that matches what you have. A single substitution is usually simpler than replacing several ingredients in the original tare at once.
Ingredient substitutions change more than flavour: a different chicken cut alters moisture retention, while thinner scallions may need different handling.
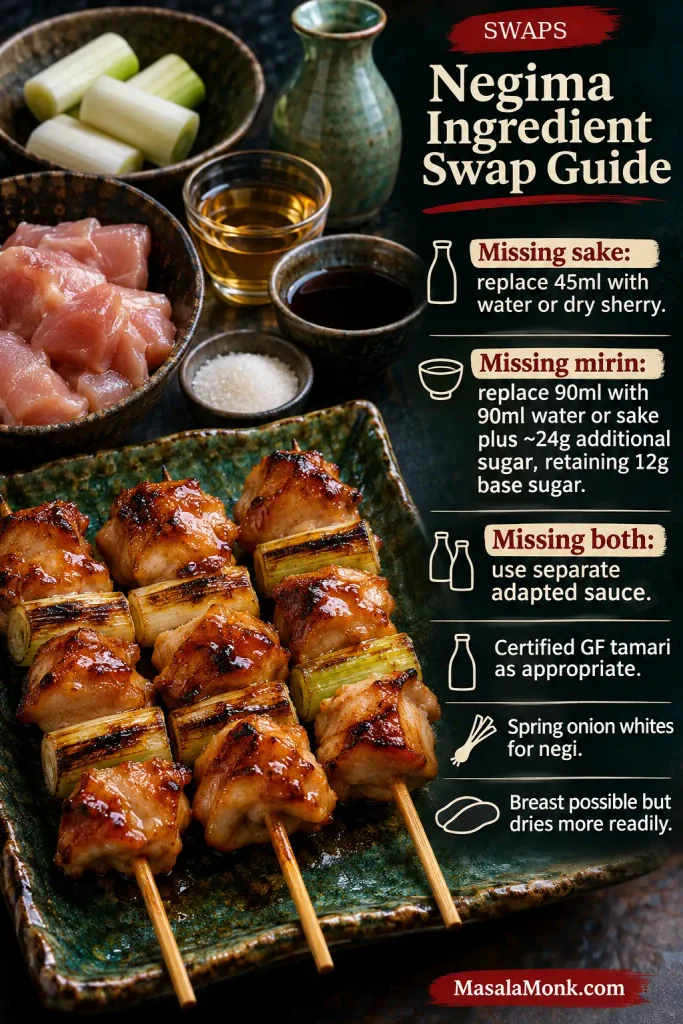
| If you’re missing… | Use… |
|---|---|
| Sake only | 45 ml water, dry sherry or unsalted rice cooking wine |
| Mirin only | 90 ml water or sake + about 24 g sugar |
| Both sake and mirin | The complete adapted sauce below |
| Japanese soy sauce | Regular unsweetened soy sauce; taste for saltiness |
| Gluten-free soy sauce | Clearly labelled gluten-free tamari; check all other ingredients |
| Japanese negi | Firm scallion or spring-onion whites |
| Chicken thigh | Boneless chicken breast; check doneness earlier |
Chicken Breast, Skin-On Thighs and Scallions
Breast is leaner and dries out sooner than thigh, so cut evenly and check temperature earlier. Skin-on thighs give richer skewers, but the rendered fat may cause flare-ups over charcoal. Japanese negi is thicker than many spring onions: use firm white and pale-green pieces, or cook very thin scallions loose in a pan.
Replacing Sake or Mirin
Water works when sake is unavailable, though the tare loses some aroma. A water-and-sugar replacement supplies mirin-like sweetness without fully recreating mirin’s fermented flavour. Keep the main recipe’s separate 12 g sugar when substituting for mirin. If both sake and mirin are missing, use the following complete formula rather than stacking separate changes.
Yakitori-Style Sauce Without Sake or Mirin
This adapted sauce relies on rice vinegar for brightness, though it does not reproduce the aroma of mirin and sake. Taste once cooled before adjusting sweetness.
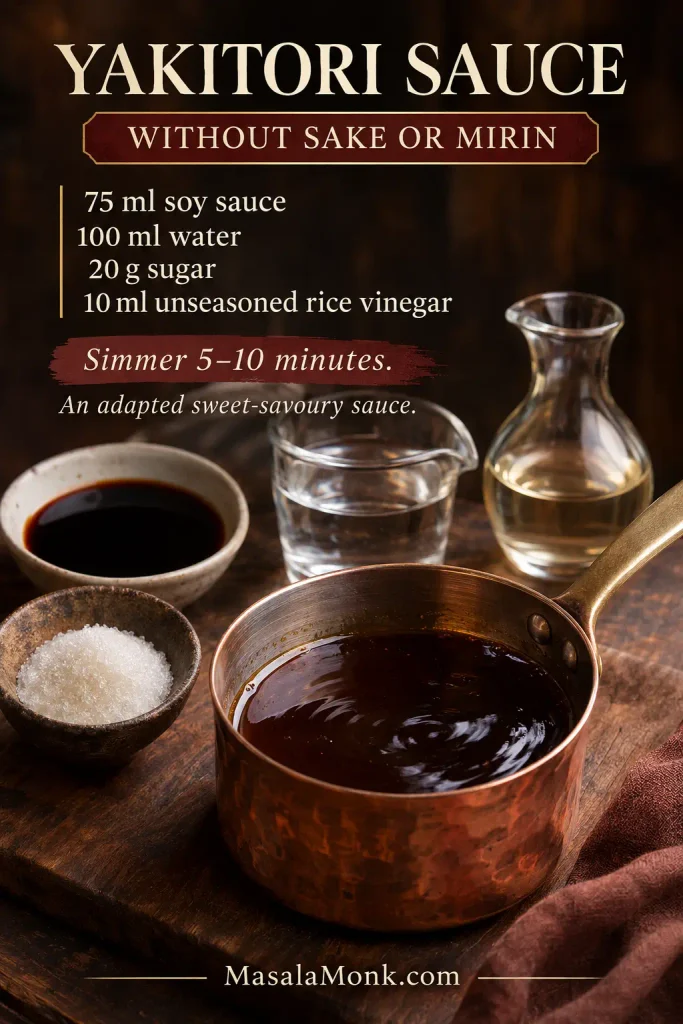
- 75 ml (5 tbsp) regular soy sauce
- 100 ml (6 tbsp + 2 tsp) water
- 20 g (about 5 tsp) granulated sugar
- 10 ml (2 tsp) unseasoned rice vinegar
Heat together until the sugar dissolves, then simmer gently for 5–10 minutes. Taste a cooled spoonful; add water if too concentrated or a little sugar if you want more sweetness. This is an adapted sweet-savoury glaze, not traditional sake-and-mirin tare. If you must avoid alcohol strictly, check fermented seasoning labels; cooking alcohol-containing ingredients does not guarantee complete removal.
Other Soy Sauce Options and Teriyaki Shortcuts
Regular unsweetened soy sauce works when Japanese koikuchi is unavailable, but brands vary in saltiness. For gluten-free cooking, choose clearly labelled gluten-free tamari and check the mirin and other ingredients too. Coconut aminos are usually sweeter and less salty, so they need more adjustment. Bottled teriyaki tends to be thicker and sweeter than this tare; brush a little on near the end, thinning a separate portion with water when necessary.
If you are ready to cook, return to the original yakitori recipe; otherwise, review the guide contents.
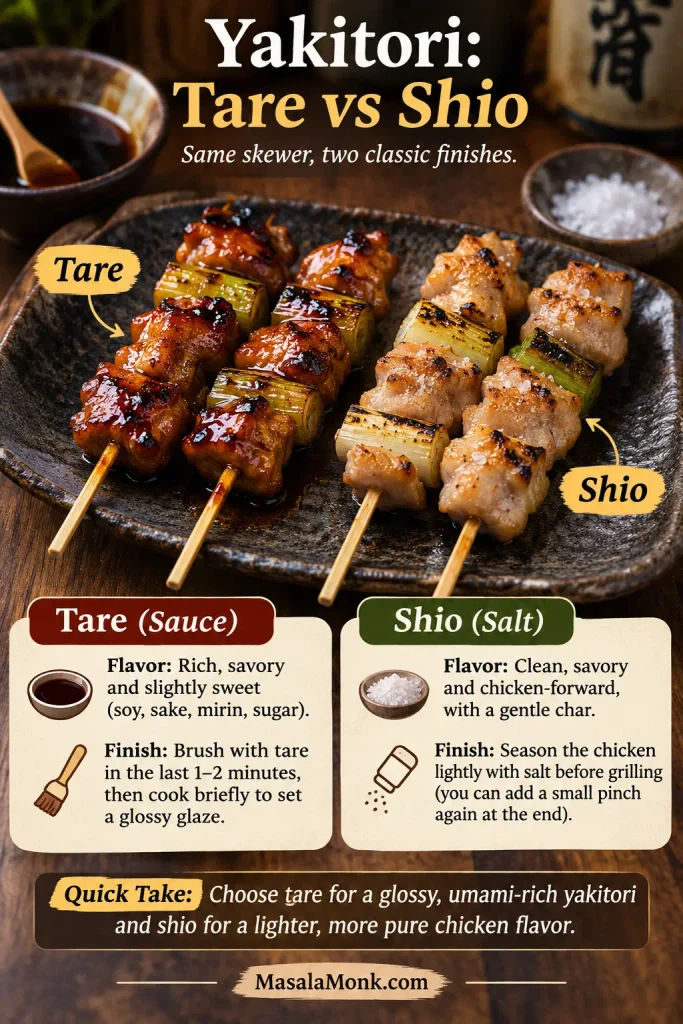
Shio vs Tare: Two Ways to Season Yakitori
Tare gives the skewers a savoury-sweet soy glaze; the homemade tare section explains how to control its consistency. Shio seasons the chicken mainly with salt, making its flavour and surface browning more prominent. For 600 g thigh, skip tare and season evenly with 4 g fine salt, or up to 5–6 g for a stronger finish. Weigh the salt if possible because teaspoon volume varies by crystal size.
Salt-seasoned shio yakitori should show the natural colour of roasted thigh, not a soy-sugar lacquer. Distribute fine salt across uneven chicken folds.
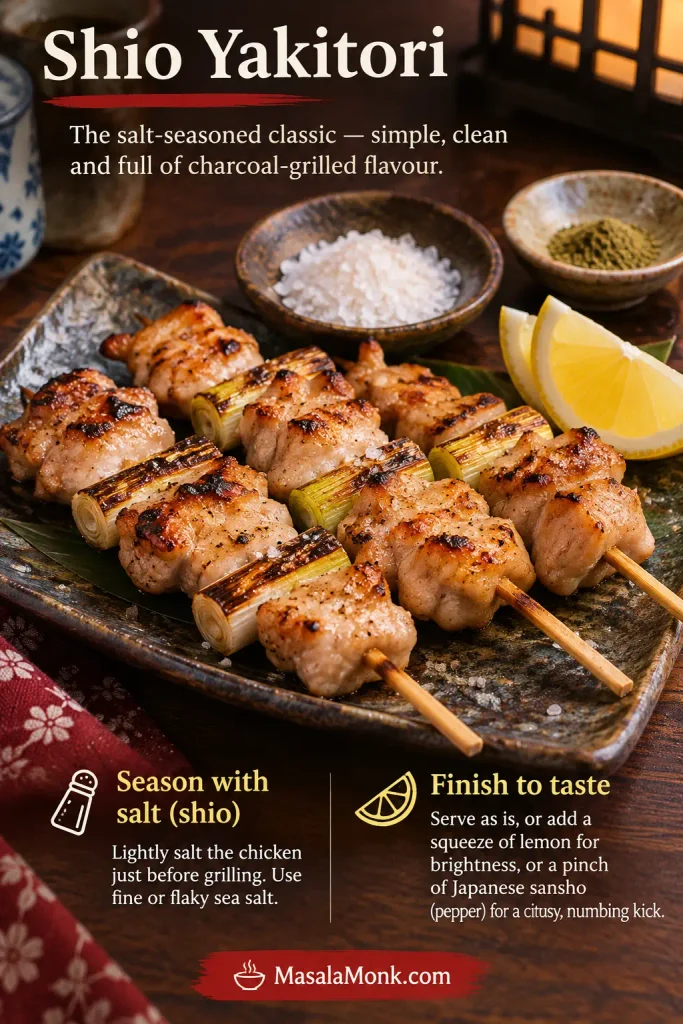
Cook using your chosen method without a glazing stage, finishing the chicken to 74°C / 165°F. Serve with lemon or sansho pepper. Yakitori shops also prepare momo (thigh), tsukune (seasoned minced chicken), kawa (skin), reba (liver), sunagimo (gizzard) and tebasaki (wings); these need cooking suited to their particular cuts rather than the timings for this negima recipe.
Tare and shio begin with the same chicken-and-negi arrangement, but their finishes highlight different qualities: sauce sheen versus the meat’s own browning.
What to Serve with Yakitori
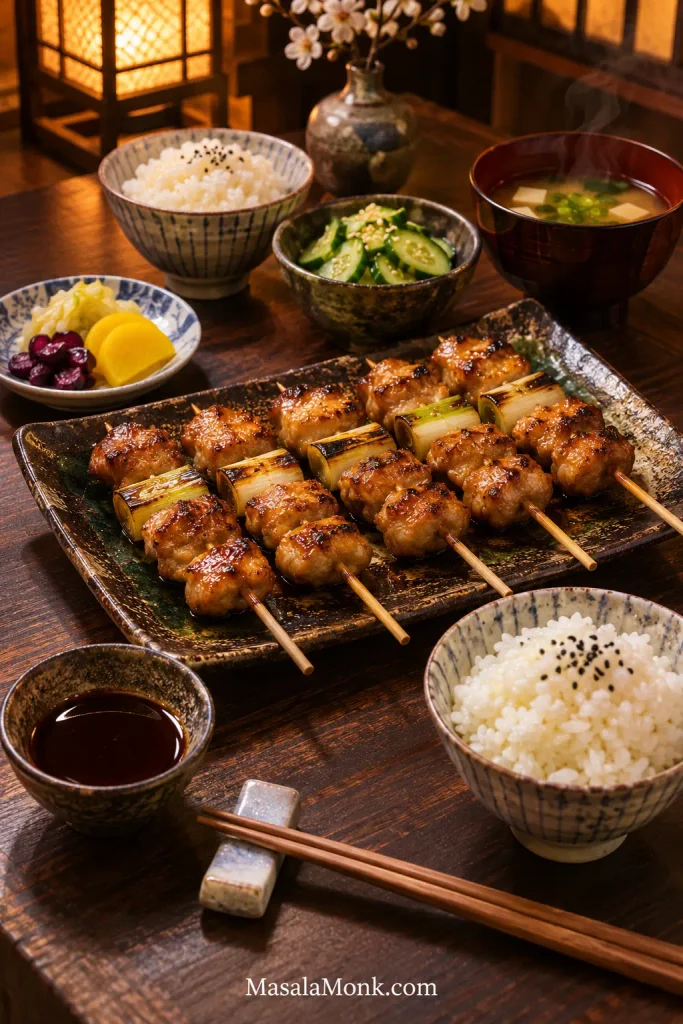
Serve yakitori while the skewers are hot. Put them in the middle of the table with rice, Japanese pickles and something cool and crisp, and let everyone take a skewer. Set out the clean serving tare in a small bowl so people can add sauce to taste. Shredded cabbage and miso soup are good companions; a crisp cucumber salad brings a refreshing contrast.
A shared yakitori platter works well with rice and cool, crunchy sides served in separate bowls. Offer clean tare at the table so guests can add it without soaking the crisp accompaniments.
How to Make Yakitori Don Rice Bowls
For four bowls, cook 300 g uncooked Japanese short-grain rice, roughly 1½ US measuring cups or two 180 ml Japanese rice-cooker cups. The small rice-cooker cup is not the same as a standard US cup; use your cooker’s instructions for water.
For yakitori don, keep short-grain rice recognizable beneath the toppings. Add nori close to serving so it stays aromatic instead of turning soggy.
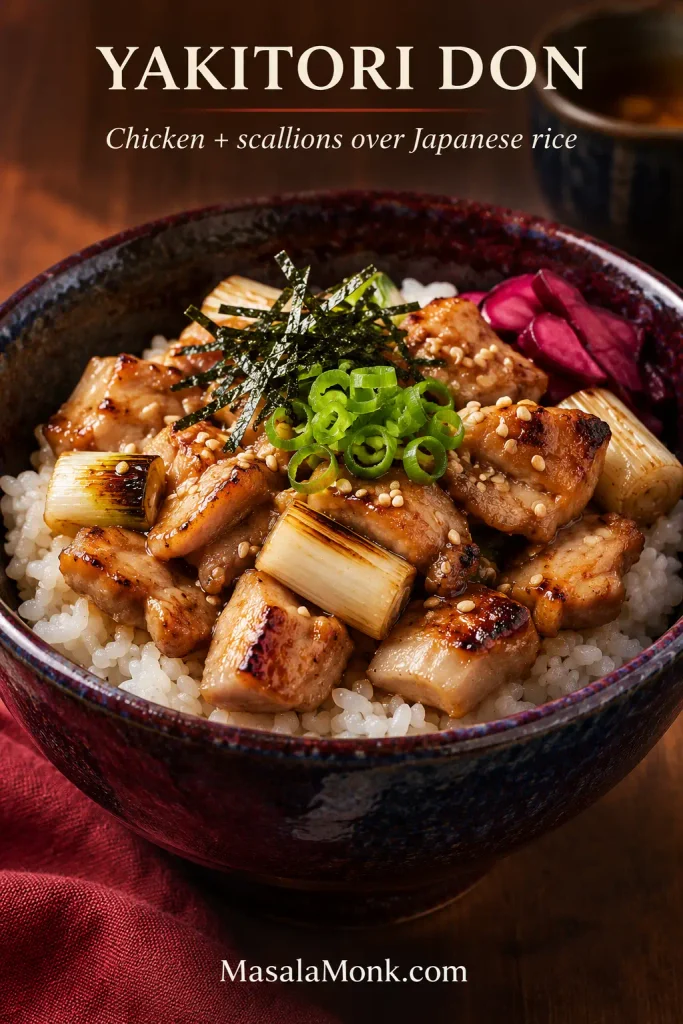
Divide cooked rice into four bowls. Use chicken prepared with the main negima yakitori recipe; slide the cooked chicken and scallions from the skewers and divide among the bowls; add clean tare, sliced scallion, sesame seeds, nori strips or pickles. See our guide to cooking rice for stovetop and rice-cooker methods, or serve onigiri rice balls alongside the skewers.
Make-Ahead, Storage and Reheating
Cooked yakitori keeps 3–4 days in the refrigerator when cooled promptly and stored at 4°C / 40°F or colder. Reheat thoroughly to 74°C / 165°F using moderate heat so the chicken doesn’t dry out and the glaze doesn’t scorch.
Preparing Tare and Skewers Ahead
Prepare tare a day or two ahead if convenient. Divide clean sauce into small covered food-safe containers, cool promptly and refrigerate; for a conservative plan, use within 3–4 days or freeze the surplus. Raw assembled chicken skewers can be refrigerated a day ahead when the chicken is fresh and properly handled. Keep them covered on a drip-catching tray at 4°C / 40°F or colder. Freeze in packaging that fully encloses the sticks, and thaw in the refrigerator.
Reheating Without Burning the Glaze
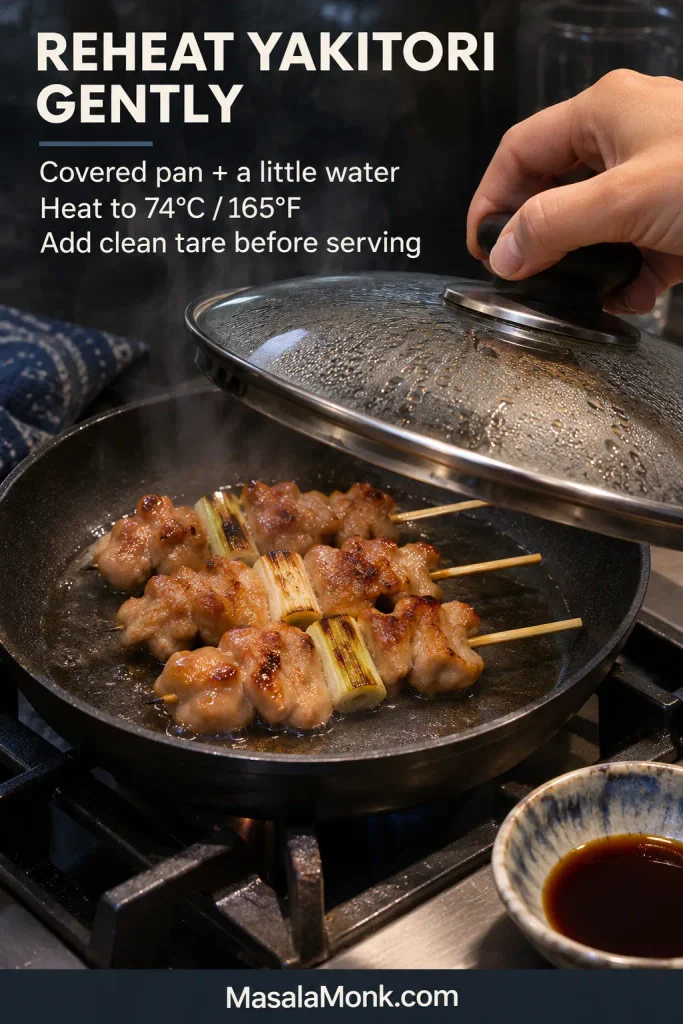
Warm cooked skewers in a covered frying pan with a little water or in a moderate oven until they reach 74°C / 165°F. Add a little clean tare before serving. Cool leftover cooked rice promptly in shallow containers and refrigerate it; rice held warm too long can support Bacillus cereus, and reheating may not destroy toxins already formed. Properly chilled leftover rice can be used for fried rice.
Cooked tare already contains browned sugars. Reheat the chicken gently in a covered pan with a splash of water, then finish with clean sauce instead of putting the old glaze through another hard sear.
Can You Reuse Yakitori Tare?
Only clean tare set aside before basting should be stored for later use. Discard the sauce remaining in any basting bowl that has contacted undercooked chicken.
Serve the skewers hot, with rice and something crisp alongside. If you enjoyed tare this time, try shio next time: the same chicken and scallions, seasoned simply with salt.
Which method did you use, and did you choose tare or shio? Share what worked in your kitchen—especially a useful trick for browning scallions, turning skewers or getting the sauce right.








