Sometimes you crave a mug that’s pure comfort—nothing fancy, nothing fussy—just deep chocolate flavor, gentle sweetness, and the kind of steam that fogs the window while you stir. This hot chocolate with cocoa powder takes you there in minutes. It’s pantry-friendly, it scales for a crowd, and it’s endlessly adaptable for darker, milkier, lighter, or dairy-free moods. Along the way, you’ll see exactly how to dial in the texture, choose between natural and Dutch-process cocoa, and even shake up a cold chocolate milk for warmer days—without losing the spirit of a classic stovetop cup.
Before we heat anything, here’s the single biggest secret to café-smooth results: start with a paste. Cocoa powder (especially unsweetened) doesn’t want to dissolve right away. Whisking it with a splash of milk and sugar first means every sip turns out silky, never gritty.
Also Read: Peanut Butter Cookies (Classic Recipe & 3 Variations)
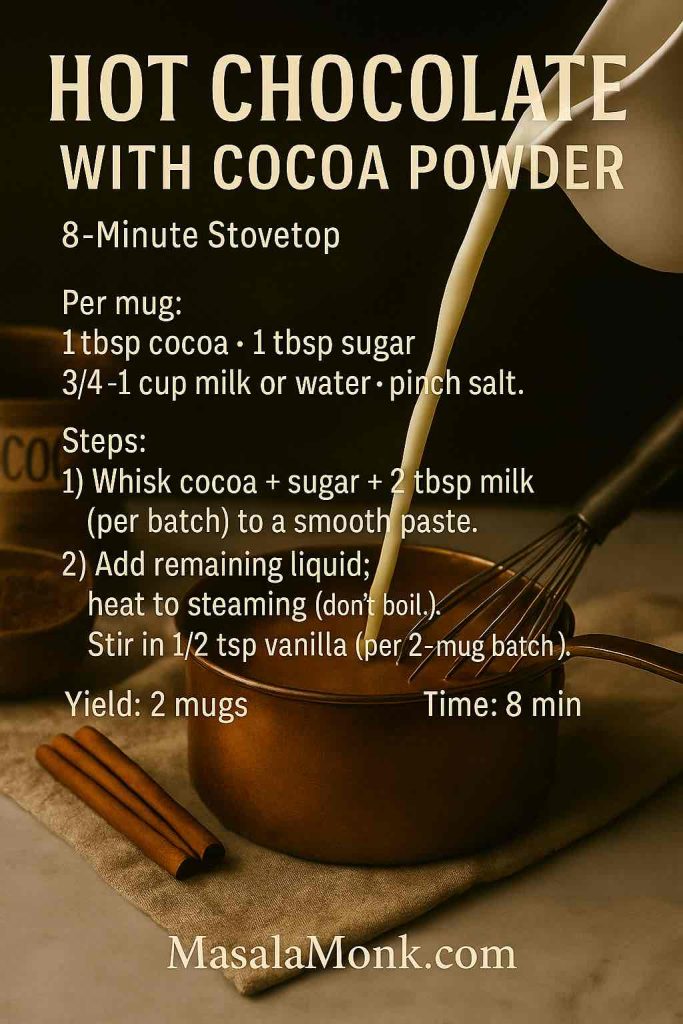
Ingredients for the best hot chocolate with cocoa powder (2 mugs)
- 2 tbsp unsweetened cocoa powder (natural or Dutch-process)
- 2 tbsp sugar (or 1–2 tbsp maple or honey, to taste)
- Pinch of fine salt
- 1 cup (240 ml) milk of choice, plus ½ cup (120 ml) water
- ½ tsp vanilla extract (optional, but lovely)
Want a quick refresher on cocoa styles and why one might taste smoother or darker than the other? King Arthur’s plain-English guide to Dutch-process vs natural cocoa is a great starting point. For an overview of other cocoa types in baking and drinks, their types of cocoa, explained expands the nuance even further.
Recipe: classic stovetop hot chocolate with cocoa powder
- Make the paste. Off the heat, whisk the cocoa, sugar, and salt with 2 tablespoons milk until the mixture is glossy and lump-free. This takes 15–30 seconds and makes all the difference.
- Heat gently. Whisk in the rest of the milk and the water. Set the pan over medium heat and warm until steaming and hot—but not at a rough boil. Gentle heat keeps the mouthfeel creamy and prevents “cooked” flavors.
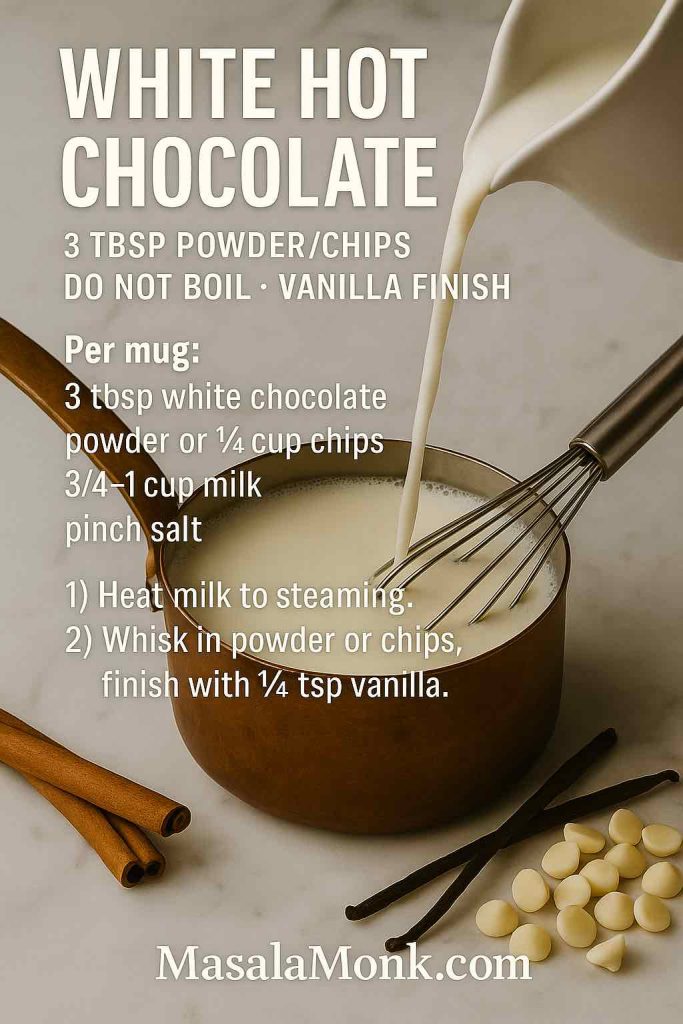
- Finish with fragrance. Take the pan off the heat and stir in the vanilla. Froth briefly with a whisk or handheld frother for that café-style lightness. Pour into warm mugs.
While that first sip is still hugging your hands, you might be wondering about cacao versus cocoa. They’re related, of course, yet not identical in processing or flavor. For a practical, balanced read on how cacao differs from cocoa (and why cacao can taste fruitier while cocoa blends more smoothly), see this explainer on MasalaMonk and the concise overview from Healthline on cacao vs cocoa.
Texture, temperature, and the power of a whisk
Even excellent cocoa powder needs a little help to bloom. The paste stage hydrates the particles so they disperse evenly when you add more liquid. Beyond that, moderate heat (think “steaming” rather than turbulent simmer) coaxes out chocolate aromas without pushing milk proteins too far. If you’ve ever had a cup that felt thin, chalky, or strangely “cooked,” it likely skipped one or both steps.
For extra lift, whisk in quick, tight circles right after you add vanilla. Just 10–15 seconds can transform the surface from flat to glossy with a delicate foam. If you own a small frother, this is its moment to shine. Otherwise, a sturdy balloon whisk is more than enough.
Also Read: Green Tea Shot with Jameson | Recipe & 10 Variations
Sweetness, salt, and balance
Sugar sweetens, yes, but it also rounds the cocoa’s bitter edges so the flavor reads chocolaty rather than merely “cocoa-y.” Start with the 2 tablespoons in the base recipe and adjust a teaspoon at a time next time you make it. Maple and honey add their own accents—maple gives a caramelly finish; honey feels floral—so you can tune the personality of your mug without changing the core ratio.
Don’t skip the pinch of salt. It’s not about making a “salty” drink; it’s about focus. That tiny amount tightens the flavor so the chocolate tastes bolder at the same sweetness.
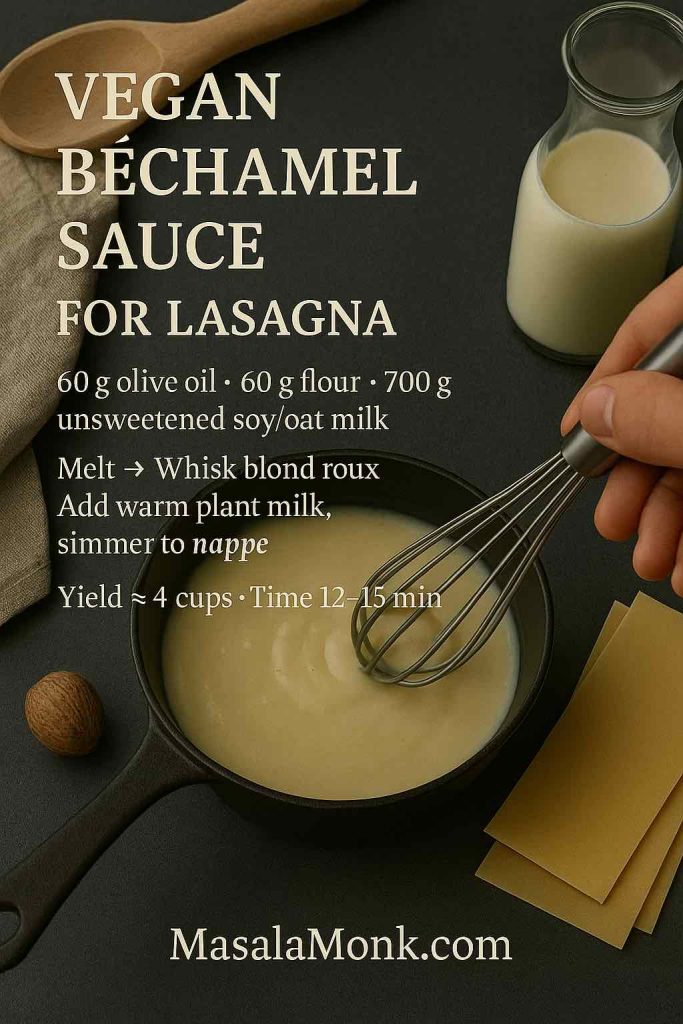
Also Read: Béchamel Sauce for Lasagna: Classic, Vegan & Ricotta Sauce Recipe
Milk or water? Finding your comfort zone
A lot of classic hot cocoa recipes use a mix of milk and water. There’s a reason. Milk gives body and richness; water lightens the profile and lets the chocolate notes pop. This base splits the difference—1 cup milk plus ½ cup water per two mugs—so you get a creamy backbone without heaviness. Prefer extra body? Go all milk (1½ cups / 360 ml). Want something lighter after dinner? Use more water and finish with a splash of cream to restore a silky finish.
If you’re making this dairy-free, barista-style oat milk drinks especially well, as do cashew and soy. Almond milk stays thinner but tastes clean and toasty, which some people adore in a nighttime cup.
Also Read: Crock Pot Lasagna Soup (Easy Base + Cozy Slow-Cooker Recipes)
Natural vs Dutch: how it changes your mug
Let’s talk flavor and feel. Natural cocoa is lighter in color and usually tastes a touch brighter, sometimes with a hint of fruit or acidity. It makes a classic, snappy-tasting hot chocolate with cocoa powder—the kind you might remember from childhood, just elevated by technique.
Dutch-process cocoa has been alkalized to tame acidity. In the cup, it reads darker, smoother, and often creamier at the same ratio. Because the edges are softer, many people find it dissolves more easily and gives a rounded finish. If your top priority is silky texture and a deep color, Dutch is the move. If you love lively, punchy chocolate, natural sings.
Curious which to stock? For a quick reference beyond this recipe, King Arthur’s types of cocoa, explained lays out how different powders behave in both baking and drinking.
Also Read: Cottage Cheese Lasagna Recipe | Chicken, Spinach, & Ricotta
Make-it-yours: small tweaks that change the whole cup
- Extra-dark hot chocolate with cocoa powder: Add 1–2 teaspoons more cocoa during the paste stage. You can nudge sweetness up by ½–1 teaspoon if needed, or keep it punchy.
- Lower sugar: Swap in allulose or erythritol. Because these sweeteners taste slightly cooler and less rounded than sugar, add a drop of vanilla or a tiny extra pinch of salt to keep the flavor full.
- Dairy-free richness: Barista oat, soy, and cashew milk foam beautifully. For even more body, whisk in 1–2 teaspoons coconut cream at the finish.
- Mocha moment: Stir in 1–2 teaspoons strong coffee or a splash of espresso. The coffee doesn’t steal the show; it just deepens the chocolate.
- Finishing swirl: A ribbon of homemade chocolate syrup turns a simple mug into something that feels café-made—perfect when you want a quick flourish without melting chocolate.
Also Read: How to Make Churros (Authentic + Easy Recipe)
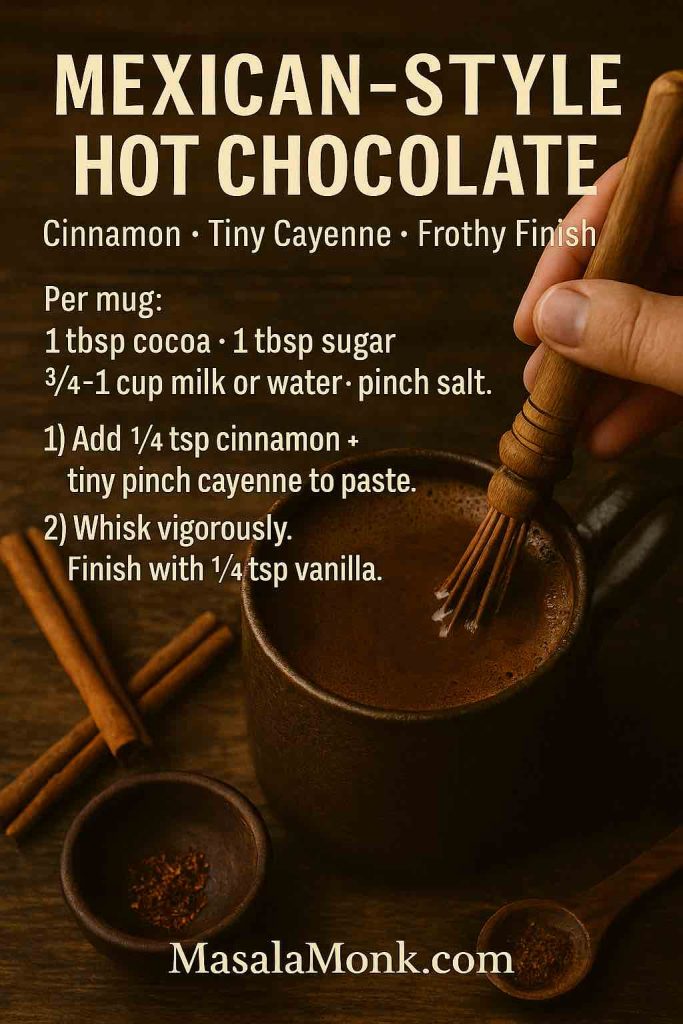
Spiced variation (Mexican-style recipe)
Keep the base the same, but in the paste stage whisk in ¼ teaspoon ground cinnamon and the tiniest pinch of cayenne. As the mixture warms, the cinnamon blooms and the heat lingers, not as a burn but as a gentle hum under the chocolate. Finish with vanilla, then whisk vigorously or use a frother to aerate the surface. If you’re going for a cozy dessert board, dunking something crisp is half the fun—homemade churros are a nostalgic, wildly satisfying pairing.
Cold spin: chocolate milk with cocoa powder (no syrup, no sludge)
Not every craving arrives with a cold night. For summer afternoons or quick post-workout comfort, make a cold chocolate milk that dissolves fully and tastes balanced:
- In a tall glass or a lidded jar, combine 1 tablespoon cocoa, 1–1½ tablespoons sweetener, a pinch of salt, and 1–2 teaspoons milk. Stir or shake into a silky paste.
- Add 1 cup cold milk gradually, whisking (or shaking) until smooth. The paste method saves you from floating clumps and gives a glossy finish.
If you like make-ahead chocolate treats with a lighter footprint, chia pudding recipes can lean cocoa-rich, dessert-ish, or breakfast-bright—handy when you want chocolate without the stovetop.
Heat, hold, and reheat: the practical bits
Heating: Keep it to medium. You want steam, not aggressive bubbles. Harsh boiling can press the proteins too far and leave a grainy impression even if you made a great paste.
Holding: If you’re hosting, keep hot chocolate warm on the lowest heat with a lid slightly ajar and whisk briefly every 10 minutes to keep it silky.
Reheating: Gentle is again the rule. If you’ve made a larger batch, rewarm on low and whisk as you go. A splash of fresh milk can refresh the body after prolonged holding.
Also Read: How to Cook Bacon in the Oven (Crispy, No-Mess, Crowd-Ready Recipe)
Serving ideas, garnishes, and textures for Hot Chocolate with Cocoa Powder
- Classic marshmallow cap: Homemade or store-bought, marshmallows soften into a creamy top layer that acts like a flavor filter—each sip pulls through vanilla sweetness.
- Light whipped cream: Soft peaks add air without weight. Dust the top with a whisper of cocoa for a café finish.
- Citrus twist: A tiny strip of orange zest rubbed over the cup perfumes the steam.
- Spice dust: A little cinnamon or nutmeg on the foam moves the aroma forward as you lift the mug.
- Cocoa-nib crunch: For a fun contrast, float a pinch of cocoa nibs; they’ll soften at the edges but keep a little bite.
Also Read: French Toast Sticks (Air Fryer + Oven Recipe) — Crispy Outside, Custardy Inside
Troubleshooting Hot Chocolate with Cocoa Powder
- Gritty sip: The paste likely wasn’t fully smooth. Next time, whisk the cocoa and sugar with a larger splash of milk until glossy before adding the rest.
- Too thin: Use all milk (1½ cups total) or whisk in ½–1 teaspoon cornstarch while cold, then heat gently until lightly thickened.
- Too sweet or flat: Add a pinch of salt, then nudge sweetness down next round. Cocoa flavor wakes up when the sweet–salty balance clicks.
- Dairy-free but watery: Try a barista-style oat or soy, or add 1–2 teaspoons coconut cream off heat.
- Lacks depth: Fold in a teaspoon of instant espresso powder or a few drops of vanilla. Tiny adjustments go a long way.
Also Read: 10 Best Chicken Sandwich Recipes (BBQ, Parm, Buffalo & More)
Choosing cocoa: pantry strategy that pays off
If you drink hot chocolate with cocoa powder even a few times a month, keeping two cocoas on hand is a clever move:
- Everyday natural cocoa for a bright, classic cup and baking.
- A Dutch-process cocoa for company or nights when you want a deep, plush mug.
This way, you can lean one direction or blend them. Many home cooks discover a 50/50 mix hits their sweet spot: vibrant yet smooth, dark yet lively.
For flavor clarity, sift your cocoa into a jar when you first open it—this breaks early clumps and keeps it ready for paste-making. Store in a cool, dry cabinet away from the stove so heat and steam don’t encourage caking.
Also Read: 10 Best Espresso Martini Recipe Variations (Bar-Tested)
A quick note on cacao (and when to use it)
Cacao powder is less processed than typical cocoa and often tastes fruitier and more delicate. If you prefer a “healthy-leaning” cup with a lighter body, warm your milk gently (hot but not boiling), then whisk in cacao, sweetener, and salt.
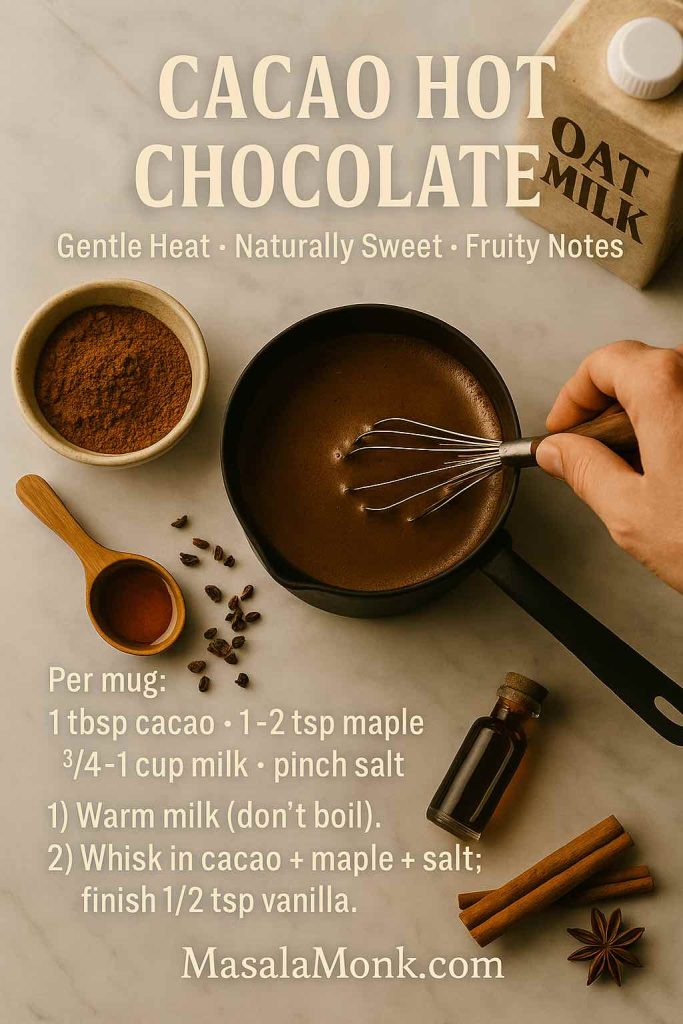
Because cacao’s edges are softer, it can feel more transparent in milk—some people love that, especially with maple syrup. If you’d like context on how cacao relates to chocolate and dark chocolate more broadly, this MasalaMonk guide maps the landscape in everyday language, while Healthline’s overview covers processing differences without getting fussy.
Also Read: Pumpkin Spice, Your Way: Master Blend, Variations & Real-World Recipes
Nutrition whisper: perspective without the lecture
Cocoa powder brings a small amount of minerals to the party, including magnesium. That doesn’t turn a mug into a supplement, of course, but it’s a pleasant bonus. If you’re curious about broader wellness angles that include cocoa or dark chocolate in a wider diet, you might enjoy MasalaMonk’s look at magnesium-rich foods. For technical nutrition data per serving, the USDA’s FoodData Central is the neutral reference many dietitians use; search their database for “cocoa powder, unsweetened” to compare brands and serving sizes.
- USDA reference: FoodData Central – cocoa powder
Scaling up: a crowd-pleasing pot of Hot Chocolate with Cocoa Powder
When you’re pouring for a game night or movie marathon, multiply everything and grab a heavier pot (4–5 liters for 8–10 servings). The method stays the same: paste first, gentle heat, vanilla off heat, quick whisk for foam. Here are a few patterns that work well:
- 8 mugs: 8 tbsp cocoa, 8 tbsp sugar, big pinch salt, 6 cups milk + 2 cups water, 2 tsp vanilla.
- 12 mugs: 12 tbsp cocoa, 12 tbsp sugar, generous pinch salt, 9 cups milk + 3 cups water, 1 tbsp vanilla.
Keep a small ladle nearby so guests can top themselves. Offer cinnamon, shaved chocolate, and a jar of homemade chocolate syrup for custom finishing.
Also Read: Healthy Pumpkin Spice Latte (Low Cal, Real Pumpkin)
Make-ahead components that speed up weeknights
If you want to cut prep to practically zero, you have two low-effort options:
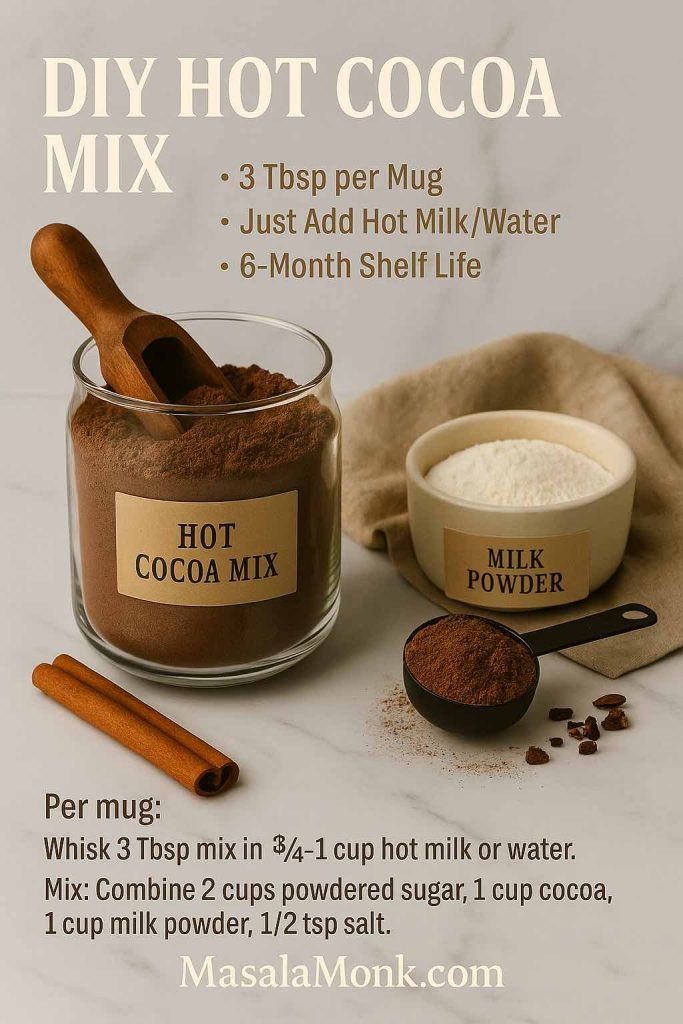
- Dry base mix: In a small jar, combine cocoa, sugar, and salt for 4–6 servings. When you’re ready, scoop out what you need, add milk+water, and go straight to the heat step.
- Syrup shortcut: Keep a jar of 3-minute chocolate syrup in the fridge. Stir a spoonful into hot milk for an on-the-fly cup, or drizzle the finished mug for a café look without extra tools.
Either way, you retain control over quality and sweetness while shaving prep down to the whisking.
Also Read: Vegan French Toast: 6 Easy Recipes (Pan, Air Fryer, GF & High-Protein)
Seasonal riffs that keep Hot Chocolate with Cocoa Powder interesting
- Peppermint steam: Add 1–2 drops peppermint extract at the finish.
- Orange glow: Infuse the milk with a strip of orange peel while heating; remove before serving.
- Ginger warmth: Simmer thin slices of fresh ginger with the milk and water, then strain.
- Nutty whisper: A teaspoon of hazelnut or almond extract can evoke chocolate-hazelnut vibes without turning the cup into dessert.
Rotate these through the colder months and your “same” hot chocolate with cocoa powder never feels repetitive.
Also Read: Classic vs. Authentic Alfredo: 5 Essential Recipes
A note on quality: small upgrades, big rewards
- Freshness matters: If your cocoa has been open for a year and lives near the stove, the aroma might have faded. Move it to a cool cabinet and refresh the supply every few months if you make cocoa often.
- Sifted and ready: Pre-sifting into a jar means paste-making is quick and clump-free.
- Vanilla restraint: Vanilla is beautiful here, but it’s a supporting actor. Go light so it frames the chocolate rather than masking it.
Chocolate-forward pairings
Hot chocolate practically begs for a snack to dunk. Crisp-edged churros are a classic. If you’d like something lighter, cocoa-leaning chia puddings deliver chocolate notes in an entirely different texture—cool, spoonable, and meal-prep-friendly. Meanwhile, if you’re curious about broader chocolate and cacao territory (bars, bakes, and the space between), this MasalaMonk cocoa/cacao explainer is a handy compass.
Why this ratio works (and when to break it)
Per mug, this recipe lands at roughly 1 tablespoon cocoa : 1 tablespoon sugar : ¾–1 cup liquid. That’s the sweet spot for most palates—enough cocoa to read as chocolate rather than faintly flavored milk; enough sugar to polish the edges; enough liquid to feel sippable, not heavy. Nevertheless, ratios are invitations, not rules. If you adore a darker profile, lift the cocoa and reduce the sugar slightly. If you’re serving kids, tipping the sweetness up a teaspoon can feel more familiar. You can shift the milk-to-water balance too: all milk for a plush nightcap; all water with a splash of cream for something featherlight yet still cozy.
Also Read: Lemon Drop Martini Recipe (Classic, 3-Ingredient, & More)
Beyond the mug: a chocolate-forward pantry
Once you dial in hot chocolate with cocoa powder, you’ve effectively cracked a handful of other winter comforts:
- Mocha oatmeal: Stir a teaspoon of cocoa and a little sugar into hot oats; finish with a splash of milk and vanilla.
- Quick chocolate sauce: Whisk cocoa, sugar, a pinch of salt, and hot water into a thick drizzle; enrich with a knob of butter or a splash of cream. Or, take the faster route with this three-minute chocolate syrup.
- Hot cocoa base for bakes: The paste technique is the backbone of cocoa glazes and certain stovetop frostings; once you see how smoothly cocoa bloomed in milk behaves, you’ll start applying it elsewhere.
Cold weather ritual, warm weather habit
In winter, this recipe is ritual: steam curling, cinnamon nearby, a soft blanket waiting. In summer, the cold chocolate milk variation takes over—we shake, we pour over ice, we sip on the balcony. Either way, it’s still the same foundation: a quick paste, gentle heat (or no heat at all), and a minute of whisking to make it feel special.
If you’re exploring further
- For clear, non-technical answers about cocoa styles, King Arthur’s guides on Dutch vs. natural cocoa and cocoa types are reader-friendly.
- For a grounded look at cacao versus cocoa and where chocolate sits in that spectrum, try MasalaMonk’s explainer, and for broader processing context, Healthline’s cacao vs cocoa piece is a good supplement.
- If nutrition tables help you calibrate your own serving, the USDA’s FoodData Central is a straightforward database—useful if you compare brands or track macros.
One last mug
The difference between a forgettable cup and a memorable one almost always comes down to the same simple moves: bloom the cocoa in a paste, warm gently, finish with something fragrant, and whisk for a breath of foam. From there, you can veer darker or lighter, dairy-rich or dairy-free, spiced or straight, hot or ice-cold. That’s the charm of hot chocolate with cocoa powder—it gives you a classic to return to and endless little detours to enjoy along the way.
Also Read: Daiquiri Recipe (Classic, Strawberry & Frozen Cocktails)
FAQs on Hot Chocolate with Cocoa Powder
1) Can I make hot chocolate with baking cocoa?
Absolutely. Baking cocoa is simply unsweetened cocoa powder, so it’s perfect for hot chocolate with cocoa powder. First, whisk it into a smooth paste with a little milk and sugar, then add the remaining liquid and heat gently.
2) What’s the best cocoa powder for drinking?
Generally, Dutch-process gives a darker color and smoother taste, while natural cocoa delivers a brighter, classic chocolate snap. For everyday hot chocolate with cocoa powder, either works; choose Dutch for silkiness or natural for lively flavor.
3) How do I make hot chocolate with cocoa powder extra creamy?
Use all milk instead of milk + water, keep the heat moderate, and finish with a quick whisk or frother. Optionally, add a teaspoon of cream or coconut cream at the end.
4) Can I make hot chocolate with cocoa powder without sugar?
Yes. Swap sugar for allulose, erythritol, or a liquid sweetener like maple. Because some alternatives taste less rounded, balance with a tiny pinch of salt and a drop of vanilla.
5) Does milk type matter for hot chocolate with cocoa powder?
Definitely. Whole dairy milk gives the richest body; barista-style oat, cashew, and soy foam well and taste silky. Almond reads lighter and toasty; coconut adds tropical richness.
6) How do I stop cocoa from clumping?
Begin with a paste: whisk cocoa, sugar, and a spoon or two of milk until glossy, then add the rest of the liquid. This quick step prevents gritty, floating specks.
7) What ratio should I use per mug?
A reliable baseline is 1 tbsp cocoa : 1 tbsp sugar : ¾–1 cup milk (or milk + water) with a pinch of salt. Adjust darker by adding ½–1 tsp extra cocoa, or sweeter by 1–2 tsp sugar.
8) Can I make low-carb hot chocolate with cocoa powder?
Certainly. Use unsweetened almond or cashew milk, choose a zero-calorie sweetener, and keep the classic ratio. For body, whisk a splash of cream or a bit of coconut cream after heating.
9) How do I make Mexican-style hot chocolate with cocoa powder?
Stir ¼ tsp ground cinnamon and a tiny pinch of cayenne into the paste. Warm gently, finish with vanilla, then whisk vigorously for a frothy top.
10) Is cacao powder good for hot chocolate?
Yes—cacao tastes fruitier and more delicate. Heat your milk just to hot (not boiling), then whisk in cacao and sweetener. Expect a lighter body than typical hot chocolate with cocoa powder.
11) Can I prepare hot chocolate ahead of time?
You can. Mix the dry base (cocoa, sugar, salt) in a jar and store airtight. When ready, add milk and heat. If holding a cooked batch, keep it warm on low and whisk occasionally.
12) How do I reheat leftover hot chocolate?
Warm on low heat until steaming, not boiling. If it thickened or sat for a while, whisk in a splash of fresh milk to restore creaminess.
13) What’s the difference between hot cocoa and drinking chocolate?
Hot cocoa uses cocoa powder and is lighter; drinking chocolate melts real chocolate, so it’s richer and thicker. Choose based on mood—weeknight comfort or decadent treat.
14) Can I make hot chocolate with cocoa powder using water only?
Yes. Water highlights the chocolate notes and keeps things lighter. For a silkier finish, add a small splash of milk or cream after heating.
15) How can I boost chocolate flavor without extra sugar?
Add a pinch more salt, a few drops of vanilla, or ½–1 tsp instant espresso powder. These amplify chocolate depth without increasing sweetness.
16) What’s the ideal temperature for hot chocolate with cocoa powder?
Aim for “steaming hot” rather than a rolling boil. Gentle heat preserves a smooth mouthfeel and prevents a cooked-milk aftertaste.
17) Can I scale this recipe for a crowd?
Definitely. Multiply the ratio, use a heavy pot, and still start with a paste. Keep warm on low and whisk every 10–15 minutes to maintain a silky texture.
18) Why does my hot chocolate taste thin?
Use all milk instead of part water, increase cocoa by ½–1 tsp per mug, or add ½–1 tsp cornstarch while the mixture is cold and then heat until lightly thickened.
19) How can I make hot chocolate with cocoa powder more “dark chocolate” forward?
Increase cocoa by 1–2 tsp per mug, reduce sugar slightly, and finish with a tiny pinch of salt. For extra depth, add a touch of espresso powder.
20) What toppings work best without overpowering the drink?
Softly whipped cream, a dusting of cocoa or cinnamon, micro-grated orange zest, or a few cocoa nibs. Keep the layer light so the chocolate remains the star.