Posted on Leave a comment

Green Peas, Corn and Mint Parantha for Toddlers

This recipe came into being when my then 4 year old suddenly one day decided that he hates green peas. Toddlers and their tantrums! But seeing the nutritional profile of peas, I wanted to make him feed peas in some form. I know, all mothers have gone down that lane atleast once where we are finding ways to hide such nutritious vegetables into our child’s meal.

I finally found this perfect way to make him have peas. He absolutely loves this parantha. But now that he is 10, the difference is that he now knows that this is Peas Parantha and sometimes requests for it too. He still hates peas in its whole form though. 🙂

This Parantha tastes extremely good and is perfect for toddlers. Your little one will enjoy the mild soothing flavour derived from apt spices and easily chewable texture. The natural sweetness from peas and corn is very well balanced with mint and spices. 

Peas I think are quite under-rated. It is not actually a vegetable but a small, edible legume and belong to the same family. They are rich in fibre and one of the best plant sources of protein. Always remember when it comes to nutrients, quality over quantity will always win. They are also a useful vegan source of iron. Just 80 grams of green peas can give almost 6 grams of superb quality protein and 1.2 mg of iron.

The combination of sweet corn kernels with peas is quite different and delectable. Sweet corn gives its own creaminess and milky sweet taste to this parantha and mint leaves not only adds that much needed freshness but also is an absolute MUST in summers to keep the digestive system cool.

Let’s see how we can make these parantha for our little picky eaters 🙂

Recipe: makes 3 Paranthas

Ingredients: 

  1. Green Peas: 1/2 cup, boiled or steamed
  2. Sweet Corn Kernels: 1/4th cup, boiled or steamed
  3. Whole wheat flour: 1 cup
  4. Mint leaves: 1/4th cup
  5. Ginger: 1/2 inch
  6. Roasted Cumin Powder: 1/4th tsp
  7. Black pepper: as per taste
  8. Salt: as per taste
  9. Coriander Powder: 1/4th tsp
  10. Garam Masala: a pinch (optional)
  11. Caraway seeds/Ajwain: a generous pinch
  12. Ghee for cooking and dough

Instructions:

  • In a large plate or bowl take wholewheat flour. Add salt, blackpepper, roasted cumin powder, coriander powder, garam masala, ajwain and 1 tbsp desi ghee. 
  • In a blender, add boiled/steamed peas, corn, mint leaves and ginger. Blend to a smooth purée. Use a little water to get a smooth purée.
  • Add the purée to the flour and knead the flour using the purée. Make a soft dough. 
  • Cover the dough and let the dough rest for 10 mins. Then make small balls and roll it with a rolling pin to the shape and size you want. 
  • Heat a tawa and place rolled parantha over it. Drizzle oil or ghee after it gets half cooked and cook both sides using ghee till golden brown. 
  • Serve with dollop of homemade butter and loads of love.  ❤️

Always serve homemade butter to your child and never store-bought one. Know why you should not give store-bought butter to your child and how to make homemade butter here- Is Homemade Butter really Worth the Effort?

Notes: 

  1. If you are boiling peas and corn then do that in minimal water and use the water to make the purée. Do not let the nutrients get washed away down the drain.
  2. Do not cook parantha on low flame for a long time. It will make harder or crisp paratha which kids don’t like.
  3. You can use frozen peas for this recipe but remember fresh will always taste better. 
  4. Do not skip adding caraway seeds or ajwain in your child’s parantha. They are excellent for digestion.

Do try out this recipe for your child. I am absolutely sure your child will enjoy it. More than your child I am sure you will enjoy watching your child gobbling down such healthy stuff. 🙂 Do let me know in the comments if you do. Would love to know how your child liked it. 

Happy Feeding! 

Posted on Leave a comment

Kali Mirch Paneer | Black Pepper Paneer- Kid Friendly Recipe

Paneer Kali Mirch is an onion based white gravy. The concept of combining the mild flavor of paneer with the strong flavour of black pepper emerged as Indian cookery developed, and regional cuisines grew in popularity. The flavours of this dish are mild yet there is subtle heat from the pepper. It has a rich silky-smooth gravy. As the name white gravy suggests, we instantly associate white gravy with too much cream but surprisingly this kali mirch gravy does not contain any cream at all. The gravy is made using cashews and milk which makes it light and easy on your stomach. It is perfect for those days when strong paneer cravings strike but you don’t want to indulge in those heavily cream based gravies. It can turn your boring lunch or dinner to something special, something that will bring a sense of satisfaction and smile to your face. I promise that! 🙂

I had my first kali mirch paneer dish from a famous restaurant in Ludhiana, a city in Punjab. I loved it so much then that I badly wanted to crack the recipe. Lot of trials later, I kind of figured out the technique they use but I wish I can crack the recipe of their secret masala. Though, this recipe doesn’t give that exact taste but comes pretty close to the original and of course tastes delicious.

For people who eat chicken and want to make Kali Mirch Chicken, you can totally use this recipe. Just marinate chicken in ginger-garlic paste, salt and black pepper for 30 minutes to an hour before and cook it in the gravy.

Now let’s see how we can make this delicious paneer dish. Check out the step by step recipe below.

Recipe: serves 3

Ingredients: cup measurement 250 ml

  1. Paneer: 200 grams
  2. Black pepper: 1 tbsp (freshly ground)

For the Gravy

  1. Onion: 1 large or 2 medium, sliced
  2. Ginger: 1 inch
  3. Garlic: 7-8 cloves
  4. Green Chilli: 1
  5. Oil: 2 tbsps
  6. Ghee: 2 tbsps
  7. Milk: 1.5 cups
  8. Cashews: 8-9
  9. Water: 1/2 cup or as required 
  10. Kasuri Methi: 1 tsp
  11. Bay leaf: 1
  12. Salt to taste

For Kali Mirch Paneer Masala

  1. Cloves: 2
  2. Black Cardamom: 1
  3. Green Cardamom: 2
  4. Mace: 1
  5. Cumin seeds: 1/4th tsp
  6. Coriander seeds: 1.5 tbsp
  7. Cinnamon stick: 1/2 an inch

Instructions 

  • In a wok roast all the dry spices till they become fragrant and coriander seeds turn slightly brown. Then ground them in the mixer grinder or mortar pestle to a fine powder. Keep aside. 
  • In the same wok heat oil and ghee. Add bay leaf, roughly chopped ginger and garlic. Slit the green chilli from the middle and then add it. Sauté till they the rawness goes. Do not brown it. 
  • Now, add sliced onions, some salt and cook till they become translucent. Add cashews and sauté till onions become soft. Do not brown the onions. We need white gravy. Browning onions will change the colour and flavour of the gravy.
  • Once the onions become soft, switch off the flame. Remove green chilli and bay leaf. Allow onions to cool a little then transfer to a mixer jar. Add a little water and blend to a smooth paste. 
  • Transfer the paste back to the wok. Add 2 tbsps of prepared masala and 1/2 tsp of freshly ground black pepper. Mix well. Cook the onion paste for 4 to 5 minutes on low flame. 
  • Now add 1.5 cups of milk in the wok. Swirl some milk in the mixer jar to take out all the onion paste. Bring the milk to simmer then immediately lower the flame. Do not boil the milk on high heat. Chances are that it will curdle. Keep stirring regularly for 5-6 minutes so that milk doesn’t curdle. This is the only tricky part. Rest is a cake walk.
  • Once the gravy starts to thicken, add 1/2 cup of water, salt to taste and cook on low flame till the gravy thickens and coats the back of the spoon. 
  • Now crush kasuri methi between your hands and add it to the gravy along with remaining black pepper. Mix well. 
  • Add diced paneer cubes to the gravy and 1 tbsp of prepared masala. Cook on low flame for another 5 minutes. After 3 or 4 minutes, check for salt, add if required, cook for another minute and switch off the flame. 
  • Cover and let the gravy rest for 10 to 15 minutes before serving. Serve with hot rotis, naan or paranthas. 

Troubleshooting

  • The only trouble shooting in this recipe is curdling of the milk. If that happens, don’t get worried, I have got you covered. If the milk curdles while the gravy is thickening, then let the gravy thicken at first. Once it thickens, switch off the flame. Allow it to cool a little. Now before adding water, blend the curdled gravy in the blender and you will get a silky-smooth gravy. Transfer the gravy back to the wok, add water and cook like mentioned above.

Pro tips:

  1. For the best flavor and aroma, use peppercorns that are no more than a year old and grind them fresh using a pepper grinder or mortar pestle.
  2. The gravy can be made a day or two ahead and refrigerated. When ready to serve, add the paneer, cook for 5 minutes and serve. You can add some water to loosen up the gravy.
  3. If you want to make even more lighter gravy, you can skip cashews and just use milk.

Once you try this paneer kali mirch, I am sure it’ll become a regular part of your meal rotation. Do let me know in the comments how this recipe turned out for you. I would love to have your feedback. Stay Healthy! 🙂

Posted on 1 Comment

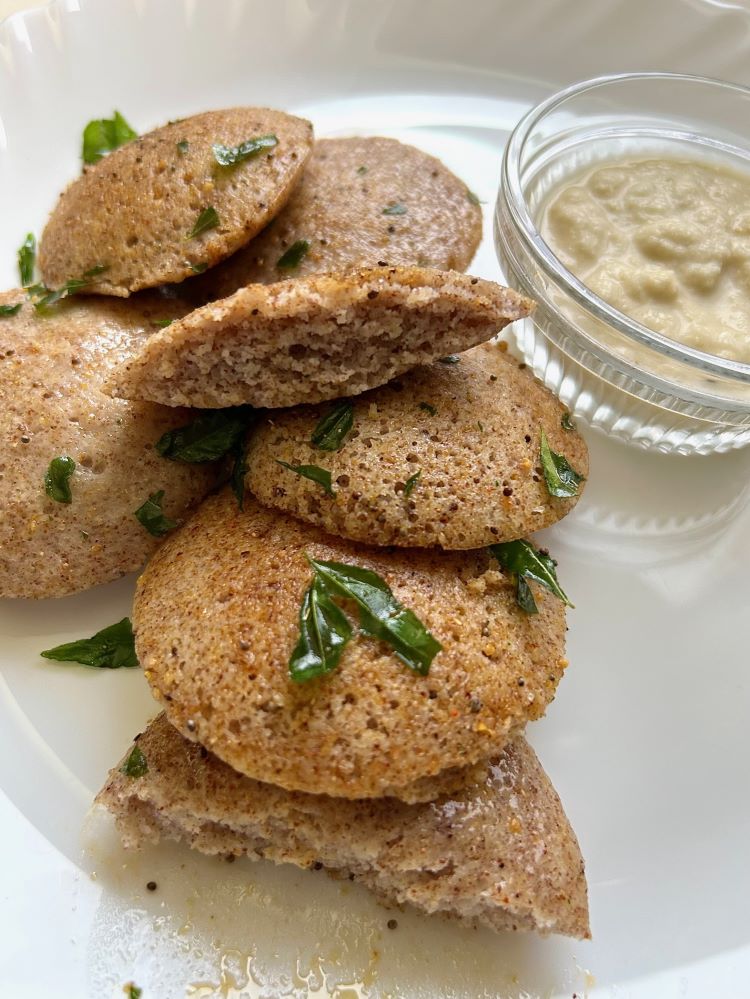
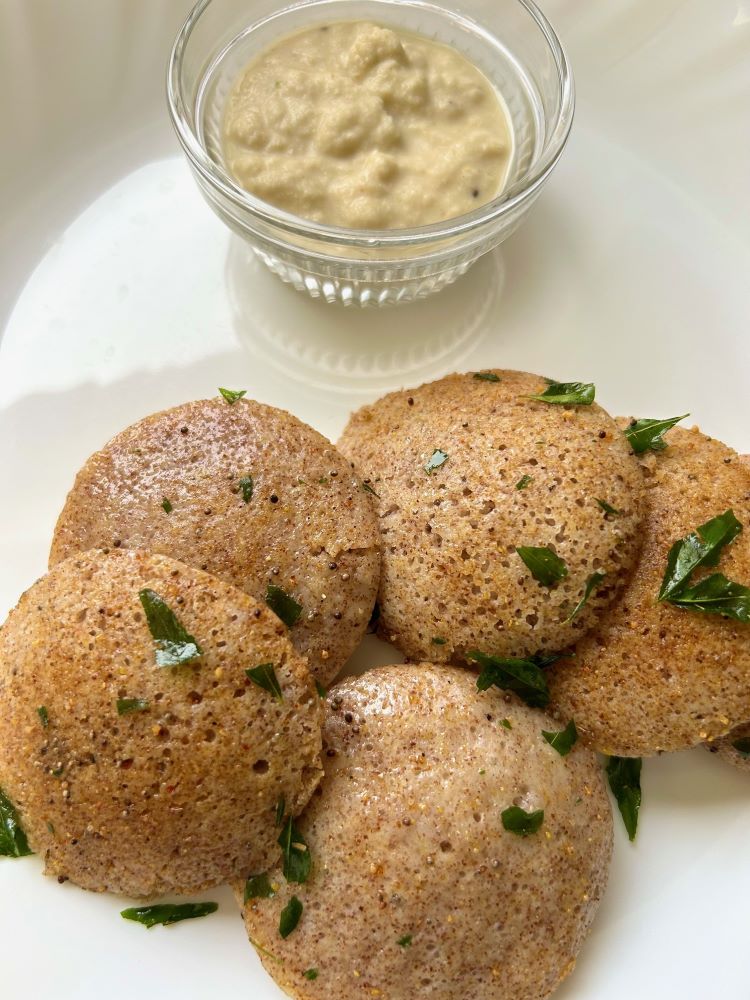
Fermented RAGI (Finger Millet) IDLIS- Gluten Free | Gut Friendly | Breakfast Recipe

At home Idlis is our favourite breakfast. Ragi idli is a nutritious wholesome South Indian meal. They are light, easy on stomach and have tremendous health benefits. Idlis are like steamed cakes made with lentils and idli rice. Ragi idli is just another variation where ragi is replaced by rice. The batter of these ragi idlis will also be beneficial for making dosas the next day. I like to serve these millet idlis with Coconut Chutney or Kara Chutney.

Ragi idli is made using idli rice, flattened rice (poha), ragi flour, urad dal and fenugreek seeds. The ingredients are first soaked and then the batter is prepared by grinding the ingredients followed by fermentation, then the batter is steamed to make idlis. This batter yields consistent results. The idlis will always be pillowy soft and totally melt in mouth.

Not just Ragi idlis or dosas, if you are a pancake lover, you can also try these, Ragi Pancakes or these Millet Cutlets which you can easily make at home in 10 minutes using minimal oil. They come out absolutely delicious and are so healthy.

Given the health benefits of ragi, these steamed cakes become a superfood which not only has benefits of whole grains, but it is also fermented. 

Why fermented food is good for you? 

Fermented foods like idli, dhokla, dosa are a fabulous addition to your diet.

  • It helps in increasing immunity and improves digestion. 
  • It also increases the bio availability of minerals. It breaks down proteins, carbohydrates and other minerals in a way making it easily available to our body. 
  • Also a lot of good bacterias are at play when your food is fermenting. All fermented foods are natural probiotic. It’ll strengthen your immune system making you disease resistant.
  • The lactic acid bacteria which helps in fermentation also creates omega 3 fatty acids, essential for the immune system. It will help to remove toxins and helps your body build a healthy gut flora. 

Here are 5 excellent reasons why this millet should be in your diet.

  1. High fibre content: Ragi is high in dietary fibre which will help to promote proper digestion and keep your bowel movements in check. 
  2. Rich in Calcium: It is an ultimate non-dairy source of calcium. Just 100 grams of Ragi can give you 344 mg of calcium.
  3. Supports Gluten- Free Diet: Ragi is a great choice if you are on a gluten-free diet – it’s naturally gluten-free! No need to worry about hidden gluten as it’s a safe and delicious way to enjoy your meals.
  4. Child Nutrition: It helps to fulfil child’s nutritional needs. It is rich in protein, calcium, iron, zinc and other essential nutrients.
  5. Treats Anaemia: Since Ragi is an excellent source of iron too, which is essential for producing red blood cells, it helps to fight off anaemia.

With all such goodness and nutrition packed in this humble dish, let’s get to the recipe now

Recipe: serves 4

Ingredients: measuring cup size 250 ml

  1. Ragi flour: 1 cup
  2. Idli Rice/Parboiled Rice or Broken Rice: 1 cup
  3. White Split Urad dal: 1/2 cup
  4. Flattened Rice/Poha: 1/4th cup
  5. Fenugreek seeds/Methi dana: 1/4th tsp
  6. Rock Salt or any non-iodised salt: As per taste
  7. Oil/ghee for greasing
  8. Water as required for making batter and steaming 

Method: 

  • Wash rice and poha 3 to 4 times. Soak them in enough water for 5 hours. 
  • Wash urad dal and fenugreek seeds 3 to 4 times and soak for 5 hours. 
  • Drain the water from dal and rice. First grind urad dal to a smooth and fluffy batter. Add little water at a time to get a smooth paste. Do not add too much water in one go. 
  • Then grind rice and poha to a smooth batter using water as required. Again, don’t add too much water. Add little at a time. 
  • In large steel bowl, mix together both dal and rice batter. 
  • Add roughly 3/4th cup of water to ragi flour and make a smooth consistency batter. Make sure there are no lumps. 
  • Mix Ragi batter with rice and dal batter till it completely incorporates. 
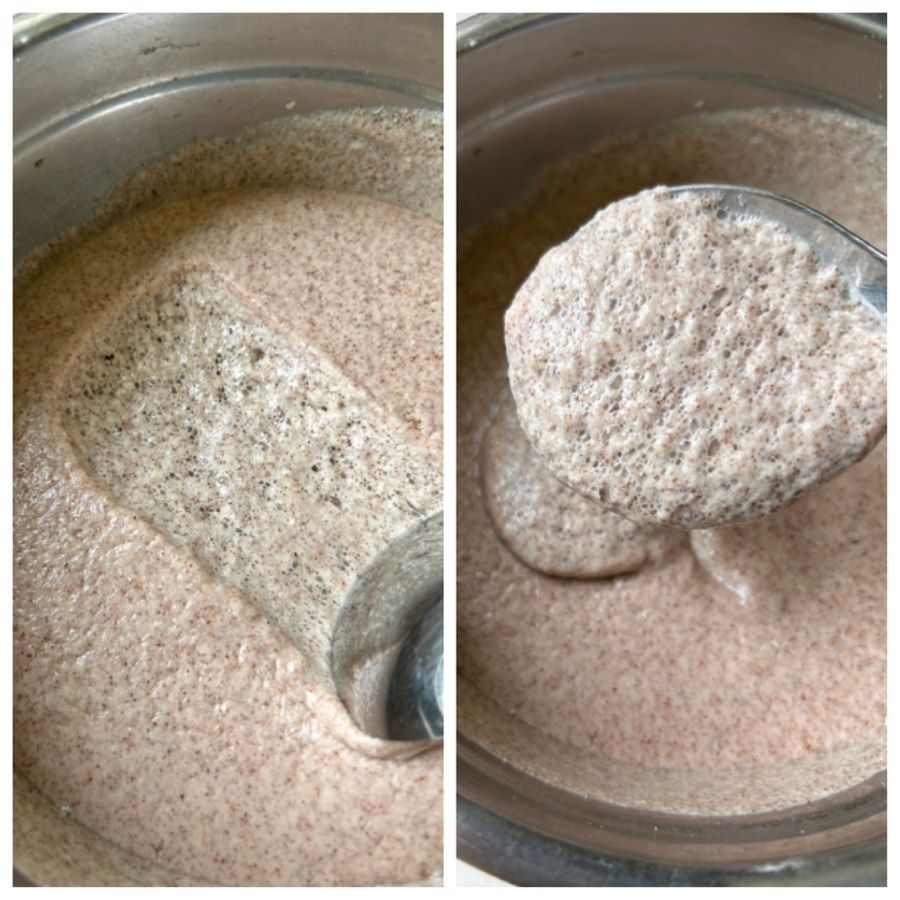
  • Add rock salt as per taste. Cover the bowl with a lid and keep the batter in dark warm place for 9 hours or more. I had to keep it for 12 hours.
  • The batter will double and become fluffy and airy. Give a gentle mix before making the idlis. Do not mix rigorously or you will lose the airiness of the batter. 
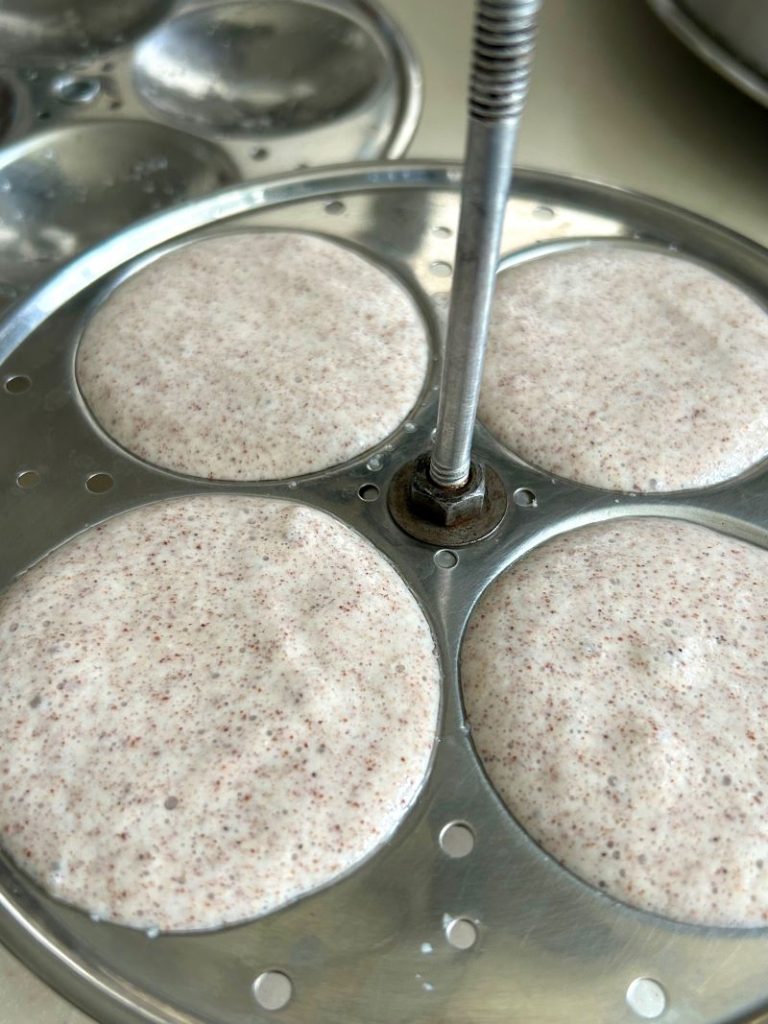
  • In an idli maker, bring water (roughly 3″ above) to boil. Grease idli moulds with oil/ghee. Fill in the cavities with the batter.
  • Now, steam the idlis in idli maker for 10 to 12 minutes or till toothpick inserted at the centre comes out clean. It shouldn’t be sticky.

Tips for fermentation: – 

  1. Add rock salt to the batter before fermenting. Salt helps in fermentation. Do not use iodised salt. 
  2. Do not skip Fenugreek seeds. It helps the batter to get bubble like texture. Also, it’s makes dosa crispier. 
  3. Add enough water while grinding dal and rice to get smooth and fluffy batter. Do not add water in one go. Keep adding little at a time. This will give you soft idlis. 
  4. Mix the final batter with your hands for a minute and then keep it at a warm place. The warmth in your hand will help in fermentation. 

I hope you enjoyed reading this recipe and will give it a try. Do let me know if you do. I would love to hear from you guys. Here’s to healthy eating! 🙂

Posted on 2 Comments

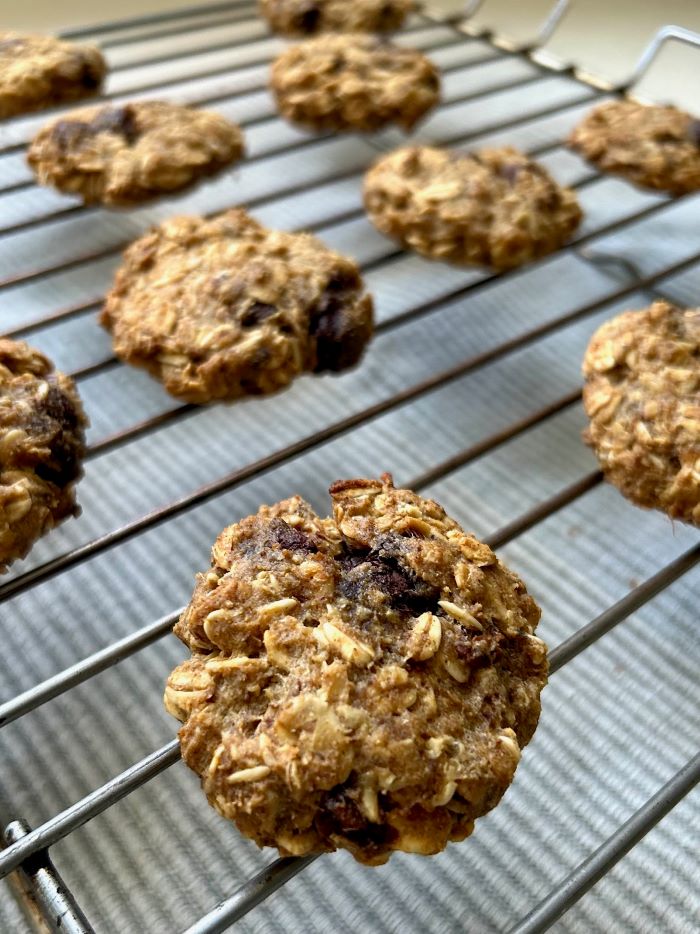
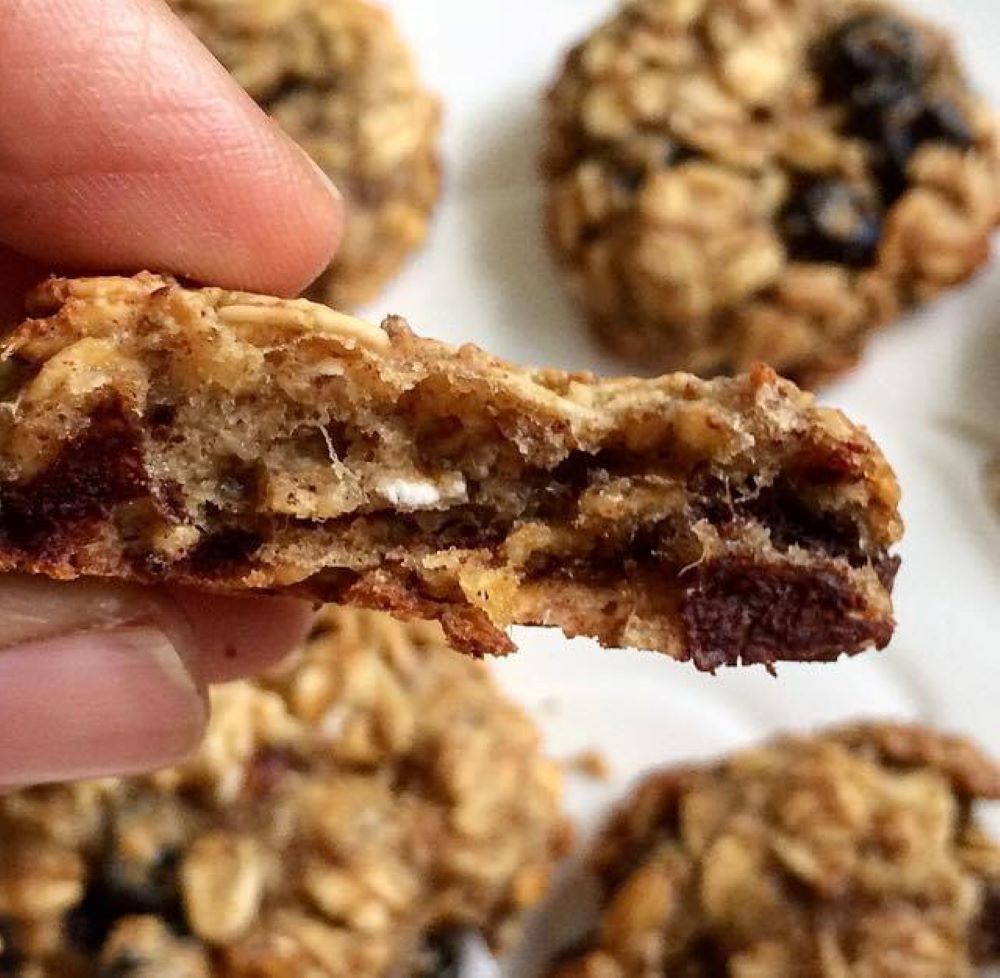
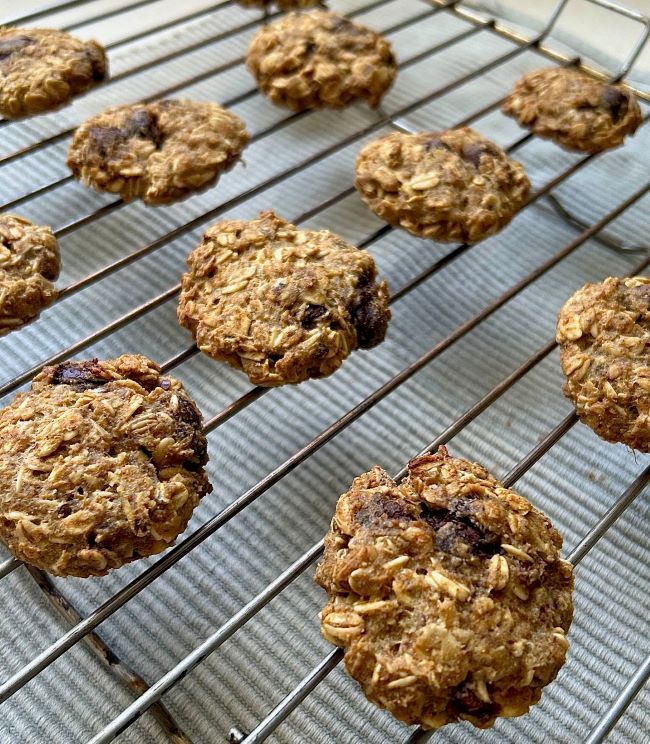
Easy and Healthy Oat Cookies- No Sugar | No Butter | No Refined Flour

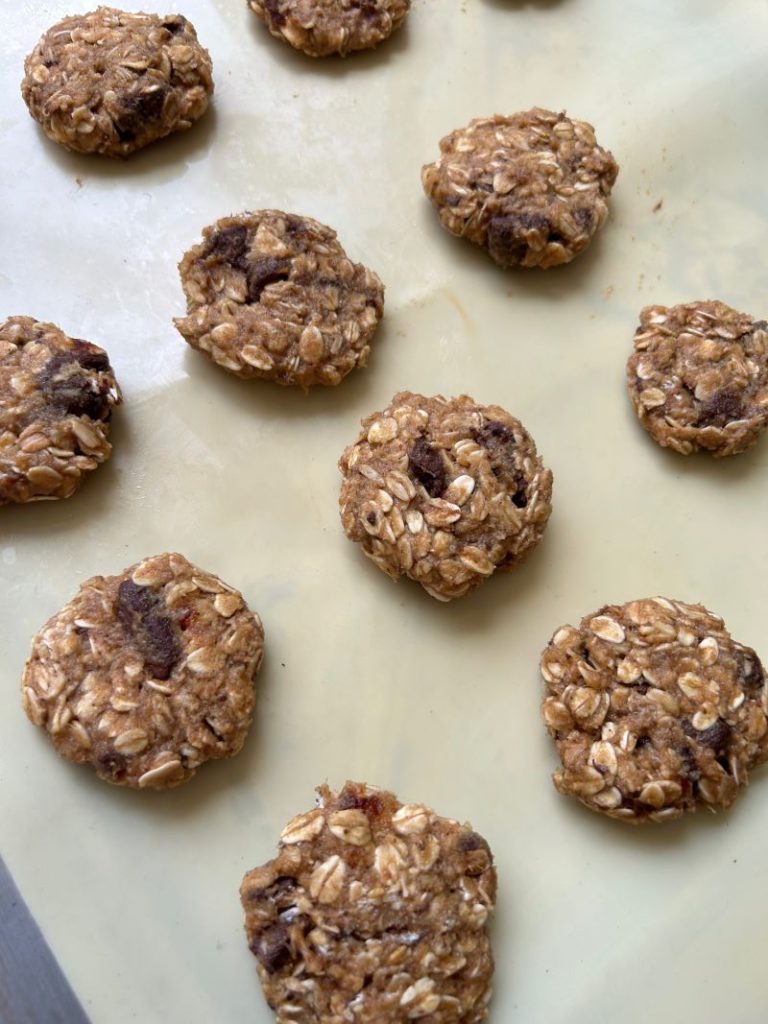
If you are looking for healthy cookies recipe for your kids, this is it! These soft, chewy, perfectly sweet and wholesome cookies will be your go to recipe. I highly recommend this for your sweet cravings and pick-me-up snack moments.

Being a mother I am always on a look out for healthy snacking options for my child. I hate to give him sugary packet snacks everyday. While they are ok as once in a while indulgence but I get wary of all the artificial flavours, preservatives and processed sugar added in bakery cookies. 

These cookies have the goodness of whole-grains, oatmeal, egg and dates as prime ingredients. The natural sweetness and moisture come from a fruit, dates and coconut oil. The best part about these cookies is that they are one bowl cookies. No endless use of utensils and whisking is required. 

Main Ingredients and their Substitutes

Rolled Oats: I have used rolled oats or old fashioned oats here because they are better for baking. However, you can also quick oats. Quick oats will give you a slightly uniform texture. I however, prefer the taste and texture of rolled oats

Wholewheat Flour: I have added wholewheat flour for more fibre. Also, it brings together the cookie dough and gives nice crunch to these cookies. 

Apple: I like to add an apple in the cookies for moisture and natural sweetness. You can totally substitute apple with either a banana or applesauce. 

Virgin Coconut Oil: Coconut oil offers an almost direct substitute to butter. It lends a sweet but subtle flavour to bakes. You do not need to use as much coconut oil to get the same fat content as butter, since butter comprises 20% water. You can use butter here if coconut oil is not available. Just increase the butter by 20%.

Egg: Egg not only adds more protein and nutrition in cookies but it also helps to bind and improve texture of the cookies resulting in more light and chewy cookies. However you can totally make them eggless too by substituting 1 egg with flaxmeal. 1 tsp ground roasted flaxseeds in 4 tbsps water. Let it sit for 10 minutes. Use this mixture in place of egg or use 1/4th cup of greek yogurt. 

Dates: I have added dates as a natural replacement for sugar. Dates are also rich in iron, fibre and antioxidants. If you want to substitute dates in this recipe, you do that by adding 1/4th cup of pure maple syrup.

Dark Chocolate: Use a good quality dark chocolate, atleast 70%. You can totally substitute it by adding raisins, black currants, cranberries, walnuts, dried blueberries or any other dried fruits or nuts of your choice.

Now let’s get to the recipe

Recipe: makes 14 to 15 cookies

Ingredients 

  • Rolled Oats: 1 cup
  • Wholewheat flour: 1/2 cup
  • Apple: 1 medium
  • Virgin Coconut oil: 3 tbsps
  • Egg: 1 
  • De-seeded dates: 4
  • Baking powder: 1/2 tsp
  • Cinnamon powder: 1/2 tsp
  • Vanilla Extract: 1 tsp
  • Dark Chocolate chunks (70%): 1/2 cup

Method:

  • Soak dates in hot water for 10 minutes to soften it.
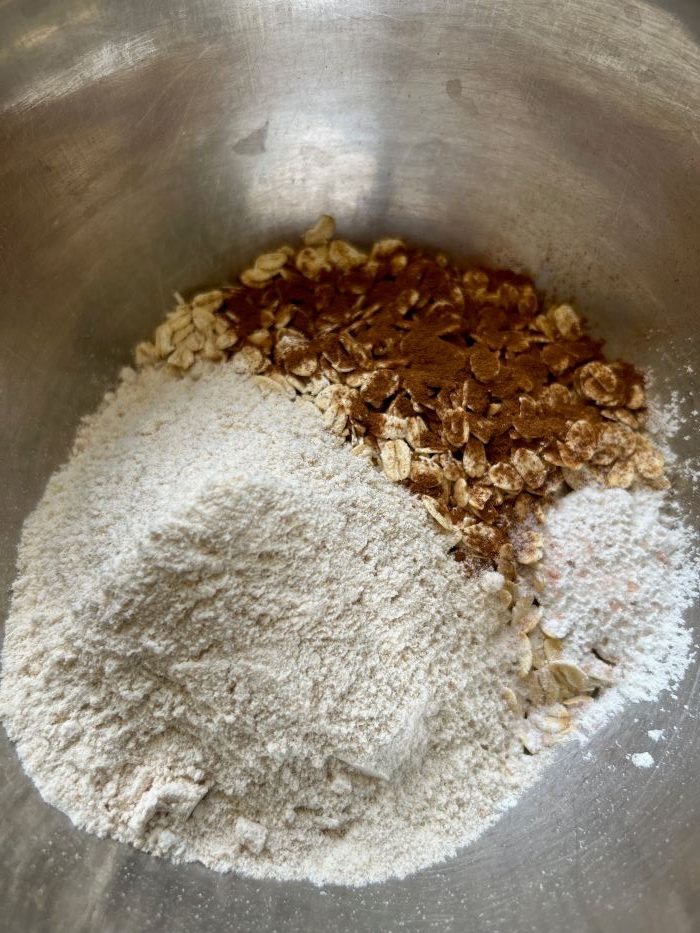
  • Sieve wholewheat flour, baking powder and cinnamon in a large bowl. Now mix rolled oats. Keep aside. 
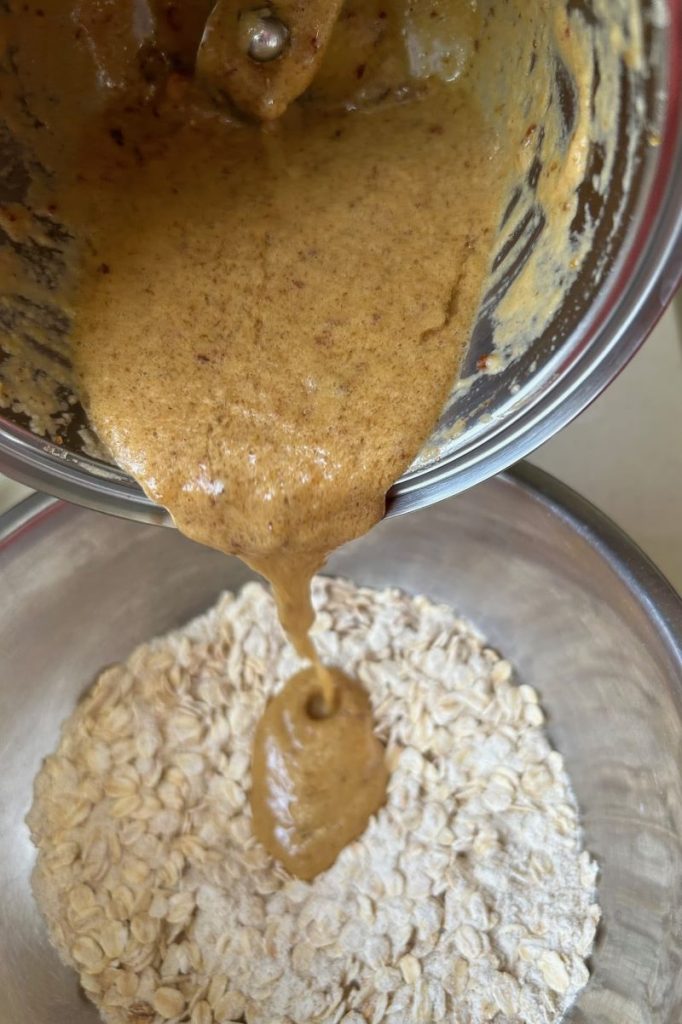
  • In a blender, crack an egg or add flaxmeal/yogurt. Add chopped apple, softened dates, vanilla and oil. Blend this mixture to a purée.
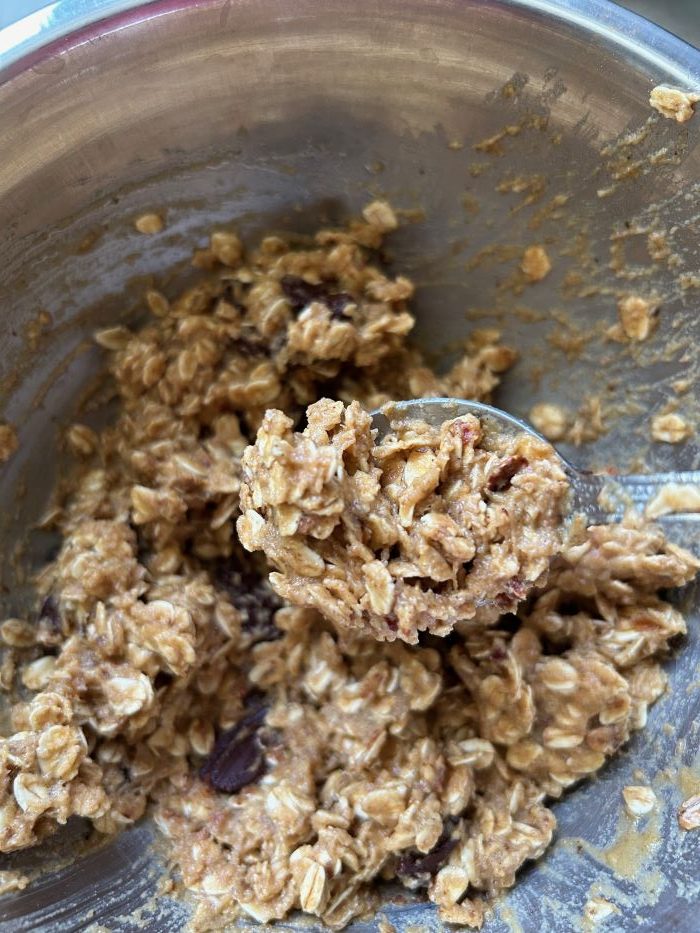
  • Now add wet ingredients to dry ingredients in batches. Mix till everything incorporates well. Do not over mix. Cut and fold gently.
  • Add chocolate chunks and mix well. The mixture will be moist at this time. You can refrigerate the cookie dough for 30 minutes. It will become easier to give it a shape. Also, the oats will absorb the flavour and soften.
  • Line baking tray with a baking paper or a silicon sheet.
  • Take one tbsp scoop and scoop out the mixture on the baking tray. Scoop will give you even size cookies. Flatten a little with a back of a spoon.
  • Bake in the preheated oven for 10 to 12 minutes at 180 C
  • Transfer on a wire rack. Allow it to cool. Once cooled, store in an airtight container.

How to store

These Healthy Cookies store well for a few days, so you can make a batch on the weekend and enjoy them throughout the week. Store in an airtight container at room temperature or in the fridge for up a week. They will soften further as they sit in the container making it perfect for toddlers. 

You can also try more of such healthy bakes- Healthy Carrot Orange Marmalade Cake and Wholewheat Banana and Jaggery Cake. 

Do give these healthy cookies a try. I am sure you and your kids will love it. Let me know in the comment section below if you do give it a try. It will be great to hear from you guys. Stay Healthy! 🙂

Posted on Leave a comment

Instant Masala Bread Idli- Easy Breakfast Recipe

Instant Masala Bread idli is delicious protein rich breakfast. They are air light, super easy to make and above all healthy. I can bet you can’t stop at one. This is one of my favourite breakfast recipes. Easy, simple with no fancy ingredients required!

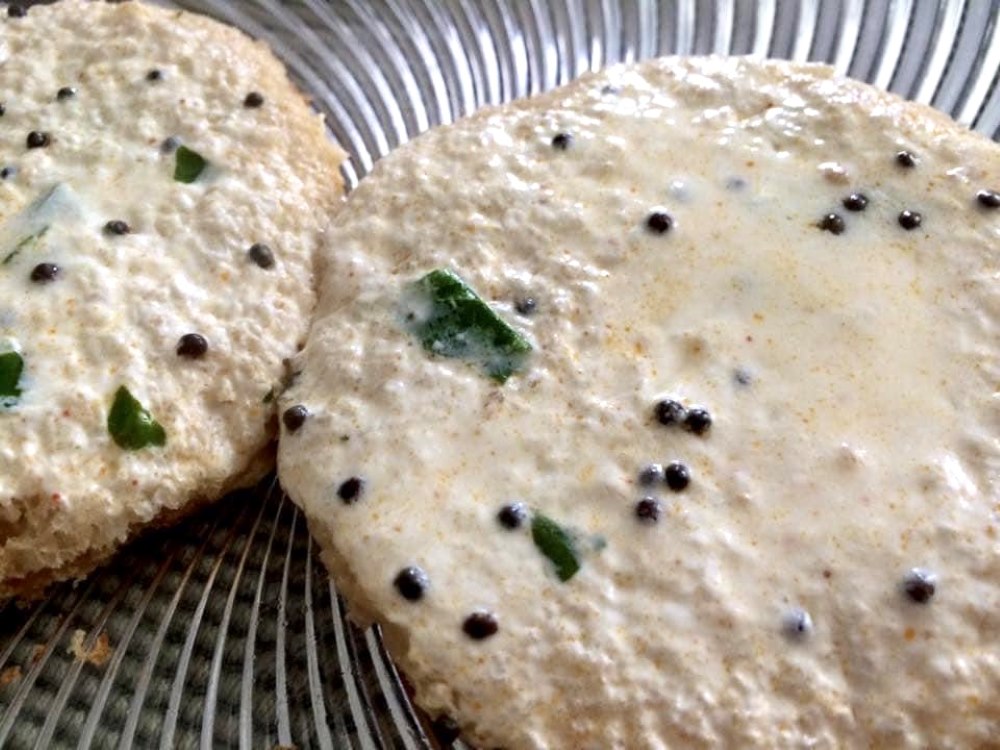
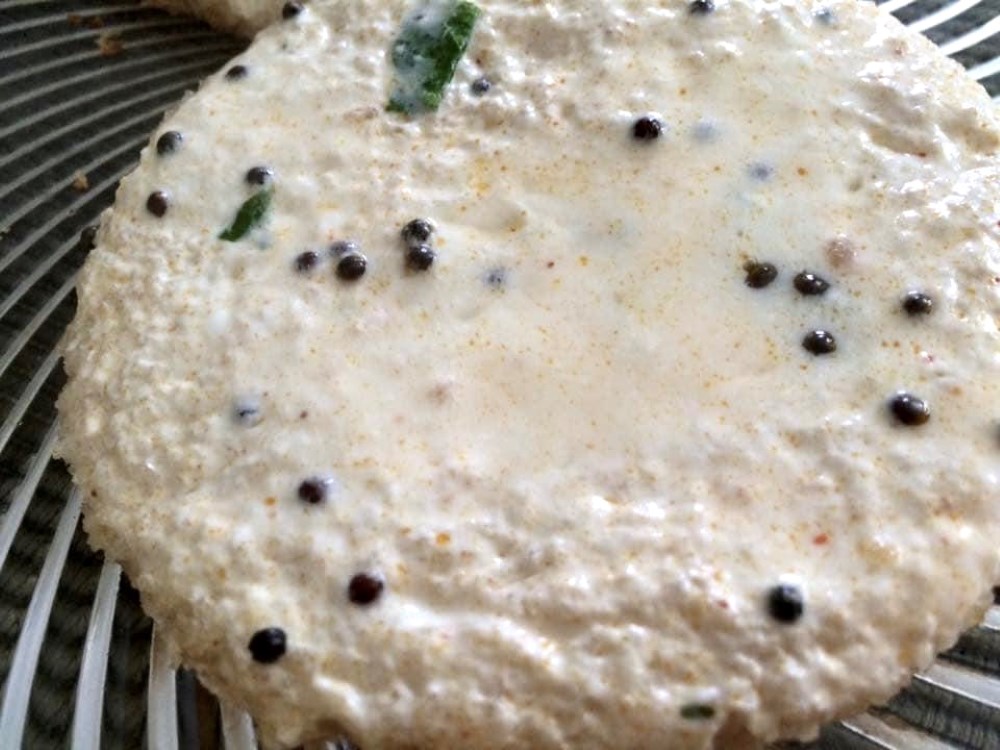
It is like a slice of bread with a filling of your choice on one side and steamed tempered yogurt on the other side, adding different textures to this simple yet delicious dish. It’s creamy, soft and crispy- all of that in one slice of bread. 

I had these bread idlis for the first time some 17-18 years back at my Aunt’s house and instantly fell in love with it. Years later when I got married, I remembered those instant bread idlis and wanted to make it for my husband and child. Just like me, my family too totally loved it.

You need very basic ingredients for this recipe- bread slices, either brown or white bread, thick yogurt or homemade curd and Indian cottage cheese (Paneer) or potatoes.

I shared this recipe in one of the food community groups on facebook, Eatlo and it was such a huge hit. I was amazed to see that hundreds of people tried this recipe and the feedback was just fantastic. If you talk about food just as much as you eat, you should definitely join this community. It’s a safe space where you can share your cooking adventures, know more about different cultural and regional foods, ask for recipes, get health tips and interact with food enthusiasts all over the world.

Now without further delay let’s see how you can make this delicious recipe

Recipe: serves 3

Ingredients: 

  • Bread slices: 8
  • Oil/Ghee for Cooking

For Tempered Yogurt/Curd

  • Thick Yogurt/Curd: 1.5 cup
  • Mustard seeds: 1/2 tsp
  • Curry leaves: 1 sprig
  • Asafoetida/hing: a pinch
  • Oil: 1 tbsp
  • Red chilli powder: 1/4th tsp
  • Salt to taste

For Paneer Filling

  • Paneer: 150 grams
  • Coriander Leaves: handful 
  • Capsicum: 1/4th cup; finely chopped
  • Salt to taste
  • Minced Garlic: 1/4th tsp
  • Red Chilli Powder: 1/4th tsp or to taste
  • Garam masala: 1/4th tsp
  • Roasted Cumin Powder: 1/2 tsp
  • Raw Mango Powder: 1/4th tsp
  • Green Chilies: 1; finely chopped (optional)

Method:

  • Whisk thick yogurt/curd to get a smooth consistency. 
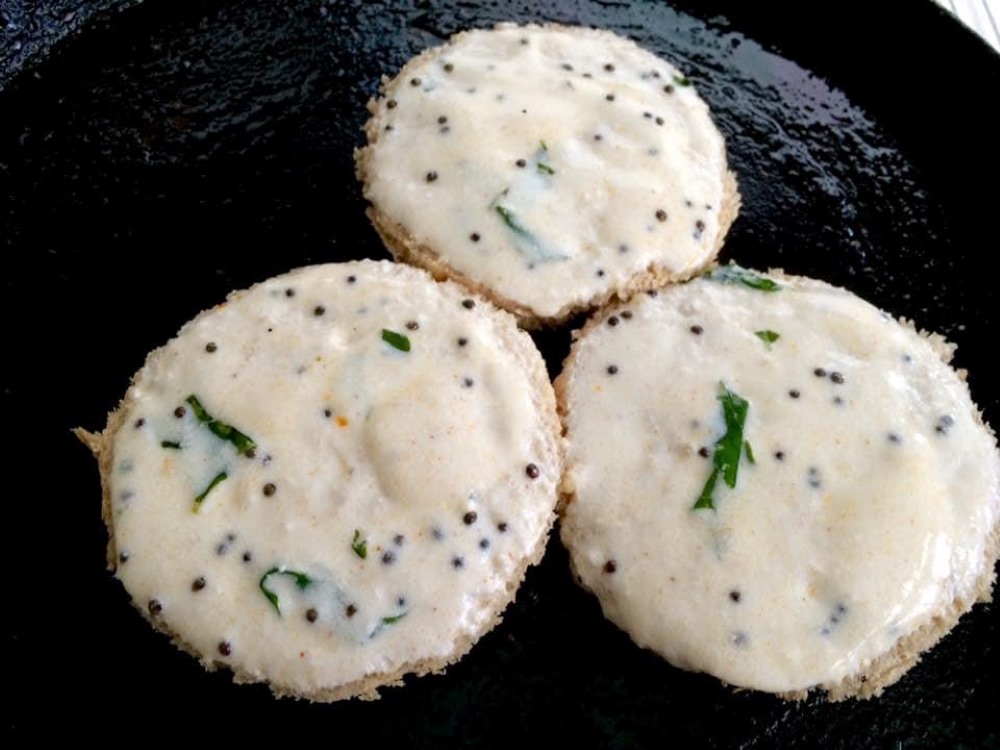
  • Now heat oil in a small pan. Add mustard seeds and hing. Let it splutter. Switch off the flame and add curry leaves, salt and red chilli powder. Let it sit in hot oil for 15 seconds and then add this tempering to yogurt and mix well. Keep aside.
  • Cut bread slices in roundels using a bowl or a round cutter and keep aside.
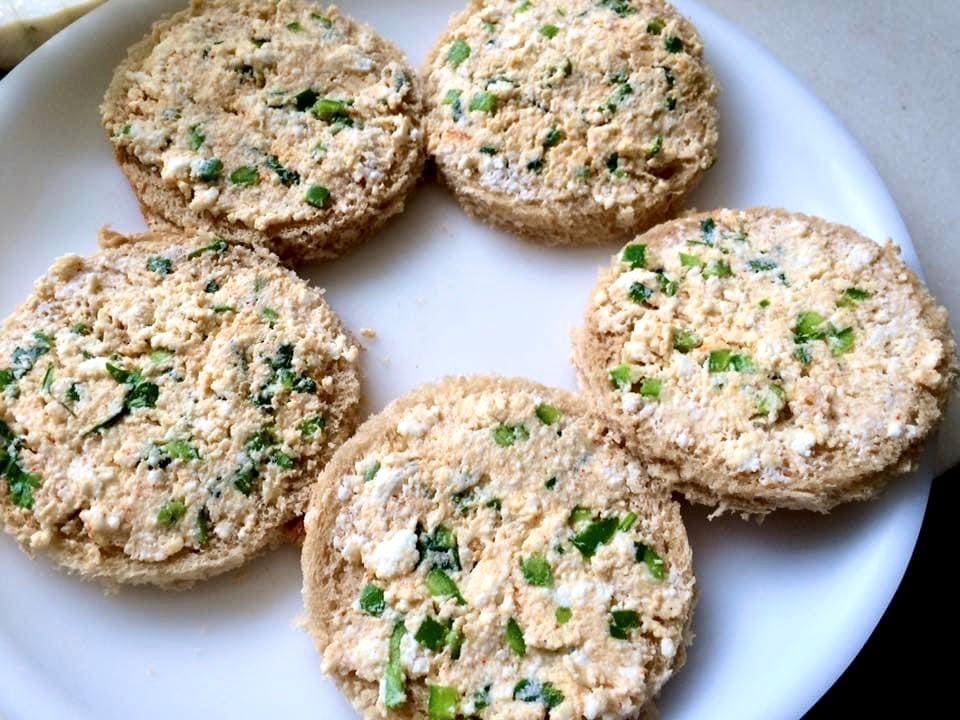
  • Crumble paneer in a plate. Add finely chopped capsicum, coriander leaves, minced garlic, salt, red chilli powder, garam masala, cumin powder and raw mango powder. Mix well. Check for seasoning and your filling is ready.
  • Now take the bread slice and spread the prepared filling on one side. Do not make a very thick layer. 
  • Heat a non stick pan to a medium heat. Brush it with some oil or ghee. 
  • Now put the filling side down. Reduce the flame to the lowest. On the top, apply the prepared tempered yogurt. Do not overload it with curd but put a generous amount so that the bread is coated well. 
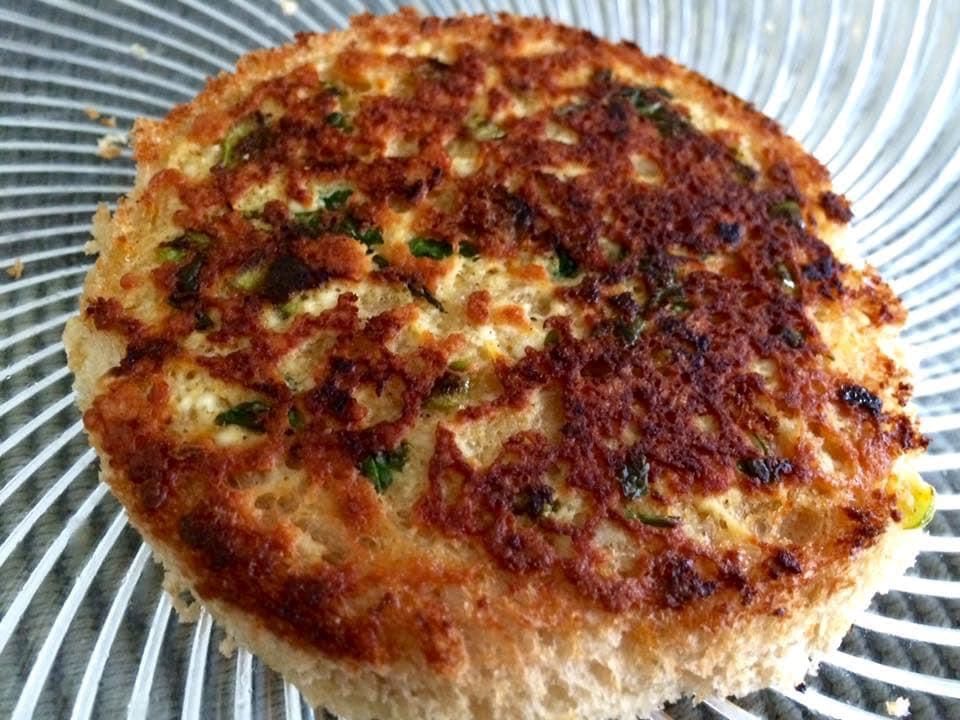
  • Cover the slice with a large bowl. The idea is to steam the yogurt side and make the filling side crisp. This should take about 3-4 minutes to cook. Keep the flame low.
  • Cook till bottom side becomes golden brown. 
  • Serve hot with chutney of your choice.

Notes: 

  1. You can choose the filling of your choice. I also make this with potatoes. Just replace paneer with potatoes. 
  2. Always cook bread idli on low flame. Otherwise the bottom side will be cooked and yogurt side will not get time to get set. 
  3. Serve it immediately or the bread will become soggy.
  4. For leftover bread sides, you can toast them in the oven and turn into bread crumbs.
  5. If the yogurt or curd you have is watery, simply line a colander with muslin cloth. Add yogurt/curd and keep it refrigerated for an hour. This will drain the excess whey.

For more quick yogurt recipes you can try out my quick and absolutely delicious Hung Curd Spinach Cheese Sandwiches

Do try out this recipe. I promise you will not be disappointed. Let me know in the comments if you do try. Would love to have your feedback. Happy Cooking! 😊