Posted on Leave a comment

What to Eat After Wisdom Teeth Removed

business care clean clinic

Whether you’re a teenager or a full-grown adult, the removal of wisdom teeth is a rite of passage that most of us go through. With the process comes a brief period of recovery which requires careful management of your diet. If you’ve just undergone wisdom tooth extraction and are wondering what to eat, this comprehensive guide will address all your queries and provide detailed insights on a post-extraction diet, including what to eat after wisdom teeth removal on day 1 and beyond.

Understanding Wisdom Teeth Removal

Also known as third molars, wisdom teeth are the last to erupt, usually during late teens or early twenties. Owing to their late arrival and limited space in the mouth, these teeth often cause complications such as crowding or impaction, making their removal necessary. After the surgical procedure, it is crucial to follow your oral surgeon’s advice on diet and oral care to ensure a smooth and speedy recovery.

What to Eat After Wisdom Teeth Surgery?

After wisdom tooth extraction, the soft tissue and bone exposed by the surgery need time to heal. Therefore, it is recommended to consume soft or liquid foods that don’t require much chewing and won’t disturb the surgical site. Here are some of the best food types you can have after wisdom teeth removal:

  1. Smoothies: A fruit or veggie smoothie is a great option after your surgery, as it packs nutrition while being gentle on your healing mouth. Avoid using straws as the suction can dislodge the blood clot at the surgery site, leading to a painful condition known as ‘dry socket.’
  2. Pureed Soups: Pureed or broth-based soups like tomato soup, pumpkin soup, or chicken noodle soup are soft, easy to consume, and can help keep you hydrated.
  3. Mashed Potatoes: Mashed potatoes are soft, easy to chew, and a comfort food staple that can be easily swallowed without much effort.
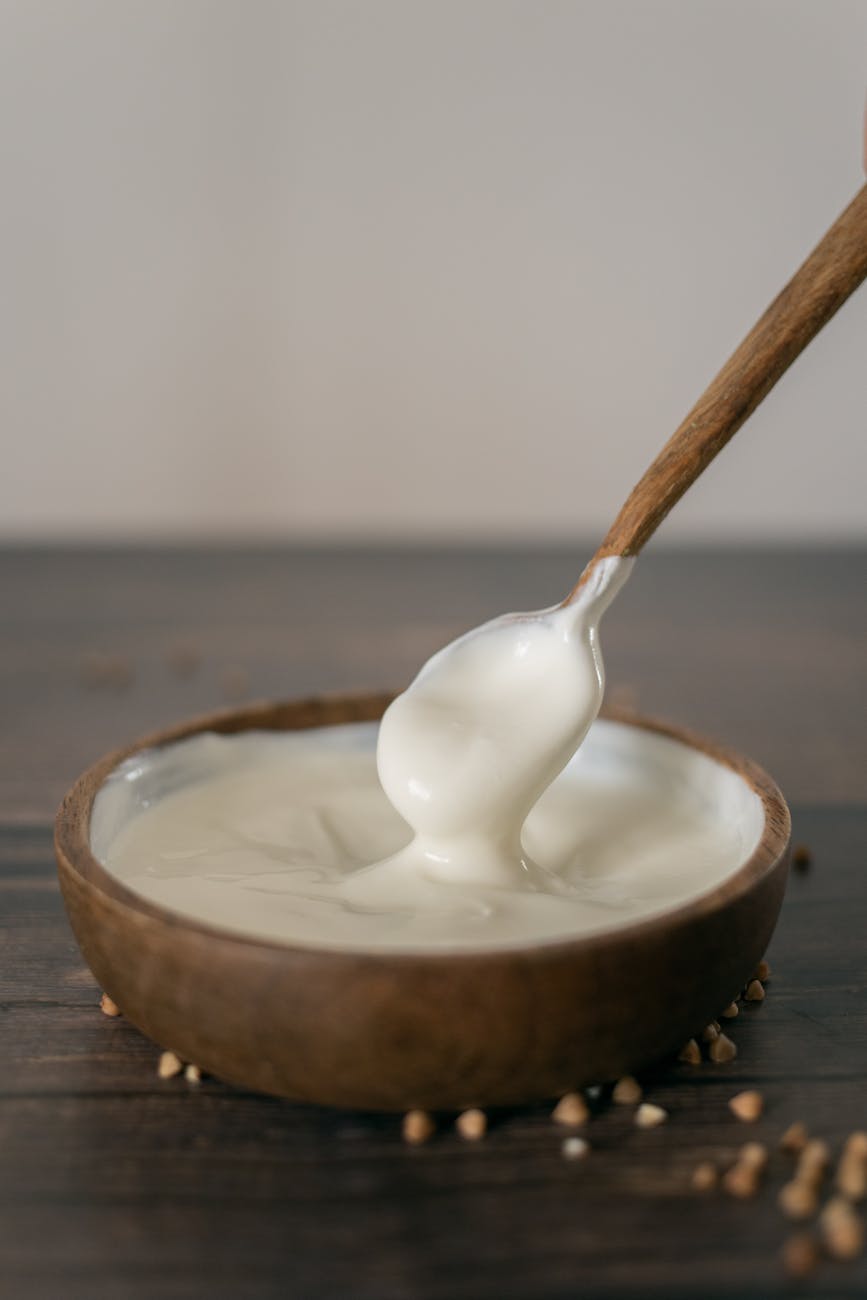
  4. Yogurt: Creamy and smooth, yogurt is a great source of protein. Opt for the plain variant to avoid sugar, or choose the ones with soft fruits if you want a bit of flavor.
  5. Applesauce: Applesauce offers a sweet taste and a smooth consistency, which is perfect for your healing mouth.
  6. Scrambled Eggs: These are soft, easy to chew, and packed with protein, making them an excellent choice for a post-surgery breakfast.

What to Eat After Wisdom Teeth Removal on Day 1?

On the first day after the surgery, it’s best to stick to a liquid diet, as your mouth may still be numb from anesthesia and the wounds are fresh. Here are some options:

  1. Water and Ice Chips: Hydration is key to your recovery. Keep drinking water throughout the day, and suck on some ice chips to soothe your mouth.
  2. Broths and Soups: Warm (not hot) broths are nutritious and easy on the mouth.
  3. Juices and Smoothies: Freshly squeezed or blended fruits and vegetables offer necessary vitamins and minerals. Again, remember to avoid straws.
  4. Puddings and Gelatins: Soft, smooth, and cool, they are easy to eat and can be quite soothing.

As the days progress, you can gradually introduce more solid foods into your diet as your comfort level increases. Always remember, everyone’s healing process is unique, so listen to your body and proceed accordingly.

Foods to Avoid After Wisdom Teeth Removal

While knowing what to eat is important, being aware of the foods to avoid is equally crucial for a successful recovery. In the days following your wisdom teeth surgery, steer clear of:

  1. Crunchy Foods: Foods like chips or hard fruits can irritate or harm the surgical site.
  2. Sticky Foods: Chocolates, candies, or anything sticky can stick to the surgical site and disrupt the healing process.
  3. Spicy Foods: Spicy foods can cause discomfort and irritation in the healing area.
  4. Alcohol: It can dehydrate you and slow down the healing process.
  5. Hot Foods and Beverages: High-temperature foods and drinks can dissolve the blood clots that aid healing.

The journey after getting your wisdom teeth out can be a bit challenging, but with the right diet and proper oral care, you can ensure a comfortable and quick recovery. Always remember to follow your dentist’s instructions and take prescribed medications on time. Regular check-ups post-surgery will help monitor your recovery process.

We hope this guide has provided you with a comprehensive understanding of what to eat after wisdom teeth removal. Here’s to a speedy recovery!

Posted on Leave a comment

Chocolate Chip Cookie Bars: The Ultimate Dessert

happy asian women cooking oriental noodles in kitchen

Hello, dessert enthusiasts! 🙋‍♀️ Today, we’re going to delve into a mouth-watering recipe from Preppy Kitchen, a YouTube channel renowned for its delightful and easy-to-follow recipes. This time, we’re learning how to make Chocolate Chip Cookie Bars, a dessert that marries the best qualities of brownies and chocolate chip cookies into one irresistible treat. 🍪🍫

🍪 Chocolate Chip Cookie Bars: A Delectable Fusion 📝

Imagine the most decadent brownie and the most delicious chocolate chip cookie coming together to create the ultimate dessert. That’s exactly what these Chocolate Chip Cookie Bars are! They’re a delightful fusion of the fudgy, gooey texture of brownies and the crispy, crunchy edges of cookies, all packed with the delightful sweetness of brown sugar, butter, and chocolate.

🍪 The Magic of Chocolate Chip Cookie Bars 🍫

What makes these cookie bars so special is their unique texture and flavor. They’re not just a cookie or a brownie – they’re the best of both worlds. The outside is crispy and golden, while the inside is soft, chewy, and loaded with melty chocolate chips. Every bite is a burst of sweet, buttery, chocolatey goodness that will have you reaching for more.

🍪 How to Make Chocolate Chip Cookie Bars 🍵

The recipe for these cookie bars is incredibly easy and quick to whip up. Here’s how you can make your own batch of these delicious treats:

Ingredients 📋

  • 200 grams of fresh turmeric
  • 50 grams of fresh ginger
  • 100 grams of Tamarind pulp
  • Salt
  • 100 to 150 grams of jaggery or unprocessed sugar

Method 🍳

  1. Preparation: Start by prepping your 8 by 8-inch dish by lining it with parchment paper. This will make it easier to remove the bars once they’re baked.
  2. Mixing the Wet Ingredients: In a large bowl, combine melted butter, regular white sugar, and brown sugar. Mix until it forms a thick slurry. This is the base of your cookie bars, providing them with their rich, sweet flavor.
  3. Adding the Eggs and Vanilla: Add in vanilla extract and two room temperature eggs. Whisk together. The eggs will give your bars structure, while the vanilla adds a depth of flavor.
  4. Incorporating the Dry Ingredients: Dump in the dry mixture and fold it in until it’s mostly incorporated. Be careful not to overmix, as this can lead to tough cookie bars.
  5. Adding the Chocolate Chips: Toss in your chocolate chips and fold them in. Try to distribute the chocolate chips evenly so every bite has a bit of chocolate.
  6. Transferring to the Baking Dish: Transfer the mixture to your prepared baking dish and smooth the top out.
  7. Adding the Final Touches: Dot the surface with some clean chocolate chips. This will give your bars a beautiful, appetizing appearance. If you like, sprinkle some flaked sea salt on top for a hint of savory contrast to the sweet cookie bars.
  8. Baking: Pop it into the oven for 30+ minutes. The exact baking time will depend on how gooey or firm you like your cookie bars.

🎥 Video and Channel Credits 📺

All these amazing tips and information are from the YouTube channel Preppy Kitchen. They share their passion for food and health through their easy-to-follow videos. Check out the original video for a step-by-step guide on how to prepare this drink. Also, don’t forget to visit and subscribe to the Preppy Kitchen channel for more health tips and recipes.

🤝 Join Our Community

We’d love to have you in our community! If you’re passionate about food, health, and wellness, join our Facebook group EatLo. It’s a space where you can share your own recipes, meal prep tips, and foodie adventures. Plus, you’ll get to connect with like-minded individuals who can inspire and motivate you.

Posted on Leave a comment

What are Tik Tok / TikTok cinnamon rolls and what are the easiest ways to make them at home?

bake baking cinnamon rolls confectionery

Hello, fellow dessert aficionados! If you’ve been keeping an eye on the latest food trends, you’ve probably noticed a certain sweet treat taking over TikTok – the sensational TikTok Cinnamon Rolls. These delightfully fluffy and sinfully sweet rolls have captured the hearts (and stomachs!) of millions of users across the globe, making them an absolute must-try for anyone with a sweet tooth. 🍬🌍

In this extensive guide, we’ll be exploring the ins and outs of this viral recipe. From the classic recipe to exciting variations, healthier alternatives, and even a no-oven method, we’ve got you covered. So, roll up your sleeves, preheat your oven (or don’t, we’ll get to that!), and let’s dive into the world of TikTok Cinnamon Rolls! 🏊‍♀️🍽️

The Classic TikTok Cinnamon Roll Recipe 📜🍯

The core appeal of the TikTok Cinnamon Rolls lies in the beautiful simplicity of taking a store-bought product and elevating it with a few additional ingredients. Here’s the classic recipe that started it all:

Ingredients:

  1. 1 Package Cinnamon Rolls (like Pillsbury or Britannia in India)
  2. 1/2 Cup Heavy Cream (Amul cream in India)
  3. 1/4 Cup Butter, melted (Amul butter in India)
  4. 1/2 Cup Brown Sugar
  5. 1 Teaspoon Cinnamon
  6. 1 Package Cream Cheese Frosting (like Betty Crocker or Pillsbury in India), optional

Instructions:

  1. Kick off the process by lightly spraying a baking dish with nonstick cooking spray. Arrange the cinnamon rolls evenly, ensuring there’s space between each roll. This allows for even baking and the perfect rise. 🍩💫
  2. Next, pour your heavy cream over the rolls, making sure it seeps into the gaps between the rolls. The cream will soak into the dough, adding moisture and richness. 🥛🥐
  3. In a small mixing bowl, combine your melted butter, brown sugar, and cinnamon together. Drizzle this sweet and spicy mixture over the rolls, coating them with a layer of extra flavor and sweetness. 🥣🍯
  4. Now it’s time to bake! Follow the package instructions for the cinnamon rolls (typically, they’re baked at 350 degrees for about 30 minutes). This will vary depending on the brand of rolls you’re using. 🕓🔥
  5. Once they’re golden brown and your kitchen smells like a bakery, take the rolls out of the oven. While they’re still warm, slather them with the included icing and extra cream cheese frosting if desired. The heat from the rolls will melt the icing slightly, creating a glossy, sweet glaze. 🎂💗
  6. And voila! Your TikTok Cinnamon Rolls are ready to be devoured. Serve them warm for the ultimate experience. 🍽️🎉

TikTok Cinnamon Rolls: Exciting Variations 🎨🌈

The beauty of the TikTok Cinnamon Roll recipe is its flexibility. Here are a few exciting variations you can try:

Extra Fruity TikTok Cinnamon Rolls 🍏🍇

Add a fresh and tangy twist by incorporating some fruit into your cinnamon rolls. Sprinkle a layer of your favorite dried fruit, like raisins or dried cranberries, over the rolls after you’ve added the heavy cream. The fruit will plumpup in the oven, adding a burst of flavor and a chewy texture that pairs wonderfully with the softness of the rolls.

Chocolate Chip TikTok Cinnamon Rolls 🍫🍪

For the chocoholics out there, this variation is for you! Simply scatter a handful of chocolate chips over the rolls before baking. The heat from the oven will cause the chips to melt slightly, creating pockets of gooey chocolate throughout the rolls. Yum!

Nutty TikTok Cinnamon Rolls 🌰🥜

Craving some crunch? Adding nuts is a fantastic way to introduce a bit of texture to your fluffy cinnamon rolls. Sprinkle a handful of chopped pecans, walnuts, or even almonds over the rolls before baking. The nuts will toast in the oven, adding a delightful crunch and nutty flavor to your rolls.

Healthier Alternatives: TikTok Cinnamon Rolls with a Twist 🥗🏋️‍♀️

While these cinnamon rolls are indeed a decadent treat, there are ways to make them a bit healthier without sacrificing too much of the taste and texture that makes them so irresistible.

Whole Wheat TikTok Cinnamon Rolls 🌾🍞

For a healthier take on these rolls, consider replacing the regular store-bought cinnamon rolls with a whole wheat version. Whole wheat flour contains more fiber and nutrients compared to white flour, making it a healthier choice. In India, brands like Pillsbury and Britannia offer whole wheat options.

Sugar-Free TikTok Cinnamon Rolls 🚫🍬

If you’re watching your sugar intake, you can opt for a sugar-free version of the TikTok cinnamon rolls. Replace the brown sugar in the recipe with a sugar substitute like Stevia or Erythritol. Additionally, look for sugar-free cinnamon rolls and frosting in the store.

Vegan TikTok Cinnamon Rolls 🌱🍩

For those following a vegan diet, you can make vegan TikTok cinnamon rolls by using dairy-free alternatives. Use a vegan cinnamon roll package, replace the heavy cream with a non-dairy cream (like almond or coconut cream), and use a plant-based butter substitute. For the frosting, use a vegan cream cheese or make your own from cashews or coconut cream.

How to Make TikTok Cinnamon Rolls Without an Oven 🚫🔥

Don’t have an oven? No problem! You can still enjoy these delicious cinnamon rolls by using a stovetop method:

  1. Follow the same steps as the original recipe to prepare your rolls.
  2. Instead of placing them in an oven, put the rolls in a heavy-bottomed pan or pot with a tight-fitting lid. The pan needs to be large enough to fit all the rolls without squishing them.
  3. Cover the pan and cook the rolls over low heat for about 20-30 minutes. It’s important to keep the heat low to prevent the bottom from burning while the top is still uncooked.
  4. After about 20 minutes, check the rolls. If they’re golden brown and cooked through, they’re ready. If not, cover and continue to cook, checking every few minutes.
  5. Once the rolls are done, remove them from the heat and immediately spread the icing and any additional frosting on top.

The Final Roll: TikTok Cinnamon Rolls are Here to Stay! 🏁🎉

From the classic recipe to the various creative twists and healthier alternatives, TikTok Cinnamon Rolls offer a delightful treat that can be customized to suit anyone’s palate or dietary preferences.

This guide has explored the many ways to enjoy this viral trend, providing you with the tools to make your very own TikTok Cinnamon Rolls right athome, regardless of your kitchen setup or dietary preferences.

But the best part about these rolls? They’re incredibly fun to make, and the end result is a sweet reward that will have you coming back for more. So don’t hesitate to try this trend and maybe even come up with your own unique variation. Remember, the kitchen is your playground – so have fun, get creative, and most importantly, enjoy the delicious results! 🥳🍽️

In the world of ever-changing food trends, TikTok Cinnamon Rolls have made a mark. They’ve proven that sometimes, the simplest recipes can create the most buzz. And with this comprehensive guide, you can participate in this sweet trend too!

So, what are you waiting for? Grab those ingredients, start baking, and join the TikTok Cinnamon Roll revolution! Don’t forget to share your creations online using the hashtag #TikTokCinnamonRolls. Who knows, your twist on the recipe might be the next big thing! 📸💖

Posted on Leave a comment

Five Ingredient Casseroles | Deliciously SIMPLE Casserole Recipes

bowl of soup and two silver spoons

Hello, food lovers! 🙋‍♀️ Today, we’re going to explore a delightful video from Julia Pacheco, a YouTube channel dedicated to sharing simple, delicious, and budget-friendly recipes. This time, we’re learning how to make five different casseroles, each with only five ingredients. These recipes are perfect for those busy weeknights when you need a quick and easy dinner. 🥘🥦🍗🥚

🍲 White Chicken with Creamy Sauce 🍗

This recipe is a unique take on a chicken dish, featuring chicken wrapped in crescent rolls and smothered in a rich and creamy sauce. The chicken is seasoned with Italian seasoning, pepper, and salt, then wrapped in crescent dough and baked in a 9×13 baking dish. The result is a delicious and satisfying meal that’s sure to be a hit with the whole family. 🍗🥐🥛

🍲 Chicken and Spinach Lasagna 🥬

Next up is a chicken and spinach lasagna. This recipe combines ground chicken and spinach for a high-protein, nutrient-rich meal. The lasagna is layered with a creamy sauce and topped with cheese, then baked until golden and bubbly. This is a great way to sneak some veggies into your family’s diet. 🍗🥬🧀

🍲 Chicken Cordon Bleu Casserole 🍗

This Chicken Cordon Bleu Casserole is a simplified version of the classic dish. It features chicken, ham, and cheese, all baked together in a creamy sauce. This casserole is a great way to use up leftover chicken or ham, and it’s sure to be a hit with kids and adults alike. 🍗🍖🧀

🍲 Philly Cheese Steak Casserole 🥩

This Philly Cheese Steak Casserole is a hearty and satisfying meal that’s perfect for a cold winter’s night. It features ground beef, onions, peppers, and provolone cheese, all baked together in a delicious casserole. Serve it in hoagie rolls for a complete meal. 🥩🧅🫑🧀

🍲 French Onion Chicken Casserole 🍗

Last but not least is the French Onion Chicken Casserole. This recipe features chicken breasts, caramelized onions, and a rich French onion soup sauce, all topped with melted mozzarella cheese. Serve it over mashed potatoes for a comforting and delicious meal. 🍗🧅🧀🥔

🎥 Video and Channel Credits 📺

All these amazing recipes and tips are from the YouTube channel Julia Pacheco. Julia shares her passion for food and cooking through her easy-to-follow recipes and meal prep videos. Check out the original video for a step-by-step guide on how to prepare these meals. Also, don’t forget to visit and subscribe to the Julia Pacheco channel for more simple and delicious recipes.

Posted on Leave a comment

Healthy Meal Prep for a Full 5-Day Work Week

white and black wooden blocks

Hello, food lovers! 🙋‍♀️ Today, we’re going to dive into another fantastic video from Clean & Delicious, a YouTube channel dedicated to sharing simple, nutritious, and tasty recipes. This time, we’re exploring a full 5-day work week meal prep that’s packed with protein and flavor. 🥘🥦🍗🥚

🥣 Breakfast: Protein-Packed Mason Jar Cobb Salads 🥗

Start your day with a bang with these protein-packed mason jar Cobb salads. They’re easy to prepare, delicious, and will keep you energized all morning long. The salads include a variety of ingredients, such as boiled eggs, chicken breast, turkey bacon, diced cucumber, cherry tomatoes, and red onion. The dressing is a homemade Greek yogurt ranch dressing, adding extra protein and cutting the calories. Each salad contains a whopping 40 grams of protein! 🥚🍗🥓🥒🍅

🍽️ Lunch: Grain-Free Korean Beef Bowls 🍲

For lunch, we have grain-free Korean beef bowls. This recipe is a new favorite, combining ground beef and ground turkey for a high-protein meal. The sauce is a blend of coconut aminos, toasted sesame oil, raw honey, and red pepper flakes, giving the dish a savory and slightly sweet flavor. Served over cauliflower rice, this meal is not only grain-free but also low in calories, making it weight-loss friendly. 🥩🦃🥥🍯🌶️

🍛 Dinner: Blueberry Flax Protein Shakes 🥤

For a quick and easy snack or light dinner, try these blueberry flax protein shakes. They’re packed with frozen blueberries, plain unsweetened Greek yogurt, ground flax seeds, protein powder, and a dash of cinnamon. Each shake contains 31 grams of protein, providing a great way to get extra protein and nutrients throughout the day. 🫐🥛🌾💪🍌

📝 Meal Prep Tips 📖

Meal prepping can be a game-changer for maintaining a healthy diet during a busy work week. Here are some tips from the video:

  • Layer your mason jar salads with the high water content foods at the bottom to prevent other ingredients from getting soggy.
  • Cook your ground beef and turkey together to save time and add more flavor to your meals.
  • Use pre-riced cauliflower for a quick and easy grain-free alternative to rice.
  • Prepare your protein shakes in advance and store them in freezer-friendly bottles for a quick grab-and-go snack.

🎥 Video and Channel Credits 📺

All these amazing recipes and tips are from the YouTube channel Clean & Delicious. The creator, Dani Spies, is a Health, Wellness, and Weight Loss Coach and a mother of two. She shares her passion for food and wellness through her easy-to-follow recipes and meal prep videos. Check out the original video for a step-by-step guide on how to prepare these meals. Also, don’t forget to visit and subscribe to the Clean & Delicious channel for more healthy and delicious recipes.