Imagine your gut as a second brain—a dense network of neurons and microbes silently shaping how you think, feel, and even panic. The idea might sound like science fiction, but it’s not. It’s cutting-edge science.
Welcome to the world of the gut-brain axis, where trillions of bacteria, the food you eat, and even your sleep patterns team up to influence your mental health. Let’s take a deep dive into how your gut could be feeding your anxiety—and more importantly, what you can do about it.
🌐 What Is the Gut-Brain Axis?
The gut-brain axis is the complex, bidirectional communication system between your gut and your brain. This axis includes:
- The vagus nerve, which acts like a high-speed cable between the brain and gut.
- Hormonal signals, such as cortisol (stress hormone) and serotonin (mood regulator).
- The immune system, especially inflammation triggered by the gut lining.
- Microbial metabolites, like short-chain fatty acids (SCFAs), that influence brain activity.
In other words, your gut and brain are in constant conversation—and your gut microbiome (the trillions of bacteria in your gut) plays a leading role in this dialogue.
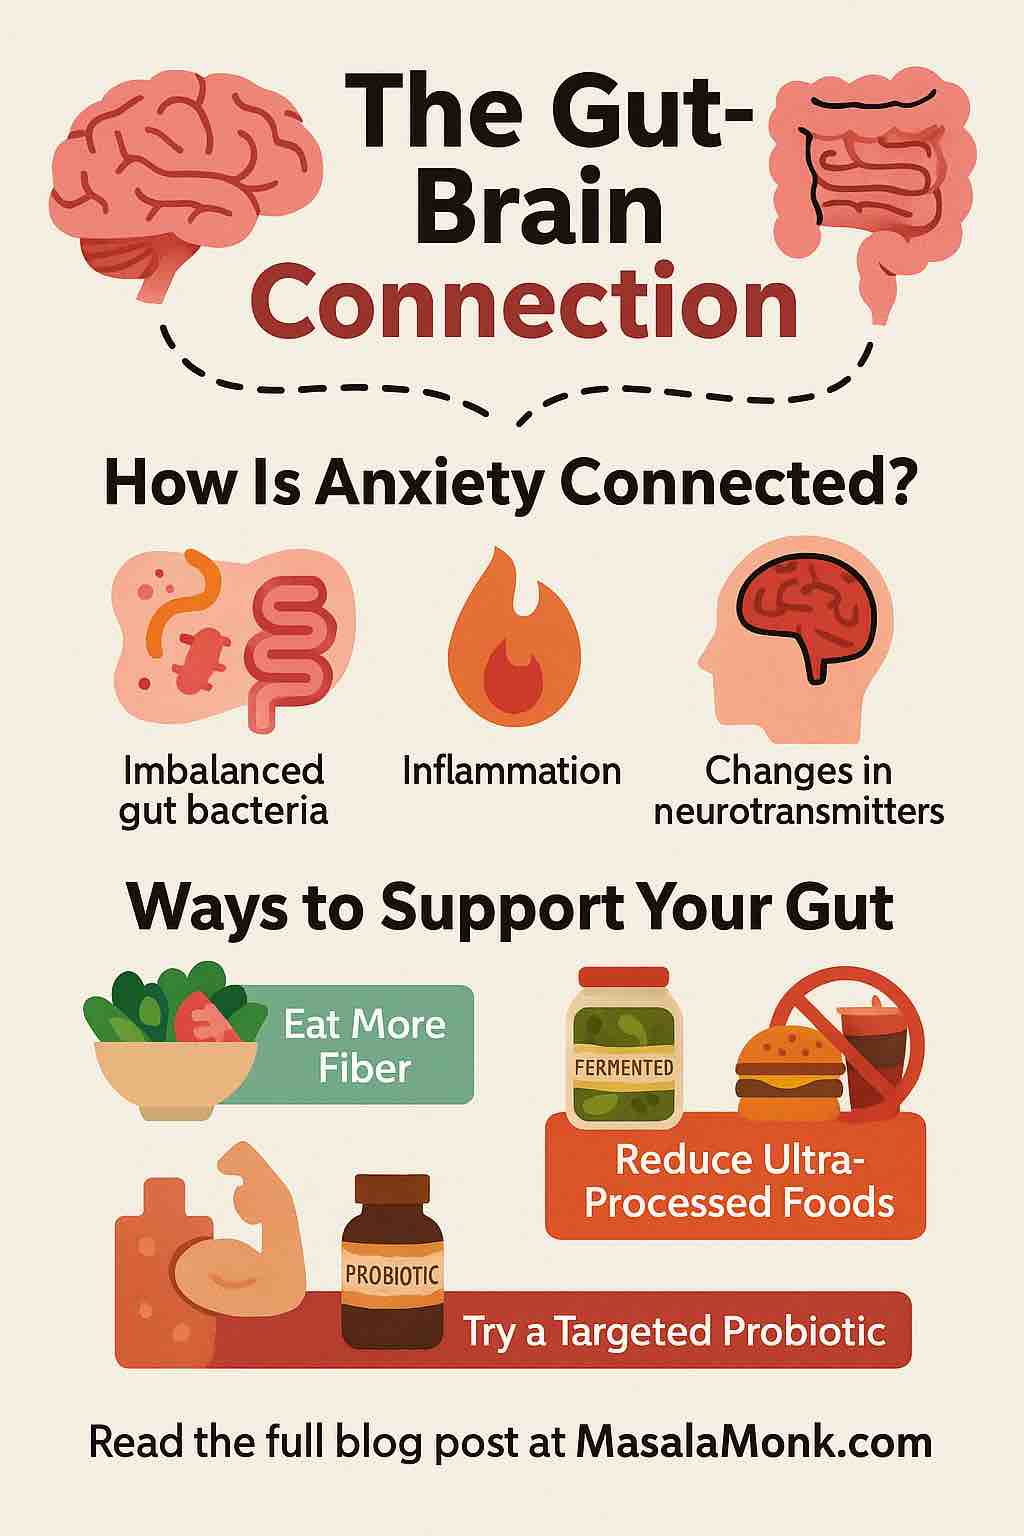
😰 How Is Anxiety Connected?
Over the last decade, researchers have found compelling links between gut health and anxiety, especially:
- People with anxiety often have imbalanced gut bacteria (dysbiosis).
- Inflammation from the gut can reach the brain, worsening mood and stress resilience.
- Certain microbes produce or influence neurotransmitters like serotonin, GABA, and dopamine.
- Animal studies show transferring gut bacteria from anxious humans to mice makes the mice anxious.
New studies published as recently as 2025 show that microbial byproducts like indoles and SCFAs can directly affect anxiety circuits in the brain via the vagus nerve.
🔬 Latest Research Highlights
Here are the most recent findings worth noting:
1. Microbial Fingerprints in Anxiety Disorders
- People with Generalized Anxiety Disorder (GAD) have fewer SCFA-producing bacteria (like Faecalibacterium and Coprococcus).
- There’s a notable increase in pro-inflammatory strains like Fusobacterium and Enterobacteriaceae.
2. SCFAs & Mood Regulation
- These fatty acids—produced when bacteria ferment fiber—strengthen the gut barrier, reduce inflammation, and impact brain function.
- SCFAs have been shown to activate the vagus nerve, directly modulating stress responses.
3. Psychobiotics
- Probiotic strains like Lactobacillus rhamnosus and Bifidobacterium longum have been shown to lower anxiety-like behavior in mice and reduce stress hormone levels in humans.
- A 2025 human trial with 88 adults found that a 2-week probiotic intervention improved negative mood scores, though effects varied.
🥗 How to Support Your Gut to Reduce Anxiety: Practical Tips
Here’s the part that matters most: how to turn the science into action.
✅ 1. Eat More Fiber
Fiber feeds your good gut bacteria. Focus on:
- Whole grains (oats, brown rice, quinoa)
- Legumes (lentils, chickpeas, black beans)
- Vegetables (broccoli, carrots, spinach)
- Fruits (apples, berries, bananas)
👉 Aim for 25–30g of fiber per day.
✅ 2. Incorporate Fermented Foods
Fermented foods contain natural probiotics:
- Yogurt (with live cultures)
- Kefir
- Kimchi
- Sauerkraut
- Miso
- Tempeh
🧪 Fermented foods can increase microbial diversity and are linked to reduced stress and inflammation.
✅ 3. Reduce Ultra-Processed Foods
Highly processed foods can damage the gut lining and promote bad bacteria. Avoid:
- Packaged snacks
- Sugary cereals
- Artificial sweeteners
- Soft drinks and refined oils
📉 One recent study found that reducing ultra-processed food significantly improved gut-brain signaling within just four weeks.
✅ 4. Try a Targeted Probiotic
If you’re curious, you could try strains shown to reduce anxiety:
- Lactobacillus rhamnosus GG
- Bifidobacterium longum 1714
- Lactobacillus helveticus R0052 + B. longum R0175 (sold in some psychobiotic blends)
⏱️ Note: Results can take 2–4 weeks. Look for third-party-tested brands.
✅ 5. Sleep, Move, Breathe
Don’t underestimate the basics:
- Sleep 7–9 hours: Gut bacteria have circadian rhythms too!
- Exercise regularly: Increases microbial diversity and SCFA production.
- Manage stress: Practices like meditation and breathwork reduce cortisol, which in turn supports the gut barrier.
👀 Are You a “High Gut Responder”?
A new concept from 2025 research describes “high gut responders”—people whose guts react strongly to stress, often resulting in IBS-like symptoms and anxiety. If that sounds like you, gut-targeted strategies (like CBT for IBS, low-FODMAP diets, or vagus nerve stimulation) may help more than standard anxiety treatments.
🧩 Where We’re Headed
Future directions in the gut-anxiety space include:
- Personalized microbiome tests to tailor mental health interventions
- Fecal microbiota transplants (FMT) as potential therapies
- Microbial psychobiotic cocktails designed for specific psychiatric outcomes
- Vagus nerve stimulation paired with diet and probiotics
💬 Final Thoughts
Anxiety isn’t just in your head—it may also be in your gut.
By understanding and supporting your gut-brain axis, you’re tapping into a promising new layer of mental health care. While not a silver bullet, these strategies can enhance your emotional resilience and complement therapy or medication.
So next time your stomach churns before a big meeting or your mood plummets after junk food, listen up—your gut might be trying to tell you something.
Have you tried probiotics or fermented foods for anxiety? What worked for you? Share your experiences or questions in the comments below—we’d love to hear from you!
🔍 FAQs: Gut-Brain Connection & Anxiety
1. How long does it take to see results from gut health changes on anxiety?
Answer: Most studies show noticeable mood or anxiety changes within 2 to 4 weeks of starting a high-fiber diet, probiotics, or fermented foods. For chronic anxiety, effects may take longer and work best when combined with other therapies.
2. Can probiotics really help reduce anxiety?
Answer: Yes, certain strains like Lactobacillus rhamnosus, Bifidobacterium longum, and Lactobacillus helveticus have shown anxiety-reducing effects in studies. However, results vary per person, and probiotics are most effective as part of a broader lifestyle and diet change.
3. Which foods are worst for the gut-brain axis?
Answer: Ultra-processed foods, refined sugars, artificial sweeteners, alcohol, and trans fats can damage gut lining, reduce microbial diversity, and increase inflammation—negatively affecting mood and anxiety.
4. How does the vagus nerve factor into anxiety and gut health?
Answer: The vagus nerve connects the gut and brain. It transmits microbial and inflammatory signals, influencing stress responses. Stimulating it through deep breathing, meditation, or even certain foods can calm both gut and brain.
5. Are there signs that my gut is causing my anxiety?
Answer: Yes. Signs include:
- Anxiety that worsens after eating
- Bloating, IBS, or food sensitivities
- Cravings for sugar or processed food
- Fatigue and brain fog
- Mood swings linked to digestion
6. What’s the difference between psychobiotics and probiotics?
Answer: All psychobiotics are probiotics, but not all probiotics are psychobiotics. Psychobiotics are specific strains with proven effects on mental health—particularly mood, anxiety, and cognitive function.
7. Should I take a probiotic supplement or just eat fermented food?
Answer: Both work. Fermented foods like yogurt or kimchi are natural sources of beneficial microbes. Supplements provide targeted doses of specific strains—helpful if you’re addressing anxiety or gut issues directly.
8. What is “leaky gut” and how does it relate to anxiety?
Answer: “Leaky gut” refers to increased intestinal permeability. When the gut lining is compromised, toxins and bacteria can enter the bloodstream, triggering inflammation that affects the brain, often worsening anxiety and mood disorders.
9. Can children or teens benefit from gut-focused anxiety interventions?
Answer: Yes. While research is still growing, some studies show probiotics and dietary changes can support emotional regulation in children. Always consult a pediatrician before beginning supplements.
10. Is the gut-brain connection scientifically proven or still theoretical?
Answer: It’s scientifically established. Multiple human and animal studies (including randomized controlled trials) have shown causal links between gut microbiota, brain function, and emotional health. The field is rapidly evolving toward clinical applications.