

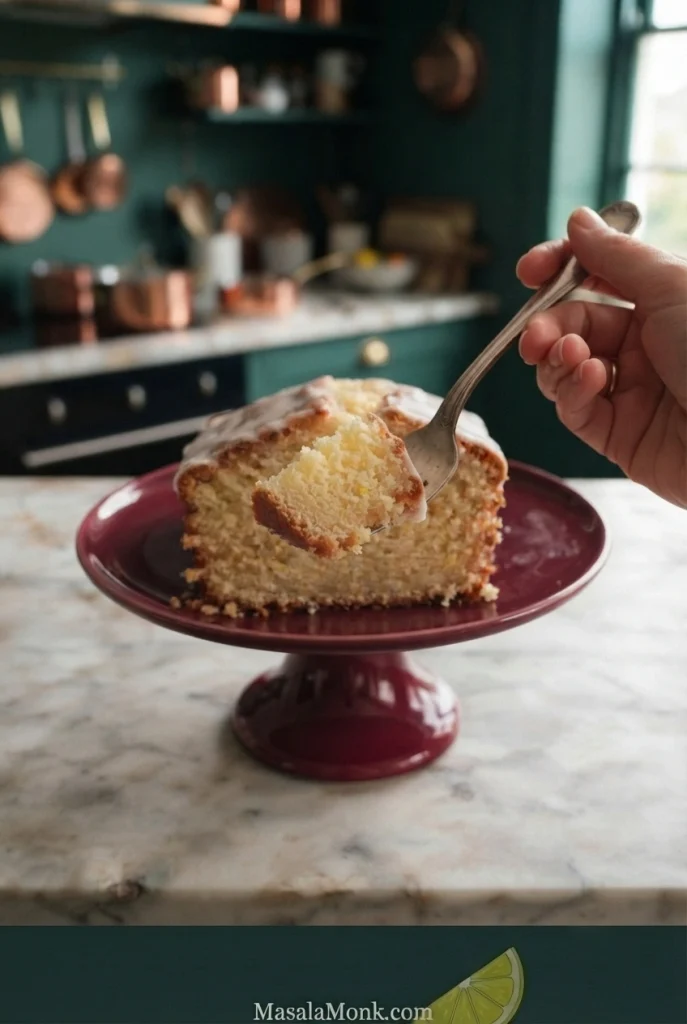
Cut into this lemon pound cake and you’ll find a fine, buttery crumb flecked with zest beneath a tart white glaze. The lemon aroma comes through before the first bite. The cake itself should taste lemony before the glaze—the glaze is there to brighten it, not rescue it.
Pound cake has a naturally close texture, with small, fairly even air pockets. A good slice feels substantial yet tender, holds together neatly and yields easily when you take a bite.
This from-scratch version uses sour cream for tenderness, fresh zest rubbed into sugar for fragrance and a simple two-ingredient glaze. The batter comes together with a classic butter-and-sugar creaming method and bakes in one loaf pan. There’s no separate lemon syrup to make—just time to let the loaf cool before glazing.
Lemon Pound Cake Recipe
| Yield | 1 loaf; about 10 slices |
|---|---|
| Texture | Fine, close, buttery and tender |
| Pan | 9 × 5-inch / 23 × 13 cm light-coloured metal loaf pan |
| Hands-on prep | About 25 minutes; allow additional time for chilled ingredients to warm slightly |
| Baking time | About 65–75 minutes; begin checking around 60 minutes |
| Oven | 325°F / 160°C conventional / 140°C fan |
| Cooling | 10–15 minutes in the pan, then completely on a rack |
| Before serving | Allow several hours overall, including cooling and time for the glaze to set |
Ingredients
- 250 g / 8.8 oz all-purpose flour, plain flour or maida — about 2 US cups + 1 tablespoon
- 6 g baking powder — 1½ teaspoons
- 3 g fine salt — ½ teaspoon
- 227 g / 8 oz unsalted butter — 1 cup; softened
- 250 g / 8.8 oz granulated or caster sugar — about 1¼ US cups if using granulated sugar; weigh caster sugar for accuracy
- 10–12 g finely grated fresh lemon zest — about 2 tablespoons; yellow peel only
- 4 large eggs — about 200 g without shells
- 120 g / 4.2 oz full-fat sour cream — about ½ cup
- 30 ml fresh lemon juice — 2 tablespoons
- 5 ml vanilla extract — 1 teaspoon
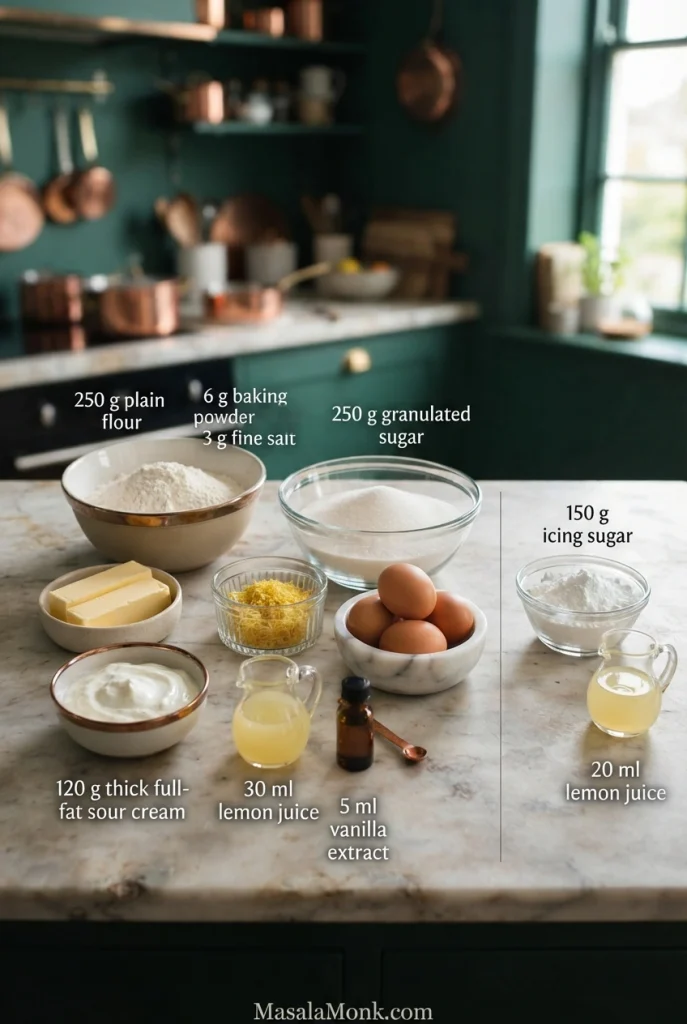
Measure before you mix. Set the cake ingredients within reach, and reserve the separate icing sugar and lemon juice for glazing after the loaf cools.
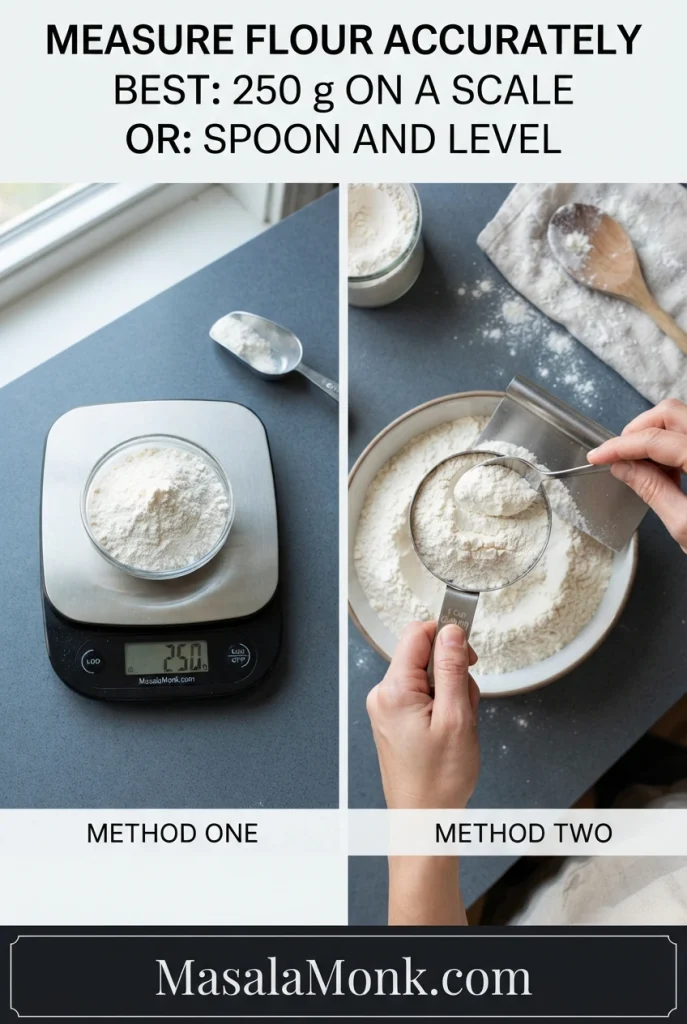
Measure Flour and Soften Butter
Measuring flour: a scale is best. If using cups, loosen the flour, spoon it into the measuring cup and level the top. Don’t scoop straight from the bag.
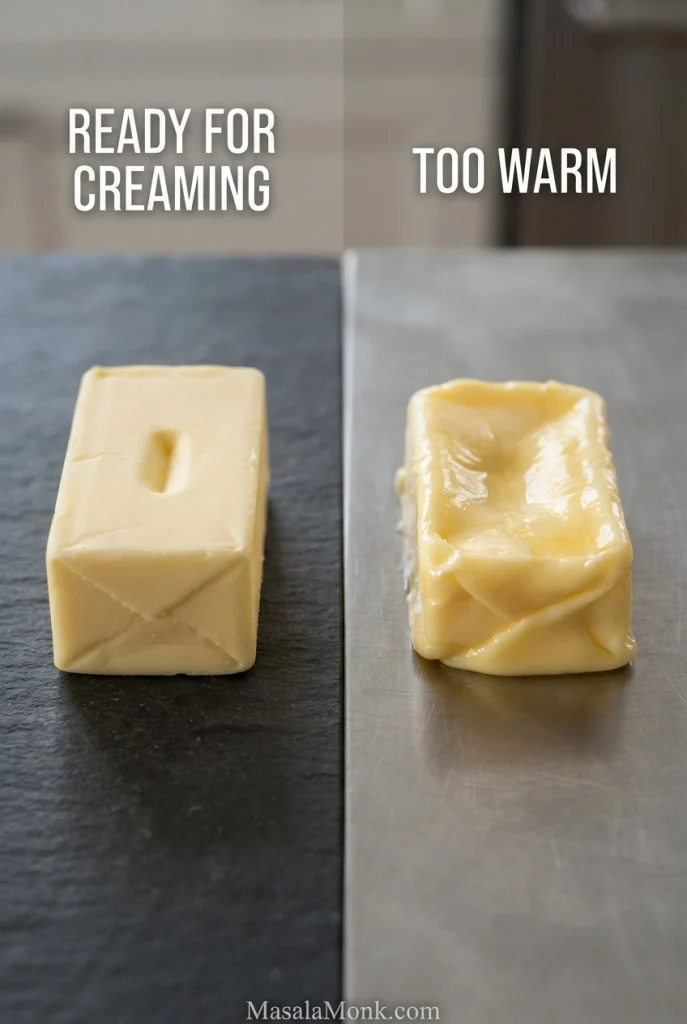
Before starting: the butter should be soft enough to dent when pressed but still look matte and hold its shape; around 64–68°F / 18–20°C is a useful target. Let the eggs and sour cream lose their refrigerator chill, too. This waiting time is separate from the hands-on prep estimate.
For the Lemon Glaze
- 150 g / 5.3 oz powdered or icing sugar — about 1⅓ US cups, plus a little extra if needed for adjustment
- 20 ml fresh lemon juice to start — 1 tablespoon + 1 teaspoon; have a little extra available
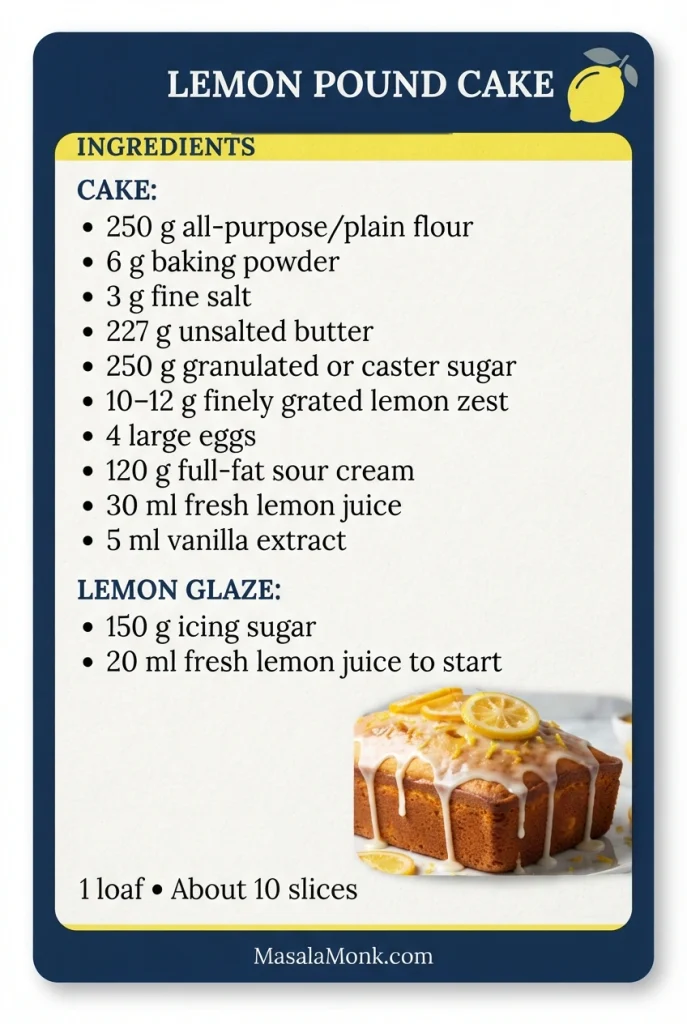
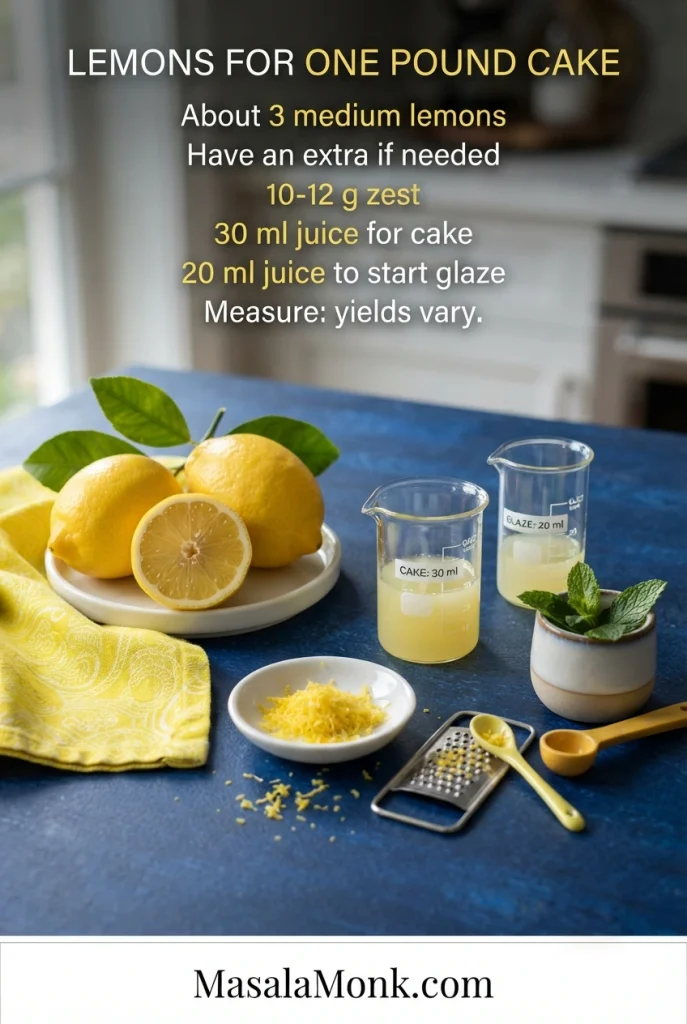
Use the ingredient card as a visual checklist. The written quantities above are the measuring reference; the bowls and small inset photograph are illustrative.
How many lemons? Have about three medium lemons available, plus an extra if yours are small or dry. You’ll need 10–12 g zest and at least 50 ml juice across the cake and glaze. Measure both, since yield varies. Zest the lemons before cutting and squeezing them.
Equipment and Loaf-Pan Choice
Useful equipment: an electric hand mixer or stand mixer, fine zester, kitchen scale, parchment paper, a long skewer or cake tester, and a wire cooling rack.
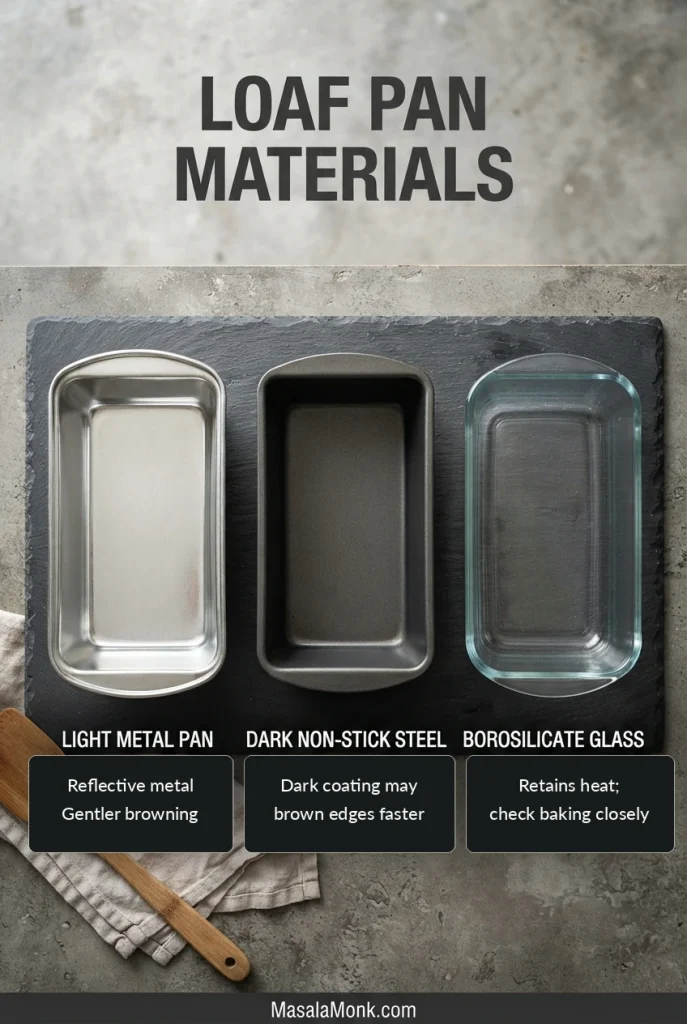
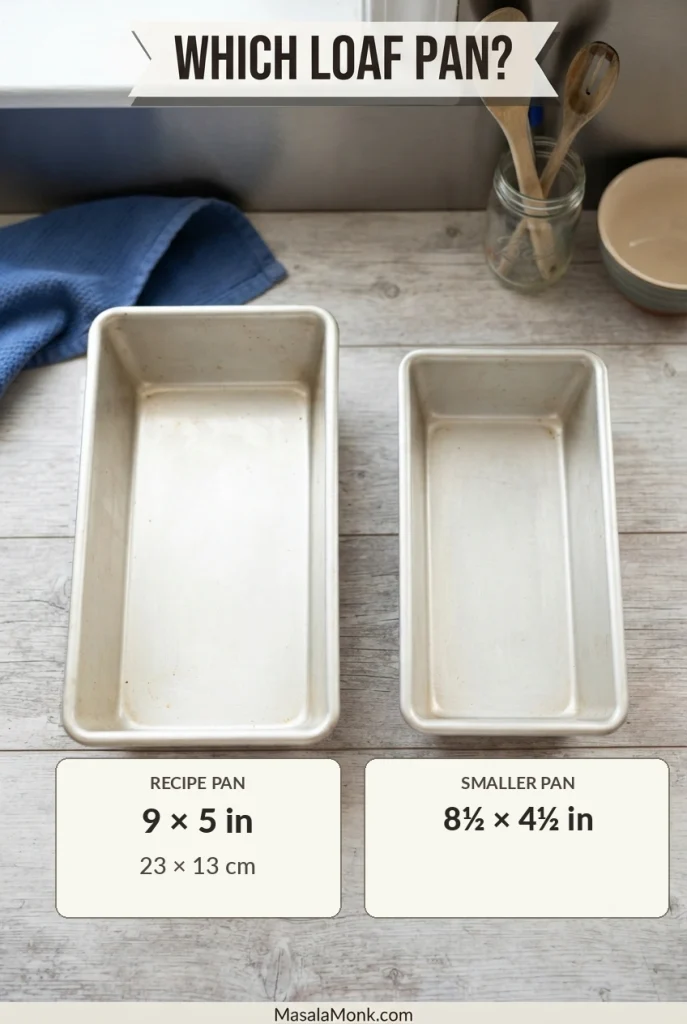
Use a 9 × 5-inch light-coloured metal loaf pan if possible. The pan’s depth and capacity matter as well as its length and width; a shallow pan may not hold the full batter safely. Dark metal, glass and ceramic also heat differently, which can affect how quickly the crust browns. If you are using a different pan, compare loaf-pan sizes and see how pan materials differ before baking.
How to Make Lemon Pound Cake
Prepare the Pan and Lemon-Sugar Base
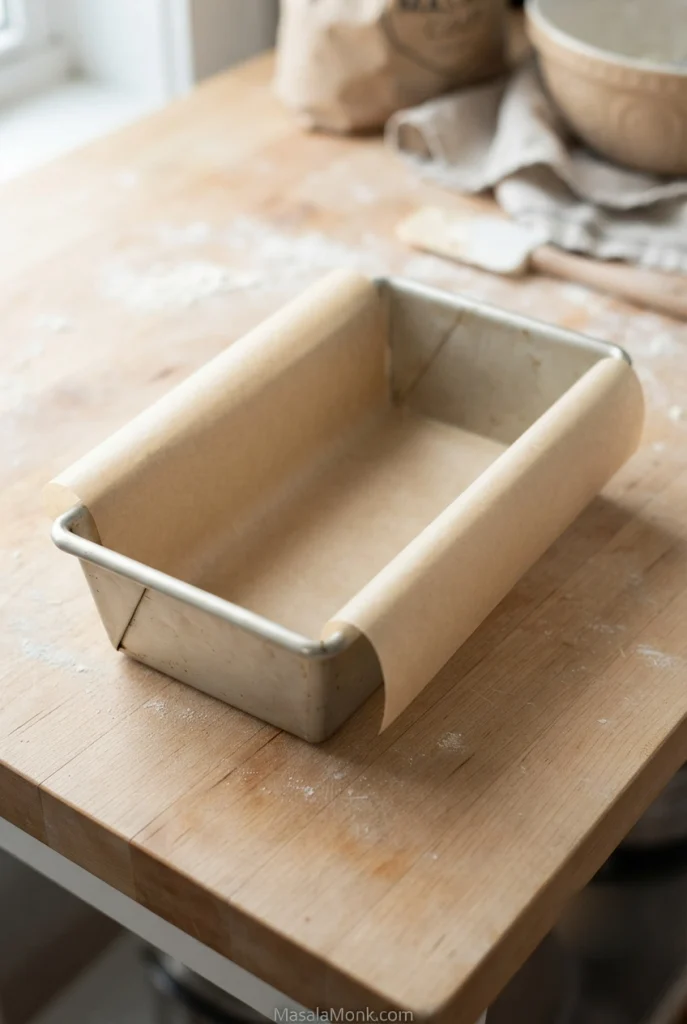
- Prepare the oven and pan. Put a rack near the centre of the oven and heat to 325°F / 160°C conventional or 140°C fan. Lightly grease the 9 × 5-inch loaf pan. Line its base and long sides with parchment, leaving enough overhang to lift the cake out later.
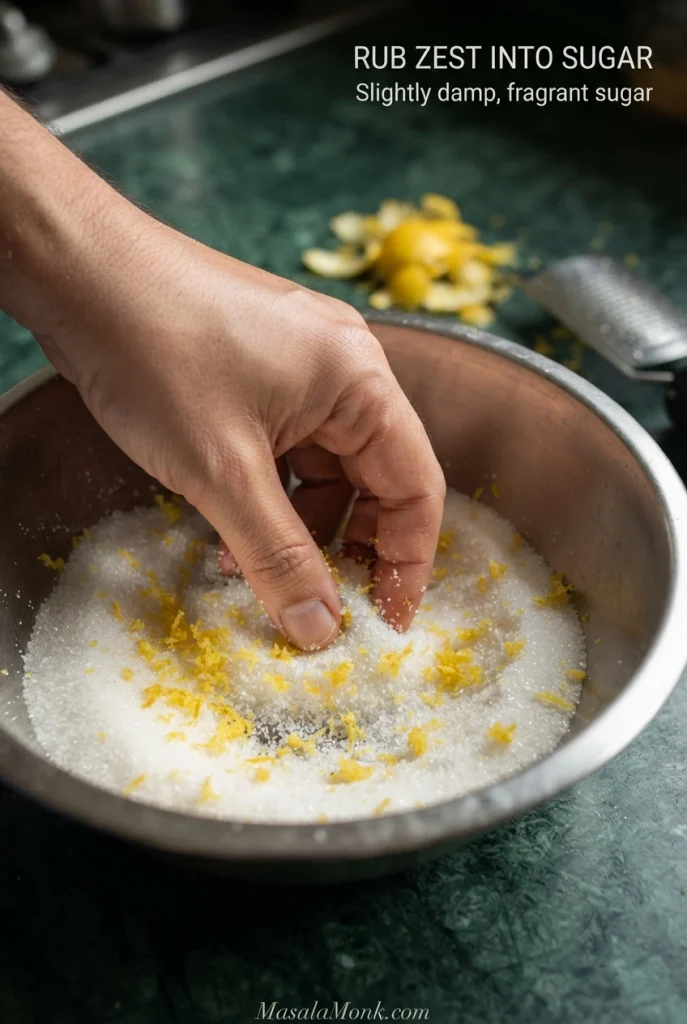
- Mix the dry ingredients and make the lemon sugar. Whisk the flour, baking powder and salt together in a medium bowl. In the mixing bowl, rub the measured lemon zest into the sugar with clean fingertips for 30–60 seconds. As you rub, the sugar should start to feel slightly damp and smell intensely lemony.
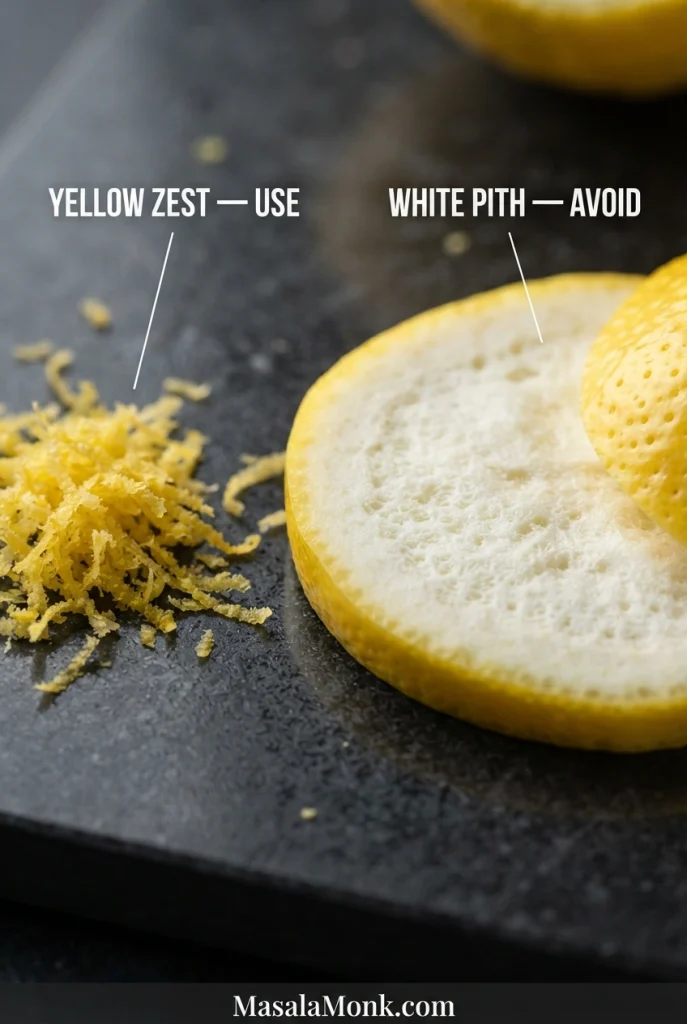
Zest the yellow peel, not the white pith. The aromatic oils are concentrated near the surface, so short, light strokes are more useful than pressing hard.
Cream the Butter and Add Eggs
- Cream the butter and lemon sugar. Add the softened butter and beat at medium speed until pale, creamy and visibly lighter, scraping the bowl once or twice. About 3–4 minutes is a useful guide. Look for a mixture that holds soft ridges and appears noticeably aerated, then stop.
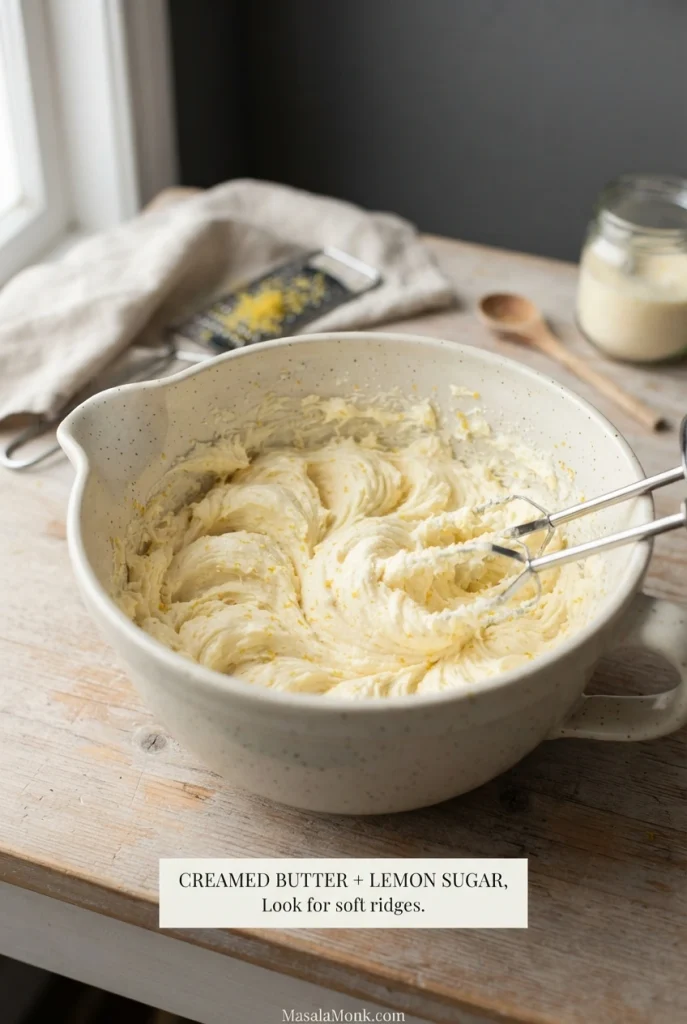
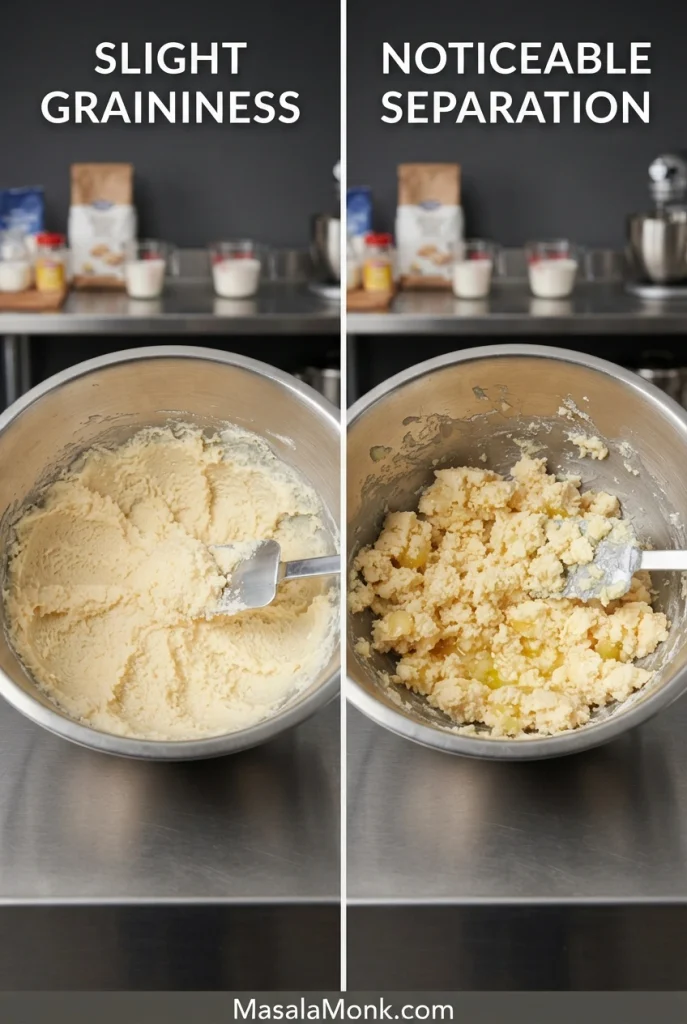
- Add the eggs gradually. Beat them in one at a time at medium-low speed, letting each mix in before adding the next. Scrape the bowl as needed. A little graininess is common. If the mixture starts visibly curdling, beat in 1 tablespoon of the already-measured flour mixture before adding the next egg.
Did the egg-stage mixture turn oily or split? See the grainy-versus-separated comparison before proceeding.
Combine and Finish the Batter
- Combine the sour cream, juice and vanilla. Stir them together in a small bowl until smooth.
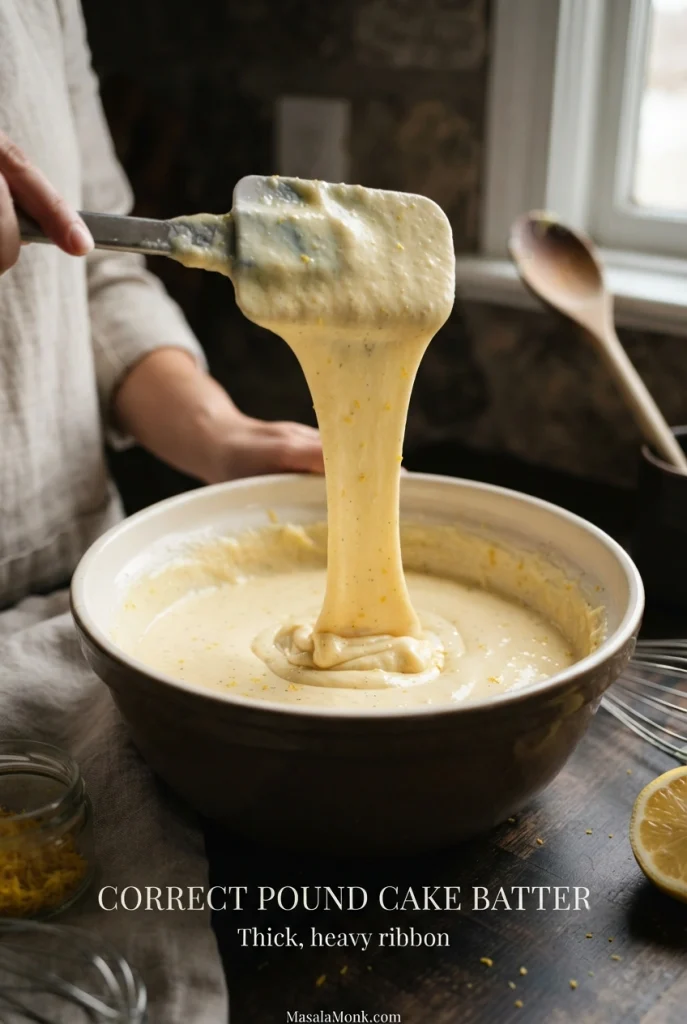
- Finish the batter. With the mixer on low, add one-third of the remaining dry ingredients, followed by half the sour-cream mixture. Add another third of the dry ingredients, the rest of the sour-cream mixture, then the last of the dry ingredients. Stop when faint flour streaks remain. Scrape underneath the batter and finish with a few folds by hand. It should be thick and creamy, falling from the spatula in heavy ribbons before slowly settling back into the bowl.
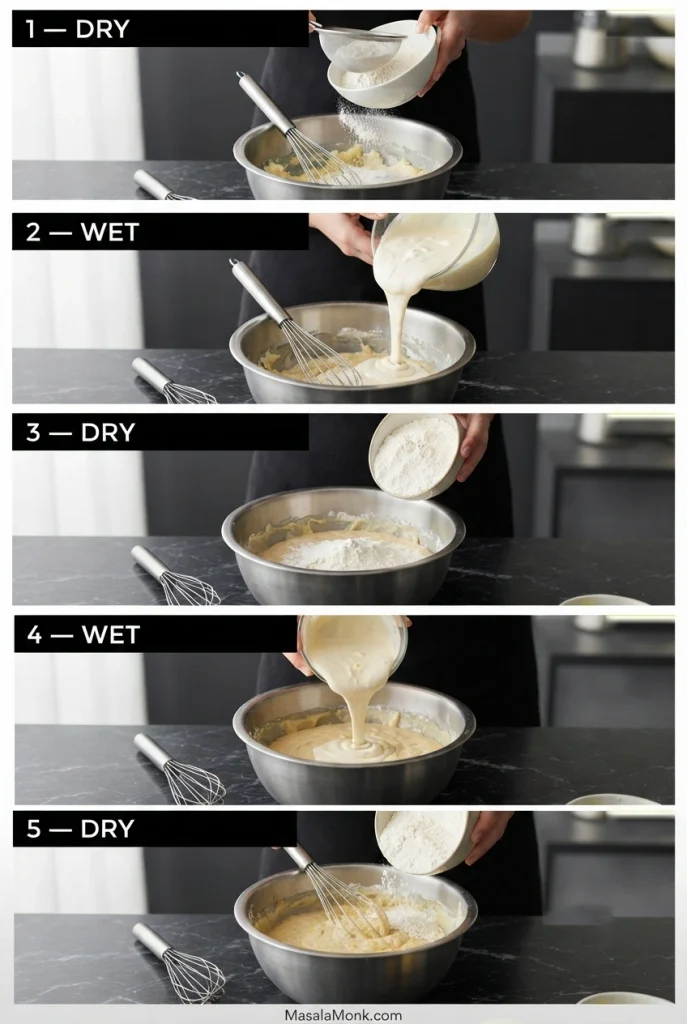
Check the batter before filling the pan. It should fall heavily from a spatula and settle slowly. A freely pourable mixture is not the intended texture for this recipe.
Fill the Pan and Check the Bake
- Fill the pan and bake. Scrape the batter into the prepared loaf pan and smooth the top. Leave room for the cake to rise; if your pan is unusually shallow or the batter comes close to the rim, bake the excess separately in a suitable small tin or lined muffin cups. Avoid opening the oven unnecessarily early. Begin checking around 60 minutes; expect approximately 65–75 minutes in the specified pan. A long crack along the top is normal.
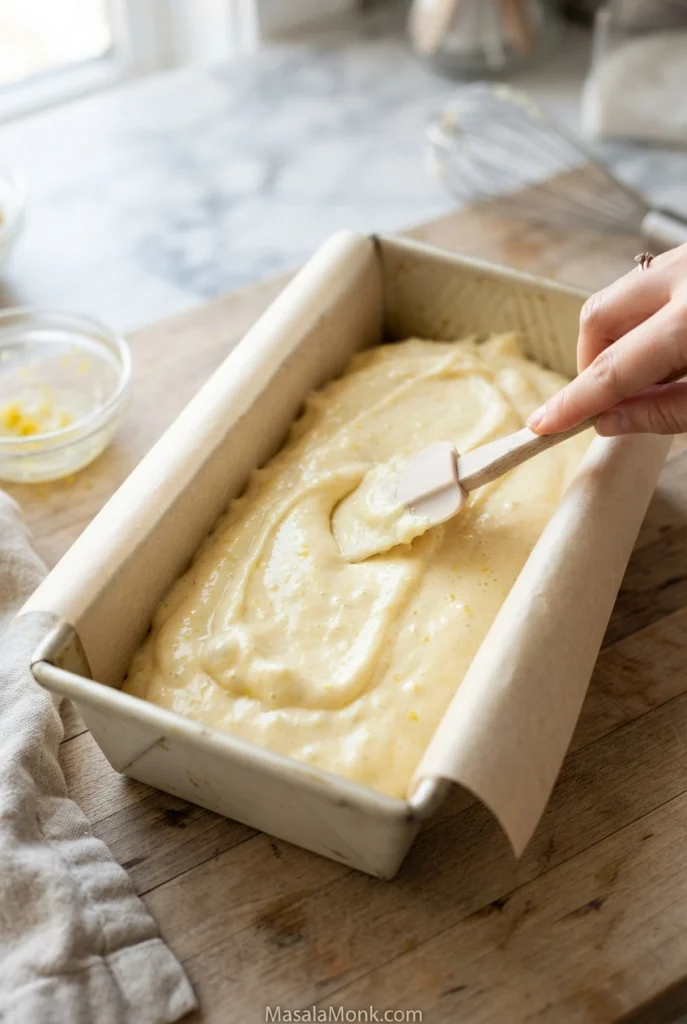
Using a smaller pan? Check the smaller-pan FAQ and size photograph before putting the loaf in the oven.
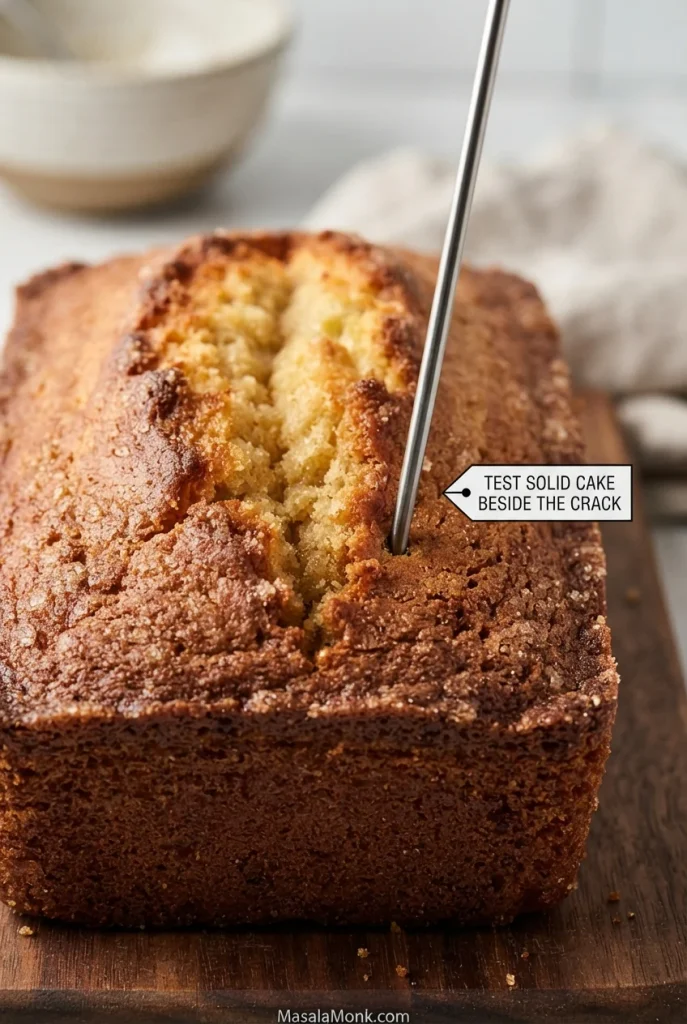
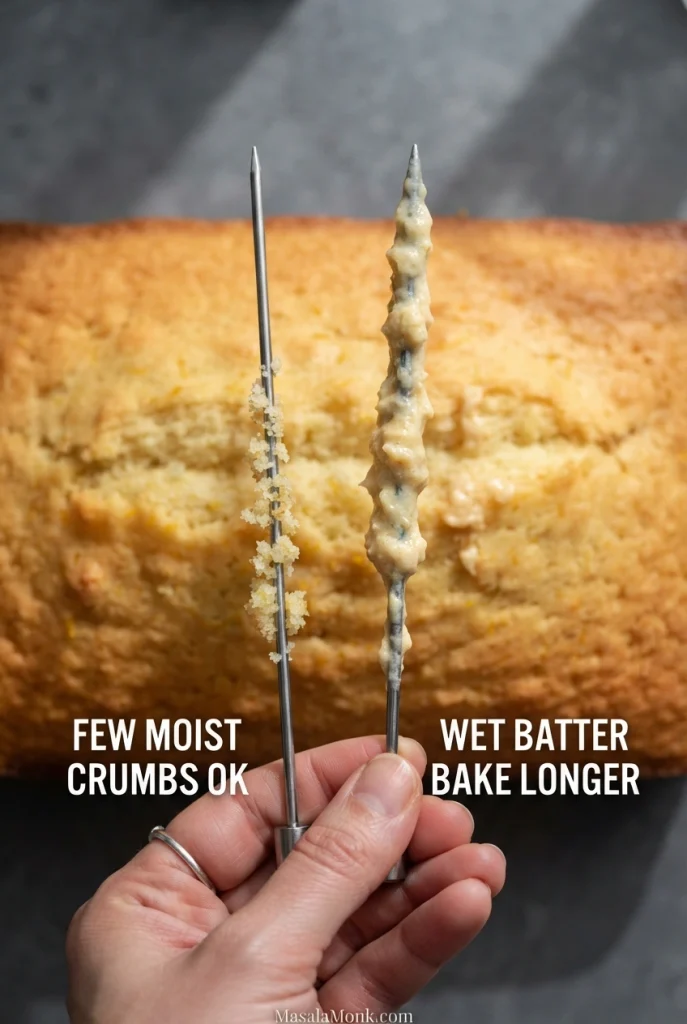
- Check for doneness. Look for a golden, set top and a centre that springs back lightly. Test near the centre in two spots, angling the skewer into solid cake beside any wide crack. A few moist crumbs are fine; wet batter means it needs longer. If the top is already dark enough, tent it loosely with foil.
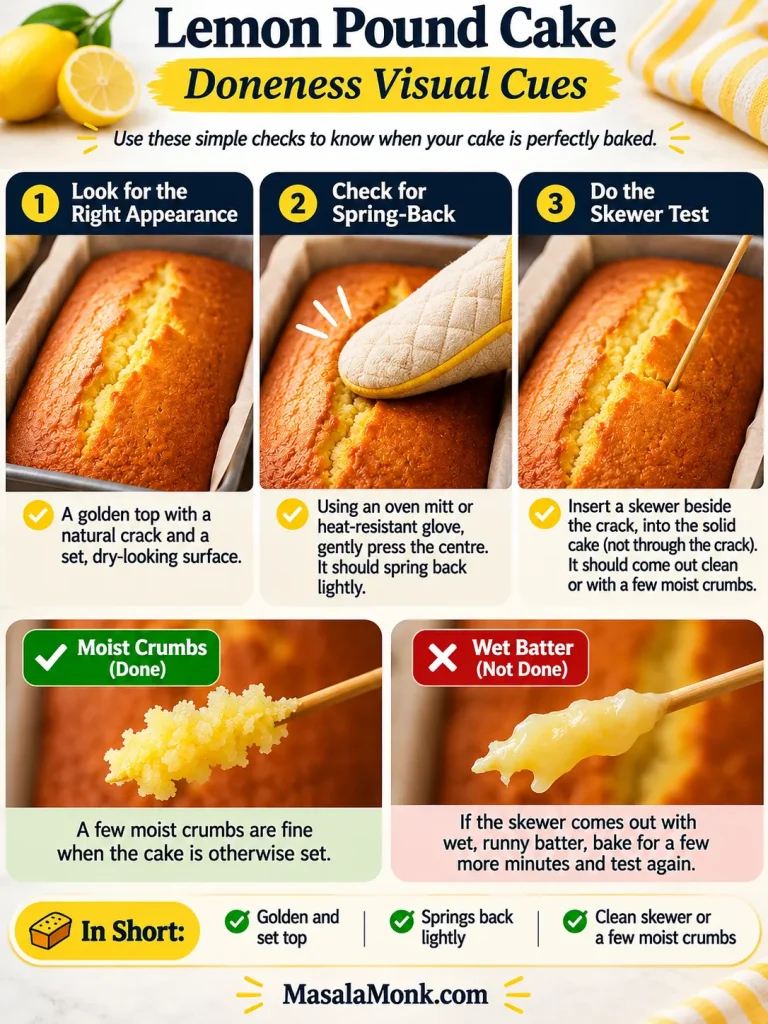
Choose the skewer entry point deliberately. An open crack may look like an easy route, but it does not sample the solid crumb around it.
Uncertain what came off the tester? Compare moist crumbs with wet batter before deciding whether to bake longer.
Cool, Glaze and Slice
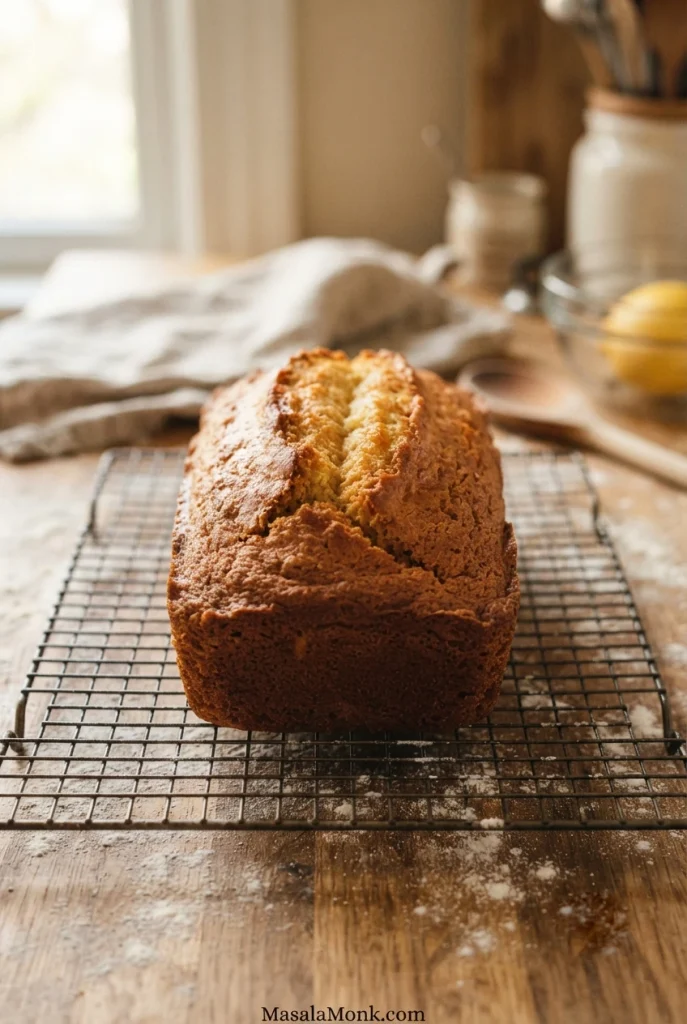
- Cool the loaf. Let it rest in its pan for 10–15 minutes, then lift it out using the parchment and transfer it to a wire rack. Wait until it is completely cool before glazing. The crumb will be easier to slice neatly after it has settled.
- Make the glaze. Whisk 150 g icing sugar with 20 ml lemon juice. Add more juice about ½ teaspoon at a time until the glaze falls from a spoon in a slow, thick ribbon. Spoon it over the cooled loaf, letting it settle down the sides. Allow it to set before slicing.
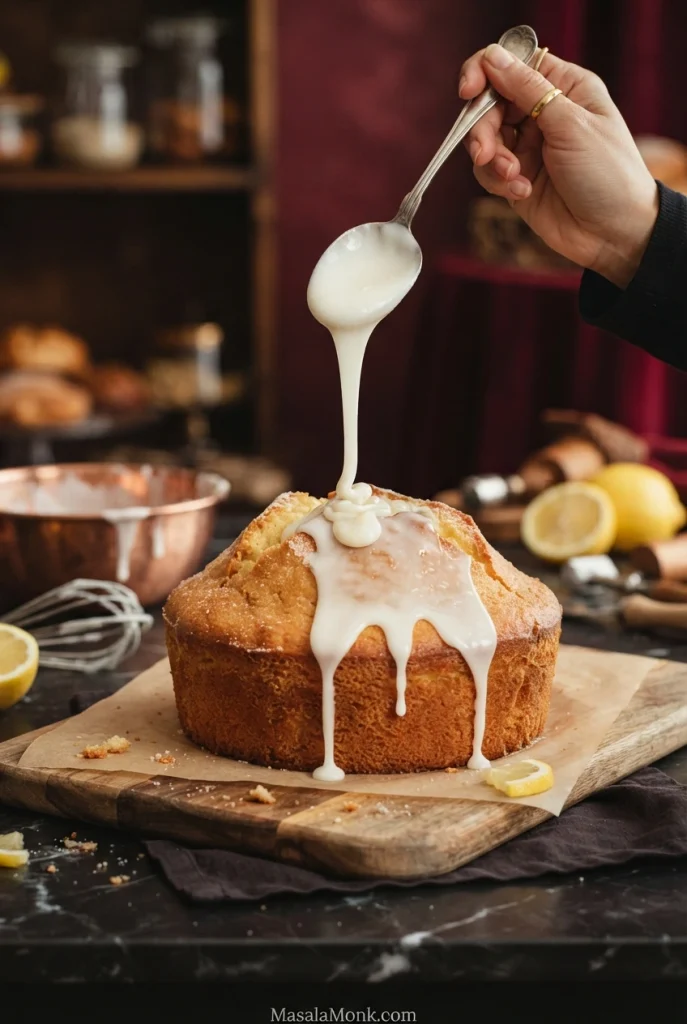
Glaze running off too quickly? Compare thick, correct and runny glaze before pouring the rest.
Look at the finished loaf as a whole. The naturally cracked crown and golden sides should remain visible beneath the white lemon glaze.
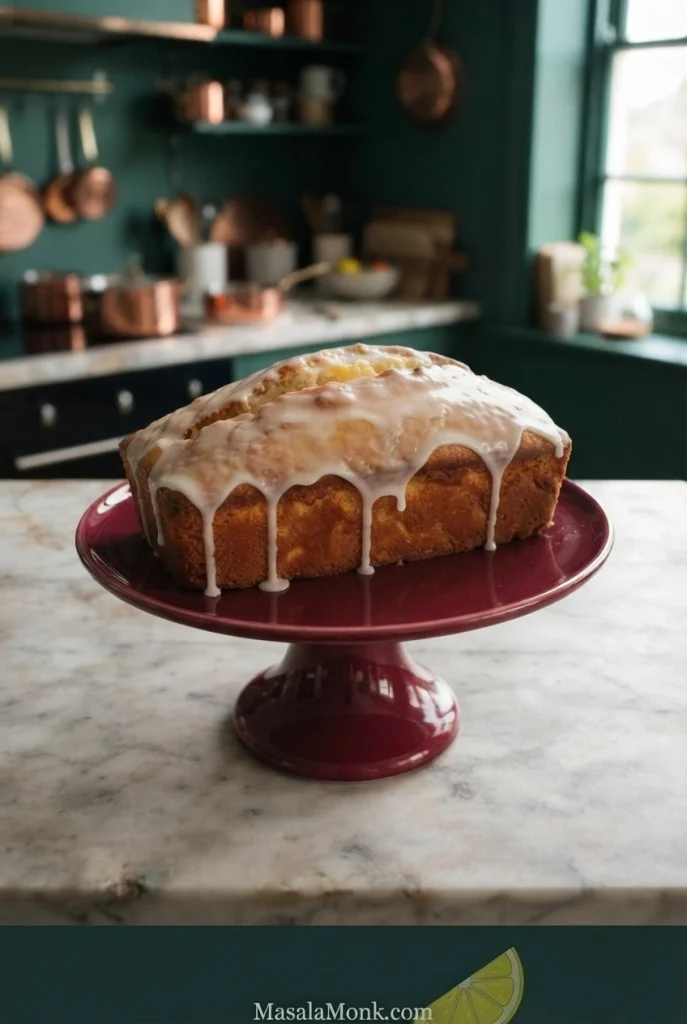
Slice only after the cake cools and the icing sets. The recipe makes about ten servings, depending on how thickly you cut them.

Review ingredients · Back to top
The Cake Should Taste Lemony Before the Glaze
For stronger lemon flavour, pay attention to the zest. Much of a lemon’s fragrance comes from oils in its yellow peel. Rubbing that zest into sugar before creaming helps spread the aroma through the cake.
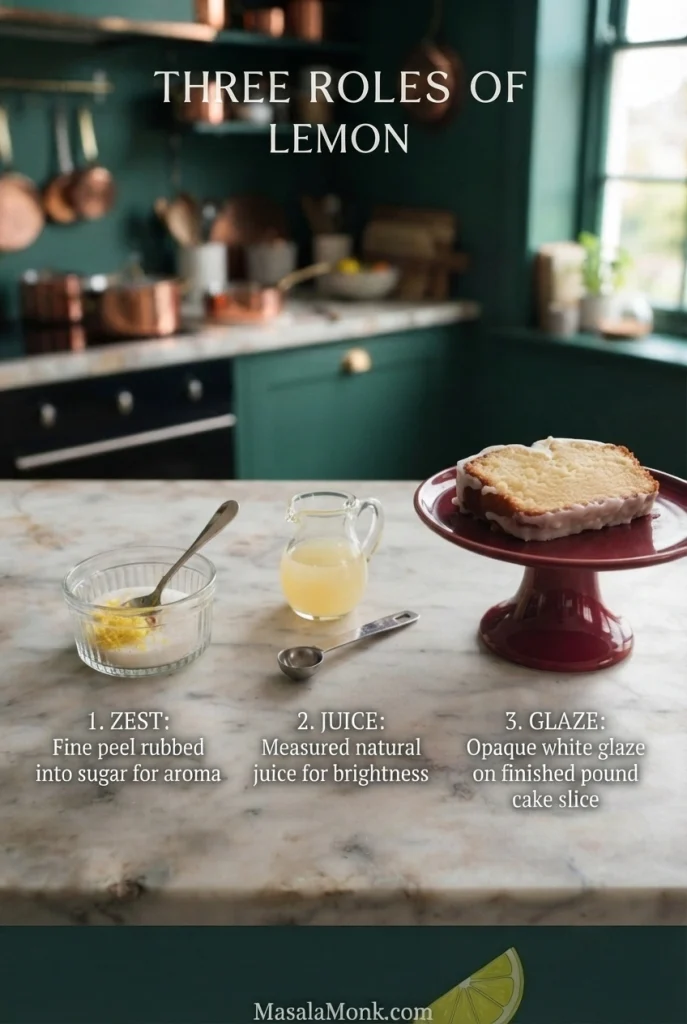
More juice isn’t the best shortcut to a more lemony loaf. Juice adds acidity and liquid, which can change the batter’s balance. Keep the measured amount in the cake and use fresh, finely grated zest for the baked-in lemon aroma.
What the Crumb Should Look Like
Once the loaf is cool, cut through the centre to see how evenly the crumb has baked.
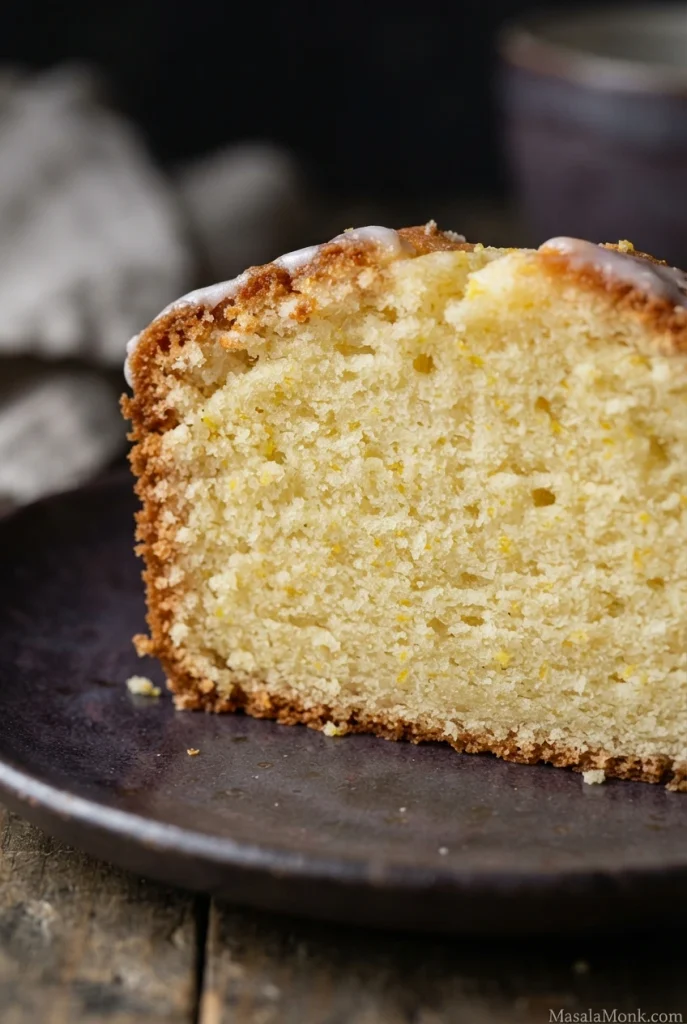
- Fine and close: the crumb is substantial, with small, fairly even air cells.
- Moist but matte: the centre looks tender, without a shiny or pasted-together band.
- Buttery and tender: the slice holds together but yields easily when you bite into it.
- Evenly baked: the texture remains consistent through the slice, with no wet or gluey strip near the bottom.
A close crumb is a style. A gummy streak is a fault.
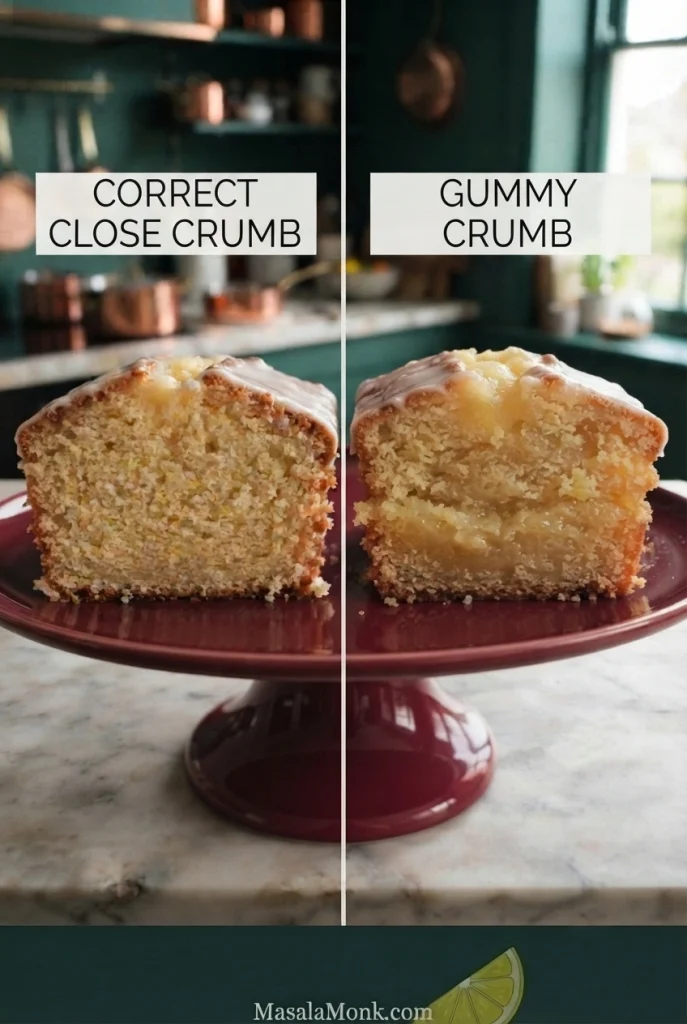
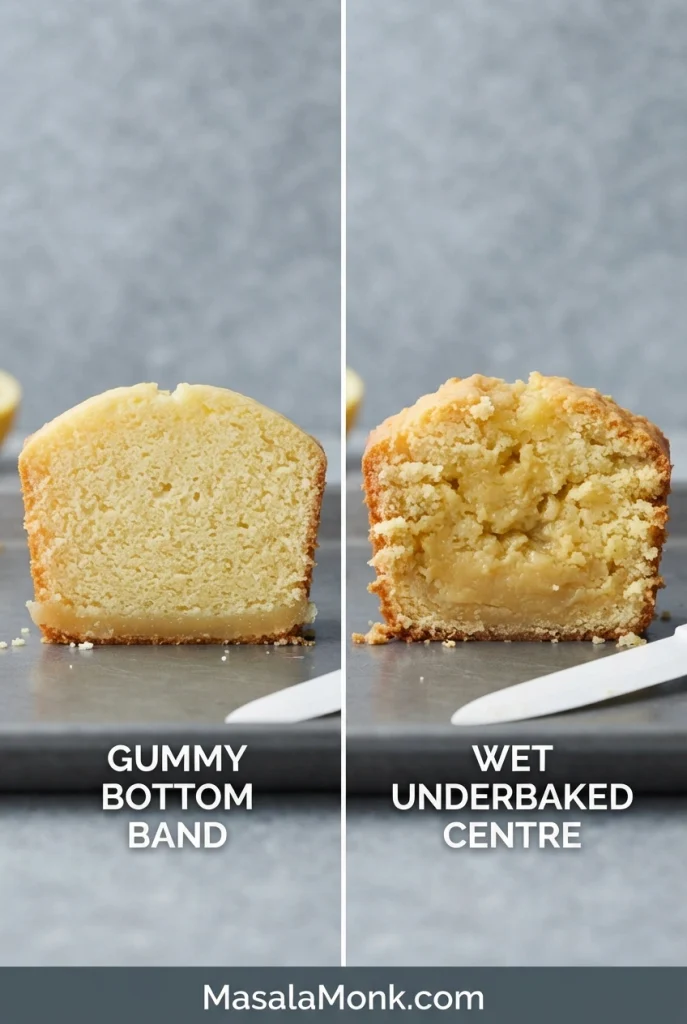
Not sure whether you are seeing a compact strip or an underbaked centre? Compare the two faults side by side.
And then comes the best part: a bite. This is a rich butter cake, not an airy sponge. The bright lemon glaze cuts through that buttery crumb just enough.
For more on butter temperature, creaming and the structure of this style of cake, see our classic Pound Cake Recipe.
Lemon Glaze: Getting the Consistency Right
A good lemon glaze falls from the spoon in a slow, thick ribbon. It should stay visible on the cooled cake, with just enough movement to settle gently down the sides.
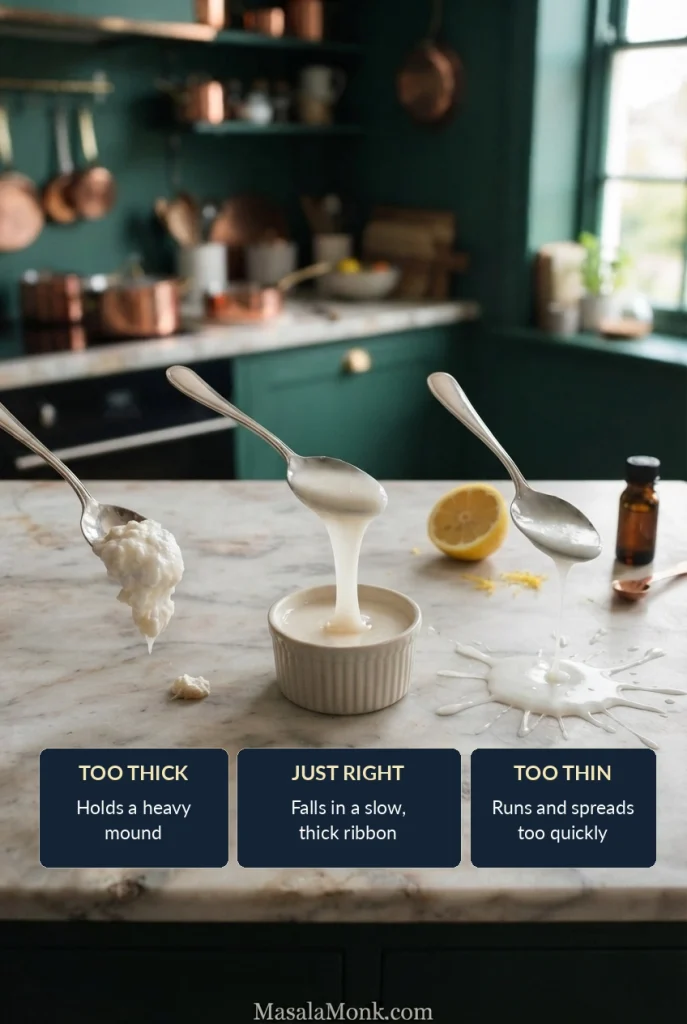
Too thick? Add another ½ teaspoon of lemon juice and stir again. Too thin? Whisk in a little more icing sugar. If the glaze disappears into the cake, it may be too runny or the loaf may still be warm.

For an extra-tart serving, try a little homemade lemon curd alongside a slice.
Back to the glazing step · Back to top
Troubleshooting Lemon Pound Cake
If something went wrong, start with where it shows up. A wet centre, gummy band and greasy patch can all get called “dense cake,” but they point to different possibilities.
Find the Symptom First
| What Happened | Check First |
|---|---|
| Wet or sunken centre | Doneness, oven accuracy and pan size |
| Gummy or “sad” streak | Mixing, aeration, batter separation, leavening and doneness |
| Greasy patches | Butter temperature or fat separating in the batter |
| Curdled batter | Ingredient temperatures and how quickly eggs were added |
| Dark crust, underdone middle | Pan material, oven heat and rack position |
| Dry crumb | Flour quantity, oven temperature and bake duration |
| Weak lemon flavour | Freshness and quantity of zest |
| Runny glaze | Excess juice or glazing a warm cake |
Wet Centres and Gummy Streaks
Wet or sunken in the middle: if the cake is still baking and the centre contains wet batter, give it more time. Tent the top loosely with foil if it’s already deeply golden. A skewer that passes straight down a wide top crack can miss underdone cake, so check the solid crumb near the centre as well. If this keeps happening, check your oven temperature and loaf-pan size.
A gummy band or “sad streak”: this is a dense, sometimes translucent strip, often near the bottom. Possible causes include under- or overmixing, excessive creaming, batter separation, leavening problems or insufficient baking. The appearance doesn’t always identify one definite cause. If the surrounding cake is already fully baked, additional oven time may only dry it out without repairing the gummy layer.
Separated Batter, Browning and Dryness
Curdled or greasy batter: slight graininess as eggs go in is common, but glossy oil patches signal separation. If caught early, mix in a tablespoon of the already-measured dry ingredients. Next time, use soft, shape-holding butter and add eggs gradually; severe separation may not recover fully.
Lemon flavour too mild: serve the baked loaf with tart lemon curd or, if unglazed, a sharper icing. Next time, measure fresh zest carefully; extra batter juice changes the liquid balance and cannot replace fragrant peel oils.
Dark outside, underdone inside: a dark pan can brown the crust faster than a light-coloured one. If the cake is still baking, loosely cover the top once it’s sufficiently golden and let the middle finish. For future bakes, check pan material and oven temperature. King Arthur Baking explains how baking-pan size and material affect results.
Dry crumb: softly whipped cream alongside a slice can make it more enjoyable now. Next time, weigh the flour if possible, check for an oven running hot and begin testing before the end of the estimated bake window. A skewer with a few moist crumbs is acceptable; there’s no need to bake until it emerges dusty-dry.
Try the method again · Back to top
Ingredient Substitutions & Pan Changes
Thick, full-fat plain Greek yogurt is the closest practical substitute if you don’t have sour cream. Other dairy changes can affect the balance of fat and liquid in the batter.
| Change | Best Approach |
|---|---|
| Thick, full-fat plain Greek yogurt | Try 120 g in place of the 120 g sour cream. Texture and richness may vary slightly by brand. |
| Buttermilk | Don’t replace sour cream cup-for-cup; it’s much thinner and changes the batter. |
| Cream cheese | Use a pound-cake formula designed around cream cheese because its fat and moisture balance differs. |
| Bundt pan | Use a recipe or reliable conversion for that pan’s capacity and shape. The loaf timing won’t transfer directly. |
Storage, Freezing & Make Ahead
Keep the Cake Fresh
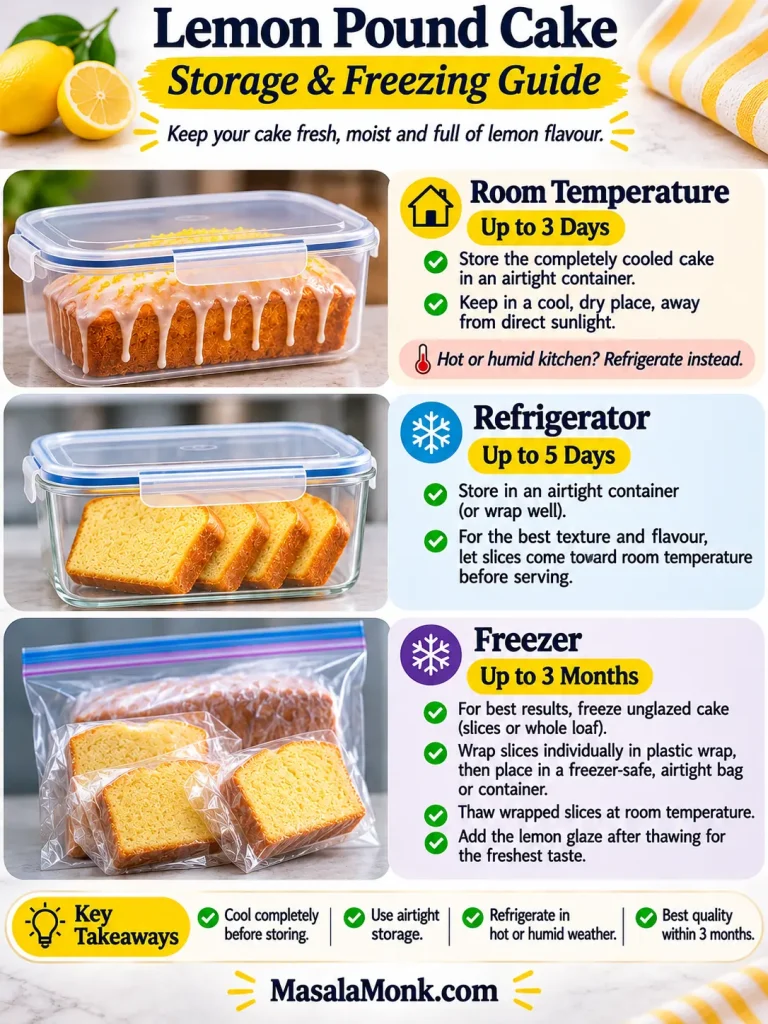
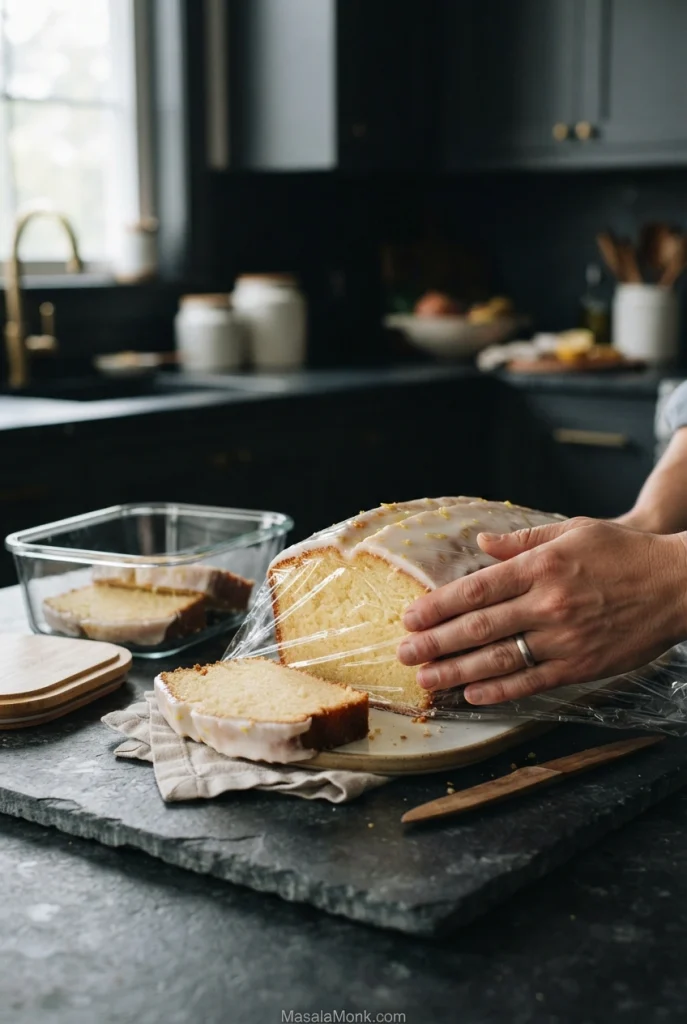
At room temperature: keep the completely cooled cake with its plain lemon-sugar glaze airtight in a cool room for up to 3 days. Cover the cut end well; that’s where the crumb dries first. In a hot or humid kitchen, refrigerating it is the better option.
Protect the cut face. Once a slice is removed, air reaches the exposed crumb more easily than the glazed top, so cover that surface before storing the rest of the loaf.
In the refrigerator: keep the plain cake well covered for up to 5 days. Butter firms when cold and some lemon aroma becomes less noticeable, so let slices come toward room temperature before serving. Refrigerate cakes stored with perishable toppings such as cream cheese frosting or lemon curd.
Freeze and Make Ahead
To freeze: wrap the loaf or individual slices securely and freeze for up to 3 months for best quality. Freezing without the glaze usually gives the neatest finish. Thaw while wrapped, let the cake return to room temperature and glaze before serving.
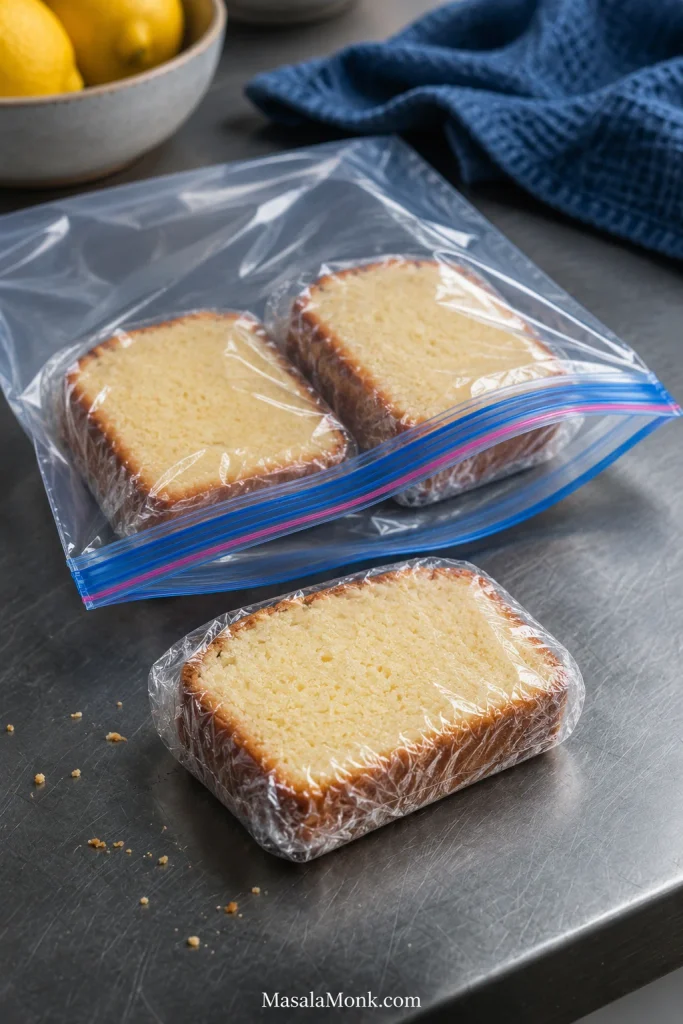
Making it ahead: bake the loaf the day before serving, cool it completely and keep it airtight. Add the glaze closer to serving if you want the freshest finish.
The next day, the cake often slices especially neatly and tastes pleasantly buttery with tea or coffee. The lemon glaze gives each bite its bright finish.

Questions About Lemon Pound Cake
Cracks and Loaf-Pan Questions
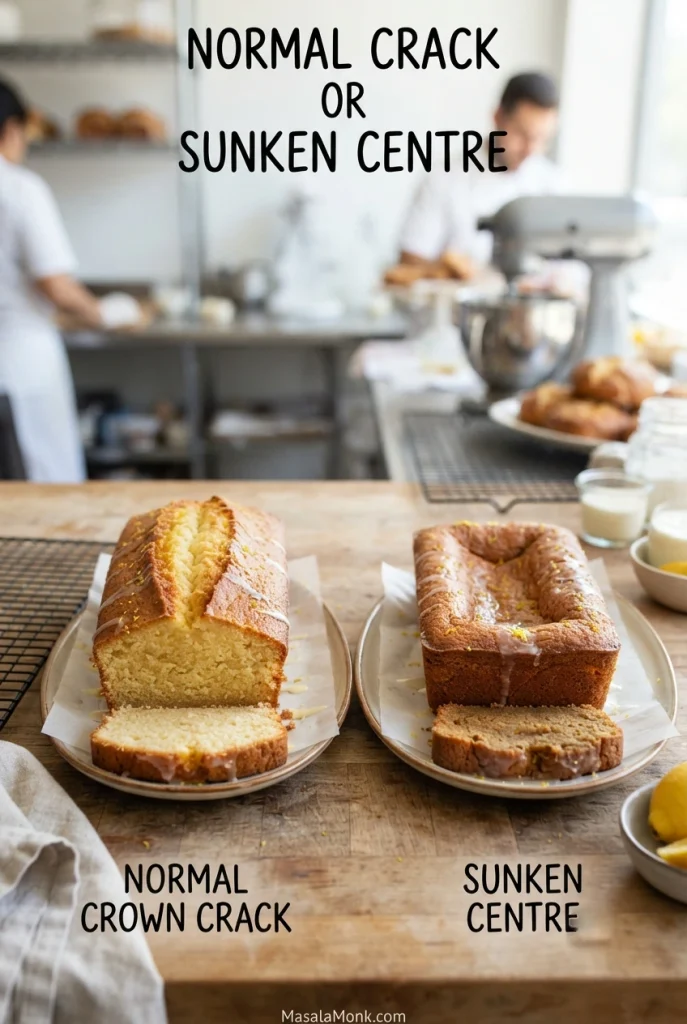
A top crack alone is not a defect. Compare the overall crown shape and check the centre for doneness before assuming something went wrong.
Why did my lemon pound cake crack on top?
A long crack along the top is normal. The outside begins setting while the middle is still rising, so the expanding centre breaks through the surface. The crack itself doesn’t mean the cake has failed.
Changing the pan changes the bake. Check its depth and usable capacity, not only the length and width stamped on the rim.
Can I use an 8½ × 4½-inch loaf pan?
The smaller pan may not hold the full batch with enough room to rise. A 9 × 5-inch pan is the safer choice for these quantities. If you use the smaller pan, leave room for expansion and bake any excess separately in a suitable small tin or lined muffin cups. Check the smaller portions earlier and don’t rely on the stated loaf timing.
Can I bake lemon pound cake in a glass loaf pan?
Glass holds and transfers heat differently from light-coloured metal, affecting browning and bake time. Reducing the temperature by about 25°F / 15°C is a common starting adjustment for glass bakeware, but follow your pan manufacturer’s guidance. Check the centre carefully; the specified metal-pan timing may change.
Lemon Choices and Pound Cake Traditions
Can I use bottled lemon juice?
Fresh juice gives a cleaner citrus flavour, and you’ll need fresh lemons for the zest anyway. Bottled juice can contribute acidity, but it won’t replace the fragrant oils in freshly grated peel.
Can I use Meyer lemons?
Yes. Meyer lemons are generally sweeter and less sharply acidic than standard lemons, so the finished loaf may have a softer citrus character. Measure the zest and juice because fruit size and yield vary. Our guide to lemon varieties provides more background on Meyer lemons and other types.
Is this an old-fashioned lemon pound cake?
It has the rich, close crumb associated with traditional pound cake, but this is a modern lemon loaf. Older pound-cake formulas often rely on butter, sugar, eggs and flour for most or all of their structure. This version includes sour cream and baking powder for a different balance of richness and tenderness.
Serve at room temperature. The cake is good plain, with tea or coffee, or with a little tart lemon curd alongside.
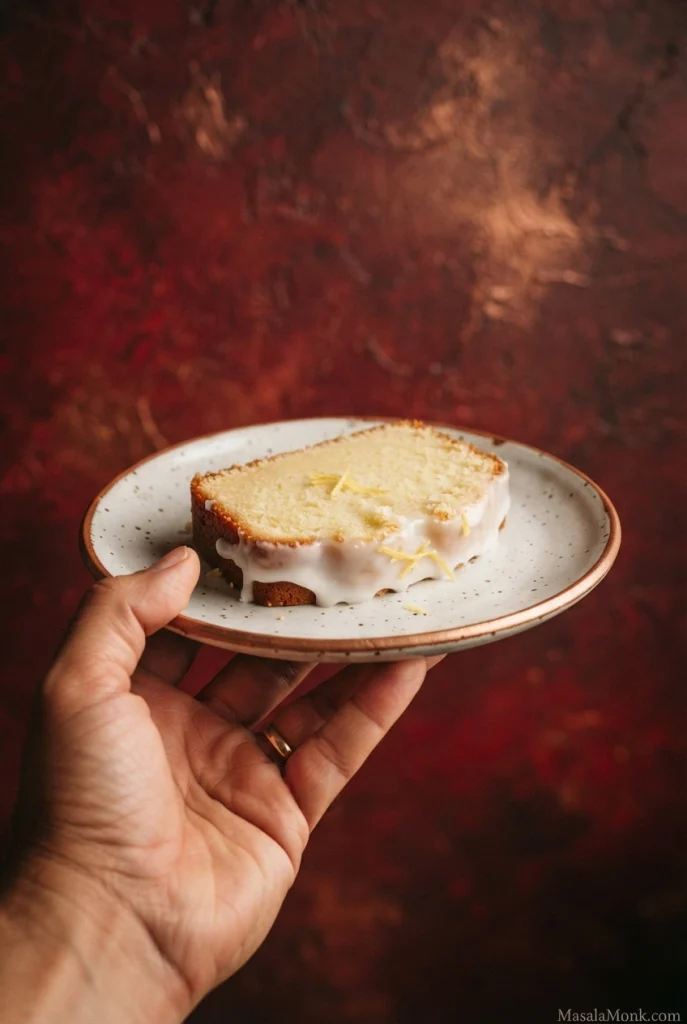
How did your loaf turn out? Tell us about the crumb, the crack on top or how the glaze set—we can help troubleshoot if something went wrong. And if you’re baking it again, would you choose a thin tart drizzle or a generous white layer running down the sides?








