

Break one open after it has had a few minutes to settle and the middle still bends before it breaks: soft through the center, lightly chewy around the edge, with vanilla and butter coming through before the cocoa.
These from-scratch red velvet cake cookies carry the cake’s vanilla-first flavor, mild cocoa, faint tang, and deep red color into a chewy drop cookie. White chocolate is optional.
Soft & Chewy Red Velvet Cookies
Deep-red cookies with lightly set edges, a soft, chewy middle, mild cocoa and plenty of vanilla. Add white chocolate for extra sweetness, or leave it out and let the red velvet flavor lead.
Useful Equipment
- Hand mixer or stand mixer
- Light-colored baking sheets
- Parchment paper
- Cookie scoop, optional
- Digital kitchen scale, recommended
Ingredients
- 1 2/3 cups all-purpose flour, spooned and leveled (200 g / 7.1 oz)
- 1/4 cup natural unsweetened cocoa powder (20 g / 0.7 oz)
- 3/4 teaspoon baking soda
- 1/2 teaspoon fine salt
- 1/2 cup unsalted butter (113 g / 4 oz), softened but still cool
- 2/3 cup lightly packed light brown sugar (135 g / 4.8 oz)
- 1/4 cup granulated sugar (50 g / 1.8 oz)
- 1 large egg, ideally at room temperature
- 2 teaspoons vanilla extract (10 ml)
- 1 tablespoon buttermilk (15 ml)
- 1/2 teaspoon concentrated red gel food coloring, plus up to another 1/4 teaspoon if needed for your brand
- 1/2 cup white chocolate chips or chopped white chocolate (85 g / 3 oz), optional
Four things make the biggest difference: natural cocoa, concentrated gel color, a 30-minute chill, and pulling the tray while the centers still look soft. Brown sugar helps hold moisture in the middle, while a smaller amount of white sugar encourages the edges to spread and set.
Method
Chill, Portion & Bake
Recipe Notes
- No buttermilk? Use 1 tablespoon plain full-fat yogurt, or sour cream loosened with a few drops of milk. You only need a subtle cultured-dairy note here.
- Gel color: Brands vary in strength. Start with 1/2 teaspoon and judge the shade only after the cocoa has been fully mixed in.
- Dark baking sheet? Nonstick pans with dark surfaces can brown the bottoms faster. Use parchment and begin checking toward the early end of the bake range.
- Want cut-out cookies instead? This dough is designed to spread. For hearts, stars, and decorated shapes, use our soft sugar cookie recipe.
- Using almond flour? Don’t swap it cup for cup here; it changes both structure and spread. Use our almond flour cookies recipe instead.
- Don’t eat this dough raw. It contains raw egg and untreated flour; the CDC recommends cooking raw dough before eating it. If cookie dough straight from the bowl is what you’re after, use our edible cookie dough recipe.
Red Velvet Cookie Guide
Flavor & Color
Dough & Bake
What Do Red Velvet Cookies Taste Like?
Here, butter and vanilla come first, followed by mild cocoa and a faint tang from the buttermilk. Think buttery vanilla cookie dough with cocoa in it, not brownie batter.
That same cocoa-vanilla balance matters in our red velvet cake recipe, though cookie dough reacts much faster to changes in flour, cocoa, and temperature.

Get the Red Right Without Wrecking the Cookie
Red velvet is a balance, not a shade. Cocoa darkens the dough while food coloring brings the red forward. Neither needs to take over.
It’s easy to keep adding color because the bowl never looks quite as bright as the cookie in your head. A rich red is enough. The baked cookie does not need to glow.

Why Did My Red Velvet Cookies Turn Brown?
With this style of red velvet cookie, a muddy brown-red color usually points first to very dark cocoa, too much cocoa, or too little coloring. For the color, spread, and flavor described here, use natural unsweetened cocoa.
Twenty grams gives the dough a clear cocoa note without pushing it into chocolate-cookie territory. Dutch-process cocoa is darker and smoother, so it tends to produce a deeper burgundy or brown-red cookie with more obvious chocolate flavor.
For more on that difference, King Arthur Baking’s guide to natural and Dutch-process cocoa explains how alkalization changes acidity, color, flavor, and leavening behavior.
Why Gel Color Helps
Concentrated gel gives strong color with very little added moisture. Ordinary liquid coloring often needs much more volume, which can loosen the dough before you realize what’s happening.
The common chain is simple: weak liquid color → wetter dough → extra flour → tougher cookie. If coloring has noticeably softened the dough, more refrigerator time is usually a better fix than more flour.
You can also skip the food coloring. The cookies will bake cocoa-brown, but the butter, vanilla, mild cocoa, and buttermilk flavor stay essentially the same.
Start With a 30-Minute Chill
Does red velvet cookie dough need to chill? For this dough, yes. Thirty minutes is the baseline: it firms the butter enough to help control the spread while keeping the dough easy to scoop.
After chilling, the dough will feel cool and pliable. Drop a mound onto the tray and it should stay where you put it instead of slowly relaxing outward.
Dough from a warm kitchen may need another 10–15 minutes in the refrigerator. Very cold dough can sit on the counter briefly before portioning. You’re there when it scoops cleanly without fighting you.
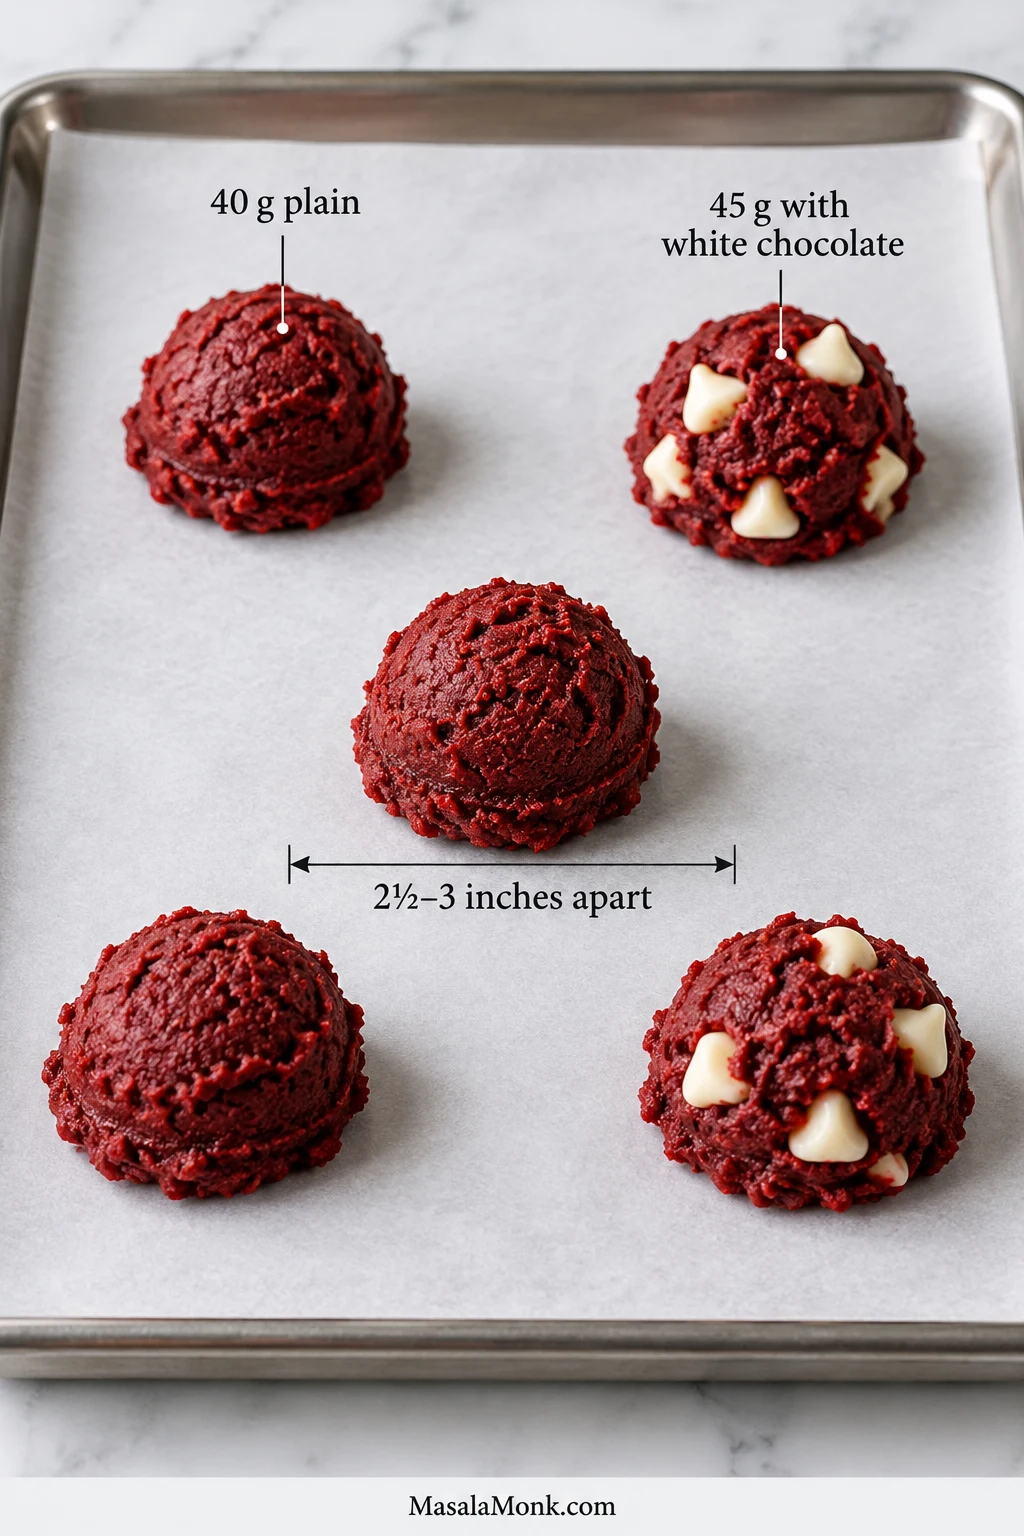
Portion & Space the Dough Consistently
Here a scale earns its place: keeping each version close to its target weight helps the cookies bake at a similar pace, especially when white chocolate makes each scoop slightly heavier.
Did They Spread the Way You Wanted?
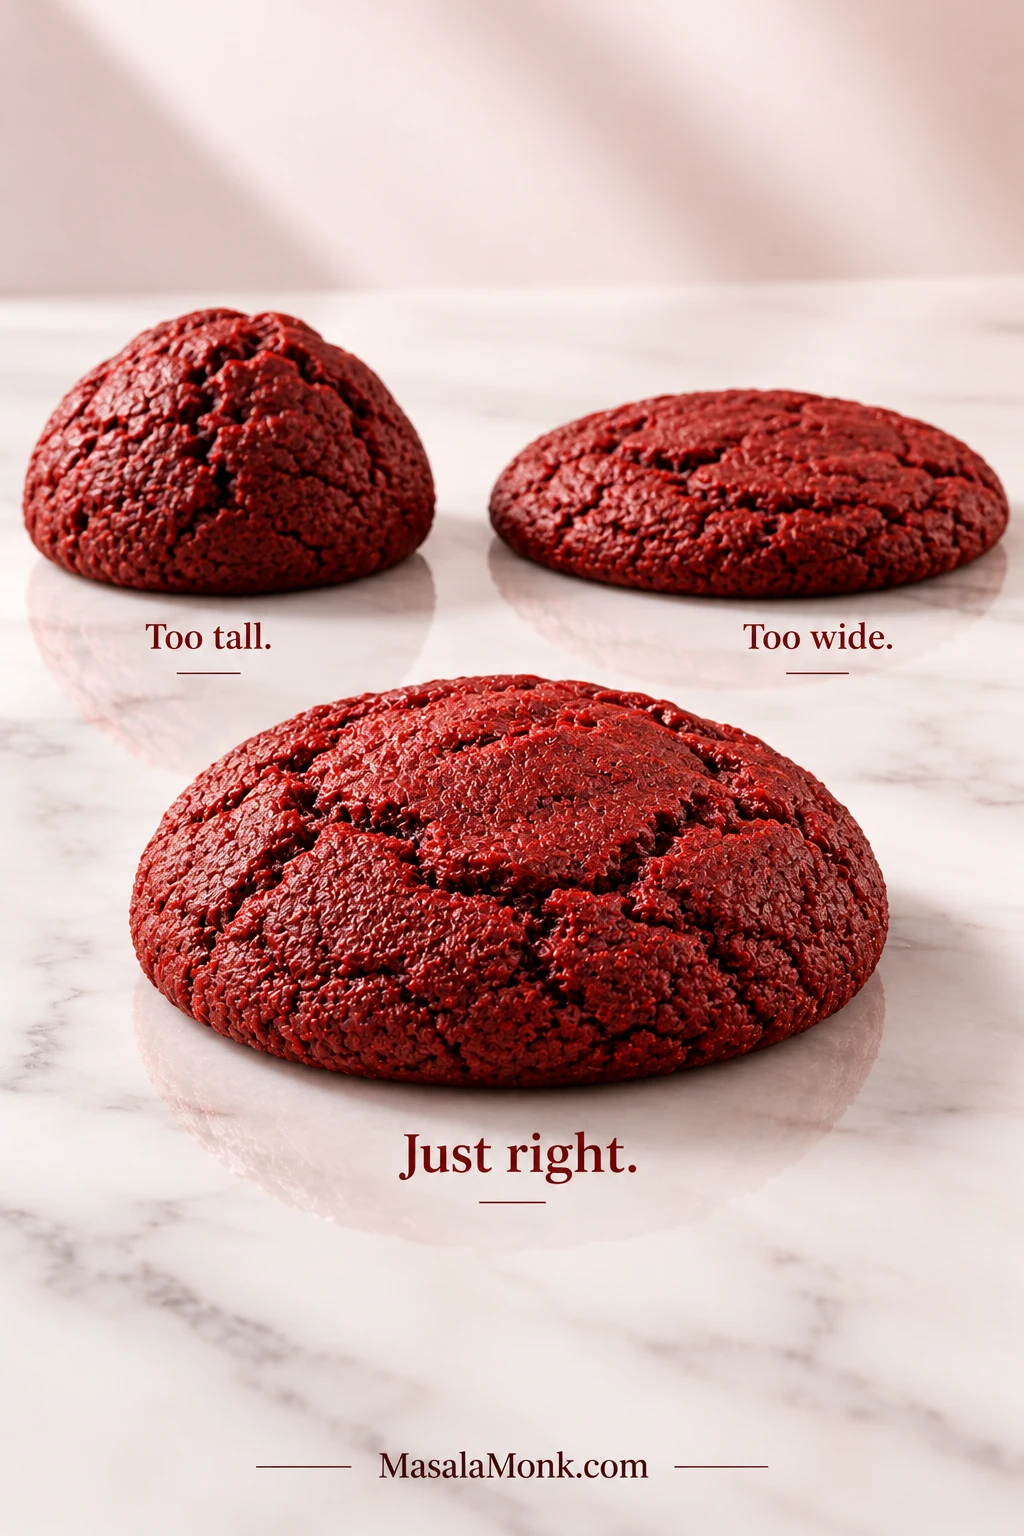
The first tray is useful information, not a final exam. If the cookies spread into thick rounds with soft centers, you’re in good shape. Don’t worry about perfectly round edges; drop cookies naturally vary.
| First-tray result | What to try next |
|---|---|
| Stayed very tall | The dough may simply be very cold. Give the next portions a few minutes on the counter; if they still barely move, double-check the flour measurement. |
| Thick with a soft center | Keep the remaining dough cool and use a cooled baking sheet. |
| Spread very wide | Chill the remaining portions. Warm dough, too little flour, or a large amount of liquid color are the usual suspects. |
How Do You Know When Red Velvet Cookies Are Done?
Red velvet cookies are done when the edges are set, the wet shine has disappeared, and the centers still look soft.
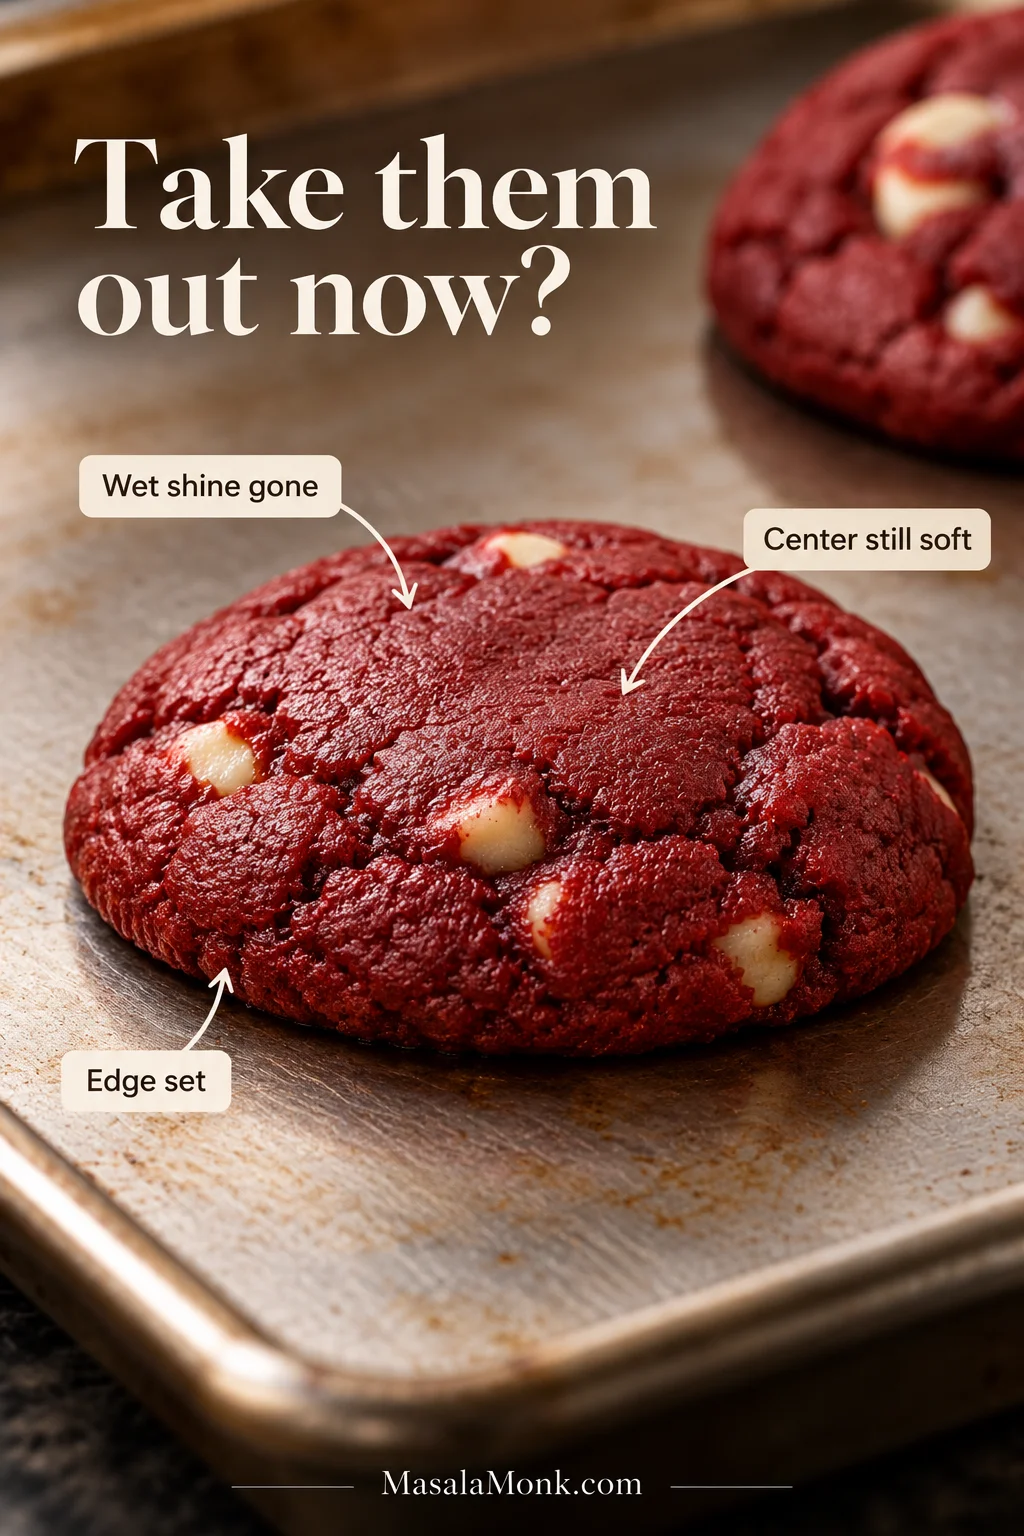
This is the moment that feels wrong the first time. The center looks slightly under-set, and the instinct is to give the tray another two minutes. Usually, that’s the two minutes you didn’t need.
The edge may deepen toward burgundy as it sets; that darker rim is expected. Give the cookies 5 minutes on the hot sheet before moving them. Residual heat finishes the middle gently.
With red velvet cookies, texture tells you more than color. A center that looks slightly underdone on the tray can settle into a dense, yielding middle once the cookies rest.
Fix This Batch: Red Velvet Cookie Troubleshooting
Most first-tray problems are useful clues. Make one adjustment at a time and the next tray usually tells you whether you found the cause.
| What happened | What to change next tray |
|---|---|
| Dry or crumbly | Too much flour or cocoa, or too long in the oven. Weigh the dry ingredients and pull the next tray sooner. |
| Cakey or bready | Check the flour measurement and bake time first. Major substitutions can change the texture too. |
| Tough after fixing sticky dough | Extra flour may be the culprit. Warm, tacky dough usually benefits more from chilling. |
| Bitter or tastes of food coloring | The color was pushed too far. Use concentrated gel and stop once the dough reaches a rich red or burgundy. |
| Greasy or genuinely raw after cooling | Check for under-measured flour, oversized portions, or underbaking. A soft center should still hold together once cool. |
When the bake is right, the edge has a little chew while the middle stays dense and yielding, with vanilla first and cocoa underneath.
White Chocolate & Cream Cheese Frosting
Red Velvet White Chocolate Chip Cookies
Fold 1/2 cup white chocolate chips or chopped white chocolate (85 g / 3 oz) into the dough before chilling.

Chopped white chocolate gives irregular pools and shards, while chips stay neater. Reserve a few pieces and press them into the tops just after baking if you want more visible chocolate.
Prefer semisweet chocolate? Use the same amount. The cookies will taste more chocolate-forward and lose some of the red-and-white contrast, but the swap is straightforward.
Red Velvet Cookies with Cream Cheese Frosting
This version keeps the frosting on top, so the cookie dough and bake stay exactly the same.
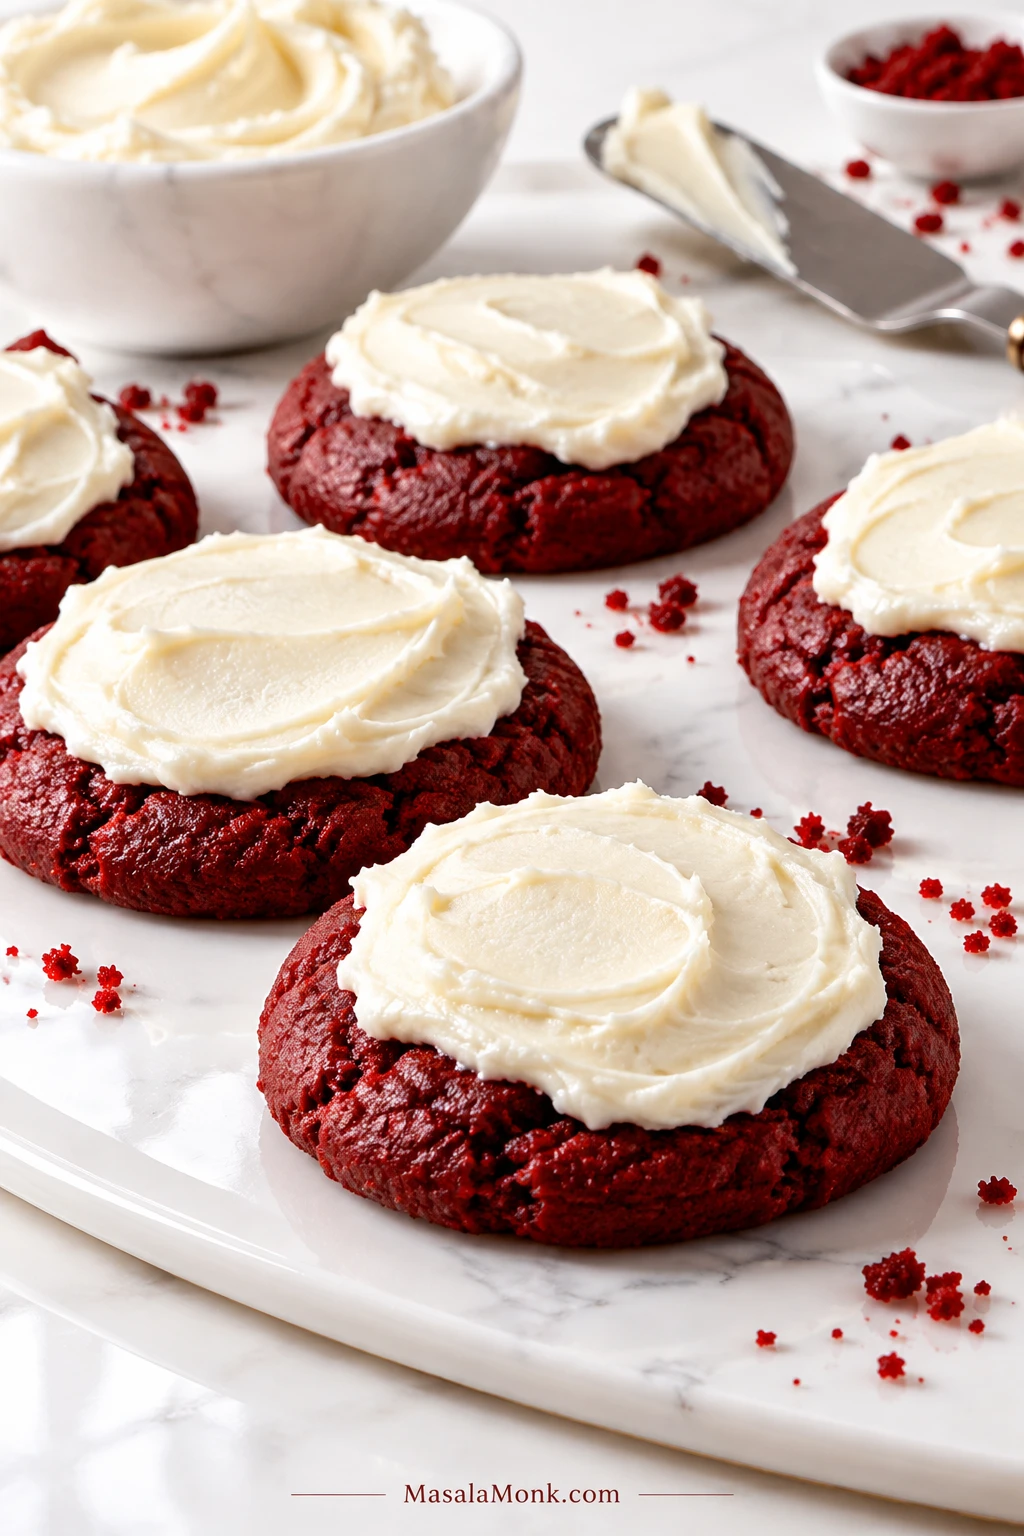
For a light layer over one batch, use:
- 2 oz full-fat block cream cheese (56 g), cool but pliable
- 2 tablespoons unsalted butter (28 g), softened
- 1/2 cup powdered sugar (about 60 g)
- 1/4 teaspoon vanilla extract
- A small pinch of salt
Beat the butter, powdered sugar, vanilla, and salt until creamy. Add the cream cheese last and mix on low only until smooth. If the frosting feels loose, chill it for 15–20 minutes before spreading.
Wait until the cookies are completely cool. The cool, tangy frosting against the cocoa-vanilla center is the whole appeal. For a darker topping, our chocolate cream cheese frosting takes the pairing further into chocolate.
Stuffed cream-cheese cookies are a different project: cold filling, chilled dough and careful sealing all matter. Save that version for a recipe designed around a cream-cheese filling.
Can I Make These Into Red Velvet Crinkle Cookies?
You can get a light crinkle by chilling the dough until easy to handle, rolling each portion first in granulated sugar and then generously in powdered sugar, and keeping the remaining dough cold. Expect a softer crackle rather than deep fissures; for that dramatic crinkle-cookie finish, use a recipe designed specifically for crinkling.
If You Came Here for Red Velvet Cake-Mix Cookies
If cake mix is what you have—or speed is the priority—this version gets you there with far fewer ingredients.
Check the package weight before you start. Older American recipes were often written around 15.25 oz or larger boxes, while smaller boxes are common now. That difference changes the ratio of dry mix to oil and eggs.
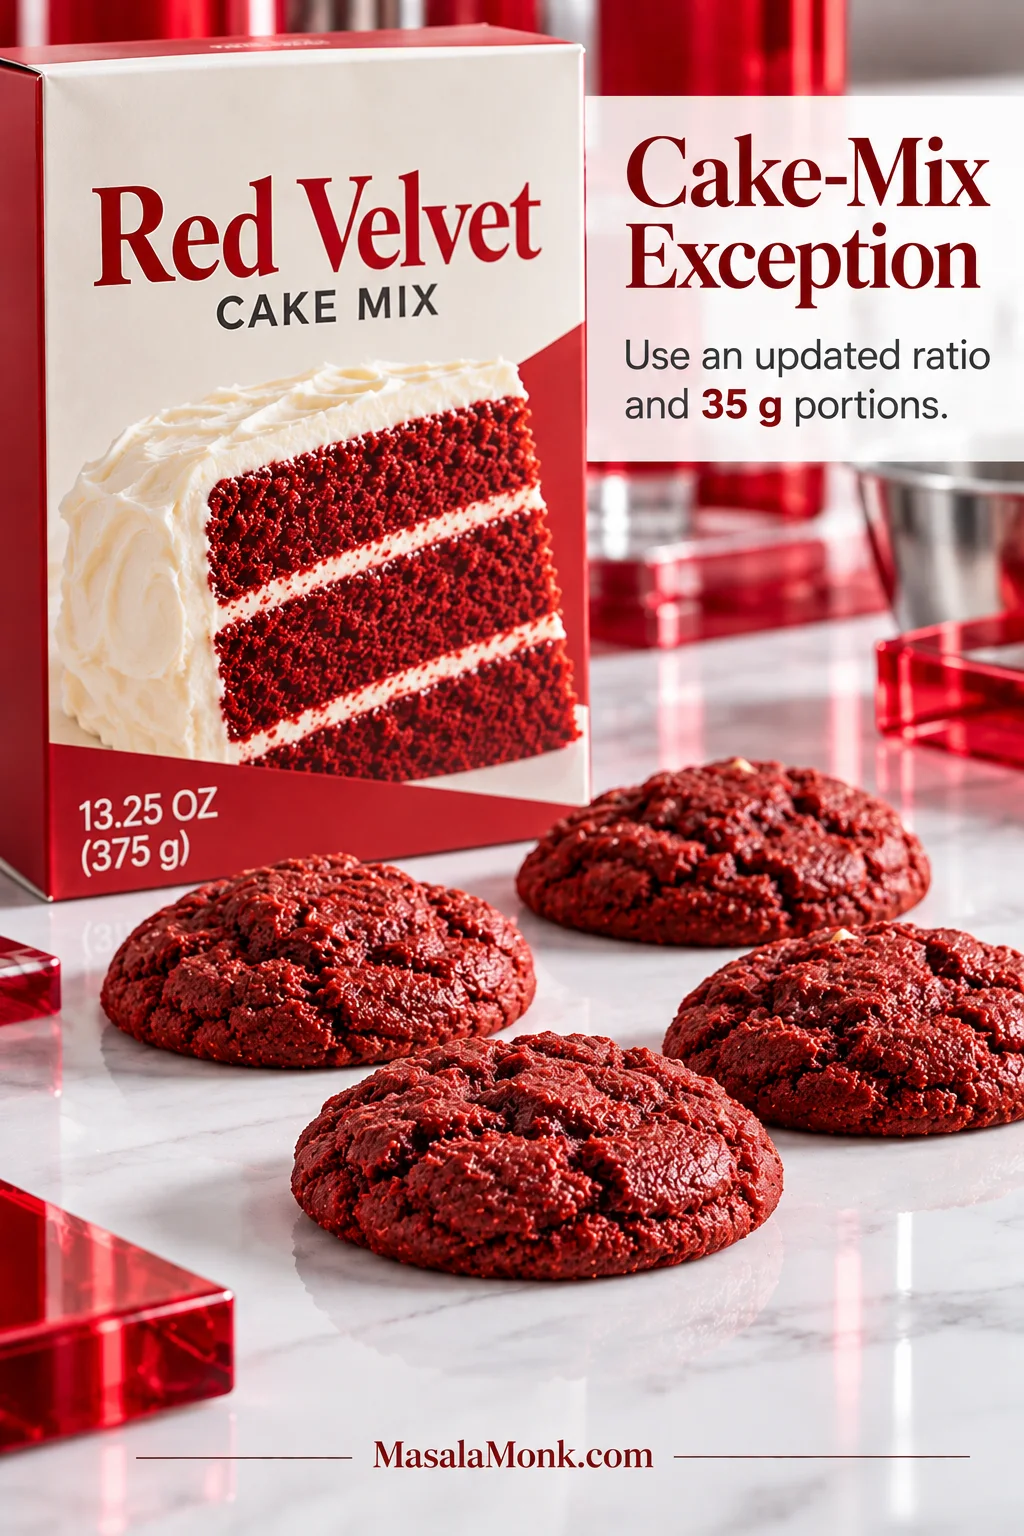
Quick Cake-Mix Version for a 13.25 oz / 375 g Box
Yield: about 16–18 cookies
- 1 box red velvet cake mix (13.25 oz / 375 g)
- 1/3 cup neutral oil (80 ml)
- 2 large eggs
- 1 teaspoon vanilla extract
- 1/2 cup white chocolate chips (85 g), optional
Mix until the dough is thick and sticky enough to hold a scoop. If it slowly relaxes on the tray, refrigerate it for 15–20 minutes.
Portion about 35 g per cookie, leave the mounds unflattened, and bake at 350°F / 177°C for 9–11 minutes. Pull them when the edges are set and the centers still look soft, then leave them on the hot pan for 5 minutes.
Prefer the from-scratch version? Return to the main red velvet cookie recipe.
Make Ahead & Storage
The dough can be covered and refrigerated for up to 48 hours. Portioning it before a long chill makes later baking easier, and very cold portions may need a few minutes on the counter before they spread normally.
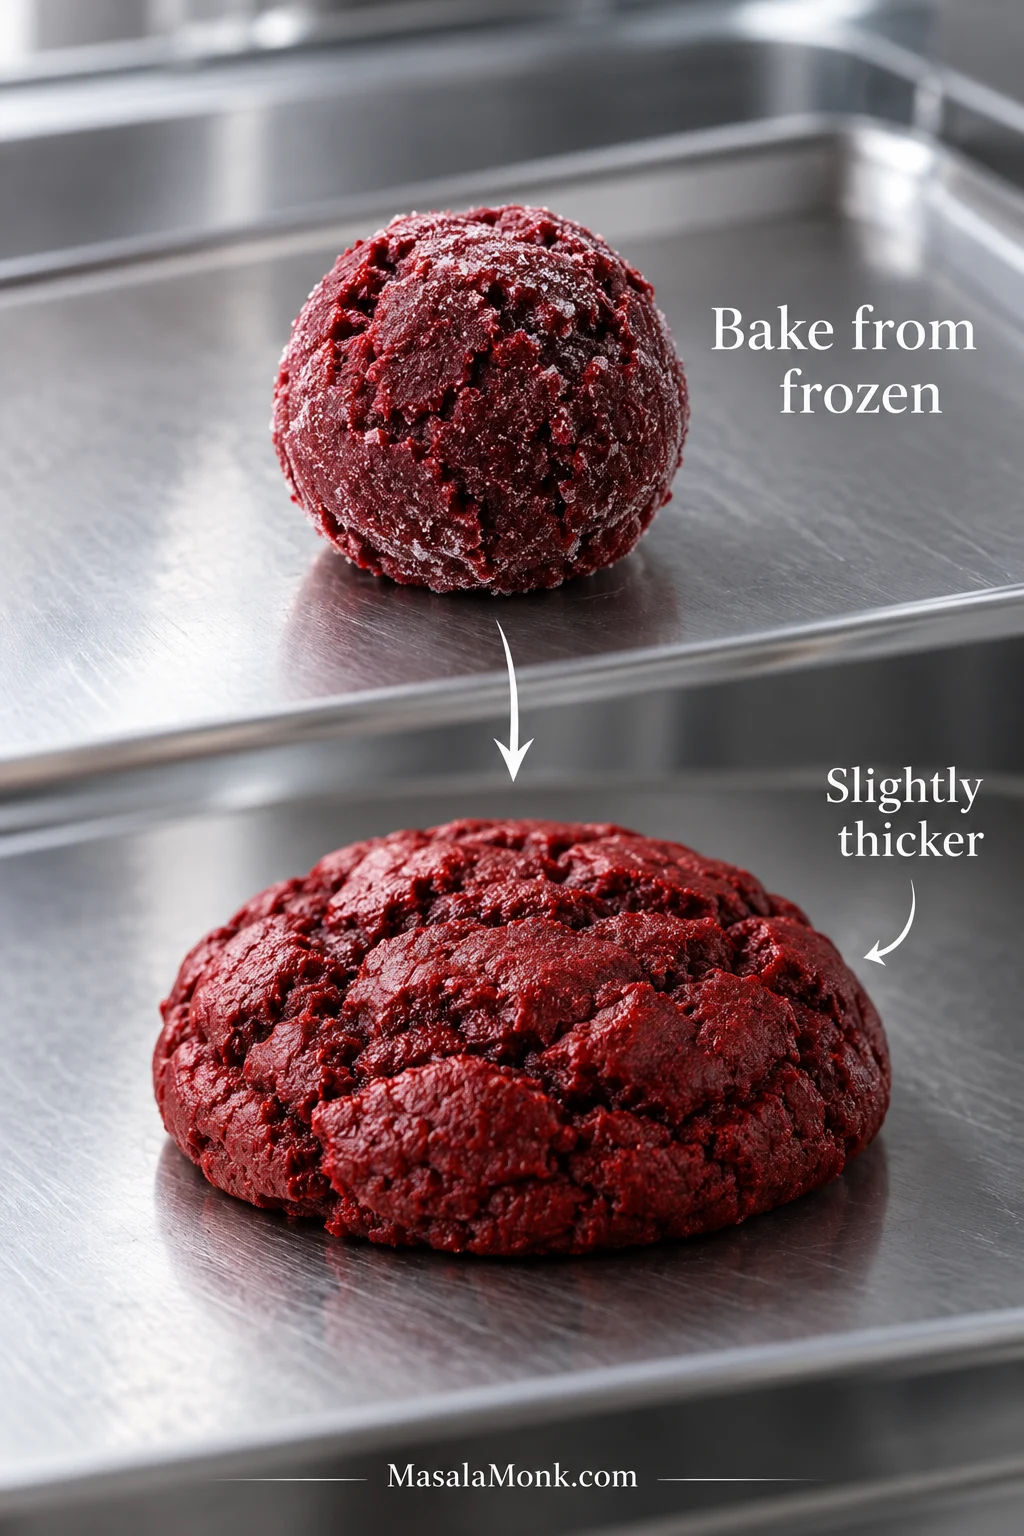
For longer storage, freeze portioned dough on a tray until firm, then transfer it to an airtight freezer container for up to 2 months.
Frozen portions can go straight into the oven for a slightly thicker cookie; keep the oven at the same temperature and add 1–2 minutes as needed. For spread closer to a freshly chilled batch, let them sit at room temperature for 10–15 minutes while the oven heats.
Cream-cheese-frosted cookies should be refrigerated.
Plain baked cookies keep in an airtight container at room temperature for 3–4 days and freeze well for up to 2 months.








