
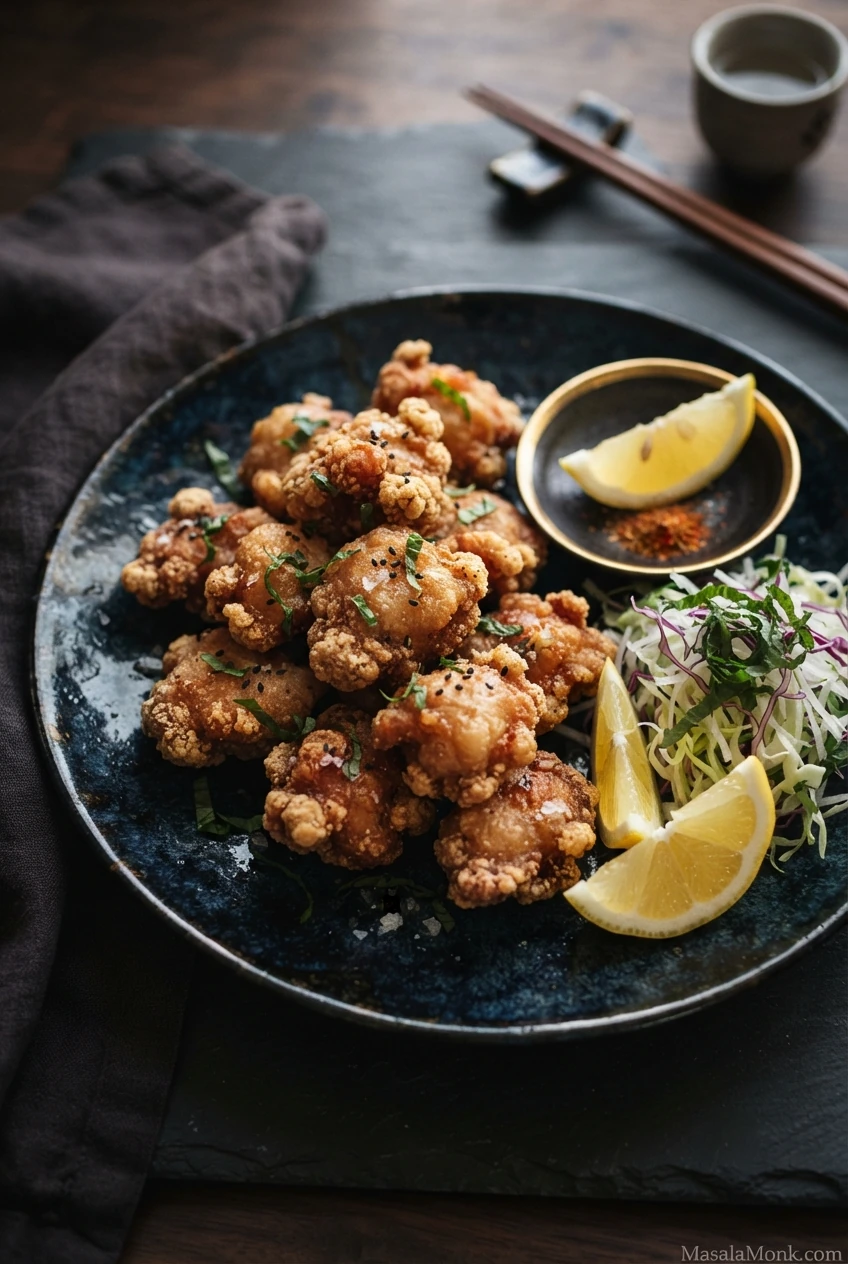
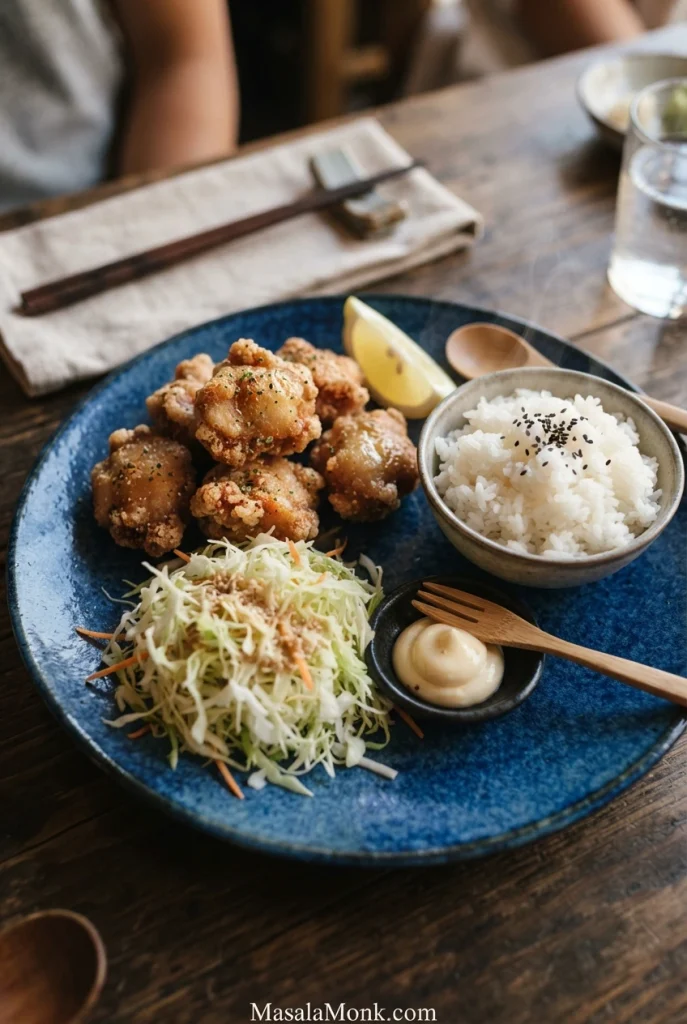
Chicken karaage doesn’t look particularly promising after its first fry. The potato-starch coating is pale, with rough edges that haven’t yet turned crisp. A short second fry changes that. Those uneven ridges firm up around small pieces of Japanese fried chicken seasoned with soy, ginger and garlic. Add hot rice and a wedge of lemon, and there’s very little else you need.
Drain the chicken until its surface is lightly tacky, coat it without piling on starch, and watch how the oil responds when each batch goes in. The temperatures matter, but knowing what to look for makes them much easier to use.
Table of Contents
- Chicken Karaage Recipe
- Full Cooking Method
- Karaage Cooking Guide
- Step-by-Step Karaage Photos
- What Makes Karaage Different
- Read the Crust: What Good Karaage Looks Like
- Potato Starch vs Cornstarch vs Flour
- Frying Temperature, Batch Size & Oil Recovery
- Why Double-Frying Karaage Works
- The Bite Test
- Karaage Troubleshooting
- Chicken Breast, No-Sake & Air-Fryer Karaage
- What to Serve With Karaage
- Make Ahead, Store & Reheat Karaage
Chicken Karaage Recipe
The sequence is simple: marinate, drain, coat, first-fry all the chicken, then finish the batches in hotter oil. Keep the cooking process moving from one frying stage into the next.
| Chicken | 600 g / about 1.3 lb |
| Serves | 4 with rice and sides |
| Prep | About 15 minutes |
| Marinate | 30–60 minutes |
| Cooking | About 25–35 minutes, depending on batches and oil recovery |
| Total time | About 1 hour 10 minutes to 1 hour 50 minutes |
| First fry | 160–165°C / 320–330°F |
| Second fry | 185–190°C / 365–375°F |
| Chicken doneness | At least 74°C / 165°F internally |
Ingredients
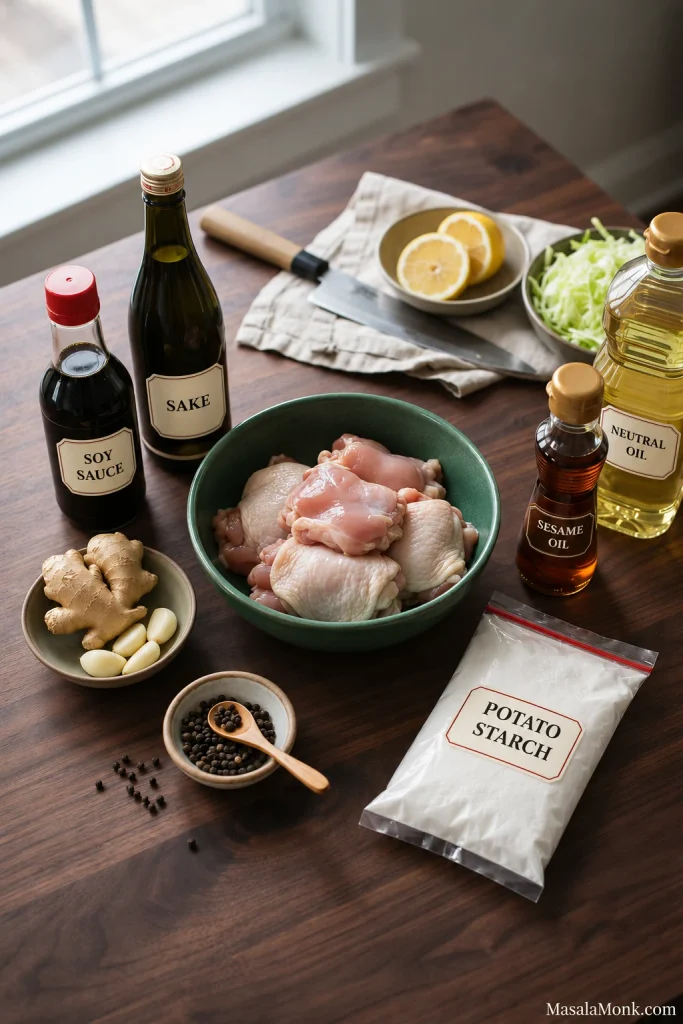
- 600 g (about 1.3 lb) boneless chicken thighs, skin-on or skinless
- 20 ml (1 tbsp + 1 tsp) regular Japanese soy sauce, preferably koikuchi-style
- 15 ml (1 tbsp) sake, or the same amount of water to make karaage without sake
- 10 g fresh ginger, finely grated
- 5 g garlic, finely grated
- 5 ml (1 tsp) toasted sesame oil
- ¼ tsp freshly ground black pepper
- 75 g (about ½ cup) potato starch for dredging, plus more if needed; you may not use all of it. Cornstarch is the easiest substitute.
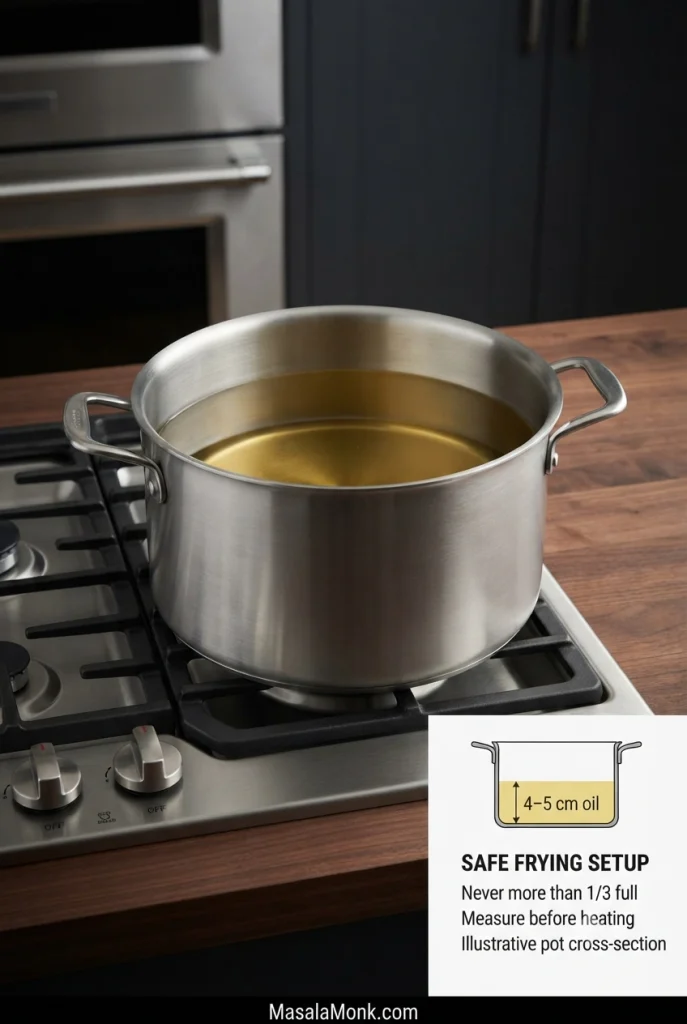
- Neutral high-heat oil such as rice bran, canola, sunflower or vegetable oil, enough for 4–5 cm (1½–2 inches) depth in a suitably deep pot
For serving, optional: lemon wedges, shredded cabbage, Japanese mayonnaise, shichimi togarashi and steamed rice.
Ingredient Notes and Substitutions
The soy, ginger and garlic give the chicken most of its flavour. Sake adds a subtle note without mirin’s sweetness. Regular Japanese soy sauce works best here; Chinese-style dark soy sauce or sweet soy sauce will change the seasoning.
Skin-on and skinless thighs both work. Skin-on pieces can develop especially crisp edges, while skinless thighs are easier to prepare. If using skin-on chicken, spread the skin over each piece so a large flap doesn’t fold underneath.
Gluten-free note: potato starch is naturally gluten-free, but regular soy sauce often contains wheat. Use certified gluten-free tamari or soy sauce, and check the sake or cooking wine and any packaged seasonings. For a coating swap, see the starch comparison.
Useful Equipment
- Kitchen scale: helps keep chicken pieces and batches reasonably even.
- Deep, heavy-bottomed pot or Dutch oven: choose one with enough room for the oil to bubble safely.
- Deep-fry or candy thermometer: useful for monitoring oil temperature and recovery.
- Instant-read meat thermometer: for checking chicken doneness.
- Spider or slotted spoon: for lowering and lifting the chicken.
- Wire racks and trays: let oil drain and steam escape. Keep first-fried chicken separate from fully cooked chicken, using a clean rack or thoroughly washed and sanitized equipment for finished pieces.
Deep-Frying Safety
Use a deep, stable pot and never fill it more than one-third full of oil. If the recommended oil depth would exceed that level, choose a deeper pot. Keep water away from hot oil, lower chicken carefully and never leave the pot unattended. If the oil starts smoking, switch off the heat and let it cool. Never pour water onto burning oil. Let used frying oil cool completely before moving, straining or disposing of it.
Discard used marinade and dredging starch that has touched raw chicken. Keep raw chicken separate from cooked food and use clean equipment for finished batches.
Method
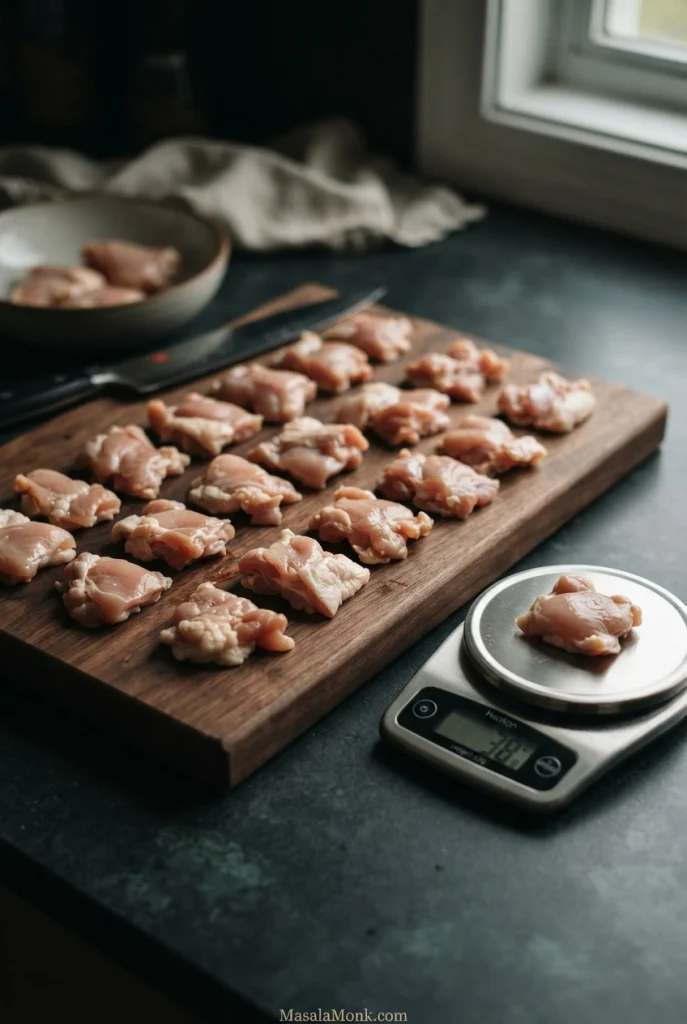
- Cut the chicken. Trim cartilage and sinew. Cut thighs into 35–45 g (1.2–1.6 oz) pieces about 4–5 cm across, keeping thickness even.
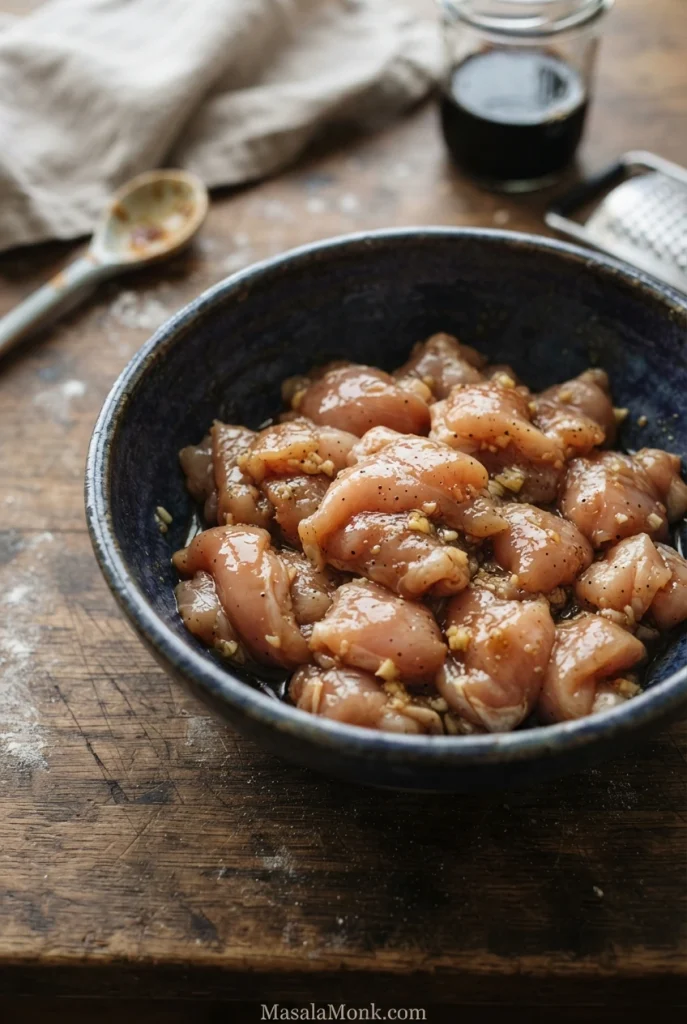
- Marinate. Mix soy sauce, sake, ginger, garlic, sesame oil and pepper. Coat chicken; cover and refrigerate 30–60 minutes.
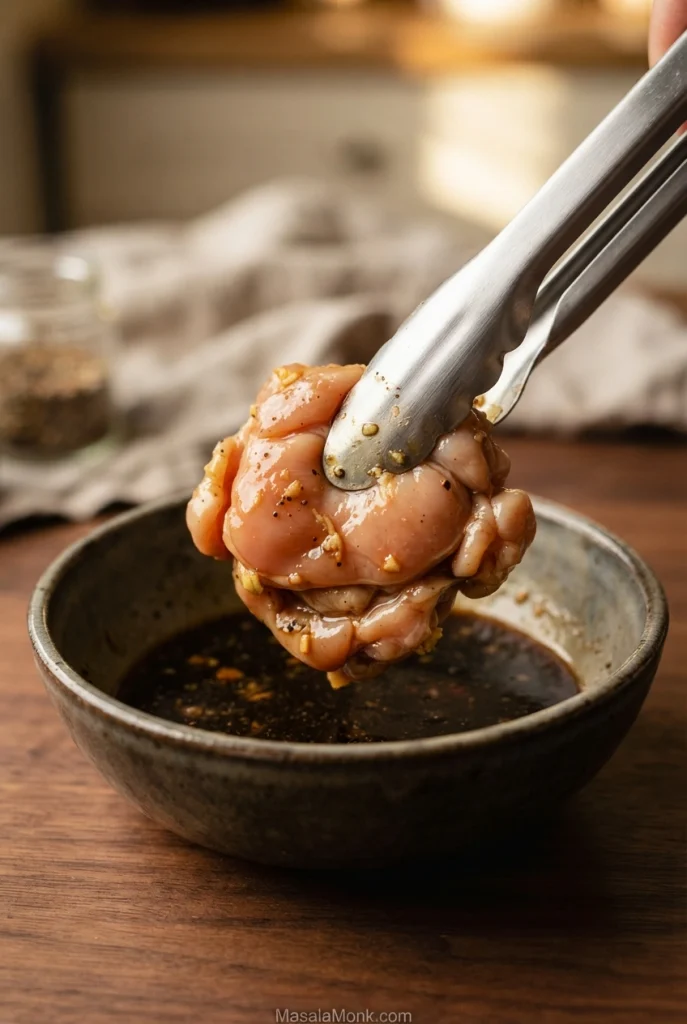
- Drain. Lift chicken from marinade; drain until lightly tacky, without drips or puddles.
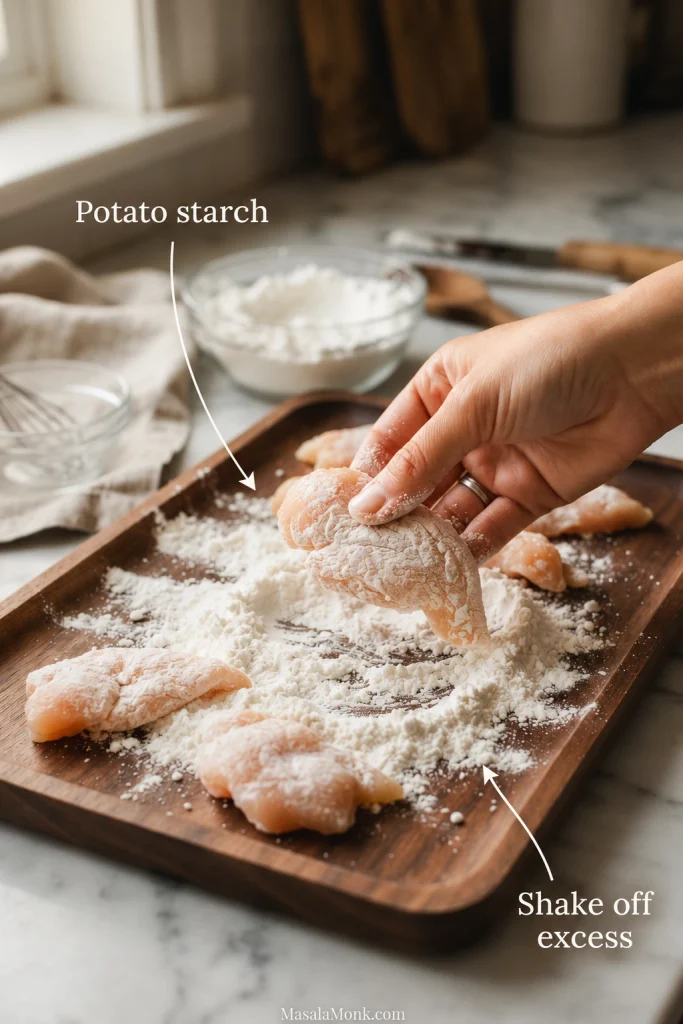
- Heat oil and coat. Heat 4–5 cm of oil in a deep pot to 160–165°C (320–330°F). Coat four pieces lightly with potato starch; shake off excess and let settle.
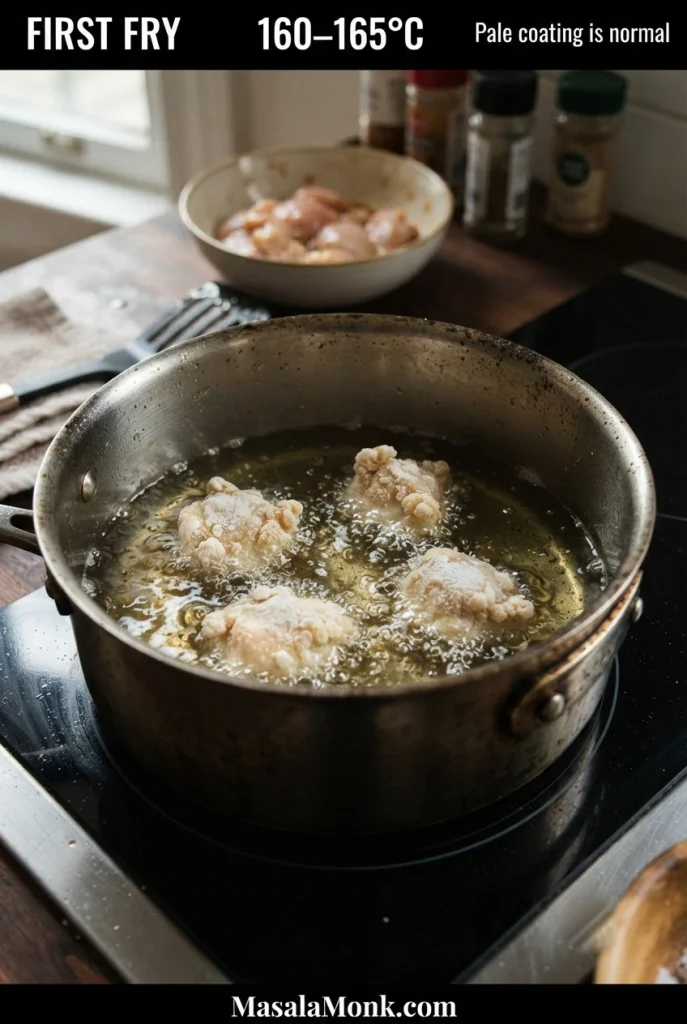
- First fry. Carefully lower four pieces (140–180 g). Fry 2½–3 minutes, mostly undisturbed, until pale coating sets. Turn exposed surfaces; move to the first-fry rack.
- Repeat first fry. Let oil return to 160–165°C between batches. Coat just before frying; reduce batch size if recovery slows. Keep remaining raw chicken refrigerated.
- Second-fry the first batch. Once all the chicken has been first-fried, raise the oil to 185–190°C (365–375°F). Starting with the earliest pieces, fry one batch for 45–75 seconds until crisp.
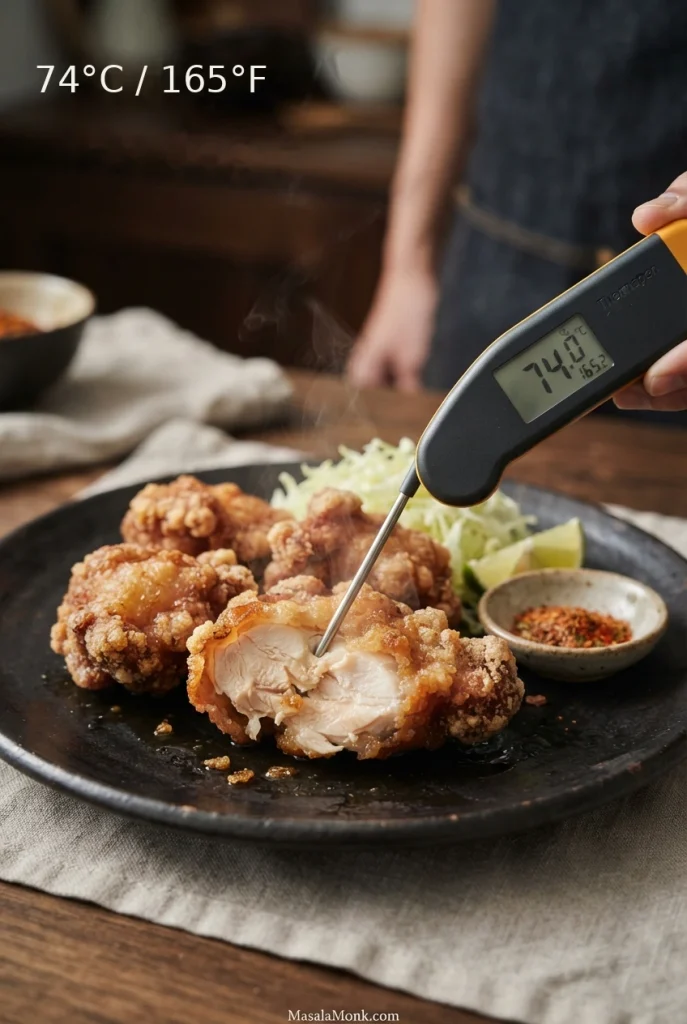
- Check that batch. Insert a thermometer into the thickest part of a finished piece; it must reach at least 74°C / 165°F. Continue cooking and recheck any piece that is not yet hot enough.
- Adjust the next batch if needed. If the coating darkens too quickly, correct the oil temperature; if the oil recovers slowly, use fewer pieces. Do not sacrifice safe doneness for colour.
- Finish and serve. Second-fry the remaining batches, restoring the finishing temperature between them. Check a thick piece from each batch for 74°C / 165°F, then move fully cooked chicken to a clean rack with space for steam to escape. Serve hot.
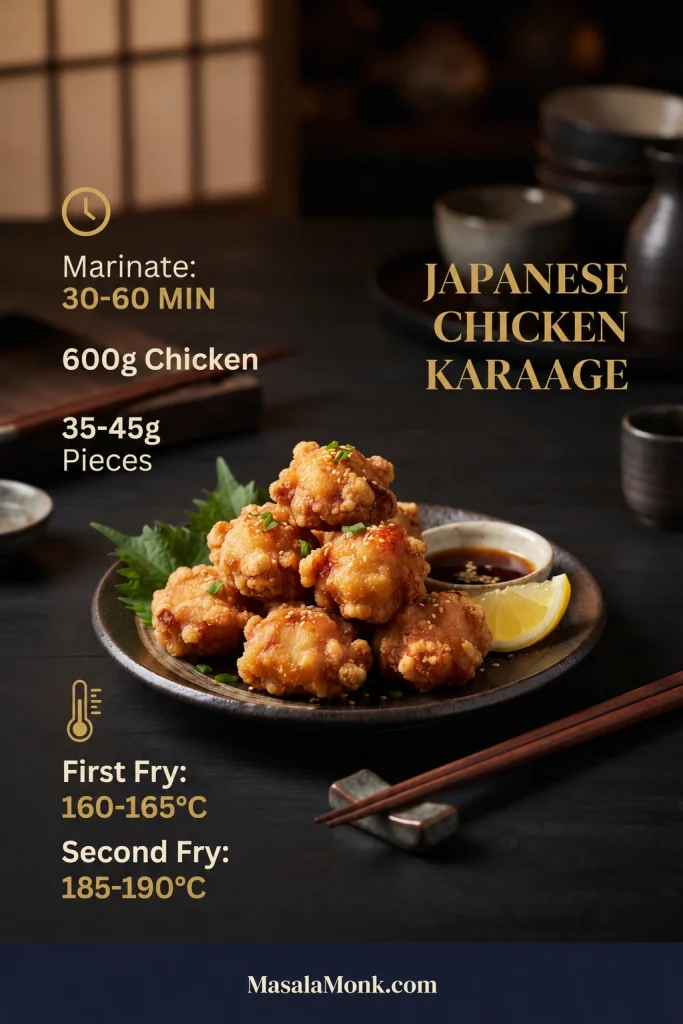
Karaage Cooking Guide at a Glance
This guide summarises the batch size and the two different oil-temperature stages. Use it to plan the sequence before heating the oil, then follow the full method for timing and doneness checks.
Step-by-Step Karaage Photos: From Raw Thighs to Finished Chicken
These photographs show the texture and handling cues that a short numbered recipe can’t always explain. Keep the method above handy for the actual sequence, timings and safety checks.
Cut the Chicken into Even Pieces
Boneless thighs make naturally irregular mouthfuls. The scale is handy for keeping portions reasonably close in size.
Coat the Thighs in Soy-Ginger Marinade
Coat the chicken lightly and evenly, then cover and refrigerate it for the full marinating period.
Drain Excess Marinade
This is the move from marinade to starch. Let excess liquid fall back into the bowl before dredging.
Apply a Light Potato-Starch Coating
Coat just a few pieces before each batch; long waits can make the starch turn pasty.
Watch the First Fry
The oil should be around 160–165°C (320–330°F) when the pieces go in. The first stage sets the coating.
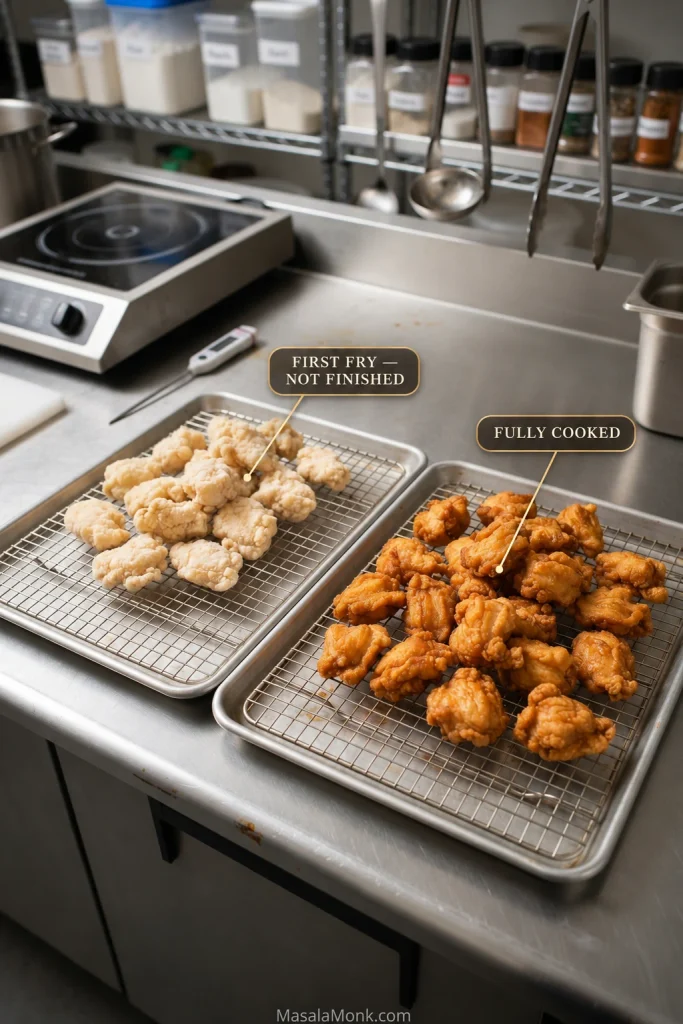
Keep First-Fried and Finished Batches Separate
Two separate racks keep the first-fried and completely cooked batches organised during one continuous session.
Check the Chicken Centre
Golden colour is not a temperature reading. The thickest part of a finished piece must reach at least 74°C / 165°F.
Using the photos while cooking? Return to the complete recipe and method · Back to top.
What Makes Karaage Different
Karaage is a Japanese frying technique in which ingredients such as chicken or fish are usually seasoned, often lightly coated with flour or starch, and deep-fried. Chicken karaage is the version most widely associated with the name.
Chicken katsu usually starts with a larger cutlet coated in flour, egg and panko. Karaage is generally made with smaller pieces, lightly coated in flour or starch instead of breadcrumbs. Chicken katsu curry shows that difference clearly.
There’s no single universal karaage formula. Japanese cooks use different coatings and frying methods; Kikkoman’s Washoku karaage, for example, uses flour and a single fry. This recipe uses potato starch and two stages to produce a lighter, irregular crust.
Read the Crust: What Good Karaage Looks Like
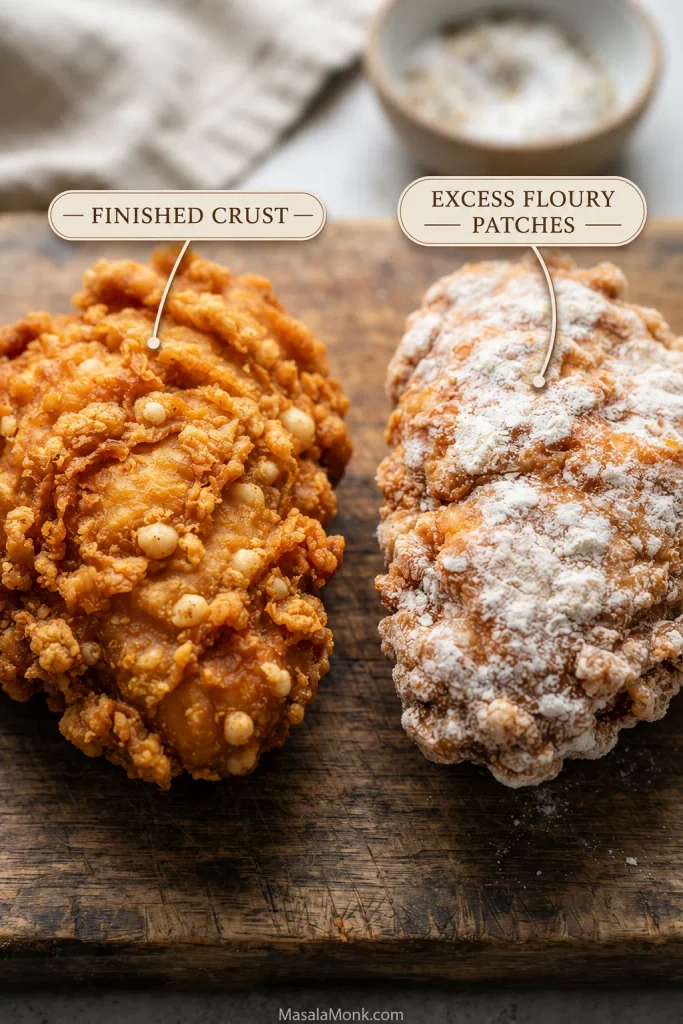
Before frying, the starch should follow the shape of the lightly tacky chicken. As it absorbs a little surface moisture, some areas begin to look damp while others still have a light dry-looking dusting. That’s fine. Shake off thick piles of starch, which can remain powdery after frying.
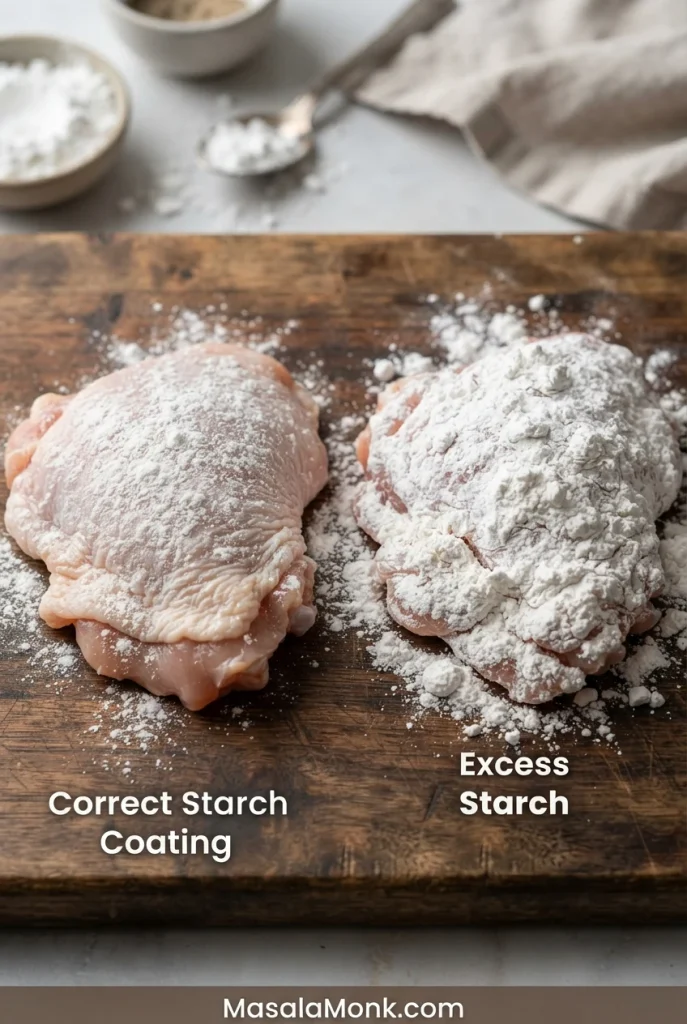
Chicken dripping with marinade can turn the starch pasty. Chicken that’s too dry can leave loose powder sitting on the surface. You’re looking for a thin coating that has begun to settle, without thick wet or dry patches.
After frying, potato starch often produces a mottled surface, with golden areas broken up by small, pale ridges. Those lighter ridges are normal if they feel crisp. Thick patches that remain powdery and taste floury are not the finish we’re after.
This version aims for a close-fitting coating that gives way quickly to the chicken underneath. For a thicker flour-and-cornstarch crust, crispy fried chicken takes a different approach.
Pale Ridges or Floury Patches?
These two surface patterns can look alike at first glance, yet they do not mean the same thing. Compare the small attached pale ridges with the broader deposits that can remain dusty after frying.
Potato Starch vs Cornstarch vs Flour for Karaage
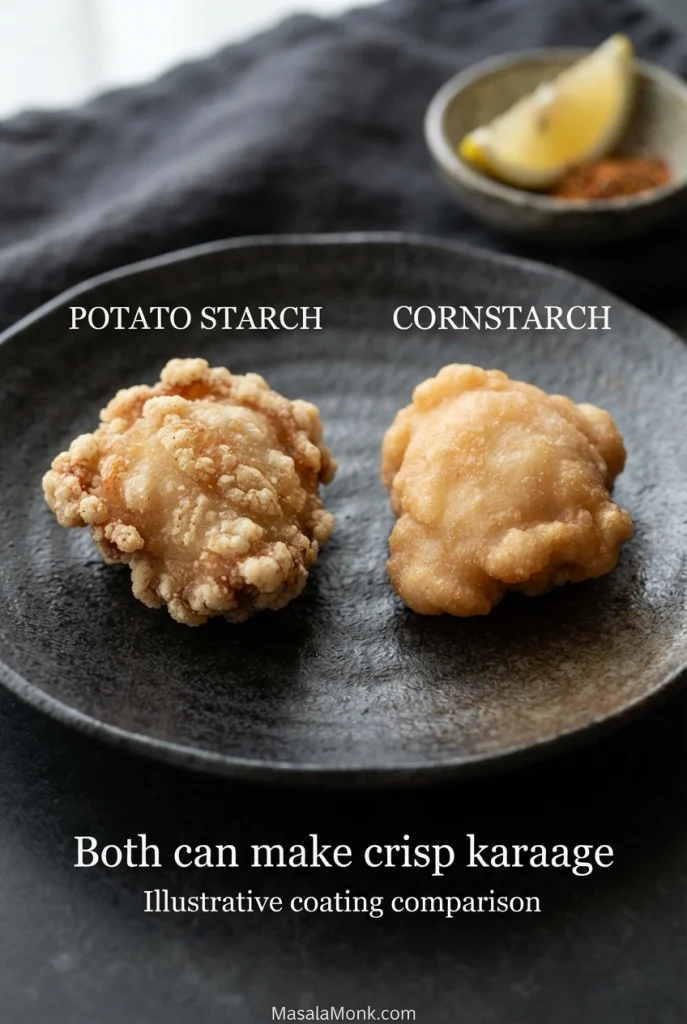
Cornstarch is the easiest potato-starch substitute. It makes a fine, crisp coating, often less irregular than potato starch.
| Coating | What to expect |
|---|---|
| Potato starch | Light, craggy and irregular, often with pale mottling. Used in this recipe. |
| Cornstarch | Fine and crisp, with a somewhat more uniform surface. The simplest substitute. |
| Flour + starch | A slightly thicker, more substantial coating. |
| Rice flour | Can produce a light, crisp finish, with different browning and texture. |
| Tapioca starch | May become crisp, chewy or gummy depending on coating thickness and moisture. Less predictable as a direct swap. |
Watch the name on the packet. Potato starch is the fine white powder you want. In the US, potato flour usually means a different product made from whole potatoes. In some other markets, including the UK, potato flour may be another name for potato starch. Check the product description instead of relying on the name alone.
In India, the UK and several other countries, the fine white product sold as cornflour is usually what American recipes call cornstarch. It is different from yellow cornmeal. Once you have the right powder, check the light-coating photo to see how much should cling.
For a glazed variation, see Korean fried chicken.
Read the Oil: Frying Temperature, Batch Size & Recovery
The thermometer reading before the chicken goes in only tells you where the oil started.
After adding chicken, look for steady bubbling. If it nearly stops while oil temperature keeps falling, that batch may overwhelm your pot or burner.
Suppose 165°C oil falls toward 135°C after four pieces. Rather than turning the burner to maximum, try three next time. Compare your batch with the pale first-fry example.
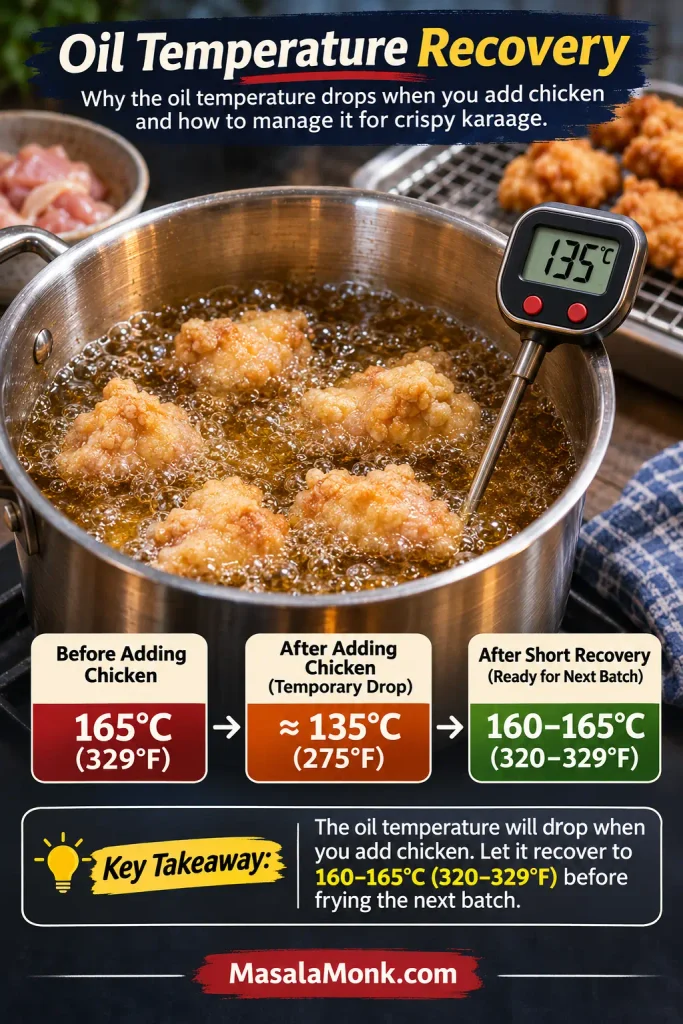
Colour adds another clue: browning in the first minute can mean excessive initial heat. If later batches darken faster, the burner may be overshooting during recovery. Adjust heat gradually.
No frying thermometer? A completely dry wooden or bamboo chopstick gives a rough indication. Gentle, steady bubbles around its tip suggest useful frying heat. Almost no activity suggests the oil is cool; violent bubbling or smoking means it is too hot. This test cannot reliably distinguish the two frying temperatures, so a thermometer is strongly preferable.
A 25 g piece and a 55 g piece may both look bite-size, but they won’t cook at the same speed. Keeping most pieces around 35–45 g makes the method easier to repeat.
Why Double-Frying Karaage Works
Double-frying separates two jobs: the first fry begins cooking the chicken and sets the coating; the hotter second fry drives off more surface moisture and crisps the crust.
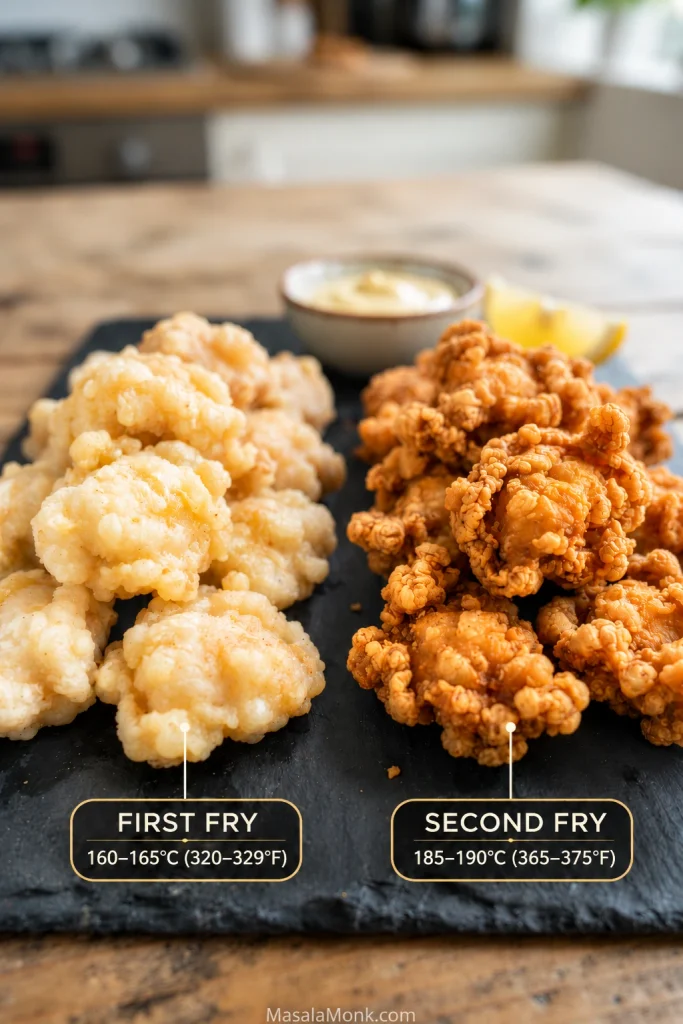
While the chicken rests between stages, heat continues moving inward and steam escapes from the surface. By the time the pieces return to hotter oil, the coating is already set, so the final fry can be short. To keep the stages organised, see the separate-rack setup.
The Bite Test
A thermometer tells you the chicken is safely cooked. The first bite tells you what kind of karaage you made.
The soy gives the meat savouriness, while the ginger and garlic bring their own aromatic notes. Ideally, those flavours come through without the chicken tasting overly salty. The coating adds a light crunch, and the thigh meat should remain tender and moist.
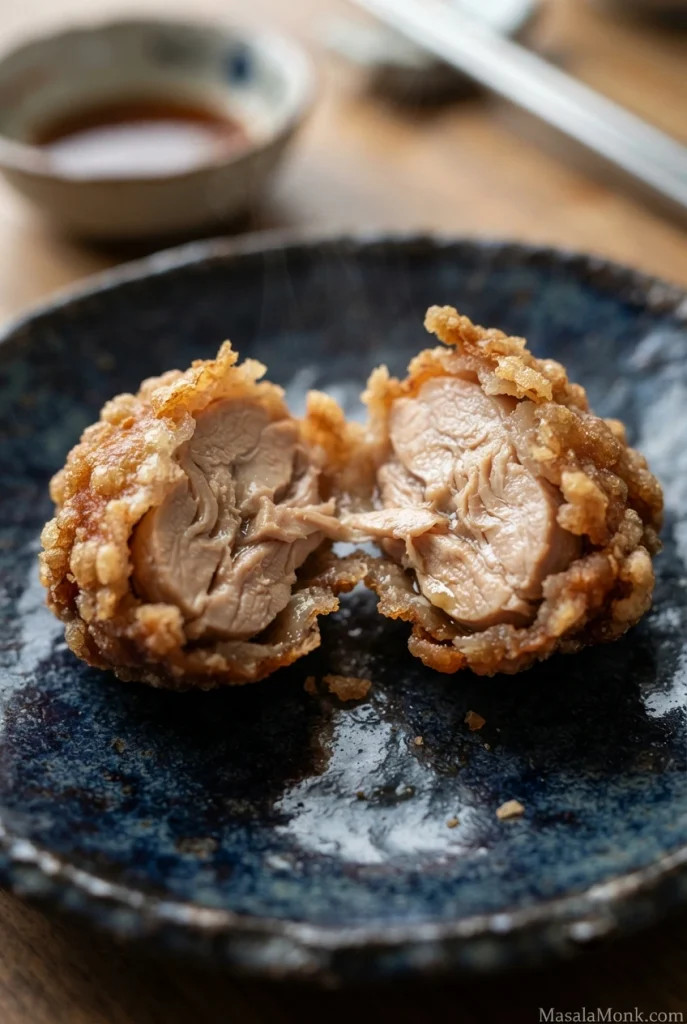
A squeeze of lemon changes the balance, cutting through some of the richness. Spicy mayo is good alongside it too, especially with rice, but try a piece on its own first. You’ll get a much clearer sense of how the seasoning and frying came together.
Karaage Troubleshooting: What to Fix and What to Leave Alone
Start with what you can actually see. The three examples below illustrate common outcomes, not proof of a single cause; compare them with the quick fixes that follow.
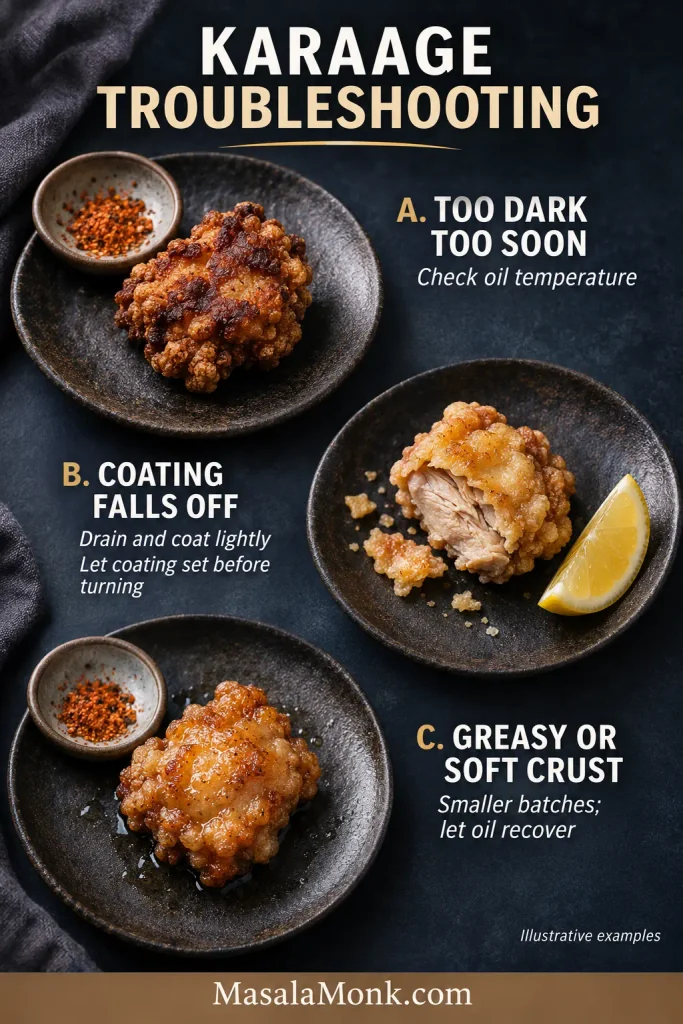
Quick Fixes by Symptom
| What you notice | Likely cause and useful fix |
|---|---|
| Pale after the first fry | Normal. The hotter second fry adds colour and crunch; do not overextend the first stage. |
| Soggy immediately | The chicken may be dripping or the oil too cool. Drain better, use less starch and reduce batch size. |
| Greasy coating | Cool oil or poor draining can leave oily crust. Use smaller batches and a raised rack. |
| Dark outside, undercooked centre | Oil may be too hot or pieces too thick. Adjust both; continue cooking the centre to 74°C / 165°F. |
| Coating falls off | Wet chicken or early turning can loosen starch. Drain, settle the coating briefly and handle gently. |
| Large floury white patches | Loose dry starch remained on the chicken. Shake off heavy deposits and let the thin coating settle. |
| Small pale ridges | Normal when attached and crisp. Pale potato-starch mottling alone is not a fault. |
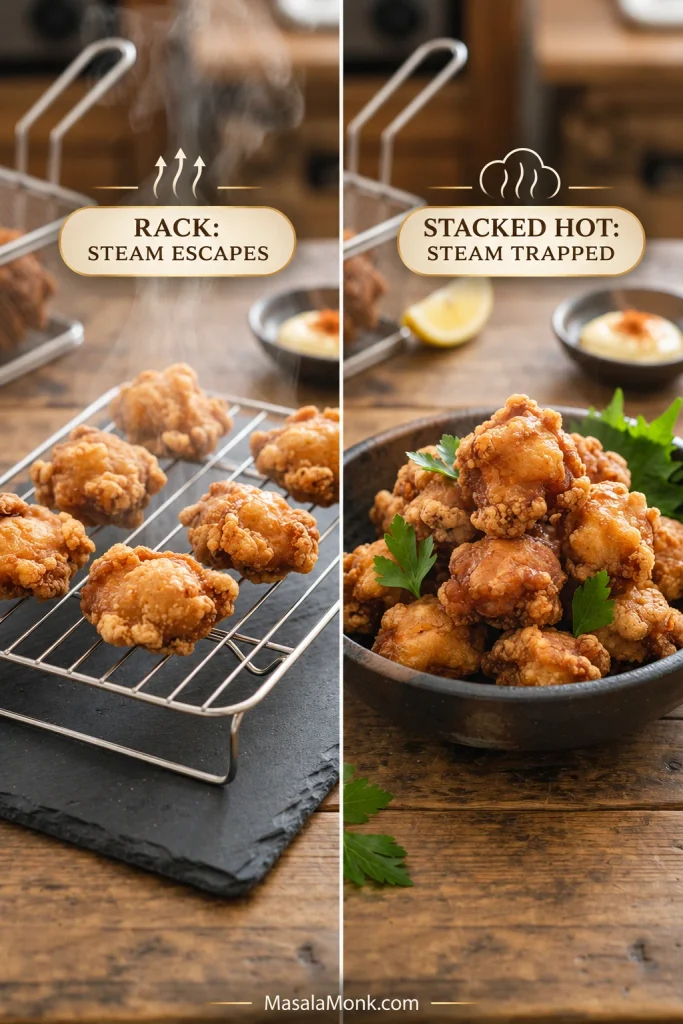
| Crisp at first, then soft | Steam trapped by stacking or covering softens crust. Keep hot pieces separated on a rack. |
| Crust too thick | Too much dredging starch. Use a finer, lighter coating and shake off loose excess. |
| Chicken dry | Uneven or small pieces may overcook. Trim evenly and check the centre temperature earlier. |
| Too salty | Serve with plain rice and cabbage. Next time, reduce soy sauce slightly or marinate less. |
For a closer diagnosis, revisit the crust cues or oil recovery; then return to the recipe.
Keep the Karaage Crisp on a Raised Rack
Look at the space surrounding the hot chicken, especially underneath it. A raised rack offers a route for steam to escape; tightly stacked pieces create more contact points where moisture can linger.
Chicken Breast, No-Sake & Air-Fryer Karaage
Using Chicken Breast
Chicken breast works, but it dries out more readily if overcooked. Cut it into substantial, fairly even pieces and start checking doneness sooner than with thighs. Once the centre reaches 74°C / 165°F and the coating is crisp, remove it from the oil.
Making Karaage Without Sake
To omit sake, replace the 15 ml (1 tbsp) with the same amount of water. The soy, ginger and garlic still carry most of the seasoning.
Dry sherry or a suitable rice cooking wine can work when alcohol isn’t the concern. Mirin is sweeter than sake, so a direct swap changes the marinade’s balance. If you need to avoid alcohol entirely, check your soy sauce and other seasonings too: naturally brewed soy sauce can contain fermentation-derived alcohol, so omitting sake alone doesn’t guarantee an alcohol-free dish.
Air-Fryer Karaage: A Practical Adaptation
An air fryer produces a different crust because oil doesn’t surround the chicken. Dry starch patches and sticking are the main risks. Use the same marinade and coating ingredients, but change the cooking method.
Marinate and drain the chicken as above, then coat it lightly in potato starch. Preheat the air fryer to about 190°C / 375°F. Lightly oil the basket and spray or brush the chicken with enough neutral oil to moisten visible powdery areas. Arrange the pieces in a single layer with room for air to circulate.
Cook for an estimated 12–18 minutes, turning approximately halfway through, once the coating is firm enough to move without tearing. Lightly oil any remaining dry patches after turning. Begin checking doneness around 10–12 minutes and continue as needed until the thickest piece reaches at least 74°C / 165°F.
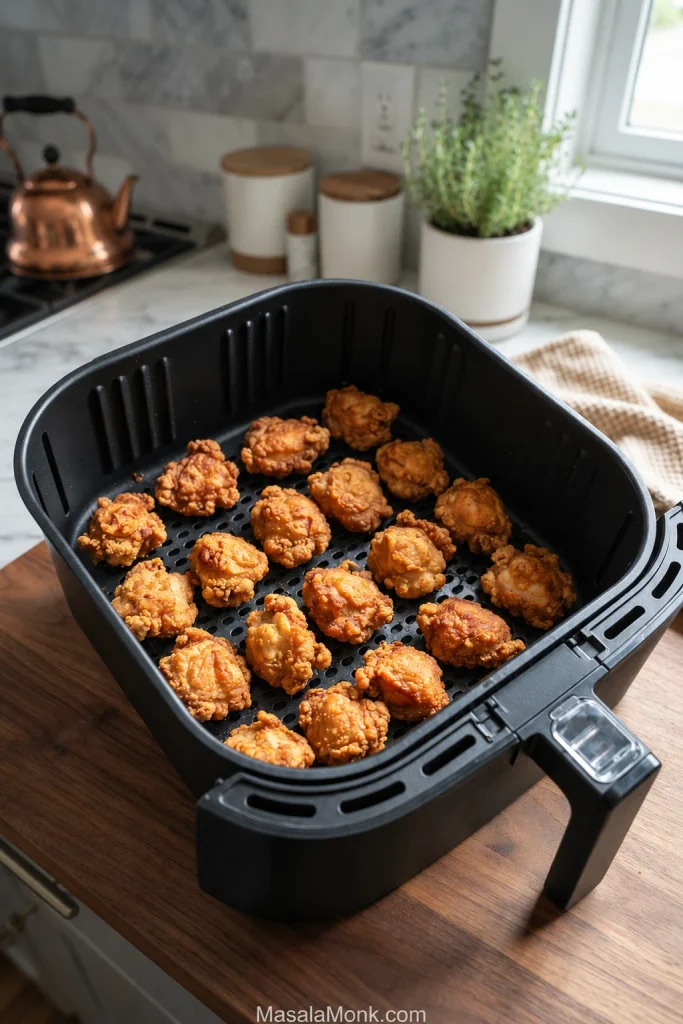
Adaptation note: these are starting estimates, not timings kitchen-tested for this exact formulation. Air fryers differ in airflow, heating and browning, so use the thermometer rather than the clock as the final check.
Keep the basket openings clear and avoid stacking the chicken. Air fryer chicken tenders also covers spacing, oil coverage and handling a delicate coating.
What to Serve With Chicken Karaage
Hot karaage, shredded cabbage, lemon wedges and steamed rice make a good plate without much extra work. A cold cucumber salad is another welcome contrast, especially with a little rice vinegar in the dressing.
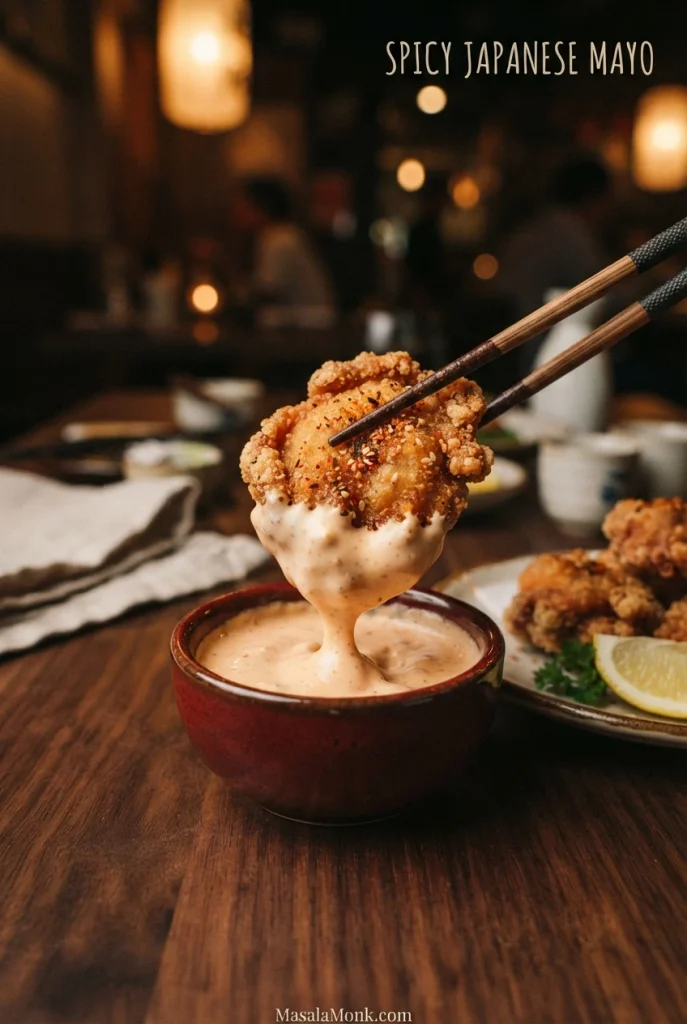
Quick Spicy Japanese-Style Mayo
- 60 g (¼ cup) Japanese mayonnaise
- 5–10 g (1–2 tsp) sriracha or another smooth chilli sauce
- 5 ml (1 tsp) fresh lemon juice
- Pinch of shichimi togarashi, optional
Stir everything together and serve it in a small bowl for dipping. Keeping the sauce on the side helps the last pieces stay crisp.
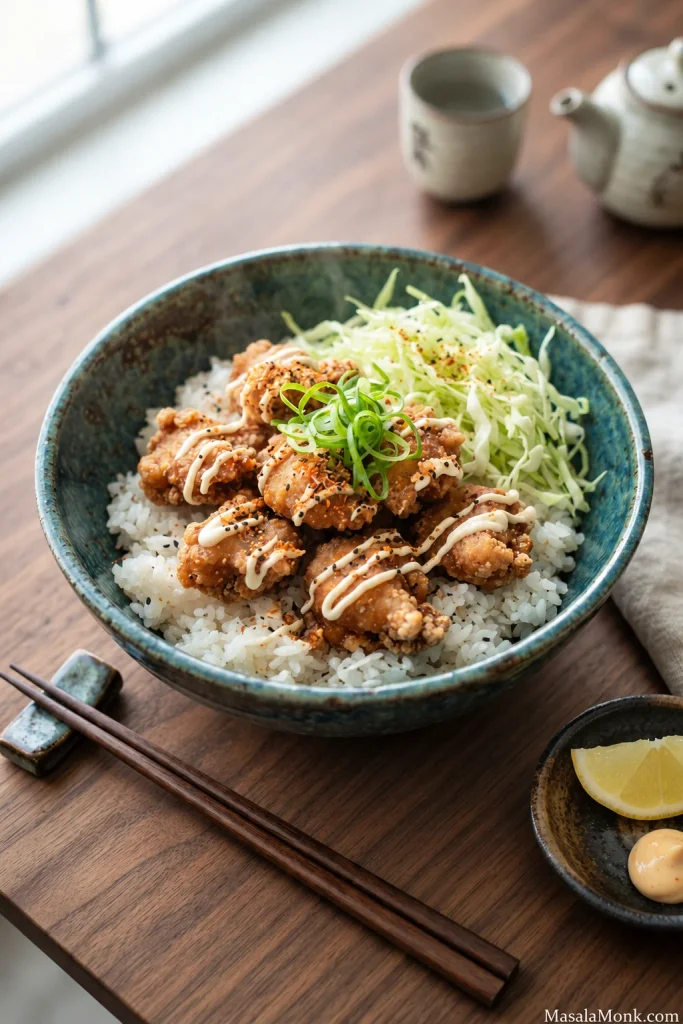
Turn It Into Karaage Don
Put hot steamed rice in a bowl, add shredded cabbage and arrange the karaage on top. Finish with a little Japanese mayo, scallions, sesame seeds or pickles. If you’re preparing the rice from scratch, the rice-cooking guide covers both stovetop and rice-cooker methods.
A little sauce running into the rice is lovely. Soaking the chicken itself changes the crust very quickly.
For a lunch that’s easier to pack, homemade onigiri works well with karaage and a few pickles. If you’re packing it for later, chill the cooked chicken promptly and keep the lunch cold until it’s time to eat.
Make Ahead, Store & Reheat Karaage Without Losing the Crust
What You Can Prepare Ahead
Cut the chicken and mix the marinade earlier in the day, keeping them refrigerated separately. Combine them for the recommended 30–60-minute marination period before frying.
Coat the chicken shortly before frying. Leaving starch-coated pieces in the refrigerator for hours can make the coating overly wet and pasty.
Don’t partially fry chicken, refrigerate it and finish the second fry hours later. Keep the two frying stages within one continuous cooking session. For a longer make-ahead window, cook the chicken completely, refrigerate it safely and reheat it before serving.
Holding and Storing Cooked Karaage
Keep finished pieces on a rack to let steam escape. If hot-holding cooked chicken, maintain it at 60°C / 140°F or above; a low oven can help for a short serving window, though fresh karaage has the best crust.
Refrigerate cooked karaage within 2 hours of cooking, or within 1 hour if the surrounding temperature is above 32°C / 90°F. Use shallow containers so the chicken cools quickly. Refrigerated cooked chicken keeps for 3–4 days.
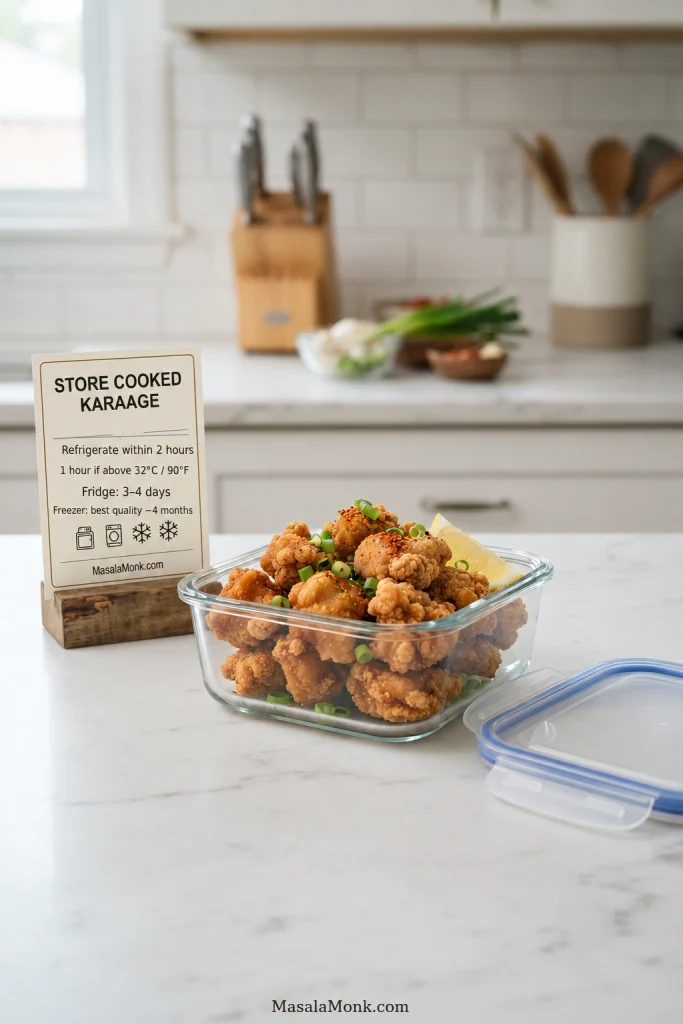
For freezing, cool the fully cooked pieces safely, freeze them in a single layer until firm, then transfer them to a freezer-safe container or bag. For best quality, use within about 4 months.
How to Reheat Karaage
These are starting points for refrigerated, fully cooked karaage. Larger pieces and different appliances may need more time. Frozen chicken will take longer; thawing safely in the refrigerator first makes reheating easier to judge.
- Oven: preheat to about 180°C / 350°F. Arrange pieces on a rack over a tray and begin checking after 7–8 minutes.
- Air fryer: preheat to about 180°C / 350°F. Arrange in a single layer and begin checking after 4–6 minutes.
- Microwave: convenient for quick reheating, but the coating will soften. Rearrange the pieces during heating for more even results.
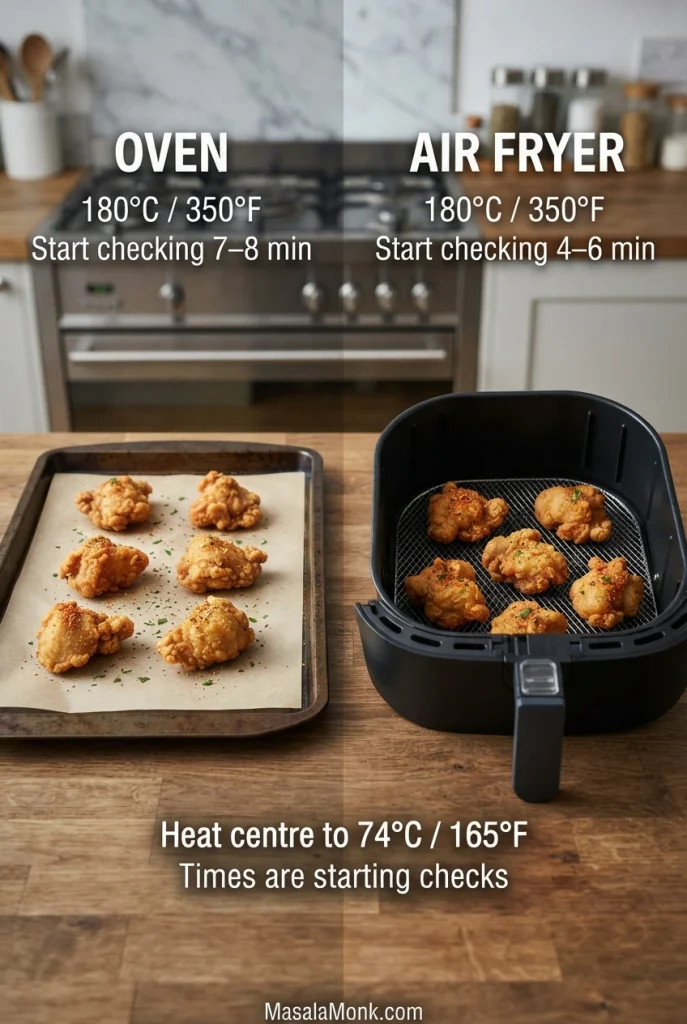
Continue reheating as needed until the centre reaches at least 74°C / 165°F. The suggested times are checkpoints, not substitutes for checking doneness.
Cook again or check a quantity? Back to the chicken karaage recipe · Back to top.
Made it? How did your karaage turn out? Did you get the crunch you wanted, or did you adjust anything along the way? Share what worked, what surprised you or what you’d change next time in the comments.








