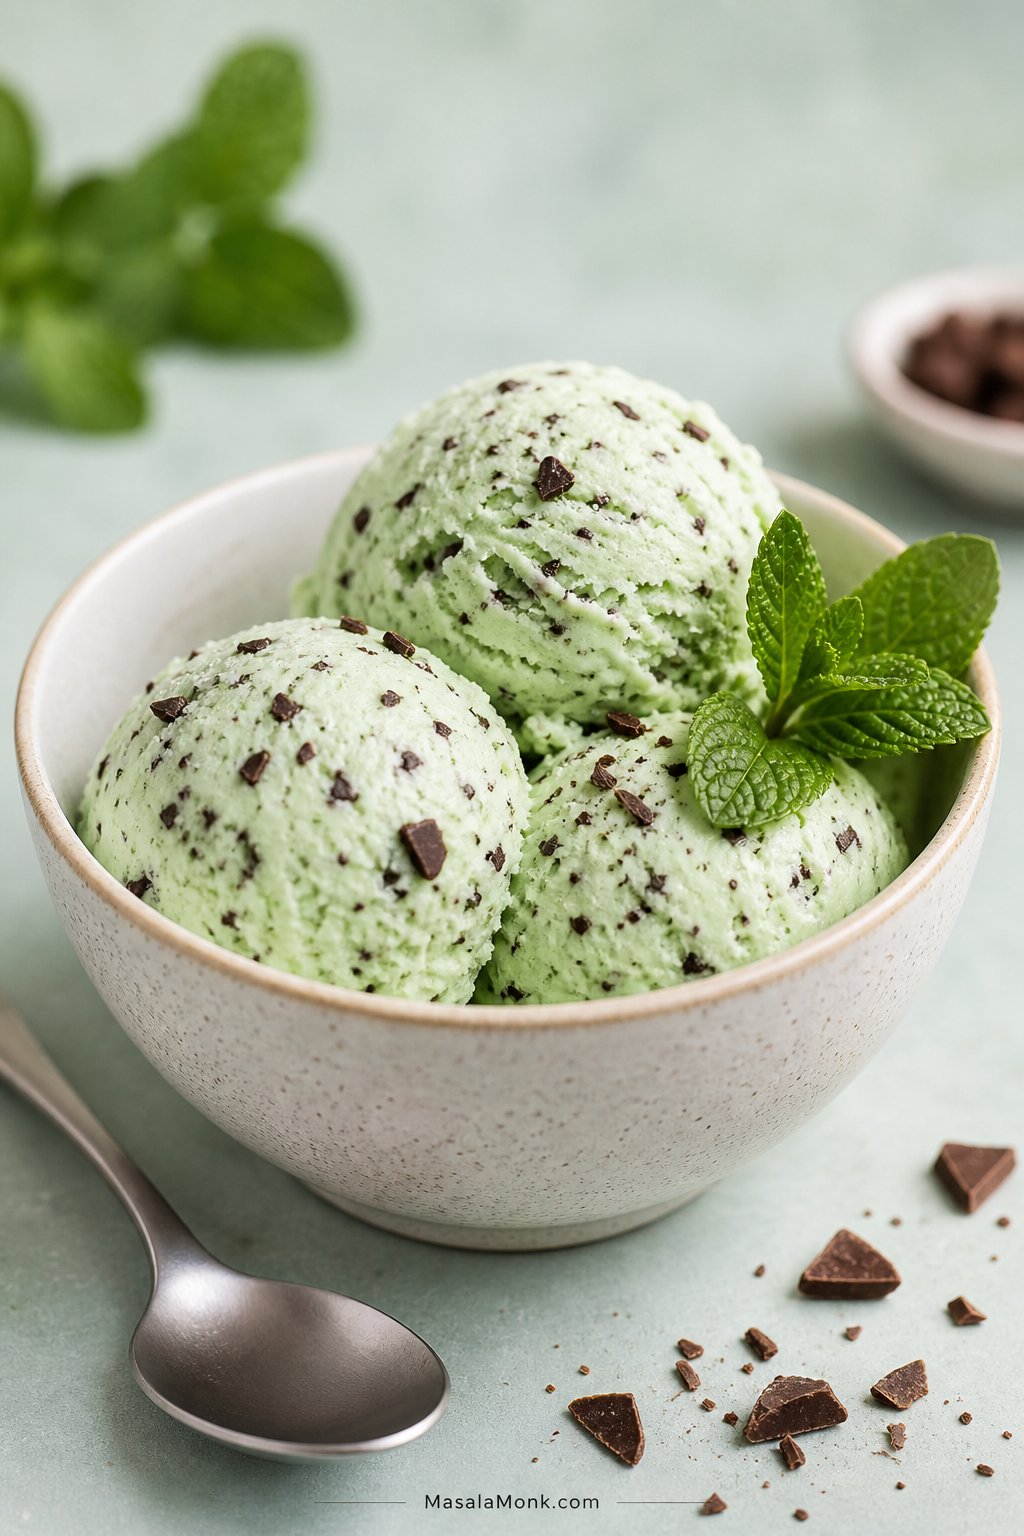
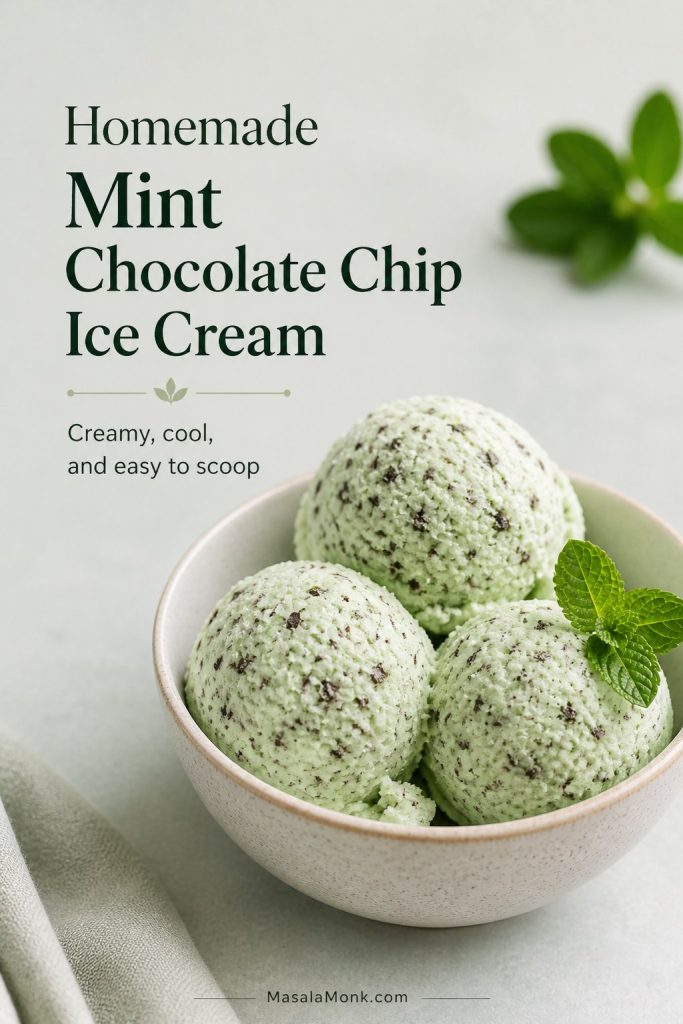
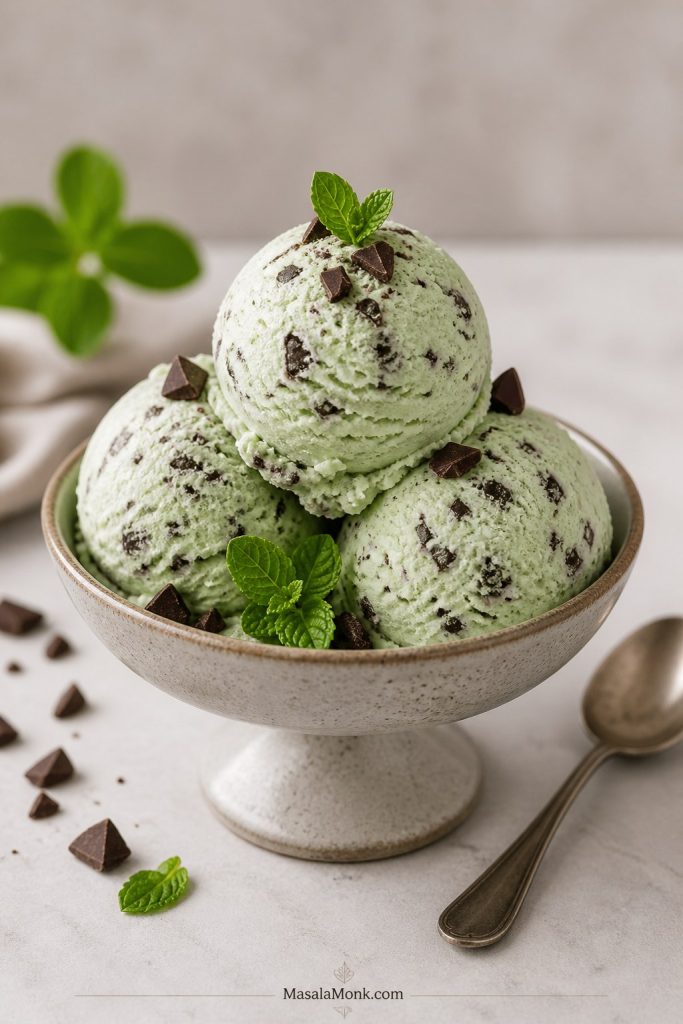
This mint chocolate chip ice cream recipe makes cool, creamy homemade mint chip ice cream with a clean mint flavor, little crisp bits of chocolate, and a smooth scoopable texture. It tastes bright and refreshing without turning sharp or toothpaste-like, and the chocolate stays small enough to melt nicely as you eat.
The main method stays simple: whisk, chill, churn, add chocolate, and freeze. You do not need to cook a custard for the basic version, and you do not need any unusual ingredients. No ice cream maker? There is a no-churn version below. Prefer a softer, more natural mint flavor? The fresh mint variation shows you how to steep real mint leaves into the base.
The small details make the biggest difference here. A little restraint with mint extract keeps the flavor clean, chopped chocolate gives a better bite than large frozen chips, and a fully chilled base helps the ice cream freeze creamy instead of icy.
Quick Answer: How to Make Mint Chocolate Chip Ice Cream
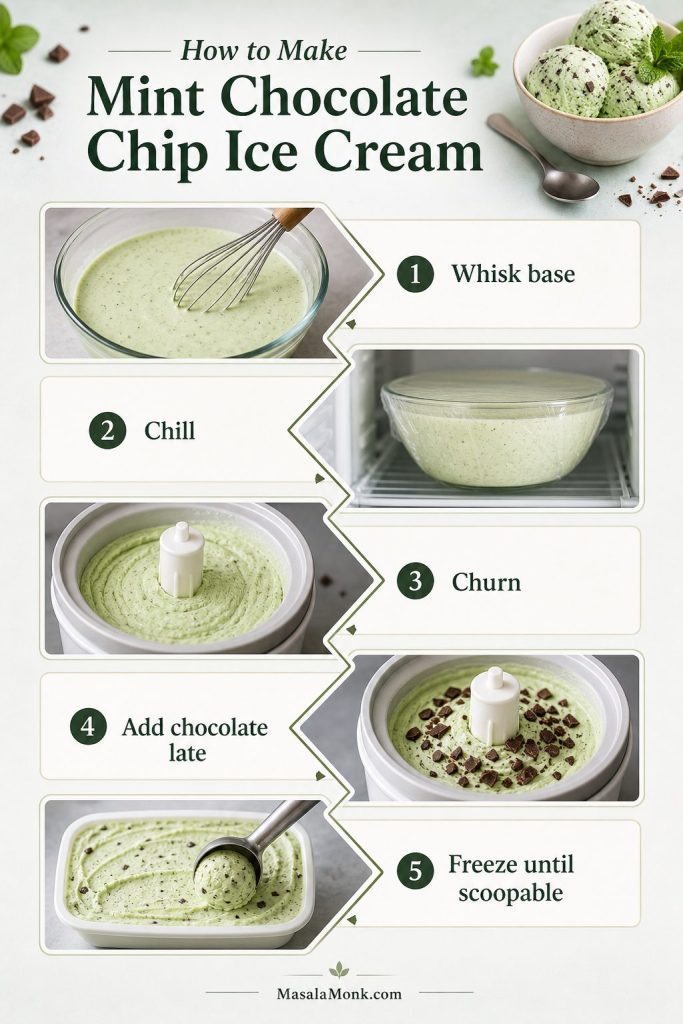
To make mint chocolate chip ice cream, whisk together whole milk, sugar, salt, vanilla, mint extract, and heavy cream to make a cold ice cream base. Chill the base for at least 2 to 4 hours, then churn it in an ice cream maker for about 20 to 25 minutes. Add chopped chocolate during the last 5 minutes of churning, transfer the ice cream to a freezer container, and freeze it for 2 to 4 hours until scoopable.
For the best first batch, start with mint extract or peppermint extract and chopped semisweet or dark chocolate. A more natural herbal flavor comes from steeping fresh mint leaves in the dairy first. Without an ice cream maker, the easiest route is the no-churn version with whipped cream and sweetened condensed milk.
Make this version first: Use the main eggless ice cream maker recipe with mint extract and chopped semisweet or dark chocolate. It gives you the easiest balance of creamy texture, classic mint flavor, and reliable results.
Once the ice cream has set, the scoops should hold their shape while still looking creamy, with fine chocolate flecks spread evenly through the mint base.
Once you know the basic method, the variations are easy to choose. The no-churn version is best when you do not have a machine, fresh mint gives a softer herbal flavor, and the custard upgrade is there when you want the richest texture.
Why This Mint Chocolate Chip Ice Cream Recipe Works
This is the kind of mint chip ice cream that feels easy enough for a weekend dessert but still gets the important details right: a cold base, balanced mint, enough creaminess, and chocolate pieces that do not freeze into hard chunks.
The goal is not to make the most complicated mint ice cream. It is to make the version most people will actually repeat: creamy, minty, easy to churn, and easy to scoop.
The best mint chocolate chip ice cream is not the strongest mint version or the greenest version; it is the one with balanced mint, creamy texture, and chocolate pieces that are easy to bite once frozen.
The main method is easy. The recipe uses an eggless ice cream maker base, so there is no cooking, tempering, or straining required.
The texture stays creamy. Heavy cream, whole milk, sugar, and proper chilling help the ice cream churn smoothly.
The mint flavor is controlled. You start with a modest amount of extract, then adjust only if you want it stronger.
The chocolate bite is better. Chopped chocolate gives smaller, more pleasant pieces than large frozen chips.
The color is flexible. Keep the ice cream naturally pale or add a few drops of green coloring for the classic look.
There are backup methods. You get no-churn, fresh mint, and custard-style upgrade options without changing the main recipe.
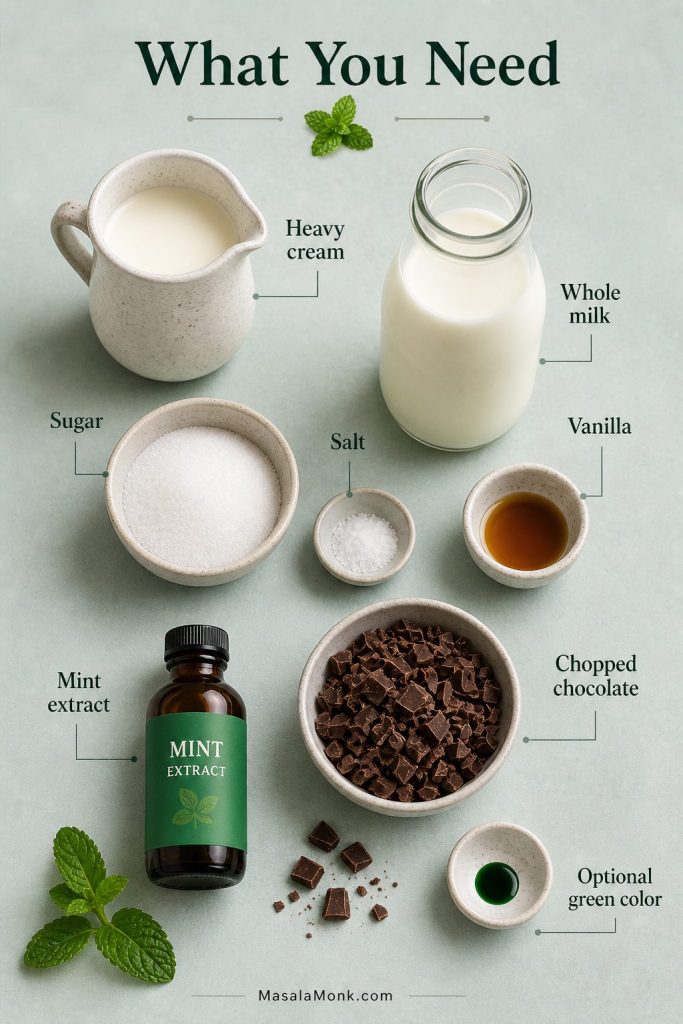
Ingredients for Mint Chocolate Chip Ice Cream
Because the ingredient list is short, each choice matters. Cream and whole milk create the body. Sugar sweetens the base and keeps it scoopable. Mint gives the flavor, but it needs restraint. Chocolate adds the familiar chip texture, provided the pieces are small enough to eat comfortably when frozen.
Because this homemade mint chip ice cream uses a short ingredient list, cream builds richness, sugar helps scoopability, mint controls flavor, and chopped chocolate improves the frozen bite.
Heavy Cream and Whole Milk
Heavy cream gives the ice cream its rich, smooth body. Whole milk lightens the base so it stays refreshing instead of tasting overly heavy. The ratio here is simple: 2 cups heavy cream to 1 cup whole milk.
Avoid skim milk for this recipe. A leaner base is more likely to freeze icy, especially in a home freezer.
Sugar and Salt
Sugar does more than make ice cream sweet. It also helps the finished ice cream stay scoopable. Reduce it too aggressively and the ice cream can freeze very hard. A small amount of salt keeps the sweetness from tasting flat and makes the mint and chocolate clearer.
Mint Extract or Peppermint Extract
Mint extract gives the familiar ice cream-shop flavor. Peppermint extract tastes sharper and cooler, so it should be used carefully. Start with 1 teaspoon mint extract or 3/4 teaspoon peppermint extract, taste the chilled base, and add a little more only if you want a stronger mint flavor.
Too much extract is the fastest way to make homemade mint ice cream taste medicinal. You want refreshing, not mouthwash-like.
Vanilla Extract
Vanilla softens the mint and makes the base taste more rounded. One teaspoon is enough for the whole batch.
Chopped Chocolate
Use chopped semisweet or dark chocolate for the best everyday version. Large chocolate chips can freeze hard, while chopped chocolate gives smaller, thinner pieces that are easier to bite through.
For the main recipe, use 4 ounces / 115 grams chopped chocolate. If you love a finer chip texture, use the chocolate shard method below.
Optional Green Food Coloring
Green color is optional. It gives the ice cream the nostalgic mint chip look, but it does not change the flavor. Add 1 to 3 drops if you want a pale green scoop, or skip it for a natural white mint chip ice cream.
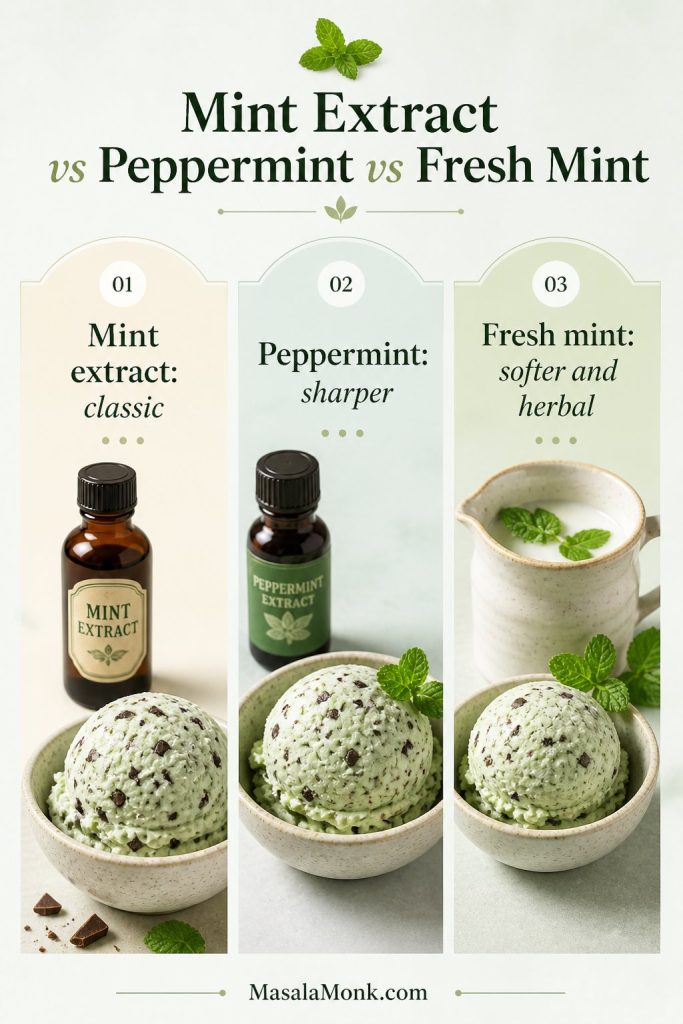
Your mint choice changes the whole personality of the ice cream. Mint extract gives you the familiar mint chip flavor most people expect, peppermint extract tastes colder and sharper, and fresh mint tastes softer, greener, and more herbal.
Mint option
Flavor
Best for
Watch out for
Mint extract
Classic, sweet, ice cream-shop style
Easy homemade mint chocolate chip ice cream
Strength varies by bottle
Peppermint extract
Sharper, cooler, stronger
Bold mint flavor
Can taste medicinal if overused
Fresh mint leaves
Herbal, natural, softer
A fresher, more delicate mint ice cream
Needs steeping and straining
Using mint extract is the easiest classic route; meanwhile, peppermint extract tastes cooler and sharper, while fresh mint gives a gentler herbal finish.
For the classic mint chip flavor most people expect, use mint extract. Peppermint extract gives a stronger cooling effect, so add it carefully. Fresh mint is best when you want a softer garden-fresh flavor and have extra time for steeping and chilling.
Fresh mint gives a beautiful flavor, but it usually will not make the ice cream bright green by itself. Add a small amount of food coloring separately if you want the classic green look.
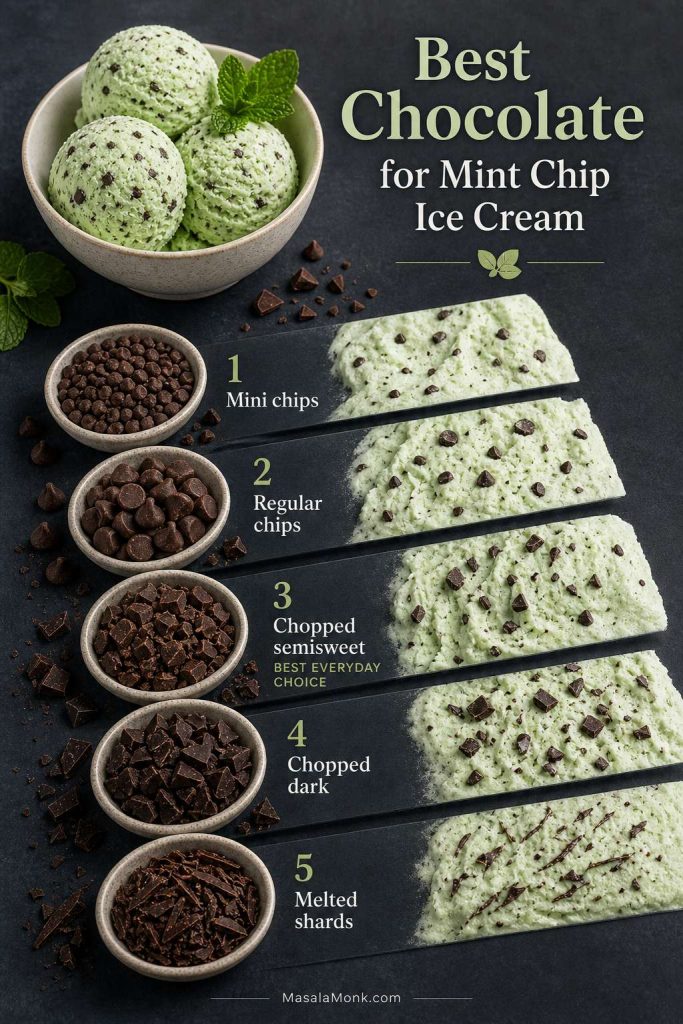
Chocolate Chips vs Chopped Chocolate in Mint Ice Cream
Chocolate behaves differently once it is frozen. Regular chocolate chips are convenient, but they can become hard in ice cream. Chopped chocolate gives a better bite because the pieces are thinner and more irregular. Thin chocolate shards give the smoothest texture of all.
Chocolate type
Texture in ice cream
Best use
Mini chocolate chips
Small, crisp, convenient
Easiest classic choice
Regular chocolate chips
Often too firm once frozen
Better chopped lightly first
Chopped semisweet chocolate
Uneven pieces with a better bite
Best everyday choice
Chopped dark chocolate
Cleaner flavor and less sweetness
Best grown-up flavor
Melted chocolate shards
Thin, crisp, quicker-melting pieces
Best premium texture
Instead of relying on large chips, use chopped chocolate or thin shards when you want chocolate pieces that stay easier to bite after freezing.
Best choice for most batches: Use chopped semisweet chocolate. It is easier than making shards, more pleasant than large frozen chips, and balanced enough for both kids and adults.
If you like the mint-and-chocolate pairing in baked desserts too, MasalaMonk’s double chocolate chip cookies include a mint chocolate variation that uses the same flavor logic in cookie form.
Easy Chocolate Shard Method
Melt 4 ounces / 115 grams semisweet or dark chocolate with 1 teaspoon neutral oil or coconut oil. Let it cool slightly so it is fluid but not hot. During the last 1 to 2 minutes of churning, drizzle the melted chocolate slowly into the moving ice cream. It will harden into thin, irregular shards.
You can skip this step and still get excellent ice cream. However, if you want the chocolate to feel thinner and more delicate, the shard method is worth the extra minute. This stracciatella-style approach is also used in more technical mint chip ice cream methods, where melted chocolate with a little oil is drizzled into the churned base for smoother pieces.
How to Make Mint Chocolate Chip Ice Cream in an Ice Cream Maker
The main method is simple, but the base needs to be cold. If your ice cream maker uses a freezer bowl, that bowl should be fully frozen before you begin. The base should also be chilled before churning. A warm base takes longer to churn and can freeze with a coarser texture.
If you are using a stand-mixer attachment, MasalaMonk’s guide to making ice cream with a KitchenAid mixer explains freezer-bowl timing, base chilling, and churning cues in more detail.
Step 1: Freeze the Ice Cream Maker Bowl
If your machine uses a freezer bowl, freeze it for at least 12 to 24 hours. It should be completely solid before you start.
Step 2: Make the Mint Ice Cream Base
Whisk the whole milk, sugar, salt, vanilla, and 1 teaspoon mint extract or 3/4 teaspoon peppermint extract until the sugar dissolves. Stir in the heavy cream. Add 1 to 3 drops of green food coloring now if you want green mint chocolate chip ice cream.
Step 3: Chill the Base
Cover and chill the base for at least 2 to 4 hours. Overnight is even better. A very cold base churns faster and gives a smoother texture.
Step 4: Churn Until Thick
Pour the chilled base into the ice cream maker and churn according to your machine’s instructions. Most home machines take about 20 to 25 minutes. The churned ice cream should mound on a spoon but still look soft; it will not be scoop-shop firm until after the freezer set.
Step 5: Add the Chocolate Late
Add chopped chocolate during the last 5 minutes of churning. If you are using the melted chocolate shard method, drizzle the chocolate in during the last 1 to 2 minutes instead.
Do not add the chocolate too early: Let the base thicken first, then add chopped chocolate during the last 5 minutes of churning. This keeps the pieces evenly distributed without weighing down the texture.
Chill first, churn second, and add the chocolate near the end; this order keeps the base smooth and the chocolate evenly distributed.
Step 6: Freeze Until Scoopable
Transfer the churned ice cream to an airtight freezer container. Press parchment paper directly onto the surface, cover, and freeze for 2 to 4 hours. The ice cream will be soft right out of the machine and firmer after hardening in the freezer.
Texture Cues: Soft Serve First, Scoopable After Freezing
Texture cue: Right after churning, homemade ice cream usually looks like soft serve. That is normal. Extra freezer time turns it into scoopable ice cream.
Freshly churned mint chip ice cream should look like soft serve at first; after a freezer set, it becomes firm enough to scoop cleanly.
Recipe Card: Mint Chocolate Chip Ice Cream Recipe
Mint Chocolate Chip Ice Cream Recipe
This creamy homemade mint chocolate chip ice cream recipe uses an easy eggless base, mint extract or peppermint extract, and chopped chocolate for a smooth, scoopable mint chip ice cream you can repeat all summer.
Yield About 1.5 quarts / 6 cups
Servings 8 to 10
Prep Time 10 minutes
Churn Time 20 to 25 minutes
Chill Time 2 to 4 hours
Freeze Time 2 to 4 hours
Total Time About 4½ to 8½ hours
Method Ice cream maker
Difficulty Easy
Equipment
Ice cream maker
Mixing bowl
Whisk
Rubber spatula
Measuring cups and spoons
Airtight freezer container
Ingredients
2 cups / 480 ml heavy cream
1 cup / 240 ml whole milk
3/4 cup / 150 g granulated sugar
1/4 teaspoon fine salt
1 teaspoon vanilla extract
1 to 1 1/2 teaspoons mint extract, or 3/4 to 1 teaspoon peppermint extract
4 oz / 115 g semisweet or dark chocolate, finely chopped
1 to 3 drops green food coloring, optional
Instructions
Freeze the bowl if needed. If your ice cream maker uses a freezer bowl, freeze it until fully solid, preferably overnight.
Make the base. In a mixing bowl, whisk the whole milk, sugar, salt, vanilla, and 1 teaspoon mint extract or 3/4 teaspoon peppermint extract until the sugar dissolves.
Add cream and color. Stir in the heavy cream. Add 1 to 3 drops green food coloring if you want green mint chocolate chip ice cream.
Chill. Cover and refrigerate the base for at least 2 to 4 hours, or overnight for the smoothest texture.
Taste and adjust. Taste the cold base. Add another 1/4 to 1/2 teaspoon mint extract, or a few drops more peppermint extract, only if you want stronger mint flavor.
Churn. Pour the chilled base into the ice cream maker and churn for 20 to 25 minutes, or until thick like soft serve.
Add chocolate. Add the chopped chocolate during the last 5 minutes of churning.
Freeze. Transfer to an airtight container, press parchment onto the surface, cover, and freeze for 2 to 4 hours until scoopable.
Serve. Let sit at room temperature for 5 to 10 minutes if the ice cream is very firm.
Notes
Increase extract gradually for stronger mint flavor. A large splash can quickly turn harsh.
Chopped chocolate gives a better frozen bite than large chocolate chips.
For chocolate shards, melt the chocolate with 1 teaspoon neutral oil and drizzle it into the ice cream during the last 1 to 2 minutes of churning.
For fresh mint ice cream, steep 1 to 2 packed cups / about 25 to 40 g fresh mint leaves in warm milk and cream for 30 to 60 minutes, strain, then chill and churn.
For no-churn mint chip ice cream, use the condensed milk and whipped cream method below.
You can make the ice cream 1 day ahead. Let it soften for 5 to 10 minutes before scooping if it freezes very firm.
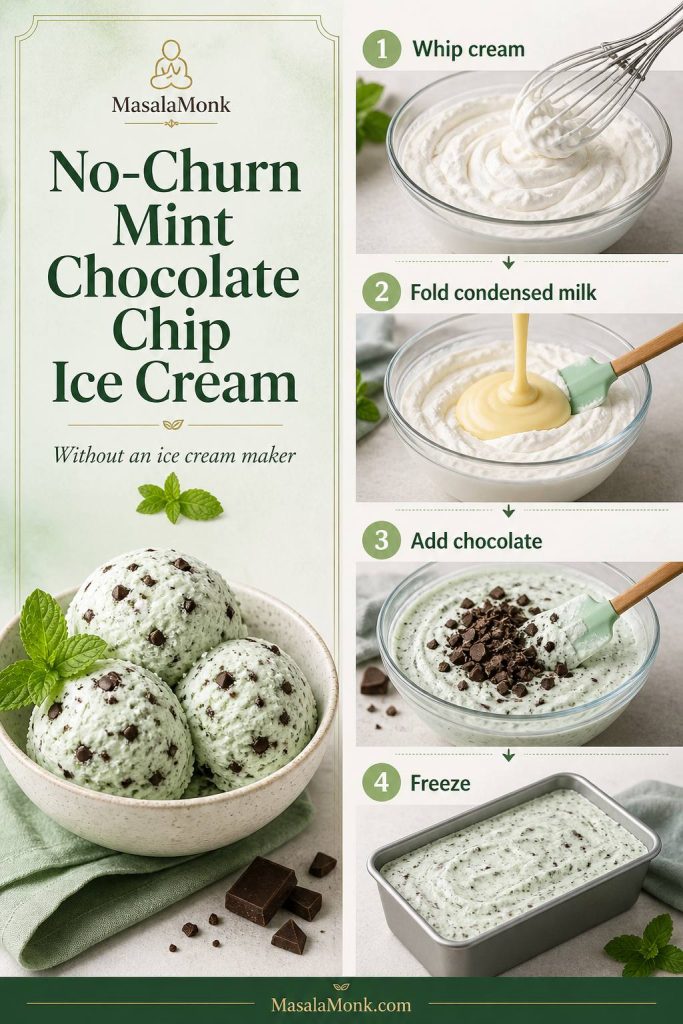
No-Churn Mint Chocolate Chip Ice Cream Without an Ice Cream Maker
No ice cream maker? Use this no-churn version. It is sweeter than churned ice cream because sweetened condensed milk provides both sweetness and structure, but it is easy, creamy, and reliable. For a broader no-machine method, MasalaMonk’s homemade ice cream without a machine guide is a useful companion.
No-churn mint chip ice cream is usually sweeter and slightly denser than churned ice cream. For the cleanest texture, whip the cream to firm peaks and fold gently so you keep as much air in the mixture as possible.
If you want to see how condensed milk and whipped cream behave in a fruit-based no-churn dessert, the homemade mango ice cream recipe is a good comparison.
No-Churn Ingredients
2 cups / 480 ml cold heavy cream
1 can / 14 oz / 397 g sweetened condensed milk
1 teaspoon mint extract or 3/4 teaspoon peppermint extract
1 teaspoon vanilla extract, optional
3/4 to 1 cup chopped semisweet or dark chocolate
1 to 3 drops green food coloring, optional
No-Churn Method
Chill a mixing bowl for 15 to 20 minutes if your kitchen is warm.
Whip the cold heavy cream until stiff peaks form.
In another bowl, stir together the condensed milk, mint extract or peppermint extract, vanilla, and optional green color.
Fold the whipped cream into the condensed milk mixture gently.
Fold in the chopped chocolate.
Spread into a 9×5-inch loaf pan.
Cover and freeze for at least 6 hours, or overnight.
When you do not have an ice cream maker, whipped cream and condensed milk create a no-churn mint chocolate chip ice cream that freezes into a creamy scoop.
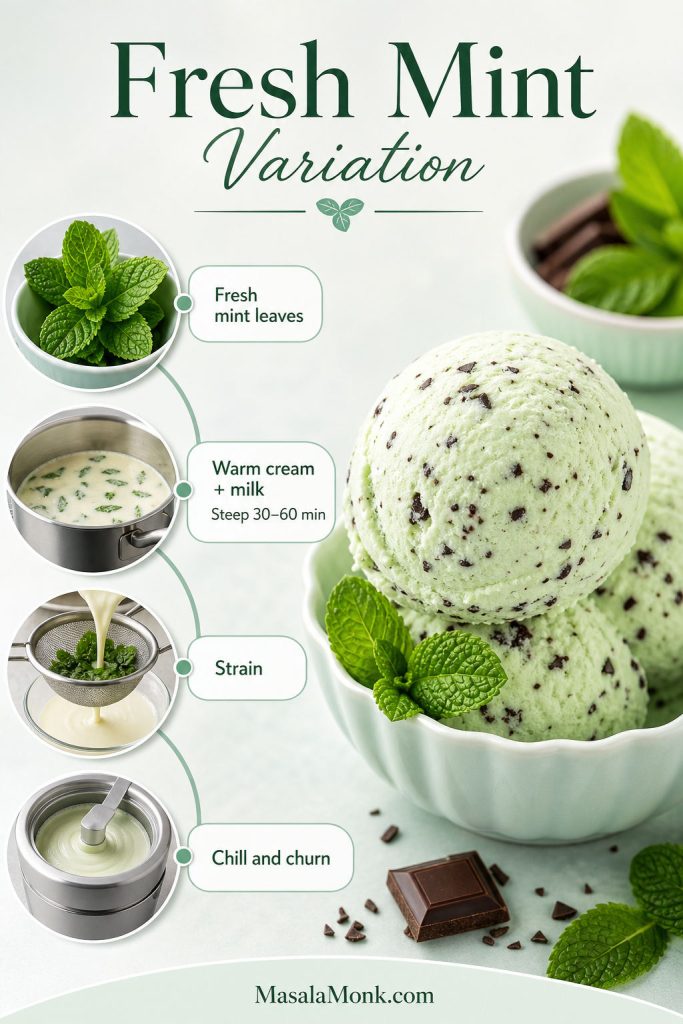
Fresh Mint Chocolate Chip Ice Cream Variation
Fresh mint gives the ice cream a softer, more herbal flavor. It tastes less like candy and more like real mint leaves. The trade-off is time: you need to steep the mint in warm dairy, strain it out, and then chill the base before churning.
How to Use Fresh Mint
Warm the milk and cream until steaming, not boiling.
Add 1 to 2 packed cups / about 25 to 40 g fresh mint leaves.
Remove from heat, cover, and steep for 30 to 60 minutes.
Strain very well, pressing gently on the leaves.
Whisk in sugar, salt, and vanilla while the dairy is still slightly warm.
Chill completely before churning.
Add chopped chocolate near the end of churning.
Use more leaves and steep longer for a stronger fresh mint flavor. A shorter steep tastes gentler. Fresh mint ice cream usually stays pale, so add a little green color only if you want the classic look.
Fresh mint flavor varies: Young, fragrant mint leaves may need only 30 minutes of steeping, while milder bunches may need closer to 60 minutes. If the chilled base tastes too gentle, add 1/4 teaspoon mint extract before churning.
For fresh mint flavor, steep the leaves in warm dairy and strain them out before churning so the ice cream tastes clean rather than grassy.
Green vs White Mint Chocolate Chip Ice Cream
Mint chocolate chip ice cream can be green, white, or somewhere in between. Green is the nostalgic ice cream-shop version. White or pale mint chip looks more natural and often means no food coloring was used.
Green mint chip ice cream gives the nostalgic look; however, a white or pale mint base can taste just as minty without added color.
Color does not decide flavor. Mint extract, peppermint extract, fresh mint, sugar, dairy, and chocolate do that. If you want green ice cream, use only a few drops of color. Too much color can make the ice cream look artificial even when the flavor is balanced.
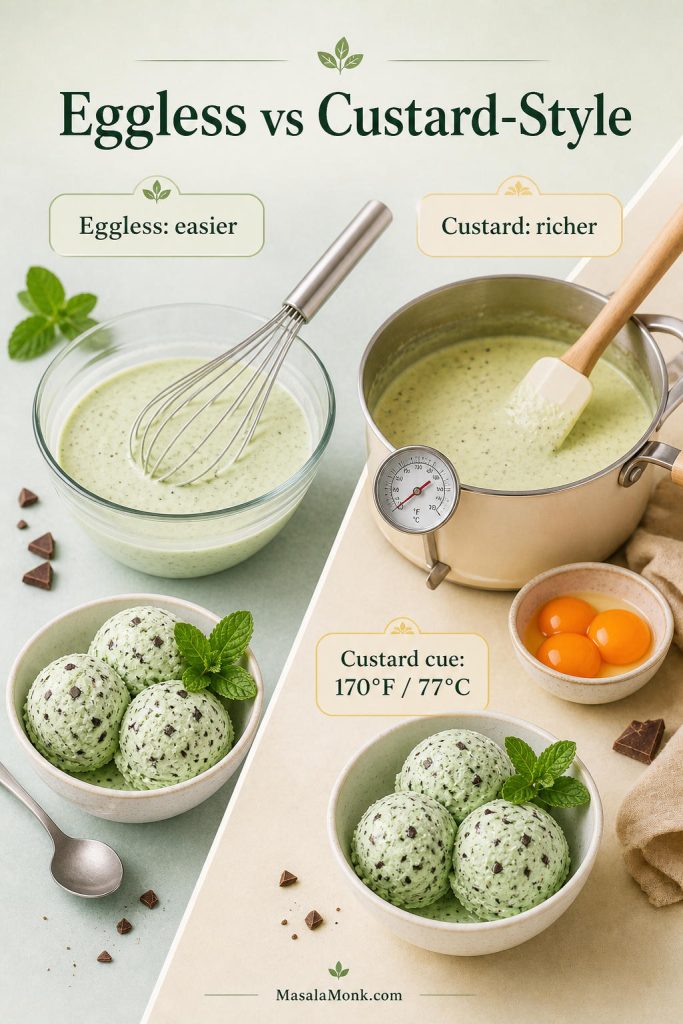
Custard-Style Mint Chocolate Chip Ice Cream Upgrade
The main recipe is eggless because it is easier and still creamy. Choose this route if you want a richer, silkier scoop and do not mind cooking the base. Stay with the eggless version if you want the easiest repeatable batch.
Use 4 large egg yolks for the batch. Warm the milk, cream, sugar, and salt in a saucepan until steaming. Whisk the yolks in a separate bowl, slowly stream in some of the hot dairy while whisking, then pour the yolk mixture back into the saucepan. Cook gently, stirring constantly, until the custard thickens enough to coat a spoon and reaches about 170°F / 77°C. Do not boil it.
Strain the custard, stir in vanilla and mint extract, then chill until very cold, preferably overnight. Churn as usual and add the chocolate near the end. This approach takes more attention than the eggless recipe, but the texture is richer and silkier.
Use the custard upgrade when: you want a richer, more premium texture and do not mind cooking the base. Use the eggless version when you want the easiest reliable homemade mint chip ice cream.
Choose the eggless base when you want the easiest batch, or use the custard-style method when you want a richer, silkier mint chocolate chip ice cream.
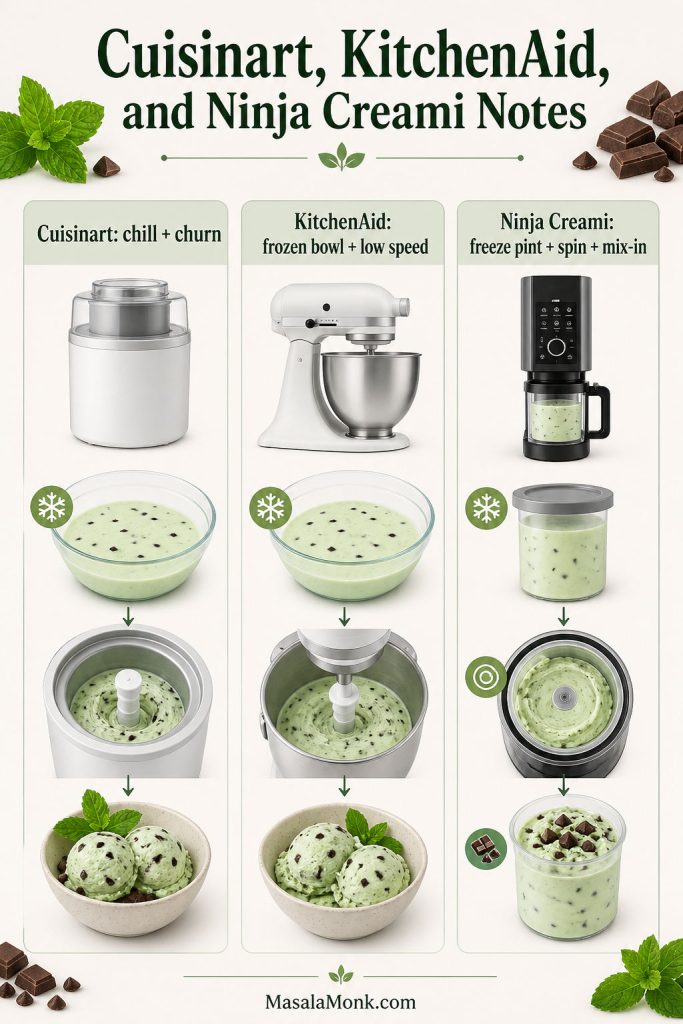
Ice Cream Maker, Cuisinart, KitchenAid, and Ninja Creami Notes
This recipe is written for a standard home ice cream maker, including freezer-bowl machines and stand-mixer ice cream attachments. The same base works well in most Cuisinart-style ice cream makers and KitchenAid freezer-bowl attachments as long as the bowl is fully frozen and the base is very cold before churning.
Cuisinart and KitchenAid-style machines churn a cold liquid base, whereas the Ninja Creami works from a frozen pint and mixes chocolate in later.
Cuisinart Mint Chocolate Chip Ice Cream
For a Cuisinart ice cream maker, freeze the bowl until completely solid, chill the mint ice cream base for at least 2 to 4 hours, then churn for about 20 to 30 minutes. Add the chopped chocolate during the last 5 minutes, when the ice cream is already thick like soft serve.
KitchenAid Ice Cream Maker Attachment
For a KitchenAid ice cream maker attachment, freeze the bowl for at least 15 to 24 hours, start the mixer on the recommended low speed before pouring in the base, and churn until the ice cream thickens. Add chocolate near the end so it distributes evenly without sinking.
Ninja Creami Mint Chocolate Chip Ice Cream
The Ninja Creami method is different from a traditional ice cream maker. Instead of churning a liquid base, you freeze the base solid in a Creami pint for 24 hours, process it in the machine, then add chocolate using the Mix-In function. If the texture looks crumbly after the first spin, add a small splash of milk and use Re-Spin before adding the chocolate.
Do not pour this churned ice cream maker base directly into a Ninja Creami and expect the exact same timing. Use a Creami-specific base if you want the most reliable result, because the machine is designed around frozen pints rather than traditional churning.
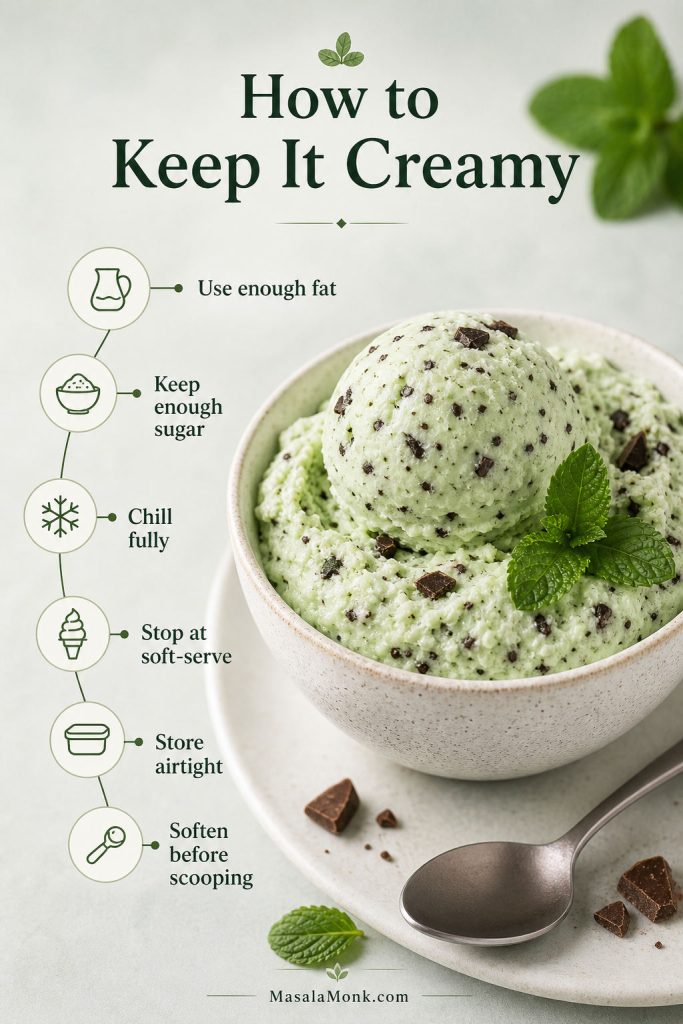
How to Keep Homemade Mint Chocolate Chip Ice Cream Creamy
Homemade ice cream is sensitive to temperature and balance. A good base needs enough fat, enough sugar, and enough chilling time. The way you store it matters too, because air exposure can create ice crystals on the surface.
Use whole milk and heavy cream. Lower-fat dairy makes icier ice cream.
Keep enough sugar in the base. Sugar helps the finished ice cream stay scoopable.
Chill the base fully. A cold base churns smoother and faster.
Stop at soft-serve texture. Over-churning can make the texture heavy.
Store airtight. Press parchment onto the surface before covering.
Soften before scooping. Five to ten minutes at room temperature usually helps.
To keep homemade ice cream creamy, use enough fat and sugar, chill the base fully, stop at soft-serve texture, and store it airtight.
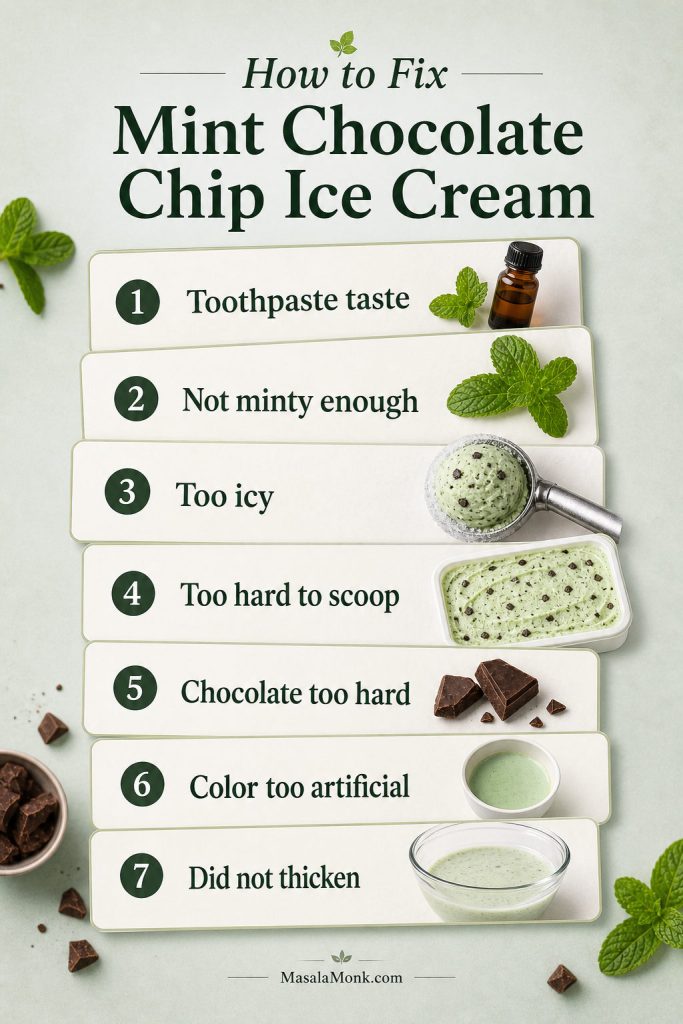
Most mint chocolate chip ice cream problems come from one of four things: the base was not cold enough, the extract was too strong, the chocolate pieces were too large, or the sugar and fat balance was changed too much.
Problem
Likely cause
Fix
Tastes like toothpaste
Too much peppermint extract
Start lower next time and increase only after tasting the cold base.
Not minty enough
Mild extract or a very rich base
Increase the extract by 1/4 teaspoon before churning.
Too icy
Lean dairy, warm base, or heavy sugar reduction
Whole milk, heavy cream, full chilling, and balanced sugar give a smoother freeze.
Too hard to scoop
Very cold freezer or reduced sugar
Rest the container for 5 to 10 minutes before scooping.
Chocolate pieces are too hard
Large chips or thick chunks
Chopped chocolate, mini chips, or thin chocolate shards are easier to bite.
Color looks too artificial
Too much green coloring
One to three drops are usually enough for a pale green scoop.
Ice cream did not thicken
Bowl or base not cold enough
Freeze the bowl longer and chill the base overnight before trying again.
If the texture, color, chocolate, or mint flavor feels off, check four things first: base temperature, extract amount, chocolate size, and sugar balance.
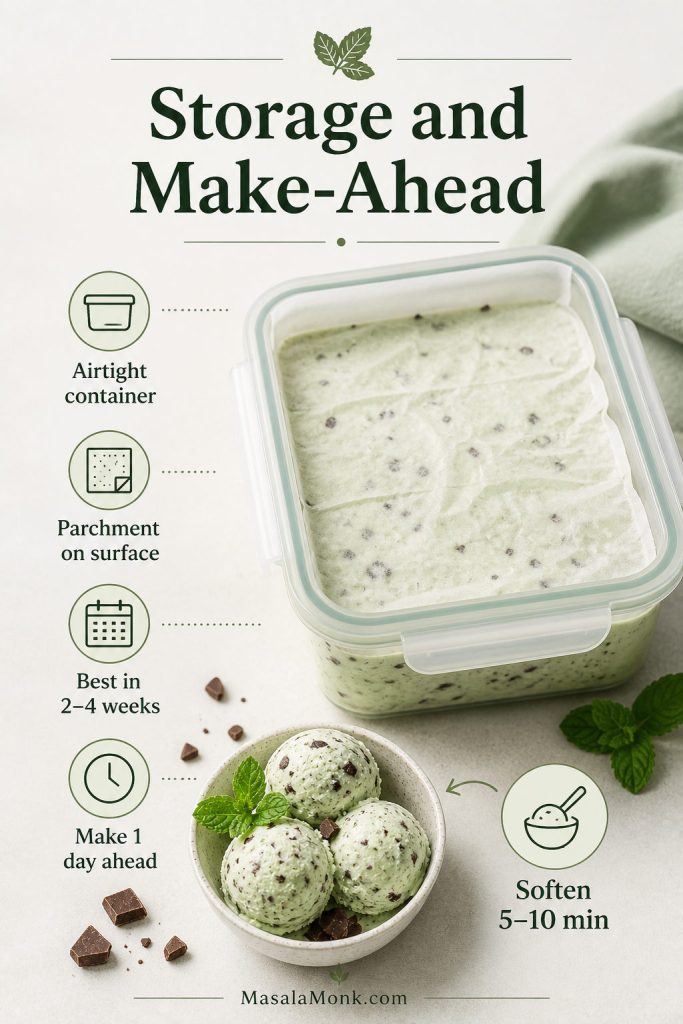
How to Store Homemade Mint Chocolate Chip Ice Cream
Transfer the churned ice cream to a shallow airtight freezer container. Press parchment paper or plastic wrap directly onto the surface, then cover with the lid. This helps reduce ice crystals on top.
Homemade mint chocolate chip ice cream tastes best within 2 to 4 weeks. It will still be safe longer if frozen properly, but the texture is usually best when eaten fresh. FoodSafety.gov notes that freezer storage guidance is about quality, while foods kept continuously at 0°F / -18°C or below remain safe. You can read their cold food storage chart for the broader freezer guidance.
You can make this ice cream a day ahead. Churn it, freeze it overnight, then let it soften for 5 to 10 minutes before serving.
Press parchment onto the surface before freezing; as a result, the ice cream is better protected from air exposure and surface ice crystals.
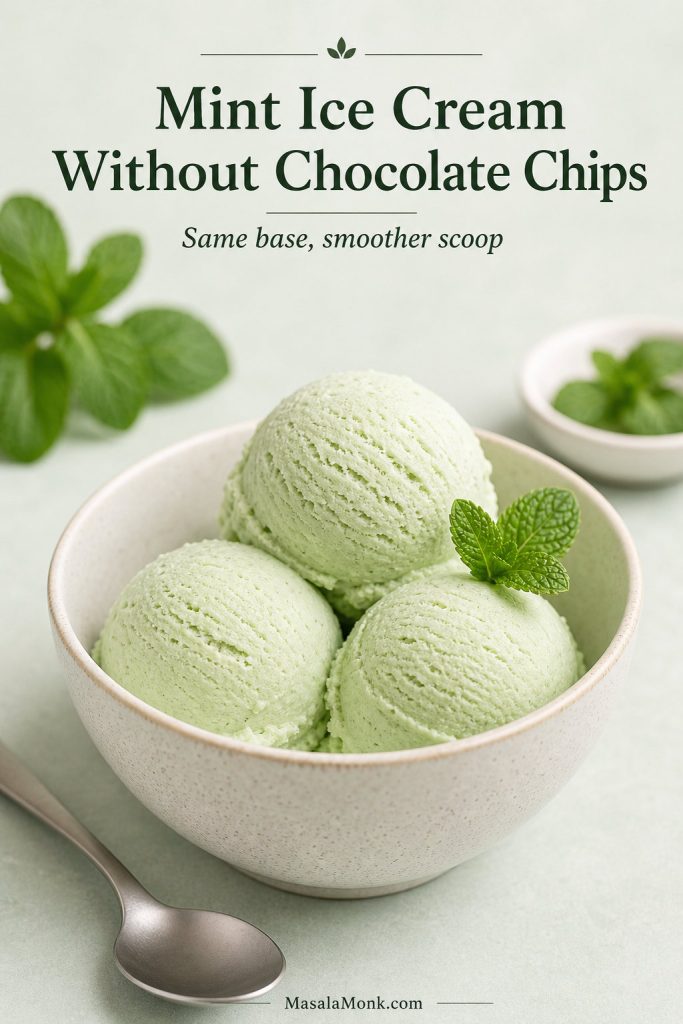
For plain mint ice cream, simply leave out the chopped chocolate. The same base works well without chips, especially if you want a smoother scoop or plan to serve it with brownies, chocolate sauce, or cookies on the side. Taste the chilled base before churning and keep the mint balanced, because there will be no chocolate to soften a sharp extract flavor.
For a smoother plain mint ice cream, skip the chocolate pieces and serve the scoop with brownies, cookies, or chocolate sauce on the side.
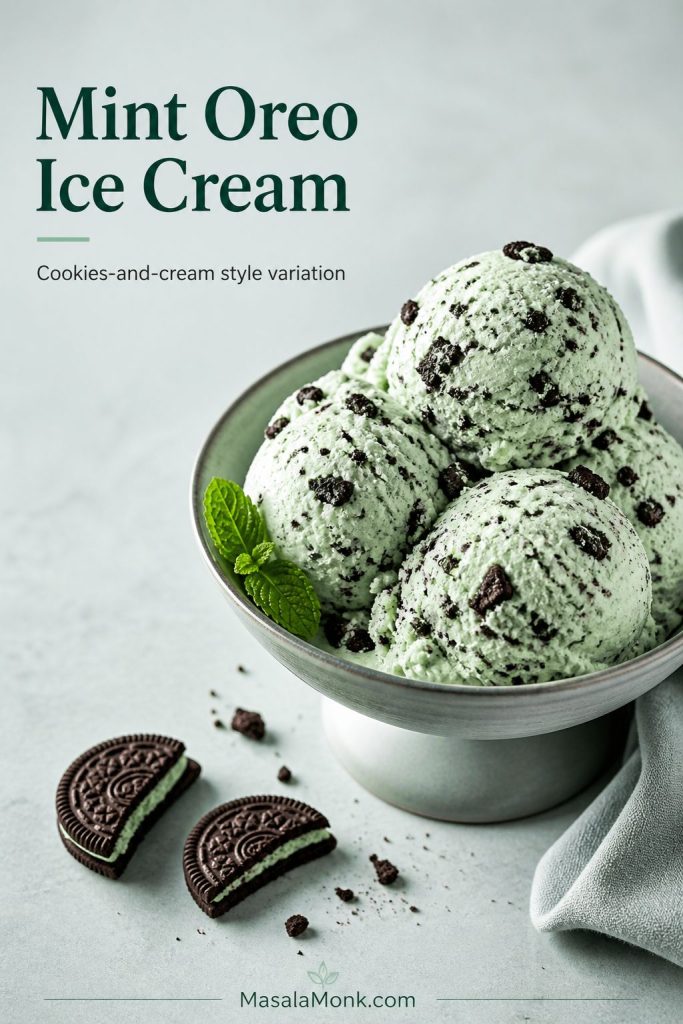
For a cookies-and-cream style mint ice cream, replace half of the chopped chocolate with crushed chocolate sandwich cookies. Add the cookie pieces during the last 2 to 3 minutes of churning so they stay visible and do not completely dissolve into the base. For a stronger cookie flavor, sprinkle a few extra crushed cookies over the top before the final freezer set.
Fold crushed chocolate sandwich cookies in near the end of churning so this mint Oreo ice cream keeps visible cookie pieces and a creamy base.
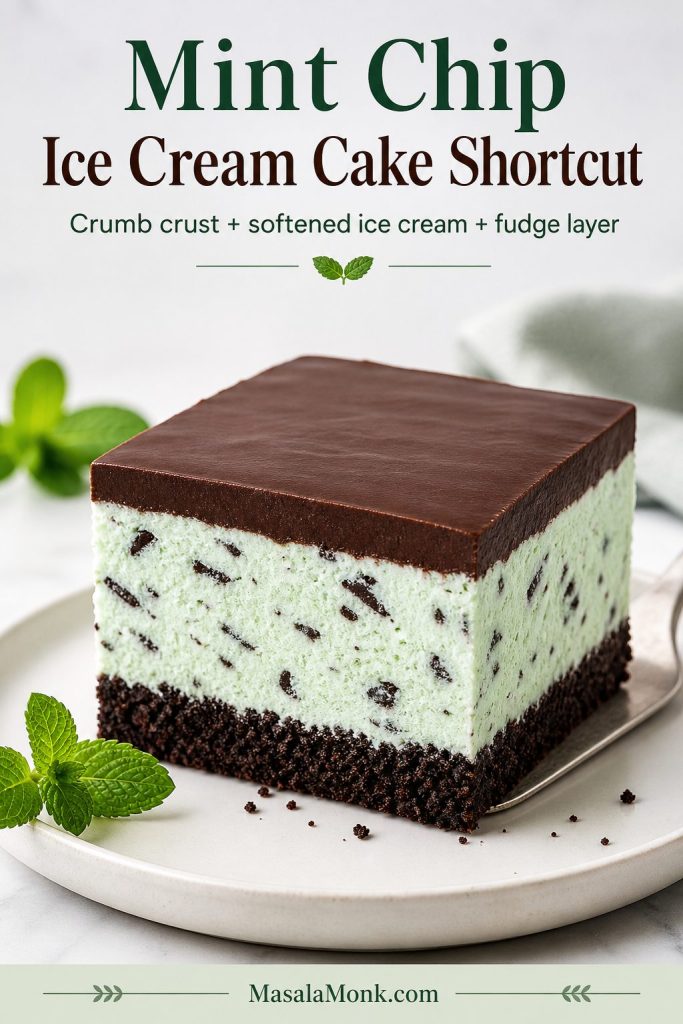
For a quick mint chip ice cream cake, press an Oreo-style crumb crust into a loaf pan or small square pan, spread softened mint chocolate chip ice cream over it, add a thin layer of fudge or ganache, and freeze until firm. This is not the full cake method, but it is an easy way to turn one batch into a make-ahead dessert.
A crumb crust, softened mint chip ice cream, and thin fudge layer turn the same batch into an easy make-ahead ice cream cake shortcut.
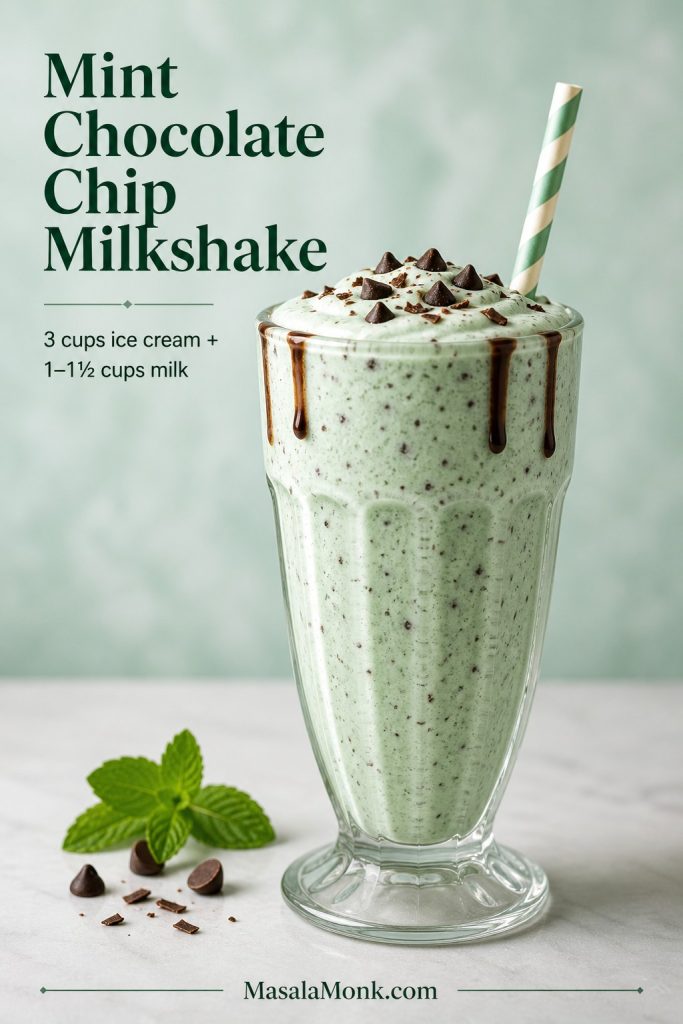
Turn a few scoops into a thick milkshake by blending 3 cups mint chocolate chip ice cream with 1 to 1 1/2 cups cold milk. Use 1 cup milk for a spoon-thick shake, 1 1/4 cups for a classic thick milkshake, and 1 1/2 cups for a more sippable texture.
A spoon of chocolate syrup makes the milkshake more dessert-like. For a homemade topping, this 3-minute homemade chocolate syrup works well for drizzling over scoops or blending into the shake.
Use 1 cup milk for a spoon-thick mint chocolate chip milkshake, then add more only if you want a lighter, more sippable texture.
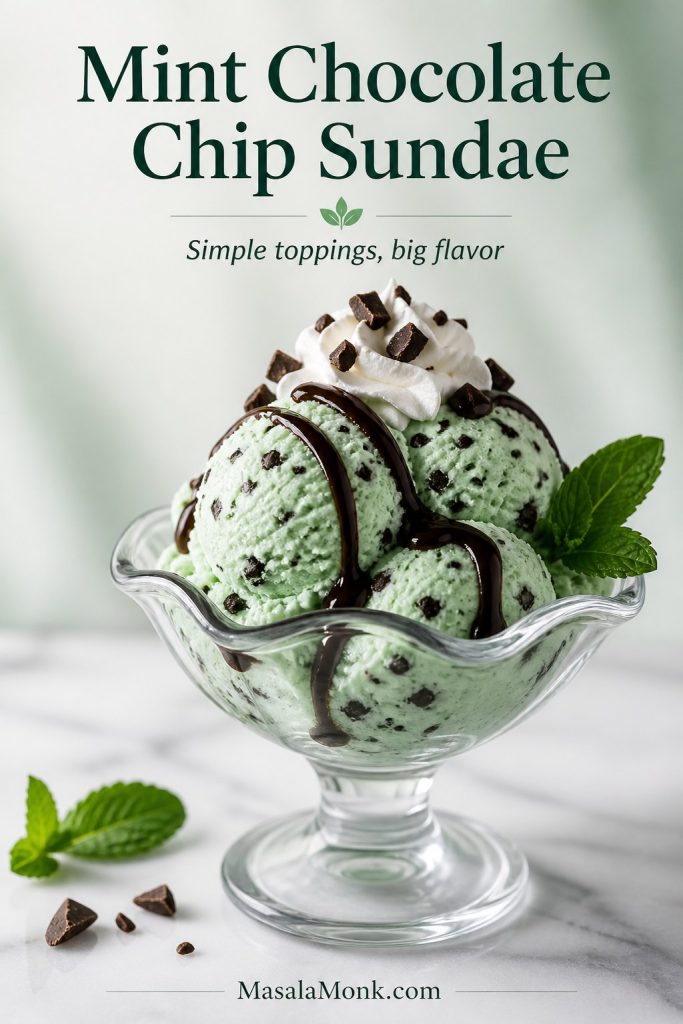
For a quick sundae, scoop the ice cream into chilled bowls and top with chocolate syrup, whipped cream, extra chopped chocolate, or crushed cookies. Keep the toppings simple so the mint flavor still comes through.
Keep toppings simple here; chocolate syrup, whipped cream, and a few chopped pieces should support the mint chip ice cream rather than hide it.
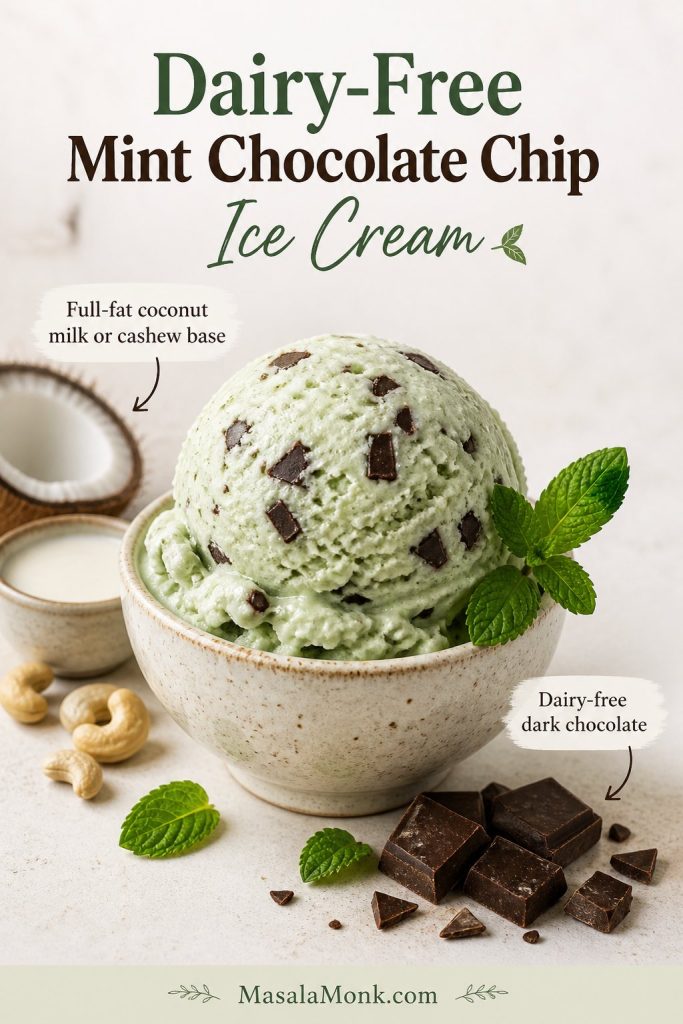
Use a rich dairy-free base such as full-fat coconut milk or cashew cream, and choose dairy-free dark chocolate. Coconut-based versions can taste slightly tropical, which works well with dark chocolate but changes the classic flavor. If you are building a dairy-free dessert table, MasalaMonk’s avocado chocolate mousse is another creamy chocolate dessert with vegan and keto-friendly options.
A rich coconut milk or cashew base can make dairy-free mint chocolate chip ice cream creamy, although the flavor will be different from dairy.
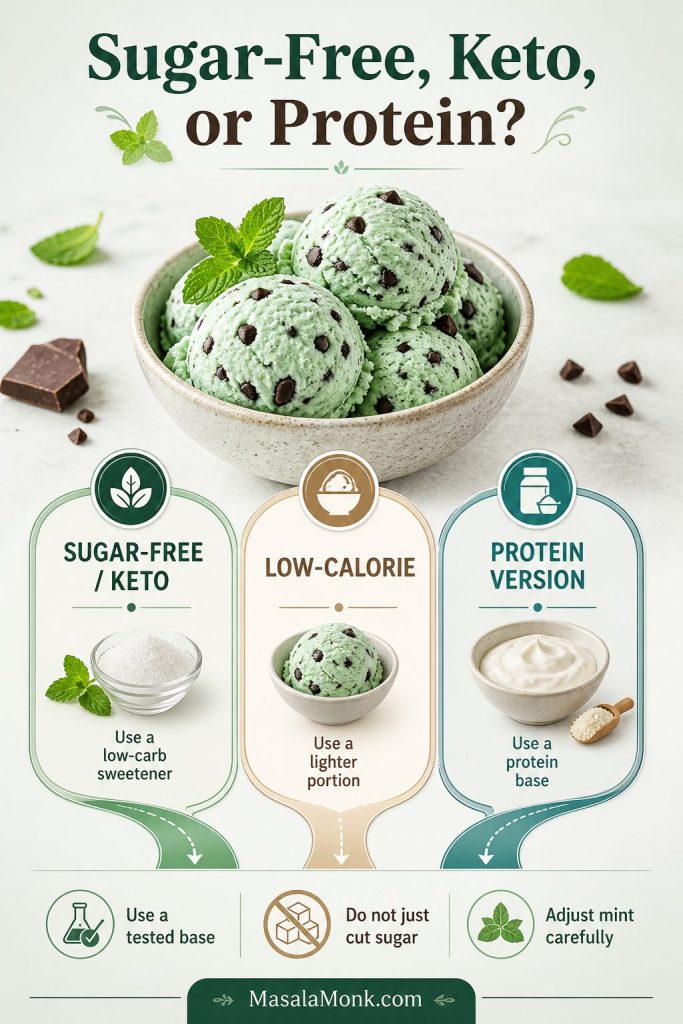
Sugar-Free, Keto, Low-Calorie, or Protein Mint Chocolate Chip Ice Cream
Sugar-free, keto, low-calorie, and protein versions need a different base because sugar, fat, and protein all affect how ice cream freezes. Do not simply remove the sugar from this recipe; sugar helps homemade ice cream stay scoopable. For a low-carb or keto batch, start with a tested low-carb ice cream formula, then add mint extract and finely chopped sugar-free dark chocolate.
For a higher-protein version, use MasalaMonk’s protein ice cream recipe as the base and adapt it with mint extract plus chopped dark chocolate. If you only want a slightly lighter batch, reduce the sugar modestly in the main recipe rather than cutting it heavily. Too little sugar usually means a harder, icier scoop.
Sugar-free, keto, low-calorie, and protein versions need their own tested bases because changing sugar, fat, or protein changes how ice cream freezes.
After the base is chilled, churned, and frozen, the final scoop should hold its shape, taste cleanly minty, and soften within a few minutes for easy serving.
Is mint chocolate chip ice cream made with mint or peppermint?
Either one works. Mint extract usually gives a more classic ice cream-shop flavor, while peppermint extract tastes sharper and stronger. Start with a small amount because peppermint extract can quickly become too intense.
How do I make mint chocolate chip ice cream without an ice cream maker?
Use the no-churn version with whipped heavy cream and sweetened condensed milk. It will be sweeter and a little denser than churned ice cream, but it still freezes into a creamy scoopable dessert.
Why is my mint chocolate chip ice cream white instead of green?
Mint ice cream is not naturally bright green. The green color usually comes from food coloring. Without coloring, homemade mint chocolate chip ice cream will usually be white, cream-colored, or very pale green.
How do I use fresh mint instead of mint extract?
Warm the milk and cream, add fresh mint leaves, steep for 30 to 60 minutes, strain well, then chill and churn the base. Fresh mint gives a softer herbal flavor, while extract gives the classic mint chip taste.
When should I add chocolate chips to ice cream?
Add chopped chocolate or mini chocolate chips during the last 5 minutes of churning. This keeps the pieces evenly distributed without interfering with the base as it thickens.
Why are my chocolate chips too hard in homemade ice cream?
Large chocolate chips freeze very firm. Chopped chocolate, mini chips, or melted chocolate drizzled into the ice cream near the end of churning will give you thinner pieces that are easier to bite.
Is this mint chocolate chip ice cream eggless?
The main recipe is eggless. It uses heavy cream, whole milk, sugar, mint extract, vanilla, salt, and chopped chocolate.
How do I make dairy-free mint chocolate chip ice cream?
Use a rich dairy-free base such as full-fat coconut milk or cashew cream, then choose dairy-free chocolate. The flavor will not be exactly the same as classic dairy mint chip ice cream, but it can still be creamy and satisfying.
How long does homemade mint chocolate chip ice cream last?
It tastes best within 2 to 4 weeks. Store it in an airtight freezer container with parchment pressed against the surface to reduce ice crystals.
What chocolate is best for mint chocolate chip ice cream?
Semisweet or dark chocolate works best because it balances the sweetness of the mint ice cream. Chopped chocolate gives a better frozen texture than large chocolate chips.
Protein ice cream sounds perfect until you make a bad batch. One turns chalky. Another freezes so hard it barely gives way to a spoon. A third tastes less like dessert and more like cold protein powder with ambition.
The good news is that homemade protein ice cream can be genuinely enjoyable. The mistake is expecting one formula to cover every goal. A fast blender bowl, a scoopable vanilla tub, a tangy Greek yogurt version, a dairy-free chocolate batch, and a lighter low-calorie option are not trying to deliver the same experience. Once you stop treating them as the same dessert, the category becomes much easier to understand and much easier to get right.
This guide is built to do exactly that. It helps you choose the right method, start with the strongest all-around recipe, and then move into the version that actually suits the kind of frozen dessert you want to eat. If you want something that tastes good enough to make again, not just once for the macros, this is the way to do it.
If You Want the Short Version
Want something cold and fast? A blender version is your best bet.
Planning to keep a tub in the freezer? Go with no-churn.
After the closest thing to a classic homemade scoop? Use an ice cream maker.
Need the best place to begin? Start with classic vanilla homemade protein ice cream.
Nervous about chalky flavor? Chocolate is the safest route.
Prefer something fresher and tangier? Greek yogurt protein ice cream fits best.
Looking for more body and fullness? Reach for peanut butter or cottage cheese.
Keeping it plant-based? Make sure the dairy-free or vegan base is rich enough to support the texture.
Want something ready in minutes? Start with protein soft serve in a blender.
Using a Ninja Creami? Most of these bases can also become Ninja Creami protein ice cream.
That is the whole category in miniature. The rest of the guide shows you how to make each one work.
What Is Protein Ice Cream?
Protein ice cream is a frozen dessert made with extra protein-rich ingredients such as protein powder, Greek yogurt, cottage cheese, ricotta, higher-protein dairy, or plant-based bases paired with vegan protein powder.
That broad definition matters because this category can lead to very different results. Some versions are fast, soft, and blender-based. Others are built for a scoopable freezer tub. Some feel lighter and tangier, while others lean richer and more dessert-like. It is not automatically creamy, and it is not automatically a better dessert choice just because it has more protein. The best version depends on the texture, method, and eating experience you actually want. For broader context on protein itself, Harvard Nutrition Source’s guide to protein is a useful reference.
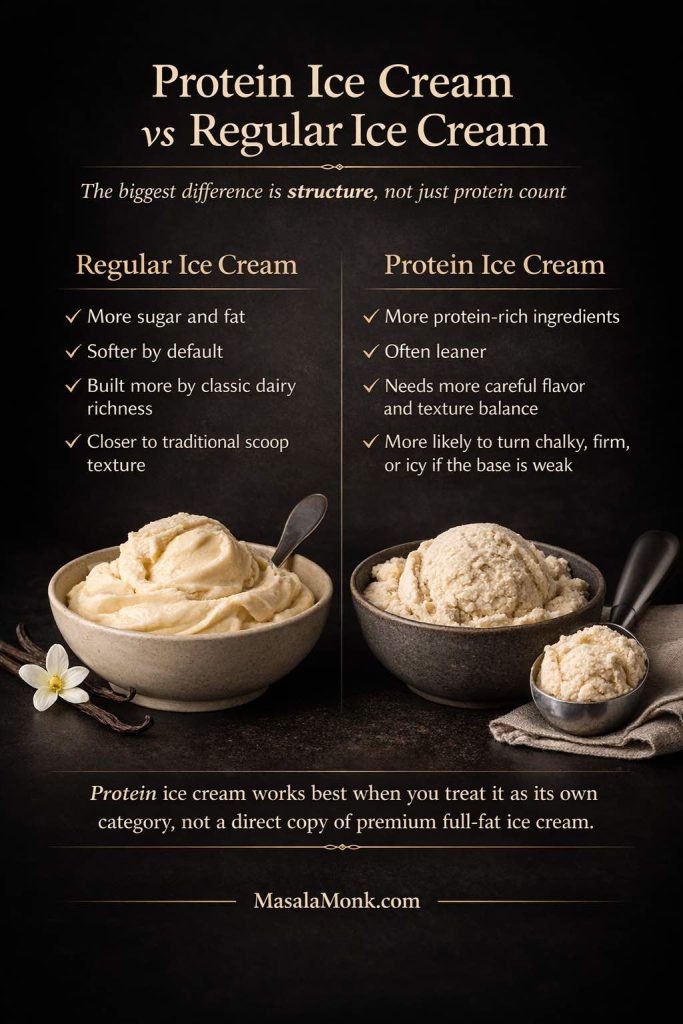
Protein Ice Cream vs Regular Ice Cream: What Changes?
The biggest difference is not just the protein count. It is the structure. Regular ice cream usually relies more heavily on sugar, fat, and traditional dairy richness to create softness and body. Protein ice cream often asks protein powder, Greek yogurt, cottage cheese, or plant-based ingredients to do more of that work.
Protein ice cream and regular ice cream are not separated by protein count alone. Regular ice cream gets more built-in softness from sugar, fat, and classic dairy richness, while protein ice cream depends more on yogurt, cottage cheese, protein powder, and careful structure, which is why it can feel satisfying when well made but far easier to turn chalky, firm, or icy when the base is weak.
That changes both texture and flavor. High protein ice cream can be thick, satisfying, and genuinely good, but it also has more ways to go wrong. It can turn chalky if the powder is too aggressive. It can freeze too hard if the base is too lean. And then it can taste flat if the flavor is not built strongly enough before freezing.
That is why homemade protein ice cream should be treated as its own category rather than judged as a direct one-to-one copy of premium full-fat ice cream. Some versions land closer to frozen yogurt. Some land closer to soft serve. And then some are best thought of as lighter frozen desserts with a higher-protein profile rather than replicas of classic custard.
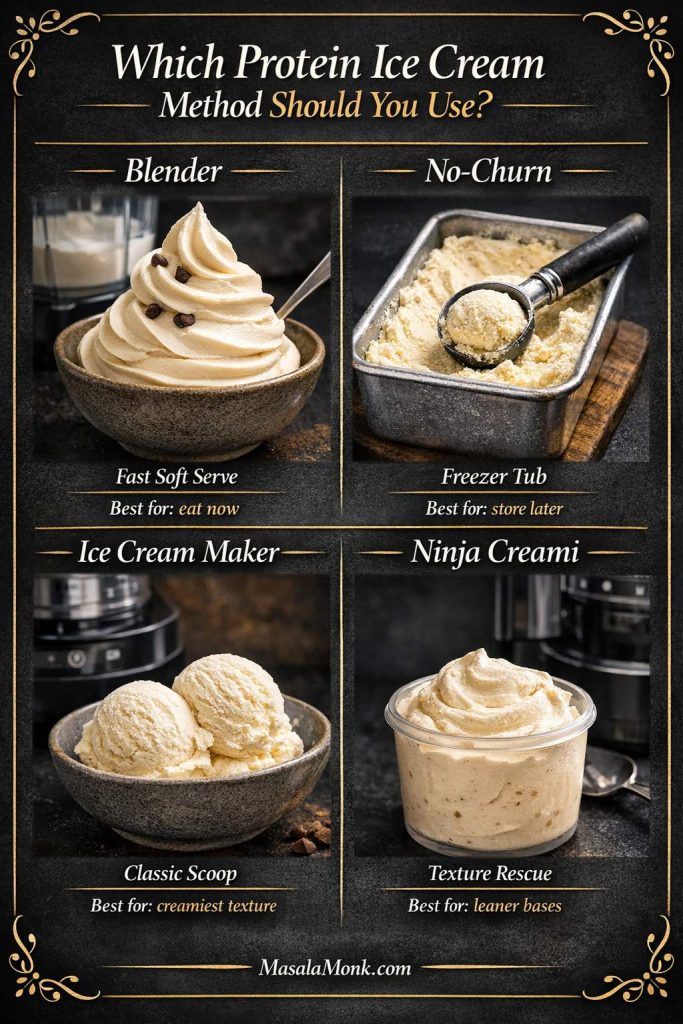
How to Make Protein Ice Cream: Choose the Right Method
Before you decide on vanilla, chocolate, fruit, or peanut butter, decide how you want the finished dessert to behave. This is where many homemade recipes go off course. People want a soft blender bowl to scoop like a freezer tub, or they want a lean no-churn mix to eat like a richer churned ice cream.
Not every protein ice cream method gives the same result. Use this quick guide to choose between blender soft serve, a no-churn freezer tub, classic ice cream maker scoops, or Ninja Creami texture rescue before you start your batch.
Blender Protein Ice Cream for a Fast Soft-Serve Texture
A blender method is the quickest path. It is best when you want something thick, cold, and immediate rather than something to store for several days. This style suits frozen fruit, Greek yogurt, cottage cheese, and softer protein-based mixtures that taste best right away.
Its weakness is storage. Fresh from the blender, the texture can be lush and spoonable. After deep freezing, many versions turn firmer and lose their easy soft-serve appeal. That does not make them bad. It simply means they are built for speed rather than long freezer life. This is the best method when you want protein soft serve rather than a freezer tub.
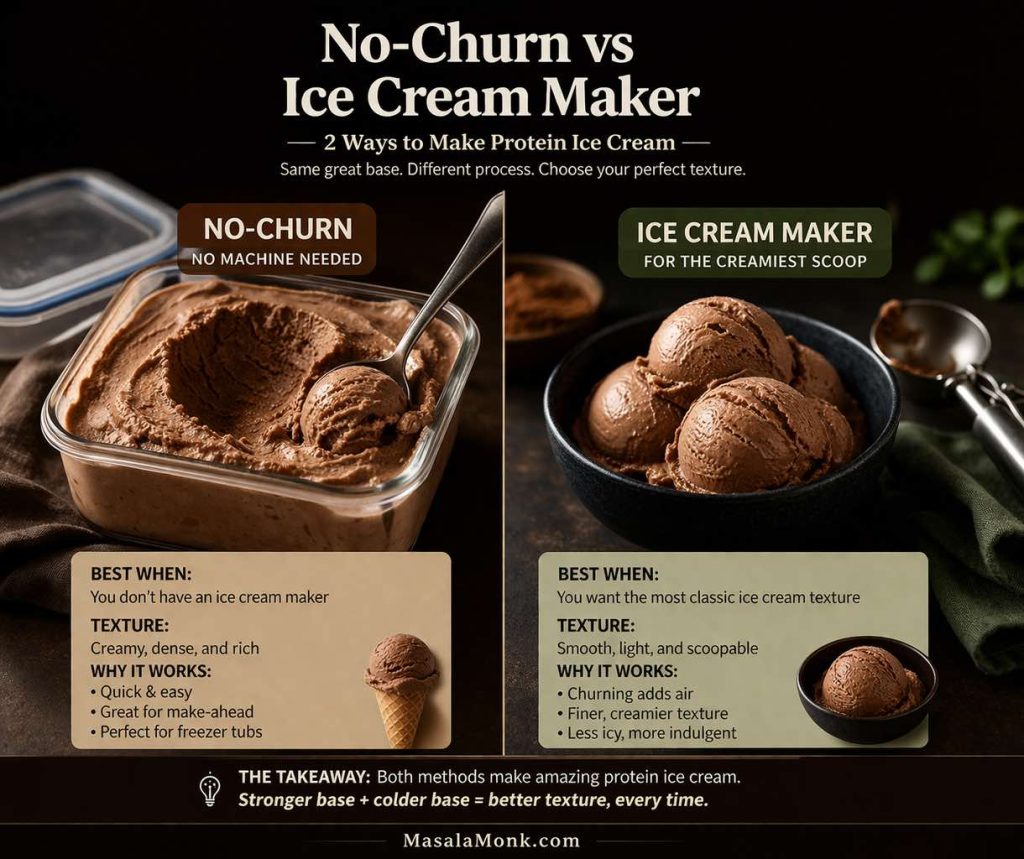
No-Churn Protein Ice Cream for a Scoopable Freezer Tub
No-churn makes more sense when you want a proper freezer dessert that can sit in a container and still feel worth revisiting later. It is also the most useful option if you do not own an ice cream maker. MasalaMonk’s guide to homemade ice cream without a machine is a helpful companion if you want a broader no-machine foundation.
This method needs a stronger base. If the mixture is too lean, too watery, or overloaded with powder, it usually freezes hard or icy. When the structure is right, though, a no-churn tub can feel far more like a real stored dessert than a quick frozen shake.
Ice Cream Maker Protein Ice Cream for the Most Classic Texture
An ice cream maker gives the best chance of producing a batch that feels closest to traditional homemade ice cream. Constant movement as it freezes improves body and helps avoid the one-block problem that plagues many freezer-only recipes. This matters most with richer versions such as vanilla, chocolate, peanut butter, or cottage cheese-based styles. For a fuller churn workflow, MasalaMonk’s guide on how to make ice cream with a KitchenAid mixer is worth reading.
One thing is non-negotiable: the base has to be thoroughly chilled first. A properly cold mixture churns more smoothly, thickens more evenly, and lands much closer to the creamy finish most readers are hoping for.
No-churn and ice cream maker protein ice cream can both work well, but they do not produce the same kind of scoop. No-churn usually lands denser and richer, while an ice cream maker gives a smoother, lighter texture that feels closer to classic homemade ice cream.
Healthy Protein Ice Cream: What Makes It Actually Work
Healthy protein ice cream is not just regular ice cream with protein powder stirred in, and it is not automatically a success because the macros look better on paper. The versions that actually work are the ones that balance protein with enough body, sweetness, and flavor to remain enjoyable after freezing.
That is the real tension in this category. Push too hard toward lean, low-fat, ultra-high-protein formulas and you often end up with something dry, icy, or strangely joyless. Build with more care and you can get a homemade frozen dessert that feels lighter or more balanced without becoming a punishment.
Healthy protein ice cream works when balance still matters more than macros alone. Enough body, moderate sweetness, and stronger flavor support keep the scoop satisfying after freezing, while overly lean, watery, or powder-heavy mixes are far more likely to turn dry, chalky, icy, or flat.
Greek yogurt, cottage cheese, well-chosen protein powder, concentrated fruit, nut butter, and moderate sweetness often do more for healthy protein ice cream than macro extremism ever will. The best version is not the one making the loudest promise. It is the one you would actually want to eat again.
Best Homemade Protein Ice Cream Recipe: Classic Vanilla
If you make only one version from this guide, make this first. It is the strongest all-around starting point for most readers because it balances texture, flavor, and practicality better than the leaner or more extreme versions. It is also the recipe that makes the rest of the guide easier to understand, because so many variations build from the same logic.
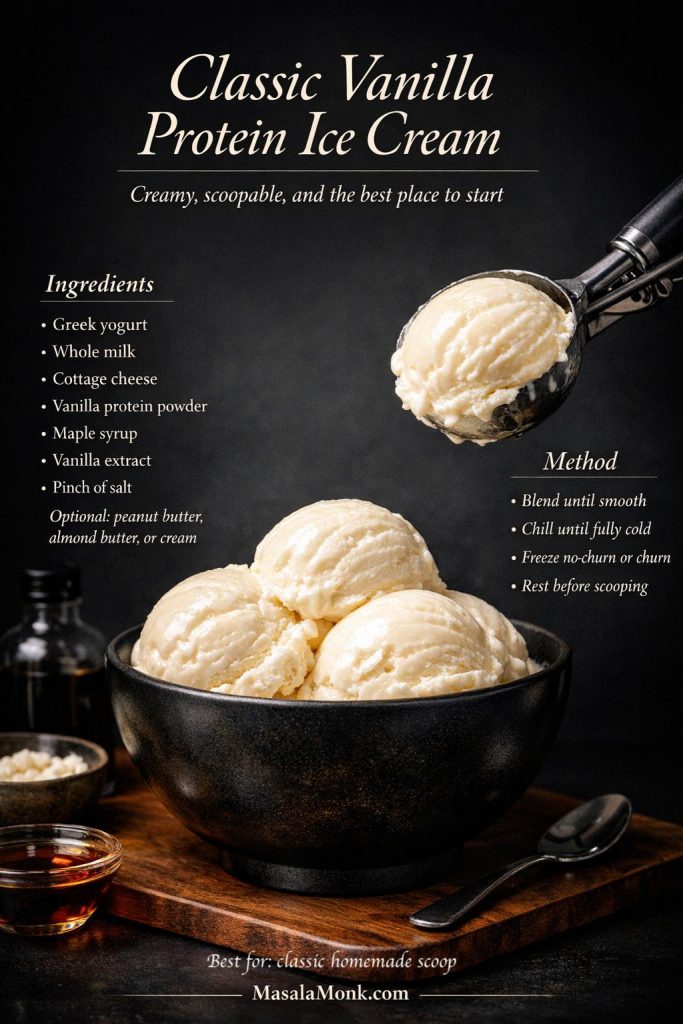
Best for: a classic scoopable homemade protein ice cream Method: no-churn or ice cream maker Texture: creamy, balanced, and softer than leaner versions
Start with this classic vanilla protein ice cream when you want the creamiest, most reliable introduction to homemade protein ice cream. It gives you a scoopable base built with Greek yogurt, cottage cheese, vanilla protein powder, and just enough richness to feel satisfying instead of chalky or flat.
Why This Vanilla Protein Ice Cream Works
This version works because no single ingredient is forced to do all the heavy lifting. Greek yogurt brings brightness and protein. Cottage cheese adds body. Milk keeps the mixture workable. A little optional cream or nut butter rounds off the dry edge that protein powder can create.
Balance is what matters here. A lot of homemade recipes are too thin, too lean, or too powder-heavy, so they freeze into something dull and stubborn. This one is built to stay softer, fuller, and more dessert-like than those shortcut versions. It is not identical to custard ice cream, but it gets much closer to that direction than a simple milk-and-powder formula ever will.
Ingredients
1 cup Greek yogurt
3/4 cup whole milk
1/2 cup cottage cheese
1 scoop vanilla protein powder
2 to 3 tablespoons maple syrup or another preferred sweetener
1 teaspoon vanilla extract
1 pinch salt
2 tablespoons peanut butter, almond butter, or cream, optional but recommended
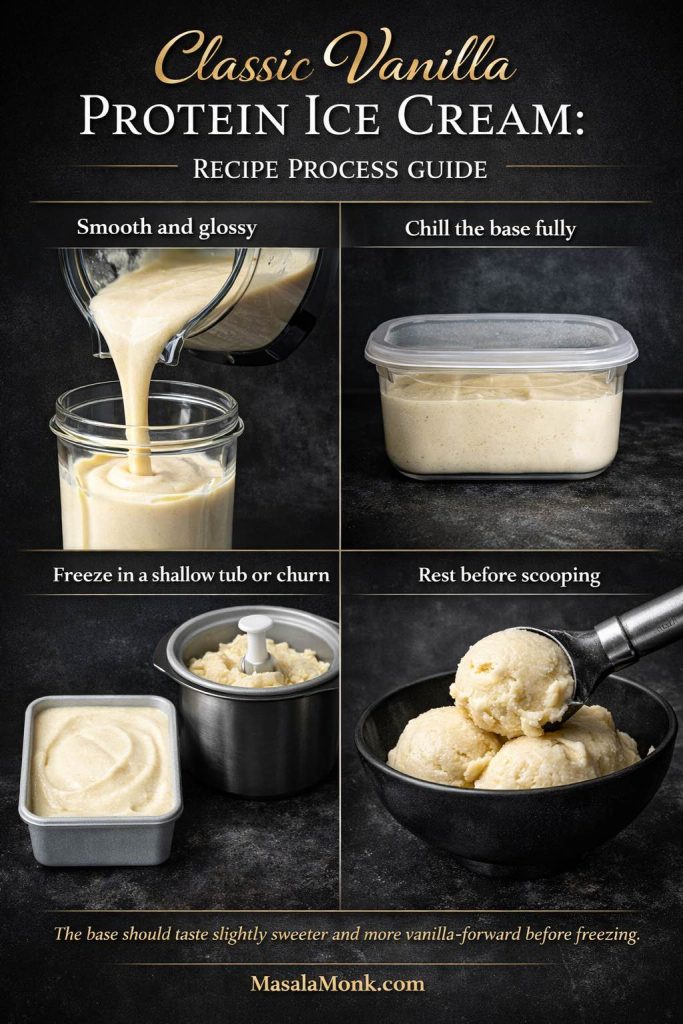
The best vanilla protein ice cream starts looking right before it ever freezes. A smooth glossy base, a full chill before freezing or churning, and a short rest before scooping are what help this version stay creamier, softer, and more dessert-like instead of turning grainy, icy, or stubbornly firm.
Method
Blend everything until completely smooth and glossy. The base should look silky, not grainy or dull. Taste before chilling. At this point it should seem slightly sweeter and slightly more vanilla-forward than necessary, because both will soften once frozen.
Chill the mixture until fully cold, ideally for 2 to 4 hours. For a no-churn version, freeze it in a shallow container for about 4 to 6 hours, stirring once or twice during the early freezing stage if convenient.
For the most classic texture, churn the cold base in an ice cream maker until it reaches a thick soft-serve stage, then freeze it for another 1 to 2 hours for a firmer scoop. Let it stand for 5 to 10 minutes before serving.
What to Expect
This vanilla version should feel smoother, rounder, and more complete than the leaner recipes in the post. It lands between rich frozen yogurt and classic homemade ice cream, which is exactly why it works so well as the hero version. If you are making homemade protein ice cream for the first time, this is the one most likely to convince you the effort is worth it.
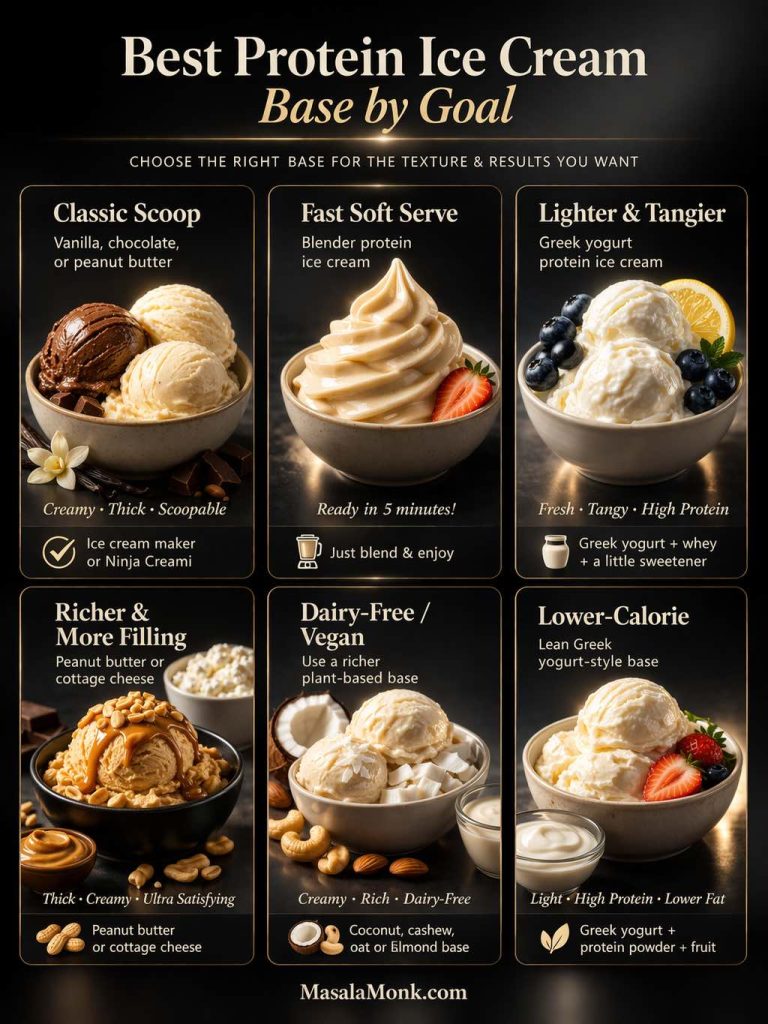
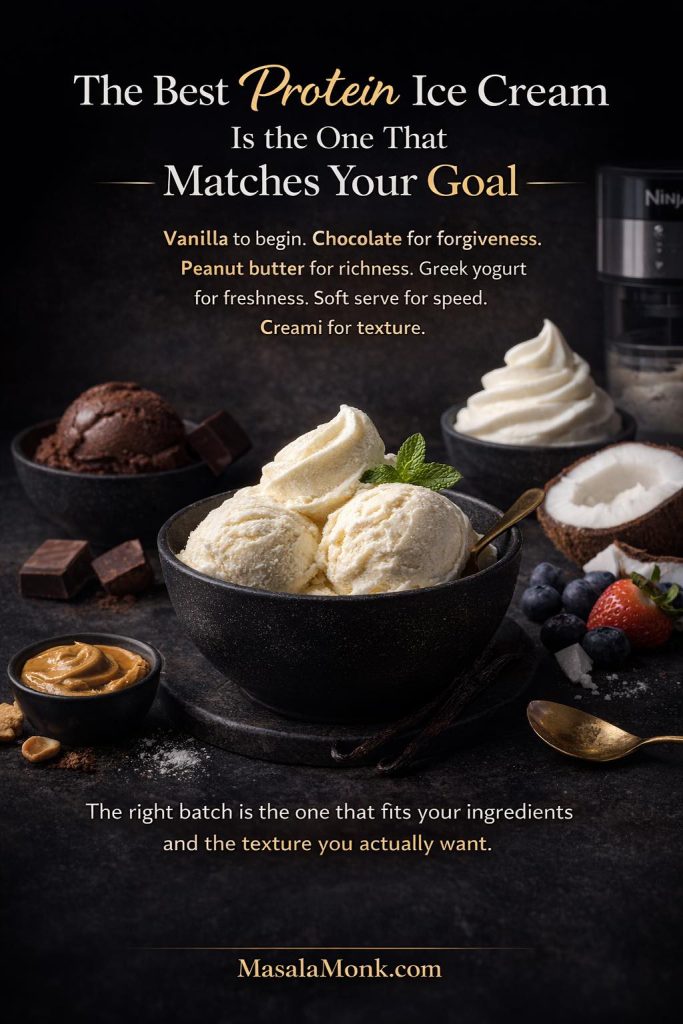
If you match the recipe style to the dessert you actually want, the whole category becomes easier.
Not every protein ice cream base is built for the same result. Use this quick guide to choose between a classic scoop, fast blender soft serve, tangy Greek yogurt, richer peanut butter or cottage cheese, dairy-free plant-based options, or a lighter lower-calorie base before you commit to a recipe.
Best for a Classic Scoop
Classic vanilla, chocolate, and the richer peanut butter version are your best options if you want something closest to a true homemade scoop. These styles have the most support from dairy, body-building ingredients, and overall balance. An ice cream maker improves the odds even more.
Best for a Fast Soft-Serve Bowl
A blender-style version is the right fit when speed matters more than storage. Choose this route when you want something thick, cold, and satisfying within minutes instead of waiting half a day for a freezer tub to set.
Best for a Lighter, Tangier Dessert
Greek yogurt is the clearest winner when you want something fresher, cleaner, and less heavy on the palate. Strawberry also fits naturally here when the fruit is concentrated properly.
Best for a Richer, More Filling Spoonful
Peanut butter and cottage cheese are the strongest choices when you want more body. Peanut butter gives richness and softness, while cottage cheese gives the dessert a denser, more substantial spoonful.
Best for Dairy-Free or Vegan Needs
Choose a dairy-free base when you want a plant-based route with some flexibility around the rest of the formula. Move into a vegan version when both the base and the protein source need to stay plant-based. In both cases, richer ingredients and stronger flavor directions usually give the best results.
Best for Lower-Calorie Goals
Low calorie protein ice cream is the most direct fit when keeping the dessert lighter matters most. Sugar-free versions can also work well, but they ask more from the flavor structure and usually freeze more firmly.
Best for Freezer Storage
Richer no-churn versions and churned versions usually hold up best if you want to keep a batch in the freezer and return to it later. Quick blender bowls are usually the weakest at long storage.
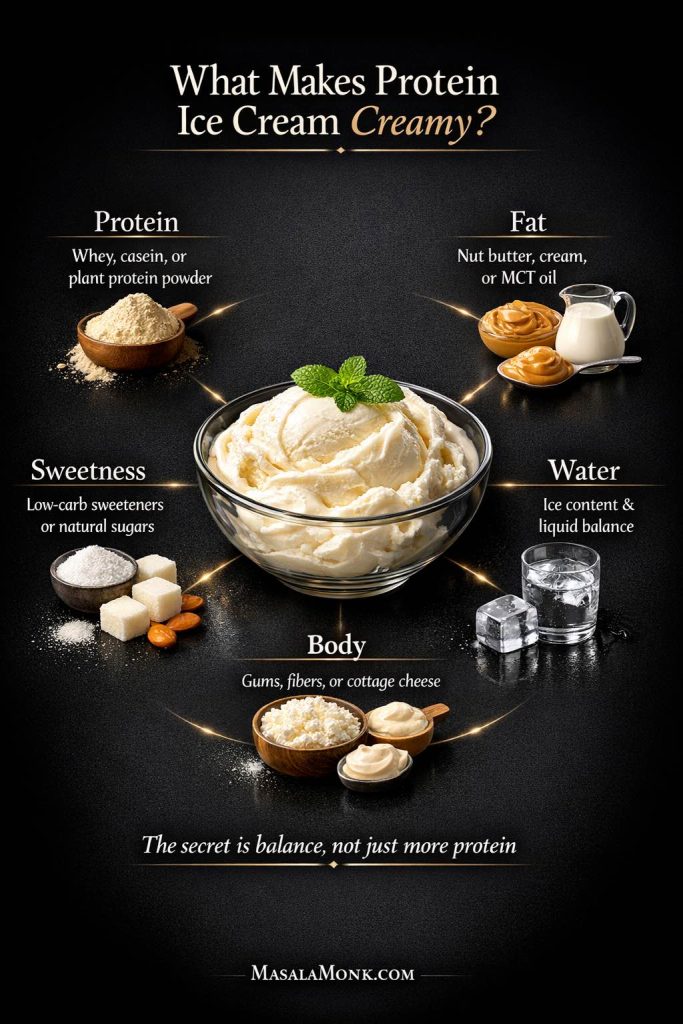
How to Make Protein Ice Cream Creamy Instead of Chalky or Icy
Homemade protein ice cream gets much better once you understand one simple truth: protein alone does not make frozen dessert creamy. Texture depends on balance, not just macros.
Protein powder alone does not create creamy protein ice cream. The best texture comes from balancing protein with enough fat, sweetness, body, and controlled water so the final scoop stays smooth instead of turning chalky, icy, or hard.
Protein Alone Does Not Make Good Ice Cream
Protein powder can help build the dessert you want, but it cannot do every job at once. It adds protein, some flavor, and some thickness, but it can also make the base drier, grittier, or more artificial if used too aggressively. That is why homemade batches go downhill so quickly when people keep adding extra scoops to chase bigger numbers.
Greek yogurt, cottage cheese, ricotta, and thicker dairy ingredients often help because they bring protein with body and texture, not just powder. That is one reason some high protein frozen desserts feel naturally creamy while others feel dry and strange.
Fat, Sweetness, and Body Matter More Than People Think
Creaminess depends on more than protein. Fat softens texture. Sweetness matters because frozen desserts always taste less sweet once cold. Body matters too. Thick yogurt, cottage cheese, nut butter, and even a little cream can make the difference between a spoonable dessert and a disappointing frozen mass.
Very lean formulas often underperform for exactly that reason. They are light on softness, light on flavor support, and easy to freeze too firmly.
Too Much Water Is What Breaks Many Homemade Batches
If there is one silent problem behind weak results, it is excess water. Thin milk, watery fruit, unbalanced plant milk, and diluted bases all raise the risk of iciness. Fruit can be wonderful here, but it often needs reducing or concentrating first. Dairy-free versions can also be excellent, but thin plant milk alone rarely gives enough support.
The real secret is balance: enough richness, enough sweetness, enough solids, and not too much water.
Chocolate is one of the easiest flavors to make convincingly, and that is part of its charm.
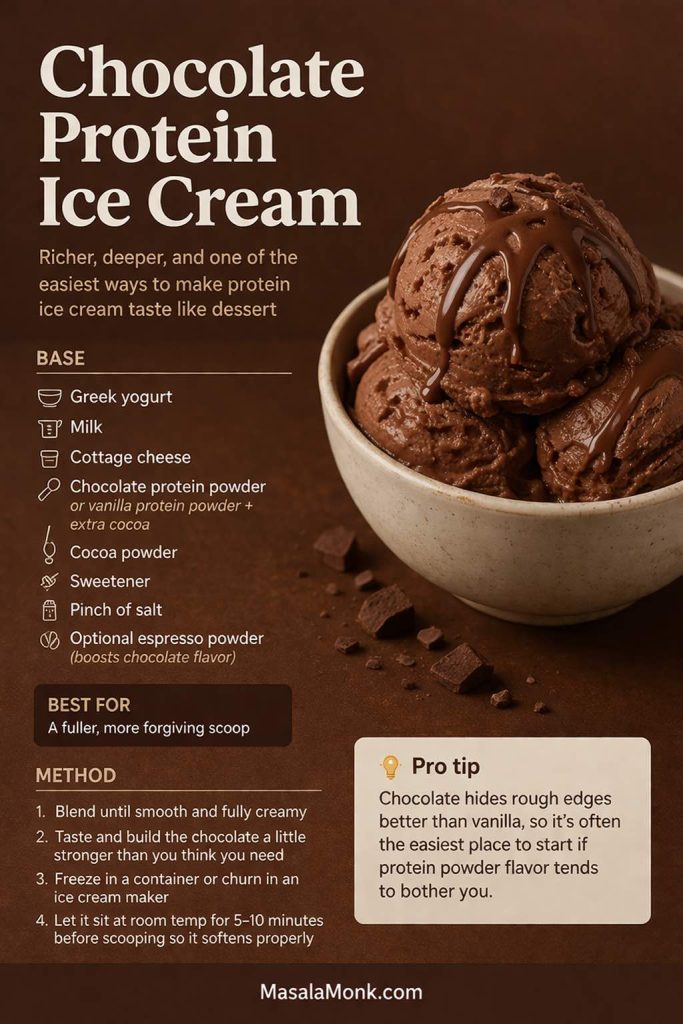
Chocolate is often the easiest way to make protein ice cream feel like dessert instead of a cold nutrition experiment. Cocoa builds depth, helps cover rough protein-powder edges, and gives the scoop a fuller, more forgiving flavor than lighter vanilla-style versions usually manage.
Why This Chocolate Protein Ice Cream Works
Chocolate works because it hides rough edges. A powder that would feel exposed in vanilla often becomes much easier to enjoy once cocoa, bitterness, and salt enter the picture.
That makes this one of the safest choices for readers who want their dessert to feel unmistakably like dessert.
Ingredients
1 batch classic vanilla protein ice cream base
2 tablespoons cocoa powder
1 teaspoon espresso powder, optional
1 tablespoon melted dark chocolate or 1 tablespoon peanut butter, optional
Method
Blend the cocoa into the vanilla base until smooth. Add espresso powder if you want more depth. For a darker finish, add the melted chocolate or peanut butter too.
If the base warms during blending, chill it again before freezing. Then either freeze it in a shallow container for 4 to 6 hours or churn it until thick and soft, followed by a short freezer rest. Taste before freezing and make sure the chocolate feels a touch stronger than you think it should.
What to Expect
Chocolate usually feels deeper, richer, and more forgiving than vanilla. If you already know you prefer intense chocolate desserts, MasalaMonk’s avocado chocolate mousse is another natural direction.
Peanut butter is one of the most effective ingredients in the whole category because it improves flavor and texture in the same move.
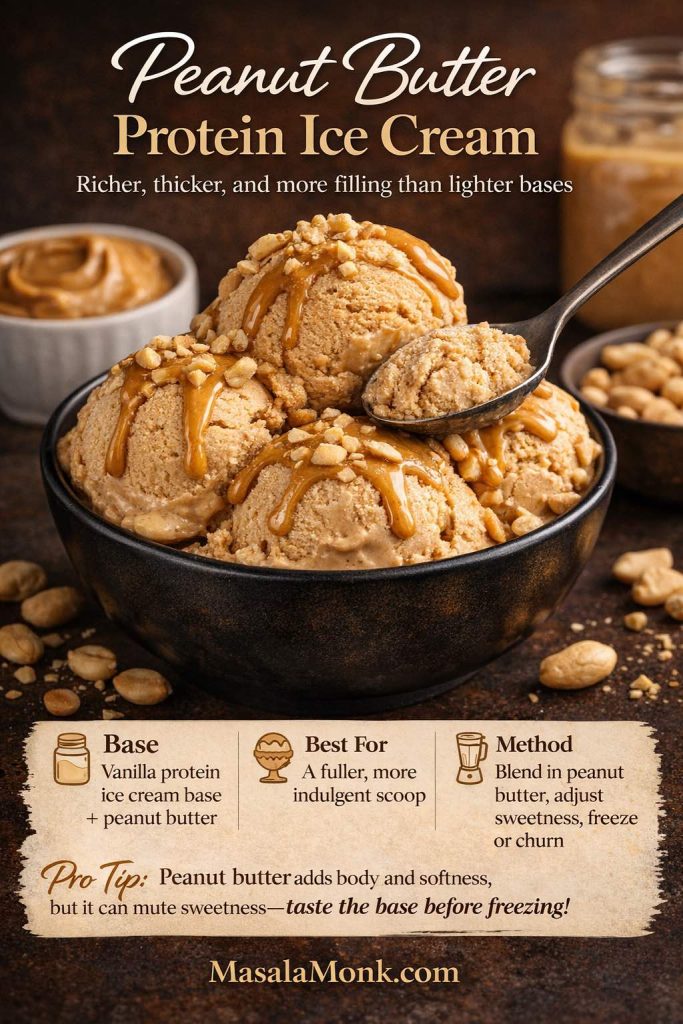
Peanut butter changes protein ice cream in two important ways at once: it adds richer flavor, and it makes the texture feel thicker, softer, and more filling. That is why this version works so well when you want a scoop that feels more indulgent than lighter Greek yogurt or lower-calorie styles.
Why This Peanut Butter Protein Ice Cream Works
Peanut butter adds fat, softness, and body while also giving the dessert a fuller personality. Instead of feeling light or overly functional, the finished scoop tends to feel rounded, thick, and more indulgent.
Biggest Mistake to Avoid
Do not assume peanut butter automatically makes the base balanced. It improves texture, but it can also mute sweetness and make a weak vanilla base seem flatter. Taste after blending and adjust before freezing if needed.
Ingredients
1 batch classic vanilla protein ice cream base
2 to 3 tablespoons peanut butter
Chopped roasted peanuts, optional
Dark chocolate shards or chips, optional
Method
Blend the peanut butter into the base until fully smooth. If it thickens more than you want, add a splash of milk to loosen it. Taste and adjust sweetness if needed because peanut butter can quiet the sweetness slightly.
Freeze in a shallow container for 4 to 6 hours or churn and then firm briefly in the freezer. Fold in chopped peanuts or chocolate near the end if you want more texture.
What to Expect
This version should feel thicker and more substantial than the vanilla base. It is one of the easiest styles to make feel satisfying in a classic dessert sense.
Strawberry is appealing in theory, but it only works well when the fruit flavor is treated seriously.
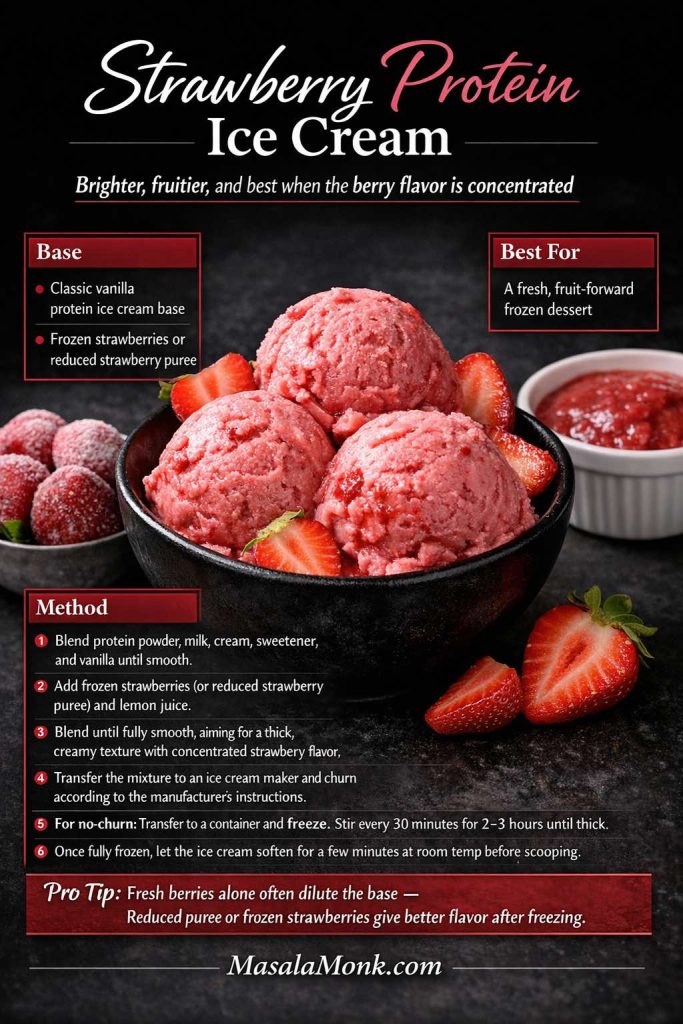
Strawberry protein ice cream only works well when the fruit flavor is strong enough to survive freezing. That is why frozen strawberries or reduced strawberry puree give a fuller, brighter result than fresh berries alone, which can water down the base and leave the final scoop tasting weaker than it should.
Why This Strawberry Protein Ice Cream Works
The weakness of many strawberry versions is dilution. Fresh berries blended straight into the base often make the dessert colder and pinker without making it truly taste like strawberry.
Using frozen berries or reduced strawberry puree creates a more concentrated fruit flavor that still shows up clearly after freezing.
Best Method for This Version
This is one of the variations where fruit concentration matters more than equipment. A churned version can be smoother, but even the best machine cannot rescue a watery berry base. If the strawberry flavor is weak before freezing, the finished dessert will be weaker still.
Ingredients
1 batch classic vanilla protein ice cream base
3/4 cup frozen strawberries or reduced strawberry puree
Extra 1/2 teaspoon vanilla extract, optional
Method
Blend frozen strawberries or cooled reduced puree into the base until smooth. If starting with fresh strawberries, cook them down first until they are thicker and less watery, then cool before blending.
Taste before freezing. The fruit should taste stronger than seems necessary at room temperature. Freeze in a shallow container for 4 to 6 hours or churn if you prefer a smoother finish. For more fruit-forward ideas, MasalaMonk’s strawberry smoothie recipe with healthy variations is a useful related read.
What to Expect
This strawberry protein ice cream should feel bright, softly tangy, and properly strawberry-forward rather than pale and watery. When the fruit is concentrated well, it becomes one of the freshest styles in the guide.
This is the cleaner, tangier style in the article, and it deserves to be treated as its own category rather than a weaker version of vanilla.
Greek yogurt changes protein ice cream more than people expect. It gives the batch a brighter tang, a cleaner finish, and a lighter feel than richer classic-style bases, which is exactly why this version works so well when you want something fresher instead of heavier.
Why This Greek Yogurt Protein Ice Cream Works
Greek yogurt changes the character of the dessert. It makes the scoop fresher, more lively, and more refreshing. Instead of chasing richness above all else, it gives the whole thing a cooler, lighter, almost frozen-yogurt identity.
That is why Greek yogurt and protein powder ice cream can be so appealing when you want something cleaner and brighter than a fuller vanilla tub. A good Greek yogurt protein powder ice cream should taste deliberate, not like a compromised vanilla.
How This Differs From the Base Recipe
The hero vanilla version aims for a broader, softer, more classic dessert feel. This one is deliberately sharper and brighter. If you want something that tastes clean rather than plush, this is the better fit.
Ingredients
1 1/4 cups Greek yogurt
3/4 cup whole milk
1/4 cup cottage cheese
1 scoop vanilla protein powder
2 to 3 tablespoons sweetener
1 teaspoon vanilla extract
Pinch of salt
Method
Blend until fully smooth. Taste carefully before chilling and make sure the base is sweet enough to carry the yogurt’s tang after freezing.
Freeze in a shallow container for about 4 to 5 hours, stirring once or twice early if desired, or churn until it thickens into a soft frozen texture. Let it soften briefly before serving if stored overnight.
What to Expect
Expect something brighter and cleaner than the hero vanilla version. This lands closer to premium frozen yogurt than to rich custard-style ice cream, which is exactly its strength.
Dairy-free versions do not succeed by acting like dairy is irrelevant. They succeed by replacing some of dairy’s lost richness and body intelligently.
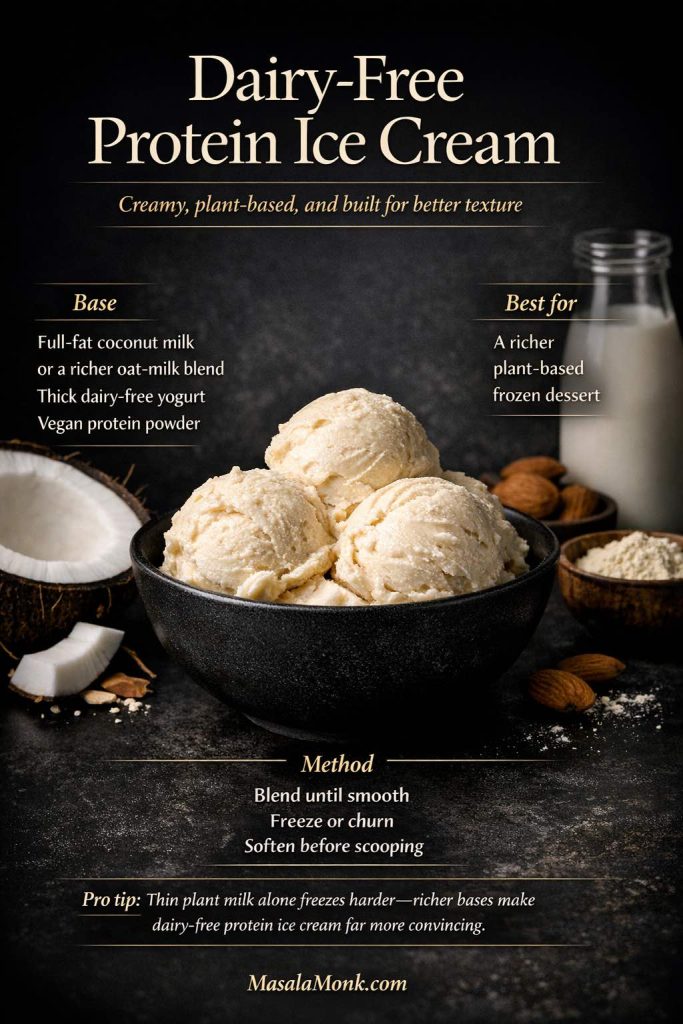
Dairy-free protein ice cream works best when the base brings enough richness to replace what dairy usually provides. Full-fat coconut milk, richer oat blends, and thick dairy-free yogurt create a smoother, more convincing texture than thin plant milk ever can.
Why This Dairy-Free Protein Ice Cream Works
Without dairy solids and creaminess, a plant-based base can freeze brittle or icy surprisingly fast. That is why full-fat coconut milk, thick dairy-free yogurt, and nut butter matter so much here. They bring back some of the softness and body that thin plant milk cannot provide on its own. Chocolate is often the safest default direction here because it helps the dairy-free base feel fuller and more convincing.
Best Method for This Version
For a dairy-free batch, the best method depends on how rich the base is. Coconut-forward versions handle no-churn storage better than thinner oat-based ones. If the base feels lean, churning helps. If the base is already rich and well-built, either route can work.
Ingredients
1 cup full-fat coconut milk or a rich oat-milk blend
1/2 cup thick dairy-free yogurt or extra rich plant milk
1 scoop vegan or neutral protein powder
2 to 3 tablespoons sweetener
1 teaspoon vanilla extract
Pinch of salt
1 tablespoon peanut butter or almond butter, optional
1 to 2 tablespoons cocoa powder, recommended for a fuller flavor
Method
Blend everything until smooth. If the base feels too thin, add a little more thick yogurt or a spoon of nut butter. Taste before chilling and make sure the flavor is confident enough to survive freezing.
Freeze for about 4 to 6 hours in a shallow container or churn if your machine handles plant-based mixtures well. Give it a little extra time on the counter before scooping if the base is on the lighter side.
What to Expect
Coconut-forward versions usually feel richer and softer. Oat-based versions tend to be lighter and less lush. Both can work well, but neither benefits from being too thin. A chocolate-led version usually feels more convincing than a delicate vanilla one.
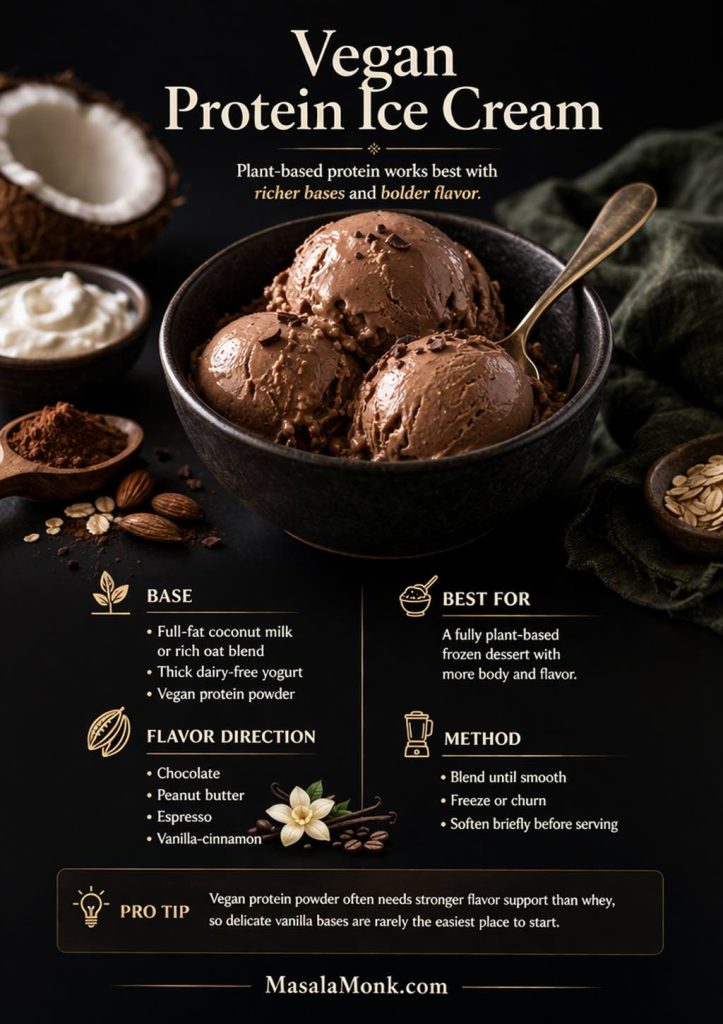
A vegan version is not just dairy-free with a label change. It has its own behavior because the protein itself changes the dessert.
Vegan protein ice cream works best when the base is rich enough to support the powder. Thick dairy-free yogurt, full-fat coconut milk, or a richer oat blend give plant-based batches more body, while bolder flavor directions like chocolate, peanut butter, espresso, or vanilla-cinnamon help the scoop taste fuller after freezing.
Why This Vegan Protein Ice Cream Works
Plant-based protein powders often finish drier, flatter, or more noticeable than whey once frozen. That means this style needs a bolder flavor strategy from the start. Chocolate, peanut butter, coffee, and warm vanilla-cinnamon all tend to perform better than delicate flavors that leave the powder exposed. For most readers, chocolate-peanut-butter is the strongest first version because it gives plant-based powders more support and a more complete dessert feel.
Best Flavor Direction to Choose First
If this is your first homemade vegan batch, start with chocolate or peanut butter. They are more forgiving, they support plant-based powders better, and they give the whole dessert a fuller personality.
Ingredients
1 batch dairy-free protein ice cream base
Extra cocoa, peanut butter, espresso, or vanilla-cinnamon, depending on the flavor direction you want
Method
Start with the dairy-free base, then choose one strong direction. Blend in cocoa for a darker finish, peanut butter for a fuller texture, espresso for depth, or cinnamon with extra vanilla for warmth.
Taste before freezing and adjust while the base still feels easy to correct. Freeze in a shallow container for 4 to 6 hours or churn if you prefer. A short counter rest before serving usually improves the texture noticeably.
What to Expect
The best vegan version feels cohesive and intentional, not like a plant-based compromise. Strong flavor choices are what make that happen.
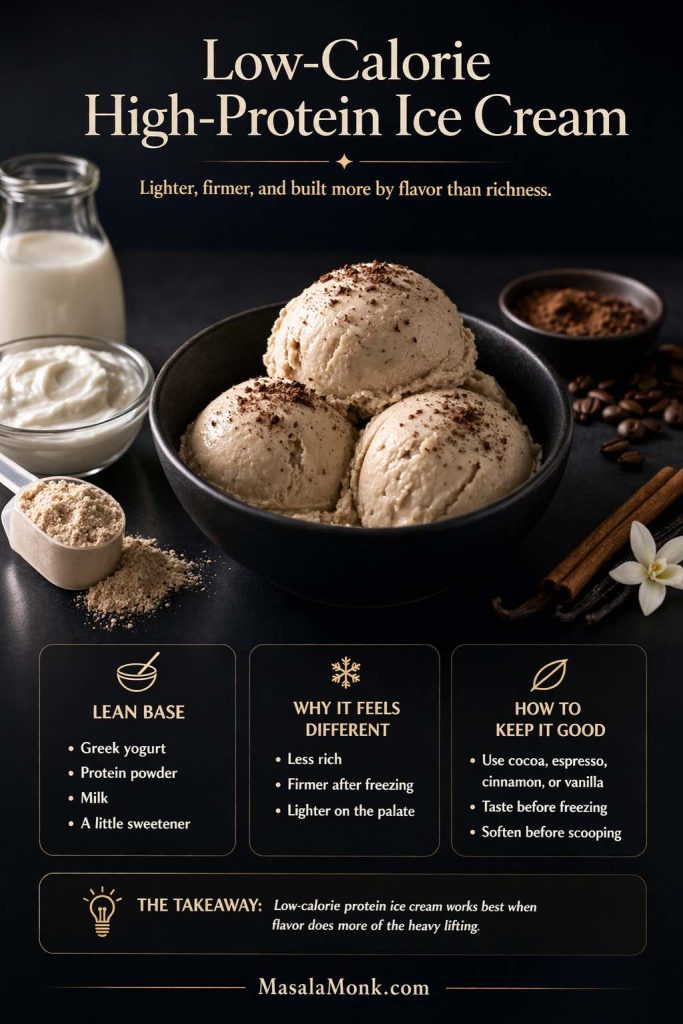
This is one of the most commercially attractive directions in the category, but it only works when the expectations are realistic.
Low-calorie protein ice cream works when you stop expecting richness to do the work for you. A leaner base made with Greek yogurt, protein powder, milk, and a little sweetener can still feel satisfying, but only when flavor is built deliberately and the scoop gets time to soften before serving.
Why This Low-Calorie High-Protein Ice Cream Works
This version succeeds by aiming for a lighter frozen dessert that still feels worth repeating, not by pretending to be premium full-fat ice cream. Once that is clear, the recipe becomes much easier to enjoy on its own terms.
Biggest Mindset Shift for This Version
Do not judge this one by whether it matches premium ice cream spoon for spoon. Judge it by whether it gives you a lighter dessert that still tastes deliberate, satisfying, and worth keeping in the freezer.
A chocolate-espresso direction usually works better than a shy vanilla one because leaner formulas need stronger flavor support.
Ingredients
1 1/4 cups Greek yogurt
1 scoop vanilla or chocolate protein powder
1/2 cup milk
1 to 2 tablespoons sweetener
Pinch of salt
1 teaspoon vanilla extract
Cocoa, espresso, or cinnamon, optional
Method
Blend until smooth and taste carefully before chilling. If the flavor feels underbuilt, add cocoa, espresso, or cinnamon rather than relying on extra powder.
Freeze in a shallow container for 4 to 5 hours or churn if you want a more refined finish. Let it soften for several minutes before scooping because this style usually freezes firmer than richer versions.
What to Expect
This version should feel lighter, firmer, and less plush than the richer recipes. Its strength is not decadence. Its strength is that it can still feel satisfying without becoming heavy.
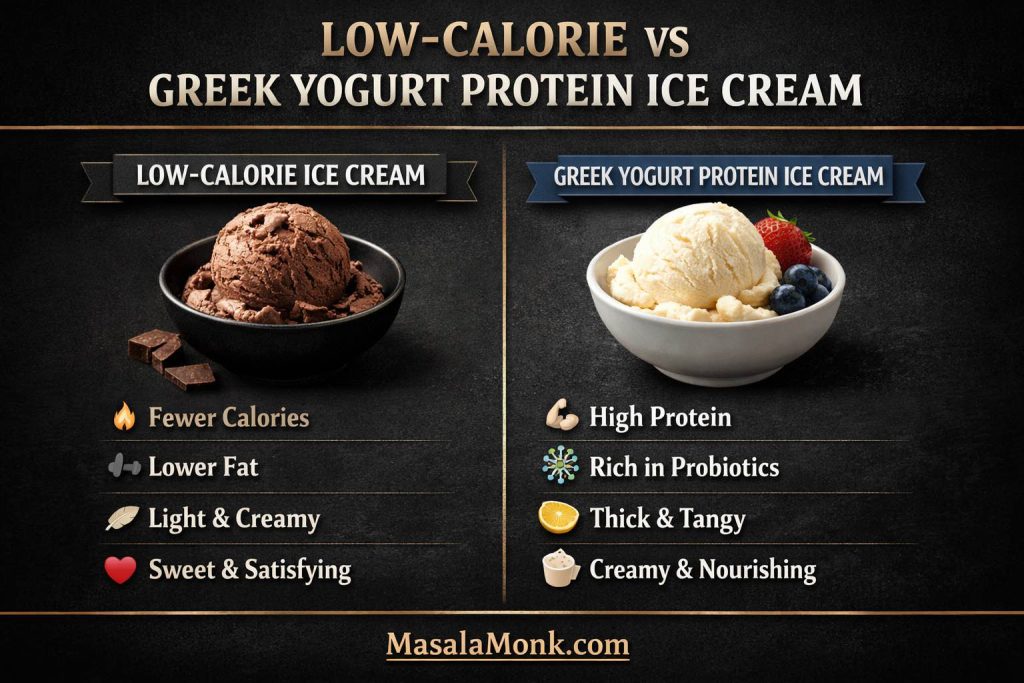
Low-calorie protein ice cream and Greek yogurt protein ice cream may both sound lighter than classic versions, but they do not eat the same way. One is leaner and usually firmer after freezing, while the other stays brighter, tangier, and closer to frozen yogurt in character.
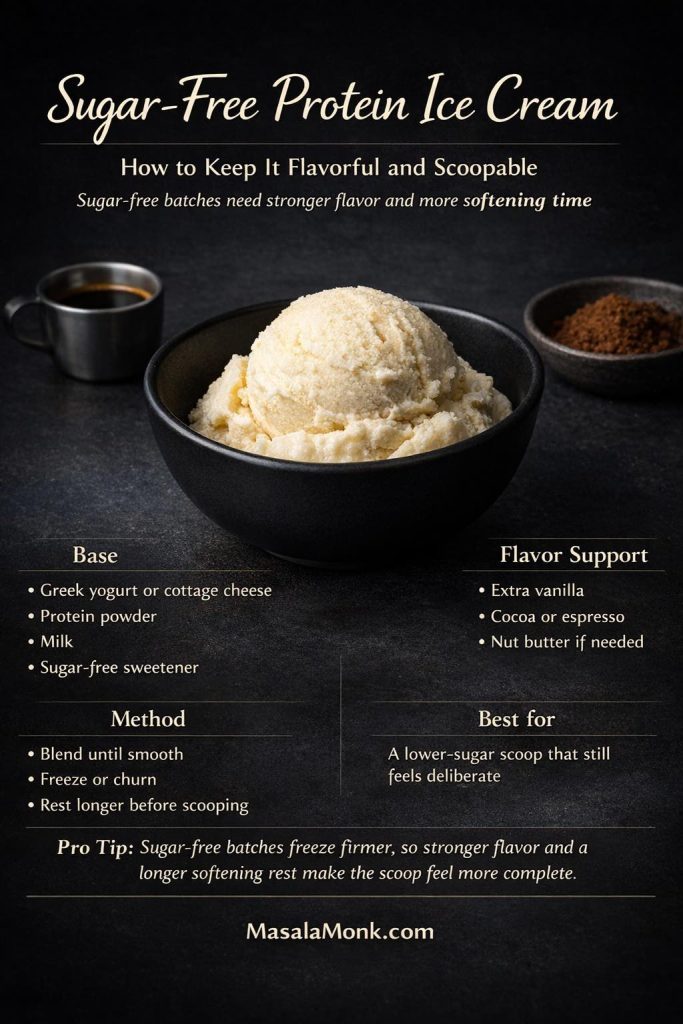
Sugar-free versions can be rewarding, but they are one of the clearest examples of why sweetness affects more than taste.
Sugar-free protein ice cream needs more than a sweetener swap to work well. When sugar drops, texture firms up faster, so stronger flavor support and a longer softening rest help the scoop feel fuller, smoother, and far less flat.
Why This Sugar-Free Protein Ice Cream Works
Sugar contributes softness and body. Once you remove it, you lose more than sweetness. That is why this style needs stronger help from vanilla, cocoa, nut butter, espresso, and overall balance.
Biggest Mistake to Avoid
Do not make this version too delicate. A sugar-free base needs a confident flavor direction. A timid vanilla mix that might survive with regular sweetener often feels flat and severe without it.
The easiest way to make this style satisfying is to lean into bolder flavors like chocolate, peanut butter, or warm vanilla-cinnamon rather than keeping the base too delicate.
Ingredients
1 batch classic vanilla protein ice cream base
Sugar-free sweetener in place of maple syrup or other liquid sweetener
Extra vanilla, cocoa, espresso, or nut butter, optional but often helpful
Method
Blend the base with your chosen sweetener and taste before chilling. If it feels thin in flavor, strengthen it now with more vanilla, cocoa, espresso, or nut butter.
Freeze for about 4 to 6 hours if using the no-churn route, or churn and then firm briefly if using a machine. Let it rest a little longer on the counter before serving because sugar-free versions often set up more firmly.
What to Expect
Expect a firmer, more direct texture than the standard sweetened versions. When the flavor is built properly, though, it can still feel complete and satisfying rather than austere.
Can You Make Low Carb Protein Ice Cream at Home?
Yes, but the easiest path is not always the most obvious one. If you want low carb protein ice cream, skip the banana-heavy blender route and focus instead on vanilla, chocolate, peanut butter, Greek yogurt, cottage cheese, or richer dairy-free bases with a lower-carb sweetener.
The same logic applies to high protein low sugar ice cream. You are looking for enough protein and enough body to make the dessert satisfying without relying on a lot of sugar or higher-carb fruit. That can work very well, but it works best when the flavor is bold and the structure is supportive.
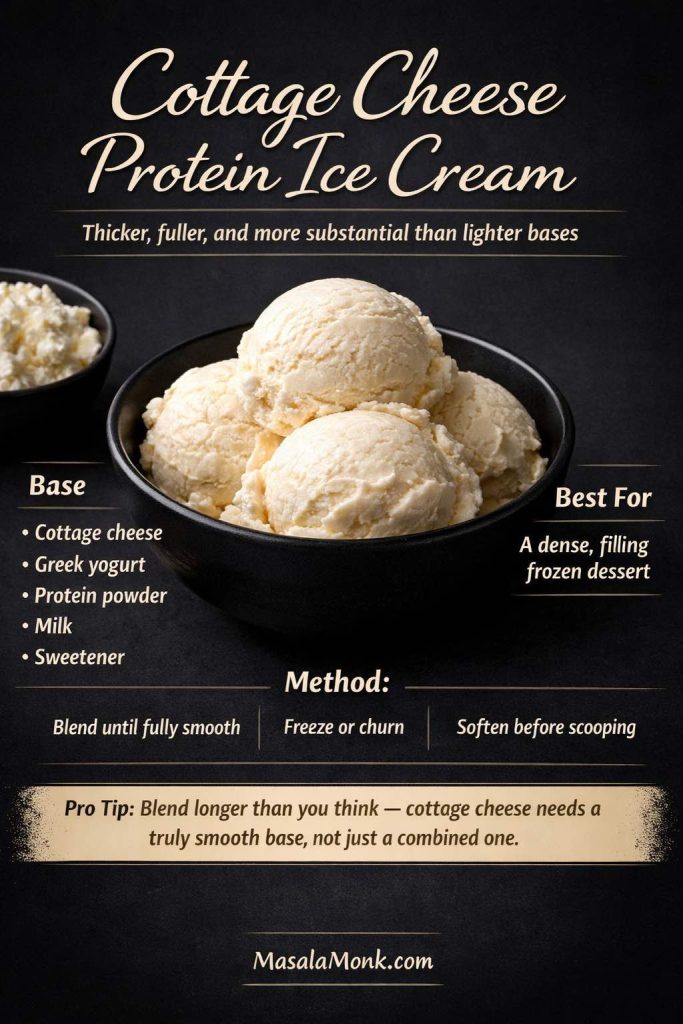
This is the thickest, most substantial style in the guide, and that density is exactly why some readers will love it.
Why This Cottage Cheese Protein Ice Cream Works
Cottage cheese brings protein, body, and a more grounded texture than Greek yogurt. Instead of tasting bright and cool, this style tends to feel heavier, rounder, and more filling.
Cottage cheese changes protein ice cream by adding more body than lighter bases can usually deliver. When it is blended fully smooth, the result feels thicker, fuller, and more substantial, which is exactly why this version works so well for a denser, more filling scoop.
Biggest Mistake to Avoid
Do not stop blending too early. In this version, well combined is not enough. It has to be truly smooth, or the texture will never feel finished.
Ingredients
3/4 cup cottage cheese
3/4 cup Greek yogurt
1 scoop protein powder
3/4 cup milk
2 to 3 tablespoons sweetener
Pinch of salt
1 teaspoon vanilla extract
Method
Blend longer than you think you need to. The mixture should look completely smooth, not merely combined. Taste, adjust sweetness or vanilla, then chill thoroughly.
Freeze for about 4 to 6 hours in a shallow container or churn if preferred. Chocolate and peanut butter both suit this base especially well if you want a deeper, more dessert-like finish.
What to Expect
This version gives the fullest spoonful in the guide. It is not the lightest or freshest option. It is the most substantial.
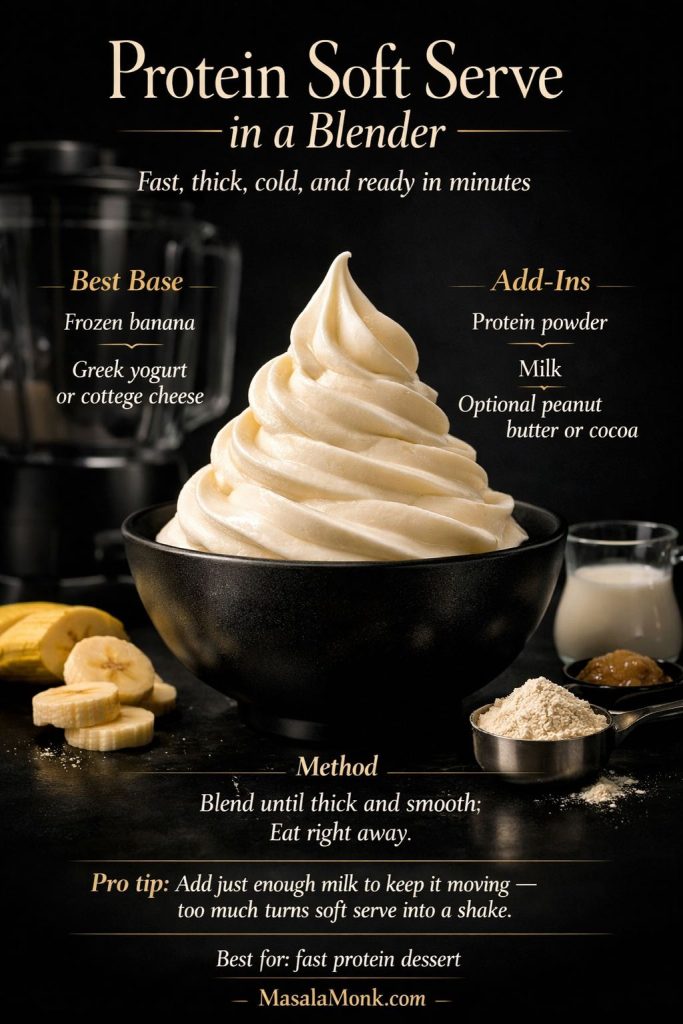
Protein Soft Serve: How to Make Protein Ice Cream in a Blender
A blender version is the fastest way to make protein ice cream at home when you want something thick, cold, and ready right away. This style works best when you are after protein soft serve rather than a freezer tub you plan to revisit days later.
Banana is one of the easiest ways to make this method work because it adds body, sweetness, and immediate soft-serve texture. Greek yogurt, cottage cheese, milk, and protein powder can all support it. Peanut butter and cocoa are especially useful here because they help the bowl feel fuller and more dessert-like.
When you want protein ice cream fast, blender soft serve is the easiest win. Frozen banana gives it body, Greek yogurt or cottage cheese makes it thicker, and just enough milk keeps the mixture moving without thinning it into a shake.
Why This Blender Version Works
Unlike a stored tub, blender protein ice cream is built for immediate texture. Frozen fruit gives it bulk, dairy or dairy-free support ingredients smooth it out, and protein powder adds substance without having to carry the whole dessert on its own.
Best Ingredients for Fast Protein Soft Serve
Frozen ripe banana is the easiest base. Greek yogurt makes it tangier and lighter. Cottage cheese makes it thicker and more filling. A splash of milk helps the blender move. Peanut butter, cocoa, or vanilla give it a more complete dessert flavor.
This is also the clearest answer to how to make protein ice cream in a blender. You are building for immediate softness, not for long-term freezer storage.
Ingredients
2 frozen ripe bananas
1/2 cup Greek yogurt or cottage cheese
1/4 to 1/3 cup milk
1 scoop vanilla or chocolate protein powder
1 tablespoon peanut butter or 1 tablespoon cocoa powder, optional
Pinch of salt
Method
Blend until thick and smooth, stopping to scrape down as needed. Add just enough milk to keep the mixture moving. Eat right away for the best soft-serve texture.
What to Expect
This version is colder, softer, and more immediate than a freezer tub. It is ideal when you want a fast protein dessert in minutes, not a scoopable batch for later.
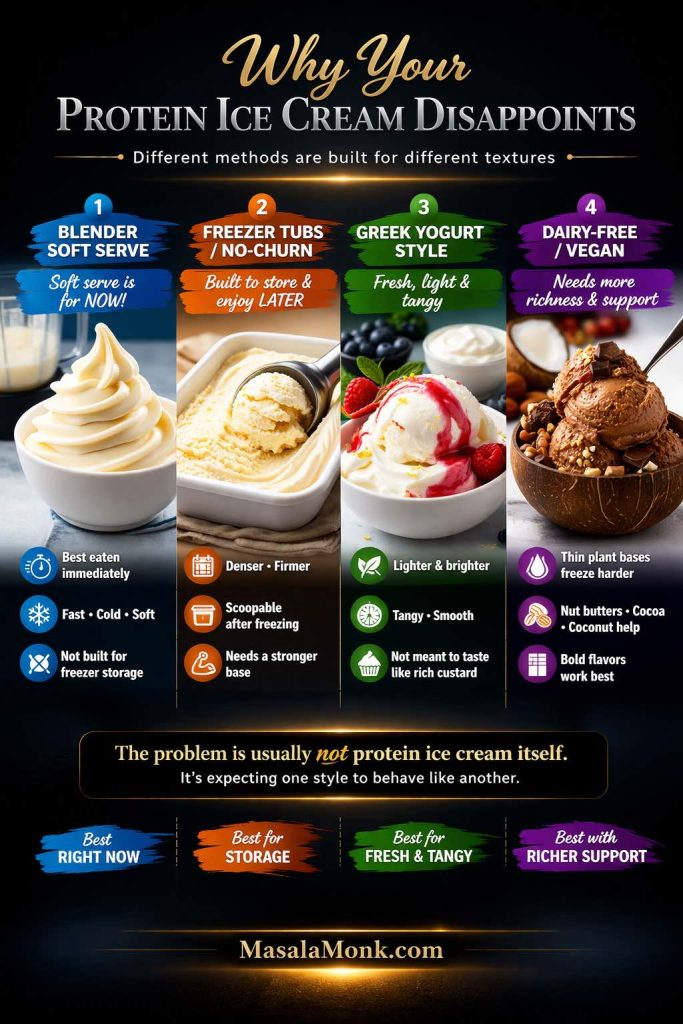
Why Homemade Protein Ice Cream Disappoints and How to Fix It
Most failures come down to mismatched structure. The base is too lean, so it freezes hard. The powder is too aggressive, so the dessert turns chalky or oddly sweet. The flavor tastes acceptable before freezing, then weak and lifeless once cold.
Protein ice cream often disappoints when the method and the expectation do not match. Blender soft serve is best eaten right away, freezer tubs need a stronger base to stay scoopable, Greek yogurt versions stay lighter and tangier, and dairy-free batches usually need more richness and bolder flavor support to feel creamy after freezing.
A fruit-heavy blender bowl is not meant to behave like a scoopable freezer tub. A tangy Greek yogurt version is not trying to imitate rich custard. A dairy-free batch can be smooth and satisfying, but it usually needs more support than a dairy-based version to stay that way.
Once you understand that this topic is really a family of desserts rather than one fixed formula, the failures start making much more sense.
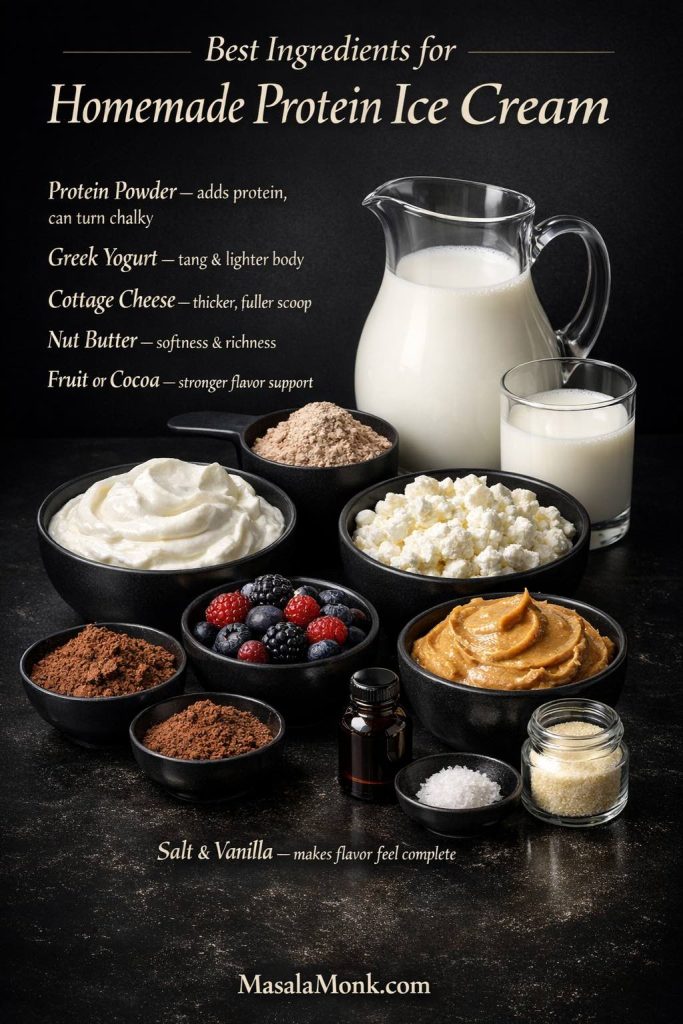
Best Ingredients for Homemade Protein Ice Cream
A good base is not about piling in healthy ingredients. A few ingredients do most of the real work.
Use this ingredient guide to build better homemade protein ice cream from the start. Protein powder adds protein, Greek yogurt and cottage cheese build body, nut butter softens the texture, and cocoa, fruit, vanilla, and salt help the final scoop taste fuller instead of chalky or flat.
Protein Powder
Protein powder changes flavor, thickness, and final texture very quickly. Some powders stay smooth and cooperative. Others turn chalky, grainy, or strangely sweet once cold. One scoop is often enough for a home batch. More than that can make the dessert feel processed faster than it makes it feel better.
Whey-based powders and plant-based powders often behave differently in homemade protein ice cream, especially once the dessert is fully frozen. That is one reason broad rules about protein powder do not always travel well from one recipe to another.
Greek Yogurt and Cottage Cheese
Greek yogurt lifts the dessert. It adds tang, brightness, and a lighter feel. Cottage cheese grounds it. It adds body, weight, and a more substantial spoonful. Both are useful, but they create very different personalities.
Milk, Cream, Nut Butter, and Sweetener
Milk keeps the base blendable. Cream softens the result and makes it feel closer to classic homemade ice cream. Nut butter adds body and softness at the same time. Sweetener matters because frozen desserts always taste less sweet once cold, so the base has to taste stronger before freezing than many people expect.
Fruit, Cocoa, Vanilla, and Salt
These are what bring the dessert back to life. Fruit often needs concentrating. Cocoa usually needs enough salt and sweetness behind it. Vanilla needs more presence than people think. A pinch of salt, a little espresso, or a touch of cinnamon can make a huge difference in how complete the final scoop tastes.
Once brands are out of the conversation, the real question becomes behavior. What kind of powder actually works well once the dessert is cold, thick, and fully frozen?
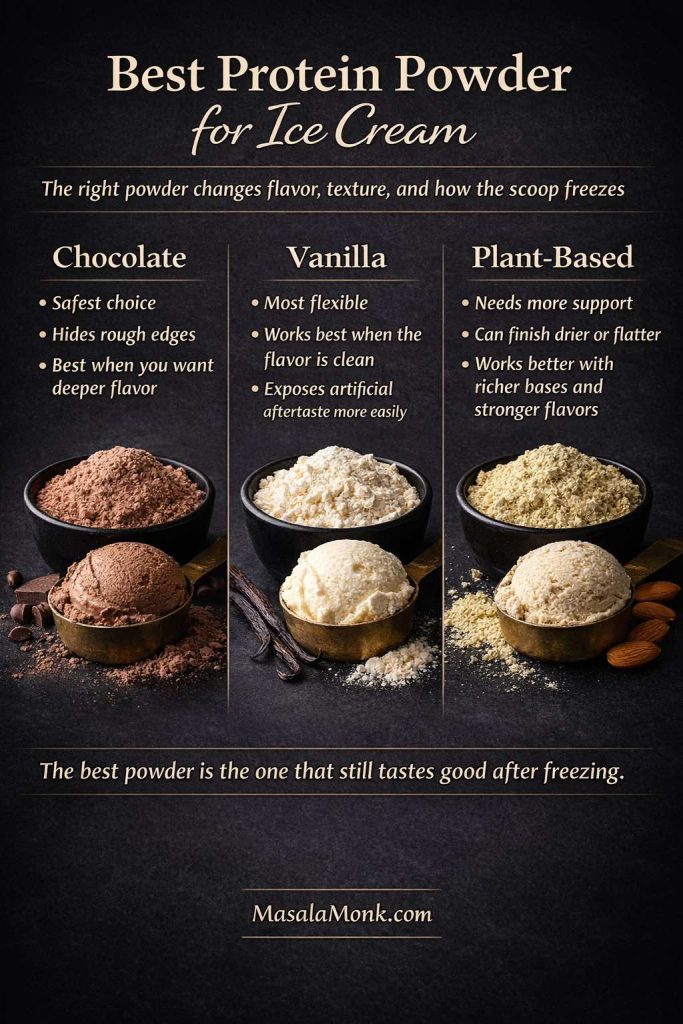
The best protein powder for ice cream is not just the one that looks good in a shaker. Chocolate usually hides rough edges best, vanilla stays the most flexible when the flavor is clean, and plant-based powders often need richer bases and bolder flavor support to avoid tasting dry or flat after freezing.
What Makes a Protein Powder Work Better in Ice Cream
The best choice blends in smoothly, tastes pleasant before freezing, and still behaves well after freezing. It should support the dessert rather than sit on top of it. A powder that already tastes tiring, gritty, or oddly sweet in a shake rarely becomes more enjoyable in frozen form.
The best powder for homemade protein ice cream is usually one that tastes good before freezing and still behaves well after freezing.
Chocolate Protein Powder Is Usually the Safer Choice
Chocolate is usually the safer route because cocoa hides flaws. It covers mild chalkiness, softens a harsh sweetener edge, and gives the dessert more depth right away. If someone has had disappointing protein desserts before, chocolate often gives them the best chance of a result that still feels like dessert.
Vanilla Protein Powder Works Best When the Flavor Is Clean
Vanilla can be excellent, but only when the powder itself is clean, rounded, and not overly artificial, because vanilla itself leaves very little room to hide. If the powder has an aftertaste, the frozen dessert will expose it. The upside is flexibility. A good vanilla powder can move into strawberry, cinnamon, peanut butter, honey-style, or classic vanilla directions very naturally.
Plant-Based Protein Powder Needs More Help
Plant-based powder can absolutely work here, but it often needs more support from the rest of the recipe. Vegan powders are more likely to finish dry, flat, or slightly dusty unless the base has enough richness and the flavor direction is strong enough to carry them.
What to Avoid
Avoid powders that leave a strong aftertaste, turn sandy in cold mixtures, or taste aggressively sweet in a way that feels processed rather than dessert-like. Also avoid trying to fix a weak recipe by adding more and more powder. That usually makes the texture worse, not better.
If your goal is protein ice cream with protein powder, the smartest route is usually to let the powder support the dessert rather than dominate it. That same rule applies whether you are trying to make ice cream from protein powder in a blender, a no-churn tub, or an ice cream maker.
Why Protein Ice Cream Needs Stronger Flavor Than You Think
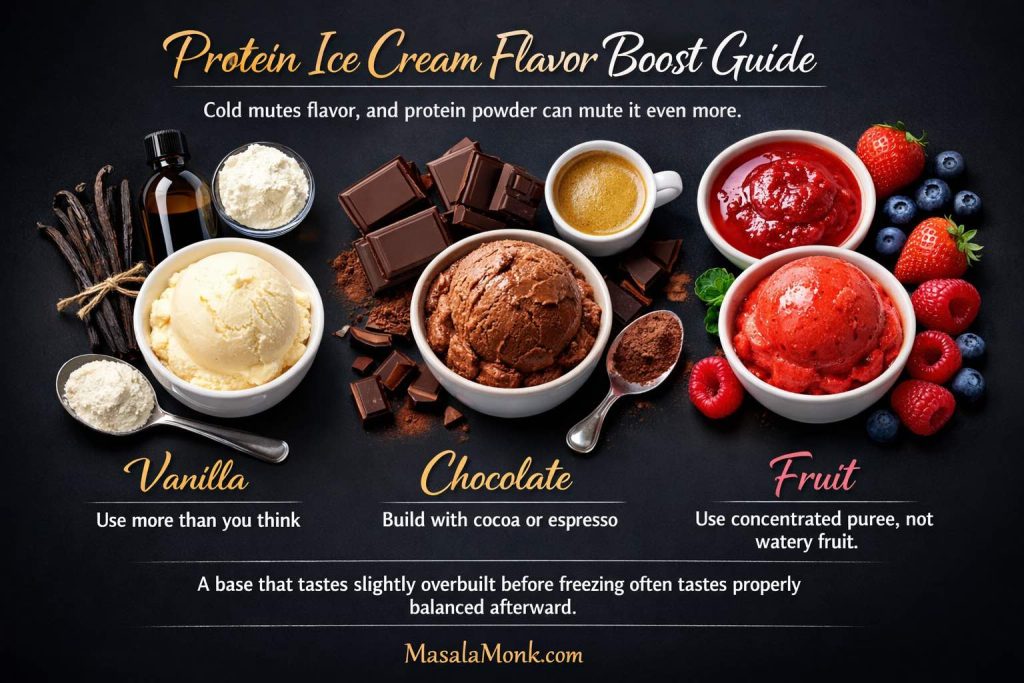
One of the easiest ways to ruin a batch is to underbuild the flavor. Cold mutes sweetness and aroma, and protein powder often mutes them further. Vanilla needs to be louder. Chocolate needs more depth. Fruit needs concentration instead of extra water.
Protein ice cream often tastes weaker after freezing because cold dulls flavor and protein powder can mute it further. That is why vanilla usually needs a heavier hand, chocolate benefits from cocoa or espresso depth, and fruit works best when the flavor comes from a concentrated puree instead of extra watery fruit.
That is why so many homemade versions feel technically fine but emotionally disappointing. The texture may be acceptable, yet the flavor lands flat. The sweetness is too cautious. The cocoa is too timid. The fruit is too diluted. For stronger chocolate thinking, MasalaMonk’s homemade hot chocolate with cocoa powder and this guide to cacao vs chocolate vs dark chocolate are both useful related reads.
A base that tastes slightly overbuilt before freezing often tastes properly balanced afterward.
Can You Make Protein Ice Cream in a Ninja Creami?
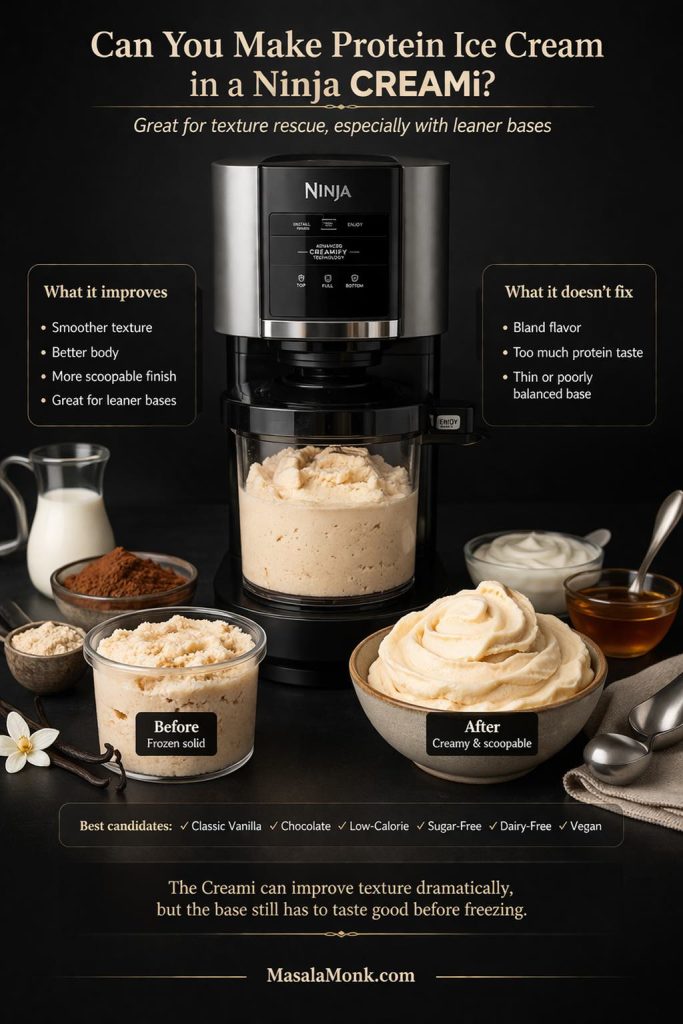
Yes, and that is one reason Ninja Creami protein ice cream recipes are so popular. The machine works especially well with leaner or higher-protein frozen bases because spinning after freezing can dramatically improve texture.
A Ninja Creami can rescue texture far better than it can rescue a weak recipe. It is especially useful for leaner protein ice cream bases that freeze firm or crumbly, but the base still has to taste good before freezing because the machine cannot fix bland flavor or a poorly balanced formula.
What it helps with is body. It can make a firmer, more restrained base feel smoother, softer, and more scoopable. What it does not fix is a weak formula. A bland base will still taste bland. An overly powdery base can still taste too much like protein powder. A thin base can still feel less satisfying than one built with better richness and balance.
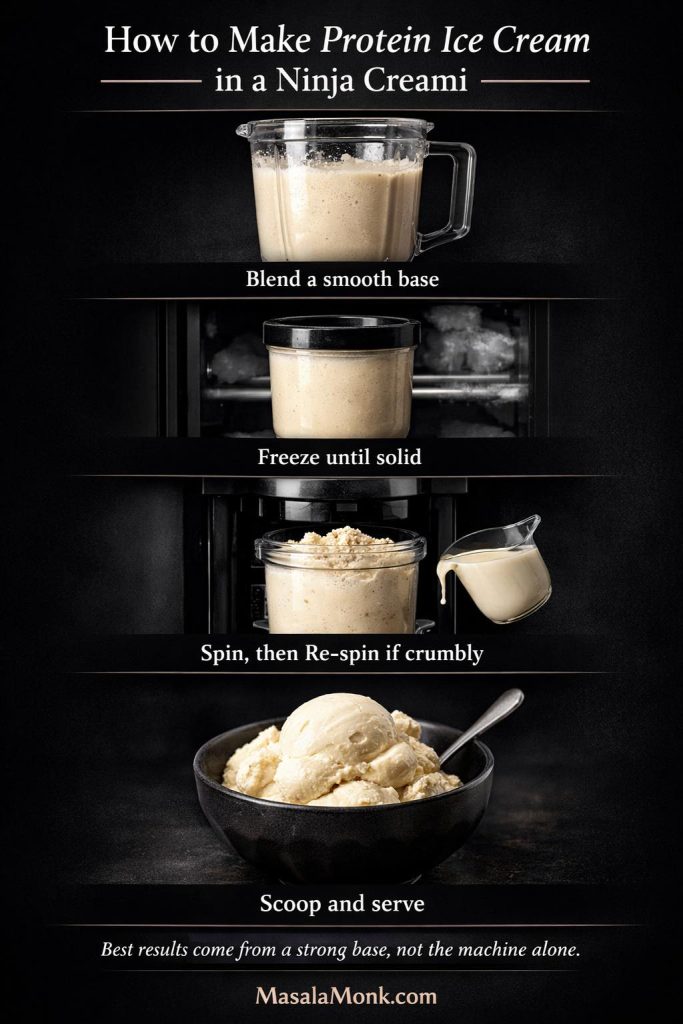
A Ninja Creami can smooth out a firmer protein ice cream base, but it works best when the mix is already built well. Freeze the pint fully solid, expect the first spin to look crumbly with leaner recipes, then re-spin to bring it together into a creamier, more scoopable texture.
The best candidates from this article for Creami-style adaptation are the classic vanilla, chocolate, low-calorie, sugar-free, dairy-free, and vegan versions. In other words, the machine is excellent for texture rescue, but it is not a substitute for building a good base in the first place.
Most bad batches fail in familiar ways, which is good news because familiar problems are easier to fix.
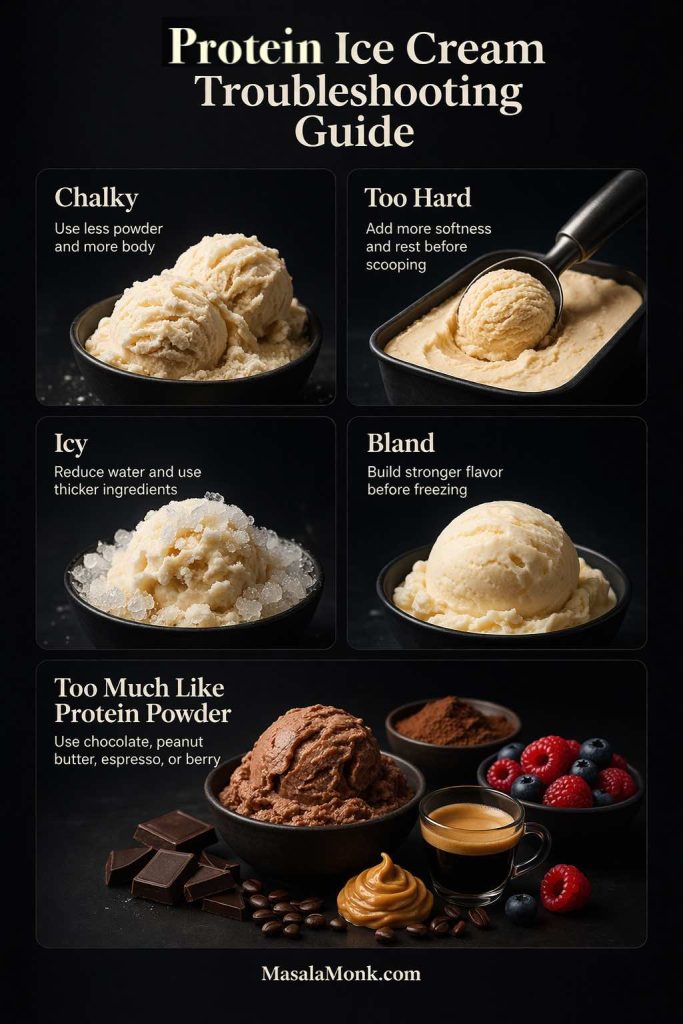
Homemade protein ice cream gets much easier once you know what went wrong. Use this troubleshooting guide to fix chalky texture, hard freezer tubs, icy batches, weak flavor, or that overly powdery finish before you give up on the recipe.
Why Protein Ice Cream Turns Chalky
Chalkiness usually comes from too much powder, a powder that behaves badly in the cold, or a base that is too lean to support it. Reduce the powder slightly next time and build more body through yogurt, nut butter, cottage cheese, or a little cream.
Why Protein Ice Cream Freezes Too Hard
This usually means the formula is short on softness. Too little sugar, too little fat, or too much water can all make the dessert set up like a brick. A richer base and a short softening rest before serving usually help.
Why Protein Ice Cream Turns Icy
Iciness is most common in fruit-heavy, dairy-free, or low-fat versions because there is too much water relative to the rest of the base. Reduce fruit purees, use thicker plant ingredients, or add more structure through yogurt or nut butter.
Why Protein Ice Cream Tastes Bland Once Frozen
Cold mutes flavor. If the unfrozen base tastes merely pleasant, the frozen version will usually taste weak. Increase vanilla, salt, cocoa, espresso, cinnamon, sweetness, or concentrated fruit before freezing the next batch.
Why Protein Ice Cream Tastes Too Much Like Protein Powder
That usually means the rest of the dessert is underbuilt. Instead of adding more powder, choose a stronger direction such as chocolate, peanut butter, espresso, or berry and let those flavors carry more of the load.
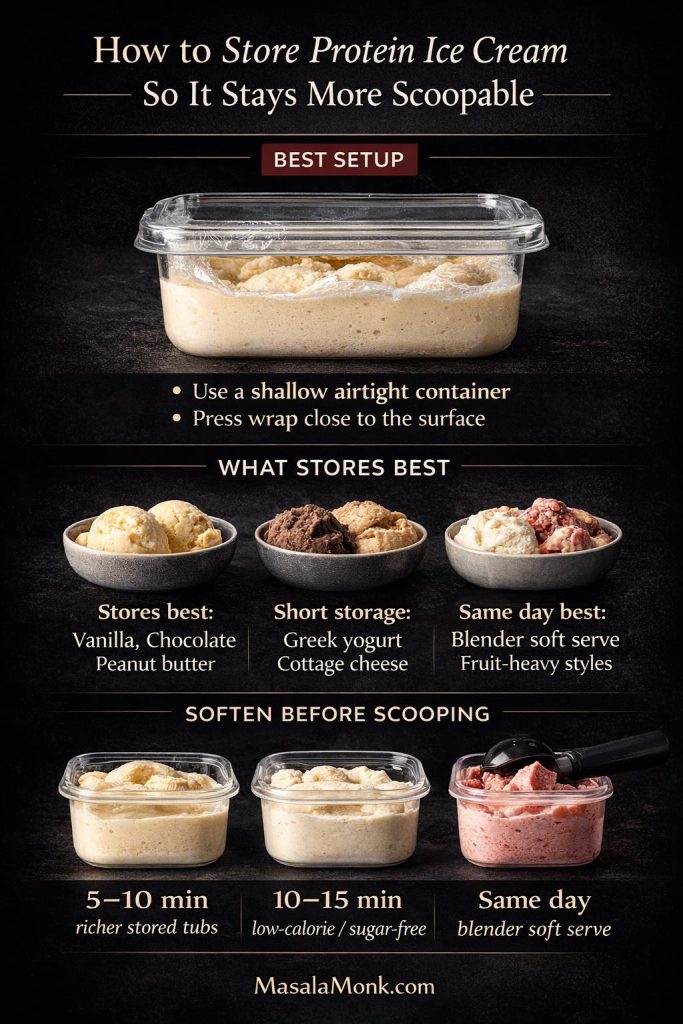
How to Store Protein Ice Cream So It Stays More Scoopable
Storage matters more than people often realize. A batch can taste excellent on the day it is made, then feel much firmer and less appealing after a night in the freezer. That does not always mean the recipe failed. It often means the storage setup or the expectations were off.
A good batch can still feel disappointing the next day if you store it badly. Shallow airtight containers help protein ice cream freeze more evenly, wrap pressed close to the surface reduces drying and crystals, and a short softening rest before scooping makes richer tubs, low-calorie versions, and sugar-free batches much more pleasant to eat.
The Best Container Setup for Homemade Protein Ice Cream
Use a shallow airtight container rather than a deep, narrow one. A flatter layer freezes more evenly, is easier to scoop from, and gives you more control over the final texture. Press wrap or parchment close to the surface if you want to reduce freezer crystals and keep the top from drying out.
If you know the batch is a lighter or lower-sugar version, shallow storage matters even more because those styles tend to firm up faster.
How Long Different Protein Ice Cream Styles Keep Their Best Texture
Most homemade protein ice cream is best within the first couple of days, when the texture still feels relatively fresh and the flavor has not gone dull from deep freezing. Richer no-churn or churned versions usually store the best. The hero vanilla recipe, chocolate protein ice cream, and peanut butter protein ice cream all hold up better than quick blender bowls.
Greek yogurt protein ice cream and cottage cheese protein ice cream can still store well for a short time, but both benefit from a little softening before serving. Fruit-heavy and soft-serve-style versions are usually best eaten the same day.
How Long to Soften Protein Ice Cream Before Serving
Most versions improve with 5 to 10 minutes on the counter before scooping. Leaner, lower-calorie, or sugar-free styles may need a little longer because they freeze firmer. The goal is not to melt the dessert. The goal is to let the structure relax enough that the scoop becomes smoother, more pleasant, and much closer to what you intended when you made it.
Final Thoughts on Making Protein Ice Cream at Home
Protein ice cream can absolutely be worth making at home, but only when the recipe matches the goal. If you want the best all-purpose place to begin, start with the classic vanilla version. From there, chocolate is the easiest forgiving variation, peanut butter gives the richest comfort, Greek yogurt offers the lightest easy win, and dairy-free or vegan versions become much more successful once you build in enough body from the start.
If speed matters most, the blender soft-serve section is the clearest shortcut. If you already own a Creami, it can help smooth out leaner or firmer bases, but it still cannot rescue a weak flavor structure on its own.
That is the real key to the whole category. The best version is not the one making the loudest promise. It is the one that fits your ingredients, respects the texture you actually want, and still tastes good enough that you would choose to make it again.
Protein ice cream gets much better once you stop chasing one “perfect” version for every craving. A classic vanilla bowl is the easiest place to begin, chocolate is more forgiving, peanut butter brings extra richness, Greek yogurt keeps things lighter, and dairy-free or soft-serve styles work best when you choose them for the texture they are actually built to deliver.
Protein Ice Cream FAQs
1. Can you make protein ice cream without an ice cream maker?
Yes. A no-churn version works when you want a freezer tub to scoop later, while a blender version is better when you want a soft-serve-style bowl to eat immediately.
2. Do you need protein powder to make protein ice cream?
No. Greek yogurt, cottage cheese, ricotta, and other protein-rich ingredients can all help build a higher-protein frozen dessert, though protein powder is still one of the easiest ways to push the protein level higher.
3. Can you make protein ice cream without banana?
Yes. Banana is especially helpful for blender-style protein soft serve, but plenty of no-churn, cottage cheese, dairy-free, and Ninja Creami versions skip it completely.
4. What protein powder works best in protein ice cream?
The best protein powder is one that tastes good before freezing and still behaves well after freezing. Chocolate is often the safest choice, while vanilla works best when the flavor is clean and not overly artificial.
5. Is whey or plant-based protein better for protein ice cream?
Neither is automatically better, but they behave differently. Whey is often easier to work with, while plant-based powders usually need more help from richer ingredients and stronger flavors.
6. Why does protein ice cream turn chalky?
It usually turns chalky because there is too much protein powder, the powder behaves badly in the cold, or the base is too lean to support it.
7. Why does protein ice cream freeze so hard?
It usually freezes hard because the formula is too lean, too watery, or too low in sugar and fat for the style you are trying to store.
8. How long should protein ice cream soften before serving?
Usually 5 to 10 minutes is enough, though leaner, lower-sugar, and lower-fat versions may need a little longer.
9. How long does homemade protein ice cream last in the freezer?
Most homemade protein ice cream is at its best within the first few days, especially if texture matters as much as flavor.
10. Can you make protein ice cream in a Ninja Creami?
Yes. A Ninja Creami can improve body and scoopability, especially with leaner or higher-protein bases, but it cannot fix a bland or poorly balanced formula.
11. Why is my Ninja Creami protein ice cream crumbly after the first spin?
That is common. The usual fix is to re-spin, and sometimes add a very small splash of milk first if needed.
12. What is the easiest protein ice cream version for beginners?
For most readers, the easiest good first batch is either a balanced vanilla freezer tub, a forgiving chocolate version, or a banana-based blender soft serve.