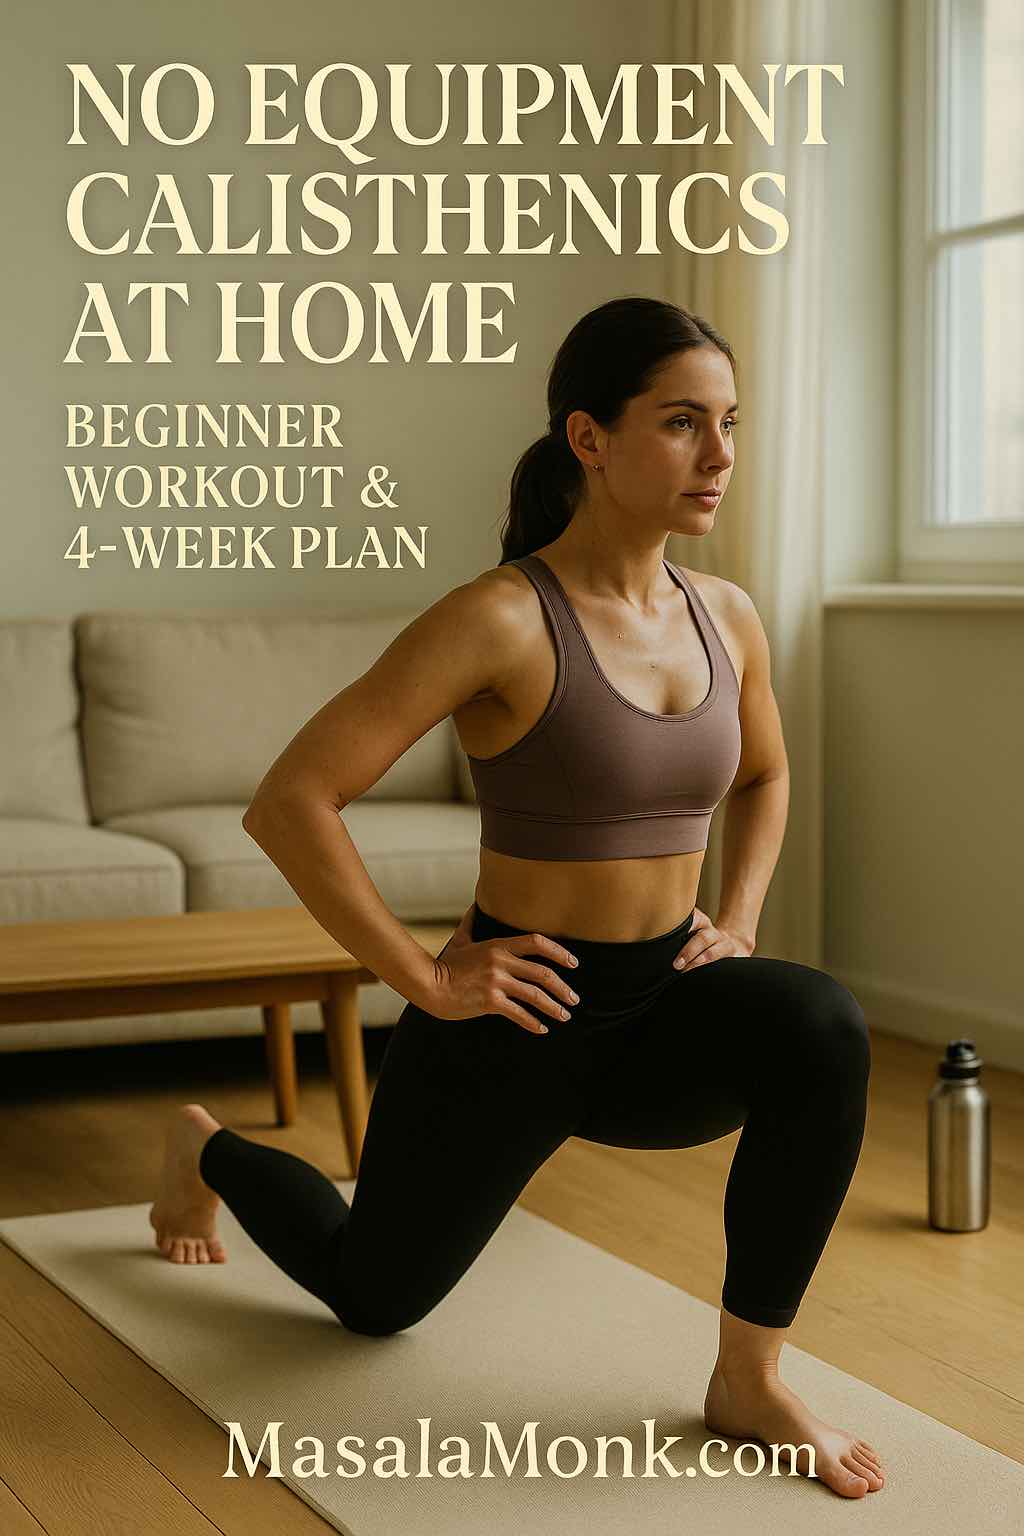
You don’t need a gym to get stronger. With no equipment calisthenics at home, you can build practical strength, steadier balance, and genuine confidence using movements that scale to your current level. All you need is a few square feet of floor, a stable surface, and a plan you can actually follow. This guide gives you a crisp exercise list, two plug-and-play routines, and a four-week progression that fits real life. Moreover, the structure aligns with public-health guidance—roughly 150 minutes of weekly activity plus two or more days of muscle-strengthening work—so you’ll improve health markers while you get stronger. For the official language, see the WHO physical activity fact sheet and the CDC guidelines for adults.
Why No Equipment Calisthenics at Home Works—And Keeps Working
To begin with, it’s accessible. You can start today with zero purchases and minimal setup. Next, it’s scalable. You’ll begin with friendly variations—knee push-ups, table rows, and short planks—then progress toward tougher versions at a pace that feels sustainable. Furthermore, it’s habit-friendly. Because the barrier to entry is tiny, workouts actually happen; consistency follows almost automatically. Consequently, progress arrives earlier than you expect.
Beyond convenience, no equipment calisthenics at home is evidence-aligned. Short sessions accumulated across the week help you reach those activity targets without rearranging your life. If you’re unsure what “counts,” the CDC’s plain-English explainer on what counts as activity confirms that practical movement, done consistently, matters. In turn, strength work at home checks the “muscle-strengthening” box while sharpening coordination and control.
Moreover, this approach supports more than muscle. Short sessions accumulate toward those weekly movement targets without overhauling your schedule. If you like gentle, low-impact options on off days, try wall-assisted mobility and core activation to stay in the groove without fatigue.
Fast Setup With Minimal Friction
First, clear a small rectangle of floor so you can step forward, back, and sideways without bumping into furniture. Then choose a sturdy table, countertop, or door frame—you’ll use it for supported rows or hands-elevated push-ups. Afterward, put down a mat or towel for traction, place water within reach, and cue a short playlist. That’s your entire gym. Additionally, link training to an existing habit—after coffee, during lunch, or just before dinner—so the decision to move becomes automatic. As a result, you’ll start more often and finish more sessions.
When you need a low-impact stand-in, swap a session for this standing Pilates workout—no floor work, still a full-body feel.
No Equipment Calisthenics at Home — Beginner Exercise List
Rather than memorize dozens of exercises, master five movement families that cover the whole body. From there, you’ll progress by adjusting leverage, tempo, or range of motion. When you want visual cues, jump to reputable references for a quick form check—or borrow ideas from focused sessions like Lower Body Strength (Day 22) or Core Power (Day 23) to sharpen form.
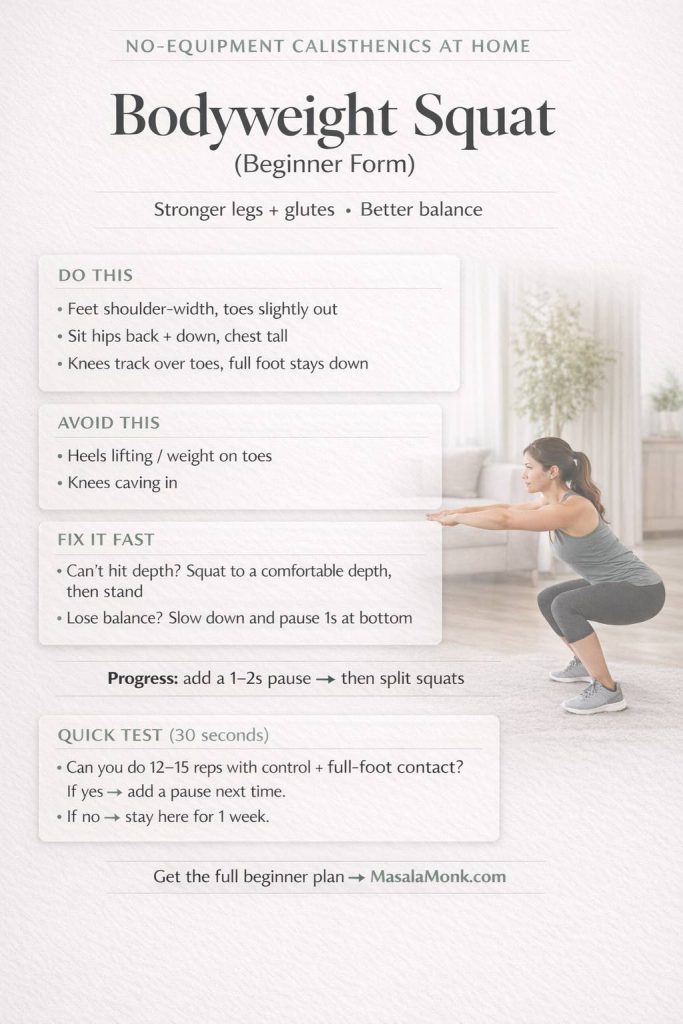
Squat → Reverse Lunge
Sit the hips back, keep the chest tall, and press through the whole foot. Pause for one second at the bottom to build control. Subsequently, introduce reverse lunges to train one leg at a time and improve balance.
Save this squat form checklist for your next workout—stable feet, clean depth, and an easy 30-second test.
Bodyweight squat form for beginners: the 3 cues that make squats feel stable, the 2 mistakes that cause wobble, plus a 30-second test to know when to add a pause and progress.
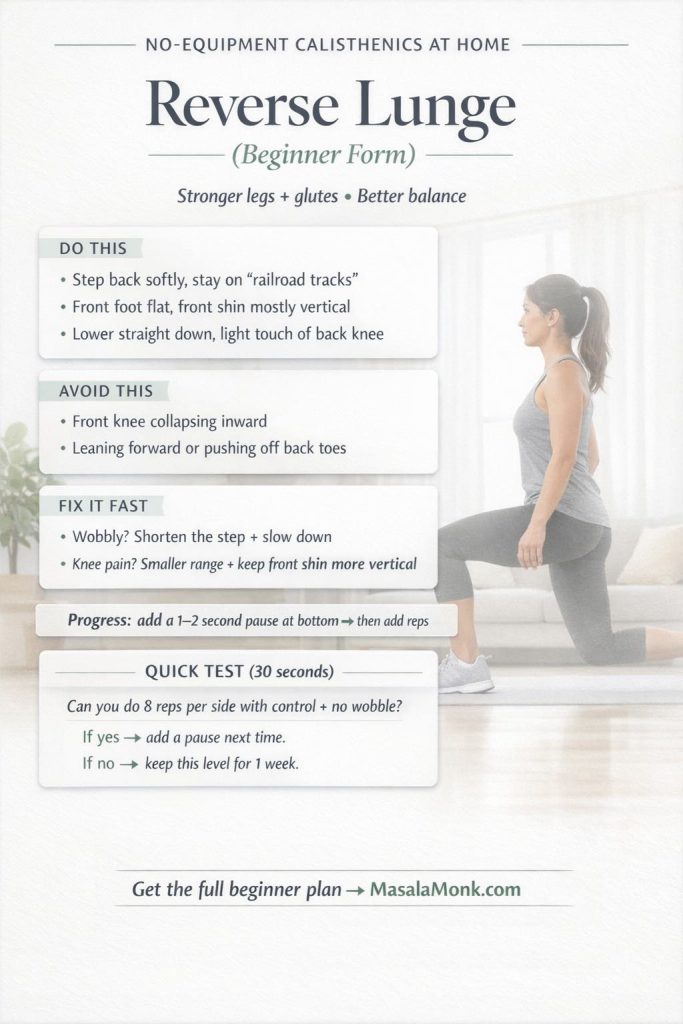
Save this reverse lunge checklist for your next workout—better balance, cleaner reps, and knee-friendly form cues.
Reverse lunge beginner form: the 3 cues that keep your knee happy and your balance steady, the 2 mistakes that cause wobble, plus a 30-second test to know when to add a pause and progress.
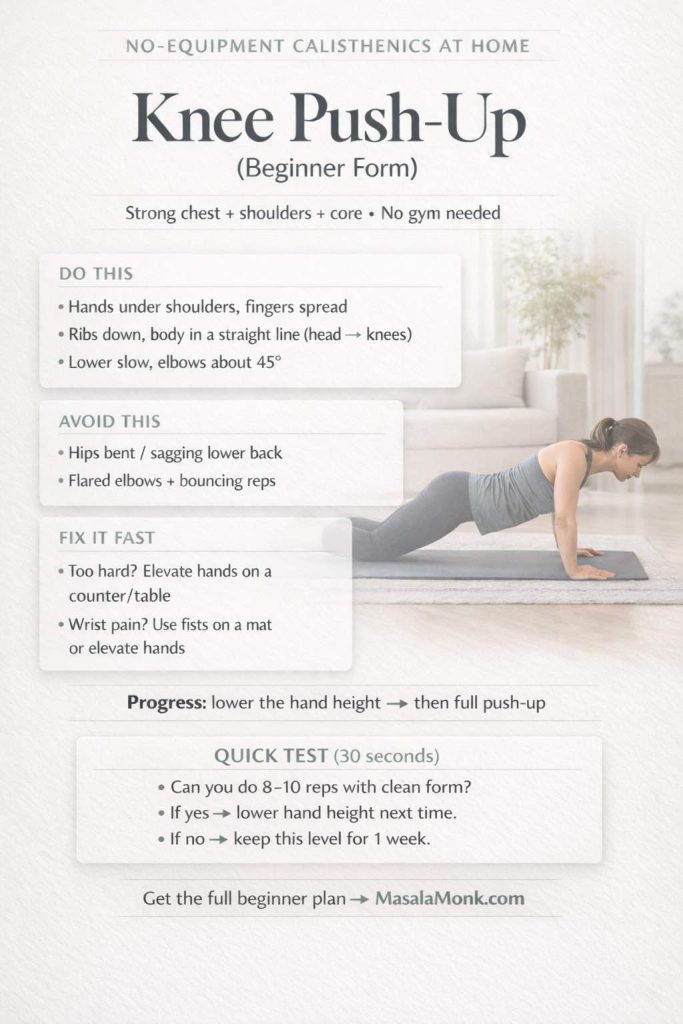
Knee Push-Up → Push-Up
Begin on knees or elevate the hands on a table or countertop. Lower smoothly with elbows about 45 degrees from your sides and keep ribs down. For a concise walkthrough, skim this bent-knee push-up guide from ACE. Afterwards, reduce the elevation, then move to full floor reps once sets feel tidy.
On days you prefer a gentler push pattern, lean against a wall and follow cues from our Wall Pilates for Beginners.
Save this knee push-up checklist for your next workout—stronger reps, happier wrists, and a simple “ready to progress?” test.
Knee push-up form made simple: 3 quick cues, 2 common mistakes to avoid, fast fixes for wrist pain, plus a 30-second “clean reps” test so you know exactly when to progress.
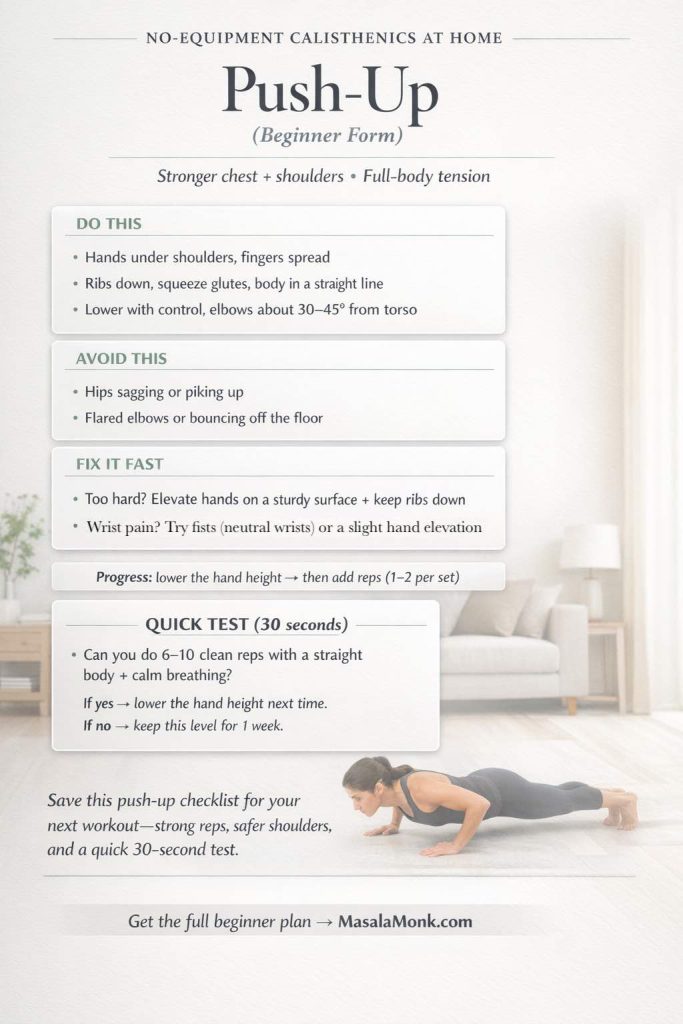
Save this push-up checklist for your next workout-strong reps, safer shoulders, and a quick 30-second test.
Push-Up beginner form: the 3 cues that keep your body rigid and elbows happy, the 2 mistakes that wreck form, plus fast wrist-friendly fixes and a 30-second test to know when to lower hand height and progress.
Table / Towel Row
Use a sturdy table for a light inverted row, or loop a towel through a door and pull your chest toward the anchor. Notably, always test the setup before each set. Start with a mild body angle and bent knees; then, as strength improves, walk your feet forward to increase the challenge.
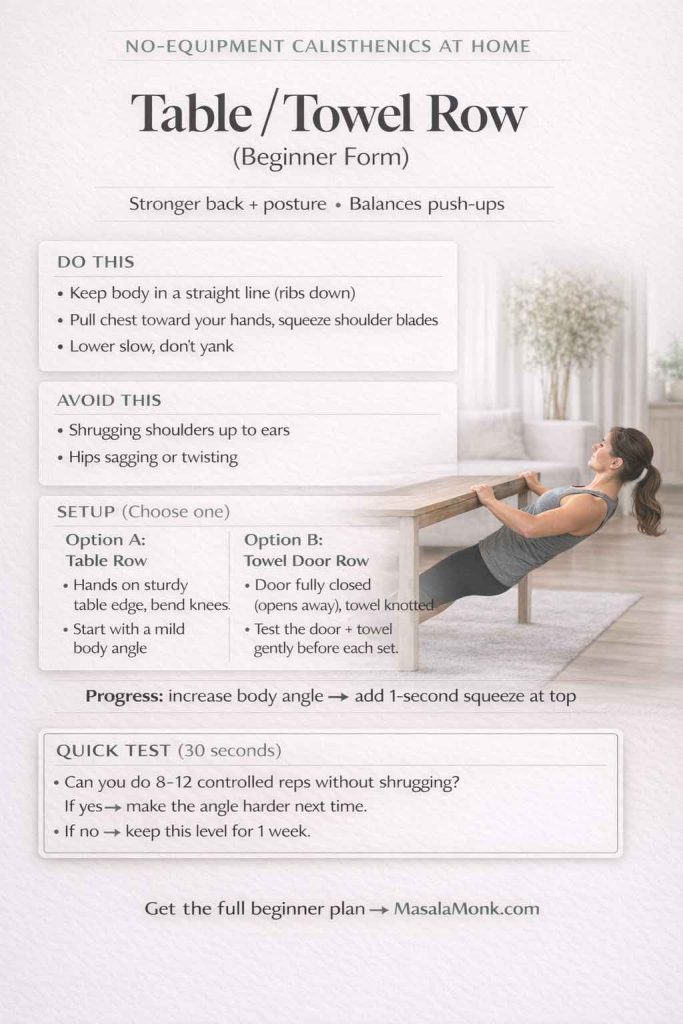
Save this row checklist for your next workout—safer setup, better back activation, and a quick test to level up the angle.
Table/Towel Row beginner form: the 3 cues that actually hit your back (not your traps), the 2 mistakes that turn it into a shrug, plus a quick setup safety check and a 30-second test to know when to make the angle harder.
Glute Bridge
Lie on your back, set feet flat, and drive through the heels. Squeeze at the top without arching the lower back. Hence, think “hips up, ribs down.” If you want more tension without extra gear, add a two-second pause at the top.
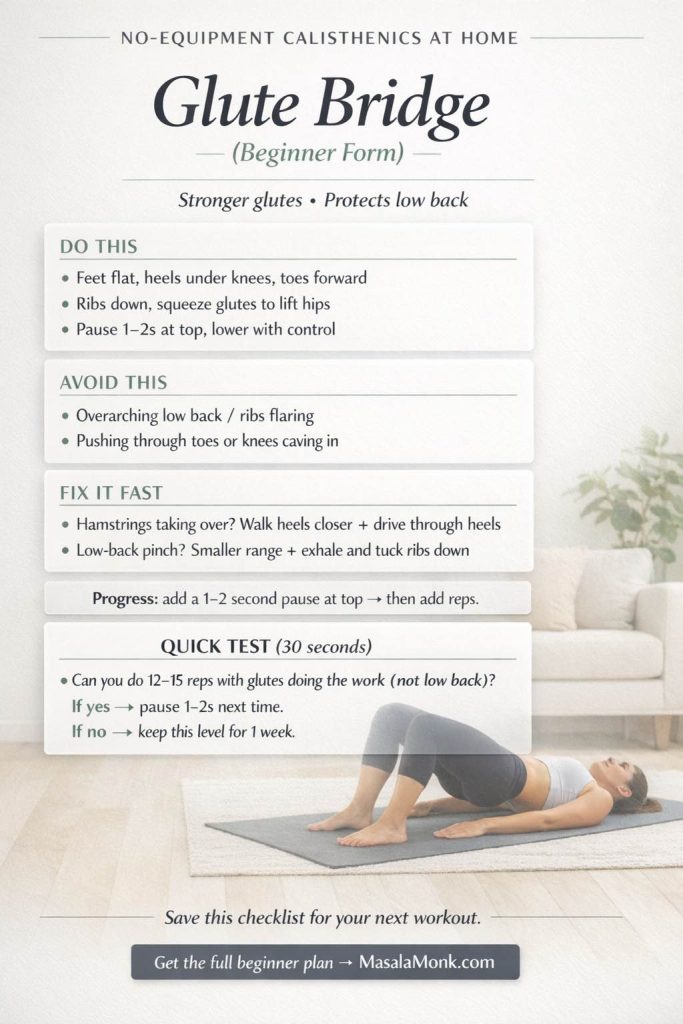
Save this glute bridge checklist for your next workout—stronger glutes, a safer low back, and a simple 30-second test.
Glute Bridge beginner form: the 3 cues that light up your glutes without cranking your low back, the 2 mistakes that shift work into hamstrings/toes, plus a 30-second test to know when to add a pause and progress.
Plank → Dead Bug → Hollow Hold
Brace the torso while breathing calmly. Keep the spine neutral. Initially, use short, repeatable holds. Later, progress to dead bug for anti-extension strength and then to hollow body positioning for deeper control.
Save this plank form checklist for your next workout—ribs down, steady breathing, and a quick 30-second test to level up.
Plank beginner form: the 3 cues that lock in a straight body line, the 2 mistakes that dump tension into your low back/shoulders, plus a 30-second test to know when to add time and progress.
Save this dead bug checklist for your next workout—keep your low back flat, move with control, and progress without strain.
Dead Bug beginner form: the 3 cues to keep your low back flat while you build core strength, the 2 mistakes that steal control, plus a 30-second test to know when to extend farther and progress safely.
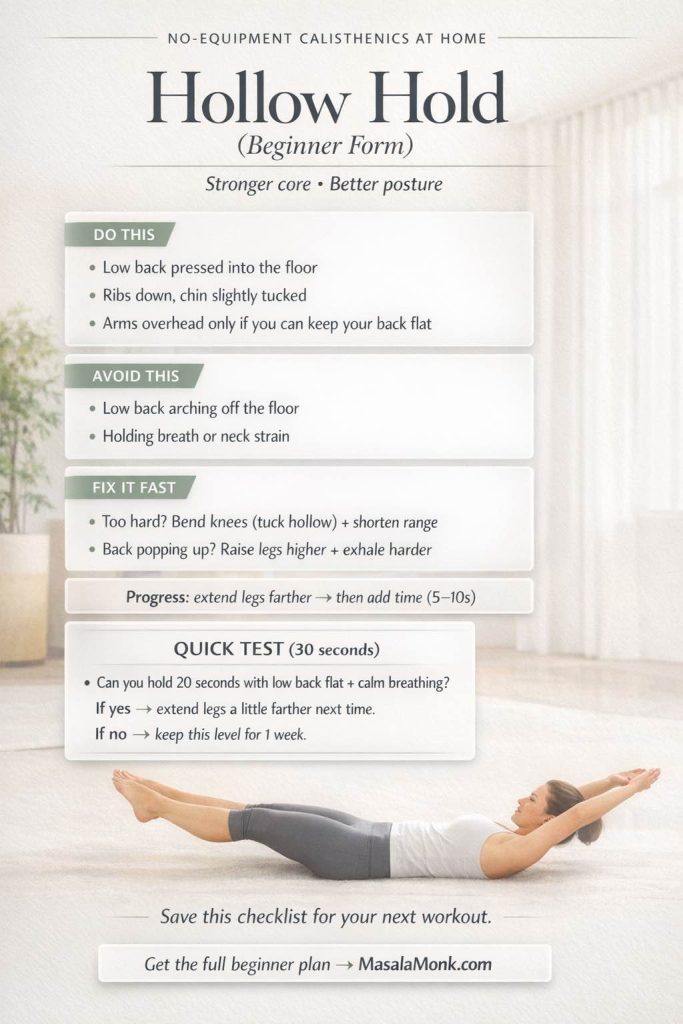
Save this hollow hold checklist for your next workout—keep your low back flat, breathe calmly, and level up safely.
Hollow Hold beginner form: the 3 cues to keep your low back flat while you build core strength, the 2 mistakes that cause strain, plus a 30-second test to know when to extend your legs farther and progress.
If you prefer gentler options or chair-friendly progressions, the NHS provides home-friendly strength exercises and short strength & resistance videos. Conversely, if you enjoy variety, these clips pair well with off days.
Smart Warm-Up and Steady Cool-Down
Start with three to five minutes: ankle rocks, hip circles, arm swings, and two slow squats. Importantly, the warm-up should make the first set feel better—not drain energy. After finishing, cool down with unhurried breathing and light mobility. For instance, try cat-camel, gentle thoracic rotations, and an easy forward fold. Ultimately, these bookends keep joints happy and mark the session complete.
No Equipment Calisthenics at Home — Two Beginner Routines
Train three days per week at the start. Alternate these sessions. Keep the moves familiar so your body learns positions and patterns quickly. However, if a movement feels shaky, step back one progression and reclaim clean form.
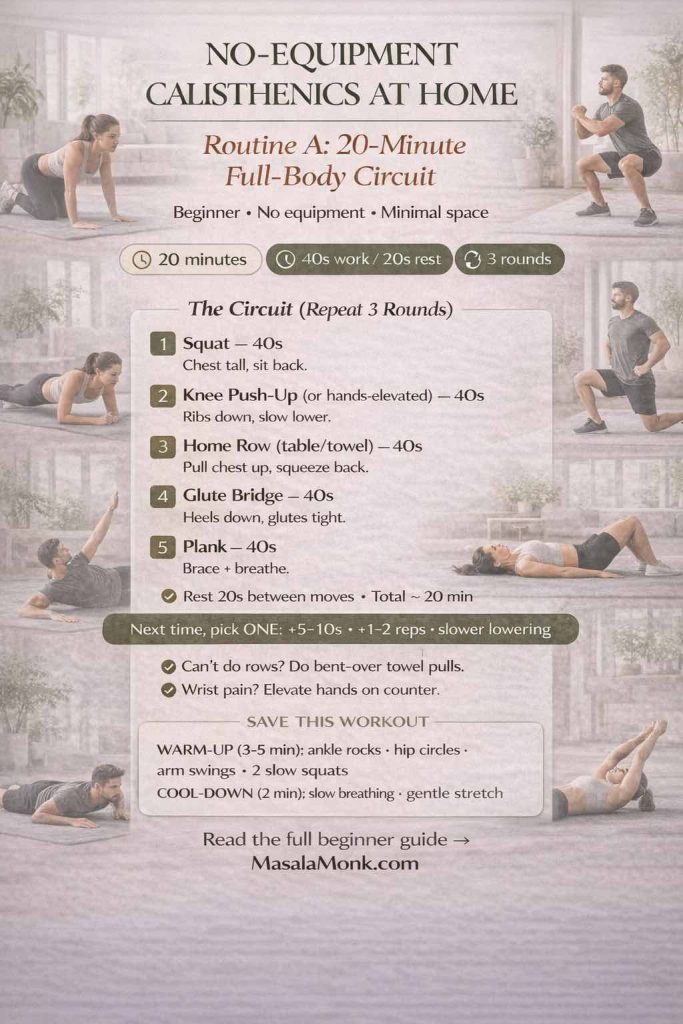
Routine A — 20-Minute Circuit (Full Body)
Save this | Routine A (20 minutes): a beginner-friendly no-equipment calisthenics circuit—40s on / 20s off for 3 rounds—plus quick warm-up, cool-down, and progression tips.
Complete 3 rounds. Progress by adding five to ten seconds per hold, slipping in one or two extra reps, or slowing the lowering phase. In essence, tiny changes create new stimulus without crushing recovery.
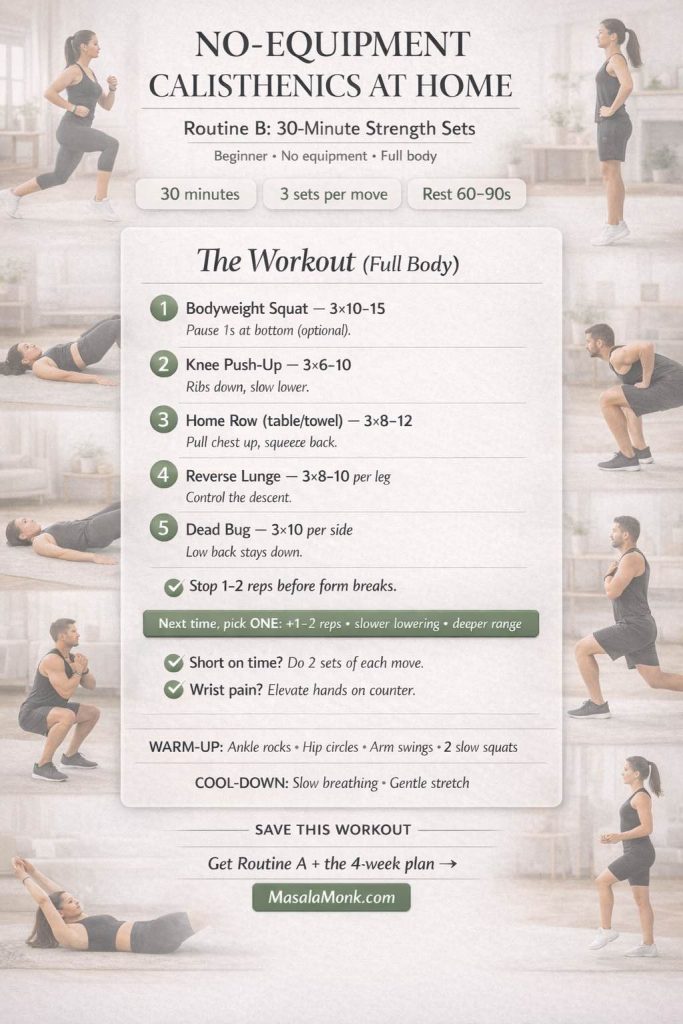
Routine B — 30-Minute Sets × Reps (Full Body)
Save this | Routine B (30 minutes): beginner no-equipment strength sets—3 sets per move with 60–90s rest—plus warm-up, cool-down, and simple progression tips to keep improving week after week.
Bodyweight Squat — 3×10–15
Knee Push-Up — 3×6–10
Table / Towel Row — 3×8–12
Reverse Lunge — 3×8–10 per leg
Dead Bug — 3×10 per side
Rest 60–90 seconds between sets. If everything feels easy, add a slow three-second descent or a one-second pause at the hardest point. Conversely, if form breaks, trim each set by two reps and rebuild next time. For dependable technique photos and simple regressions, browse the ACE no-equipment exercise library.
Brief reminder: short, regular sessions help you satisfy both the “muscle-strengthening” target and a sizable portion of your weekly movement minutes. Consequently, the payoff compounds when you keep the plan simple.
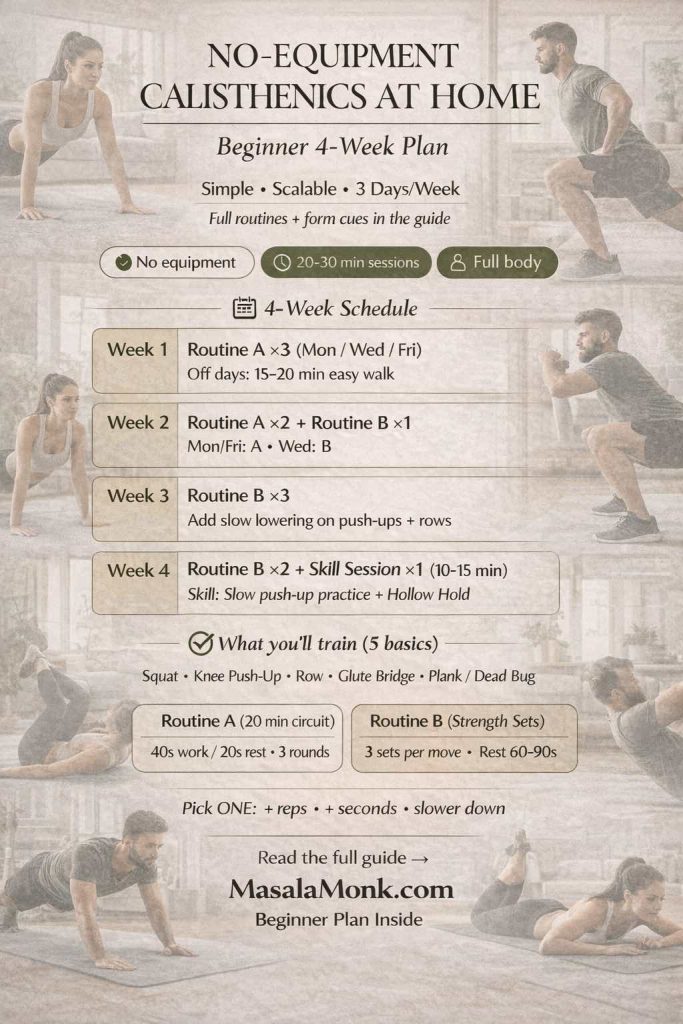
No Equipment Calisthenics at Home — 4-Week Beginner Plan
You’ll now plug the two routines into a clear calendar. The plan is brief, progressive, and repeatable. Crucially, you’ll leave a little in the tank so the rest of the day still feels good.
Save this 4-week no-equipment calisthenics plan for beginners (3 days/week): follow Routine A + B, then progress with reps, seconds, or slower lowers.
Week 1 — Routine A ×3 (e.g., Mon / Wed / Fri). On off days, walk 15–20 minutes at a conversational pace.
Week 2 — Routine A ×2 + Routine B ×1 (Mon / Fri = A, Wed = B). Keep tempo calm and crisp.
Week 3 — Routine B ×3. Add slow negatives on push-ups and rows; hold planks five seconds longer than last week.
Week 4 — Routine B ×2 + one short skill session (10–15 minutes): practice push-up technique for 2–3 sets of 3–5 slow reps, then finish with hollow holds (3×20–30 seconds).
When you want a day-by-day map with built-in momentum, step into our beginner-friendly 30-day calisthenics challenge. It turns intention into action with small, specific tasks you can actually complete.
Progressions That Prevent Plateaus
After four weeks, you’ll feel steadier. At that point, nudge difficulty without changing everything. Adjust leverage, pace, or range—then write down what you did. Subsequently, add a little more next time.
Squat family Add a two-second pause at the bottom to build control. Later, switch to split squats for unilateral strength and balance. Eventually, try reverse lunges with a slower descent for extra time under tension.
Push-ups Reduce hand elevation week by week, moving from countertop to table to floor. Then, once full reps feel honest, elevate the feet slightly for more load. Notably, keep the body line rigid and the ribcage tucked.
Rows When using a towel, step farther from the door to steepen the angle. Or, under a sturdy table, place the feet forward so the torso is closer to horizontal. Squeeze the shoulder blades together at the top and pause briefly. If you later add gear, short finishers from battle rope workouts can complement your pull days.
Core Shift from forearm plank to high plank. Introduce hollow body holds in short, deliberate sets. Meanwhile, breathe quietly through the nose so the torso stays braced.
Small tweaks deliver real changes. Clean reps now beat sloppy “PRs” you can’t repeat later. Therefore, build conservatively and let momentum accumulate.
Cardio That Complements Strength
The routines above tick the “muscle-strengthening” box. To approach the 150-minute activity goal, add short, easy cardio that doesn’t complicate your day. For instance, take brisk walks, cycle casually, or dance in the living room. Spread it out: several 20-minute bouts, or daily 10–15-minute chunks. If time is scarce, climb stairs for five minutes and count it. On the other hand, if you prefer structured ideas, the CDC’s page on what counts as activity offers helpful examples. Ultimately, the mission is simple: collect minutes without turning life upside down.
When you crave gentle variety, rotate in a day from the 28-day wall Pilates challenge to blend cardio-style movement with core-friendly strength.
Troubleshooting: Smooth Fixes for Common Hiccups
Wrists ache during push-ups Use hands-elevated push-ups on a countertop to reduce wrist extension. Alternatively, make fists and place knuckles on a mat so the wrists stay neutral. Add light wrist circles and palm lifts before the first set.
Rows feel awkward with a towel Fold the towel thick, close the door on the knot, and test the anchor with a gentle lean. Initially, use a small angle with bent knees. Gradually walk the feet forward to increase challenge. If uncertainty lingers, switch to table rows until the groove feels natural.
Out of breath too soon Slow the tempo. Rest 60–75 seconds between sets. Temporarily skip long end-range holds. Even so, keep showing up—your engine adapts quickly when the plan is simple and repeatable.
Short on time Run two rounds of Routine A and call it a win. Next day, do two sets of squats, push-ups, and rows. Consistency compounds; perfection does not.
Motivation dips Lay the mat out the night before. Pair training with a favorite playlist or podcast. Promise five minutes. Frequently, a five-minute start becomes twenty once you begin.
Optional Add-Ons After Four Weeks (Low Cost, Big Payoff)
Although no equipment calisthenics at home will take you far, a few inexpensive tools unlock new progressions and keep training fresh.
Resistance band Perfect for face pulls, band-assisted rows, and pull-apart patterns that build the upper back. Additionally, bands make tempo work natural and joint-friendly.
Doorway pull-up bar Begin with passive hangs and scapular pull-ups. Over time, progress to full pull-ups. Incidentally, hangs also decompress the shoulders after desk hours.
Yoga mat Comfort matters. When floor work feels good, you’ll do more of it. A mat improves traction on planks and hollow holds.
For a practical breakdown—what’s worth buying, what to skip, and how to set up a minimalist corner—see our essential equipment for home & office workout. The list stays focused so purchases remain intentional.
Recovery, Sleep, and Food—Without Complexity
Strength gains arrive between sessions. Sleep accelerates them. Aim for a consistent bedtime and a dark, cool room. Walk after meals when possible. Drink water. Eat enough protein to support recovery, but avoid chasing perfection. Whole foods most of the time is more than fine. If soreness lingers, reduce total volume slightly next session and polish technique. Then, re-add sets once you feel fresh.
Meanwhile, consider micro-recovery during the day: stand up every hour, stretch the hips for thirty seconds, and take a minute of slow breathing when stress climbs. Individually, these moments feel small; collectively, they stabilize energy and improve readiness for the next session.
Mindset: Make the Habit Obvious, Easy, and Satisfying
Habits stick when they’re visible and rewarding. Therefore, leave your mat where you’ll see it. Schedule sessions as you would a meeting. Keep a tiny log—date, routine, one note. Celebrate small wins: a first full push-up, a longer plank, or a week with three sessions done. Likewise, set “minimums” for hectic days: one round of the circuit, or two sets of squats and rows. Even minimal effort maintains identity—I’m someone who trains—and that identity keeps momentum alive.
If you enjoy structure and accountability, join our beginner-friendly 30-day calisthenics challenge. It provides daily prompts and sensible progressions, which, in practice, means fewer decisions and more done sessions.
Curious about tailoring cardio or calories to your body type? Skim our endomorph, ectomorph, and mesomorph guides for quick orientation. They’re optional, but useful if you’re experimenting.
Form Support When You Want It
Every so often, you’ll want visual confirmation that a setup is right. On those days, pull a single cue from a dependable source rather than doom-scrolling. For clear step-by-step photos, explore the ACE exercise library by body part. If you prefer gentle follow-alongs, the NHS offers short strength & resistance videos that pair well with off days. Prefer written checklists? The NHSstrength exercises page includes simple progressions you can print or save.
No Equipment Calisthenics at Home — Bringing It All Together
Let’s connect the dots. You now have a simple system: two reliable routines that hit every major muscle group, a four-week plan that respects time and energy, and progressions that don’t require gear. Along the way, short walks or easy cardio help you reach the weekly movement target recommended by the WHO and the CDC. For technique check-ins, the ACE no-equipment exercise library remains a dependable reference. For gentle options or guided clips, the NHS has you covered with strength exercises and short strength & resistance videos.
Ultimately, no equipment calisthenics at home is enough to start, enough to progress, and enough to feel better in your body. Choose a routine. Set a tiny timer. Move with intent. Then, the next day, do it again.
Next Step: Pick Your Line and Go
If you’re brand new, start with Routine A tomorrow and keep the rests honest. For those who have trained before, begin at Week 2 and run the 30-minute plan once. People who prefer a daily program with crystal-clear prompts, can jump into the 30-day calisthenics challenge. And if a minimalist setup with two or three smart tools sounds appealing, the essential equipment guide will keep purchases focused and effective.
FAQs
1. What is “no equipment calisthenics at home” and who is it for?
No equipment calisthenics at home means full-body strength training using only your bodyweight. Moreover, it suits beginners, busy professionals, and anyone returning to exercise who wants scalable, joint-friendly workouts without buying gear.
2. How do I start calisthenics at home as a beginner?
Begin with five basics: squats, knee push-ups, table/towel rows, glute bridges, and planks. Additionally, train three days per week, keep 1–2 reps in reserve, and record sets so you can progress gradually.
3. Can I build muscle with no equipment calisthenics at home?
Yes. Consequently, you’ll grow by increasing reps, time under tension (slow eccentrics, pauses), and range of motion over weeks. Furthermore, aim for consistent sleep and adequate protein to support recovery.
4. How many days per week should I train?
Start with 3 days weekly. Subsequently, add a fourth day once sets feel tidy and recovery stays solid. Likewise, sprinkle easy walks on non-lifting days to maintain momentum.
5. What’s a simple beginner routine I can follow today?
Try 3 rounds of: squats 40s, knee push-ups 40s, table/towel rows 40s, glute bridges 40s, plank 40s; rest 20s between moves. Notably, keep breathing steady and stop one rep before form breaks.
6. Do I need cardio in addition to no equipment calisthenics at home?
Ideally, yes. Hence, add short, conversational-pace walks or light cycling on off days to reach weekly activity targets while still recovering between strength sessions.
7. What’s the best way to progress if I can’t do full push-ups yet?
Use hands-elevated push-ups on a stable surface; thereafter, lower the surface over time until you reach the floor. Importantly, keep a straight line from head to heels and control the descent.
8. How do I make rows at home without equipment?
Anchor a sturdy towel in a closed door or use a solid table for light inverted rows. Alternatively, bend the knees and reduce the angle first; then, as strength improves, walk the feet forward to increase difficulty.
9. How long should a beginner session last?
Generally 20–30 minutes. Thus, you’ll complete warm-up, 5 movements, and a brief cool-down without draining energy for the rest of the day.
10. What if I’m short on time?
Do one condensed circuit: squats, push-ups, rows—two rounds only. Even so, this mini-workout maintains habit strength while still nudging progress.
11. Which muscles does no equipment calisthenics at home train?
Specifically: legs (squats, lunges), chest and shoulders (push-ups), back and biceps (rows), and core (planks, dead bugs, hollow holds). Akin to gym sessions, these cover every major area.
12. How soon will I see results?
Beginners often feel better coordination within 1–2 weeks. Thereafter, visible strength changes typically appear in 4–6 weeks, provided you train consistently and recover well.
13. What if my wrists hurt during push-ups?
Switch to hands-elevated push-ups or use knuckles on a mat. Additionally, warm up with gentle wrist circles and palm lifts to prepare the joints.
14. Is equipment ever necessary for progress?
Not inherently. Nevertheless, a resistance band or doorway bar later on allows extra variations. For now, prioritize crisp technique and small weekly improvements.
15. How do I avoid plateaus with no equipment calisthenics at home?
Rotate one variable at a time: add reps, extend holds, slow eccentrics, or deepen range. Moreover, log sessions so you can nudge a single metric upward each week.
16. What’s a safe rep range for beginners?
Aim for 6–12 reps on strength moves and 20–40 seconds on core holds. Consequently, you’ll balance challenge with form and recover faster between sessions.
17. Should I train full body or split days?
Full body works best at first. Subsequently, once you’re consistent, you may alternate push/pull/legs days; however, keep volume moderate to protect recovery.
18. How do I warm up quickly at home?
Perform 3–5 minutes of ankle rocks, hip circles, arm swings, and two slow squats. Likewise, finish with one easy set of your first exercise to groove the pattern.
19. What’s the right rest time between sets?
For beginners, 60–90 seconds is sufficient. Thus, you’ll preserve quality without letting the session drag.
20. How can I keep motivation high?
Set a tiny “minimum”—five minutes. Importantly, celebrate small wins (first clean push-up, longer plank). Subsequently, string together weeks, not heroic days.
A strawberry smoothie recipe can be as simple as fruit and milk—sweet, cold, and comforting in the way only strawberries manage. Still, it can also be the kind of drink that feels a little more intentional: thicker, creamier, packed with protein, or bright and tropical depending on what you toss into the blender. That’s the charm. You can keep it basic on a sleepy morning, then lean into something spoonable and extra on the weekend.
Even if you start with one strawberry smoothie recipe, the variations open up fast. Add banana and you’ve got a strawberry banana smoothie that tastes like a classic diner treat. Stir in yogurt and it turns into a strawberry smoothie with yogurt—tangy, creamy, and quietly luxurious. Blend in protein powder and you’re suddenly in strawberry protein shake territory, where the smoothie stops being “just a drink” and starts pulling real weight as breakfast or post-workout fuel. Push the texture thicker and you’ve stepped into strawberry smoothie bowl land, with toppings and crunch and the satisfaction of eating your smoothie with a spoon.
Before any of that, though, it’s worth doing two quick things that make every version better.
First, wash fresh strawberries properly. The FDA’s guidance on handling produce is practical and straightforward in their page on selecting and serving produce safely. Second, if you ever like checking nutrition basics for ingredients you use often, the USDA FoodData Central strawberry listings are a dependable reference.
Now that you’ve got clean berries and a blender, let’s make smoothies that taste like strawberries—whether you want them light and drinkable, thick and creamy, or bold enough to count as a full meal.
The small details that make smoothies taste smoother, richer, and more “finished”
Start with the fruit: fresh strawberries vs frozen strawberries
Fresh strawberries taste vivid and perfumed when they’re in season. Frozen strawberries, on the other hand, are the secret to texture. If you’re chasing that thick café-style consistency, a strawberry smoothie made with frozen strawberries is hard to beat.
Fresh vs Frozen Strawberries: Use fresh berries when you want the most fragrant strawberry flavor—use frozen berries when you want thickness and a frosty smoothie without watering it down with ice.
When you use frozen fruit, you’re essentially replacing ice with flavor. That’s why the “smoothie frozen fruit” approach works so well: you get frost and thickness without watering down the fruit. The same logic applies to any recipe for smoothie with frozen fruit—frozen berries, frozen mango, frozen pineapple—because cold fruit behaves like a built-in thickener.
If your blender is strong, you can go fully frozen. If it struggles, you can use half frozen and half fresh, then adjust.
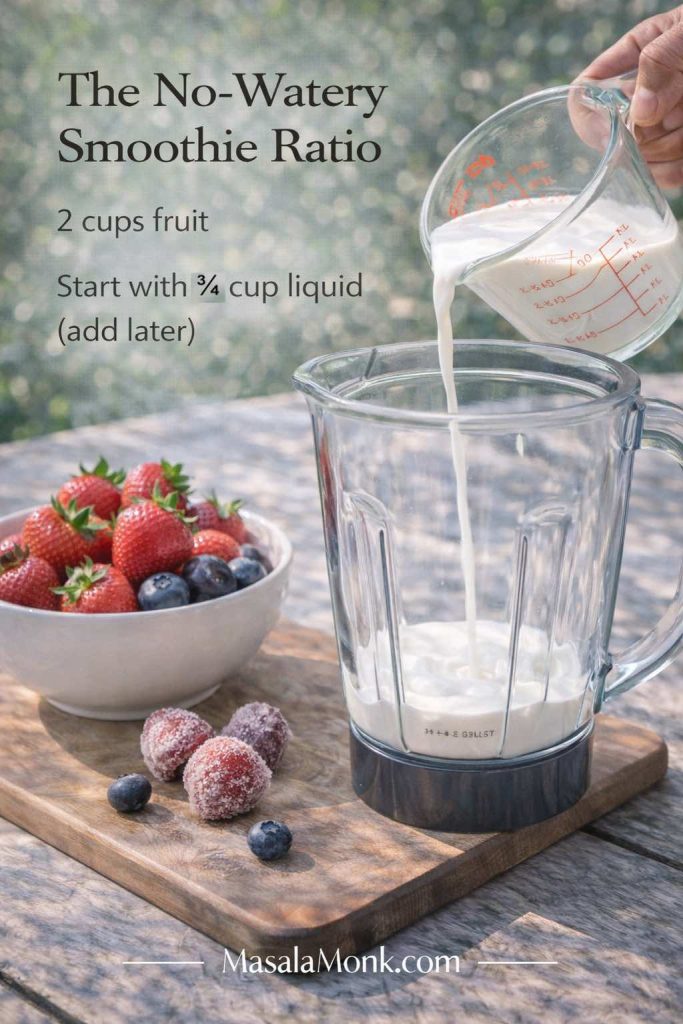
A simple ratio that keeps you out of watery territory
A lot of disappointment comes from one thing: too much liquid too soon. Instead, begin conservatively and add more only when the blender needs it.
A reliable starting point for most drinkable smoothies:
2 cups fruit (more if you want it extra thick)
¾ cup liquid (milk, almond milk, coconut water, juice)
½ cup creamy element (yogurt, banana, oats, nut butter)
The No-Watery Smoothie Ratio: Start thick on purpose—use plenty of fruit and add liquid only as needed. It’s the easiest way to avoid a bland, watery smoothie without adding ice.
For thicker blends, especially smoothie bowls:
2½ to 3 cups frozen fruit
¼ to ½ cup liquid (start low)
Optional yogurt, but don’t lean on it too heavily unless you like a tang-forward bowl
Once you get comfortable with this, you can improvise endlessly—banana strawberry fruit smoothie one day, strawberry mango smoothie the next—without thinking too hard about measurements.
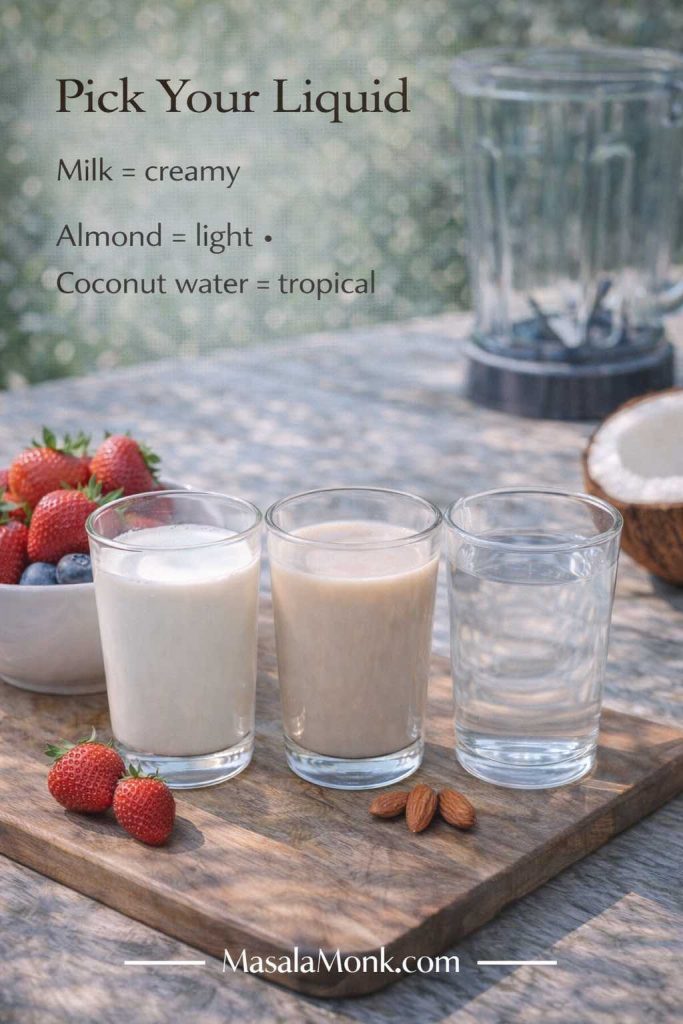
Choosing the liquid sets the vibe
The liquid you choose isn’t just “what makes the blender spin.” It decides the flavor direction and the mouthfeel.
Pick Your Liquid: Milk gives the creamiest strawberry smoothie, almond milk keeps it lighter, and coconut water makes fruit taste brighter—choose based on whether you want “milkshake” comfort or a refreshing finish.
Milk makes a classic strawberry smoothie with milk: creamy, mild, and familiar.
Almond milk keeps things lighter and slightly nutty, which is perfect for an almond milk strawberry smoothie or a banana strawberry smoothie almond milk version.
Yogurt-based liquids (like kefir or drinkable yogurt) create a tangy, thicker “strawberry smoothie drink” feel.
Coconut water brightens tropical smoothies. If you like that clean, refreshing finish, MasalaMonk’s coconut water smoothie ideas are a great source of flavor combinations.
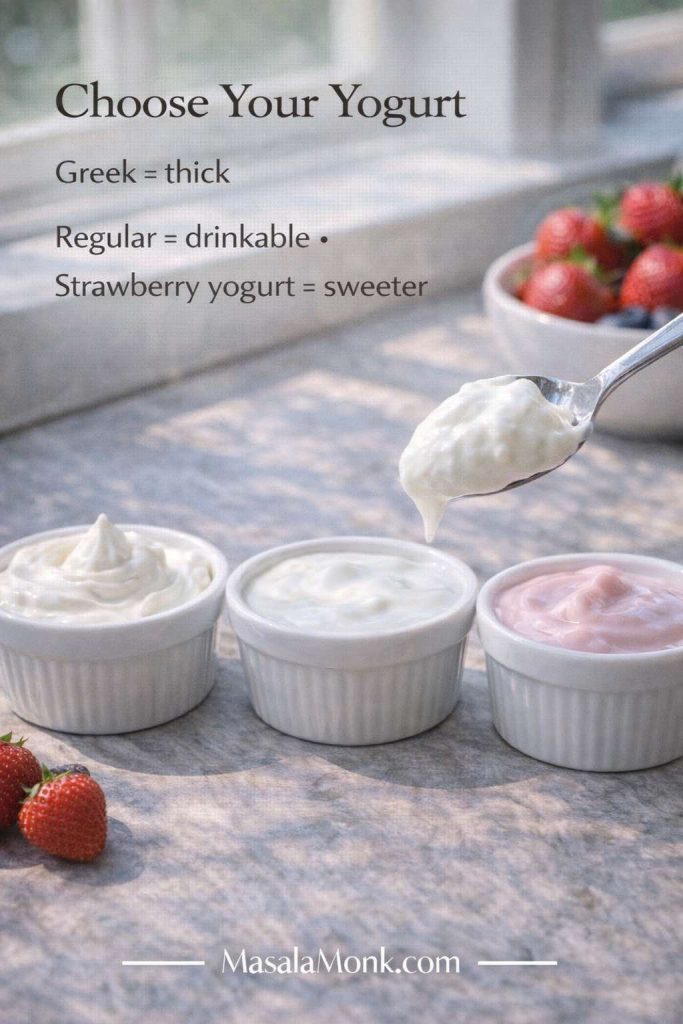
Yogurt: regular, Greek, or strawberry yogurt?
Yogurt is one of the easiest ways to turn “nice” into “wow.”
Choose Your Yogurt: Want a thick, café-style strawberry smoothie? Go Greek. Prefer a lighter sip? Use regular yogurt. Want extra sweetness without adding honey? Strawberry yogurt does the job.
Greek yogurt makes thick smoothies and supports the kind of creamy texture people want when they look up smoothie recipes with Greek yogurt.
Regular yogurt is softer and more drinkable; it’s ideal for strawberry fruit smoothie recipes with yogurt that feel light but still creamy.
Strawberry yogurt adds extra sweetness and a dessert-like flavor. It’s also handy if you want a strawberry smoothie with strawberry yogurt and you don’t feel like adding a sweetener.
If you like the idea of a strawberry yogurt shake recipe that feels like a treat without ice cream, yogurt is the cleanest path.
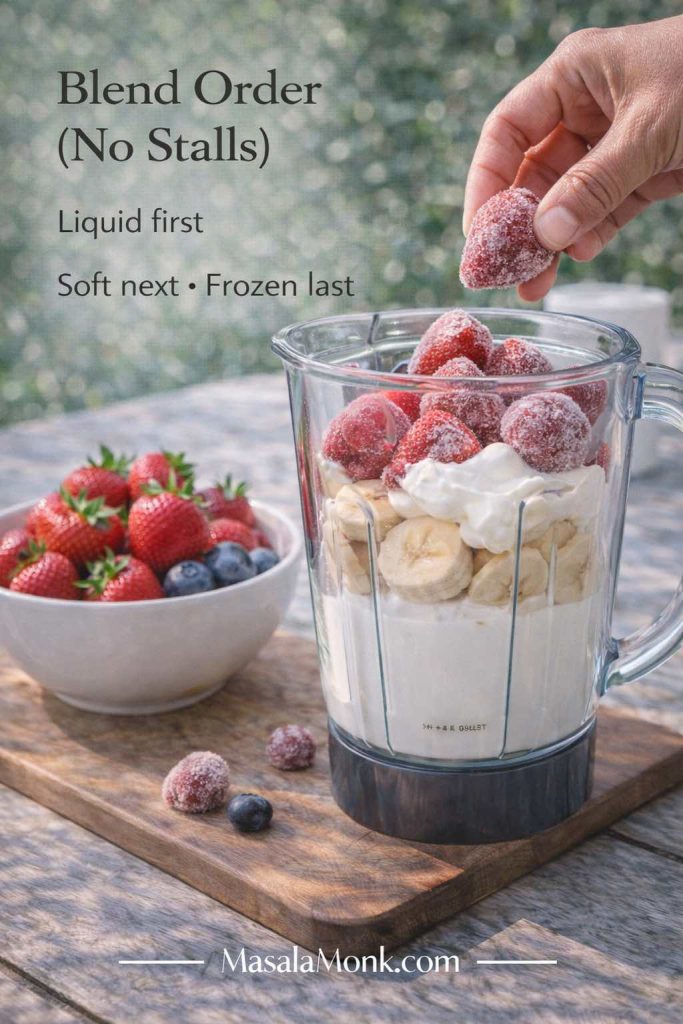
Blend order matters more than you think
If your blender ever stalls, it’s usually because frozen fruit got stuck around the blades. The fix is simple: blend in layers.
Blend Order (No Stalls): Putting liquid in first helps the blades catch—then add soft ingredients, and finish with frozen fruit so everything blends smooth without getting stuck.
Liquid first
Soft ingredients next (yogurt, banana, nut butter, protein powder)
Frozen fruit last
With leafy greens, blend greens with liquid first, then add fruit. You’ll see why when we get to the strawberry spinach smoothie.
Sweetness: aim for balance, not sugar
Strawberries can be sweet or tart depending on the batch. Instead of reaching straight for sugar, you can sweeten through ingredients:
ripe banana
dates
honey or maple
a splash of orange juice (especially good with pineapple)
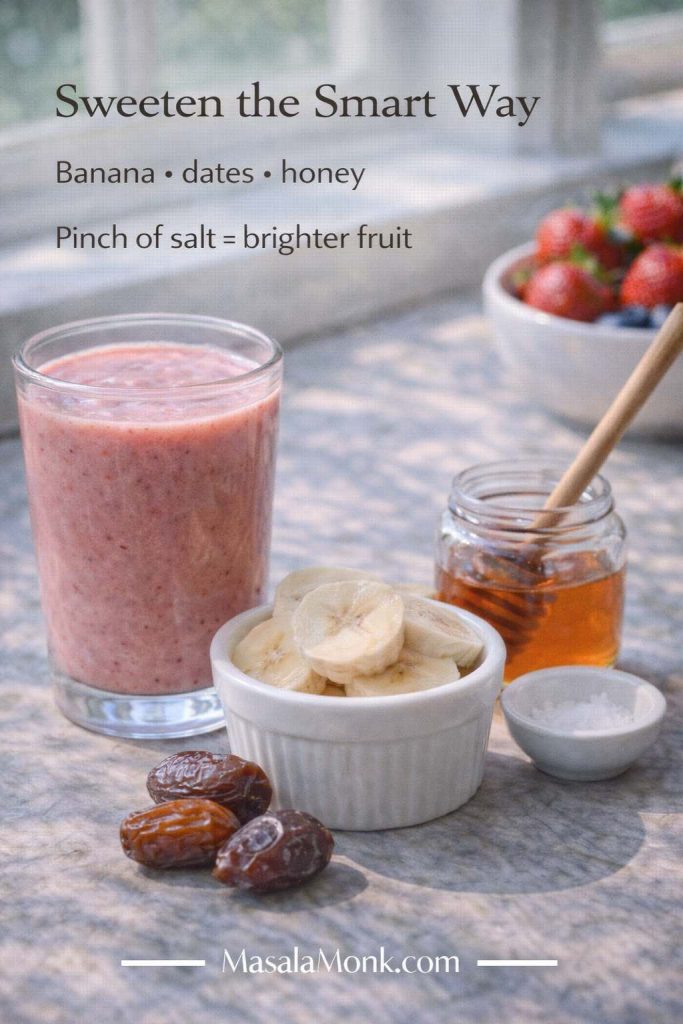
Sweeten the Smart Way: If your strawberries are tart, sweeten with banana, dates, or a little honey—then add a tiny pinch of salt to make the fruit flavor pop without making the smoothie taste “salty.”
A tiny pinch of salt can also make fruit taste brighter. It won’t taste salty; it just rounds out the flavor.
A note on “shake” style smoothies (without ice cream)
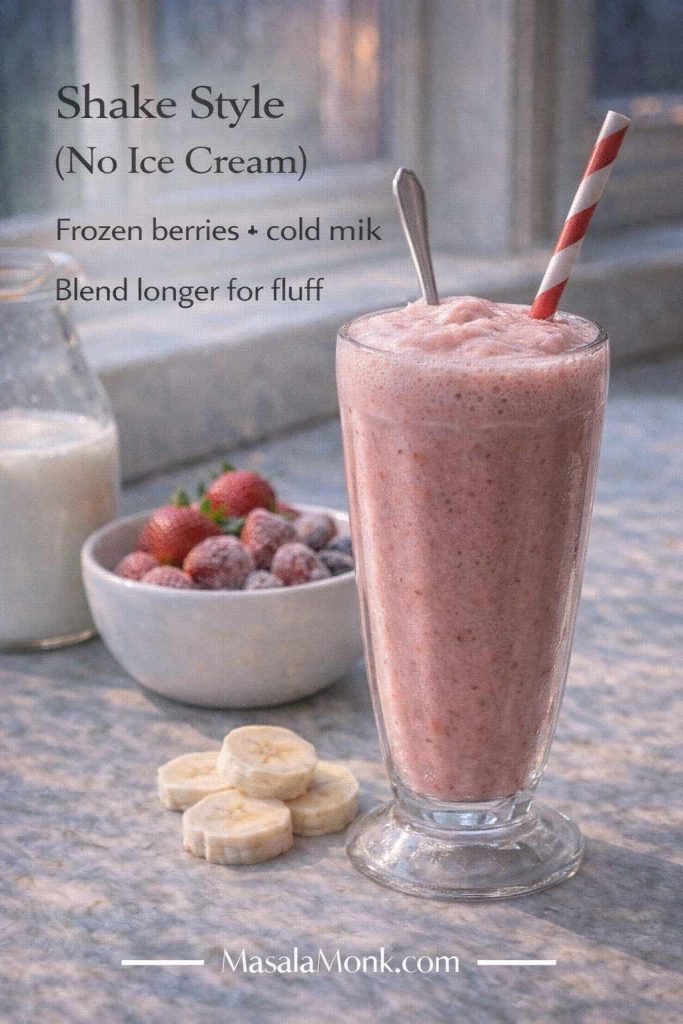
When someone wants a strawberry shake recipe, they often mean a smoothie that feels like a milkshake—thicker, creamier, a little frothy—without adding ice cream.
Shake Style (No Ice Cream): Skip the ice cream and the ice—use cold milk plus frozen strawberries, then blend a little longer to whip in air for that milkshake-like fluff.
To get that strawberry milkshake without ice cream feel:
use cold milk
use frozen strawberries
include banana or yogurt for thickness
blend a little longer for fluff
That’s it. You’ll get a strawberry shake without ice cream that still feels indulgent.
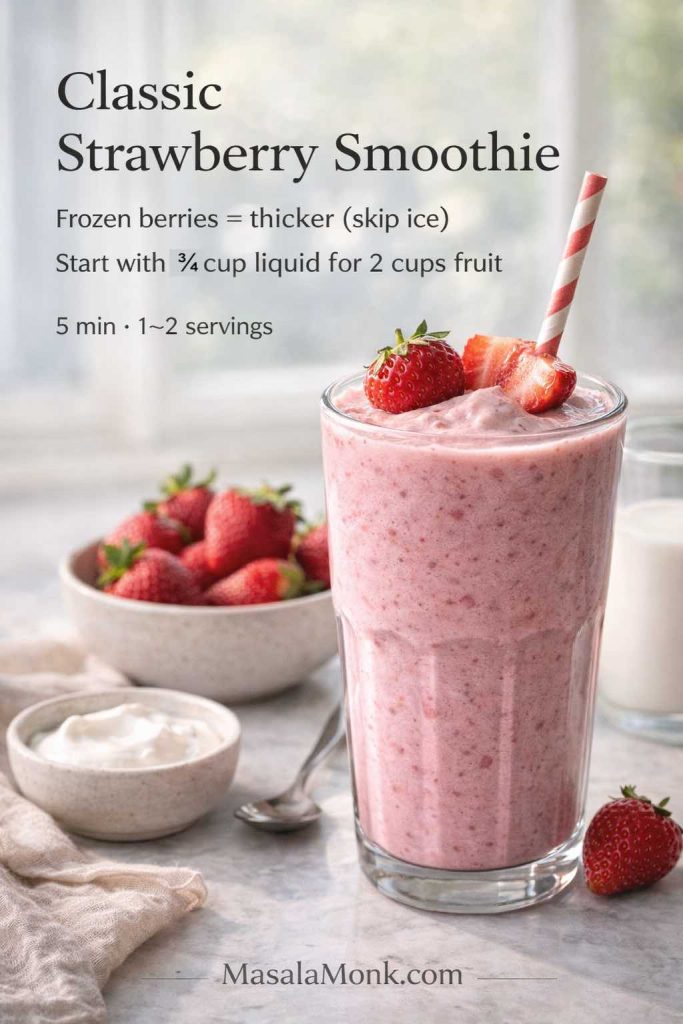
Recipe 1: Strawberry Smoothie (Classic, flexible, and dependable)
This is the foundational strawberry smoothie recipe you can return to anytime. It’s simple enough to memorize, yet it’s also the base that supports dozens of strawberry fruit smoothie recipes.
Ingredients for Strawberry Smoothie Recipe
2 cups strawberries (fresh or frozen)
¾ cup milk (or almond milk)
½ cup yogurt (optional)
1–2 teaspoons honey or maple (optional)
Ice (only if using fresh strawberries and you want it extra cold)
Classic Strawberry Smoothie: For a thicker café-style blend, use frozen strawberries instead of ice and add liquid gradually—start low, then loosen only if the blender needs it.
Method
Add the liquid to the blender first, followed by strawberries. Blend until smooth. If you’re using yogurt, add it after the berries break down, then blend again. Taste and adjust.
Make it three different ways (without changing the spirit)
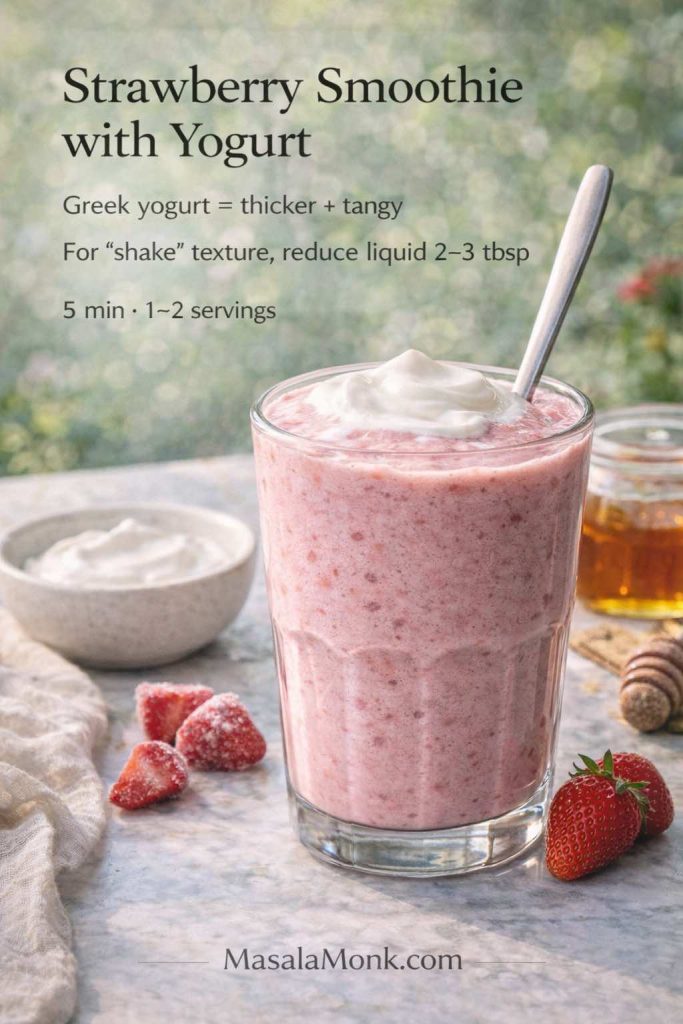
Strawberry smoothie with yogurt Add ½ cup Greek yogurt for a creamy, thick finish. This is the version that often feels like the best strawberry smoothie recipe when you want something satisfying.
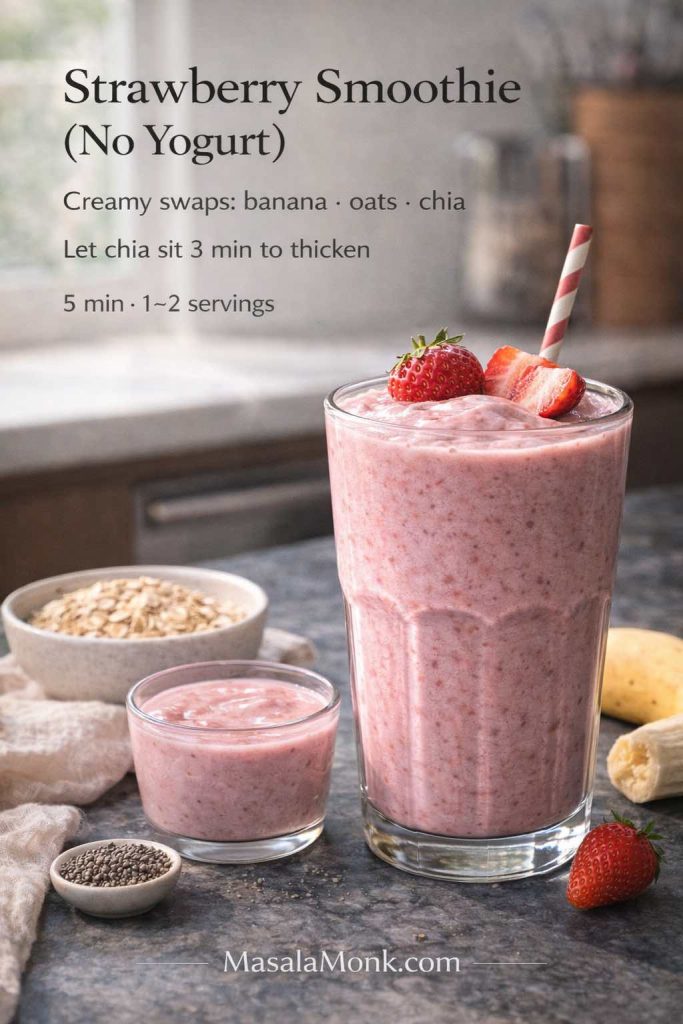
Strawberry smoothie recipe without yogurt Skip yogurt and add ½ banana, or 2 tablespoons oats, or 1 tablespoon chia. Each makes it creamy in a different way.
Strawberry smoothie with milk Use cold milk and frozen strawberries for a smooth, classic drink. If you want it extra thick, reduce the milk slightly and add more frozen strawberries instead.
If you’re ever unsure what to do with a batch of berries, this is the “good strawberry smoothie recipe” you can make without thinking.
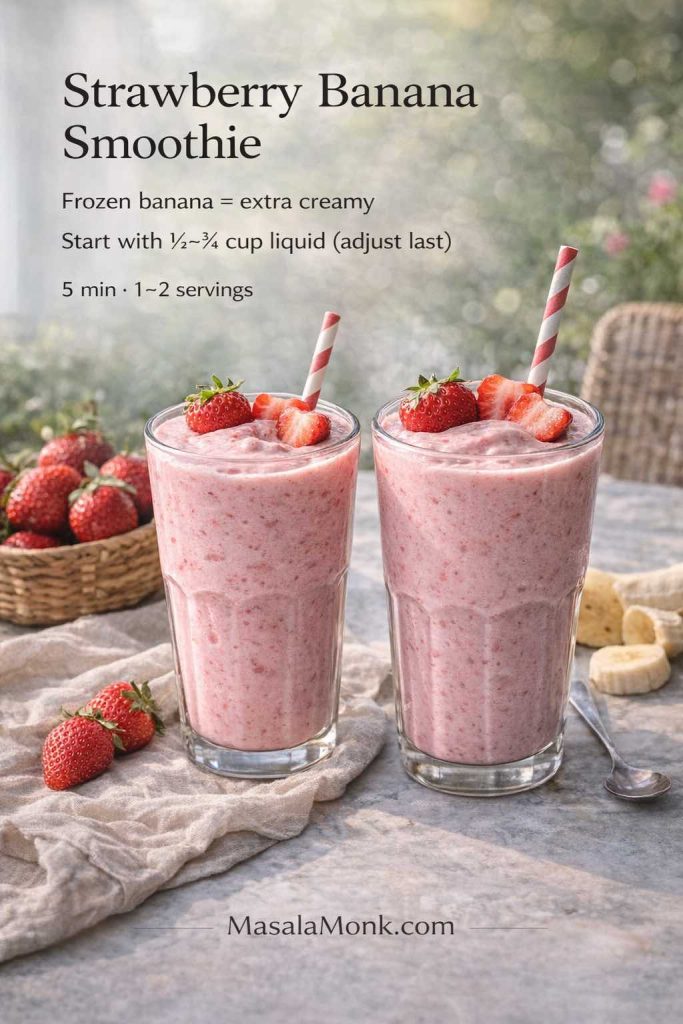
Recipe 2: Strawberry Banana Smoothie (the classic everyone loves)
A strawberry banana smoothie is sweet, creamy, and forgiving. It’s also the smoothie that most people associate with the phrase “fruit smoothie.” Whether you call it banana and strawberries smoothie or banana strawberry fruit smoothie, the goal is the same: smooth texture, bright berry flavor, and a sweetness that feels natural.
Ingredients for Strawberry Banana Smoothie Recipe
2 cups strawberries (frozen is ideal)
1 banana (fresh or frozen)
¾ cup milk (or almond milk)
½ cup yogurt (optional)
Pinch of salt (optional)
Strawberry Banana Smoothie: Freeze the banana for built-in creaminess, then add milk slowly—thickness comes from fruit, not extra liquid.
Method
Blend milk and strawberries first. Once the strawberries break down, add banana and yogurt (if using), then blend until creamy.
Variation options you’ll actually use
Strawberry banana smoothie with yogurt Use Greek yogurt for extra thickness. If you’re building smoothie recipes with yogurt and strawberries into your routine, this is a great staple.
Strawberry banana smoothie with milk Keep it simple: cold milk + frozen strawberries + banana. It feels like a strawberry banana drink, especially if you blend it until slightly frothy.
Strawberry banana smoothie without yogurt Frozen banana does the heavy lifting. Use slightly less liquid and you’ll still get a thick smoothie.
If you enjoy comparing techniques, Serious Eats has a clear, straightforward strawberry banana smoothie method that’s easy to read alongside your own version.
And if you ever want a more filling, nutty twist, MasalaMonk’s nut-infused smoothie recipes are a great way to borrow ideas—like adding walnuts for richness without making the smoothie taste heavy.
Recipe 3: Strawberry Smoothie With Yogurt (extra creamy, lightly tangy)
Sometimes the “best strawberry smoothie” isn’t the simplest one—it’s the one with that lush, creamy texture that tastes like it came from a café. Yogurt is the easiest way to get there.
This recipe also naturally fits smoothie recipes with Greek yogurt, strawberry smoothie recipe with yogurt, and even the idea of a strawberry yogurt milk smoothie if you prefer a thinner pour.
Ingredients for Strawberry Smoothie With Yogurt Recipe
2 cups frozen strawberries
½ cup Greek yogurt
¾ cup milk (or almond milk)
1 teaspoon honey (optional)
½ teaspoon vanilla (optional)
Strawberry Smoothie with Yogurt: Greek yogurt gives you that café-thick texture—if it feels too pourable, reduce the liquid by a couple tablespoons instead of adding ice.
Method
Blend milk and yogurt first until smooth. Then add strawberries and blend until thick and creamy. Taste; sweeten lightly if needed.
Two directions to take it
If you want something closer to a strawberry yogurt shake recipe, use cold whole milk and blend longer so it becomes a little airy. On the other hand, if you prefer a brighter, lighter smoothie, use regular yogurt and almond milk.
Either way, you’ll get a strawberry smoothie drink that feels creamy without being heavy.
Recipe 4: Strawberry Smoothie Without Yogurt (still creamy, still satisfying)
If yogurt isn’t your thing—or you simply ran out—you can still make a strawberry smoothie that’s thick and silky. The trick is replacing yogurt with something that brings body.
Ingredients for Strawberry Smoothie Recipe Without Yogurt
2 cups frozen strawberries
¾ cup milk or almond milk
One creamy option:
½ banana, or
2 tablespoons oats, or
1 tablespoon chia (let it sit for a few minutes after blending), or
¼ avocado
Optional sweetener if your berries are tart
Strawberry Smoothie Without Yogurt: If it tastes great but feels thin, thicken with fruit or fiber—banana for sweetness, oats for a breakfast-like body, or chia (rest 3 minutes) for a naturally thicker finish.
Method
Blend liquid and your creamy option first. Add frozen strawberries and blend until smooth.
What it tastes like
With banana, the smoothie leans sweet and classic—almost like a strawberry banana smoothie but lighter. When making it with oats, it becomes more breakfast-like, especially if you let it sit briefly so it thickens. And with avocado, it feels plush and rich, yet it still tastes like strawberries.
This is a simple strawberry smoothie solution that feels complete even without yogurt.
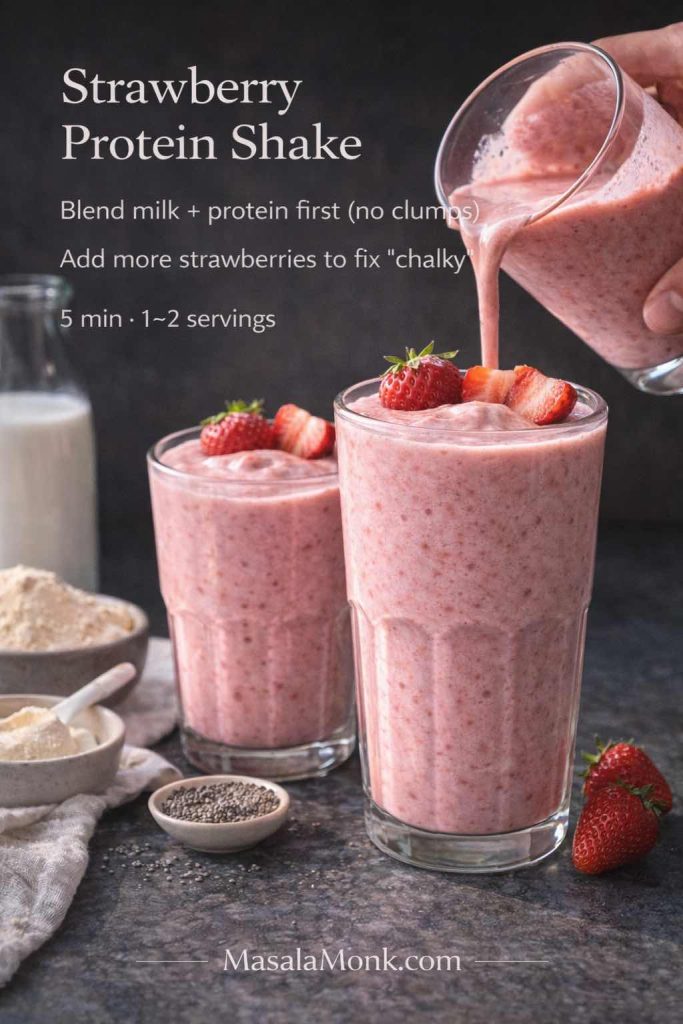
Recipe 5: Strawberry Protein Shake (filling, fast, and surprisingly delicious)
A strawberry protein shake should still taste like fruit, not like a supplement. The best versions are creamy, balanced, and easy to drink even when you’re not in the mood for something heavy.
It’s also a natural fit for strawberry protein drink, strawberry protein smoothie, and strawberry protein shake powder type blends.
Ingredients for Strawberry Protein Shake Recipe
2 cups frozen strawberries
1 cup milk (or almond milk)
1 scoop vanilla protein powder
½ banana or 1 date (optional)
1 tablespoon chia or ground flax (optional)
Strawberry Protein Shake: For a smooth, non-chalky shake, blend your liquid with protein powder first, then add frozen strawberries—extra fruit fixes texture and flavor better than extra sweetener.
Method
Blend the milk and protein powder first. Next, add strawberries and blend until thick. If you’re using chia, pulse it in at the end.
Make it more satisfying in a clean way
A spoonful of nut butter adds richness and makes the smoothie feel like a meal. Hemp seeds work well too; MasalaMonk’s hemp seed smoothie ideas include combinations that pair nicely with berries.
If you’re in a season where you want higher-calorie blends, MasalaMonk’s high calorie protein shakes can inspire how to build a thicker, more substantial shake while keeping your own version strawberry-forward.
Recipe 6: Strawberry Banana Protein Smoothie (breakfast + gym-friendly)
This is what happens when a strawberry banana smoothie grows up. It’s still sweet and familiar, yet it carries you further thanks to protein.
It also naturally matches phrases like strawberry banana protein smoothie, banana and strawberry protein shake, and protein banana strawberry smoothie.
Ingredients for Strawberry Banana Protein Smoothie Recipe
1½ cups frozen strawberries
1 banana
1 cup milk or almond milk
1 scoop protein powder
½ cup yogurt (optional)
Strawberry Banana Protein Smoothie: Use frozen banana for creaminess, then decide your texture—skip yogurt for a lighter shake, or add a little Greek yogurt when you want it extra thick and filling.
Method
Blend milk and protein powder until smooth. Add strawberries and banana, then blend until creamy.
Two easy adjustments
If you want it lighter, skip the yogurt and rely on frozen banana for creaminess. Conversely, if you want it extra thick, add yogurt and reduce the milk slightly.
If you’re using almond milk, you’ll end up close to a strawberry banana smoothie with almond milk—just with more staying power.
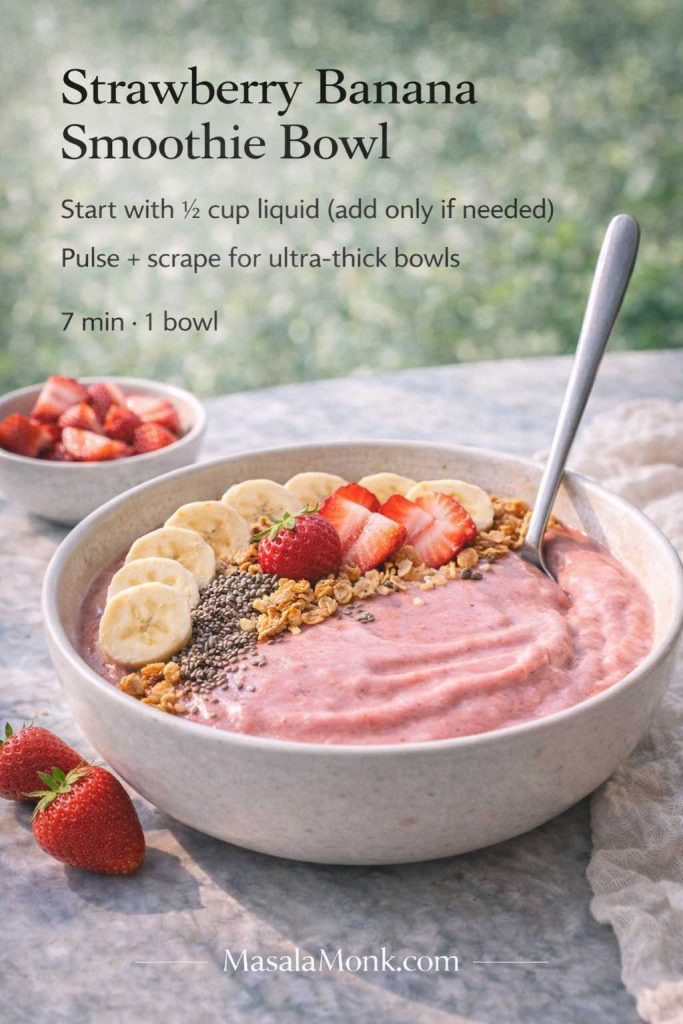
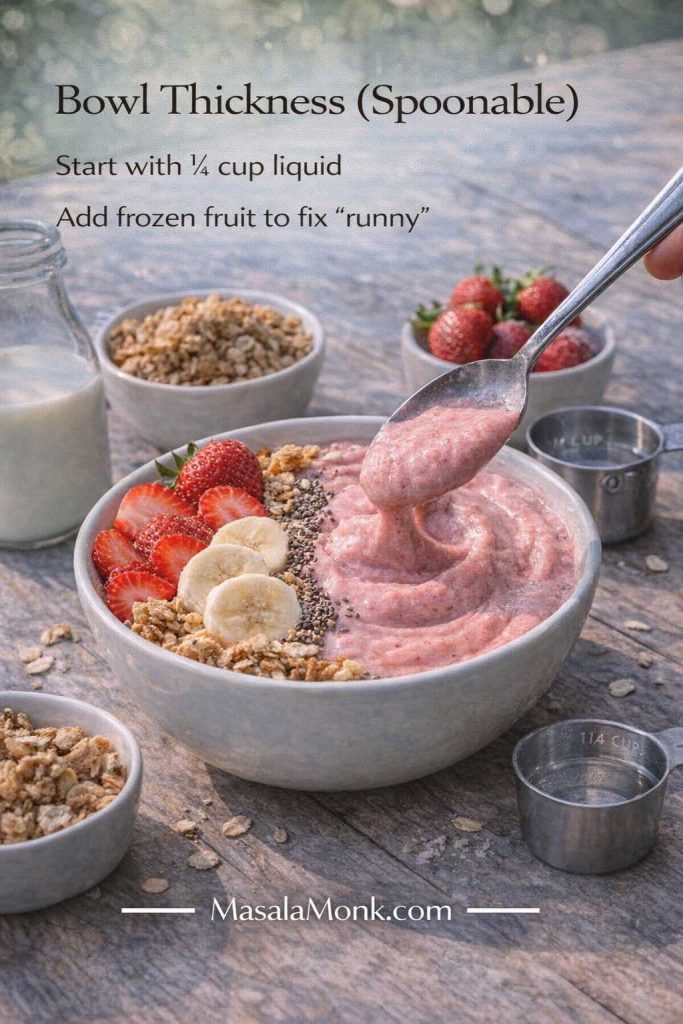
A smoothie bowl is all about texture. Instead of “drinkable,” you’re aiming for thick enough to hold toppings without everything sinking.
This covers strawberry banana smoothie bowl, smoothie bowl strawberry banana, and strawberry smoothie bowl recipe style blends naturally—without turning it into a project.
Ingredients for Strawberry Banana Smoothie Bowl Recipe
2 cups frozen strawberries
1 frozen banana (sliced before freezing)
¼ to ⅓ cup milk or almond milk (start small)
Optional: ¼ cup yogurt for tang
Strawberry Banana Smoothie Bowl: Bowl thickness comes from frozen fruit, not extra yogurt—start with very little liquid, then pulse and scrape until it turns spoonable enough to hold toppings.
Method
Add frozen fruit to the blender first. Then add the smallest amount of liquid to help it catch. Blend, stop, scrape, blend again until thick. Spoon into a bowl.
Toppings that work every time
Granola + sliced strawberries
Banana coins + nut butter drizzle
Coconut flakes + pineapple chunks
Chia seeds + cacao nibs
Bowl Thickness (Spoonable): Smoothie bowls should be blended “thick first”—start with very little liquid, then correct texture by adding more frozen fruit (not more yogurt or milk) if it turns runny.
If you want a quick visual reference for thickness, Bakerita’s strawberry banana smoothie bowl shows a classic approach. Meanwhile, Minimalist Baker’s smoothie bowl method explains the key principle: minimal liquid and patience in the blender.
For a make-ahead angle, MasalaMonk’s meal prepping with strawberries is a great companion read, especially if you like prepping frozen fruit packs for quick blending.
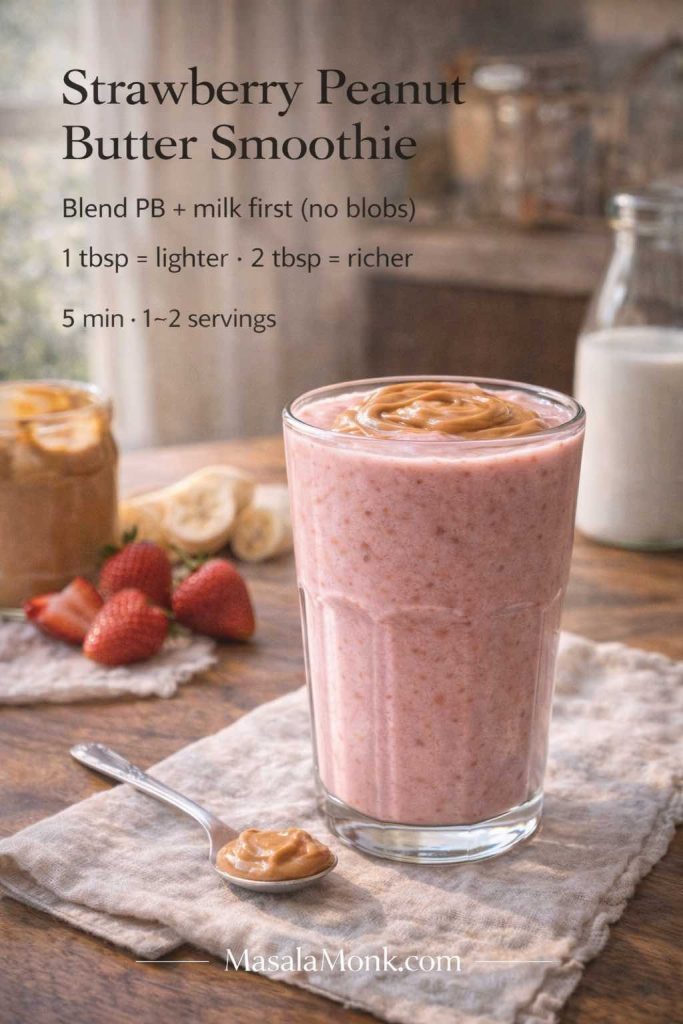
Recipe 8: Strawberry Peanut Butter Smoothie (comforting, rich, and balanced)
Strawberries and peanut butter sound unusual until you taste them together. The berries keep it bright; the peanut butter adds depth. The result feels like dessert while still being breakfast-friendly.
This naturally fits strawberry peanut butter smoothie, peanut butter and strawberry smoothie, and strawberry banana peanut butter smoothie variations.
Ingredients for Strawberry Peanut Butter Smoothie Recipe
2 cups frozen strawberries
1 banana
1–2 tablespoons peanut butter
¾ cup milk or almond milk
Optional: pinch of cinnamon, pinch of salt, splash of vanilla
Strawberry Peanut Butter Smoothie: For a smooth, creamy blend, emulsify peanut butter with milk first—then choose your richness: 1 tablespoon keeps it light, 2 tablespoons makes it dessert-like.
Method
Blend milk and peanut butter first so it emulsifies. Add strawberries and banana and blend until thick and creamy.
A few ways to change the mood
If you want something lighter, use almond milk and stick to 1 tablespoon peanut butter. If you want it more like a strawberry shake without ice cream, use cold milk and blend longer so it becomes airy.
Either direction, you’ll have a smoothie that feels indulgent without being heavy.
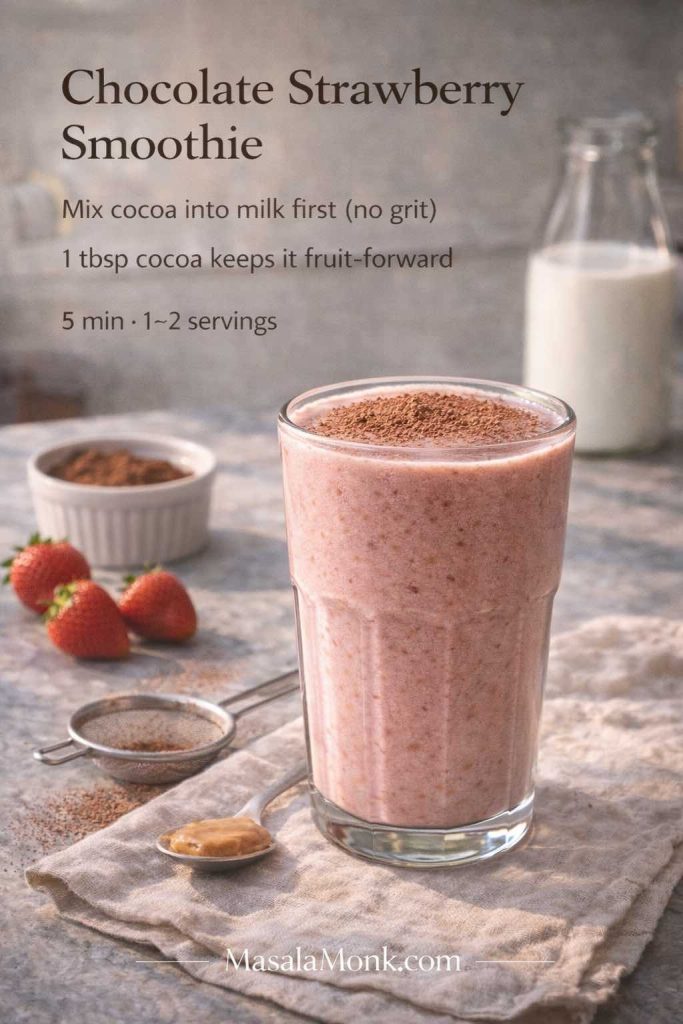
Recipe 9: Chocolate Strawberry Smoothie (cocoa-forward, not syrupy)
Chocolate and strawberry is a classic pairing, although it can become overly sweet if you lean on syrups. Cocoa powder keeps things grounded while frozen strawberries keep it bright.
This is a natural fit for chocolate strawberry smoothie, chocolate and strawberry smoothie, and cocoa strawberry smoothie versions.
Ingredients for Chocolate Strawberry Smoothie Recipe
2 cups frozen strawberries
1 banana (or 2 dates)
1 tablespoon cocoa powder
1 cup milk (or almond milk)
Optional: ½ cup yogurt for extra creaminess
Chocolate Strawberry Smoothie: To avoid gritty cocoa, dissolve it into the milk first—then keep it to about 1 tablespoon so the chocolate supports the strawberries instead of overpowering them.
Method
Blend cocoa powder with milk first so it dissolves smoothly. Add strawberries and banana, then blend until creamy.
A protein-friendly approach
If you like the idea of a strawberry banana chocolate protein smoothie, you can add vanilla or chocolate protein powder and keep the cocoa modest. That way, the smoothie stays fruit-forward rather than tasting like a protein bar in liquid form.
If you’re curious about adding seeds for extra richness, MasalaMonk’s hemp seed smoothie ideas include combinations that pair beautifully with cocoa.
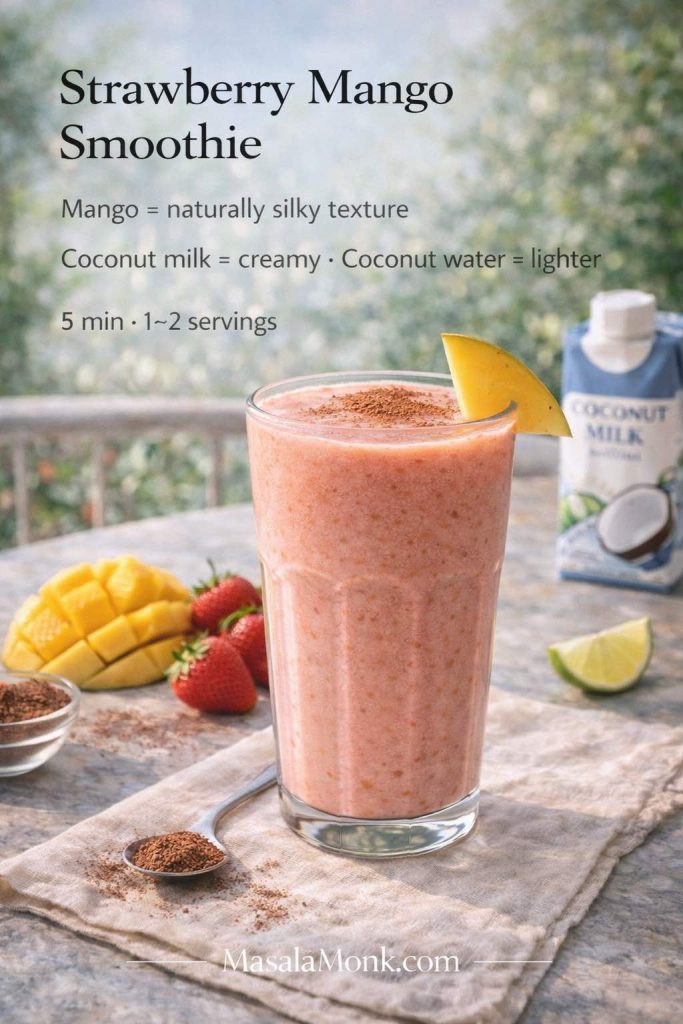
Recipe 10: Strawberry Mango Smoothie (sunny, tropical, and silky)
Strawberry mango smoothie blends are bright, cheerful, and naturally creamy—even without much dairy. Mango has a way of smoothing everything out, so the texture feels “finished” with very little effort.
This fits strawberry mango smoothie, mango and strawberry smoothie, mango and strawberry smoothie recipe, and smoothie strawberry mango phrasing naturally.
Ingredients
1½ cups frozen strawberries
1 cup frozen mango
¾ cup coconut milk beverage or milk
Optional: ½ banana or 1 date
Optional: 1 tablespoon chia
Strawberry Mango Smoothie: Mango gives you a naturally silky blend—choose coconut milk when you want it creamy, or coconut water when you want a lighter, more refreshing tropical finish.
Method
Blend liquid and fruit until smooth. If you’re using chia, pulse it in at the end.
An easy twist if you like “shake” style blends
If you enjoy mango drinks beyond smoothies, MasalaMonk’s mango shake guide offers variations that translate well—especially if you want a dairy-free or lower-sugar direction.
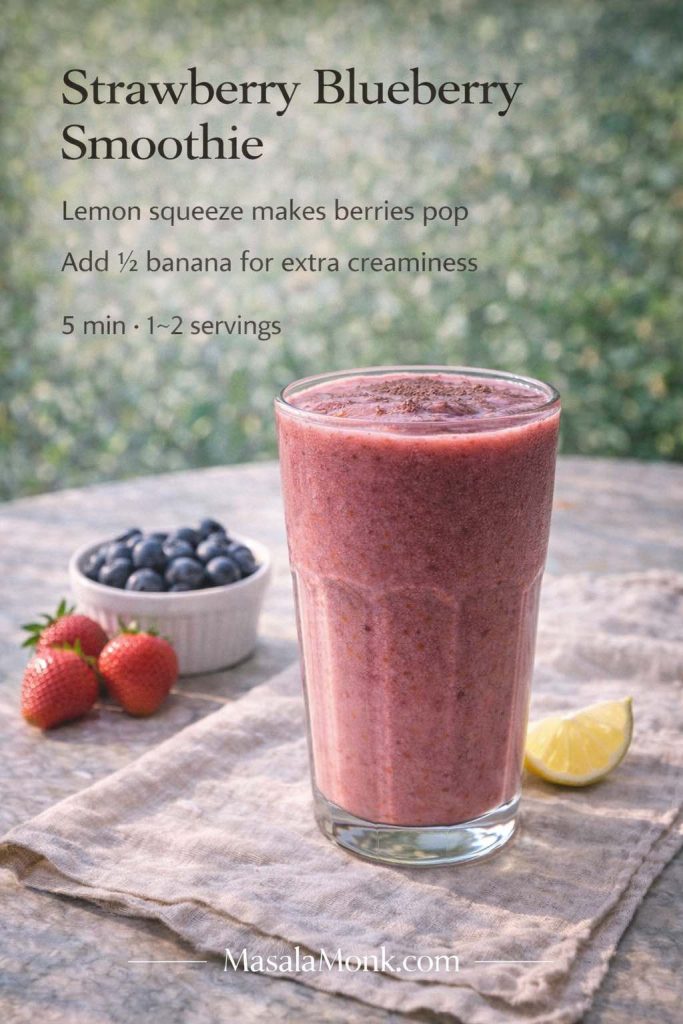
Recipe 11: Strawberry Blueberry Smoothie (berry-forward, vibrant, and satisfying)
A strawberry blueberry smoothie tastes like berries—not just sweetness. It’s also endlessly flexible, because you can keep it lean and bright or make it creamy and thick depending on your mood.
This naturally covers strawberry blueberry smoothie, strawberry and blueberry smoothie, strawberry blueberry smoothie recipe, and smoothie strawberry and blueberry phrasing.
Ingredients
1½ cups frozen strawberries
1 cup frozen blueberries
¾ to 1 cup milk or almond milk
Optional: ½ cup yogurt
Optional: sweetener only if needed
Strawberry Blueberry Smoothie: Berries taste brighter with a tiny squeeze of lemon—then add half a banana only if you want a smoother, creamier finish (especially with frozen fruit).
Method
Blend liquid and berries until smooth. Add yogurt if using, then blend again until creamy.
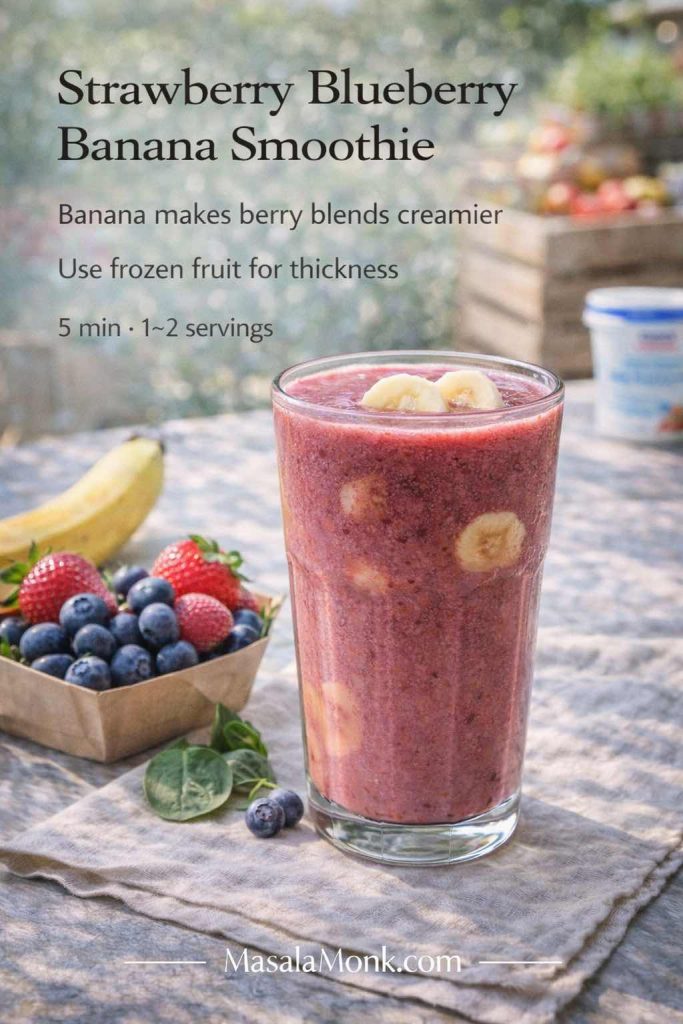
Triple-fruit variation (banana blueberry and strawberry smoothie)
Add ½ banana. You’ll end up with a strawberry blueberry banana smoothie that tastes rounder and creamier, and it also aligns beautifully with the classic banana blueberry and strawberry smoothie style.
Strawberry Blueberry Banana Smoothie: When berry smoothies taste too sharp, half a banana rounds them out—use frozen fruit for thickness and a smoother, creamier finish without extra dairy.
If you enjoy berry blends in general, you can also push this into “berry smoothies” territory by adding raspberries or blackberries—just keep your liquid modest so it stays thick.
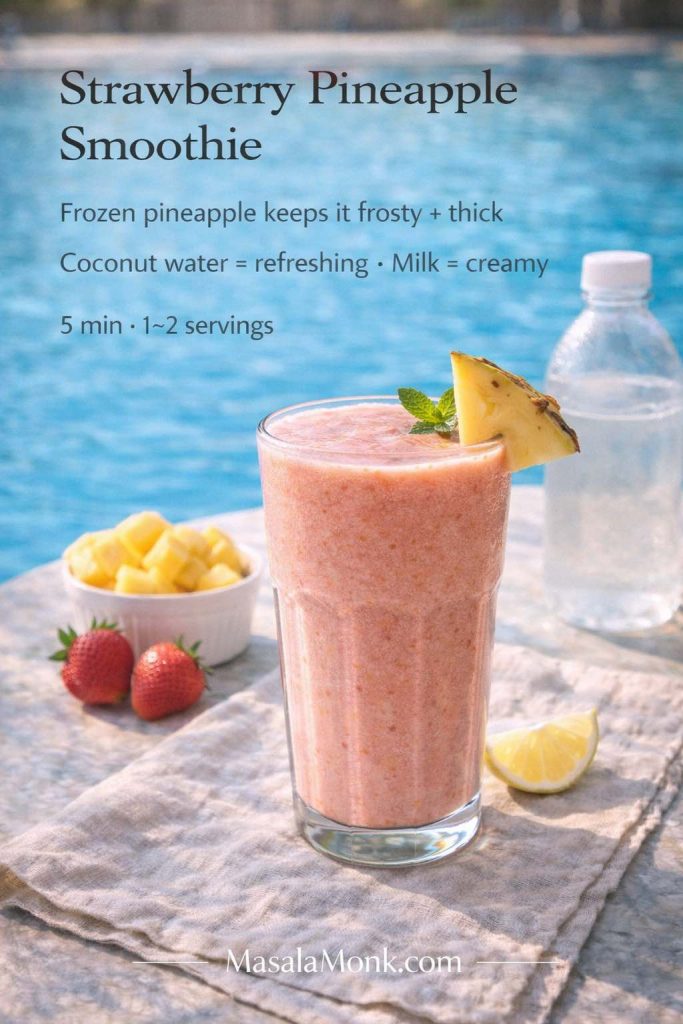
Pineapple brings a tropical sharpness that makes strawberries taste even sweeter. If you like a smoothie that feels light and energizing, strawberry pineapple smoothie blends are a great choice.
This naturally fits pineapple and strawberry smoothie and smoothie with strawberries and pineapple versions.
Ingredients
1½ cups frozen strawberries
1 cup pineapple chunks (fresh or frozen)
¾ cup coconut water or milk
Optional: ½ banana for sweetness
Strawberry Pineapple Smoothie: For a bright, refreshing tropical blend, use frozen pineapple to keep it thick and frosty—then choose coconut water for a lighter finish or milk when you want it creamy.
Method
Blend coconut water and pineapple first until smooth. Add strawberries and blend until frosty.
If you enjoy the clean, refreshing finish of coconut water, MasalaMonk’s coconut water smoothie ideas pair naturally with this style.
And if you like the idea of “tropical” but want more structure, MasalaMonk’s meal prepping with strawberries includes a tropical bowl direction that’s easy to adapt using strawberry, pineapple, mango, and banana.
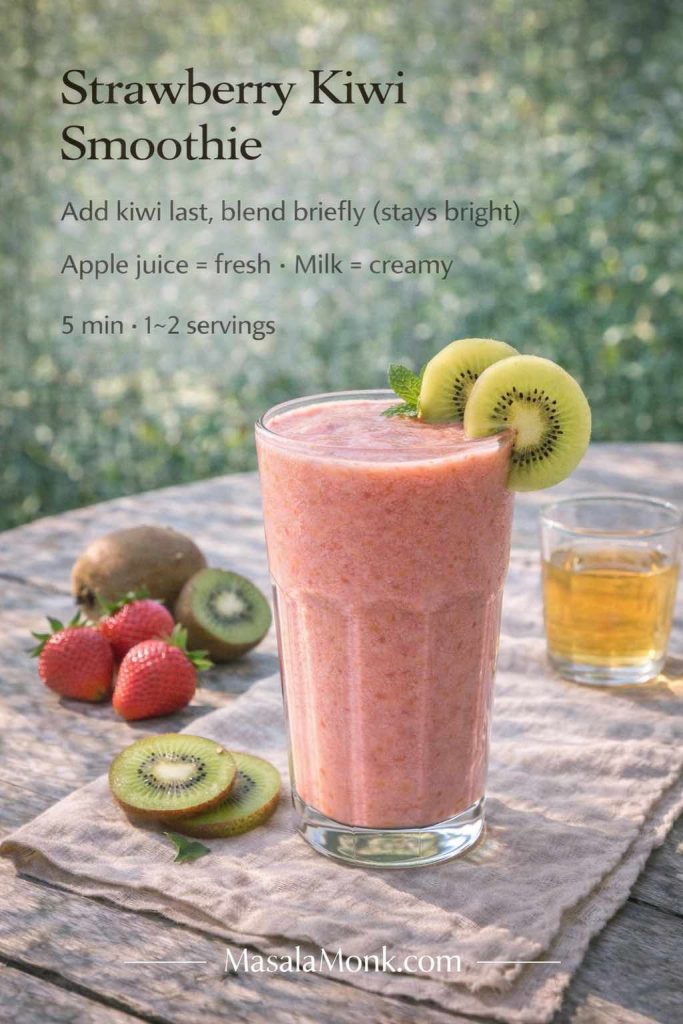
Bonus: Strawberry Kiwi Smoothie (zippy, bright, and a little fancy recipe)
This one isn’t part of the numbered list above, but it deserves a spot in your rotation. Strawberry kiwi smoothies taste like a fruit salad that decided to become a drink—bright, juicy, and refreshing.
It also naturally matches strawberry kiwi smoothie, kiwi and strawberry smoothie, and smoothie with kiwi and strawberry phrasing.
Ingredients
2 cups strawberries (frozen works best)
1–2 kiwis, peeled
¾ cup apple juice or milk
Optional: ½ banana if you want it sweeter
Strawberry Kiwi Smoothie: Kiwi tastes brightest when it’s blended briefly—add it at the end, then choose apple juice for a crisp, fresh smoothie or milk when you want it creamier.
Method
Blend strawberries with your liquid first. Add kiwi and blend briefly until smooth.
Kiwi can get slightly bitter if over-blended in some machines, so keeping it quick helps the flavor stay clean.
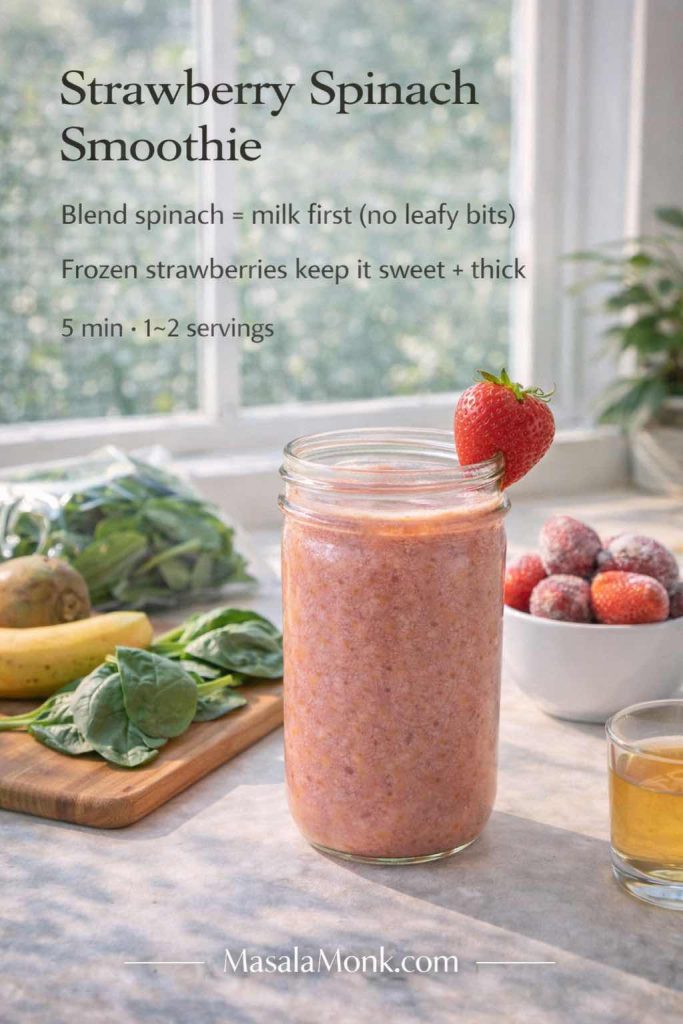
Bonus: Strawberry Spinach Smoothie Recipe (green, but still tastes like strawberries)
If you want greens without sacrificing flavor, this is the one. Strawberry spinach smoothie blends are at their best when they taste like fruit first, spinach second.
This naturally covers smoothie with spinach and strawberries and strawberry smoothie with spinach variations.
Ingredients
2 cups frozen strawberries
1 banana
1–2 packed cups baby spinach
¾ to 1 cup milk or almond milk
Optional: chia or flax for extra body
Strawberry Spinach Smoothie: For a smooth, fruit-forward green smoothie, blend spinach with your liquid first until completely silky—then add frozen strawberries and banana for sweetness and thickness.
Method
Blend milk and spinach first until completely smooth. Then add strawberries and banana and blend until thick and creamy.
If you’re interested in iron-friendly directions, MasalaMonk’s high-iron smoothies and shakes includes ideas in the same spirit—greens plus vitamin C–rich fruits—without turning the smoothie into something that tastes medicinal.
How to build your own “mix and match” variations without overthinking it
Once you’ve made a few of these, you’ll start noticing patterns. From there, you can spin off new combinations easily—whether you’re craving smoothie strawberry ingredients that feel light, or something thicker and more filling.
If you want a smoothie recipe without strawberries
Sometimes you land here even though you’re not in a strawberry mood. In that case, you can swap strawberries for another frozen fruit and keep the same method. Mango, blueberries, pineapple, and mixed berries all work beautifully. The blending logic stays exactly the same as any recipe for smoothie with frozen fruit.
If you want smoothie ideas with strawberries but not banana
Banana is popular, although not everyone loves it. If you want a strawberry smoothie no banana or strawberry smoothie without banana direction, try one of these as your “creamy element” instead:
Greek yogurt
oats
chia (let it rest briefly after blending)
avocado (use a small amount)
That’s how you get a creamy strawberry smoothie without banana, without needing special ingredients.
If you want a strawberry smoothie recipe no banana and no yogurt
Use frozen strawberries, almond milk, and oats or chia. It turns into a simple strawberry smoothie that’s creamy enough to satisfy, yet still light.
If you want a strawberry fruit shake feel
Lean on cold milk, frozen strawberries, and an extra banana slice or two. Blend longer until the texture looks fluffy. You’ll end up with a strawberry fruit shake that feels like a treat, especially if you add a splash of vanilla.
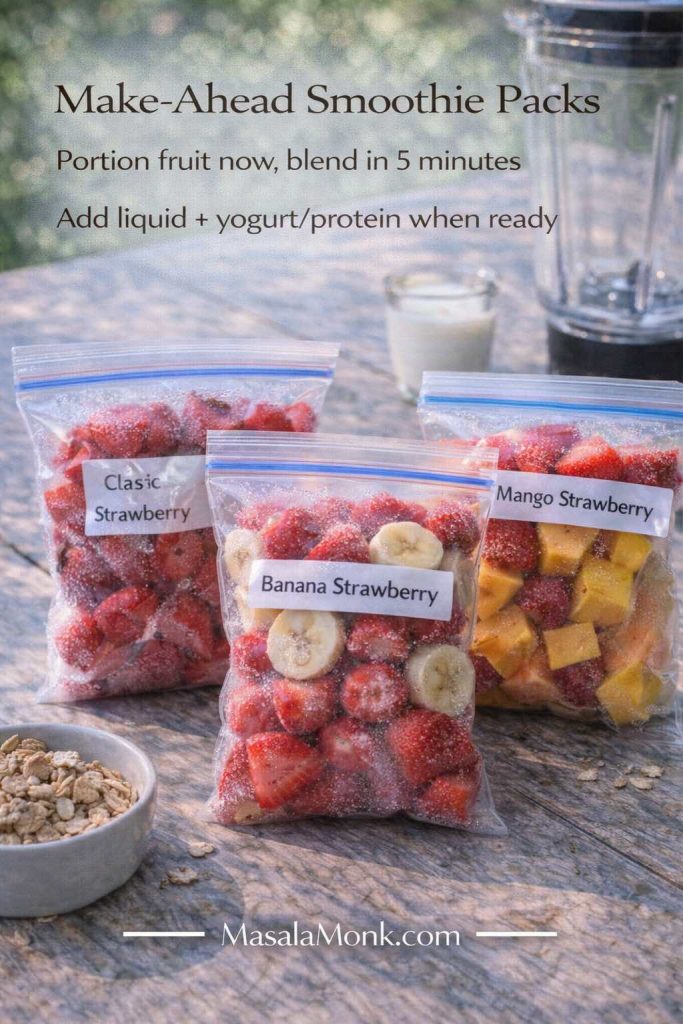
Make-ahead smoothie packs (the easiest way to drink smoothies more often)
If you’ve ever bought frozen strawberries and bananas with good intentions, only to watch the bananas over-ripen on the counter, smoothie packs are the answer.
They also make mornings smoother because you’re not measuring fruit while half awake.
What to do
Portion fruit into freezer bags or containers. Then, when you want a smoothie, dump a pack into the blender and add liquid plus any creamy element you like.
Make-Ahead Smoothie Packs: Pre-portion frozen fruit once, then smoothies become a 5-minute habit—just dump a pack into the blender and add your liquid (plus yogurt or protein) when you’re ready.
Packs to try (easy, practical, and delicious)
Classic Strawberry pack
2 cups strawberries This one works with milk, almond milk, or yogurt. It’s the base for most strawberry smoothie recipes.
BananaStrawberry pack
1½ cups strawberries
1 banana, sliced This is your go-to for a strawberry banana smoothie recipe whenever you want it.
MangoStrawberry pack
1½ cups strawberries
1 cup mango Add coconut milk beverage for the smoothest, sunniest result.
BlueberryStrawberry pack
1½ cups strawberries
1 cup blueberries Great with milk, almond milk, or yogurt, depending on whether you want it bright or creamy.
Strawberry pineapple pack
1½ cups strawberries
1 cup pineapple Try coconut water for a fresh finish, especially on hot days.
Turning packs into smoothie bowls
If you want a smoothie bowl, use the same packs—but cut your liquid down dramatically. Instead of ¾ cup, start with ¼ cup, then increase only if the blender needs it.
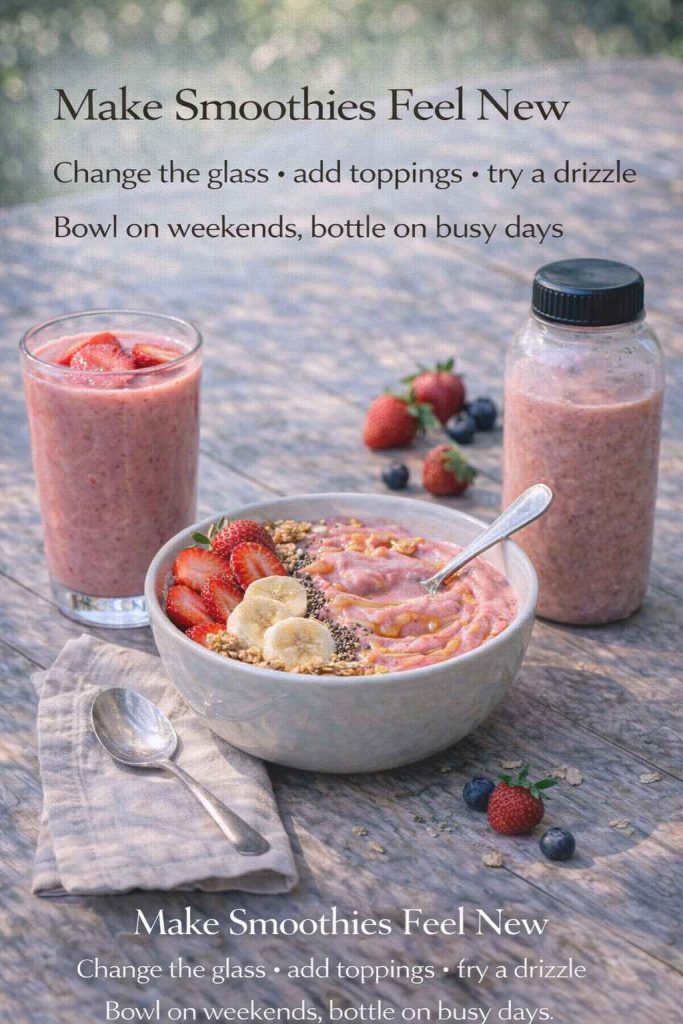
A few serving ideas that make smoothies feel less repetitive
It’s easy to love smoothies for a week and then get bored. A small change in presentation can keep them interesting.
Serving ideas: Keep smoothies from getting boring by changing the format—glass for a classic sip, bowl for weekend toppings, and a bottle when you need something grab-and-go.
Pour your strawberry smoothie with milk into a chilled glass and add a few sliced strawberries on top. It feels more “finished.”
Turn a strawberry banana smoothie into a smoothie bowl on weekends and add crunchy toppings.
Make a chocolate strawberry smoothie when you’re craving dessert, then add a spoonful of yogurt to keep it creamy and satisfying.
Blend a strawberry protein smoothie after workouts, then sprinkle chia on top for a little texture.
Small shifts keep the routine enjoyable, which is often the real secret to sticking with it.
1. What’s the easiest strawberry smoothie recipe for beginners?
To keep it simple, start with strawberries + milk and blend until smooth. For an easy strawberry smoothie recipe that’s consistently creamy, use frozen berries and begin with less liquid than you think you need. Afterward, adjust: add a splash more milk if it’s too thick, or add more frozen strawberries if it’s too thin. That approach turns a basic strawberry smoothie into a good strawberry smoothie recipe you can repeat without measuring perfectly every time.
2. What are the best strawberry smoothie ingredients for a creamy texture?
In practice, creaminess comes from a combination of frozen fruit and one “softener.” Strawberries provide flavor; banana, yogurt, oats, chia, or nut butter provide body. For a classic strawberry smoothie recipe, frozen strawberries + milk + yogurt is hard to beat. Alternatively, if you prefer fewer ingredients, frozen strawberries + milk + banana creates a thick, smooth result with a naturally sweet finish.
3. Can I make a strawberry smoothie with yogurt, and what yogurt works best?
Absolutely—strawberry smoothie with yogurt is one of the creamiest versions. Greek yogurt yields a thicker, tangier blend, while regular yogurt makes it lighter and more drinkable. As it happens, flavored strawberry yogurt can also work when you want extra sweetness without adding honey. If your goal is a strawberry smoothie recipe with yogurt that feels like a treat, choose a thicker yogurt and keep the liquid modest.
4. How do I make a strawberry smoothie recipe without yogurt that’s still creamy?
For that reason, you’ll want a substitute that adds body. A ripe banana is the easiest swap; it thickens and sweetens at the same time. Otherwise, oats (2 tablespoons) add a breakfast-like texture, while chia seeds thicken after blending if you let the smoothie rest briefly. In a pinch, a small piece of avocado can create a velvety mouthfeel without overpowering the strawberry flavor.
5. What’s a simple strawberry smoothie recipe with only 3 ingredients?
A simple strawberry smoothie recipe can be as straightforward as: frozen strawberries, milk, and banana. That combination also doubles as an easy strawberry smoothie recipe when you don’t want yogurt. By the same token, you can swap banana for yogurt if you prefer tang over sweetness. Either way, keeping the ingredient list short tends to make the strawberry flavor stand out more.
6. How do I make a strawberry smoothie with milk that doesn’t taste watery?
All things considered, wateriness comes from too much liquid or too much ice. Use frozen strawberries rather than ice, and start with about ¾ cup milk for 2 cups fruit. Next, blend thoroughly so the fruit fully breaks down—under-blended smoothies can taste thin even when they aren’t. If it still feels light, add more frozen strawberries instead of adding more milk.
7. What’s the best strawberry banana smoothie recipe for a thick, creamy result?
A reliable strawberry banana smoothie recipe uses frozen strawberries and a ripe banana, plus just enough milk to get the blender moving. At the same time, blending the milk with strawberries first can prevent clumps, especially if your berries are very icy. If you want a richer strawberry and banana smoothie recipe, add yogurt; if you’d rather keep it simpler, rely on the banana for creaminess and reduce the liquid slightly.
8. How do I make a strawberry banana smoothie with yogurt?
In contrast to the no-yogurt version, a strawberry banana smoothie with yogurt has more tang and a thicker texture. Add yogurt after the fruit begins to blend—this helps the blender stay smooth and prevents the mixture from getting stuck. Subsequently, tweak consistency with frozen fruit rather than extra liquid. If you want a more dessert-like finish, a dash of vanilla makes the flavor feel rounder.
9. How do I make a strawberry banana smoothie with milk that tastes like a shake?
To get that “strawberry shake recipe” vibe, use cold milk, frozen strawberries, and a ripe banana, then blend a little longer to introduce air. In addition, skip ice whenever possible—ice can dull the flavor and thin the texture as it melts. For a strawberry shake without ice cream, a spoonful of yogurt can mimic milkshake creaminess without making it heavy.
10. What’s the easiest way to use frozen fruit in smoothies?
In practice, the best smoothie frozen fruit method is to treat frozen fruit as your thickener. Start with frozen strawberries (or a frozen fruit mix), add liquid gradually, and blend in stages. If you’re following a recipe for smoothie with frozen fruit, begin with less liquid than suggested and increase only if the blender stalls. That strategy keeps the smoothie thick and prevents the “watery aftertaste” that can happen when you over-pour liquid.
11. How do I make a frozen strawberry smoothie that’s smooth, not icy?
A frozen strawberry smoothie turns silky when you blend long enough and use a creamy element. Yogurt, banana, or a spoonful of nut butter helps prevent an icy texture. Moreover, letting frozen fruit sit for 2–3 minutes before blending can reduce harsh ice crystals. If your blender struggles, blend the liquid with softer ingredients first, then add the frozen strawberries gradually.
12. Can I make a strawberry smoothie bowl recipe if I only have a regular blender?
Yes—strawberry smoothie bowl recipes are doable in most blenders with one adjustment: use far less liquid. Begin with frozen strawberries and frozen banana, add only a small splash of milk, and stop to scrape down the sides. In the same vein, pulsing can help the blades catch. If it becomes too thick to blend, add liquid a tablespoon at a time rather than pouring freely.
13. How do I thicken a strawberry banana smoothie bowl if it turns runny?
In that situation, add more frozen fruit first—frozen strawberries or frozen banana fixes texture quickly. Alternatively, a spoonful of oats or chia can thicken the bowl if you let it sit a couple of minutes. Avoid adding extra yogurt once it’s already runny, because yogurt can add moisture. For a reliable strawberry banana smoothie bowl, starting with minimal liquid is the best prevention.
14. What’s a good strawberry protein shake that still tastes like fruit?
A strawberry protein shake works best when protein supports the flavor rather than taking over. Blend your liquid with protein powder first to prevent clumps, then add frozen strawberries. Next, consider adding a banana or yogurt to keep the texture creamy and the taste balanced. If you want a strawberry protein smoothie that feels more like dessert, a small pinch of cocoa or vanilla can round out the flavor without burying the strawberries.
15. How do I make a strawberry banana protein smoothie without it tasting chalky?
To reduce chalkiness, use less powder than you think you need and build creaminess with banana or yogurt instead. Additionally, blending the powder with liquid first makes a smoother base. If the flavor still feels strong, add more strawberries rather than more sweetener—extra fruit softens the protein taste while keeping the smoothie bright. That approach usually produces a better strawberry protein drink overall.
16. Can I make a strawberry smoothie no banana that’s still thick?
Certainly—strawberry smoothie without banana is easy if you replace banana’s thickening role. Greek yogurt is the simplest option; oats and chia also work well. In particular, chia thickens after blending, so a short rest can transform texture. If you need a strawberry smoothie recipe no banana and no yogurt, use oats or chia with frozen strawberries and start with minimal liquid.
17. How do I make a non dairy strawberry smoothie or an almond milk strawberry smoothie?
A non dairy strawberry smoothie works beautifully with almond milk, oat milk, or coconut milk beverage. For an almond milk strawberry smoothie, blend frozen strawberries with almond milk and add a creamy element like banana, oats, or nut butter. In addition, skip ice and rely on frozen fruit for thickness. If you’re aiming to make smoothie without milk entirely, coconut water can be used, although it’ll taste lighter and more refreshing.
18. How do I make a strawberry shake without ice cream?
A strawberry shake without ice cream comes down to cold milk, frozen strawberries, and one thickener. Banana creates a classic milkshake-style sweetness; yogurt adds tang and creaminess. After that, blend longer than usual to make it slightly frothy. If you’re after a strawberry milkshake without ice cream that feels extra rich, add a small spoonful of nut butter and a pinch of salt.
19. What’s the best way to add strawberry puree for smoothies?
Strawberry puree for smoothies works best as a flavor booster rather than the main thickener. Use puree when you want a strong strawberry taste from fresh berries, then add frozen fruit (or a banana/yogurt) to build texture. Likewise, puree is handy in smoothie bowls if your blender needs help catching—use a little puree as the base, then blend in frozen fruit for thickness.
20. Can I prep frozen strawberries and bananas ahead for quick smoothies?
Yes—frozen strawberries and bananas are one of the easiest make-ahead combos. Slice bananas before freezing so they blend smoothly. Then, portion frozen fruit into packs so you can dump and blend. For a drinkable smoothie, add milk or almond milk; for a thicker bowl, add only a small splash. As a result, you’ll make strawberry banana smoothie recipes far more often because the hardest part is already done.
21. What if I’m using frozen smoothie mixes or strawberry smoothie mix packets?
Frozen smoothie mixes can be convenient, although flavor varies. To make them taste fresher, add extra frozen strawberries and keep sweeteners minimal. If you’re working with a strawberry smoothie mix or strawberry smoothie powder, use it lightly and let real fruit lead. In general, blending the mix with milk or almond milk and adding a banana improves both texture and taste.
22. What can I make if I want a smoothie recipe without strawberries?
A smoothie recipe without strawberries can follow the same structure—frozen fruit + liquid + a creamy element. Mango, pineapple, blueberries, and mixed berries all work well. Consequently, you can still keep a thick, creamy texture by relying on frozen fruit instead of ice. If you like tropical flavors, mango and pineapple blends are naturally smooth; if you prefer a deeper berry taste, blueberries make a rich base.
Fasting gets easier—and steadier—when your hydration plan is simple, precise, and sustainable. To that end, the homemade electrolytes for fasting below use gram-level measurements so you can mix, sip, and adjust without guesswork. Because many readers want clarity right away: strict fasting usually means zero calories (plain salts and unsweetened mineral drops are fine), while flexible fasting sometimes allows a few calories for taste or adherence. For context on when electrolytes actually help, skim Harvard Health’s practical overview and this clear Cleveland Clinic explainer.
If you’re just starting out, you might appreciate a quick primer on intermittent fasting patterns and food timing; this simple guide to foods for 16:8 intermittent fasting pairs well with today’s recipes. Likewise, because fruit confuses a lot of newcomers, this gentle breakdown on fruit during intermittent fasting keeps expectations realistic before we talk salts, drops, and flavor.
Why Homemade Electrolytes for Fasting Work So Well
Electrolytes—primarily sodium, potassium, and magnesium—support normal nerve signaling, steady muscle contractions, and fluid balance. During long fasts, hot weather, or active days, losses can increase, and that’s when headaches, fatigue, or cramps creep in. Building homemade electrolytes for fasting into your routine lets you adjust dosing quickly without relying on sugary sports drinks or flavored powders that may not fit your fasting rules.
Because not everyone needs the same amounts, think of today’s mixes as a solid baseline rather than a rigid prescription. Some will want more sodium on humid days; others might appreciate a touch of potassium during multi-day stretches. If you prefer to reintroduce flavor after your window closes, circle back later to our refreshing natural homemade electrolyte drink ideas for off-fast variety.
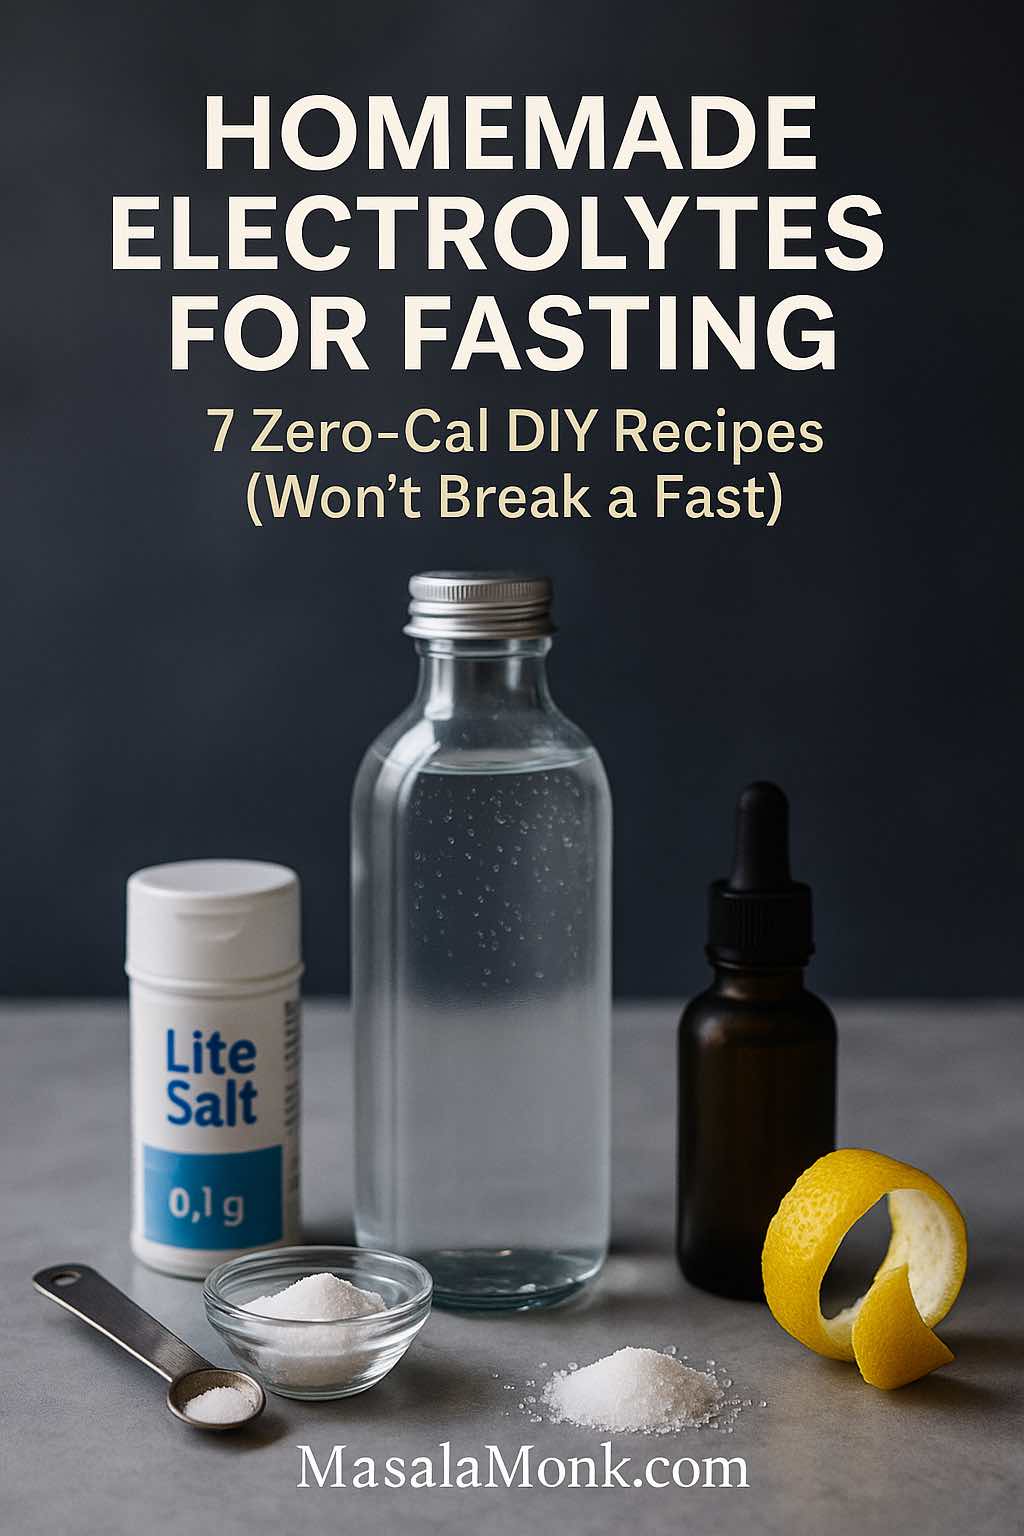
Strict-Zero: Homemade Electrolytes for Fasting (0 Calories)
These recipes are designed for strict windows. Each formula makes 1 liter. Weigh ingredients on a 0.1 g scale, add to a bottle, top with water, and shake until clear. Chilling often improves taste.
Basic Salty Water (simple, clean, dependable)
2.5 g fine table salt (≈ 1,000 mg sodium)
1 liter water
Optional: 300–400 mg magnesium from unsweetened drops (follow label)
This minimalist mix is the backbone of homemade electrolytes for fasting: inexpensive, repeatable, and truly zero-calorie. If you’re sensitive to mineral flavor, cool it before sipping.
Lite-Salt Balance (adds gentle potassium, still zero-cal)
1.5 g table salt
1.5 g potassium chloride (often called “lite salt” or a salt substitute)
1 liter water
Optional: ⅛ tsp baking soda to soften the edge
Taste is slightly bitter for some, so begin conservatively. Nevertheless, many fasters find this mild potassium addition smooths long days without complicating the plan.
You may see higher-dose versions online, yet this more restrained take respects individual variability. If you manage blood pressure, kidney health, or heart conditions—or use diuretics—get personalized guidance; here’s a straightforward look at electrolyte imbalance signs.
Drop-In Zero-Cal Copycat (customizable without calories)
Sodium:1,000–1,500 mg (via salt)
Magnesium:200–400 mg (unsweetened mineral drops)
Potassium:0–300 mg (optional)
1 liter water
This template mirrors unsweetened concentrates that truly list 0 kcal per serving. If you’re curious about a label reference, see Keto Chow’sFasting/Electrolyte Drops and their broader electrolytes FAQ, which clarifies that unflavored versions remain strict-fast friendly.
Flexible Days: DIY Electrolyte Water for Fasting (Light-Cal Options)
Some protocols permit a few calories to improve adherence. If that’s your camp, these mixes add interest while staying restrained. Even so, because they are not zero-calorie, they do not belong in a strict window.
The lemon rounds off saltiness and encourages steady sipping without turning your bottle into lemonade. And if you’re about to reopen your window, peek at these sensible foods to break a fast so the transition stays comfortable.
When plain water feels monotonous, a warm, salty infusion can be surprisingly satisfying—especially in the evening. Keep it unsweetened to minimize calories.
Coconut-Lime Rehydrate (specifically after the fast)
250 ml unsweetened coconut water
Pinch salt + squeeze lime
Top with water and ice to 1 liter
Naturally sweet and potassium-rich, this mix is excellent after a long window or gentle training. For a different scenario, if you’re recovering from a social night, these targeted electrolytes for hangovers can be a helpful reset.
Product Reality Check: Will Commercial Mixes Break a Fast?
Because labels vary, it pays to verify. LMNT lists 1,000 mg sodium, 200 mg potassium, and 60 mg magnesium per stick and is marketed as sugar-free; however, certain flavors carry small but real calories, which means they don’t fit strict-zero rules. Confirm details on the LMNT product page and the company’s ingredients overview. Conversely, unsweetened mineral concentrates—like the Fasting/Electrolyte Drops mentioned earlier—indicate 0 kcal and are, therefore, compatible with strict windows (see the brand’s product details and FAQ).
Why do some formulas include sugar at all? Outside the fasting context, glucose improves sodium absorption in the gut through co-transport, which is the rationale behind oral rehydration solutions. If you’re curious, here’s the World Health Organization’s concise summary of ORS composition and use. That’s ideal for illness recovery, yet it introduces calories—so it sits outside strict fasting.
Meanwhile, if you’re tailoring fasting to hormonal shifts or training cycles, you may find this approachable overview on intermittent fasting for women helpful; it frames electrolyte choices without rigidity.
Fine-Tuning Intake: From Baseline to Personal Fit
Although the homemade electrolytes for fasting above provide sturdy starting points, needs change with temperature, altitude, sweat rate, caffeine, and even daily stress. Consequently, treat these as reliable baselines and iterate:
Sodium Targets (the main lever)
A practical starting point is ~1,000 mg sodium per liter, sipped to thirst through your active hours. On hot, humid days or during long walks, you may want more. If you experience persistent headaches or lightheadedness while fasting, consider whether your sodium is lagging before you assume anything else is wrong. For wider context on when electrolytes are truly necessary, this short Harvard guide is reassuringly balanced.
Potassium (useful but not mandatory)
A small amount can feel great during multi-day fasts or heavy sweating. Nevertheless, many people meet needs once eating resumes. Start conservatively; taste and muscle calm are simple guides.
Magnesium (sometimes the difference maker)
Not everyone benefits during the fast itself, yet 200–400 mg from unsweetened drops can reduce nighttime cramping for those who need it. If your sleep or calves improve, you’ll know quickly.
Safety, Sensibility, and Signals
Swelling, unusual fatigue, palpitations, or stomach upset tell you something’s off—ease up, drink plain water for a while, and reassess. If you have kidney, heart, or blood-pressure concerns, or you use medications that alter fluid balance, involve your clinician early. For a calm clinical primer, here’s a quick orientation to electrolyte panels and what doctors look at.
Choose the Right Salt (predictable dissolving, predictable dosing)
Fine table salt dissolves quickly and measures consistently. If you prefer sea salt, weigh it—flake size makes teaspoons unreliable. Because precision matters for homemade electrolytes for fasting, that small digital scale is worth it.
Make a Bottle You Like (you’ll drink what you enjoy holding)
A wide-mouth liter bottle simplifies mixing and cleaning. If you prefer glass at home and plastic when traveling, set both out the night before—habit beats willpower.
Chill or Warm Strategically (taste follows temperature)
Cold water reduces mineral bite; lukewarm water feels easier on early-morning stomachs. Either way, taste perception changes with temperature, so experiment rather than tolerate.
Pre-Weigh Travel Packs (your future self will thank you)
Measure several sets of dry ingredients into tiny baggies. When your day gets hectic, you’ll appreciate how fast “add water, shake, go” becomes.
Track Gently (signal over noise)
Instead of obsessing over totals, jot down liters finished and how you felt. After a week, patterns emerge—maybe you always need more during late-afternoon errands or before evening walks.
A Short, Friendly Science Detour (So You Can Ignore the Noise)
Sodium dominates the extracellular fluid, pulling water with it and supporting blood volume. When you sweat, sodium losses can be meaningful—hence the immediate relief many people feel when they sip a salty liter during longer fasts. Potassium, meanwhile, lives mostly inside cells, partnering with sodium to maintain normal electrical gradients for nerves and muscles. Magnesium underpins hundreds of enzymatic reactions and aids muscle relaxation; no surprise some people sleep better when they meet modest needs.
Because the internet often conflates fasting hydration with medical rehydration, here’s a quick distinction: oral rehydration solutions include glucose to enhance sodium uptake in the small intestine (the SGLT1 co-transport mechanism). That’s superb during illness, yet those same calories break a strict fast. If you enjoy concise backgrounders, the WHO’s page on ORS composition and rationale is plain and to the point.
Equally important, you don’t need to turn this into a chemistry exam. Consistency beats perfection; the homemade electrolytes for fasting you’ll actually drink are better than an “optimal” formula you never mix.
Bringing It Together for Fasting and Homemade Electrolytes
On strict days, choose the zero-calorie mixes: Basic Salty Water, Lite-Salt Balance, Minimalist Snake-Style, or the Drop-In Zero-Cal Copycat. They’re quick to prepare, easy on the wallet, and aligned with strict rules. On flexible days, lean into the Citrus-Salt Sipper, the Herbal Salt Tea, or the Coconut-Lime Rehydrate—each adds a little pleasure without turning into dessert.
When real life gets messy, adapt and continue. You’ll likely sip more in summer, less in winter. You may love a touch of potassium one week and skip it the next. If you want product convenience, read labels with a clear eye: LMNT is deliciously salty but carries small calories (details on their product and ingredients), while unsweetened mineral drops remain strict-fast friendly (see Keto Chow’s Fasting/Electrolyte Drops and the FAQ). Furthermore, if you’d like a broader nutritional frame for different life stages, consult this grounded overview of intermittent fasting for women.
In the end, the point isn’t perfection—it’s momentum. With homemade electrolytes for fasting dialed in, you’ll feel steadier, think more clearly, and keep your protocol simpler than ever. Mix thoughtfully, listen to your body, adjust with grace, and let consistency do the heavy lifting.
1) Do homemade electrolytes for fasting break a strict fast?
Generally, homemade electrolytes for fasting made with plain salts and unsweetened mineral drops are zero-calorie and therefore compatible with strict fasting. However, flavored mixes or recipes that add juice, sweeteners, or coconut water introduce calories and, consequently, end a strict fast.
2) How much sodium, potassium, and magnesium should I target while fasting?
As a simple baseline, many fasters start near ~1,000 mg sodium per liter of water, then adjust to thirst, heat, and sweat. Potassium can sit in the 0–300 mg per liter range for gentle support, while magnesium often lands around 200–400 mg per day from unsweetened drops. Nevertheless, individual needs vary—tune gradually.
3) What are the best homemade electrolytes for fasting if I want zero calories?
Strict-fast options prioritize plain sodium chloride, optional potassium chloride, and unsweetened magnesium drops in water. In short, pick a simple salt-forward mix, keep dosing precise (grams, not “pinches”), and skip flavorings that add energy.
4) Will electrolyte water break intermittent fasting but not water fasting?
Both intermittent fasting and water fasting consider calories the key divider. Consequently, zero-calorie homemade electrolytes for fasting are typically fine for either style, while any recipe containing caloric ingredients will break both.
5) Can I drink electrolytes while fasting during workouts or hot weather?
Yes. Indeed, when sweat loss rises, modest sodium replacement during the fast often improves comfort, reduces headaches, and helps you stay consistent. Even so, avoid megadoses; increase in small steps and monitor how you feel.
6) What’s the best electrolyte drink for intermittent fasting if I allow a few calories?
If your protocol is flexible, a light-calorie option—such as a saline base with a splash of citrus—can aid adherence without turning into a sugary beverage. Importantly, label it as “flexible” in your routine so you keep strict days truly zero.
7) Do I need potassium in homemade electrolytes for fasting?
Often, a little potassium helps some people during longer or hotter days; others feel fine without it. Consequently, start with sodium, then add small potassium amounts only if cramps or muscle tightness persist.
8) How much should I drink per day?
Hydration targets depend on body size, climate, and activity. Broadly, sipping 1–2 liters of well-salted water across your active window suits many people, though some need more. Thus, let thirst, urine color, and symptoms guide your real-time adjustments.
9) Can electrolytes help with fasting headaches, dizziness, or muscle cramps?
Frequently, yes. Headaches and lightheadedness during fasting are often related to inadequate sodium; meanwhile, nighttime leg cramps can respond to small, consistent magnesium. That said, if symptoms are severe or unusual, pause and reassess your plan.
10) What electrolytes should I take while water fasting for multiple days?
For extended fasts, emphasize sodium first and consider potassium and magnesium in conservative amounts. Moreover, make changes slowly—steady dosing beats large sporadic hits.
11) Are there zero-calorie electrolytes for fasting that are premade?
Unsweetened mineral concentrates exist, and many are truly 0 kcal; nonetheless, always read labels carefully. Flavored powders can be sugar-free yet still contain small calories, which, by definition, break strict fasts.
12) Do electrolyte tablets or powders count as homemade electrolytes for fasting?
Technically, no; they’re commercial products. However, if you dissolve unflavored, zero-calorie mineral drops or salts in water yourself, the effect is similar to homemade electrolytes for fasting—with the advantage of fully controlling the dose.
13) How do I measure ingredients without a lab scale?
Use a 0.1 g digital kitchen scale for reliability. Alternatively—but less ideally—gradated micro-spoons can approximate tiny amounts. Still, for consistency and repeatability, weighing is strongly preferred.
14) Can I add citrus, apple cider vinegar, or herbs and still stay strict?
Citrus juice and vinegar add measurable calories, albeit small ones; therefore, they don’t fit strict rules. Nevertheless, non-caloric aromas (like a tiny twist of peel oils without juice) may make salt water more palatable without adding energy.
15) Do homemade electrolytes for fasting help on keto or low-carb diets?
Typically, yes. Lower insulin levels can increase sodium excretion; consequently, many low-carb fasters feel better with routine sodium and perhaps small amounts of potassium and magnesium.
16) Is dry fasting compatible with electrolytes?
No. By definition, dry fasting avoids water and dissolved minerals. More importantly, it carries higher risk of dehydration; as a rule, it’s prudent to avoid dry fasts unless you’ve consulted a qualified professional.
17) How do I prevent overdoing electrolytes?
Increase doses gradually, watch for swelling, unusual fatigue, palpitations, or stomach upset, and back off if anything feels wrong. Equally, remember that consistency with moderate amounts outperforms large, erratic boluses.
18) What’s the simplest starter recipe for homemade electrolytes for fasting?
Begin with 2.5 g fine table salt in 1 liter of water, then optionally add 200–400 mg magnesium (unsweetened) and a small amount of potassium if needed. Afterward, adjust by taste, weather, and symptoms.
19) Do homemade electrolytes for fasting differ for women?
Needs vary by size, cycle, and training load. Consequently, many women prefer to start at the lower end of sodium and scale up carefully, paying attention to comfort, sleep, and recovery.
20) Can I premix bottles or should I make them fresh?
You can premix for the day; nevertheless, shake before each sip since minerals can settle. For travel, pre-weigh dry packets, then add to water as you go—practical and consistent.
21) What if salty water tastes too strong?
Chill the bottle, use fine salt for faster dissolution, or split a liter into two half-liters to reduce perceived intensity. Additionally, very small bicarbonate (baking soda) can smooth harshness in some recipes.
22) Will homemade electrolytes for fasting affect sleep?
Sometimes in a good way. A modest magnesium dose may decrease nighttime cramps, and adequate sodium can reduce wake-ups from headaches or thirst. However, avoid large late-evening volumes if nocturnal bathroom trips disturb rest.
23) How do I scale recipes for larger bottles?
Multiply ingredients proportionally. For instance, if your bottle is 1.5 liters, multiply each gram amount by 1.5. Thus, a 2.5 g salt base becomes 3.75 g.
24) What’s the difference between electrolyte water for fasting and ORS (oral rehydration solution)?
ORS includes glucose to speed sodium absorption during illness; by contrast, homemade electrolytes for fasting are intentionally sugar-free to remain zero-calorie. Therefore, ORS is excellent for recovery, not for strict fasting.
25) Can I rely on thirst alone?
Often, yes; still, during intense heat or long walks, thirst can lag. Consequently, pairing thirst with a simple baseline (like 1–2 liters of salted water across the day) helps you stay ahead of symptoms without micromanaging.
26) What signs suggest I need more sodium during a fast?
Common cues include persistent headaches, salt cravings, lightheadedness on standing, or cramping that improves after a salty drink. If these resolve with a modest sodium bump, you likely found your gap.
27) Are sea salt and Himalayan salt better than table salt?
Functionally, sodium content is what matters most for fasting hydration. Micromineral differences are minor at the doses used. Practically speaking, fine table salt dissolves predictably and measures accurately.
28) Do homemade electrolytes for fasting help mental clarity?
Often. When sodium is adequate and hydration is steady, many people report fewer “foggy” moments during fasting windows. Thus, precision pays off in both body and brain.
29) Should I change my electrolyte plan on rest days?
Possibly. If you sweat less, you may need fewer salty liters. On balance, observe your cues and scale down gently rather than stopping abruptly.
30) What’s the smartest way to progress from beginner to advanced?
Start with the basic salty water recipe, track how you feel for a week, then layer optional potassium or magnesium if needed. Gradually, you’ll create a personalized set of homemade electrolytes for fasting that fit both your climate and routine.
Apple cider vinegar (ACV) is one of those remedies that just won’t quit. For years it’s been hailed as a metabolism booster, detoxifier, and — most of all — a belly-fat burner. On social media, you’ll see it mixed into detox drinks, touted in “before and after” weight-loss videos, or taken as daily shots. No wonder search engines are filled with questions like:
Does apple cider vinegar really burn belly fat?
How do you use ACV to lose stomach fat?
Can this drink shrink my waistline?
The short answer is: ACV is not a magic potion. You can’t spot-reduce fat from your stomach with any single food or drink. That said, there is credible research showing that vinegar — and ACV in particular — may help with modest weight loss, waist reduction, and even decreases in visceral fat (the deeper abdominal fat linked to metabolic disease).
For example:
In a landmark Japanese trial, adults who took vinegar daily for 12 weeks lost weight, reduced their waistlines, and lowered visceral fat compared to a placebo group (Kondo et al., 2009).
A 2024 Lebanese study found that overweight adolescents and young adults who drank ACV for 12 weeks saw significant drops in BMI, waist, and hip measurements (Abou-Khalil et al., 2024).
A 2023 Iranian study in people with type 2 diabetes showed ACV lowered waist circumference and improved blood sugar and cholesterol levels (Jafarirad et al., 2023).
So while it’s no miracle, science does suggest ACV can play a supportive role in trimming belly fat — especially when combined with healthy eating and exercise.
What Is Apple Cider Vinegar and How Does It Affect Belly Fat?
From apple juice to acetic acid
Apple cider vinegar starts its life as crushed apples. First, yeast converts the fruit sugars into alcohol (making hard cider). Then bacteria convert that alcohol into acetic acid, the sour-tasting compound that defines vinegar.
Most commercial ACV contains about 4–6% acetic acid — the same range studied in clinical trials. Acetic acid is thought to be the main driver of vinegar’s metabolic effects, from appetite control to fat storage. A 2006 review in MedGenMed noted that vinegar reliably lowers post-meal glucose and insulin spikes, which may indirectly influence weight and fat gain (Johnston & Gaas, 2006).
The “mother”
If you’ve ever seen cloudy strands floating in ACV labeled “with the mother,” that’s a mix of proteins, enzymes, and beneficial bacteria from the fermentation process. Many people prefer raw, unfiltered versions with the mother because of its traditional and probiotic appeal. However, current research shows the real fat-loss effects come from acetic acid, not the mother itself.
More than acetic acid
Although acetic acid is the star, ACV also contains:
Malic acid (from apples),
Trace minerals such as potassium,
Polyphenols, plant-based antioxidants.
These compounds may contribute to ACV’s overall health profile, but they’re present in small amounts. When it comes to weight or waist reduction, the focus remains firmly on acetic acid.
ACV versus other vinegars
It’s worth pointing out that many vinegar studies — including the Japanese visceral fat trial — didn’t always use apple cider vinegar specifically. Because acetic acid is common to all vinegars, their metabolic effects are likely similar. ACV simply dominates the wellness world because of its natural image, long history in folk medicine, and wide availability.
Can You Really Burn Belly Fat with Apple Cider Vinegar?
It’s tempting to believe that apple cider vinegar is some kind of shortcut to a flat stomach. The internet is full of “ACV before and after” photos that make it seem like magic. But let’s set expectations straight: no food or drink can target belly fat in isolation.
What ACV can do, according to research, is help with overall fat loss, waist reduction, and even visceral fat (the type of fat around organs that raises your risk for diabetes and heart disease). And because belly fat is where much of that excess fat gets stored, losing overall fat often shows up as a slimmer waistline.
The Japanese Trial on Apple Cider Vinegar and Visceral Belly Fat
One of the most important studies on vinegar and belly fat comes from Japan. In 2009, researchers ran a 12-week randomized, double-blind trial with 175 obese adults. Participants were divided into three groups: one took a daily drink with 15 mL vinegar, another 30 mL vinegar, and the third took a placebo.
Clinical studies show apple cider vinegar can reduce waist circumference and visceral fat in 8–12 weeks.
The results were eye-opening:
Both vinegar groups lost significantly more body weight than placebo.
Their waist circumference decreased, while the placebo group’s waistline slightly increased.
CT scans showed reductions in visceral fat area — the deep belly fat strongly linked to metabolic disease.
Blood triglyceride levels also dropped.
This study, published in Bioscience, Biotechnology, and Biochemistry, was the first to show that vinegar could reduce visceral belly fat in humans (Kondo et al., 2009).
2024 Study: Apple Cider Vinegar and Belly Fat Reduction in Young Adults
Fast forward to 2024, and researchers in Lebanon tested apple cider vinegar itself. They enrolled 120 overweight and obese adolescents and young adults in a randomized, placebo-controlled trial. Participants took 5, 10, or 15 mL of ACV daily, or a placebo, for 12 weeks.
The findings mirrored the Japanese study:
All ACV groups lost more weight and BMI than placebo.
They also saw measurable reductions in waist and hip circumference.
The highest ACV dose (15 mL/day) showed the strongest effects.
This study, published in BMJ Nutrition, Prevention & Health, confirms that ACV can support modest belly-slimming effects in younger, diverse populations (Abou-Khalil et al., 2024).
Belly fat and diabetes: extra benefits
What about people already struggling with metabolic issues? In 2023, an Iranian trial looked at ACV in patients with type 2 diabetes. All participants followed a healthy diet, but one group also consumed 30 mL ACV daily.
After 8 weeks, the ACV group showed:
Lower body weight and BMI,
Reduced waist and hip circumference,
Improved blood sugar control (HbA1c) and cholesterol levels.
This study, published in Frontiers in Clinical Diabetes and Healthcare, suggests ACV can play a double role: helping reduce abdominal fat and improving metabolic health in high-risk individuals (Jafarirad et al., 2023).
Supporting evidence from smaller trials
Another trial, published in 2018, tested 30 mL/day of ACV in overweight and obese adults, alongside a calorie-restricted diet. After 12 weeks, participants lost more weight, lowered their BMI, and improved body composition compared to diet alone. While this study didn’t measure visceral fat directly, it still supports ACV as a helpful add-on to lifestyle changes (Khezri et al., 2018).
What the evidence tells us
Across these studies, some clear patterns emerge:
Dosage matters: Benefits are seen around 15–30 mL/day (1–2 tablespoons).
Lifestyle still rules: In every trial, ACV worked with healthy diet or habits — not instead of them.
The belly link is real: Waist and visceral fat reductions show ACV’s effects go beyond just weight on the scale.
So, does ACV “burn” belly fat?
Not in the instant, fat-melting way the internet sometimes suggests. But science does show that daily, diluted apple cider vinegar can help reduce waist circumference and visceral fat over time, especially when paired with balanced nutrition and exercise.
Think of it as a supporting actor in your weight-loss journey — helpful, but not the star of the show.
How to Use Apple Cider Vinegar for Belly Fat
By now, the evidence is clear: apple cider vinegar (ACV) can play a modest but real role in helping reduce weight and waist size — as long as you use it consistently and safely. But that leads to the practical question: how exactly should you take it? Let’s break it down.
The right dosage
Most of the human trials that showed results used between 15–30 milliliters (1–2 tablespoons) per day.
In Japan’s landmark 2009 study, participants drank either 15 mL or 30 mL vinegar daily and saw reductions in weight and visceral belly fat (Kondo et al., 2009).
The Lebanese 2024 trial used 5, 10, and 15 mL/day, with the 15 mL group showing the strongest waist-slimming effects (Abou-Khalil et al., 2024).
In diabetic adults, 30 mL/day improved waist circumference, blood sugar, and cholesterol (Jafarirad et al., 2023).
So if you’re looking to follow the science, 1–2 tablespoons per day, split into 1–2 doses, is the sweet spot.
Apple cider vinegar and belly fat: safe daily dosage is 1–2 tablespoons, always diluted in water.
Always dilute it
This part cannot be stressed enough: never drink ACV straight. Its high acidity can erode tooth enamel, irritate the throat, and upset your stomach. All the clinical studies diluted ACV in water or mixed it with food.
A safe and practical way is:
1–2 teaspoons in a large glass of water (250–300 ml).
Work up slowly to 1 tablespoon per glass if tolerated.
Spread across 1–2 drinks per day, ideally with meals.
Best timing
There’s no single “magic time,” but research suggests drinking vinegar before or with meals helps reduce blood sugar spikes and may increase satiety (Johnston & Gaas, 2006). Many people prefer a diluted drink in the morning and another before dinner.
If you’re sensitive to acidity on an empty stomach, start with meals only.
ACV drink ideas
Plain water + ACV works fine, but variety helps with consistency. Here are three simple, research-friendly options:
Classic ACV water
1 teaspoon ACV
250 ml warm or room-temperature water
Optional: add a slice of fresh ginger
ACV + lemon refresher
1 teaspoon ACV
Juice of ½ lemon
300 ml water
Adds vitamin C and flavor without calories
Green tea + ACV combo
Brew a cup of green tea, let it cool slightly
Stir in 1 teaspoon ACV
This combines two evidence-backed fat-loss helpers: tea catechins + vinegar
Tip: Always use a straw to reduce enamel exposure, and rinse your mouth with plain water afterward.
Three apple cider vinegar drink ideas for belly fat: with lemon, ginger, or green tea.
Incorporating ACV into food
If drinks aren’t your style, you can still reap the benefits:
Use ACV as a salad dressing base (mixed with olive oil, mustard, and herbs).
Add a splash to marinades for chicken or tofu.
Mix into soups or stews just before serving for a tangy kick.
This approach is easier on your teeth and stomach, while still giving you daily acetic acid.
Safety reminders
Most people tolerate ACV well, but there are some cautions:
Don’t exceed 30 mL/day. More is not better and can cause side effects.
Never take it undiluted.
If you take insulin, diuretics, or heart medications, talk to your doctor first — ACV can interact with these.
If you have reflux, ulcers, or sensitive teeth, use sparingly or skip it.
A few case reports have documented throat burns or enamel erosion from misuse, so moderation and dilution are key.
What results to expect
In the studies, participants lost weight and inches over 8–12 weeks of daily use. For example, in Kondo’s Japanese trial, the vinegar groups lost about 1–2 kg (2–4 lbs) more than placebo, along with meaningful reductions in waist size (Kondo et al., 2009).
That may not sound dramatic, but remember: these were results just from adding vinegar, without other big lifestyle overhauls. When paired with a balanced diet and movement, ACV can be a small but steady ally in trimming belly fat.
What Results to Expect from Apple Cider Vinegar for Belly Fat Reduction?
If you’ve ever scrolled through social media, you’ve probably seen dramatic “before and after” photos of people claiming they lost 10, 20, or even 30 pounds just by drinking apple cider vinegar. The truth is less glamorous — but more realistic.
ACV helps, but modestly
In most human trials, participants lost 1–2 kilograms (2–4 pounds) over 8–12 weeks when adding vinegar to their daily routine — without making other major changes.
In the Japanese 2009 trial, the vinegar groups lost around 1.2–1.9 kg (2.6–4.2 lbs) over 12 weeks, while the placebo group gained a little weight (Kondo et al., 2009).
Waist circumference dropped by about 1–2 cm, and CT scans confirmed a reduction in visceral belly fat.
In the 2024 Lebanese study, adolescents and young adults also lost measurable waist and hip circumference along with body weight (Abou-Khalil et al., 2024).
In diabetic adults, ACV added on top of a healthy diet led to smaller waists and better blood sugar levels in just 8 weeks (Jafarirad et al., 2023).
That’s not a miracle transformation, but it’s a steady, meaningful improvement — especially considering nothing else in the diet was drastically changed.
Myth: apple cider vinegar melts belly fat overnight. Fact: studies show small but real waist reductions in 8–12 weeks.
Why results vary
Several factors influence how much ACV might help you:
Your starting point: The bigger the calorie surplus and the more belly fat you carry, the more room there is for improvement.
Your diet quality: Vinegar won’t offset a consistently high-calorie diet. But when paired with balanced meals, it may help you feel fuller and snack less.
Consistency: Benefits show up after daily use for 8–12 weeks. Skipping days or using it irregularly won’t cut it.
Other habits: Exercise, sleep, and stress management all play a huge role in belly fat. ACV alone isn’t enough.
Think of ACV as a helper, not a hero
A good way to think about ACV is like this: it’s not the engine of fat loss — that comes from diet and activity — but it can be a booster. By helping regulate blood sugar, controlling appetite, and slightly improving fat metabolism, it nudges your body in the right direction.
When added consistently over time, those nudges add up to small but noticeable changes: a belt that fits looser, a waistline that feels less bloated, and blood markers that shift in a healthier direction.
Expect 1–2 kg weight loss over a few months with ACV alone.
Expect a small waist reduction — a couple of centimeters, not several inches.
Expect better results when you combine ACV with a calorie-conscious diet and light activity.
So if you’re hoping for overnight six-pack abs, ACV won’t deliver. But if you’re looking for a safe, inexpensive way to support your belly fat loss journey, it’s a worthy addition.
Apple Cider Vinegar for Belly Fat: Safety and Side Effects
Apple cider vinegar may be natural, but that doesn’t mean it’s risk-free. Most of the positive studies used moderate doses (15–30 mL/day) and always in diluted form. When people go beyond that — taking shots of undiluted ACV, chugging large amounts, or combining it with risky “detox” diets — side effects are much more likely.
Here’s what you need to know before making ACV part of your routine.
1. Protect your teeth and throat
The biggest everyday risk is tooth enamel erosion. Vinegar’s acetic acid is very acidic, and repeated exposure can gradually wear down enamel, leading to sensitivity and cavities. Sipping ACV straight can also irritate your throat and esophagus.
How to prevent it:
Always dilute ACV in plenty of water.
Use a straw when drinking ACV beverages.
Rinse your mouth with plain water afterward.
Don’t brush your teeth immediately (enamel is softened right after acid exposure).
2. Stomach and digestion issues
Some people experience nausea, heartburn, or digestive discomfort with ACV, especially if taken on an empty stomach or in large amounts.
In one case report, a woman developed delayed stomach emptying (gastroparesis) from chronic, excessive vinegar use. While this is rare, it’s a reminder that more is not better.
Tip: Start with 1 teaspoon in a glass of water and increase slowly. Stop if you notice ongoing discomfort.
3. Medication interactions
ACV can interact with several types of medication:
Diabetes medications (like insulin): ACV can lower blood sugar, which might increase the risk of hypoglycemia when combined.
Diuretics (water pills): ACV may worsen potassium loss.
Digoxin (heart medication): Combining with ACV could potentially lower potassium too much, leading to dangerous side effects.
If you’re on any of these, talk to your doctor before adding daily ACV.
4. Potassium and bone health
Very high vinegar intakes over long periods have been linked to low blood potassium and even reduced bone density in rare case reports. Again, this was with extreme overuse, not the moderate amounts used in clinical trials.
5. Pregnancy and children
There’s limited research on ACV in pregnancy and children. While small amounts in food are generally considered safe, it’s best to avoid concentrated ACV drinks in these groups unless cleared by a healthcare provider.
6. Safe daily limits
Based on clinical research, the safe and effective range is:
Apple cider vinegar is safe for most healthy adults when used in moderate, diluted amounts. The risks come from overuse or misuse — such as drinking it straight, exceeding 30 mL/day, or combining it with sensitive medications.
If used wisely, ACV can be a simple, affordable addition to your health routine. Just remember: consistency and moderation are your best friends here.
Apple Cider Vinegar vs Other Belly Fat Remedies
Apple cider vinegar isn’t the only natural remedy marketed for trimming the waistline. Green tea, lemon water, probiotics, and even fat-burning supplements all make similar claims. So how does ACV really stack up?
ACV vs green tea
Green tea is one of the most researched natural aids for fat loss. Its catechins (EGCG) and caffeine may help increase calorie burning and fat oxidation. Some studies show modest reductions in body weight and belly fat with regular green tea consumption.
ACV works differently. Its strength lies in acetic acid, which seems to improve blood sugar control, slow stomach emptying, and help with appetite regulation. While green tea gives you a metabolic boost, ACV may help you eat less overall. Both can be part of a healthy belly-fat strategy — and some people even combine them in one drink.
Green tea has its own fat-burning compounds, and combining it with ACV may work even better. You can explore some green tea and spice infusions for weight loss as creative add-ons.
ACV vs lemon water
Lemon water is refreshing, hydrating, and rich in vitamin C, but there’s little scientific evidence that it directly burns fat. Its main benefit comes from encouraging hydration and sometimes replacing sugary drinks. Compared to lemon water, ACV has far more clinical research backing its effects on waist circumference and visceral fat.
That said, adding lemon juice to an ACV drink can make it more palatable and give you both hydration and acetic acid benefits.
ACV vs probiotic foods
Gut health is closely linked to weight regulation, and probiotic foods like yogurt, kefir, or kimchi have been studied for their potential role in belly fat reduction. Raw, unfiltered ACV does contain the “mother,” which has probiotic-like qualities, but the clinical trials on fat loss point to acetic acid, not probiotics, as the driver. For true gut diversity, fermented foods beyond ACV are still important.
ACV vs supplements
From “fat-burning pills” to ACV capsules, the supplement industry is full of products promising quick belly-fat loss. Most have limited scientific backing, and in some cases, questionable safety. In contrast, liquid ACV is inexpensive, widely available, and backed by multiple human trials.
The takeaway
Compared to other belly-fat aids, ACV stands out for being simple, affordable, and supported by human studies. It’s not the strongest tool — that crown probably goes to consistent calorie control and movement — but it is one of the most accessible helpers you can add to your routine.
Should You Try Apple Cider Vinegar for Belly Fat?
At this point, the verdict is clear: apple cider vinegar is not a miracle belly-fat burner, but it does have credible science behind it. Multiple human studies show that when taken daily — in moderate, diluted amounts — ACV can help reduce body weight, shrink waist circumference, and even lower visceral fat.
The best part? It’s inexpensive, widely available, and easy to incorporate into meals or drinks. Unlike many trendy supplements, ACV has stood the test of time — both in traditional use and in modern clinical research.
But it’s important to keep your expectations realistic. If you’re hoping for dramatic, overnight changes, ACV will disappoint you. The typical results seen in trials are 1–2 kilograms of weight loss and a couple of centimeters off the waist over 8–12 weeks. Those are steady, sustainable improvements — especially if you also make small adjustments to your diet, movement, and lifestyle.
Apple cider vinegar is a sidekick, not the hero — consistency is what reduces belly fat over time.
Who may benefit most
People with excess belly fat who want an extra nudge alongside healthy habits.
Individuals with blood sugar issues or type 2 diabetes, since ACV may improve glucose control and lipid levels.
Anyone looking for a low-cost, natural way to support long-term weight management.
Final word
Think of ACV as a helpful sidekick, not the hero of your weight-loss journey. Pair it with balanced meals, regular movement, and good sleep, and it can give you that extra push toward a slimmer, healthier waistline.
If you’re ready to try it, start small: 1 teaspoon in a big glass of water before meals, and gradually build up to 1–2 tablespoons a day. Consistency, not excess, is where the real magic happens.
Frequently Asked Questions about Apple Cider Vinegar and Belly Fat
1. Does apple cider vinegar burn belly fat?
Apple cider vinegar doesn’t “burn” belly fat directly, but research shows it can help reduce waist circumference and visceral fat when taken consistently for 8–12 weeks (Kondo et al., 2009). Think of it as a gentle helper rather than a fat-melting potion.
2. Can apple cider vinegar reduce stomach fat overnight?
No — there’s no overnight fix for stomach fat. Clinical studies show that apple cider vinegar and belly fat reduction happens gradually over weeks, not days. Patience and consistency matter most.
3. How should I drink apple cider vinegar for belly fat?
Dilute 1–2 teaspoons of ACV in a large glass of water, and drink before or with meals. You can slowly build up to 1–2 tablespoons daily, which is the range tested in human trials.
4. What is the best time to take apple cider vinegar for belly fat?
Most people find it helpful before meals, since ACV may reduce blood sugar spikes and help control appetite. If it upsets your stomach, try it only with food.
5. How much apple cider vinegar should I take daily to lose belly fat?
The safe and effective range is 15–30 mL per day (1–2 tablespoons), always diluted in water. Going beyond this doesn’t speed up belly fat loss — and may cause side effects.
6. Can apple cider vinegar flatten your stomach?
It won’t give you visible abs on its own, but studies do show ACV helps reduce waist size and visceral belly fat. Combined with diet and exercise, it may support a flatter midsection.
7. Is apple cider vinegar good for visceral fat?
Yes — the Japanese trial measured visceral fat with CT scans and found that vinegar drinkers had significant reductions in deep belly fat compared to placebo (Kondo et al., 2009).
8. Does apple cider vinegar work for belly fat without diet changes?
Even without big diet changes, participants in ACV studies lost 1–2 kg and inches off their waist. But pairing ACV with balanced eating makes the results stronger.
9. How long does it take to see belly fat results with apple cider vinegar?
Most trials lasted 8–12 weeks, and that’s when results — smaller waistlines and modest weight loss — became noticeable.
10. Is it better to drink apple cider vinegar in the morning or at night for belly fat?
Either works, but morning can give you a fresh start, while evening may help control late-night cravings. What matters is daily consistency.
11. Does apple cider vinegar help with belly fat in diabetics?
Yes — in people with type 2 diabetes, ACV reduced waist circumference and improved blood sugar and cholesterol (Jafarirad et al., 2023).
12. Can apple cider vinegar pills help with belly fat?
ACV capsules are popular, but most research uses liquid vinegar. Pills may work if they contain enough acetic acid, but quality varies — liquid ACV is more reliable.
13. What’s the difference between apple cider vinegar and white vinegar for belly fat?
Both contain acetic acid, which drives the fat-loss effects. Apple cider vinegar and belly fat reduction are studied more often, but white vinegar may offer similar benefits.
14. Can I mix apple cider vinegar with lemon or green tea for belly fat?
Yes — lemon adds vitamin C and flavor, while green tea brings its own fat-burning compounds. Together, they may make your ACV routine tastier and more effective.
15. Will apple cider vinegar alone get rid of my belly fat?
No single food or drink can do that. But as studies show, ACV can give you a modest but meaningful nudge toward smaller waistlines — especially when paired with healthy diet, activity, and good sleep.
Ever felt drained despite a full night’s sleep, or caught yourself craving chocolate for no obvious reason? Maybe your muscles twitch after exercise, or your stress levels run higher than usual. While we often blame sleep, caffeine, or stress itself, the underlying culprit could be something quieter: magnesium deficiency.
Magnesium is essential for over 300 biochemical reactions in the body, from keeping your heart steady to fueling muscle contractions and regulating blood sugar (NIH Fact Sheet). Yet, it’s one of the most overlooked nutrients in modern diets. Studies estimate that nearly half of U.S. adults don’t meet the daily requirement, and around 60% fall short of recommended intake (PMC). In Canada, up to 21.8% of adolescents show low serum magnesium levels (MDPI). And globally, similar patterns emerge—from Germany to South Korea, deficiency is widespread.
The consequences go beyond fatigue. Low magnesium is linked to hypertension, insulin resistance, osteoporosis, cardiovascular disease, and even mental health issues like depression (PMC; Frontiers). One recent study even found that low magnesium correlates with elevated homocysteine levels, a marker of DNA damage that increases risk for Alzheimer’s and Parkinson’s (Verywell Health).
Here’s the good news: magnesium deficiency doesn’t demand exotic supplements or expensive treatments. The most effective solutions are already in your kitchen—in seeds, beans, greens, and even a square of dark chocolate. Let’s dive into the best magnesium deficiency foods and how to make them part of your daily diet.
If there’s a single food that deserves the crown in the magnesium world, it’s pumpkin seeds. Just one ounce contains ~150 mg of magnesium, nearly 37% of the recommended daily allowance (Cleveland Clinic).
Pumpkin seeds—also called pepitas—have long been treasured across cultures. In Mexico, they’re ground into sauces like mole; in India, they’re blended into chutneys and trail mixes. Their earthy, nutty crunch makes them easy to sprinkle on oatmeal, salads, or yogurt bowls.
Pumpkin seeds are one of the most powerful natural sources of magnesium, making them an easy snack to fight magnesium deficiency.
What makes pumpkin seeds particularly valuable is their nutrient synergy. Alongside magnesium, they offer zinc, iron, plant-based protein, and healthy fats. But there’s a catch: like many seeds, they contain phytates, which can block mineral absorption. The good news? Light roasting or soaking can reduce phytates and boost bioavailability (ScienceDirect).
Try this: Blend pumpkin seeds into a smoothie with spinach, banana, and coconut water for a magnesium-rich energy drink that doubles as a post-workout recovery booster.
In Mexico… pumpkin seeds—also called pepitas—have long been treasured across cultures. Need recipe ideas? You can also try Masala Monk’s nutrient-rich pumpkin-seed smoothies for a creative twist.
Spinach and Leafy Greens: More Than Iron
Spinach has long been associated with iron (thank you, Popeye), but it’s also a quiet magnesium hero. Half a cup of cooked spinach contains ~78 mg magnesium, or about 19% of daily needs (Cleveland Clinic).
Leafy greens also come with oxalates, compounds that bind to minerals and reduce absorption. Here’s the trick: cooking reduces oxalates significantly—by up to 66% in spinach—making the magnesium far more available (ACS Journal of Agricultural and Food Chemistry). That means sautéed spinach, palak paneer, or Mediterranean-style greens drizzled with olive oil aren’t just delicious, they’re smarter choices than raw salads when it comes to magnesium intake.
Spinach and leafy greens not only provide iron but also supply vital magnesium, especially when lightly cooked for better absorption.
Other leafy greens worth mentioning include Swiss chard, kale, and collard greens—all packed with magnesium and calcium.
Try this: Toss cooked spinach with garlic, olive oil, and a squeeze of lemon. The vitamin C enhances mineral absorption while balancing the flavor.
Sautéed spinach, garlicky and bright, isn’t just a smart magnesium source—it also appears in unexpected places like a Hung-curd spinach sandwich on Masala Monk.
Legumes and Spinach pair beautifully—check out Masala Monk’s lentil-and-spinach snacks, which are both iron-rich and magnesium-forward.
Almonds and Nuts: Snackable Strength
Almonds are more than a healthy snack—they’re one of the best foods high in magnesium, offering ~80 mg per ounce. Cashews, peanuts, and Brazil nuts also contribute meaningful amounts.
Nuts fit seamlessly into daily routines: a handful on the go, almond butter on toast, or almond milk in coffee. Beyond magnesium, they supply vitamin E, protein, and heart-healthy fats. Read more about Almonds Nutrition Facts 100g & Glycemic Index Impact.
Almonds are a convenient, snackable source of magnesium that helps keep energy steady throughout the day.
Nut-based cuisines highlight their versatility. Indian sweets often use almonds, Middle Eastern dishes use tahini (sesame paste), and Mediterranean diets feature nut-based sauces.
Keep in mind portion size: nuts are calorie-dense. Pair them with fruit or whole grains for balanced snacks that deliver both energy and minerals.
Try this: Make an almond-date energy ball with rolled oats and cacao powder for a magnesium-packed afternoon pick-me-up.
Almonds are easy to snack on—or blend into one of Masala Monk’s nut-infused smoothie recipes to boost both flavor and minerals. Pairing almonds with chia seeds makes a magnesium-rich breakfast; try one of Masala Monk’s almond-and-chia smoothies for a tasty twist.
Black Beans and Legumes: Comforting Protein + Minerals
Legumes may not get the same spotlight as trendy seeds, but they’re a cornerstone of a diet for magnesium deficiency. Half a cup of cooked black beans contains ~60 mg magnesium (Cleveland Clinic). Lentils, chickpeas, and soybeans (edamame) also rank high.
Globally, legumes are cultural staples—whether it’s Indian dals, Latin American bean stews, or Middle Eastern hummus. They bring not just magnesium but also plant-based protein and fiber, making them ideal for energy and digestion.
Black beans are a comfort food packed with magnesium, fiber, and protein, supporting both digestion and mineral balance.
Absorption can be tricky because beans are rich in phytates. The traditional wisdom of soaking, sprouting, and slow cooking proves its worth—research shows these methods reduce phytates and enhance mineral bioavailability (ResearchGate).
Try this: A black bean chili topped with avocado and pumpkin seeds delivers a magnesium trifecta in one hearty bowl.
Dark Chocolate and Cacao: Sweet Stress Relief
Yes, your late-night chocolate craving may be your body’s cry for magnesium. A single ounce of 70–85% dark chocolate contains ~64 mg magnesium, about 16% of daily needs. Cocoa powder adds ~26 mg per tablespoon.
Dark chocolate is also rich in flavonoids, antioxidants that support heart health and stress resilience. Research suggests that cacao’s compounds may help lower cortisol, making it both a comfort food and a functional stress reliever.
Dark chocolate offers a delicious way to boost magnesium while also delivering antioxidants that reduce stress.
Pairing matters: melted into mole sauce, blended into a cacao-banana smoothie, or savored as a simple square with nuts—dark chocolate is one of the tastiest foods to eat for low magnesium.
Try this: A warm cacao drink with almond milk before bed makes for the ultimate magnesium bedtime drink—relaxing and restorative.
Looking for a richer way to enjoy dark chocolate’s benefits? Consider Masala Monk’s chocolate-vanilla pudding—a treat that still nods to magnesium.
Beyond the Top 5: More Foods Good for Magnesium Deficiency
To diversify your diet for magnesium deficiency, add these everyday items:
Chia seeds (111 mg per ounce)
Quinoa (118 mg per cooked cup)
Avocado (58 mg per medium fruit)
Tofu (37 mg per half cup)
Banana (32 mg per medium fruit)
These foods are versatile and easy to incorporate into daily meals—from breakfast bowls to dinner sides.
Magnesium doesn’t just hide in foods—it also shows up in nourishing drinks.
Cacao Hot Chocolate: A tablespoon of cocoa (~26 mg magnesium) stirred into milk with a teaspoon of blackstrap molasses (+50 mg) creates a rich, mineral-packed tonic.
Green Electrolyte Smoothie: Blend coconut water (~60 mg magnesium per cup), spinach, banana, and chia seeds for a natural sports drink.
Blackstrap Lemonade: Old-fashioned but effective, molasses adds not just magnesium but also iron and potassium.
Supplement powders also exist. Clinical studies show that oral magnesium supplementation reduced deficiency prevalence from 26% to just 2% (Epidemiology & Health Journal). While they can be useful, especially for people with low intake, food-first remains the most sustainable approach.
Want refreshing ways to boost both magnesium and energy? Masala Monk’s matcha-spinach green powers are nutrient-rich and vibrant.
Bath soaks with magnesium flakes and topical butters are popular for relaxation. While research shows limited evidence of absorption through the skin, many people find them calming (Ancient Minerals). They can be part of a bedtime ritual, but they’re not substitutes for food.
Conclusion: From Deficiency to Vitality
Magnesium deficiency is far from rare—it’s a silent epidemic with wide-ranging effects, from energy and mood to long-term disease risk. But the fix doesn’t require fancy pills or expensive powders. It starts with food: a handful of seeds, a bowl of beans, a plate of greens, a square of chocolate.
By focusing on these magnesium deficiency foods—and complementing them with nourishing drinks—you can restore balance, energy, and resilience. It’s not just about avoiding deficiency; it’s about thriving.
Your next step? Sprinkle pumpkin seeds on your breakfast, sauté spinach for dinner, sip cacao at night. Small daily choices add up to a mineral-rich life.
Frequently Asked Questions About Magnesium Deficiency Foods
1. What are the first signs of low magnesium?
To begin with, symptoms can be subtle. You might notice muscle twitches, restless sleep, headaches, or fatigue creeping in. Over time, low magnesium may also show up as anxiety, poor concentration, or chocolate cravings—yes, that sweet tooth may be your body’s way of asking for minerals.
2. Which foods are best for magnesium deficiency?
In short, the most powerful magnesium deficiency foods are pumpkin seeds, spinach, almonds, black beans, and dark chocolate. They’re nutrient-dense and easy to add to daily meals. What’s more, you can round out your diet with quinoa, chia seeds, avocado, tofu, and bananas. Together, they provide a natural, balanced approach to restoring your levels.
3. What fruits are high in magnesium?
Although fruits aren’t the richest sources, some still help. Avocados top the list with ~58 mg per medium fruit. Bananas contribute ~32 mg, while figs and raspberries also contain modest amounts. So, while fruits alone won’t cover your needs, they play a supportive role—especially when paired with nuts or seeds.
4. Can drinks really boost my magnesium intake?
Absolutely. For example, a cacao hot chocolate with molasses can give you 70–80 mg in a single cup. Likewise, a coconut water green smoothie blends hydration with magnesium and potassium for an electrolyte lift. And here’s the good news: these drinks don’t just add minerals, they also make your daily routine feel comforting and enjoyable.
5. How can I increase magnesium absorption from foods?
Here’s where small changes matter. Cooking greens like spinach lowers oxalates, which block absorption. Soaking or sprouting beans and seeds makes minerals more available. And spreading your intake throughout the day works better than eating one large magnesium-rich meal. In other words, it’s not just what you eat—it’s how you prepare and enjoy it.
6. Do magnesium flakes or body butters help with deficiency?
To put it simply, they’re relaxing but not a reliable cure. Research shows limited evidence for magnesium being absorbed through the skin. Still, a warm bath with magnesium flakes or a calming magnesium butter massage can reduce stress and prepare your body for sleep. Think of them as complementary rituals—not replacements for food.
7. Who is most at risk of magnesium deficiency?
In fact, certain groups need to be extra mindful. Older adults, people with diabetes, heavy drinkers, and those following restrictive diets (like strict keto) often run low. Pregnant women also require higher amounts. For these groups especially, focusing on foods to eat for low magnesium can make a big difference.
8. What’s the easiest way to start getting more magnesium today?
Start simple. Add a handful of pumpkin seeds to your breakfast, sauté spinach with your dinner, and swap one evening dessert for a square of dark chocolate. As a bonus, try a magnesium bedtime drink like warm cacao with almond milk. These small steps add up, turning your daily meals into a steady source of calm and energy.