
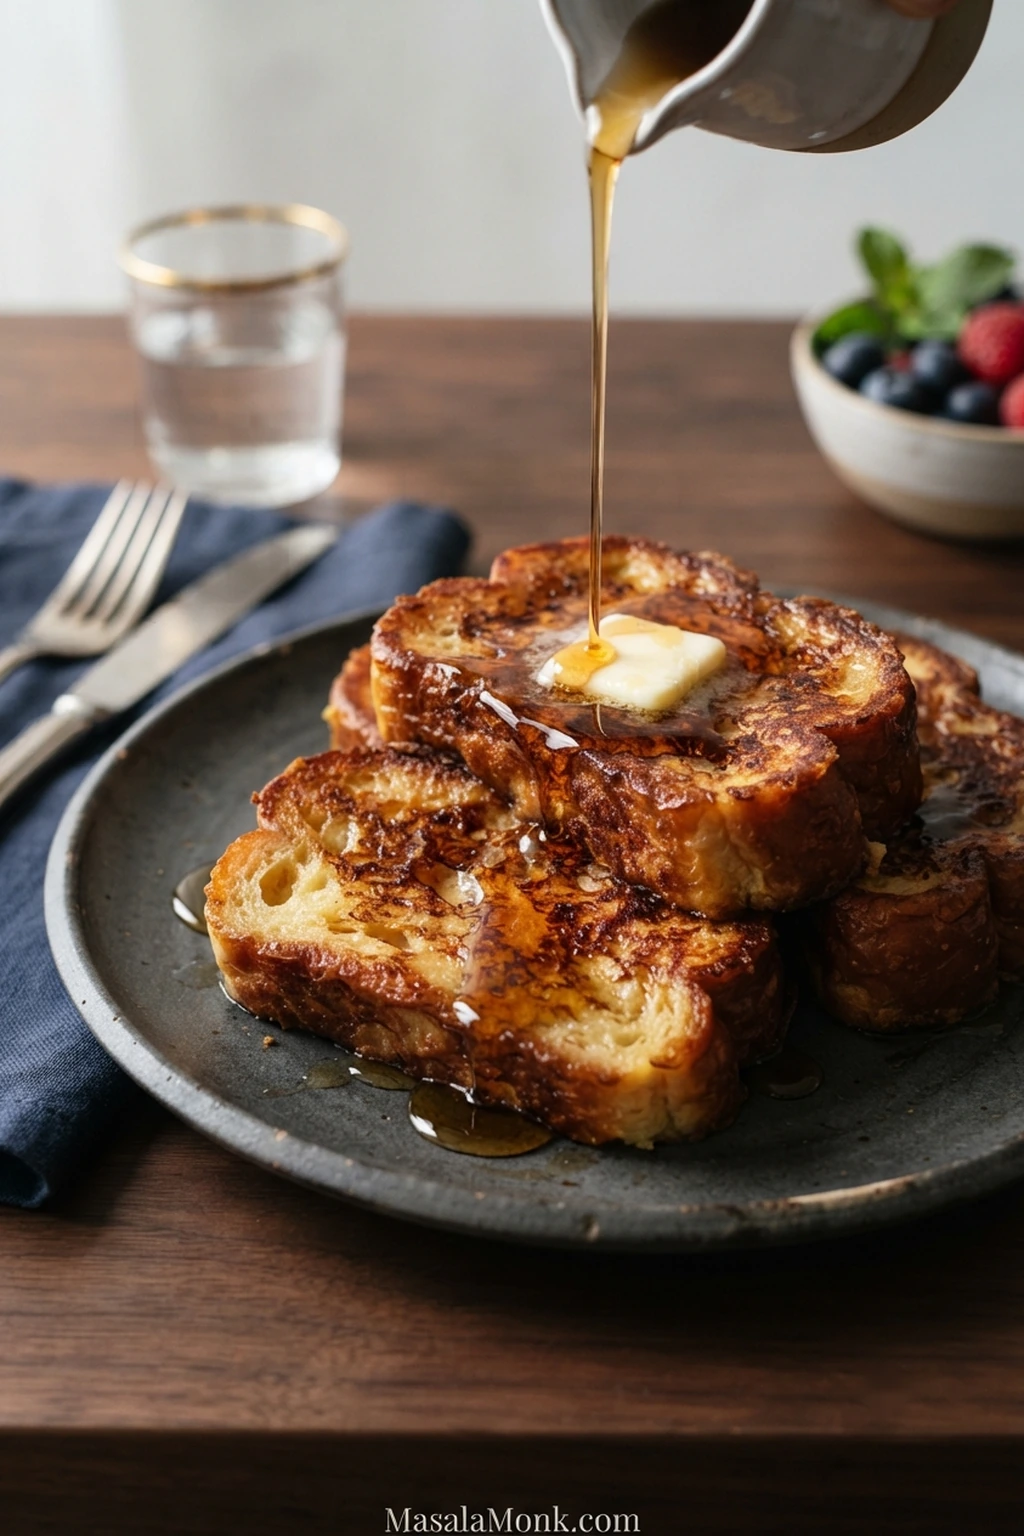
Brioche French toast gets its appeal from contrast: deeply golden, buttery edges around a soft, custardy middle. Warm maple syrup sinks into the cut crumb; the browned surface stays lightly crisp.
The tricky part is that not every brioche loaf behaves the same way. Thin, pillowy supermarket slices can become too fragile to lift after a long soak. By contrast, a thicker, drier bakery slice has the opposite problem: the outside may brown beautifully before enough custard reaches the middle.
Brioche is especially good for French toast because its tender, butter-and-egg-enriched crumb absorbs custard readily and browns quickly. The fix is not one magic soaking time. It is knowing what kind of brioche is in front of you, then using the first cooked slice to adjust the rest of the batch.
Before You Dip: Which Brioche Do You Have?
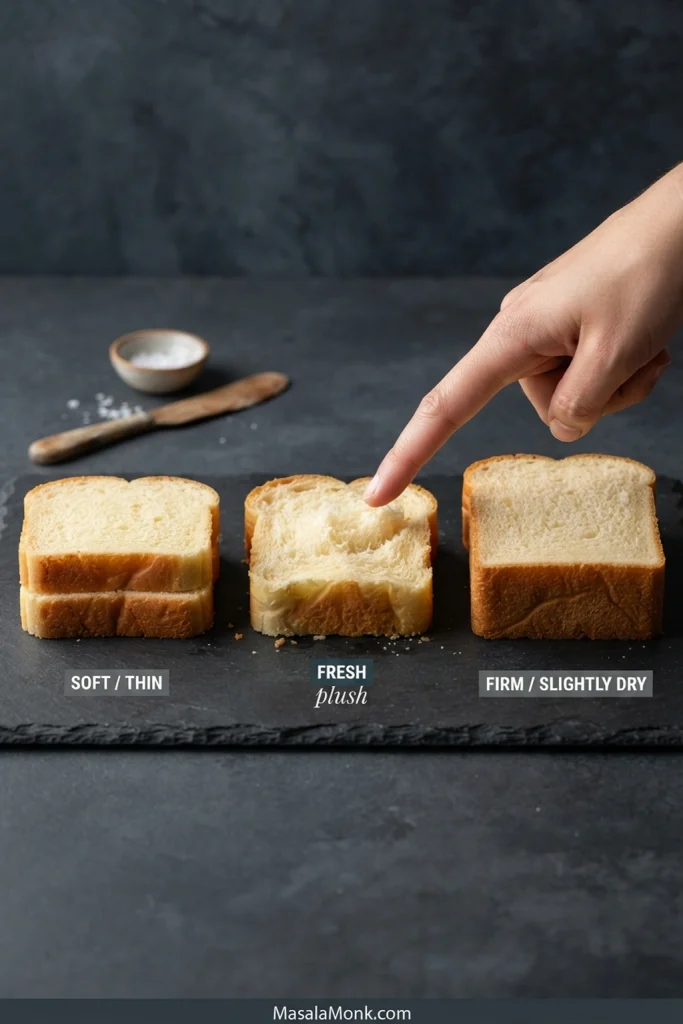
Soft pre-sliced brioche: usually thinner, softer, and more delicate. Treat it gently. Some packaged slices can go from intact to floppy in the time it takes to turn them over.
Fresh whole brioche: cut it about 1 inch / 2.5 cm thick. If the crumb feels extremely plush and moist, dry the slices gently before dipping.
Day-old or slightly dry brioche: usually the easiest starting point. The crumb has firmed enough to take on custard without immediately becoming fragile.
The recipe timings below are written for that last situation: thick brioche that feels firm and slightly dry without becoming hard.
Brioche French Toast Recipe
Buttery, Custardy Brioche French Toast
Thick brioche with golden, buttery edges and a moist, fully set center. Start with the soaking time below, then adjust only if your loaf needs it.
| Yield | 6–8 substantial slices, about 3–4 servings |
| Prep Time | 10 minutes |
| Cook Time | 20–25 minutes |
| Optional Drying Time | 10–15 minutes |
| Total Time | About 30–35 minutes, plus optional drying |
Ingredients
- 14–16 oz / 400–450 g brioche, ideally cut into 6–8 slices about 1 inch / 2.5 cm thick
- 4 large eggs
- 1 cup / 240 ml whole milk
- 1 tablespoon / about 12 g granulated sugar
- 1 teaspoon / 5 ml vanilla extract
- ½ teaspoon ground cinnamon
- ¼ teaspoon fine salt
- 2–3 tablespoons / 28–42 g unsalted butter for cooking, plus more for serving if desired
- Maple syrup, berries, powdered sugar, whipped cream, or other toppings for serving
Instructions
1. Dry Very Fresh Brioche If Needed
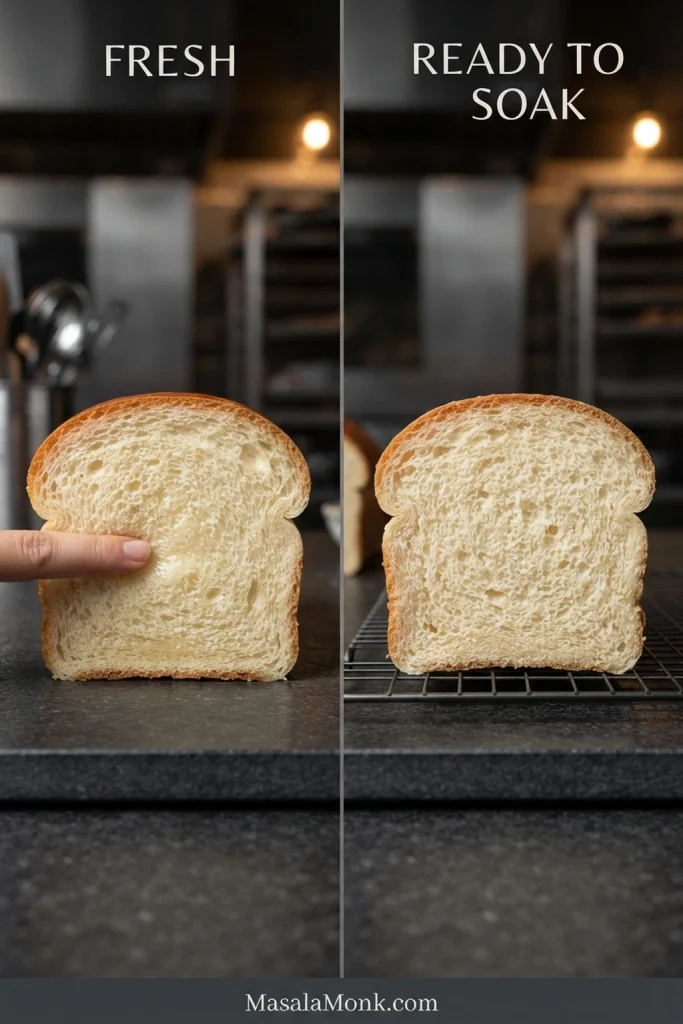
Arrange exceptionally fresh, pillowy slices in one layer and dry them at 250°F / 120°C. Start checking around 10 minutes.
Pull them once the freshly cut plushness has faded but the bread remains pale and flexible inside. You are not trying to toast the slices. Let them cool before dipping. Brioche that already feels firm and slightly dry can skip this step.
2. Whisk the Custard
Whisk the eggs and sugar in a wide, shallow dish large enough for one brioche slice to lie flat. Once the mixture looks uniform and no obvious strands of egg white remain, whisk in the milk, vanilla, cinnamon, and salt.
Cinnamon tends to collect at the surface, so give the mixture another quick whisk after every couple of slices.
3. Preheat the Skillet
Heat a large nonstick or well-seasoned skillet over medium-low to medium heat. On an electric griddle, about 350°F / 175°C is a useful starting point.
4. Soak the First Slice
For 1-inch brioche that is firm and slightly dry, start with about 10–15 seconds per side.
Very soft packaged bread may need only a few seconds. A particularly dry or dense slice can need 20–30 seconds per side or longer.
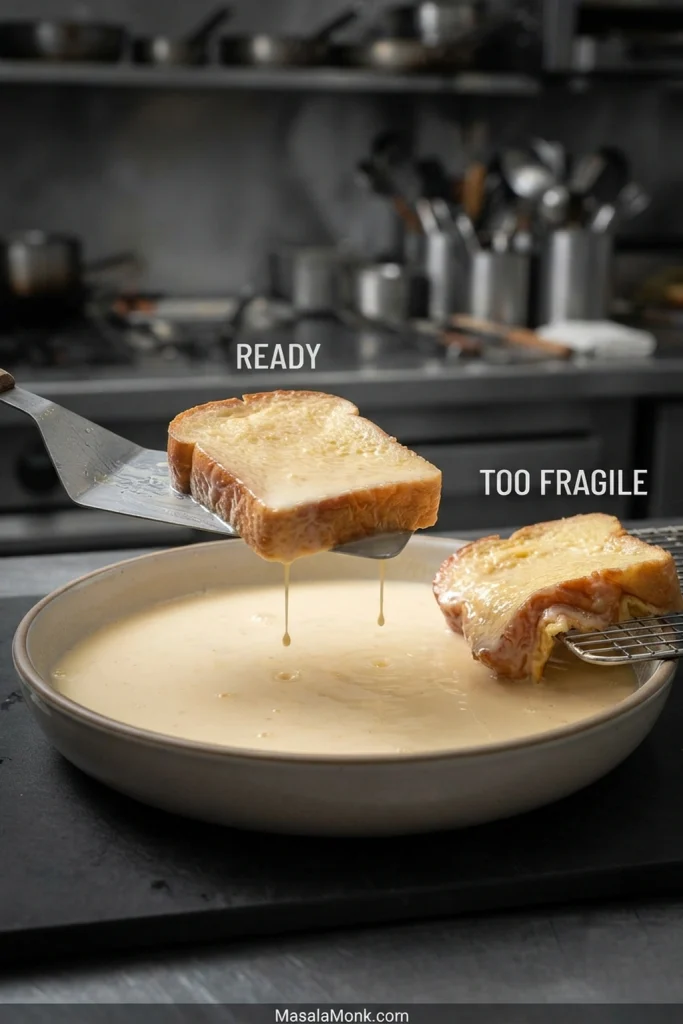
The clock tells you when to check; the bread tells you when to stop. It should feel noticeably heavier and hold its shape. If the lower edge begins to droop or feel fragile, stop soaking and let the excess custard drain away.
For a delicate slice, slide a thin turner underneath rather than lifting it from one corner.
5. Cook Until Richly Golden
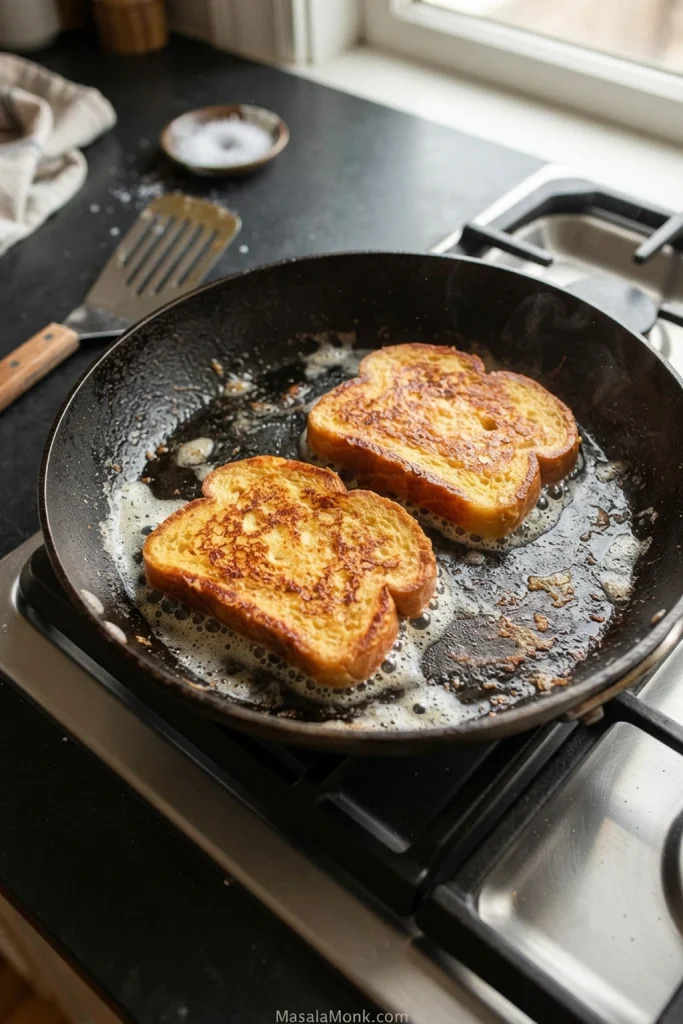
Add enough butter to lightly coat the skillet. Once it has melted and gives a gentle, steady sizzle, add the soaked brioche in a single layer with enough room to turn the pieces easily.
Cook in batches rather than crowding the pan. Give the first side about 2–4 minutes, until richly golden, then flip and cook the second side for another 2–3 minutes. The middle should feel soft with a little spring.
6. Cut and Check
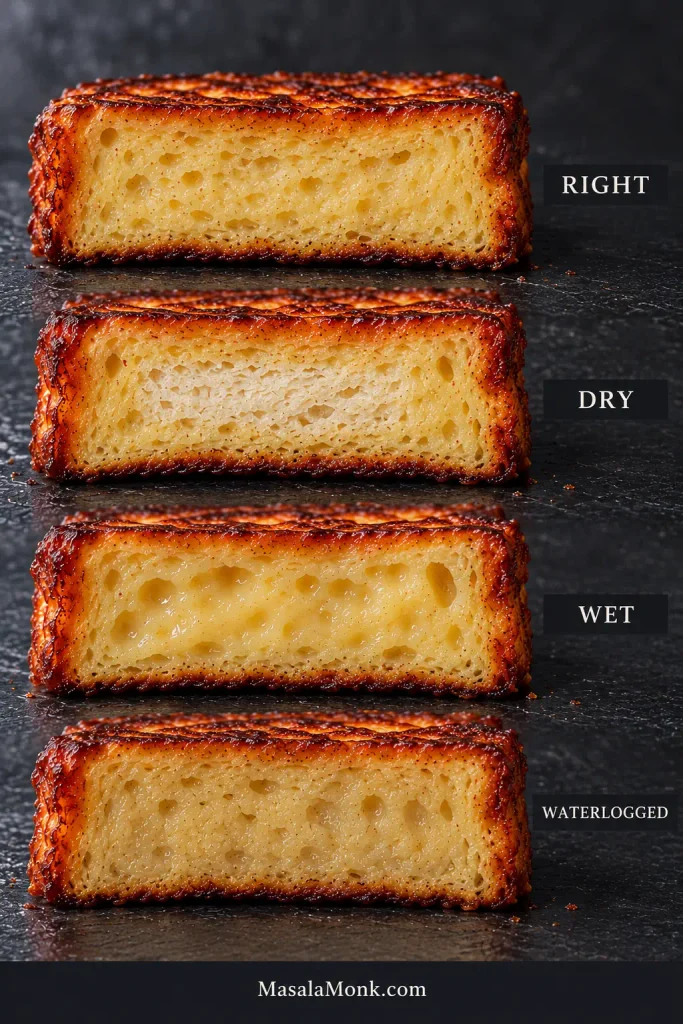
Treat this first piece as your calibration slice. If it is not perfect, that is exactly what it is for.
- Dry, pale stripe through the middle: let the next piece absorb more custard.
- Wet middle with an already-dark exterior, but the slice held together well: lower the heat and give the center more time to set.
- Dense or waterlogged through the middle: shorten the next soak.
- Floppy bread before cooking: shorten the next dip.
- Moist, tender, set crumb: keep the same soak and heat for the rest.
The cut crumb should look like bread, but it should be moist and tender all the way through. There should be no fluffy dry stripe and no liquid custard seeping out.
7. Finish the Batch
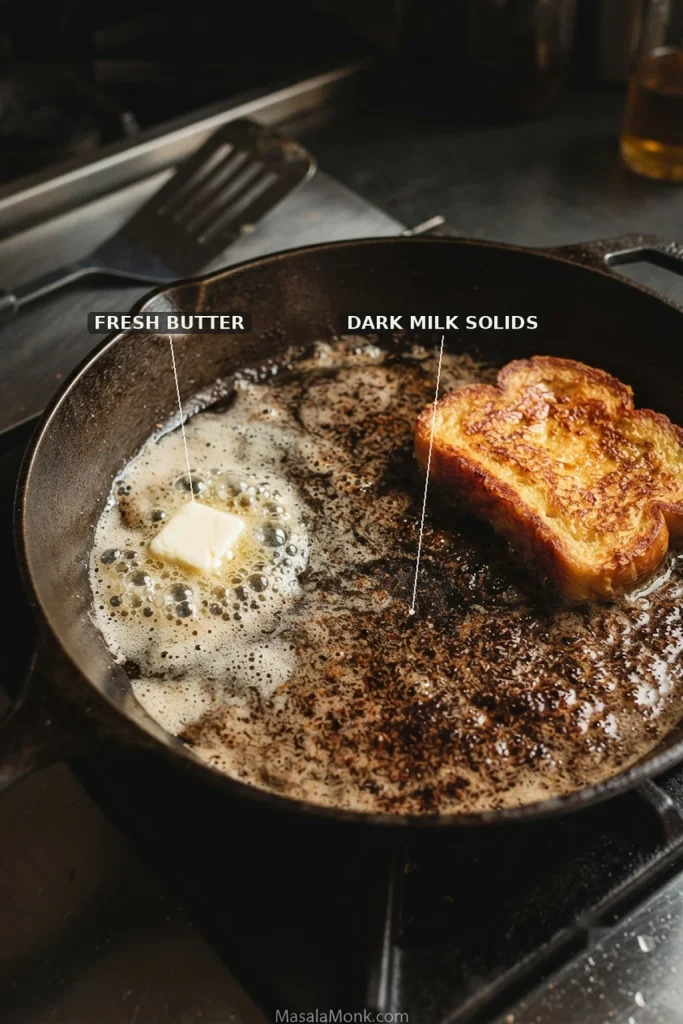
Continue with the remaining slices, refreshing the custard with a quick whisk as needed. If later pieces start browning faster, turn the burner down slightly. Wipe very dark butter solids from the skillet before adding fresh butter.
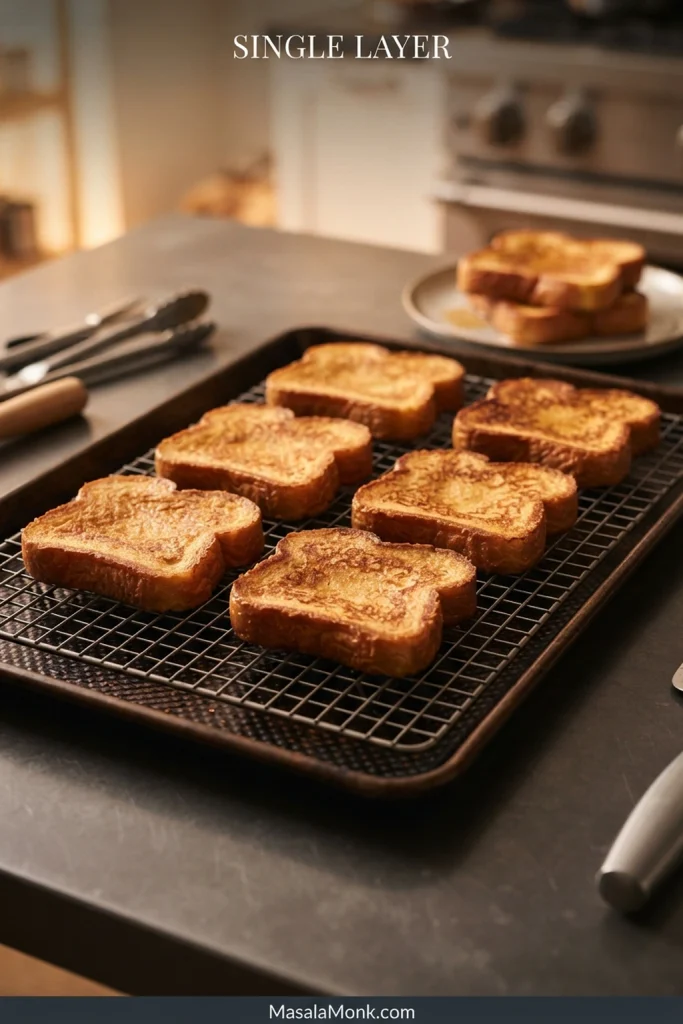
To serve the batch together, place cooked pieces in one layer on a wire rack in a 200°F / 95°C oven as you finish the rest. Avoid stacking them, which traps steam against the browned surfaces.
8. Serve
Bring the French toast to the table with the edges golden and the middle warm. Fruit or something tart can cut the richness; whipped cream or toasted nuts make the plate more indulgent. Butter and warm maple syrup are all it really needs.

Recipe Notes
- Whole milk: rich enough for brioche without making the custard unnecessarily heavy. Use half-and-half for an even richer version.
- Sugar: 1 tablespoon is enough because brioche is already lightly sweet and browns readily.
- Very dry brioche using all the custard? Mix another half batch instead of rationing the remaining slices with shallow dips.
- Half batch: halve the brioche, eggs, milk, sugar, vanilla, cinnamon, and salt; use butter and toppings as needed.
- Need an egg-free version? Don’t simply omit the eggs. The Eggless French Toast Recipe uses a different method designed to set without them.
Method note: This is a research-led recipe built from established French-toast methods, published cooking guidance, and recurring problems reported by home cooks. MasalaMonk has not independently kitchen-tested this exact formula.
Choose & Prepare the Bread
Soak & Cook
Fix & Finish
Choose and Prepare the Bread
Why Brioche Needs a Lighter Touch
Brioche needs enough custard to moisten the center, but the slice must remain sturdy enough to lift and turn. A firmer slice gives you more room to adjust the soak; very soft bread needs a quicker dip and gentler handling.
Pre-Sliced Brioche vs a Whole Loaf
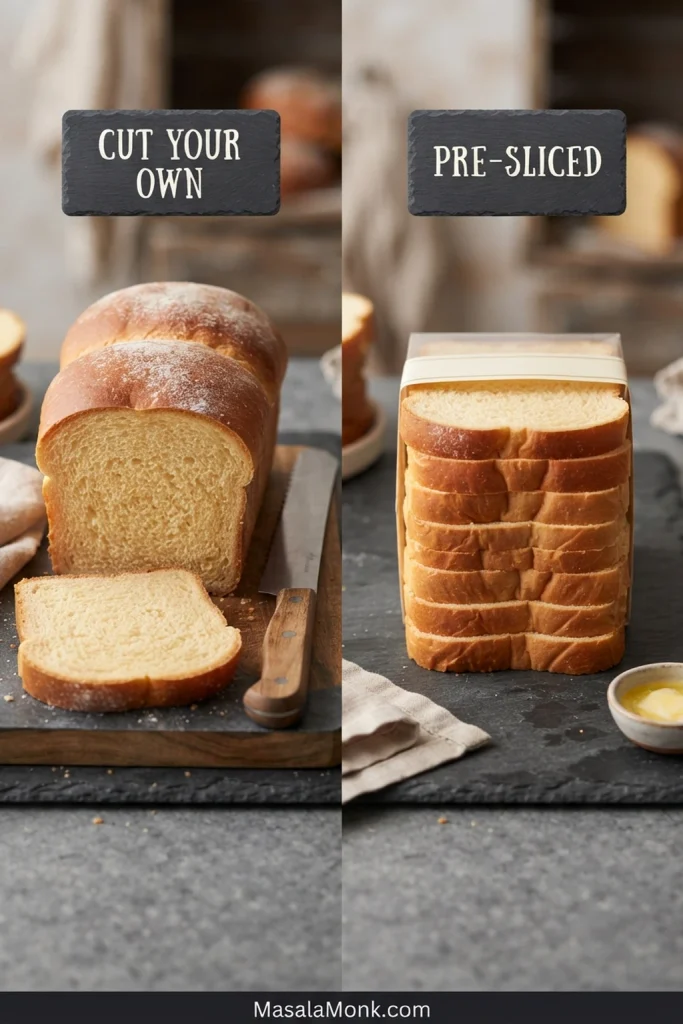
A whole brioche loaf gives you one major advantage: control over slice thickness. Cut it yourself and you can stay close to the 1-inch range this recipe is built around. Packaged brioche works well too, but thinner, softer pieces generally need less time in the custard.
Bread weight is more reliable than slice count: six broad bakery slices can contain as much bread as eight smaller packaged ones. End slices may also be thinner or drier than the middle slices, so check them separately rather than assuming the whole loaf will soak at one pace.
If you’re comparing brioche with challah, Texas toast, sandwich bread, or sourdough, the broader French Toast Recipe goes deeper into how different breads behave in custard. For the measurements that matter most here, continue to Thickness That Works at Home.
Thickness That Works at Home
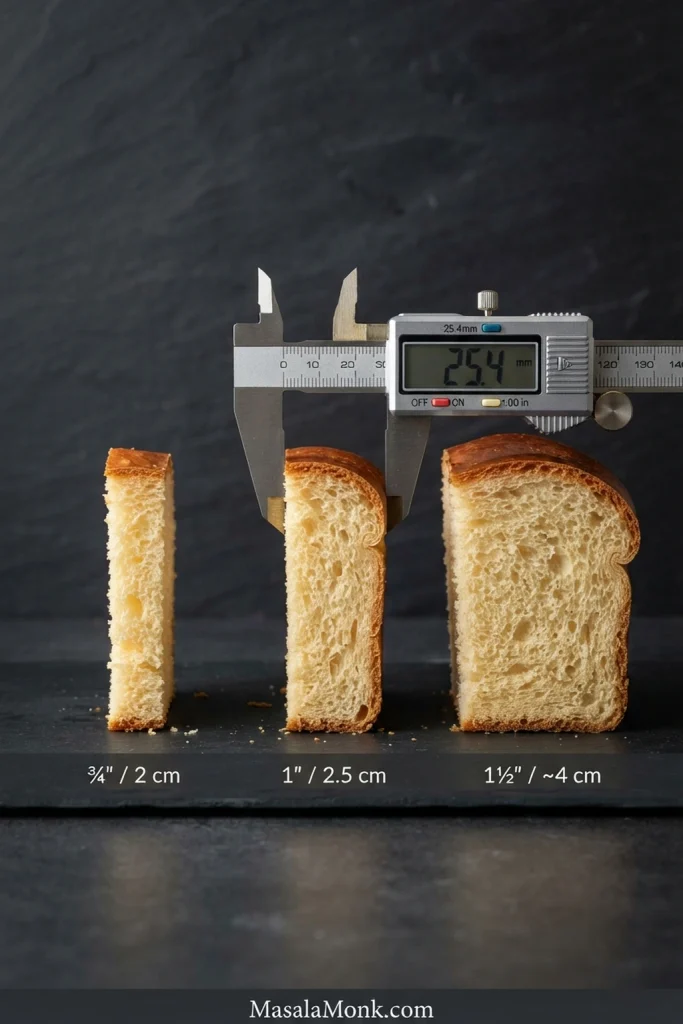
For most home cooks, 1 inch / 2.5 cm is the sweet spot. It gives you enough depth for a soft brunch-style middle and remains easy to finish in a skillet.
Thinner slices around ¾ inch / 2 cm cook faster and are easy to handle, but the contrast between the browned outside and tender interior is less dramatic.
Move toward 1½ inches / about 4 cm or more and the outside and middle start running on different clocks. A beautifully browned surface can arrive several minutes before the center is ready; see the extra-thick method for how to finish those slices.
Fresh, Day-Old and Dried Brioche
Slightly dry brioche is ideal for French toast, but it does not have to be a day old. Dryness matters more than age. A day-old loaf can remain quite moist; a fresh loaf can be gently dried before cooking.
Fresh brioche works; it simply has less margin before the soaked bread becomes fragile. Very dry brioche may need substantially more custard.
The goal is not stale, hard bread. You want a crumb that has lost some of its fresh plushness but bends without feeling brittle. For very fresh slices, use the gentle drying step in the recipe before dipping.
Soak and Cook Brioche French Toast
How Long Should Brioche Soak?
There is no single soak time for brioche French toast. Slice thickness, loaf moisture, crumb density, and whether the bread has been dried all change how quickly custard reaches the middle. That is why successful methods can range from a quick dip to a much longer soak.
| Brioche in Front of You | How to Start |
|---|---|
| Thin, very soft packaged slice | A few seconds per side |
| Firm or slightly dry 1-inch slice | About 10–15 seconds per side |
| Very dry or dense brioche | 20–30 seconds per side or longer if needed |
| Extra-thick restaurant-style slice | Longer soak; finish more slowly in the oven |
What Changes the Soaking Time?
Thickness is only one part of the equation. A dry, open cut face can take up custard quickly, while a soft, moist slice may become fragile before much liquid reaches its core. The crust also matters: a slice with more exposed cut surface absorbs differently from one with thick outer crust along several sides.
The custard should contact the full cut face of each slice. Lay the bread flat, turn it once, then lift it without pressing; compression can squeeze the crumb and make the slice harder to handle. Let excess custard drain back into the dish and whisk again every couple of slices so cinnamon stays distributed. If the custard runs low, mix a little more rather than forcing the remaining bread into a shallow puddle.
For very thick bread, a longer soak may still leave the center behind. Let the custard penetrate as far as the slice can comfortably take, then rely on gentler cooking to finish the middle. Extra-thick brioche is a separate method, not a reason to soak every slice for longer.
A properly soaked slice feels heavier in your hand but still feels like a slice of bread—not something you need to rescue from the custard. For the hands-on sequence, return to Step 4: Soak the First Slice in the recipe.
Browning tells you about the pan; the cut center tells you how far the custard penetrated. A fluffy, pale band through the middle means it never reached far enough in.
How to Coat the Slice Evenly
The custard should contact the full cut face of each slice. Lay the bread flat, turn it once, then lift it without pressing; compression can squeeze the crumb and make the slice harder to handle. Let excess custard drain back into the dish and whisk again every couple of slices so cinnamon stays distributed. If the custard runs low, mix a little more rather than forcing the remaining bread into a shallow puddle.
Custardy Does Not Mean Wet or Raw
Custardy brioche should be moist and tender, but the egg-and-milk mixture must be fully set. The crumb should look like bread rather than shiny, liquid custard held inside a browned shell.
An undercooked center is wet because the custard has not set. By contrast, an oversoaked slice feels dense and heavy throughout because the bread took on more custard than it could hold without losing its normal crumb.
Once the center is properly set, soak time lets you tune the texture: longer for a softer middle, shorter for more recognizable bread texture. The best slice is almost two textures at once—browned and buttery at the edges, warm and tender through the middle. When judging your own batch, use the first-slice check to distinguish a dry core from an under-set one.
Extra-Thick Restaurant-Style Brioche
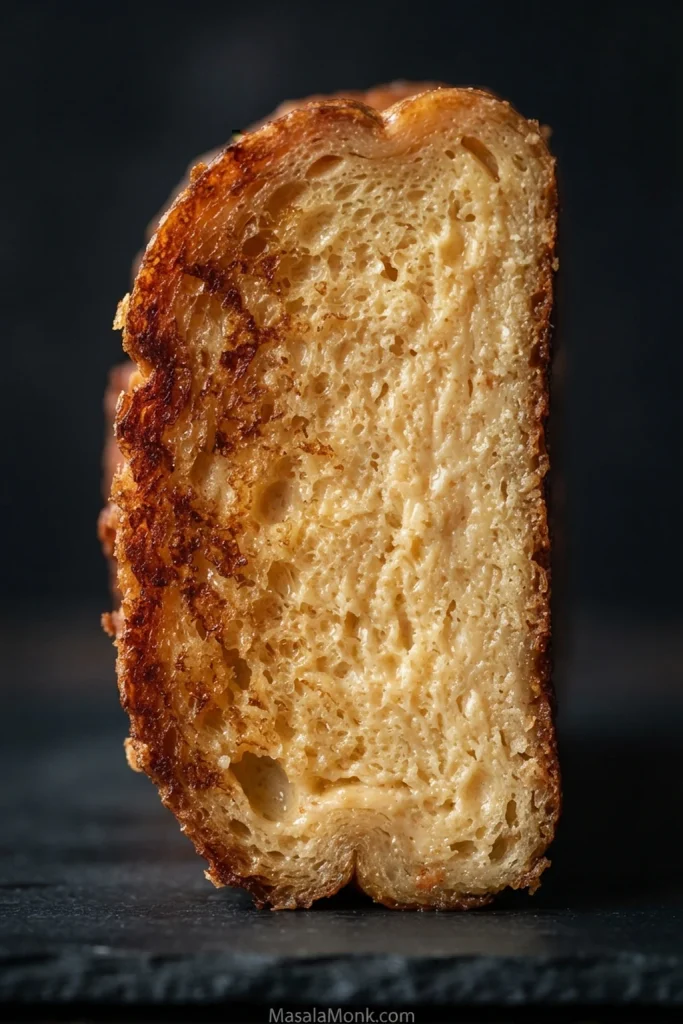
A 1½–2-inch / 4–5 cm slice can give you a dramatic browned exterior around a very soft center, but skillet heat alone becomes harder to control at that thickness.
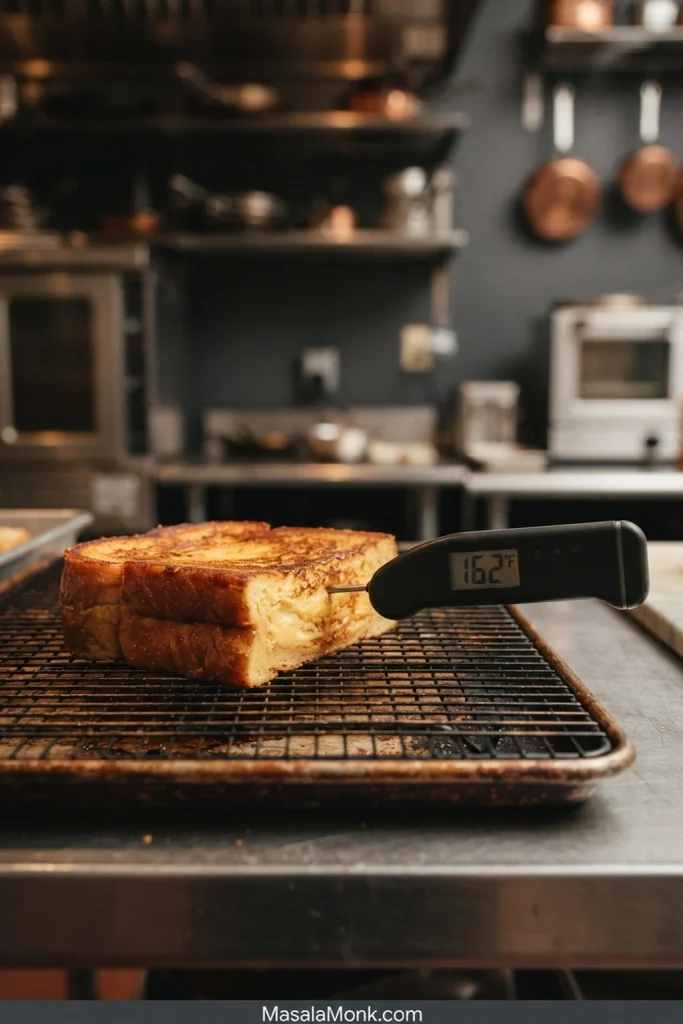
Let sturdy bread absorb enough custard to reach well beyond the surface, then brown both sides gently. Move the slices to a 275°F / 135°C oven and check the middle after about 5 minutes, continuing only until it is hot and set.
For a numerical check on very thick slices, aim for at least 160°F / 71°C in the center, consistent with FDA guidance for egg dishes. Standard 1-inch slices can follow the main recipe card.
When Brioche French Toast Goes Wrong
“Soggy” is too broad to be useful on its own. What happened—and when it happened—usually tells you what to change next.
If the first slice is off, you have not lost the batch. Change one thing on the next piece and keep going. The Cut and Check step shows how to read the center before adjusting the next slice.
While Soaking
The bread tears or collapses while soaking. Shorten the next dip and support the slice from underneath. If the brioche is exceptionally fresh and plush, dry it gently before dipping again.
It absorbs far more custard than expected or feels awkward to move. Large, dry bread can genuinely drink more than the main recipe assumes. Support delicate pieces from underneath instead of pinching an edge, and mix more custard if the dish runs nearly dry.
While It Is Cooking
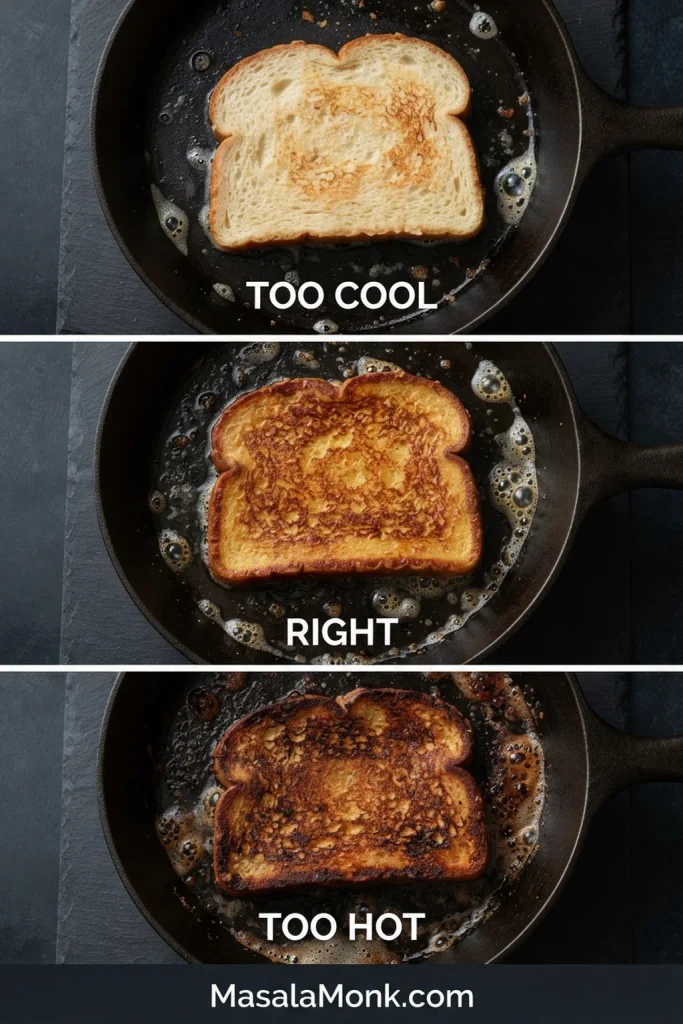
Listen to the skillet. A gentle, steady sizzle is about right. Silence is an early warning that the pan is too cool; aggressive splattering or smoke means it is too hot.
The surface darkens almost immediately. Reduce the heat and check the butter in the pan. Dark milk solids can color the next slice before its middle has time to set.
The French toast looks pale and greasy. Give the skillet more heat and let it recover before adding another piece.
Scrambled-looking egg gathers around the edges. Whisk the custard thoroughly and let more of the excess drip away before the bread reaches the skillet.
Later batches burn even though the first was perfect. The skillet has accumulated heat and the butter solids have darkened. Turn the burner down and refresh the pan.
Uneven Browning and Torn Slices
One side is much darker than the other. The skillet may have a hot spot, or the first side may have cooked longer than you realized. Rotate the pan if the burner heats unevenly, and use the color of the first slice to set a more consistent turning point for the next one.
The slice tears when you flip it. Give the first side enough time to form a stable browned surface, then slide a broad turner fully underneath before turning. If the slice was already sagging before it reached the pan, shorten the soak on the next piece.
The edges brown but the center looks pale. Cut the slice to check the crumb. A fluffy, dry stripe through the middle means the next slice needs more custard. When the center is wet or under-set beneath a dark crust, lower the heat and give it more time to set. For unusually thick slices, use the extra-thick method.
After You Cut It
Beautiful outside, disappointingly dry inside. Increase the soak. A darker crust will not fix a dry center.
Dark outside, wet inside. If the soaked bread held together normally, lower the heat and give the middle more time before shortening the dip.
The whole center is dense and waterlogged. That points more strongly to too much custard for that loaf. Dip the next piece more briefly.
The middle tastes unusually eggy. First make sure it is fully cooked; an under-set custard can taste more overtly eggy. Also check the bread amount: this formula is scaled for 14–16 oz / 400–450 g, and a much smaller loaf may not need every slice dipped as deeply or all the custard used. Once the center is set, a little vanilla can round the aroma, but extra sweetness is not a substitute for proper cooking.
The golden surface goes soft while waiting. Steam is usually the culprit. Keep cooked pieces unstacked on a rack in the low oven so air can move underneath them.
Ready to cook another batch? Return to the Brioche French Toast Recipe for the full sequence.
Toppings and Easy Variations
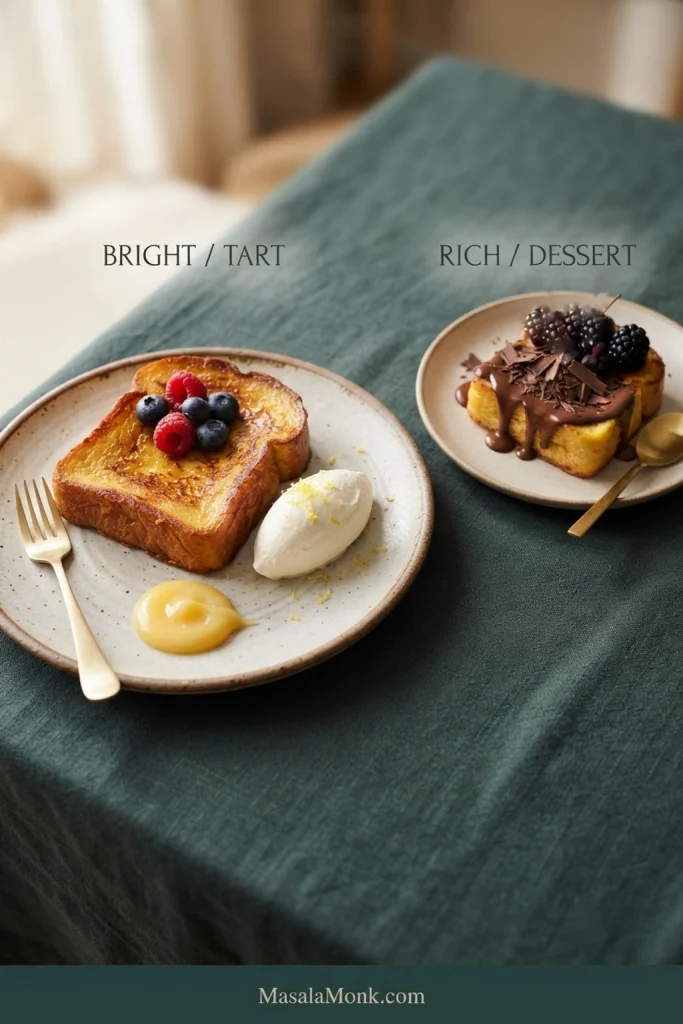
Butter and warm maple syrup are enough when you want the brioche itself to stay in the foreground. For a fresher plate, pair berries with homemade whipped cream; banana and toasted pecans make it sweeter and nuttier, while orange zest or a little homemade lemon curd adds aromatic lift or acidity. Chocolate sauce or Nutella with berries takes the same toast in a more dessert-like direction.
To keep the flavor contrast clear, choose one main direction and one supporting accent rather than piling on several sauces. Since brioche is already rich and lightly sweet, taste before adding more syrup; a little fruit, citrus or crunch can do more than another layer of sweetness.
Add syrup, fruit juices and other wet toppings close to serving. They soften the browned exterior if they sit on the toast for too long, so letting diners finish their own slices helps preserve the contrast.
Hold, Store and Reheat
Make Ahead and Keep Warm
You can slice or gently dry the bread ahead, and the custard can be whisked, covered, refrigerated, and whisked again before cooking.
Do not leave individual skillet slices soaking overnight. If you want French toast specifically designed to absorb custard for hours and bake in the morning, the French Toast Casserole is a better fit.
To keep a cooked batch warm, use the 200°F / 95°C wire-rack hold from Step 7 of the recipe. The open rack helps prevent steam from softening the browned surfaces.
Refrigerating and Freezing
Refrigerate leftovers promptly, and always within 2 hours. Use them within 3–4 days, following USDA leftovers guidance.
For longer storage, freeze cooled slices in a single layer until firm, then pack them in an airtight freezer-safe container or bag. To preserve quality, use frozen leftovers within about 3–4 months.
If you plan to freeze several slices, separate them with parchment once firm so you can take out only what you need. Freeze them plain and add butter, syrup, cream or fruit after reheating; those toppings do not freeze and reheat as neatly as the toast itself.
If you regularly make French toast for the freezer, French Toast Sticks are particularly easy to portion and reheat one serving at a time.
Best Way to Reheat
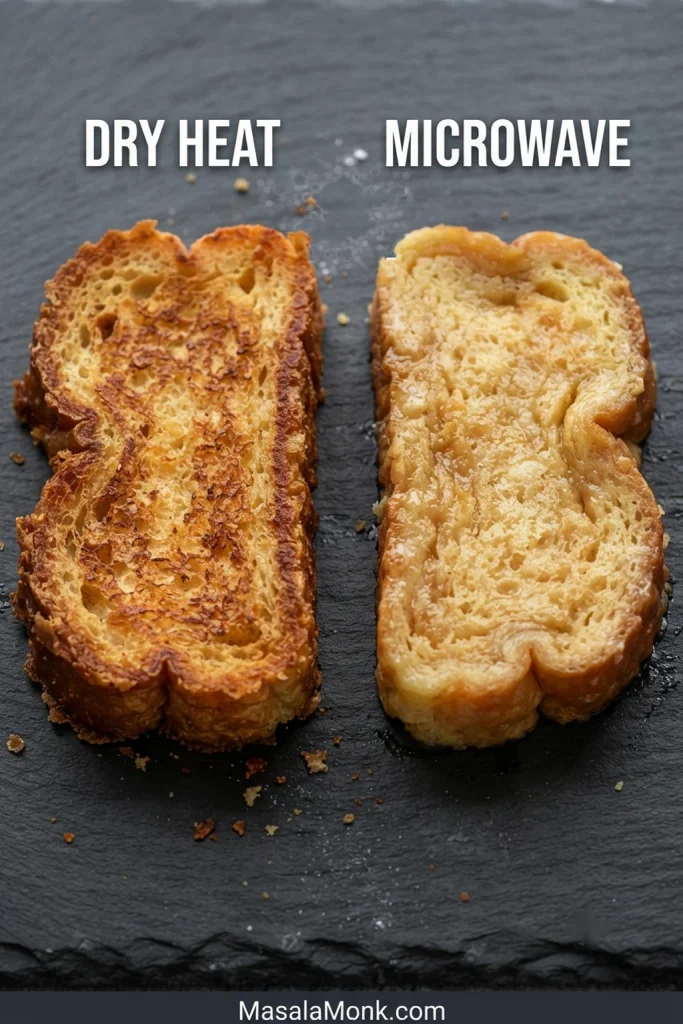
Reheat refrigerated slices at 350°F / 175°C, ideally on a wire rack or baking sheet. Start checking around 5 minutes and continue until the middle is hot and the exterior feels dry again. Frozen slices will take longer.
A toaster oven or skillet also works. The microwave is fastest, but the brioche will come back much softer. For a food-safety temperature check, reheated leftovers should reach 165°F / 74°C.
Frequently Asked Questions
Can I Use Brioche Buns?
Yes, if that is what you have. Slice larger buns horizontally into even pieces, keeping the thickness as consistent as possible. Because the pieces are round and may have more crust around the edge, dip briefly at first and check the cut center before adjusting the next one.
Can I Skip the Cinnamon or Vanilla?
Yes. Cinnamon and vanilla add aroma, but neither is needed for the egg-and-milk custard to set. Leave one out, or keep both modest so the buttery flavor of the brioche remains noticeable.
Can I Use Half-and-Half Instead of Whole Milk?
Yes. Half-and-half makes a richer custard, which can suit a dessert-style serving. Since brioche already contains butter and eggs, whole milk gives a balanced starting point; whichever you choose, watch the bread’s shape during soaking rather than assuming the same timing will fit every loaf.
Can I Cook Brioche French Toast on an Electric Griddle?
Yes. An electric griddle gives you a broad, even cooking surface and can make batches easier to manage. Use about 350°F / 175°C as a starting point, leave space around each slice, and judge the browning as you cook because griddles can vary in how evenly they heat.
Can I Substitute Challah for Brioche?
Yes. Challah is one of the closest substitutes for brioche, although it is usually a little less rich. Adjust the dipping time to the loaf rather than assuming it will behave exactly like brioche.
Is Brioche French Toast the Same as Pain Perdu?
They overlap closely. Pain perdu means “lost bread” and traditionally describes bread revived with an egg-and-dairy mixture. Modern versions range from familiar French toast to very thick, deeply soaked restaurant or dessert preparations. This recipe stays closer to an easy skillet breakfast with a soft, fully set interior.
Can I Use Cinnamon-Swirl or Chocolate-Chip Brioche?
Yes, but those additions can make the surface brown faster or create sticky spots in the skillet. Start at the lower end of the heat range, watch the first slice closely and reduce added sugar in the custard if the bread is already sweet.
Can I Use Frozen Brioche?
Yes. Thaw the slices first, then check how moist they feel before dipping. If thawing leaves the crumb especially soft or damp, dry the slices gently and let them cool; frozen bread can behave differently from a loaf that has simply dried for a day.
Can I Use Non-Dairy Milk?
An unsweetened, unflavored plant-based milk can replace the whole milk, although the flavor and richness will change slightly. Start with the same volume, keep the eggs in the custard, and use the first slice to judge soaking and doneness rather than expecting identical timing.
Can I Make the Custard Less Sweet?
Yes. You can reduce or omit the tablespoon of sugar in the custard, especially when serving brioche with syrup, chocolate or sweetened fruit. The bread still browns in the skillet, while the toppings give you control over how sweet each serving becomes.
Can I Prepare Brioche French Toast the Night Before?
Yes. Prepare the bread and custard separately, then dip and cook in the morning. For an overnight soak, choose a baked French toast casserole instead.
Once you know how quickly your loaf takes up the custard, brioche French toast stops feeling unpredictable. The first slice teaches you what that loaf needs; after that, the rest of the batch gets easier.








