When White Claw first splashed onto the beverage scene in 2016, few could have predicted the cultural wave it would unleash. Today, White Claw is more than a drink—it’s a movement. Whether you’re sipping poolside, tailgating, or unwinding after work, White Claw has become a go-to choice for those craving flavor, fizz, and just the right buzz. But despite its popularity, there’s still a lot of confusion about how much alcohol is in White Claw, what type of alcohol it actually contains, and how it compares to other drinks like beer or cocktails.
In this blog post, we’ll deep-dive into everything you need to know about White Claw’s alcohol content in 2025, the evolving product lineup, and what makes this hard seltzer a staple in fridges across the country.
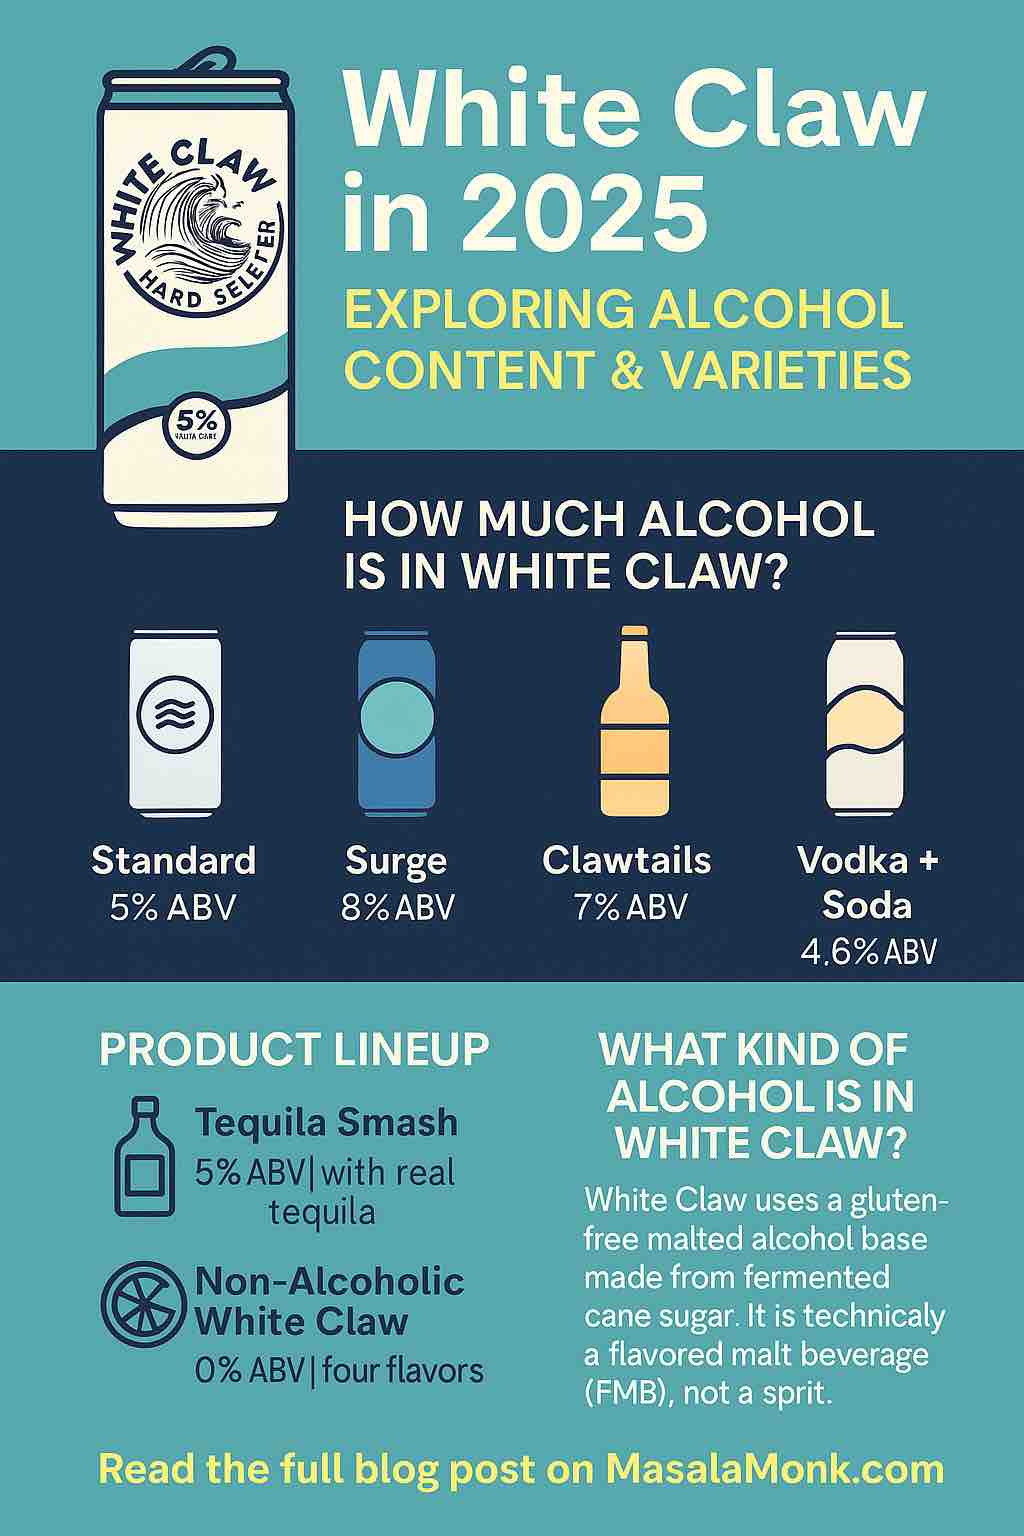
🍺 What Kind of Alcohol Is in White Claw?
Let’s settle one of the most asked questions once and for all: What kind of alcohol does White Claw use?
Unlike beer, which is brewed from malted barley, or vodka, which is distilled, White Claw is made from fermented sugar—specifically, cane sugar. This process results in a clear, gluten-free, flavor-neutral alcohol base, which is then infused with carbonated water and fruit flavors. Officially, White Claw is classified as a Flavored Malt Beverage (FMB), not a spirit.
Despite some misconceptions, there’s no vodka, rum, or tequila in the original White Claw formula. Instead, think of it as closer to a very clean, alcohol-infused sparkling water.
🧪 How Much Alcohol Is in White Claw? (By Product Line)
1. White Claw Hard Seltzer (Original) – 5% ABV
This is the classic that started it all. A 12 oz can contains:
- Alcohol: 5% ABV (about the same as a standard beer)
- Calories: ~100
- Carbs: 2–3 grams
- Sugars: Often 1 gram or less
- Gluten-Free: Yes
✅ Popular Flavors: Black Cherry, Watermelon, Mango, Lime, Raspberry
Perfect for: Day drinking, brunches, beach days—anywhere you want something light and sessionable.
2. White Claw Surge – 8% ABV
Looking for a stronger buzz? Surge is White Claw’s high-ABV version, designed for those who want to feel the effects a little faster.
- Alcohol: 8% ABV
- Calories: 220 per 16 oz can
- Carbs/Sugar: Slightly higher than original
✅ Popular Flavors: Blood Orange, Blackberry, Cranberry
Perfect for: Pre-gaming, parties, or when one can is all you need.
3. White Claw Clawtails – 7% ABV
One of White Claw’s newer innovations in 2025, Clawtails are flavored malt cocktails that blend real juice and exotic flavors.
- Alcohol: 7% ABV
- Profile: Sweeter and more cocktail-like
- Vibe: Margarita meets seltzer
✅ Flavors: Strawberry Cosmo, Tropical Mai Tai, Mango Margarita
Perfect for: Cocktail lovers who don’t want to mix drinks themselves.
4. White Claw Vodka + Soda – 4.5% ABV
Yes, White Claw now offers real spirits too. This line features vodka-based seltzers that are crisp, clean, and lightly flavored.
- Alcohol: 4.5% ABV
- Base: Premium distilled vodka
- Calories: ~100
✅ Flavors: Peach, Wild Cherry, Pineapple
Perfect for: Fans of vodka sodas looking for convenience and portability.
5. White Claw Tequila Smash – 5% ABV
Riding the tequila wave, this newer release includes real tequila and fresh, tropical flavors.
- Alcohol: 5% ABV
- Taste: A bolder, zestier option with south-of-the-border vibes
✅ Flavors: Strawberry Guava, Lime Prickly Pear, Mango Tamarind
Perfect for: Taco nights, poolside lounging, Cinco de Mayo
6. White Claw 0% – Non-Alcoholic Seltzer
Yes, even White Claw has gone booze-free. The 0% line caters to the sober-curious or those who just want the taste and vibe without the alcohol.
- Alcohol: 0% ABV
- Flavors: Black Cherry Cranberry, Mango Passion Fruit, Peach Orange Blossom
Perfect for: Weekday lunches, designated drivers, or anyone going dry.
⚖️ White Claw vs. Beer: Alcohol Comparison
| Beverage | ABV | Calories | Gluten-Free |
|---|---|---|---|
| White Claw Original | 5% | ~100 | Yes |
| Bud Light | 4.2% | 110 | No |
| IPA (average) | 6–7% | 180–220 | No |
| White Claw Surge | 8% | 220 | Yes |
Takeaway: White Claw matches or exceeds the alcohol of many beers, with fewer calories and a gluten-free tag.
🍹 How Many White Claws to Get Tipsy?
This depends on your body weight, alcohol tolerance, and time frame, but here’s a rough estimate:
- One 5% White Claw = ~1 standard drink
- Most people report feeling tipsy after 2–3 cans
- Surge or Clawtails can bring you to that point with fewer cans
➡️ Remember: effects vary by individual, and it’s always best to pace yourself and stay hydrated.
📈 The Trend: Why White Claw Isn’t Fizzling Out in 2025
- Diversification: From Surge to non-alcoholic options, White Claw continues to innovate.
- Health-Conscious Appeal: Lower sugar, lower calorie, and gluten-free makes it attractive to modern drinkers.
- Flavor Variety: There’s truly something for everyone, from tropical to classic citrus.
- Cultural Cachet: White Claw remains a meme-worthy, Instagrammable staple.
Fun fact: According to recent market research, White Claw still leads the U.S. hard seltzer market, commanding over 50% share, with spiked seltzer drinkers averaging 2.8 cans per occasion.
🎯 Final Thoughts: Should You Drink White Claw?
If you’re after a light, refreshing, flavorful alcoholic beverage that won’t leave you bloated or buzzed too quickly, White Claw remains a top-tier choice in 2025. Whether you’re a die-hard fan of the original or curious to try the tequila-infused Smash or the non-alcoholic line, there’s never been a better time to explore the Claw lineup.
Just remember the golden rule: “Ain’t no laws when you’re drinking Claws”—unless you’re driving. Then it’s 100% laws. 🚓
📚 Frequently Asked Questions (FAQs)
1. What is the alcohol percentage in regular White Claw?
Regular White Claw hard seltzer contains 5% ABV (Alcohol by Volume), similar to a standard light beer.
2. What kind of alcohol is used in White Claw?
White Claw uses a fermented cane sugar base, making it a flavored malt beverage, not a spirit-based drink like vodka or rum.
3. Does White Claw get you drunk?
Yes, like any alcoholic beverage, White Claw can cause intoxication. The number of cans needed varies by person, but most feel tipsy after 2–3 regular cans (5% ABV).
4. Is White Claw stronger than beer?
White Claw’s 5% ABV is on par with most beers. However, its Surge line (8% ABV) is stronger than the average beer.
5. Is White Claw gluten-free?
Yes, all White Claw products are gluten-free, including the original, Surge, Clawtails, and non-alcoholic lines.
6. What’s the difference between White Claw Surge and regular White Claw?
Surge has 8% ABV, making it significantly stronger than the 5% regular version. It also comes in 16 oz cans and has more calories.
7. Is there a non-alcoholic version of White Claw?
Yes, in 2025, White Claw launched a 0% ABV line with flavors like Mango Passion Fruit and Black Cherry Cranberry.
8. How many calories are in a White Claw?
A standard 12 oz White Claw contains about 100 calories, while Surge versions have around 220 calories per 16 oz can.
9. Can you mix White Claw with other drinks?
Absolutely! White Claw can be used as a mixer with spirits like vodka or tequila, or as a base for creative cocktails.
10. How is White Claw different from vodka soda?
Original White Claw uses a fermented sugar base, while vodka soda is made with distilled spirits. However, White Claw Vodka + Soda (4.5% ABV) is a newer line made with real vodka for a more classic taste.