

Freshly boiled pierogi have tender wrappers around fluffy potato, tangy fresh cheese, sweet onion and black pepper. Brown a few in butter, and their edges turn lightly crisp. This pierogi recipe makes Polish pierogi ruskie with an egg-free hot-water dough and traditional twaróg, plus practical cheese alternatives when twaróg is hard to find.
You’ll make about 55–60 pierogi, but you don’t have to shape them all at once. A plain, firmly sealed half-moon is all you need, and a quick two-piece trial helps you check the filling and dough before carrying on. Jump to the ingredients, start the step-by-step recipe, or use the half-batch amounts.
Potato-and-twaróg pierogi are a familiar part of Polish home cooking, alongside versions filled with mushrooms, cabbage, meat or fruit. The word ruskie refers to historical Ruthenia, not modern Russia; Culture.pl explains the name. In Polish, pierogi is plural (one is a pieróg); North American spellings include perogies and pierogies.
Contents
- Ingredients, yield and time
- Choose potatoes and cheese
- Tools and batch plan
- Make the pierogi step by step
- Toppings and sides
- Troubleshoot common problems
- Freeze, store and reheat
- Variations and practical questions
Pierogi Recipe: Ingredients, Yield and Time
- Makes: approximately 55–60 medium pierogi, using an 8 cm (3⅛-inch) cutter and dough rolled about 2 mm (0.08 inch) thin.
- Serves: about 6–8 as a main course, depending on appetites and sides.
- Time: allow roughly 2½–4 hours on a first attempt, including a 30-minute dough rest and around 45–90 minutes or more for shaping. You can cook the onions while the potatoes boil. Pan-frying all 55–60 pierogi adds time.
Weigh the flour and potatoes if you can: the filling uses 500 g of peeled, cooked, drained potato, not 500 g raw.
For the soft, egg-free pierogi dough
- 500 g (17.6 oz) plain/all-purpose flour — approximately 4–4¼ US cups; weighing is more reliable.
- 260 ml hot water (about 1 US cup + 1½ tbsp), ideally 80–90°C (176–194°F), plus up to 20 ml (4 tsp) extra warm water if needed.
- 40 ml neutral oil (2 tbsp + 2 tsp), such as sunflower or canola oil.
- ¾ tsp fine salt.
- Extra flour for light dusting.
For the traditional potato-and-cheese filling
- 500 g (17.6 oz) peeled, cooked, well-drained potato — buy about 800 g (1¾ lb) raw to allow for peeling and trimming. Weigh out 500 g after cooking; set any extra aside.
- 300 g (10.6 oz) twaróg or dry farmer’s cheese, crumbled. Drain any wetter alternative before weighing 300 g. Compare the cheese substitutes if twaróg is unavailable.
- 250 g (8.8 oz) peeled, finely chopped onion; measure after peeling, since onion sizes vary.
- 30 g butter (about 2 tbsp) for frying the filling onions.
- Filling salt: ½ tsp fine salt to start, then more to taste; allow for any salt in the potatoes.
- Black pepper: ½–1 tsp freshly ground, to taste.
And for boiling and serving
- Salted water for the potatoes: start with about 1 tsp fine salt, adjusted to your pot; this is separate from the salt in the dough and filling.
- Pierogi boiling water: about 3 L (3.2 US quarts) water and 2 tsp fine salt in the main pot; top up between batches.
- Coating or pan-frying: about 30–60 g butter (2–4 tbsp), with more as needed if browning the whole batch.
- Optional onion topping: use 2 medium onions and 30 g (2 tbsp) butter for the full batch, or 1 small onion and 15 g (1 tbsp) butter for a light garnish. These are separate from the filling onions and the butter used to coat or pan-fry pierogi. Prepare the topping during the dough rest or before boiling the serving batches.
- Other toppings: sour cream, chopped dill or chives.
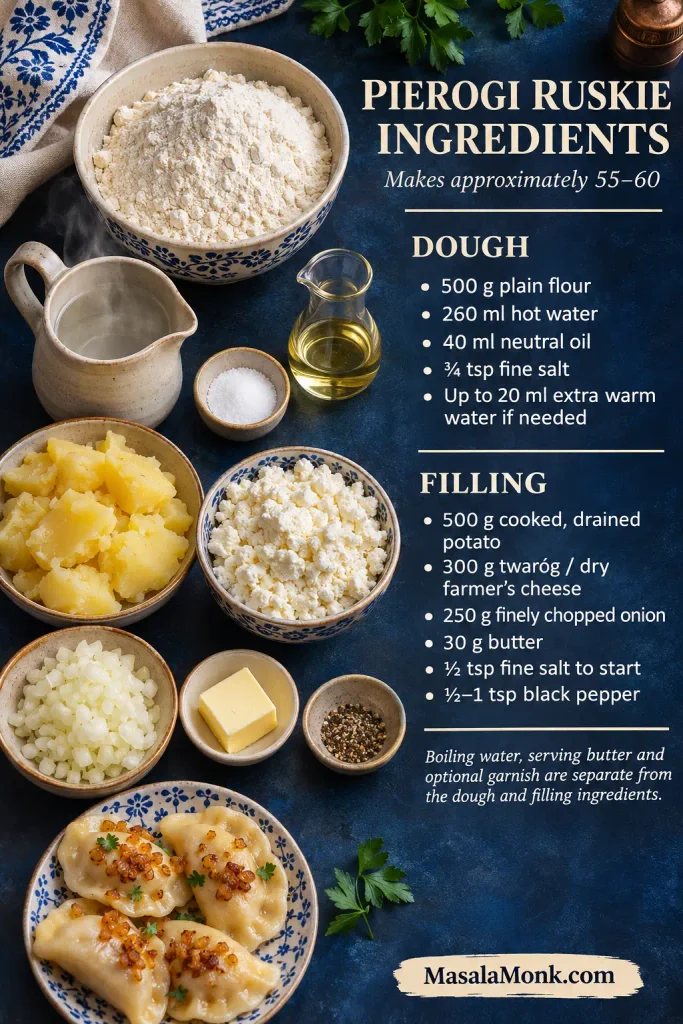
Pierogi Ruskie Ingredients at a Glance
Use this reference as a visual cross-check after weighing the ingredients. It separates dough supplies from filling supplies; the boiling water and optional serving toppings have their own list above.
Choose the Right Potatoes and Cheese
Best potatoes for pierogi filling
Floury potatoes give the filling a light texture without added milk. Russets work well in the US; Maris Piper and King Edward are useful choices in the UK. Yukon Gold makes a slightly creamier filling. Avoid firm, waxy salad potatoes if you have a floury variety available.
Drain the potatoes thoroughly and mash without milk or cream. The gentle mashing and steam-drying techniques in our mashed potatoes guide are useful here, too—just keep this mash plain and fairly dry.
What cheese is best for pierogi ruskie?
Twaróg, a fresh Polish curd cheese with a gentle tang, gives this filling its characteristic flavor. Look for it at a Polish or Eastern European food shop. Dry farmer’s cheese is the closest substitute. After that, choose a fresh cheese that is firm, lightly tangy and well drained: some quarks and cottage cheeses work better than others. Ricotta is usually milder.
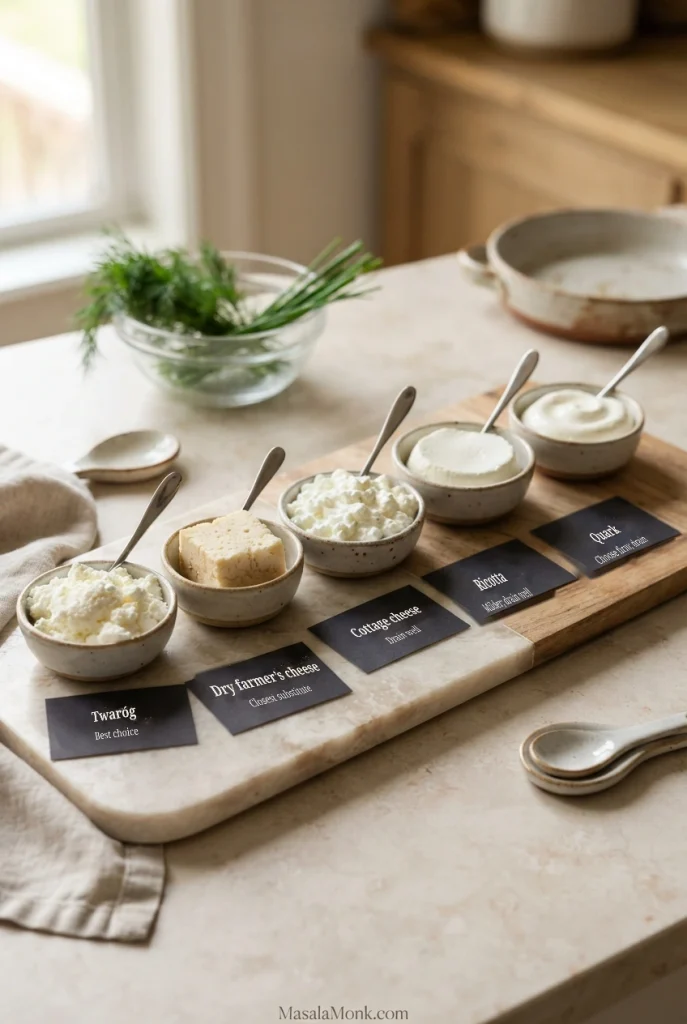
| Cheese | How to use it in this recipe |
|---|---|
| Twaróg | First choice; crumble 300 g with a fork or press it through a ricer. |
| Dry farmer’s cheese | Close practical alternative; use 300 g and break up large curds. |
| Cottage cheese | Drain in a cheesecloth-lined sieve in the fridge until it is firm enough to mound without obvious free liquid. This may take 30–60 minutes or longer. Press gently if needed; use 300 g after draining. |
| Ricotta | Choose a firm ricotta or strain it in the fridge until thick. Use 300 g after draining; the flavor will be milder. |
| Quark | Choose a firm version; strain loose quark in the fridge and use 300 g drained. The texture may be smoother. |
For a different-style filling: well-drained, crumbly chhena can work for an Indian adaptation, although its moisture and acidity vary. Paneer is firmer and less tangy; cheddar melts and tastes sharper, while cream cheese is softer and richer. These are not direct replacements for twaróg. The 300 g amount and moisture guidance above apply to the closer fresh-cheese options.
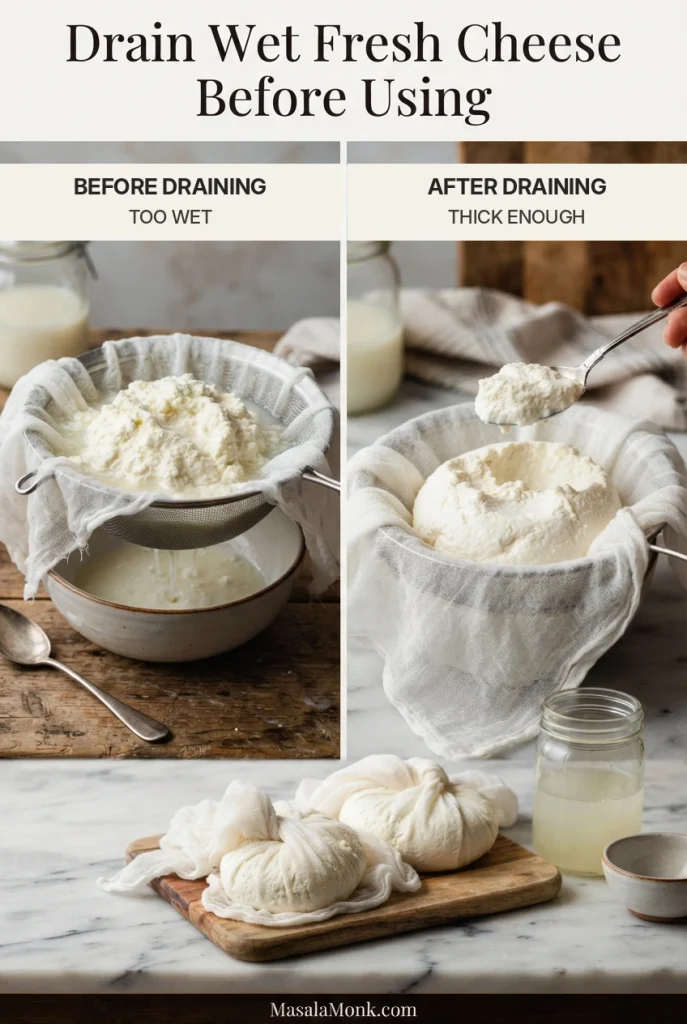
Drain Wetter Fresh Cheese for Pierogi
Cottage cheese, loose ricotta and some quarks may release excess whey. Set a cheesecloth-lined sieve over a bowl, keeping its base above the collected liquid. Drain in the refrigerator until the cheese holds soft curds without obvious free liquid, then weigh 300 g for the filling.
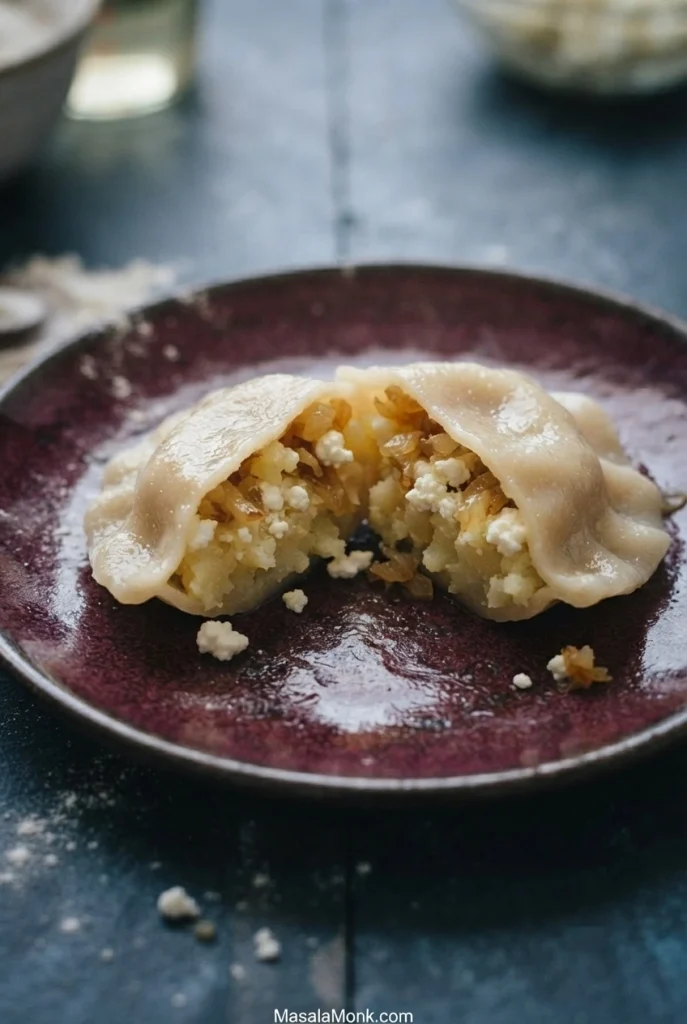
What the Potato-and-Cheese Filling Looks Like Inside
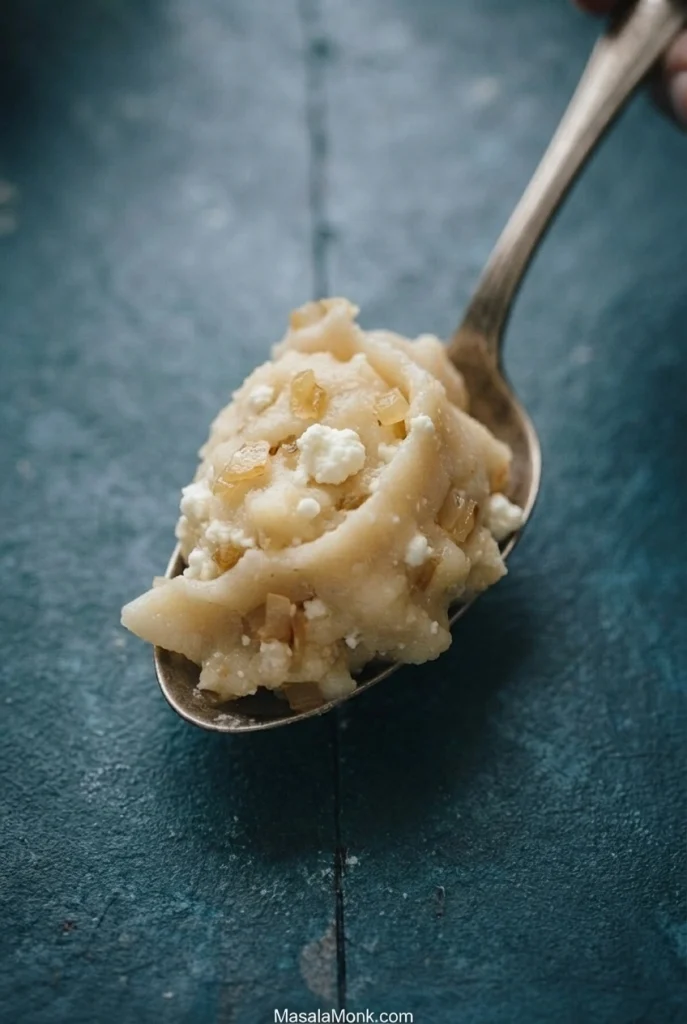
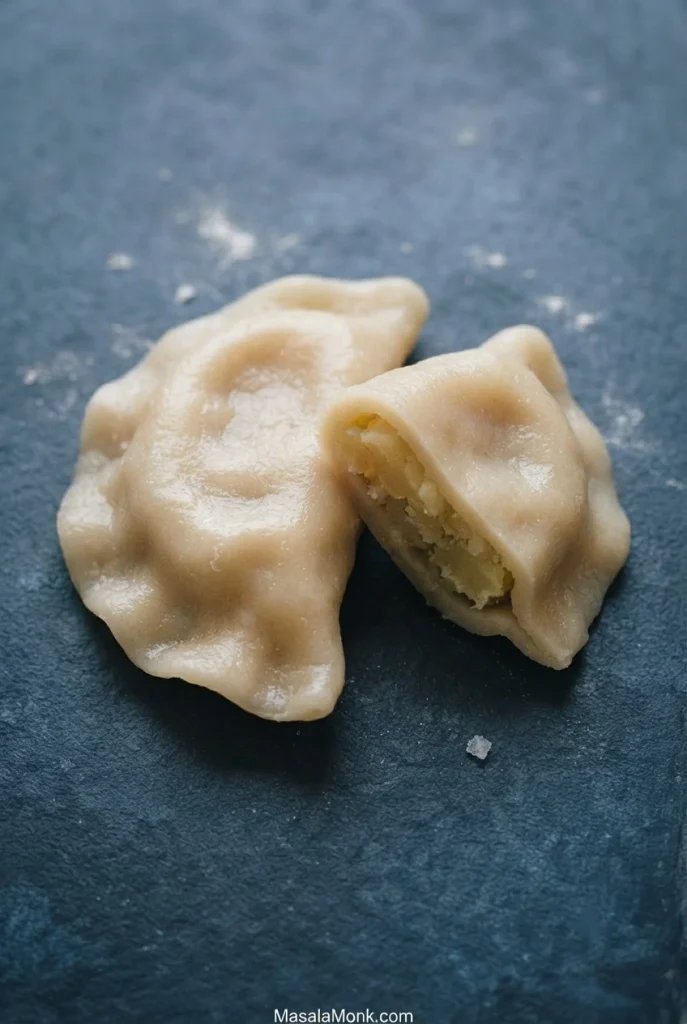
Inside traditional pierogi ruskie, soft mashed potato sits alongside small curds of fresh cheese and finely cooked onion. The cut-open photograph shows these textures nestled inside a thin, tender wrapper rather than whipped into one smooth paste.
Tools and a Manageable Batch Plan
You’ll need a bowl, masher or ricer, frying pan, rolling pin, 8 cm (3⅛-inch) cutter or glass, large pot, slotted spoon and two trays or large plates. Line the trays with parchment and dust lightly with flour. No pierogi press is needed.
Keep unused dough covered. Space the shaped pierogi apart on their trays and protect waiting pieces with a clean, dry, lightly floured towel laid loosely over them, without pressing on the seams.
Choose a rhythm that suits your kitchen. With two trays, shape one trayful and boil or freeze it before reusing the tray. If you have room for more trays in the refrigerator, you can shape the full batch before boiling close to serving. Keep filling you’re not using chilled, and freeze raw pierogi for longer storage instead of holding them on trays overnight. For that route, follow the raw-pierogi freezing steps.
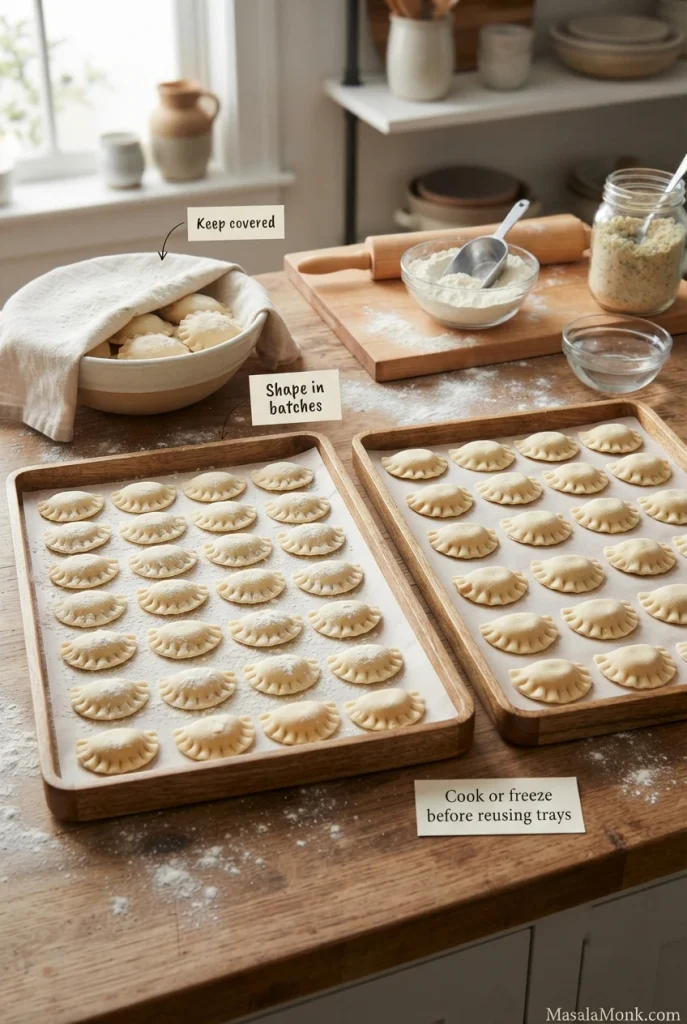
How to Make Homemade Polish Pierogi
1. Cook the potatoes and make a dry mash
Peel and cut the potatoes into roughly 2.5–3 cm (1-inch) chunks. Cover with cold water, add about 1 tsp salt and simmer until the thickest piece is fork-tender, usually 15–25 minutes. Drain thoroughly.
Return them to the warm, empty pan off the heat for a minute to let excess steam escape. Mash or rice while warm, without milk or cream. Weigh 500 g of the cooked, drained potato and spread it out to cool before adding cheese. Keep any extra plain mash aside until you’ve checked the filling’s firmness.
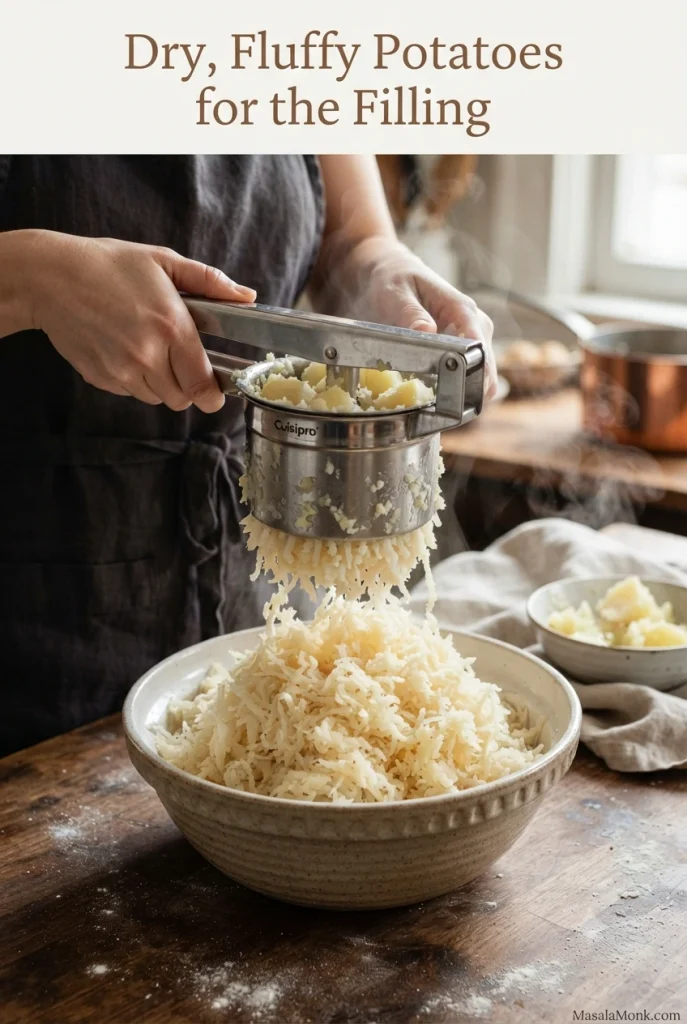
The mash should be fluffy, with no water collecting at the bottom. A blender can make potatoes gluey.
2. Cook the onions and make the filling
While the potatoes simmer, melt 30 g butter in a frying pan. Add 250 g finely chopped onion and cook over medium-low heat, stirring occasionally, until soft and lightly golden. This usually takes 10–15 minutes, but follow the color and softness rather than the clock. The onions should taste sweet, without dark, bitter edges.
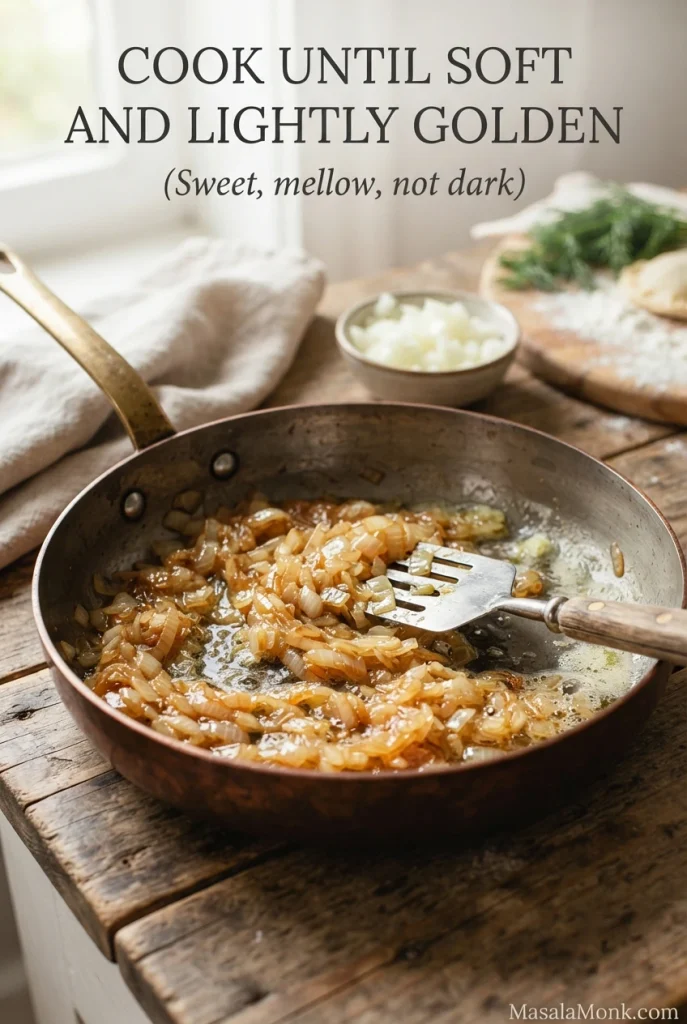
Once the potato mash is warm rather than hot, fold in the onions and their butter, followed by 300 g crumbled twaróg. Break up large curds with a fork, then fold gently rather than beating the filling smooth; small flecks of fresh cheese should remain.
Start with ½ tsp salt and ½ tsp black pepper, then taste the filling. The mild potato should be properly seasoned, the black pepper noticeable, and the sweetness of the onions balanced by the fresh cheese. Cool the filling and keep it refrigerated while making the dough.
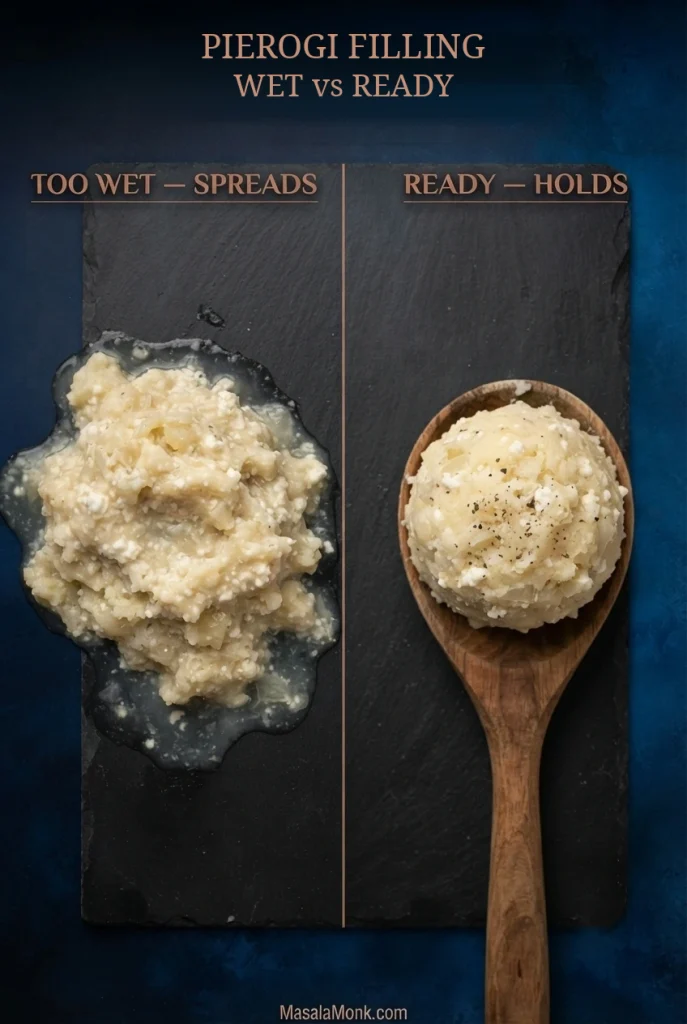
A cooled spoonful of filling should hold a soft mound without weeping. If the mixture merely feels soft, chill it briefly; if it still spreads, add a little of the reserved plain mash. Compare the wet and ready filling examples for a visual guide.
3. Make and rest the hot-water dough
Mix 500 g flour and ¾ tsp fine salt in a bowl. Add 40 ml oil, then stir in 260 ml hot water, ideally 80–90°C (176–194°F), with a sturdy spoon. Without a thermometer, let freshly boiled water cool somewhat before using it; the temperature will be approximate. The mixture will look rough at first. Wait until it is safe to handle before kneading.
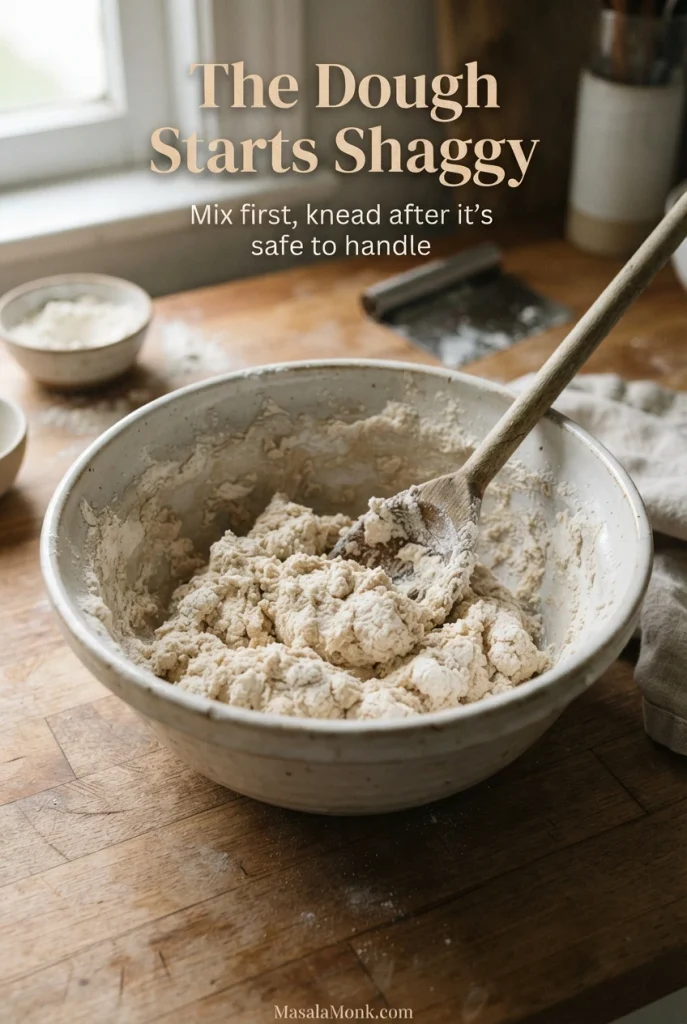
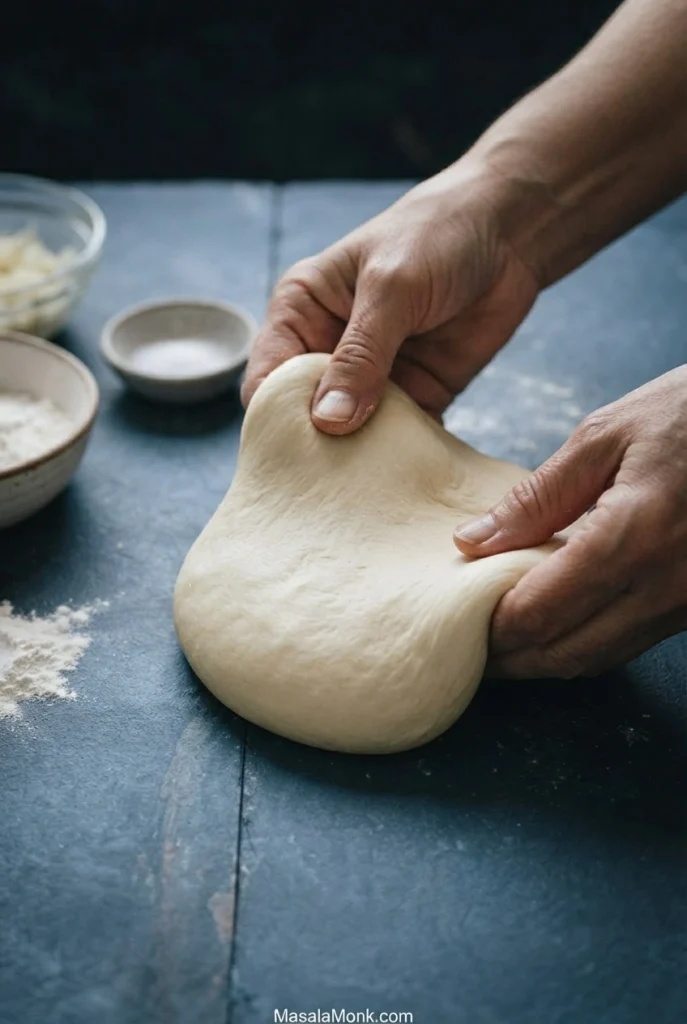
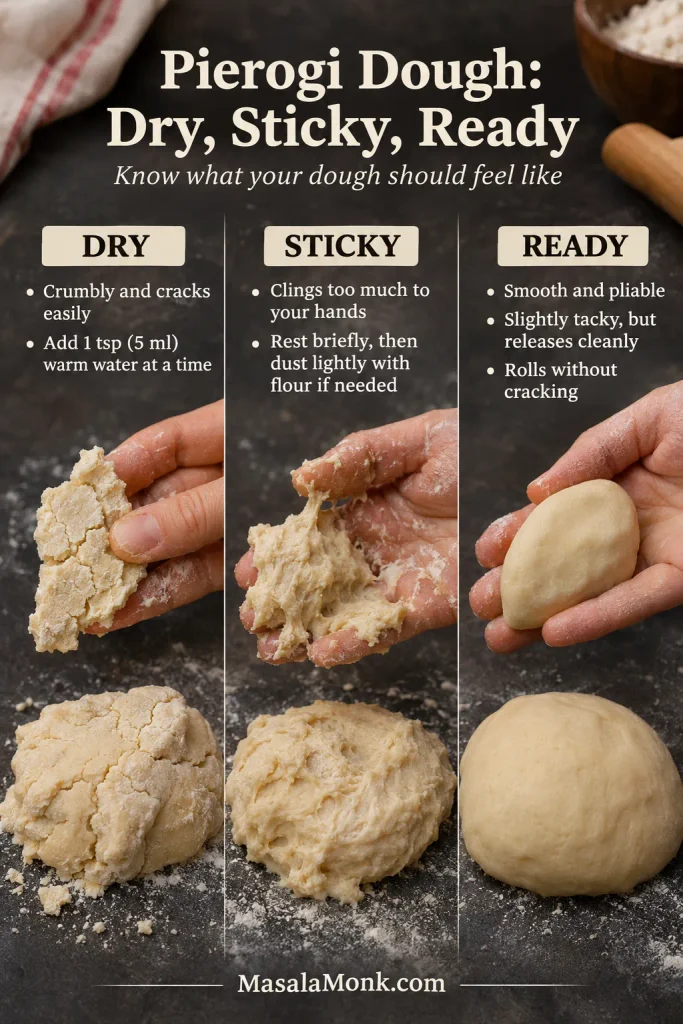
Scrape any dry flour from the sides and bottom of the bowl into the mixture before deciding whether it needs more water. Then knead for 5–8 minutes, once safe to handle. The rough dough should become smooth and pliable; a little tackiness is normal, but it should release from your hands without leaving a sticky paste.
For dough that stays dry and crumbly, knead in the reserved warm water 1 tsp (5 ml) at a time, up to 20 ml. If it feels sticky, allow a few minutes for the flour to hydrate before dusting lightly with extra flour. See the dough texture comparison if you are unsure which adjustment is needed.
Cover and rest for 30 minutes. A small piece should then roll thinly without immediately shrinking. If it pulls back under the rolling pin, cover it for another 10–15 minutes.
4. Try two pierogi before making the rest
If you’re making a large batch for the first time, try two pierogi before shaping the rest. Roll two 8 cm (3⅛-inch) circles about 2 mm thin, add a rounded spoonful of filling to each (roughly 16–18 g), fold and pinch the clean edges shut.
Boil gently in salted water until they float, then cook about 2–3 minutes longer. Cut one through its thickest seam: the wrapper should be tender and cooked all the way through, without a dense, doughy ridge. Taste the other and adjust the seasoning or rolling thickness as needed. If you used the main pot, turn it off until the rest are ready.
5. Roll, fill and seal the remaining pierogi
Work with one portion of dough at a time and keep the rest covered. Roll, fill and seal each circle before its edges dry.
Rolling and Cutting Pierogi Wrappers
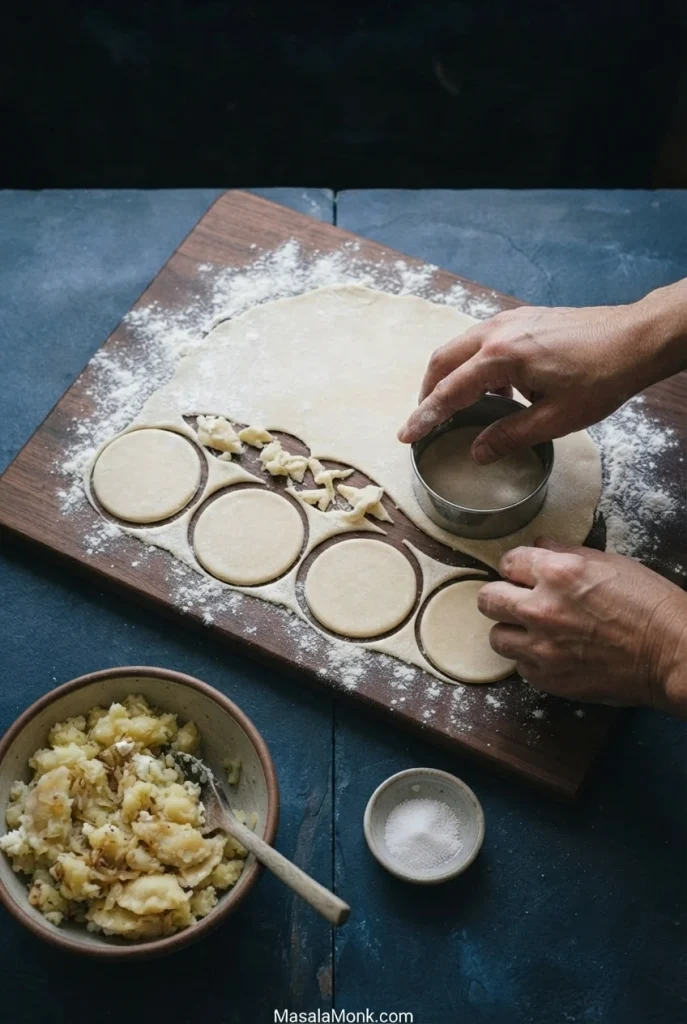
Divide the dough into three pieces. Roll one portion about 2 mm (0.08 inch) thin and cut 8 cm (3⅛-inch) circles. Dust lightly, keep unused dough covered, and let gathered scraps rest for 10–15 minutes if they resist rerolling. Each circle should lift without tearing.
Choosing the Right Filling Portion
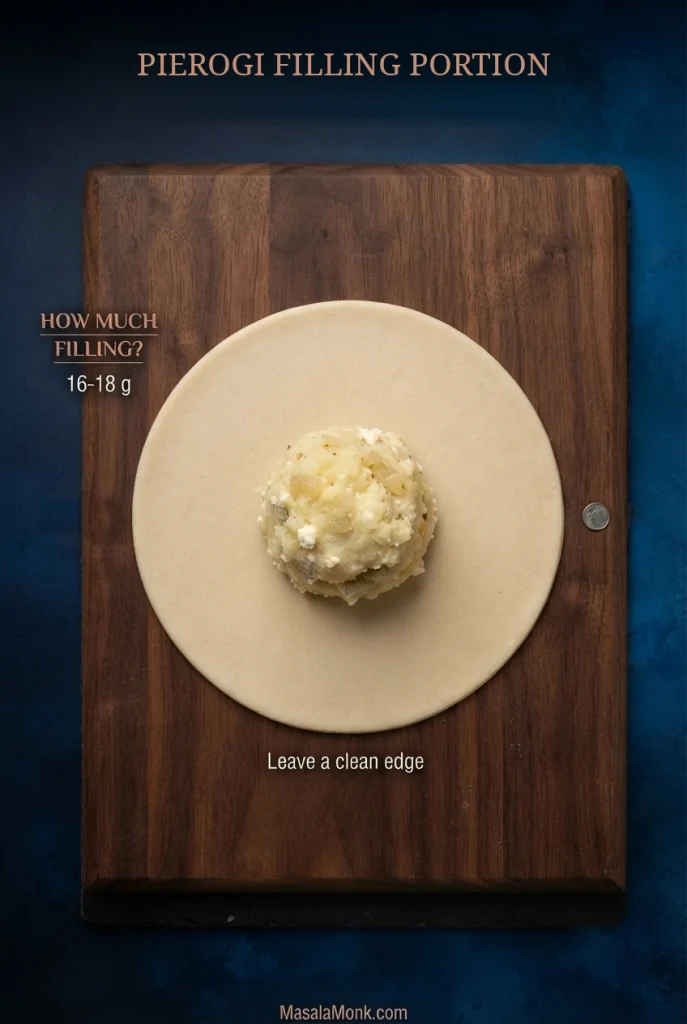
Place approximately 16–18 g filling in the center as a low mound, leaving a clean border. If the wrapper edges cannot meet comfortably, remove a little filling rather than stretching the dough.
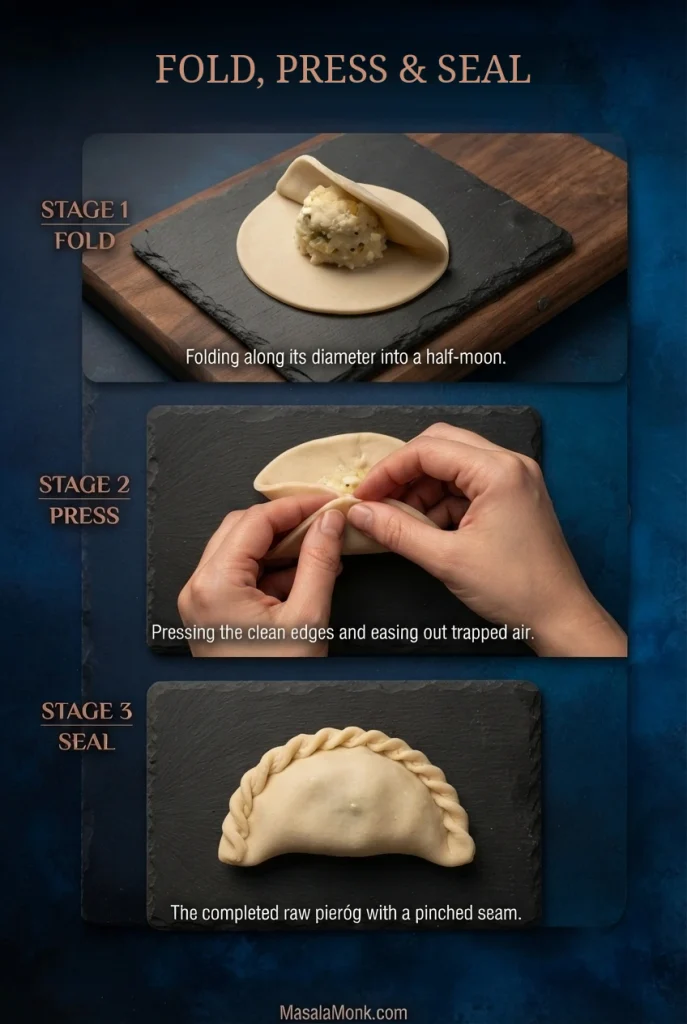
How to Fold and Seal Pierogi
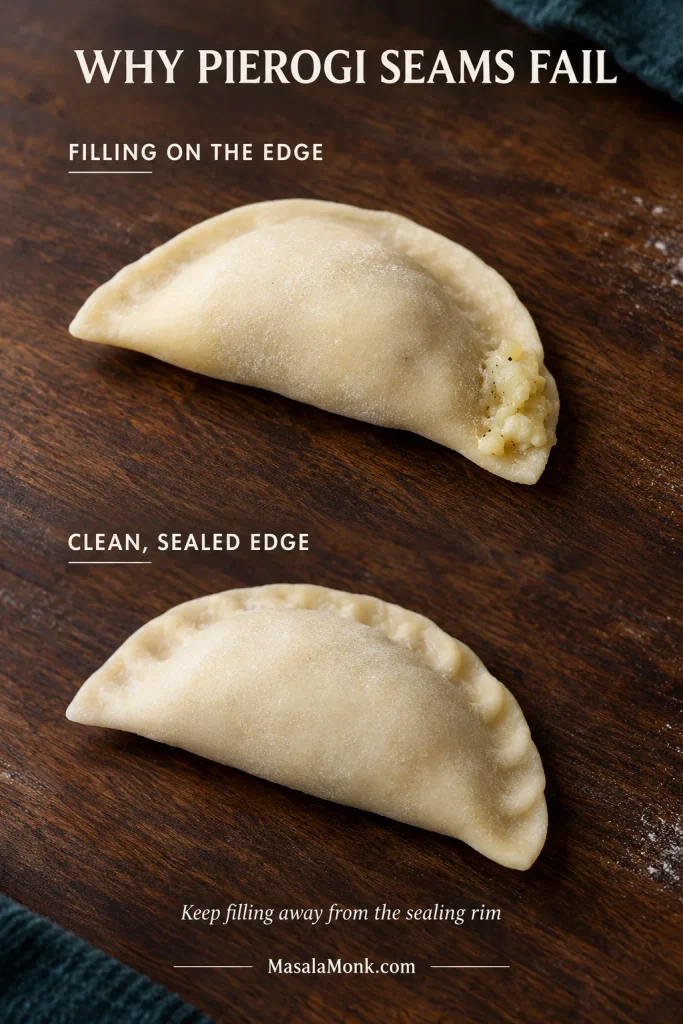
Fold each circle into a half-moon and ease out trapped air. Starting at one end, pinch the clean rim in small overlapping presses along the entire curve. Moisten a dried edge with only a trace of water if needed, then set the sealed pieróg apart on a prepared tray.
Is an edge still opening? Compare a filling-contaminated seam with a clean one before you boil the batch.
6. Boil homemade pierogi in batches
Fresh pierogi of this size usually cook for 2–3 minutes after floating. Cut one through its thickest seam to confirm the wrapper is tender all the way through. Thicker pierogi may take longer.
Bring about 3 L (3.2 US quarts) water and 2 tsp fine salt to a boil in the main pot, or return it to a boil after the test. Lower in a few pierogi at a time—often 8–12 in a large pot, but enough room to move matters more than the number. Gently sweep a slotted spoon under them once so none stay stuck to the bottom.
Keep the water at a gentle boil. Lift the cooked pierogi with a slotted spoon, drain and spread them in a shallow buttered dish. Top up the water between batches as needed.
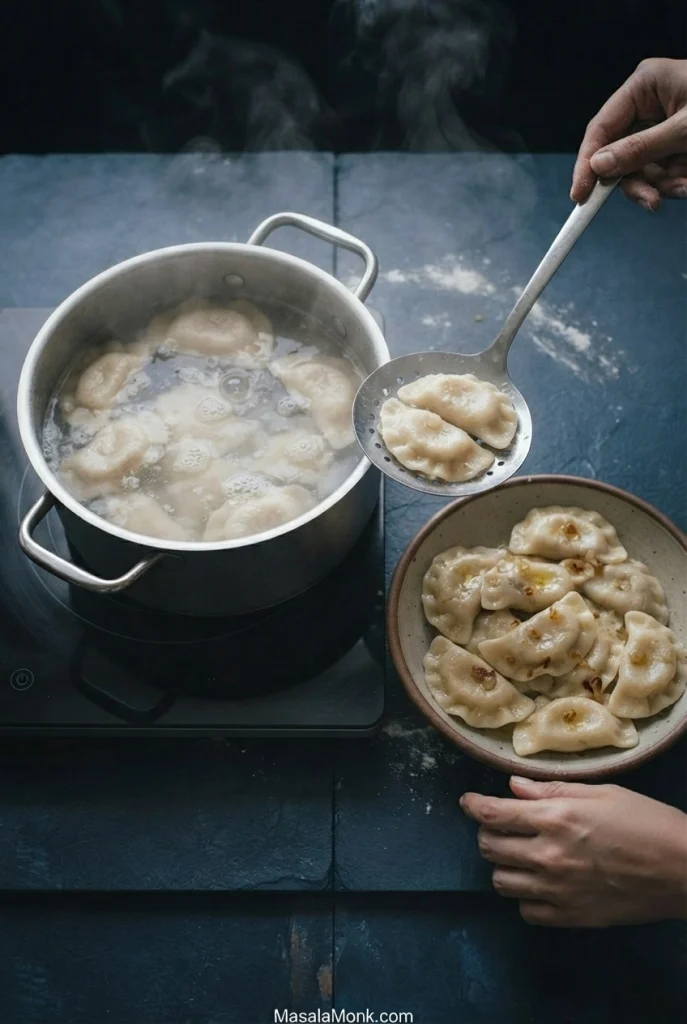
For a group meal, cover the earlier potfuls loosely while the last batches cook. If they cool, rewarm gently in a covered skillet with a splash of water just before serving. For a smaller meal, bring each potful to the table as it finishes.
7. Enjoy them boiled or pan-fry for golden edges
Boiled pierogi need little more than melted butter and onions. Their thin wrappers are at their softest straight from the pot.
For a richer finish, drain the already boiled pierogi well. Brown in butter in a single layer over medium heat, about 2–3 minutes per side, turning when the underside releases easily. The edges develop light crispness while the potato filling stays soft. Brown a few or work through the batch in several rounds.
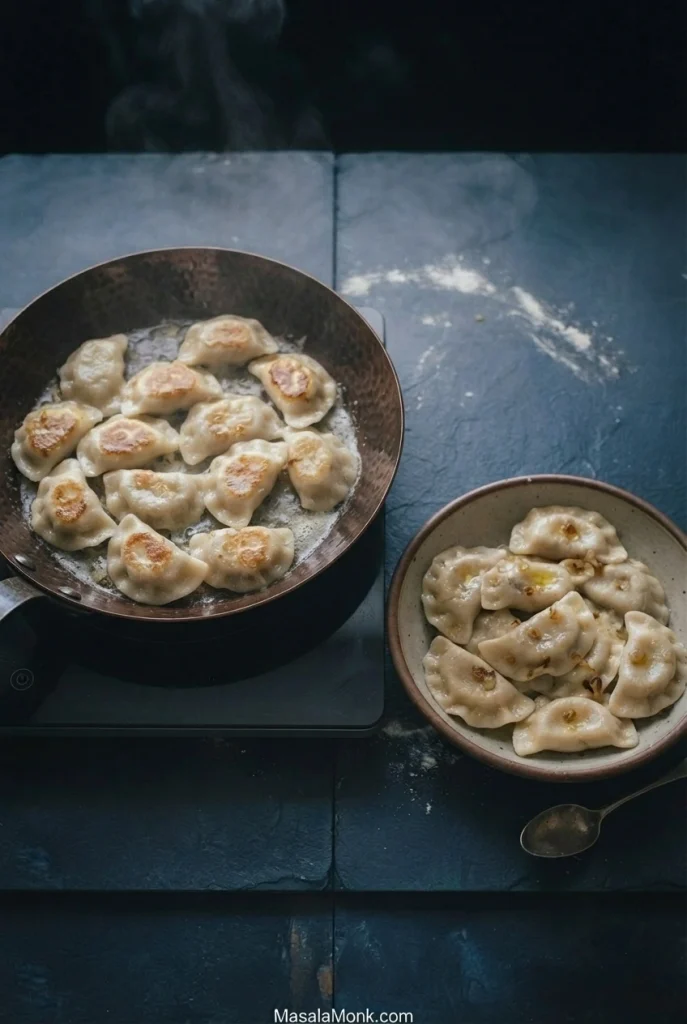
Cooking some pierogi for later? Go to the make-ahead and freezing guide.
What to Serve with Pierogi
For the butter-and-onion topping, cook the extra onions with their measured butter over medium-low heat until soft and golden—about 15–20 minutes for two medium onions, less for one small onion. Do this during the dough rest or before the serving batches, then warm briefly if needed and spoon over the pierogi.
Sour cream adds tang; dill or chives bring freshness. Some Polish versions are served with bacon or pork cracklings. For a different, richer topping, try creamy mushroom sauce.
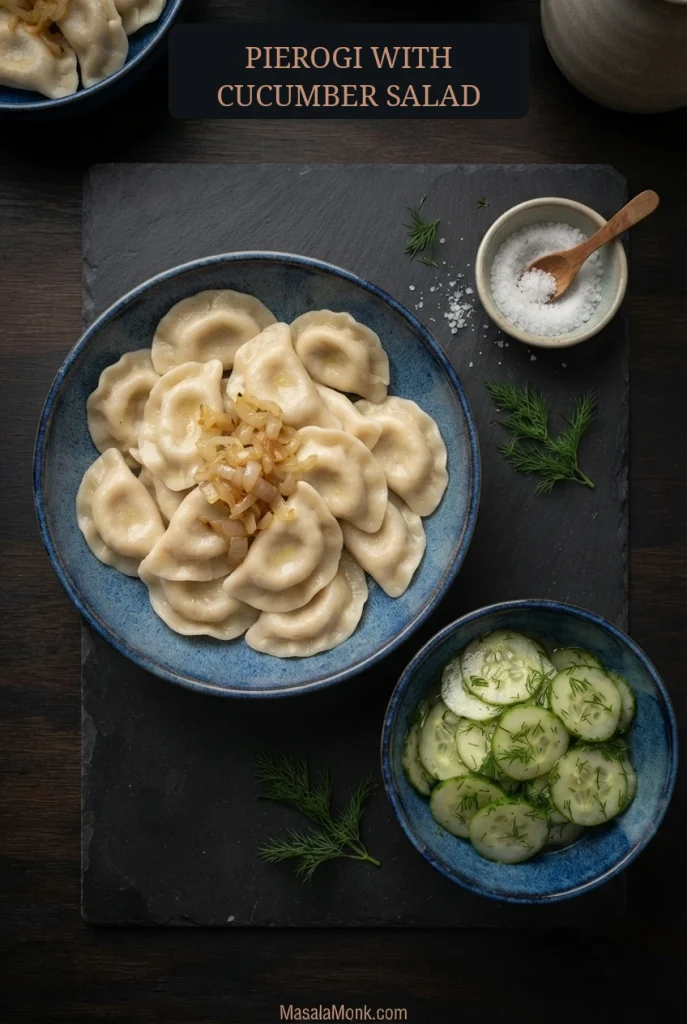
The vinegar and crunch of a cucumber salad with dill are especially good beside the rich filling.
Serve the cucumber salad in its own bowl rather than spooning its dressing over the tender dumplings. That way, readers can combine crisp salad and buttery pierogi on the plate without soaking the wrappers.
Common Pierogi Problems and How to Fix Them
| What happened | Most useful diagnosis and next move |
|---|---|
| Filling is too wet | Chill briefly. If it still slumps, fold in reserved plain mash; otherwise steam-dry another potato. Avoid flour, which can make the filling pasty. |
| Seams will not seal | Clear the rim and pinch firmly. If an edge dried out, dampen it lightly; rework cracked, brittle circles rather than forcing them shut. |
| Filling leaks in the pot | Check for open seams or tears underneath. Reduce filling, lift gently and keep the boil calm. |
| Dough shrinks when rolled | Cover and rest 10–15 minutes, especially after rerolling scraps. |
| Dough is sticky | Rest to hydrate, then dust lightly. Avoid handfuls of extra flour. |
| Dough cracks or feels stiff | Crumbles throughout? Add warm water by the teaspoon. Springs back? Rest covered. Only the rim dry? Dampen that edge lightly. |
| Wrappers are thick or chewy | Roll thinner and check the thickest seam for doneness. Excess flour toughens the dough. |
| Filling tastes bland | Potato and fresh cheese are mild. Taste the finished filling and adjust salt or pepper before shaping more. |
| Raw pierogi stick to the tray | Use lightly floured parchment, leave space between pieces and lift carefully with a thin spatula. |
| Cooked pierogi stick together | Drain, spread in a shallow dish and coat lightly with butter; don’t pile them up wet. |
| Pan-fried pierogi tear | Drain thoroughly, use a heated skillet and let the underside brown before turning. |
When Pierogi Filling Is Too Wet
The comparison shows loose filling spreading while a better-balanced scoop holds together. Judge it once cool: softness and free liquid are different problems.
Dry, Sticky and Ready Pierogi Dough
Use the three dough examples to identify cracking, excessive stickiness or the pliable middle ground. For the correct adjustment, return to the hot-water dough method.
Why Pierogi Seams Fail to Close
Filling caught on the rim can interrupt the seal even when the dumpling looks neatly folded. Compare the two examples, then review the fold-and-seal technique if needed.
Back to contents · Return to the boiling method.
Make Ahead, Freeze and Reheat Pierogi
Prepare the filling and dough ahead
Make the filling a day ahead, cool it promptly and refrigerate covered. The dough can also be wrapped tightly and refrigerated overnight; let it become pliable before rolling. For a bigger head start, shape the pierogi and freeze them raw rather than holding full trays in the fridge overnight.
Can you freeze pierogi before boiling?
Yes—freeze freshly shaped, uncooked pierogi individually, then bag them and boil directly from frozen. There is no need to thaw them first.
Raw pierogi still contain uncooked dough, which is why they need boiling straight from frozen—not just a quick warm-up. The freezing stages below show how to keep the shapes separate until they are firm enough to pack.
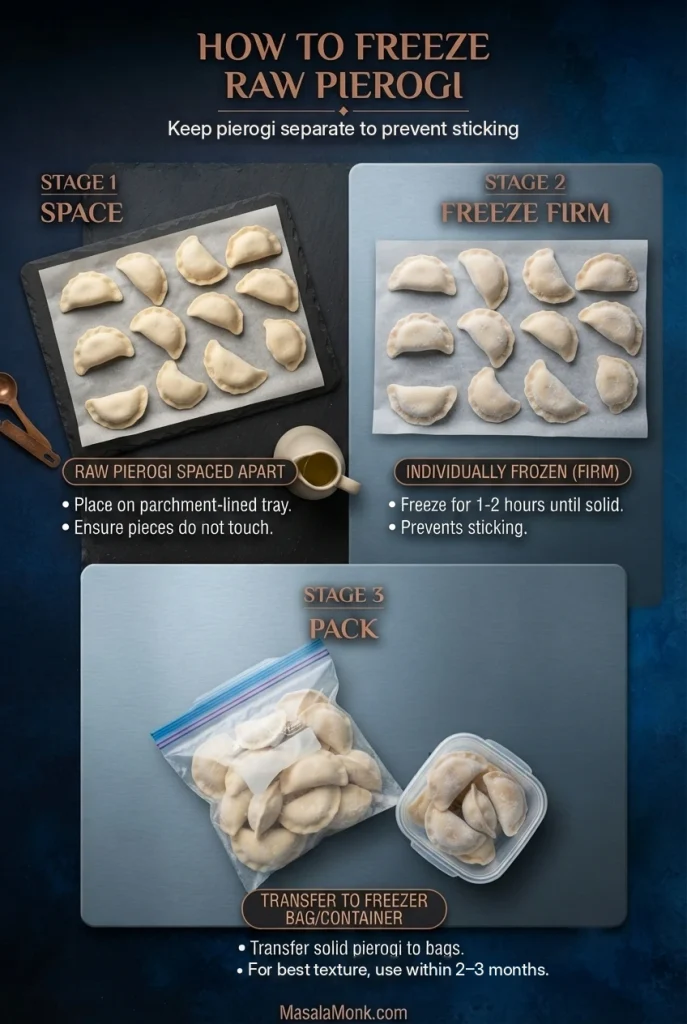
- Separate: lay pierogi apart on lightly floured parchment-lined trays, with sound seals and no pieces touching.
- Freeze and pack: freeze until individually firm, usually around 1–2 hours depending on the freezer. Transfer to labeled freezer bags or airtight containers without crushing. For best texture, use within about 2–3 months (a quality guideline).
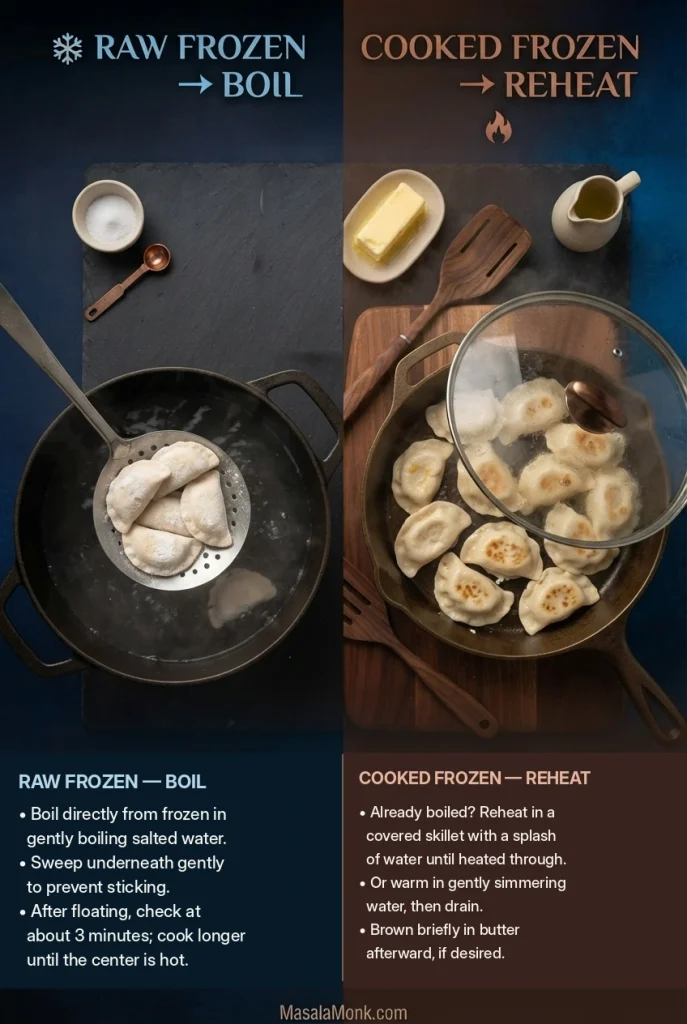
- Cook from frozen: use smaller batches in gently boiling salted water and let the simmer recover. After the dumplings float, start checking at about 3 minutes and allow longer as necessary. Cut one open: both the wrapper and center should be hot, with no icy or cold middle.
Freeze cooked pierogi and reheat
To freeze cooked pierogi, drain well, coat lightly with butter or oil, and cool promptly in a shallow layer. Arrange them apart on a tray until frozen firm, then pack in freezer-safe bags or containers.
Reheat from frozen or after thawing in the refrigerator. Warm in a covered skillet with a splash of water or briefly in gently simmering water until heated through. Drain and brown in butter if you like. Previously boiled pierogi need reheating, not the full raw-dough cooking time.
Refrigeration and food safety
Keep perishable filling and cooked pierogi refrigerated at 4°C (40°F) or below. Refrigerate promptly—within 2 hours at ordinary room temperature, or 1 hour when the air is hotter than 32°C (90°F). Divide leftovers into shallow containers so they cool quickly.
Use refrigerated cooked leftovers within 3–4 days, and reheat leftovers to 74°C (165°F). Keep frozen food at about −18°C (0°F). See FoodSafety.gov’s food-safety guidance for safe cooling, refrigeration and reheating.
Return to the step-by-step method.
Other Pierogi Fillings and Practical Questions
Other Polish pierogi fillings include sauerkraut and mushrooms, meat, sweet cheese and fruit. Those fillings need their own seasoning and moisture adjustments.
Polish dough recipes vary; some use eggs, while this one uses hot water and oil. Potato-and-cheddar pierogies, common in parts of North America, are a different filling style.
Can I use leftover mashed potatoes?
Yes, provided the mash is not watery or heavily enriched with milk or cream. Weigh 500 g, account for any salt and butter already added, and check that the combined filling can hold its shape before you wrap it.
How many pierogi should I make per person?
Plan on about 7–10 medium pierogi per adult for a main course, adjusting for appetite and sides. A batch of 55–60 usually serves around 6–8 people.
How do I make a half batch?
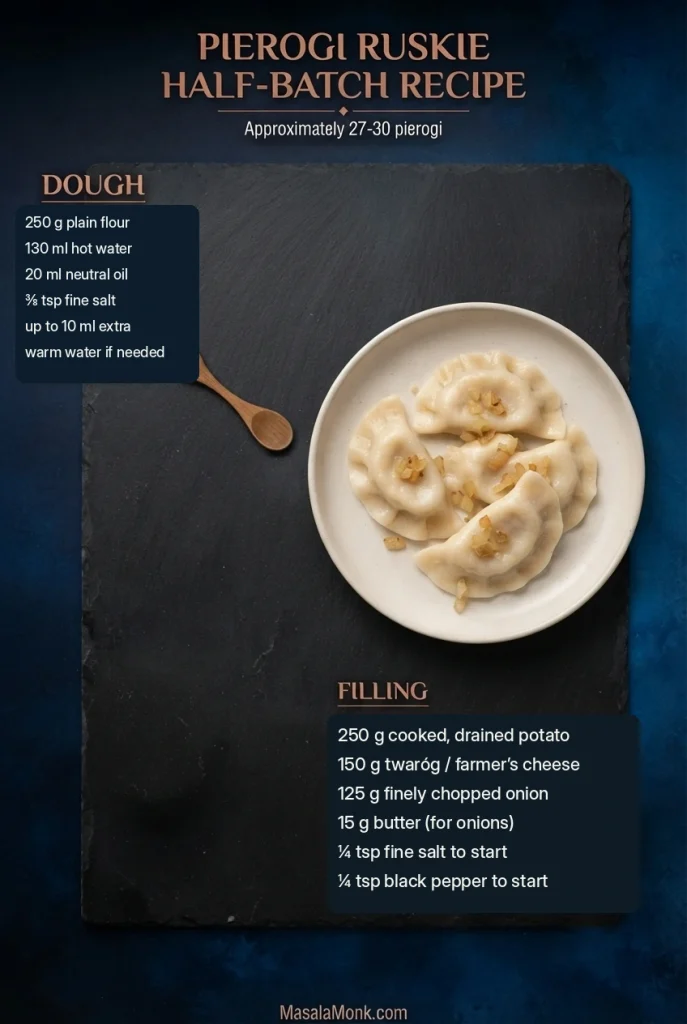
Use 250 g flour, 130 ml hot water (about ½ US cup + 2 tsp), 20 ml oil (1 tbsp + 1 tsp) and ⅜ tsp fine salt (¼ tsp + ⅛ tsp) for the dough. Keep up to 10 ml extra water available if needed. Rest the dough for the same 30 minutes.
For the filling, use 250 g cooked, drained potato, 150 g twaróg, 125 g prepared onion and 15 g butter. Start with ¼ tsp salt and ¼ tsp pepper, then adjust by taste. Expect approximately 27–30 pierogi. If you are cooking for more people, return to the full-batch quantities.
What can I do with extra filling or dough?
Firm extra filling can be shaped into little patties and pan-fried until hot throughout, or used in potato croquettes. Roll leftover dough into thin strips, cut into short pieces and boil until tender.








