
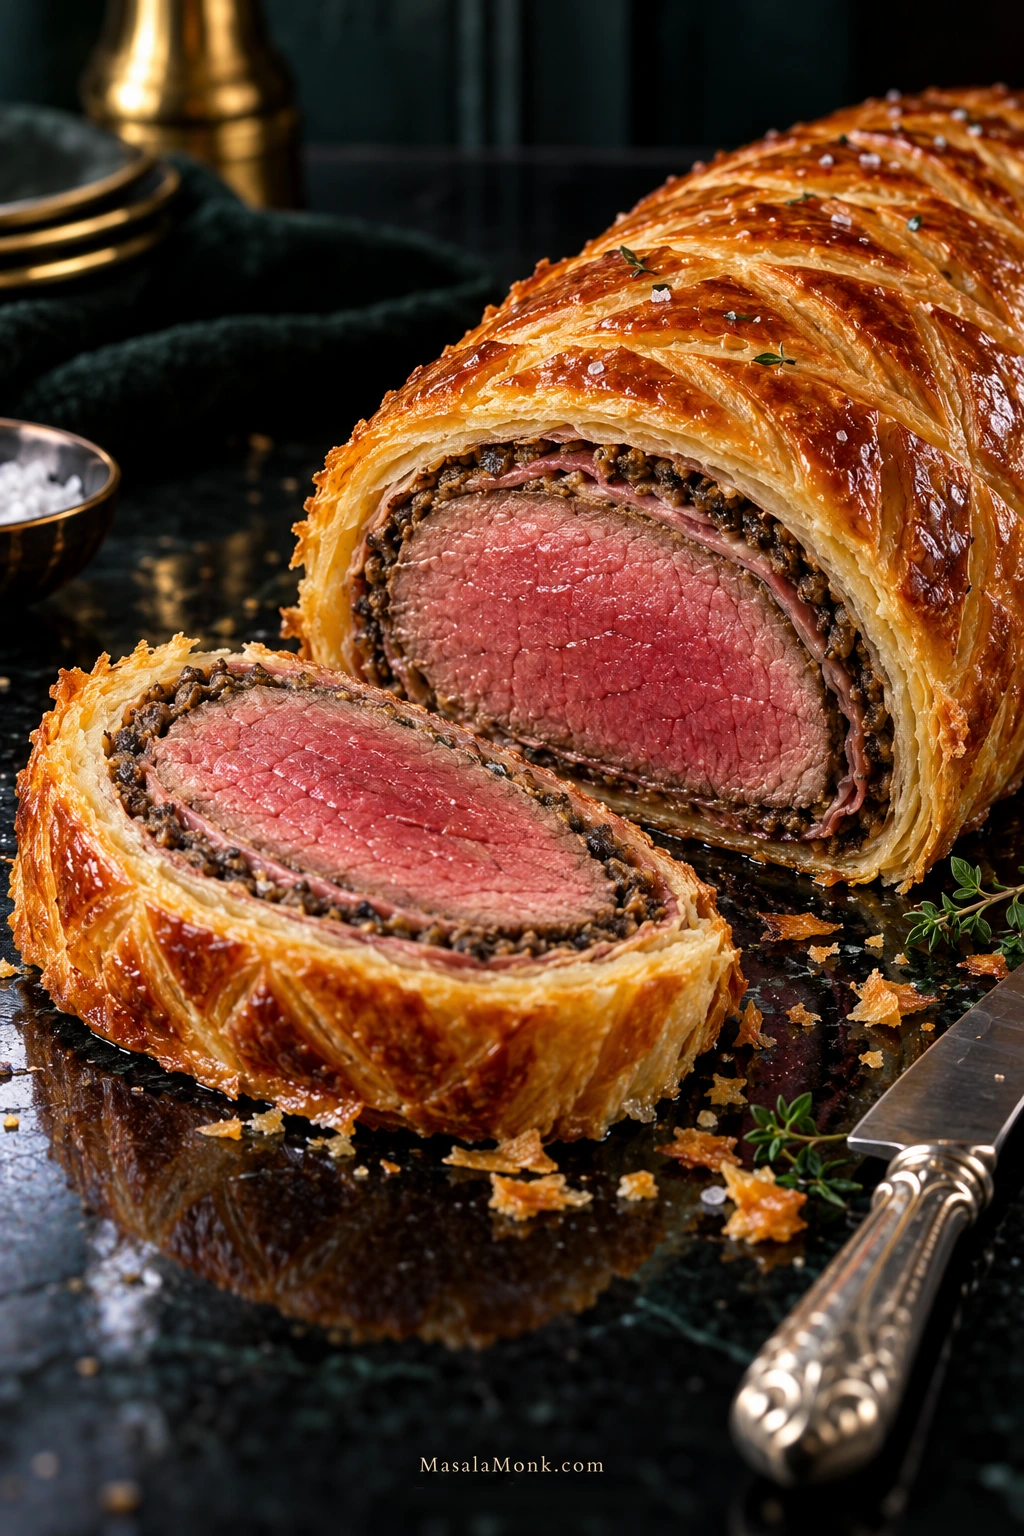
Cut into a good Beef Wellington and three things should happen at once: crisp golden pastry breaks into flakes, the mushroom layer stays close to the meat, and the beef in the centre is still tender and pink.
Beef Wellington is beef tenderloin or fillet wrapped in savoury layers inside puff pastry, then baked whole and sliced. Mushroom duxelles is a familiar part of the classic construction, although the layers around the beef vary from recipe to recipe.
It is also the sort of dish that makes people nervous. Tenderloin is expensive, the centre disappears once you wrap it, and Wellington is often made for a dinner where you really care how it turns out.
And when it works, it earns the centrepiece treatment. This is one of those dishes worth bringing to the table whole—the suspense is part of serving it.
The challenge is that the beef and pastry do not cook on the same clock. The pastry needs enough time to bake underneath; the tenderloin cannot wait forever while that happens. Most of the control comes earlier: cool the beef, cook the water out of the mushrooms, keep the pastry cold, trim the bottom seam, then use a thermometer once it reaches the oven.
Beef Wellington Recipe
This version makes one whole Wellington for about six people using a 900 g / about 2 lb centre-cut tenderloin, mushroom duxelles, Dijon mustard, prosciutto and all-butter puff pastry.
For This Wellington
- Serves: about 6
- Total time: about 3 hours; allow a little longer the first time
- Hands-on time: about 1 hour
- Make ahead: yes — complete the beef, duxelles and prosciutto wrap the day before; add the puff pastry on baking day
- Oven: 220°C / 425°F conventional or about 200°C / 400°F fan
- Rest: about 15 minutes
Ingredients
For the Beef
- 900 g / about 2 lb centre-cut beef tenderloin or beef fillet, trimmed of silverskin
- 7 g fine sea salt, or about 1¼ teaspoons; volume varies with crystal size
- 1 teaspoon freshly ground black pepper
- 1 tablespoon / 15 ml neutral high-heat oil
- 2 tablespoons / about 30 g Dijon mustard
For the Mushroom Duxelles
- 500 g / about 1 lb cremini, chestnut or button mushrooms
- 2 small shallots, about 60 g, finely chopped
- 2 garlic cloves, finely chopped
- 1 tablespoon / 15 ml olive oil
- 1 tablespoon / 14 g unsalted butter
- 2 teaspoons fresh thyme leaves
- 1.5 g fine sea salt, or about ¼ teaspoon
- ½ teaspoon freshly ground black pepper
For Wrapping
- 100–125 g / 3½–4½ oz thinly sliced prosciutto, usually 8–10 slices
- 450 g / about 1 lb all-butter puff pastry, thawed but cold
- A little flour, for rolling
- 1 large egg
- 1 tablespoon / 15 ml water
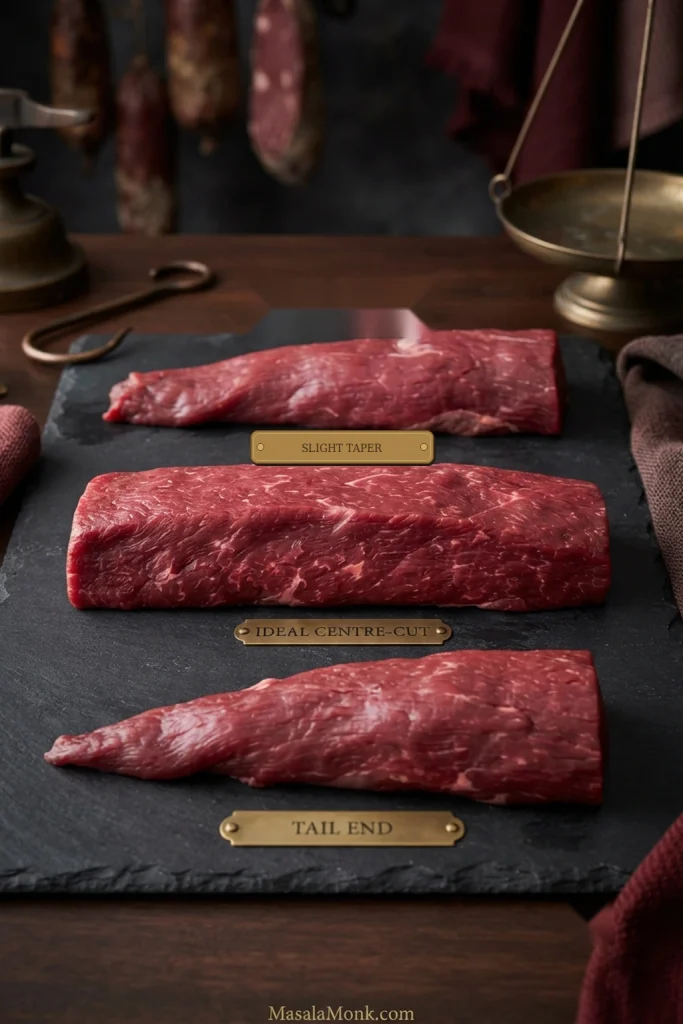
Choosing the beef: buy an evenly thick centre-cut tenderloin or fillet if you can. A small taper is manageable, but avoid a piece that narrows sharply into a long thin tail.
Mustard: Dijon gives a balanced sharpness without taking over. English mustard works too, but it is considerably hotter; a thinner coating of 15–20 g is plenty for a tenderloin this size.
Equipment: a heavy skillet, a wide pan for the mushrooms, kitchen twine, plastic wrap, a rolling pin, parchment, a heavy baking sheet, a pastry brush and a reliable meat thermometer. A leave-in probe is especially convenient, but an instant-read thermometer works too. A food processor is handy, but it isn’t essential.
Start with the Beef
- Trim away any silverskin and pat the tenderloin dry. If one end narrows slightly, fold it underneath and tie the roast at intervals so it holds a more even shape. Season all over with the salt and pepper.
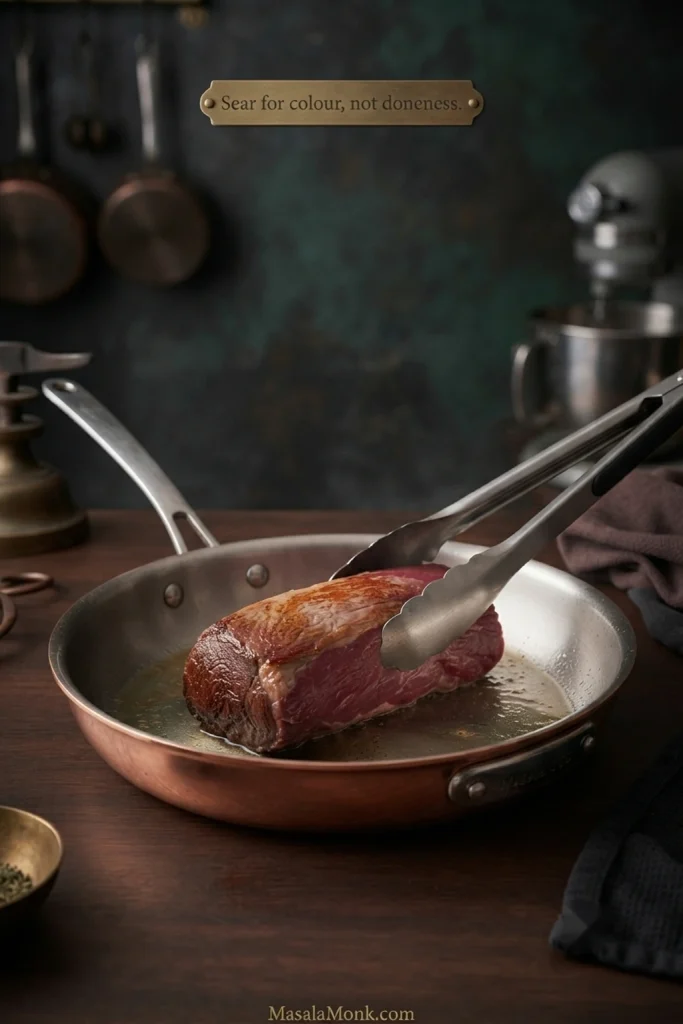
- Sear for colour, not doneness. Get a heavy skillet very hot, add the oil and brown the beef on all the long sides. Give both ends a quick colour too. Four to five minutes total is usually enough for a piece this size.
- Brush the warm beef with Dijon. Leave the twine in place while it cools, then refrigerate for about 30 minutes. Once the beef has firmed up and is no longer warm, remove the twine just before the first wrap.
The beef doesn’t need to look restaurant-perfect. You want good colour outside while the centre remains largely untouched.
Cook the Mushrooms Until the Pan Is Dry
- Finely chop the mushrooms. A food processor is quick, but use short pulses. Stop at small pieces. If they turn to slurry, you have gone too far.
- Heat the olive oil and butter in a wide skillet over medium to medium-high heat. Cook the shallots for about 2 minutes, then add the mushrooms, salt and pepper.
- The mushrooms will collapse and release a surprising amount of water. Keep going. Once most of the obvious liquid has disappeared, add the garlic and thyme.
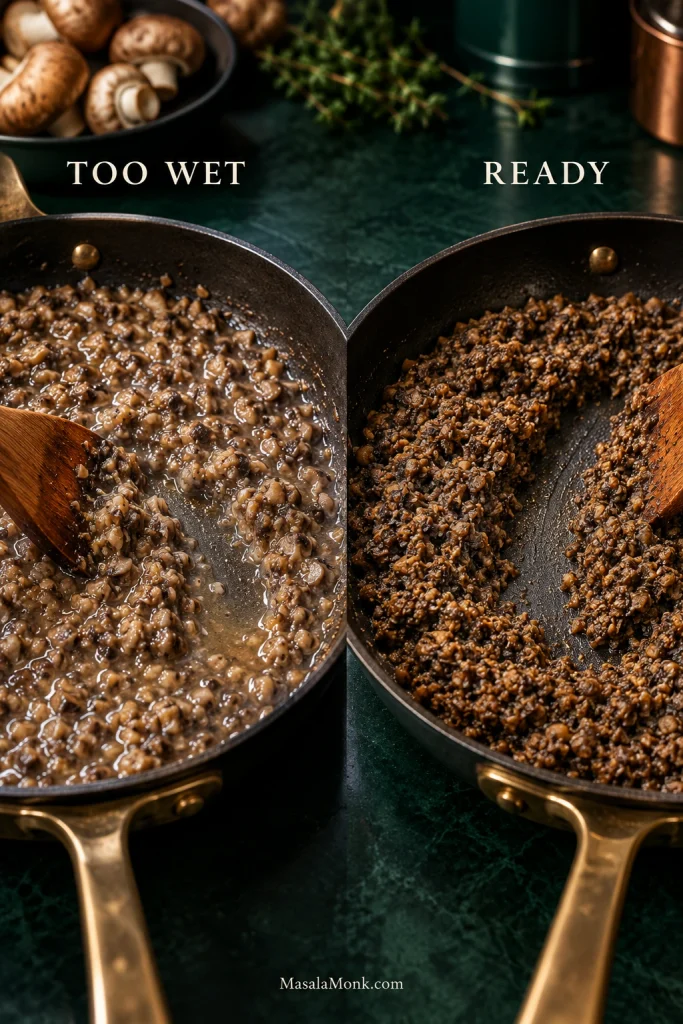
- Scrape a line through the mushrooms with a spatula. If watery liquid rushes straight back into the gap, keep cooking. When the line stays mostly clear and the mushrooms are dark, concentrated and still spreadable, they are ready. This usually takes 12–18 minutes, sometimes longer.
- Spread the duxelles over a plate or tray so it cools quickly. Do not wrap warm mushrooms around the beef.
The raw mushroom pile looks excessive at first. It won’t stay that way. Once the duxelles is cooling, the wettest part of the recipe is behind you.
The First Wrap
- Lay 45–50 cm / 18–20 inches of plastic wrap on the counter. Arrange the prosciutto in overlapping rows with no obvious gaps, making a rectangle large enough to surround the tenderloin.
- Spread the cold duxelles evenly over the prosciutto. Put the chilled beef across the lower third. Lift the plastic wrap and roll the beef away from you, using the wrap to pull the prosciutto and mushrooms tightly around it. Press out obvious air pockets without squeezing the filling out of the sides.
- Twist the ends of the plastic wrap until the package becomes a snug cylinder. Refrigerate for about 30 minutes.
It can look a little awkward before the plastic tightens everything up. That’s fine. After chilling, the package should hold its shape.
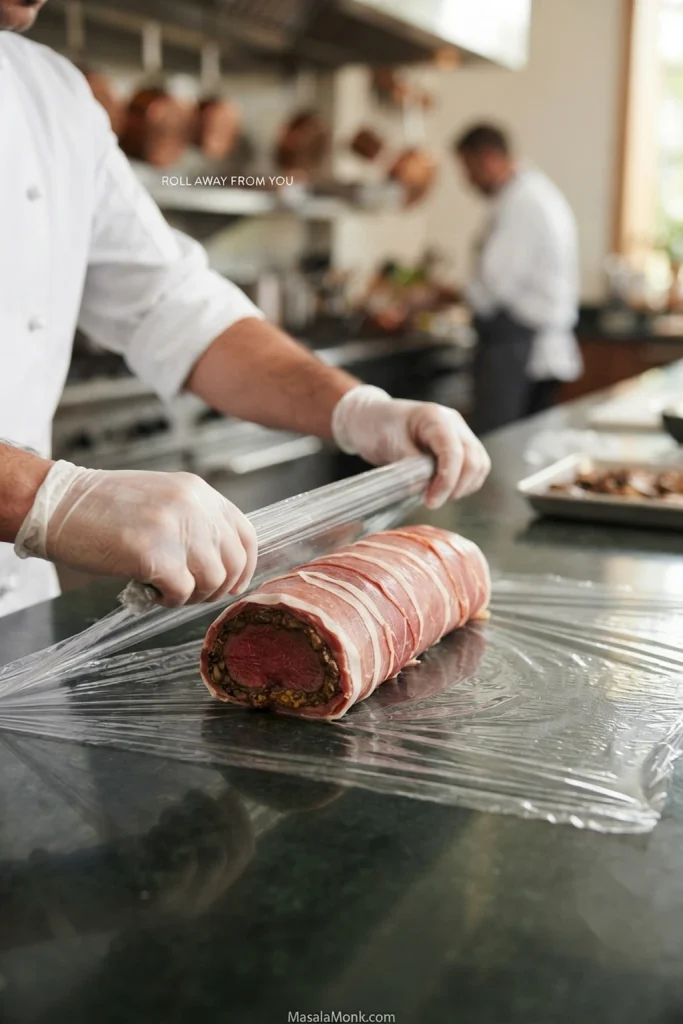
This is a useful pause: clear the counter, wash the mushroom pan and get the pastry ready.
Now the Puff Pastry
- Roll the cold pastry on a lightly floured surface to 3–4 mm / about ⅛ inch. A rectangle about 40 × 35 cm / 16 × 14 inches is a useful starting point, but fit it to the beef in front of you.
- If your pastry comes in smaller sheets, overlap two edges slightly and roll across the join just enough to seal it. Keep that join away from the final bottom seam if you can.
- Beat the egg with the water. Unwrap the beef, set it on the pastry and lightly brush the joining edges with egg wash. Bring the pastry around the beef and seal with 2–3 cm / about 1 inch of overlap.
- Trim the excess before closing the ends. Turn the Wellington seam-side down onto parchment and chill for another 20–30 minutes.
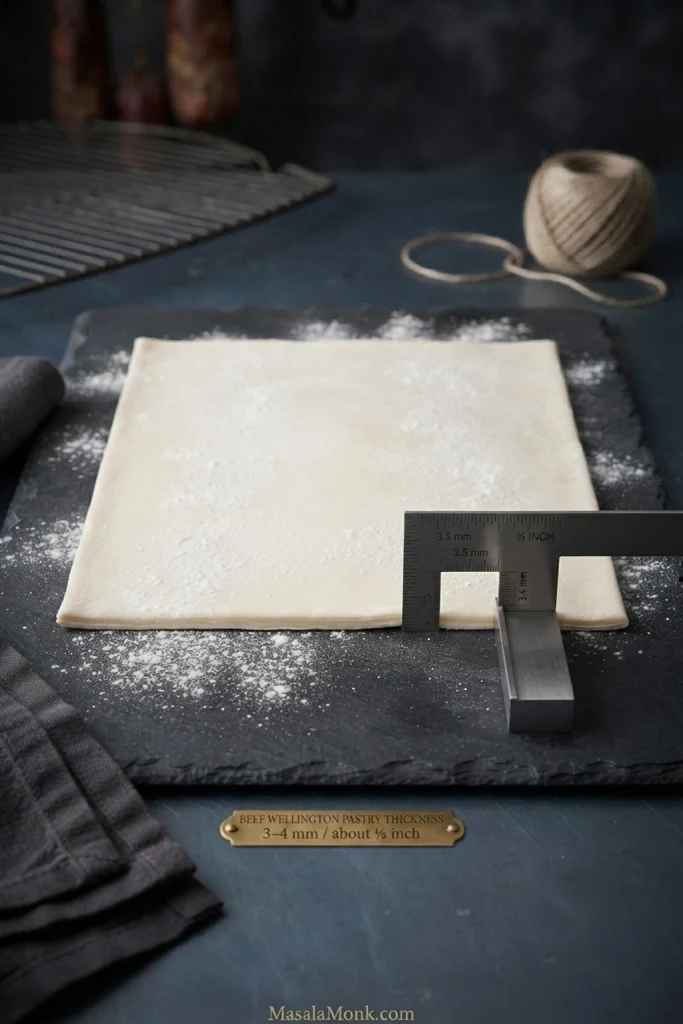
Pastry that starts feeling shiny, floppy or greasy needs ten minutes back in the refrigerator. Cold pastry is much easier to wrap cleanly.
Look underneath before it goes back into the fridge. One tidy seam is enough. Once the wrapped Wellington is chilling again, most of the hands-on work is done.
Bake and Watch the Centre
- Set an oven rack in the middle position. Heat the oven to 220°C / 425°F conventional or about 200°C / 400°F fan. Put a heavy baking sheet in the oven while it preheats and give the metal time to get properly hot.
- Brush the cold Wellington with egg wash. Score the surface lightly if you want a pattern, but do not cut deeply through the pastry.
- Transfer the Wellington, still on its parchment, to the hot sheet. Using a leave-in probe? Insert it through one short end before baking so the tip reaches the centre of the tenderloin. Using an instant-read thermometer? Start checking through the same end at about 25 minutes. A Wellington this size will often finish somewhere around 30–45 minutes.
- For medium-rare, use the reference below instead of relying on one fixed pull temperature. Once the beef is hidden inside the pastry, the probe and the crust are the two things you can still read.
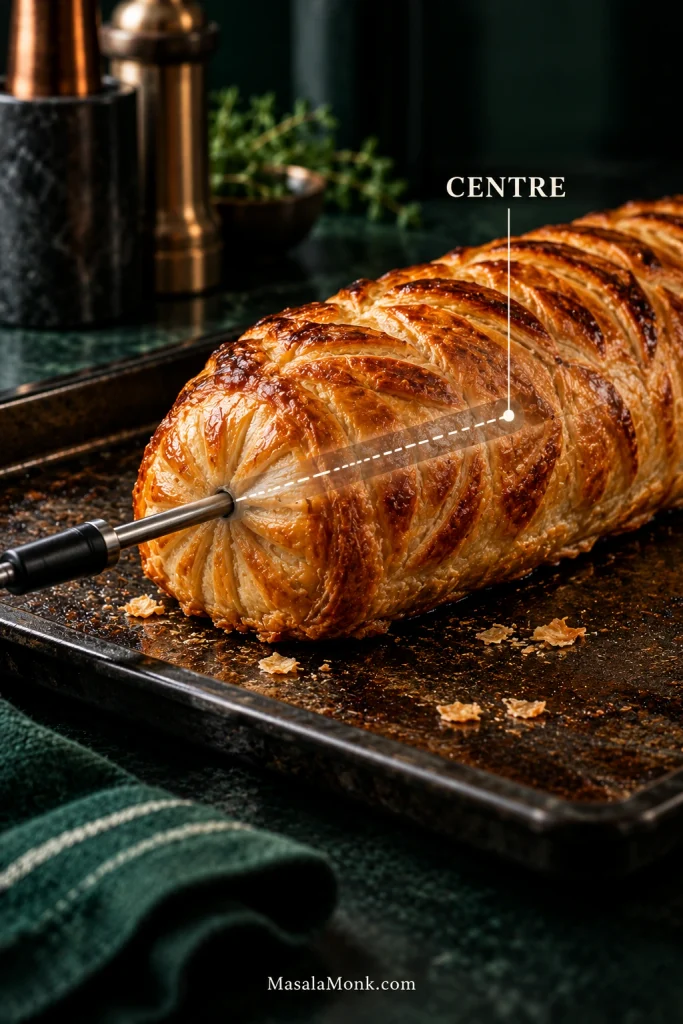
Medium-Rare at a Glance
| For this 900 g / 2 lb Wellington | Guide |
|---|---|
| Oven | 220°C / 425°F conventional or about 200°C / 400°F fan |
| Timing | Start checking at about 25 min; many finish around 30–45 min |
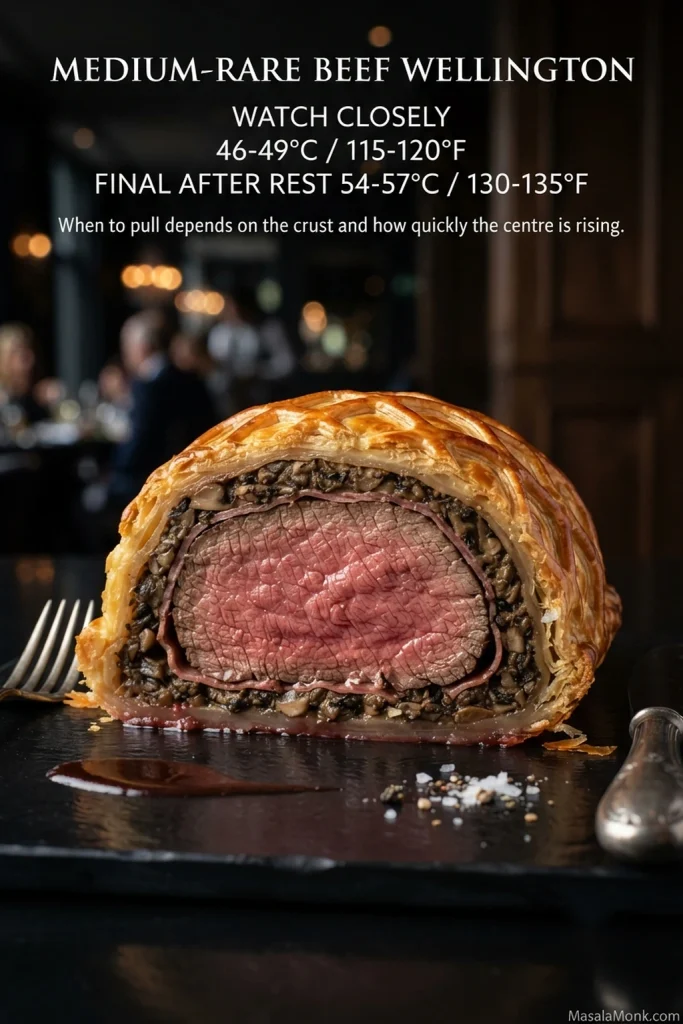
| Watch zone — not a fixed pull temperature | 46–49°C / 115–120°F |
| Culinary final medium-rare | 54–57°C / 130–135°F after resting |
| Rest | About 15 minutes |
At 46–49°C / 115–120°F, start paying close attention. Whether it comes out then depends on the pastry and how quickly the centre is rising. Once the crust is fully baked and the centre is approaching your target, take the Wellington out before it reaches the final temperature you want, then monitor the rise during the rest.
A leave-in probe makes that easy because you can keep watching as the Wellington rests. With an instant-read thermometer, check again after a few minutes if you need to see where the centre is settling.
Safety note: If you’re following official U.S. food-safety guidance rather than a culinary medium-rare target, FoodSafety.gov recommends at least 63°C / 145°F before removing whole beef steaks and roasts from the heat, followed by a rest of at least 3 minutes.
Give It a Proper Rest
- Move the Wellington off the hot baking sheet. A wire rack is useful because steam can escape underneath. Rest for about 15 minutes and keep an eye on the centre temperature if the probe is still in place.
- Slice with a long, sharp serrated knife using a gentle sawing motion. Aim for slices 2–3 cm / about 1 inch thick.
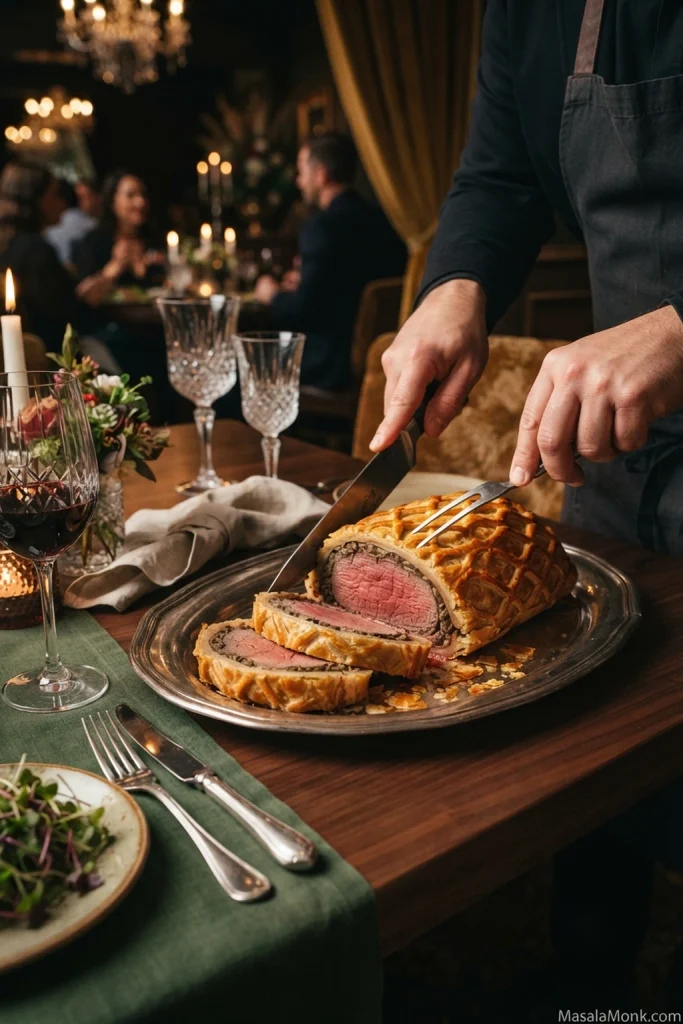
For the full centrepiece moment, bring the rested Wellington to the table whole and slice it there. The first slice is often the least tidy. That doesn’t tell you whether the Wellington is good.
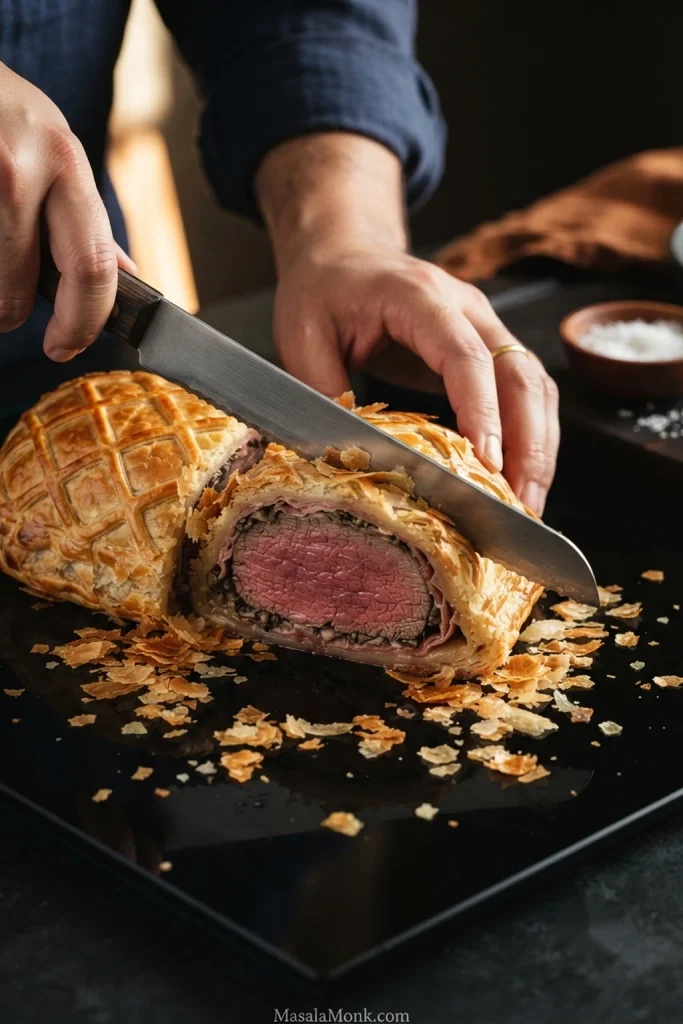
A small gap around the beef is normal too. Meat shrinks as it cooks. Large empty spaces are a different story, but a narrow ring doesn’t mean the Wellington failed.
Serve it while the pastry is still crisp. A red-wine or Madeira-style sauce and creamy mashed potatoes make a classic plate; something green or sharp keeps all that richness from becoming heavy.
What you want on the plate: deeply golden pastry, a properly baked underside, concentrated mushrooms hugging the beef, and a centre that has settled at the doneness you chose.
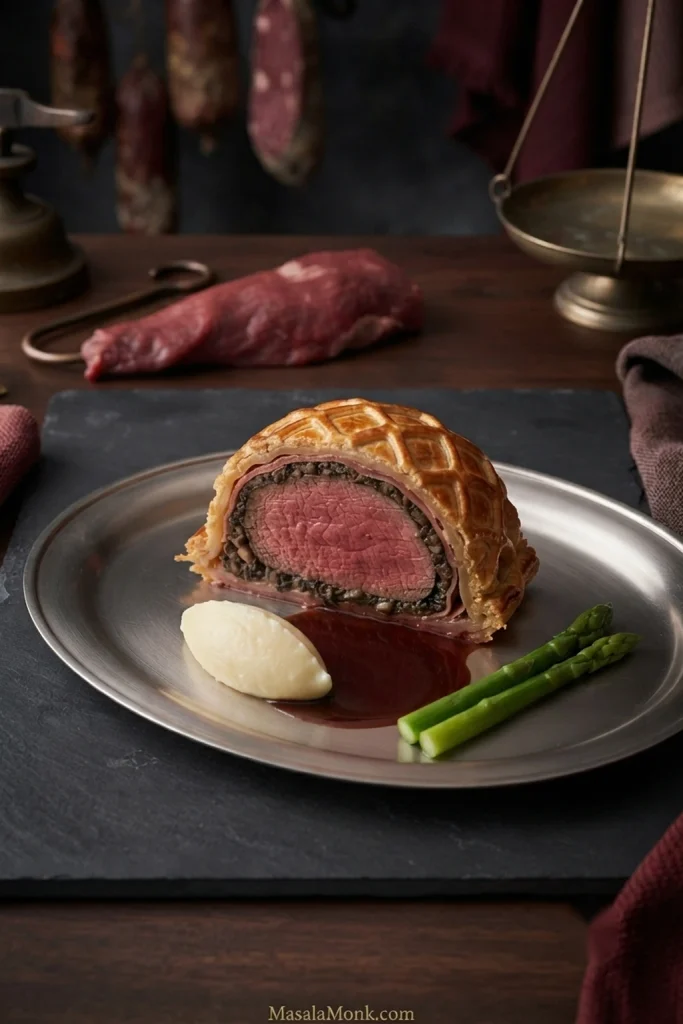
Beef Wellington Guide
The method above gives you the route. What follows explains what changes when the beef is a different shape, the mushrooms hold more water, the pastry behaves differently or the oven runs faster than expected.
- Why the Shape of the Beef Matters
- Dry Means No Free Water—not Dry Mushrooms
- The Bottom Seam Is Where Good Wellingtons Go Wrong
- Beef Wellington Cooking Time & Temperature
- Is the Bottom Wet—or Is It Raw?
- Troubleshooting Beef Wellington
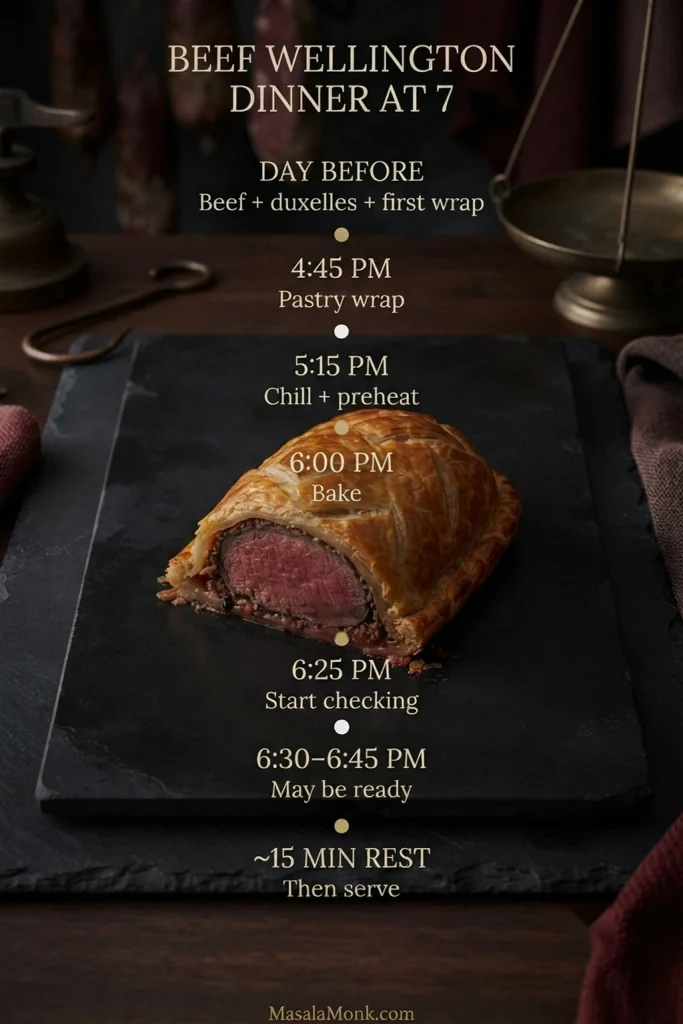
- Make-Ahead Beef Wellington: If Dinner Is at 7:00
- Beef Wellington Without Mushrooms—and Other Variations
- Storing and Reheating Leftovers
Why the Shape of the Beef Matters
Weight is the number printed on the label. Thickness is the number the oven cares about.
Two tenderloins can both weigh 900 g and cook at very different speeds. A long, narrow piece heats through faster than a short, thick one.
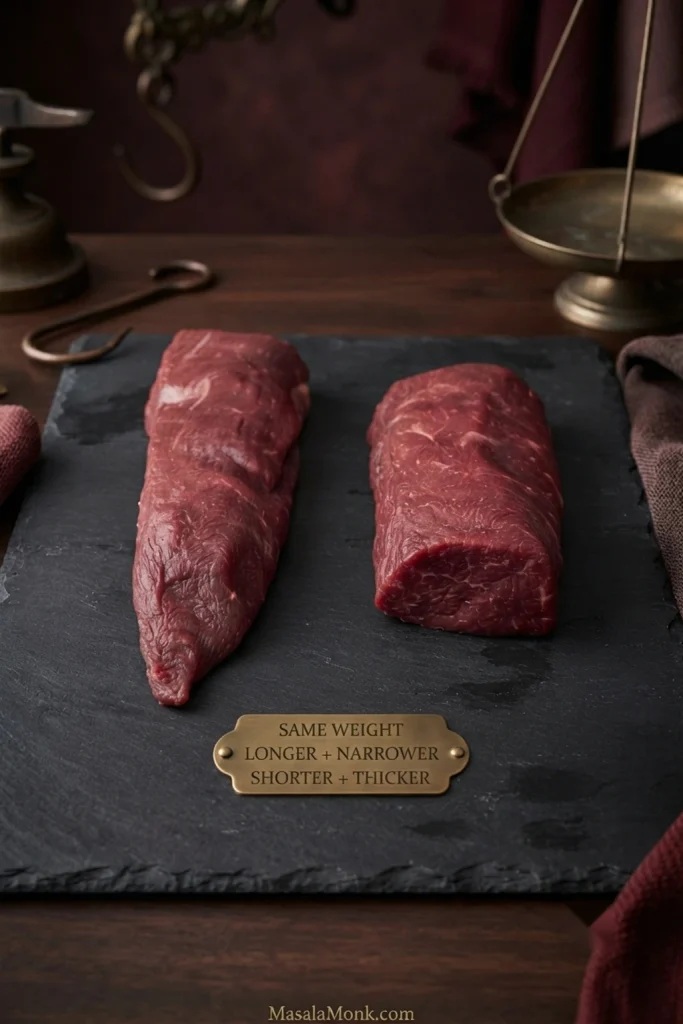
Centre-cut tenderloin avoids much of that problem because it is usually more even from one end to the other. A thin tail can move well past medium-rare while the thicker end is still catching up.
Ask the butcher for an evenly thick centre-cut portion suitable for Beef Wellington. A small taper is manageable; fold it underneath and tie it before searing.
For a meal with pastry, mushrooms, sauce and sides, roughly 150–170 g / about 5–6 oz of raw trimmed tenderloin per person is generous. A 900 g to 1 kg Wellington comfortably serves about six.
Back to the beef steps · Back to the recipe
Dry Means No Free Water—not Dry Mushrooms
“Cook the mushrooms until dry” is not terribly helpful when you are staring into the pan wondering what dry is supposed to look like.
Here, dry means no free watery liquid, not mushrooms cooked into crumbs. The finished duxelles should still be soft enough to spread.
The mushrooms start by steaming heavily. They collapse, water gathers around them, then the pan gradually gets quieter and the flavour becomes more concentrated. You can see the same water-release stage when browning mushrooms for mushroom stroganoff: deeper browning really begins once excess liquid has cooked away.
Wet duxelles can soften the pastry and shrink more dramatically in the oven, leaving a looser layer around the beef. Hot mushrooms cause another problem, so spread the cooked mixture out and let it cool before wrapping.
Back to the duxelles steps · Back to the recipe
The Bottom Seam Is Where Good Wellingtons Go Wrong
The top can look perfect while the bottom hides a strip of pale, heavy dough.
Sometimes that is moisture. Quite often, there is simply too much pastry underneath.
The top may be one layer thick while the base quietly becomes two or three where the pastry overlaps and the ends fold in. That extra dough needs more oven time, and the beef keeps cooking while you wait.
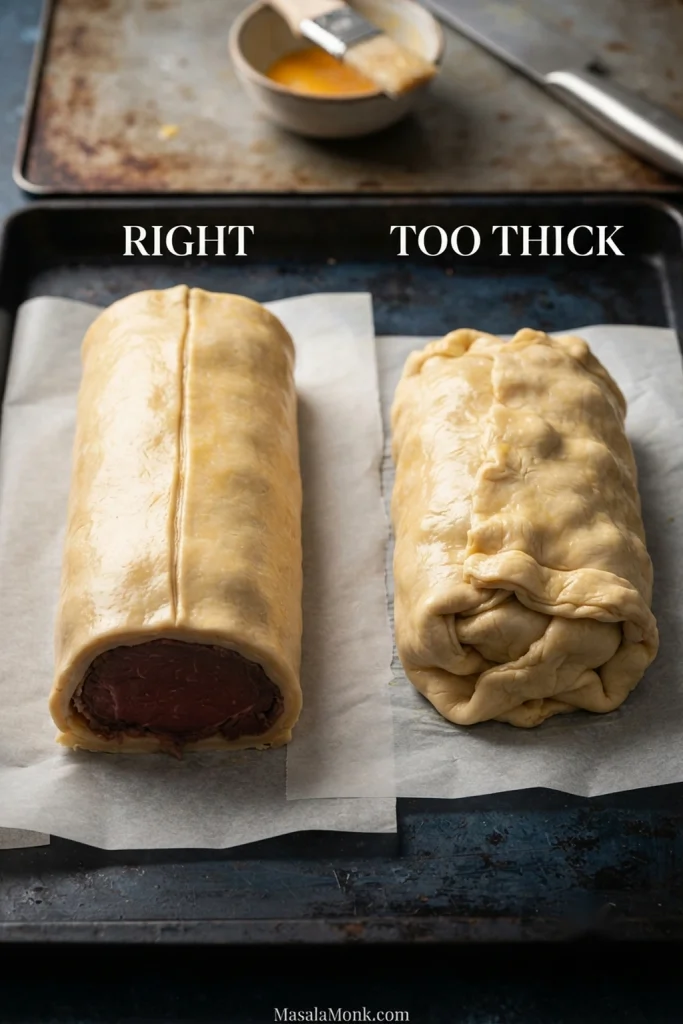
Keep the final overlap to 2–3 cm / about 1 inch and trim the rest. A fully heated baking sheet gives the bottom pastry a fighting chance from the moment it enters the oven, but even a hot sheet cannot rescue a thick bundle of raw dough.
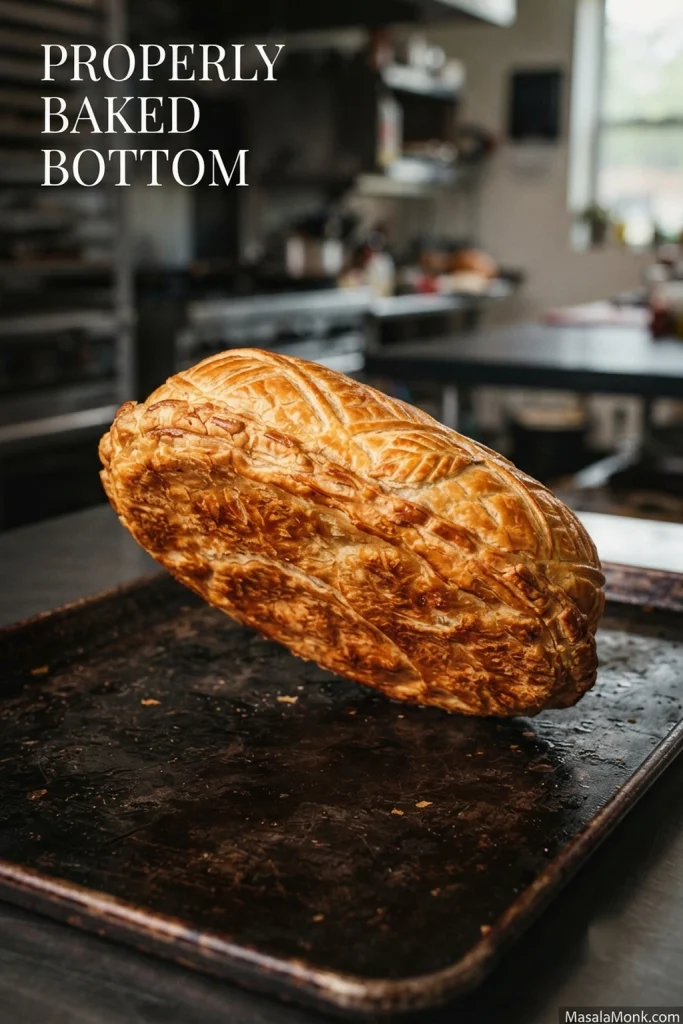
Decoration deserves a little restraint too: light scoring barely changes the bake, while thick lattices and piles of pastry leaves add more dough that still has to cook.
Get the pastry thickness and seam right, and the last big variable is heat.
Back to the pastry steps · Back to the recipe
Beef Wellington Cooking Time & Temperature
Beef Wellington cooking time is a checking window, not a finish time.
Diameter, starting temperature, pastry thickness and the behaviour of your oven can all move that window. For a Wellington built like this one, 30–45 minutes is a sensible broad range, but the thermometer gets the final say.
Pull Temperature and Carryover
The temperature when the Wellington leaves the oven isn’t necessarily where it finishes. Heat stored in the pastry and filling continues moving into the beef while it rests, and the size of that rise is not identical every time.
The practical rule is simpler than trying to predict an exact rise: once the pastry is properly baked and the centre is approaching the finish you want, the remaining decision belongs to the thermometer, not the clock.
The same pull-versus-final problem appears with larger roasts such as prime rib. For a deeper explanation of why food can keep warming after it leaves the oven, ThermoWorks has a useful guide to carryover cooking.
When the Pastry and Beef Get Out of Sync
Pastry brown, beef still cool? First make sure the pastry is actually too dark. Deep golden is what you want. A surface that is genuinely racing ahead can be shielded loosely with foil while you keep watching the centre.
Beef ready, pastry still pale? This is harder to rescue. Warm starting beef, thick pastry, a heavy bottom seam or weak heat underneath are the usual reasons. Once the beef is close to done, there may not be enough oven time left to fix a badly underbaked base without changing the meat.
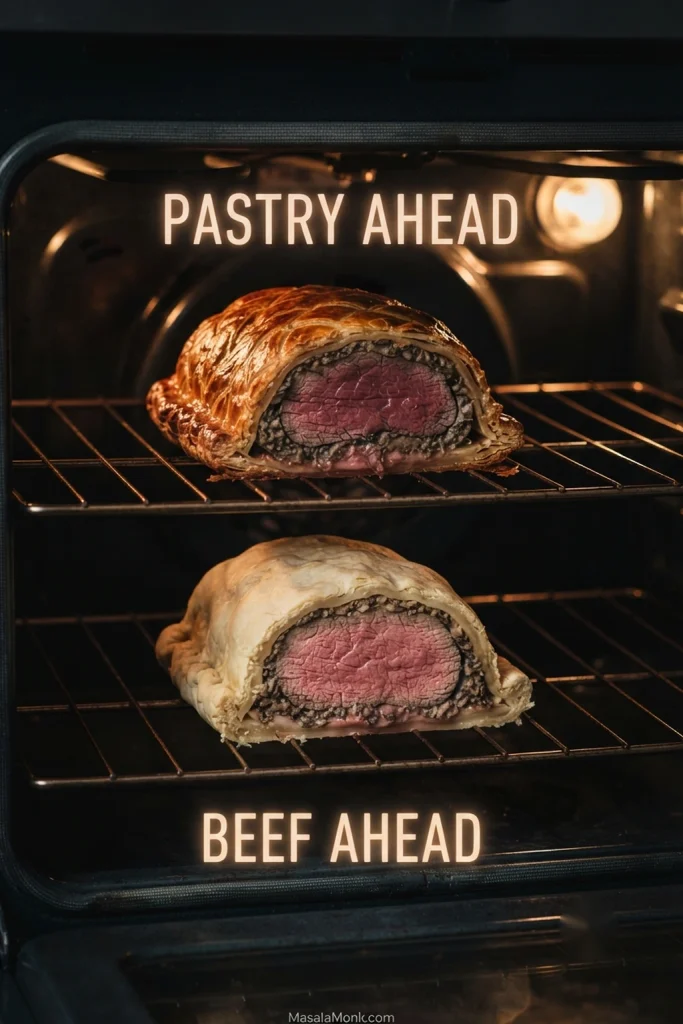
When the underside looks wrong after baking, the first question is what kind of wrong you are looking at.
Is the Bottom Wet—or Is It Raw?
A wet Wellington bottom usually points to excess moisture; a pale, doughy bottom usually means the pastry itself is underbaked.
Wet and softened: think wet duxelles, warm filling, escaped juices or steam trapped underneath during the rest.
Pale, dense and doughy: think too much pastry, a thick seam, or not enough heat reaching the base.
Crisp at first, soft later: think condensation and holding time.
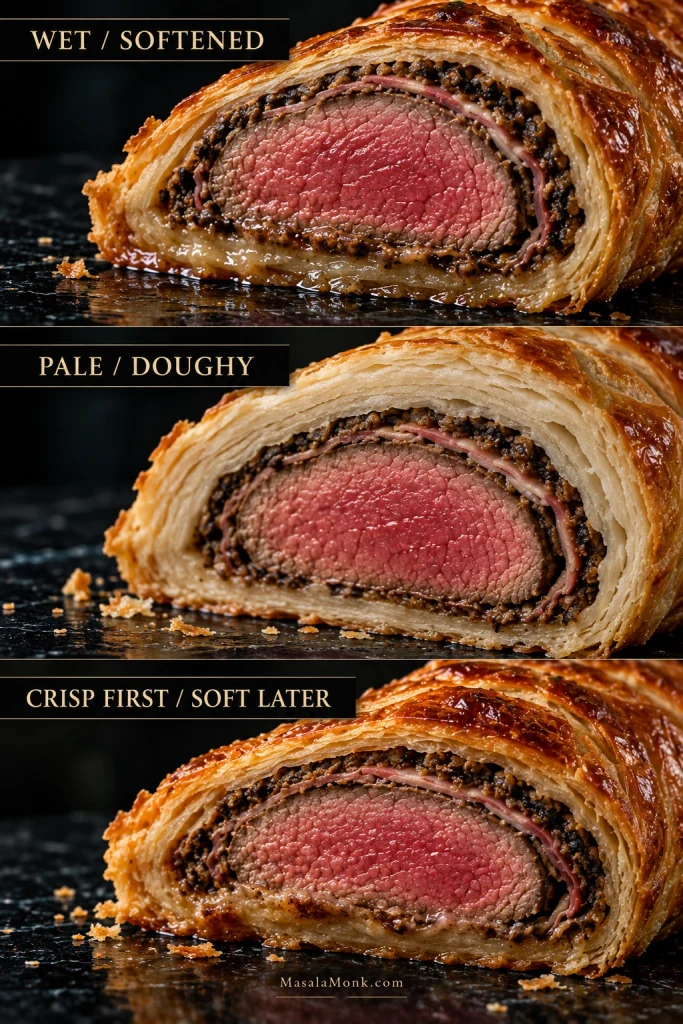
Cook the mushrooms longer for the first problem. Do that to a triple-thick bottom seam and nothing changes.
Back to the baking steps · Back to the recipe
Troubleshooting Beef Wellington
A few other problems tend to show up only once the Wellington is wrapped, baked or sliced.
- Pastry split in the oven? Deep scoring, stretching, warm dough or a weak seam can all contribute. Keep decorative cuts shallow.
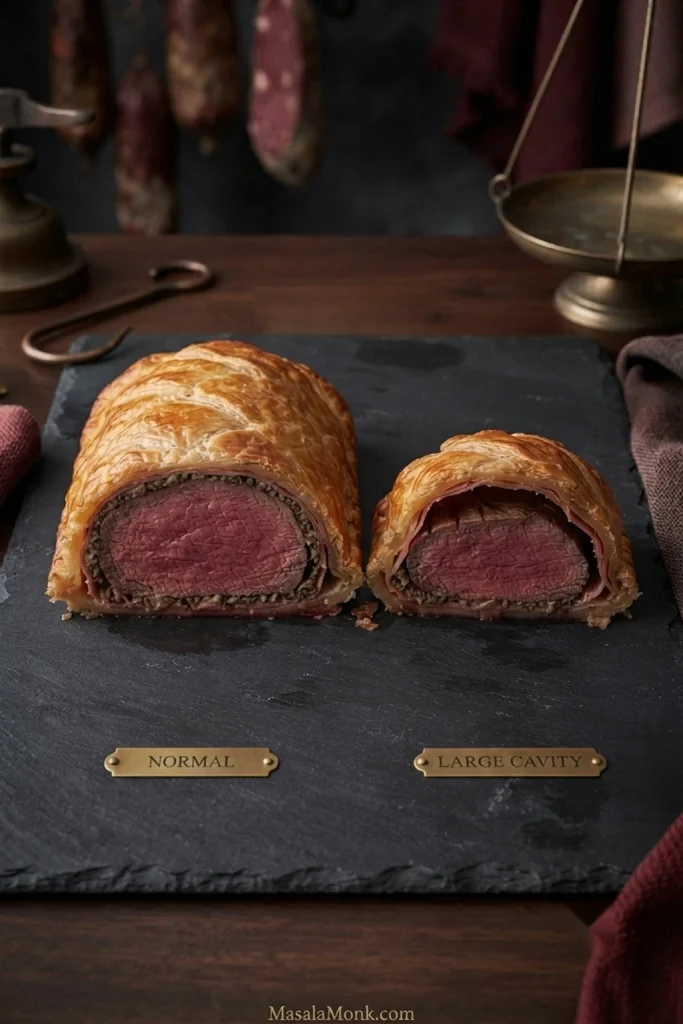
- A large empty cavity around the beef? The inner wrap may have trapped air or loosened as the filling shrank. A narrow gap is normal; a large hollow suggests the first wrap could have been tighter.
- Layers sliding when you slice? Give the Wellington its full rest, use a serrated knife and cut thicker slices. Excess moisture can make the layers move more easily too.
- Carryover larger or smaller than expected? The rise varies with the size of the Wellington, its starting temperature and the heat of the oven. Watch the probe during the rest rather than assuming a fixed increase.
- Wellington too salty? Prosciutto brings plenty of seasoning. Salt the beef properly, but keep the mushroom layer restrained.
Back to the recipe · Back to top
Make-Ahead Beef Wellington: If Dinner Is at 7:00
Most of this Beef Wellington can be made a day ahead. Finish the beef, duxelles and prosciutto wrap the day before, then add the puff pastry on the day you bake it.
The day before: trim and shape the beef, sear it, brush with mustard, make and cool the duxelles, then complete the prosciutto-and-mushroom wrap. Refrigerate the tightly wrapped cylinder overnight.
Some methods refrigerate a fully pastry-wrapped Wellington overnight. This schedule keeps the pastry for baking day, reducing the time it sits against the filling.
For a bigger holiday dinner, potatoes au gratin can also be prepared ahead. That’s much easier than trying to assemble both dishes in the last hour.
Baking-Day Timeline
4:45 pm: roll the puff pastry and wrap the chilled beef.
5:15 pm: put the Wellington back in the refrigerator and start preheating the oven with the heavy baking sheet inside. The long preheat is deliberate.
At 6:00 pm: egg-wash, score and bake.
Around 6:25 pm: start checking the centre.
Between 6:30 and 6:45 pm: the Wellington may be ready to come out. Follow the thermometer.
While it rests: the evening gets easier. Finish the sauce and vegetables. Green beans almondine work particularly well because the beans can be blanched ahead and finished quickly with butter, lemon and almonds.
A cold, sharp accompaniment is useful beside all that rich beef and pastry too. Creamy horseradish sauce can be made without competing for oven space.
Carving Beef Wellington at the Table
About 15 minutes later: slice and serve. Depending on when the Wellington finishes, dinner will usually land somewhere around 6:45–7:00 pm.
Back to the recipe · Back to top
Beef Wellington Without Mushrooms—and Other Variations
Leaving out the mushrooms is possible, but the duxelles contributes more than flavour: it also gives the inner wrap body and structure.
No mushrooms: well-reduced shallots or a dry spinach-and-shallot mixture can work. Whatever replaces the duxelles should contain very little free moisture.
No prosciutto: thin crêpes are an established alternative, and a thin layer of filo can serve a similar barrier role in some versions.
Pâté or foie gras: both appear in richer classical versions. They add another layer of fat and flavour but aren’t essential here.
Storing and Reheating Leftovers
If you are following U.S. food-safety guidance, refrigerate leftover Wellington within 2 hours and use cooked leftovers within 4 days.
For the best pastry texture, use the oven rather than the microwave. Put thick slices uncovered on a rack over a baking sheet and reheat at about 160°C / 325°F. Start checking after about 10 minutes.
There isn’t a perfect reheating method here. Enough heat to revive the pastry also keeps cooking the beef. If you follow U.S. guidance for reheating leftovers, take the centre to 74°C / 165°F, which will move originally medium-rare beef beyond its first-day doneness.
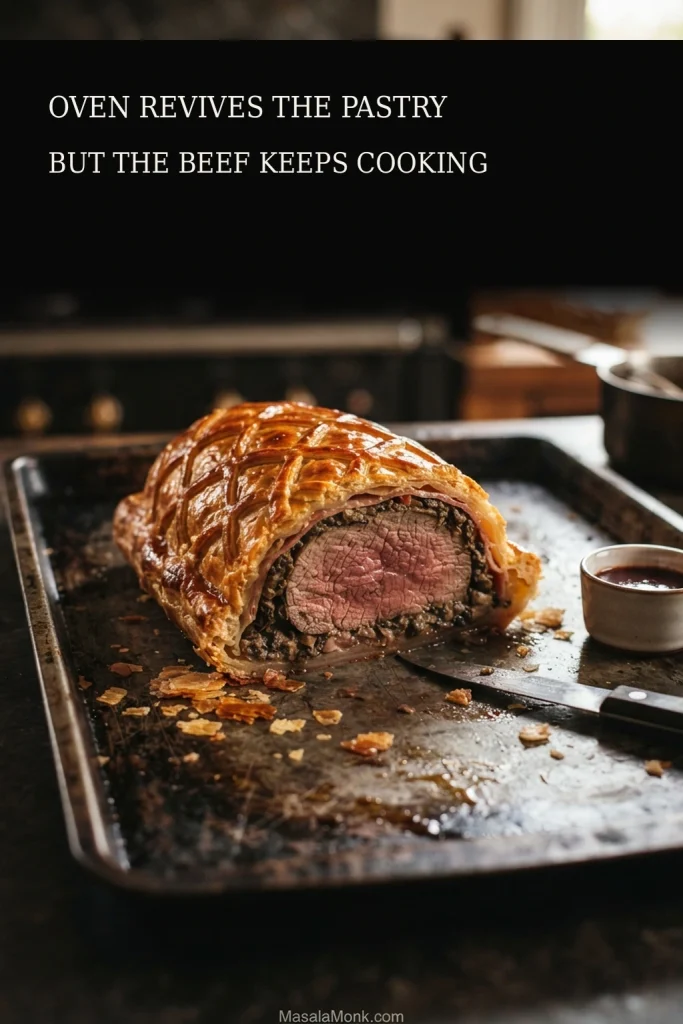
The microwave is quicker, but the pastry will soften. Sometimes that trade is perfectly fine.
Back to the recipe · Back to top
Once you know what the mushrooms, pastry and centre temperature are telling you, cutting into that golden crust feels a lot less like hoping—and much more like knowing what you’re going to find.








