
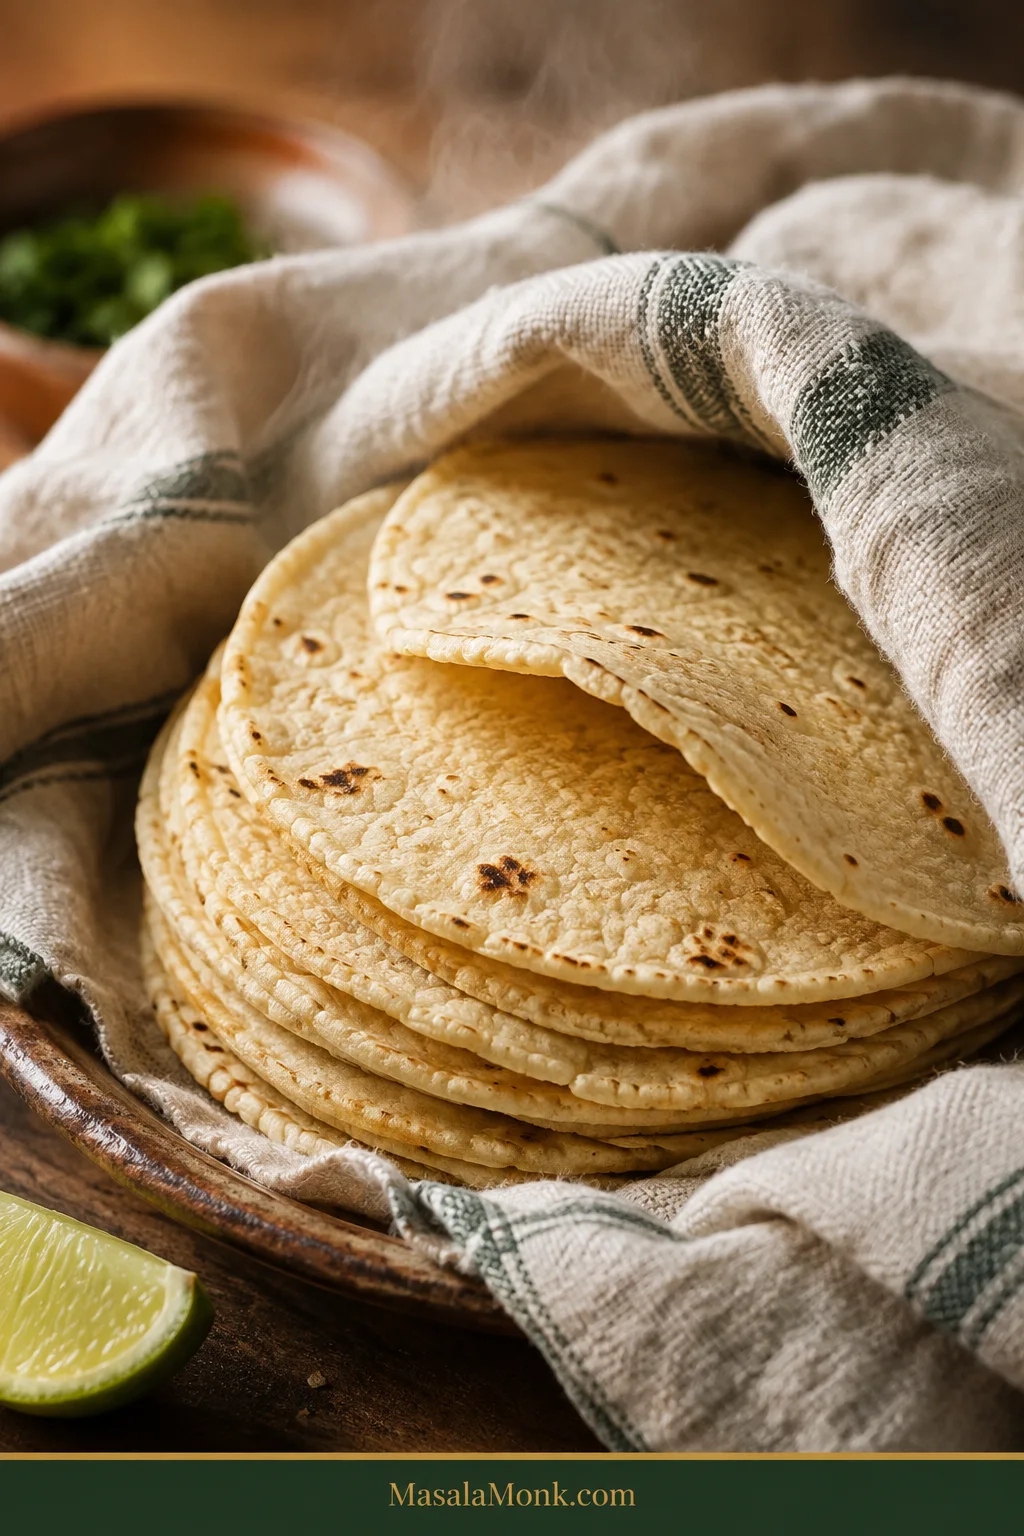
Fresh corn tortillas have a brief moment when they are especially good: straight from the skillet, tucked beneath a towel, still carrying the smell of toasted corn. Give the stack a few minutes and the tortillas become softer and more flexible, ready to fold around dinner without splitting at the edge.
Homemade is worth it for the texture as much as the flavor. And once a warm tortilla folds easily around dinner, its shape matters very little. Perfect circles have very little to do with it.
The ingredient list is almost suspiciously short—masa harina, water, and salt—but the dough responds to your kitchen. One bag of masa may want more water than another, uncovered dough can dry while you work, and the right skillet heat reveals itself during the first cook.
Quick Answer: How to Make Soft Corn Tortillas
To make homemade corn tortillas, mix masa harina with water and salt, rest the dough, press it thin, and cook each tortilla quickly on a hot dry skillet before stacking it under a towel. Press one tester before dividing the batch: cracked edges mean the masa needs more moisture, while a mostly smooth edge and clean release mean it is ready.
The tester tortilla calibrates the dough; tortilla number one calibrates the heat.
Corn Tortilla Recipe
Soft homemade corn tortillas made with masa harina, with one simple dough check before you commit the full batch.
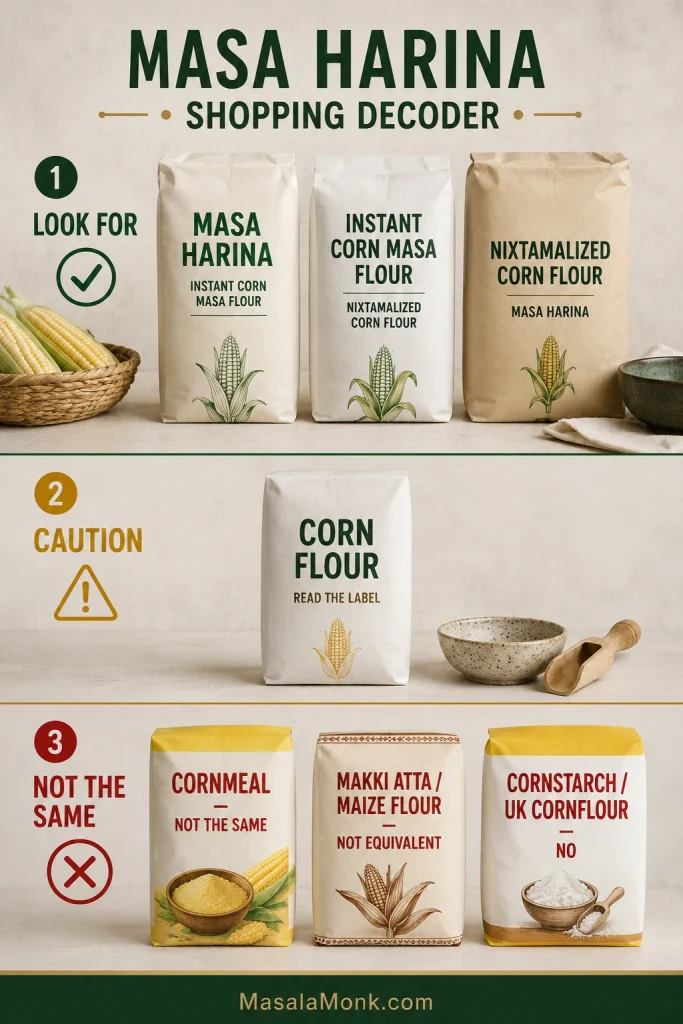
Before you mix: make sure the bag says masa harina for tortillas, instant corn masa flour, or nixtamalized corn flour. Ordinary cornmeal, cornstarch, and most plain maize flours will not behave the same way.
Ingredients
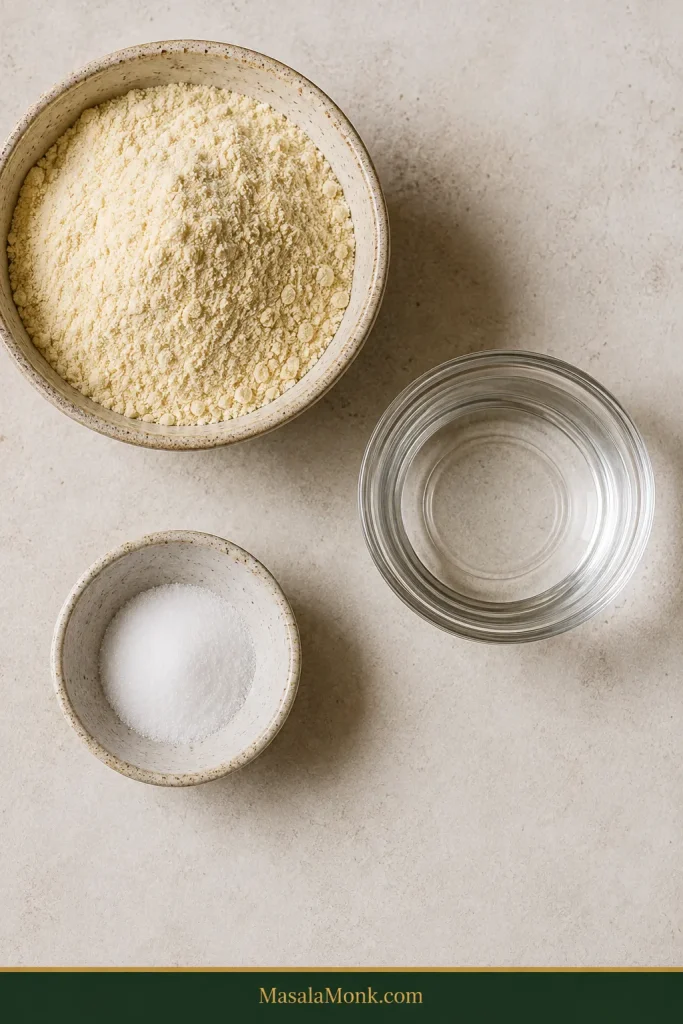
- 230 g masa harina for tortillas. Weigh it if you can; cup volume varies by product and measuring method.
- 325 ml lukewarm water to start, about 1⅜ cups
- Extra water for adjustment — keep 60 ml / ¼ cup nearby; a very absorbent masa may need more
- 3 g fine salt, about ½ teaspoon, optional; use more to taste if you prefer a more seasoned tortilla
No scale? Use the cup-and-water ratio on your bag as the starting point, then check the rested dough with the tester below. Different masa harina products absorb water differently, so expect to adjust by feel.
Equipment
- Medium mixing bowl
- Tortilla press, or a heavy flat-bottomed pan or dish
- Two pieces of sturdy food-safe plastic for pressing
- Cast-iron skillet, carbon-steel pan, comal, or heavy griddle
- Clean kitchen towel or tortilla warmer
- Kitchen scale, if available
1. Mix the masa
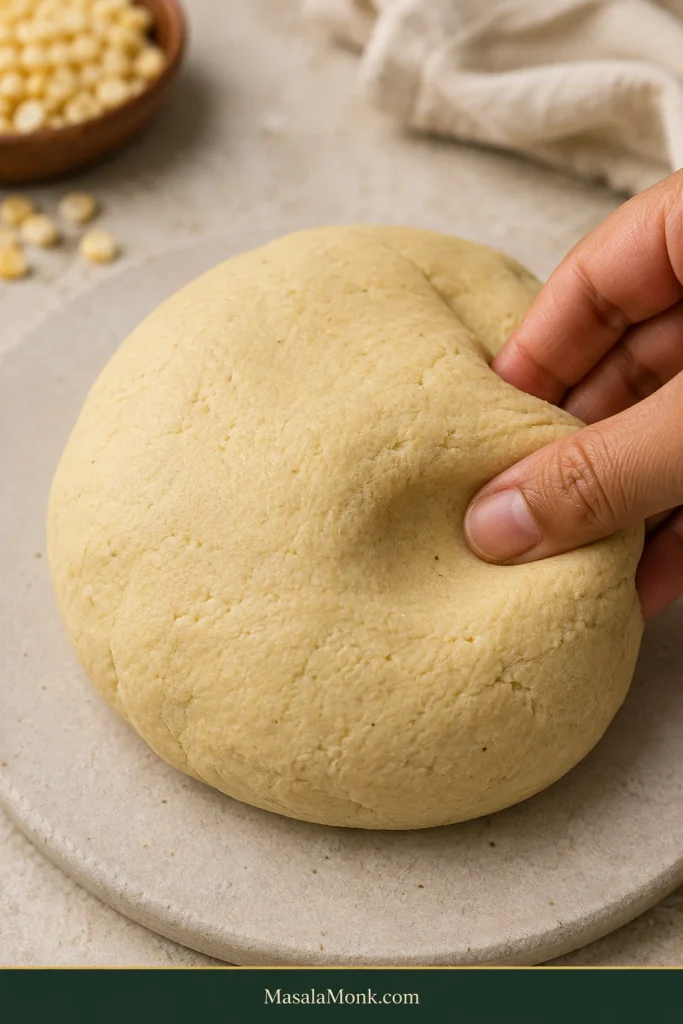
Combine the masa harina and salt. Add 325 ml of lukewarm water and mix with your hand, squeezing and folding until no dry flour remains. Knead for about 2 minutes, until the dough comes together into a soft mass.
Lukewarm water is convenient, but room-temperature water works too. Give the masa time to absorb what you have already added before deciding it needs more.
2. Rest
Cover the bowl tightly, or cover it with a slightly damp clean towel, and let the masa sit for 15–20 minutes. Knead it briefly once more after the rest.
3. Press a tester and adjust
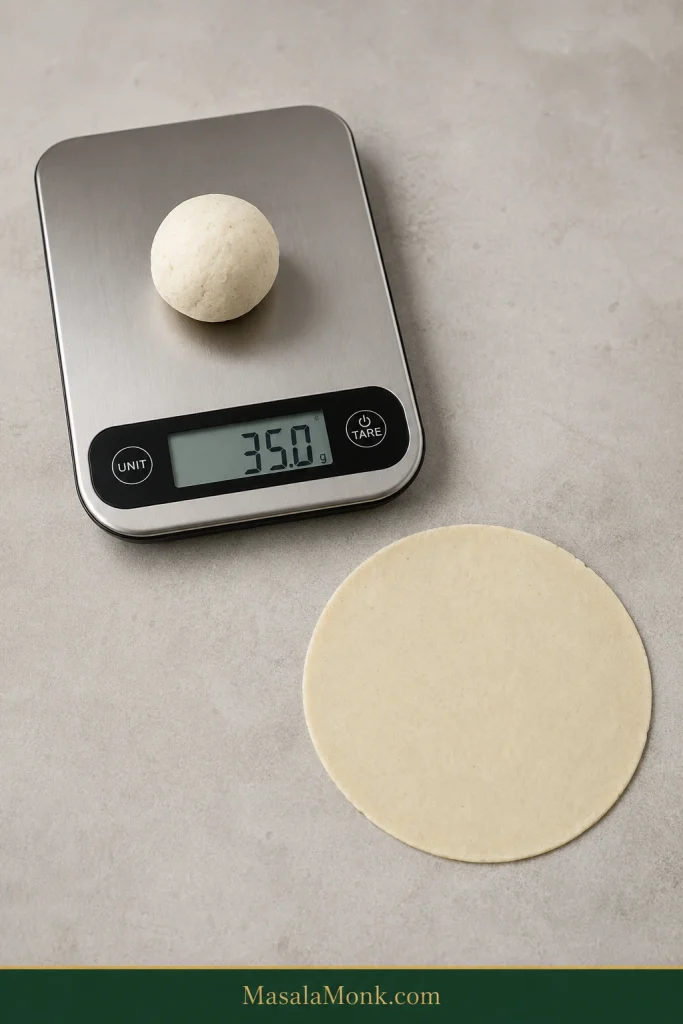
Pinch off about 35 g / 1¼ oz of dough, roll it into a smooth ball, and press it between two pieces of sturdy food-safe plastic.
- Large cracks or a ragged edge: knead in water 1 teaspoon at a time.
- Mostly smooth edge and clean release: the masa is ready.
- Heavy sticking or smearing: once the dough has rested, knead in masa harina 1 teaspoon at a time.
You may use only part of the adjustment water, or none at all. Return the tester to the bowl and adjust the whole batch before portioning.
Once the tester peels away cleanly with a mostly smooth edge, the fussiest part is behind you.
4. Portion the dough and heat the pan
Divide the finished dough into about 16 portions, usually 35–39 g / 1¼–1⅜ oz each depending on final hydration. Roll them into balls and keep them covered while you work so the surfaces do not dry out.
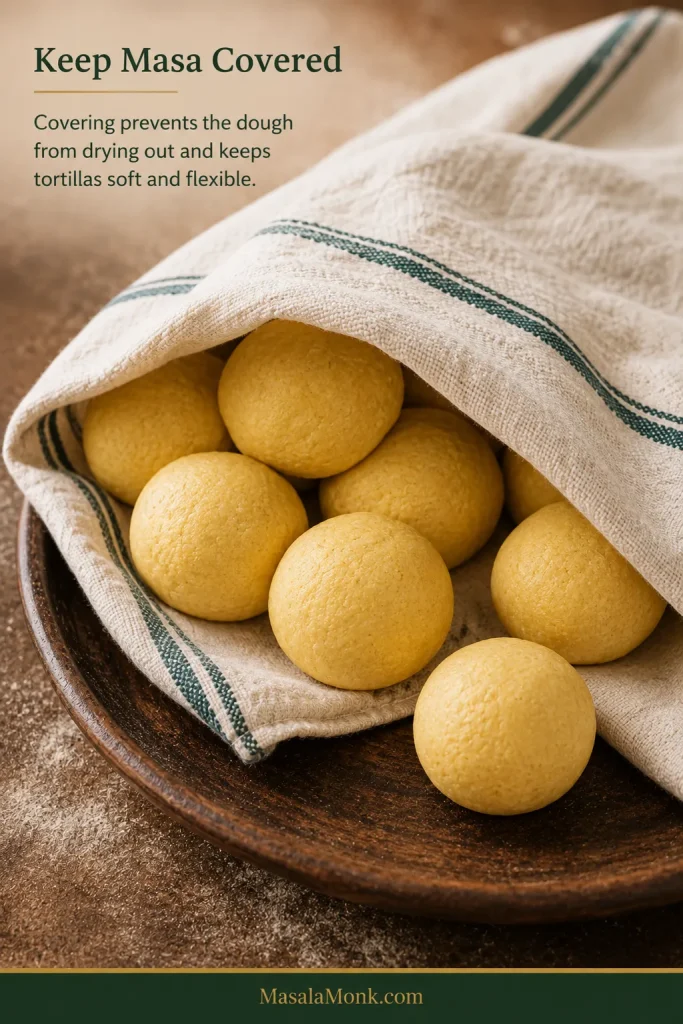
Meanwhile, heat a dry cast-iron skillet, carbon-steel pan, comal, or heavy griddle over medium to medium-high heat for about 5 minutes.
With nonstick cookware, stay within the manufacturer’s recommended heat range.
5. Press and transfer
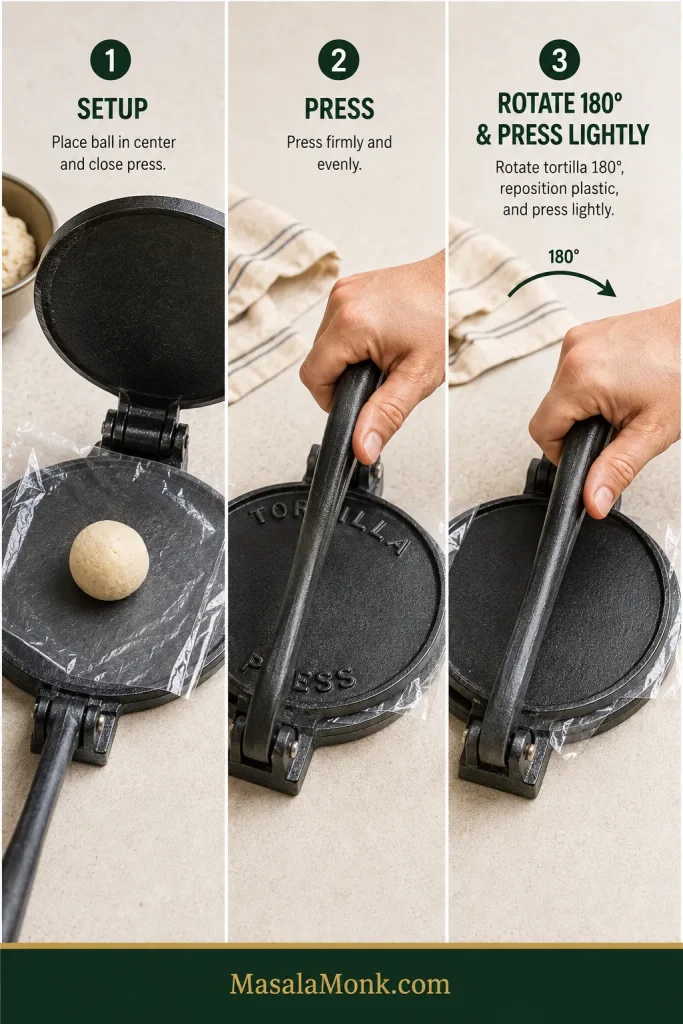
Press one ball into a thin, even tortilla about 5–5½ inches / 13–14 cm wide. A noticeably thicker side is a cue to rotate the tortilla 180 degrees and press lightly again.
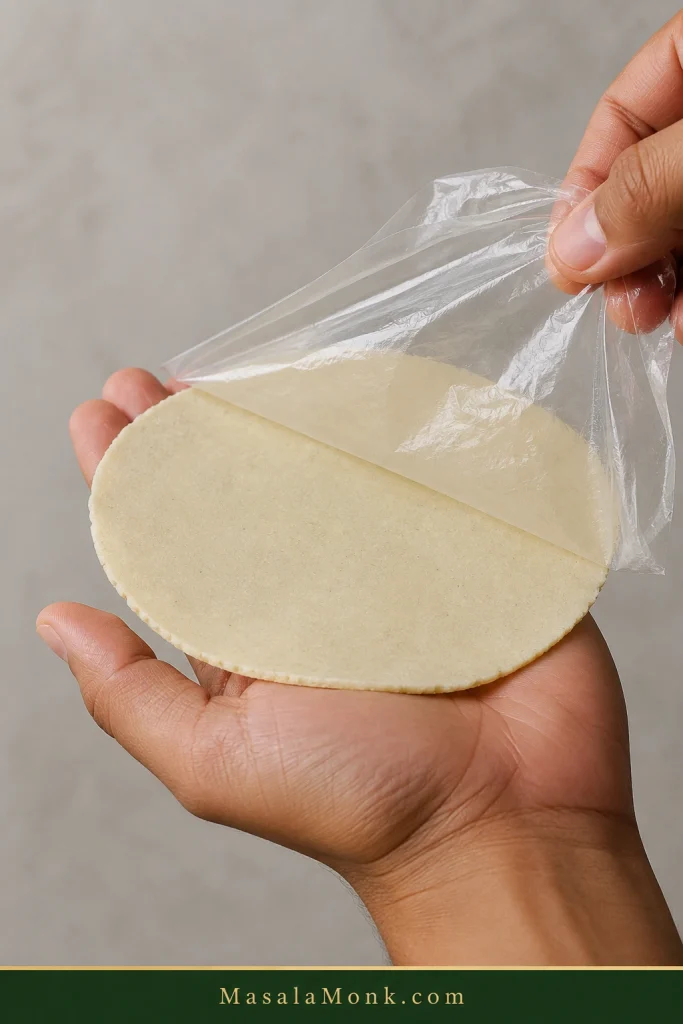
Peel away the top liner, turn the tortilla onto your open hand, then peel the remaining plastic away from the dough. Supporting the tortilla this way makes tearing much less likely.
6. Cook
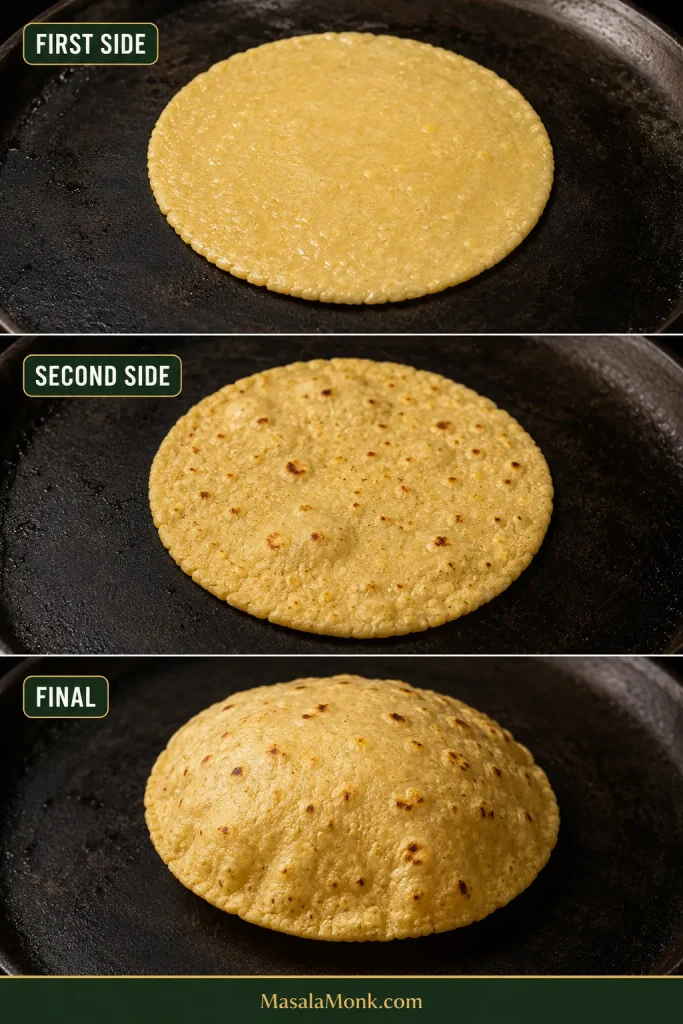
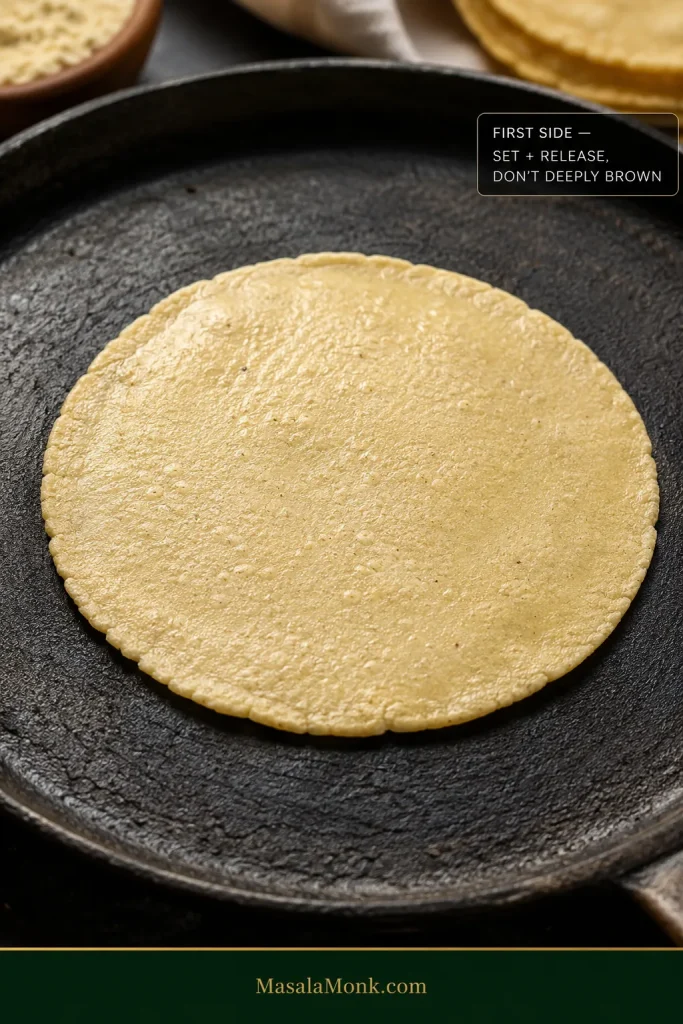
First side: about 25–35 seconds. Flip once the raw sheen begins to fade and the tortilla releases cleanly.
Second side: about 40–60 seconds. The surface should look cooked and toasted freckles may begin to appear.
Final flip: about 15–30 seconds. The tortilla may inflate in patches or puff dramatically. Remove it when it is cooked through and still soft enough to fold.
The clock gives you a window. Release, how the surface looks, aroma, and flexibility tell you when to move.
7. Stack, cover and repeat
Move each tortilla straight into a folded clean towel or tortilla warmer and keep the stack covered. Once the first couple are cooking well, press the next tortilla while the current one is on the pan.
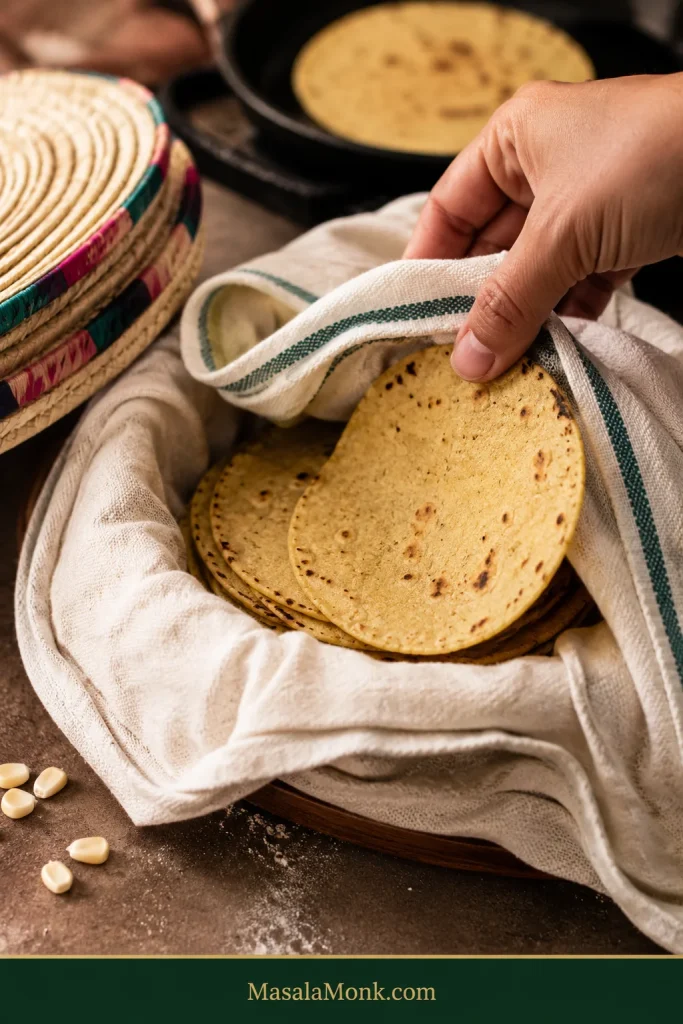
If tortilla number two releases cleanly, bends without cracking, and smells like warm corn, you are there. Stop adjusting things and cook the batch.
Let the finished stack rest covered for about 5 minutes before judging its final softness.
Recipe Notes
- Water absorption varies by masa harina. After the rest, adjust only if the dough still shows cracking or heavy sticking.
- A full balloon-like puff is not required. Judge the tortilla after it has softened for a few minutes in the covered stack.
- As written, the tortillas are vegan and gluten-free by ingredients. If gluten cross-contact matters medically, use masa harina specifically labeled or certified gluten-free.
That first warm tortilla rarely needs much while you finish the batch. A squeeze of lime, some salsa verde, or avocado is enough to make the cook’s sample disappear before anyone reaches the table.
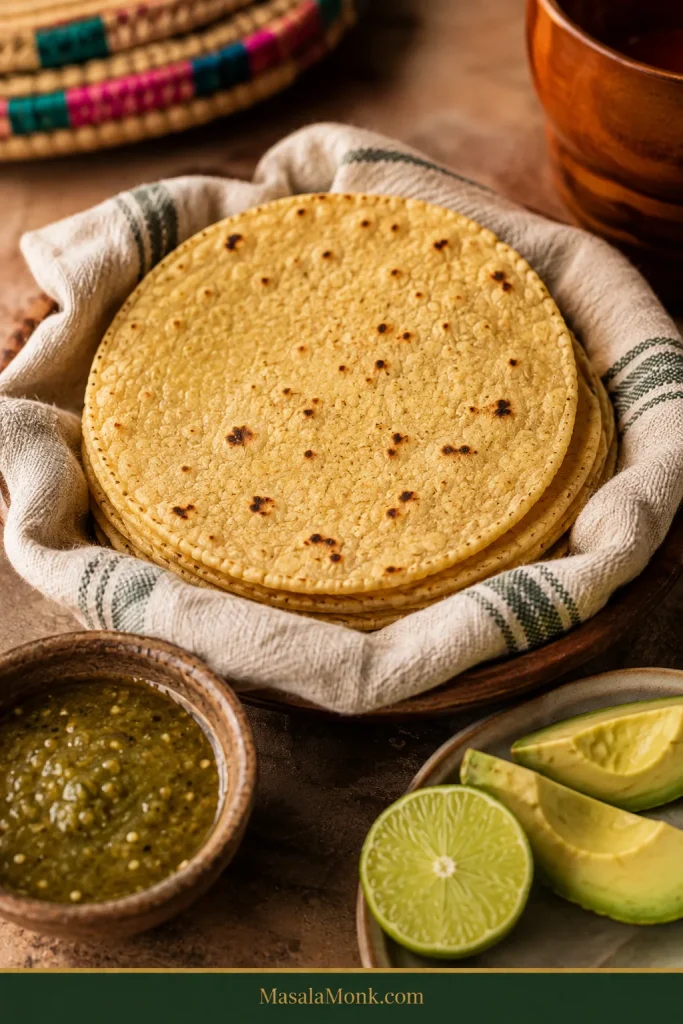
If your tortillas are already soft and folding well, you have everything you need to serve them. If you want to understand why the dough behaves the way it does—or fix something that didn’t—keep going.
Corn Tortilla Guide
The Masa Test: Too Dry, Ready, or Too Wet?
The tester turns hydration from a guess into something you can see. Masa harina varies by brand, grind, age, and storage, while exposed dough can lose moisture as you work.
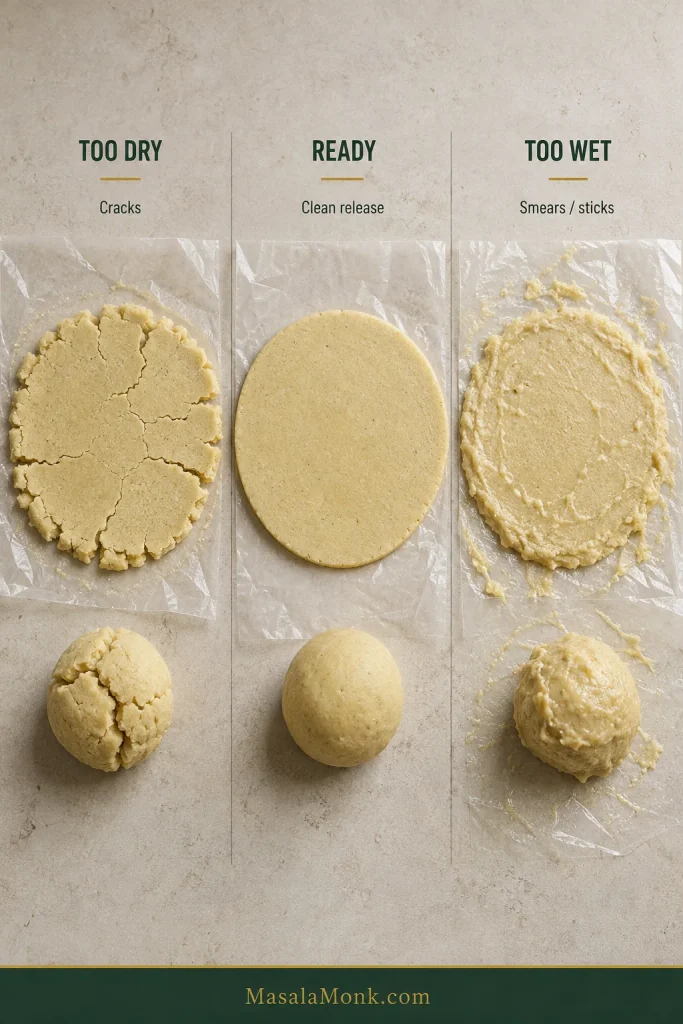
| What you see | What it means | What to do |
|---|---|---|
| Large cracks, ragged edge, crumbly ball | Masa is too dry or has dried while waiting | Add water 1 teaspoon at a time, knead, then retest |
| Mostly smooth edge, soft dough, clean release | Masa is ready to portion | Continue with the batch |
| Smears, clings heavily, difficult to peel | Masa may be too wet—or not yet fully hydrated | Let it rest first; if still wet, add masa harina 1 teaspoon at a time |
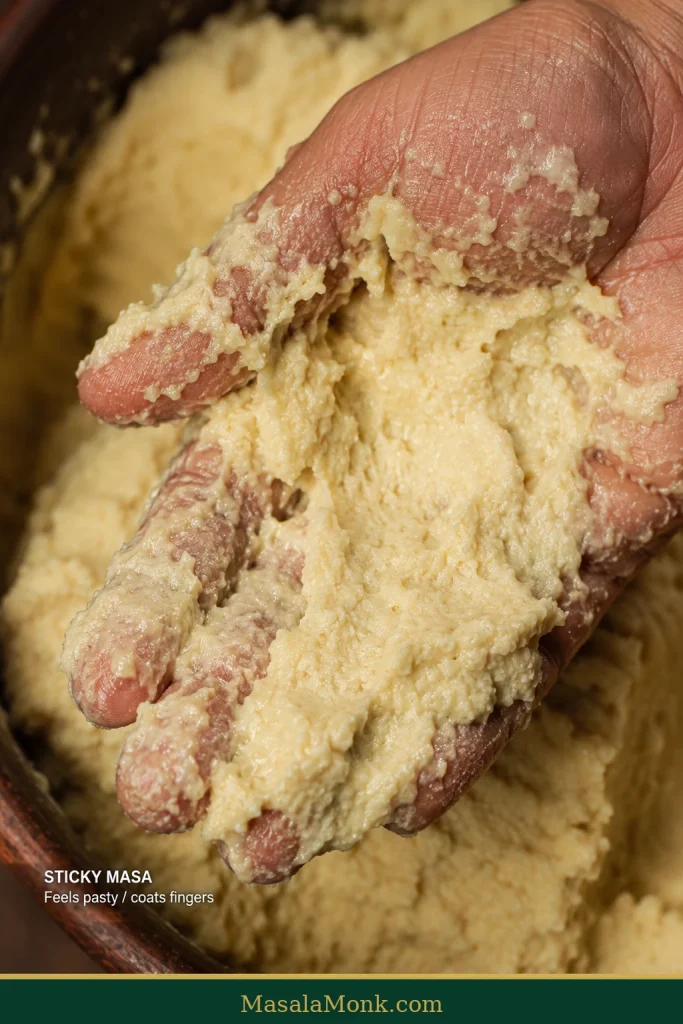
By feel, ready masa should be soft and cohesive without coating your fingers—closer to soft modeling clay than paste. Dry masa feels crumbly as you roll it; overly wet masa may look smooth but smears when the liner comes away. Judge the dough only after it has rested.
Change one thing at a time. Cracked raw edge? Adjust the moisture. Tortilla too thick? Work on pressing. Slow cooking? Look at thickness and heat. Changing everything together makes it hard to know what actually helped.
Masa Harina: What to Buy and What Not to Substitute
If the dough still behaves strangely after the hydration looks right, check the flour itself. Masa harina is dried flour made from nixtamalized corn. The corn is treated with slaked lime, or calcium hydroxide, ground into fresh masa, then dried and ground again. That processing is why masa harina forms tortilla dough so differently from ordinary ground corn.
| Package says | Use here? | What to know |
|---|---|---|
| Masa harina / instant corn masa flour for tortillas | Yes | Dried nixtamalized corn flour intended for tortilla masa |
| Maseca | Yes | A widely available brand of masa harina |
| Nixtamalized corn flour | Yes | The correct ingredient category |
| Cornmeal | Not as a direct substitute | Ground corn without the same dough behavior |
| Makki atta / maize flour | Not equivalent | Usually not nixtamalized like masa harina |
| Corn flour | Read the label | The term means different things in different countries |
| UK cornflour / cornstarch | No | Starch, not tortilla flour |
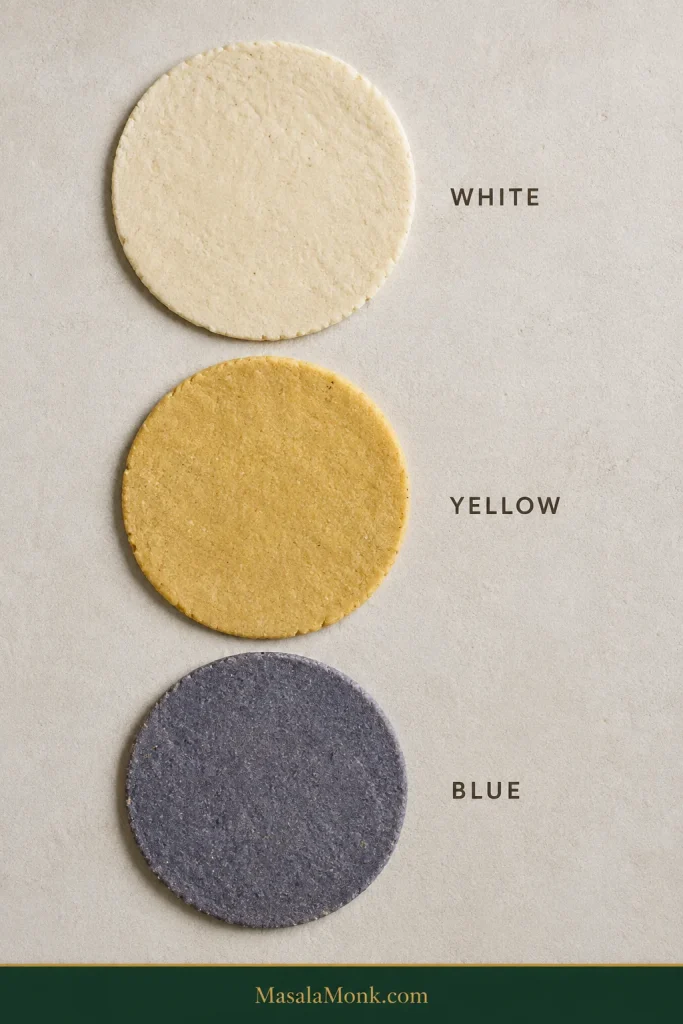
White, yellow, or blue masa harina? White and yellow products generally use the same method, though flavor and water absorption still vary by brand and corn. Blue masa products can behave differently too, so do not assume the same water amount will transfer exactly.
Masa Harina, Maseca and Fresh Masa
Is Maseca the same as masa harina? Maseca is a brand; masa harina is the ingredient. If Maseca is the bag in your kitchen, its official tortilla recipe gives you a brand-specific starting formula. After the rest, adjust only if the dough still needs it.
Can you make corn tortillas without masa harina? Yes—by starting with fresh masa instead of dried masa harina. Fresh masa already contains water, so it needs its own handling rather than the formula above.
Fresh masa can give tortillas a fuller fresh-corn aroma and a somewhat different texture. Rick Bayless has a detailed corn tortilla method using both fresh masa and masa harina if you want to explore that route.
Cornmeal, Corn Flour and Makki Atta
The practical rule is simple: unless the flour is nixtamalized and intended for masa or tortillas, do not expect it to behave like masa harina.
Shopping in India? Look for masa harina, instant corn masa flour for tortillas, or nixtamalized corn flour instead of relying on makki atta alone. A package that simply says “corn flour” deserves a closer look; in the UK, “cornflour” usually means cornstarch.
Do Corn Tortillas Need Oil or Lard?
No. Basic corn tortillas need neither. Some modern formulas add fat for tenderness or longer-lasting softness, but if your tortillas are coming out dry or stiff, check moisture, thickness, pan heat, and cooking time first.
How to Press Corn Tortillas Evenly
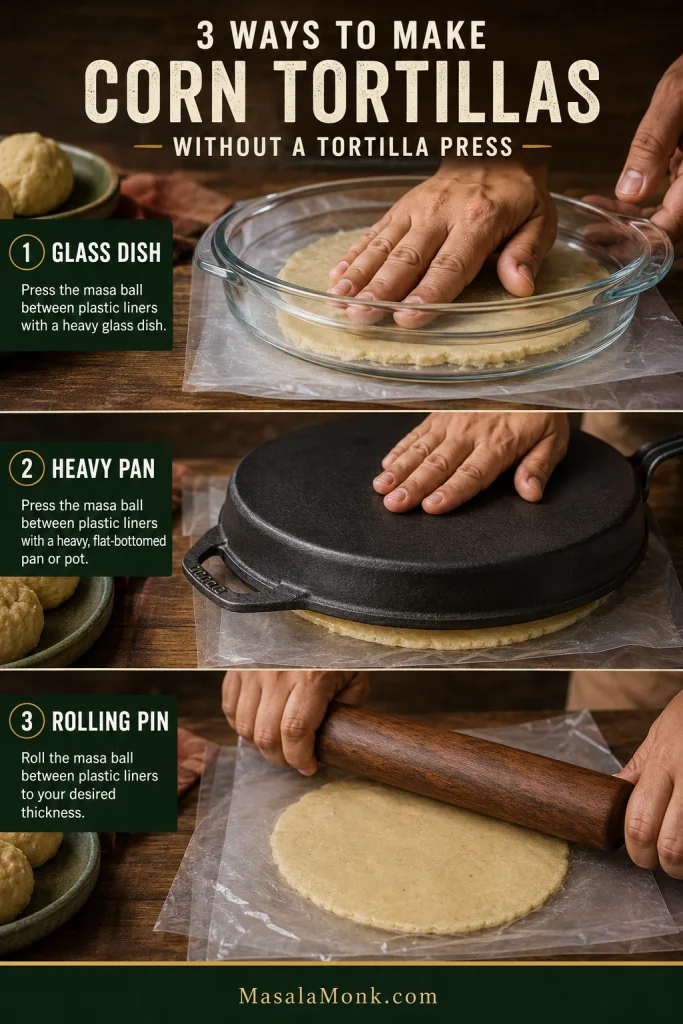
Yes—you can make corn tortillas without a tortilla press. A press is fastest and most consistent, but any sturdy flat-bottomed pan or dish that can apply even pressure will do the basic job.
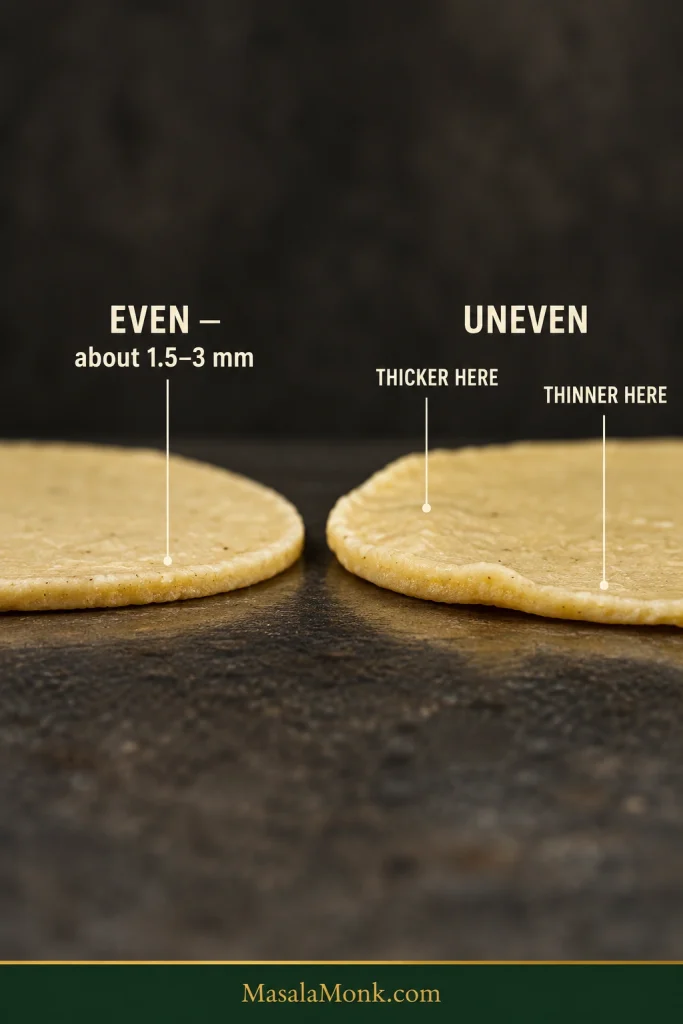
Whatever you use, aim for even thickness. A paper-thin patch can dry while a thicker section is still cooking through.
Use a liner that releases cleanly. A freezer bag or sturdy food-storage bag cut open into two sheets works well. Parchment is another option, although delicate tortillas can release less cleanly and the paper may leave faint marks.
Read what the press is doing
Open the press after the first compression and look at the whole tortilla before pressing harder. If tortilla after tortilla is thicker on the same side, suspect the press rather than the water.
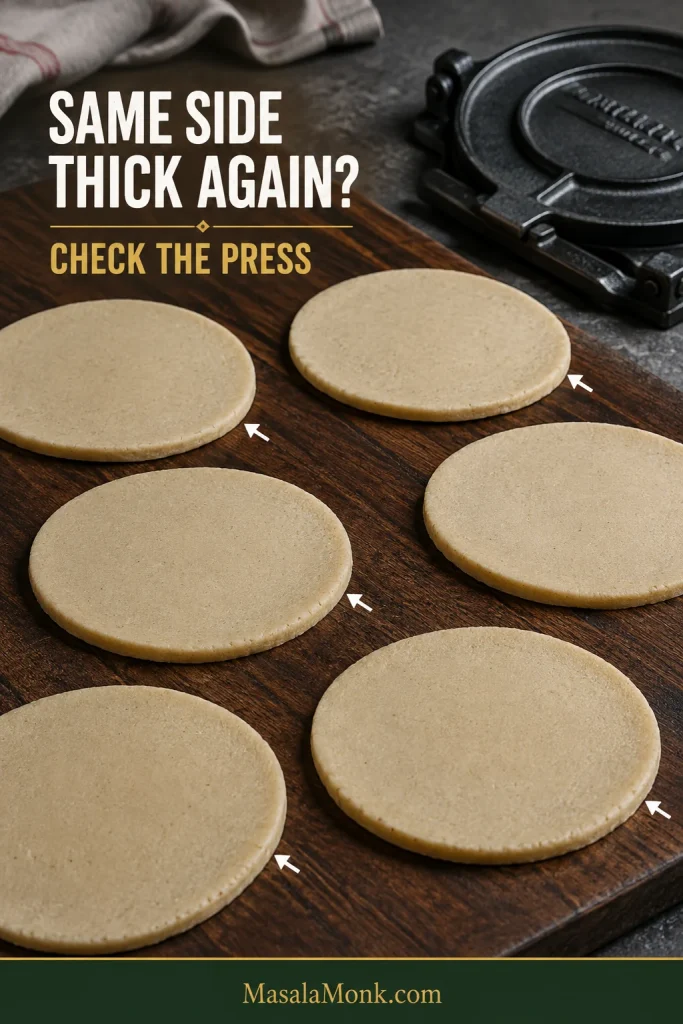
Having to lean your entire body weight onto the press is another reason to pause. Start with the portion size and dough moisture. If those look right, check whether the press is closing evenly.
Making Corn Tortillas Without a Press
A heavy glass pie dish or casserole dish is convenient because you can watch the tortilla spread beneath it. A flat-bottomed skillet, Dutch oven, or heavy pot works too.
You can also use a rolling pin, though keeping the thickness even takes more attention.
Transfer without tearing
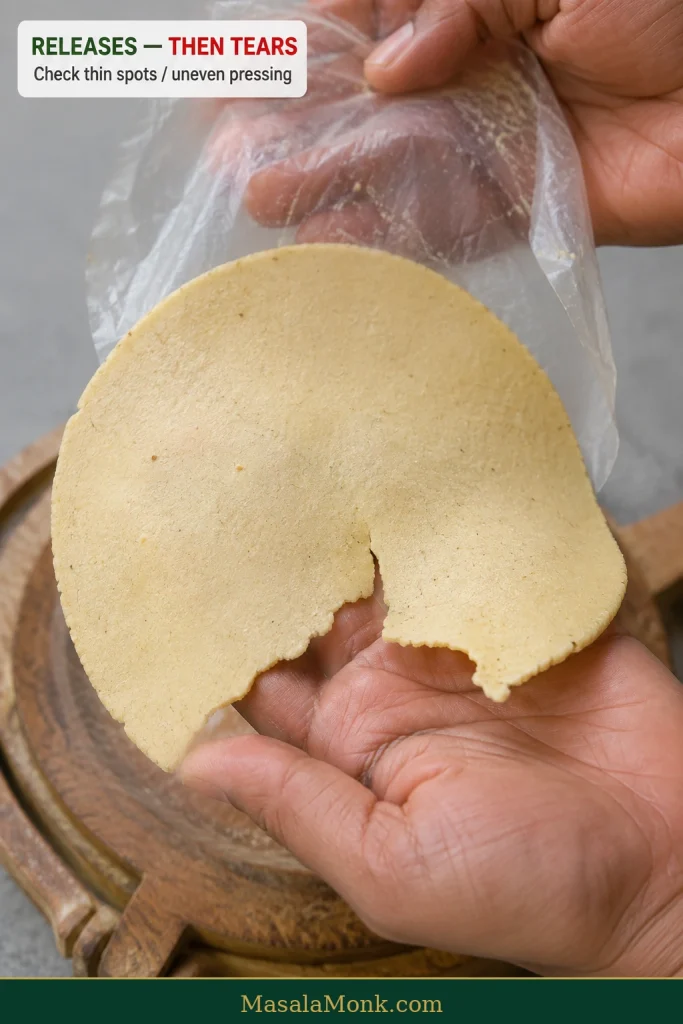
The useful principle is simple: move the liner, not the unsupported tortilla. Turn the exposed tortilla onto your hand and peel the remaining liner away. If the liner releases cleanly but the tortilla still breaks while you move it, check for excessive thinness or uneven pressing before adding more water.
How Big and Thin Should Corn Tortillas Be?
For everyday tacos, aim for tortillas about 5–5½ inches / 13–14 cm wide. The recipe above uses 35–39 g / 1¼–1⅜ oz of dough per tortilla.
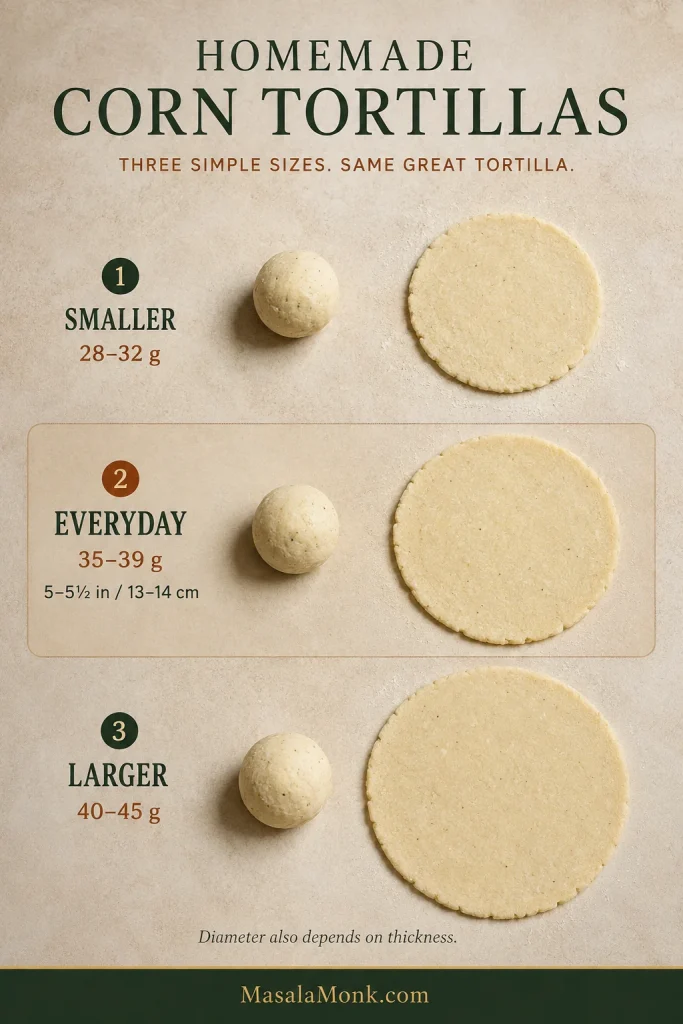
Smaller taco tortillas can start around 28–32 g / 1–1⅛ oz, while 40–45 g / about 1½ oz gives you something larger. Diameter still depends on how thinly you press.
If you want a thickness number, about 1.5–3 mm is a useful range. In practice, you are looking for an even tortilla that releases cleanly and is sturdy enough to transfer without tearing.
How to Cook Corn Tortillas: Heat, Flips and Cues
Most homemade corn tortillas cook in three short stages: set the first side, cook the second, then flip once more to finish and encourage puffing.
The pan needs to be hot enough to cook the tortilla quickly, before the longer cook required on a cooler surface dries it out.
If you check with an infrared thermometer, a cast-iron or carbon-steel pan or comal will often read around 425–475°F / 218–246°C. Treat that as a reference, not a number you need to chase; the tortilla itself is the better everyday gauge.
The first side is only a setup stage. It needs enough time to set and release, not enough time to become deeply toasted. Leaving it too long can dry that surface before the later stages have a chance to trap steam.
Let the first tortilla set the heat
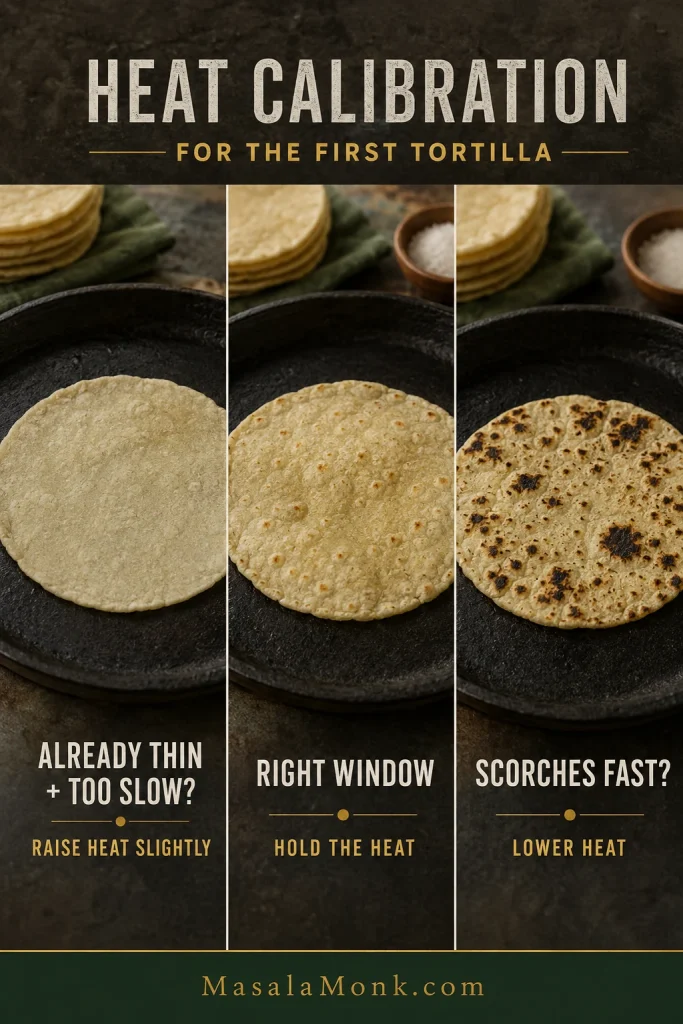
The initial tortilla is allowed to be ordinary. Its job is to show you what this dough does on this pan.
- Taking a long time? If the tortilla is already thin, raise the heat slightly.
- Scorching almost immediately? Reduce the heat.
- Sticking? Give the first side a little longer to set. Persistent sticking can mean the pan needs more preheating or the masa is unusually wet.
- Turning hard? Shorten the cook first; if the problem continues, revisit moisture or thickness.
Once the heat is right, leave it alone unless the next tortillas begin behaving differently.
Puffing and Softness: What Success Actually Looks Like
How to Keep Corn Tortillas Soft
Stack freshly cooked corn tortillas immediately under a clean towel or in a tortilla warmer. The trapped steam helps them soften after they leave the skillet.
A tortilla that feels slightly firm on the way into the towel can be noticeably softer five minutes later. Tear one while it is still warm and the center should feel tender and steamy, with the aroma of cooked corn coming through before you add a filling.
Should Corn Tortillas Puff?
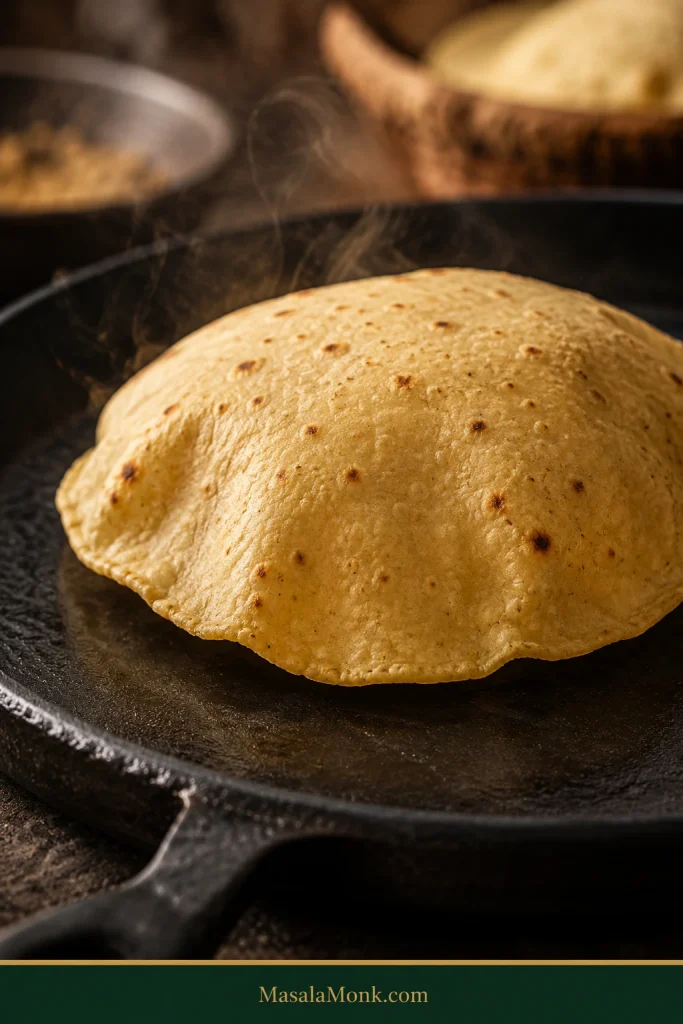
Often, yes. Puffing happens when moisture becomes steam and separates the cooked outer layers, so a strong puff is a sign that moisture, even pressing, heat, and timing have come together.
Full Puff, Partial Puff, or No Puff?
- Full puff: excellent.
- Several large pockets: completely fine.
- No puff, but soft and fully cooked: still a successful tortilla.
- No puff plus dry, dense, or cracked texture: use the other symptoms to find the problem.
A tortilla that has sealed but is inflating only in patches may respond to a very gentle press with a spatula after the final flip. Uneven thickness can also make one area inflate while another stays flat.
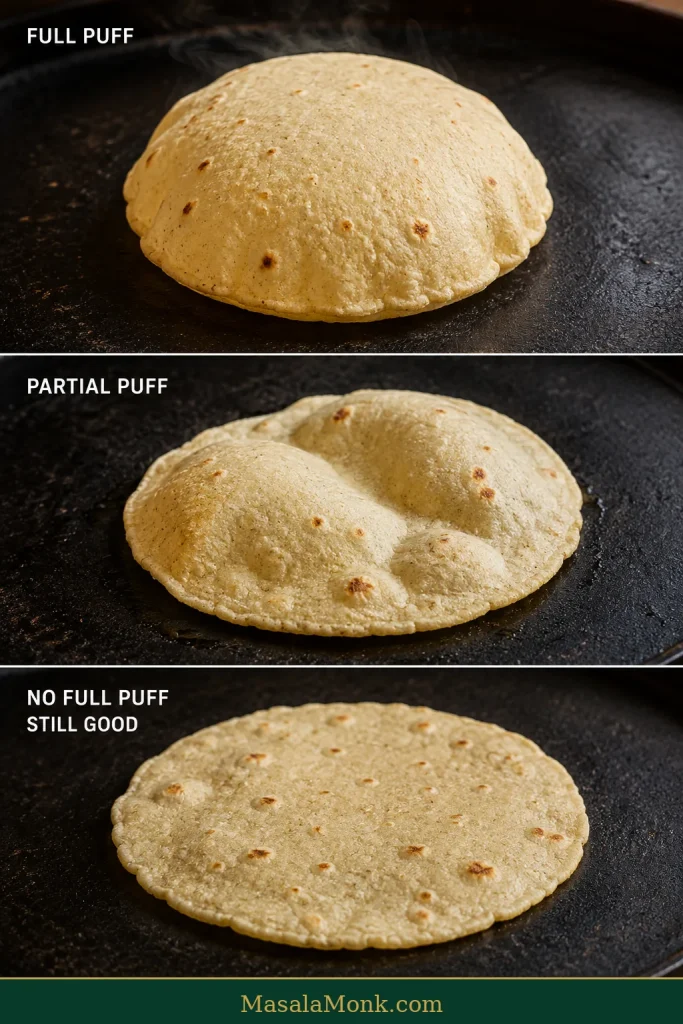
Do not turn a good tortilla into a dry one while waiting for a photograph-worthy balloon.
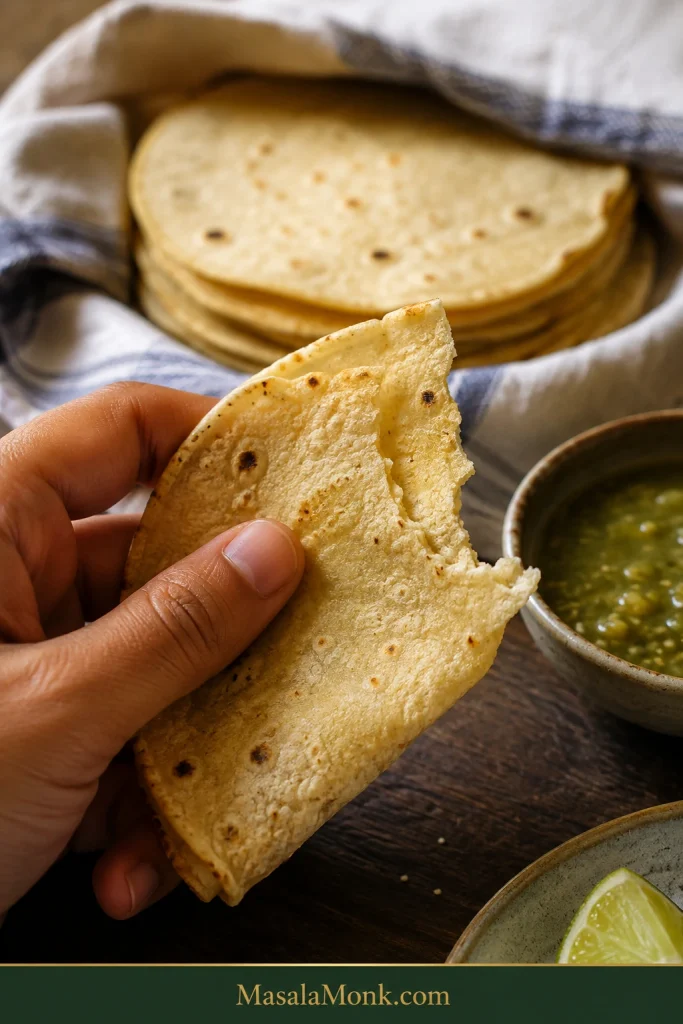
A finished tortilla should be soft after a few minutes beneath the towel, fold without cracking, and be cooked through rather than chalky or doughy in the center. Toasted freckles and the smell of cooked corn are welcome. Perfect shape and a full balloon puff are not requirements.
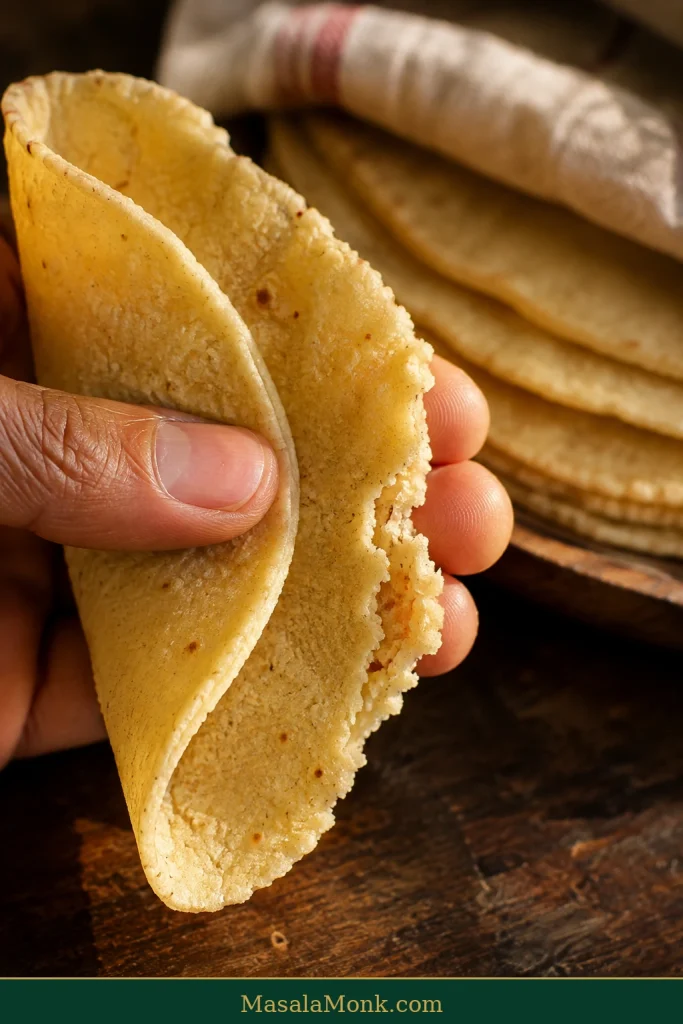
Rolled dishes put that flexibility under more pressure: a cold or dry tortilla is far more likely to split on the way into the baking dish. These easy chicken enchiladas are a useful example of why warming the tortillas first matters.
Corn Tortilla Troubleshooting
With corn tortillas, timing is part of the diagnosis. A crack in raw dough, a crack after the first flip, and a crack at tomorrow’s lunch are three different problems.
Most raw-edge cracking means the masa is too dry. Cracking that appears later can come from overcooking, excessive thickness, uncovered holding, or reheating that dries the tortilla instead of restoring flexibility.
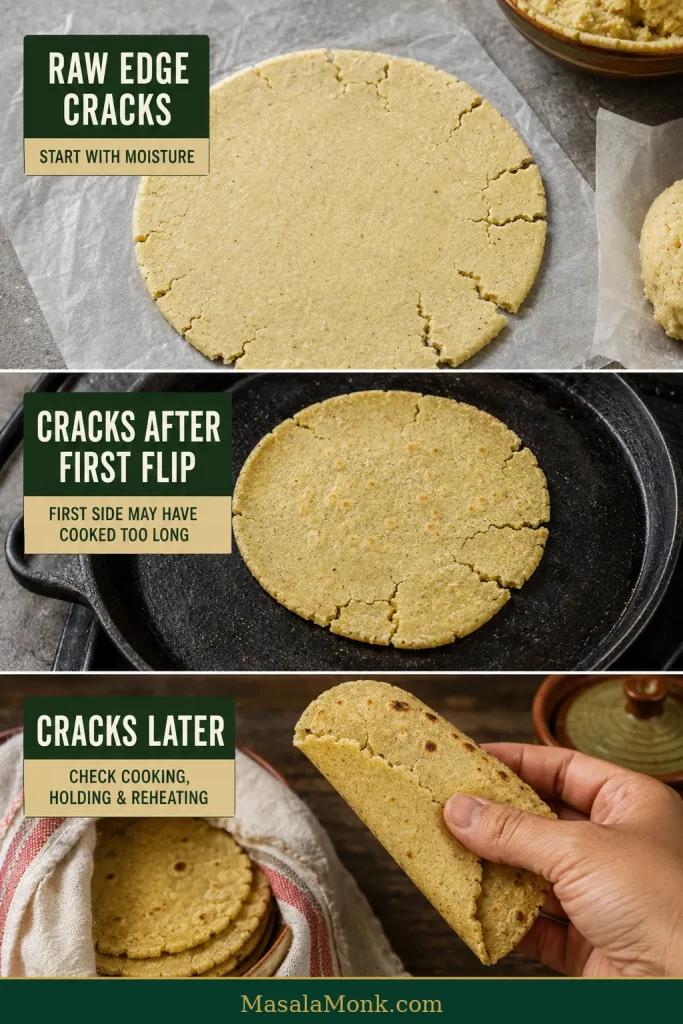
Masa & Pressing Problems
Cracked edges. The masa is probably dry. Add water 1 teaspoon at a time, knead, and press another tester. Keep the remaining dough covered.
Sticky masa. This is a dough problem before pressing: the masa feels pasty or coats your fingers. Give freshly mixed dough its full rest first. If it is still sticky afterward, knead in masa harina 1 teaspoon at a time.
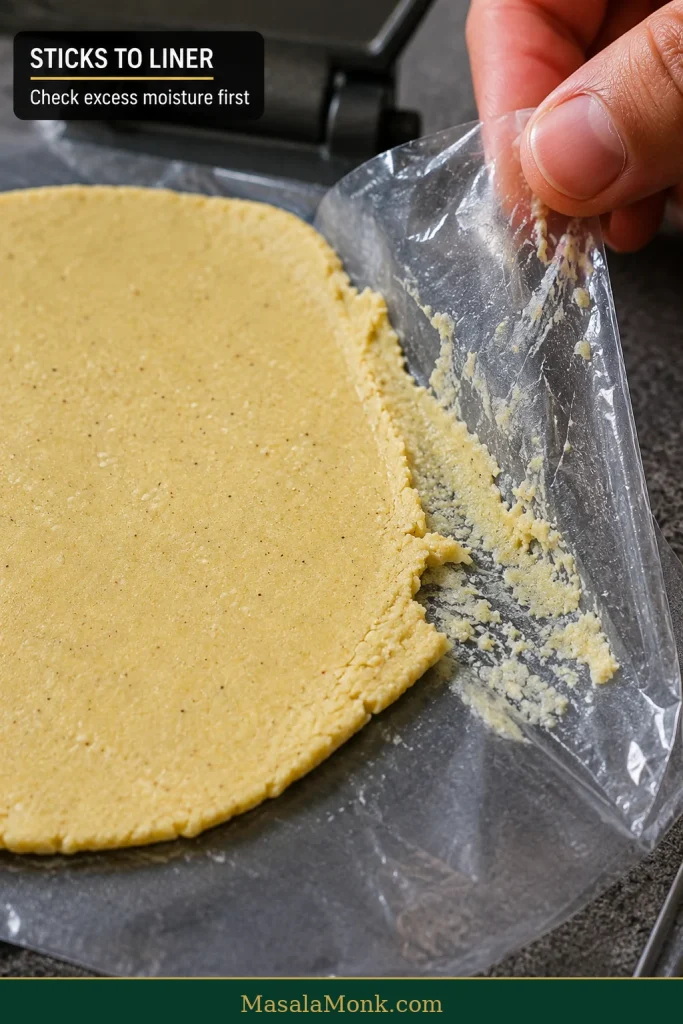
Sticks to the liner. Here the dough presses successfully but refuses to peel away cleanly. Check for excess moisture first; an unsuitable liner or an extremely thin tortilla can make release harder too.
Tears during transfer. If the liner releases but the tortilla breaks while you move it, support it on your hand and look next at thickness and evenness. A very thin patch is easy to tear under its own weight.
Won’t press thin enough. Start with portion size and dough moisture. A large ball or dry masa resists spreading. If both are right, check whether the press is closing evenly.
The same side is always thicker. Suspect the press. Rotate the tortilla for a light second press instead of changing the water every time.
Pan & Cooking Problems
Sticks to the skillet. Give the first surface another few seconds to set before trying to move it. If sticking continues, check pan preheat and whether the masa is unusually wet.
Takes too long to cook. Change one variable first. If thickness is already right, raise the heat slightly. If the pan is clearly hot but the tortilla is thick, press the next one thinner.
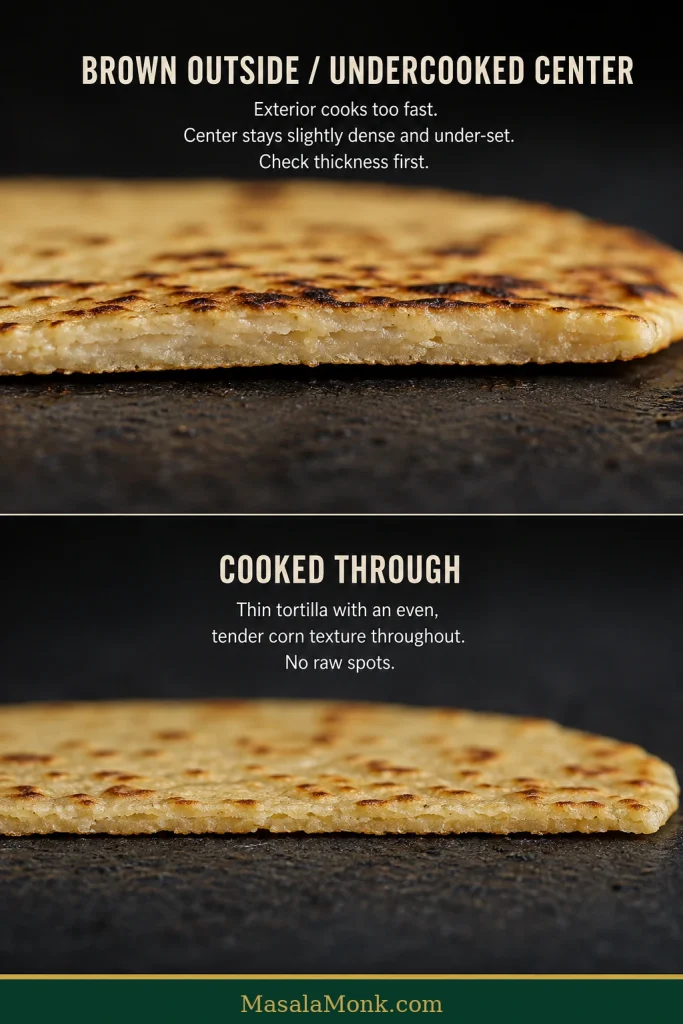
Brown outside, doughy inside. The exterior is cooking faster than heat can reach the center. Check thickness first. If the tortilla is already evenly thin, lower an overly aggressive heat slightly.
Won’t puff. Check moisture, even thickness, tears that let steam escape, pan heat, and whether the first side cooked long enough to set but not long enough to dry.
If the tortilla is soft, bends without breaking, is fully cooked, and tastes good, leave the batch alone even if it never inflates completely.
Texture & Flavor Problems
Hard or leathery. If the tortilla was flexible leaving the skillet but stiffened while sitting, start with how you are keeping the stack warm before changing the dough. Otherwise revisit moisture, thickness, heat, and total cooking time.
Cracks when folded. Raw edge cracks suggest dry masa. Cracks after the first flip can mean that side cooked too long. If a fresh tortilla breaks at the table, check moisture, thickness, cooking time, and whether the stack stayed covered. Brittle leftovers usually need better reheating.
Flat or stale flavor. Smell and taste the masa harina itself. Corn varieties and brands differ, and an old or poorly stored bag can taste lifeless even when the technique is sound. More salt may help when the fillings are lightly seasoned.
Good, but not quite like a tortillería. Your technique may be perfectly sound. Freshly ground masa can have a different aroma and texture from rehydrated masa harina. Both can make excellent tortillas without tasting identical.
What to Make With Fresh Corn Tortillas
Once you have a warm stack, give the tortillas a chance to be noticeable. Beans, eggs, shredded meat, grilled vegetables, cheese, lime, and salsa are plenty for the first batch.
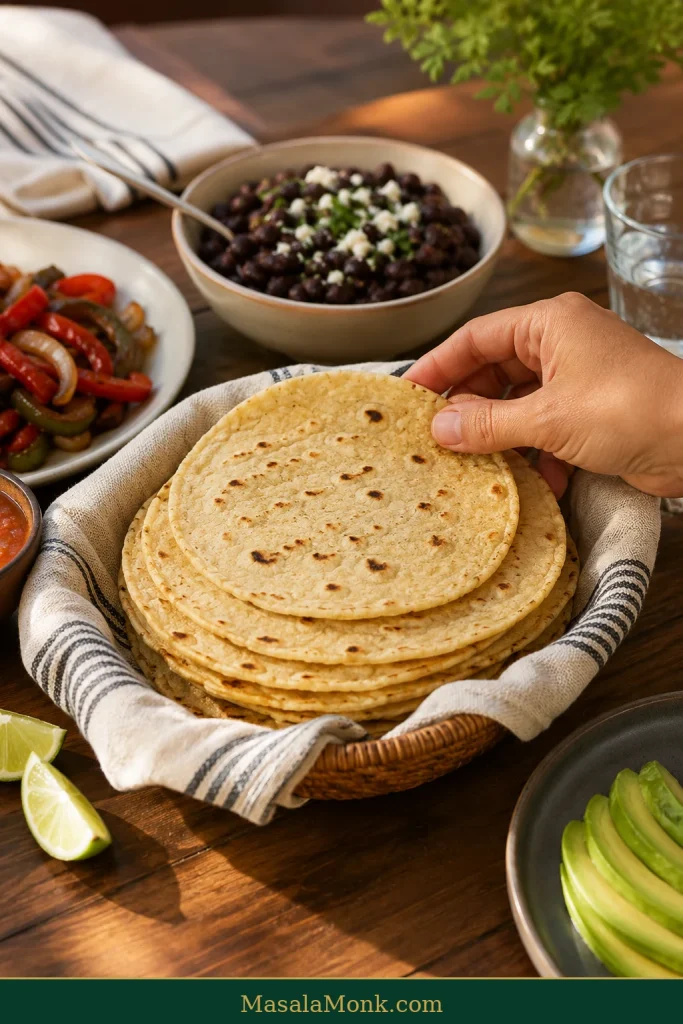
Fillings that can wait while the tortillas come off the skillet make serving easier. Slow cooker chicken fajitas are useful for exactly that reason: the chicken, peppers, and onions can stay warm while you finish the stack.
Corn tortillas won’t stretch like large wheat-flour burrito wraps. A good one should still fold comfortably when warm without cracking, which is all you need for tacos, enchiladas, and everyday table use.
Make Ahead, Store and Reheat
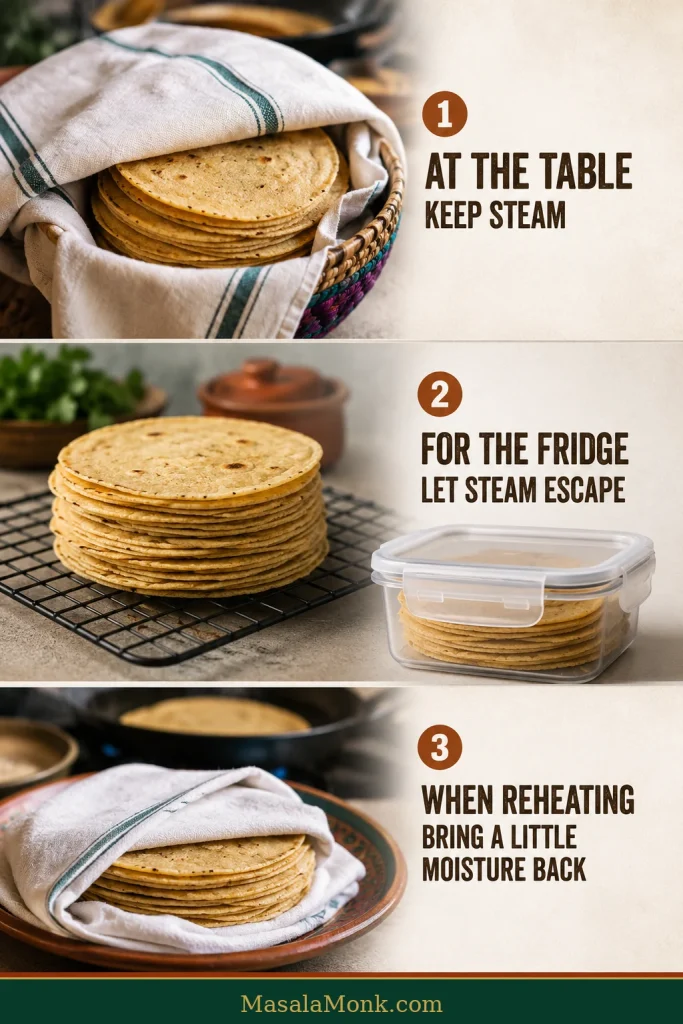
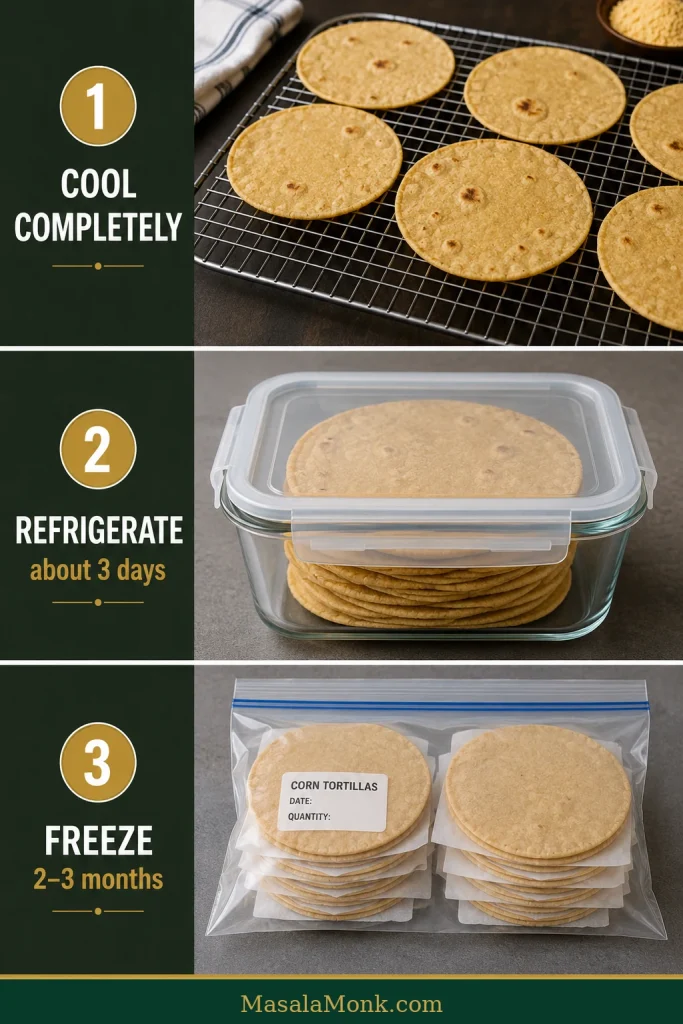
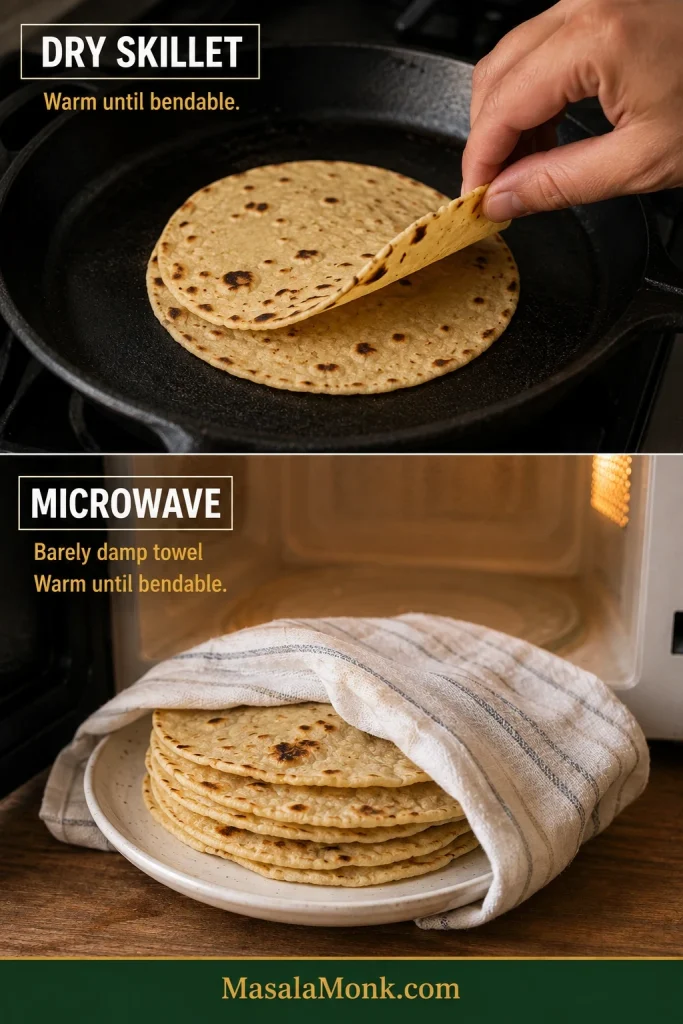
Homemade corn tortillas are best fresh, but you can refrigerate them airtight for about 3 days or freeze them for 2–3 months. Reheat only until warm and bendable; a barely damp towel helps in the microwave, while a skillet can stay dry.
At the table, keep the steam. For the fridge, let it escape. When reheating, bring a little moisture back.
Can you make the masa ahead?
Yes. Mix and hydrate the masa, cover it tightly, and refrigerate it for up to 24 hours. Let it warm slightly before pressing, knead it again, and make a small tester. Add water if the dough now feels dry.
Storing Cooked Corn Tortillas
For the meal itself, keep the stack wrapped in its towel or tucked into a tortilla warmer and bring it to the table still covered.
Refrigerator: let the tortillas cool completely before sealing them in an airtight bag or container. For the best texture, use them within about 3 days.
When yesterday’s tortillas are still good but less flexible, layered dishes can be more forgiving than rolls. This chicken enchilada casserole puts small corn tortillas beneath sauce and filling, where their structure works in your favor.
Freezer: cool completely, wrap well, and separate small groups with parchment if you want to remove only a few at a time. For best quality, use them within 2–3 months.
How to Reheat Corn Tortillas
Stovetop: warm a dry skillet over medium heat and heat each tortilla briefly on both sides until hot and bendable. Stop once the flexibility returns; extra browning at this stage usually means extra moisture loss.
Microwave: wrap a small stack in a barely damp clean towel or paper towel and microwave in short bursts until warm enough to fold without cracking.
The important word when reheating is not merely hot. It is bendable.
Older tortillas that are past their softest stage are good candidates for crisping into tostadas or tortilla chips.
The First Tortilla Is Supposed to Teach You Something
Homemade corn tortillas become much easier once you stop expecting every masa harina, tortilla press, skillet, and stove to behave identically.
Let the masa hydrate. Press one tester and read the edge. Cook one tortilla and read the pan. Change one thing at a time.
By tortilla two or three, your hands usually understand the dough better than the measuring cup ever could. The motion settles down. One tortilla cooks while the next gets pressed. The stack beneath the towel grows softer, and the kitchen begins smelling unmistakably of warm corn.
And if tortilla number one came out a little lopsided while teaching you that the pan needed more heat? Eat it. It did its job.
If you make a batch, tell me which masa harina you used and what the first tortilla taught you. Those tiny adjustments are where homemade tortillas start becoming yours.








