
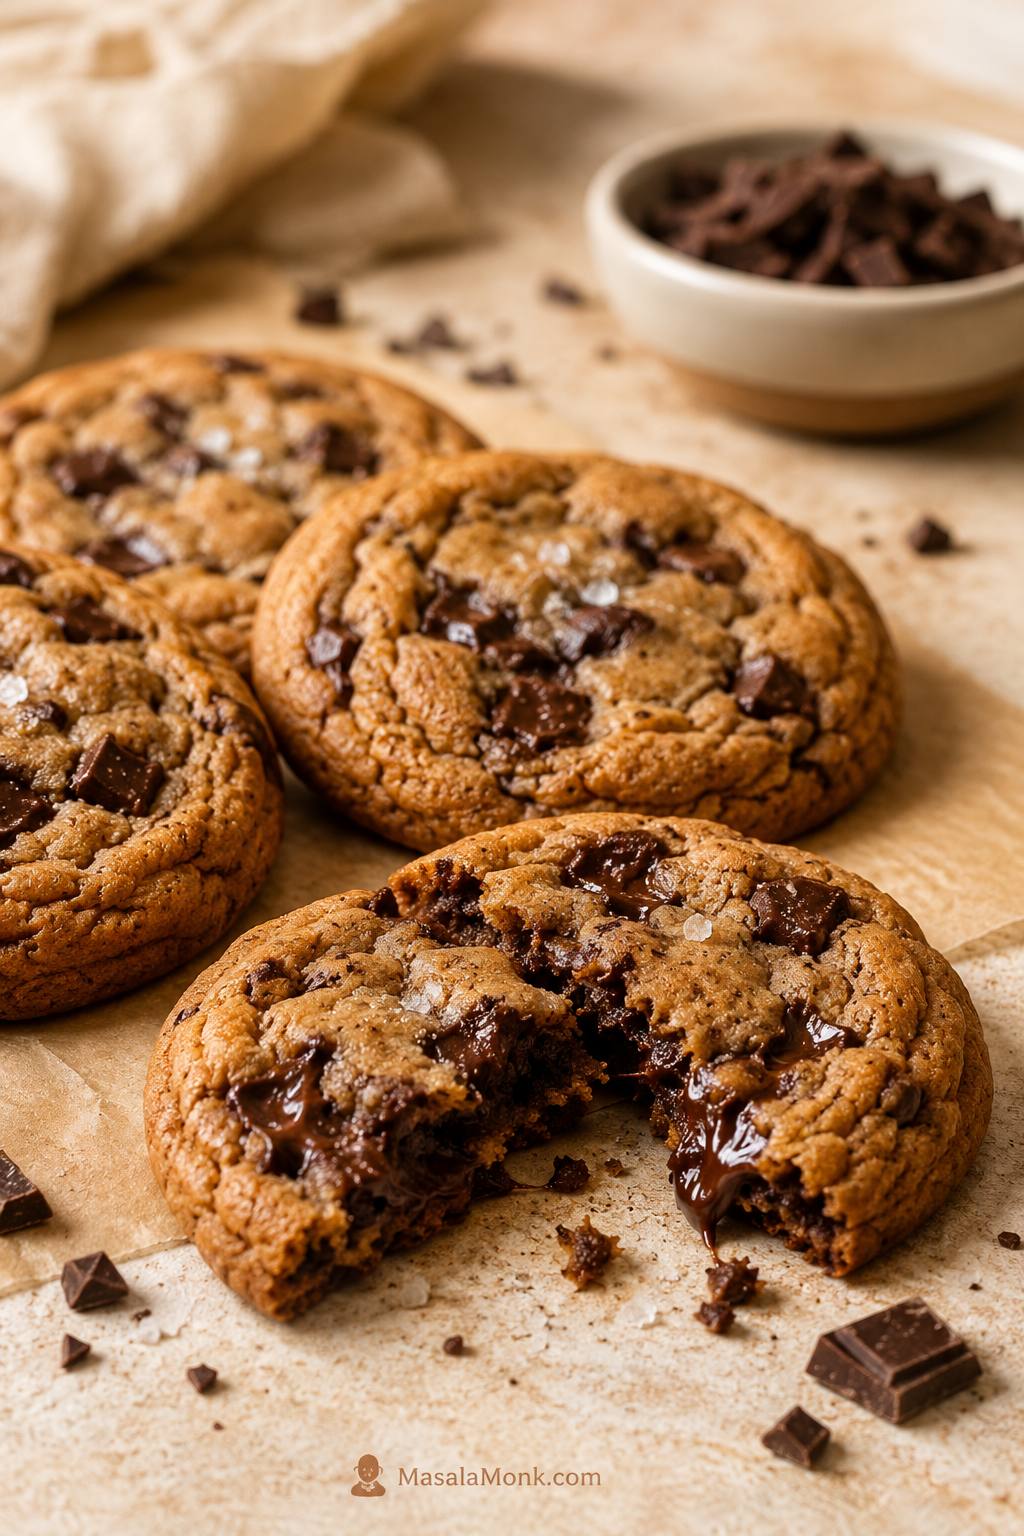
The first sign these brown butter chocolate chip cookies are going to be good is the smell: butter turning nutty in the pan, brown sugar and vanilla hitting that toasted base, then chopped chocolate folding into a dough that already tastes deeper than a regular cookie.
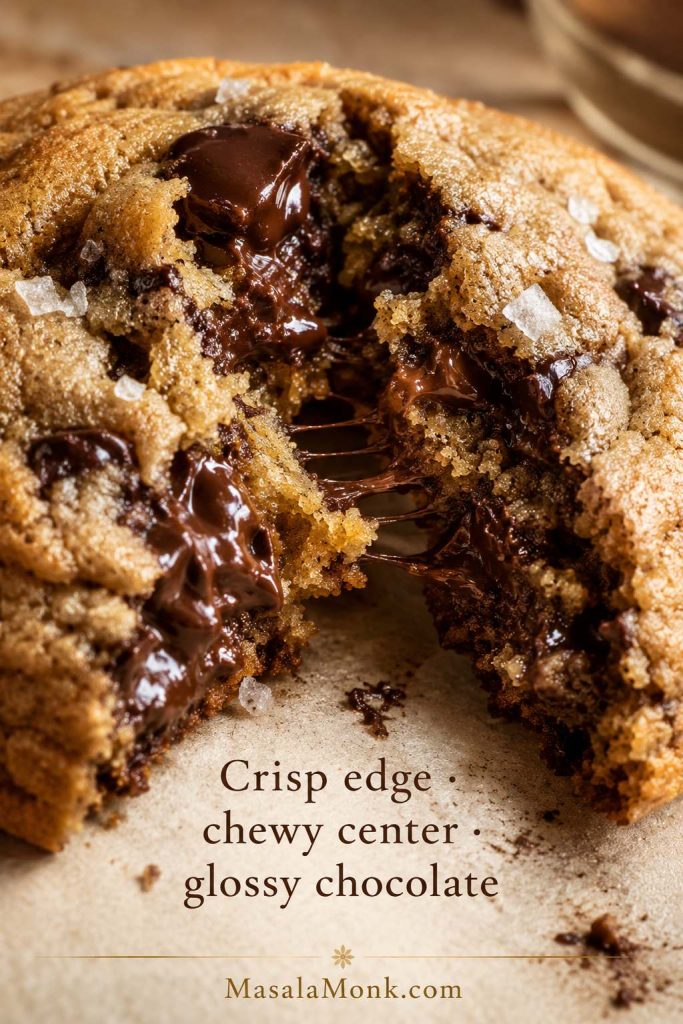
They bake with crisp edges, chewy centers, glossy chocolate pockets, and the kind of warm toasted flavor that makes a regular chocolate chip cookie taste a little plain by comparison.
The trick is not only browning the butter. It is cooling it properly, adding back a little moisture, shaping the dough before chilling, and baking the cookies just until the centers still look soft. That is how you get the cookie most people hope for when they brown butter: crisp at the edge, chewy in the center, full of melted chocolate, and sturdy enough that it does not bake into a flat greasy puddle.
This is a first-batch-friendly brown butter cookie: deep toasted flavor, thick chewy centers, and enough small safeguards to keep the dough from turning flat, greasy, dry, or weak-flavored. If you have ever made brown butter cookies that tasted good but did not bake right, this guide is built to help.
What You’ll Learn in This Cookie Guide
Start Here
Technique
Texture + Timing
Quick Answer: Brown Butter Chocolate Chip Cookies
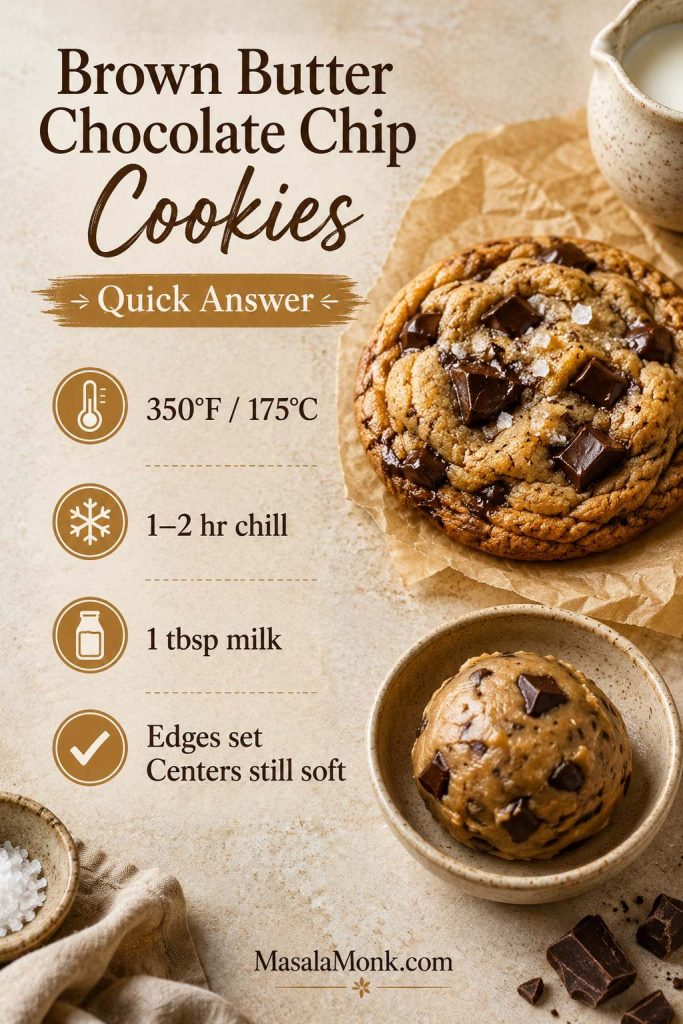
For chewy brown butter chocolate chip cookies that stay thick instead of flat, brown the butter until amber and nutty, then let it cool before adding the egg. Mix in 1 tablespoon milk, scoop before chilling, and bake at 350°F / 175°C until the edges are set but the centers still look slightly underdone.
| Default oven temperature | 350°F / 175°C for the most even first batch |
|---|---|
| Hotter option | 375°F / 190°C for well-chilled dough and slightly thicker edges |
| Bake time | 10 to 12 minutes for large cookies; 8 to 10 minutes for smaller cookies |
| Recommended chill time | 1 to 2 hours after scooping |
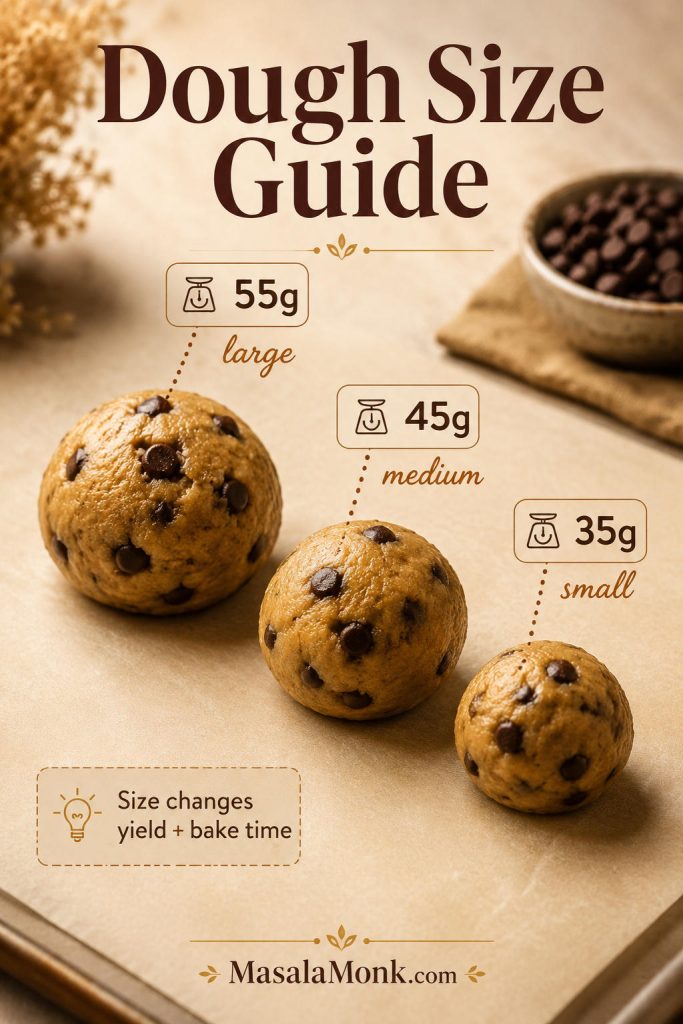
| Dough size | 55g for large cookies, 45g for medium cookies, or 35g for smaller cookies |
| Yield | About 16 large, 20 to 22 medium, or 26 to 28 smaller cookies |
| Texture | Crisp edges, chewy centers, soft middle, glossy chocolate pockets |
| Chocolate | A mix of chopped semi-sweet or dark chocolate and chocolate chips |
What This First-Batch Setup Controls
If your main worry is spread, dryness, or greasy dough, jump to the troubleshooting guide before baking the full batch.
You do not need a mixer for this dough. A whisk, spatula, and a little patience while the butter cools are enough.
The goal is a cookie that feels generous without being messy: edges that hold, centers that bend, chocolate that stays glossy for a few minutes after baking, and enough toasted butter flavor that the dough smells caramel-like before it even reaches the oven.
Why This Recipe Works
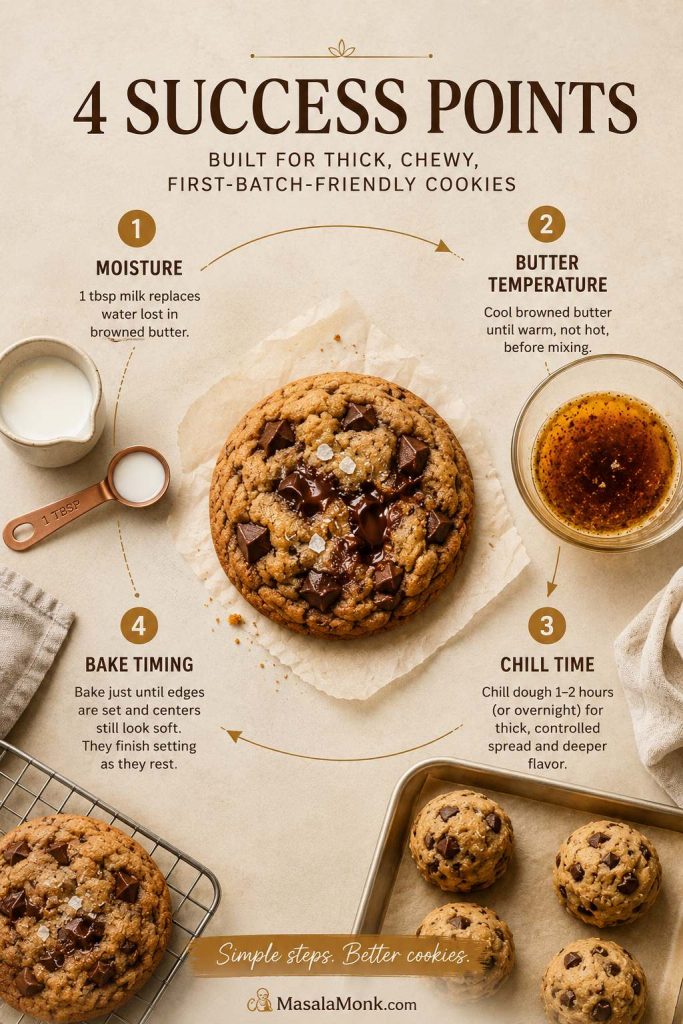
This version is built around the four places brown butter cookies usually fail: moisture loss, butter temperature, dough chill, and bake timing. Brown butter tastes better after browning, but it also loses moisture. A splash of milk restores just enough liquid, the extra yolk keeps the centers rich, and chilling the shaped dough helps the cookies bake thick instead of spreading too fast.
- Browned butter gives the cookies their nutty, caramel-like flavor.
- Brown sugar and egg yolk keep the centers chewy and soft.
- Milk replaces some of the moisture lost while browning butter.
- Scooping before chilling makes the dough easier to handle and helps the cookies bake evenly.
- Soft-center doneness keeps the final cookie chewy after it cools.
Why Brown Butter Makes Chocolate Chip Cookies Better
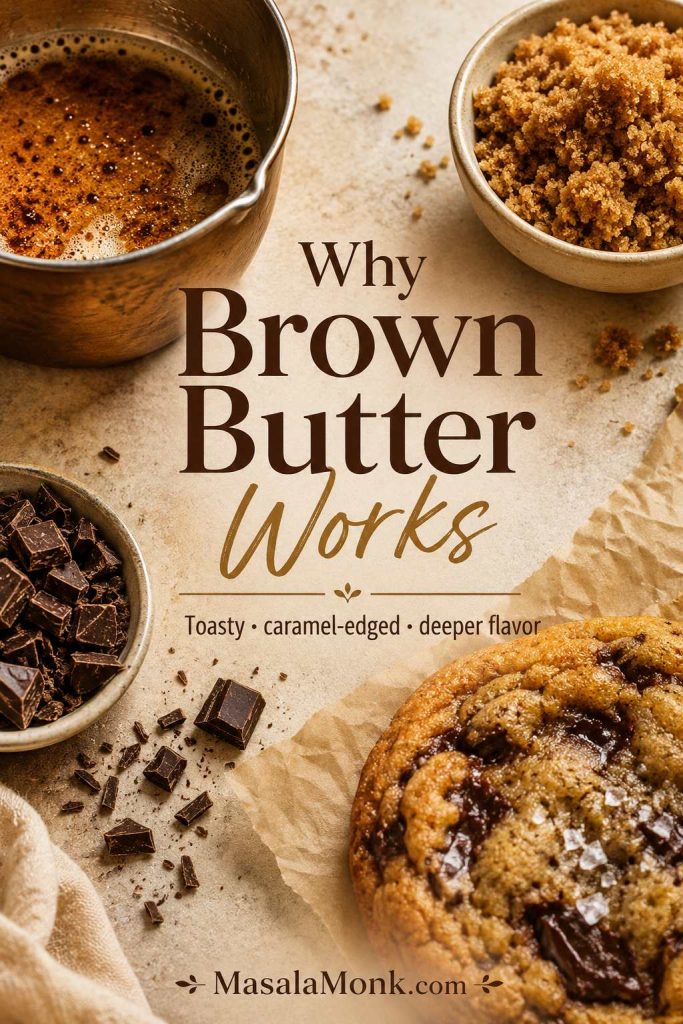
Brown butter is regular butter that has been cooked until the milk solids toast. Instead of tasting only creamy and buttery, it becomes nutty, caramel-like, and almost toffee-scented. In chocolate chip cookies, that flavor works beautifully with brown sugar, vanilla, chocolate, and a little salt.
That is why brown butter cookies often taste more layered than standard chocolate chip cookies. The flavor is not just sweet. It has a warm toasted edge, a deeper bakery smell, and a finish that makes the chocolate taste richer.
That is the reason brown butter is worth the extra few minutes. It gives the cookie a toasted, caramel-edged base before the chocolate even melts.
The Brown Butter Problem: Moisture Loss
What Moisture Loss Does to the Dough
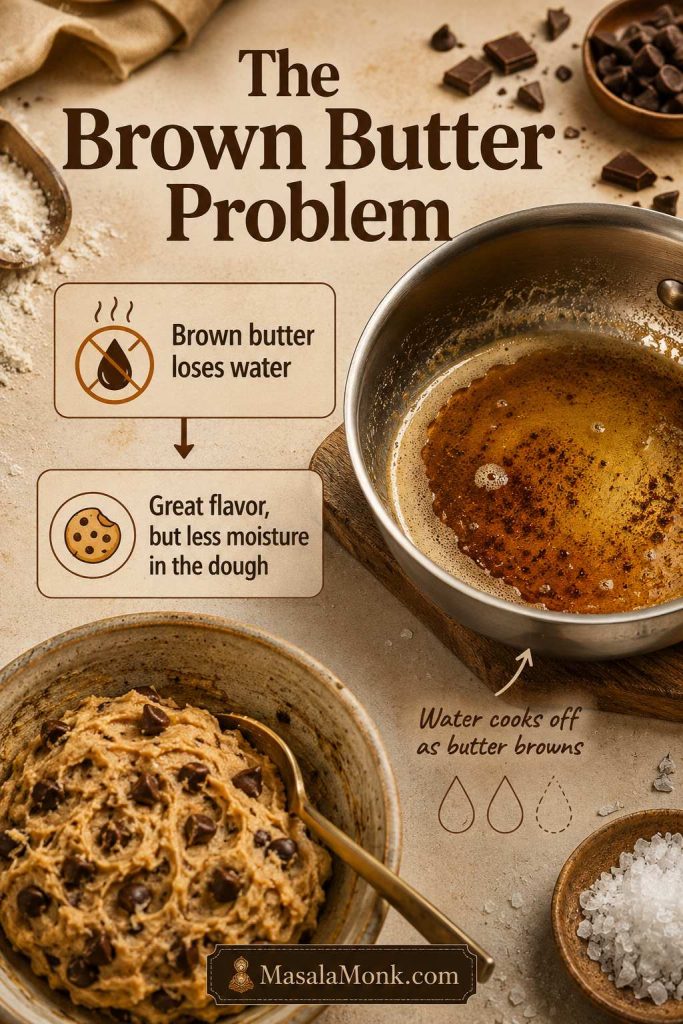
Brown butter gives you flavor with a catch: it brings toffee-like depth, but it takes water with it. This is the part that turns brown butter from a delicious risk into a reliable cookie dough.
Add the Moisture Back Carefully
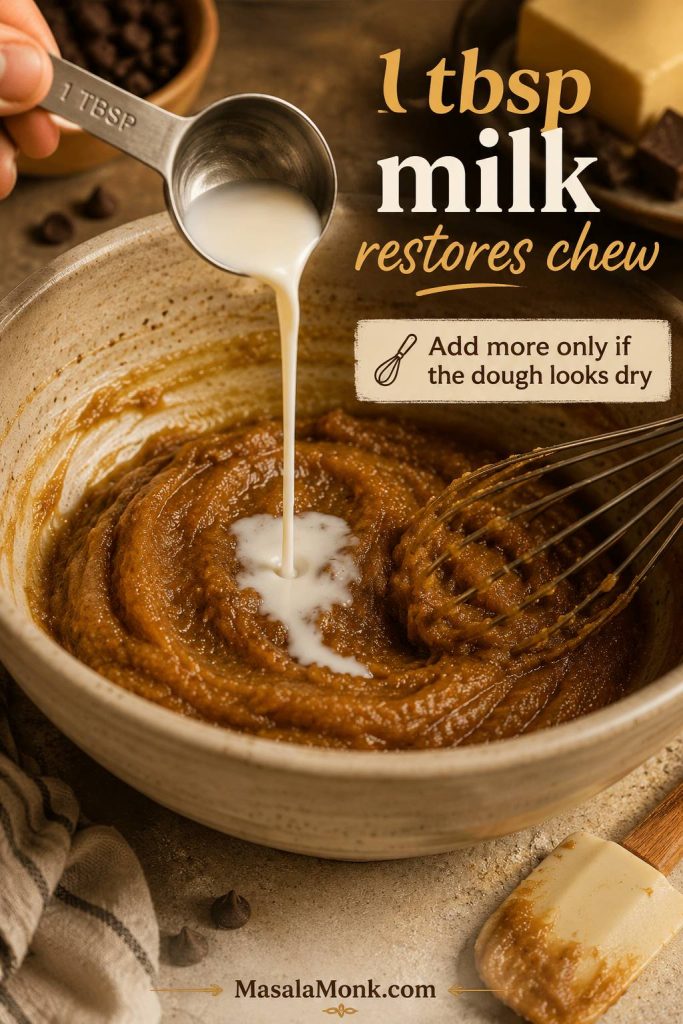
In this recipe, the butter is weighed before browning. After browning, you will have a little less liquid because water has cooked off. That is expected. The fix is to scrape every browned bit into the bowl, cool the butter, and add a small amount of milk to bring moisture back into the dough.
Use 1 tablespoon of milk by default. Keep up to 1 tablespoon more nearby and add it only if the butter cooked longer than usual or the dough does not come together after a short rest.
| What goes wrong | Why it happens | How this recipe fixes it |
|---|---|---|
| Cookies spread too much | The butter was too warm, dough was not chilled, or the tray was hot | Cool the butter, scoop the dough, chill before baking, and use a cool tray |
| Cookies taste dry | Too much moisture evaporated or too much flour was used | Use 1 tablespoon milk by default, add more only if needed, and weigh flour |
| Dough feels greasy | The butter was still hot when mixed | Let the butter cool before adding the egg |
| Cookies are cakey | Too much flour, overmixing, or too much leavener | Weigh the flour and mix only until the dough comes together |
| Flavor is not nutty | The butter was only melted, not browned enough | Cook until amber specks form and the aroma turns toasted |
What the Dough Should Feel Like
A good dough should feel rich, not oily; soft, not loose. It should scoop cleanly, hold its shape on the tray, and still feel tender enough that the centers will stay chewy after baking.
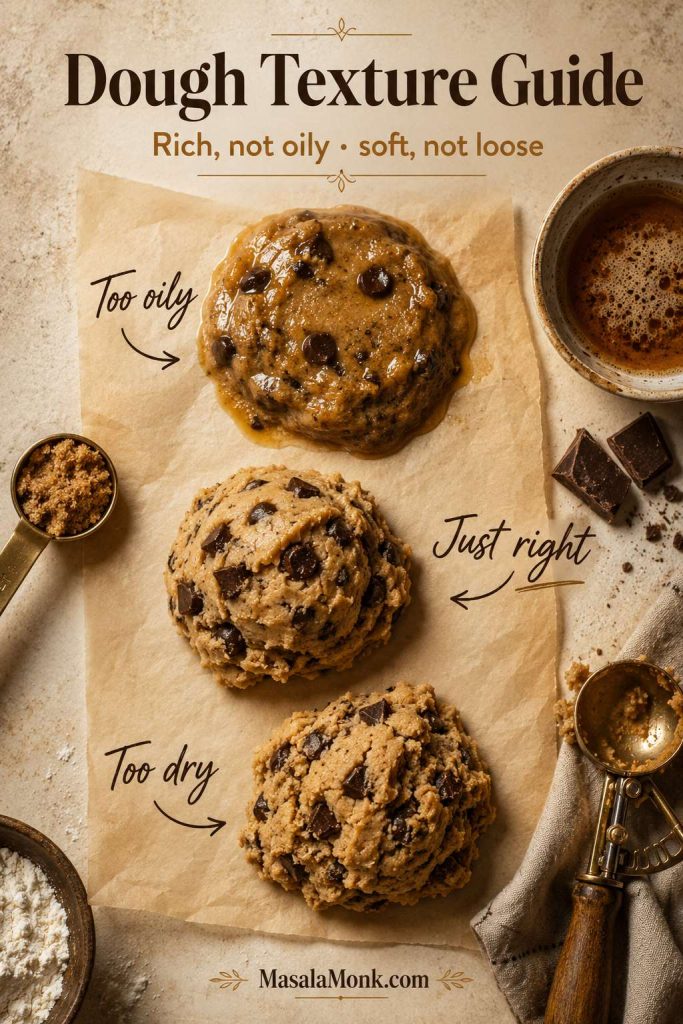
You still get the nutty flavor, but the dough scoops cleaner, holds its shape, and bakes with more control.
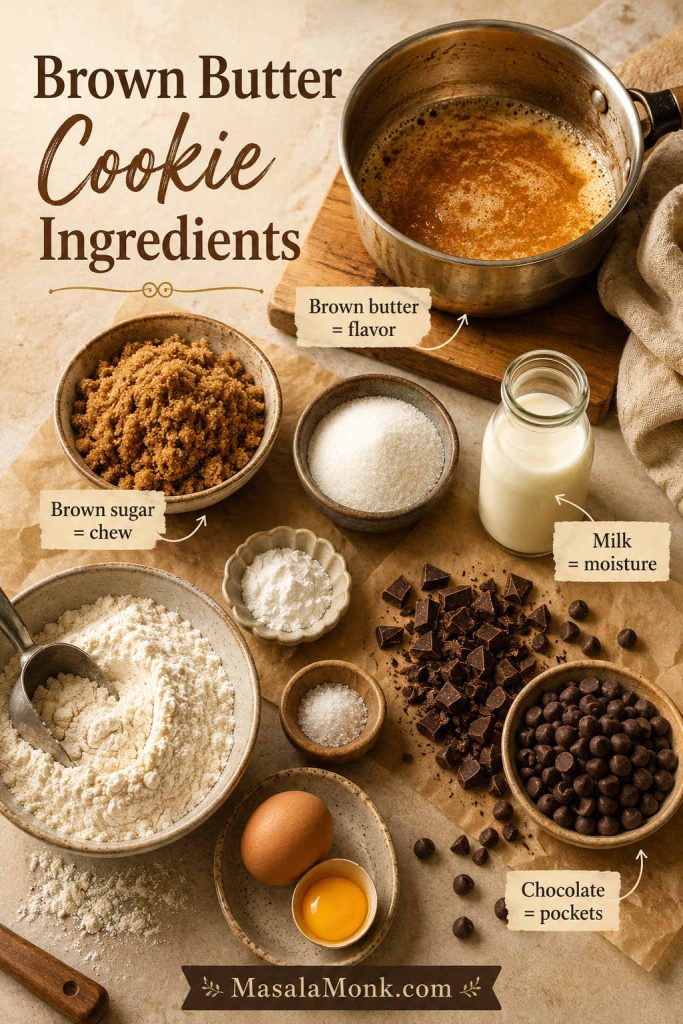
Ingredients You Need
The ingredient list is simple, but the balance matters. The goal is not just a sweet cookie; it is a cookie where the toasted butter still comes through after the sugar, flour, and chocolate join the bowl.
Browned butter gives the dough its deep flavor, brown sugar keeps the center soft, white sugar encourages crisp edges, and the extra yolk adds the richness that makes the cookie feel bakery-style.
Unsalted Butter
Use 170g / 6 oz / 3/4 cup unsalted butter, weighed before browning. Unsalted butter gives you better control over the final salt level, especially because these cookies also use chocolate and optional flaky salt on top.
Salted butter can work, but reduce the fine salt in the dough. If your salted butter is very salty, skip the flaky salt on the first test batch and add it only after tasting.
Brown Sugar and White Sugar
Brown sugar is the backbone of the chewy texture. It brings moisture, caramel notes, and a softer center. White sugar helps the edges crisp and encourages just enough spread.
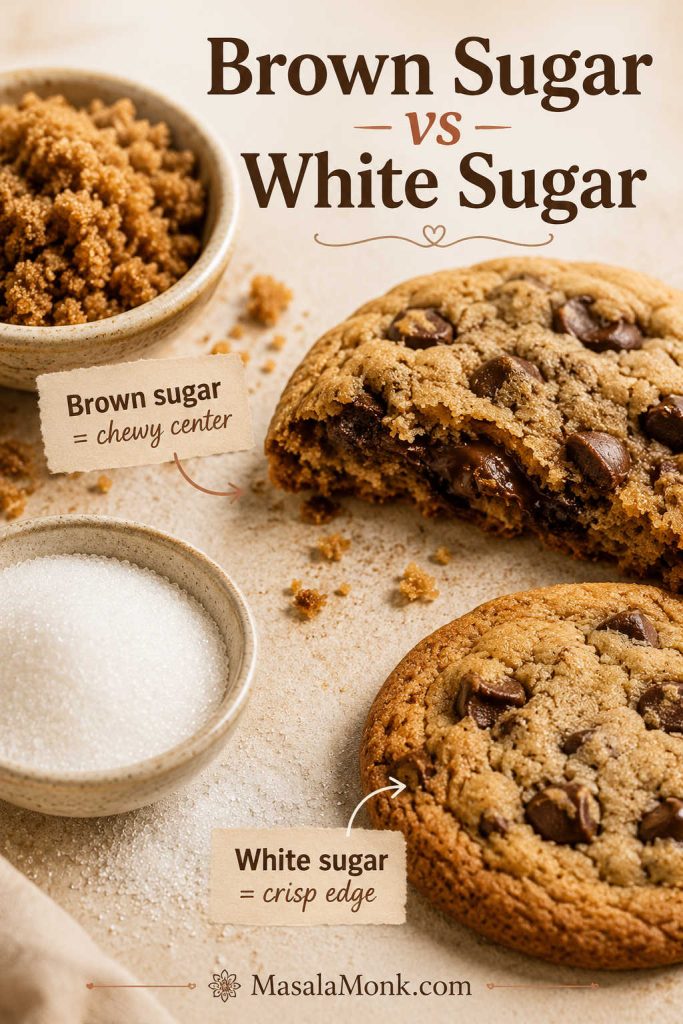
If you are out of brown sugar, this is one of the rare swaps worth skipping. This dough depends on brown sugar for chew, moisture, and caramel flavor, so a no-brown-sugar cookie needs a different balance.
Egg and Egg Yolk
One whole egg gives structure. One extra yolk gives richness, chew, and a softer center without adding too much extra liquid. It is one of the easiest ways to make the cookies feel bakery-style without using complicated ingredients.
Milk
Use 1 tablespoon / 15 ml milk by default. Keep up to 1 tablespoon / 15 ml more nearby and add it only if the dough looks dry after mixing. That small amount restores chew without making the dough loose.
For the full reason milk matters in brown butter cookie dough, see the moisture-loss explanation above.
All-Purpose Flour
Use 220g all-purpose flour, which is about 1 3/4 cups plus 1 tablespoon when spooned and leveled. Weighing is best because too much flour is one of the fastest ways to turn chewy cookies into cakey cookies. King Arthur Baking’s ingredient weight chart is a useful reference if you bake often and want more consistent cup-to-gram conversions.
Baking Soda and Baking Powder
Baking soda helps with browning, spread, and classic cookie chew. A small amount of baking powder gives a little lift so the cookies do not feel dense. Keep both amounts modest; too much leavener pushes the cookies toward cakey.
Chocolate
For dramatic melted pockets, chopped chocolate is the better choice. Chips are more predictable: they hold their shape, spread evenly through the dough, and give the cookies a familiar chocolate-chip look. For the easiest everyday batch, use a mix of both.
Semi-sweet chocolate is the safest choice. Dark chocolate makes the cookies more intense, while milk chocolate makes them sweeter and softer. Chopped chocolate makes the cookie feel more bakery-style because every bite gets both big melted pockets and tiny chocolate flecks. For a deeper chocolate dough rather than a brown-butter-forward dough, try our double chocolate chip cookies.
Equipment That Makes These Cookies Easier
You do not need special equipment, but a few tools make the recipe more forgiving: a light-colored pan for seeing the butter brown, a digital scale for flour and dough portions, parchment for controlled spread, and a cool light-colored baking sheet for gentler bottoms.
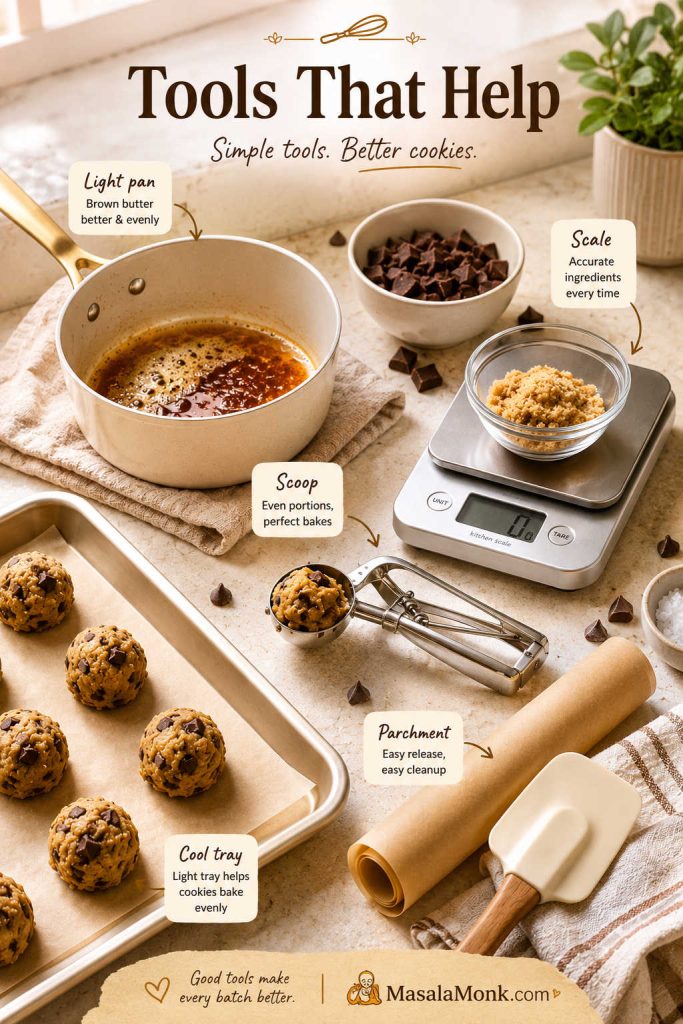
- Light-colored skillet or saucepan: helps you see when the butter turns amber instead of burnt.
- Digital scale: prevents too much flour and keeps cookie size consistent.
- Cookie scoop or kitchen scale: makes it easier to portion 55g, 45g, or 35g cookies evenly.
- Parchment paper and a cool baking sheet: help control spread and protect the bottoms.
- Round cutter or glass: lets you scoot warm cookies into rounder shapes if they spread unevenly.
How to Brown Butter for Cookies
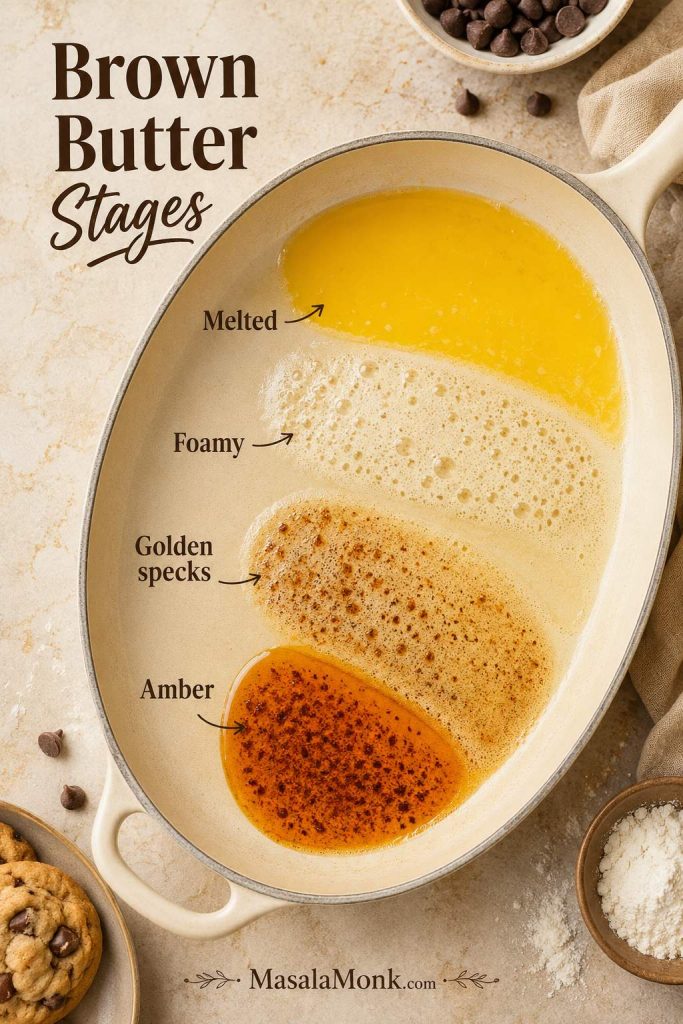
Browning butter is easy once you know what to watch for. Use color, smell, sound, and the little brown specks at the bottom of the pan.
Step-by-Step Browning Cues
- Cut the butter into pieces. Smaller pieces melt more evenly.
- Use medium heat. Too much heat can burn the milk solids before the butter browns evenly.
- Let it melt, foam, and crackle. The crackling sound is moisture cooking off.
- Stir often. Scrape the bottom so the milk solids brown evenly.
- Watch for amber specks. The butter should smell nutty and toasted, not bitter.
- Remove from heat quickly. It keeps cooking from residual heat.
- Scrape everything into the bowl. Do not leave the brown bits behind.
- Cool before mixing. The butter should be liquid but no longer steaming before it meets the egg.
| Stage | What you see | What to do |
|---|---|---|
| Melted butter | Yellow liquid, no brown specks | Keep cooking |
| Foamy butter | Foam and crackling sounds | Stir and watch closely |
| Golden specks | Light brown bits forming at the bottom | You are close |
| Amber brown butter | Brown specks, nutty smell, golden liquid | Remove from heat |
| Burnt butter | Black bits, sharp bitter smell | Start over for best flavor |
Once you catch that amber stage a few times, it becomes familiar. The smell changes first, then the specks darken quickly, so stay close to the pan once the butter starts foaming.

Once the butter reaches the amber stage, continue with the step-by-step method so it cools before the egg goes in.
Brown Butter vs Melted Butter
Melted butter gives you easy, chewy cookies. Brown butter gives you something deeper: toasted milk solids, a nutty smell, and a flavor that leans caramel and toffee. The tradeoff is moisture. Because browned butter has cooked longer, this dough needs a little added milk and time to chill before baking.
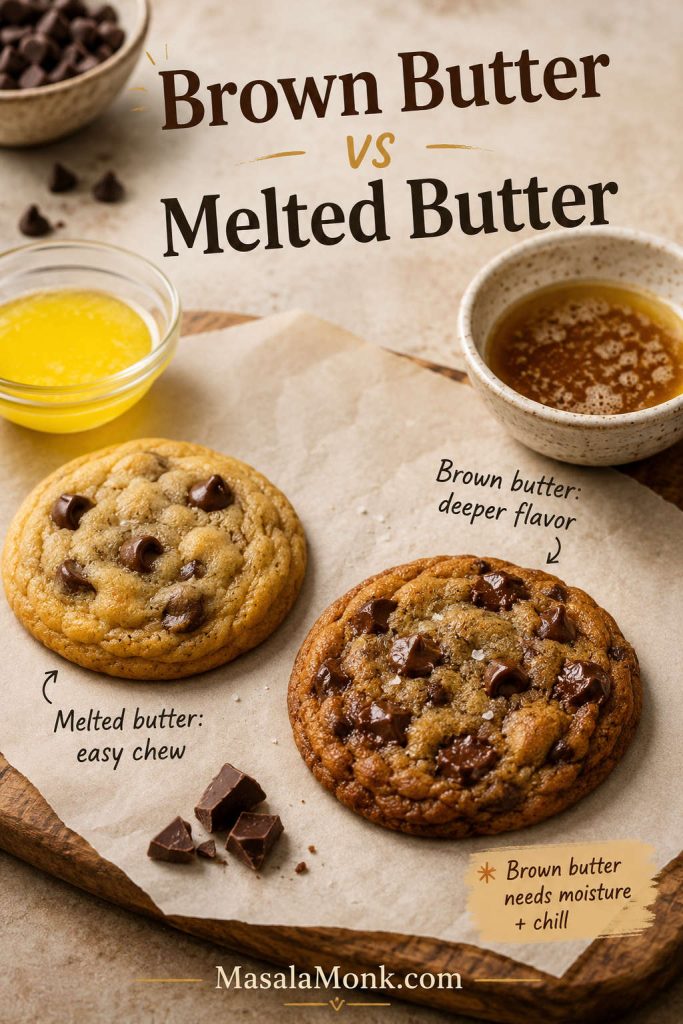
If speed matters most, melted butter can be useful. If you want the cookie to taste more toasted, caramel-like, and bakery-style, brown butter is worth the extra few minutes.
How to Make Brown Butter Chocolate Chip Cookies
Once the butter is ready, the dough comes together without complicated mixing. The main workflow is simple: brown, cool, mix, scoop, chill, bake.
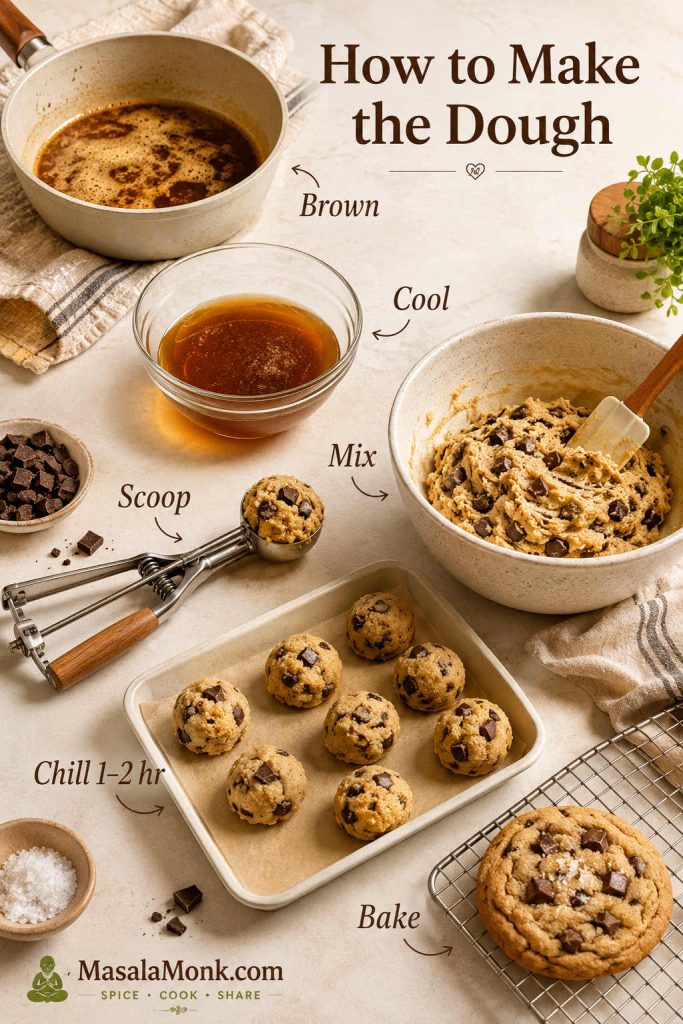
1. Brown and Cool the Butter
Brown the butter until amber specks form and the kitchen smells nutty. Pour it into a heat-safe mixing bowl, scraping in all the browned bits. Let it cool for 15 to 25 minutes, until liquid and warm, not hot.
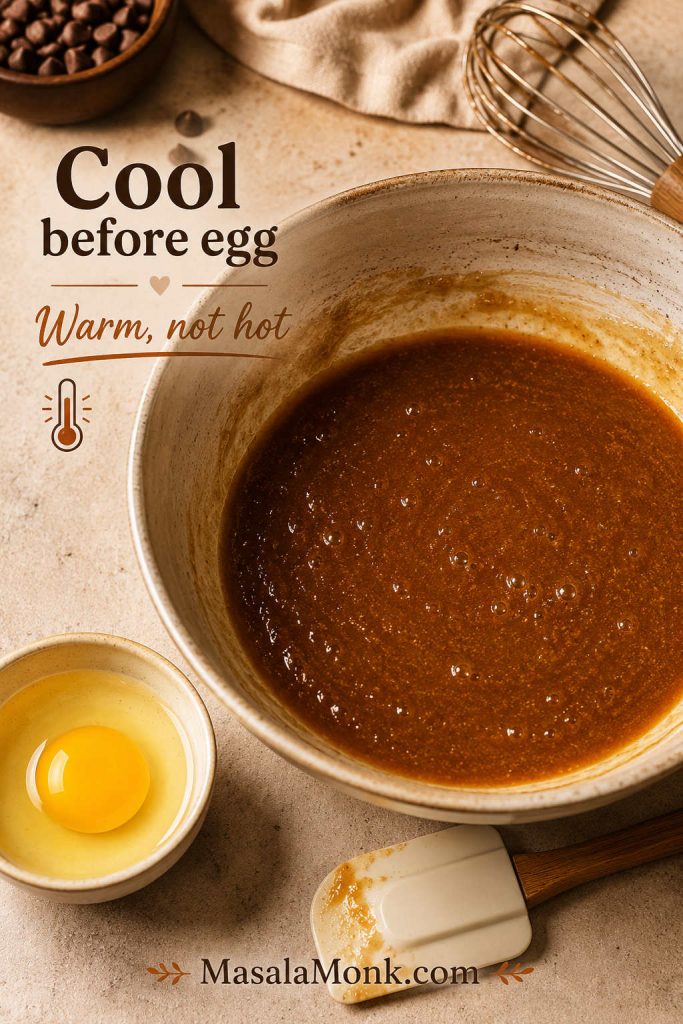
If the butter becomes completely solid, let it soften slightly before mixing. If it is still steaming, give it more time before adding the egg.
2. Whisk in the Sugars
Add the brown sugar and granulated sugar to the cooled butter. Whisk until the mixture looks glossy and thick. It does not need to become fluffy like creamed butter and sugar.
3. Add Egg, Yolk, Vanilla, and Milk
Add the whole egg, egg yolk, vanilla extract, and 1 tablespoon milk. Whisk until smooth. Hold back the extra tablespoon unless the finished dough looks dry later.
4. Mix the Dry Ingredients Separately
In another bowl, whisk together the flour, baking soda, baking powder, and fine salt. A quick separate whisk keeps the leaveners from landing in one bitter or puffy pocket.
5. Fold the Dough Together
Add the dry ingredients to the wet ingredients and fold just until a few flour streaks remain. Add the chocolate and fold again until combined.
Aim for dough that is thick and scoopable: not shiny-loose, not dry-crumbly. If it looks too soft, rest it for 10 minutes before scooping. If it looks dry, add the extra milk a little at a time.
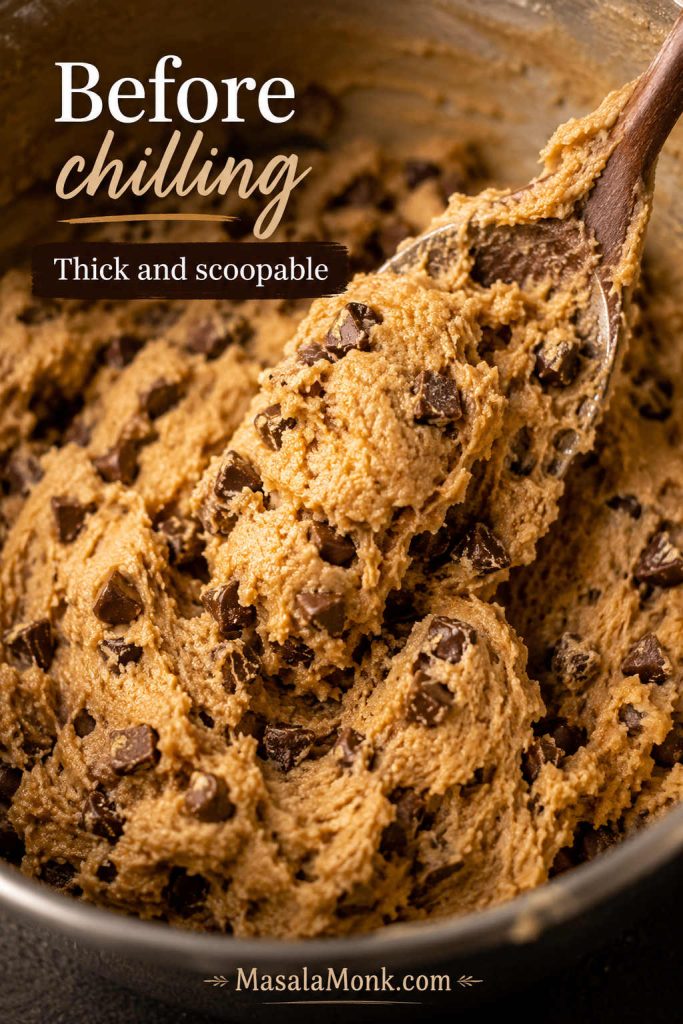
6. Scoop Before Chilling
Scoop the dough before chilling. This is easier than trying to scoop a cold, firm bowl of dough later, and it helps the cookies bake more evenly.
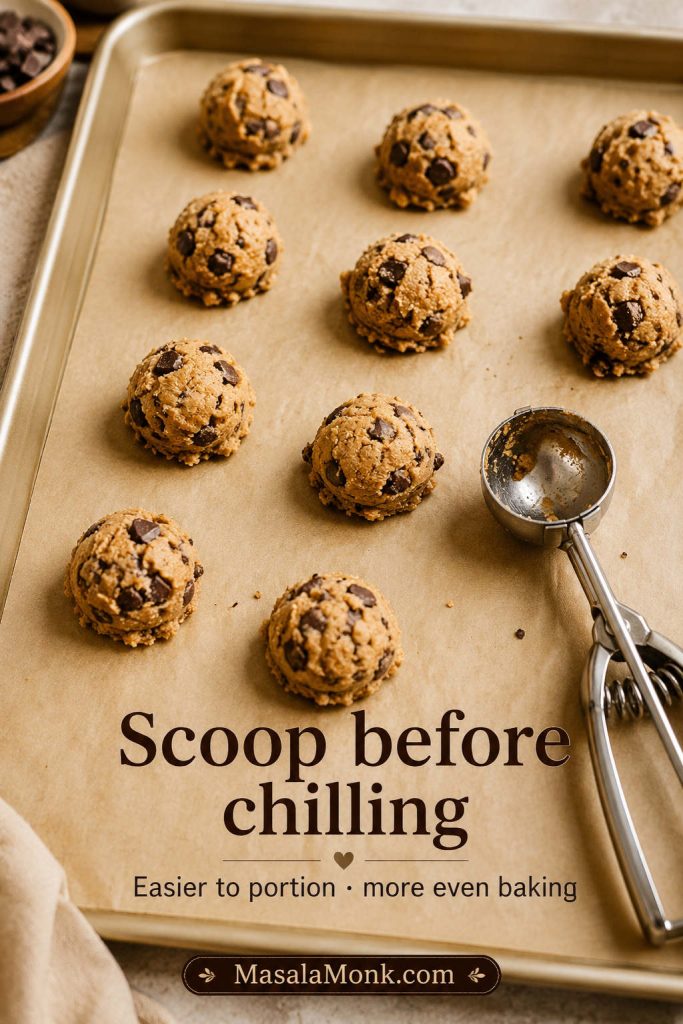
Use 55g portions for about 16 large cookies, 45g portions for about 20 to 22 medium cookies, or 35g portions for about 26 to 28 smaller cookies. Place them on a lined tray, cover, and chill for 1 to 2 hours.
If you are deciding between no chill, 30 minutes, 1 to 2 hours, or overnight, use the chill time guide before baking.
7. Bake Until the Centers Look Soft
Heat the oven to 350°F / 175°C. Place the chilled portions on a parchment-lined baking sheet with room to spread. Bake 55g cookies for 10 to 12 minutes, 45g cookies for 9 to 11 minutes, or 35g cookies for 8 to 10 minutes. The edges should be set and the centers should still look slightly soft.
8. Shape and Finish While Warm
If the cookies spread unevenly, use a round cutter or glass to gently scoot them into shape while they are still hot. Finish with flaky salt if you like. Let the cookies rest on the baking sheet for 5 to 10 minutes before moving them to a rack.
At this point, the cookies should smell like toasted butter, vanilla, brown sugar, and chocolate. That is the moment the chill time starts to feel worth it.
Chill Time Guide: No Chill vs 30 Minutes vs 2 Hours vs Overnight
Chill time is one of the biggest differences between an okay cookie and a great one. Chilling firms the butter, hydrates the flour, deepens flavor, and slows spread in the oven.
You can bake the dough without chilling, but the cookies will usually spread more, bake thinner, and have crispier edges. That is not automatically bad, but it is a different result.
If You Need to Bake Right Away
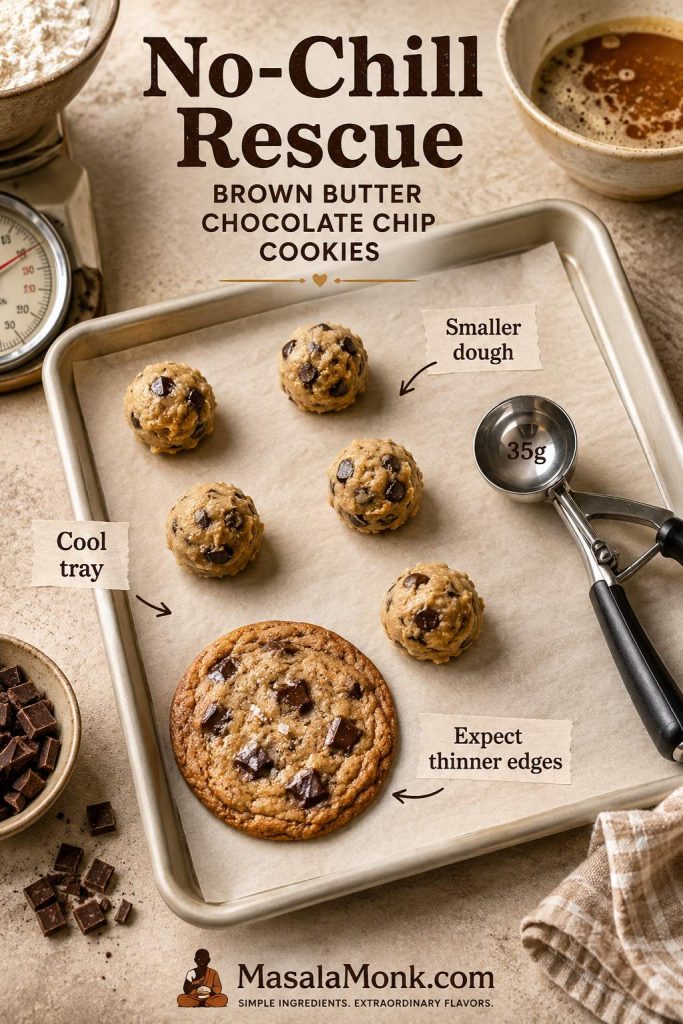
If the first tray still spreads more than expected, use the troubleshooting section to adjust the next tray before baking the rest.
Choose the Right Chill Time
Choose the chill time based on the cookie you want today: fast and crisp-edged, thicker and chewier, deeper-flavored, or ready to bake later.
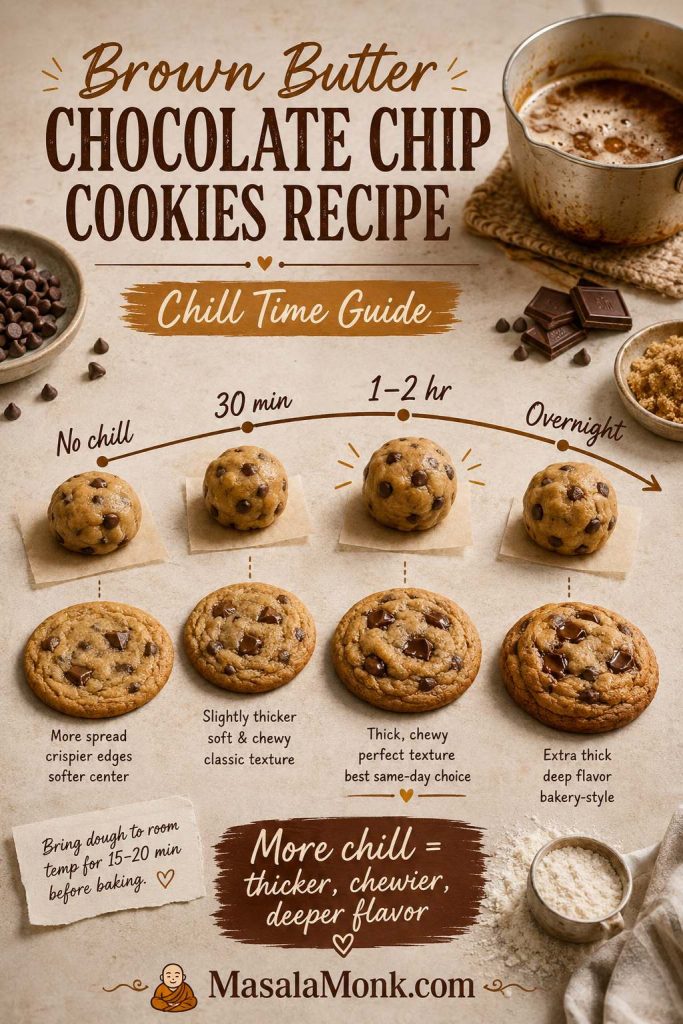
| Chill time | What happens | Best for |
|---|---|---|
| No chill | More spread, thinner cookies, crispier edges | Fast craving cookies |
| 30 minutes | Some control, still slightly spread-prone | Same-day baking when short on time |
| 1 to 2 hours | Thicker cookies, chewier centers, better flavor | Most reliable balance of flavor, texture, and same-day baking |
| Overnight | Deeper flavor, firmer dough, stronger bakery-style texture | Make-ahead baking |
| More than 24 hours | Very firm dough and deeper flavor | Planning ahead; let the dough sit briefly before baking if very hard |
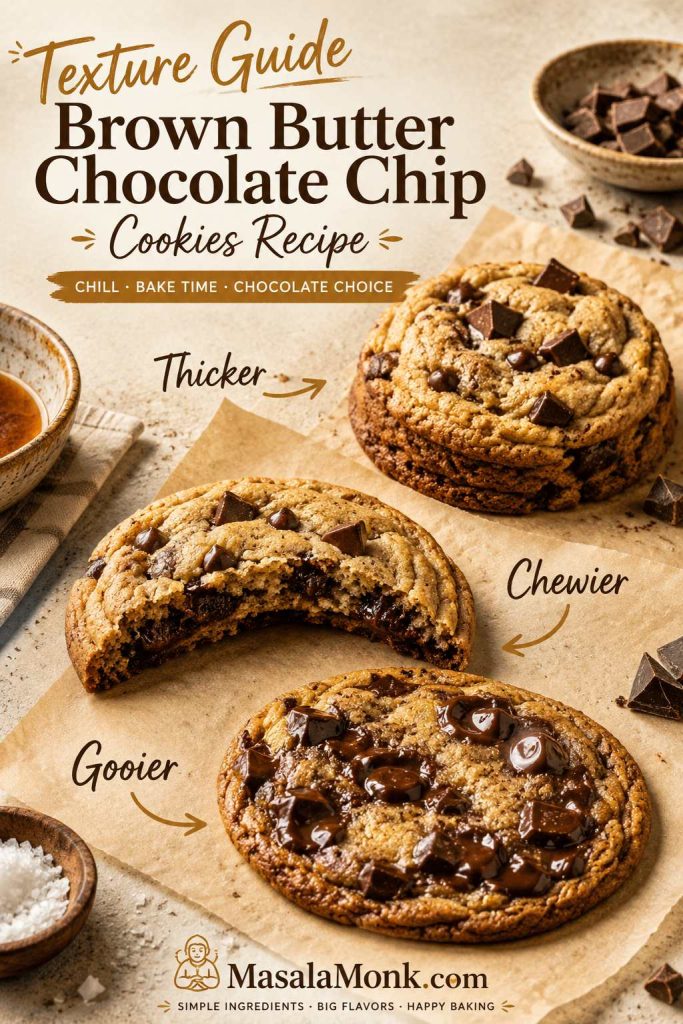
How to Get Thicker, Chewier, or Gooier Cookies
Start with the base recipe once, then adjust from a place of control. A longer chill, a shorter bake, or a different chocolate can shift the cookie without turning it into a new recipe.
How to Adjust the Texture
| What you want | What to do | Why it works |
|---|---|---|
| Thicker cookies | Chill shaped dough for 2 hours and bake cold | Cold dough spreads more slowly |
| Chewier centers | Use the egg yolk, enough brown sugar, and avoid overbaking | Yolk and brown sugar keep the center soft |
| Crispier edges | Bake 1 minute longer or use slightly smaller portions | More edge exposure gives more crispness |
| Gooier chocolate pockets | Use chopped chocolate or wafers instead of chips alone | Flat pieces melt into larger pockets |
| More toasted-butter flavor | Brown until amber, scrape in every bit, and do not drown the dough in too much chocolate | The toasted milk solids carry the nutty flavor |
| Less spread | Cool butter fully, chill before baking, use parchment, and avoid hot trays | Warm fat spreads faster in the oven |
| More spread | Use a shorter chill or gently flatten the portions before baking | Flatter dough spreads sooner |
| Softer cookies | Pull the cookies when the centers still look soft | They finish setting on the hot baking sheet |
You do not need to change everything at once. Try the base recipe first, then adjust one thing next time: chill longer for thickness, bake a minute less for softer centers, or switch to chopped chocolate for bigger melted pockets.
For more control after choosing your texture, check the oven temperature guide and the doneness cues.
350°F vs 375°F for Brown Butter Cookies
Use 350°F / 175°C as the default because it gives first-time bakers a wider doneness window. The cookies have time to spread slightly, melt the chocolate, and set without over-browning the bottoms.
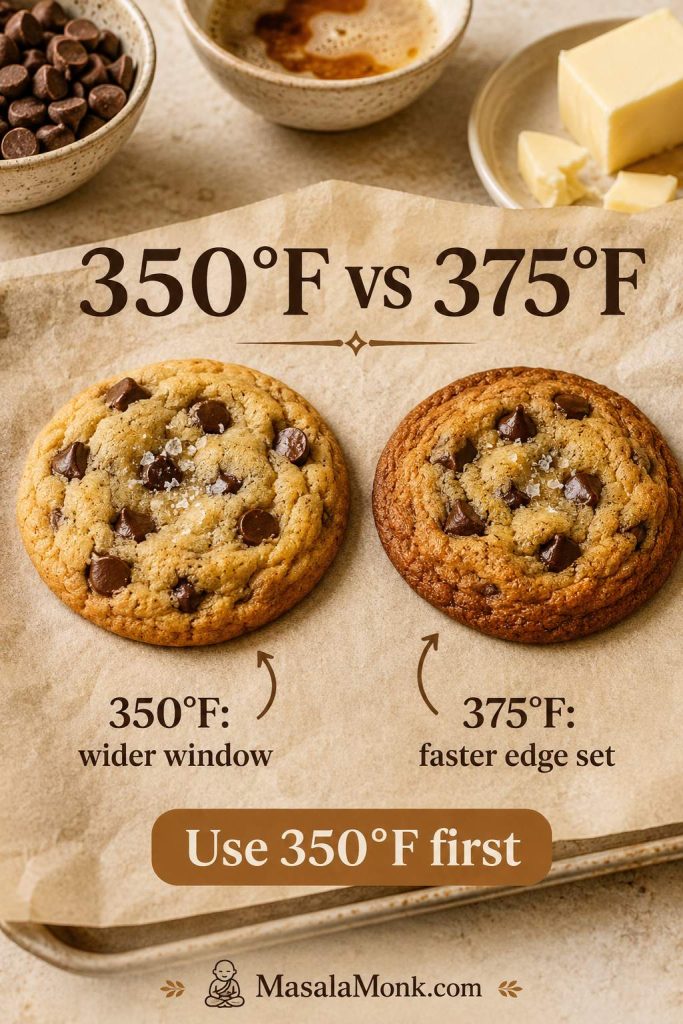
If your oven uses round Celsius markings, 180°C is close enough for the default bake; just watch the first tray carefully. Once you know how your oven and trays behave, try 375°F / 190°C for a slightly taller, faster-setting cookie.
Chocolate Chips vs Chunks vs Wafers
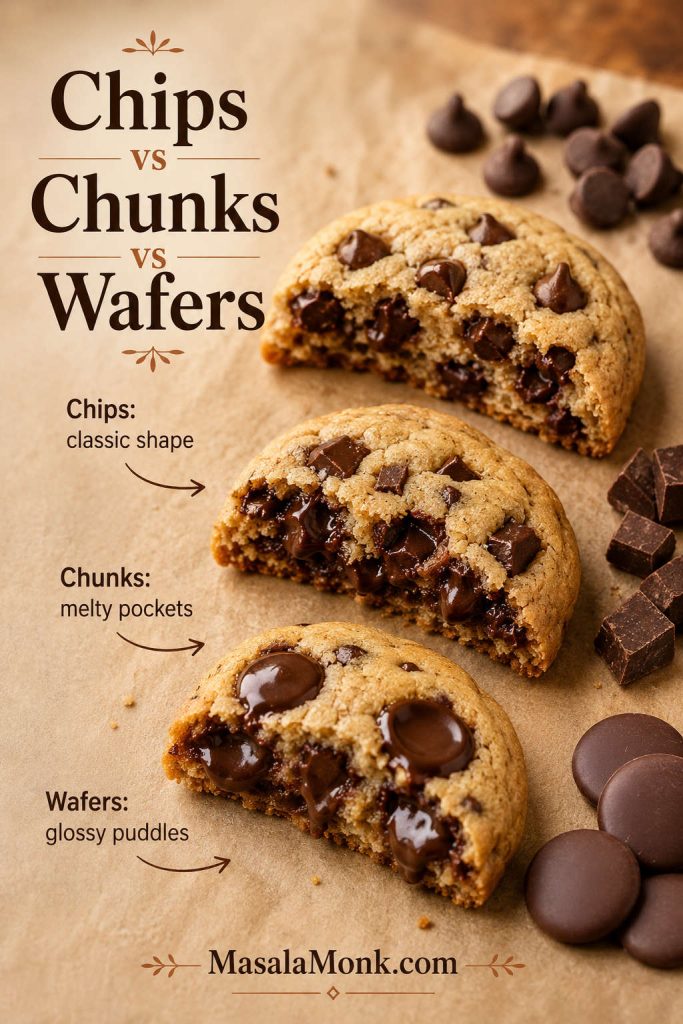
The chocolate changes the personality of the cookie. The dough can be the same, but chips, chopped chocolate, and wafers melt differently.
| Chocolate type | What it gives | Best use |
|---|---|---|
| Chocolate chips | Classic look, neat pieces, less melting | Easy pantry cookies |
| Chopped chocolate | Melty pockets and tiny chocolate shards through the dough | Bakery-style cookies |
| Chocolate wafers or fèves | Large glossy puddles | Premium dramatic cookies |
| Mixed chips and chunks | Shape from chips, melt from chunks | Best everyday version |
Chocolate chips are perfectly fine here. The cookies will still taste excellent; they will simply have fewer dramatic melted pockets than a chopped-chocolate batch.
How to Know When the Cookies Are Done
The best cookie moment happens before the tray looks fully finished. If you wait until the centers look completely baked in the oven, the cookies are often overbaked after cooling.
- The edges should look set and lightly golden.
- The centers should still look soft and slightly puffed.
- The tops should no longer look wet, but they should not look firm all the way through.
- The bottoms should be golden, not dark brown.
- The cookies should smell buttery, nutty, and chocolatey.
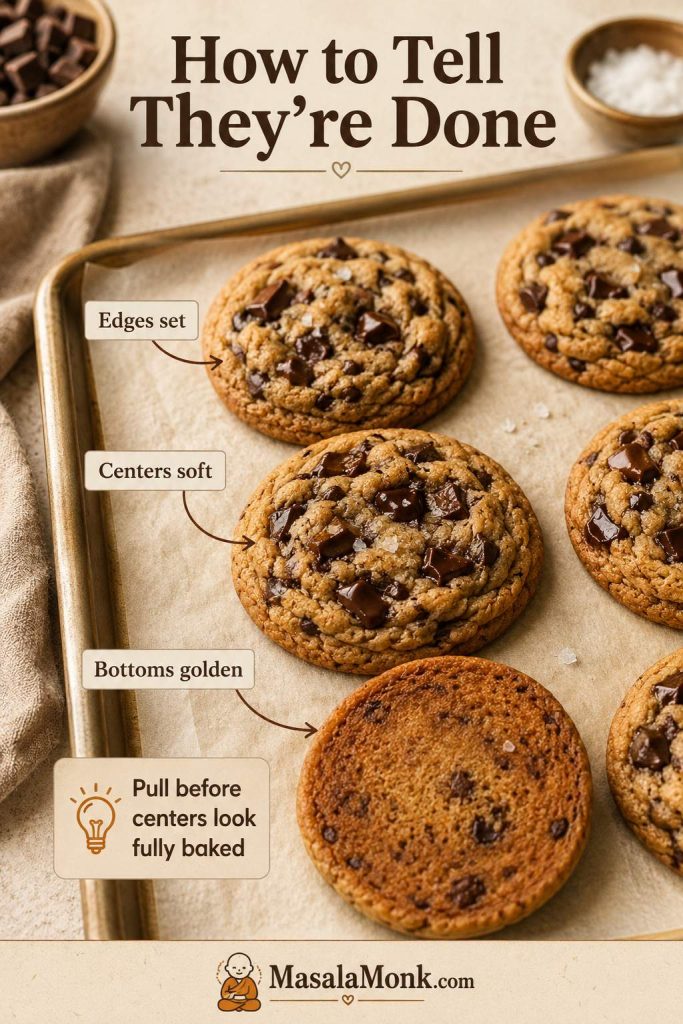
Pull them when they still look a little too soft. The baking sheet finishes what the oven started.
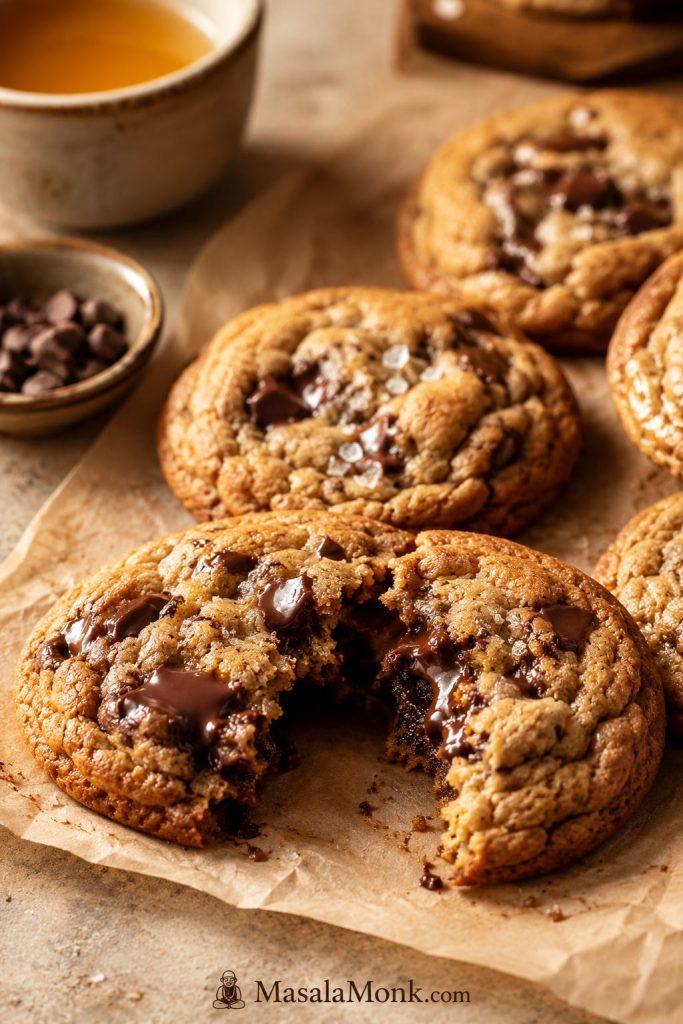
Let the cookies rest on the hot baking sheet for 5 to 10 minutes, then move them to a rack. When the batch is right, the cookies settle into soft ripples, the centers still bend slightly, and the chocolate stays glossy enough that breaking one open feels like the reward for waiting through the chill time.
Troubleshooting Brown Butter Cookies
Fix the Next Tray
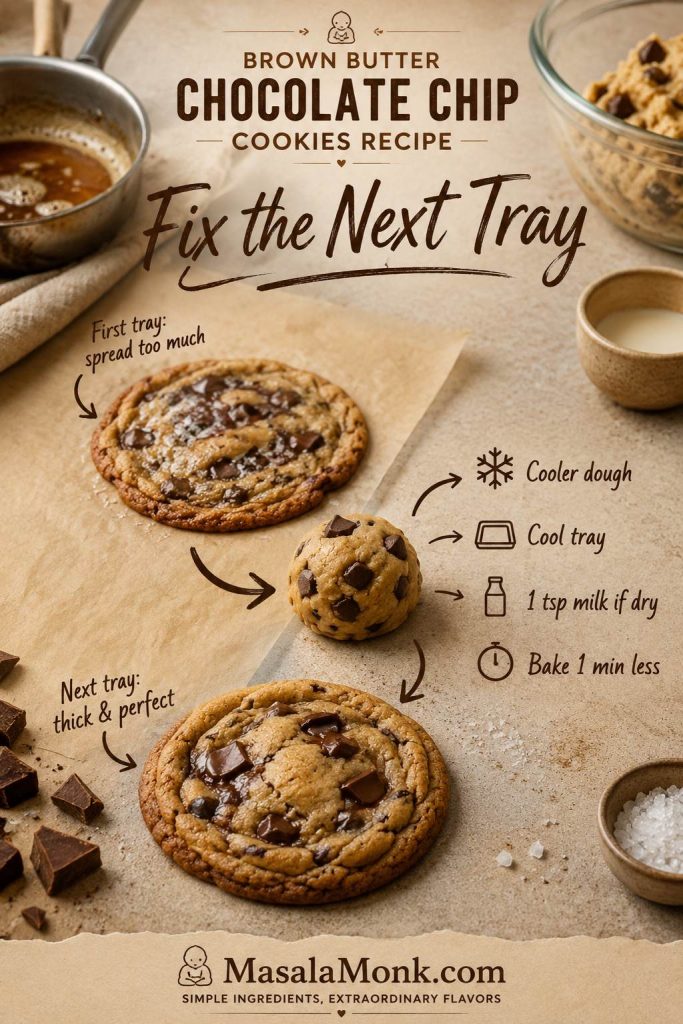
If the first tray tells you something is off, adjust the next one before baking the whole batch. Most fixes are small: cooler dough, a cooler pan, 1 teaspoon more milk, or 1 minute less in the oven.
A good tray starts before the oven: cooled butter, shaped dough, cold portions, and a cool pan. Most problems come from one of those places.
What to Change on the Next Tray
| What you see | Likely cause | What to change on the next tray |
|---|---|---|
| Cookies spread too much | Dough was too warm, butter was too hot, dough was not chilled, or tray was hot | Cool the butter, chill the shaped dough, and bake on a cool parchment-lined tray |
| Cookies look greasy | Butter was still hot when mixed | Cool it before adding the egg |
| Cookies taste dry | Too much flour or too much moisture lost from the butter | Weigh the flour and use the milk adjustment |
| Cookies bake cakey | Too much flour, overmixing, or too much leavener | Mix gently and measure flour by weight |
| Cookies barely spread | Dough was over-chilled or flour was overmeasured | Let the shaped dough sit at room temperature for 10 minutes before baking |
| Brown butter tastes bitter | The milk solids burned | Use medium heat, stir often, and remove at amber brown |
| Brown-butter flavor feels weak | Butter was not browned deeply enough or brown bits were left in the pan | Cook until nutty and scrape every browned bit into the bowl |
| Chocolate burned on the bottom | Chocolate pieces sat directly against the hot tray | Fold chocolate evenly and bake on parchment |
| Cookies look pale | Oven runs cool or dough was too cold and underbaked | Add 1 minute bake time or test 375°F / 190°C with chilled dough |
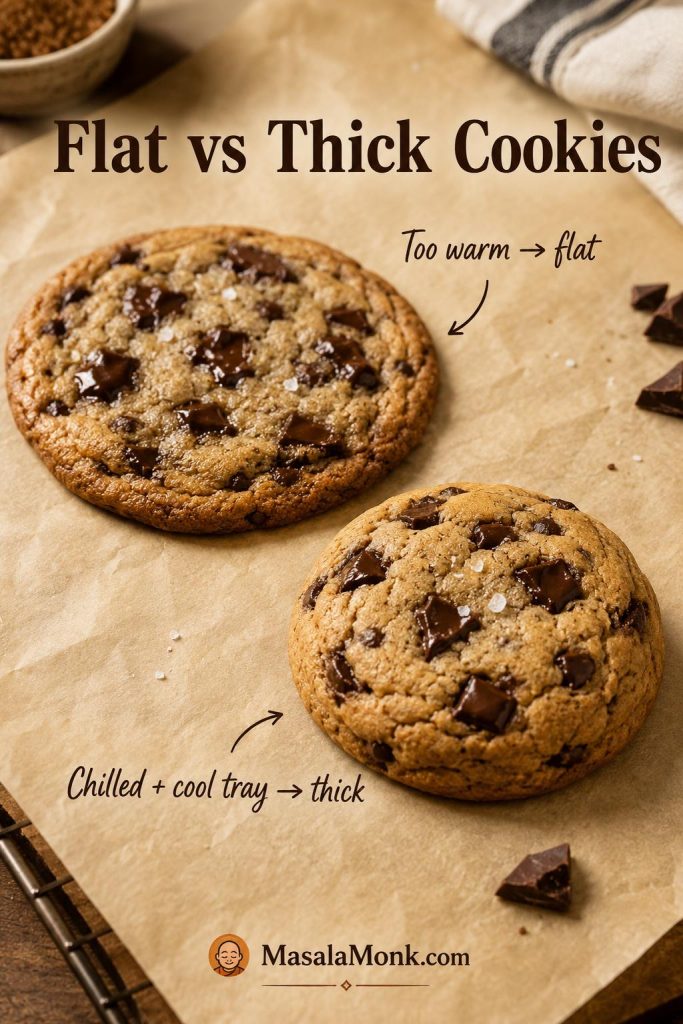
Use this comparison when your first tray spreads too much. A flatter cookie usually points to warm dough, hot butter, or a warm tray; a thicker cookie usually comes from colder portions and cooler metal.
Check the Dough Before Baking
Before baking, aim for dough that is thick and scoopable. Shiny-loose dough needs a short rest or a chill. Dry-crumbly dough needs milk, 1 teaspoon at a time, until it comes together.
Variations to Try
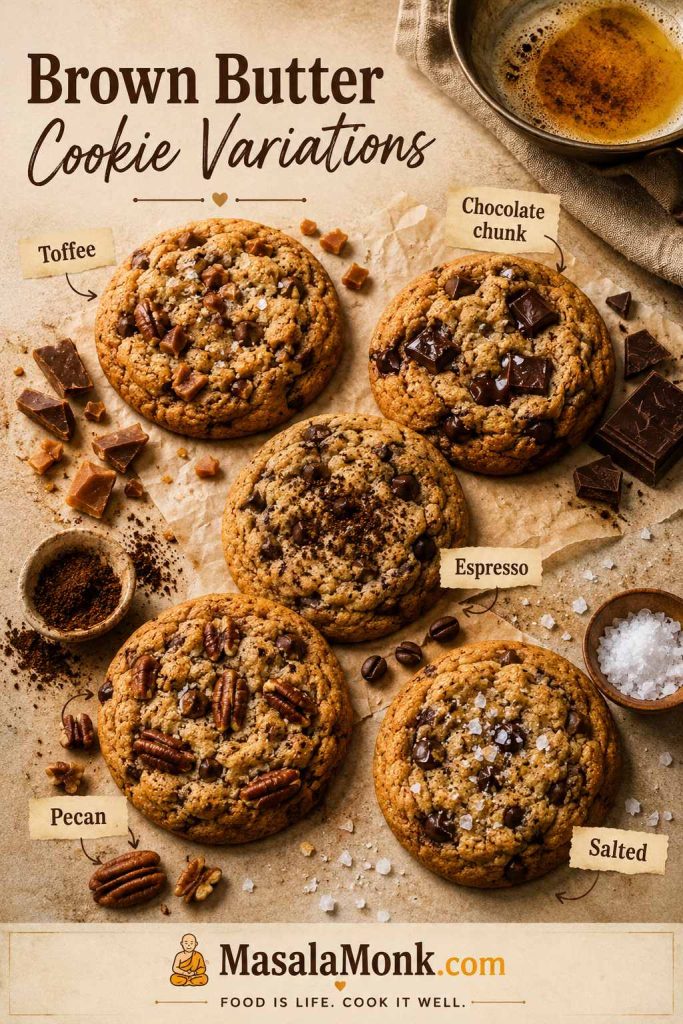
Once you have baked the base version once, the dough is easy to adapt. Start with small changes so the brown-butter flavor still comes through.
Easy Variations That Work with This Dough
Brown Butter Toffee Chocolate Chip Cookies
Add 1/2 cup chopped toffee or toffee bits with the chocolate. Chill the dough well because toffee can make cookies spread and caramelize faster.
Brown Butter Chocolate Chunk Cookies
Use chopped dark or semi-sweet chocolate instead of chips for more melted pockets and a more dramatic bakery look.
Espresso Brown Butter Chocolate Chip Cookies
Add 1 teaspoon espresso powder to the dry ingredients. It deepens the chocolate and toasted-butter flavor without making the cookies taste strongly like coffee.
Brown Butter Pecan or Walnut Cookies
Add 1/2 cup toasted chopped pecans or walnuts. Toasting the nuts first helps them stand up to the browned butter.
Salted Brown Butter Chocolate Chip Cookies
Use salted butter and reduce the fine salt in the dough to 1/4 teaspoon. Finish with only a small pinch of flaky salt, or skip it if your chocolate is already salty.
Variations That Need More Adjustment
Brown Butter Oatmeal Chocolate Chip Cookies
Treat oatmeal as its own formula rather than a quick stir-in. Oats absorb moisture and change spread, so a proper oatmeal cookie needs a slightly different balance.
Gluten-Free Brown Butter Chocolate Chip Cookies
A good 1:1 gluten-free baking flour can work, but the spread and chew may change. Let the dough rest before baking so the flour can hydrate. For a cookie built specifically around gluten-free flour alternatives, start with our almond flour cookies instead.
Eggless Brown Butter Chocolate Chip Cookies
This recipe is not a simple eggless swap because the egg and yolk affect structure, chew, and moisture. If you are learning egg-free baking, our flax egg guide is useful background, but this cookie deserves its own tested eggless formula.
Storage and Freezing
These cookies are excellent warm, but they also store well if you protect them from drying out.
| Form | How to store | Timing |
|---|---|---|
| Baked cookies | Airtight container at room temperature | 3 to 4 days |
| Chilled shaped dough | Covered in the refrigerator | Up to 3 days |
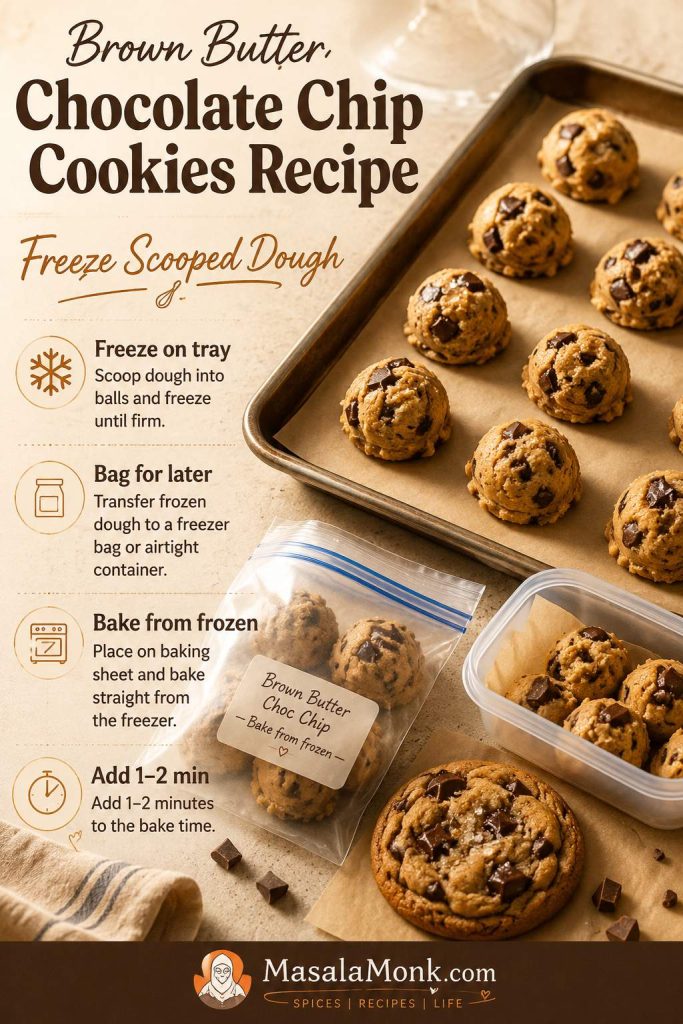
| Frozen shaped dough | Freeze on a tray, then transfer to a freezer bag | 2 to 3 months |
| Baking from frozen | Bake straight from frozen or thaw briefly | Add 1 to 2 minutes to bake time |
| Reheating | Microwave briefly or warm in a low oven | Just until the chocolate softens |
If you are freezing shaped dough, use the recipe card for bake times and add 1 to 2 minutes when baking from frozen.
If you want a cookie-style dessert that bakes as one sliceable centerpiece instead, our cookie pie recipe is a better direction than pressing this chilled dough into a deep pan.
This is the kind of dough worth freezing because one warm cookie later still tastes like you made the whole batch from scratch. The kitchen gets the brown-butter-cookie smell again, and the chocolate softens like a fresh tray.
Serving Ideas
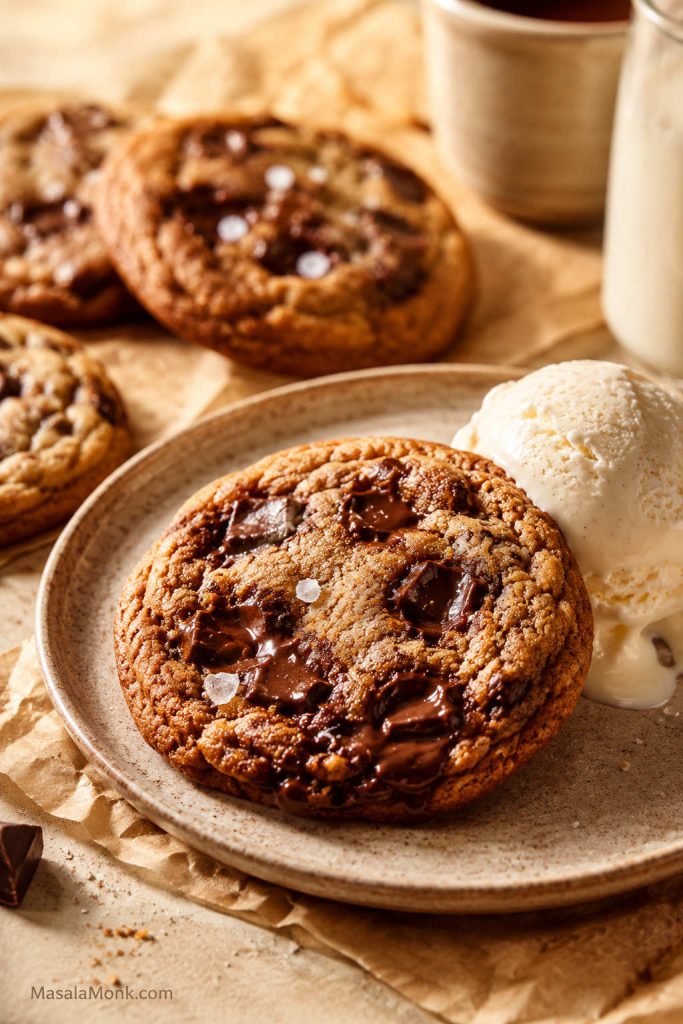
These cookies are best when the centers are still soft and the chocolate is a little melty. Serve them warm with milk, coffee, or a scoop of homemade mint chocolate chip ice cream for a simple cookie-and-ice-cream dessert.
Once you understand the butter color, dough texture, and soft-center bake cue, the recipe becomes much less intimidating. The recipe below is written for a reliable first batch, not just a dramatic photo batch; start there, then use the texture notes later when you want the cookies thicker, softer, or more chocolate-heavy.
Brown Butter Chocolate Chip Cookies Recipe Card
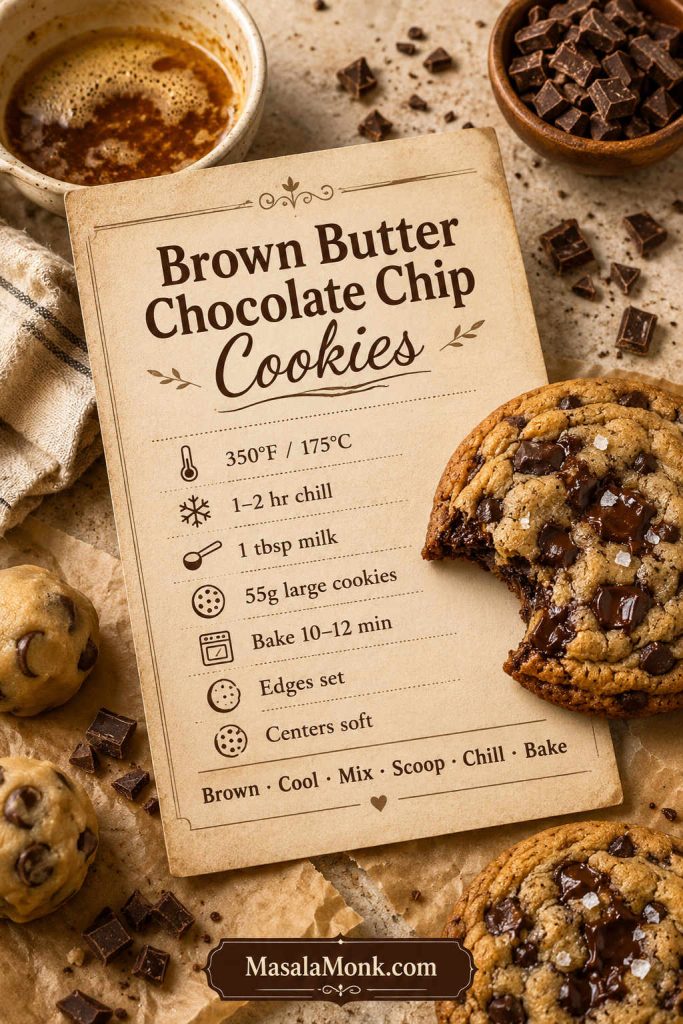
These cookies bake with crisp edges, chewy centers, glossy chocolate pockets, and brown butter flavor you can actually taste. The method keeps the dough thick, controlled, and soft in the center instead of flat, greasy, or dry.
Yield: About 16 large cookies, 20 to 22 medium cookies, or 26 to 28 smaller cookies
Ingredients
- 170g / 6 oz / 3/4 cup unsalted butter, weighed before browning
- 165g / 3/4 cup packed brown sugar, light or dark
- 65g / 1/3 cup granulated sugar
- 1 large egg, room temperature if possible
- 1 large egg yolk
- 1 tablespoon / 15 ml milk, plus up to 1 tablespoon / 15 ml more only if the dough looks dry
- 2 teaspoons / 10 ml vanilla extract
- 220g all-purpose flour / about 1 3/4 cups plus 1 tablespoon, spooned and leveled
- 1/2 teaspoon baking soda
- 1/4 teaspoon baking powder
- 3/4 teaspoon fine salt
- 200 to 225g / 7 to 8 oz semi-sweet or dark chocolate, chopped, chips, or a mix
- Flaky salt, optional, for finishing
Instructions
Brown and Mix the Dough
- Brown the butter. Add butter to a light-colored skillet or saucepan over medium heat. Let it melt, foam, and crackle, stirring often. Continue cooking until amber brown specks form at the bottom and the butter smells nutty.
- Cool the butter. Pour it into a large mixing bowl, scraping in all the browned bits. Cool for 15 to 25 minutes, until liquid and warm, not hot.
- Add the sugars. Whisk the brown sugar and granulated sugar into the cooled butter until glossy and thick.
- Add wet ingredients. Whisk in the egg, egg yolk, vanilla, and 1 tablespoon milk. Hold back the extra tablespoon unless the dough looks dry later.
- Mix dry ingredients. In a separate bowl, whisk together flour, baking soda, baking powder, and fine salt.
- Make the dough. Fold the dry ingredients into the wet ingredients until a few flour streaks remain. Add the chocolate and fold just until combined. If the dough looks dry after resting for a few minutes, add milk 1 teaspoon at a time.
Scoop, Chill, and Bake
- Scoop. Scoop 55g portions for about 16 large cookies, 45g portions for about 20 to 22 medium cookies, or 35g portions for about 26 to 28 smaller cookies. Place on a lined tray.
- Chill. Cover and chill the shaped dough for 1 to 2 hours. For overnight dough, let it sit at room temperature for 10 minutes before baking if very firm.
- Preheat. Heat oven to 350°F / 175°C. Line baking sheets with parchment paper.
- Bake. Arrange chilled portions on the baking sheet with room to spread. Bake 55g cookies for 10 to 12 minutes, 45g cookies for 9 to 11 minutes, or 35g cookies for 8 to 10 minutes, until the edges are set and the centers still look soft.
- Shape and finish. If needed, scoot cookies into rounder shapes with a large round cutter or glass while warm. Sprinkle with flaky salt.
- Cool. Rest cookies on the baking sheet for 5 to 10 minutes, then move to a rack.
Notes
- Use 1 tablespoon milk by default. Add more only if the dough looks dry.
- For thicker cookies, chill the shaped dough closer to 2 hours.
- For faster cookies, chill for 30 minutes and expect a little more spread.
- For no-chill cookies, use smaller 35g portions and a cool baking sheet.
- If using salted butter, reduce the fine salt to 1/4 teaspoon.
- If baking from frozen, add 1 to 2 minutes to the bake time.
- For a hotter test batch, bake well-chilled dough at 375°F / 190°C and start checking early.
FAQs
Why did my cookies spread?
Usually, something was too warm: the butter, the tray, or the dough itself. Bake chilled portions on a cool parchment-lined tray for the most reliable shape.
Is brown butter the same as melted butter?
No. Brown butter starts as melted butter, but it is cooked longer until the milk solids toast and turn amber. That extra cooking gives the cookies their nutty, caramel-like flavor.
Should brown butter be hot or cooled before making cookie dough?
Cool it first. The butter should be liquid and warm, not hot, before you add the egg.
Do I have to chill the dough?
Yes, for the best texture. Even 30 minutes helps, but 1 to 2 hours gives the most reliable thick, chewy cookie.
What chocolate works best?
Use chopped semi-sweet or dark chocolate for dramatic melted pockets, and chips for a neater classic cookie. A mix gives you familiar chocolate-chip texture plus glossy puddles.
Can I use salted butter?
Yes. Use salted butter if that is what you have, but reduce the fine salt in the dough to about 1/4 teaspoon. Taste the first baked cookie before adding flaky salt to the rest.
Why add milk to brown butter cookie dough?
Browning butter cooks off some water while deepening the flavor. The milk gives a little moisture back, so the cookies stay chewy instead of turning dry or sandy.
Can I make these without brown sugar?
This specific dough depends on brown sugar for chew, moisture, and caramel flavor. A white-sugar-only version will spread and crisp differently, so it needs its own recipe balance.
Can I eat this cookie dough raw?
No, this dough is meant to be baked. Regular cookie dough contains raw flour, and the FDA explains that raw flour is not treated to kill germs. For a safe no-bake chocolate-chip craving, use our edible cookie dough instead.
Are these the same as brown butter toffee chocolate chip cookies?
Not exactly. Toffee is a variation of this base dough. It makes the cookies sweeter and more caramelized, so the dough benefits from a good chill before baking.
Why are my cookies cakey instead of chewy?
The most common reason is too much flour. The dough should be thick and scoopable, not stiff, dry, or crumbly. Weigh the flour if possible; if using cups, spoon it in and level it off instead of packing it down.
How do I freeze the cookie dough?
Scoop the dough, freeze the portions on a tray, then transfer them to a freezer bag. Bake from frozen and add 1 to 2 minutes to the bake time.
What changes for smaller cookies?
Use about 35g dough per cookie and start checking around 8 to 10 minutes. Smaller cookies bake faster and can overbake quickly.
Once you learn the butter color, dough texture, chill-time cue, and soft-center bake point, these cookies stop feeling fussy. You get nutty brown-butter flavor, chewy centers, glossy chocolate, and cookies that hold their shape instead of spreading into disappointment.
For another classic cookie, our peanut butter cookies are a good next bake when you want something simple, nostalgic, and deeply flavored in a different way.








