Posted on Leave a comment

Exploring the Depths of Inner Freedom Through Yoga

“The body is your temple. Keep it pure and clean for the soul to reside in.” – B.K.S. Iyengar

In the realm of self-discovery and inner peace, yoga emerges as a beacon of light, guiding us through the tumultuous waves of life towards a haven of tranquility. The practice of yoga is an ancient art, deeply rooted in the pursuit of ultimate freedom—a freedom that encompasses the body, mind, and soul.

The Philosophy of Yoga: A Path to Liberation

Yoga is not merely a physical exercise but a holistic approach to living. It is the union of the body with the mind and the soul with the universe. This union, as described by the revered yoga teacher B.K.S. Iyengar, is the essence of yoga. It is a means to achieve freedom and the very end in itself.

The sage-like Iyengar, who brought the treasures of yoga to the forefront of the global consciousness, taught that the discipline of yoga is the gateway to liberation. Through the practice of asanas (postures) and pranayama (breath control), one can navigate the journey of life with grace and strength.

A Glimpse into the Mastery of B.K.S. Iyengar

To truly comprehend the transformative power of yoga, one must witness its practice by a master. In a profound demonstration from 1976, B.K.S. Iyengar, the founder of Iyengar Yoga, showcases the depth and breadth of this discipline. His demonstration is not just a display of flexibility or strength but a manifestation of the philosophy of yoga. Watch the full video here.

Credit: Be You Fully on YouTube

In this video, we observe Iyengar’s meticulous attention to alignment and his meditative focus. He speaks of yoga as a healing force, one that brought him back from the clutches of tuberculosis to a state of health and enlightenment. His message is clear: yoga is accessible to all and has the potential to heal and transform lives.

The Art of Alignment: Asanas Demonstrated by B.K.S. Iyengar

In the video, B.K.S. Iyengar meticulously demonstrates a series of asanas, each designed to cultivate balance, strength, and flexibility. Here’s a detailed look at the poses and the wisdom behind them:

Trikonasana (Triangle Pose)

This foundational pose is a testament to balance and extension. Iyengar emphasizes the importance of extending each part of the upper body in various directions while maintaining a connection with the self.

Parivrtta Trikonasana (Revolved Triangle Pose)

In this asana, the spine receives a beneficial lateral movement. Iyengar’s execution of the pose shows the importance of the movement of the back and the stretch it provides.

Parsvakonasana (Extended Side Angle Pose)

Also known as the plank or angular pose, this asana demonstrates how each part of the body, from the knuckles of the toes to the hips and waist, stretches independently yet remains interconnected.

Ardha Chandrasana (Half Moon Pose)

The Half Moon Pose showcases balance and the extension of the entire body, right down to the toes. Iyengar’s precision highlights the importance of engaging even the smallest parts of the body.

Uttanasana (Standing Forward Bend)

This forward bend is crucial for extending the spine. Iyengar points out that in our modern, technology-driven world, we’ve lost the resonance of the spine, leading to common ailments like sciatica and slipped discs.

Adho Mukha Svanasana (Downward-Facing Dog)

Iyengar compares the stretch in this pose to a dog stretching its front legs, emphasizing the lengthening of the spine and the distribution of weight through the hands and feet.

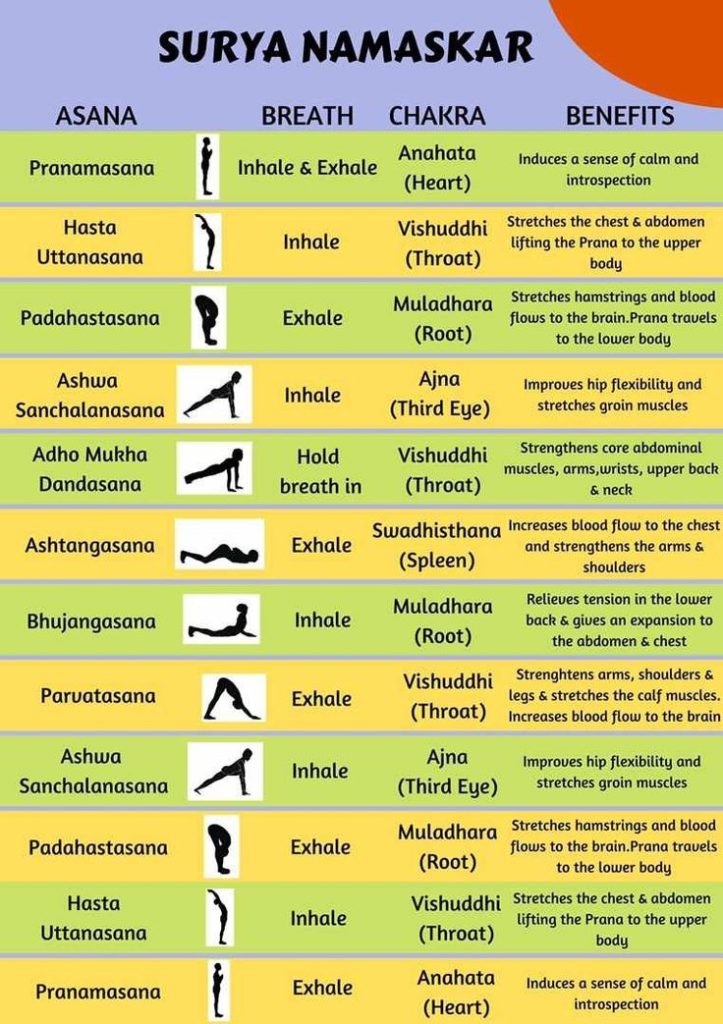
Surya Namaskar (Sun Salutation)

Iyengar demonstrates the dynamic flow of the Sun Salutation, which includes poses like Chaturanga Dandasana (Four-Limbed Staff Pose) and Urdhva Mukha Svanasana (Upward-Facing Dog), highlighting the fluidity and strength required in the practice.

Steps of Surya Namaskar
Steps of Surya Namaskar, Sun Salutation.

Janu Sirsasana (Head-to-Knee Forward Bend)

This asana focuses on stretching the back of the body and requires the head of the knee to be stretched backward, providing a deep stretch to the hamstrings and back.

Parivrtta Janu Sirsasana (Revolved Head-to-Knee Pose)

Offering a lateral stretch, this pose extends the liver and other internal organs, showcasing the detoxifying effects of yoga.

Padmasana (Lotus Pose)

Iyengar demonstrates the Lotus Pose with one leg in the half-lotus position, emphasizing the depth of meditation and concentration that can be achieved in this asana.

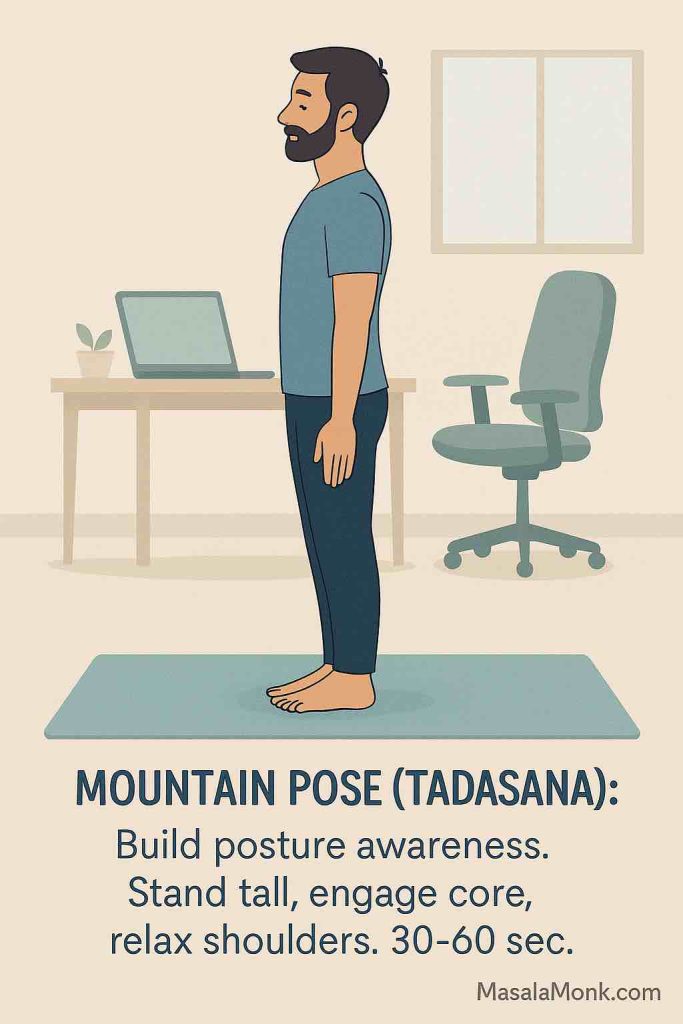
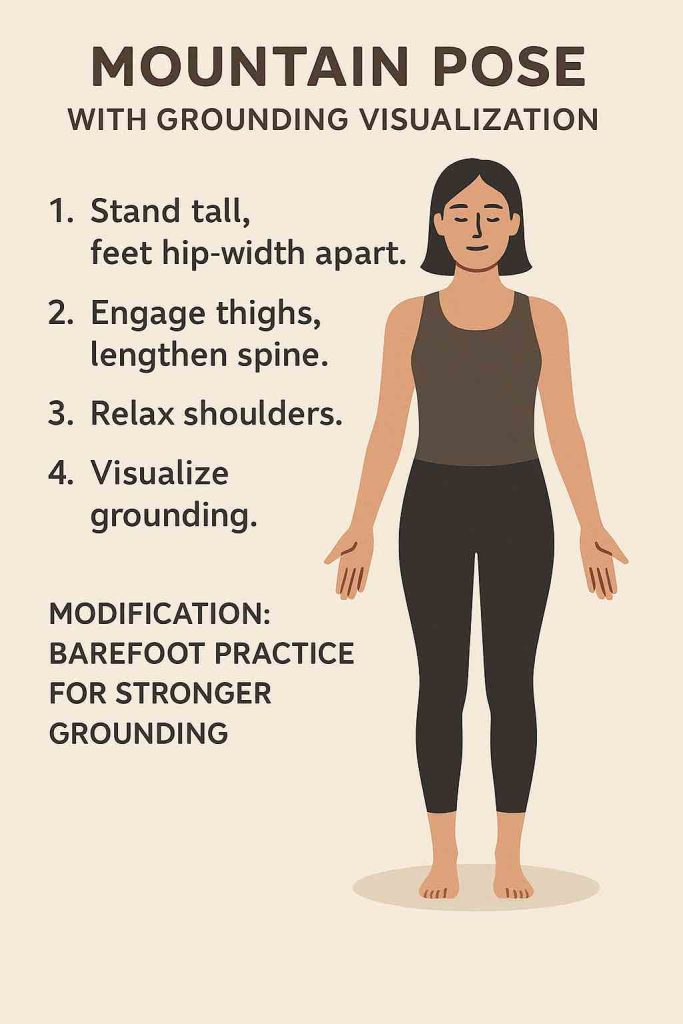
Tadasana (Mountain Pose)

The Mountain Pose is a fundamental yoga pose that establishes the basis for all standing poses. It involves standing steady, firm, and upright like a mountain, which Iyengar describes as essential for brain stability.

Parighasana (Gate Pose)

This asana involves a lateral bend that stretches the side body, resembling the crossbar of a gate, hence the name.

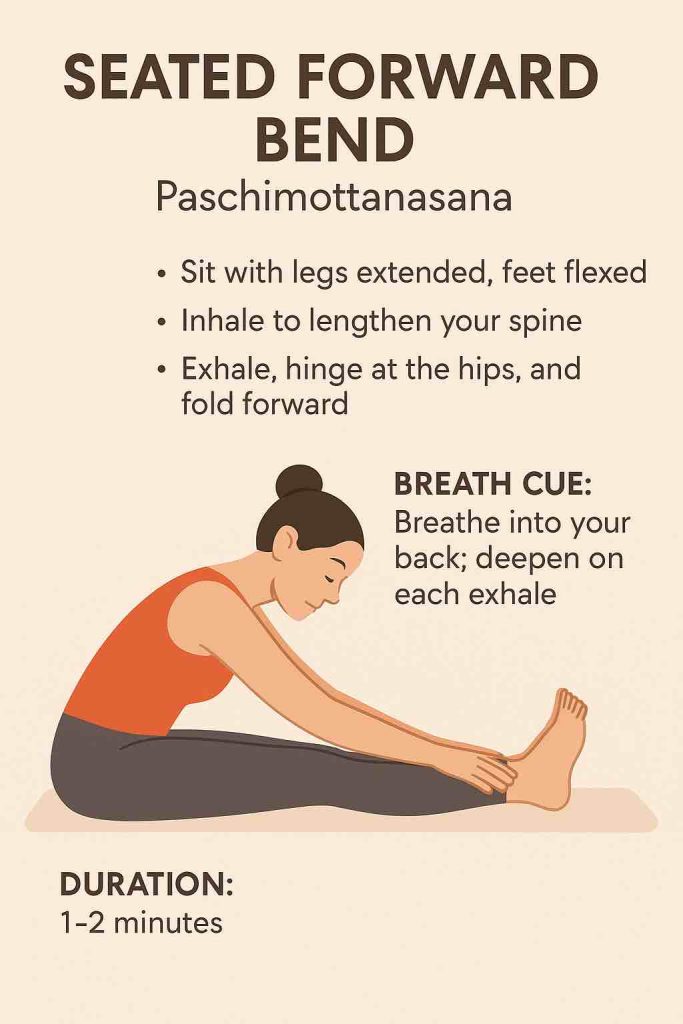
Paschimottanasana (Seated Forward Bend)

Iyengar highlights the posterior stretch in this pose, where the energy moves from the heel to the crown of the head, emphasizing the importance of engaging the entire posterior chain of the body.

In each of these asanas, Iyengar’s approach is not just about achieving a physical position but about reaching a state of ultimate freedom where the body, mind, and intellect operate in unison without obstruction. His demonstration serves as a profound reminder of the depth and precision required in the practice of yoga.

The Practice of Yoga in Modern Times

In our contemporary society, where the pace of life accelerates daily, yoga serves as a sanctuary. It offers a space to slow down, to reconnect with our inner selves, and to cultivate a sense of well-being. The teachings of Iyengar remind us that the practice of yoga is a form of self-care that extends beyond the physical body to the mind and spirit.

As we incorporate yoga into our daily routine, we begin to experience its myriad benefits. Our bodies become stronger, our minds clearer, and our hearts more open. We learn to move through life’s challenges with equanimity and to embrace each moment with mindfulness and gratitude.

Embracing the Journey

The journey of yoga is infinite, filled with continuous learning and growth. As we delve deeper into its practice, we uncover layers of our being and discover the boundless potential within. Yoga is a lifelong companion, a source of comfort and strength, and a path to inner freedom.

Let us honor the legacy of B.K.S. Iyengar and the ancient wisdom of yoga by stepping onto the mat with intention and curiosity. Let us explore the depths of our own being and, in doing so, find the peace and freedom that yoga promises.

Credits to the Original video: Yoga Demonstration, BKS Iyengar (1976)

FAQs

  1. What are the health benefits of practicing Trikonasana (Triangle Pose)? Trikonasana is known to stretch and strengthen the thighs, knees, and ankles, while also stimulating the abdominal organs, which can aid in improving digestion. Additionally, it can relieve back pain and stress, offering a holistic approach to wellness.
  2. How does Parivrtta Trikonasana (Revolved Triangle Pose) improve posture? The Revolved Triangle Pose is excellent for providing a deep stretch to the spine, improving balance, and increasing proprioceptive awareness, which collectively contribute to better posture and spinal health.
  3. Can beginners attempt Parsvakonasana (Extended Side Angle Pose), and what should they be aware of? Beginners can certainly practice Parsvakonasana with modifications. It’s important to focus on maintaining a strong base with the feet and engaging the core for stability to prevent any strain.
  4. What is the significance of Ardha Chandrasana (Half Moon Pose) in a yoga sequence? Ardha Chandrasana challenges and promotes balance and concentration. It also strengthens the abdomen, ankles, thighs, buttocks, and spine, making it a significant pose for building core strength and stability.
  5. In what ways does Uttanasana (Standing Forward Bend) counteract the effects of sitting all day? Uttanasana helps to stretch the hamstrings, calves, and hips, which are often tight from prolonged sitting. It also encourages blood flow to the brain, which can alleviate stress and rejuvenate the body.
  6. How does Adho Mukha Svanasana (Downward-Facing Dog) support mental health? This pose is known for its calming effect on the brain, which can help relieve stress, mild depression, and anxiety. It’s also therapeutic for headaches, insomnia, and fatigue.
  7. What is the purpose of including Surya Namaskar (Sun Salutation) in a daily yoga practice? Surya Namaskar is a comprehensive practice that warms up the body, improves circulation, and is a cardiovascular workout that strengthens and tones the body, making it a great all-in-one practice for daily health.
  8. Can Janu Sirsasana (Head-to-Knee Forward Bend) aid in digestion, and if so, how? Yes, by folding forward, this pose massages the abdominal organs, which can stimulate digestion and help alleviate issues such as constipation, while also calming the mind and reducing anxiety.
  9. What are the benefits of Parivrtta Janu Sirsasana (Revolved Head-to-Knee Pose) for internal organs? This twisting pose enhances the massage effect on the abdominal organs, improving the function of the liver, kidneys, and intestines, and can aid in detoxifying the body.
  10. How does practicing Tadasana (Mountain Pose) benefit daily activities? Tadasana helps develop proper posture and body awareness, which can translate into better body mechanics during daily activities, reducing the risk of injury and improving overall physical alignment.

Blog Tags for the Post

yoga, B.K.S. Iyengar, asanas, health and wellness, mindfulness, stress relief, flexibility, strength training, mental health, inner peace, balance, yoga philosophy, yoga practice, yoga benefits, posture improvement, yoga for beginners

Posted on Leave a comment

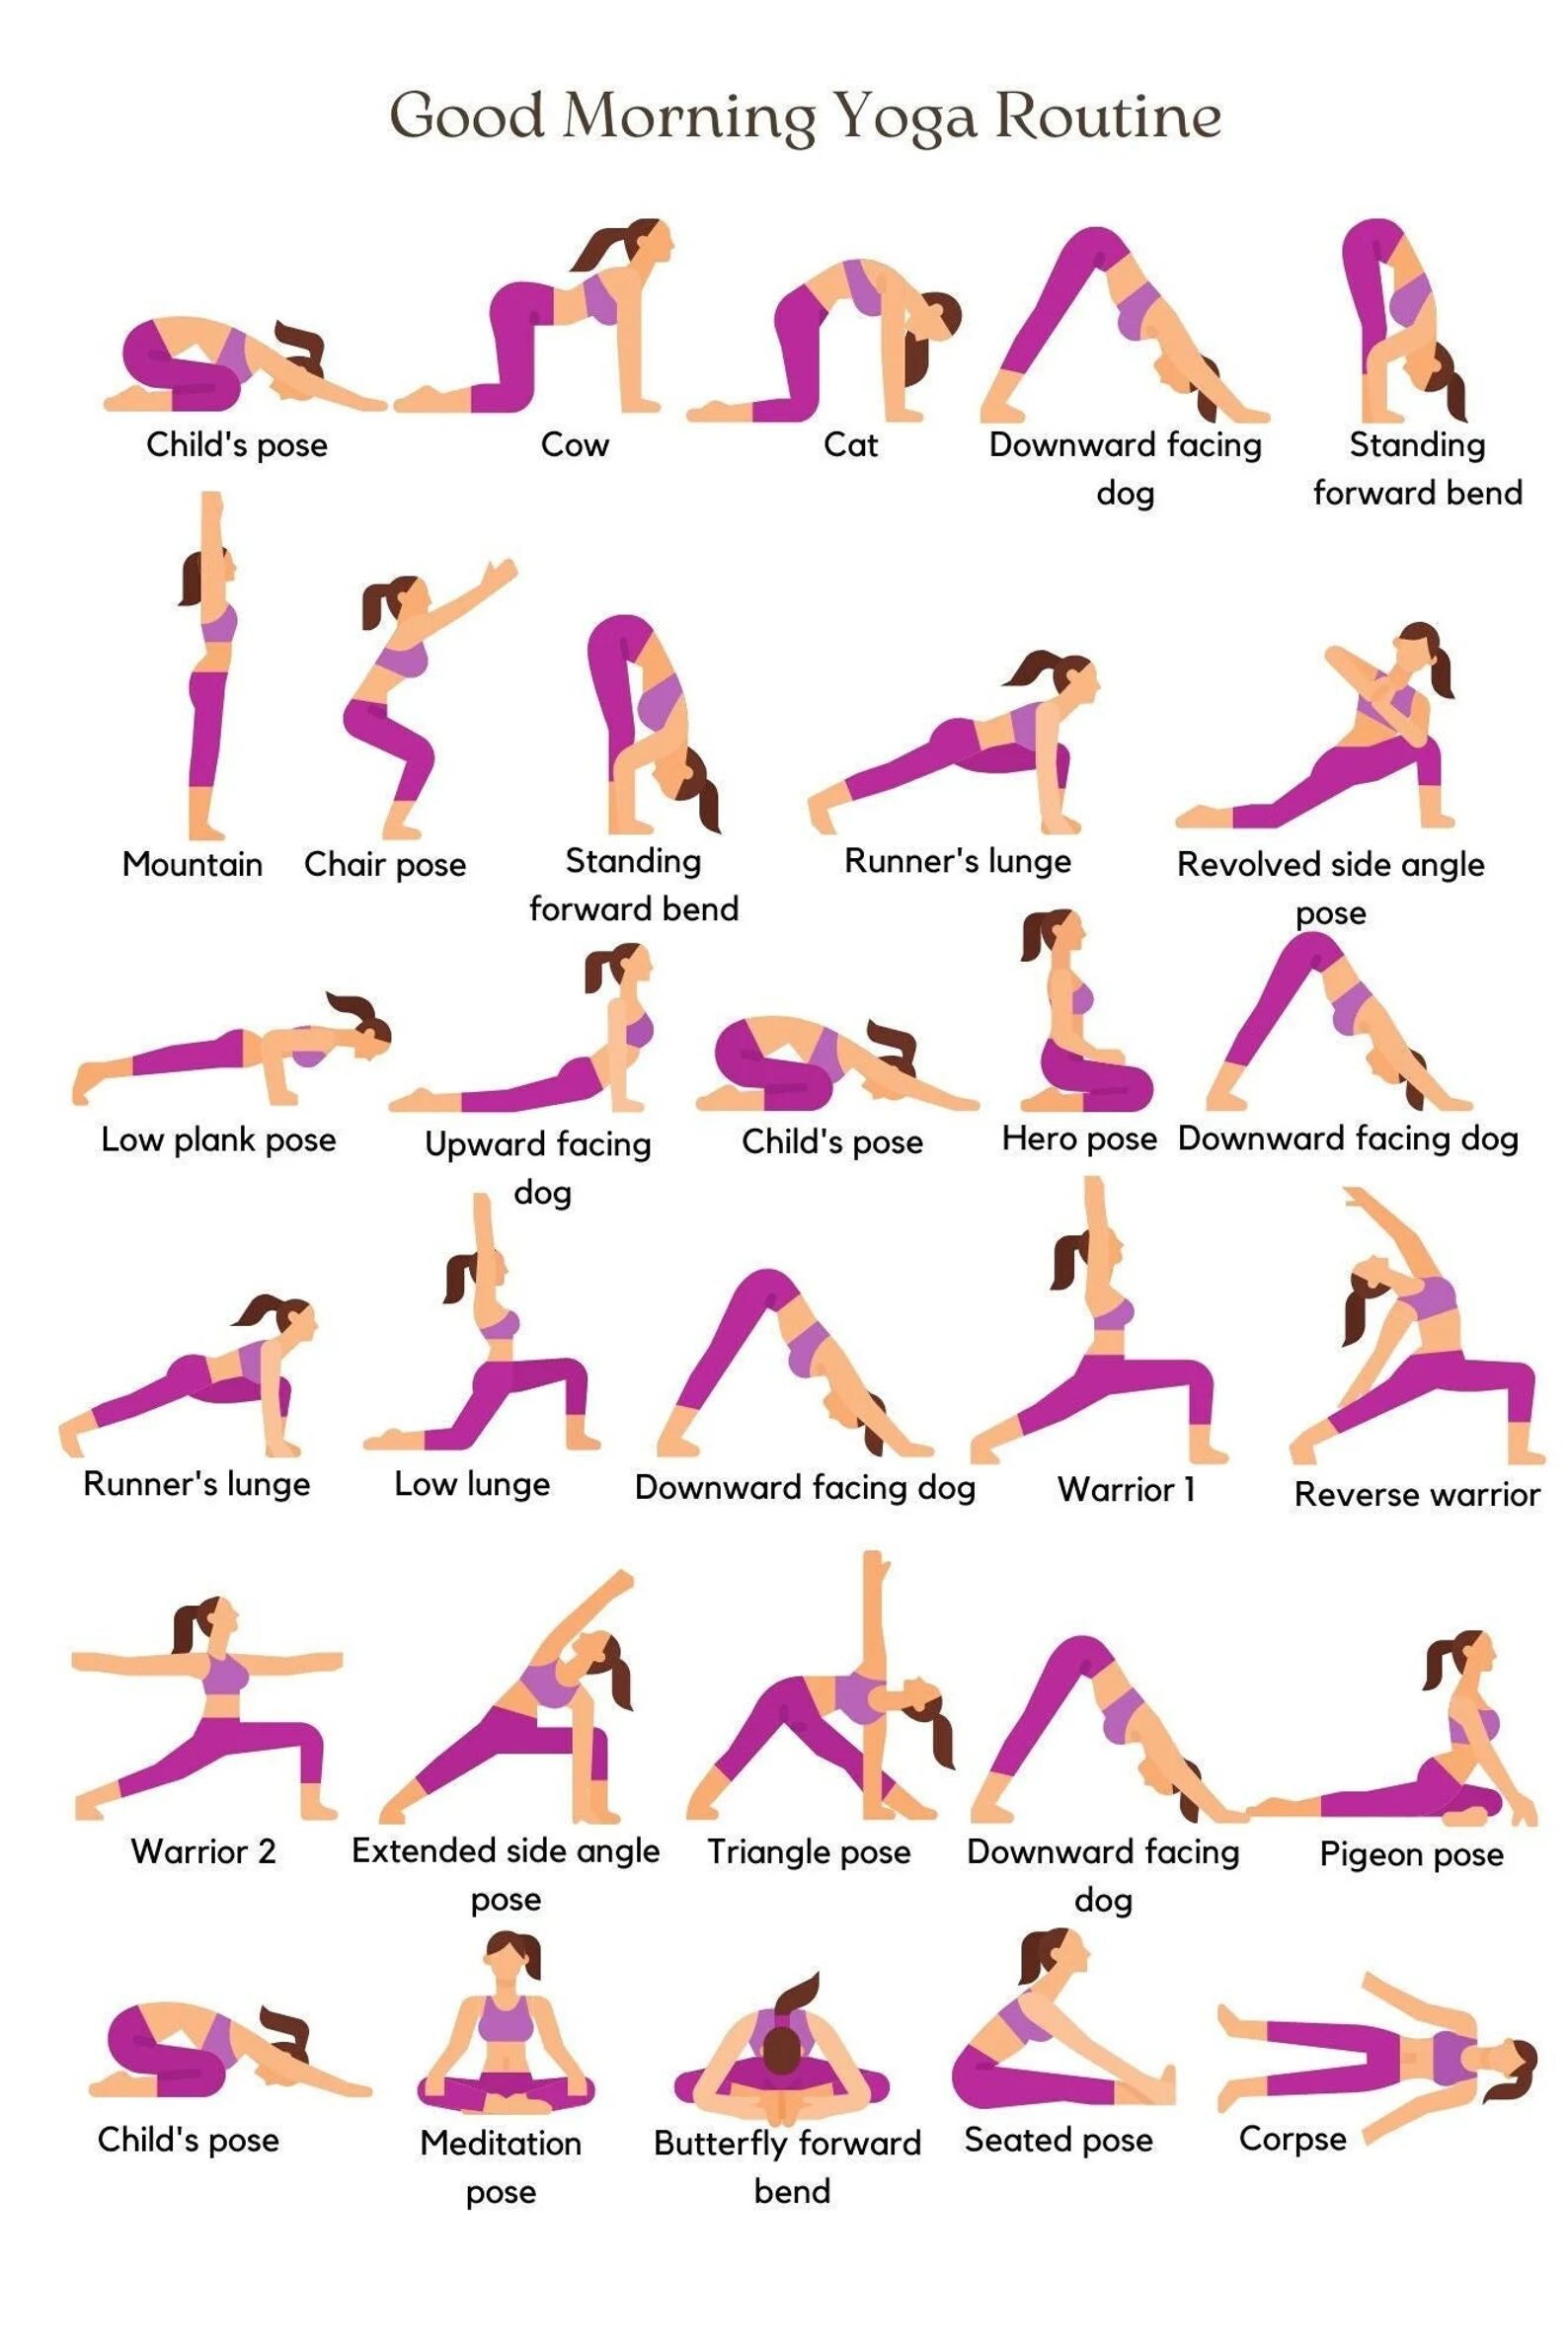
Good Morning Yoga Routine: A Beginner’s Guide

Starting your day with yoga can set a positive tone and energize your body and mind. A morning yoga routine helps to increase flexibility, build strength, and cultivate a sense of calm that lasts throughout the day. In this guide, we’ll walk you through a detailed morning yoga routine that you can easily follow at home. Each pose is designed to wake up your muscles, improve your mood, and enhance your overall well-being.

A free PDF is embedded and available to download, save, or print at the end of this post.

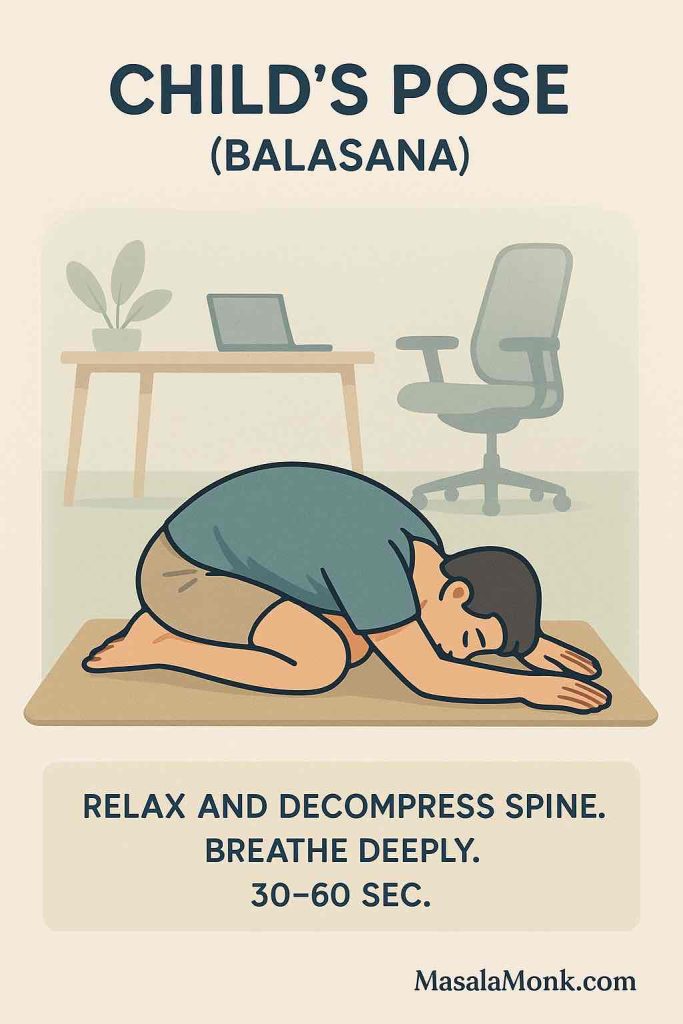
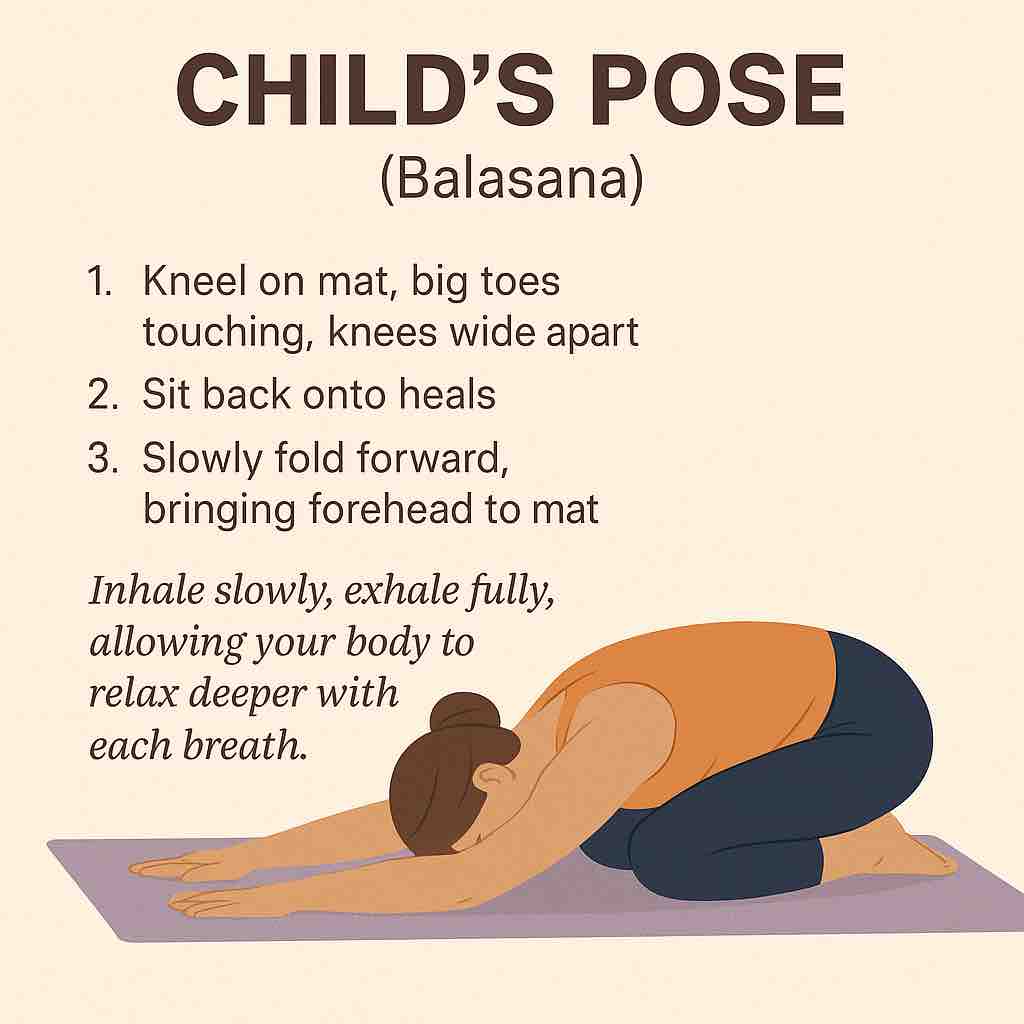
1. Child’s Pose (Balasana)

Begin in a kneeling position, sit back on your heels, and extend your arms forward, resting your forehead on the mat. This pose gently stretches your back and calms the mind.

  • Benefits: Relieves back and neck pain, reduces stress, and calms the brain.
  • How to: Kneel on the mat with your big toes touching and knees apart. Sit back on your heels and stretch your arms forward, lowering your torso between your thighs. Rest your forehead on the mat.

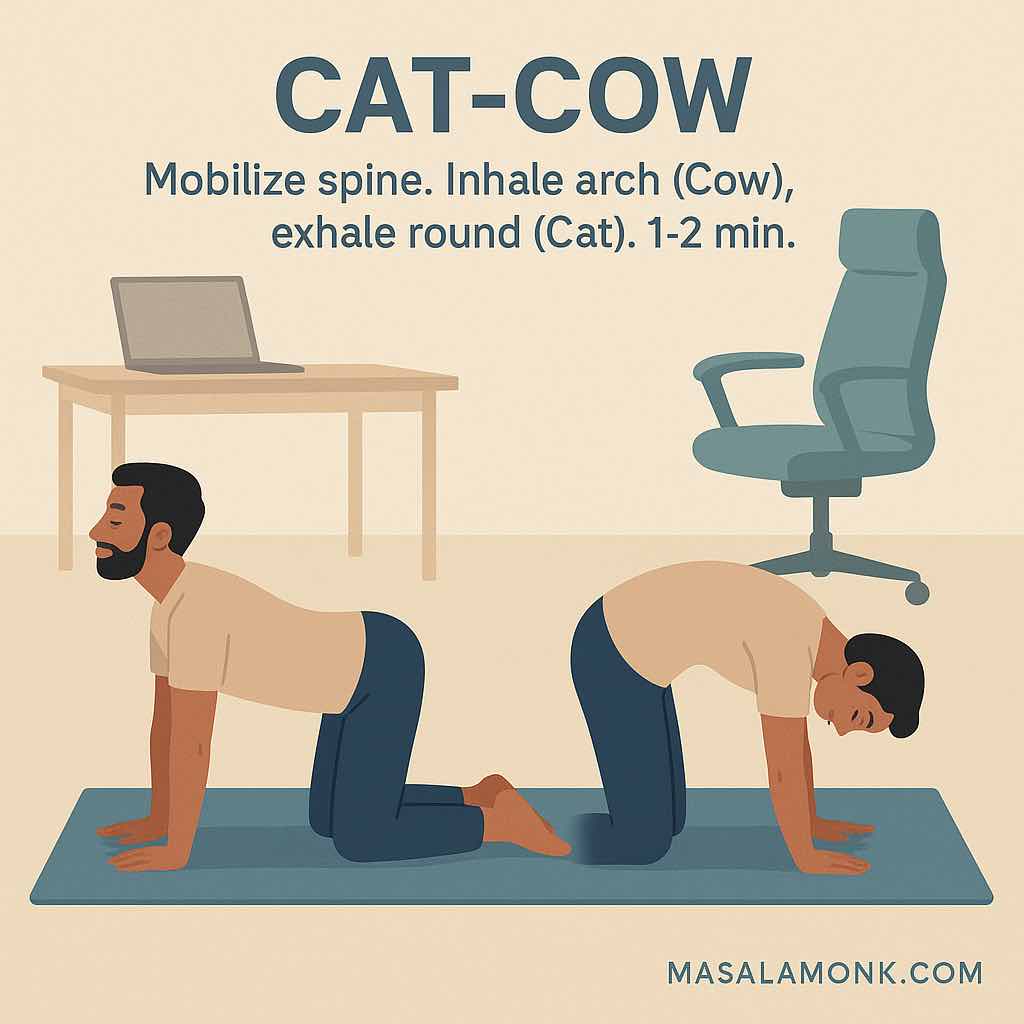
2. Cow Pose (Bitilasana)

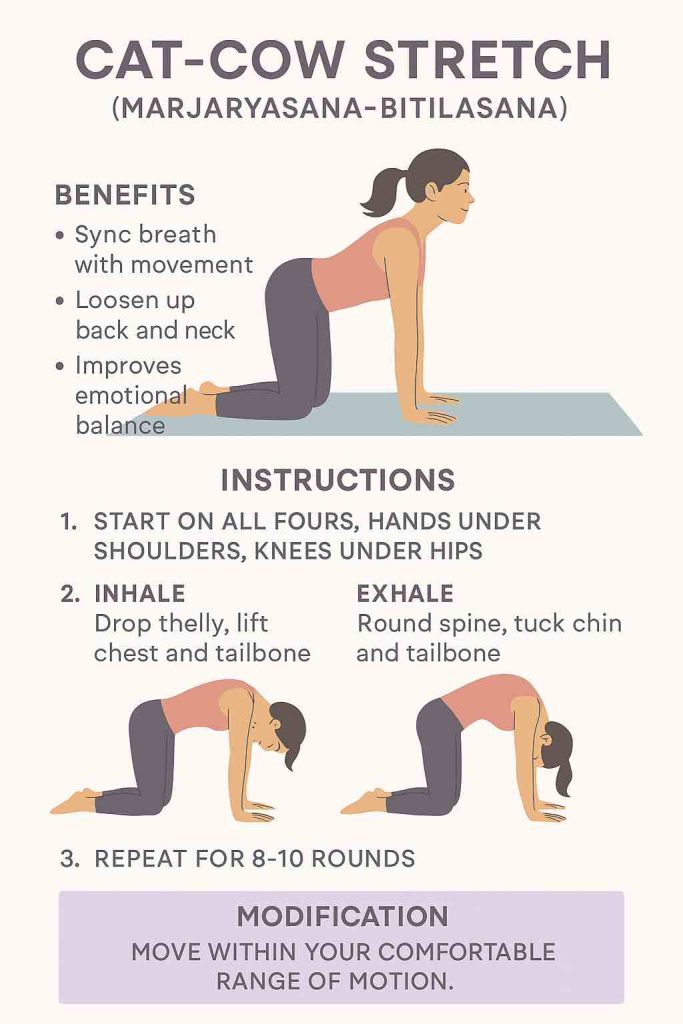
Transition to an all-fours position. Inhale, arch your back, and lift your head and tailbone towards the ceiling. This pose warms up your spine and improves posture.

  • Benefits: Stretches the front torso and neck, gently massages the spine.
  • How to: Position yourself on your hands and knees, ensuring your wrists are directly under your shoulders and knees under your hips. Inhale deeply, arch your back, and lift your tailbone and head towards the sky.

3. Cat Pose (Marjaryasana)

Exhale, round your spine, and tuck your chin to your chest, moving into the cat pose. Alternate between cow and cat poses to release tension in the back.

  • Benefits: Stretches the back torso and neck, gently massages the spine.
  • How to: From the cow pose, exhale and round your spine towards the ceiling, tucking your tailbone and drawing your chin to your chest. Repeat the cow-cat sequence several times.

4. Downward Facing Dog (Adho Mukha Svanasana)
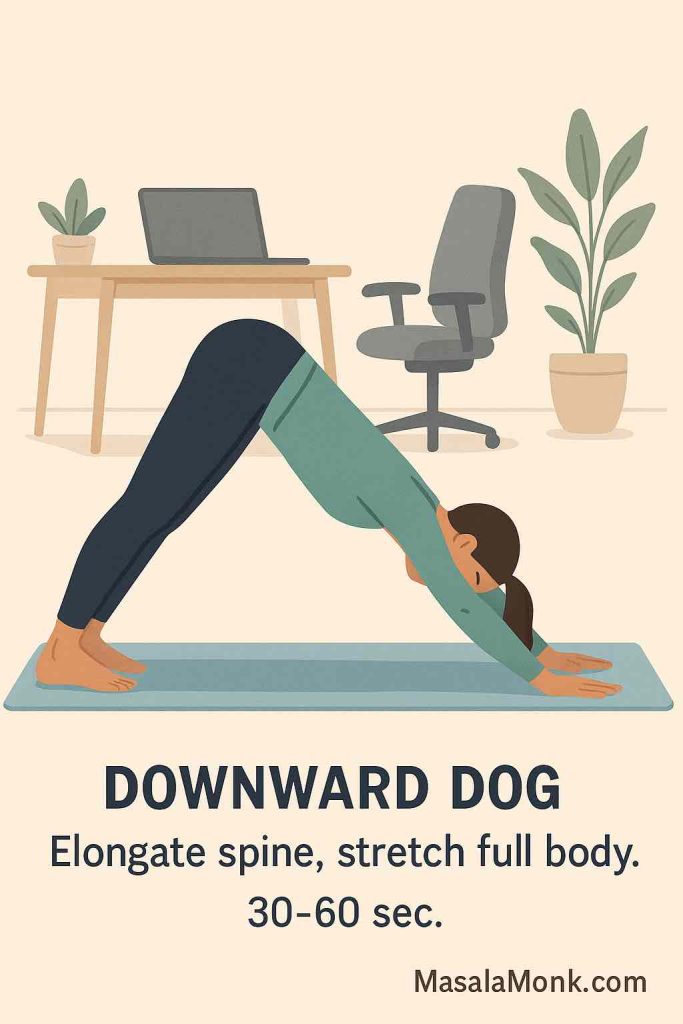
From all fours, lift your hips up and back, straightening your legs and forming an inverted V shape. This pose stretches the hamstrings, calves, and shoulders.

  • Benefits: Strengthens arms and legs, stretches the shoulders, hamstrings, calves, and feet.
  • How to: From your hands and knees, lift your hips towards the ceiling, straightening your legs as much as possible without locking your knees. Press your heels towards the floor and your hands into the mat, spreading your fingers wide.

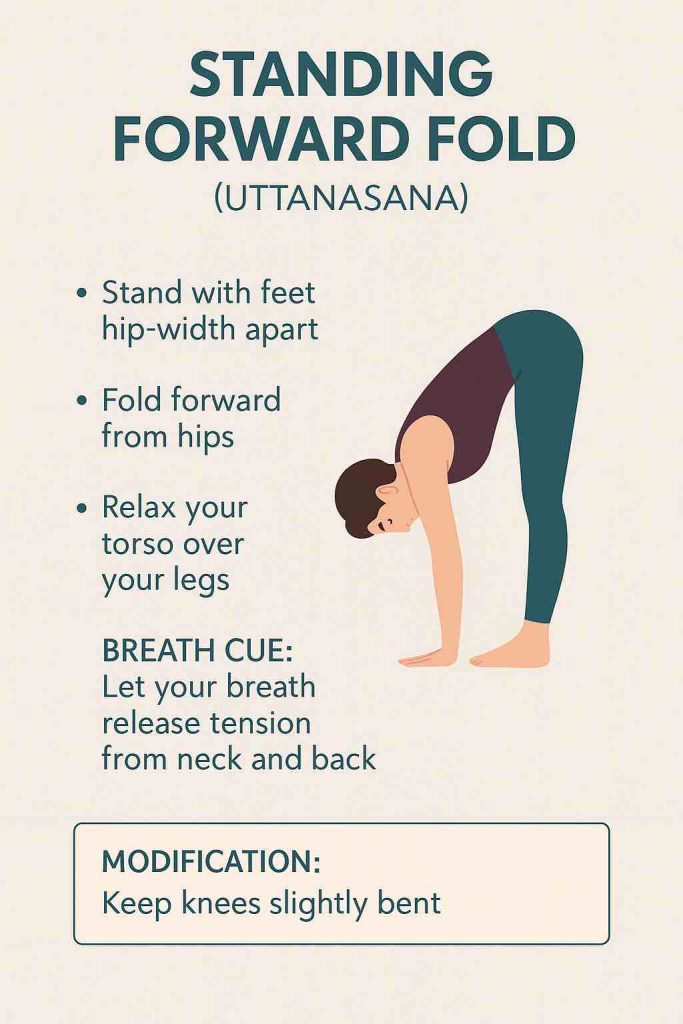
5. Standing Forward Bend (Uttanasana)

Step forward and fold your upper body over your legs, allowing your head to hang down. This pose helps to relieve stress and stretch the hamstrings.

  • Benefits: Stretches the hamstrings, calves, and hips; strengthens the thighs and knees; relieves stress.
  • How to: From the downward facing dog, step your feet forward to meet your hands. Keep your knees slightly bent if needed, and let your upper body hang over your legs.

6. Mountain Pose (Tadasana)

Stand up tall with feet together, grounding through your feet. Reach your arms overhead, lengthening your spine. This pose improves posture and balance.

  • Benefits: Improves posture, strengthens thighs, knees, and ankles, firms abdomen and buttocks.
  • How to: Stand with your feet together, arms at your sides. Distribute your weight evenly across both feet, lift your kneecaps, and engage your thighs. Inhale and reach your arms overhead, lengthening through your spine.

7. Chair Pose (Utkatasana)

From mountain pose, bend your knees and lower your hips as if sitting in an invisible chair. Extend your arms overhead, engaging your core and leg muscles.

  • Benefits: Strengthens the thighs, calves, and spine, stretches the chest and shoulders, stimulates the heart and diaphragm.
  • How to: From mountain pose, bend your knees deeply, trying to keep your thighs as parallel to the floor as possible. Reach your arms overhead, with your biceps next to your ears.

8. Standing Forward Bend (Uttanasana)

Fold forward again from the hips, releasing any tension in your back and legs.

  • Benefits: Stretches the hamstrings, calves, and hips; strengthens the thighs and knees; relieves stress.
  • How to: Bend forward from the hips, allowing your torso to hang over your legs. Keep your knees slightly bent if needed, and hold your elbows with opposite hands for a deeper stretch.

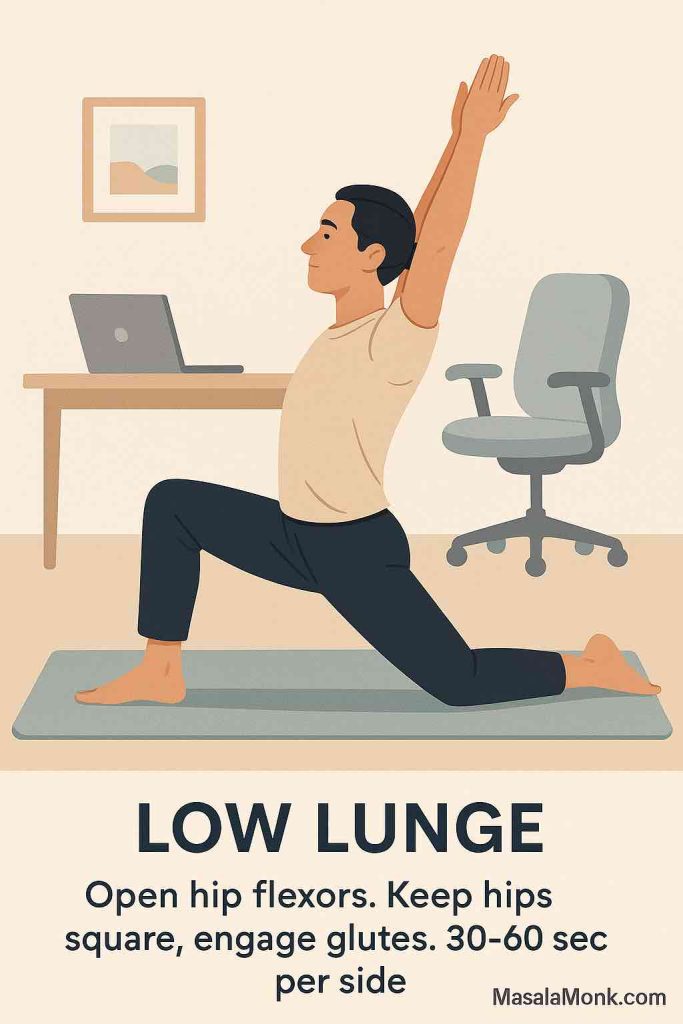
9. Runner’s Lunge (Ardha Mandalasana)

Step one foot back into a deep lunge, aligning your knee over your ankle. This pose stretches the hip flexors and strengthens the legs.

  • Benefits: Stretches the hips, groin, and legs; strengthens the thighs and ankles; improves balance.
  • How to: From a standing position, step one foot back into a deep lunge, keeping your front knee over your ankle. Lower your hips and extend your back leg straight behind you.

10. Revolved Side Angle Pose (Parivrtta Parsvakonasana)

From the runner’s lunge, twist your torso towards the bent knee, extending your opposite arm up and over. This pose improves balance and detoxifies the organs.

  • Benefits: Stretches and strengthens the legs, knees, and ankles; improves digestion and detoxifies the organs.
  • How to: From runner’s lunge, place your opposite elbow on the outside of your bent knee. Twist your torso, extending your top arm overhead, and gaze towards your top hand.

11. Low Plank Pose (Chaturanga Dandasana)

Lower your body into a plank position with elbows bent, keeping your body in a straight line. This pose builds core and arm strength.

  • Benefits: Strengthens the arms, shoulders, and core; improves balance.
  • How to: From a high plank position, lower your body until your elbows are at a 90-degree angle, keeping your body in a straight line from head to heels.

12. Upward Facing Dog (Urdhva Mukha Svanasana)

From the low plank, roll over your toes and lift your chest upwards, keeping your legs straight and thighs off the ground. This pose opens the chest and strengthens the arms.

  • Benefits: Strengthens the spine, arms, and wrists; stretches the chest, shoulders, and abdomen.
  • How to: From low plank, roll over your toes, lift your chest, and straighten your arms. Keep your thighs off the ground and press your shoulders back.

13. Child’s Pose (Balasana)

Return to child’s pose for a moment of rest and relaxation.

  • Benefits: Relieves back and neck pain, reduces stress, and calms the brain.
  • How to: Sit back on your heels and extend your arms forward, resting your forehead on the mat.

14. Hero Pose (Virasana)

Sit back on your heels with knees bent and hands resting on your thighs. This pose promotes relaxation and improves digestion.

  • Benefits: Stretches the thighs, knees, and ankles; improves digestion and relieves gas.
  • How to: Kneel on the mat, with your knees together and feet slightly apart. Sit back between your heels, keeping your back straight and hands on your thighs.

15. Warrior 1 (Virabhadrasana I)

Step one foot forward and bend the knee, keeping the back leg straight. Raise your arms overhead. This pose builds strength and stability.

  • Benefits: Strengthens the legs, ankles, and arms; stretches the chest, shoulders, and groin; improves balance.
  • How to: From a standing position, step one foot back and bend your front knee. Raise your arms overhead and gaze forward.

16. Reverse Warrior (Viparita Virabhadrasana)

From warrior 1, lean back and reach one arm overhead, stretching the side body.

  • Benefits: Stretches the side body, strengthens the legs and arms, improves flexibility.
  • How to: From warrior 1, reach your back hand down your leg and extend your top arm overhead, leaning back slightly.

17. Warrior 2 (Virabhadrasana II)

Turn your back foot slightly and open your hips to the side, extending your arms parallel to the ground. This pose strengthens the legs and improves concentration.

  • Benefits: Strengthens the legs, ankles, and arms; stretches the hips and groin; improves concentration and balance.
  • How to: From warrior 1, open your hips to the side and extend your arms parallel to the ground, gazing over your front hand.

18. Extended Side Angle Pose (Utthita Parsvakonasana)

From warrior 2, lower your front hand to the ground or a block and extend your top arm over your ear. This pose stretches the sides and strengthens the legs.

  • Benefits: Stretches the sides, hips, and hamstrings; strengthens the legs and ankles.
  • How to: From warrior 2, lower your front hand to the ground or a block, and extend your top arm over your ear, creating a long line from your back foot to your fingertips.

19. Triangle Pose (Trikonasana)

Straighten your front leg, extend your front arm to the ground or a block, and reach your top arm towards the ceiling. This pose improves flexibility and balance.

  • Benefits: Stretches the legs, hips, and spine; strengthens the legs and ankles; improves flexibility and balance.
  • How to: From warrior 2, straighten your front leg and reach your front hand to the ground or a block. Extend your top arm towards the ceiling and gaze upwards.

20. Pigeon Pose (Kapotasana)

From downward facing dog, bring one knee forward and extend the opposite leg back, lowering your hips. This pose deeply stretches the hips and relieves lower back pain.

  • Benefits: Stretches the hips, thighs, and groin; relieves lower back pain.
  • How to: From downward facing dog, bring one knee forward and lower your hips, extending your back leg straight behind you. Keep your hips square and fold forward over your front leg.

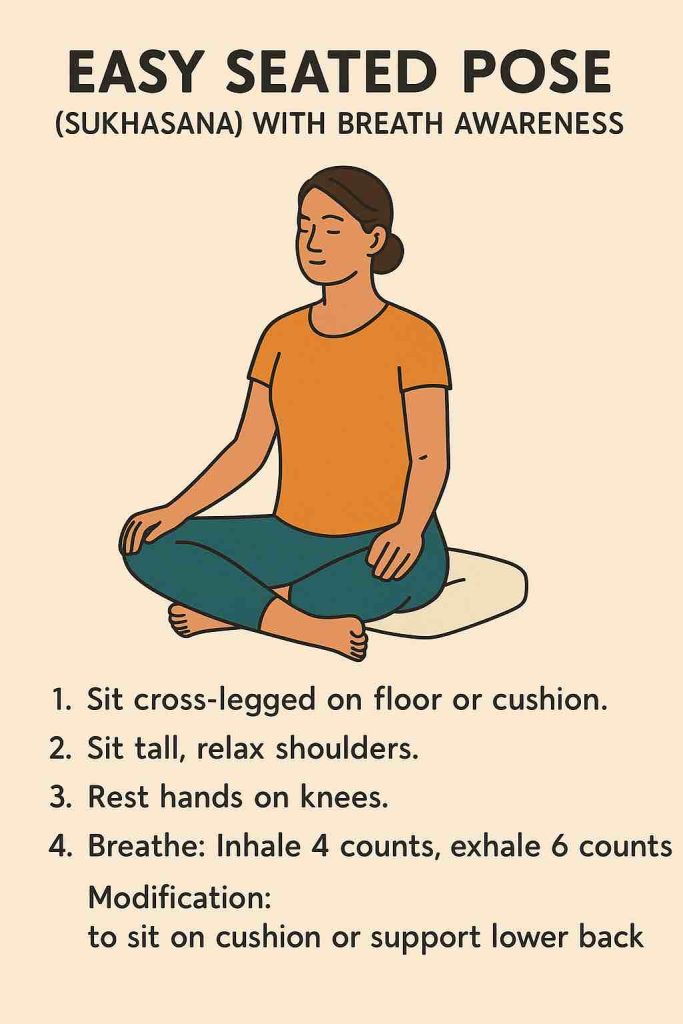
21. Meditation Pose (Sukhasana)

Sit comfortably with your legs crossed and hands resting on your knees. Close your eyes and focus on your breath, calming your mind and body.

  • Benefits: Calms the mind, reduces stress, improves focus.
  • How to: Sit with your legs crossed and your back straight. Rest your hands on your knees, close your eyes, and take deep breaths.

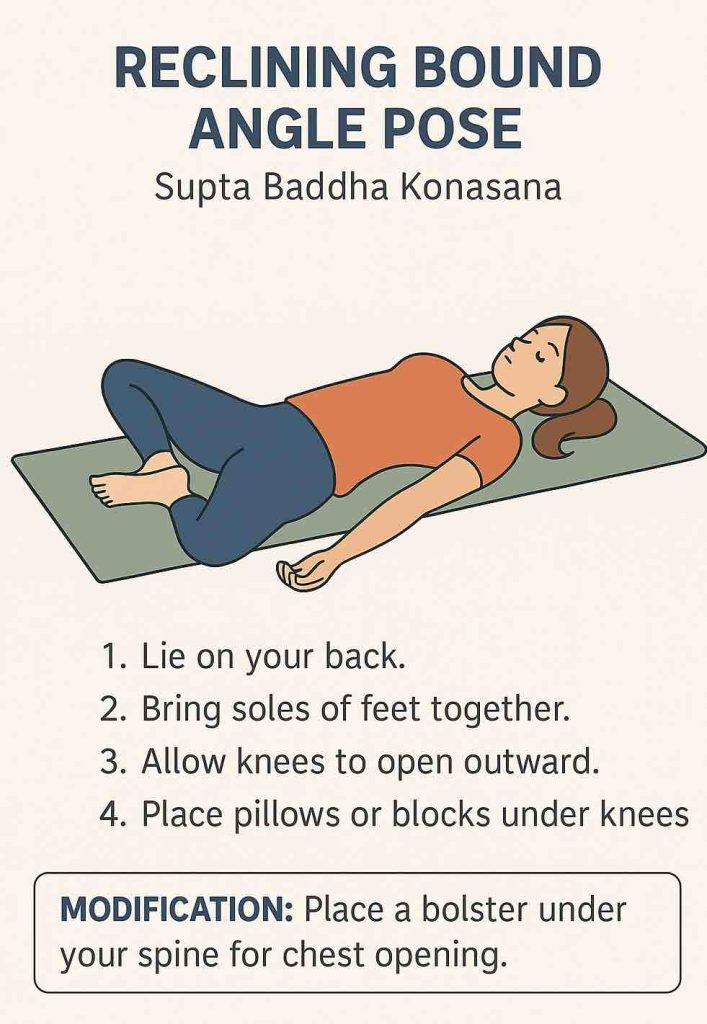
22. Butterfly Forward Bend (Baddha Konasana)

Bring the soles of your feet together and fold forward over your legs, gently stretching your inner thighs and groin.

  • Benefits: Stretches the inner thighs, groin, and knees; improves flexibility.
  • How to: Sit with your legs bent and the soles of your feet together. Hold your feet with your hands and gently fold forward, keeping your back straight.

23. Seated Pose (Dandasana)

Sit with your legs extended straight in front of you, engaging your core and sitting tall. This pose improves posture and stretches the legs.

  • Benefits: Strengthens the back muscles, improves posture, stretches the legs.
  • How to: Sit with your legs extended straight in front of you. Flex your feet, engage your core, and sit up tall, with your hands resting on the mat beside you.

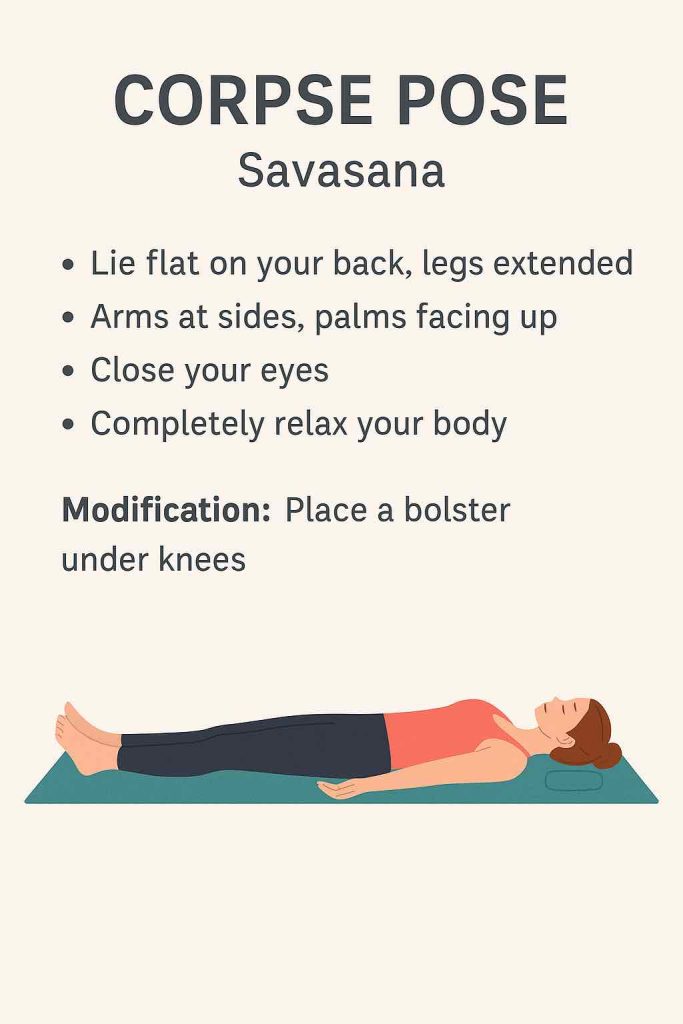
24. Corpse Pose (Savasana)

Lie down on your back with arms at your sides and legs slightly apart. Close your eyes and relax completely, allowing your body to absorb the benefits of your practice.

  • Benefits: Relaxes the body, reduces stress, promotes overall well-being.
  • How to: Lie on your back with your legs slightly apart and your arms at your sides, palms facing up. Close your eyes and take deep breaths, allowing your body to fully relax.

You can download / save / print this basic FREE PDF with 25 poses to get you started.

Conclusion

Incorporating this morning yoga routine into your daily schedule can bring numerous physical and mental benefits. Whether you’re new to yoga or a seasoned practitioner, these poses are designed to help you start your day with a sense of calm and vitality. Remember to move at your own pace, listen to your body, and enjoy the process.

Tags: Morning Yoga, Yoga Routine, Daily Yoga Practice, Yoga for Beginners, Yoga Poses, Wellness

FAQs:

Q: How long should I hold each pose? A: Aim to hold each pose for 3-5 breaths, adjusting the duration based on your comfort and experience level.

Q: Can I do this routine if I’m new to yoga? A: Yes, this routine includes beginner-friendly poses. Feel free to modify the poses as needed and use props for support.

Q: What are the benefits of a morning yoga routine? A: Morning yoga can improve flexibility, increase energy, reduce stress, and enhance mental clarity throughout the day.

Posted on 1 Comment

30-Minute Chair Yoga for Seniors and Elderly

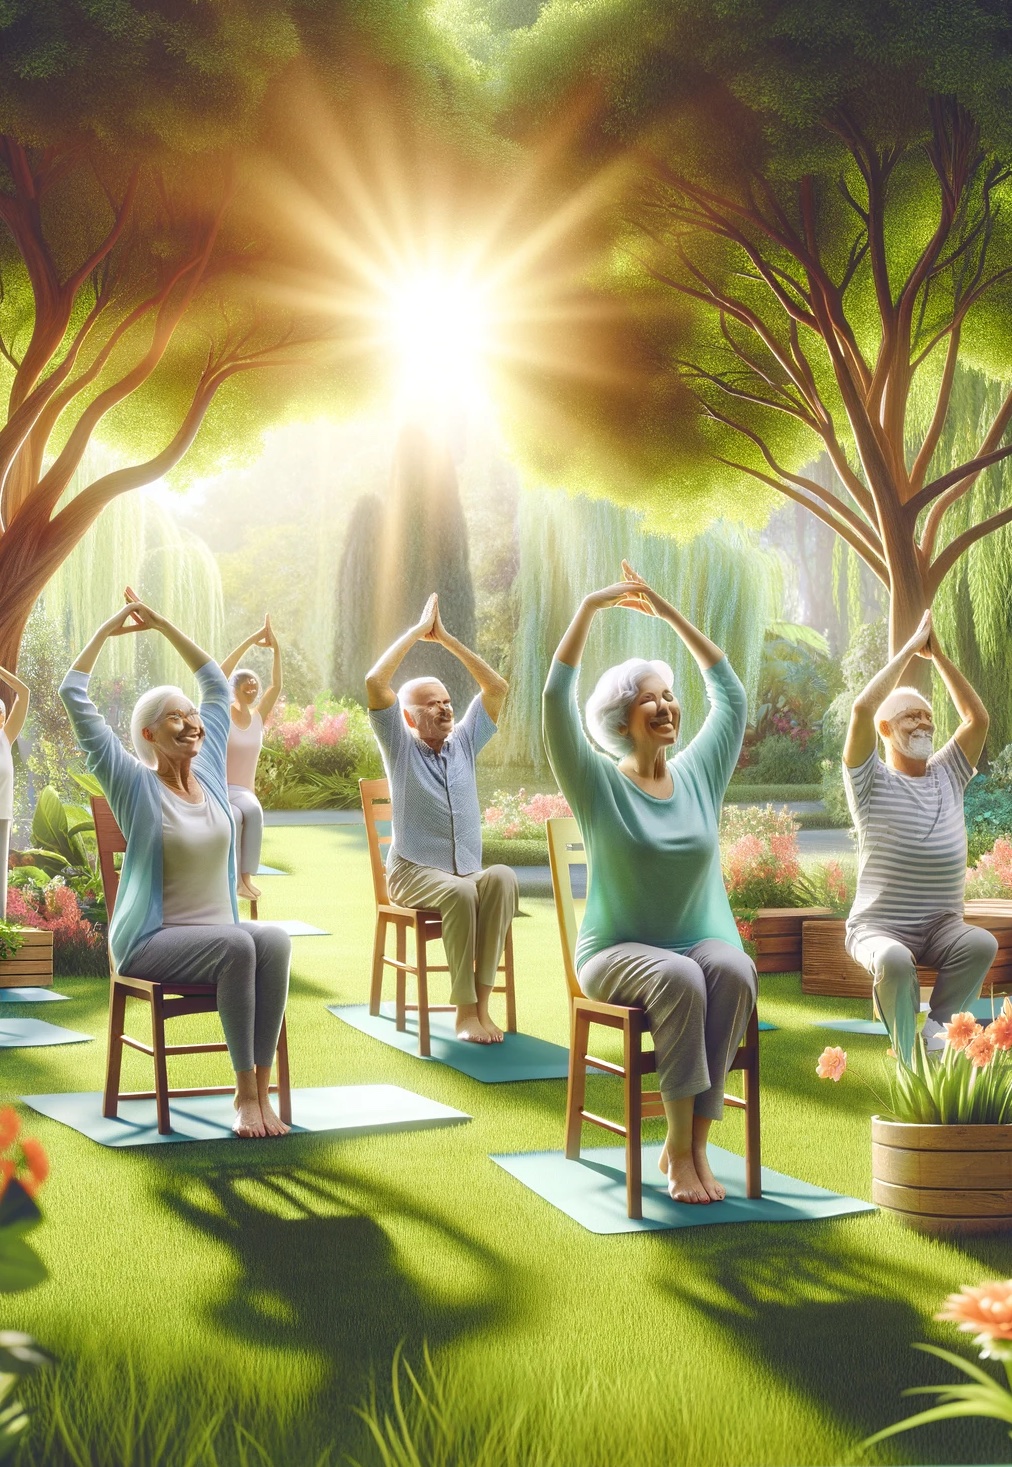
Chair yoga is an excellent way for seniors to engage in physical activity, improve flexibility, and maintain a healthy lifestyle without the risk of strain or injury associated with more traditional forms of exercise. Let’s outline a gentle, yet effective 30-minute chair yoga session that incorporates these elements. This session can be performed at home with minimal equipment—a sturdy chair without arms, and perhaps a yoga mat for added stability under the chair if needed.

Warm-Up (5 minutes)

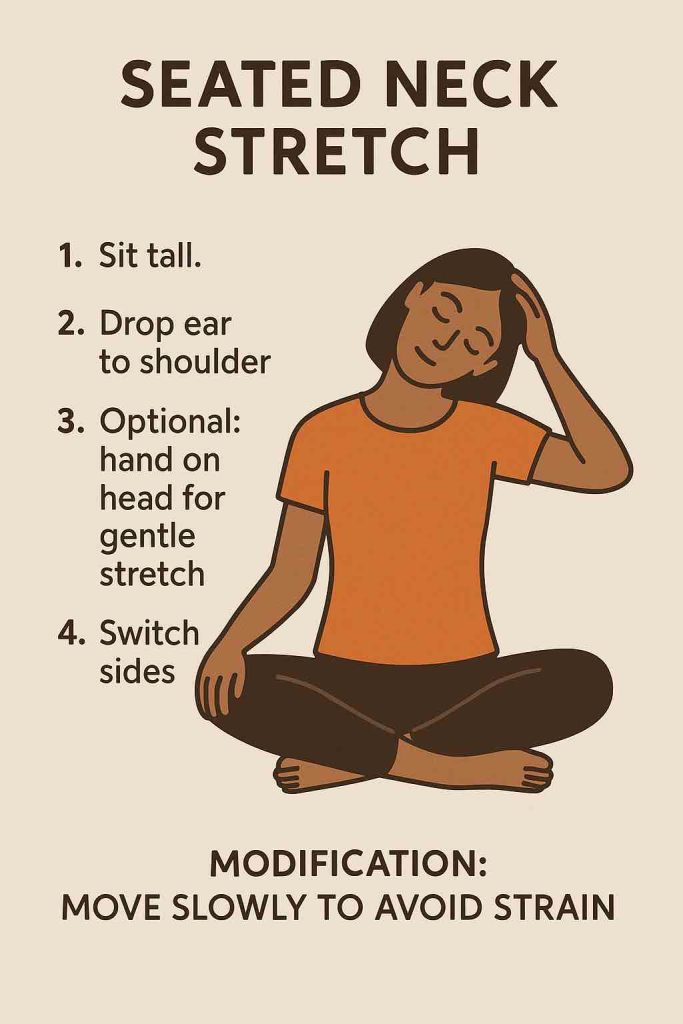
  • Neck and Shoulder Rolls: Sit up straight and gently roll your neck and shoulders to release tension. This helps to prepare your body for the practice.
  • Arm Raises: Inhale and slowly raise your arms above your head, palms facing each other; exhale and lower them. This movement increases blood flow and warms up the body.

Main Routine (20 minutes)

  1. Tadasana (Mountain Pose) Variation: Sitting, ground your feet flat on the floor, straighten your spine, and raise your arms overhead. This pose helps improve posture.
  2. Paschimottanasana (Seated Forward Bend): Extend your legs forward, hinge at the hips, and reach towards your toes. It stretches the spine and hamstrings.
  3. Baddha Konasana (Bound Angle Pose): With feet together, let your knees fall to the sides. This opens up the hips and thighs.
  4. Virabhadrasana (Warrior Pose) Variation: Turn to one side, extending one leg back and the other bent at the knee, raise your arms to shoulder height. This strengthens the legs and improves balance.
  5. Ardha Chakrasana (Half Wheel Pose): Place your hands on the back of the chair for support, push your chest forward and arch your back. This asana strengthens the back and improves flexibility.
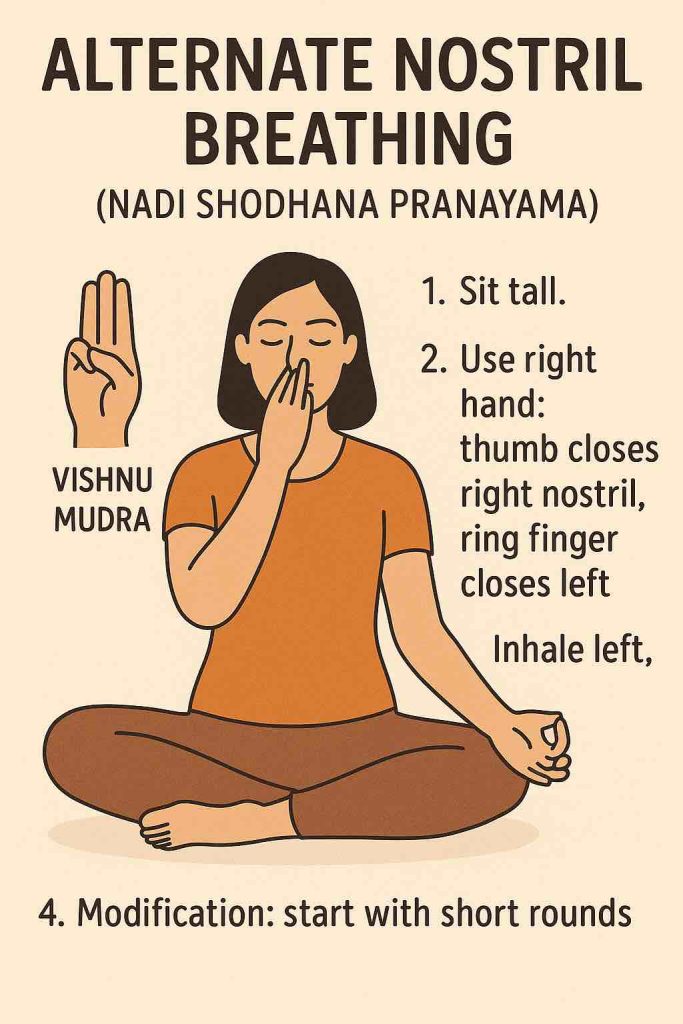
  6. Pranayama (Breathing Exercises): Focus on deep, controlled breathing. Try the Anulom Vilom (Alternate Nostril Breathing) to promote relaxation and balance the mind.

Cool Down (5 minutes)

  • Gentle Twists: Sitting, place one hand on the opposite knee and twist your torso gently. Repeat on the other side. Twists help to relax the spine and aid digestion.
  • Savasana (Corpse Pose) Variation: Sit comfortably, close your eyes, and focus on deep breathing for a few minutes to relax your body and mind.

Additional Tips:

  • Always listen to your body and modify poses as needed. Use cushions for support if necessary.
  • Maintain a regular practice, ideally 3-4 times a week, to see improvements in flexibility, strength, and mental well-being.
  • For weight loss, combine this practice with a healthy diet and perhaps additional low-impact exercises like walking.

These exercises can be printed for ease of access and to help establish a routine. Remember, the key to chair yoga is consistency and adapting the practice to fit your individual needs and capabilities. Enjoy your practice and the journey towards better health and well-being!

10 FAQs for Chair Yoga Practice

  1. What is chair yoga?
    • Chair yoga is a form of yoga that modifies traditional poses so they can be done while seated or using a chair for support. It’s designed to make yoga accessible to people of all ages and abilities.
  2. Who can benefit from chair yoga?
    • Seniors, individuals with limited mobility, those recovering from injury, or anyone who spends long hours seated, like office workers, can benefit from chair yoga.
  3. Do I need any special equipment?
    • All you need is a sturdy, armless chair. Optional items include yoga blocks, a cushion, or a blanket for additional support or comfort.
  4. Can chair yoga improve balance?
    • Yes, many chair yoga poses focus on strengthening the core and legs, which can help improve balance and reduce the risk of falls.
  5. Is chair yoga effective for stress relief?
    • Absolutely. Chair yoga incorporates breathing exercises and mindfulness practices that are effective for reducing stress and promoting mental clarity.
  6. How often should I practice chair yoga?
    • For best results, aim for at least 2-3 sessions per week. Consistency is more important than duration.
  7. Can chair yoga help with arthritis?
    • Yes, the gentle movements and stretches in chair yoga can help maintain joint flexibility and reduce pain associated with arthritis.
  8. I’m a beginner. Will I be able to do chair yoga?
    • Chair yoga is perfect for beginners. It’s a gentle way to start yoga, focusing on safety and individual ability.
  9. How long is a typical chair yoga session?
    • Sessions can vary, but a typical chair yoga routine can be completed in about 30 minutes, making it easy to fit into a busy schedule.
  10. Where can I find chair yoga classes?
    • Many community centers, yoga studios, and online platforms offer chair yoga classes. Virtual classes can be a convenient option to practice at home.

Blog Tags

chair yoga, senior wellness, gentle yoga, yoga for beginners, mobility exercises, stress relief, arthritis relief, balance improvement, mindful yoga, home exercise

Posted on Leave a comment

Chair Yoga for Seniors and Beginners: Energize with Seated Stretches

Unlock the Power of Gentle Movement Right from Your Chair!

Welcome to a world where fitness is not just for the fleet-footed! Chair yoga, a wonderfully accessible form of yoga, is especially beneficial for seniors and beginners, offering a plethora of health advantages without the need for standing poses. Today, we delve into the art of chair yoga through the insightful video “Chair Yoga for Seniors & Beginners // Energizing Seated Stretches” by SeniorShape Fitness.

What You Need: Simplicity at its Best

All you need is a sturdy, armless chair, and a strap like a resistance band, belt, or even a dog leash. Yes, it’s that straightforward!

Beginning with the Basics: Warm-Up

  • Posture Check: Begin by ensuring your knees and ankles are aligned while seated.
  • Breathing and Shoulders: Engage in deep breathing and shoulder rolls, setting a relaxed yet alert posture.

The Heart of the Session: Main Yoga Sequence

  1. Elevate and Lower Arms: Inhale as your arms rise, exhale as they descend, focusing on the movement of your palms.
  2. Calf and Toe Workouts: Alternate between raising heels and toes, activating lower leg muscles.
  3. Cow Pose for Spine: Alternate between rounding and arching your back, perfect for spinal health.
  4. Camel and Tree Pose Variations: These poses open your chest and improve balance, all from the comfort of your chair.
  5. Twists and Bends: Gentle twists and forward bends, fabulous for spinal flexibility and digestion.
  6. Adapted Triangle Pose: Stretch and strengthen your side body with these seated variations.
  7. Butterfly for the Hips: Open up those hips with a gentle, seated butterfly stretch.

Winding Down: Cool-Down Stretches

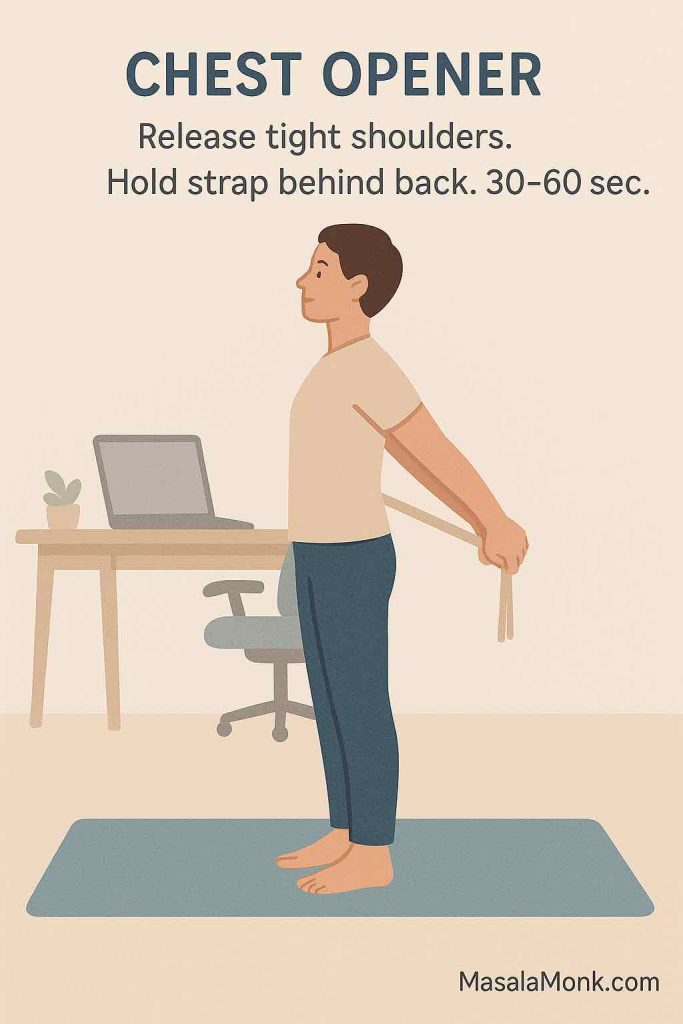
  1. Strap-Assisted Shoulder and Tricep Stretch: An excellent way to stretch out these often neglected areas.
  2. Quad Stretches with a Strap: Focus on the front of your thighs, using the strap for an enhanced stretch.
  3. Seated Happy Baby Pose: A forward bend that’s excellent for your spine.
  4. Side Bends: Release tension in the lower back and side body with these stretches.
  5. Relaxation and Breath Work: Conclude with deep, calming breaths, bringing peace to both body and mind.

The Takeaway: More Than Just Stretches

This chair yoga session is not just about stretching; it’s about embracing a healthier, more flexible you. It’s about finding strength and serenity in movements that are gentle yet effective.

Watch and Learn: Bringing the Video to You

To see these exercises in action and follow along, check out the video below. It’s a fantastic visual guide that complements this post perfectly.

Chair Yoga for Seniors & Beginners // Energizing Seated Stretches

Join the Movement!

Why wait? Grab that chair, and let’s make fitness a joyful, inclusive journey. Share your experiences, thoughts, or any fun moments you have while trying out these exercises. Your feedback is not just welcomed; it’s celebrated!


FAQs for Chair Yoga for Seniors and Beginners

  1. What is chair yoga? Chair yoga is a form of yoga practiced sitting on a chair or using a chair for support during standing poses. It’s particularly beneficial for those with limited mobility or balance issues.
  2. Who can do chair yoga? Anyone can do chair yoga! It’s especially helpful for seniors, beginners, or individuals with physical limitations.
  3. Do I need any special equipment for chair yoga? All you need is a sturdy, armless chair. Optionally, a strap (like a resistance band or belt) can be used for some stretches.
  4. Is chair yoga effective? Yes, chair yoga is an effective way to improve flexibility, strength, balance, and mental clarity.
  5. How long is a typical chair yoga session? Sessions can vary, but most chair yoga routines, like the one in the SeniorShape Fitness video, are about 20-30 minutes long.
  6. Can chair yoga help with arthritis? Yes, the gentle movements in chair yoga can help reduce pain and improve joint mobility for people with arthritis.
  7. Is chair yoga safe for people with back problems? Chair yoga can be beneficial for back health, but it’s always advisable to consult with a healthcare provider before starting any new exercise regimen, especially if you have back issues.
  8. Can I lose weight with chair yoga? While chair yoga is more focused on flexibility and strength, it can contribute to weight loss as part of an overall healthy lifestyle.
  9. How often should I do chair yoga? Regular practice is key for the best results. You can start with a few times a week and adjust according to your comfort and schedule.
  10. Can chair yoga improve my mental health? Yes, chair yoga combines physical exercise with mindful breathing and relaxation techniques, which can positively impact mental health.

Blog Tags for the Post

Chair Yoga, Senior Fitness, Yoga for Beginners, Gentle Yoga, Accessible Yoga, Yoga Practice, Health and Wellness, Mind-Body Connection, Flexibility Exercises, Stress Relief

Posted on Leave a comment

30 Days of Yoga Challenge for Self-Discovery and Wellness

By Adriene Mishler from the YouTube channel “Yoga With Adriene”

Embarking on a 30-day yoga journey is not just about physical transformation; it’s about connecting with oneself, finding inner peace, and embracing a holistic approach to well-being. Adriene Mishler, a renowned yoga instructor, introduces a 30-day yoga challenge that is designed for everyone, irrespective of their yoga experience. This journey is about finding what feels good, challenging oneself, and embracing the power of yoga in daily life.

Key Highlights from the Video:

  1. Introduction to the 30-Day Challenge: Adriene welcomes participants to the 30-day yoga journey, emphasizing that it’s designed for all levels, body types, and backgrounds.
  2. Essentials for the Journey: While a yoga mat, towel, or blanket can be beneficial, they aren’t mandatory. Participants should wear comfortable clothing and practice barefoot or in socks.
  3. Guidance for Beginners: Adriene suggests beginners check out her “Yoga for Complete Beginners” video to ease into the practice.
  4. Foundations of Yoga: For those interested in deepening their understanding of specific poses, Adriene recommends her “Foundations of Yoga” series.
  5. Personalizing the Experience: The 30-day challenge is flexible, allowing participants to adapt and modify as per their comfort. The primary focus is on connecting with oneself and finding what feels good.
  6. Engaging with the Community: Adriene encourages participants to share their journey using the hashtag #30daysofyoga, fostering a sense of community and shared experience.
  7. The Essence of the Challenge: The challenge is not just about physical postures; it’s about mindfulness, breathwork, and self-discovery. Every day brings a new lesson, a new posture, and a new opportunity to connect with oneself.

Benefits of the 30-Day Yoga Challenge:

  • Physical Well-being: Regular practice can enhance flexibility, strength, and overall physical health.
  • Mental Clarity: Yoga helps in reducing stress, anxiety, and promotes mental clarity and focus.
  • Emotional Balance: The practice aids in emotional regulation, promoting feelings of peace and contentment.
  • Community Building: Engaging with the YWA community provides a sense of belonging and shared purpose.

Final Thoughts:

Adriene Mishler’s 30-day yoga challenge is a testament to the transformative power of yoga. Whether you’re a seasoned yogi or a complete beginner, this journey promises growth, discovery, and a deeper connection with oneself. Embrace the challenge, find what feels good, and let yoga be the guiding light in your journey to holistic well-being.

If you’re inspired and wish to embark on this transformative journey, consider subscribing to Adriene’s channel for daily guidance and support. Connect with her on Instagram @adrienelouise and explore more resources on her website.

Note: Always consult with a healthcare professional before starting any new exercise regimen.

Credits: Video and content by Yoga With Adriene.


FAQs for the 30 Days of Yoga Blog Post:

  1. What is the 30-day yoga challenge?
    The 30-day yoga challenge, curated by Adriene Mishler, is a series of daily yoga sessions designed to help participants connect with themselves, enhance physical well-being, and promote mental clarity.
  2. Do I need prior yoga experience to join the challenge?
    No, the 30-day yoga challenge is crafted for individuals of all levels, from complete beginners to seasoned yogis.
  3. What equipment do I need for the challenge?
    While having a yoga mat can be beneficial, it’s not mandatory. All you need is comfortable clothing and a quiet space to practice.
  4. How long are the daily sessions?
    The length of the sessions varies, ensuring a diverse and comprehensive yoga experience throughout the 30 days.
  5. Can I modify the poses as per my comfort?
    Absolutely! Adriene emphasizes the importance of finding what feels good and encourages participants to adapt and modify poses as needed.
  6. How can I engage with the YWA community during the challenge?
    Participants can share their experiences, progress, and insights using the hashtag #30daysofyoga on social media platforms.
  7. What benefits can I expect from the challenge?
    Regular participation can lead to enhanced flexibility, strength, mental clarity, emotional balance, and a deeper connection with oneself.
  8. Where can I find additional resources to support my journey?
    Adriene’s website, Yoga With Adriene, offers a plethora of resources, tutorials, and guides to complement the 30-day challenge.

Blog Tags for the Post:
30 Days of Yoga, Yoga Challenge, Adriene Mishler, Yoga With Adriene, Holistic Well-being, Mindfulness, Breathwork, Self-Discovery, Yoga for Beginners, Daily Yoga Practice, #30daysofyoga, Yoga at Home, Mental Clarity, Emotional Balance.