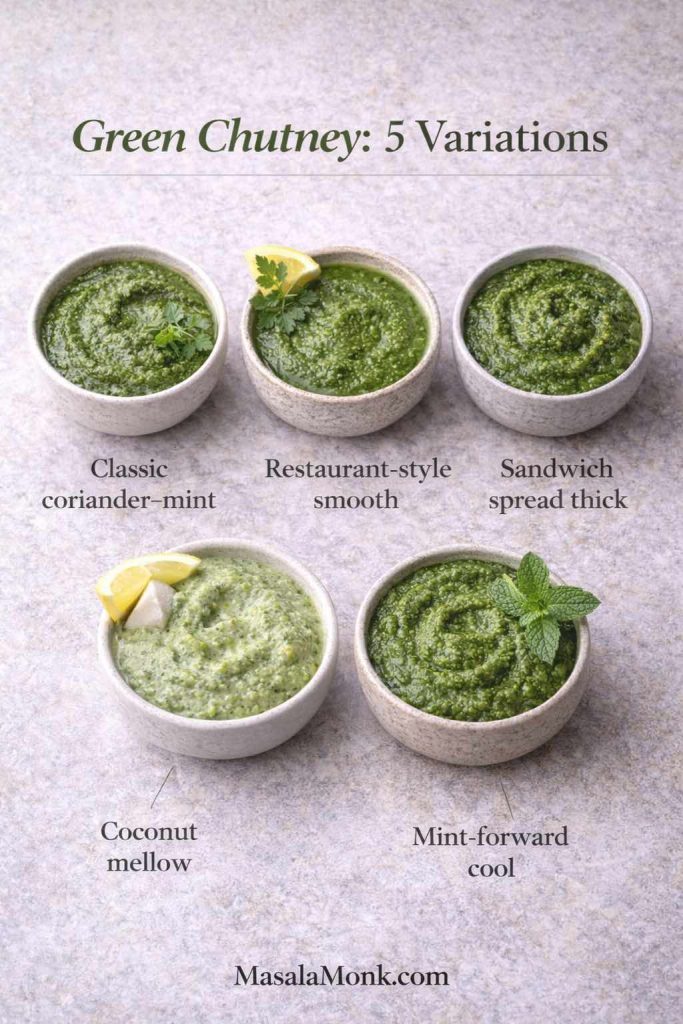
This green chutney recipe is the kind you start making “just for snacks,” and then—almost without noticing—you’re spreading it on toast, swirling it into yogurt, packing it for lunch, and finding excuses to dip everything into it. It’s fresh coriander (cilantro) and mint blended with green chilli, ginger, roasted cumin, salt, and citrus, so it tastes bright, punchy, and alive. Better still, the same base can become restaurant style green chutney for chaat nights, a thick green chutney for sandwich spreads, or a mellow coconut green chutney that belongs beside dosa and idli.
Depending on where you learned your kitchen language, you might call it coriander mint chutney, cilantro mint chutney, coriander chutney, cilantro chutney, dhania chutney, or dhaniya chutney. The name changes; the craving doesn’t. What matters is that you end up with a jar of green goodness that fixes the whole plate.
The green chutney that fixes everything
Some condiments behave like optional extras. Green chutney isn’t one of them. It’s a small, cold spoonful that can make hot food feel lighter, spicy food feel brighter, and plain food feel like you actually meant it to taste that good.
Think about the foods we naturally reach for it with: samosas, pakoras, kebabs, cutlets, chaat. Those are all rich or fried or boldly spiced, which means they love a contrast—something tangy and herbal to cut through the heaviness. Yet the real power of green chutney shows up outside snack plates. Spread it inside a sandwich and it instantly tastes more “street,” more layered, more addictive. Add it to a bowl of yogurt and it becomes a quick dip that tastes like you planned ahead. Stir a spoon into leftover rice and suddenly you’re not eating leftovers; you’re eating a clever lunch.
In other words, green chutney isn’t just a recipe. It’s a kitchen habit.
Also Read: Pesto Recipe: Classic Basil Pesto Sauce & 10 Variations
Names you’ll hear at home (and what they usually mean)
Before we blend anything, it helps to make peace with the names. The same chutney can wear different labels depending on region, language, and what your family grew up saying.
Cilantro and coriander
If you grew up calling the leafy herb “coriander,” then “coriander chutney” will sound natural. Meanwhile, if you’re used to the word “cilantro,” then “cilantro chutney” will feel like the obvious name. Both can point to the same chutney built on coriander leaves.
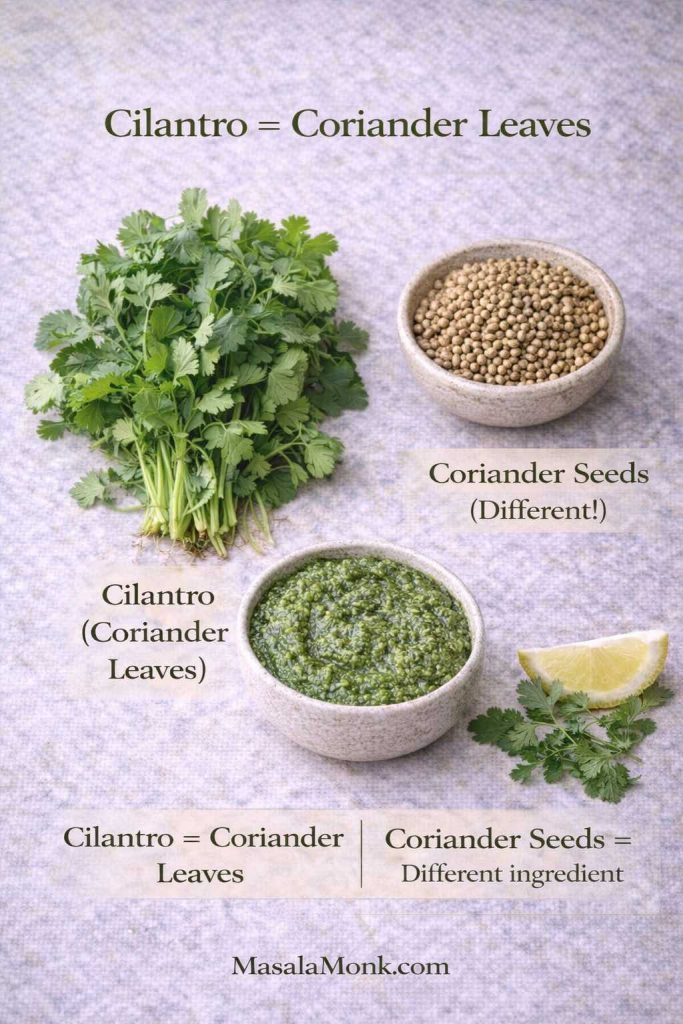
To keep it simple, treat “cilantro” and “coriander leaves” as interchangeable in your kitchen unless you’re specifically talking about coriander seeds.
Dhania and dhaniya
Dhania (and dhaniya) are common Hindi words for coriander. So a dhania chutney recipe or dhaniya chutney recipe is usually pointing you to this same green chutney family—sometimes with mint, sometimes without, but almost always brightened with lemon.
Mint chutney and green chutney
A mint chutney recipe often overlaps with green chutney, but the balance shifts. Mint becomes the main note, coriander supports, and the chutney feels cooler and more mint-forward. You’ll get that variation in this post too, because it’s genuinely useful.
Also Read: Vodka Pasta (Penne alla Vodka) + Spicy Rigatoni, Chicken, and Gigi Recipes
What a good green chutney should taste like
A great green chutney doesn’t taste like “blended leaves.” It tastes like freshness with intention.
First comes tang—lemony brightness that makes your mouth water. Next comes the herb hit, clean and green without tasting raw or grassy. Then the chilli warmth arrives, not as a punch, but as a steady glow. Finally, roasted cumin shows up quietly in the background, giving the chutney that “snack-ready” depth that keeps it from feeling like a salad.
When green chutney is off, the flavor problems are usually predictable:
- When it tastes flat, it often needs roasted cumin or salt.
- When it tastes grassy, it usually needs lemon and better seasoning.
- When it tastes harsh, chilli or ginger may be dominating and needs buffering.
- When it tastes bitter, the herbs may have heated up during blending or too many thick stems made it into the jar.
The reassuring part is that most batches can be corrected. You don’t have to start over. You just have to nudge the chutney back into balance.
Also Read: Healthy Oat Protein Bars – 5 Easy No Sugar Recipes for Snacks
Before you blend: the small choices that change everything
Choose herbs that smell bright
This sounds almost too obvious, yet it’s the easiest quality check. Coriander should smell citrusy and fresh, not damp. Mint should smell cool, not muddy. If your herbs already smell tired, your chutney will taste tired too—no amount of lemon will fully fix it.
Use tender coriander stems, skip the thick ones
Tender stems carry aroma, so using them makes the chutney taste fuller. Thick, fibrous stems near the base, on the other hand, can blunt the flavor and sometimes add bitterness. So, trim the rough ends, keep the tender parts, and you’ll get the best of both worlds.
Dry your herbs more than you think you need to
Water is the most common reason green chutney becomes thin and bland. Since this chutney is meant to taste concentrated, shake off excess water and pat the herbs dry if you can. Even a quick towel pat changes the final texture.
This step matters even more if you want green chutney for sandwich spreads, because sandwich chutney has to be thick enough to stay put.
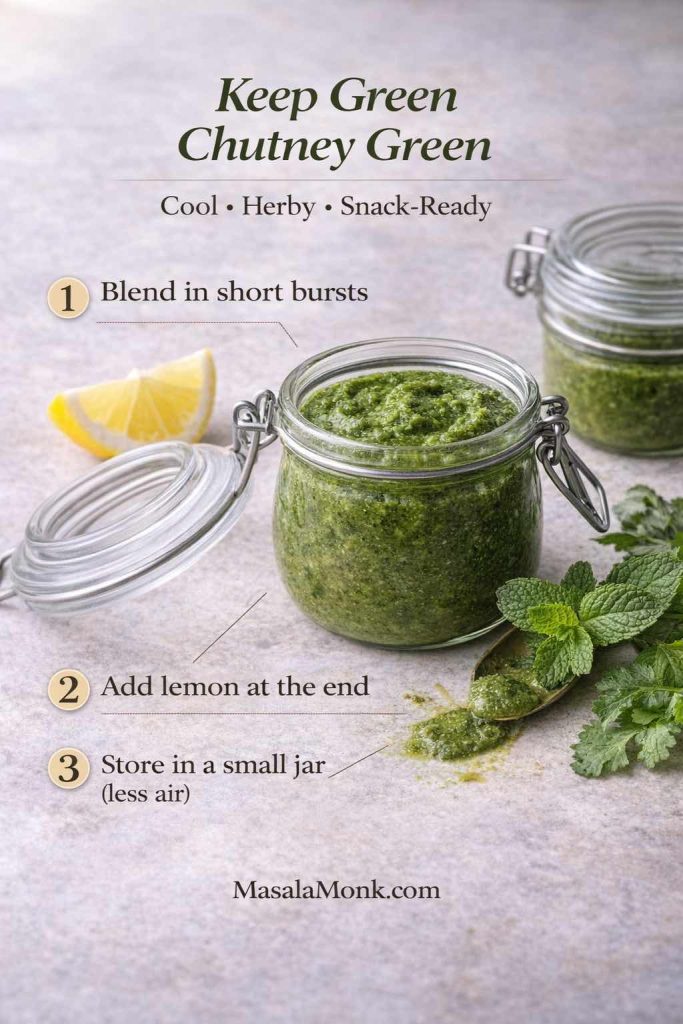
Blend in short bursts
Long blending runs heat up herbs. Short bursts keep things cooler, help preserve a brighter green, and give you more control over texture. In practice, this also makes it easier to keep the chutney thick without dumping in water too early.
Also Read: Strawberry Smoothie Recipes (12 Easy Blends + Bowls & Protein Shakes)
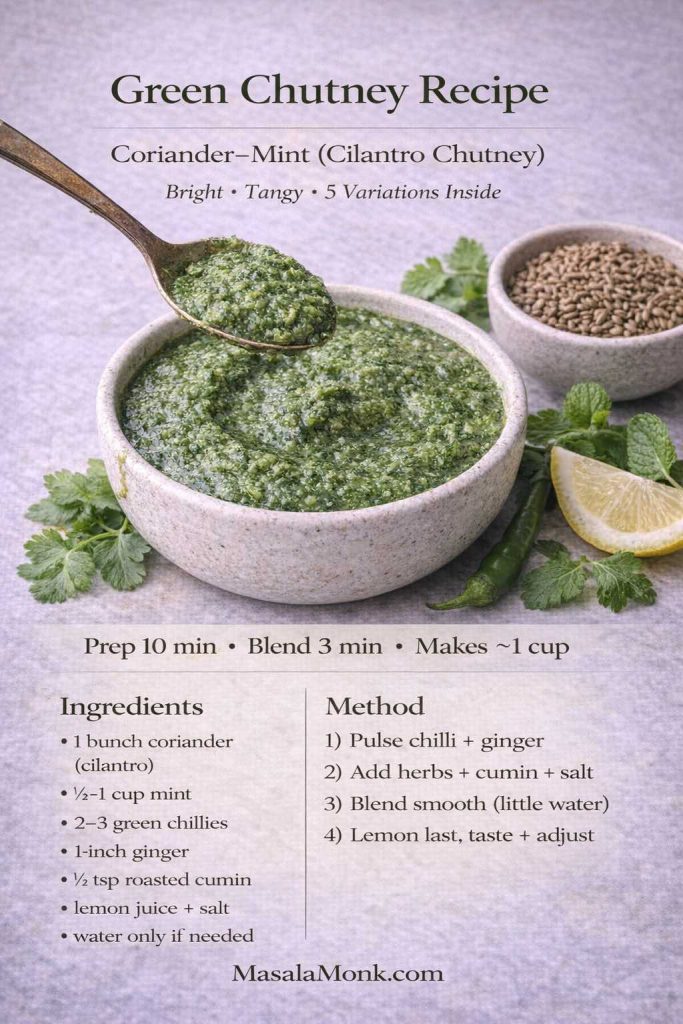
Recipe Card: Classic Green Chutney Recipe (Coriander–Mint / Cilantro Chutney)
This is the everyday base—the one you’ll use as a dip, spoon beside meals, or turn into variations. It also naturally covers what most people mean by coriander chutney recipe and cilantro chutney recipe in daily kitchen language.
Yield: about 1 to 1¼ cups
Prep time: 10 minutes
Blend time: 2 to 4 minutes
Best for: snacks, chaat, wraps, everyday meals
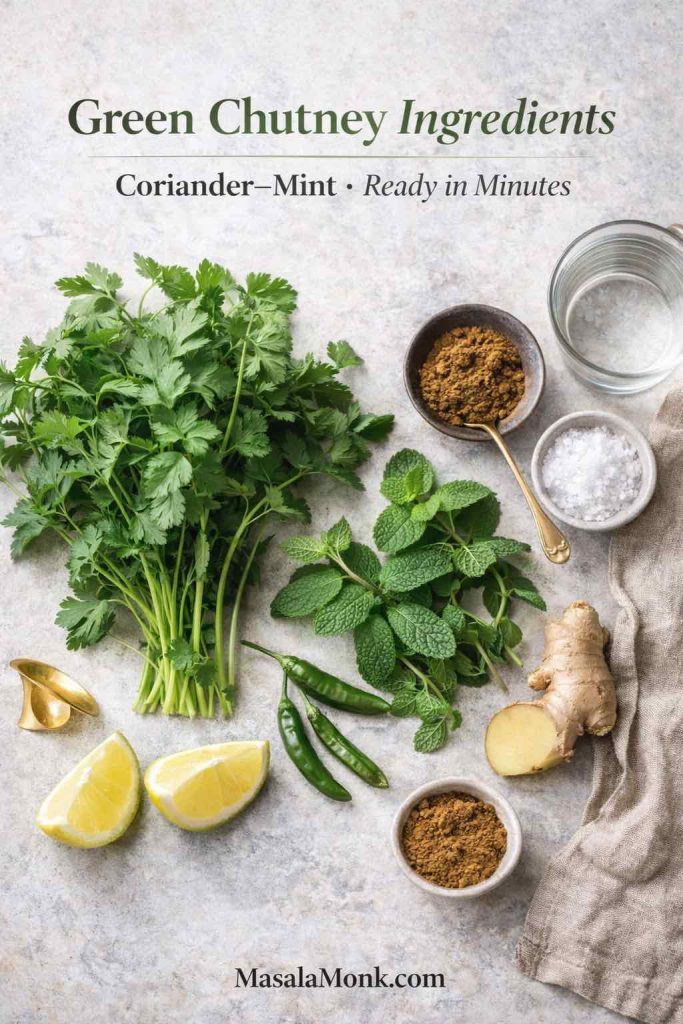
Ingredients
Coriander (cilantro), 1 large bunch (leaves with tender stems)
Mint leaves, ½ to 1 cup (adjust to taste)
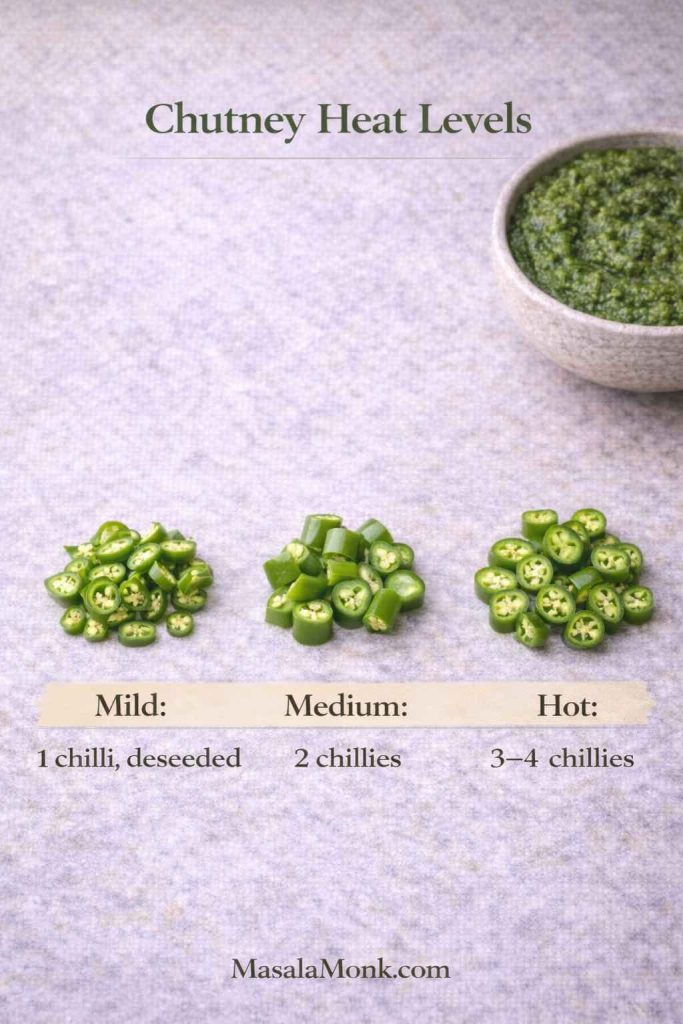
Green chillies, 2 to 4 (adjust to heat)
Ginger, 1 to 1½-inch piece
Roasted cumin powder, ½ to ¾ teaspoon
Salt, to taste (black salt optional)
Lemon or lime juice, 1 to 2 tablespoons
Water, only as needed (start with none)
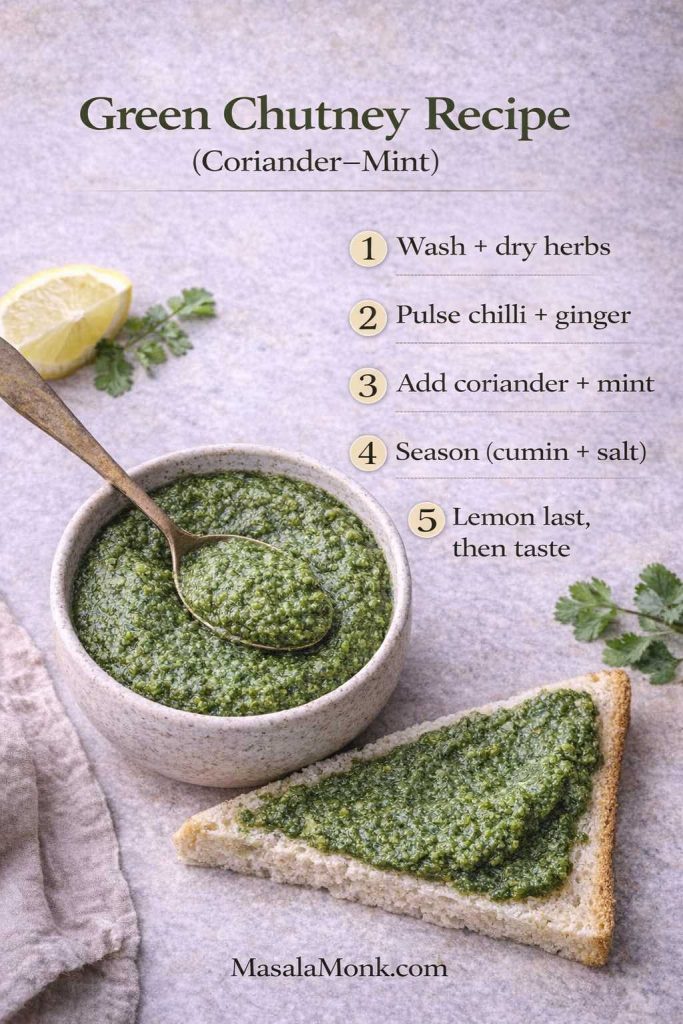
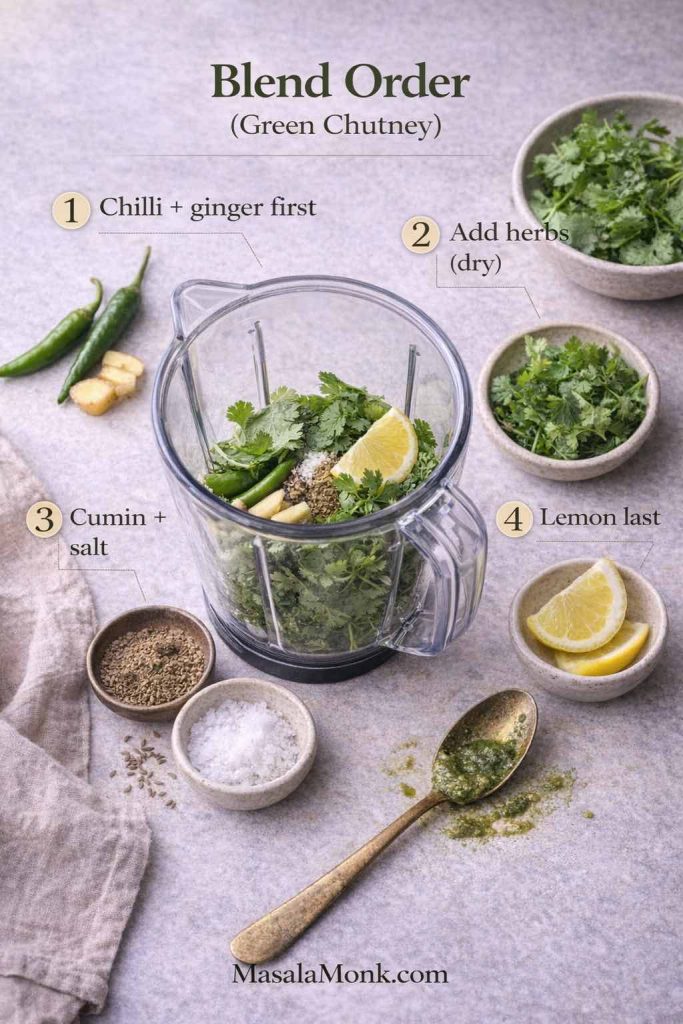
Method
- Rinse coriander and mint thoroughly. Then shake off as much water as possible and pat dry if you have time.
- Add green chillies and ginger to the blender jar first. Pulse once or twice until roughly broken down.
- Add coriander, mint, roasted cumin, and salt. Blend in short bursts, scraping down the jar once or twice.
- Add water only in tiny splashes if the blades struggle.
- Add lemon juice last. Blend briefly, taste, and adjust slowly until the chutney feels bright and balanced.
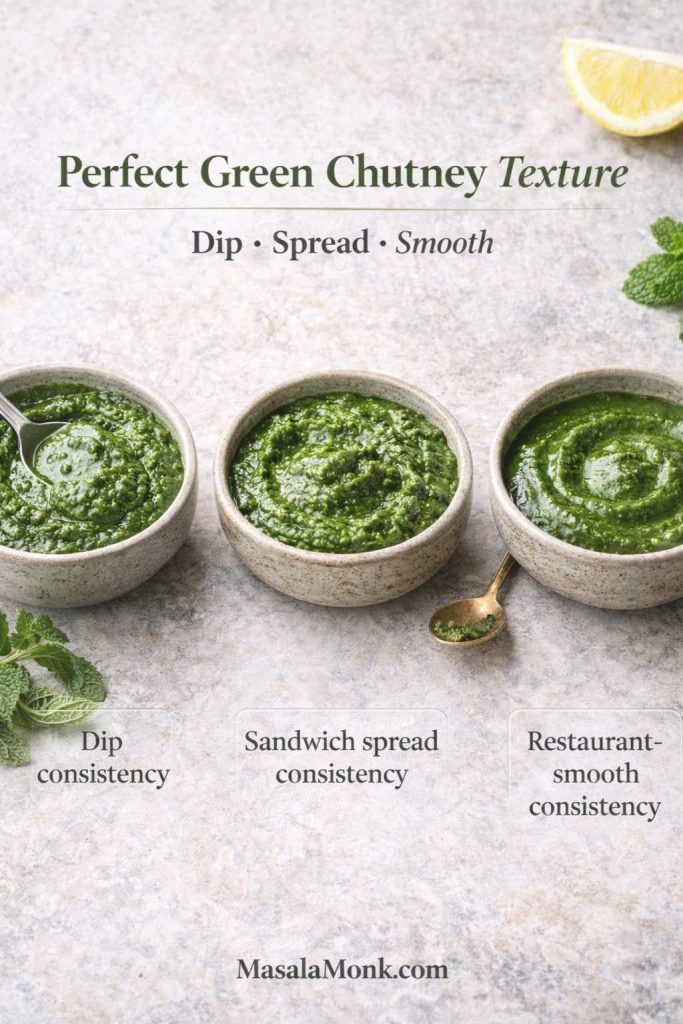
The texture of green chutney you’re aiming for
Texture depends on where the chutney is headed. A smooth, spoonable blend is perfect for dipping, especially with fried snacks. If you’re serving it as a side with everyday meals, a slightly coarse grind can taste wonderfully fresh and rustic. Sandwiches are different, though: a thicker spread works better inside bread and won’t turn the layers soggy.
If you enjoy seeing how widely this base is used, the overall structure lines up with classic versions like Veg Recipes of India’s mint coriander chutney and Indian Healthy Recipes’ cilantro chutney. No need to copy either one exactly—think of them as familiar signposts rather than strict rules.
Also Read: Classic Rum Punch + 9 Recipes (Pitcher & Party-Friendly)
Getting the texture right (because flavor isn’t the only job)
A lot of green chutney disappointment is really texture disappointment. The flavor might be good, but if the chutney is watery or uneven, it won’t behave the way you want.
When it’s too thin
Thin chutney happens when too much water enters the blender early, or when the herbs were very wet. Instead of adding more spices to “fix” it, solve the texture first. Later in this post, you’ll see the most reliable thickener for sandwich chutney; for now, remember this: you can always thin chutney later, but thickening watery chutney is harder than starting thick.
When it’s too coarse
Coarse chutney can taste wonderful, especially when served beside home-style meals. Still, if you want that restaurant style green chutney feel, smoothness matters. A smoother blend coats snacks better and tastes more “finished.” Instead of adding lots of water, blend in short bursts and scrape down more often. Usually, patience improves smoothness more than water does.
When it’s foamy or “air-y”
This happens when the blender runs too long, too fast, and pulls in air. The chutney can look lighter and feel less dense. Short bursts help. So does using a smaller jar where the blades catch the herbs properly.
Also Read: 7 Pizza Sauce Recipes | Marinara, White Garlic, Alfredo, Buffalo, BBQ, Vodka & Ranch
Cilantro chutney, coriander chutney, and the green base you already made
With the base green chutney recipe ready, you’re already holding two common variations in your hands. You don’t need separate recipes as much as you need direction.

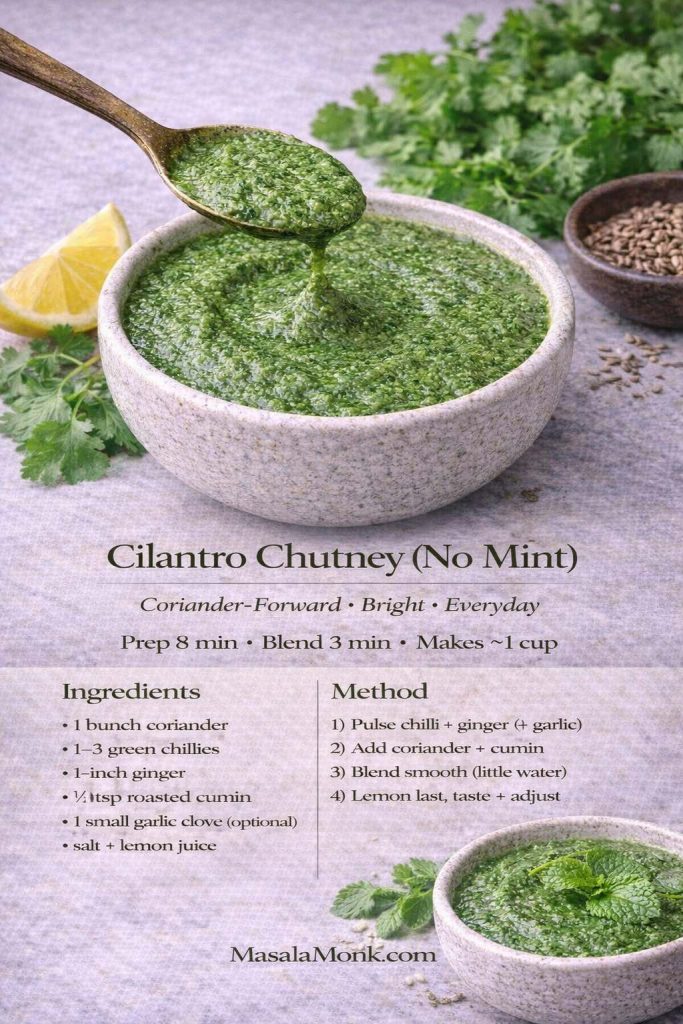
Cilantro chutney recipe style (coriander-forward Green Dip)
If you want coriander to lead, reduce mint to a small handful or skip it completely. Then keep ginger, chilli, cumin, salt, and lemon as usual. This coriander-forward chutney tastes cleaner and sharper, which makes it excellent in wraps, toasties, and quick lunches.
To make that version taste “complete,” be confident with lemon at the end and keep roasted cumin steady. That combination gives coriander chutney a satisfying finish rather than a raw edge.
Coriander mint chutney style (mint-friendly & Green)
If you prefer the snack-stall feeling, use more mint. Keep coriander as the backbone, but let mint join more confidently. Blend a bit smoother. Add black salt if you love that chaat tang. This version tends to feel cooler and more “dip-ready,” especially beside fried snacks.
Dhania chutney and dhaniya chutney (both green) at home
If you call it dhania chutney or dhaniya chutney, you’re usually making one of the two styles above—either coriander-forward or coriander-and-mint. The name doesn’t force the method; your taste does.
Also Read: Marinara Sauce Recipe: Classic Homemade Marinara
The “restaurant” taste without overcomplicating your life
Restaurant style green chutney has a particular personality: it’s smoother, brighter, and slightly more intense. It also tastes like it was designed specifically for snacks, which is why it’s so satisfying on a chaat plate.
The simplest way to get that feel is to focus on three things: smoothness, tang, and finish.
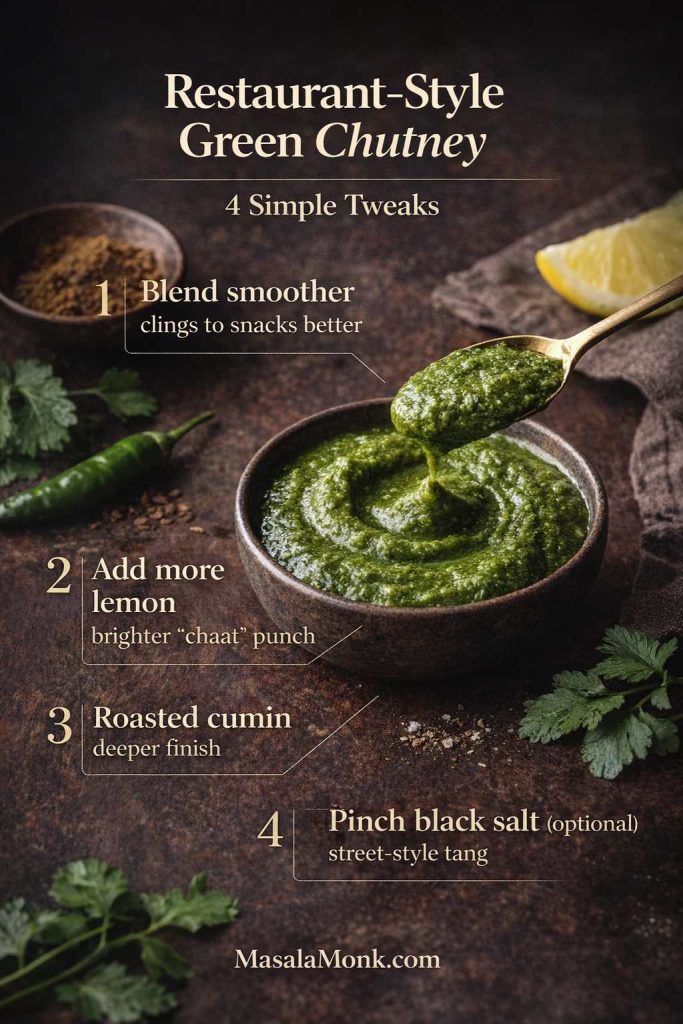
Smoothness comes from blending a little longer than your home version, but doing it in short bursts so the herbs stay cool. Tang comes from pushing lemon slightly further than you normally would. Finish comes from roasted cumin and, if you like it, a pinch of black salt. Used carefully, those two seasonings create the snack-stall memory without overpowering the herbs.
Also Read: Oat Pancakes Recipe (Healthy Oatmeal Pancakes)
Recipe Card: Restaurant Style Green Chutney (Smooth and Chaat-Ready)
This is the version that feels like it belongs beside samosas, pakoras, and chaat. It also matches what many people mean when they say “green chutney restaurant style.”
Yield: about 1 cup
Prep time: 10 minutes
Blend time: 3 to 5 minutes
Best for: chaat, samosas, pakoras, snack platters
Ingredients
Coriander (cilantro), 1 large bunch
Mint leaves, ¾ cup (adjust to taste)
Green chillies, 2 to 4
Ginger, 1-inch piece
Roasted cumin powder, ¾ teaspoon
Salt, to taste
Black salt, a small pinch (optional)
Lemon juice, 1½ to 2 tablespoons (taste as you go)
Water, minimal and added only if needed
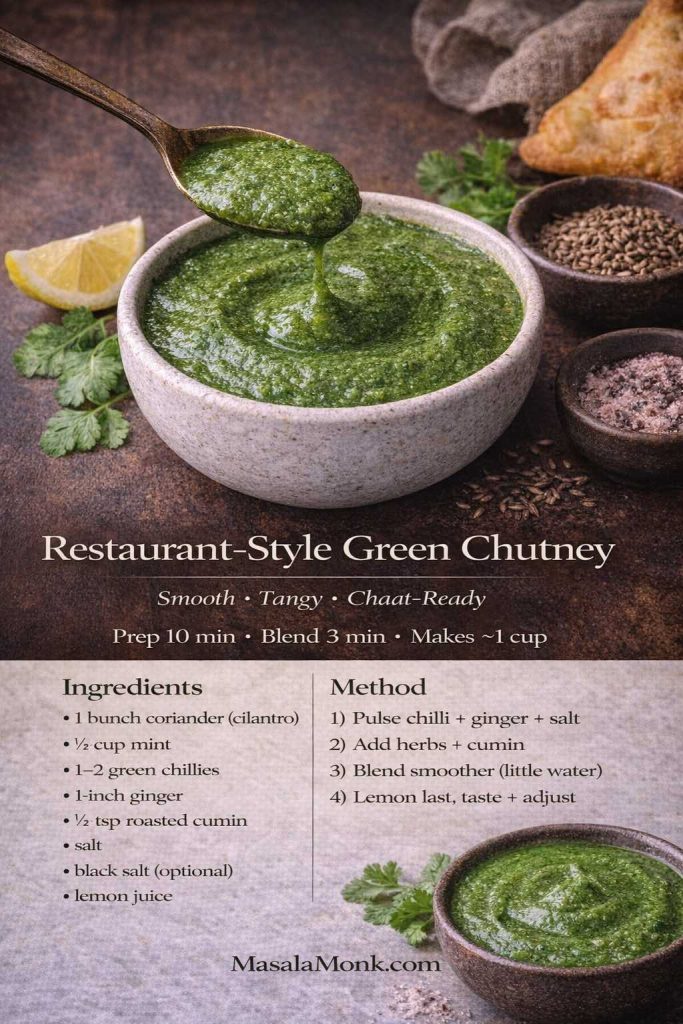
Method
- Pulse ginger and chillies first.
- Add coriander, mint, cumin, salt, and black salt (if using).
- Blend smoother than your home version, using short bursts and scraping down.
- Add lemon at the end, blend briefly, then taste.
- Adjust until the chutney tastes bright and “snack-ready.”
If you enjoy contrasting chutney personalities, it’s fun to pair this with a bold red chutney like MasalaMonk’s Kara Chutney for idli and dosa on the same table. The flavors are entirely different, yet both do the same job: they make the plate exciting.
Also Read: Mayo Recipe: 15+ Homemade Mayonnaise Variations
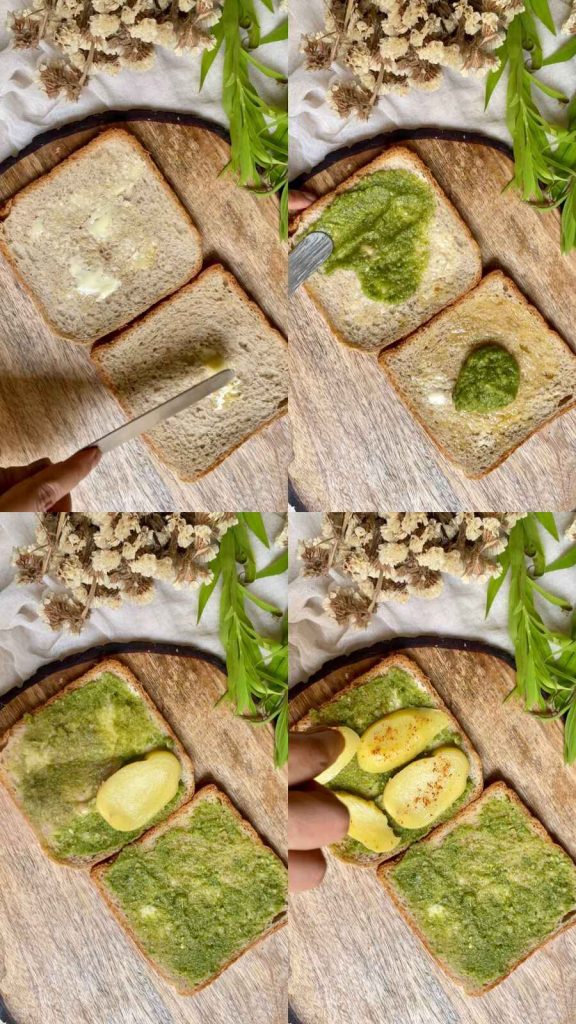
The sandwich factor (where green chutney becomes a daily habit)
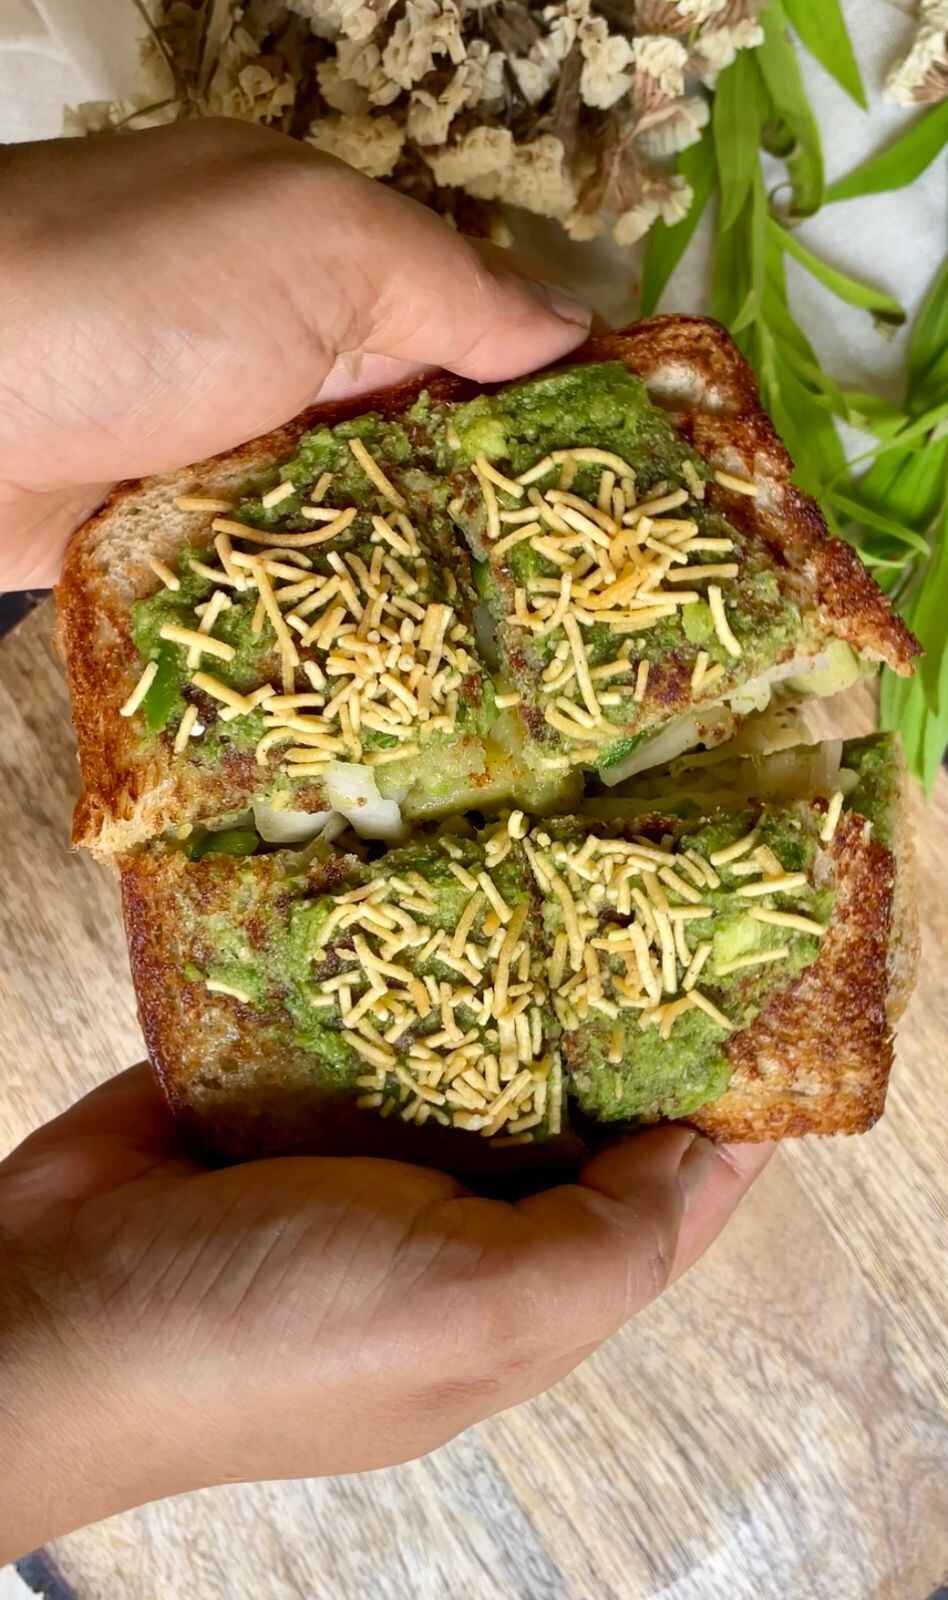
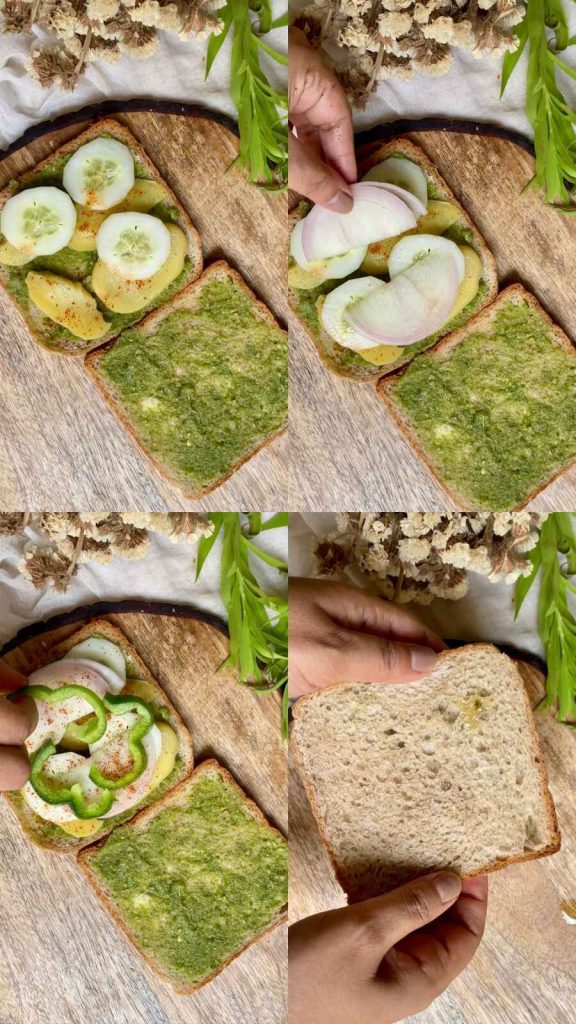
If you’ve ever eaten a proper Bombay sandwich, you already know why green chutney matters. The potatoes and spices create comfort, while the chutney creates contrast. Together, they taste like street food even when you’re eating at home.
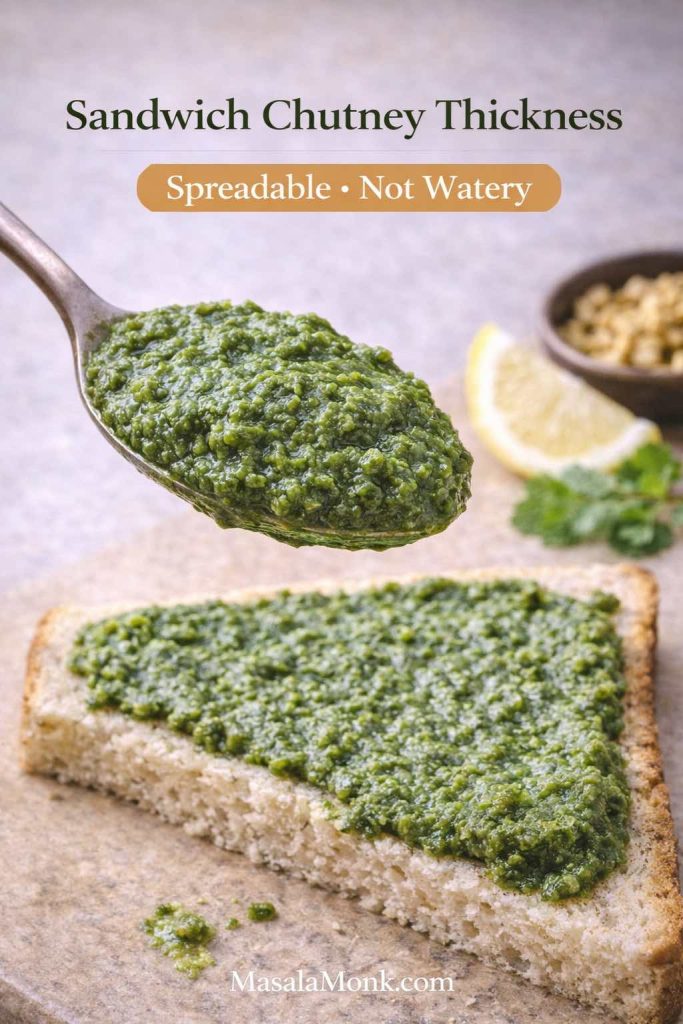
Still, green chutney for sandwich needs one special quality: it has to be thick enough to spread without soaking bread. Thin chutney migrates. It makes the bread soggy, the filling slippery, and the flavor uneven. Thick chutney, on the other hand, stays where you put it, so every bite tastes deliberate.
To build that thickness, you mainly need to control water and choose a helpful thickener.
Why roasted chana dal works so well
Roasted chana dal (bhuna chana/dalia) thickens chutney without making it heavy. It also gives the spread a satisfying body that feels very “sandwich shop.” Meanwhile, it keeps the herb flavor intact, which is exactly what you want.
Also Read: Daiquiri Recipe (Classic, Strawberry & Frozen Cocktails)
Recipe Card: Green Chutney for Sandwich (Thick Spread)
This is designed to perform inside bread. It’s spreadable, stable, and concentrated enough to hold its own under fillings.
Yield: about 1 cup
Prep time: 10 minutes
Blend time: 4 to 6 minutes
Best for: Bombay sandwich, toasties, wraps, lunchbox sandwiches
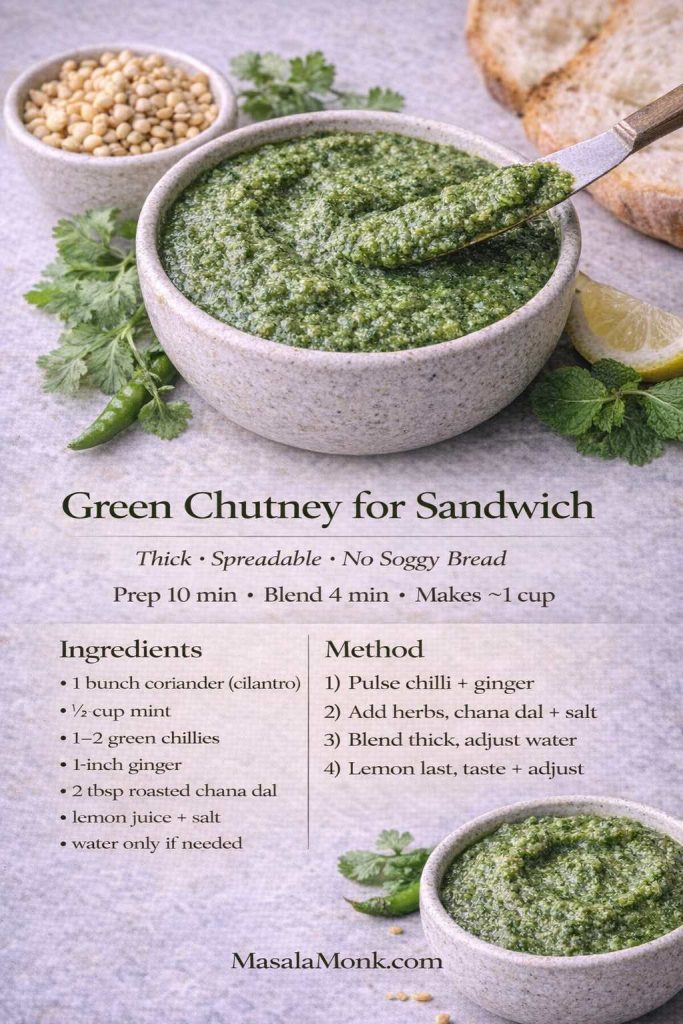
Ingredients
Coriander (cilantro), 1 large bunch
Mint leaves, ½ cup
Green chillies, 2 to 3
Ginger, 1-inch piece
Roasted cumin powder, ½ to ¾ teaspoon
Salt, to taste
Lemon juice, 1 to 1½ tablespoons
Roasted chana dal (bhuna chana/dalia), 1 to 2 tablespoons
Water, only by teaspoons if absolutely needed
Method
- Pulse ginger and chillies first.
- Add coriander, mint, cumin, and salt. Blend in bursts with almost no water.
- Add roasted chana dal and blend again until thick and spreadable.
- Add lemon at the end, blend briefly, and taste.
- If it becomes too thick, loosen with a teaspoon of water. If it’s still thin, add a little more roasted chana dal.
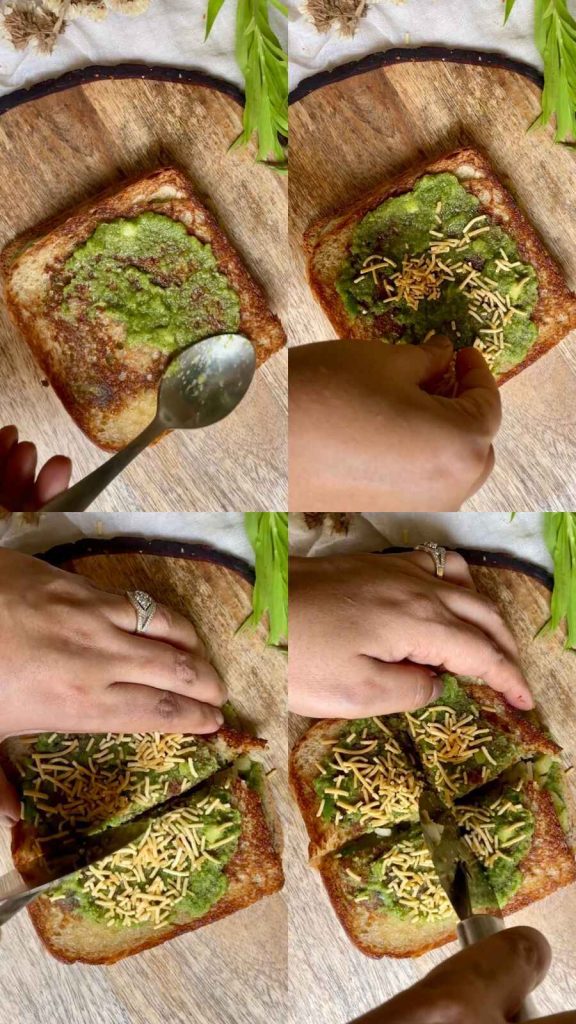
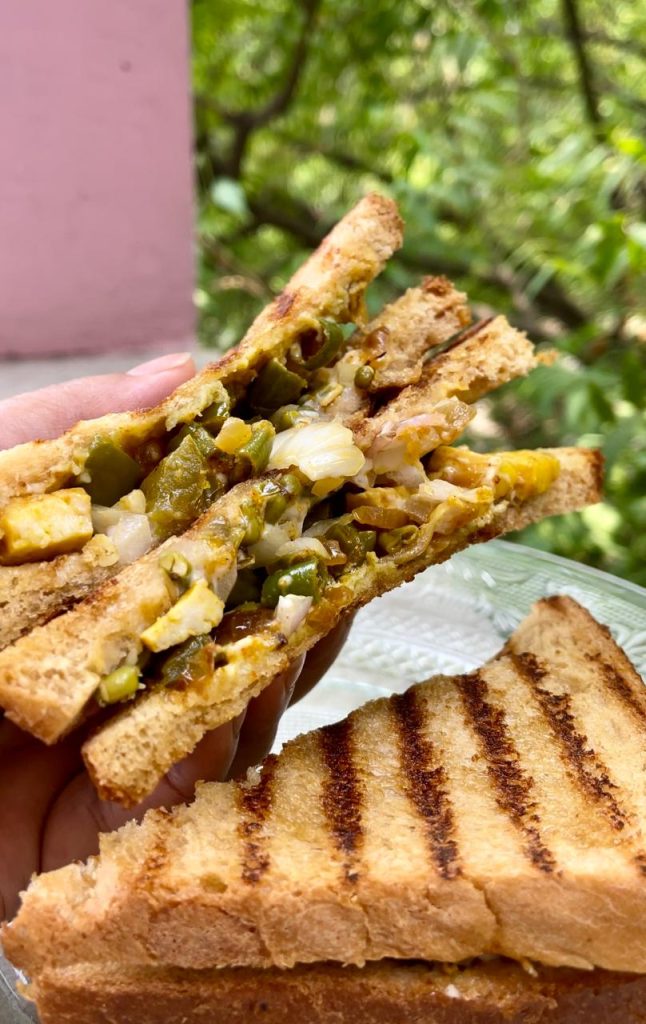
Where to use it immediately
This is the signature layer in MasalaMonk’s Authentic Grilled Bombay Sandwich Recipe, where green coriander chutney helps create that unmistakable street-style bite. It also works beautifully when you’re using leftovers creatively, like in this Paneer Sabji Sandwich. For mornings, it fits naturally into MasalaMonk’s Sandwich for breakfast ideas, especially when you want a toastie that tastes fresh and bold rather than merely filling.
Coconut green chutney: a softer, breakfast-friendly direction
Sometimes you don’t want sharp. You want calm. Coconut green chutney is that mood: creamy, mellow, and especially good with dosa, idli, or any breakfast plate that needs a comforting dip.
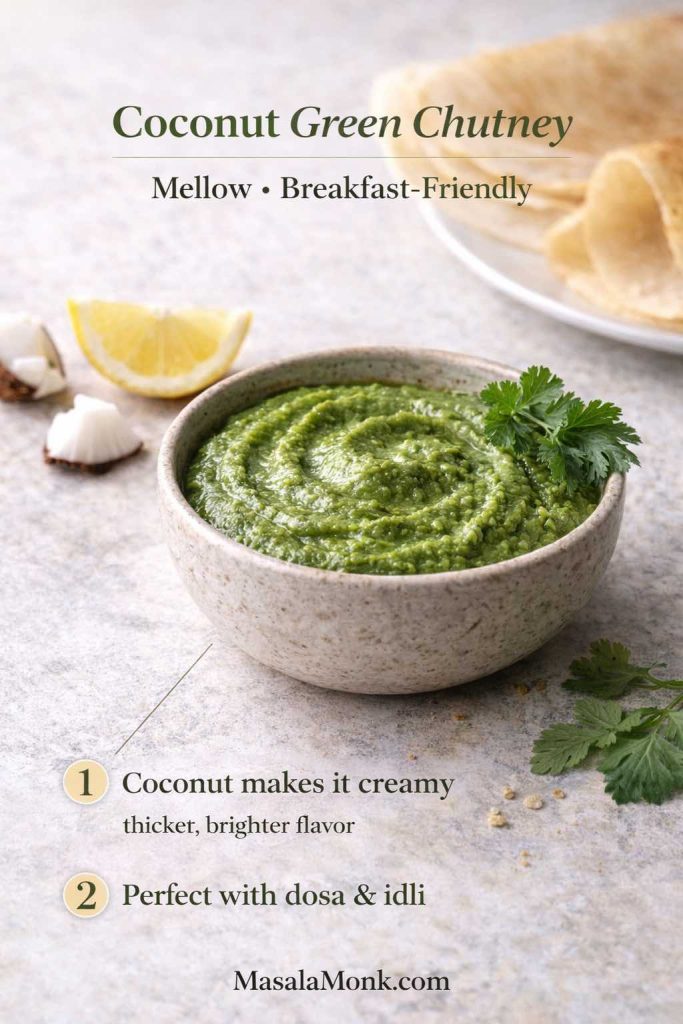
The beauty of coconut is that it rounds off harshness and softens chilli heat. Consequently, coconut green chutney feels soothing without becoming bland—especially if you remember to bring brightness back with lemon at the end.
Recipe Card: Coconut Green Chutney (Herb + Coconut)
This version keeps the green freshness, then adds coconut for a creamier finish.
Yield: about 1 to 1¼ cups
Prep time: 10 minutes
Blend time: 4 to 6 minutes
Best for: dosa, idli, savory breakfasts, snack platters
Ingredients
Fresh grated coconut, ½ to ¾ cup (or desiccated coconut soaked briefly)
Coriander (cilantro), 1 bunch
Mint leaves, a small handful (optional)
Green chillies, 1 to 3
Ginger, a small piece
Roasted cumin powder, ¼ to ½ teaspoon
Salt, to taste
Lemon juice, about 1 tablespoon (adjust to taste)
Water, minimal
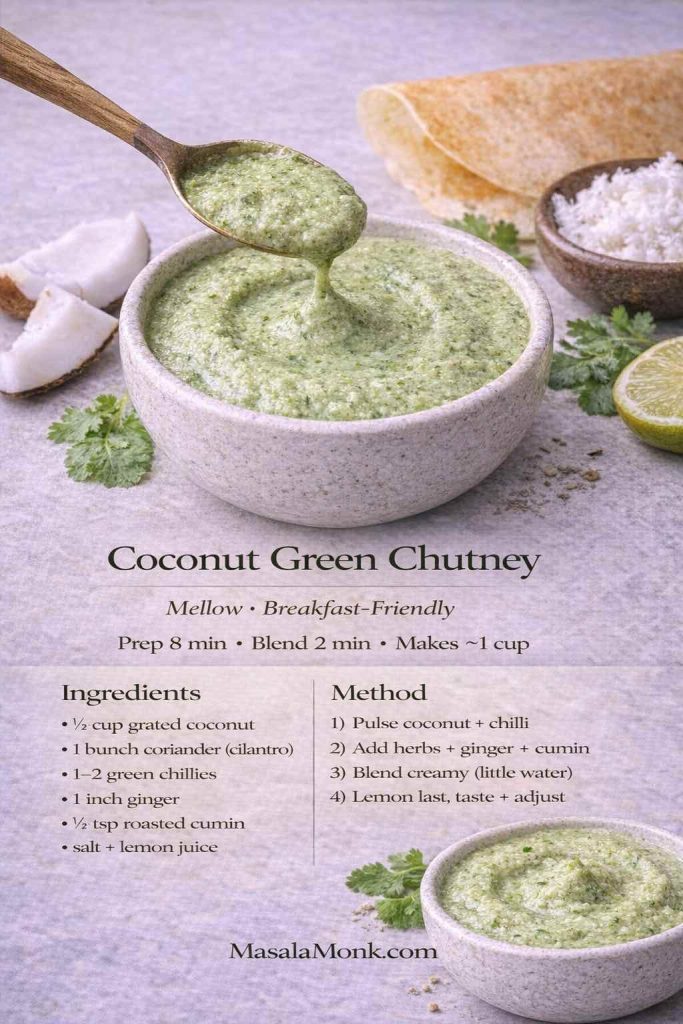
Method
- Pulse ginger and chillies first.
- Add coconut, coriander, cumin, and salt. Blend smooth with very little water.
- Add lemon at the end and blend briefly.
- Taste and adjust. If it feels too mellow, add a touch more lemon or an extra chilli.
If you want a more traditional coconut chutney profile for South Indian breakfasts, MasalaMonk’s South Indian Coconut Chutney is a great companion. It’s not the same chutney, yet it sits beautifully alongside a sharper green chutney on the same plate.
Also Read: Coconut Water Cocktails: 10 Easy, Refreshing Drinks
Mint chutney recipe: when mint leads the green melody
There are days when mint deserves the spotlight. A mint chutney recipe is cooler, more mint-forward, and often feels especially good with spicy foods because mint softens the heat without dulling flavor.
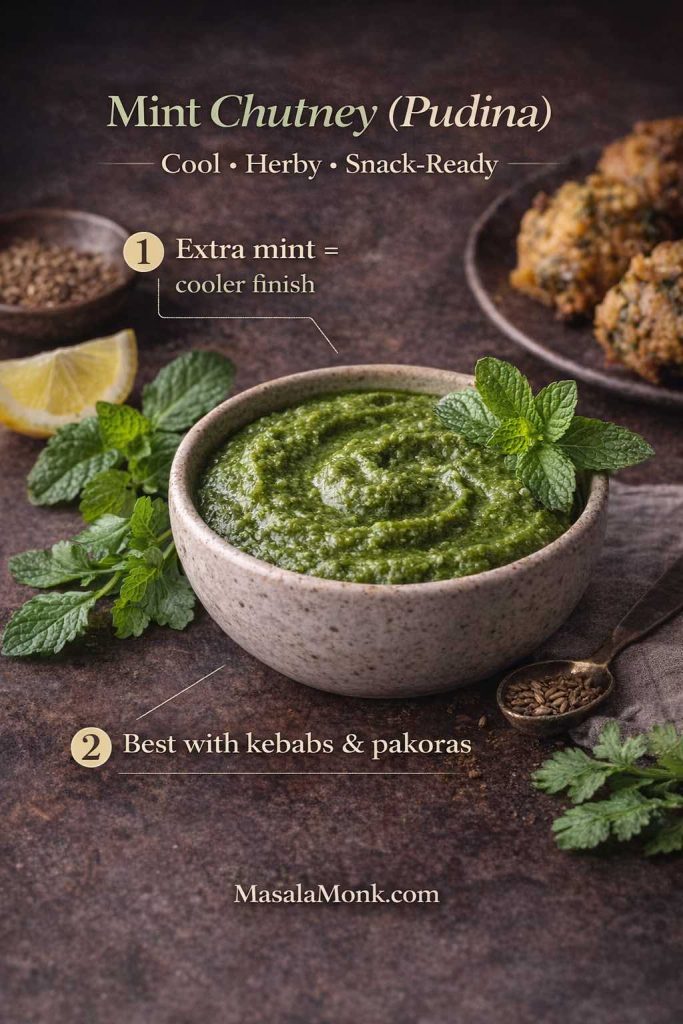
Although mint chutney and green chutney live in the same family, the balance changes. Mint becomes the main note, coriander supports, and lemon becomes especially important so the chutney feels bright rather than heavy.
Recipe Card: Mint Chutney (Pudina-Forward)
This is a mint-led chutney that still keeps enough coriander to taste rounded.
Yield: about 1 cup
Prep time: 10 minutes
Blend time: 3 to 5 minutes
Best for: kebabs, pakoras, sandwiches, snack platters
Ingredients
Mint leaves, 1 to 1¼ cups
Coriander (cilantro), ½ bunch
Green chillies, 1 to 3
Ginger, ½ to 1-inch piece
Roasted cumin powder, ½ teaspoon
Salt, to taste
Lemon juice, 1 to 1½ tablespoons
Water, minimal
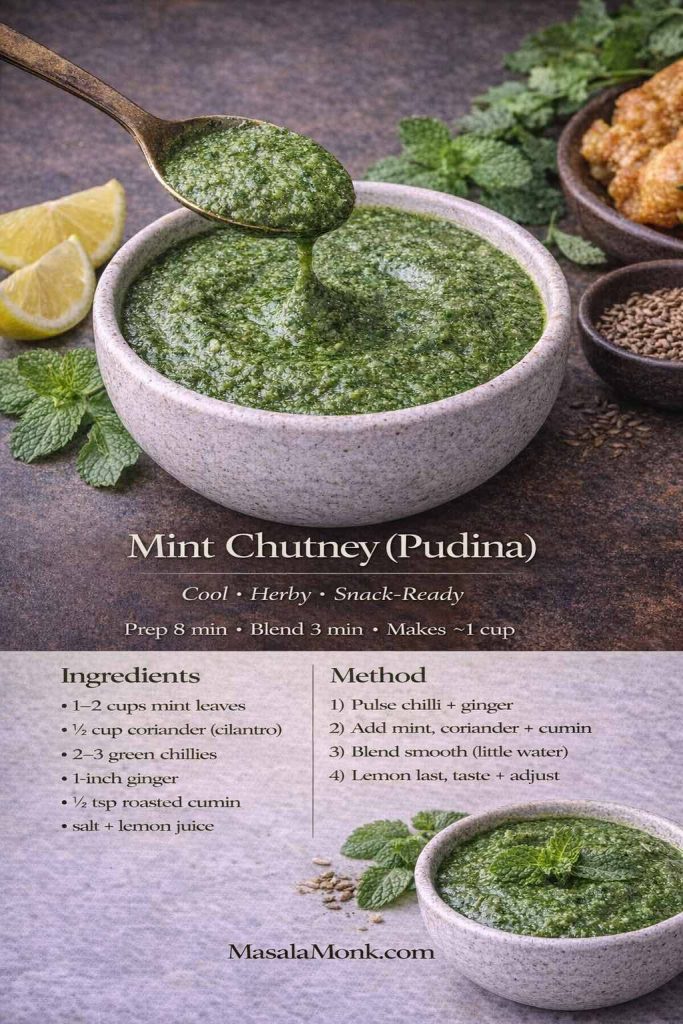
Method
- Pulse ginger and chillies first.
- Add mint, coriander, cumin, and salt. Blend in short bursts, scraping down as needed.
- Add lemon at the end and blend briefly.
- Taste and adjust until it feels bright and complete.
If you like seeing a classic mint-led approach, Veg Recipes of India’s pudina chutney recipe is a helpful reference for how naturally mint can carry a chutney.
Also Read: Double Chocolate Chip Cookies – Easy Recipe with 7 Variations
A spicier cousin to keep in mind
Green chutney is fresh and herby, yet sometimes you want something louder—more chilli, more punch, less silky smoothness. That’s where thecha comes in. It’s not the same chutney, but it scratches the same “one spoon changes the meal” itch in a fierier way. When you’re in that mood, MasalaMonk’s thecha recipe is a great one to explore.
How to use green chutney all week (without forcing it)
The jar empties fastest when you match the chutney style to the meal. Instead of treating it as “a snack condiment,” let it behave like a sauce you reach for whenever food needs contrast.

Breakfast: warm + crisp + cold chutney
A savory breakfast becomes instantly more complete when there’s something tangy on the side. For example, MasalaMonk’s Semolina Veggie Pancakes are perfect with a fresh green chutney beside them. The warm, lightly spiced pancake meets the cool, tangy chutney, and suddenly breakfast feels cheerful rather than routine.
Coconut green chutney also fits beautifully on breakfast plates, especially when you’re serving dosa or idli. Meanwhile, a sharper green chutney can sit beside it as contrast, so the plate doesn’t taste one-note.
Lunch: spread it, don’t dip it
For lunchbox sandwiches and wraps, thickness matters. That’s why the sandwich spread version earns its own recipe card. Once you use a thick green chutney for sandwich builds, you’ll notice how much cleaner the sandwich feels—less soggy, more evenly flavored.
If you’re using leftover sabji, chutney acts like a bridge between bread and filling. The Paneer Sabji Sandwich is a perfect example of how chutney makes leftovers taste intentional instead of accidental.
Snacks: the moment for restaurant-style punch
When snacks appear—pakoras, samosas, cutlets—restaurant style green chutney shines. It’s smoother, brighter, and designed to feel “ready” immediately. Even a simple plate of fried potatoes tastes more exciting when the chutney has that chaat-like pop.
Dinner: a small spoon as a fresh counterpoint
For heavier comfort meals, a fresh green chutney side can lift the whole plate. MasalaMonk’s Litti Chokha guide mentions serving it with green chutney, and the pairing makes perfect sense: smoky, hearty flavors love a tangy herbal contrast.
When the plate isn’t “Indian,” the chutney still works
Green chutney behaves like a universal herb sauce. It can sit beside roasted vegetables, grilled paneer, or even as a dip for snacks that aren’t traditionally Indian. MasalaMonk’s Falafel with Indian twists points toward mint-coriander chutney as a dip option, which is a gentle reminder that chutney doesn’t need a passport.
Condiment spreads: pair wet and dry
If you love building a snack spread, pair green chutney with something dry and bold for texture contrast. MasalaMonk’s Vada Pav Dry Chutney recipe is a great counterpart—sprinkleable, garlicky, and intense in a completely different way.
Also Read: Peanut Butter Cookies (Classic Recipe & 3 Variations)
Keeping it vibrant: why green chutney darkens and what helps
Herb chutneys dull over time. That’s normal. When herbs are crushed, they’re exposed to oxygen, and natural enzyme activity can change color. You don’t need to treat this like a crisis; you simply need a few habits that make the chutney stay brighter for longer.
To understand the “why” in plain language, IFST’s explainer on enzymic browning is a helpful read. If you enjoy practical kitchen experiments, Serious Eats has a deep dive into why pesto browns and what actually helps. Green chutney isn’t pesto, of course, but the herb-and-oxygen problem behaves similarly.
In daily cooking terms, these habits help the most:
- Blend in short bursts so the herbs don’t warm up.
- Add lemon at the end so the bright top notes stay bright.
- Store in a smaller jar so there’s less headspace.
- Smooth the top of the chutney so there’s less surface area exposed to air.
Those steps aren’t fussy. They’re simply the small things that keep your chutney looking and tasting fresher.
Also Read: How to Cook Perfect Rice Every Time (Recipe)
Storage and food safety (without turning it into a lecture)
Green chutney is typically uncooked, which means you should treat it like any prepared, ready-to-eat condiment. Keep it refrigerated, use clean spoons, and make batches sized for real life.
If you want an official reference point for general safe handling of prepared foods, the USDA page on leftovers and food safety is worth a quick skim. Even though chutney isn’t exactly “leftovers,” the mindset carries over: fresh prepared foods are best used within a reasonable window, and cleanliness matters.

For longer storage, freezing in small portions works well. The color may dull a bit after thawing, yet the flavor often stays surprisingly strong, especially if you refresh it with a squeeze of lemon before serving.
Also Read: How to Cook Perfect Rice Every Time (Recipe)
When a batch goes sideways (and how to rescue green chutney)
Even experienced cooks get a batch that’s almost right. Fortunately, green chutney is forgiving, so you can correct most problems without frustration.
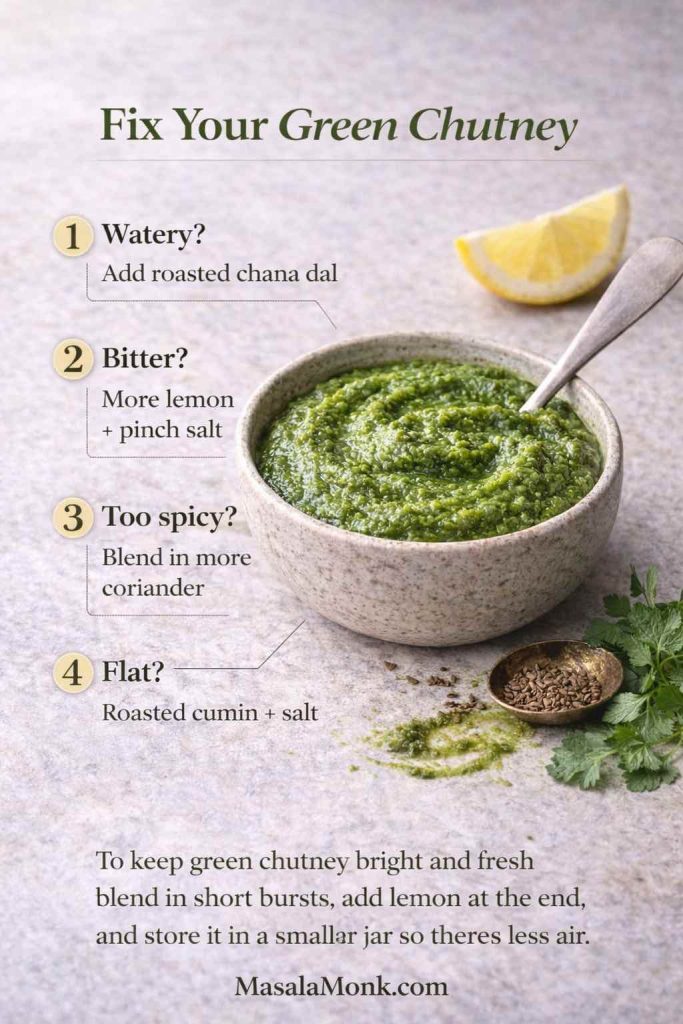
Too thin
If the chutney is watery, thicken it rather than adding more spices. Roasted chana dal is the most reliable thickener. If you don’t have it, reduce water next time and pat the herbs dry more thoroughly.
Too flat
When it tastes muted, it often needs roasted cumin and salt. Add a pinch of each, blend briefly, then taste again. Usually the chutney isn’t missing “more herbs”; it’s missing grounding.
Too grassy
Grassy chutney typically needs lemon and salt. Add lemon in small squeezes, then taste until the chutney feels “awake.”
Too spicy
Instead of diluting with water, blend in more coriander. Water reduces flavor, while more herbs keep it tasting like chutney.
Slightly bitter
Bitterness can happen when herbs heat up during long blending runs, or when thick stems dominate. To soften bitterness in the moment, add lemon and a pinch more salt, then blend in a handful of fresh coriander if you have it. Next time, use short bursts and trim thick stems more carefully.
Also Read: Whole Chicken in Crock Pot Recipe (Slow Cooker “Roast” Chicken with Veggies)
A green chutney ritual worth keeping
After making this green chutney a few times, a simple pattern shows up: the jar empties fastest when the chutney is thick enough to use without thinking. A watery batch, on the other hand, tends to linger—not because the flavor is bad, but because spreading and dipping start feeling messy.
Here’s the easiest rule to live by: begin with less water than you think you’ll need. You can always loosen the chutney later; thickening it after the fact is far more annoying. As a bonus, the flavor stays bolder, sandwiches hold up better, and the chutney feels like a daily staple rather than an occasional side.
That’s why green chutney becomes a habit. It brightens the plate, sharpens each bite, and makes even simple food feel intentional.
When you’re ready to use it right away, MasalaMonk already has plenty of natural landing spots: spread a generous layer in the Authentic Grilled Bombay Sandwich, tuck it into the Paneer Sabji Sandwich, serve it alongside Semolina Veggie Pancakes, or pair it with something bold like Vada Pav Dry Chutney. After that, the jar tends to take care of itself.
FAQs
1) What is green chutney made of?
Green chutney is usually made by blending coriander (cilantro) with mint, green chillies, ginger, salt, roasted cumin, and lemon or lime juice. Depending on the style, you may also add ingredients like black salt, roasted chana dal for thickness, or coconut for a milder, creamier version.
2) Is cilantro chutney the same as coriander chutney?
Often, yes. In many kitchens, “cilantro” and “coriander leaves” refer to the same herb, so cilantro chutney and coriander chutney commonly point to the same kind of green chutney. That said, some people use “coriander chutney” to mean a coriander-forward version with little or no mint.
3) What is dhania chutney and how is it different from dhaniya chutney?
Dhania chutney and dhaniya chutney are generally the same thing—both names commonly refer to coriander-based green chutney. The difference is usually spelling preference or regional language habits, not a different recipe.
4) How do I make restaurant style green chutney at home?
For restaurant style green chutney, blend the herbs smoother than usual, push the lemon a little further for extra brightness, and season confidently with roasted cumin. Additionally, a small pinch of black salt can give that familiar chaat-style tang, although it’s optional.
5) Why does my green chutney turn dark or brown?
Green chutney can darken because the herbs react with air after blending. To slow it down, blend in short bursts so the chutney doesn’t heat up, store it in a tightly sealed jar, and reduce the empty space at the top. Also, adding lemon at the end can help keep the flavor fresher.
6) How can I keep green chutney green for longer?
To keep green chutney greener, start with cold, dry herbs, blend quickly, and avoid adding too much water. Then, store it in a small jar so there’s less air exposure. In some cases, blanching herbs briefly and cooling them before blending can help, but many cooks prefer keeping it fully raw for the freshest taste.
7) What’s the best green chutney for sandwich spread?
The best green chutney for sandwich is thick and spreadable, not watery. For that reason, use very little water while blending and add roasted chana dal (bhuna chana/dalia) to thicken it. As a result, the chutney stays in place and the bread doesn’t turn soggy.
8) Why is my green chutney watery?
Green chutney becomes watery when herbs aren’t dried well or too much water is added during blending. Instead, blend in bursts and add water only by teaspoons if needed. If it’s already thin, roasted chana dal can thicken it quickly.
9) How do I fix green chutney that is too spicy?
To reduce heat, blend in more coriander (and a little mint, if you use it), rather than adding water. Alternatively, adding a spoon of yogurt can mellow the spice, although it will change the flavor slightly and make the chutney creamier.
10) How do I fix green chutney that tastes bitter?
Bitterness can come from too many thick coriander stems or from over-blending, which warms the herbs. To improve it, add more lemon and a pinch more salt, then blend in extra fresh coriander to rebalance. Next time, use tender stems only and blend in short bursts.
11) How much mint should I add to coriander mint chutney?
Mint quantity depends on how minty you want the chutney and how strong your mint is. Generally, a moderate handful gives a balanced coriander mint chutney, whereas a larger amount creates a more cooling, mint-forward chutney.
12) Can I make coconut green chutney without tempering?
Yes. Coconut green chutney can be made by simply blending coconut with coriander, green chilli, ginger, salt, and lemon. If you want it more traditional, you can add tempering, but it isn’t required for a tasty everyday version.
13) How long does green chutney last in the fridge?
Typically, green chutney is best used within 3 to 4 days when stored in a clean, airtight container in the refrigerator. After that, the flavor and color may degrade, even if it still looks fine.
14) Can I freeze green chutney?
Yes, green chutney can be frozen in small portions. For example, freezing in ice cube trays makes it easy to thaw only what you need. After thawing, the chutney may look slightly duller, so adding a little fresh lemon juice can brighten the flavor.
15) What can I serve with green chutney?
Green chutney pairs well with samosas, pakoras, cutlets, kebabs, chaat, sandwiches, wraps, and savory pancakes. Moreover, it works as a dip for snacks beyond Indian food when you want a fresh, herby sauce with a spicy kick.