
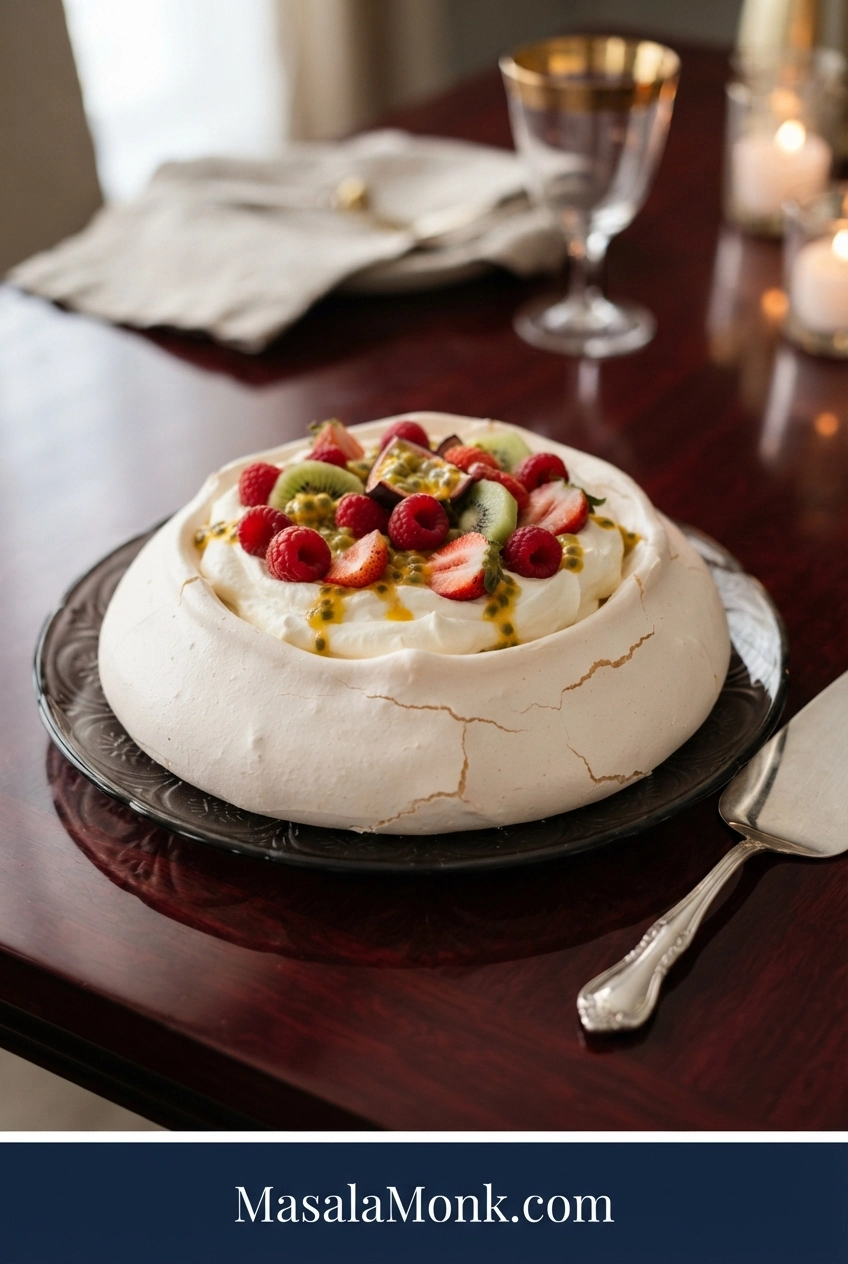
A good pavlova should make a little noise when you cut into it. The spoon cracks through a thin crisp shell, then sinks into the marshmallowy center and cool cream, with tart fruit breaking through the sweetness.
With such a short ingredient list, the harder part is knowing when the meringue is ready, how dry the shell should become, and whether a crack, dip or soft center means something actually went wrong.
A few cracks? Fine. A center that settles a little? Also fine. Pavlova is delicate by nature, and the topping is going right into that shallow center anyway.
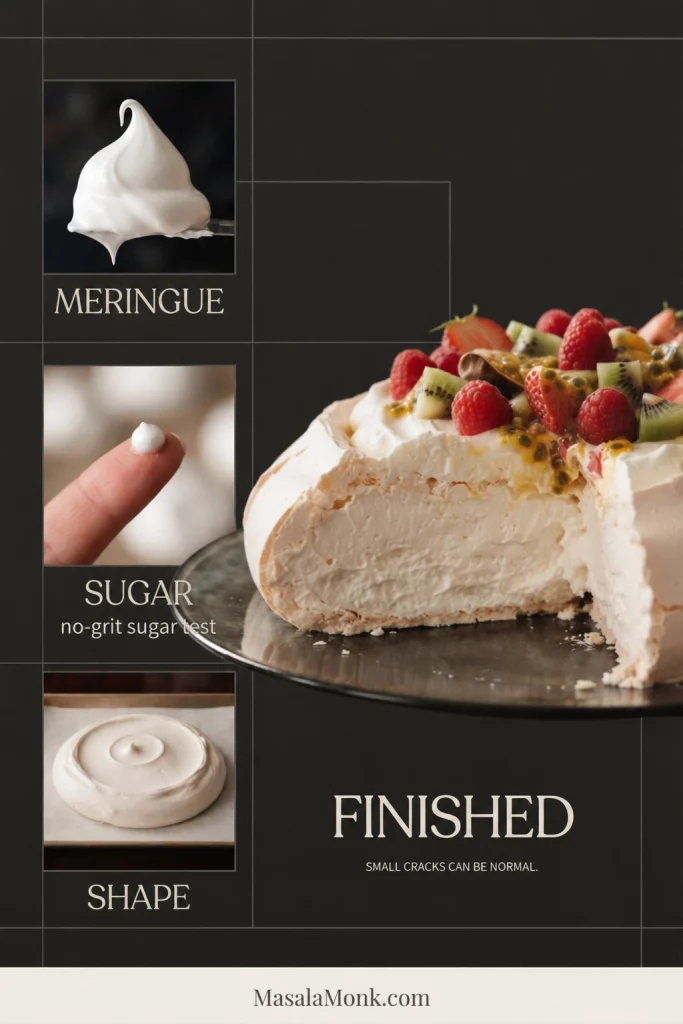
The Four Pavlova Checkpoints
| Stage | What you want |
|---|---|
| Meringue | Dense, glossy and stiff enough to hold a peak |
| Sugar | No obvious grit between clean fingertips |
| Shape | About 8 inches / 20 cm wide and roughly 2 inches / 5 cm high, holding its mound |
| Finished pavlova | Pale and dry outside, soft and marshmallowy inside |
Pavlova Recipe
This 8-inch pavlova starts with 120 g egg whites—usually about four large whites—so the sugar ratio does not depend on egg size. The outside bakes into a pale crisp shell while the thicker center stays soft, ready for whipped cream and fresh fruit.
Equipment
- Digital kitchen scale
- Stand mixer with whisk attachment or electric hand mixer
- Clean, dry metal or glass mixing bowl
- Sturdy baking sheet lined with parchment paper, not wax paper
- Silicone spatula plus an offset spatula or large spoon for shaping
Optional but useful: an oven thermometer, especially if your oven tends to brown baked goods sooner than expected.
Ingredients
For the Pavlova
- 120 g / 4.2 oz egg whites — use the weight; this is usually about 4 large whites
- 200 g / 7.1 oz superfine sugar (caster sugar), about 1 cup
- 3 g cornstarch, about 1 teaspoon
- 5 ml white vinegar, 1 teaspoon
- 5 ml vanilla extract, 1 teaspoon
For the Cream and Fruit
- 300 ml / 1¼ cups heavy whipping cream, cold
- 8 g powdered sugar, about 1 tablespoon
- 5 ml vanilla extract, 1 teaspoon
- About 300 g fresh fruit, roughly 2 cups depending on the fruit
- 1 to 2 passion fruits, optional
- A few spoonfuls of lemon curd, optional
Instructions
Prepare and Build the Meringue
- Prepare the oven and tray. Set a rack in the lower-middle part of the oven. Preheat a conventional oven to 300°F / 150°C, or a fan/convection oven to 275°F / 135°C. Trace an 8-inch / 20 cm circle onto parchment using a plate or cake pan, then flip the paper so the mark is underneath. Measure the cornstarch, vinegar and vanilla now so the finished meringue does not have to sit around later.
- Separate and weigh the whites. Make sure the mixer bowl and whisk are completely clean, dry and grease-free. Separate the eggs while cold, catching each white in a small clean bowl first. Once you know there is no yolk in it, transfer the white to the mixer bowl. Weigh out 120 g / 4.2 oz. Let the whites sit for about 20 minutes, or until they are no longer refrigerator-cold.
- Build the foam gradually. Whisk on medium-low until the whites are foamy throughout and no clear liquid remains at the bottom. Increase to medium and continue to soft peaks. Lift the whisk: the peak should rise, then bend gently at the tip.
- Add the sugar gradually. With the mixer running around medium speed, add the 200 g superfine sugar about one tablespoon at a time. Let each addition disappear into the foam before adding the next. Once all the sugar is in, increase to medium-high and whisk until the meringue is dense and glossy.
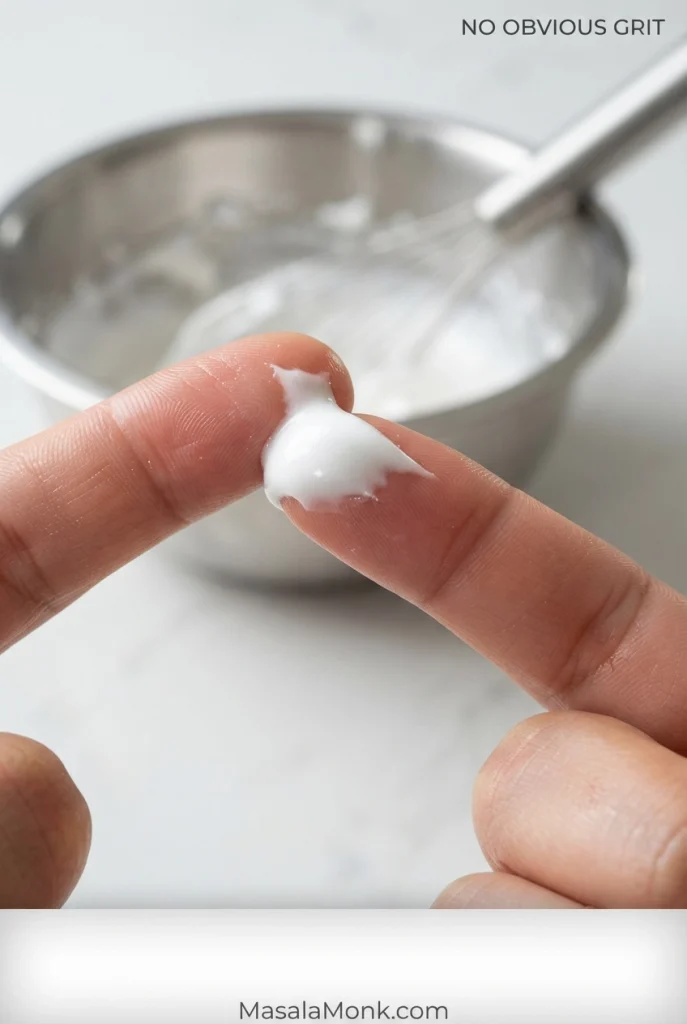
- Check the sugar and the meringue. Rub a tiny dab between two clean fingertips. It should feel essentially smooth, and the meringue should hold a glossy stiff peak. If it is still gritty while the foam remains glossy, whisk a little longer. Once the meringue starts looking dull or dry, stop rather than overbeating it.
Stabilize, Shape and Bake
- Fold in the cornstarch, vinegar and vanilla. Sift the 3 g cornstarch over the meringue. Add the 5 ml vinegar and 5 ml vanilla, then fold with a silicone spatula just until evenly distributed.
- Shape the pavlova. Spoon the meringue into the center of the traced circle. Shape it to roughly 8 inches / 20 cm wide and about 2 inches / 5 cm high, with gently sloping sides and a shallow well in the center. The mound should stay where you put it. It does not need to be perfectly round—you are controlling the thickness, not sculpting a showroom dessert.
- Lower the heat and bake. Put the tray in the oven and immediately reduce the temperature to 230°F / 110°C conventional or 210°F / 100°C fan/convection. Bake for about 90 minutes without repeatedly opening the door. Near the end, check once: the shell should look dry and feel set at the edge, not wet or tacky. If it still feels wet, bake another 10 to 15 minutes at the same low heat. White to pale ivory is normal; do not wait for browning.
Cool and Finish
- Cool it slowly. Turn the oven off and leave the pavlova inside with the door closed for at least 2 hours, or until completely cool.
- Remove the parchment carefully. Once the pavlova is completely cool, loosen the outer edges and gently peel the parchment away from the base. Peel the paper from the pavlova rather than pulling the pavlova upward. If the paper sticks under the center, start peeling from another edge and work gradually.
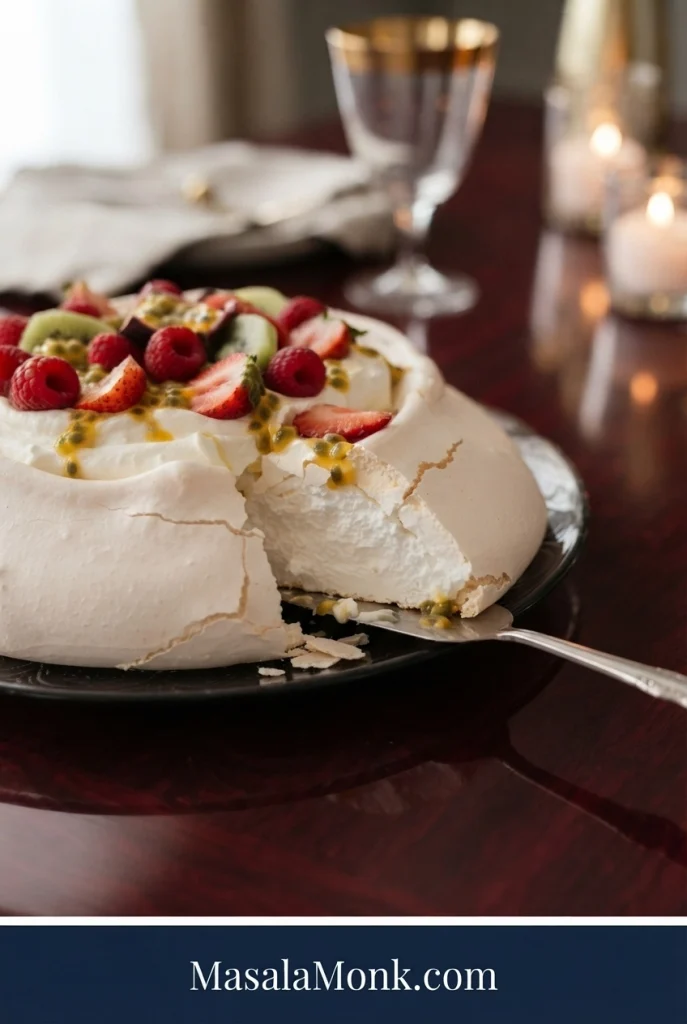
- Whip the cream and finish. Whip the cold cream with the powdered sugar and vanilla to soft-to-medium peaks. Stop while it is smooth, glossy and softly billowy. Spoon it into the center of the cooled pavlova, then add the fruit. Passion fruit or a little tart lemon curd is especially good when the other fruit is sweet. No need to make the topping pristine—pavlova looks good a little loose and generous.
Recipe Notes
- Regular granulated sugar: if that is what you have, pulse it briefly in a food processor to make the crystals finer, stopping before it becomes powdery.
- Use the full sugar amount: the sugar does more than sweeten the meringue. For a less-sweet finish, keep the cream lightly sweetened and use tart fruit.
- Make ahead: bake and cool the bare shell ahead, then store it airtight at cool, dry room temperature. Do not refrigerate the bare shell.
Method note: This formula was developed by comparing established pavlova ratios, methods and troubleshooting guidance. MasalaMonk has not independently kitchen-tested this exact version.
How to Read a Pavlova
The Sugar Test Matters More Than the Mixer Clock
Mixer times vary with bowl shape, egg temperature, mixer power and sugar crystal size. Six minutes in one kitchen can easily be eight in another.
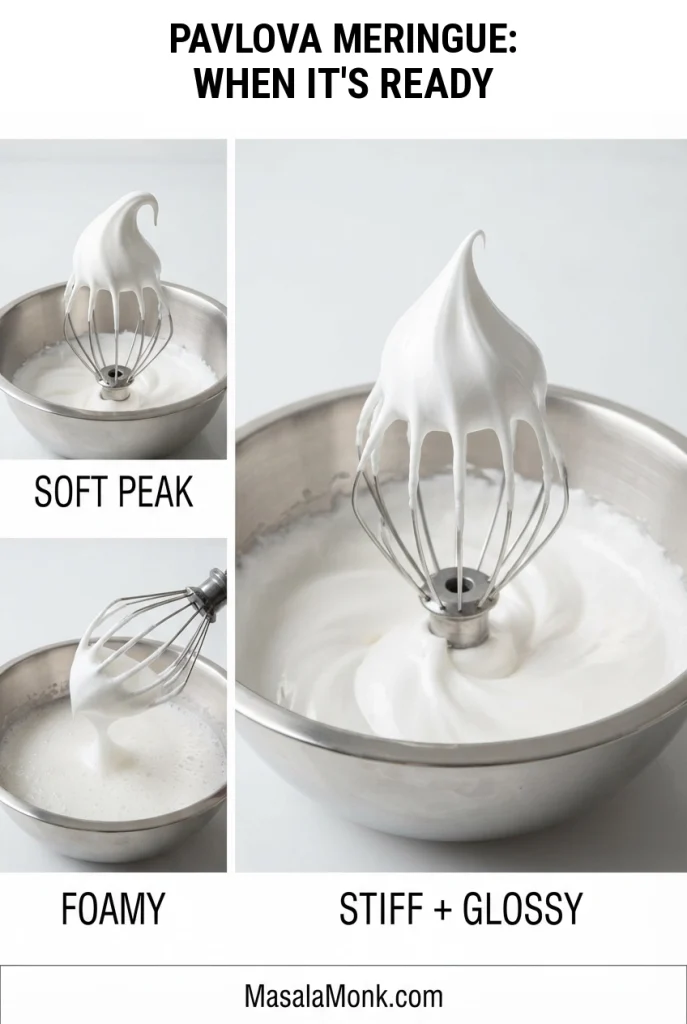
The clock tells you when to start checking. Your fingertips tell you whether the sugar is ready.
Rub a little meringue between clean fingertips and lift the whisk. You want the sugar essentially dissolved and the foam glossy enough to hold a stiff peak. If coarse grit remains but the meringue still looks glossy, keep going a little longer. Once it becomes extremely stiff and starts losing its shine, stop before it turns dry and clumpy. Finer sugar and slower additions are the better fix next time.
The meringue progression in our Japanese pancakes recipe is useful here too, because it shows the move from foamy whites through glossy peaks and into the dry, clumpy stage you want to avoid.
Do You Need Cornstarch or Vinegar?
Pavlova recipes handle starch and acid differently. This version uses 1 teaspoon cornstarch to help keep the center soft and 1 teaspoon white vinegar to stabilize the foam.
If you are reading an Australian or British recipe, cornflour means cornstarch here—not cornmeal. Other formulas use lemon juice or cream of tartar instead of vinegar, but they are not always one-for-one swaps.
Shape and Height Matter
An 8-inch pavlova spread only an inch high will not bake like an 8-inch pavlova built three or four inches tall. Same diameter, very different center.
Aim for roughly 8 inches / 20 cm wide and 2 inches / 5 cm high before baking. That leaves enough depth for the marshmallow middle without turning the pavlova into a huge mound that is difficult to dry evenly.
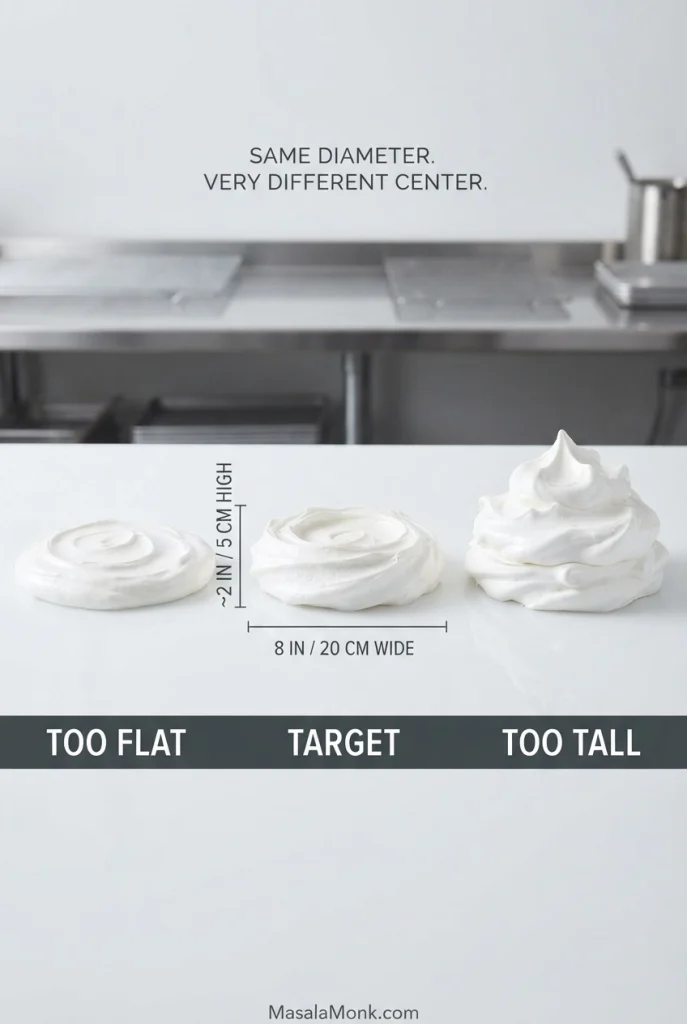
Give the sides a gentle slope and leave a shallow well in the middle. That gives the topping somewhere to sit without much pressing or spreading against the fragile shell.
How to Tell When Pavlova Is Done
At about 90 minutes, check once. The shell should look dry and feel set under a very light touch at the edge, not wet or tacky all over. If it still feels wet, give it another 10 to 15 minutes at the same low temperature.
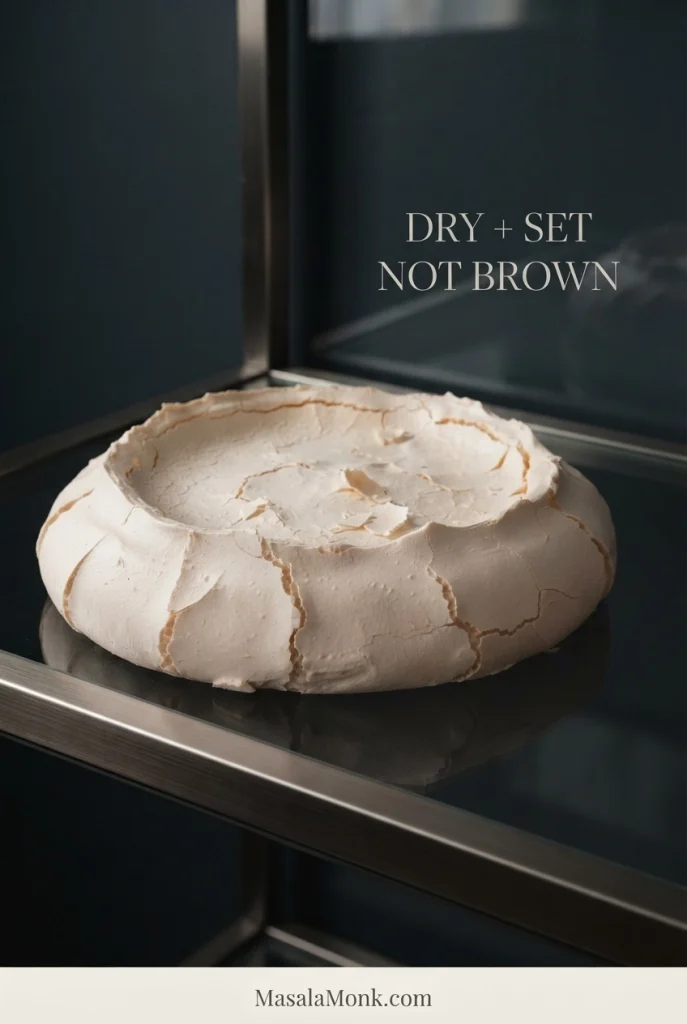
Color is secondary. White to pale ivory is normal.
If you are looking through the oven door thinking, “Why is this going brown when it still looks soft?” resist the urge to turn the heat up. The outside is already getting plenty of heat; it needs time to dry.
After Cooling: Read the Center
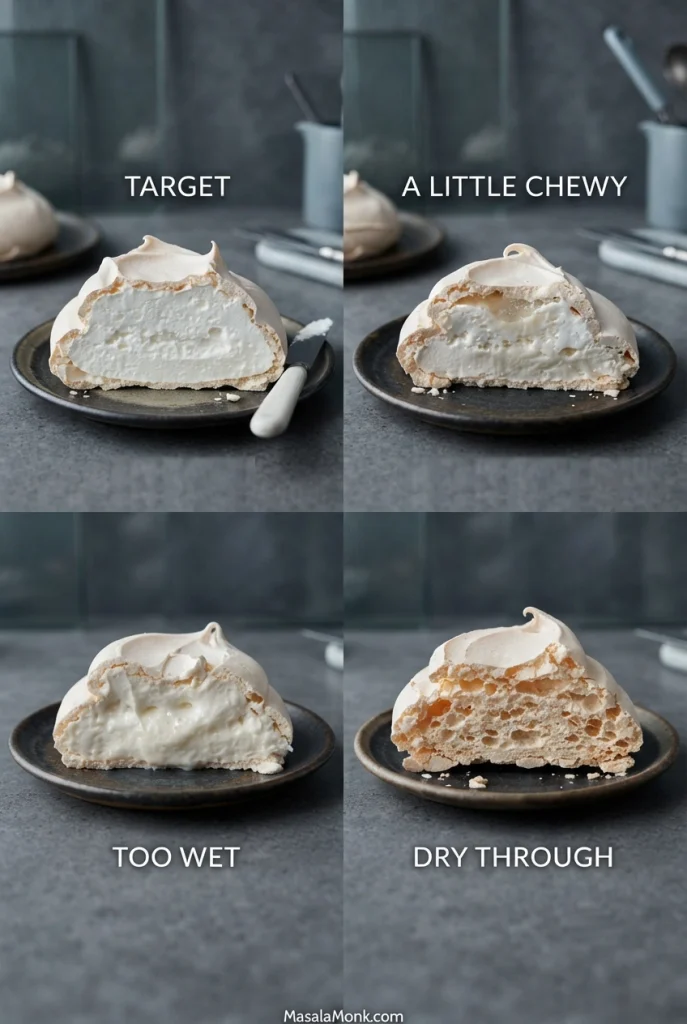
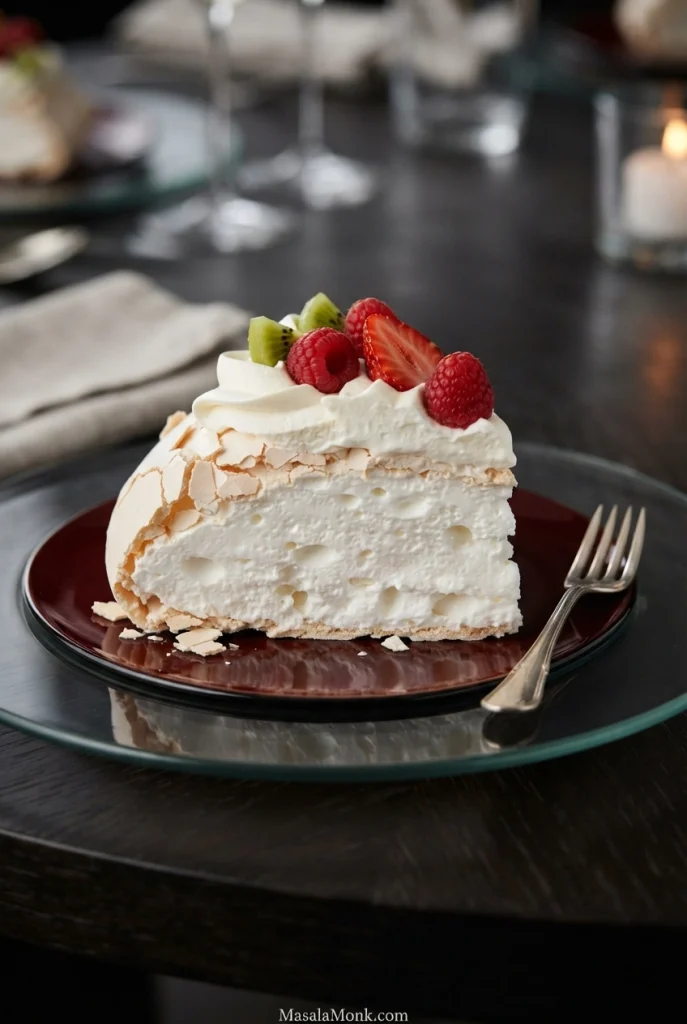
Once the cooled pavlova is cut, the center tells you how the bake turned out. The first cut tells you more than the color ever could: the knife should crack through the shell, then meet an opaque, set, marshmallow-soft center—not a glossy puddle and not a dry cookie.
| Center texture after cutting | What it tells you |
|---|---|
| Soft, opaque, airy and marshmallow-like | This is the target. |
| A little chewy near the shell | Normal. A tacky exterior is a different issue. |
| Wet, glossy, syrupy or almost liquid | Too wet for this pavlova. Check bake time, thickness and sugar dissolution. |
| Dry and crisp throughout | Still edible, but closer to a large crisp meringue than this soft-centered pavlova. |
Cream and Fruit for Pavlova
The meringue already brings plenty of sweetness. Let the topping cool it down.
Soft-to-medium peaks are enough for the cream here. It stays easy to spoon over the fragile shell and keeps the topping light rather than dense. If the difference between soft, medium and stiff peaks is unfamiliar, our whipped cream recipe walks through each stage.
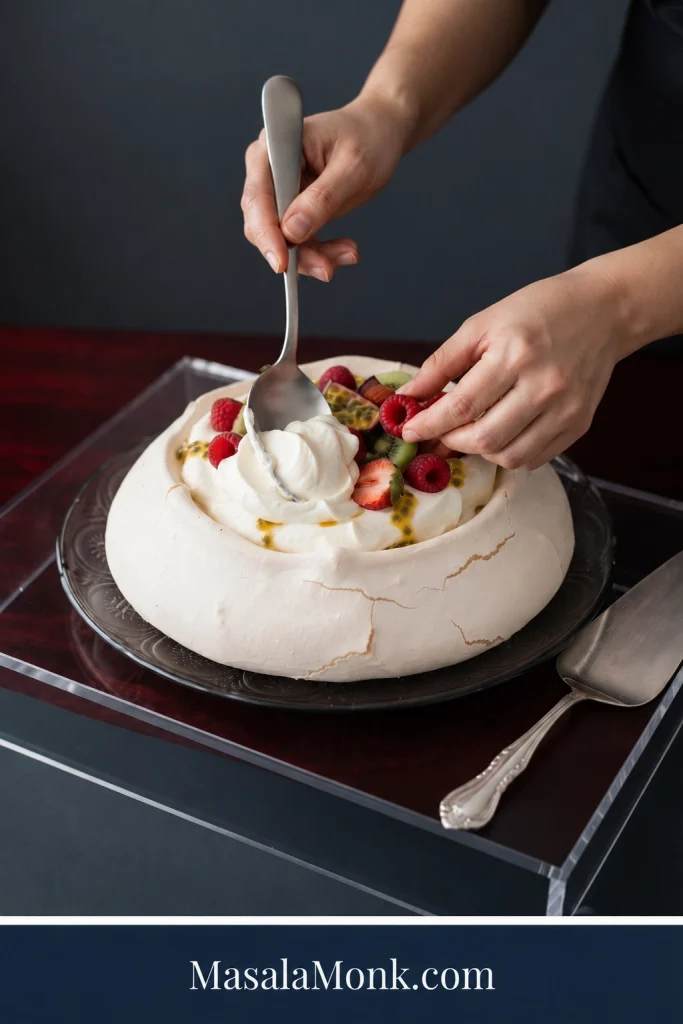
Berries are an easy default. Kiwi adds brightness. Sweeter mango is better with something sharper beside it. Passion fruit is especially good here: its sharpness cuts straight through the sugary shell and rich cream.
The best bites catch crisp shell, soft center and cool cream together, with enough tart fruit to keep the sweetness in check.
The four leftover egg yolks are also a good excuse to make homemade lemon curd. A few tart spoonfuls go a long way.
Fresh fruit should be dry before it reaches the cream. Frozen berries release plenty of liquid as they thaw. For pavlova, they work better cooked into a sauce, cooled completely and spooned over individual servings.
Make-Ahead and Storage
The easiest way to make pavlova ahead is to keep the shell, cream and fruit separate until close to serving.
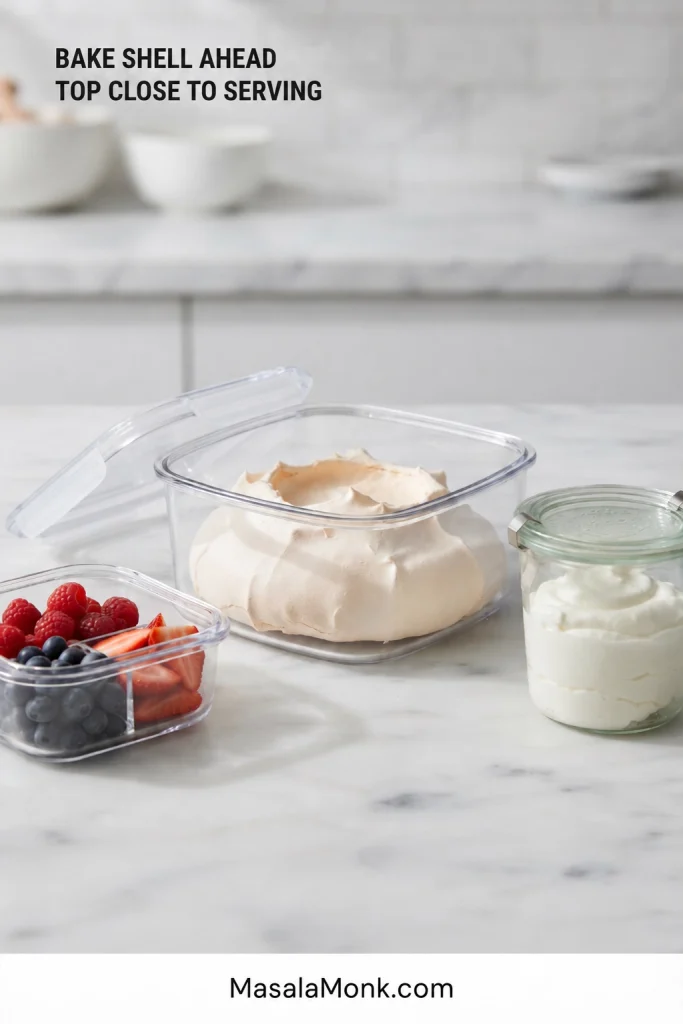
Bare shell: once completely cool, store it airtight at cool, dry room temperature. Do not refrigerate it. A day ahead is a comfortable target.
Cream: whip it close to serving and keep it refrigerated.
Fruit: wash it ahead if you like, but dry it well before topping.
Assembled pavlova: for the crispest shell, top it within about an hour of serving—and closer to serving when the weather is humid.
Taking the pavlova somewhere else? Carry the bare shell and toppings separately, then assemble it when you arrive.
Refrigerate leftovers because of the whipped cream. By the next day the shell will be softer and chewier, but the dessert can still be very good.
Pavlova in Humid Weather
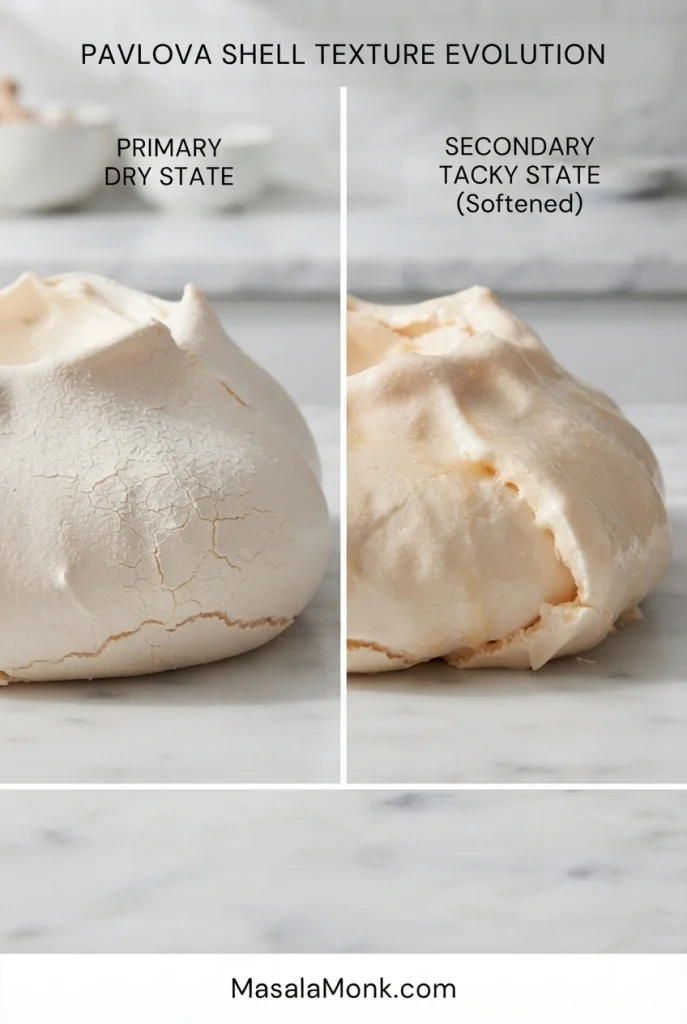
Humidity can turn a correctly baked shell tacky because the sugar absorbs moisture from damp air. On humid days, pay extra attention to dissolving the sugar, give the shell its full low-temperature drying time, and store it airtight once completely cool.
Still, the weather should not take the blame for everything. A shell that was already wet when the oven switched off, or syrup pooling underneath, sends you back to the meringue or the bake rather than storage.
Pavlova Troubleshooting: Start With When It Happened
Most pavlova problems become easier to diagnose once you start with when they appeared.
| What happened and when | Where to look next |
|---|---|
| Whites will not reach peaks During mixing |
Rule out yolk or grease first, then check the bowl, whisk and mixer attachment. |
| Sugar stays gritty During mixing |
Keep whisking while the foam remains glossy. Stop if it starts turning dull or dry. |
| Meringue puddles outward Before baking |
The foam is still too loose to hold the shape. |
| Browns early or before the shell dries During baking |
Check oven temperature, rack position and fan/convection setting. |
| Large or deep cracks During baking or cooling |
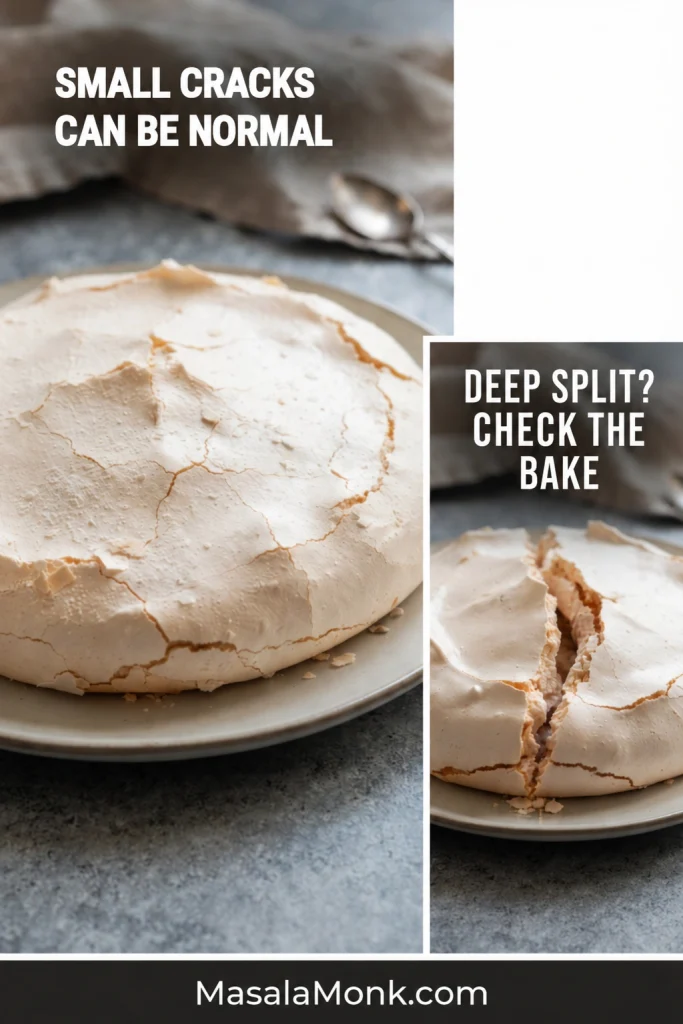
Small cracks are normal. For major splitting, check oven heat, meringue stability and abrupt temperature changes. |
| Crisp top but sticky bottom After baking |
Check bottom drying, thickness and possible sugar weeping. |
| Syrup underneath During baking or cooling |
Sugar dissolution is the first place to look. |
| Large hollow under the shell After cooling |
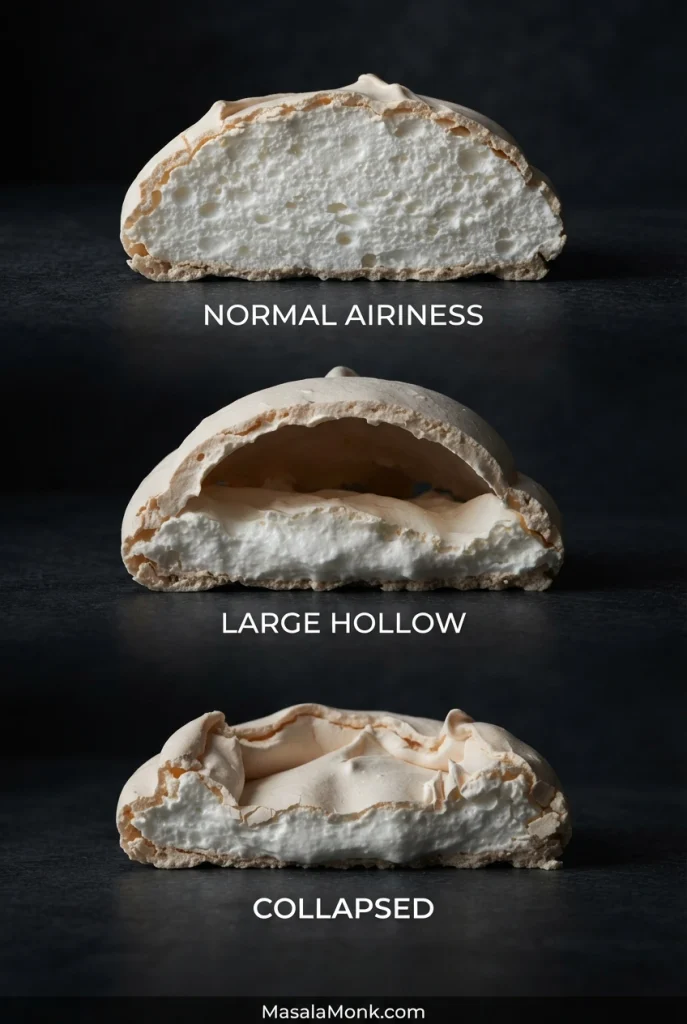
Some airiness is normal. For a large detached hollow, check meringue strength, sugar dissolution, oven heat and whether the center had enough time to set. |
| Major collapse During cooling |
Start with meringue strength, height, oven heat and cooling. |
| Center is dry and crisp throughout After cutting |
The pavlova may have been too shallow or dried too long. |
| Pavlova sticks badly to the parchment During transfer |
Cool it fully and peel the paper away gradually. A wet base can also signal incomplete drying or weeping. |
| Shell was crisp, then became sticky During storage |
Humidity or uncovered storage is much more likely. |
Pavlova Cracks: Cosmetic or Structural?
Cracks, a shallow crater or one broken edge rarely make the dessert unsalvageable. Some pavlova problems affect the texture; others mostly affect how it looks.
Why Is My Pavlova Sticky?
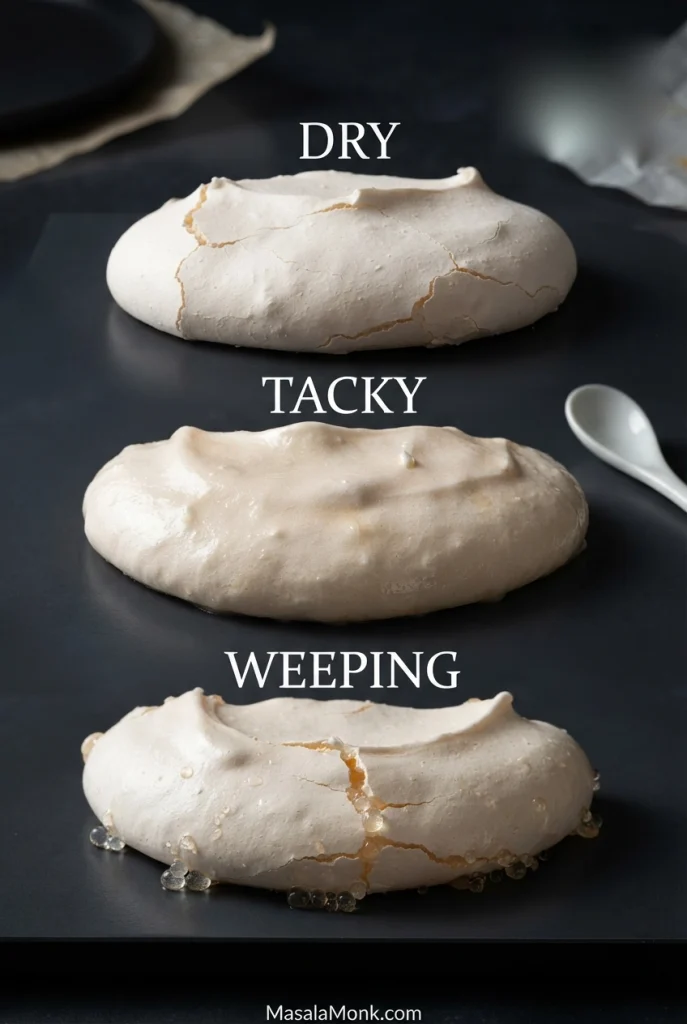
Pavlova can turn sticky because it did not dry enough, because sugar is weeping from the meringue, or because a previously crisp shell absorbed humidity after cooling. When it became sticky tells you which is more likely.
A shell that never dried properly sends you back to bake time, temperature and thickness. If syrup is collecting underneath, check the sugar first. A pavlova that was crisp when cool but turned tacky several hours later has probably picked up moisture from the air or storage.
Why Did My Pavlova Collapse?
A little settling is ordinary. By contrast, a dramatic collapse is more likely when the meringue was weak, the mound was excessively tall, the oven ran too hot or the pavlova cooled too abruptly.
Why Is My Pavlova Brown but Still Soft?
A pavlova that browns while still soft is getting too much surface heat before the shell has dried. Check the actual oven temperature, rack position and fan/convection setting rather than turning the heat up.
Why Is Syrup Leaking From My Pavlova?
Syrup or amber beads usually send you back to the sugar. If the weather is dry and it keeps happening, check sugar crystal size, gradual addition and whether the meringue passed the finger-rub test.
Rescue a Cracked or Broken Pavlova
Pavlova does not need to be flawless to be worth serving.
- Small cracks? Leave them alone and add the topping.
- Center sank? That crater is useful. Fill it.
- One edge broke? Turn it toward the back and cover it naturally with the topping.
- Too dry or badly shattered? Break it into pieces and layer it with cream and fruit, Eton-mess style.
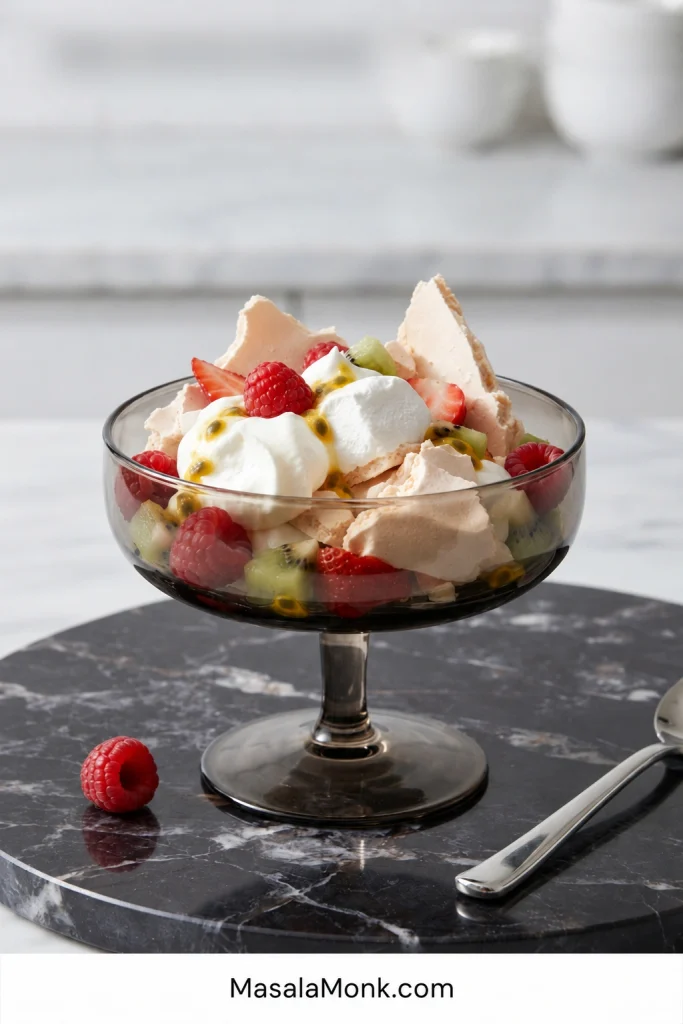
Once the pavlova is topped, those hairline cracks are usually the last thing anyone notices.
What Is Pavlova?
Pavlova is a large meringue dessert with a crisp shell and soft marshmallow center, usually topped with whipped cream and fruit.
Pavlova is closely associated with both Australia and New Zealand and takes its name from Russian ballerina Anna Pavlova. Both countries claim the dessert, and its exact origin remains disputed.
In the kitchen, the distinction is simpler. Small crisp meringues are usually dried much more thoroughly. A classic pavlova is usually shaped thick enough for the outside to dry while the center stays soft and marshmallowy, ready to carry its topping.
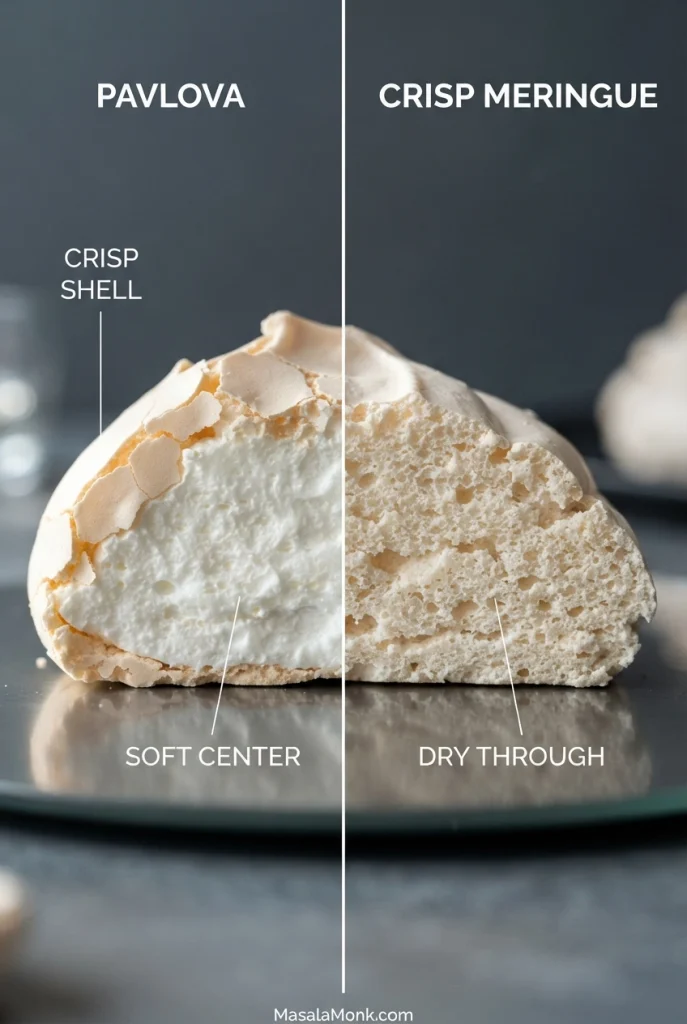
That soft middle is not something you failed to dry out. It is the reason to make pavlova in the first place.








