
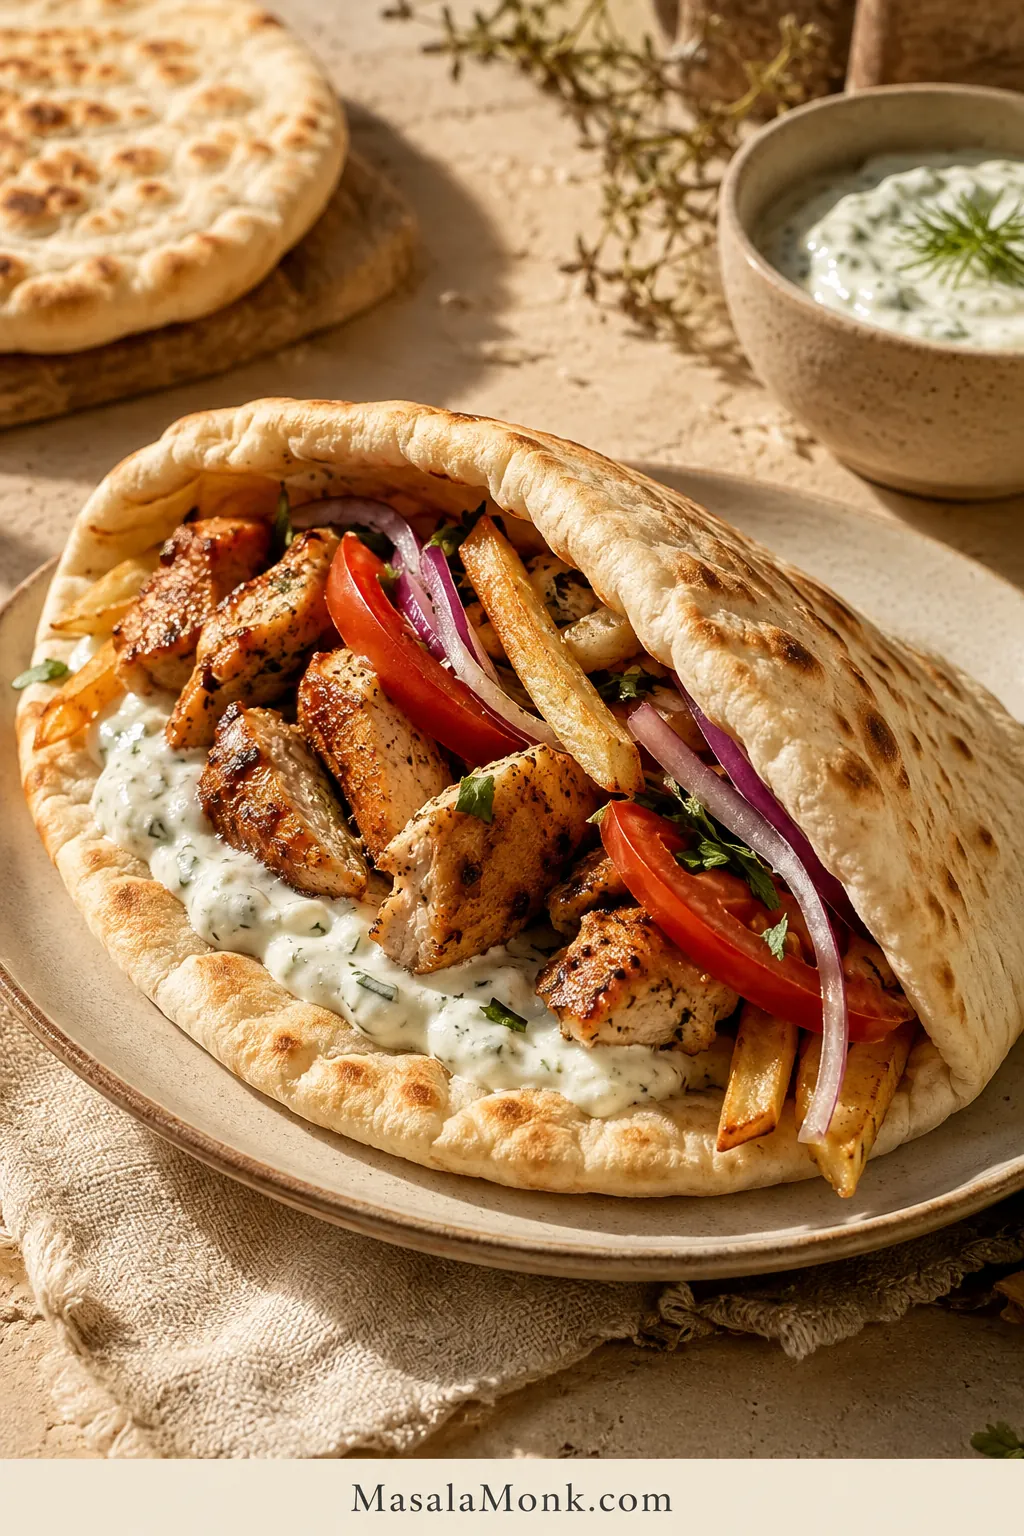
The first Greek pita rarely makes it into the finished stack. It comes off the skillet warm and mottled, gets folded between impatient fingers, and loses a torn edge before the chicken, tomato and thick Greek tzatziki reach the table.
That bend is the whole point. This Greek pita bread recipe makes the soft, thick, pocketless bread used for gyros and souvlaki. It should feel substantial in the hand, fold into a deep U and carry meat, sauce, onion and even fries without splitting along the crease.
The reward of making it fresh shows up once the pita is filled: the warm bread bends with the meat and sauce instead of feeling like a separate wrapper around them.
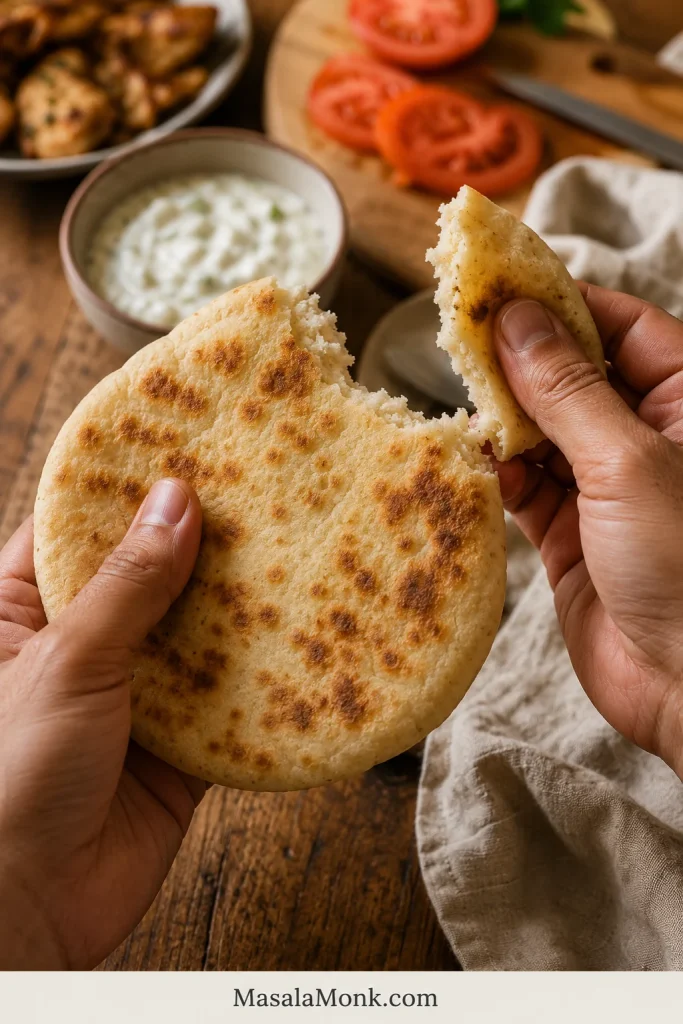
A disappointing pita can still look beautifully spotted, only to feel heavy in the center, crack at the fold or turn stiff while the rest of dinner is being assembled.
The method depends on three things: a soft but workable dough, equal rounds with an even center, and steady skillet heat. With those in balance, the remaining seven settle into an easy rhythm.
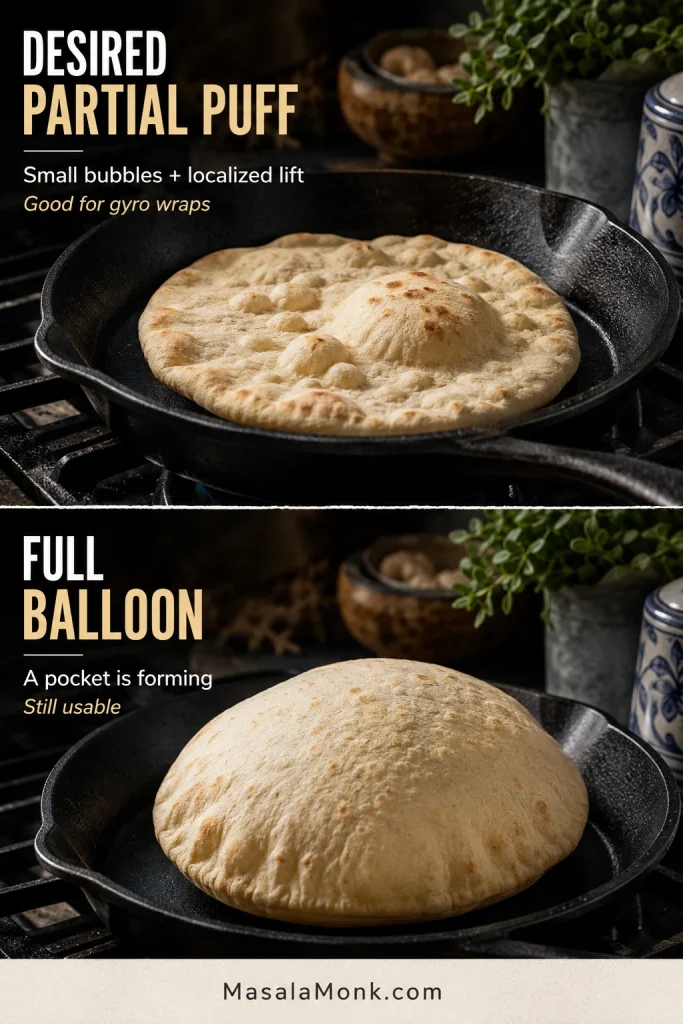
You may also see this pocketless bread called gyro bread, souvlaki bread, Greek flatbread, Greek pitta or yiros bread. Small bubbles and partial puffing are welcome; a complete balloon and a clean internal pocket are not the goal. For the thinner bread that inflates and splits for stuffing, choose a pocket-pita recipe instead.
Quick answer
The Greek Pita Method in One Minute
- Make a soft dough: start with 500 g bread flour and 325 g water. After resting and kneading, it should feel tacky and elastic—not stiff, runny or glue-like.
- Let it rise by appearance: wait until the dough is airy and close to doubled, usually 60–90 minutes.
- Make every round even: divide the dough into eight equal balls and roll each to the same width and thickness.
- Let the first pita set the heat: bubbles and light brown spotting should develop together. Adjust the burner before cooking the rest.
- Look for scattered bubbles: partial lift is correct for gyro bread; the round does not need to balloon completely.
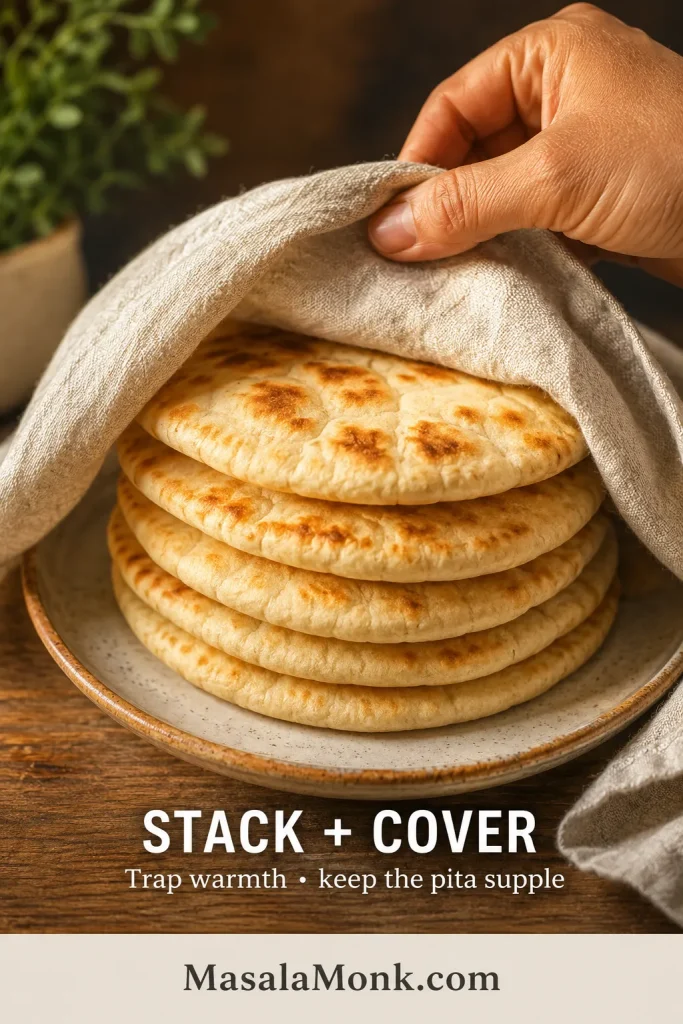
- Stack as you cook: the towel-covered stack keeps the whole batch soft enough to fold at dinner.
Shape for the wrap, cook for the center and stack for the softness.
Make it now
Greek Pita Bread Recipe
This yeasted skillet pita is soft, lightly chewy and pocketless by design. Eight equal rounds cook quickly in a wiped film of olive oil, then soften together under a towel while the rest of the meal catches up.
Total elapsed time: allow about 2 to 2¾ hours, including rests, rising, shaping and batch cooking. A warm kitchen—and rolling later rounds while the earlier ones cook—will keep you near the shorter end. Weigh the finished dough after kneading and divide its actual weight by eight so the portions remain equal.
Plan the cook
Mix, then rest 10 minutes → knead 6–10 minutes → rise 60–90 minutes → divide and rest 15 minutes → shape and cook each pita for roughly 2–3 minutes. The first round may take a little longer while you adjust the heat; after that, the batch should settle into a steady rhythm.
Set a plate and clean towel beside the skillet before cooking begins. Shape the first two rounds before heating the pan. After that, roll the next one while the skillet briefly recovers—or while the current pita cooks once you feel comfortable watching both.
Equipment
- Digital kitchen scale
- Large mixing bowl
- Flexible dough scraper
- Stand mixer with dough hook, optional
- Rolling pin
- Ruler or measuring tape for the first round
- Heavy cast-iron, stainless-steel or nonstick skillet, ideally 25–30 cm / 10–12 inches wide
- Spatula or tongs
- Lid that fits the skillet, optional for briefly finishing a thick or gummy center
- Plate and clean kitchen towel for the finished stack
Ingredients
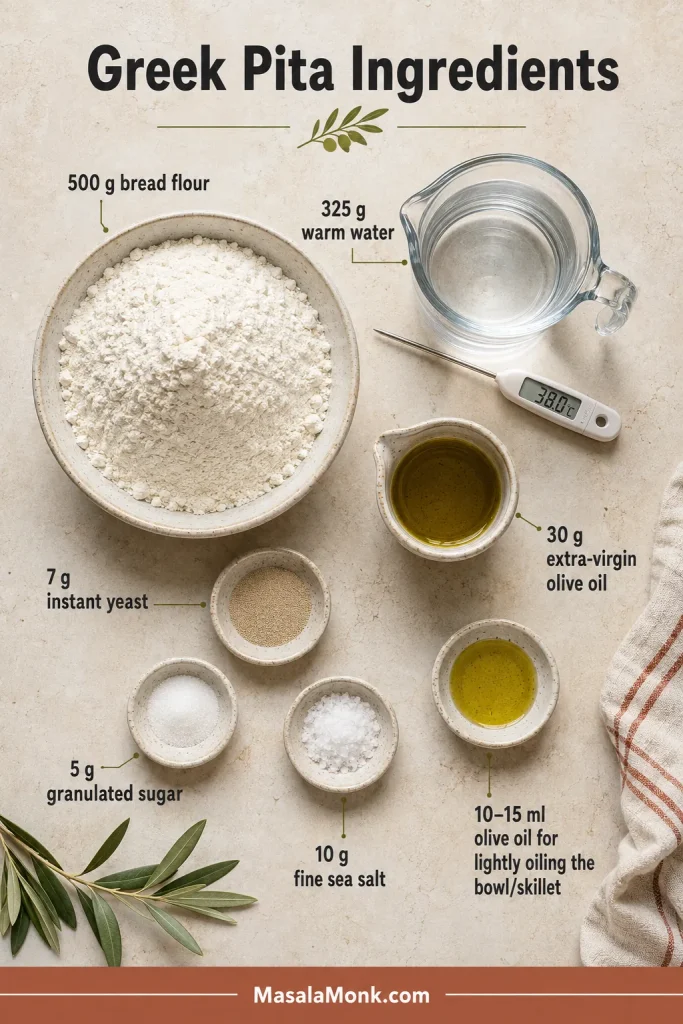
- 500 g / 17.6 oz bread flour, about 4 cups plus 3 tablespoons when spooned and leveled; use the gram measure for the most consistent dough
- 325 g / 325 ml warm water, about 1⅓ cups plus 2 teaspoons, at approximately 38–41°C / 100–106°F
- 30 g extra-virgin olive oil, roughly 2 tablespoons plus ¾ teaspoon
- 7 g instant yeast, about 2¼ teaspoons or one 7 g sachet
- 10 g fine sea salt, approximately 1¾ teaspoons depending on crystal size
- 5 g granulated sugar, about 1¼ teaspoons
- 10–15 ml / 2–3 teaspoons olive oil for lightly oiling the bowl and skillet, used in very thin films
Instructions
Mix and rise
- Mix and rest. Whisk the flour, yeast, sugar and salt in a large bowl. Add the warm water and 30 g olive oil, then mix until no dry flour remains. Cover and rest for 10 minutes. The rough surface should look calmer and the dough should feel less clingy before kneading begins.
- Knead until soft and elastic. Knead by hand for 8–10 minutes or in a stand mixer on low to medium-low for 6–7 minutes. The dough should become smoother, stretch before tearing and hold a soft ball. It may cling briefly to a clean finger, but it should not coat the hand in paste.
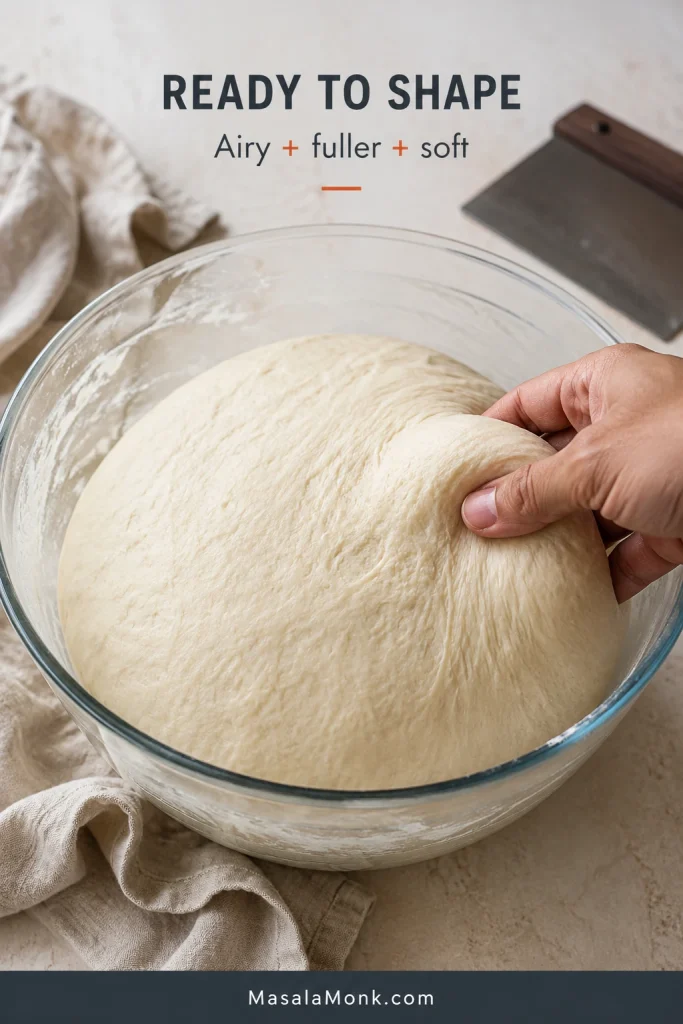
- Let the dough rise. Lightly oil the bowl, turn the dough once and cover. Leave for 60–90 minutes, or until it looks airy and is close to doubled. When you lift the cover, the dough should feel lighter and fuller beneath your hand—not merely larger. A cool kitchen may need longer.
Divide and shape
- Divide by weight. Turn the dough onto a lightly oiled work surface and weigh it. Divide the actual weight by eight; most batches will give pieces close to 109–110 g / about 3.9 oz. Shape each piece into a smooth ball.
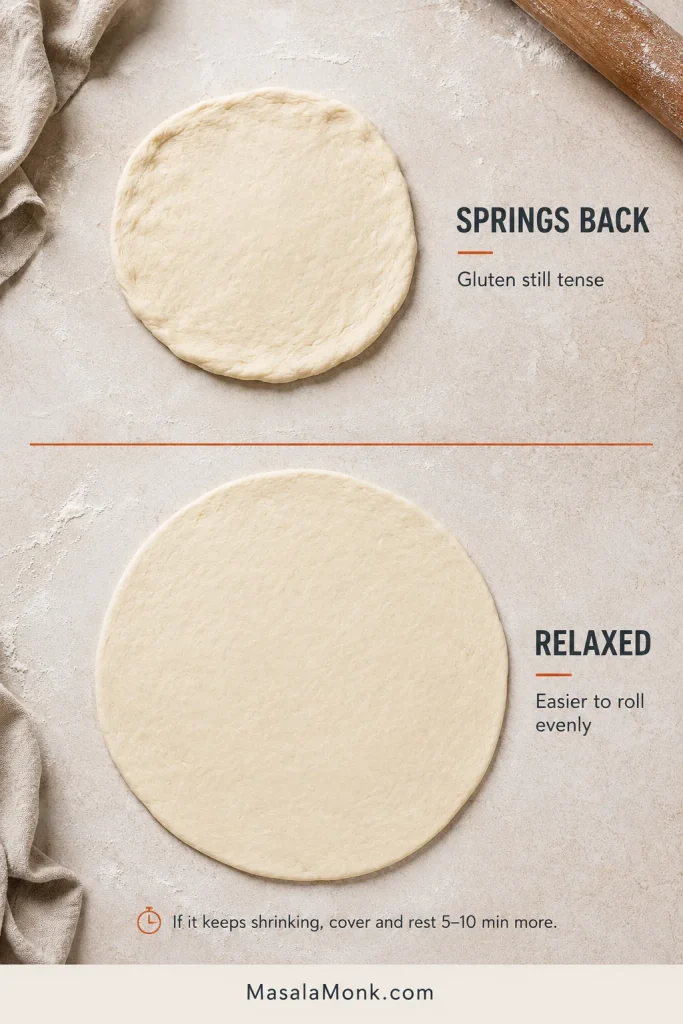
- Rest the dough balls. Cover and rest for 15 minutes. This relaxes the gluten so the rounds roll out without fighting back. If one still shrinks strongly, leave it covered for another 5 minutes.
- Shape the first two pitas. Press one ball into a disk, then roll from the center outward to 18–19 cm / 7–7½ inches and about 5 mm / 0.2 inch thick. Rotate often and check that the center is not thicker than the edges. Repeat with a second ball and keep the remaining balls covered.
Cook and finish
- Preheat and lightly oil the skillet. Heat a heavy cast-iron or stainless-steel skillet over medium-high for about 3–4 minutes. If using nonstick, follow your pan maker’s heat guidance and avoid prolonged empty preheating. Add roughly ¼ teaspoon oil and wipe it into a thin film. The oil should shimmer lightly without smoking heavily.
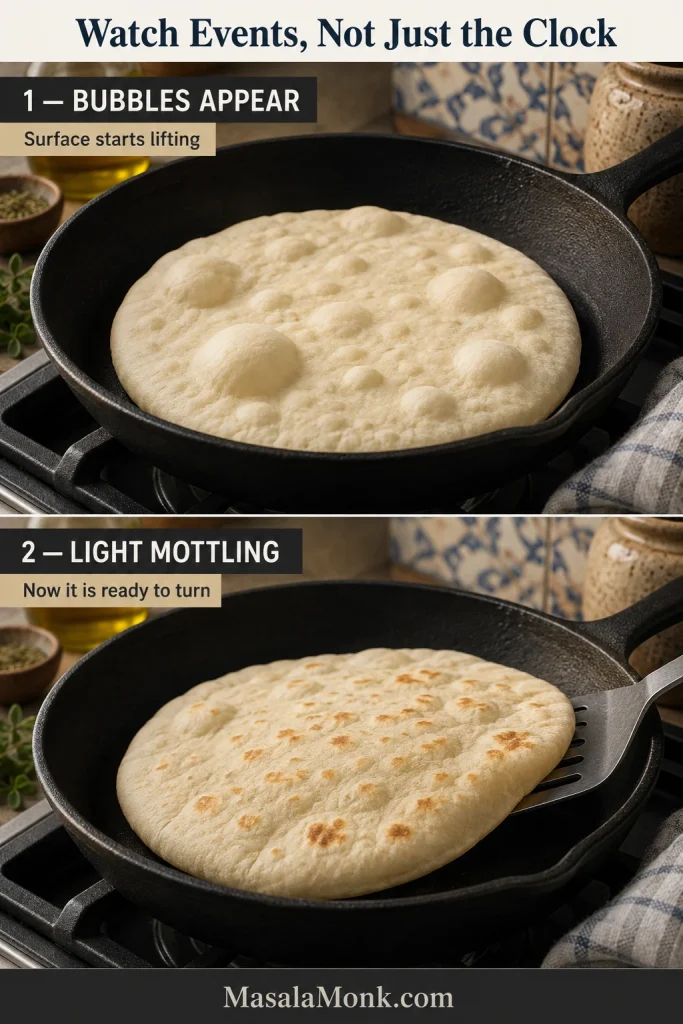
- Cook the first pita and set the heat. Lay in the pita and watch the order of events. Small bubbles should begin before the underside becomes deeply browned. Begin checking at 60 seconds; flip when the first side has scattered light-brown spots, usually within 60–90 seconds. Cook the second side for about 45–75 seconds, then give it one brief final turn only when the center still feels heavy.
- Cook the remaining pitas, then stack and cover. Keep every round close to the same width and thickness, and shape at a pace that lets you watch the skillet. Transfer each finished pita directly to the waiting stack and cover again. A surface that looks slightly dry at first should soften beneath the towel. Refresh the skillet with a thin film of oil when it looks dry, usually after two or three pitas.
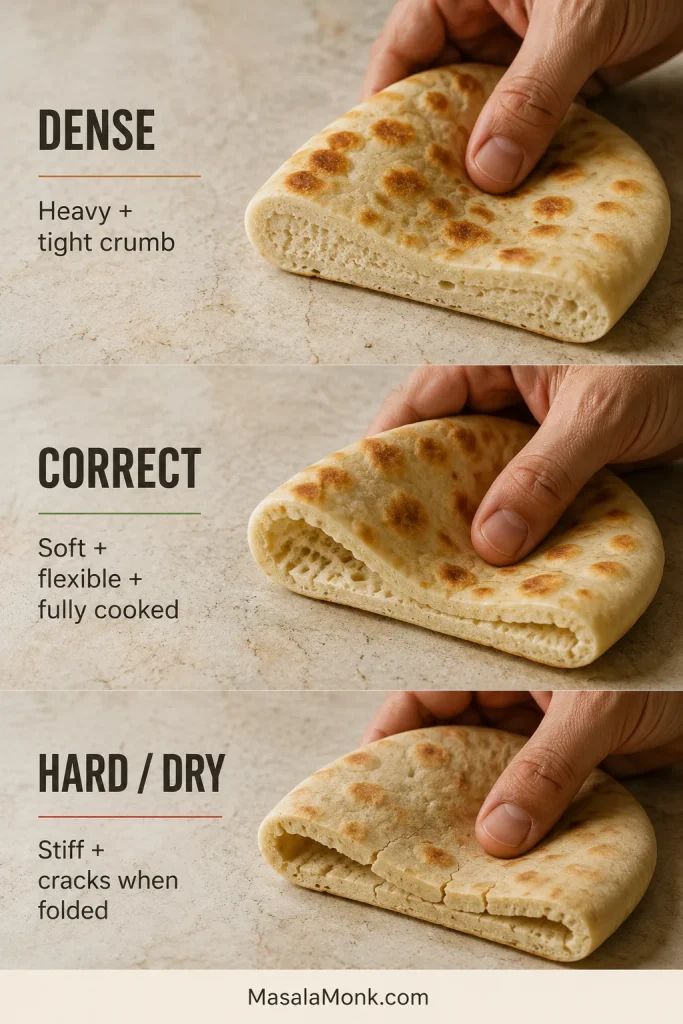
- Perform the fold test. After a few minutes in the covered stack, bend one pita into a deep U. It should fold without cracking, have no gummy center and remain substantial enough to support a loaded gyro.
Recipe notes
- Small bubbles and partial lift are desirable. The pita does not need a complete separable pocket.
- Dark spots before bubbles mean the pan is too hot; reduce the heat. A pita that stays pale and slowly dries needs more heat.
- When the outside is colored but the center is gummy, lower the heat, flip more often and cover the skillet for 20–30 seconds.
- For all-purpose flour, hold back 15 g of the 325 g water. Add it after the hydration rest only when the dough feels firm.
- Keep unshaped dough balls covered and avoid rolling all eight rounds far in advance.
If the dough feels stickier than expected, a pita balloons or the first brown spots arrive too soon, use the guide below to find the cause.
Explore the Greek Pita Guide
Understand the Bread
Fix, Plan and Serve
Greek Pita vs Pocket Pita: What Is the Difference?
Greek gyro pita and pocket pita begin with similar ingredients, but they are shaped and cooked for different jobs. Pocket pita is meant to separate into two thin walls. Greek pita is meant to remain one substantial round that can bend around the filling.
| Feature | Greek gyro pita | Pocket pita |
|---|---|---|
| Main use | Wrap around gyros and souvlaki | Split and stuff |
| Structure | Thick and pocketless | Thinner with a separated pocket |
| Desired lift | Small bubbles and partial puffing | Full ballooning |
| Typical cooking | Skillet, griddle or grill | Very hot oven or baking surface |
| Success test | Folds deeply without cracking | Inflates and opens cleanly |
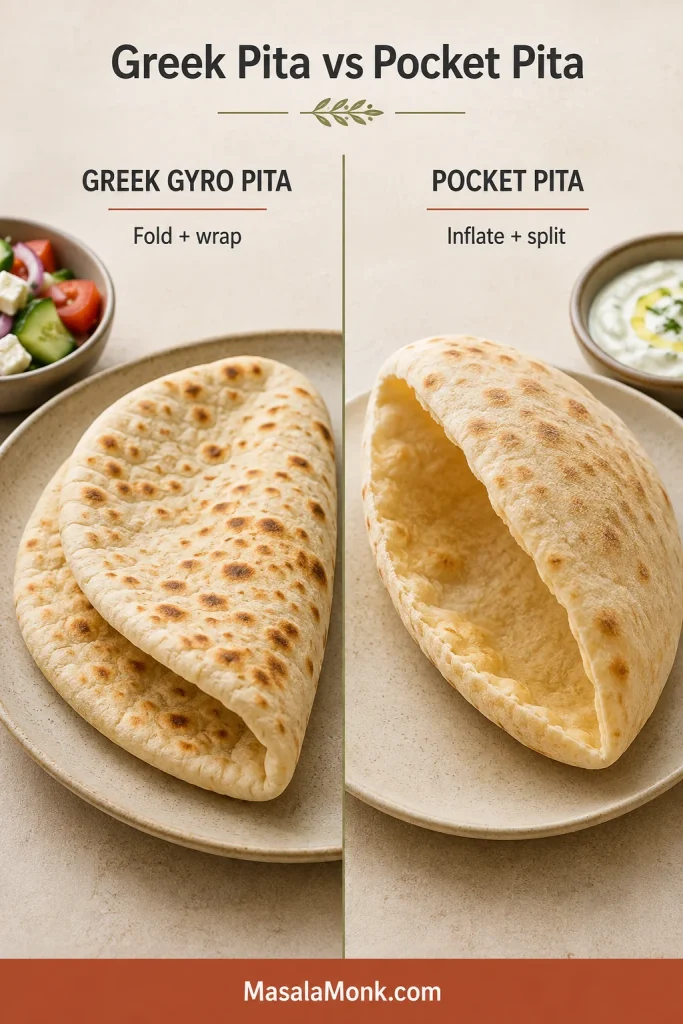
Cooking method alone does not decide whether a pocket forms. Thickness, evenness, proofing after shaping and how quickly steam builds inside the dough all matter. A skillet pita can balloon, while an oven-baked round can remain pocketless.
For this recipe, the right question is not “Did it inflate completely?” It is “Did it become light enough inside while staying strong enough to fold?”
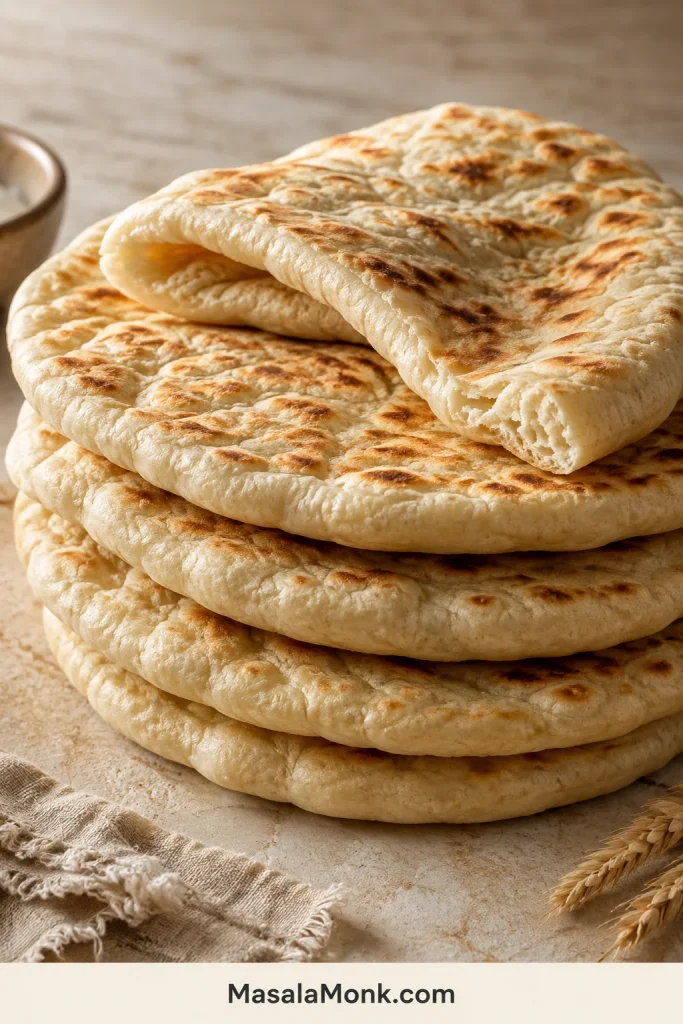
Need the other style? Use MasalaMonk’s homemade pita bread recipe, which is designed to inflate and split for stuffing.
Ingredients for Soft, Foldable Greek Pita
With only flour, water, yeast, oil, salt and sugar, small changes show up clearly in the finished pita. Flour provides the structure for a loaded fold, water keeps the crumb soft, and olive oil helps that softness last after cooling.
Bread flour or all-purpose flour?
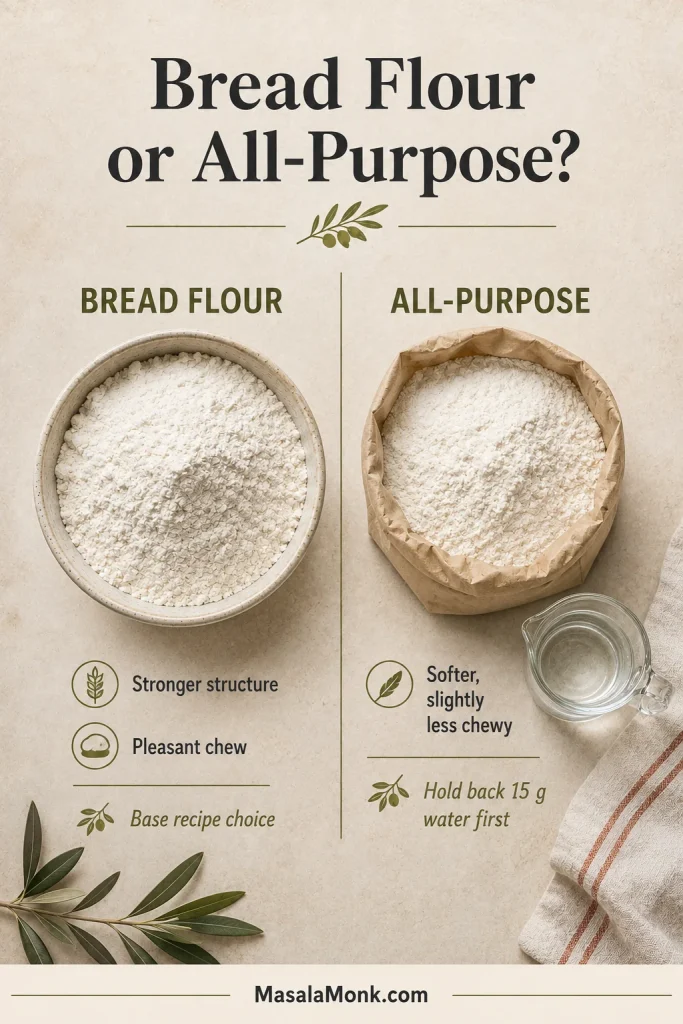
Bread flour is the best choice for this version because its stronger gluten gives the pita pleasant chew and enough strength for a moist gyro filling.
All-purpose flour makes a softer, slightly less chewy pita. Because absorption varies by brand, hold back 15 g water, then add it gradually after the rest only when the dough feels firm.
Weigh the flour whenever possible. A packed cup can add enough flour to turn a bendable pita dry. King Arthur Baking lists a level cup of bread or all-purpose flour at about 120 g; the 500 g measure is more consistent than scooping.
Warm water and instant yeast
Water around 38–41°C / 100–106°F gives the dough a comfortable start. Instant yeast can be mixed directly with the flour. King Arthur Baking notes that active dry yeast can replace instant yeast at the same weight, although it may start more slowly.
Let expansion set the pace. A warm kitchen may bring the dough close to doubled in an hour; a cool room may need another 30 minutes or more. Move on when it looks airy and feels fuller.
Olive oil inside the dough and in the skillet
Olive oil has two jobs here. The 30 g mixed into the dough helps the pita stay tender after it cools; the much smaller amount in the skillet helps the surface stay supple while it browns.
Use only a wiped film of oil in the skillet. A visible pool makes the surface heavier and more fried, while the thin coating used here gives mottled browning without weighing the pita down.
Salt adds flavor and strengthens the dough, while the small amount of sugar supports fermentation and browning without making the pita taste sweet. Weigh the salt because fine sea salt, table salt and kosher salt occupy different volumes.
What Greek Pita Dough Should Feel Like
“Sticky” is too broad to guide a useful correction. The dough can cling slightly and still be exactly right. What matters is whether it can hold a soft shape after the flour has hydrated and the gluten has developed.
| Dough state | What it looks and feels like | What to do |
|---|---|---|
| Tacky and correct | Clings briefly, releases with gentle movement and holds a soft ball | Keep kneading; do not add flour |
| Sticky but workable | Leaves a light film and is easier with a scraper or oiled hands | Rest, knead and reassess |
| Too wet | Spreads, strings like glue and cannot hold a rounded shape | Add flour 1 tablespoon at a time after the rest |
| Too dry | Rough, cracked, stiff and prone to tearing | Knead in water 1 teaspoon at a time |
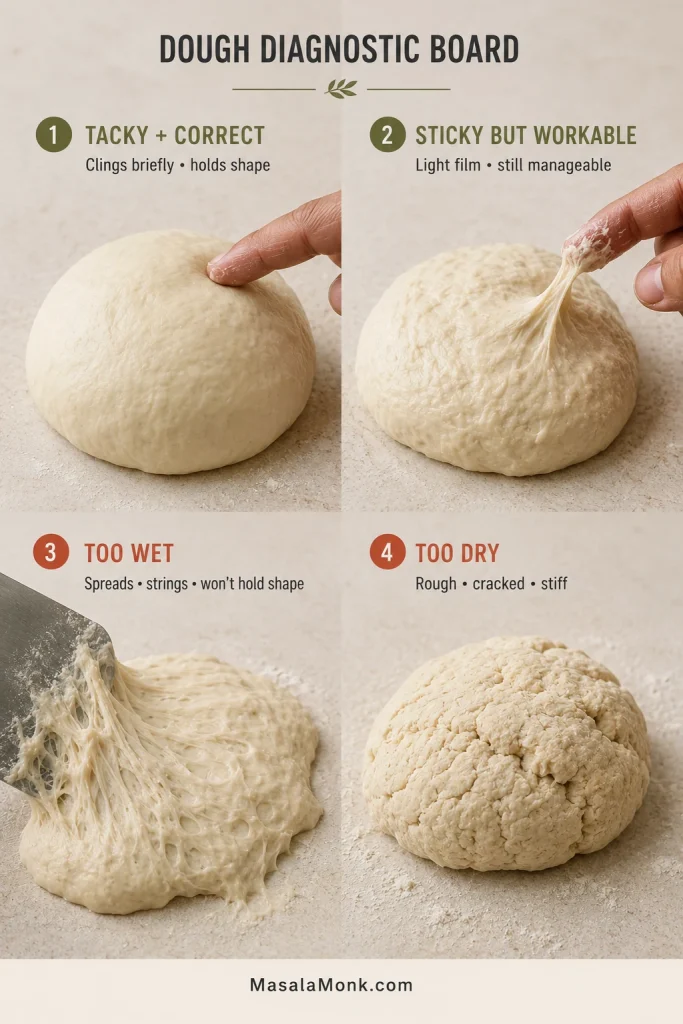
Correct the process before correcting the flour. Incorporate every dry patch, give the rough dough its 10-minute rest, then knead it fully. A mixture that feels alarming in the first minute often becomes supple without any extra flour.
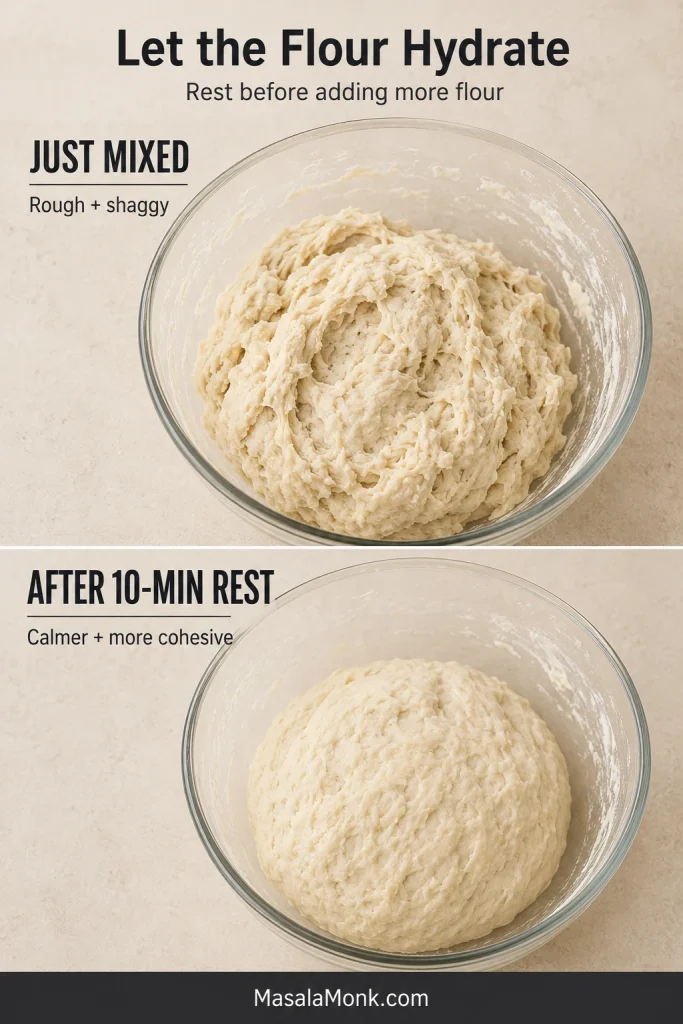
Weight, Width and Thickness Must Agree
“Roll into circles” leaves too much to chance. Dough weight, finished width and thickness need to match; change one and the way the pita cooks changes with it.
| Target | Why it matters |
|---|---|
| About 110 g / 3.9 oz per dough ball | Keeps all eight pitas within one cooking window |
| 18–19 cm / 7–7½ inches wide | Large enough for a gyro without becoming a thin wrap |
| About 5 mm / 0.2 inch thick | Substantial enough to hold filling but thin enough to cook through quickly |
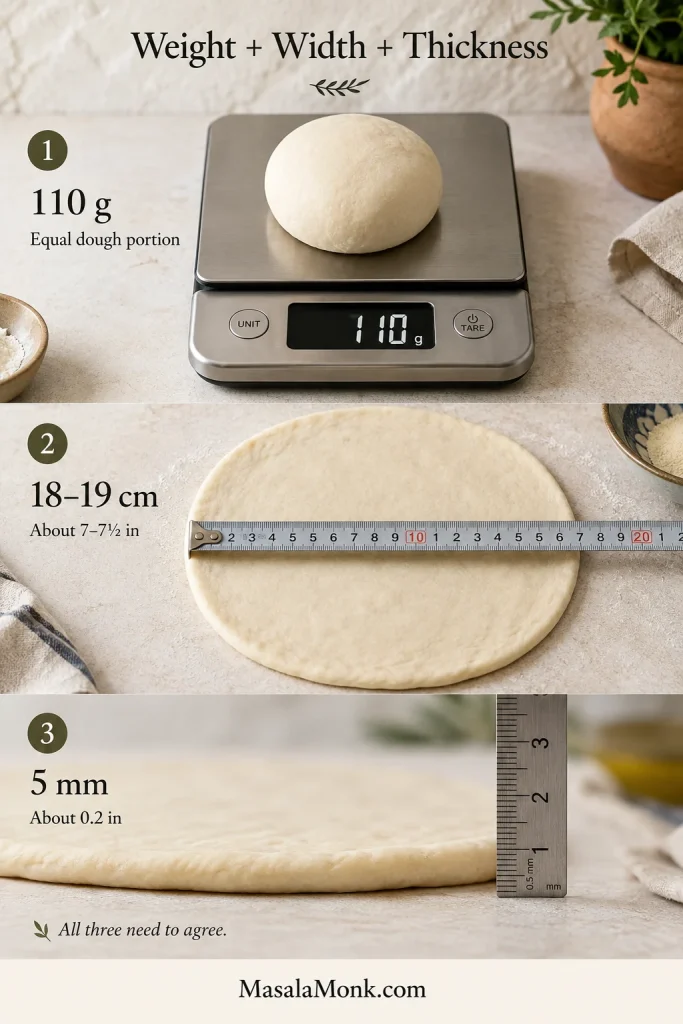
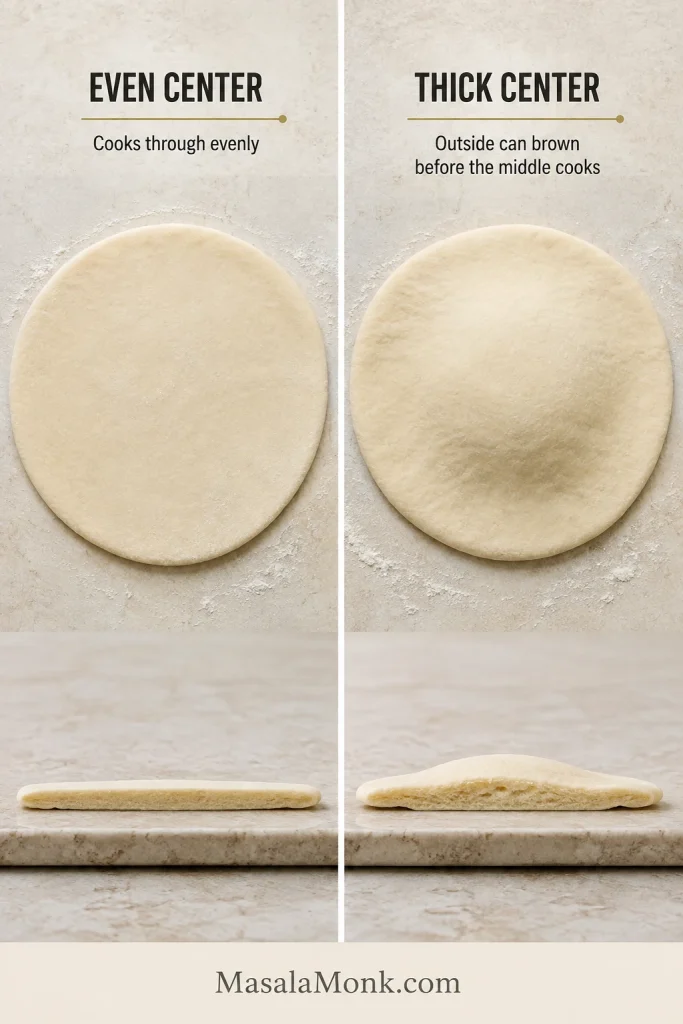
Roll from the center outward and rotate the disk frequently. Run your fingertips over the center before it enters the skillet. An apparently even round can hide a thick mound in the middle, which is where gummy bread usually begins.
When the dough repeatedly shrinks, stop pushing. Cover it and wait another 5–10 minutes. A short rest relaxes the gluten more effectively than extra pressure, which often creates thin centers and thick edges.
A rolling pin gives beginners the easiest way to repeat that even center. Hand stretching can work once the dough feels familiar, but it is easier to leave a hidden mound in the middle.
Choose a Skillet You Can Read
For the skillet, familiarity matters more than prestige. Cast iron browns strongly but stays hot after the burner is lowered. Stainless steel responds faster but needs a good preheat and a thin oil film. Heavy nonstick is forgiving and easy to handle, though the spotting may be gentler.
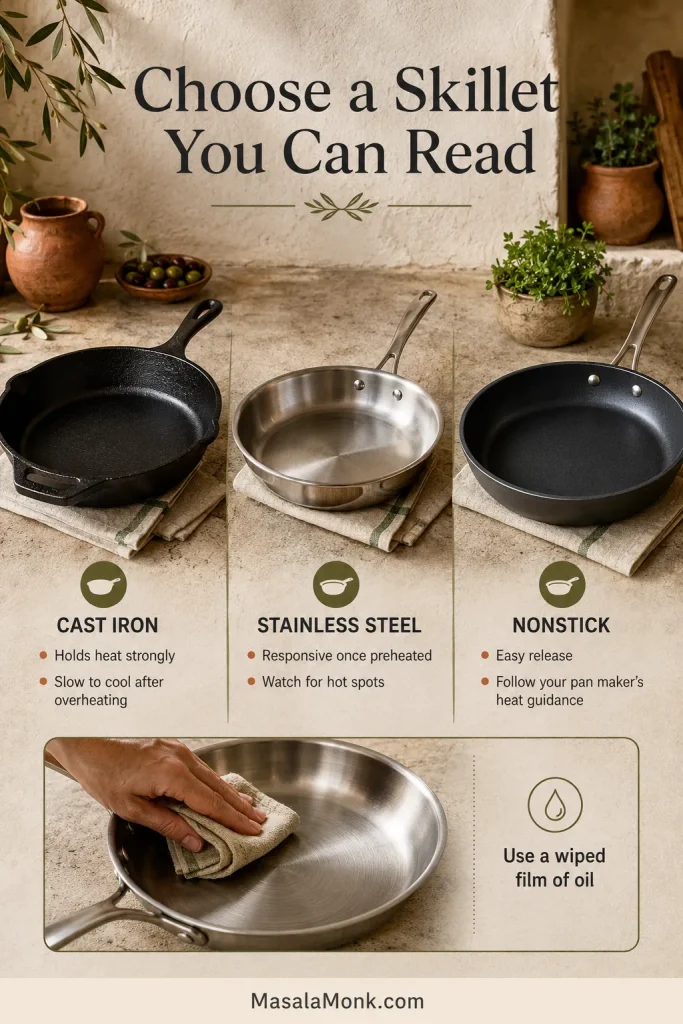
Avoid a very thin pan if possible; hot spots can darken one area before the center cooks. Have the plate, towel and optional lid beside the stove so finished pitas can be covered immediately and a stubborn center can get a brief covered finish.
Skillet Heat, Timing and the First Pita
“Medium-high” means something different on every stove. Use the first pita to set the heat: bubbles and light color should develop at roughly the same pace.
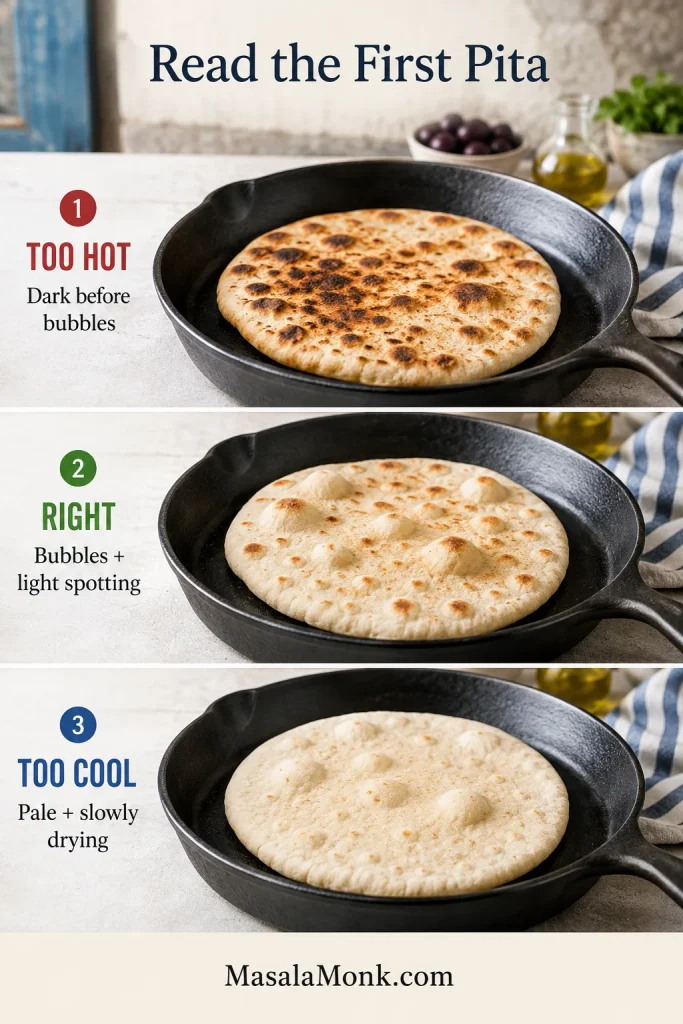
| Stage or signal | What to look for | What to do |
|---|---|---|
| Preheat | A wiped oil film shimmers without smoking heavily | For cast iron or stainless, start near medium-high after about 3–4 minutes of preheating; follow your pan maker’s heat guidance for nonstick |
| Early cooking | Small bubbles begin before deep color forms underneath | Keep the setting when lift and light spotting arrive together |
| First side | Begin checking at 60 seconds; look for scattered light-brown spots | Flip before the surface becomes stiff or deeply charred |
| Second side | Usually 45–75 seconds; mottled color and a flexible body | Add one brief final turn only when the center feels heavy |
| Dark spots before bubbles | The pan is outrunning the center | Reduce heat; move cast iron off the burner briefly |
| Pale and slowly drying | The pan is too cool | Raise the heat and let the skillet recover before the next pita |
| Brown outside, gummy inside | The round is too thick, the heat is too high or both | Lower the heat, flip more often and cover briefly |
Bubbles Before Deep Browning
When Cast Iron Runs Too Hot
Cast iron holds onto a mistake. When it becomes too hot, turning down the burner may not help immediately; move the pan off the heat for 30–60 seconds before the next pita.
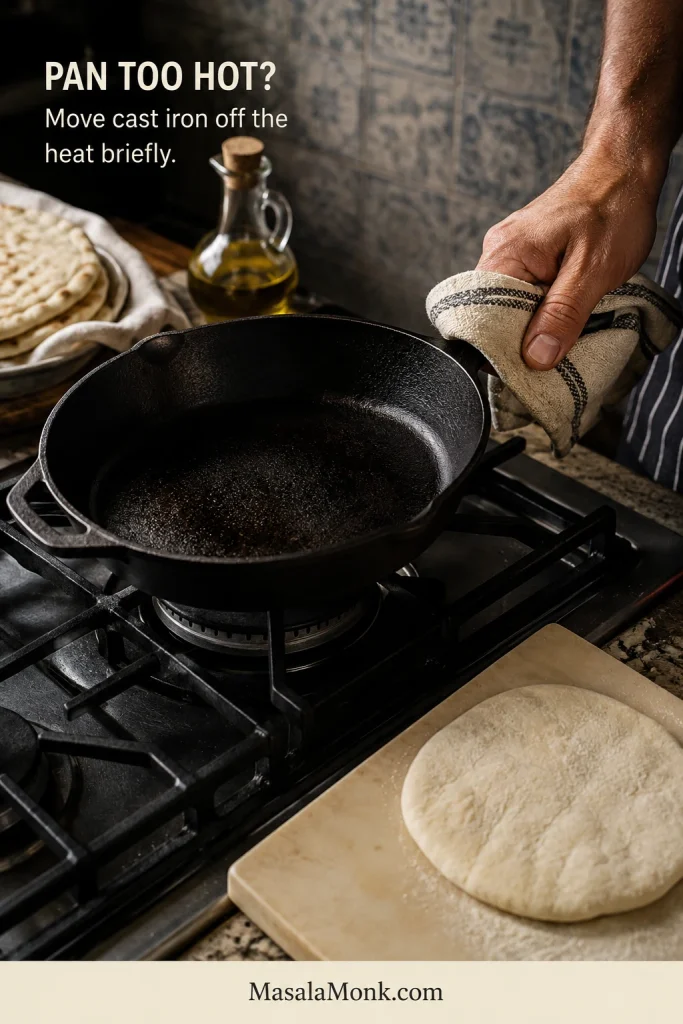
When bubbles and light color are developing at roughly the same pace, stop adjusting. By the third pita, the pan usually settles into a rhythm and the kitchen begins to smell of toasted wheat and warm olive oil. Hold the heat there rather than chasing darker spots.
How to Keep Greek Pita Light but Pocketless
Pocketless does not mean flat and dense. Numerous small bubbles and a few larger blisters create the light interior this bread needs. The aim is simply to prevent one complete balloon from separating the round into two thin walls.
- Aim for about 5 mm thickness. Very thin pitas inflate more readily, dry faster and tear more easily around a wet filling.
- Rest the balls before shaping. A long proof after rolling encourages more expansion and increases the chance of a full pocket.
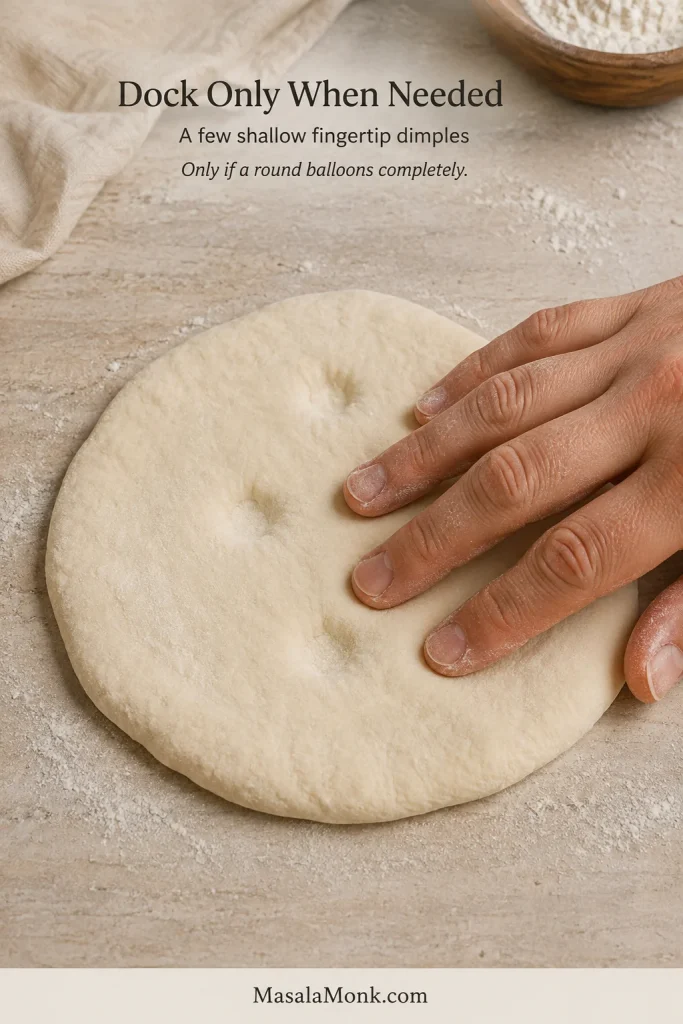
- Dock only when needed. Start with an undimpled round. If one balloons completely, lightly dimple the remaining rounds with your fingertips; too many holes suppress the smaller bubbles that keep the bread light.
A fully inflated pita is not ruined. Press it gently as it cools and use it as a wrap, then make the smallest shaping change needed for the next round.
As each pita leaves the skillet, add it to the stack and cover it again. That gentle trapped warmth softens the surface and keeps the first rounds flexible while the rest of the batch cooks.
Cooking now? Return to the recipe ↑ · Open troubleshooting ↓
Greek Pita Troubleshooting
Start with what went wrong. Sticky dough needs a different fix from a pita that browned before its center cooked, and a longer cook cannot restore moisture to bread left uncovered. Match the fix to the failure you can actually see.
Dough and Shaping Problems
| Problem | Likely cause | What to do now | Next time |
|---|---|---|---|
| Dough is extremely sticky | Flour has not hydrated, dough is under-kneaded or flour absorbs less water | Rest 10 minutes, knead fully and use oiled hands or a scraper | Add flour only 1 tablespoon at a time if it still cannot hold a ball |
| Dough is dry or cracking | Too much flour, packed cup measures or very absorbent flour | Knead in water 1 teaspoon at a time, then rest | Weigh the flour and minimize bench flour |
| Dough did not rise | Cold room, inactive yeast or water was too hot | Move it somewhere warmer and allow more time; if there is still no visible activity after an extended warm rest, restart with fresh yeast | Check the yeast date and keep the water near 38–41°C / 100–106°F |
| Round springs back | Gluten is still tense | Cover and rest another 5–10 minutes | Keep the full 15-minute ball rest |
Cooking, Texture and Folding Problems
| Problem | Likely cause | What to do now | Next time |
|---|---|---|---|
| Pita is dense | Dry dough, weak rise, low skillet heat or excessive docking | Keep it covered to soften the surface, then serve it warm for dipping or cut it into wedges; the dense crumb cannot be made light after cooking | Keep the dough soft, let it rise until airy, preheat the skillet fully and avoid excessive docking |
| Center is raw or gummy | Round is too thick or pan is too hot | Lower heat, flip more often and cover 20–30 seconds | Measure the first round and keep the center near 5 mm |
| Pita is hard | Overcooked, cooked too slowly, dry dough or left exposed | Sprinkle lightly with water, cover and warm briefly | Cook faster and stack immediately |
| Pita formed a full pocket | Round was too thin, heat was intense or shaped dough rested too long | Press gently as it cools and use it normally | Roll the remaining rounds slightly thicker, cook them promptly after shaping, lower the heat if they balloon too fast and dimple lightly only when needed |
| No bubbles appeared | Under-proofed dough, cool pan or excessive pricking | Let the remaining balls rest a little longer and raise the heat slightly | Let the dough rise until airy, preheat the skillet fully and avoid aggressive docking |
| Pita tears around filling | Too thin, dry, overcooked, cold or overloaded | Warm it before folding, redistribute the filling and remove some if the wrap is overloaded | Keep the center near 5 mm, protect the covered stack and avoid overfilling |
If the Center Is Gummy
When the outside browns before the center sets, check the round’s thickness and the skillet heat together. A longer cook alone can dry the surface while leaving the underlying cause unchanged.
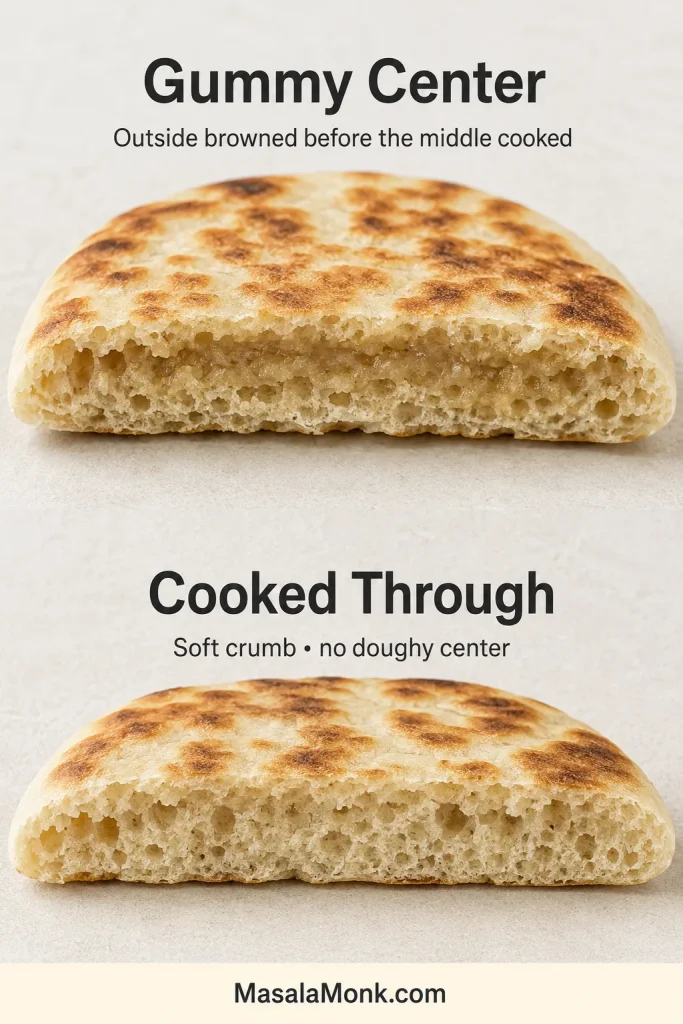
Most batches will not need every fix in these tables. Once thickness and pan heat are working together, the remaining rounds usually become much easier.
Problem solved? Back to the recipe ↑ · Store or freeze ↓ · How to serve ↓
Can You Make Greek Pita Ahead?
Yes. Cook the pitas completely earlier in the day, cool them, store them airtight and reheat them just before serving. This leaves the last-minute cooking for chicken souvlaki, vegetables and sauce rather than the bread. After reheating, hold the pitas in a covered stack until everyone is ready to assemble.
How to Store and Freeze Greek Pita
Cool the pitas completely before sealing them. Warm bread trapped in a bag produces condensation, which makes the surfaces wet and encourages sticking.
- Room temperature: store airtight for up to 2 days; the best texture is on the day of cooking and the following day.
- Refrigerator: keep for up to 4–5 days; chilling firms the starch, so plan to reheat.
- Freezer: separate with parchment if needed, press out excess air and freeze flat for up to 2–3 months.
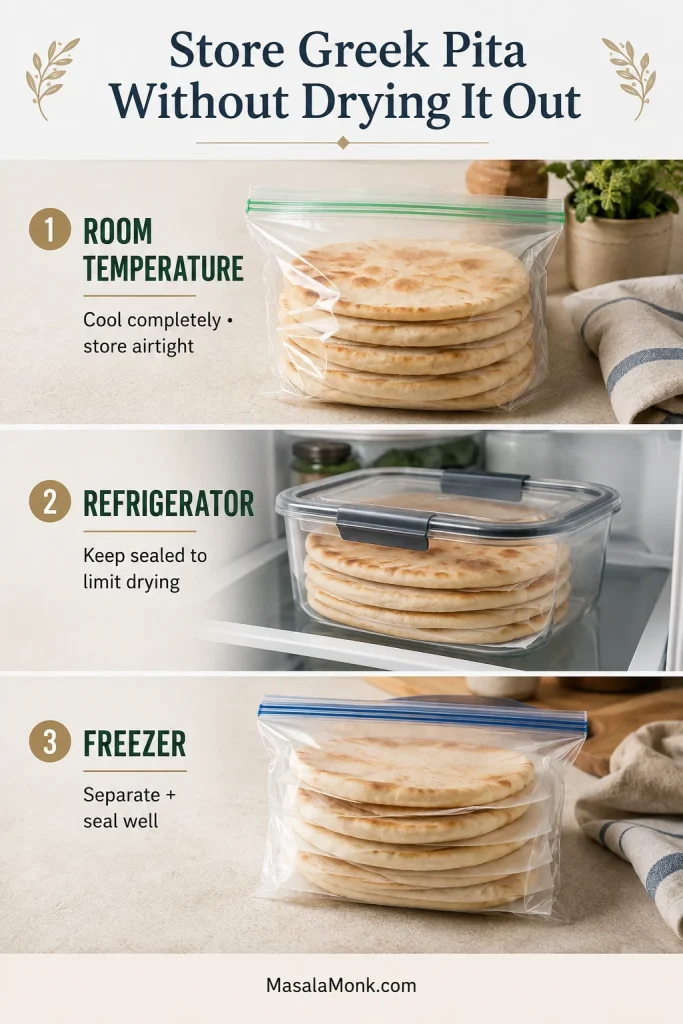
For an easy next-day lunch, warm one pita and fill it with Mediterranean chickpea salad. Add any loose dressing only when you are ready to eat.
Freezing bread while it is still fresh gives a better result than waiting until it begins to stale. Storage duration and peak texture are not the same promise.
How to Reheat Greek Pita Without Drying It Out
| Method | Best for | How to do it |
|---|---|---|
| Skillet | One or two pitas | Warm over medium for 20–30 seconds per side; add a few drops of water and cover briefly when dry |
| Oven | A batch | Wrap the stack in foil and heat at 175°C / 350°F for 5–8 minutes |
| Microwave | One pita in a hurry | Wrap in a barely damp paper towel and heat for 10–15 seconds |
| From frozen | Unplanned serving | Warm covered in a skillet over medium-low or heat a foil-wrapped stack in the oven until the pita is warm through and bends easily again |
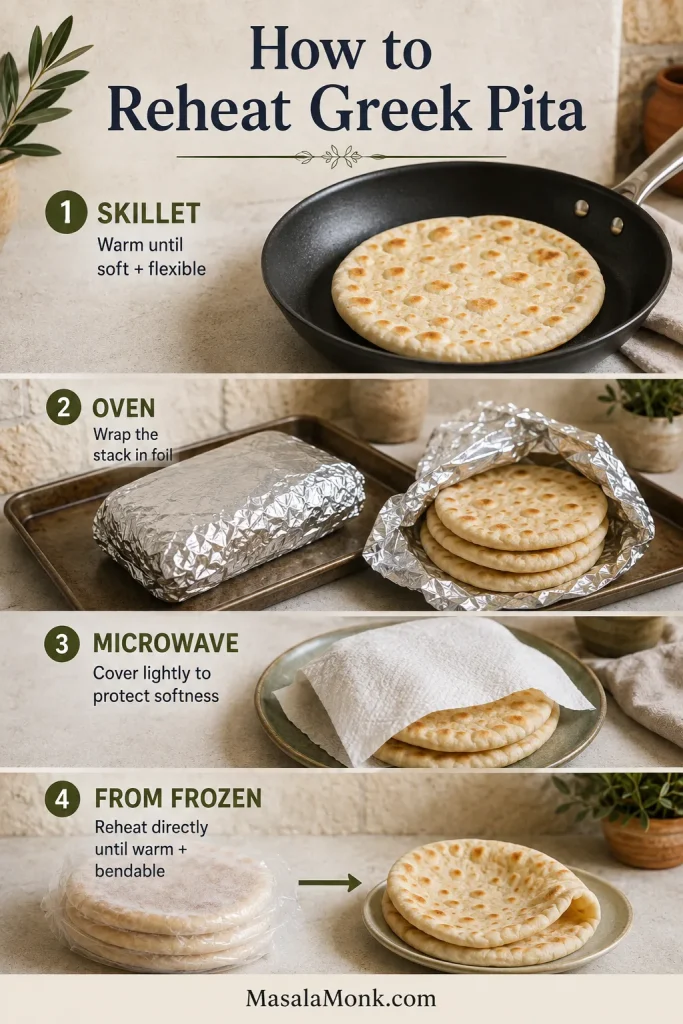
The target is flexibility, not crispness. Long microwave bursts make pita rubbery while hot and tough once it cools. An uncovered oven dries the outside before the center softens.
How to Serve Greek Pita
Build a gyro or souvlaki pita
Warm the pita and arrange the filling in a line through the center. Meat goes in first, followed by thick sauce, tomato, thin onion and optional homemade fries. Lay the fries above the meat, away from the lowest fold where sauce and steam collect.
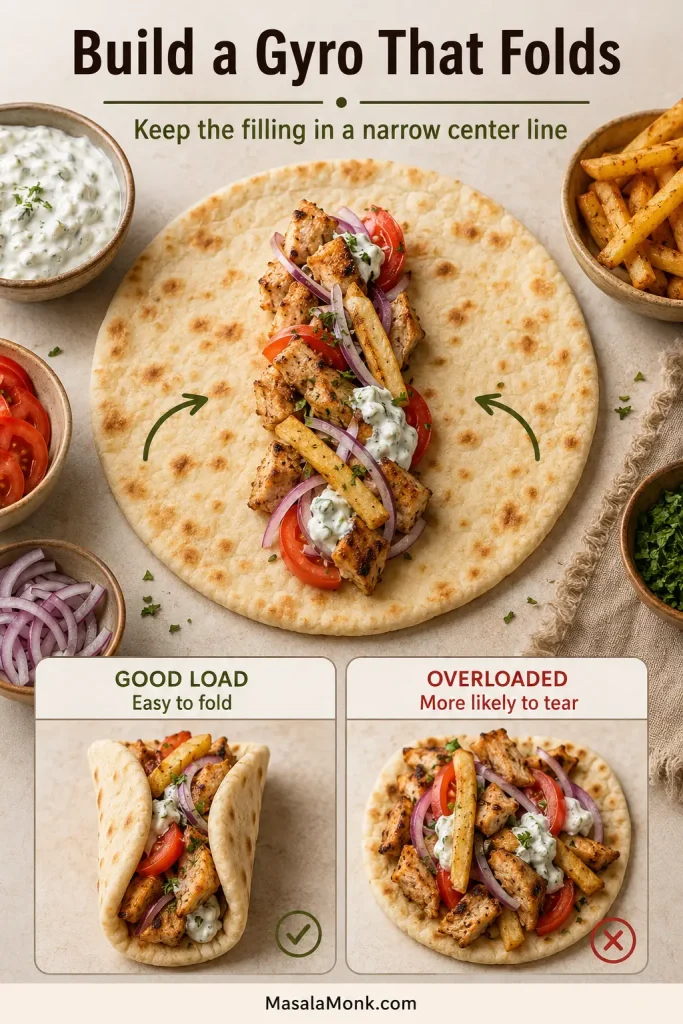
Choose a thick sauce, especially when tomato and lemon are already adding moisture. A dense spoonful of Greek tzatziki stays with the filling and away from the lower fold.
Perfect closure is unnecessary. Fold the bottom upward, bring in the sides and let parchment or foil hold the lower half while the top remains open. The bread should support the meal, not hide it.
In the first bite, the bread should still feel warm and soft against the cool sauce and juicy filling, with enough chew at the fold to hold everything together.
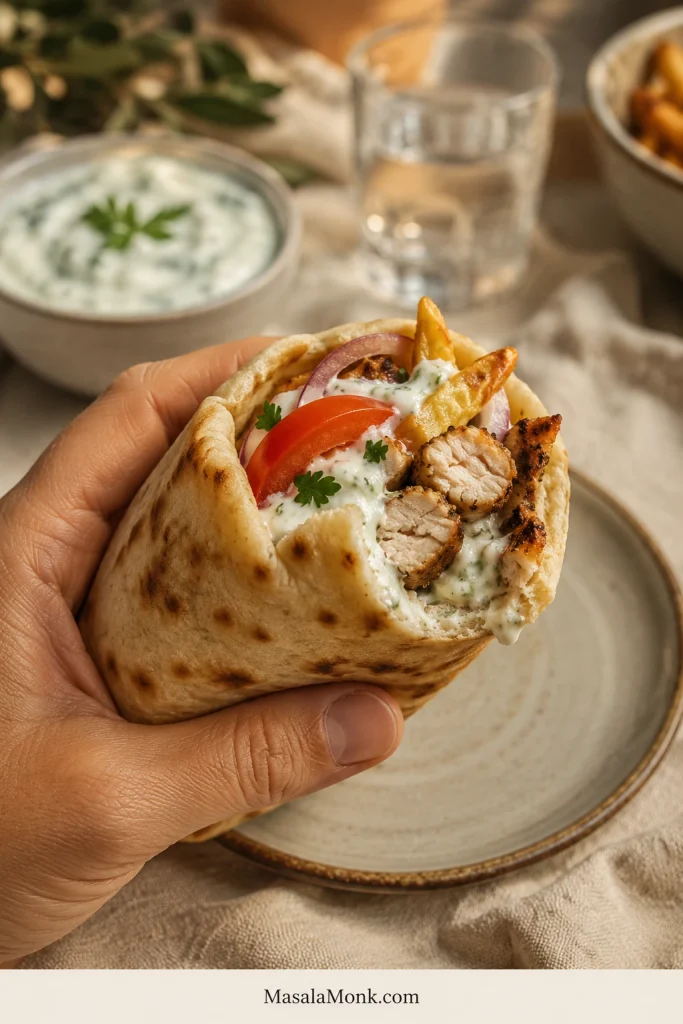
For something cold and crisp beside a rich wrap, a simple cucumber salad with dill and onion brings acidity and crunch without adding another heavy component.
Serve it with meze and dips
Cut the same warm pitas into wedges for tzatziki, hummus, whipped feta, roasted eggplant dip, olives or grilled vegetables.
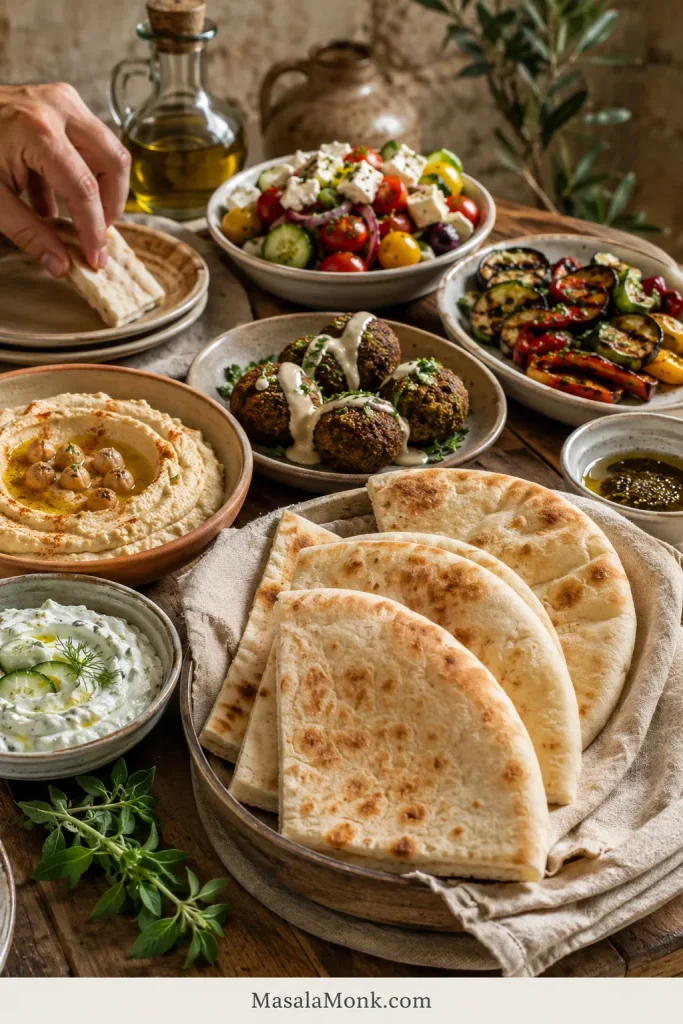
For a more substantial vegetarian plate, add crisp homemade falafel and let the warm bread, cool sauce and crunchy chickpea centers provide the contrast.
Greek Pita Bread FAQs
Dough, Shaping and Cooking
Does Greek pita bread have a pocket?
Greek pita used for gyros and souvlaki is normally pocketless. Small bubbles and partial inflation are welcome because the bread is designed to fold around filling, while pocket pita is designed to split for stuffing.
How thick should Greek pita be?
For these 110 g rounds, aim for about 5 mm / 0.2 inch. Thinner rounds dry and pocket more readily; a much thicker center can remain gummy after the outside browns.
Can I use all-purpose flour instead of bread flour?
Yes, but hold back 15 g water at first because all-purpose flour may absorb less. Add the reserved water gradually after mixing and resting only when the dough feels firm.
Why is my pita dough so sticky?
Soft pita dough should be tacky. Give it the 10-minute hydration rest and knead it fully before adding flour. Use a scraper and lightly oiled hands; add flour only if the dough still cannot hold a soft ball.
Can Greek pita be baked instead of cooked in a skillet?
It can, but a very hot oven encourages faster inflation and a drier surface. This recipe uses a skillet because it gives closer control over the softly mottled, pocketless result; oven timing cannot be copied directly from the pan method.
Storage, Dietary Needs and Variations
How do I keep pita soft for a party?
Stack and cover the pitas as they cook. When making them ahead, cool and store them airtight, then reheat the foil-wrapped stack shortly before serving. Keep every round covered until it reaches the table.
Is this Greek pita vegan and dairy-free?
As written, the pita itself is vegan and dairy-free. Choose vegan fillings and sauces for a fully vegan meal.
Can I turn this into a yogurt or no-yeast pita?
Not without changing the bread. Yogurt alters moisture, acidity, protein and browning, while removing yeast changes flavor and internal lift. A yogurt-enriched or no-yeast flatbread needs its own liquid and flour proportions.
The Fold Is the Final Test
Brown spots tell you the skillet was hot. The fold tells you whether the whole method worked.
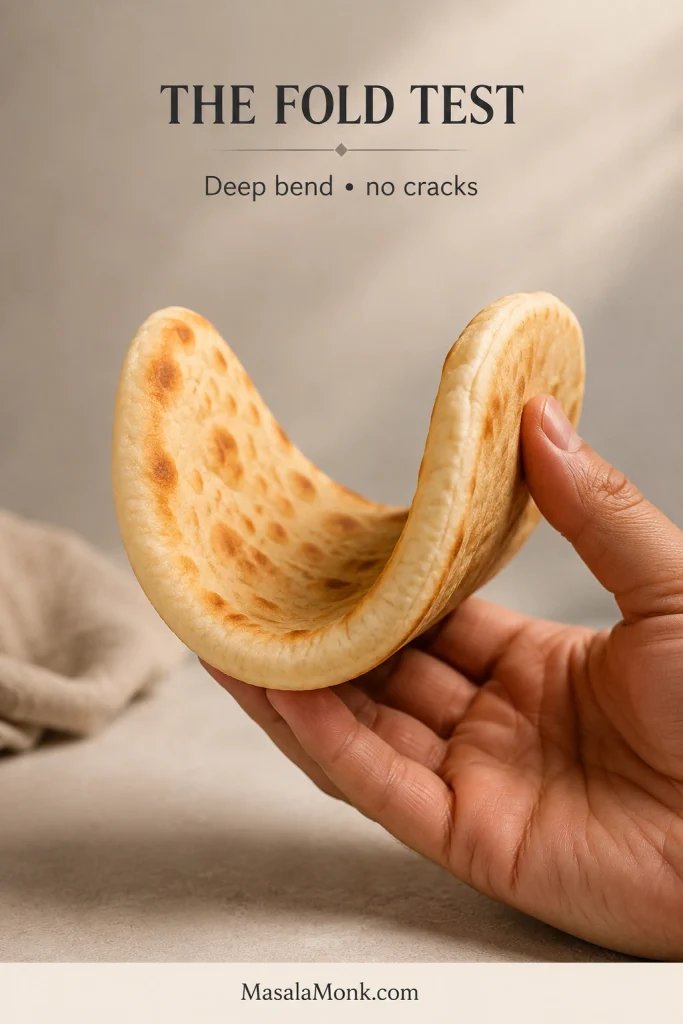
A good Greek pita can wait under its towel while the chicken finishes, the tomato is sliced and the tzatziki comes out of the refrigerator. When the table is ready, it should still feel soft and strong enough to carry everything, with a warm wheat-and-olive-oil aroma released as it bends.








