
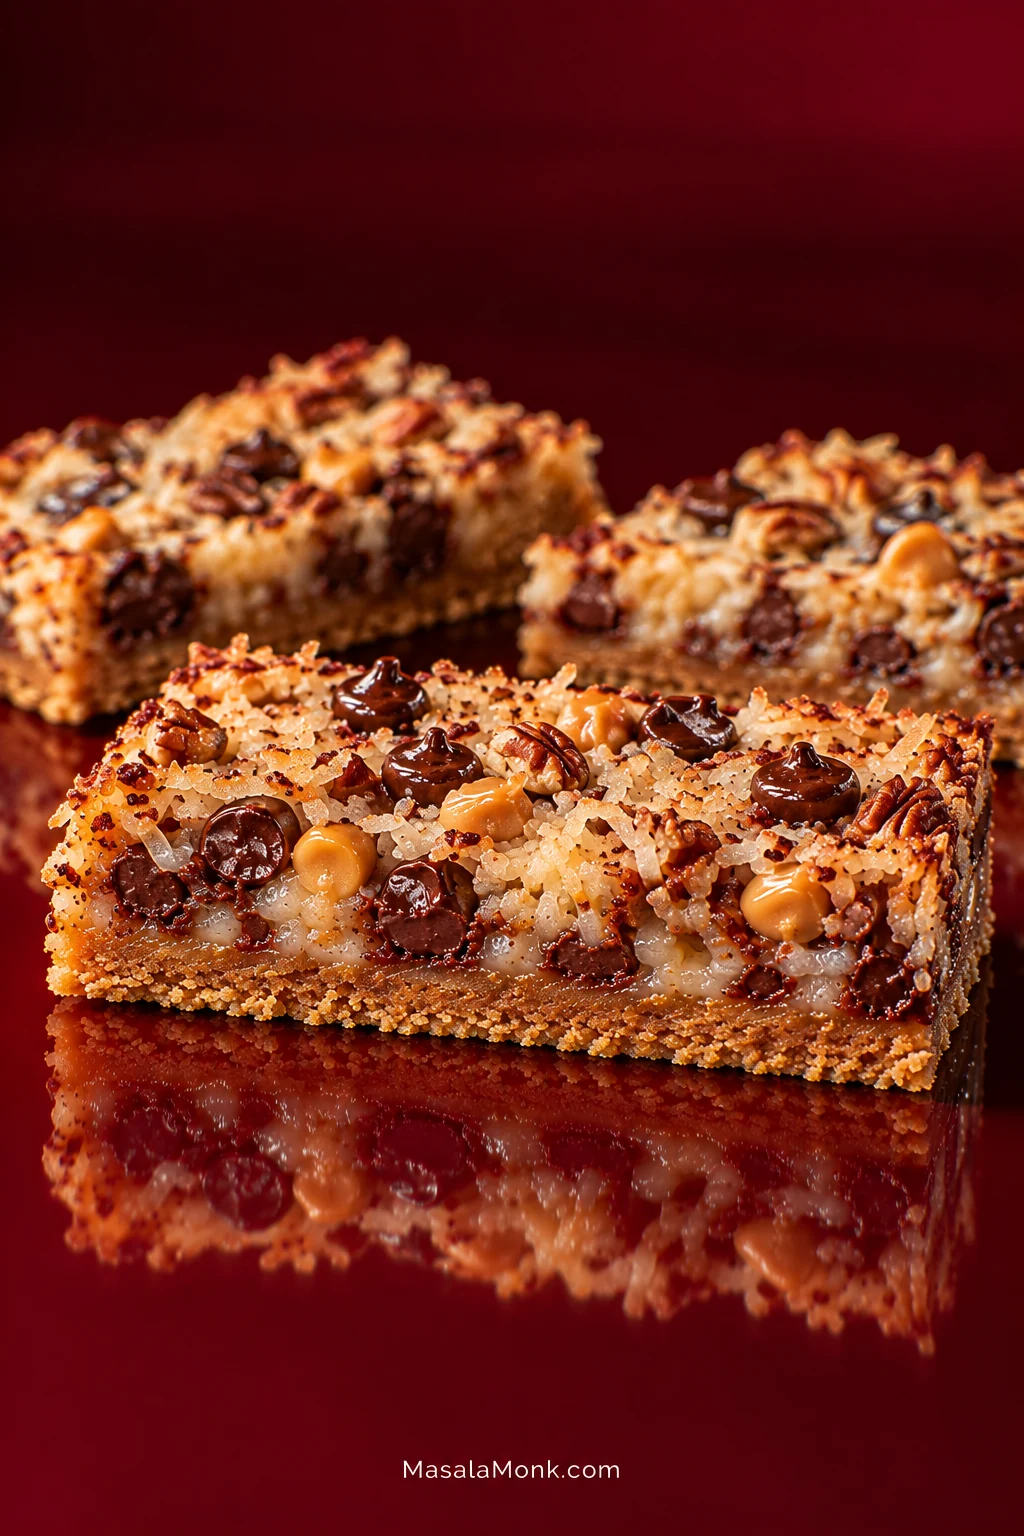
Magic Cookie Bars are the old-school layered dessert also known as 7 Layer Bars, Seven Layer Bars, Magic Bars, or Hello Dolly Bars. They start with a buttery graham crust and pile on sweetened condensed milk, chocolate, butterscotch, coconut, and pecans.
A good square gives you several textures at once: a firm buttery graham base, a dense chewy middle, pockets of chocolate and butterscotch, browned coconut, and pecan crunch. The caramelized edges are especially good once the bars have cooled enough to cut cleanly.
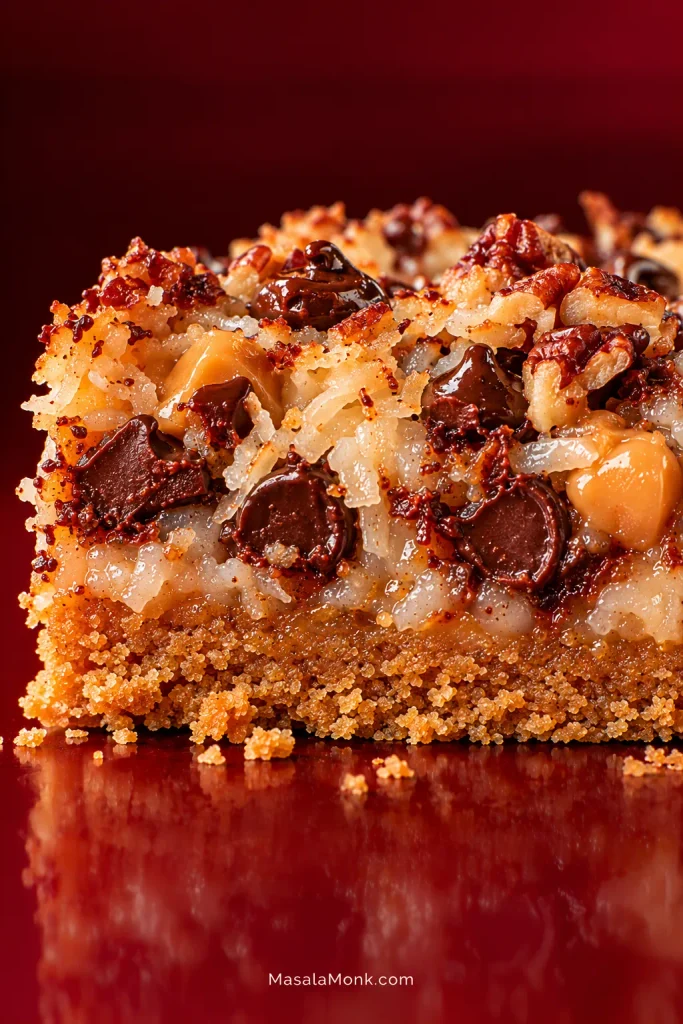
This version keeps the familiar character of the bars while pulling back on some of the extra sweetness. Part of their charm is that families remember the same dessert differently anyway—under another name, with another nut, or with the condensed milk poured in a different place.
For all those layers, the method itself stays simple: press the crust, scatter the toppings, bake, and give the bars enough time to cool.
Get These Three Things Right
Crust
The crumbs should clump when squeezed and form an even, cohesive base when pressed, with no loose dry patches or butter pooling underneath.
Bake
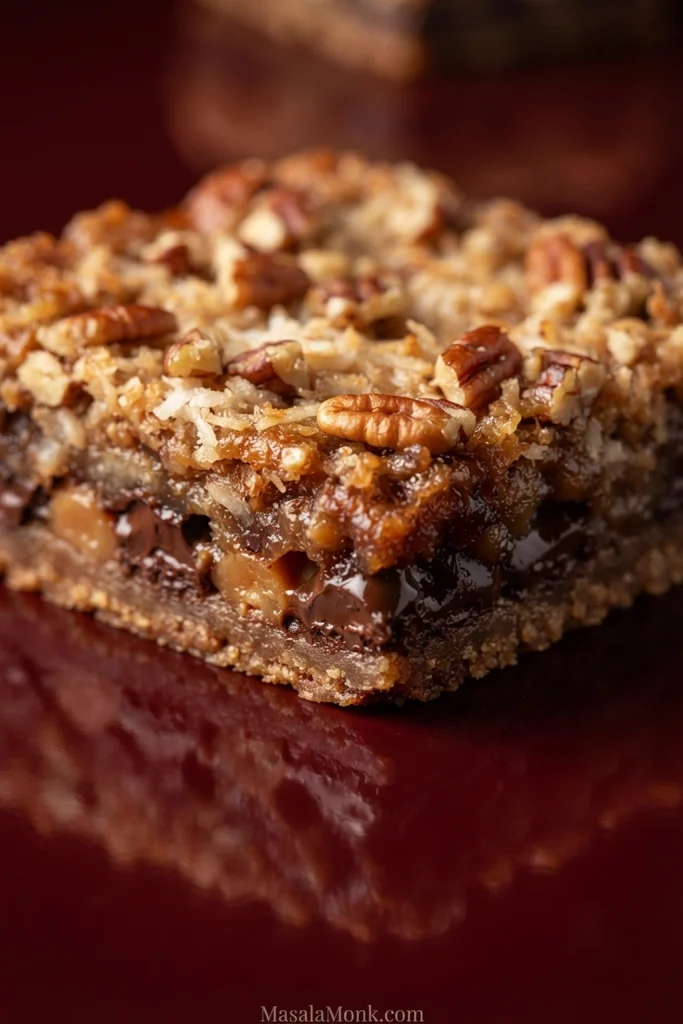
Look for bubbling golden edges, toasted patches of coconut, and a center that has set but still looks soft.
Set
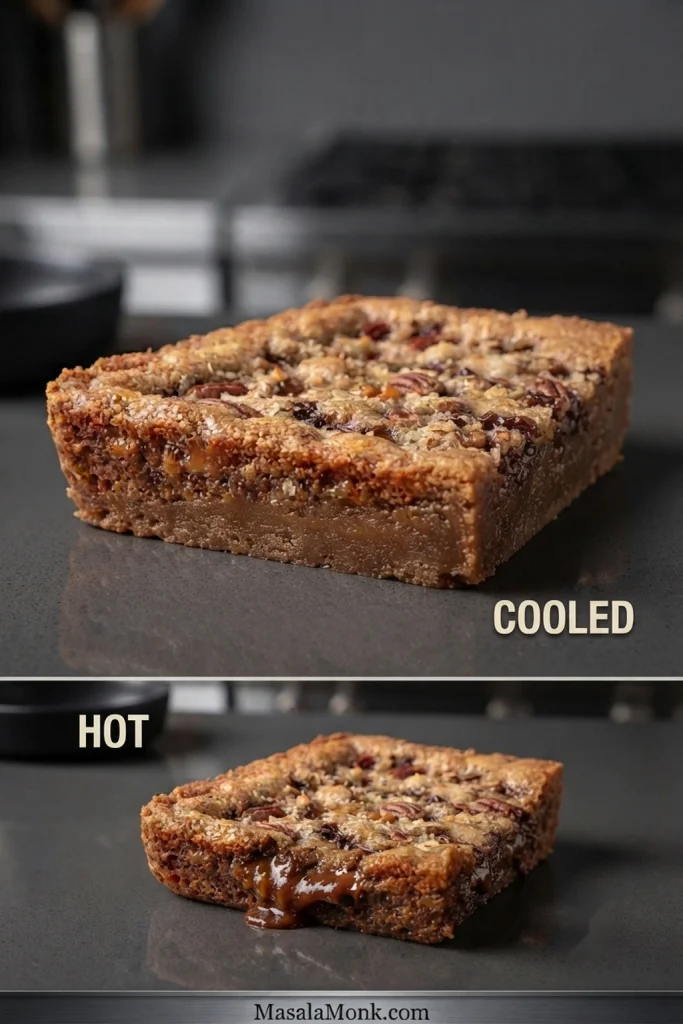
Give the bars 1½–2 hours before cutting. A batch that looks almost too soft while hot can become perfectly chewy as it cools.
Magic Cookie Bars Recipe
Classic 7 Layer Bars with a buttery graham crust, chewy center, and caramelized edges, balanced with semisweet chocolate, less butterscotch, and unsweetened coconut so they stay rich without becoming candy-sweet.
Total time: 2 hours 10 minutes to 2 hours 45 minutes, plus an optional 20–30 minute chill for very clean cuts.
Equipment
- 9×13-inch / 23×33 cm light-colored metal baking pan
- Parchment paper
- Mixing bowl
- Flat-bottom measuring cup or drinking glass for pressing the crust
Using a glass baking dish? The timing below is written for a light-colored metal pan. Follow your bakeware manufacturer’s temperature guidance and use the visual doneness cues instead of expecting the timing to transfer exactly.
Ingredients
- 2 cups / 200 g finely ground graham cracker crumbs
- ½ cup / 113 g unsalted butter, melted
- ¼ teaspoon fine sea salt
- 1 can sweetened condensed milk, 14 oz / 397 g, roughly 300 ml
- 1 cup / about 170 g semisweet chocolate chips
- ⅔ cup / about 110 g butterscotch chips
- 1¼ cups / about 105 g unsweetened desiccated coconut, fine shred
- 1 cup / about 105–110 g unsalted pecans, roughly chopped
Method
1. Heat the oven and line the pan
Heat the oven to 350°F (175°C) with a rack in the middle. Line the pan with parchment, leaving enough overhang to lift out the cooled bars.
2. Make the crust
Mix the graham crumbs, butter, and salt until evenly moistened and able to clump when squeezed. Scatter the mixture across the pan, then press gently with a flat-bottom cup until the crust is level, cohesive, and no longer shifts.
3. Add most of the condensed milk
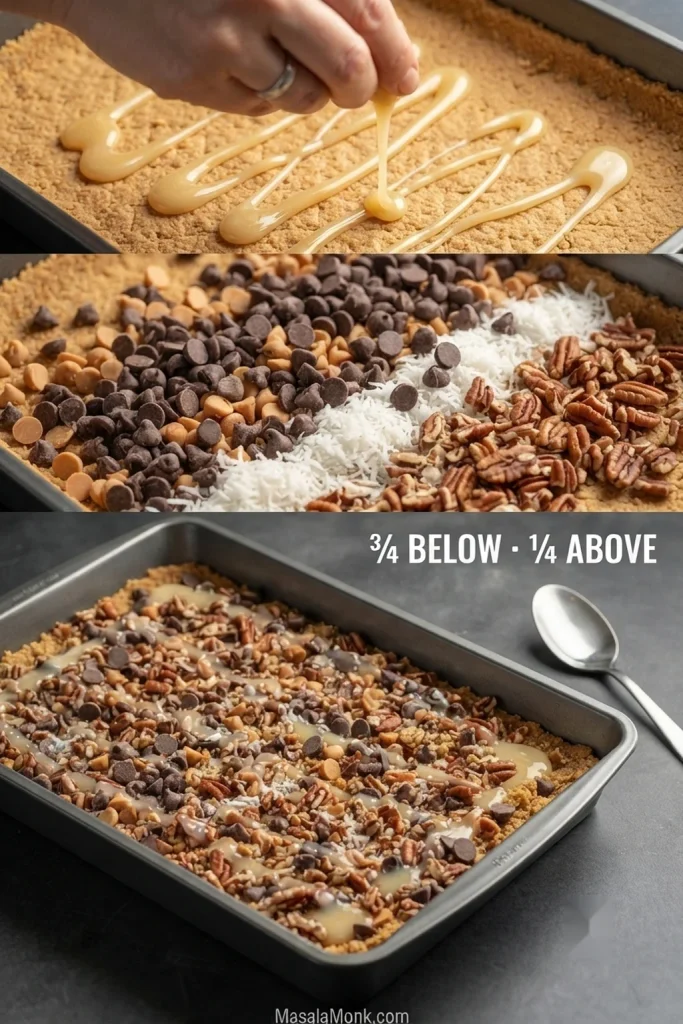
Reserve about one-quarter of the can, roughly 100 g. Pour the rest over the crust in thin ribbons. If the condensed milk is very thick, transfer it to a microwave-safe bowl or measuring jug and warm it for 10–15 seconds so it flows without dragging up crumbs.
4. Layer the toppings
Scatter the chocolate chips, butterscotch chips, coconut, and pecans evenly over the surface, including the corners.
5. Finish with the reserved milk
Drizzle the reserved condensed milk across the toppings and press very lightly so the loose pieces make contact with the sticky layers beneath.
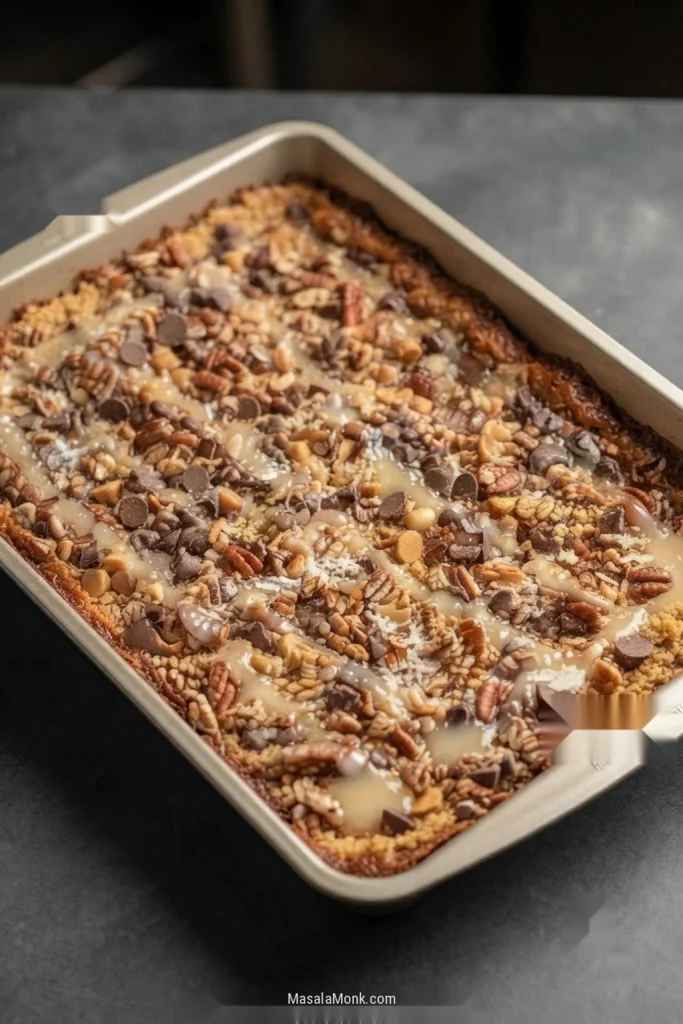
Before baking: the bars should look generous and slightly unruly, with the toppings evenly scattered and lightly anchored by ribbons of condensed milk.
6. Bake
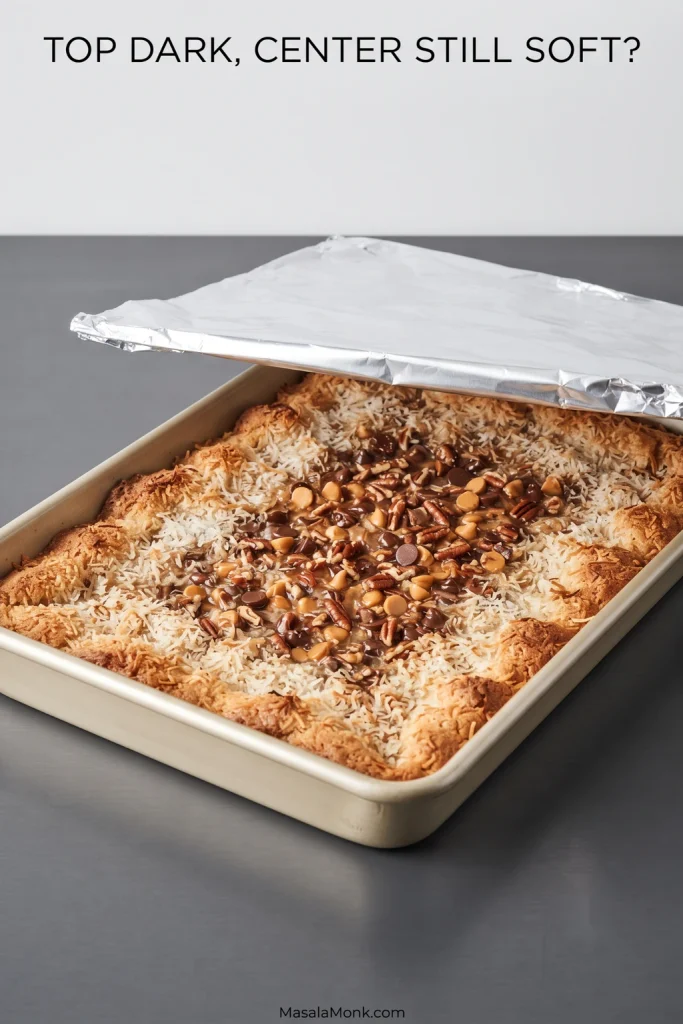
Start checking at 20–22 minutes. Most batches will take 25–30 minutes. Pull the bars when the perimeter is visibly bubbling and golden-brown, the coconut has toasted in patches, and the center looks set but still soft.
If the coconut darkens before the center is ready, lay a loose sheet of foil over the top and let the middle finish baking.
7. Cool and cut
Let the bars cool for 1½–2 hours. Lift the slab out with the parchment and cut it into 24 bars. If you want especially neat edges, use the optional chilling and cutting method in the guide below.
The recipe above gets you to the finished bars; the guide below explains why the layers behave the way they do, how to read the bake, and how to fix the problems that most often show up.
In This Guide
Build the Bars
Bake & Cut
What Are the Seven Layers, Really?
Magic Cookie Bars, Seven Layer Bars, and Hello Dolly Bars are essentially the same dessert family. Their formulas have moved through recipe boxes, community cookbooks, holiday trays, and condensed-milk labels for decades, so two households can remember the “same” bar a little differently.
By the late 1960s, Borden was already promoting Magic Cookie Bars made with Eagle Brand sweetened condensed milk, helping cement the name in American home baking. That familiar combination still appears in Eagle Brand’s Seven Layer Magic Cookie Bars.
You can see the “magic” in the method: ordinary pantry ingredients are layered straight into the pan and bake into one cohesive bar without making a conventional cookie dough.
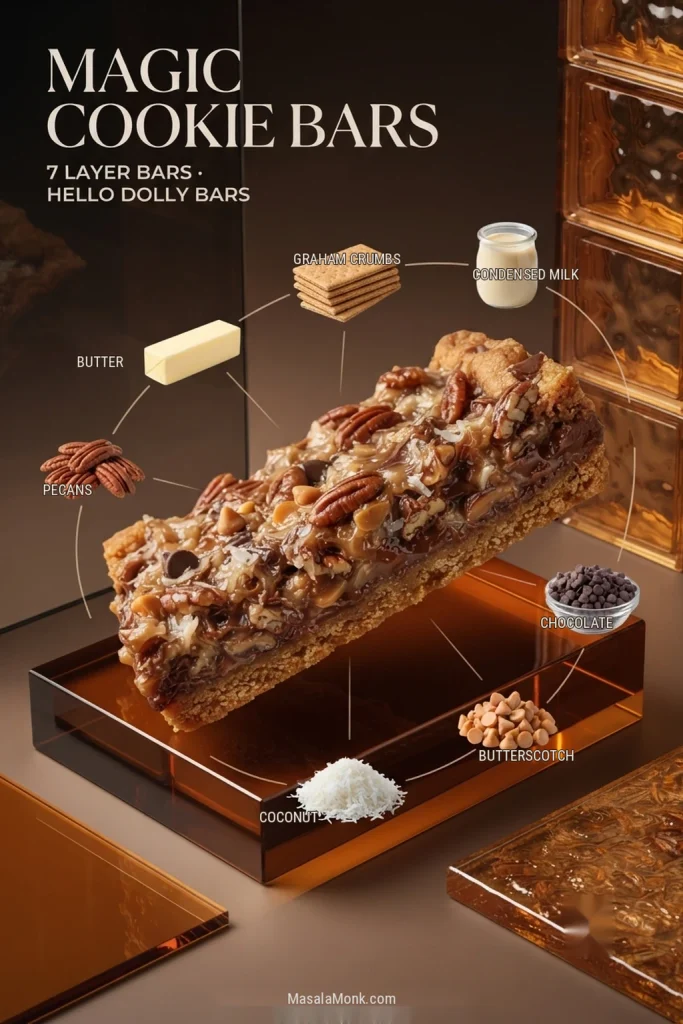
Traditionally, the seven-count treats these as separate layers:
- Butter
- Graham cracker crumbs
- Sweetened condensed milk
- Chocolate chips
- Butterscotch chips
- Coconut
- Pecans or walnuts
Butter and crumbs become one crust, of course, so you should not expect seven perfect stripes when you cut the bars.
Ingredients That Matter Most
Graham Crust
Finely ground graham crumbs matter more than an extra round of pressing. They absorb the butter more evenly and settle into a cohesive base without needing to be packed hard.
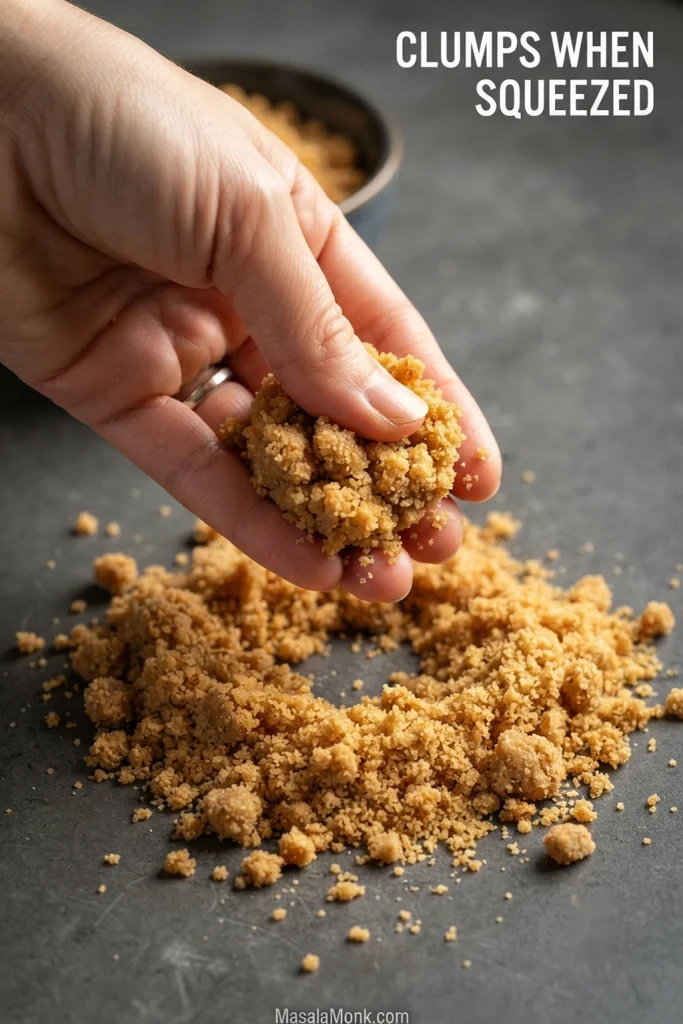
Do you need to pre-bake the crust? Not for this method. The base bakes with the toppings; press it just until level and cohesive.
Sweetened Condensed Milk
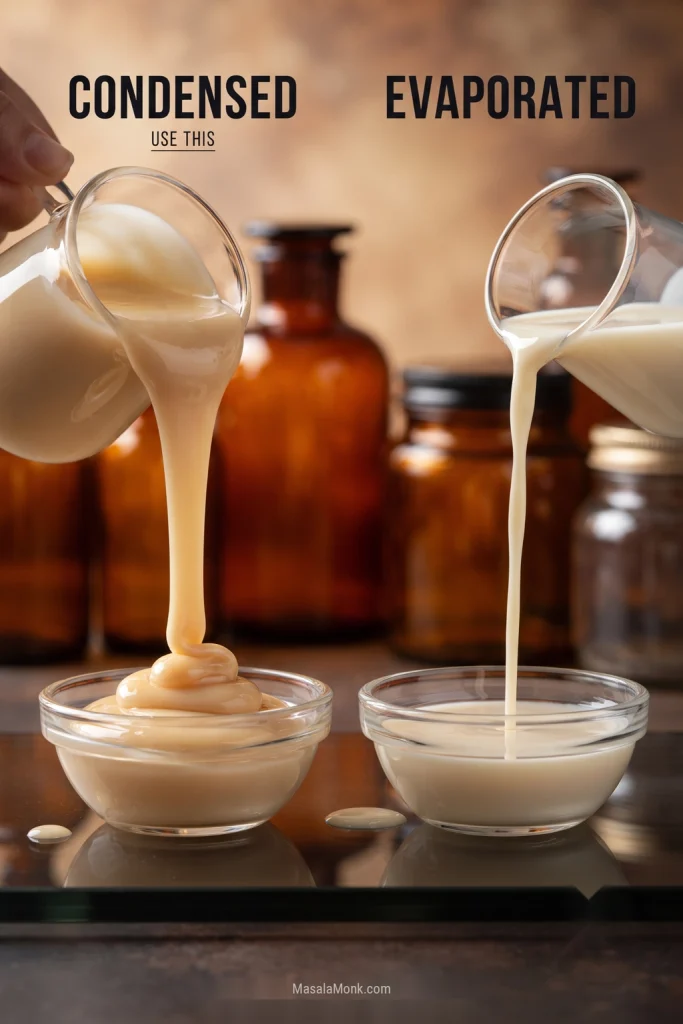
Use sweetened condensed milk, not evaporated milk. Its thick, concentrated texture becomes sticky and caramelized in the oven and helps hold the layers together.
Chocolate, Butterscotch, Coconut & Pecans
Semisweet chocolate and unsweetened coconut keep the filling from becoming one-note sweet. Butterscotch stays for its familiar caramel flavor, just in a smaller amount than many old-school formulas use. Pecans bring toasted crunch, while a little salt keeps the richer layers from tasting flat.
That balance matters in the finished bar: toasted coconut and pecan crunch should still register against the chocolate instead of disappearing into one flat sweetness. Sweetened coconut works too if that is the version you remember; expect a sweeter result and keep an eye on the exposed strands as they brown.
Changing the coconut, nuts, or chips? Jump to the substitutions that make sense before you start swapping.
Condensed Milk First or Last?
Classic Magic Cookie Bar recipes disagree about where the condensed milk belongs. Some pour it directly over the crust; others drizzle it over the toppings.
This recipe splits the can: about three-quarters goes over the crust and the remaining quarter over the toppings. That keeps most of the condensed milk against the graham base while still leaving some to run across the loose coconut and pecans.
Building the bars now? Return to the recipe method.
Keep the Sweetness in Balance
The easiest way to make Magic Cookie Bars less sweet is to keep the full can of condensed milk, then use semisweet chocolate, less butterscotch, and unsweetened coconut.
Keeping the condensed milk matters because it also helps hold the layers together. Meanwhile, pecans and salt add contrast, and smaller pieces help too. This is one of those desserts where a modest square often tastes better than a heroic one.
For a darker chocolate note, replace part of the semisweet chips with bittersweet chocolate. Sweetened coconut takes the bars toward the more candy-like style many people remember from holiday trays.
Don’t Judge These Bars by the Clock
The clock gives you a window; the surface tells you when the bars are ready. Start checking at 20–22 minutes, with most metal pans finishing around 25–30 minutes.
The perimeter should be actively bubbling and turning golden-brown. Exposed coconut will toast in patches before the whole surface changes color, while the middle should lose its liquid look without becoming firm.
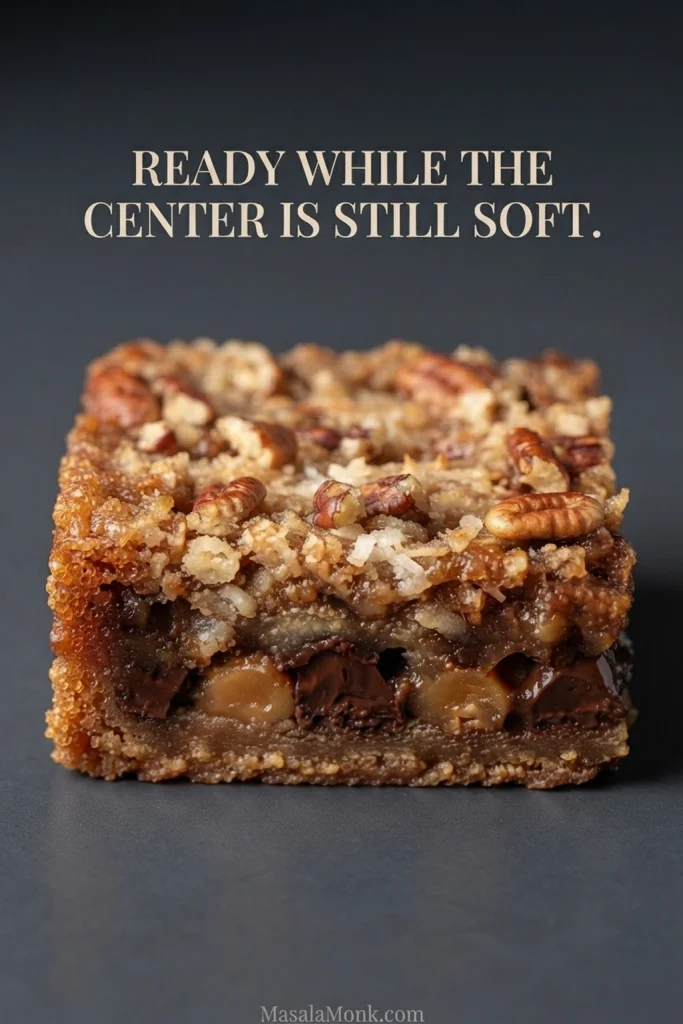
The center is supposed to make you hesitate a little. Waiting until it looks dry or rigid risks taking the bars beyond the soft, chewy texture they develop as they cool.
The Bar Isn’t Finished When It Leaves the Oven
Fresh from the oven, the chocolate is melted, the condensed-milk layer is very soft, and the graham base is still fragile. The kitchen may already smell as though dessert is finished, but the texture is not there yet.
As the bars cool, those loose-looking layers settle into one chewy slab. That is why a hot batch can look suspiciously underdone even when the bake was right. The hardest instruction in the whole recipe may be simply leaving it alone.
How to Cut Clean Magic Cookie Bar Squares
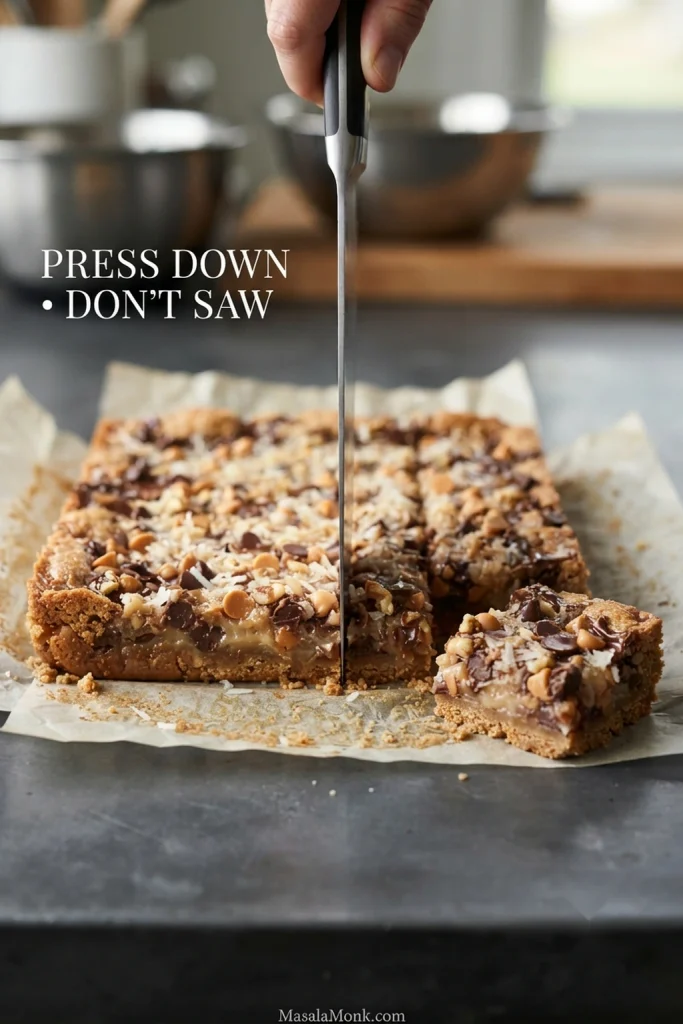
For very neat edges, chill the completely cooled slab for 20–30 minutes. Lift it out with the parchment, then press a long, sharp knife straight down through the layers. Wipe the blade whenever sticky filling begins to build up.
- 24 pieces: regular dessert bars
- 30–36 pieces: potlucks, bake sales, and parties
- 40–48 pieces: small cookie-tray bites
Troubleshooting Magic Cookie Bars
Why are my Magic Cookie Bars falling apart or still gooey?
Warm bars are naturally much softer than cooled ones. If the center had begun to set before the batch came out, let the bars cool fully before deciding they are underbaked. A center that was still visibly fluid usually needed more oven time.
Loose toppings can also make a square fall apart. The finishing drizzle and gentle press before baking help the upper layers settle together.
Why is the crust crumbly—or too hard?
A crumbly crust usually points to coarse crumbs, uneven butter distribution, very light pressing, or cutting too early. By contrast, a hard crust usually means the base was packed too firmly.
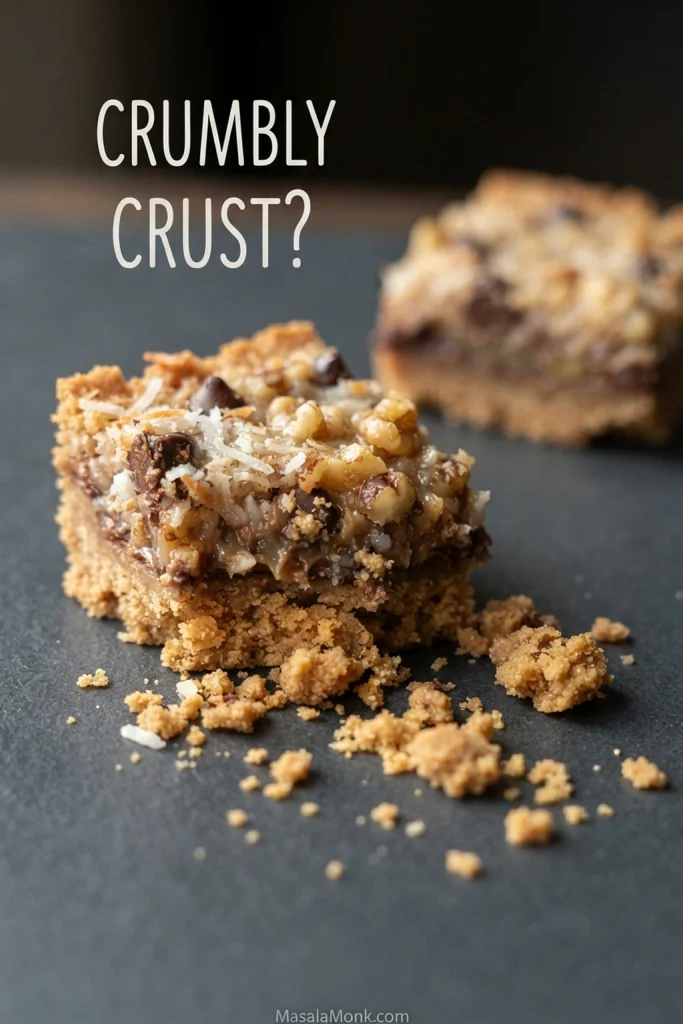
Use finely ground crumbs and mix until evenly moistened. Once the base is level and stops shifting beneath the measuring cup, stop pressing.
Why is the crust greasy?
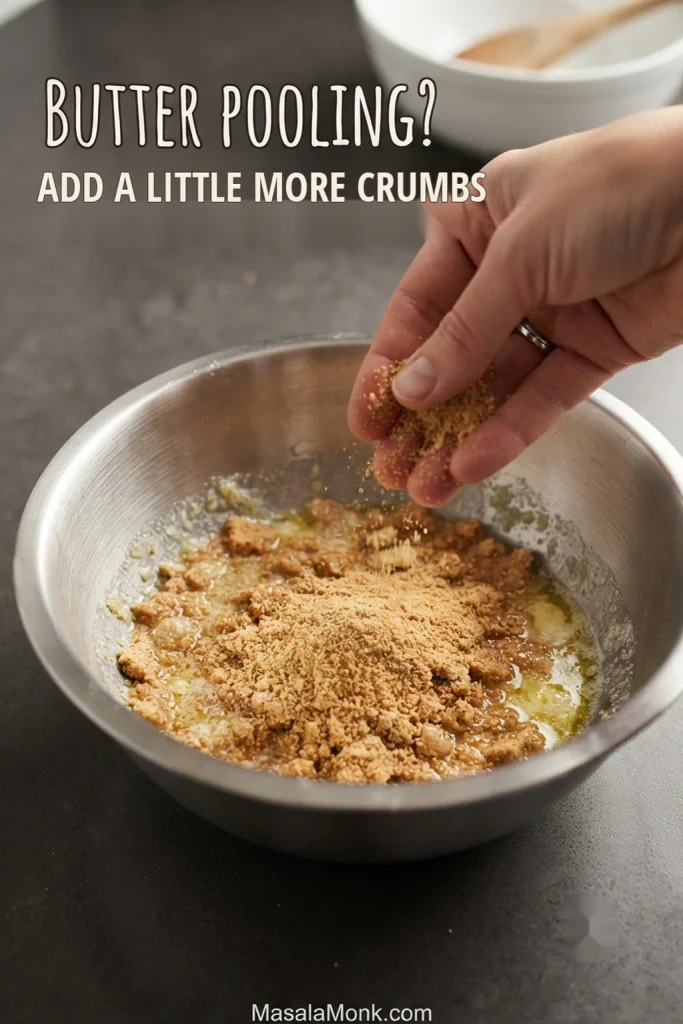
Visible butter pooling before baking means the crumbs are not absorbing all of it. If that happens, mix in a small amount of additional graham crumbs until the free butter is absorbed and the mixture looks evenly moistened again. Measuring the crumbs by weight helps prevent the problem in the first place.
Why is the coconut dark before the center is ready?
The exposed coconut is browning faster than the filling is setting. Lay a loose sheet of foil over the top and continue baking until the center has set but remains soft.
Quick fixes for a few other problems
- Condensed milk pulls crumbs from the crust: warm it briefly and pour it in ribbons instead of repeatedly spreading it.
- Toppings fall off: use the reserved finishing drizzle and press the surface lightly before baking.
- Bars stick to the pan: line the baking pan with a parchment sling before building the layers.
Substitutions That Make Sense
Leaving out either coconut or nuts is straightforward; leaving out both removes a large share of the topping. When one ingredient disappears, replace texture only if you miss it instead of automatically filling the space with more sweet chips.
| Change | What to do |
|---|---|
| No coconut | Omit it. If the top feels sparse, add some extra pecan or coarsely crushed pretzel for texture. |
| No nuts | Leave them out for a softer bar, or use some crushed pretzel for crunch. |
| No coconut and no nuts | Removing both takes away a large amount of solid topping, so use a recipe specifically balanced for both omissions instead of treating them as a simple swap. |
| No butterscotch chips | Omit them for a more chocolate-forward bar, or replace only part of the amount with another chip or some toffee to keep the sweetness in balance. |
| Walnuts instead of pecans | Swap directly. |
| Less-sweet chocolate | Replace part of the semisweet chocolate with dark or bittersweet chips. |
| Sweetened coconut | Use the same general amount, but expect a sweeter result and potentially faster browning. |
| No graham crackers | Use plain digestive biscuits by weight. Brands vary in fat and crumb texture, so use the same clump test and adjust the butter slightly if the crumbs seem unusually dry or greasy. |
Brownie batter, blondie dough, and chocolate-chip-cookie dough are different kinds of bases, not simple graham-crust swaps. If a thick cookie-dough base is what you actually want, Cookie Pie is built around that deeper center and its longer bake.
Make Ahead, Store & Freeze
Magic Cookie Bars are easy to make a day ahead because the long cooling period is already part of the process. Once fully cool, they also stack and freeze neatly with parchment between layers.
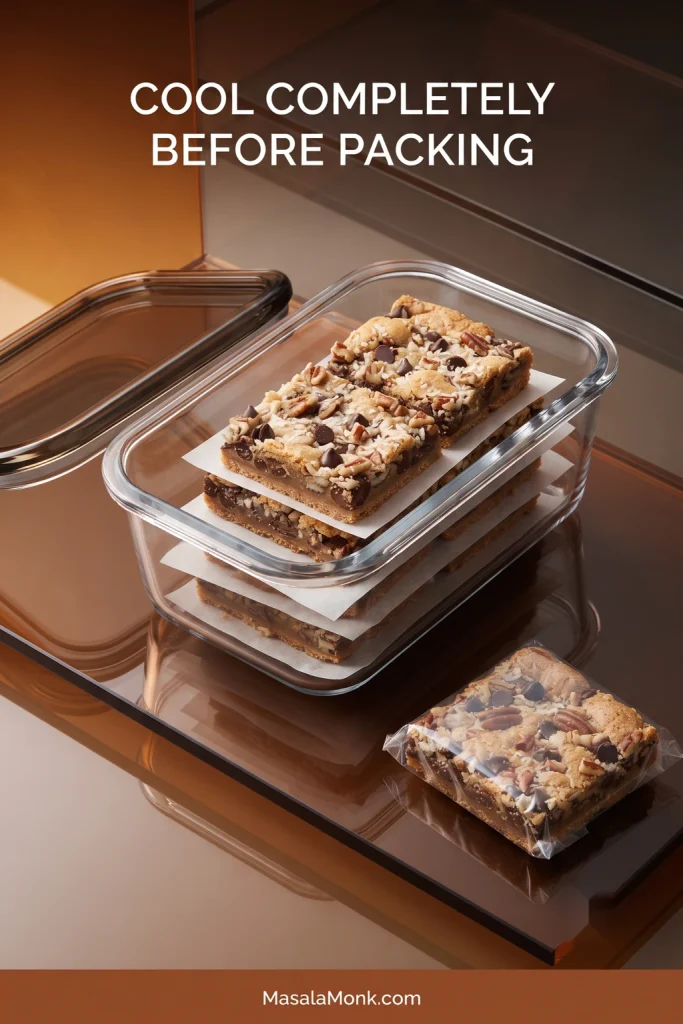
Room temperature: Keep completely cooled bars airtight for 3 days. Put parchment between stacked layers.
Refrigerator: Store airtight for up to 1 week. Let the bars sit briefly at room temperature when you want a softer, chewier texture.
Freezer: Freeze completely cooled bars airtight for up to 3 months, with parchment between layers or individual pieces wrapped separately.
Do not package or freeze the bars while they are warm. Trapped steam can soften the crust and leave condensation on the sticky surface.
For cookie trays, potlucks, bake sales, or holiday spreads, cutting the pan into 30–36 smaller bars keeps the portions manageable while preserving crust and toppings in every piece.
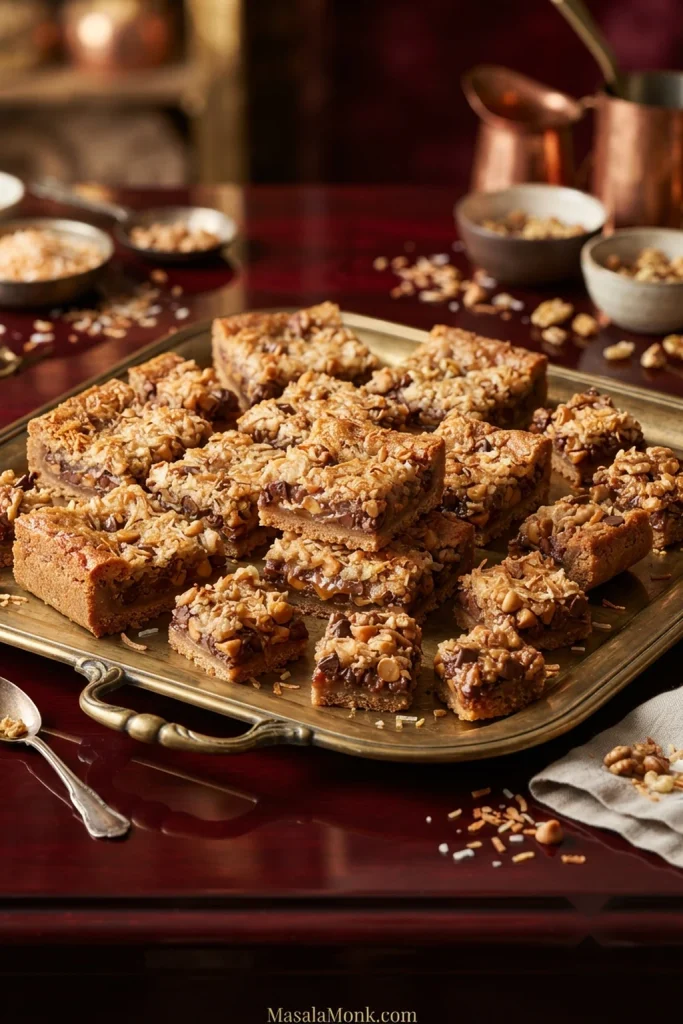
Whatever your family calls them, give the bars their full cooling time before deciding whether you got them right. By then, the messy-looking layers should have settled into what you wanted: a buttery graham base, chewy middle, toasted coconut, pockets of chocolate and butterscotch, and pecan crunch in every square.








