
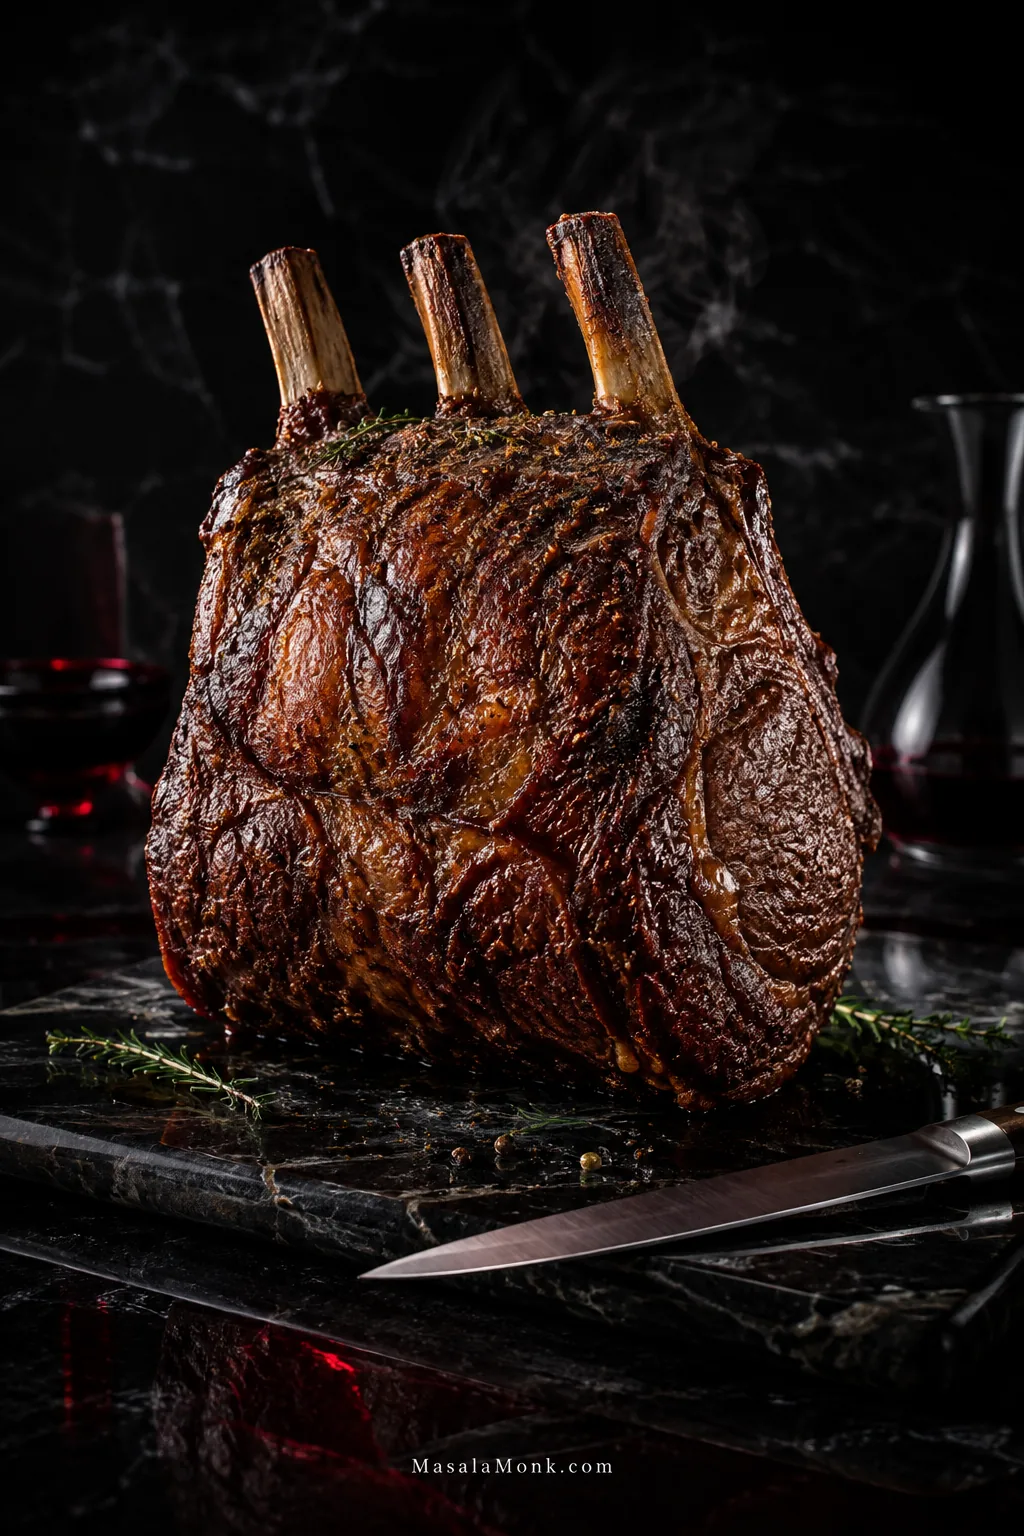
The moment that matters is the first cut. You want a dark, savory crust around warm pink beef, with softened fat at the edges and plenty of juice still inside the slice.
The difficult part is that you cannot see the middle while prime rib cooks. From the outside, the roast can look completely calm while the temperature inside is moving faster than expected. And when you’ve spent serious money on the beef and everyone is expecting dinner at seven, a minutes-per-pound formula only gets you so far.
So keep the process simple. Dry-brine a bone-in standing rib roast, give it a hot start for browning, lower the oven to 325°F (163°C), and watch the center as it approaches the doneness you actually want to eat.
Quick Answer
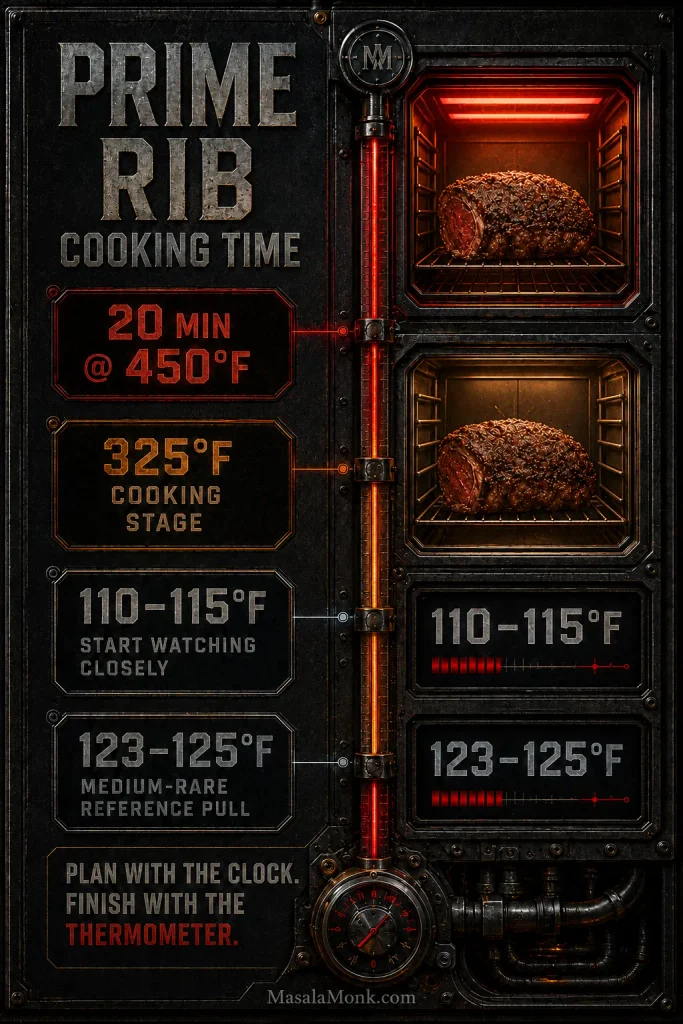
For a classic oven-roasted prime rib, start with a 7–8 lb (3.2–3.6 kg) bone-in standing rib roast. Dry-brine it uncovered for 24–48 hours if possible. Roast for 20 minutes at 450°F (232°C), lower the oven to 325°F (163°C), and continue until the center reaches your chosen pull temperature.
For a warm medium-rare center, use 123–125°F (51–52°C) as the reference pull range and rest for 25–35 minutes. That is intended to bring the center roughly into the 130–135°F (54–57°C) medium-rare zone after resting, although actual carryover varies from roast to roast.
Plan with time. Cook by temperature. Verify before you pull.
Make It Now
Prime Rib Roast
A bone-in prime rib with a deeply browned garlic-herb crust and tender pink center, cooked with a 450°F hot start and a gentler 325°F finish.
*For the reference roast. Thickness, shape, starting temperature, oven behavior and desired doneness all affect the timing.
Equipment
- Large, relatively shallow roasting pan, sturdy rimmed sheet pan or comparable oven-safe vessel
- At least one accurate meat thermometer
- Ideally, a leave-in probe thermometer plus an instant-read thermometer for cross-checking
- Sharp carving knife and large cutting board
Ingredients
- 1 bone-in standing rib roast, 7–8 lb (3.2–3.6 kg), usually 3 ribs
- 20 g salt
- 2 teaspoons coarsely ground black pepper
- 6 large garlic cloves, finely minced
- 1 tablespoon finely chopped fresh rosemary
- 1 tablespoon fresh thyme leaves
- 2 tablespoons (30 ml) avocado oil, extra-light olive oil or another neutral high-heat oil
Before You Start
- If the roast is frozen, start several days early. A 7–8 lb roast commonly needs about 2–3 days to thaw fully in the refrigerator before the dry brine.
- There is no need to leave the roast sitting out for hours. Take it from the refrigerator while you prepare the pan, seasoning and oven.
- Not sure about the thermometer? Check it in a properly prepared ice bath; it should read close to 32°F / 0°C.
- Position the oven rack so the center of the roast sits roughly around the middle of the oven.
- Keep the roasting pan dry. Wine or stock goes in later only if you make jus.
Method
Prep & Set Up
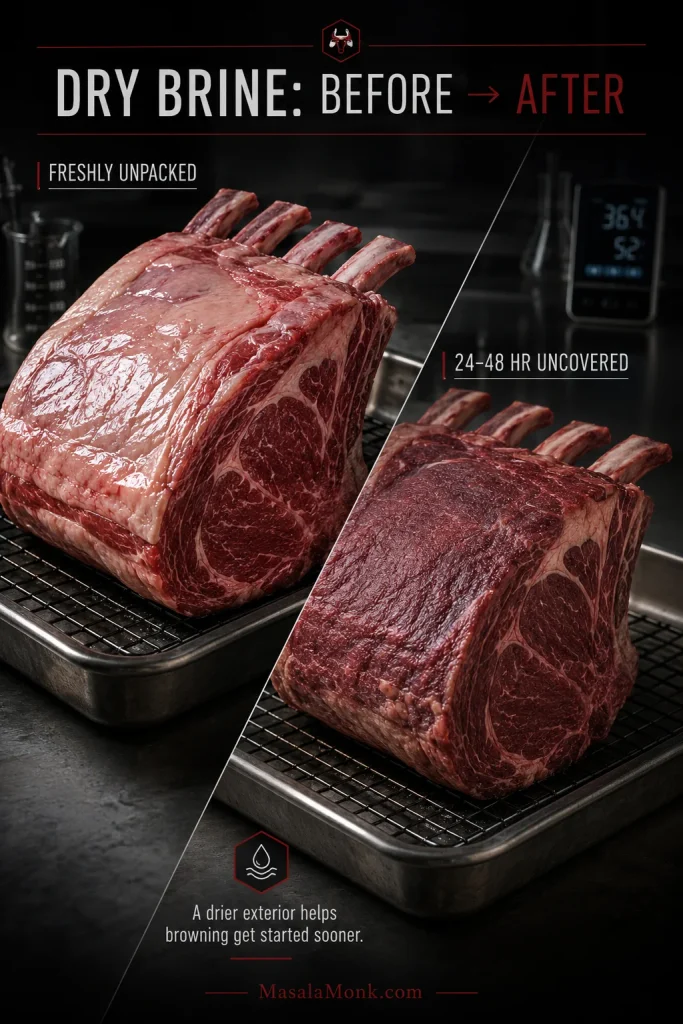
- Dry-brine the roast. Pat the beef dry and spread the measured salt evenly over the exposed meat and fat. Refrigerate bone-side down and uncovered for 24–48 hours. By cooking day, the surface should look matte rather than wet and feel dry or slightly tacky.
- Tidy the fat if needed. Leave a modest, even layer in place. Trim only unusually thick, hard deposits. There is no need to score the fat cap.
- Heat the oven. Preheat to 450°F (232°C). An oven that routinely finishes recipes early or late is worth checking with a separate oven thermometer.
- Make the garlic-herb coating. Mix the black pepper, garlic, rosemary, thyme and oil. Spread it thinly over the top and exposed sides. The dry brine has already supplied the salt.
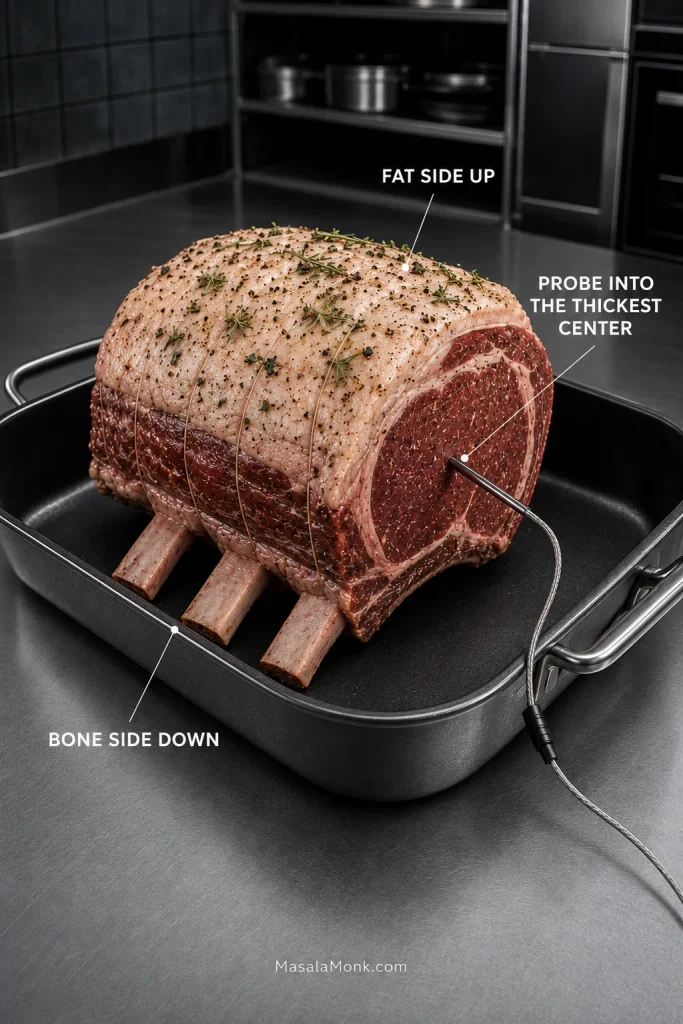
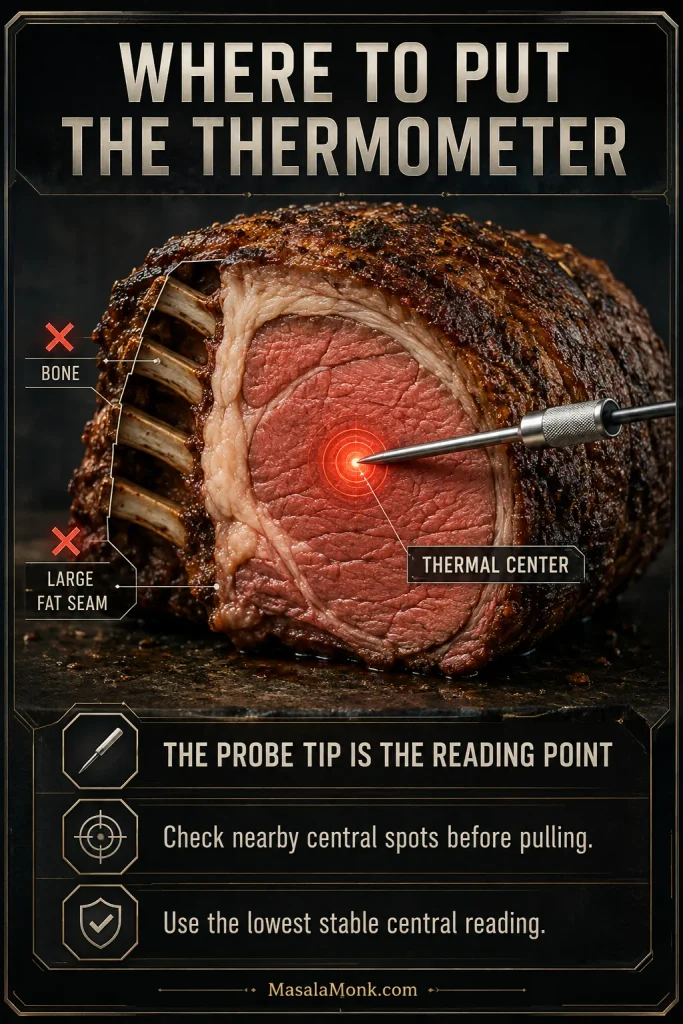
- Set up the roast. Place it bone-side down, fat-side up. Insert a leave-in probe, if using one, into the thickest central part of the meat, keeping the sensing tip away from bone and obvious fat seams.
Roast, Rest & Carve
- Give it a hot start. Roast at 450°F for 20 minutes. The fat should color and the kitchen should smell of roast beef, toasted pepper and herbs. Deep brown is good; loosely shield the darkest area if the garlic starts turning black.
- Lower the oven to 325°F (163°C). Continue roasting without removing the beef. A shallow pool of rendered fat is normal. If a deep pool starts smoking, remove some with a heatproof baster or ladle, leaving the browned bits behind.
- Start watching closely around 110–115°F (43–46°C) if you’re aiming for medium-rare. The roast may already look finished—dark crust, browned edges and glossy fat—even though the center still has its last stretch to go.
- Confirm the center before pulling. As the center approaches 123–125°F (51–52°C), check two or three nearby central spots before taking the roast out.
- Rest for 25–35 minutes. Move the roast to a carving board and rest it uncovered. Leaving it uncovered helps preserve the crust. This is a good time to make a bowl of creamy horseradish sauce for prime rib.
- Carve just before serving. Remove the twine and rib slab if needed, then slice across the grain. Around ½ inch (1.25 cm) works well for generous portions. A little juice on the board is normal.
Food-safety note: A 123–125°F pull temperature is below USDA’s recommendation for whole beef roasts. USDA advises 145°F / 63°C followed by at least a 3-minute rest. For higher-risk diners, follow USDA guidance rather than the rare or medium-rare culinary targets used here.
Different size or doneness? See the Time & Temperature Guide →
Explore the Prime Rib Guide
If the roast is already in your kitchen and dinner just needs to get moving, the recipe above is enough. The rest is here when you need a buying decision, a timing answer or help with something that is not going to plan.
Choosing the Right Prime Rib Roast
What Is Prime Rib?
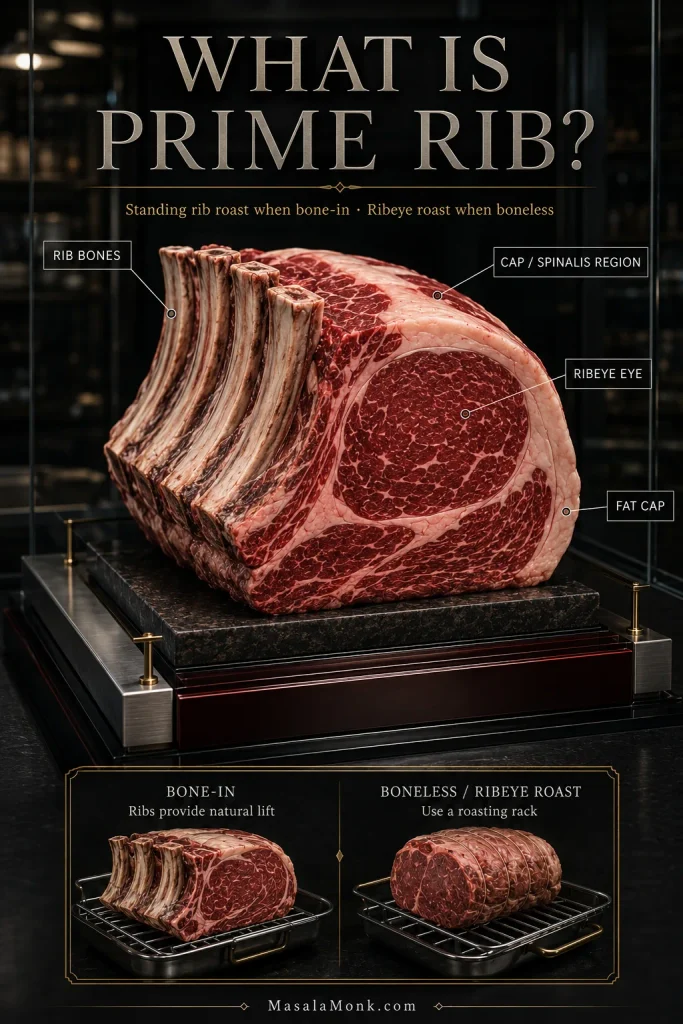
Prime rib is a large roast cut from the beef rib section. With the bones attached, it is commonly sold as a standing rib roast. Ribeye steaks come from the same broader section, and a boneless roast from this area may be labeled a ribeye roast.
The word “prime” in prime rib does not mean the beef has to carry a USDA Prime grade. USDA Prime generally has heavier marbling and a higher price. A well-marbled USDA Choice roast is also a very good option, so look at the meat as well as the grade on the label.
Look for fine streaks of fat running through the meat rather than focusing only on the fat cap outside. That internal marbling is a big part of the cut’s richness and tenderness.
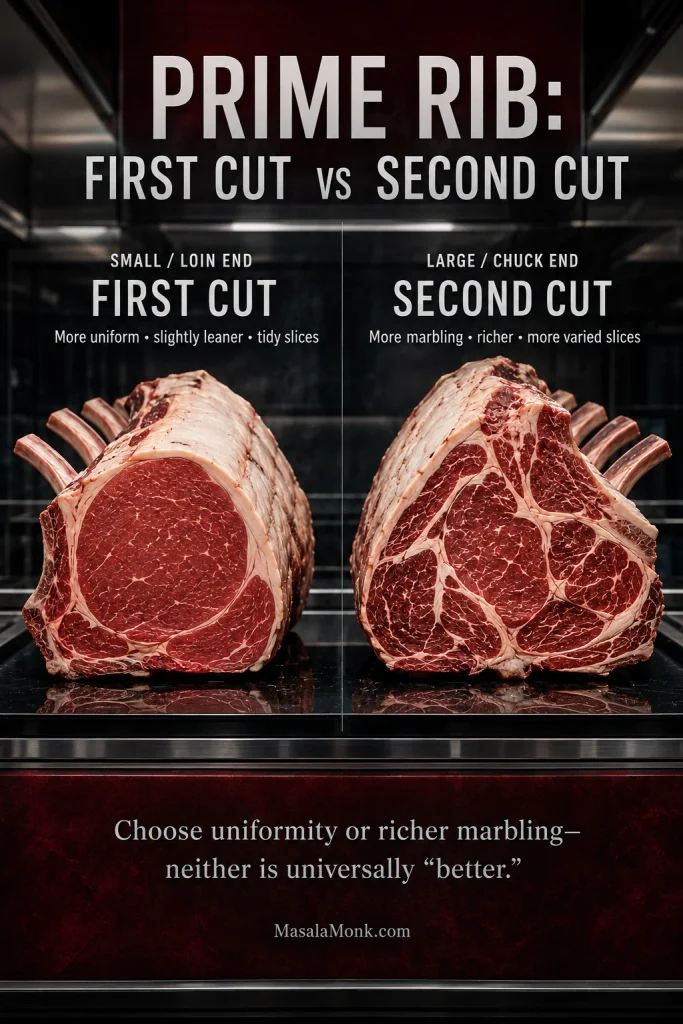
Small End or Large End?
| Cut | What It Is Like |
|---|---|
| Small / loin end (first cut) | More uniform in shape, a little leaner and particularly tidy when sliced |
| Large / chuck end (second cut) | More seams and muscles, often richer in marbling with a beefier, more varied slice |
If both are in the case, choose the small end when neat, uniform slices matter most. Choose the large end when you would rather have more marbling and don’t mind a more irregular slice.
Bone-In or Boneless?
The bone-in roast is the default here. Its ribs lift much of the meat from the pan and give you the classic standing-rib presentation.
Boneless rib roast works well too. Set it on a rack and don’t expect the bone-in timing table to match exactly; shape and thickness matter more than a simple bone-versus-no-bone rule.
Dry-aged beef and unusually thick or narrow roasts may not track neatly with a generic weight chart, so give yourself a wider timing window.
How Much Prime Rib Per Person?
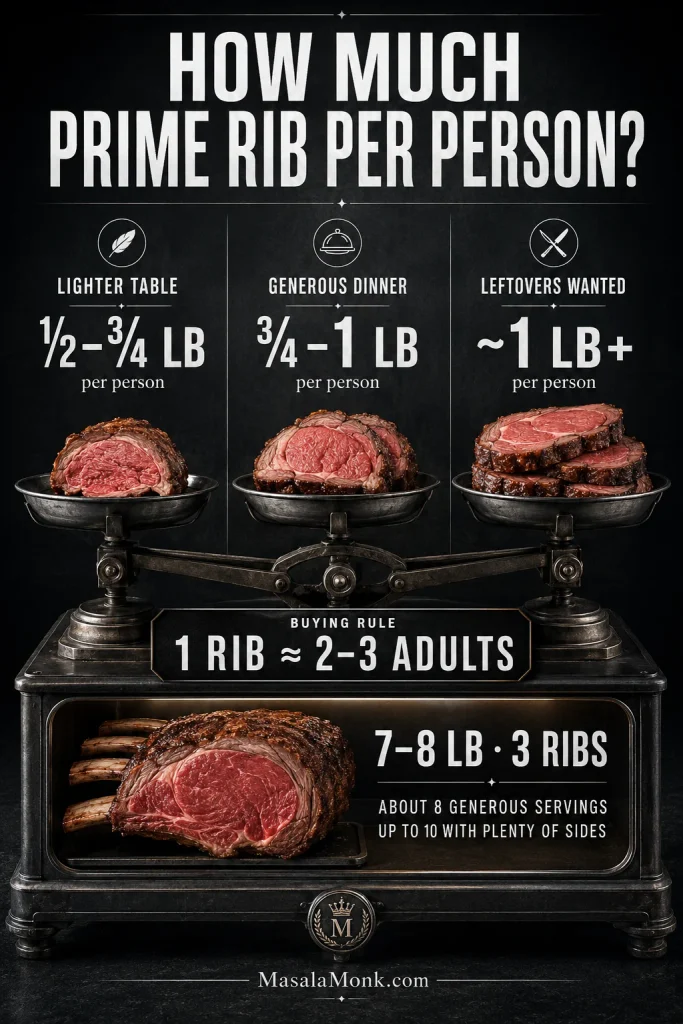
At the butcher counter, one rib for roughly every 2–3 adults is a useful starting point. Weight and the rest of the menu let you fine-tune from there.
| Meal | Bone-In Prime Rib to Buy |
|---|---|
| Lots of sides / lighter portions | ½–¾ lb (225–340 g) per person |
| Generous dinner | ¾–1 lb (340–450 g) per person |
| Big appetites / definite leftovers | About 1 lb (450 g) or a little more per person |
A 7–8 lb three-rib roast is comfortable for around 8 people at a generous dinner and can stretch toward 10 with plenty of substantial sides.
What to Ask Your Butcher
“I’d like a 3-rib bone-in standing rib roast, around 7 to 8 pounds. If possible, please remove the chine bone, cut the rib bones away in one slab, and tie them back onto the roast.”
You may hear this called cut and tied. The ribs stay underneath while the beef roasts, but carving becomes much easier afterward. An intact roast cooks just fine too; remove the bones before slicing.
Frenching simply trims meat and fat from the exposed ends of the ribs for presentation. It is cosmetic.
Go to Recipe Card →·Season & Dry-Brine →
Prime Rib Seasoning, Salt & Dry Brining
Once the roast is sorted, seasoning is straightforward. Beef this rich does not need a complicated rub.
Salt does most of the important work. Black pepper, garlic, rosemary and thyme build the savory crust without burying the flavor of the beef.
How Much Salt?
Use about 0.6% salt by total bone-in weight, or roughly 6 g per kilogram, as the moderate baseline for this recipe. For the 7–8 lb reference roast, 20 g is the recipe amount.
Salt can always be added to a slice at the table. You can’t take it back out of the roast.
| Salt | Approximate Volume for 20 g |
|---|---|
| Diamond Crystal kosher salt | About 2 Tbsp + 1¼–1⅓ tsp |
| Morton coarse kosher salt | About 1 Tbsp + 1¼ tsp |
| Morton Fine Sea Salt | About 1 Tbsp + ½ tsp |
These salts pack very differently, so the spoon measures are approximate. Weighing the salt is simpler if you have a kitchen scale.
Give the Salt Time
Salt the roast 24–48 hours before cooking and leave it uncovered in the refrigerator. That uncovered refrigerator time dries the exterior, helping browning get started sooner once the roast reaches the oven.
Missed the overnight step? Season with the same amount of salt and carry on. You lose some dry-brining time, not the meal.
Garlic, Herbs, Butter and Marinades
Keep the later garlic-herb coating unsalted. Dry brine plus a salty steak rub, garlic salt or salted butter can add up quickly.
Herb butter works in plenty of prime rib recipes. For this hot-start version, a small amount of high-heat oil carries the garlic and herbs without putting a thick butter layer through the 450°F stage.
Skip the wet marinade here. The beef already has plenty of flavor, and a relatively dry surface is what we want for browning.
Roasting Pan, Rack & Thermometers
One accurate meat thermometer is the essential tool. A leave-in probe plus an instant-read thermometer is the ideal setup because one tracks the roast while the other lets you check nearby spots as the center gets close.
Choose a roasting vessel with some clearance around the beef and without very high sides crowding it. The bones lift much of a bone-in roast from the pan, so a separate rack usually isn’t necessary. Boneless roasts should sit on one.
Keep the pan dry during roasting. Water or stock goes in later, when the browned bits become jus.
← Recipe Card·Cooking Time & Temperature →
What This Cooking Method Gives You
The first 20 minutes push the outside toward browning. Lowering the oven to 325°F afterward gives you a gentler run toward the final center temperature.
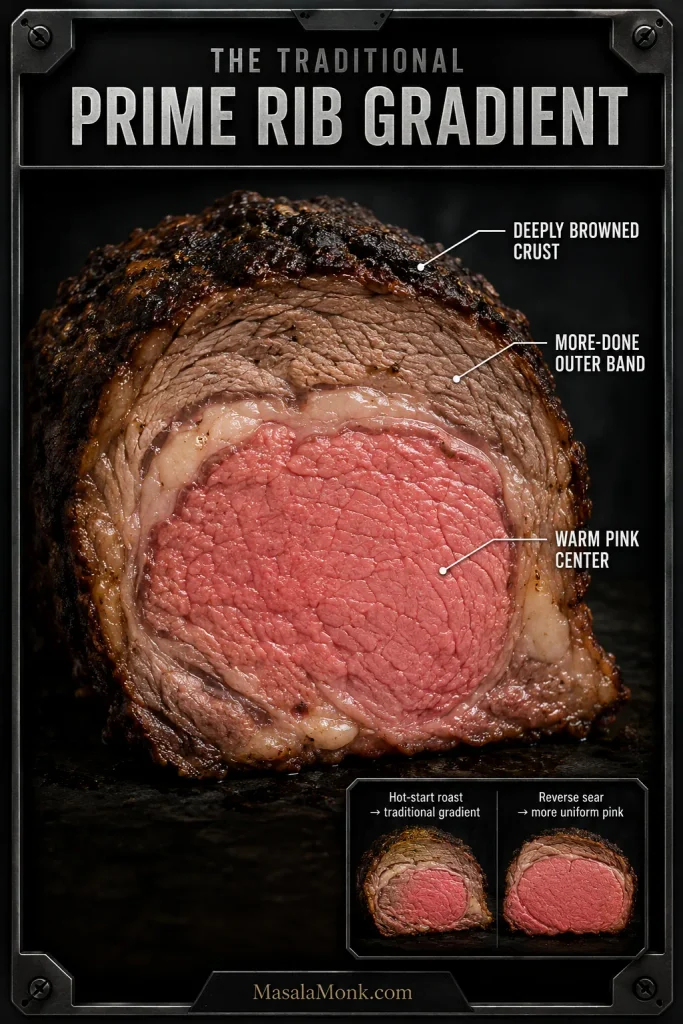
The result is a traditional doneness gradient: deeply browned outside, more-done beef near the edges, and progressively pinker meat toward the middle. That variation is useful when not everyone at the table likes their beef exactly the same way.
A low-temperature reverse sear is a better fit if your priority is an almost uniformly pink roast from edge to edge.
Keep one cooking method together. Several prime-rib methods work, but their timing, pull temperatures and resting logic aren’t interchangeable. The numbers below belong to this 450°F → 325°F approach.
Prime Rib Cooking Time & Temperature
Two roasts can weigh the same and still finish at different times because thickness matters. The table below is for planning the day, not deciding when the beef comes out of the oven.
These ranges assume a fully thawed roast taken from the refrigerator while you prepare the pan and oven, followed by 20 minutes at 450°F (232°C) and then 325°F (163°C). A roast left on the counter for hours is starting from different conditions.
That short setup period out of the refrigerator is intentional. Controlled testing of large cuts has found little meaningful advantage to leaving them out for hours before cooking.
Prime Rib Cooking Time by Weight
| Bone-In Roast | Approx. Servings | Rough 325°F Stage — After 20-Min Hot Start |
|---|---|---|
| 3–4 lb / 1.4–1.8 kg | 3–5 | 45–70 min |
| 5–6 lb / 2.3–2.7 kg | 5–7 | 75–105 min |
| 7–8 lb / 3.2–3.6 kg | About 8; up to 10 with sides | 105–140 min |
| 9–10 lb / 4.1–4.5 kg | 9–12 | 135–175 min |
| 11–12 lb / 5–5.4 kg | 11–14 | 165–205 min |
Begin checking is the useful idea, not a magic minute. With a leave-in probe, start paying close attention once the center reaches roughly 110–115°F (43–46°C). If you’re using only an instant-read thermometer, begin checking well before the earliest planning time instead of waiting for the chart to tell you the roast should be done.
Very small and very large roasts become harder to predict from weight alone because shape starts to dominate.
What about minutes per pound? You’ll often see a minutes-per-pound formula offered for prime rib, but published guidance varies considerably because starting temperature, roast shape, oven behavior and desired doneness all move the result. Use it only as rough scheduling shorthand—not as a stop rule.
Using convection or fan assist? Moving hot air can speed cooking and deepen browning. Give yourself an earlier checking window rather than expecting the conventional-oven timing above to transfer exactly.
Prime Rib Doneness & Pull Temperature
These are culinary doneness targets, not USDA food-safety minimums. The ranges assume this hot-start method and a substantial rest afterward.
| Doneness | Approx. Pull Temperature | What the Center Looks Like |
|---|---|---|
| Rare | 115–120°F / 46–49°C | Deep red to red-pink |
| Medium-rare | 123–125°F / 51–52°C | Warm red-pink |
| Medium | 130–133°F / 54–56°C | Warm pink |
| Medium-well | 138–142°F / 59–61°C | Faint pink to mostly browned |
For this method, pulling around 123–125°F (51–52°C) for medium-rare is intended to bring the rested center roughly into the 130–135°F (54–57°C) range. Actual carryover varies with the roast and the heat it just left, so treat that rested range as an expectation rather than a guarantee.
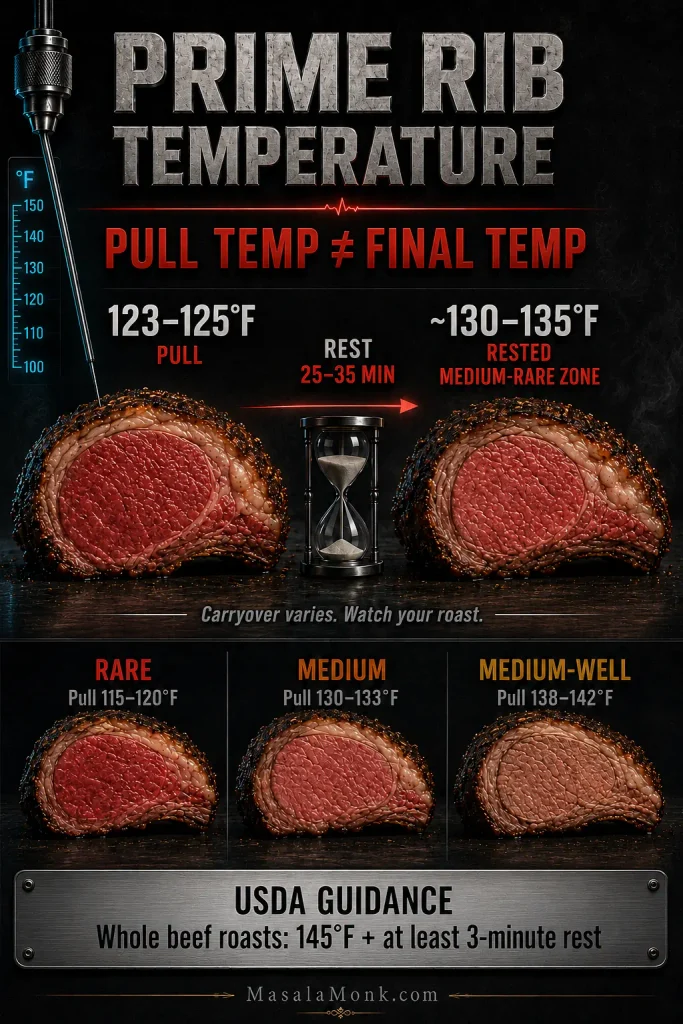
Prefer the center noticeably rosier? Pulling closer to 120–122°F moves the result toward the rare side of medium-rare. Leave the probe in for the first few minutes of resting if your thermometer allows it and see how far your roast actually climbs.
USDA food-safety guidance: USDA recommends whole beef roasts reach 145°F / 63°C with at least a 3-minute rest. Traditional rare and medium-rare prime rib is served below that recommendation. For anyone at higher risk from foodborne illness, don’t use the rare or medium-rare culinary targets above; follow USDA guidance and any medical advice specific to that person.
Where the Thermometer Goes
Insert the sensing tip into the thickest central part of the roast, clear of bone, the pan and large seams of fat. On a roast this thick, you are looking for the coolest thermal center.
Near your pull temperature, check a few nearby central spots. Use the lowest stable central reading rather than a hotter reading from closer to the exterior.
If the Number Looks Wrong
A thermometer is essential. A thermometer can also be wrong.
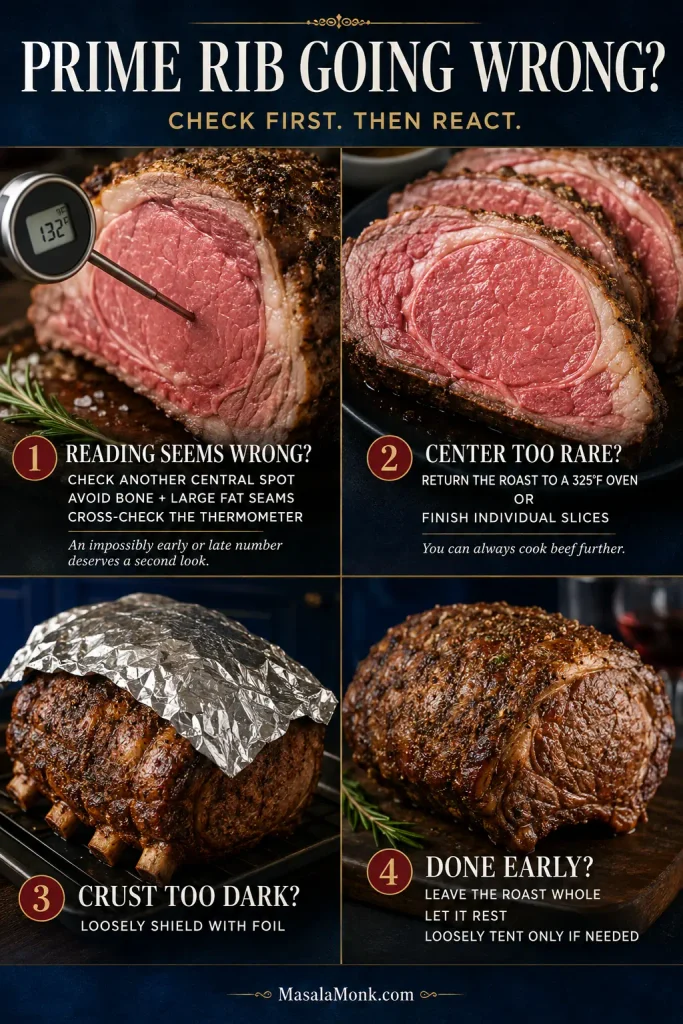
An impossibly early or late number deserves a second look before you change the oven. Check another central spot, make sure the probe is clear of bone and fat, and cross-check with a second thermometer if you have one. A cool oven or incompletely thawed center can also explain strange timing.
← Recipe Card·Plan a 7 PM Dinner →·Fix a Problem →·↑ Back to top
When Should I Start Prime Rib for Dinner?
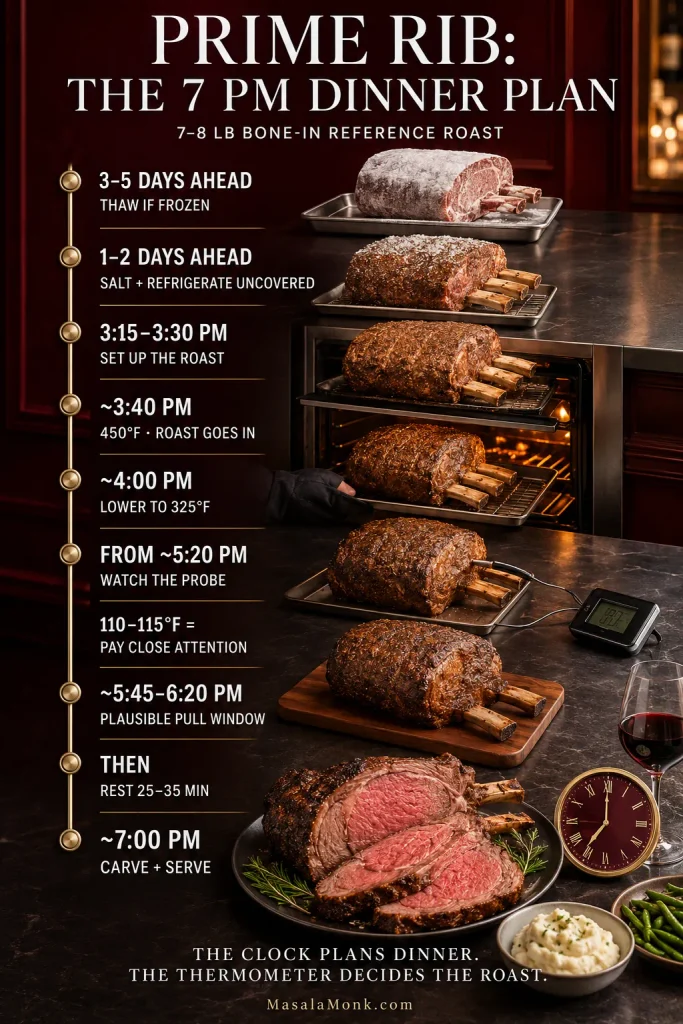
If dinner is at 7 PM, you need a window rather than one magic starting time. Nobody wants every side dish finished at 6:50 while the thermometer in the roast is still sitting at 108°F.
For the 7–8 lb reference roast, starting a little earlier gives you room for an unpredictable oven, a slower roast and the full resting time without turning the final hour into a race.
| Approx. Time | What to Do |
|---|---|
| 3–5 days ahead, if frozen | Begin thawing the roast in the refrigerator |
| 1–2 days ahead | Salt and refrigerate uncovered |
| 3:15–3:30 PM | Set up the roast, pan, seasoning and thermometer |
| Around 3:40 PM | Roast goes into the 450°F oven |
| Around 4:00 PM | Lower the oven to 325°F |
| From about 5:20 PM onward | Keep a closer eye on the probe; 110–115°F matters more than the clock |
| Roughly 5:45–6:20 PM | Plausible pull window for the reference roast |
| Next 25–35 min | Rest the beef and finish the rest of dinner |
| By about 7 PM | Carve and serve |
Scalloped potatoes need a substantial bake of their own, so getting them largely finished before the prime rib takes over the oven makes the final hour much calmer.
If the Roast Is Early
Finishing 20–40 minutes ahead works beautifully because the beef needs that rest anyway. Around an hour is still manageable if you leave the roast whole; leave it uncovered unless the room is cool, then tent it loosely with foil.
Beyond that, food safety and doneness begin pulling in opposite directions. Avoid leaving cooked beef at room temperature for hours. Hot holding at 140°F / 60°C or above keeps it hot enough from a safety standpoint, but the center can continue cooking.
If Dinner Is Running Late
If dinner is slipping and the center is still well below your pull temperature, raising the oven moderately to 350°F (177°C) can help. Once the roast is getting close, stop chasing the clock and watch the thermometer.
Prime Rib Troubleshooting
Prime rib rarely goes wrong because somebody forgot the rosemary. The bigger problems usually begin when the timing looks strange and the cook reacts before checking what is actually happening inside the meat.
Common Prime Rib Problems & Fixes
| Problem | Likely Reason | What to Do |
|---|---|---|
| Cooking much faster than expected | Normal variation or probe position | Check 2–3 central spots. If they agree, trust the reading. |
| Taking much longer than expected | Cool oven, thick roast, probe error or incompletely thawed center | Cross-check the meat and oven temperatures before turning the heat up sharply. |
| Two thermometers disagree | Different locations or one inaccurate thermometer | Check several central spots and look for the lowest stable reading. |
| Center is too rare after carving | Roast was pulled early or a cooler section was missed | Return the roast briefly to a 325°F oven, or finish only the slices that need it. |
| Crust getting dark too quickly | Strong top heat or roast sitting too high | Move the roast farther from the top element or loosely shield the darkest area. |
| Garlic or herbs are burning | Surface heat is too aggressive | Loosely protect the crust and let the center continue cooking. |
| Rendered fat is smoking | A deep pool has collected in the pan | Remove some with a heatproof baster or ladle without moving the hot pan. |
| Roast is more done than intended | Late pull or more carryover than expected | Stop cooking. Slice and serve with jus; thinner slices can eat more tenderly. |
| One guest wants well-done beef | Different preference | Offer an end slice or cook that person’s slice further. |
| Two roasts are finishing differently | Different thickness or shape | Monitor each roast separately and pull each when ready. |
The Center Is Too Rare
Discovering this after the first cut is frustrating, but fixable. Return the roast briefly to a 325°F oven and keep checking.
When only a couple of people want their beef more done, leave the main roast alone and finish their slices separately.
Underdone beef can always go back for more heat. You cannot put pink back into an overcooked center.
Cooking Two Prime Ribs
Treat them as two separate roasts. Two 6 lb prime ribs do not cook like one 12 lb roast, and even two apparently identical roasts can finish at different times. Give both enough room for air to circulate and monitor them independently.
← Recipe Card·Carving →·↑ Back to top
How to Carve Prime Rib
By the time the roast has finished resting, the stressful part is largely over.
- Remove the butcher’s twine.
- If the rib slab was cut and tied underneath, lift it away. Otherwise, follow the curve of the bones with the knife and remove them in one piece.
- Slice the boned roast across the grain with long, clean strokes.
- Cut around ½ inch / 1.25 cm thick for generous portions, a little thinner for a side-heavy meal, or thicker for steakhouse-style servings.
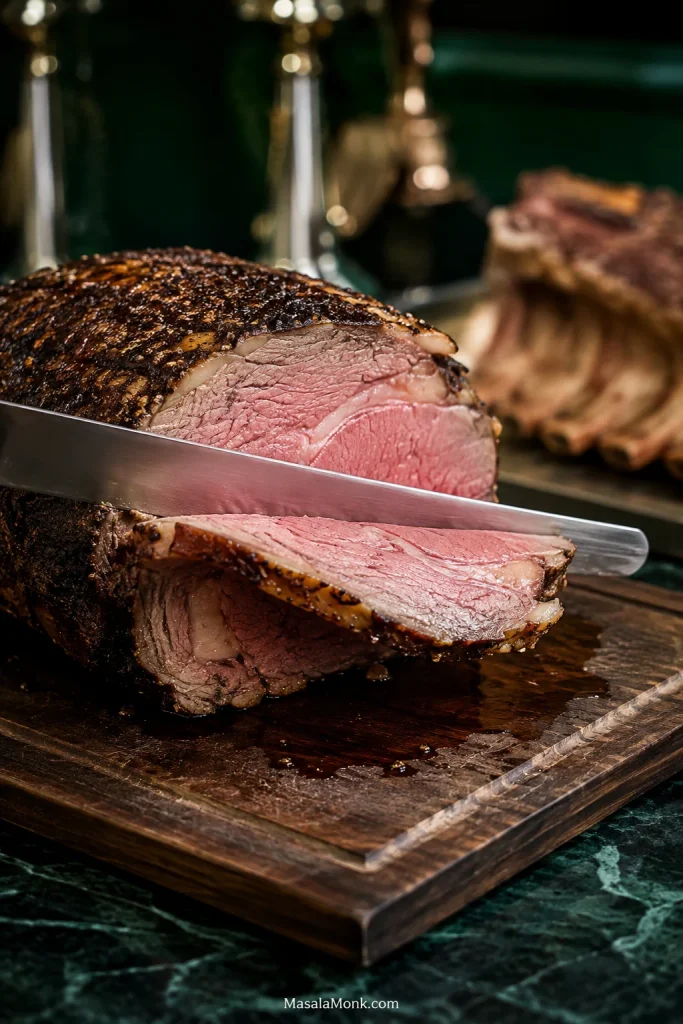
The first slice should show the method’s gradient clearly: browned crust, more-done outer beef, then the warm pink middle. End pieces are handy for anyone who prefers their beef a little further along.
Soft dinner rolls can be made earlier and warmed while the beef rests.
Prime Rib Au Jus (Simple Pan Jus)
The liquid in the roasting pan will usually be heavy on rendered beef fat. Pour most of that away and keep the deeply browned bits underneath.
- Browned drippings left in the pan after pouring off excess fat
- ½ cup (120 ml) dry red wine
- 2 cups (480 ml) unsalted or low-sodium beef stock
- 1 teaspoon Worcestershire sauce, optional
- Black pepper, to taste
- Pour off most of the rendered fat, leaving about 1–2 tablespoons and the browned deposits.
- Set a stovetop-safe roasting pan over medium heat, or transfer the drippings to a saucepan.
- Add the wine and scrape up the browned bits.
- Reduce the wine by roughly half.
- Add the stock and Worcestershire.
- Simmer until you have roughly 1½ cups (360 ml) and the flavor tastes concentrated.
- Taste before adding salt; the drippings may already contain plenty.
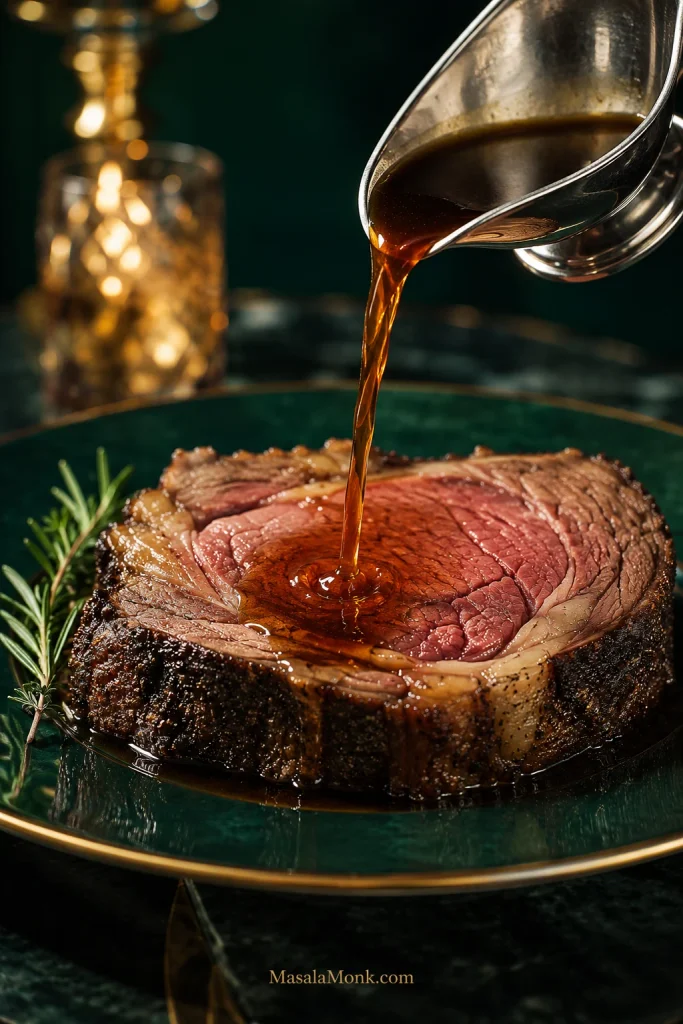
The finished au jus should taste beefy and concentrated rather than like thin stock. A spoonful over creamy mashed potatoes is about as classic as prime rib dinner gets.
What to Serve With Prime Rib
Prime rib is rich enough that the plate benefits from contrast. Potatoes catch the jus; something crisp, green or sharp keeps every bite from feeling equally heavy.
A cold steakhouse-style wedge salad works especially well beside hot beef. Roasted Brussels sprouts, carrots, Yorkshire pudding and creamed spinach all fit comfortably here too.
For a more traditional holiday table, green bean casserole can be largely assembled ahead. Crisp roasted vegetables can often take their final blast of heat during the roast’s 25–35 minute rest.
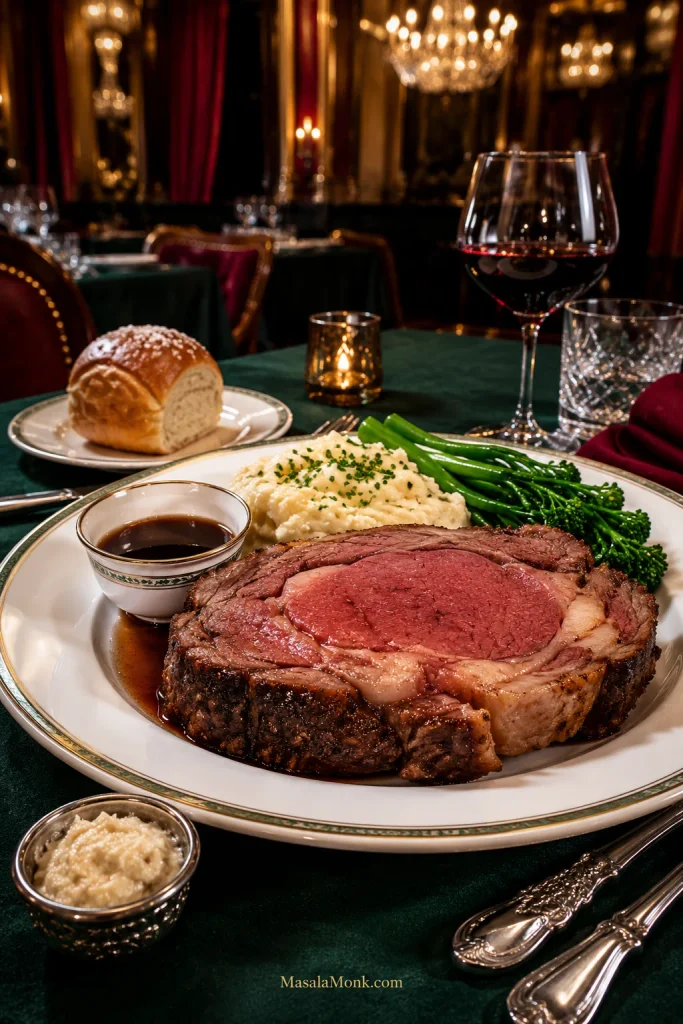
Keep the roast whole until the rest of dinner is ready; sliced beef loses heat much faster.
How to Store, Freeze & Reheat Prime Rib
Refrigerate leftovers within 2 hours. Cut a large leftover roast into a few thick portions rather than refrigerating it whole or slicing everything thin. Cooked leftovers are generally best used within 3–4 days.
For longer storage, wrap the portions well and freeze them. Cooked meat leftovers are generally best used within roughly 2–6 months for quality.
For oven reheating, put only the portions you plan to eat in a small baking dish with a spoonful or two of jus or beef stock. Cover and reheat in an oven set to at least 325°F (163°C) until the center reaches 165°F / 74°C. Previously medium-rare prime rib will cook beyond its original doneness as it reheats.
Any substantial leftovers have an excellent second life in a French dip sandwich with au jus.
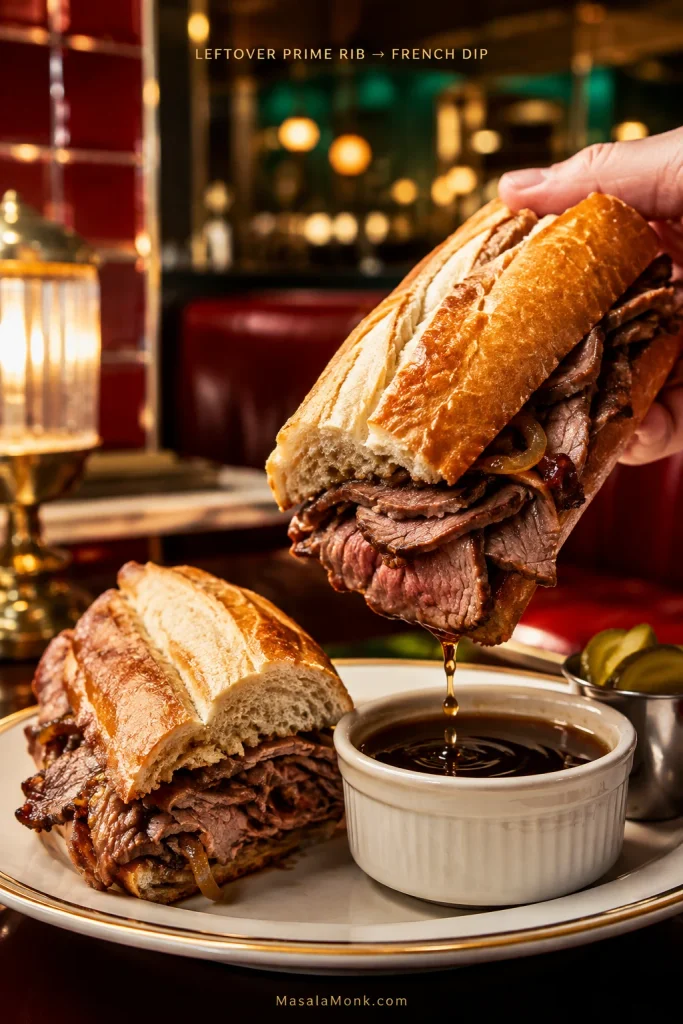
A Few Last Prime Rib Questions
Should prime rib be covered while roasting?
Roast it uncovered so the exterior can brown. Rest it uncovered as well unless the room is unusually cold; in that case, use a loose foil tent rather than wrapping it tightly.
Can I make prime rib ahead?
Do the prep ahead rather than the roasting whenever possible. Dry-brine the beef 1–2 days ahead, make the horseradish sauce and prepare suitable sides in advance, then roast the prime rib on the day you plan to serve it. Fully cooking and reheating the roast makes it much harder to preserve its original doneness.
What about the 500-degree oven-off method?
It can work, but the result depends heavily on how your oven retains heat after it is switched off. Insulation, calibration and cooling fans can all change the outcome. The method above keeps the oven actively heated instead.
For a roast that can feel intimidating when you first unwrap it, that first warm pink slice is a satisfying moment.
After the rest, the crust is dark, the fat around the edges is glossy, and the kitchen smells unmistakably of roasted beef.
Then the knife goes through the crust and you finally get to see what all those temperatures were leading toward.
If you make it, leave the weight and rib count of your roast, whether you used a conventional or convection oven, your pull temperature, the actual cooking time, and how the center looked after resting in the comments. Changed the method or seasoning? Include that too. Those details can be genuinely useful to the next person cooking a similar roast.








