There is something deeply reassuring about a warm fruit dessert, and this peach cobbler with canned peaches belongs squarely in that comforting category. It asks very little from you, yet it still manages to feel generous, homemade, and worthy of setting down in the middle of the table while everyone leans in for a closer look. Peach cobbler has always had that kind of charm. It fits just as naturally at a casual family dinner as it does at a holiday meal, and it carries that wonderful mix of ease and nostalgia that makes people reach for another spoonful almost before the first one is finished.
Even so, cobbler can become oddly complicated once real life enters the picture. Fresh peaches are wonderful when they are ripe, fragrant, and abundant, but they are not always in season, and they are certainly not always ready when you are ready. Frozen peaches can help, although they bring their own texture questions. Canned peaches, by contrast, are already peeled, already sliced, already soft, and already sitting in the pantry waiting for you. That is exactly why a good peach cobbler with canned peaches deserves a permanent place in your dessert rotation.
This peach cobbler with canned peaches is a buttery batter-style cobbler baked in a 9×13-inch dish at 350°F until the top turns deeply golden and the fruit bubbles around the edges. Better still, this is not a “good enough for now” version of cobbler. When the fruit is drained properly, the sweetness is balanced, and the topping is given the right structure, a canned peach cobbler can taste every bit as cozy and satisfying as the kind people remember from church suppers, family reunions, summer weekends, and old-fashioned Sunday dinners.
Peach cobbler with canned peaches recipe at a glance
Before we get into the richer details, here is the shape of the recipe in simple terms.
- Serves 8 to 10
- Prep time: about 15 minutes
- Bake time: 40 to 50 minutes
- Resting time: 20 minutes
- Oven temperature: 350°F
- Baking dish: 9×13-inch
- Style: buttery batter-style peach cobbler
- Best fruit: canned peaches in juice or light syrup
Those details matter because they set expectations early. The dessert is not fussy, though it does ask for a little care. Once you know the pan size, the temperature, and the texture you are aiming for, the rest becomes much easier.

Why this peach cobbler with canned peaches feels worth making
It solves the real-life version of dessert
For many home cooks, the easiest route to a truly reliable cobbler is not through perfect fresh fruit at all. It is through a well-made peach cobbler with canned peaches recipe that understands how to turn pantry ingredients into something warm, golden, and worth sharing. That is what this recipe sets out to do.
Rather than giving you a vague shortcut and hoping everything works out, it walks you into the process in a way that helps the dessert come out buttery on top, tender underneath, and pleasantly peachy without tipping into a watery mess. Along the way, it answers the practical questions that actually matter when canned fruit is involved. Should you drain the peaches? Can you use peaches in syrup? How sweet should the batter be? What makes the difference between a simple peach cobbler with canned peaches and one that tastes flat or overly sweet? Most importantly, how do you make something that feels homemade even when the peaches came from a can?
Small decisions make the biggest difference
The answer lies in a handful of choices done well. A little draining. A measured hand with liquid. Enough butter to give the cobbler a rich base. A batter that stays tender rather than heavy. A baking time that allows the topping to turn properly golden. A rest at the end so the filling can settle instead of running across the plate.
None of those choices is difficult. Taken together, however, they change everything. They are the reason one cobbler tastes like a rushed pantry dessert while another tastes warm, balanced, and fully intentional. Because of that, this recipe does not ask for perfection. It simply asks for care in the places where care matters most.
A recipe that meets several cravings at once
So whether you were hoping for an easy peach cobbler with canned peaches, a homemade peach cobbler using canned peaches, an old fashioned peach cobbler recipe with canned peaches, or simply a dependable dessert you can make without waiting for peach season, you are in exactly the right place.
This version is warm, practical, and generous. It tastes like the kind of dessert someone made because they wanted everybody at the table to feel looked after. That quality is part of what makes cobbler so enduring. It is not only about sweetness. It is also about comfort, familiarity, and the quiet pleasure of setting down something that feels both humble and deeply welcome.
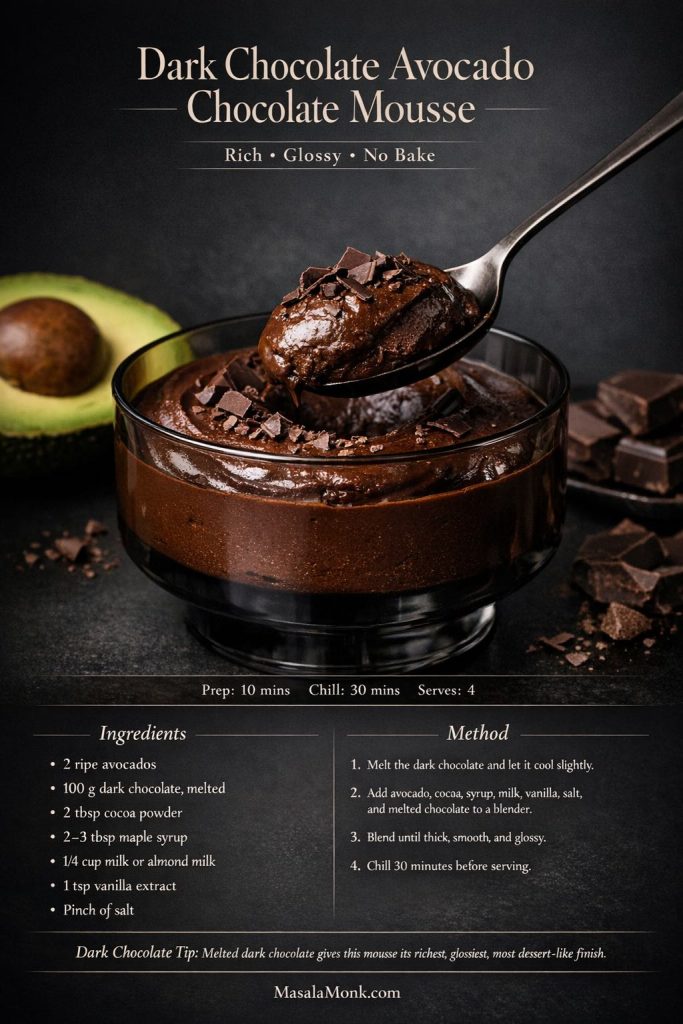
Also Read: Avocado Chocolate Mousse Recipe
Why this peach cobbler with canned peaches belongs in your kitchen
It removes the friction that keeps dessert from happening
A good cobbler earns its place not because it is flashy, but because it is useful in the loveliest possible way. It solves dessert without ever feeling like a compromise, turning ingredients you already have into something that fills the house with the smell of butter, vanilla, and fruit. Before long, there is every reason to pull out the ice cream, set the kettle on for coffee, or call people into the kitchen because something wonderful is coming out of the oven.
This particular peach cobbler recipe with canned peaches is especially useful because it removes several of the friction points that make fruit desserts feel like too much work on an ordinary day. No peeling is required, no blanching is needed, and there is no need to guess whether the peaches are ripe enough, sweet enough, or still stubbornly firm in the middle. Instead, the fruit is ready to go, which lets you focus on the part that matters most: turning those peaches into a cobbler that tastes rich, balanced, and deeply comforting.
It keeps the homemade feeling intact
Just as importantly, this recipe does not lean on artificial shortcuts that strip away the homemade feel. It is not a dump cake, although that style certainly has its place, nor is it a biscuit mix cobbler, even if that option can be helpful on a rushed day. Rather than becoming a three ingredient peach cobbler with canned peaches where convenience pushes the dessert too far from its roots, this version keeps the process easy while still delivering the warmth and character of a true cobbler.
A few ordinary pantry ingredients are all it takes to build a batter-style topping that rises around the fruit and turns into that soft, buttery, golden layer people associate with a classic cobbler. Accordingly, the result still feels easy, but it also feels cooked, considered, and made on purpose.
It gives you ease without sacrificing character
That balance is the real appeal here. You get the ease people want from a quick peach cobbler with canned peaches without losing the warmth and tenderness that make cobbler feel special in the first place. Nothing about it is fussy, yet the dessert still tastes intentional. The method is simple, though never bare, and the final result is easy enough for a weeknight, welcome at a potluck, and entirely worthy of the words homemade and old-fashioned.
It changes the way you think about pantry fruit
There is another reason this kind of recipe matters: it lets you make peace with the pantry in a much more satisfying way. Too often, canned fruit gets pushed into the category of emergency ingredient, something you use only because fresh is not available. In truth, canned peaches can be a gift. They are consistent, soft, and ready.
When used carefully, they give you a filling that already has the tenderness cobbler wants. What they need is a recipe that understands their strengths and corrects their weaknesses. That is what this one does. It does not apologize for the pantry. It makes the pantry feel smart.
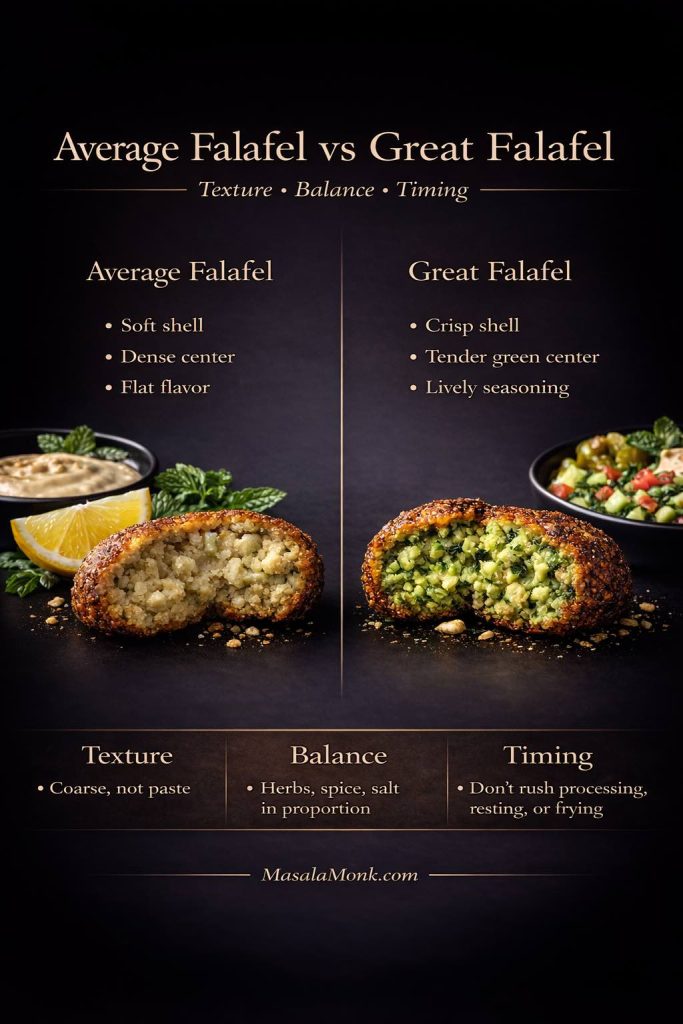
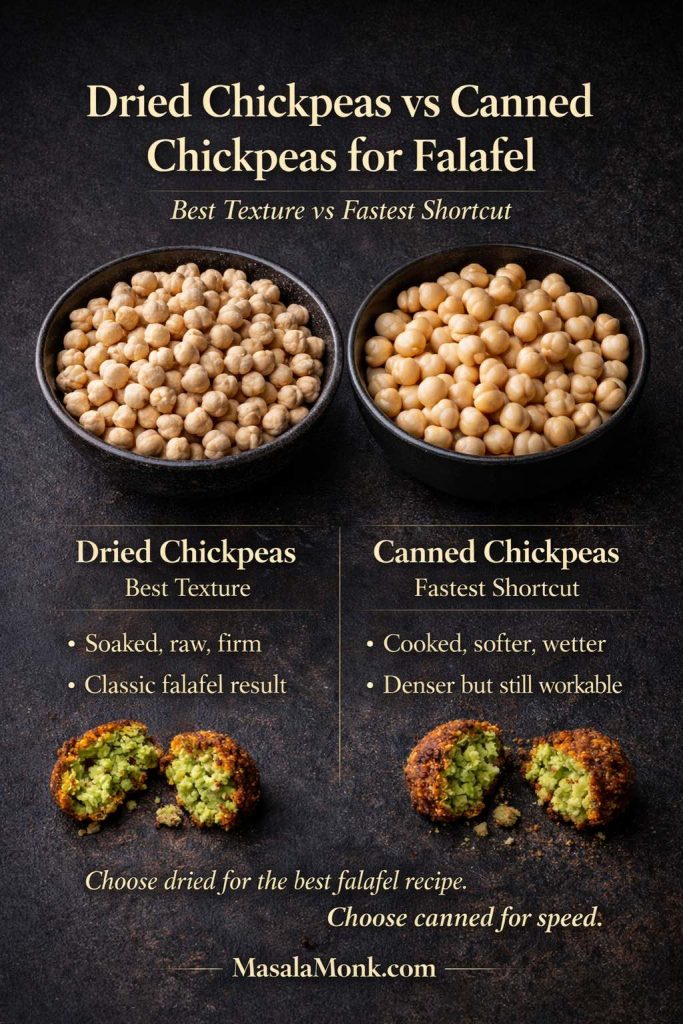
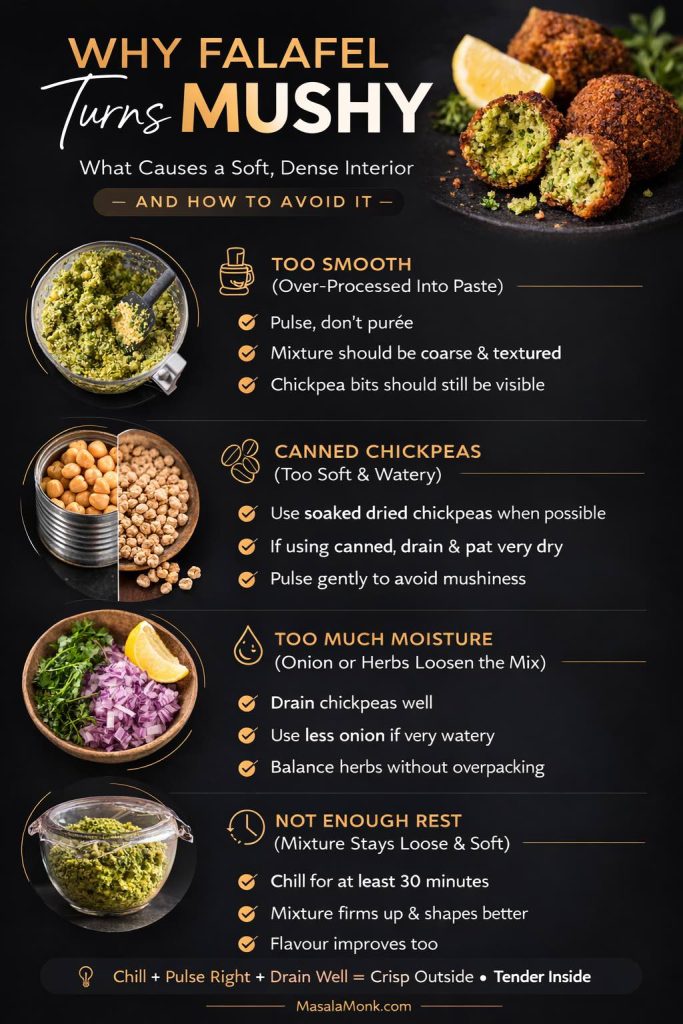
Also Read: Falafel Recipe: Crispy Homemade, Air Fryer and Baked Falafel
Can you really make excellent peach cobbler with canned peaches?
Yes, and a peach cobbler with canned peaches can taste fully homemade
You absolutely can, and not in a reluctant, second-best sort of way. A peach cobbler with canned peaches can come out golden at the edges, soft in the middle, fragrant with vanilla and cinnamon, and beautifully spoonable. With the right handling, it tastes homemade, feels old-fashioned, and becomes exactly the kind of dessert people ask about after dinner.
That matters, because many cooks begin with quiet doubts. They assume canned peaches will only ever produce a serviceable dessert, never a memorable one. Yet cobbler does not demand perfect fruit. It demands warm fruit, balanced sweetness, and a topping that bakes into something tender and rich. Canned peaches can absolutely deliver on that promise when they are treated properly.
Why people hesitate
The hesitation usually comes from a reasonable place. Canned fruit is packed with liquid, sometimes syrupy liquid, and cobbler is notoriously unforgiving when too much moisture gets into the pan. Because of that, it is easy to imagine the whole thing turning soupy, over-sweet, or strangely flat.
That is not really a canned peach problem so much as a handling problem. Once you understand how to treat the fruit, the rest becomes straightforward. In other words, the problem is rarely the peach itself. The problem is almost always what the extra liquid does to the batter and the bake.
The short answer
Yes, canned peaches work beautifully in cobbler as long as they are drained well, sweetened thoughtfully, and baked long enough for the topping to fully set. Peaches packed in juice or light syrup are usually the easiest to manage, while heavy syrup peaches often need a bit more draining and a lighter hand with sugar.
The small act of control that changes the outcome
Peaches packed in juice or light syrup are often the easiest option because they give you more control. Heavy syrup peaches can still work, though they ask for a little restraint elsewhere. Either way, the crucial step is not simply dumping the can into the dish.
The peaches need to be drained and given a moment to shed excess liquid. From there, you can decide whether the fruit needs a little of its own juices added back in. Sometimes it does. Quite often, it does not. That small act of control is one of the main reasons this canned peach cobbler recipe turns out juicy rather than watery.
From fallback ingredient to smart ingredient
So the better question is not whether you can use canned peaches. The better question is how to use them so the cobbler tastes like you meant it to, not like you settled for it. Once that shift happens, canned peaches stop feeling like a fallback and start feeling like one of the smartest ways to make cobbler well.
If you enjoy baking that balances comfort with a little practical know-how, you might also like the way MasalaMonk’s tres leches cake recipe approaches a crowd-pleasing dessert: generous, clear, and deeply reader-friendly.
Also Read: Mango Margarita Recipe (Frozen or On the Rocks)
What Kind of Peach Cobbler with Canned Peaches Is This?
Cobbler is one word for several traditions
One of the quiet confusions around cobbler is that the word sounds singular while the desserts themselves are not. Ask five people what peach cobbler should be, and you may get five different answers. Some want a biscuit topping with distinct mounds of dough. Others expect a more cake-like layer that rises around the fruit. Some think of cobbler as nearly pie-like, while others fold it into the broader family of fruit bakes that includes crisp, crumble, buckle, and slump.
That variety is part of the charm, but it can also make recipes feel unclear. A person expecting a biscuit cobbler may be surprised by a batter-style one. Someone hoping for a crisp may wonder where the oat topping went. Clarity helps.
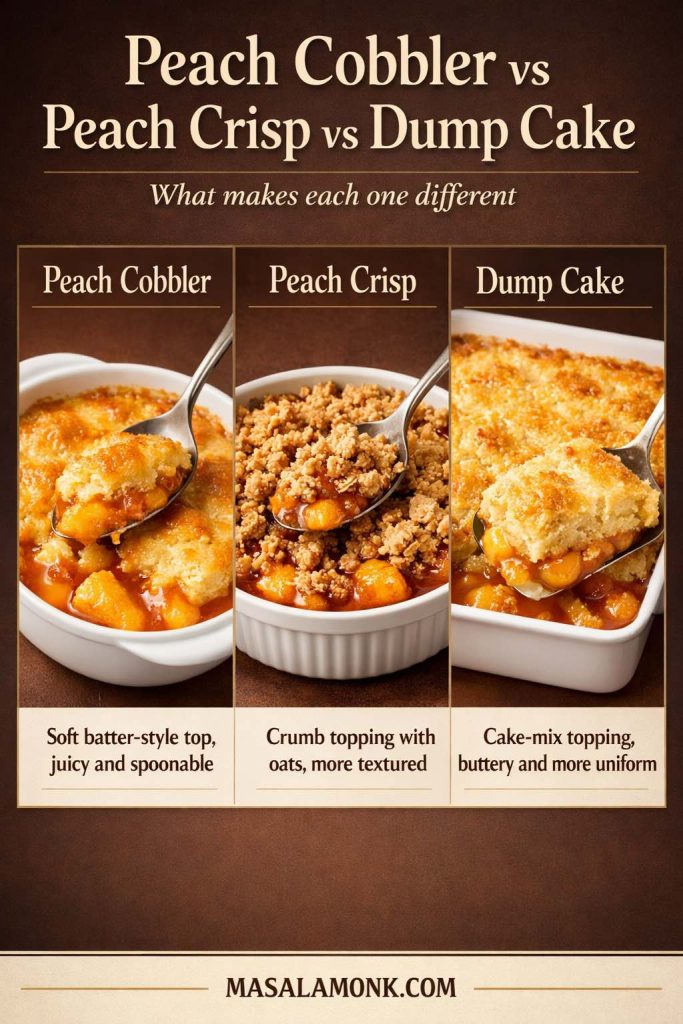
This is a batter-style peach cobbler with canned peaches
This recipe is a batter-style peach cobbler with canned peaches, and that tells you what to expect before you even pick up the flour. Rather than heading into biscuit territory, cake mix territory, or the world of oat-topped crisps and streusel-like crumbles, you are making the kind of cobbler that pours into the pan, welcomes the peaches over the top, and bakes into a soft, buttery layer around the fruit.
What this cobbler is not
It is not a biscuit cobbler with separate rounds on top, and it is not a cake mix peach cobbler with canned peaches that behaves more like a dump cake. Nor is it a peach crisp with oats or a crumble with a streusel topping. Instead, it lands in that cozy middle where the batter rises around the fruit and creates a spoonable dessert with golden edges and a tender center.
Why canned peaches work especially well in this style
That style works especially well when the peaches come from a can. Because the fruit is already soft, it nestles into the batter without needing much encouragement. The batter, in turn, rises gently as it bakes, creating those lovely areas where the top is crisp at the edge and soft closer to the fruit.
The whole dessert ends up feeling rustic, warm, and familiar. It does not need decorative flourishes to feel complete. Instead, it leans on contrast: juicy fruit, soft topping, rich edges, warm spice, and just enough sweetness to make the peaches feel fuller without drowning them.
Why one recipe can satisfy several cravings
That distinction also helps explain why this version satisfies so many closely related cravings at once. It works beautifully as an easy peach cobbler recipe with canned peaches, while still delivering the comfort and fullness of a homemade peach cobbler with canned peaches. For anyone who grew up with batter-style Southern cobblers, it may even strike the same familiar note as a southern peach cobbler with canned peaches, especially when served warm with vanilla ice cream melting into the corners.
For a broader look at how cobbler styles differ, King Arthur Baking’s piece on different peach cobbler styles is genuinely helpful. It explains why one person’s “real cobbler” may look very different from another’s. That said, the method here stays reassuringly simple: buttery batter, drained peaches, no stirring, patient bake.
Also Read: Sourdough Pizza Dough Recipe (Crispy Crust & Easy Pizza Base)
Ingredients for Homemade Peach Cobbler with Canned Peaches
The recipe ingredients
Here is the full ingredient list with amounts that make the method easier to follow.
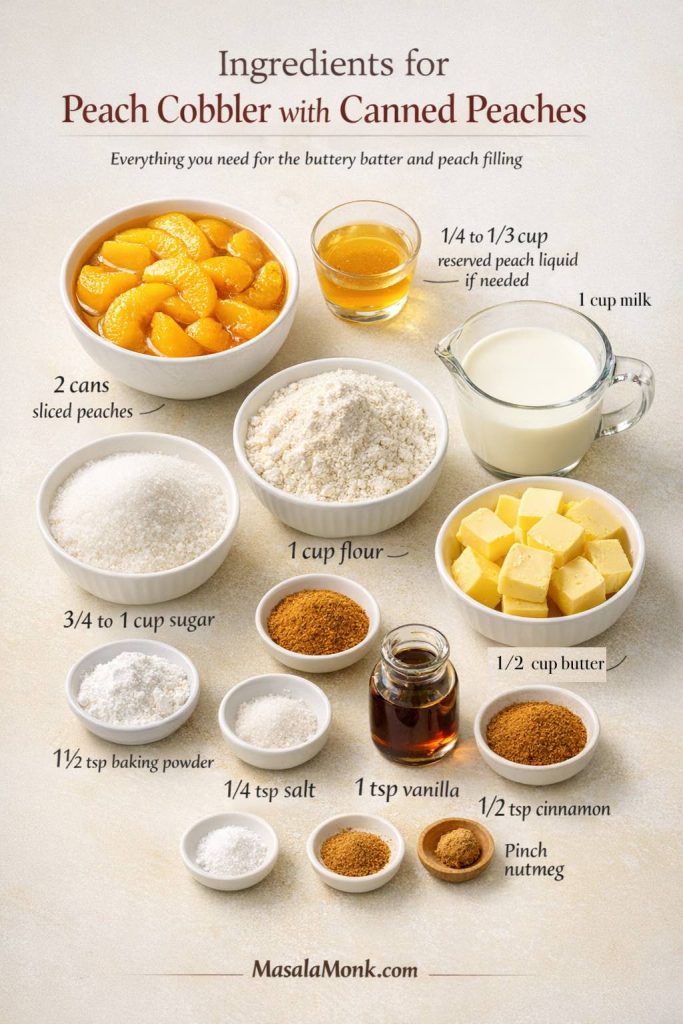
- 2 cans sliced peaches, about 15 ounces each, drained
- 1/4 to 1/3 cup reserved peach liquid, only if needed
- 1 cup all-purpose flour, about 120 grams
- 3/4 to 1 cup granulated sugar, 150 to 200 grams, depending on the peaches
- 1 1/2 teaspoons baking powder
- 1/4 teaspoon salt
- 1 cup milk, 240 ml
- 1/2 cup unsalted butter, 113 grams
- 1 teaspoon vanilla extract
- 1/2 teaspoon ground cinnamon
- Pinch of nutmeg, optional
Nothing about this ingredient list is extravagant. That is part of the charm. The dessert relies on ordinary baking staples arranged with a little care, which is exactly why it feels so approachable.
The peaches and the topping base
The peaches provide the fruit body of the dessert. Because they are already soft, they do not need much from the oven besides warmth and enough time for their juices to settle into the batter around them.
Flour gives the topping structure. It should not be heavy or dense, which is why all-purpose flour works beautifully here. Baking powder lifts the batter, turning it from a flat liquid into the tender golden top that defines this cobbler style. Milk loosens everything into a pourable consistency and helps the topping bake into something soft and tender rather than stiff.
The ingredients that bring balance
Sugar sweetens both the topping and, indirectly, the whole dessert. However, the exact amount can and should respond to your peaches. Fruit packed in heavy syrup needs less additional sugar than fruit packed in juice. That is one of the easiest ways to keep a peach cobbler made from canned peaches from becoming cloying.
Salt matters more than it may first appear. A small amount keeps the sweetness lively rather than one-note. Vanilla and cinnamon round everything out. They do not need to shout. Their job is simply to make the whole dessert smell and taste more complete.
The ingredient that gives peach cobbler with canned peaches its richest edges
Butter does several jobs at once. It enriches the flavor, supports browning, and creates the sort of edge texture people love most in a cobbler—the places where the topping goes almost crisp before giving way to softer spoonfuls underneath.
That buttery edge is one of the quiet pleasures that makes cobbler feel homemade in a deeper way. It is not only about sweetness or fruit. It is also about those golden corners, those slightly richer bites, and that unmistakable smell when butter and batter meet heat at the bottom of the dish.
Also Read: Balti Paneer Gravy (Restaurant-Style, Creamy + Bold Recipe)
The Best Canned Peaches for Peach Cobbler
A peach cobbler with canned peaches can only be as balanced as the fruit allows, so it is worth taking a moment to understand what you are opening.
How Many Cans for Peach Cobbler with Canned Peaches?
For a standard 9×13-inch peach cobbler with canned peaches, two 15-ounce cans of sliced peaches usually give the best fruit-to-topping balance. If your cans are unusually full or the slices are packed loosely, adjust by eye so the batter is comfortably covered without being overloaded.
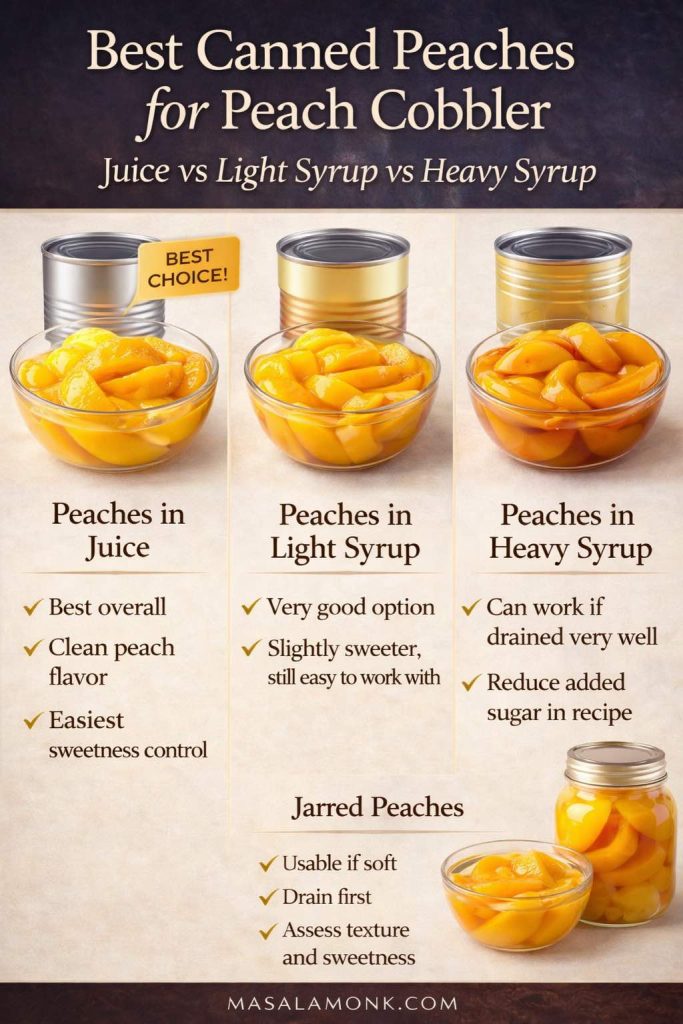
Peaches packed in juice
Canned peaches in juice are often the easiest and cleanest choice. They taste fruity rather than syrupy, which means the cobbler has a better chance of tasting like peaches instead of sugar. They also let you add sweetness where you want it rather than accepting whatever intensity came in the can.
Peaches packed in light syrup
Peaches packed in light syrup are also a very good option. They have a little more built-in sweetness, though not usually so much that the dessert becomes overwhelming. In many kitchens, these are the happy middle ground.
Peaches packed in heavy syrup
Heavy syrup peaches can still be used successfully. However, they benefit from extra draining and a lighter hand with sugar in the batter. If that adjustment is ignored, the final result can feel both too sweet and too loose, which is one of the most frustrating combinations in a cobbler.
Jarred peaches
You may also see jarred peaches from time to time. If you have been wondering about peach cobbler with jarred peaches, they can work in much the same way as canned peaches, provided the fruit is soft and the liquid is handled carefully. The same principle applies: drain first, assess later.
Slice size and texture
If the peaches are sliced evenly and not too thin, so much the better. Very soft or broken slices are not a disaster, though they will create a more jammy filling. That can be lovely in its own way, especially if what you want is comfort rather than presentation.
Also Read: Mojito Recipe (Classic) + Ratios, Pitcher, Mocktail & Easy Variations
Do You Drain Canned Peaches for Peach Cobbler?
Yes. Not always to the point of dryness, but yes, you should drain them.
This is one of the most important decisions in the recipe, and it is the main reason so many cobblers either succeed beautifully or miss the mark. Too much liquid in the pan makes it difficult for the batter to rise and set properly. The topping may remain pale or gummy. The peaches may bubble furiously and still never seem to settle. The dessert may smell wonderful and yet spoon out like sweet soup.
How Long to Drain Canned Peaches for Peach Cobbler
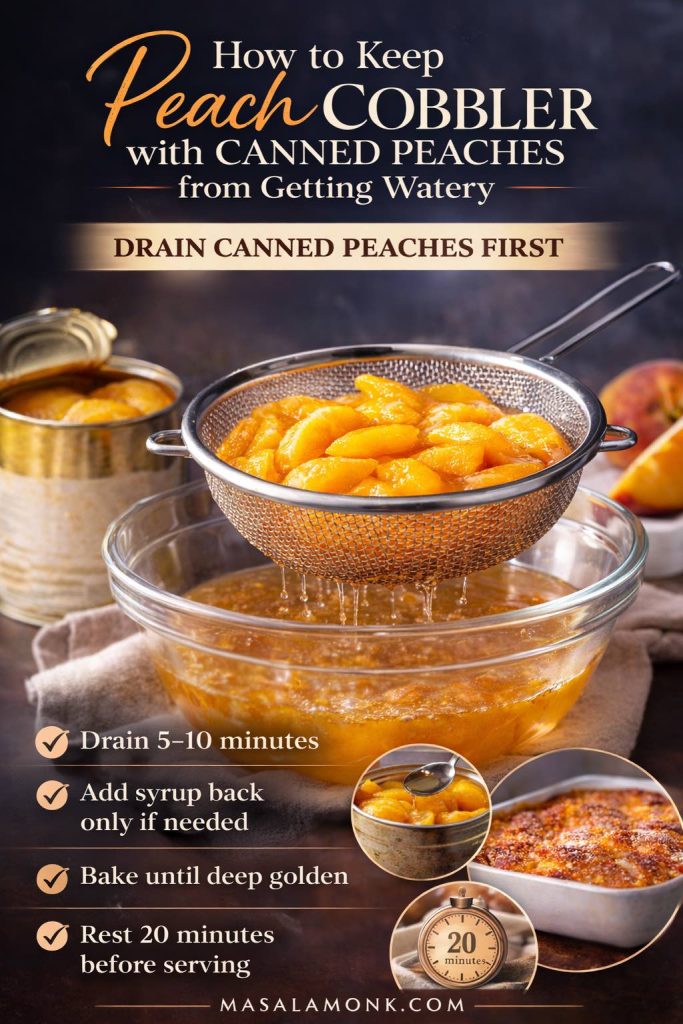
Drain the peaches for 5 to 10 minutes before using them. If they are packed in heavy syrup, lean toward the longer end. You are not trying to dry them out completely. Instead, you are removing enough excess liquid to keep the cobbler from becoming watery.
When to add some liquid back
Draining gives you control. Once the peaches sit in a colander for several minutes, you can see what you are actually working with. If they still look glossy and juicy, that is often all you need. If they look strangely dry, reserve a few tablespoons of their liquid and add it back with intention rather than by accident.
Why this matters so much
This is the point at which a homemade peach cobbler using canned peaches starts to feel more like actual cooking and less like a shortcut. You are not obeying the can. You are reading the fruit and adjusting accordingly.
For the same reason, you do not want to treat every can the same way. Juice-packed peaches behave differently from peaches in heavy syrup. A fruit cup’s worth of extra liquid may seem harmless, yet it changes the cobbler dramatically. A measured hand is kinder to the final dessert than generosity in this particular case.
Also Read: Paloma Recipe: 12 Paloma Cocktail Drinks
How to make peach cobbler with canned peaches
This is where everything comes together. The process is easy, though not careless. Each step builds on the one before it, and none of them is difficult.

Step 1: Drain the peaches for 5 to 10 minutes
Open the peaches and pour them into a colander set over the sink or a bowl. Leave them there while you prepare the batter and preheat the oven. If the peaches are in heavy syrup, letting them sit a little longer is helpful. At this stage, you are not trying to dry them out completely; you are simply removing the excess that would otherwise flood the cobbler.
If you like, save a small amount of the drained liquid. It may come in handy later, although quite often you will discover the fruit does not need it.

Step 2: Heat the oven to 350°F and melt the butter in a 9×13-inch baking dish
Place the butter in the baking dish and let it melt in the warming oven. This is one of those tiny old-fashioned moves that makes the finished dessert feel richer and more complete. The butter coats the bottom of the pan, helps the batter spread, and creates beautifully browned edges.
Meanwhile, because the dish is warming and the butter is melting, you can make the batter without feeling rushed.

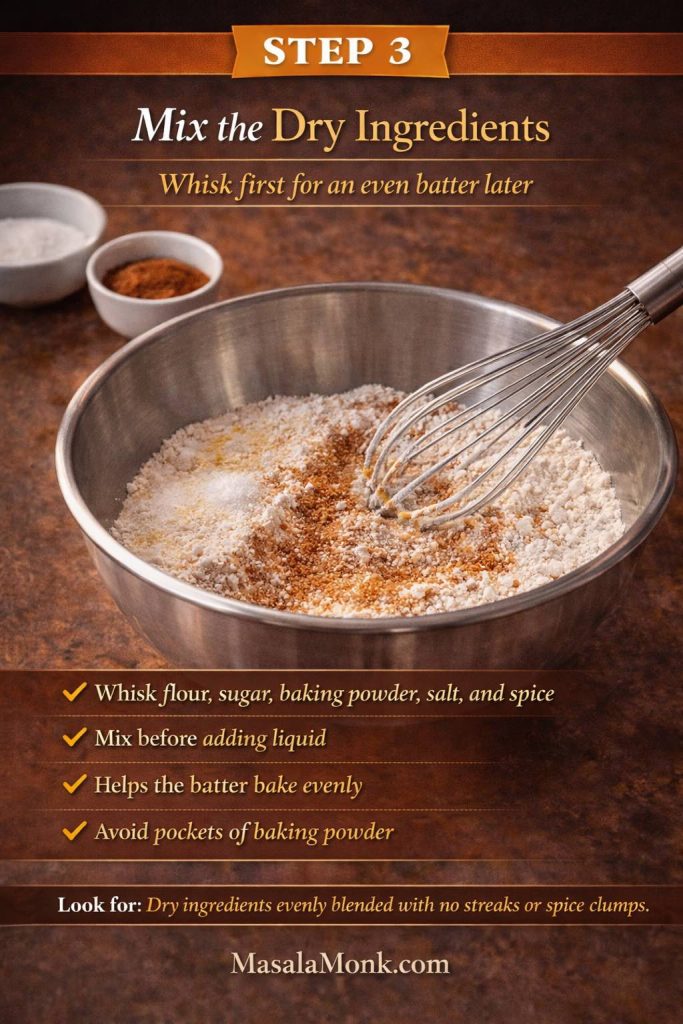
Step 3: Mix the dry ingredients
In a bowl, whisk together the flour, baking powder, salt, cinnamon, and nutmeg if you are using it. Mixing the dry ingredients first keeps everything evenly distributed, which matters more than people often realize. A pocket of baking powder in one corner and none in another is not the kind of rustic touch anybody actually wants.
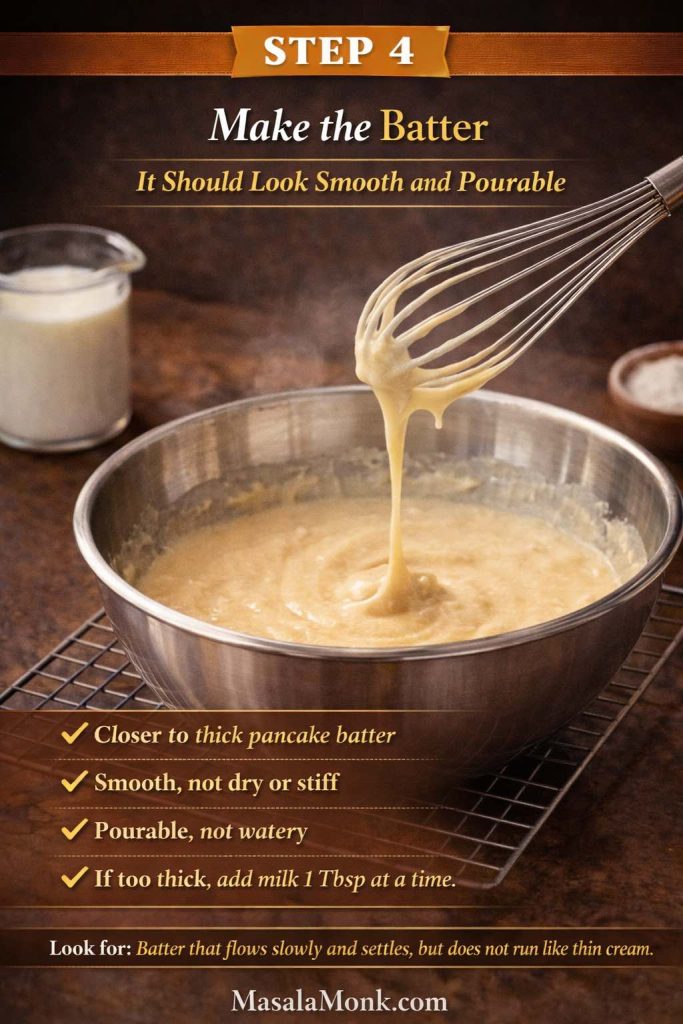
Step 4: Combine the wet ingredients and make the batter
In a separate bowl or large measuring cup, stir together the milk, vanilla, and sugar. Once the sugar is largely dissolved, add the dry mixture and stir just until the batter comes together.
What the batter should feel like
The batter should be smooth and pourable, closer to thick pancake batter than to cream. If it looks too stiff, add 1 tablespoon of milk at a time until it loosens slightly. If it seems unusually thin, let it stand for 1 to 2 minutes so the flour can hydrate before deciding whether it needs adjustment.
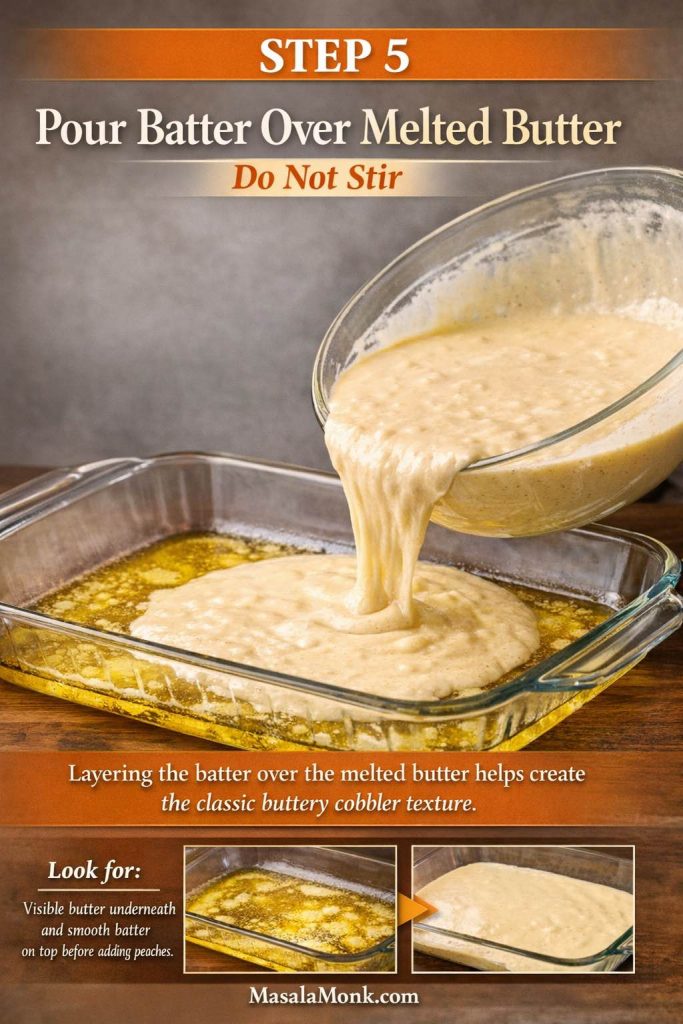
Step 5: Pour the batter over the melted butter and do not stir
Remove the dish from the oven carefully. The butter should be fully melted and fragrant. Pour the batter evenly over the butter. Do not stir. That instruction matters because the layered arrangement is part of what helps the topping form as it should.
Step 6: Spoon the peaches over the batter
Scatter the drained peaches across the surface of the batter. Try to distribute them fairly evenly so every part of the cobbler gets some fruit. If the peaches look as though they need a little moisture, drizzle over just 1 to 3 tablespoons of reserved liquid. The important point is restraint. The peaches should look glossy and comfortable, not submerged.

Step 7: Bake for 40 to 50 minutes, until deeply golden and bubbling
Slide the dish into the oven and bake for about 40 to 50 minutes. Start checking at around 40 minutes, but let color and bubbling guide you more than the clock. The cobbler is ready when the top is deeply golden, the edges are bubbling, and the center looks set rather than pale or shiny.
If it browns quickly on top but still seems underdone in the middle, lay a piece of foil loosely over the dish and keep going. It is far better to protect the top than to remove the cobbler too early.

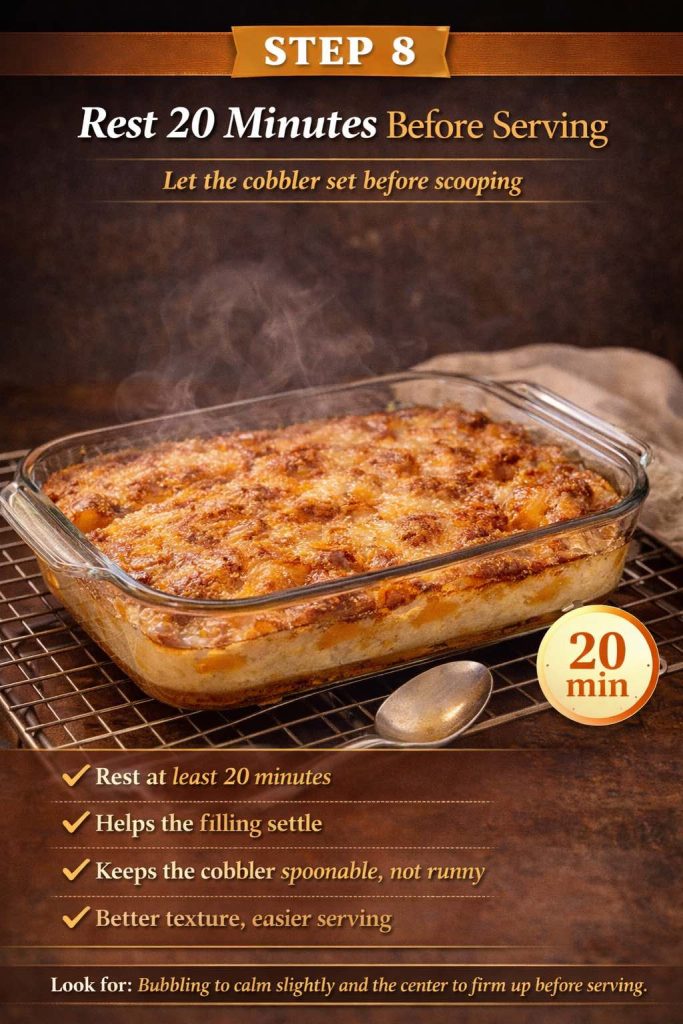
Step 8: Rest for at least 20 minutes before serving
This may be the most underrated step in the whole recipe. Let the cobbler sit for at least 20 minutes once it comes out of the oven. During that time, the juices settle, the topping firms gently, and the whole dessert becomes more coherent. The difference between immediately scooped cobbler and properly rested cobbler is surprisingly large.
Once it has rested, serve it warm.
What the Batter for Peach Cobbler with Canned Peaches Should Look Like
Recipes often tell you what to do without telling you what to look for. That can make even easy recipes feel uncertain. With this peach cobbler with canned peaches recipe, a few visual cues are especially helpful.

Before baking
The batter should be pourable but not thin. It should spread with minimal encouragement when poured into the buttered dish, yet it should not race to the edges like cream. Think of something soft enough to settle but substantial enough to hold itself.
The peaches should look juicy, not dripping. After draining, they should glisten a bit. They should not sit in a puddle.
Halfway through baking
Halfway through baking, the cobbler will look uneven in a good way. The edges usually rise and color first. The center may still seem softer and paler. Resist the urge to panic at that stage. Cobbler often looks unfinished until it suddenly does not.
When the cobbler is done
Your peach cobbler with canned peaches is ready when the top is deep golden rather than pale, the edges bubble clearly, and the center looks set instead of shiny or wet. A spoon dipped into the middle should lift soft topping, not raw batter.
After resting
Once rested, each spoonful should hold a little shape before giving way. It is still cobbler, so it is not meant to slice like a cake, yet it should not pour either. That balance is exactly what makes it so satisfying.
Also Read: Tapas Recipe With a Twist: 5 Indian-Inspired Small Plates
Why this easy peach cobbler with canned peaches tastes homemade
Homemade flavor is not magic. More often than not, it comes from restraint and care. This recipe tastes homemade because nothing about it is trying too hard. The peaches remain the star. The cinnamon is present but not overwhelming. The vanilla softens the edges of the sweetness rather than turning the whole thing into dessert perfume. The butter is generous enough to matter without drowning the fruit.
Just as importantly, the sweetness, butter, and fruit stay in balance. In many rushed versions, the fruit is too sweet, the topping too bland, or the liquid so uncontrolled that the whole dessert seems muddled. Here, the batter has enough salt to stay lively. The topping bakes long enough to develop color. The peaches stay juicy but not chaotic. Those choices give the dessert definition.
There is also something undeniably homemade about a cobbler that knows what it is. It does not try to be a pie. It does not lean on packets or mixes for identity. Instead, it becomes what cobbler has always promised to be: warm fruit under a golden topping, ready to be spooned into bowls while everyone hovers nearby.
How to keep peach cobbler with canned peaches from getting watery
A watery cobbler is disappointing not only because of texture, but also because it steals confidence from the cook. The dessert may smell wonderful. The top may look promising. Then the spoon goes in, and all at once the fruit floods the bowl. Fortunately, this is usually preventable.
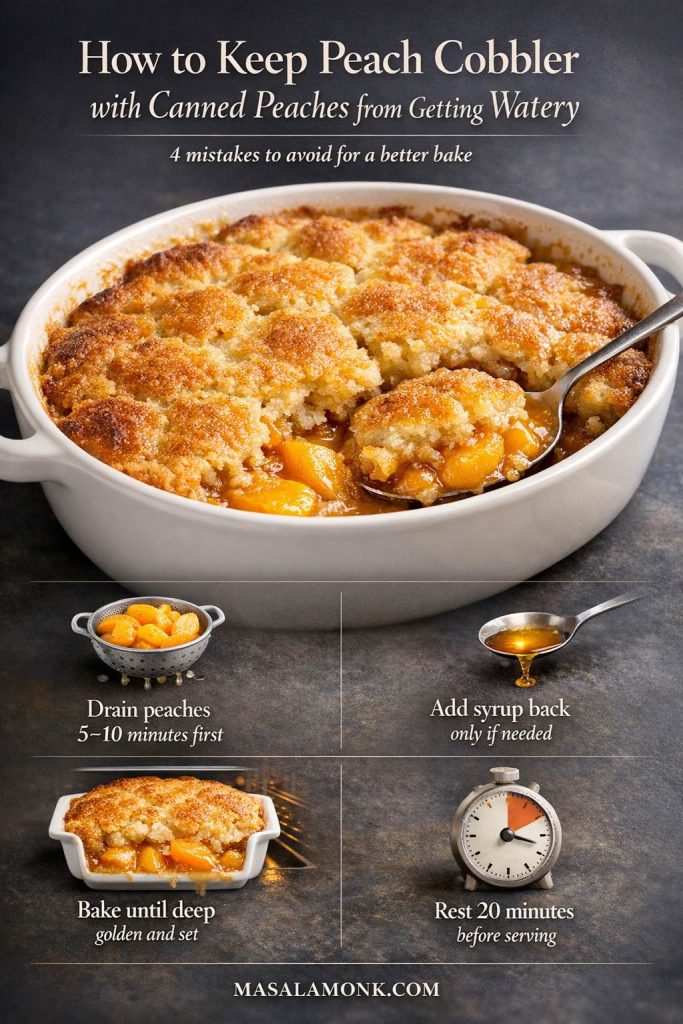
To avoid a watery cobbler
Drain the peaches well, add reserved liquid only a tablespoon or two at a time, bake until the top is deeply golden and the center looks set, and let the cobbler rest before serving. Those four steps solve most texture problems before they begin.
The first safeguard: draining
It is impossible to say too often because it matters that much. If you pour peaches and all their liquid directly into the pan, you are gambling. Sometimes the dessert will still set. Sometimes it will not. Draining takes the odds firmly in your favor.
The second safeguard: restraint with liquid
If the peaches need some moisture back, add it by the tablespoon rather than by instinctive splashing. A little can make the filling lush. Too much makes it loose.
The third safeguard: full baking time
Do not underbake the cobbler. A pale top and an under-set center are invitations to watery spoonfuls. Let the dessert become deeply golden and visibly bubbling before you call it done.
The fourth safeguard: proper rest
Fruit desserts are not at their most stable the instant they leave the oven. They need a little time to collect themselves. Give them that time.
The fifth safeguard: balanced sweetness
Peaches in heavy syrup often create the illusion that more sugar equals more flavor. In reality, too much sugar can make the filling taste exaggerated and somewhat slick. A more balanced sweetness lets the fruit and topping hold their shape better in flavor as well as texture.
If you want another thoughtful take on peach cobbler structure and fruit handling, King Arthur Baking’s Southern-style peach cobbler recipe is a useful reference.
Also Read: Air Fryer Salmon Recipe (Time, Temp, and Tips for Perfect Fillets)
Making this old fashioned peach cobbler recipe with canned peaches feel even more classic
This recipe already lands in a very comforting, old-fashioned place. Even so, there are a few ways to nudge it further in that direction if that is the mood you want.

Deepen the warmth
A touch of brown sugar in place of some of the white sugar can deepen the flavor and make the dessert feel slightly more rustic. Extra cinnamon can do the same, though too much will flatten the peach flavor rather than enhance it, so keep it gentle. A tiny bit of nutmeg is especially lovely when you want warmth without obvious spice.
Serve it simply
Warm cobbler in simple bowls has a charm all its own. A scoop of vanilla ice cream is classic for good reason. If you are in the mood to make the pairing extra special, MasalaMonk’s guide on how to make ice cream with a KitchenAid mixer is a natural companion.
Let the edges go a little darker
You can also lean old-fashioned by baking the cobbler until the edges get a bit deeper in color than you might first think necessary. Those darker buttery spots are often the most delicious parts of the pan.
Also Read: Fish and Chips Reimagined: 5 Indian Twists (Recipe + Method)
How this recipe compares with quick, simple, and shortcut versions
There is a reason phrases like quick peach cobbler with canned peaches and simple peach cobbler with canned peaches sound so appealing. They promise a dessert that fits into real life. This recipe honors that spirit, although it does not strip the process down to the point where the dessert loses character.
Biscuit mix and Bisquick versions
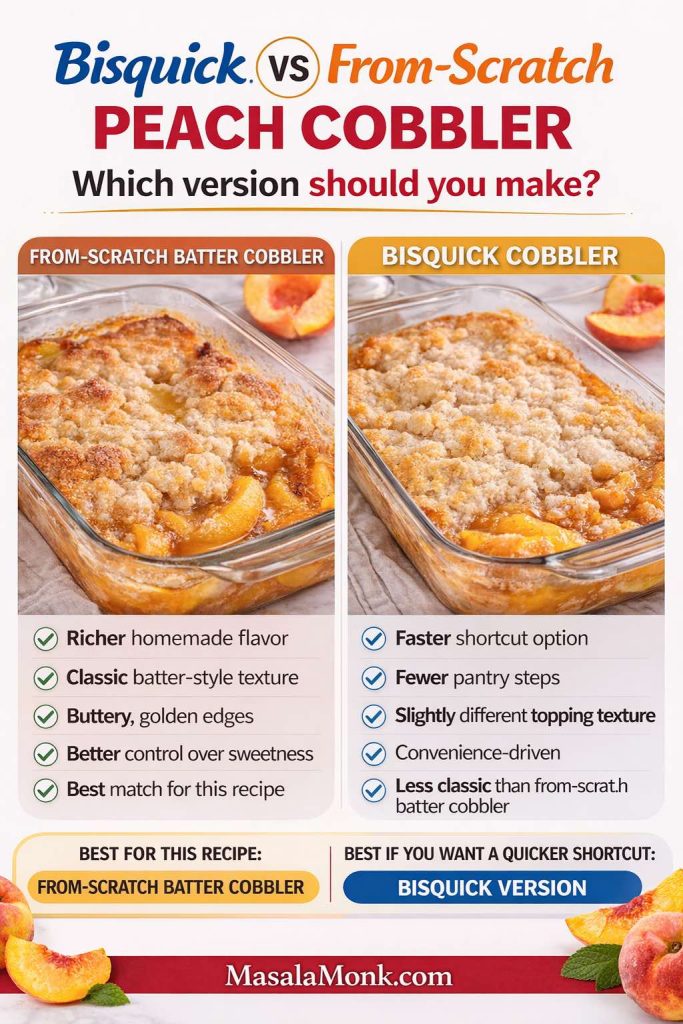
Yes, you can make a peach cobbler with biscuit mix, and a Bisquick canned peach cobbler is certainly possible too. Those versions can be useful when speed matters most. Still, they tend to produce a different topping character and a more shortcut-style flavor than a batter-style cobbler like this one.
Cake mix and dump cake versions
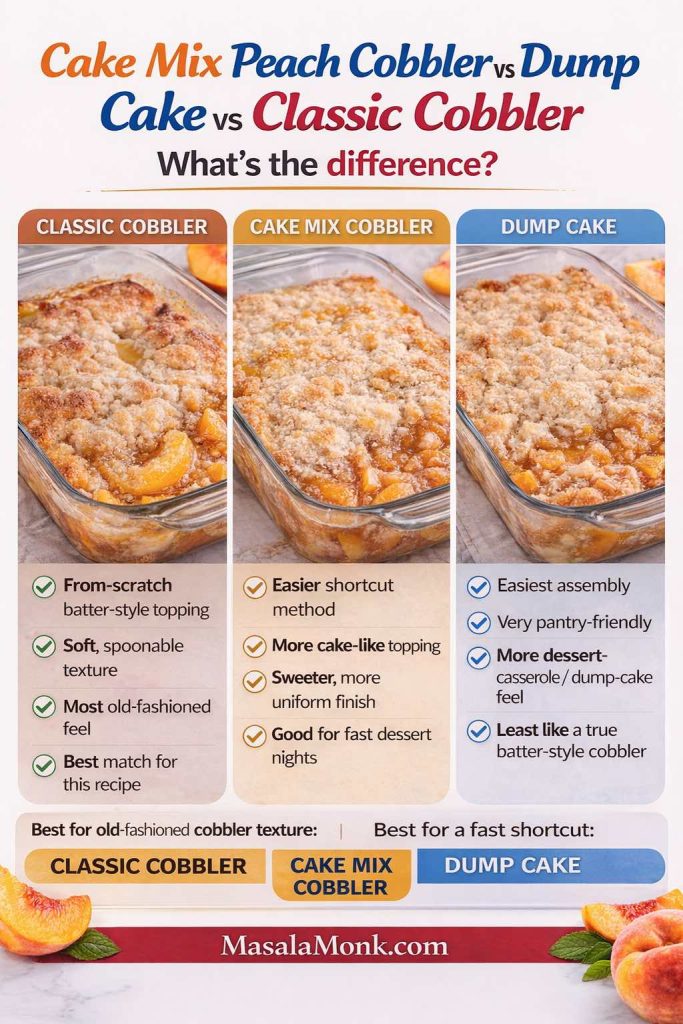
Cake mix versions, dump cake versions, and recipes built around astonishing brevity all have their place. A cake mix peach cobbler with canned peaches can be comforting in its own right. So can a peach dump cake with canned peaches. Yet those desserts move farther away from the tender, integrated topping that makes a classic batter-style cobbler feel so homemade.
Why this middle ground works so well
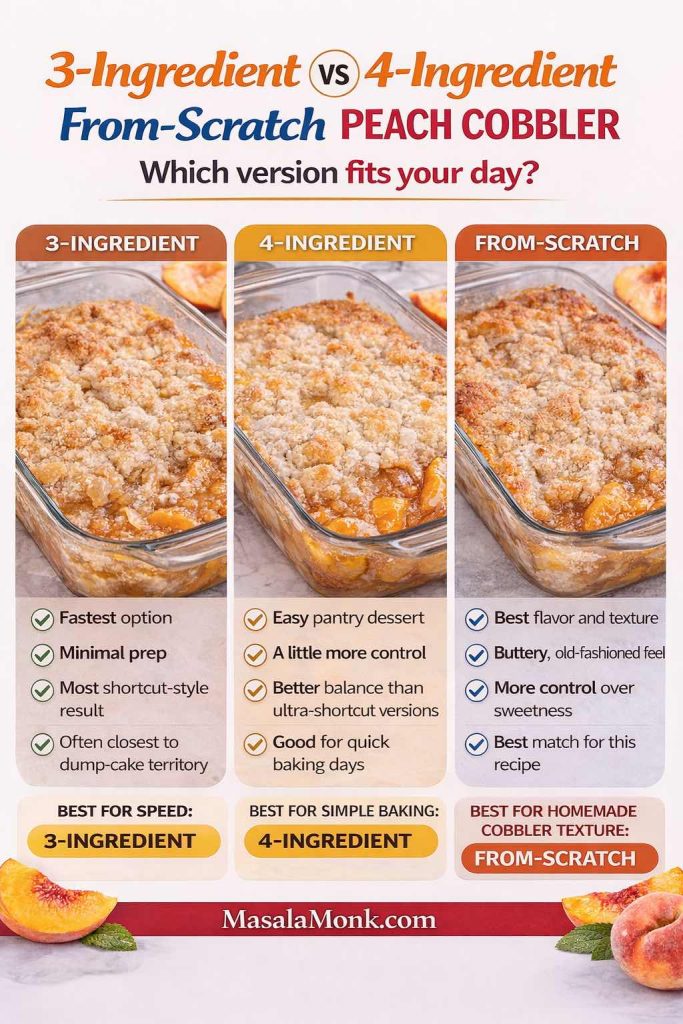
All this recipe really asks for is a bowl, a whisk, a baking dish, and a handful of pantry ingredients. Special equipment is unnecessary, advanced technique is not required, and the process does not turn the kitchen upside down. Even so, that small bit of extra effort gives you something far more satisfying than many three-ingredient or four-ingredient versions manage: a better topping, deeper flavor, and much better control over the fruit.
What about frozen peaches?
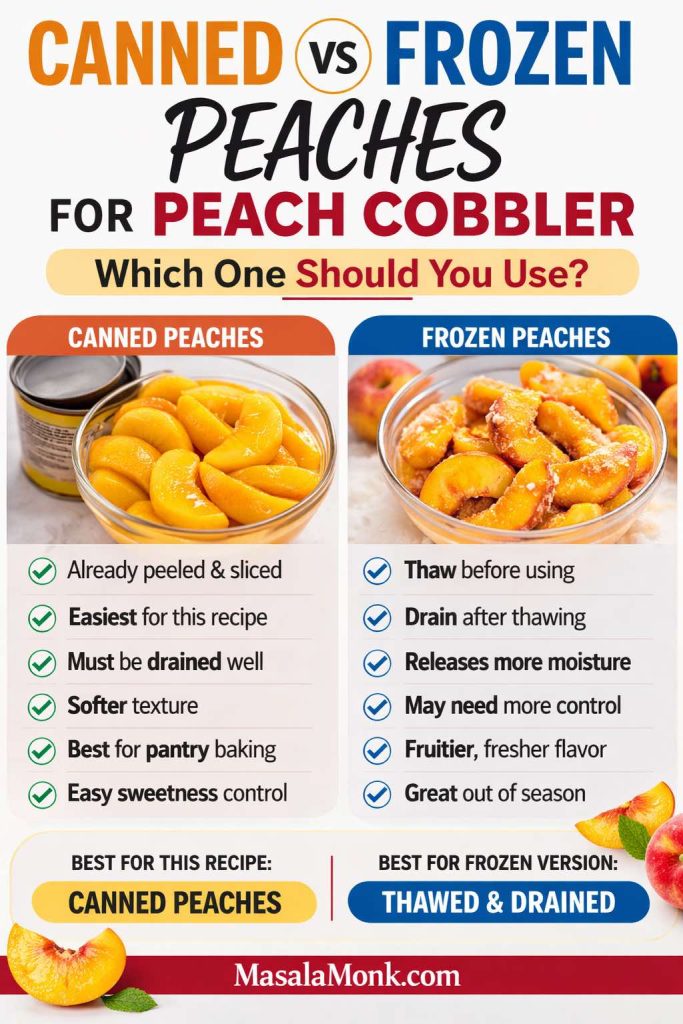
Frozen peaches work well in cobbler, though they usually need thawing and draining first. Because they release moisture differently from canned peaches, they belong more naturally in their own recipe framework. The same is true for peach cobbler using frozen peaches or peach cobbler recipe using frozen peaches. The spirit is similar, but the details deserve their own treatment.
Easy Variations on Peach Cobbler with Canned Peaches Recipe
One of the nicest things about a good cobbler base is that it can flex without losing itself.
Lemon zest
A little lemon zest can brighten peaches that taste dull or flat. This is especially helpful if the fruit feels sweet but not particularly peachy.

Brown sugar
A spoonful or two of brown sugar can make the topping feel richer and more caramel-like.
Almond extract
A bit of almond extract, used sparingly, can lend a lovely bakery note. Use much less than you would vanilla because it is powerful.
Mixed berries
A few raspberries or blueberries scattered among the peaches can make the filling feel summery and a little more vivid, though the cobbler will then become a peach-forward mixed fruit dessert rather than a pure peach version.
A slightly thicker filling
If you prefer a slightly thicker fruit layer, toss the drained peaches with 1 to 2 teaspoons of cornstarch before adding them to the batter. Many cobblers do not need this if the fruit has been drained properly and the bake is given enough time, but it can be helpful with particularly soft fruit.
Also Read: Ravioli Recipe Reinvented: 5 Indian-Inspired Twists on the Italian Classic
What to serve with peach cobbler with canned peaches
Warm peach cobbler knows how to carry a dessert course on its own, but the right accompaniments make it feel even more complete.
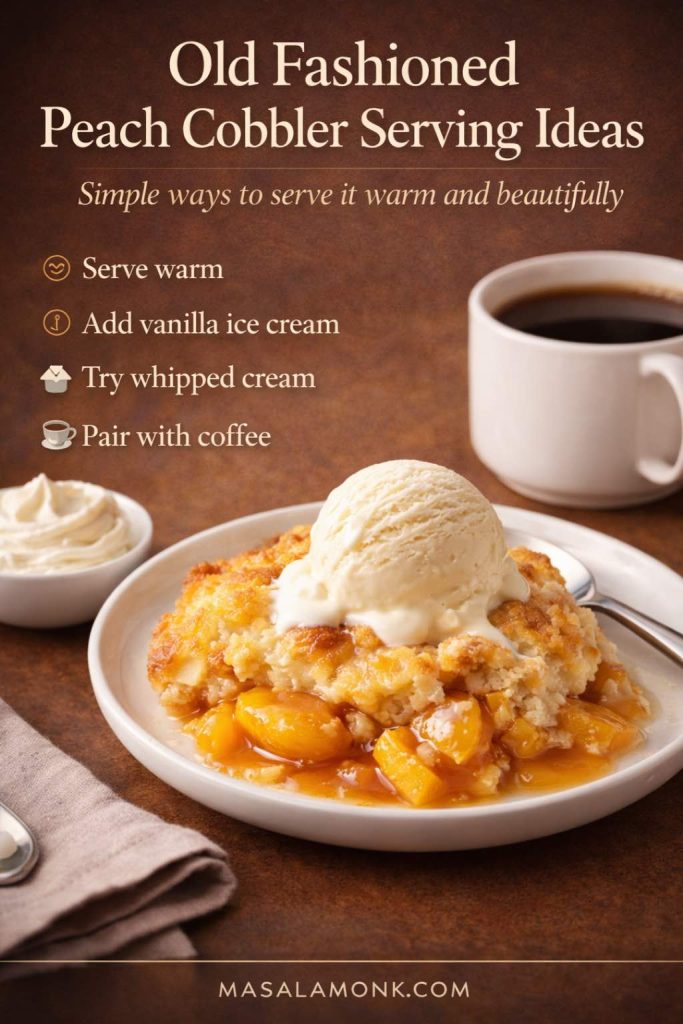
Vanilla ice cream with peach cobbler with canned peaches
Vanilla ice cream is the classic choice for obvious reason. The cream softens the sweetness, the cold contrasts beautifully with the warm topping, and the melting edges mingle with the fruit in a way that feels almost unfairly good. If you like homemade pairings, MasalaMonk’s guide to making ice cream at home is a lovely place to wander next.
Whipped cream
Whipped cream is another easy option, especially if you want something lighter than ice cream. Softly whipped cream with very little sugar lets the cobbler remain the center of attention.
Coffee with this peach cobbler with canned peaches
Coffee is wonderful beside peach cobbler, particularly in cooler weather or after dinner. A warm mug turns the whole dessert into more of an occasion. If that sounds appealing, MasalaMonk’s cappuccino recipe makes an especially nice pairing.
Iced coffee or brighter drinks
On a warmer day, or if you are serving cobbler after lunch, something chilled can feel more refreshing. In that case, these iced coffee recipes are an easy next stop.
If you are serving the cobbler at a summer gathering and want a brighter drink on the table, a fresh cocktail can make the whole dessert spread feel more playful. MasalaMonk’s Paloma recipe or mojito recipe would suit that mood beautifully.
Also Read: Croquettes Recipe: One Master Method + 10 Popular Variations
Storing and reheating leftovers of peach cobbler with canned peaches
Leftover cobbler is one of life’s small luxuries. The texture changes a little, of course. The topping softens as it sits. Even so, the flavor remains lovely, and a gently reheated bowl the next day can be unexpectedly perfect.

How long peach cobbler with canned peaches keeps
Once the cobbler has cooled, cover it and refrigerate it. It is best within 2 to 3 days. If you plan to eat it within a day or two, the pan can stay as it is. For longer storage within that short window, individual portions make reheating simpler.
How to reheat peach cobbler with canned peaches
The microwave works well enough for convenience, especially if you are warming a single serving. If you want the top to recover a little of its edge, the oven is better. Warm the cobbler gently until heated through rather than blasting it at a high temperature.
A brief food-safety note
For broader kitchen guidance, the FDA’s pages on safe food handling and safe food storage are useful references. Not every recipe needs those reminders, yet dessert made with fruit and dairy-based batter is still food that deserves proper care.
Also Read: How to Make a Flax Egg (Recipe & Ratio for Vegan Baking)
More desserts to make when this cobbler puts you in a baking mood
Once a warm fruit dessert comes out well, there is often a pleasant temptation to keep going. If that mood strikes, there are several rich, substantive MasalaMonk recipes that fit beautifully into the same comforting, reader-friendly spirit.
For something milky, generous, and celebration-ready, the tres leches cake recipe is a natural next bake. If you want a dessert with crisp edges and a different kind of warmth, homemade churros are deeply satisfying. If chocolate sounds more tempting than fruit, these vegan chocolate cake recipes offer another inviting direction.
The point is not to rush away from cobbler. Quite the opposite. It is to enjoy the way one good homemade dessert often opens the door to another.
Final thoughts on making a peach cobbler with canned peaches
Peach cobbler with canned peaches works because it meets you where you are while still giving you something that feels warm, generous, and deeply real. There is no need to wait for a perfect season, insist on ideal fruit, or treat dessert like a performance. Instead, a few pantry ingredients, a little care with the liquid, and enough patience to let butter, flour, peaches, and heat do what they have always done so beautifully together are enough to produce something genuinely comforting.
The result is the kind of dessert that earns its keep. It is easy enough for an ordinary evening, lovely enough for company, and comforting enough to make the kitchen feel briefly softer and kinder. That is no small thing.
So the next time you see canned peaches in the pantry and wonder whether they can become something more than a backup ingredient, let the answer be yes. With the right recipe, they can turn into a peach cobbler with canned peaches that tastes homemade, an easy peach cobbler with canned peaches recipe you return to without hesitation, or the kind of old fashioned canned peach cobbler that disappears from the table faster than expected. More than that, they can become the sort of dessert that reminds you how often the simplest things, handled well, are the ones that stay with people longest.
Also Read: Pork Tenderloin in Oven (Juicy, Easy, 350°F or 400°F) Recipe
FAQs about Peach Cobbler with Canned Peaches
1. Can you make peach cobbler with canned peaches?
Absolutely. A well-made peach cobbler with canned peaches can turn out buttery, golden, soft around the fruit, and every bit as comforting as a version made with fresh peaches. In fact, canned peaches make the recipe easier and more consistent because the fruit is already peeled, sliced, and tender.
2. Do you drain canned peaches for peach cobbler?
Yes, draining the peaches is usually the better choice. Otherwise, too much liquid can leave the cobbler watery and overly sweet. After draining, you can always add back a small amount of the peach liquid if the fruit looks too dry, but starting with control gives you a much better result.
3. What canned peaches are best for peach cobbler?
Canned peaches packed in juice or light syrup are usually the best option. They give you enough sweetness and moisture without making the dessert heavy or syrupy. Peaches in heavy syrup can still work, though you will usually want to drain them very well and reduce the sugar in the recipe slightly.
4. Can I use peaches in heavy syrup for peach cobbler?
Yes, you can. Even so, they need a little more care. Drain them thoroughly, taste the fruit, and use less added sugar in the batter if needed. That way, the peach cobbler with canned peaches still tastes balanced rather than overly sweet.
5. Why is my peach cobbler with canned peaches watery?
Most often, a watery cobbler comes down to too much liquid, not enough baking time, or skipping the resting period. If the peaches are not drained well, the batter struggles to set properly. Likewise, if the cobbler is pulled from the oven too early, the center may stay loose. Letting it rest after baking also helps the filling settle.
6. How do I keep peach cobbler with canned peaches from getting soggy?
Start by draining the peaches well. After that, avoid pouring all the syrup or juice back into the dish. Bake the cobbler until the top is deeply golden and the edges are bubbling, then let it rest before serving. Those small steps keep the topping tender without turning it soggy.
7. Can I make an easy peach cobbler with canned peaches ahead of time?
Yes, although cobbler is usually at its best on the day it is baked. If needed, you can make it earlier in the day and reheat it gently before serving. The flavor stays lovely, while the topping may soften a little as it sits.
8. Can I make a homemade peach cobbler using canned peaches that still tastes old-fashioned?
Definitely. The key is not the source of the peaches alone, but how the cobbler is built around them. A buttery batter, balanced sweetness, warm spice, and proper baking time go a long way toward making the dessert taste homemade and old-fashioned rather than rushed.
9. What is the difference between peach cobbler with canned peaches and peach crisp?
The difference is mostly in the topping. Peach cobbler with canned peaches has a soft batter-style or biscuit-style topping, depending on the recipe. Peach crisp, by comparison, usually has a crumbly topping made with butter, flour, sugar, and often oats. Cobbler feels softer and more spoonable, whereas crisp leans more crumbly and textured.
10. Can I make peach cobbler with canned peaches without fresh peaches at all?
Yes, completely. That is one of the best things about this dessert. You do not need fresh peaches for the recipe to work beautifully. As long as the canned peaches are drained well and the liquid is handled carefully, the cobbler can taste warm, juicy, and fully finished.
11. Can I turn this into an old fashioned peach cobbler recipe with canned peaches?
Yes, very easily. To give the cobbler more of an old-fashioned feel, keep the flavors simple, use a little cinnamon and vanilla, and bake it until the edges are richly golden. Serving it warm with vanilla ice cream also helps create that classic cobbler experience.
12. Can I use self-rising flour in peach cobbler with canned peaches?
You can, although you will need to adjust the recipe. Since self-rising flour already contains leavening and salt, it should replace both the all-purpose flour and part of the baking powder-and-salt structure. If you use it without adjusting anything else, the topping may not bake the way you expect.
13. Can I make peach cobbler with canned peaches and biscuit mix instead?
Yes, you can, and many people do. A peach cobbler made with biscuit mix or a Bisquick canned peach cobbler usually has a slightly different flavor and texture from a batter-style cobbler. It can still be good, but it will not have quite the same homemade character as a from-scratch version.
14. Is cake mix peach cobbler with canned peaches the same as regular cobbler?
Not exactly. A cake mix peach cobbler with canned peaches is usually closer to a dump cake in style. It is quicker and more shortcut-driven, whereas a traditional batter-style cobbler has a softer, more integrated topping. Both can be delicious, though they are different desserts.
15. How long does peach cobbler with canned peaches last in the fridge?
Usually, it keeps well for 2 to 3 days when covered and refrigerated. The topping will soften over time, but the flavor remains very good. Reheating individual portions before serving often brings back some of the warmth and comfort that make cobbler so appealing.
16. Can I freeze peach cobbler with canned peaches?
Yes, although the texture is best when freshly baked or gently reheated after refrigeration. Freezing is possible, but the topping may soften more after thawing. Even then, the dessert can still be very enjoyable, especially if warmed before serving.
17. What should I serve with peach cobbler with canned peaches?
Vanilla ice cream is the classic answer, and for good reason. Whipped cream is another lovely option. On cooler evenings, coffee pairs beautifully with peach cobbler, while warmer days may call for something chilled alongside it.
18. Why does my peach cobbler topping stay pale?
Usually, that happens when the cobbler needs more time in the oven or when the liquid level is too high. A proper bake gives the topping enough time to rise, brown, and set. If the top is coloring too slowly, keep baking until the edges are clearly golden and the center looks finished.
19. Can I make a simple peach cobbler with canned peaches less sweet?
Certainly. The easiest way is to reduce the sugar slightly, especially if the peaches are packed in syrup. Choosing peaches in juice or light syrup also helps keep the dessert more balanced from the start.
20. Is peach cobbler with canned peaches good for holidays and potlucks?
Very much so. Since the recipe is easy to scale, easy to transport, and familiar to most people, it works especially well for gatherings. Better yet, it holds onto that homemade, comforting feel that makes cobbler such a welcome dessert on any table.