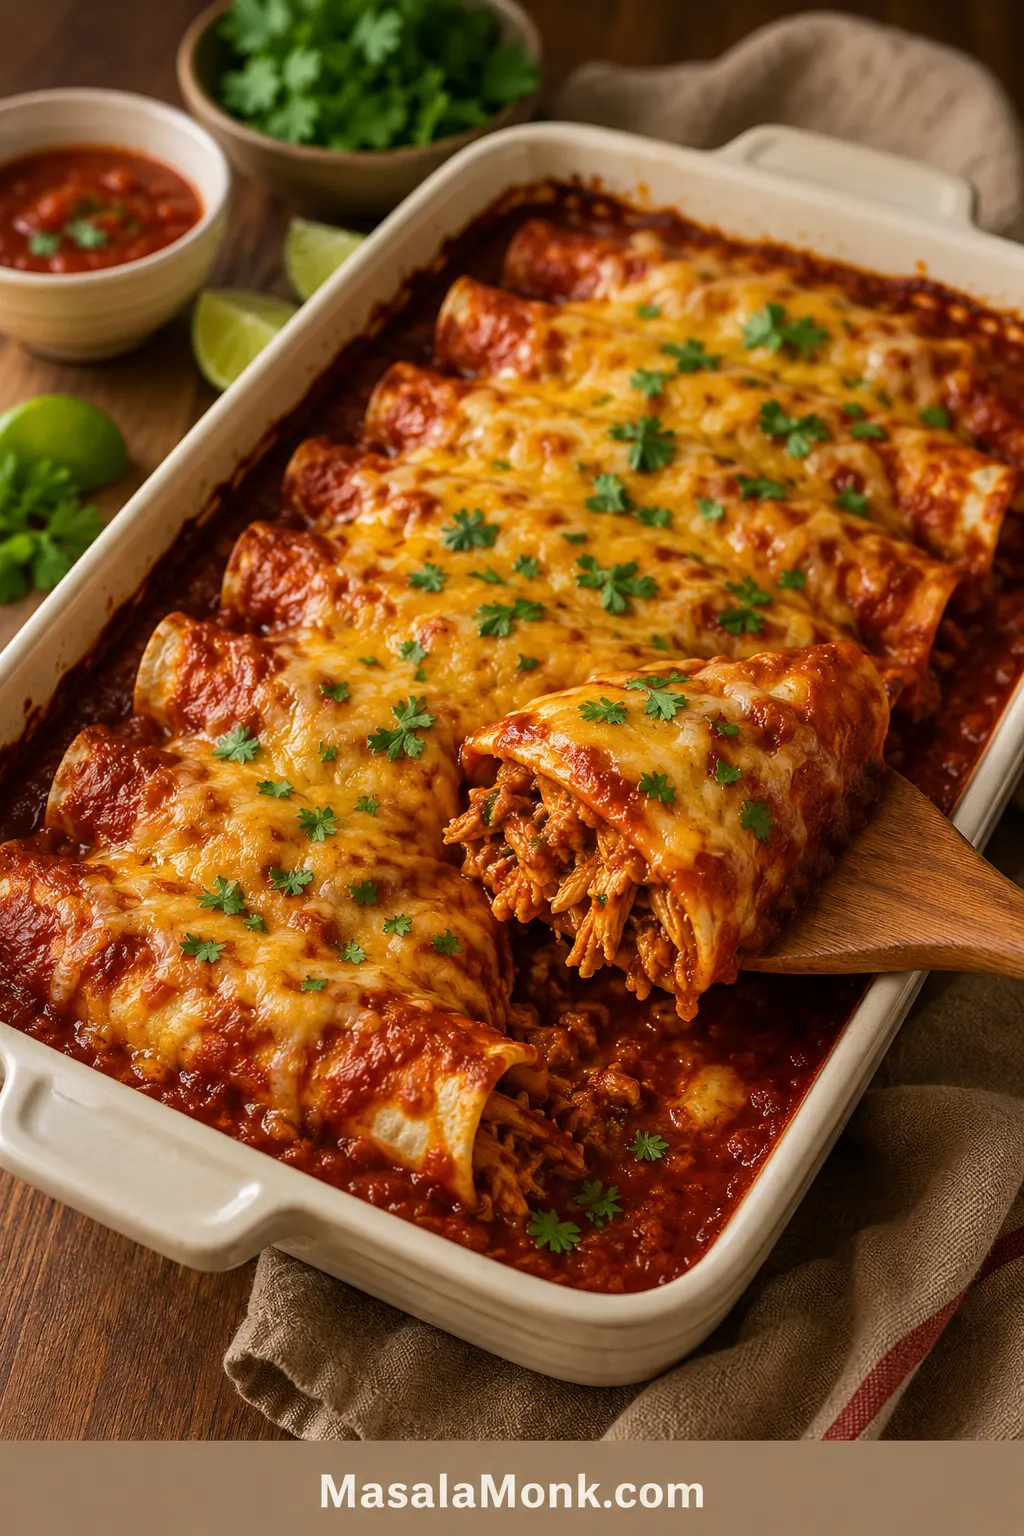
You want chicken enchiladas that taste like a real dinner, not dry chicken wrapped in tortillas and hidden under cheese. This easy chicken enchilada recipe keeps the filling juicy, the sauce generous but controlled, and the tortillas soft enough to roll without turning the whole pan soggy.
It is the pan for nights when cooked chicken is already handled and you just need it to become dinner. Store-bought sauce, rotisserie chicken, and flour tortillas are not shortcuts to apologize for here. They are what make this a dinner you can actually cook tonight.
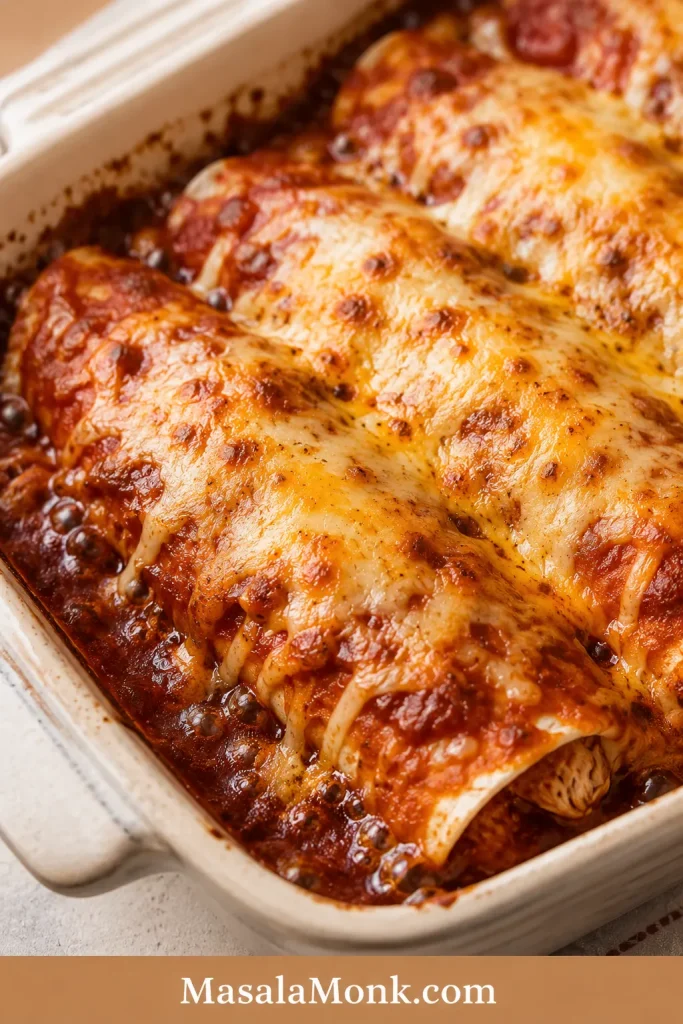
The best version gives you soft tortillas, juicy chicken, melted cheese, and saucy edges without a wet bottom. A simple trick makes that possible: the ½-½-1½ no-soggy sauce split, with a thin layer under the enchiladas, a little sauce in the chicken, and most of the sauce on top.
Quick Answer: Easy Chicken Enchiladas
Easy chicken enchiladas are made by filling warm tortillas with shredded chicken, cheese, spices, and enchilada sauce, then rolling them into a 9×13-inch baking dish. Top with more sauce and cheese, then bake at 350°F / 175°C for 22–25 minutes, until the cheese is melted and the sauce bubbles around the edges.
For one family-size pan, use 3 cups / 375–425 g cooked shredded chicken, 2½ cups / 600 ml enchilada sauce, 8 medium tortillas or 10 small corn tortillas, and 2½ cups / about 285 g shredded cheese. Let the pan rest for 5–10 minutes before serving.
The shortcut version uses rotisserie chicken and store-bought sauce, so most of the work is filling, rolling, topping, and baking. To keep the pan saucy but not soggy, use ½ cup sauce underneath, ½ cup in the chicken, and 1½ cups on top.
- Fastest chicken: rotisserie chicken.
- Main sauce: red enchilada sauce.
- Beginner-friendly tortilla: flour tortillas.
- More classic texture: warmed corn tortillas.
- Best texture clue: saucy edges, melted cheese, and tortillas that lift instead of collapse.
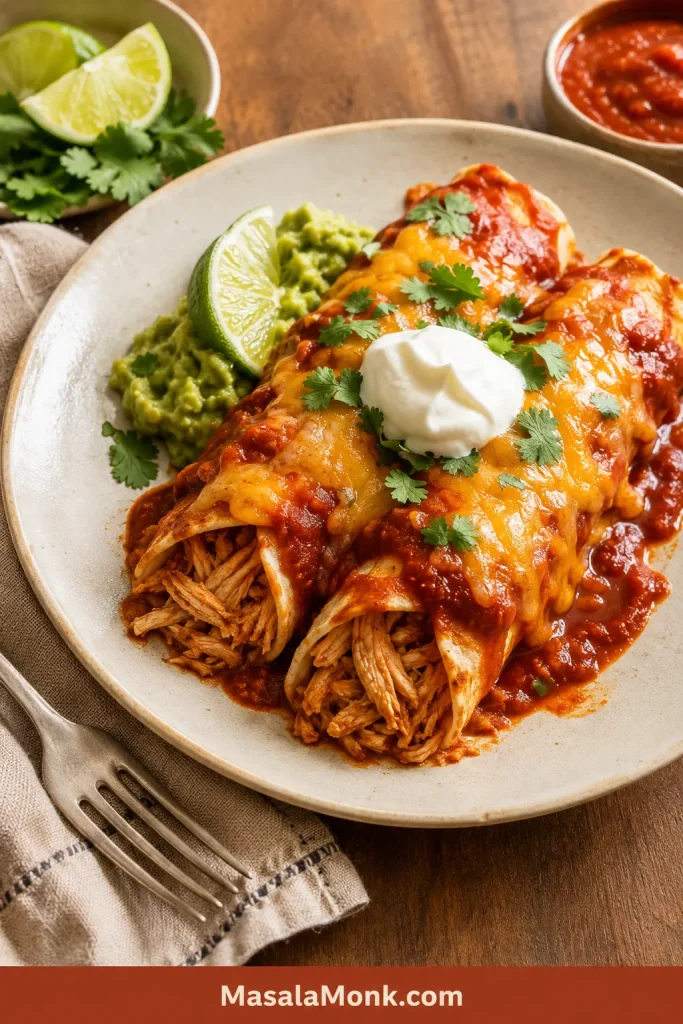
Serving Chicken Enchiladas
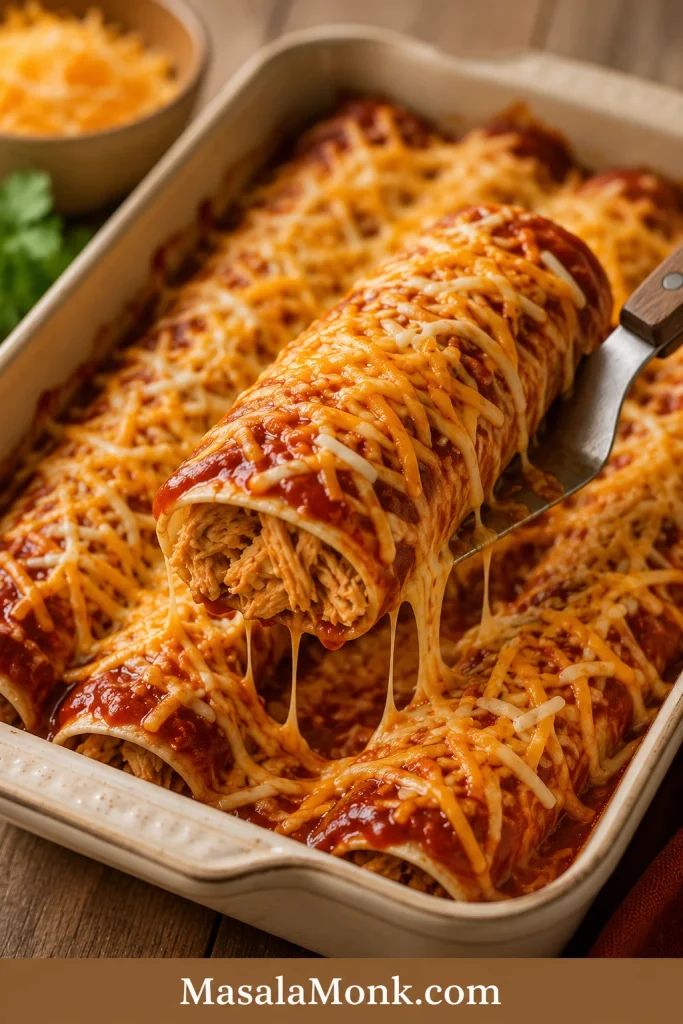
This plate shows the finished texture you are aiming for: saucy edges, melted cheese, and enough structure to serve with toppings instead of collapsing into the dish.
Make This Now If You Have
- Rotisserie chicken, leftover chicken, or any cooked shredded chicken
- Red enchilada sauce or green enchilada sauce
- Flour or corn tortillas
- A cheese that melts well
- A 9×13-inch baking dish
- About 45 minutes
You do not need homemade sauce, freshly cooked chicken, or perfect tortillas to make this work. The recipe is built around cooked chicken, ready sauce, and a few small choices that keep the pan from turning heavy or soggy.
This is the kind of pan that still works even if one tortilla tears, the sauce came from a can, and the chicken came from last night’s dinner. Choose flour tortillas if you are worried about cracking. Pick corn tortillas if you want a more classic enchilada bite.
Make the card version first. The sections after it are there for the moments that usually cause trouble: dry chicken, cracked tortillas, too much sauce underneath, and messy first servings.
Easy Chicken Enchilada Recipe Card
Start here for the classic version: red chicken enchiladas with shredded chicken, warm tortillas, enchilada sauce, and melty cheese.
Recipe Details
| Prep time | 15 minutes |
| Cook time | 22–25 minutes |
| Rest time | 5–10 minutes |
| Total time | 45–50 minutes |
| Servings | 4–6 |
| Yield | 8 medium enchiladas or 10 smaller corn-tortilla enchiladas |
| Oven temperature | 350°F / 175°C |
| Baking dish | 9×13-inch / 23×33 cm |
Equipment
- 9×13-inch / 23×33 cm baking dish
- Large mixing bowl
- Measuring cups and spoons
- Spoon or spatula
- Skillet, microwave-safe plate, or clean towel for warming tortillas
- Foil, optional
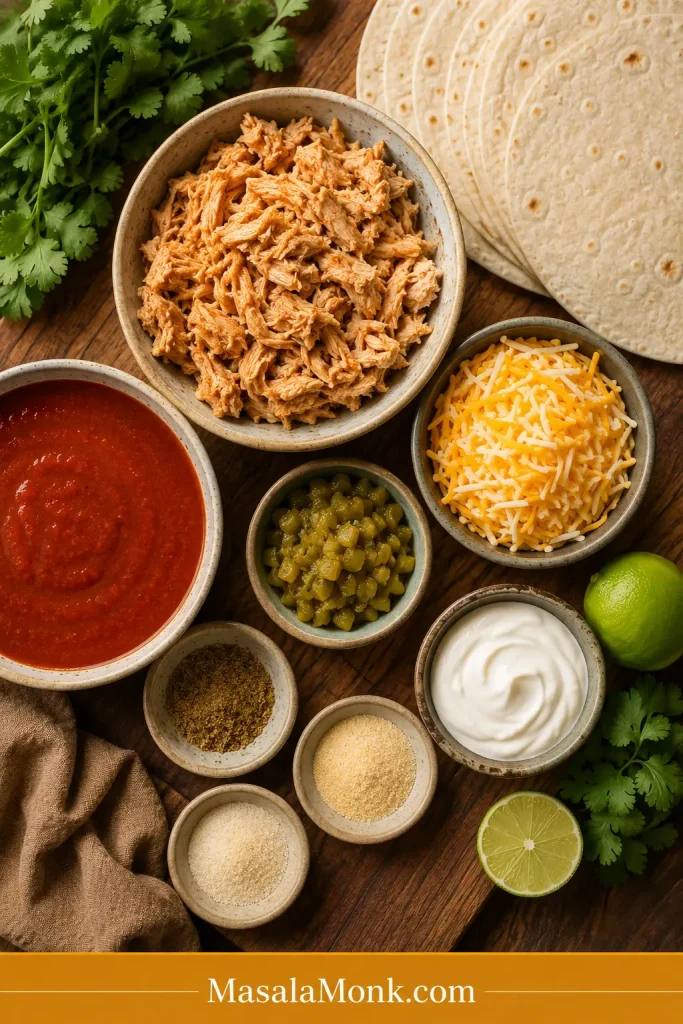
Ingredients
- 3 cups cooked shredded chicken / about 375–425 g
- 2½ cups red enchilada sauce / about 600 ml, divided
- 8 medium flour or corn tortillas, or 10 small 6-inch corn tortillas
- 2½ cups shredded cheese / about 285 g, divided
- 1 can diced green chiles / 4 oz / 113 g, optional but recommended
- ½ teaspoon ground cumin
- ½ teaspoon garlic powder
- ¼ teaspoon onion powder, or ¼ cup finely chopped onion
- ½ teaspoon salt, adjust depending on the sauce
- ¼ teaspoon black pepper
- Oil or cooking spray, for the baking dish
For topping: chopped cilantro, sour cream, diced onion, avocado, guacamole, jalapeños, lime wedges, pico de gallo, or crumbled cotija.
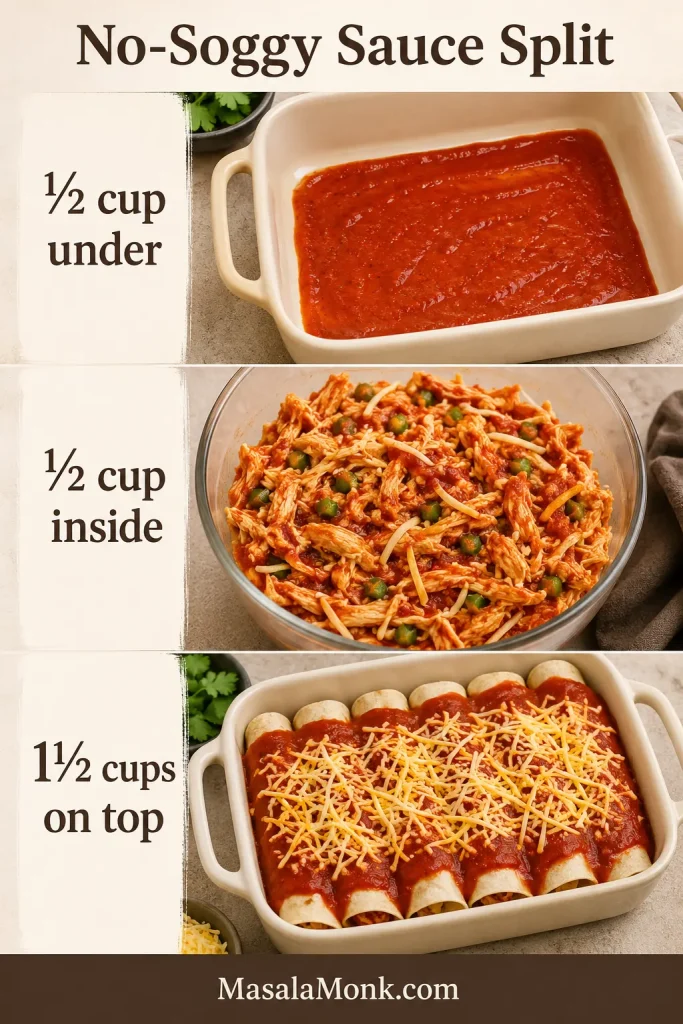
The ½-½-1½ Sauce Split
- ½ cup / 120 ml sauce for the bottom of the baking dish
- ½ cup / 120 ml sauce mixed into the chicken filling
- 1½ cups / 360 ml sauce poured over the top
This is the no-soggy rhythm: a little underneath so nothing sticks, a little inside so the chicken stays moist, and most on top where it can bubble into the cheese.
Instructions
- Preheat the oven. Heat the oven to 350°F / 175°C. Lightly grease a 9×13-inch / 23×33 cm baking dish.
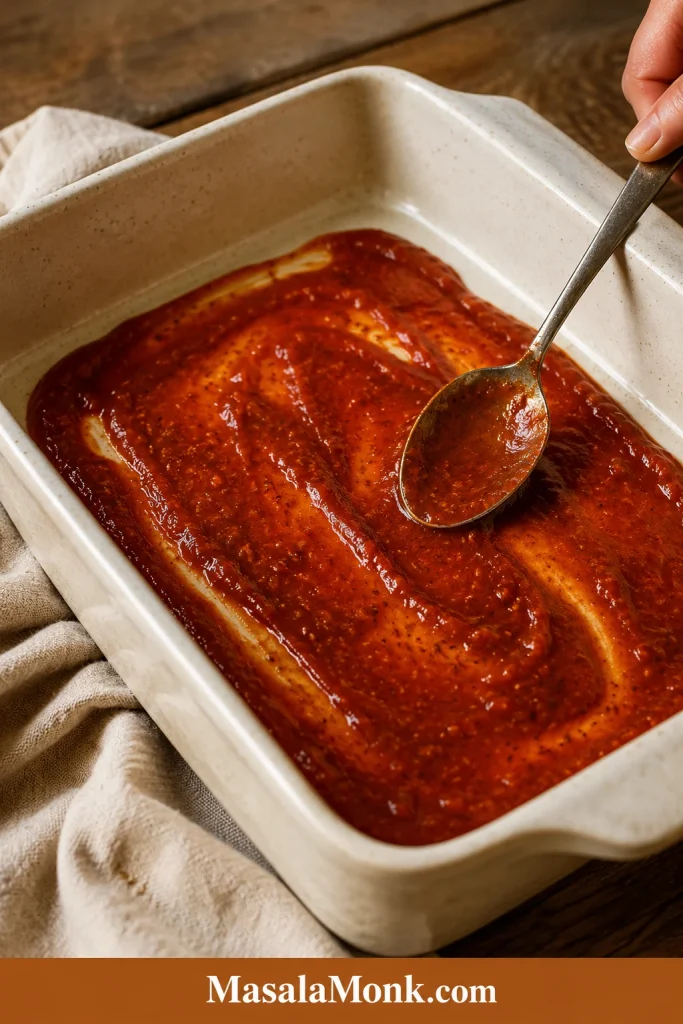
- Add the bottom sauce. Spread ½ cup / 120 ml enchilada sauce across the bottom. The dish should be coated, not flooded.
- Make the filling. Mix the shredded chicken with ½ cup / 120 ml sauce, green chiles, cumin, garlic powder, onion powder, salt, pepper, and 1 cup / about 115 g shredded cheese.
- Warm the tortillas. Heat them until flexible. Use a skillet, microwave them wrapped in a damp towel for 20–30 seconds, or briefly warm corn tortillas with a little oil.
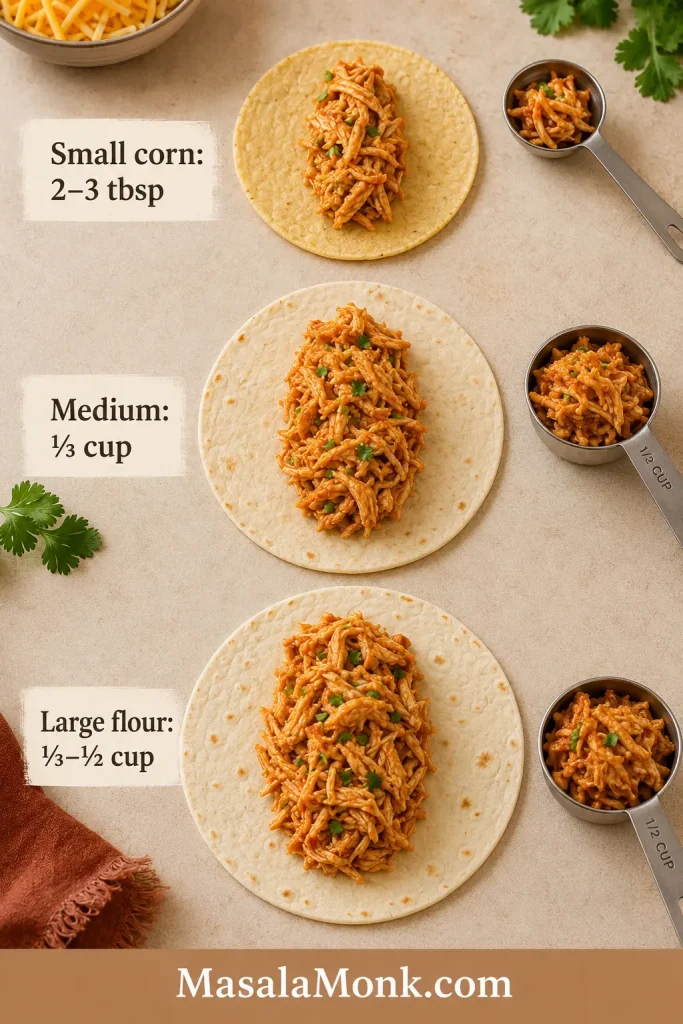
- Fill each tortilla. Spoon about ⅓ cup filling down the center of each medium tortilla. Use 2–3 tablespoons for small corn tortillas.
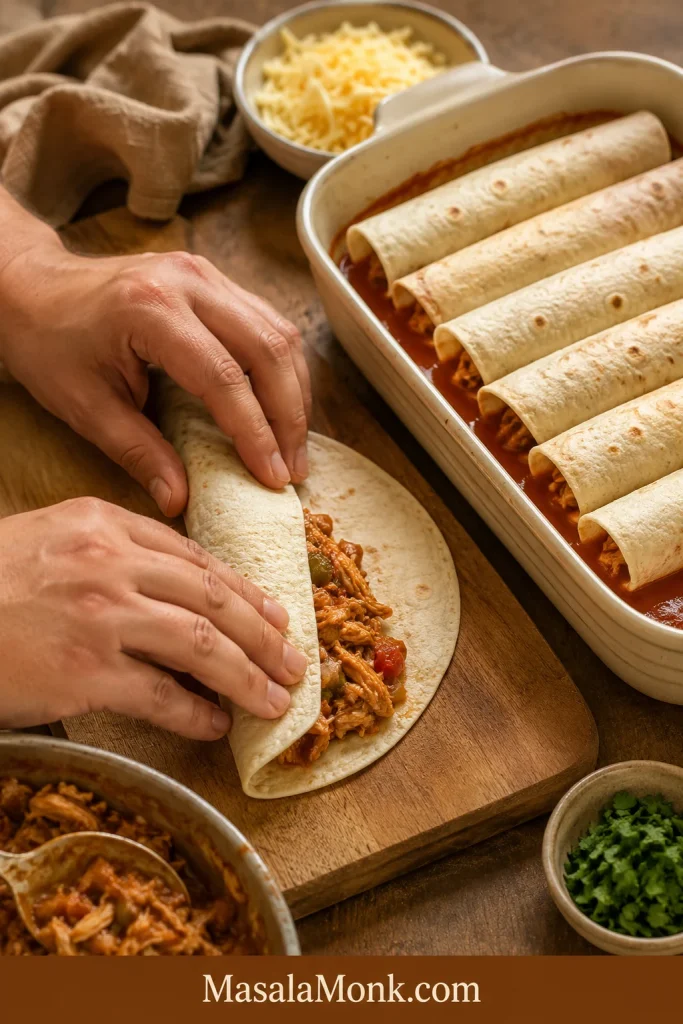
- Roll and arrange. Work snugly, then place each enchilada seam-side down in the baking dish.
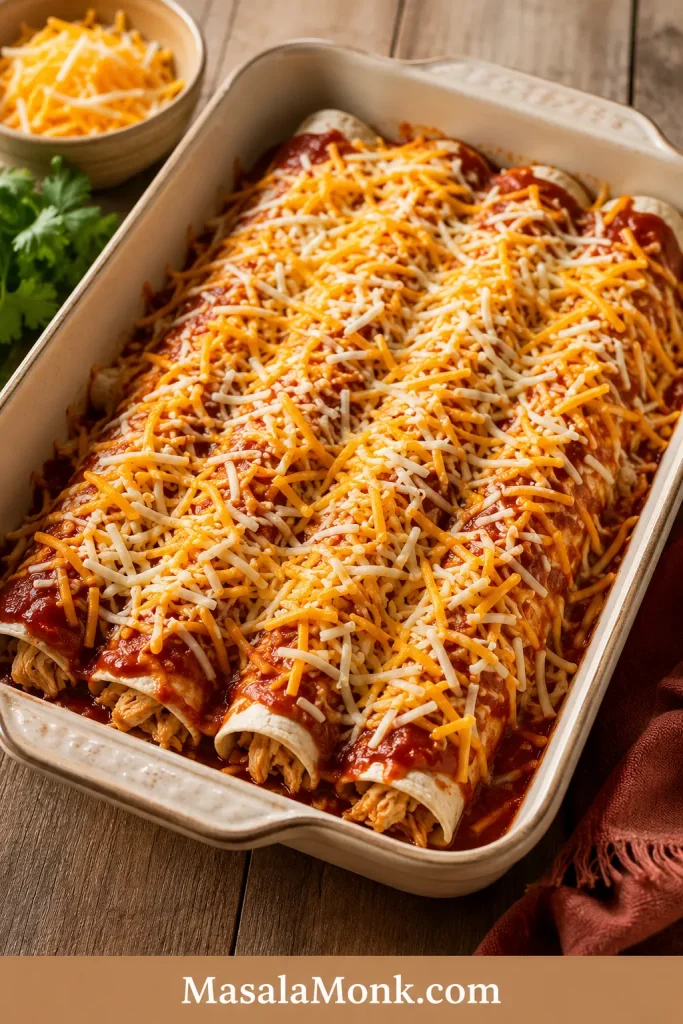
- Add the top sauce and cheese. Pour the remaining 1½ cups / 360 ml sauce over the enchiladas. Sprinkle with the remaining 1½ cups / about 170 g cheese.
- Bake. Leave the pan uncovered for 22–25 minutes, until the cheese melts, the sauce bubbles at the edges, and the center is hot.
- Rest. Let the pan rest for 5–10 minutes before serving.
- Finish. Add cilantro, sour cream, avocado, lime, jalapeños, or your favorite toppings.
Recipe Notes
- Use 2½ cups chicken for lighter enchiladas or up to 4 cups for very full enchiladas.
- If using small corn tortillas, use about 2–3 tablespoons filling per tortilla and expect about 10 smaller enchiladas.
- When the chicken filling is steaming hot, let it cool for 3–5 minutes before rolling so the tortillas do not soften too quickly.
- Bake uncovered for the best texture. Cover loosely for the first 15 minutes only if you prefer very soft enchiladas.
- If your enchilada sauce is already salty, reduce the added salt in the filling.
- Dry filling needs 1–2 extra tablespoons of sauce. Loose filling needs a little more chicken or cheese.
- For an 8×8-inch / 20×20 cm pan, halve the recipe and bake until the sauce bubbles and the center is hot.
Need help before rolling? Jump to the no-soggy sauce split, corn vs flour tortillas, or troubleshooting.
At a Glance
| What matters | Best choice for this recipe |
|---|---|
| Oven temperature | 350°F / 175°C |
| Pan size | 9×13-inch / 23×33 cm baking dish |
| Chicken | 3 cups / 375–425 g cooked shredded chicken |
| Sauce split | ½ cup bottom, ½ cup filling, 1½ cups top |
| Tortillas | 8 medium tortillas or 10 small corn tortillas |
| Cheese | 2½ cups / about 285 g shredded cheese |
| Yield | 8 medium enchiladas or 10 smaller corn-tortilla enchiladas |
| Bake time | 22–25 minutes, uncovered, until bubbling |
| Rest time | 5–10 minutes |
| Total time | 45–50 minutes |
In This Recipe
Why This Recipe Works
This recipe works because it fixes the three places chicken enchiladas usually go wrong: dry filling, cracked tortillas, and a soggy bottom.
Sauce, spices, green chiles, and cheese go into the chicken before rolling, so the filling tastes seasoned instead of plain. Warm tortillas bend instead of splitting, and the thin bottom sauce layer keeps the underside coated without turning mushy.
Most of the comfort lands on top, where the sauce and cheese bubble together. Give the pan a few minutes to rest, and the first serving has a much better chance of lifting cleanly.
The ½-½-1½ No-Soggy Sauce Split
Soggy enchiladas usually come from too much sauce underneath, watery filling, cold tortillas, very hot filling, or steam trapped in the pan for too long. Instead, aim for better placement, not less sauce.
The split is easy to remember: ½ cup underneath, ½ cup inside, 1½ cups on top.
Rule of thumb: light sauce underneath, moist chicken inside, generous sauce on top, warm tortillas, uncovered bake, and a short rest before serving.
- Underneath: a thin sauce layer keeps the enchiladas from sticking without soaking the bottom.
- Inside: a little sauce in the chicken keeps the filling juicy.
- On top: most of the sauce bubbles into the cheese where it belongs.
- Very hot filling: let it cool for a few minutes before rolling so trapped steam does not soften the tortillas too quickly.
- Extra sauce: serve it warm at the table instead of drowning the baking dish.
Use a Thin Sauce Layer Underneath
A light base layer protects the rolls from sticking, but the bottom of the dish should still look shallow and controlled.
Do not chase perfect rolls here. Warm tortillas, seam-side down, sauce and cheese on top — that is enough. The first enchilada out of the pan is always the most likely to look a little rough, so let the dish sit while everyone grabs plates, sour cream, lime, and whatever toppings are already in the fridge.
Next decision: choose corn or flour tortillas, or go back to the recipe card.
Pan Notes That Matter
These small choices make the difference between a pan that tastes good and a pan that serves cleanly.
- A 10-minute rest gives cleaner servings than cutting into the pan immediately.
- Flour tortillas are easiest for beginners, but corn tortillas give a more classic enchilada bite.
- Extra sauce works better at the table than poured into the bottom of the dish.
- Monterey Jack melts smoother than sharp cheddar alone.
- A torn tortilla is not a failure; place it seam-side down and cover it with sauce and cheese.
- The corner pieces usually get the best saucy edges.
- If the first enchilada comes out messy, serve that one to the cook and let the rest settle another minute.
Choose Your Chicken Enchilada Path
Keep the red-sauce version as the base. From there, you can make the dish brighter, creamier, lighter, or skip the rolling entirely.
| What you want | Best move |
|---|---|
| Classic easy chicken enchiladas | Use red enchilada sauce, shredded chicken, tortillas, and Monterey Jack or Mexican-blend cheese. |
| Fastest weeknight version | Use rotisserie chicken and store-bought enchilada sauce. |
| Green chicken enchiladas | Swap red sauce for green enchilada sauce or salsa verde. |
| Creamier enchiladas | Add sour cream, cream cheese, or a small amount of creamy sauce. |
| Milder family pan | Use mild sauce, Monterey Jack, and keep jalapeños or hot sauce for the table. |
| No rolling | Layer the same chicken, sauce, tortillas, and cheese as a casserole. |
| Less heavy version | Use chicken breast, corn tortillas, less cheese, and beans or vegetables. |
Ingredients You Need
Because the ingredient list is short, the few choices you make matter: use chicken that is not watery, sauce you actually like, tortillas that bend, and cheese that melts.
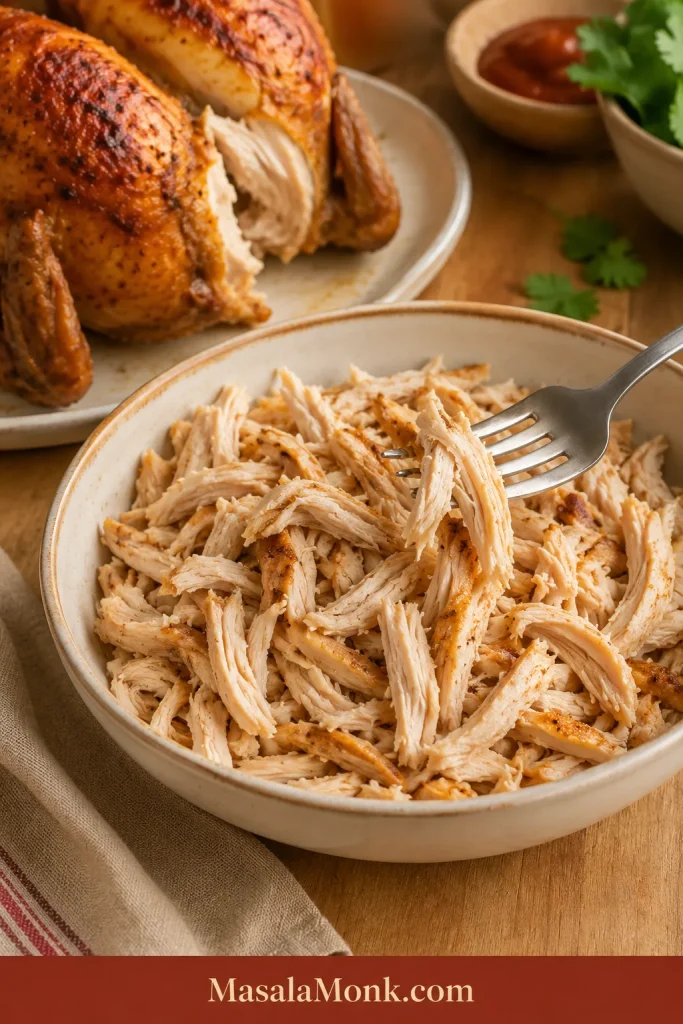
Chicken
Use cooked shredded chicken that is moist but not watery. Rotisserie chicken is the easiest choice, but leftover chicken, poached chicken breast, cooked thighs, or slow cooker shredded chicken all work.
If the chicken tastes good before rolling, the enchiladas will taste good after baking. Mix it with sauce, spices, green chiles, and cheese so every bite has flavor.
Enchilada Sauce
Pick a red enchilada sauce you would happily spoon over the finished pan, because it carries a lot of the flavor here. Store-bought sauce works well for a weeknight version; homemade sauce gives more depth if you already have it.
You will use 2½ cups / 600 ml sauce total. For extra-saucy servings, warm more sauce separately and add it at the table.
Using store-bought sauce? Warm it first and taste it before adding salt to the filling. When it tastes flat, add a pinch of cumin or garlic powder. If it tastes too sharp, stir in a small spoon of sour cream after warming. Want more heat? Add hot sauce, chipotle, or jalapeños at the table instead of making the whole pan spicy.
Tortillas
Corn tortillas taste more classic. Flour tortillas are softer and easier to roll. Both work, but cold tortillas crack and over-sauced tortillas get heavy.
Cheese
Cheese is not just topping here. It helps the filling hold together and gives the pan that melted, bubbling finish.
- Monterey Jack: smoothest melt.
- Mexican blend: easiest everyday option.
- Cheddar-Jack: more flavor with good melt.
- Oaxaca: mild, stretchy, excellent if available.
- Cotija or queso fresco: better as a finishing topping than the main melting cheese.
Green Chiles
Diced green chiles are optional, but they make the filling taste more complete without adding much heat. They bring mild chile flavor, moisture, and a little brightness to the chicken.
Best Chicken for Chicken Enchiladas
Start with whatever cooked chicken you already have. The only real rule is that it should be cooked, shredded, and not watery.
| Best for | Chicken choice |
|---|---|
| Fastest dinner | Rotisserie chicken |
| Juiciest filling | Cooked chicken thighs |
| Leanest version | Poached or cooked chicken breast |
| Meal prep | Slow cooker shredded chicken |
| Pantry emergency | Canned chicken, drained well |
If you need a simple batch of shredded chicken before making enchiladas, the same basic method from Crock Pot Chicken Breast Recipes can be used here. Keep the chicken simply seasoned so the enchilada sauce still leads the flavor.
One medium rotisserie chicken usually gives about enough shredded meat for this recipe, depending on size. If you only have 2½ cups chicken, the enchiladas will still work. With closer to 4 cups, use large tortillas or make the filling a little fuller.
Only have canned chicken? Drain it very well, break it up gently, and season it with sauce, cumin, garlic powder, green chiles, and cheese before rolling. It will not taste as rich as rotisserie chicken, but it can still save dinner when the pantry is what you have.
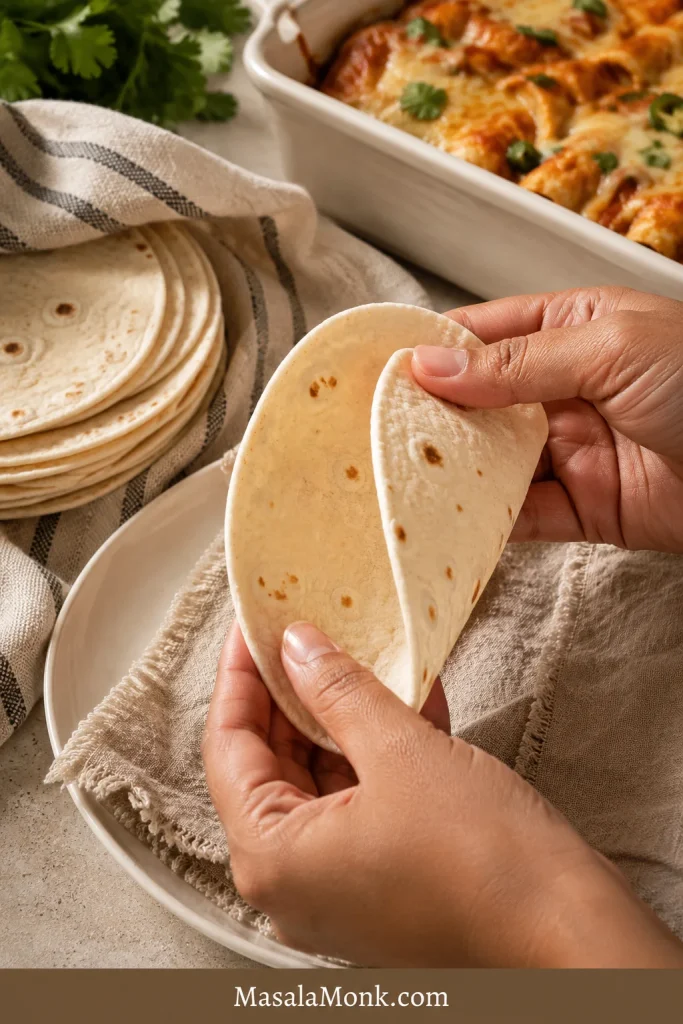
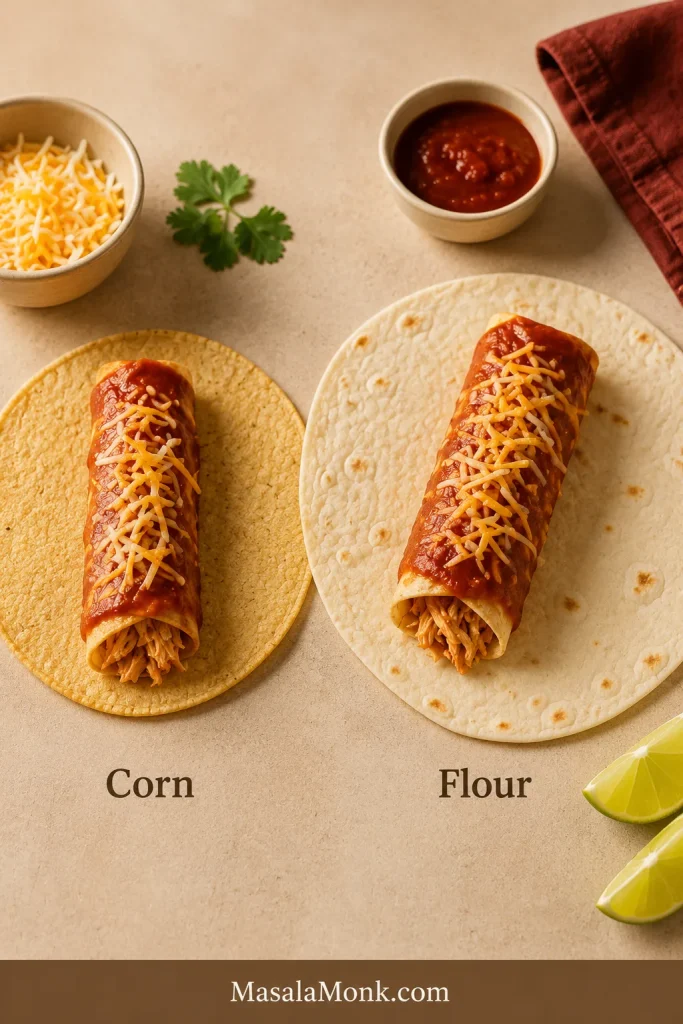
Corn Tortillas vs Flour Tortillas
Tortillas are where many enchiladas go wrong. The filling can be perfect, the sauce can be good, and one cold tortilla can still split open before it reaches the pan.
Mini rule: do not use cold tortillas. Warm tortillas bend. Cold tortillas crack.
Warm Tortillas Before Rolling
Whether you choose corn or flour, warmth matters because a flexible tortilla rolls cleanly and is less likely to split at the center.
| Tortilla | Best for | Watch out for |
|---|---|---|
| Corn tortillas | Classic flavor and better enchilada texture | They can crack if cold or dry |
| Flour tortillas | Easy rolling and softer texture | They can become too soft if over-sauced |
| Small corn tortillas | Traditional-style smaller enchiladas | Use less filling so they do not tear |
| Large flour tortillas | Bigger, fuller enchiladas | Do not overstuff or the pan becomes heavy |
Once you pick the tortilla, check how much filling to use so the rolls close without tearing.
For corn tortillas, wrap them in a damp towel and microwave for 20–30 seconds, adding a few seconds more if they are still stiff. You can also heat them one by one in a skillet, or warm them quickly with a little oil.
Flour tortillas are more forgiving, but they still need sauce control. Keep the bottom layer thin and let most of the sauce sit on top, where it can bubble into the cheese instead of soaking the underside.
How Much Filling Goes in Each Tortilla?
- Small corn tortilla: 2–3 tablespoons filling
- Medium tortilla: about ⅓ cup filling
- Large flour tortilla: ⅓–½ cup filling, depending on size
A good roll should close without strain. If you have to force it shut, use less filling.
Sauce Options and Easy Variations
Keep the same rolling and baking approach, then change the sauce, filling, or toppings to match the dinner you want. Pick the sauce based on what sounds good, not because one version is more correct.
| Version | How to make it |
|---|---|
| Classic red chicken enchiladas | Use red enchilada sauce, shredded chicken, green chiles, and Monterey Jack or Mexican-blend cheese. |
| Green chicken enchiladas | Swap red sauce for green enchilada sauce or Salsa Verde. Finish with cilantro, lime, and sour cream. |
| White chicken enchiladas | Use a creamy white sauce with chicken broth, sour cream, green chiles, and cheese. |
| Sour cream chicken enchiladas | Stir ½ cup / 120 g sour cream into the filling, or spoon sour cream over the baked enchiladas. |
| Cream cheese chicken enchiladas | Add 4 oz / 113 g softened cream cheese for a gentle creamy version, or up to 8 oz / 226 g for a heavier pan. |
| Pantry creamy enchiladas | Stir ½–1 can condensed cream of chicken soup into the filling or sauce. |
| Mild chicken enchiladas | Use mild sauce, Monterey Jack, and keep spicy toppings at the table. |
| Spicy chicken enchiladas | Add pepper Jack, jalapeños, chipotle, cayenne, hot sauce, or spicy enchilada sauce. |
| Lighter chicken enchiladas | Use chicken breast, corn tortillas, a lighter cheese layer, and beans or vegetables to make the filling feel generous. |
Red feels cozy, green feels brighter, and creamy versions feel softer and richer. The same basic recipe gives you a very different dinner depending on the sauce.
How to Make Chicken Enchiladas
The recipe card gives you the measurements. Think of this as your texture checklist while the pan comes together.
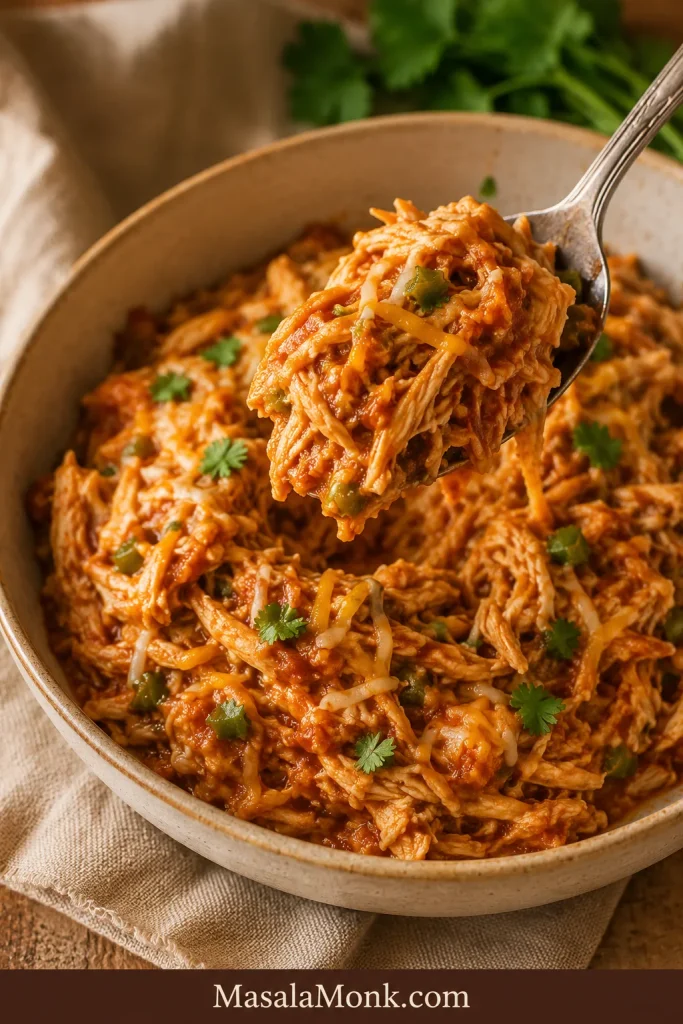
Mix a Moist, Not Soupy, Filling
The filling should look seasoned and cohesive before you roll it. If it looks dry, add a little sauce; if it drips, add more chicken or cheese.
- Coat the dish lightly. The bottom should look sauced, not flooded.
- Mix a filling that holds together. It should look moist and seasoned, not loose or dripping.
- Warm the tortillas until bendable. A flexible tortilla rolls more cleanly.
- Fill without forcing. If the tortilla strains to close, use less filling.
- Place seam-side down. This hides rough edges and keeps the rolls in place.
- Top generously, not deeply. The tortillas should be covered, but not swimming.
- Bake until bubbling. The cheese should melt into the seams, and the sauce should thicken slightly at the edges.
- Rest before serving. The sauce settles, and the first serving has a better chance of lifting cleanly.
Roll Enchiladas Seam-Side Down
A snug roll helps, but the real insurance is placing the rough edge underneath so the filling stays tucked in while the sauce heats.
Add Sauce and Cheese on Top
Keep most of the sauce above the rolls, where it can thicken around the cheese instead of soaking the bottom of the pan.
Before serving, check the doneness cues and why the pan needs to rest.
How to Know the Enchiladas Are Done
Chicken enchiladas use cooked chicken, so you are not waiting for raw meat to cook through. You are looking for heat, bubbling sauce, melted cheese, and a pan that has had a few minutes to settle.
- Sauce bubbles around the edges of the dish.
- Cheese is fully melted on top and settling into the seams.
- A knife inserted into the center comes out hot to the touch.
- The tortillas look soft but not drowned.
- You can hear a little bubbling at the edges when the dish comes out of the oven.
- After resting, the first enchilada lifts out without falling apart completely.
The best bite is usually from the edge of the pan, where the sauce has thickened into the cheese. Spoon any saucy edges over the top of each serving.
Rest Before Serving for Cleaner Pieces
Resting is not just a waiting step. It gives the sauce and cheese time to settle so the first piece comes out cleaner.
What If I Only Have…
This is where the recipe gets flexible, because dinner rarely starts with a perfect fridge.
| You only have | What to do |
|---|---|
| Flour tortillas | They are fine here. Keep the sauce layer underneath thin so they stay soft without turning heavy. |
| Corn tortillas | Warm them well before rolling. Use less filling if they are small. |
| Store-bought sauce | Use it. Taste before adding salt to the filling. |
| 2 cups chicken | Make slightly lighter enchiladas, or add black beans, corn, sautéed peppers, or extra cheese. |
| No green chiles | Skip them, or add a little extra cumin, garlic, onion, or jalapeño. |
| Only cheddar | Use it, but mix with Monterey Jack next time for a smoother melt. |
| Taco seasoning | Use a small amount in place of the cumin, garlic powder, and onion powder. Taste before adding extra salt. |
Dry filling needs sauce. Loose filling needs chicken or cheese. Cracking tortillas need warmth. Enchiladas are forgiving once the sauce and cheese settle in.
Want the Same Flavor Without Rolling?
If rolling tortillas feels like too much on a busy night, make the same chicken-sauce-cheese idea as a layered bake. This Chicken Enchilada Casserole Recipe gives you the flavor of chicken enchiladas without filling and rolling each tortilla.
The casserole version is also useful when your tortillas are tearing, when you need a scoopable dinner, or when you want enchilada flavor with less assembly.
What to Serve with Chicken Enchiladas
This is a rich, saucy, cheesy dish, so the best sides and toppings bring freshness, creaminess, crunch, or acidity.
- Fresh: cilantro, lime wedges, pico de gallo, diced onion, simple green salad
- Creamy: sour cream, Greek yogurt, avocado, Guacamole
- Hearty: Mexican rice, cilantro lime rice, black beans, refried beans
- Crunchy: tortilla chips, pickled onions, shredded lettuce
- Sweet-fresh: Mango Salsa
- Snack-table side: 7 Layer Dip
For a spicy pan, cool the plate down with sour cream, avocado, or salad. With a milder pan, bring heat at the table with jalapeños, hot sauce, pickled onions, or lime.
Make Ahead, Storage, Freezing, and Reheating
Make Ahead
You can assemble chicken enchiladas up to 24 hours ahead. Cover the dish and refrigerate until ready to bake. For the best texture, keep a little sauce and cheese aside and add them just before baking.
If baking straight from the fridge, add 5–10 extra minutes to the bake time. The center should be hot, the cheese should be melted, and the sauce should bubble around the edges.
Storage
Store leftover chicken enchiladas in an airtight container in the fridge for 3–4 days. The tortillas will soften as they sit, but the flavor usually gets even better by the next day. For general leftover timing and safe reheating guidance, see the USDA leftovers guidance.
Freezing
Chicken enchiladas freeze well. You can freeze them unbaked or freeze baked leftovers. Wrap the dish tightly, or freeze individual portions in airtight containers for easier reheating. For best texture, use frozen portions within 2–3 months.
Thaw overnight in the fridge before baking or reheating for the cleanest texture. If baking from frozen, keep the dish covered at first so the center heats through, then uncover near the end so the top does not stay wet.
For another freezer-friendly tortilla meal, these Meal Prep Breakfast Burritos use similar moisture-control logic: keep wet toppings out, cool the filling, and reheat with texture in mind.
Reheating
Reheat a larger portion covered in a 350°F / 175°C oven until hot. Reheat individual portions in the microwave. If the enchiladas look dry, spoon a little extra sauce over the top before reheating.
Troubleshooting Chicken Enchiladas
A cracked tortilla or messy first serving does not ruin the pan. Enchiladas are forgiving once the sauce and cheese settle in.

Why did my tortillas crack?
The tortillas were probably cold, dry, or overfilled. Warm them before rolling, and use less filling if you are working with small corn tortillas. If one tortilla tears, tuck it seam-side down and let the sauce and cheese cover the rough edges.
What makes chicken enchiladas soggy?
Usually too much sauce on the bottom, watery filling, cold tortillas, very hot filling, or a pan that was covered too long. Use the ½-½-1½ sauce split, let steaming filling settle briefly, bake uncovered, and rest before serving.
Why is the chicken dry?
The chicken may have been dry before it went into the filling, or it may not have been mixed with enough sauce. Stir sauce, green chiles, spices, and cheese into the chicken before rolling.
Why did the enchiladas fall apart?
They may have been overfilled, over-sauced, or served too soon after baking. If the first enchilada comes out messy, the pan probably needed a few more minutes to rest.
What if my filling tastes bland?
Add a little more salt, cumin, garlic powder, green chiles, or enchilada sauce before rolling. The filling should taste good on its own before it goes into the tortillas.
What if my enchiladas look dry after baking?
Spoon warm enchilada sauce over the top before serving. Next time, mix a little more sauce into the chicken filling and check that the top is fully covered before baking.
Why did the cheese get oily?
Some cheese blends release more oil when baked. Use Monterey Jack, a good Mexican blend, or a cheddar-Jack mix, and avoid overbaking once the cheese has melted.
Fixed the issue? Go back to the recipe card, review the sauce split, or return to the top.
FAQ
Rotisserie chicken or cooked chicken breast — which is better?
Rotisserie chicken is fastest because it is already tender and seasoned. Cooked chicken breast works too; mix it well with sauce and spices so the filling does not taste plain.
Are corn or flour tortillas better for chicken enchiladas?
Corn tortillas are more classic and slightly firmer. Flour tortillas are softer and easier to roll. Both work if they are warm and not over-sauced.
How do you keep chicken enchiladas from getting soggy?
Use the ½-½-1½ sauce split: ½ cup under the enchiladas, ½ cup in the chicken, and 1½ cups on top. Warm the tortillas, avoid overfilling, bake uncovered, and rest before serving.
Should enchiladas be covered while baking?
Bake this pan uncovered unless you specifically want very soft enchiladas. For softer enchiladas, cover for the first 15 minutes, then uncover to finish.
Do tortillas have to be fried for enchiladas?
No, but corn tortillas benefit from a quick warm in a lightly oiled skillet. It makes them more flexible and helps them hold up better in sauce.
How much filling should go in each tortilla?
Use about ⅓ cup filling for medium tortillas, 2–3 tablespoons for small corn tortillas, and up to ½ cup for large flour tortillas.
What cheese melts best for chicken enchiladas?
Monterey Jack, Mexican blend, cheddar-Jack, and Oaxaca all melt well. Cotija and queso fresco are better as finishing toppings.
Is red or green enchilada sauce better with chicken?
Both are good. Red sauce tastes cozy and classic. Green sauce is brighter and tangier, especially with lime, cilantro, sour cream, and Monterey Jack.
How far ahead can chicken enchiladas be assembled?
Assemble them up to 24 hours ahead and keep them covered in the fridge. For the best texture, hold back some top sauce and cheese until just before baking.
Do chicken enchiladas freeze well?
Yes. Freeze them unbaked or freeze baked leftovers. Wrap tightly and reheat with a little extra sauce if they seem dry.
What is the difference between chicken enchiladas and chicken enchilada casserole?
Rolled enchiladas are filled and tucked seam-side down. Chicken enchilada casserole uses similar ingredients but layers them in a dish instead of rolling each tortilla.
Next Time You Want an Easy Tortilla Dinner
Once you have the tortillas out, it is easy to stay in that dinner lane. These Sheet Pan Chicken Fajitas keep the same weeknight rhythm: seasoned chicken, warm tortillas, and simple toppings.
For another tortilla meal, try this Breakfast Burrito Recipe. Need something quicker and lighter? The Shrimp Tacos Recipe keeps the same fresh-topping energy in a faster format.
Final Thought
Good chicken enchiladas do not need perfect tortillas, homemade sauce, or freshly cooked chicken. They need moist filling, warm tortillas, controlled sauce, and a few minutes of patience after baking.
Let the pan sit while the toppings hit the table, then spoon the saucy edges over each serving.
Do that, and the pan gives you what you came for: soft tortillas, juicy chicken, bubbling cheese, and saucy edges worth scooping from the dish.