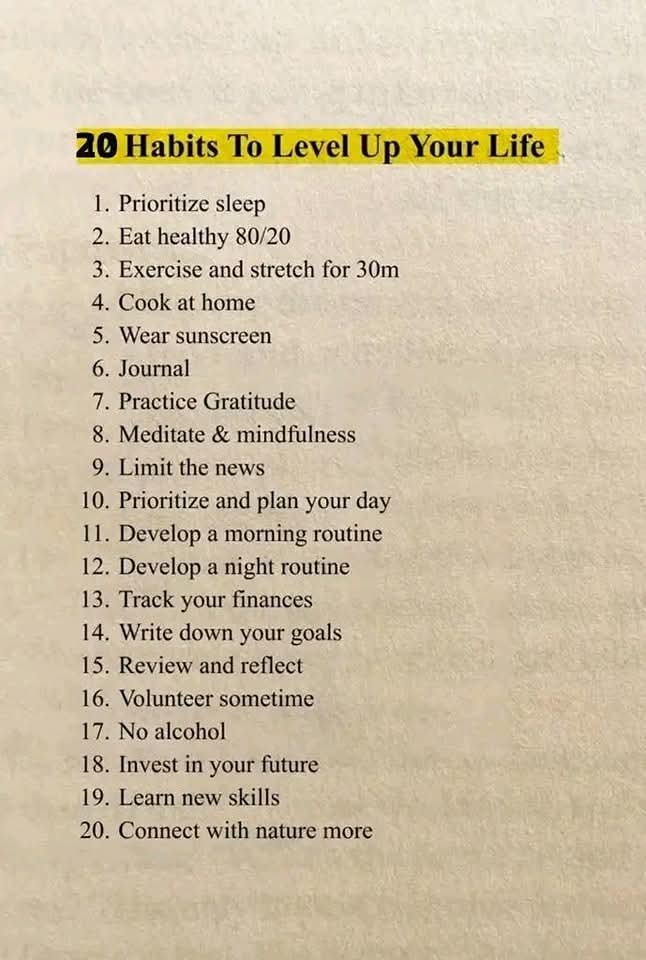
Posted on 3 Comments

Ayurvedic Cultured Ghee- The Right Way to make Ghee

Ghee is termed as Ghrita in Sanskrit, a traditional ayurvedic component used over centuries. In India, it is considered as the purest and the most sacred component. Ghee is a type of clarified butter that is made by heating butter, allowing the liquid portion and milk to separate, leaving behind only the pure butterfat. The milk caramelizes and becomes a solid, and the remaining oil is ghee. It is commonly used for cooking, as a traditional medicine and for Hindu religious rituals. Ghee is traditionally produced from indigenous cow’s milk through Bilona method which is more labour intensive but some also make it from Buffalo milk. You can refer this post- A2 Cow Ghee vs A2 Bilona Ghee for detailed information on it.

What is Cultured Ghee?

Ghee is made from milk or cream but cultured ghee is made from yogurt. Cultured ghee is made by adding live cultures to the milk or cream before it is clarified. It is a traditional method of making ghee which involves culturing or fermenting milk or cream before churning it into butter and then clarifying it into ghee.

Why is this process followed traditionally?

Scientifically when milk or cream is converted into curd then into butter and then ghee, the structure of milk changes. The live cultures break down lactose and casein into lactic acid, making ghee very easy to digest. It also becomes suitable option for those with lactose intolerance or dairy sensitivities. It is this cultured ghee that has been glorified in Vedas and many Ayurvedic remedies. The ancient tradition of Ayurveda considers cultured ghee as important for promoting and strengthening agni, our powerful digestive fire.

Ayurveda says that it is this cultured ghee that helps to promote good cholesterol and reduces bad cholesterol. 

It has a positive impact on the central nervous system in the brain. It also lubricates the joints by reducing pain and stiffness and promotes flexibility.

Also, this ghee is tastier and very aromatic with a slight tang of naturally cultured food. The fermentation process adds a depth of flavor that is not present in regular ghee.

Another advantage of cultured ghee is that it has higher concentration of vitamins and minerals than regular ghee. The fermentation process can increase the bioavailability of nutrients. 

It is the cultured ghee that is packed with all medicinal values and benefits of ghee that we have been hearing from our childhood. It is the best ghee to cook with.

Many of us have been making ghee with store bought packs of uncultured butter, but this ghee does not have the probiotic enzymes that cultured ghee has so we are actually missing out on the numerous health benefits that ghee has to offer

Regular/Uncultured ghee or the ghee you normally get in the market, is a modern commercial way of making ghee.

How to make cultured ghee at home?

Ingredients

  • Milk Cream from raw milk
  • Yogurt or Homemade Curd (1 tbsp for every litre of cream)

Instructions

  • Once you boil raw milk, you will notice a layer of cream forming on top. When the milk has cooled, refrigerate the milk for 6 to 7 hours or overnight. This will make the cream thicker.
  • In the morning, collect the cream from boiled milk in a container. I use a 3 litre container to collect the cream. It roughly takes me 2 weeks to fill the container. Always keep the container in the refrigerator.
  • Once your container is full, transfer the cream in a heavy bottom pan. Heat the cream till it becomes lukewarm. Keep stirring in between so that the cream doesn’t stick to the bottom of the pan.
  • Remove it from the heat then add yogurt or homemade curd. Mix well, cover and keep the pan at any warm place overnight or for 8 hours. The process is just like how you would make homemade curd with milk.
  • Once the cream has fermented, cool it in the refrigerator for 3 to 4 hours. When it has become cold, take it all out in a big bowl (stainless steel or earthen pot), add several ice cubes and churn the cream using a wooden churner or a whisker. You can do it with an electric beater as well if you don’t want to go through the hassle of doing it by hand. Traditionally though the butter is churned by hand or bilona and not by any electrical device.
  • After 10 minutes you will notice that the cream has reached whipped cream consistency. 
  • Continue whisking it for another 7-8 minutes. Once you start seeing the butter separating from buttermilk, add some more ice cubes. The colder it is the quicker the butter will come out. 
  • As you keep churning, butter will completely separate and the liquid will float on top. Separate the butter from buttermilk using your hands.
  • Collect all the butter in a wok in which you will cook the butter. The wok should be heavy bottom stainless steel or brass wok. No aluminum.
  • Melt the butter on a medium heat.
  • Once the butter has melted, lower the flame to the lowest. Allow the butter to cook on the lowest flame. Keep scrapping the sides and stirring occasionally so that it doesn’t stick to the bottom.
  • Once the milk solids separate & the ghee turns dark, almost honey coloured, you will notice that the ghee starts frothing again and milk solids will settle at the bottom. This is the time to turn off the heat.
  • Allow it to cool. Then use a strainer to separate milk solids from ghee. 

Your liquid gold is ready! Enjoy! 😊

Notes:

  • The leftover liquid from butter is your amazing home-made buttermilk . Strain it and refrigerate it. Use it in cooking or consume it by adding salt and other spices. It’s a protein rich natural probiotic and great for digestion.
  • If the collected cream is too old, the buttermilk or butter will taste slightly bitter but don’t worry, the ghee will still be perfect.
  • Most importantly, make cultured ghee with raw A2 milk that is ethically sourced from a dairy farm and not from commercial milk that comes in a packet or a carton
Posted on 4 Comments

Healthy Millet Protein Packed Pancakes

These gluten free millet pancakes are delicious, fluffy, easy to make and most importantly healthy. Thanks to the earthy flavor of millets, these pancakes will make a great healthy start to your days and also, they are child approved. 

What is a millet flour?

Millets are coarse grains with a high nutritional value. Millets are low in calories and contain a lot of fiber which helps with weight loss and promotes healthy digestion. Vitamins and minerals found in millets can help to lower your blood sugar and cholesterol levels. Millet flour is a naturally gluten free flour that is made by grinding millet seeds. Millet grains are ancient grains that have been cultivated in Asia and Africa for over 4000 years. 

Ingredients for Millet Pancakes

Millet Flour: I have made these pancakes using Finger Millet (Ragi) flour. You can use any other millet flour for this recipe like Buckwheat, Barnyard millet, Pearl millet or Little millet flour. 

Oats flour: I have also added oats flour in combination to millet flour. Too much millet can make for a somewhat bitter flavor pancakes, so a bit of oats flour helps to keep it balanced.

Jaggery Powder: Some form of sweetness helps to balance out too much earthy flavor of millets. Jaggery has its own distinct flavor and I think goes very well with finger millet. 

Baking Powder + Baking Soda: For adding lift and lightness to the pancakes.

Buttermilk: Buttermilk is an excellent ingredient in baked goods and pancakes because it helps to create light and fluffy baked goods by encouraging carbon dioxide bubbles to form in the batter. Also, it gives a slightly tangy flavor which I love. 

Eggs + Coconut Oil: Eggs not only add protein but are also helpful in adding volume to the pancakes. They also provide moisture along with the oil. Pure coconut oil is anti-inflammatory and antioxidant in nature, that helps maintain heart health. Thanks to all the good fats. 

Vanilla extract & Dark Chocolate chunks: These are our flavor enhancers. A good quality dark chocolate makes these pancakes totally irresistible. 

Recipe: makes 4 pancakes

Ingredients

  • Finger Millet/Ragi flour: 1/2 cup
  • Rolled Oats flour: 1/2 cup
  • Buttermilk: 3/4th cup
  • Egg: 1 whole 
  • Salt: 1/4th tsp
  • Coconut oil: 1 tbsp
  • Jaggery powder: 1 tbsp
  • Vanilla extract: 1/2 tsp
  • Baking powder: 1/2 tsp
  • Baking Soda: 1/4th tsp
  • Dark Chocolate chunks (70%): 1/4th cup
  • Nut Butter & Maple Syrup for serving

Method:

  • Mix both flour, baking powder, baking soda & salt in a bowl. 
  • In another bowl, add oil & jaggery powder. Mix it well. Then crack an egg and whisk till jaggery dissolves. 
  • Now tip in buttermilk & vanilla extract. Whisk well till everything combines.
  • Pour wet ingredients to dry ingredients. Mix gently till everything incorporates.
  • Add chopped chocolate chunks. Give a gentle mix. Do not over mix the batter. Whisk the pancake batter until mostly combined. A few lumps and pockets of flour left are totally fine.
  • Heat a nonstick pan to a medium heat. Brush it with oil or butter. Pour 1/3rd cup of the batter. When the bubbles form and top sets, flip and cook the other side. 
  • Serve with a dollop of any nut butter and maple syrup. My favourite is almond butter.

Enjoy 😊

Total Protein Content

  • Buttermilk: 6 grams
  • Egg: 6 grams
  • Oats flour: 5 grams
  • Finger millet flour: 6 grams
  • Nut butter: 4 grams

Total protein: 27 grams

Posted on 1 Comment

Refreshing Bael Sharbat / Wood Apple Summer Drink

Once upon a time, I couldn’t stand the taste of bael fruit. It was my grandfather’s favorite summer fruit, and he made it a tradition for every child to enjoy bael sharbat during the scorching heat. Those days, bael fruits arrived fresh from our village. Fast forward to urban life, and now I find myself craving these regional delights. I make it a point to visit the local market and grab some bael fruit to whip up the sharbat at least once or twice every summer. Funny how our tastes change with time, isn’t it?

It is very easy to make and it is also very amazing in taste!

Ingredients:

1 ripe bael fruit
Lemon juice (from 1 lemon)
Black salt, to taste
Cold water
Ice cubes
Sugar, to taste
Mint leaves for garnish (optional)

Instructions:

Begin by cracking open the ripe bael fruit and scooping out the pulp. Discard the seeds and any hard parts.
In a bowl, add the bael pulp and cover it with water. Let it sit for 2-3 minutes to soften.
After soaking, strain the pulp through a fine mesh strainer to separate the juice from the fibers.
Add more water to the strained juice according to your desired consistency.

Mix in sugar, lemon juice, and black salt to taste. Adjust the sweetness and tanginess according to your preference.
Stir well until the sugar and salt are fully dissolved.


Fill serving glasses with ice cubes. Pour the prepared bael sharbat over the ice in each glass. Garnish with fresh mint leaves if desired. Serve immediately and enjoy the refreshing and flavorful bael sharbat!

You can make your own bael sharbat at home or you can buy from numerous brands available online as well as offline. In case you are looking for a homemade, preservative free and authentic experience, without getting into hassle of making your own, you can always explore Masala Monk’s Bael Sharbat, which ships all over India.

Bael Sharbat isn’t just a refreshing summer drink; it’s a testament to the timeless wisdom of our ancestors. Unlike sodas and colas that can harm your health, this homemade concoction offers both flavor and nutrition in every sip. By embracing these age-old recipes and prioritizing homemade drinks, we not only honor our culinary heritage but also nourish our bodies with the goodness of nature. Here’s to savoring the simple joys and flavors of life, one glass of Bael Sharbat at a time!

Posted on 2 Comments

Thai Style Vegan Bowl with Peanut Butter Dressing- 30 grams Protein

I love hassle free bowl meals which you can put together in no time. They are practical and an easy way to get your nutrients. This Vegan bowl is a beautiful combination of vibrant and colourful vegetablesnourishing whole grains, and plenty of plant-based protein accompanied by a delicious peanut dressing.

Many people consider animals as the main source of dietary protein, but plant-based protein consumption is rising in popularity. When it comes to your body’s daily function, it doesn’t matter where you get your protein from, animal or plants.

How does protein work?

Protein is crucial for our health. Every cell in our body is made up of protein. It is an important building block for body, hair, skin, hormone production, regulating metabolism, transporting nutrients and oxygen. Your body first breaks down protein into amino acids. It’s the amino acids that contribute towards proper lean mass that gives muscle fuel and gives power to your cells. There are 23 amino acids. 15 of them your body can make every single day. The balance 8 amino acids also called essential amino acids must come from food. 

Quantity of protein is only half the battle – it is the quality of the protein that matters. Whether your protein is coming from plant or animal, you must check the source of protein. It should be ethically procured. You can get all of the amino acids you need from either plants or meat. The main differentiating factor is what else is included in those foods besides the proteins for protein digestion. This will require a different post.

On the whole, eating a wide variety of foods — and especially whole, unprocessed foods — seems to achieve the healthiest balance.

Sharing with you a recipe that is balanced and can help you fulfil your protein, vitamins and minerals requirement in one bowl. 

Recipe: serves 1

Ingredients

For Herb Rice

  • 1 cup cooked Rice
  • 1 tsp Sesame oil or Olive oil
  • Salt & pepper to taste
  • 2 cloves of chopped garlic
  • 1 tsp dried Thyme leaves

For Vegan Protein (Tofu and Beans)

  • 100 grams Silken or Firm Tofu (It’s a personal choice. I like Silken tofu better texture wise)
  • Salt & Pepper to taste 
  • 1 tbsp Olive oil
  • Red Chilli flakes to taste (optional)
  • 1 cup boiled or canned Red Beans

Vegetables

  • 1/2 cup Broccoli
  • 1/2 cup diced chunks of Zucchini 
  • 1/2 cup, sliced Button Mushroom 
  • 1/4th cup Frozen Sweet Corn Kernels
  • 1/4th cup cubed, Red Bell Pepper
  • Salt & pepper to taste
  • Red pepper flakes to taste
  • 1 tbsp Olive oil

For Thai Peanut Butter Dressing

  • 1.5 tbsp Peanut Butter
  • 1/4th cup Orange Juice
  • 1 tsp Soy sauce or Tamari
  • 1 tsp Rice Vinegar or White Vinegar
  • 2 cloves minced Garlic
  • 1 tbsp Ginger juice
  • 1 tsp Lemon juice
  • 1 tsp Maple syrup or Honey
  • Salt to taste

Mix everything well in a bowl. Your dressing is ready. 

Optional Toppings

  • Sesame seeds
  • Lemon wedges
  • Mint or Cilantro leaves

Instructions

For Herb Rice

Heat oil in a pan. Cook garlic till light brown. Now add rice, thyme, salt and pepper. Gently stir till everything combines well. Cook for 2 minutes. Set aside. 

For Tofu and Red Beans

In the same pan, heat 1/2 tbsp olive oil. Add sliced thick pieces of tofu. Sprinkle some salt, pepper and chilli flakes. SautĂŠ both sides till golden brown. While using tofu make sure you drain out all the water. If using silken tofu, handle it gently. It can break very easily. Set aside. 

For pan fried beans, add 1/2 tbsp Olive oil and boiled beans. Then add a little salt and pepper and fry the beans for 2-3 minutes. Set aside. 


For Vegetables

Steam broccoli, zucchini & sweet corn kernels for two minutes. Set aside. In a pan, heat oil. Add mushrooms, little salt and pepper & chilli flakes if using. SautĂŠ till they release all their juices. Set aside. 

In the same pan, sautĂŠ broccoli, zucchini and red bell pepper on high flame for 1 or 2 minutes. Add a little salt, pepper and chilli flakes. Set aside.

Add sweet corn kernels, salt and pepper and sautĂŠ for 1 minute. Set aside. 

Now the fun part begins. Assembling

In a wide bowl. Add all the sautĂŠed vegetables, herb rice, pan fried beans and top it all with tofu. Now drizzle the peanut dressing. Optionally, sprinkle with sesame seeds, chopped cilantro, and a squeeze of lime. We are adding salt at every step so, be mindful.

Enjoy good health 😊

Protein Content

  • 100 grams Tofu: 8 grams
  • 1 cup cooked red beans: 13 grams
  • 1.5 tbps peanut butter: 6 grams
  • 1 cup cooked rice: 4 grams

Total Protein: 31 grams

Substitutions

  • If not rice, you can go for other whole grains such as quinoa, millet, amaranth or barley
  • You can add your favourite vegetables like carrot ribbons, spinach, avocado, cucumber, spinach, kale, collard greens. Basically, whatever is seasonal and is easily available. You can grill them, steam them or oven bake them. For better digestion I personally prefer cooked vegetables. 
  • If not red beans, you can go for boiled or canned chickpeas, edamame or cannellini beans.

Sauce for Vegan Bowl: if you don’t like peanut butter sauce, you can opt for Tahini, Cilantro Lime Sauce, Vegan Mayo, Greek Yogurt. 

Posted on Leave a comment

Coconut/Thengai Dosa- Karnataka Style Spongy Dosa

Karnataka style coconut dosa (Thengai dosai in Tamil) is a flavorful, yummy dosa variety. It is prepared with rice, poha and coconut as the main ingredients.

This dosa is so delicious. The texture is spongy, super soft and totally melt in mouth. Coconut adds a very refreshing taste to this dosa and takes the regular dosa to a whole new level. This is a healthy and a filling breakfast dish which takes only minutes to cook. Adding flattened rice, poha as we call it, makes it fluffier and softer than traditional dosas.

This is my child’s favourite breakfast meal. The first time I made this dosa some 3 years back, my child literally gobbled 4 of these. I made extra batter to last me 2-3 days and in those 3 days all he took was coconut dosa in his school lunch box too. 😄 Even today whenever I make this for breakfast, I see the same excitement on his face.

Traditionally, this is made without adding urad dal, but I added some to add more protein. You can skip it if you like. The softness in this dosa comes from natural fermentation. There is no need to add any leavening agents to it. Fermented dosa offers a wealth of nutritional value, thanks to the fermentation process. When the batter undergoes fermentation, all the beneficial micro-organisms convert sugar and carbohydrates from rice and dal to lactic acid. One of the significant benefits of fermentation is the increased bioavailability of nutrients. Also, the final product becomes easy to digest, making it an ideal choice for those with sensitive stomach or digestive issues.

Batter consistency is the key to the success of this recipe. It should be pouring consistency batter, neither too runny nor thick like idli batter.

Recipe:

Prep time: 10 minutes Cook time: 3 minutes 
Fermentation time: 8-10 hoursServing: makes 10-12 dosas

Ingredients:

  • 1 cup raw Rice
  • 1/2 cup thin Poha/Flattened Rice
  • 1 tbsp Methi/Fenugreek seeds
  • 1/4th cup white split Urad dal
  • 3/4th cup grated fresh Coconut
  • 1 tsp Rock Salt or Himalayan Pink Salt
  • Table Salt to taste
  • Oil or Ghee to cook dosa

Instructions

  • Wash and soak all the ingredients mentioned above except coconut for 5 hours.
  • Now, drain all the water. Add grated coconut and blend the batter to a smooth consistency. Add a little water at a time. Do not make too thin or a thick batter. Make sure everything is well combined.
  • Transfer the batter to a large bowl. Make sure there is some room in the bowl because the batter will rise during fermentation. Add a tsp of rock salt and mix well. Cover and leave the batter for fermentation in a warm place for 8 to 9 hours.
  • After the fermentation the batter will become very frothy. Add salt to taste. Now you can add regular table salt. Mix it very gently till it is well combined. Do not over mix the batter.
  • Heat dosa tawa on a medium heat. Add a ladle full of batter. Spread slightly. Drizzle some ghee or oil around the edges and cover it with a lid for 2 to 3 minutes.
  • Steam the dosa till top has set and the edges have browned.
  • Take it out on a plate and serve it with coconut chutney or sambar.

Fermentation Tips

  • Add rock salt to the batter before fermenting. Rock salt or Himalayan pink salt helps in fermentation. Do not use table salt.
  • Do not skip fenugreek or methi seeds. It is the main ingredient that helps in fermentation.
  • Do not add water in one go. Keep adding little by little to get right batter consistency.
  • Mix the final batter with your hands for 2 to 3 minutes and keep it in a warm place. The warmth of your hand will help in fermentation.
  • If you stay in a dry or cold place, fermentation may take more than 9 hours. You can place the batter in a pre-heated oven.

Storage

Securely seal the container and store the leftover batter in the refrigerator. The lower temperature will slow down the fermentation process, allowing you to use the batter for several days. While fresh batter tastes the best, but you store the batter for 2 to 3 days without compromising on the taste. Beyond that I do not recommend storing the batter. Freezing idli or dosa batter is not recommended. Freezing will lead to change in the texture and taste. Before using refrigerated batter give it a gentle stir to redistribute the ingredients.