
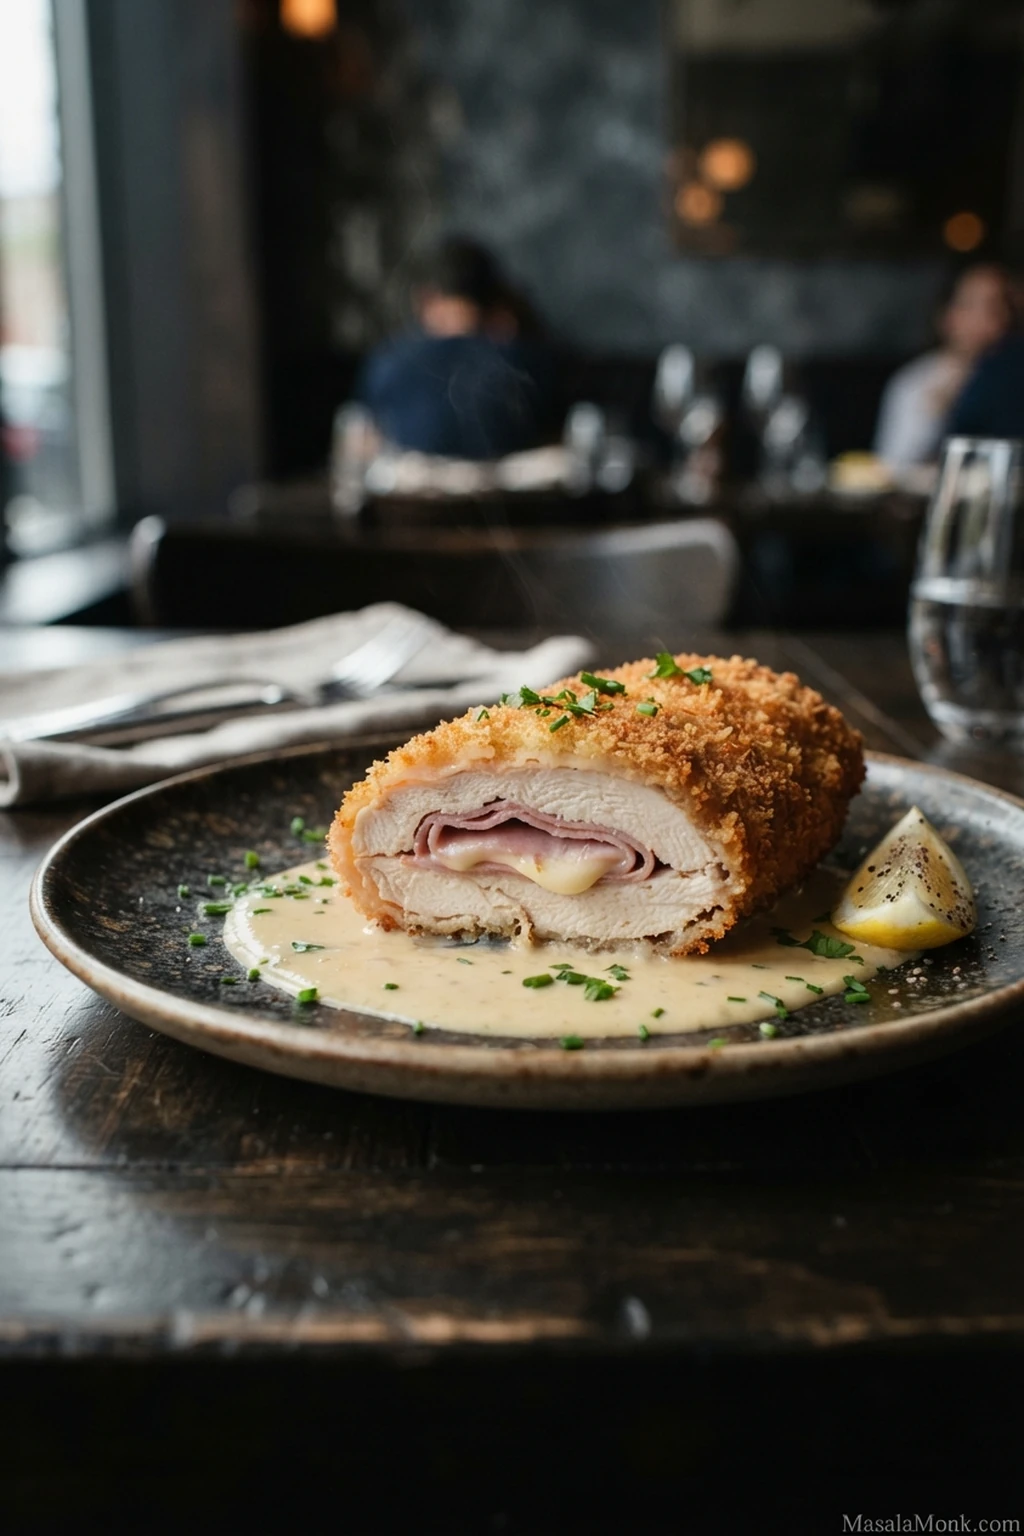
Chicken Cordon Bleu is breaded chicken wrapped around savory ham and melted cheese. The ideal slice has a crisp golden coating that gives under the knife, juicy chicken around the outside, and a clear ribbon of ham and soft cheese through the middle. Once sliced, it looks far more elaborate than the hands-on work suggests.
Getting all of those layers right at the same time is the tricky part. Cheese can escape onto the tray, or melt toward one end and leave the middle strangely empty. Chicken breast can also dry out while pale breadcrumbs are still trying to turn golden.
This baked Chicken Cordon Bleu recipe keeps the classic rolled shape while making those problems easier to control. The chicken is butterflied before it is gently flattened, the cheese is tucked inside thin ham, and the shaped rolls get a short chill before breading.
Meanwhile, the chicken and breadcrumbs are working on different clocks, so the panko gets a head start in the oven before it ever touches the meat. That way, lean chicken does not have to stay under heat simply because its crust still looks pale.
Chicken Cordon Bleu Recipe
This version makes four rolled portions with thin ham, Swiss cheese and a crisp panko coating. Active prep for the chicken is about 30–35 minutes; the optional sauce is made while the chicken bakes. Most of the remaining elapsed time is hands-off chilling and baking.
| Yield | 4 rolls |
|---|---|
| Serves | 4 |
| Active prep | About 30–35 minutes for the chicken; optional sauce is made during baking |
| Chilling | At least 30 minutes |
| Baking | Usually about 25–30 minutes; start checking around 22–25 minutes |
| Resting | 5 minutes |
| Total elapsed time | About 1½ hours |
| Oven | 400°F / 200°C conventional (180°C fan) |
| Chicken temperature | 165°F / 74°C in the chicken meat |
| Useful equipment | Meat mallet or rolling pin, rimmed sheet pan, wire rack, instant-read thermometer |
Ingredients
For the Chicken
- 4 boneless, skinless chicken breasts, ideally 6–7 oz / 170–200 g each
- 4¼ oz / 120 g thinly sliced ham, divided into four 30 g portions
- 4¼ oz / 120 g Swiss cheese, divided into four 30 g portions
- ½ tsp / about 3 g fine salt
- ½ tsp freshly ground black pepper
For the Panko Coating
- 1½ cups / about 90 g panko breadcrumbs, for dredging; you may have some left
- 1½ tbsp / 22 ml olive oil or neutral cooking oil
- ⅓ cup / about 40 g all-purpose flour, for dredging
- 2 large eggs
- 1 tbsp / about 15 g Dijon mustard
- Cooking spray or a little oil for the wire rack
Optional Dijon Cream Sauce
- 1 tbsp / 14 g unsalted butter
- 1 tbsp / about 8 g all-purpose flour
- 1 cup / 240 ml whole milk
- 1 tbsp / about 15 g Dijon mustard, plus more to taste
- ¼ cup / about 20 g finely grated Parmesan
- Freshly ground black pepper, to taste
- Salt, only if needed after tasting
- ½–1 tsp lemon juice, optional
How to Make Chicken Cordon Bleu
Shape the Chicken Rolls
- Butterfly, flatten and season the chicken. Cut horizontally through the thick side of each breast, stopping before you cut all the way through, then open it like a book. Place the chicken between sheets of plastic wrap and, using the flat side of a meat mallet or a rolling pin, work from the thick center toward the edges until it is about ¼ inch / 6 mm thick. Divide the measured salt and pepper evenly over both sides.
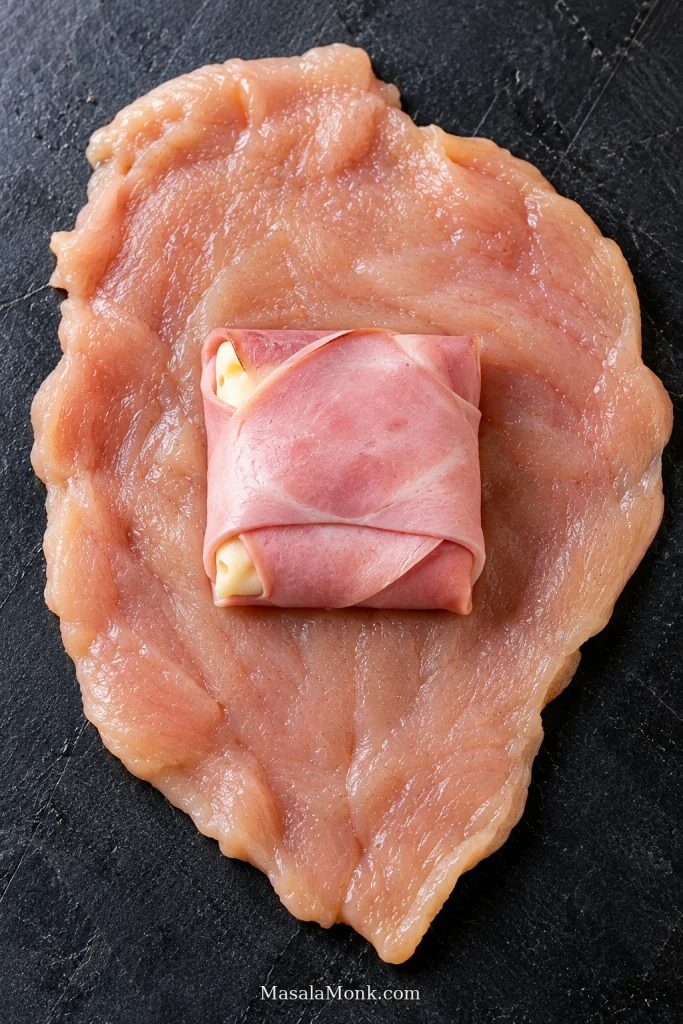
- Wrap the cheese and roll the chicken. Divide the ham and Swiss into four portions and fold each portion of ham around its cheese. Place one bundle on each breast, leaving about a ½-inch / 1–1.5 cm border. With a short edge closest to you, roll the chicken over the filling and away from you, keeping the cheese centered as you go. Do not worry if the first roll is not perfectly cylindrical; chilling will help tidy the shape.
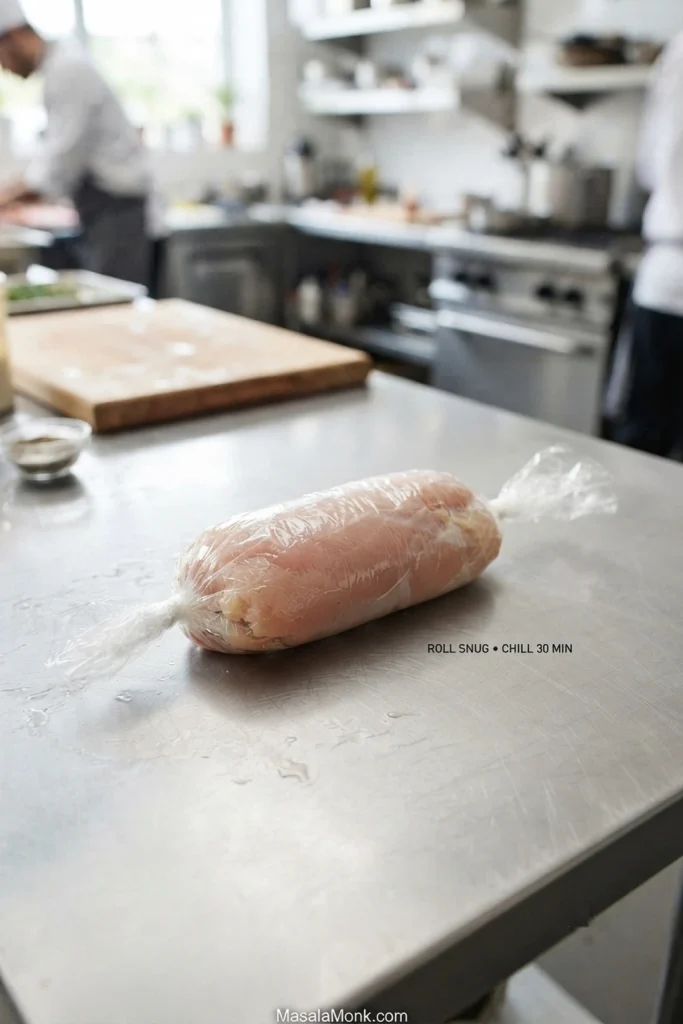
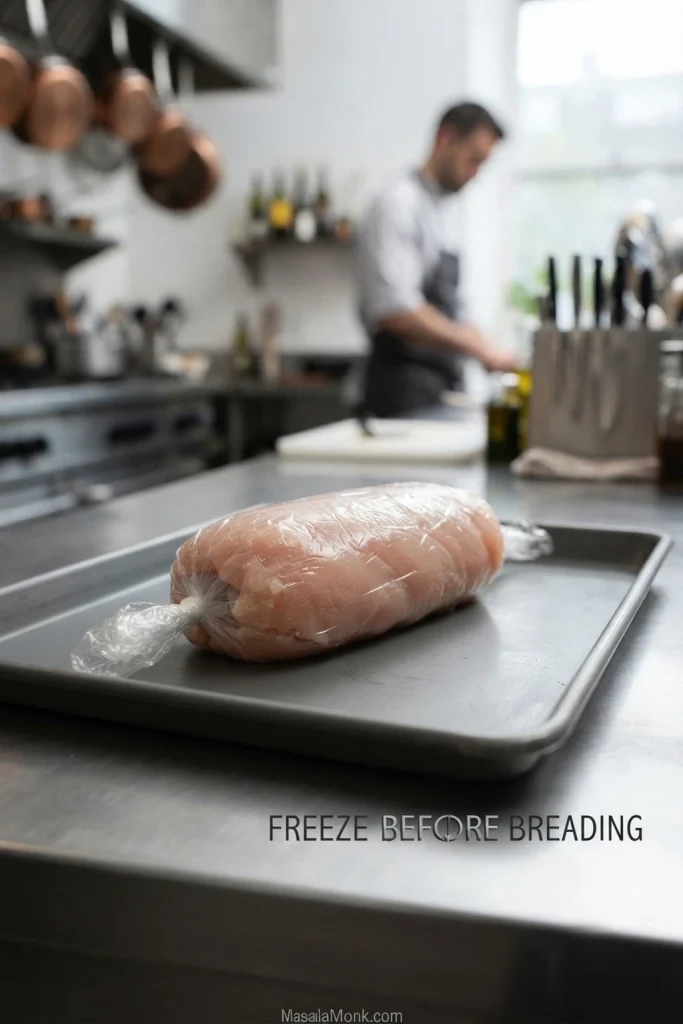
- Shape and chill. Place each roll on fresh plastic wrap. Wrap tightly around the outside, then twist the ends like a candy wrapper to firm up the shape without squeezing filling from the ends. Refrigerate for at least 30 minutes. A little longer is fine.
Bread and Bake
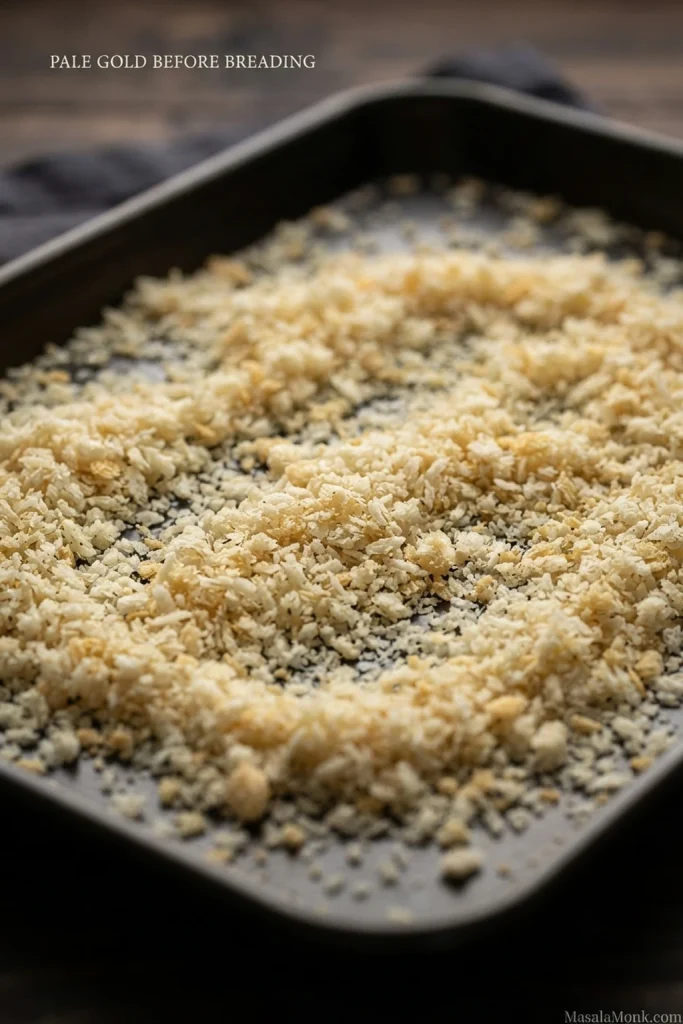
- Heat the oven and toast the panko. Near the end of the chilling time, preheat the oven to 400°F / 200°C conventional (180°C fan). Leave the chicken refrigerated while the oven heats. Once hot, toss the panko with the oil, spread it over a rimmed baking sheet and toast until pale golden, about 3–5 minutes. Stir once and watch closely from the 3-minute mark. The crumbs should still be lighter than the crust you eventually want; they will darken again while the chicken bakes. Transfer them to a shallow dish and keep the sheet pan.
- Bread the rolls. Put the flour in one shallow dish and whisk the eggs with the Dijon in another. Remove every piece of plastic wrap and pat the chicken dry if the surface looks damp. Coat lightly in flour, shake off the excess, dip in the egg mixture and let the extra drip away. Finish with an even layer of toasted panko, pressing gently so it sticks without becoming a thick shell.
- Arrange and bake. Place a lightly greased wire rack over the sheet pan. Set the rolls seam-side down—the side where the outer edge of chicken finishes—with space between them. If one seam keeps opening, secure that spot with a visible toothpick. Transfer the pan to the oven and start checking around 22–25 minutes.
Sauce, Check and Serve
- Make the optional sauce while the chicken cooks. Melt the butter over medium-low heat. Whisk in the flour and cook for about 1 minute. Gradually whisk in the milk and cook until smooth and lightly thickened. Stir in Dijon and Parmesan. Add black pepper and taste before adding salt. Remove from the heat, then add ½ teaspoon lemon juice if you want a brighter finish. Taste before adding more. If you are skipping the sauce, use this time to finish your sides.
- Check the chicken and let it rest. Insert an instant-read thermometer from the side into the thickest part of the chicken itself, avoiding the cheese center. Cook until the meat reaches 165°F / 74°C. Many rolls of this size finish around 25–30 minutes, though thicker ones can take longer. Rest for 5 minutes and remove every toothpick.
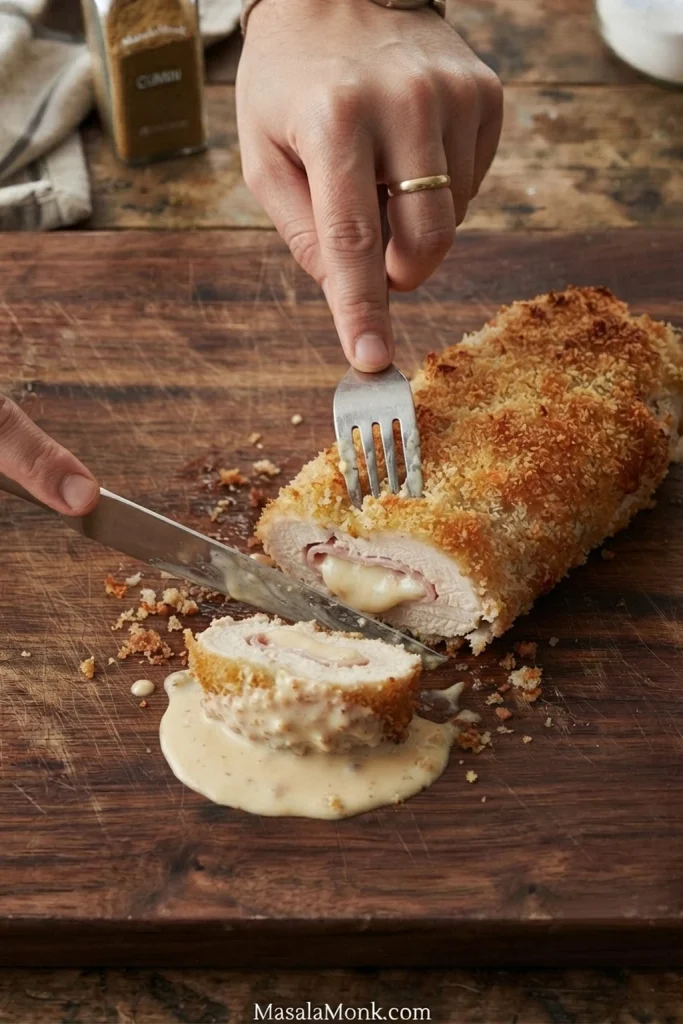
- Slice and serve. Use a sharp knife and cut cleanly through the rested roll instead of sawing hard through the crust. Spoon sauce underneath the chicken or serve it alongside. The coating should be crisp and light rather than forming a thick bread shell.
Need more help with one step? See how to build a roll that holds, get a crisp baked crust, check thermometer placement, or diagnose a problem.
Recipe Notes
- You may have flour and panko left. The dredging quantities are intentionally generous enough to make coating easy.
- If you use toothpicks, count them. Remove every one before serving.
Build a Roll That Holds
Start With the Right Chicken
Chicken breasts vary enormously, so “four chicken breasts” is not as precise as it sounds. Breasts around 170–200 g give you enough surface area for a proper roll without creating a huge center that takes far longer to cook.
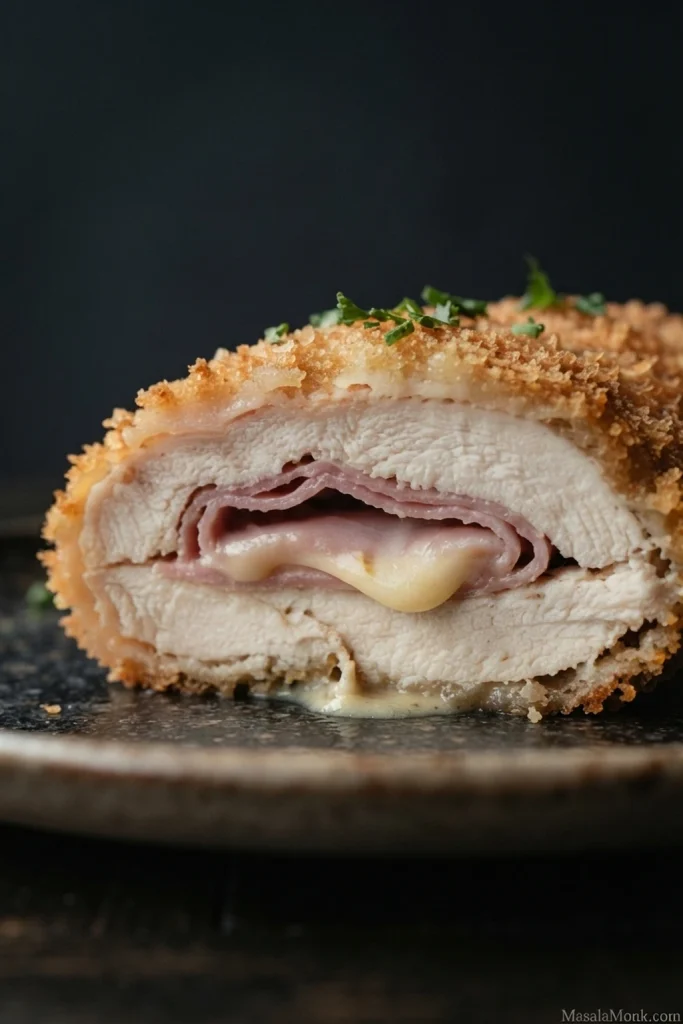
Butterfly first and let the knife create most of the width. The mallet only needs to even out the thicker areas. The chicken should be flexible enough to bend around the filling without becoming thin enough to tear.
Aim for roughly 6 mm.
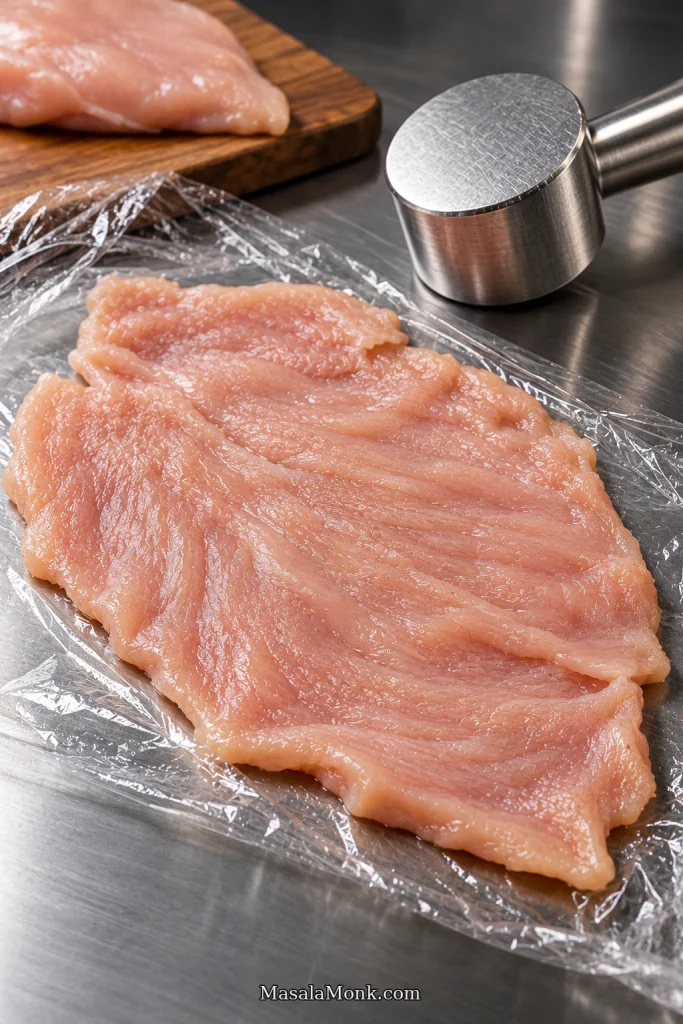
Thin-sliced chicken cutlets can work if they are large enough to wrap around the filling and already close to that thickness. Very small cutlets are harder to fill and roll. Boneless thighs can also be stuffed and breaded, but they do not flatten into the same broad, even sheet, so the filling amounts and timing here are designed for breast meat.
Choose and Measure the Filling
Thin deli ham works best because it folds neatly around the cheese. Black Forest ham brings more smoke, while prosciutto is thinner and noticeably saltier.
Use about 30 g cheese per roll. Swiss is the default in this recipe; measuring the cheese is more reliable than counting slices because brands vary so much in thickness. Other good melting cheeses are compared below.
Keep the Cheese Where You Put It
Wrapping the cheese in ham gives it another layer of protection and keeps the filling gathered in one place.
There is another cheese problem that looks nothing like a leak. Once melted, cheese can run through a loose channel inside the chicken and collect toward one end. The tray stays clean, but you cut through the middle and wonder where the filling went.
A snug filling bundle and a clear border around it help with both problems.
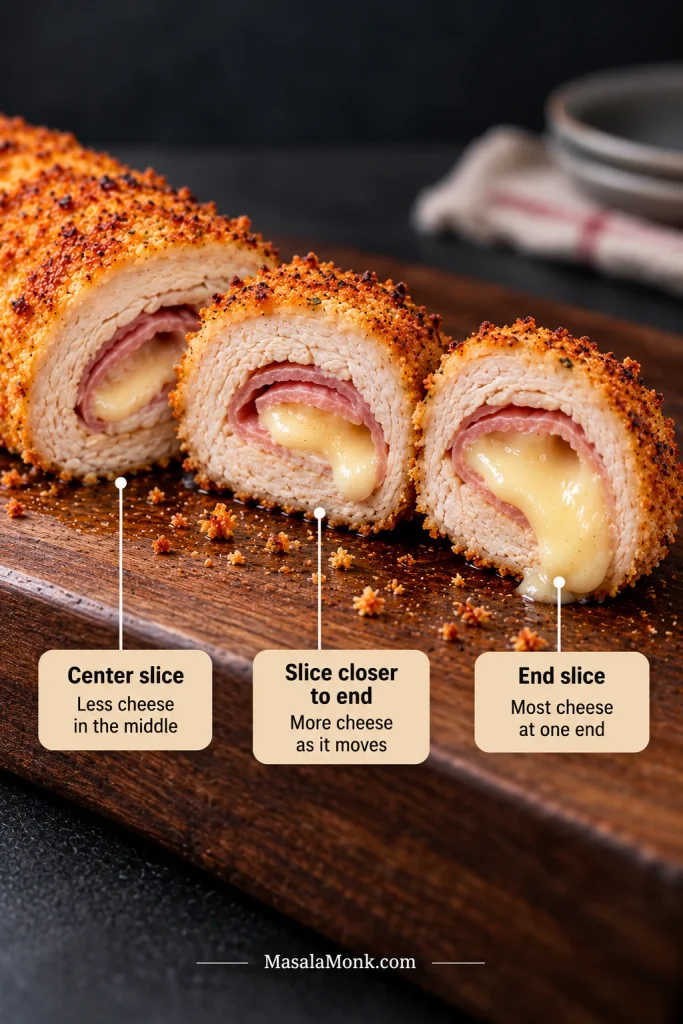
If you are diagnosing a batch that leaked or seemed to lose its filling, jump to Chicken Cordon Bleu troubleshooting.
Roll and Chill
Roll firmly enough to remove obvious gaps, but stop before you squeeze the filling toward the ends. The finished chicken should look compact, not swollen with cheese.
The plastic wrap holds the shape while the chicken chills and comes off completely before breading. An awkward-looking roll usually becomes noticeably easier to handle once it has had time to firm up in the refrigerator. Shape matters enough to help it cook evenly; it does not need to look geometrically perfect.
Toothpicks are useful backup for a stubborn seam. They are not a cheese-proof sealing system.
How to Get a Crisp Baked Crust
When the chicken reaches doneness while the crumbs are still beige, extra oven time only risks drying the meat. Giving the panko most of its color first separates those two jobs.
Toast the Panko First
A little oil and a few minutes in the oven take the crumbs to pale gold. Stop while they still look a shade lighter than you want on the plate; they will toast further around the chicken. The same pre-toasting technique also works well for baked Chicken Parmesan.
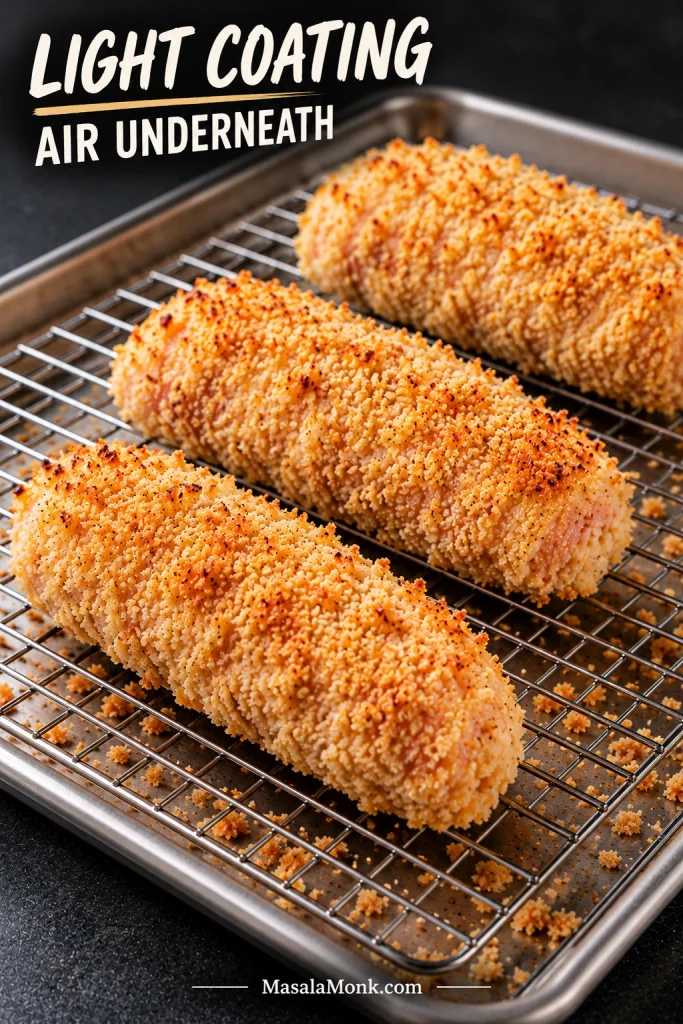
Keep the coating light. Use only enough flour and egg to give the panko something to grip. Shake off excess flour and let extra egg drip away before the chicken reaches the crumbs. You want crisp crumbs around the chicken, not a thick bread shell.
Give the bottom some air. A wire rack keeps the chicken from sitting directly in released moisture and fat as it cooks. Lightly grease the rack first so those crisp underside crumbs stay on the chicken when you lift it.
Already dealing with pale, peeling or soggy breading? Go straight to the troubleshooting guide.
How Long to Bake Chicken Cordon Bleu
Bake Chicken Cordon Bleu at 400°F / 200°C conventional (180°C fan) for about 25–30 minutes, start checking around 22–25 minutes, and cook until the chicken itself reaches 165°F / 74°C.
That range assumes reasonably even rolls made from breasts in the size range used here. A larger breast, thicker chicken or extra filling can all take longer to cook through. Even sizing matters for the same reason in our baked chicken breast: thickness changes how quickly the center catches up with the outside.
How to Know It’s Done
Insert the thermometer from the side into the thickest part of the chicken itself. Avoid aiming straight into the cheese.
According to USDA poultry guidance, chicken should reach a safe minimum internal temperature of 165°F / 74°C. Breadcrumb color, leaking cheese and “clear juices” cannot give you the same certainty.
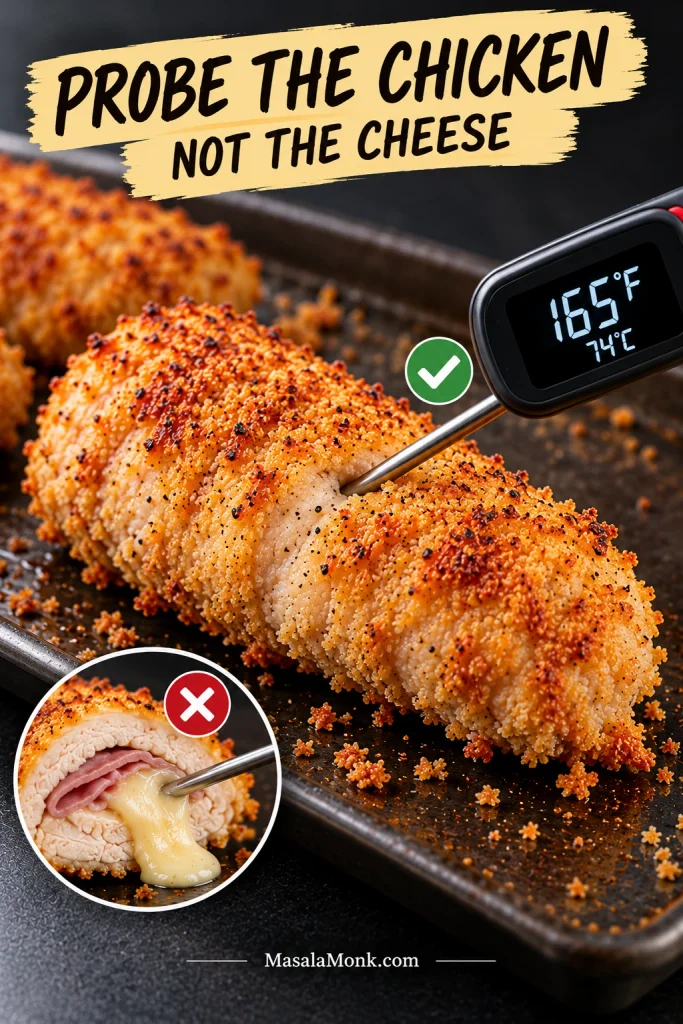
Then give the roll five minutes before cutting. The filling will still be hot, but the cheese gets a chance to settle instead of rushing onto the board with the first slice.
Dijon Cream Sauce
Butter and flour thicken the sauce, milk keeps it pourable, and Dijon cuts through the ham and cheese.
Watch the Consistency
It should coat the back of a spoon, then fall from it in a smooth ribbon rather than sitting in a heavy mound. The sauce will thicken while it waits, so whisk in a splash of warm milk if it becomes too heavy before serving.
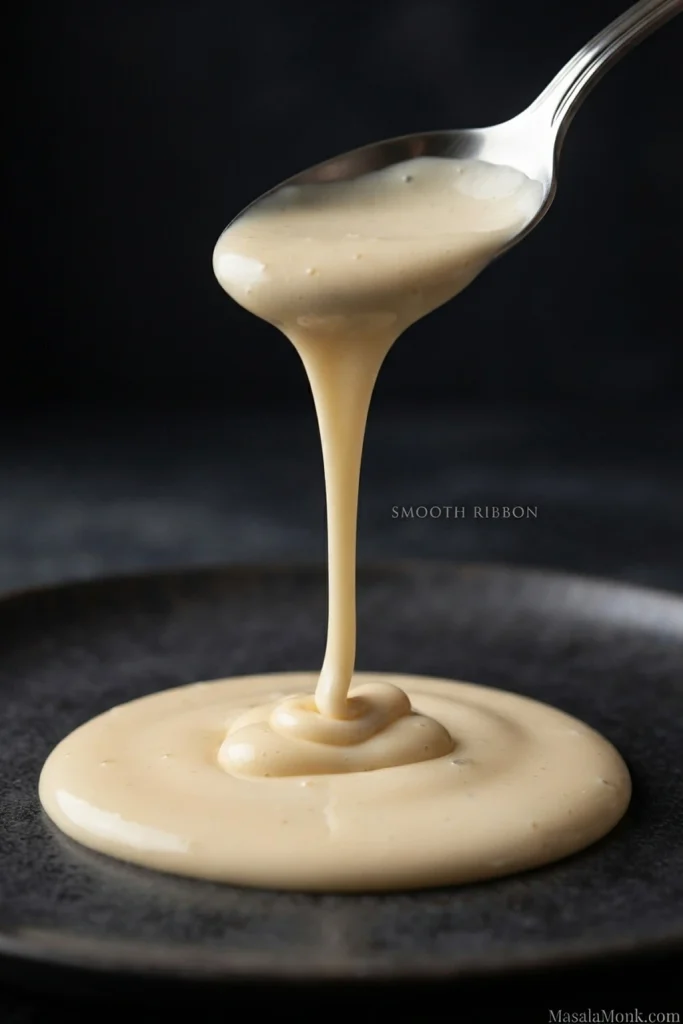
The roux behaves much like the one in our Swedish meatball sauce: loose at first, silky as it thickens, and heavy if pushed too far.
Add more Dijon only after tasting. If it needs brightness instead, take the pan off the heat and add the optional lemon a little at a time. Dijon is there for flavor rather than structure, so you can leave it out or replace it with another mustard you enjoy.
Sauce the Plate, Not the Crust
Spoon the sauce underneath the chicken or serve it alongside. You still get creamy Dijon with every bite, but the panko on top keeps its crunch.
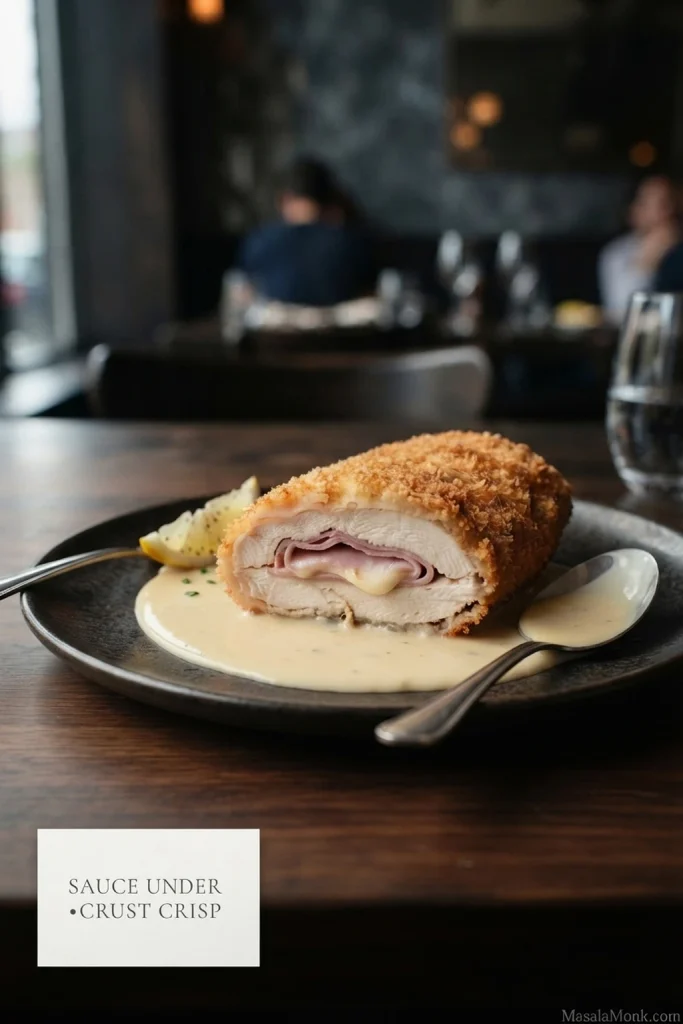
If you’re serving creamy mashed potatoes, keep the sauce loose enough to spoon over them too. The potatoes will catch plenty without turning the chicken’s crust soft.
Troubleshooting: What Went Wrong?
If you’ve made Chicken Cordon Bleu before and ended up with cheese on the tray, pale crumbs or dry chicken, the failure often started earlier than it looked.
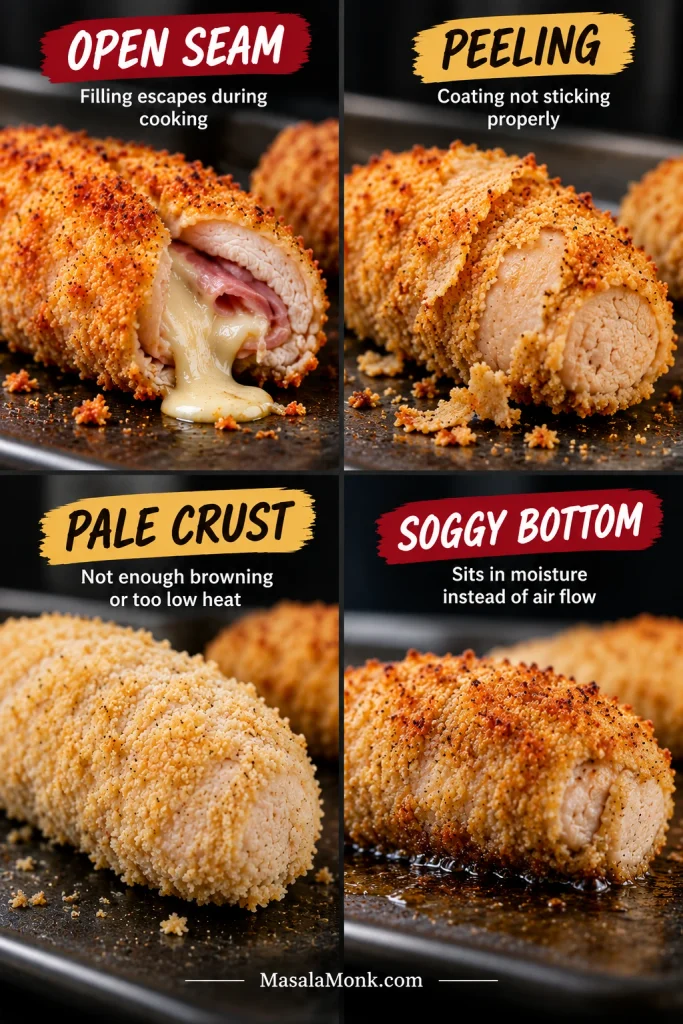
| Problem | Likely cause | Try this next time |
|---|---|---|
| Cheese leaked onto the tray | Too much filling, exposed cheese, torn chicken or an open seam | Use measured filling, wrap the cheese in ham and keep a clear border |
| Very little cheese in the middle | Melted cheese ran toward the ends | Keep the filling gathered and the roll snug |
| Roll opened | Loose shaping or not enough chilling | Shape firmly and chill before breading |
| Chicken tore | Too much pounding | Butterfly first and use the mallet only to even the thickness |
| Crumbs stayed pale | Panko went on raw or was barely toasted | Give it a pale-golden head start |
| Breading peeled away | Wet surface or too much flour/egg | Pat dry and keep each dredging layer light |
| Bottom was soggy | Chicken sat directly in released moisture | Use a lightly greased rack |
| Chicken was dry | It stayed in the oven waiting for breadcrumb color | Pre-toast the panko and cook to temperature |
| Center took much longer | Oversized or very thick roll | Control chicken size, thickness and filling |
| Crust softened on the plate | Sauce covered the breading | Put sauce underneath or alongside |
Substitutions That Work
Ham
- Prosciutto: thin and easy to wrap, but noticeably saltier. Season the chicken a little more cautiously if you use it.
- Black Forest ham: smokier while behaving much like standard deli ham.
- Thinly sliced turkey: workable, though milder and less traditional.
Best Cheese for Chicken Cordon Bleu
Choose Swiss for the familiar mild center; choose Gruyère when you want the cheese to have more presence. Whichever cheese you use, keep the portion controlled. Overfilling causes more trouble here than choosing between two good melting cheeses.
| Cheese | Flavor | When melted | Worth knowing |
|---|---|---|---|
| Swiss | Mild and nutty | Smooth melt | Classic, balanced choice |
| Gruyère | Deeper and more pronounced | Melts readily | Good when you want more cheese flavor |
| Provolone | Mild and savory | Smooth and stretchy | Easy substitute for Swiss |
| Havarti | Buttery and creamy | Soft, creamy melt | Keep the portion controlled and well enclosed |
| Low-moisture mozzarella | Very mild | Stretchy | Works, but changes the character of the dish |
Breadcrumbs
Regular breadcrumbs give you a finer, more even coating. Crushed cornflakes create a much crunchier shell. Both brown differently from panko, so do not assume the 3–5 minute panko pre-toast applies unchanged; watch the color rather than the clock.
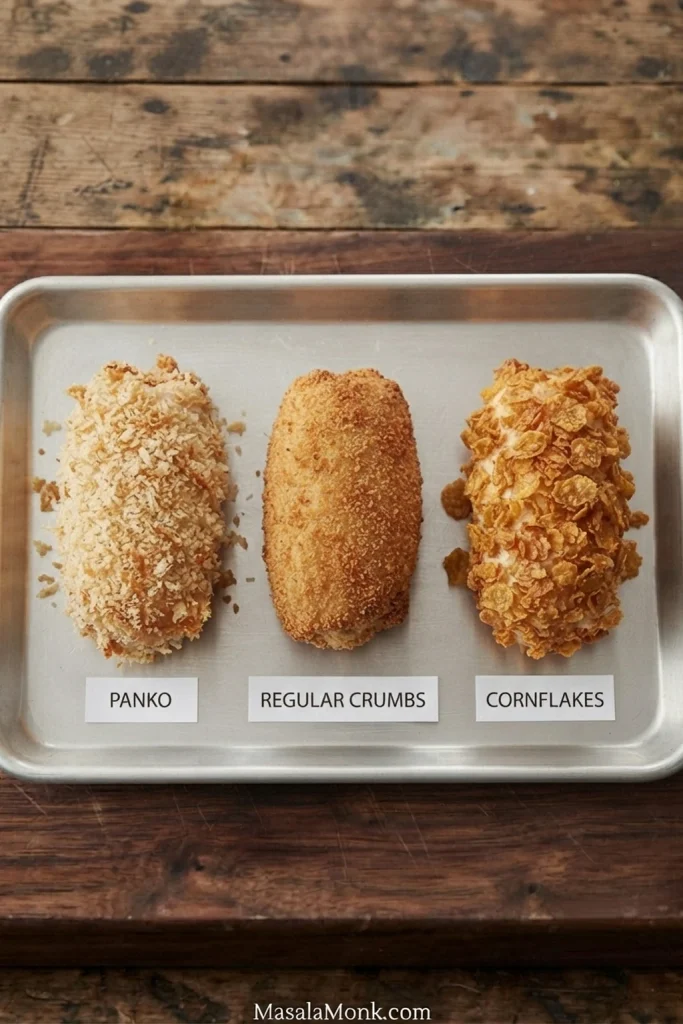
For a gluten-free coating, use gluten-free panko and replace the flour in the dredge with a suitable gluten-free flour. If the entire dish needs to be gluten-free, check packaged ingredients such as ham and mustard as well.
Using panko for the main recipe? Return to Toast the Panko First.
Make Ahead, Freeze and Reheat
Can You Make Chicken Cordon Bleu Ahead?
You can assemble the rolls up to 24 hours ahead, as long as that still falls within the usual refrigerated storage window for the raw chicken. USDA refrigeration guidance recommends cooking or freezing raw chicken within 1–2 days.
Keep the assembled rolls raw and refrigerated, then bread them closer to dinner. Do not partially bake the chicken one day and finish cooking it later.
Can You Freeze Chicken Cordon Bleu?
Freeze the rolls after filling and shaping but before breading. Wrap them tightly, then thaw them in the refrigerator before coating and cooking.
How Long Do Leftovers Keep?
Refrigerate leftover Chicken Cordon Bleu promptly in a covered container and use it within 3–4 days. Store the Dijon sauce separately whenever possible so the crust does not spend days absorbing moisture.
How to Reheat Chicken Cordon Bleu
Reheat at about 350°F / 175°C until the center reaches 165°F / 74°C. An oven or air fryer gives the coating a better chance of becoming crisp again than a microwave does. A microwave is faster, but the steam it creates softens the coating.
↑ Ready to cook? Back to the method
What to Serve With Chicken Cordon Bleu
Chicken Cordon Bleu already brings crisp breading, ham, melted cheese and optional cream sauce, so the plate usually benefits from something fresher, sharper or simpler alongside it.
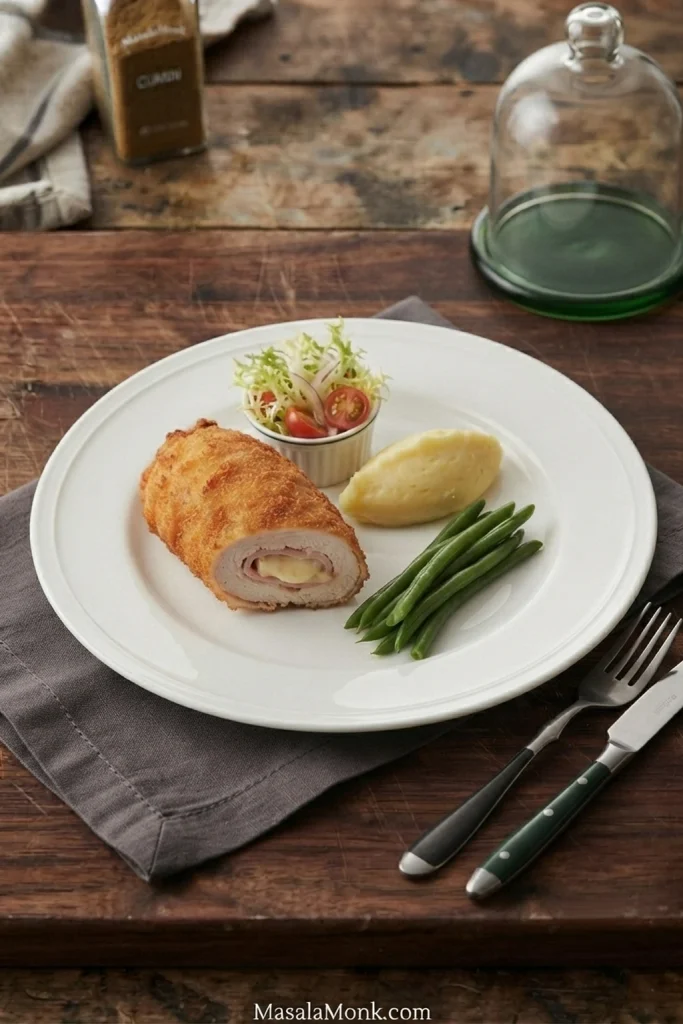
For something warm and green, green beans almondine bring tender-crisp beans, toasted almonds and enough lemon to cut through the richness.
Rice is an easy starch when you want the chicken to remain the richest thing on the plate. Roasted asparagus or broccoli work for the same reason.
For contrast, go cold and sharp. A cucumber salad with vinegar and dill adds crispness, acidity and a cool bite between pieces of warm chicken. A simple green salad with a bright vinaigrette works too.
That First Slice
After that five-minute rest, make the first cut. The crust should give cleanly rather than crumble away, and the cheese should still be soft enough to carry into each slice with the ham. If you’re serving the Dijon sauce, spoon it underneath and drag the chicken through it as you eat so the top stays crisp.
If you make it, tell us which cheese you used and roughly how long your rolls needed in the oven. Those details are genuinely useful to the next person cooking it.








