
Royal icing is all about getting the texture right. You want an outline that stays where you pipe it, a flood that settles into a smooth, even surface, and details that hold their shape as the icing dries. Get those consistencies right and decorating becomes much easier—and a neat, even layer gives you the firm finish royal icing is known for without building an unnecessarily thick shell on the cookie.
This royal icing recipe uses confectioners’ sugar, meringue powder and water to make a firm-setting icing for decorated sugar cookies. Start with one thick base, then adjust what you need for outlining, flooding or fine details. You’ll also learn how to fix broken lines, runaway floods, bubbles, color bleeding and drying problems without sacrificing the entire bowl.
Royal Icing Recipe
Easy Royal Icing for Sugar Cookies
A firm, meringue-powder icing that you can thin for clean cookie outlines and smooth flooding or keep thicker for piped details.
Ingredients
- 4 cups (454 g / 1 lb) confectioners’ sugar, also called powdered sugar or icing sugar, sifted if lumpy
- 3 tablespoons meringue powder
- 5 tablespoons (75 ml) warm water, plus small amounts for adjusting consistency
- ½ teaspoon vanilla extract, optional
- Gel food coloring, optional
Equipment
- Stand mixer with paddle attachment, or hand mixer with standard beaters
- Large, clean mixing bowl
- Flexible spatula
- Measuring cups and spoons
- Small bowls for dividing and coloring the icing
- Piping bags and round tips, or tipless piping bags
- Scribe tool or clean toothpick for flooded cookies
Instructions
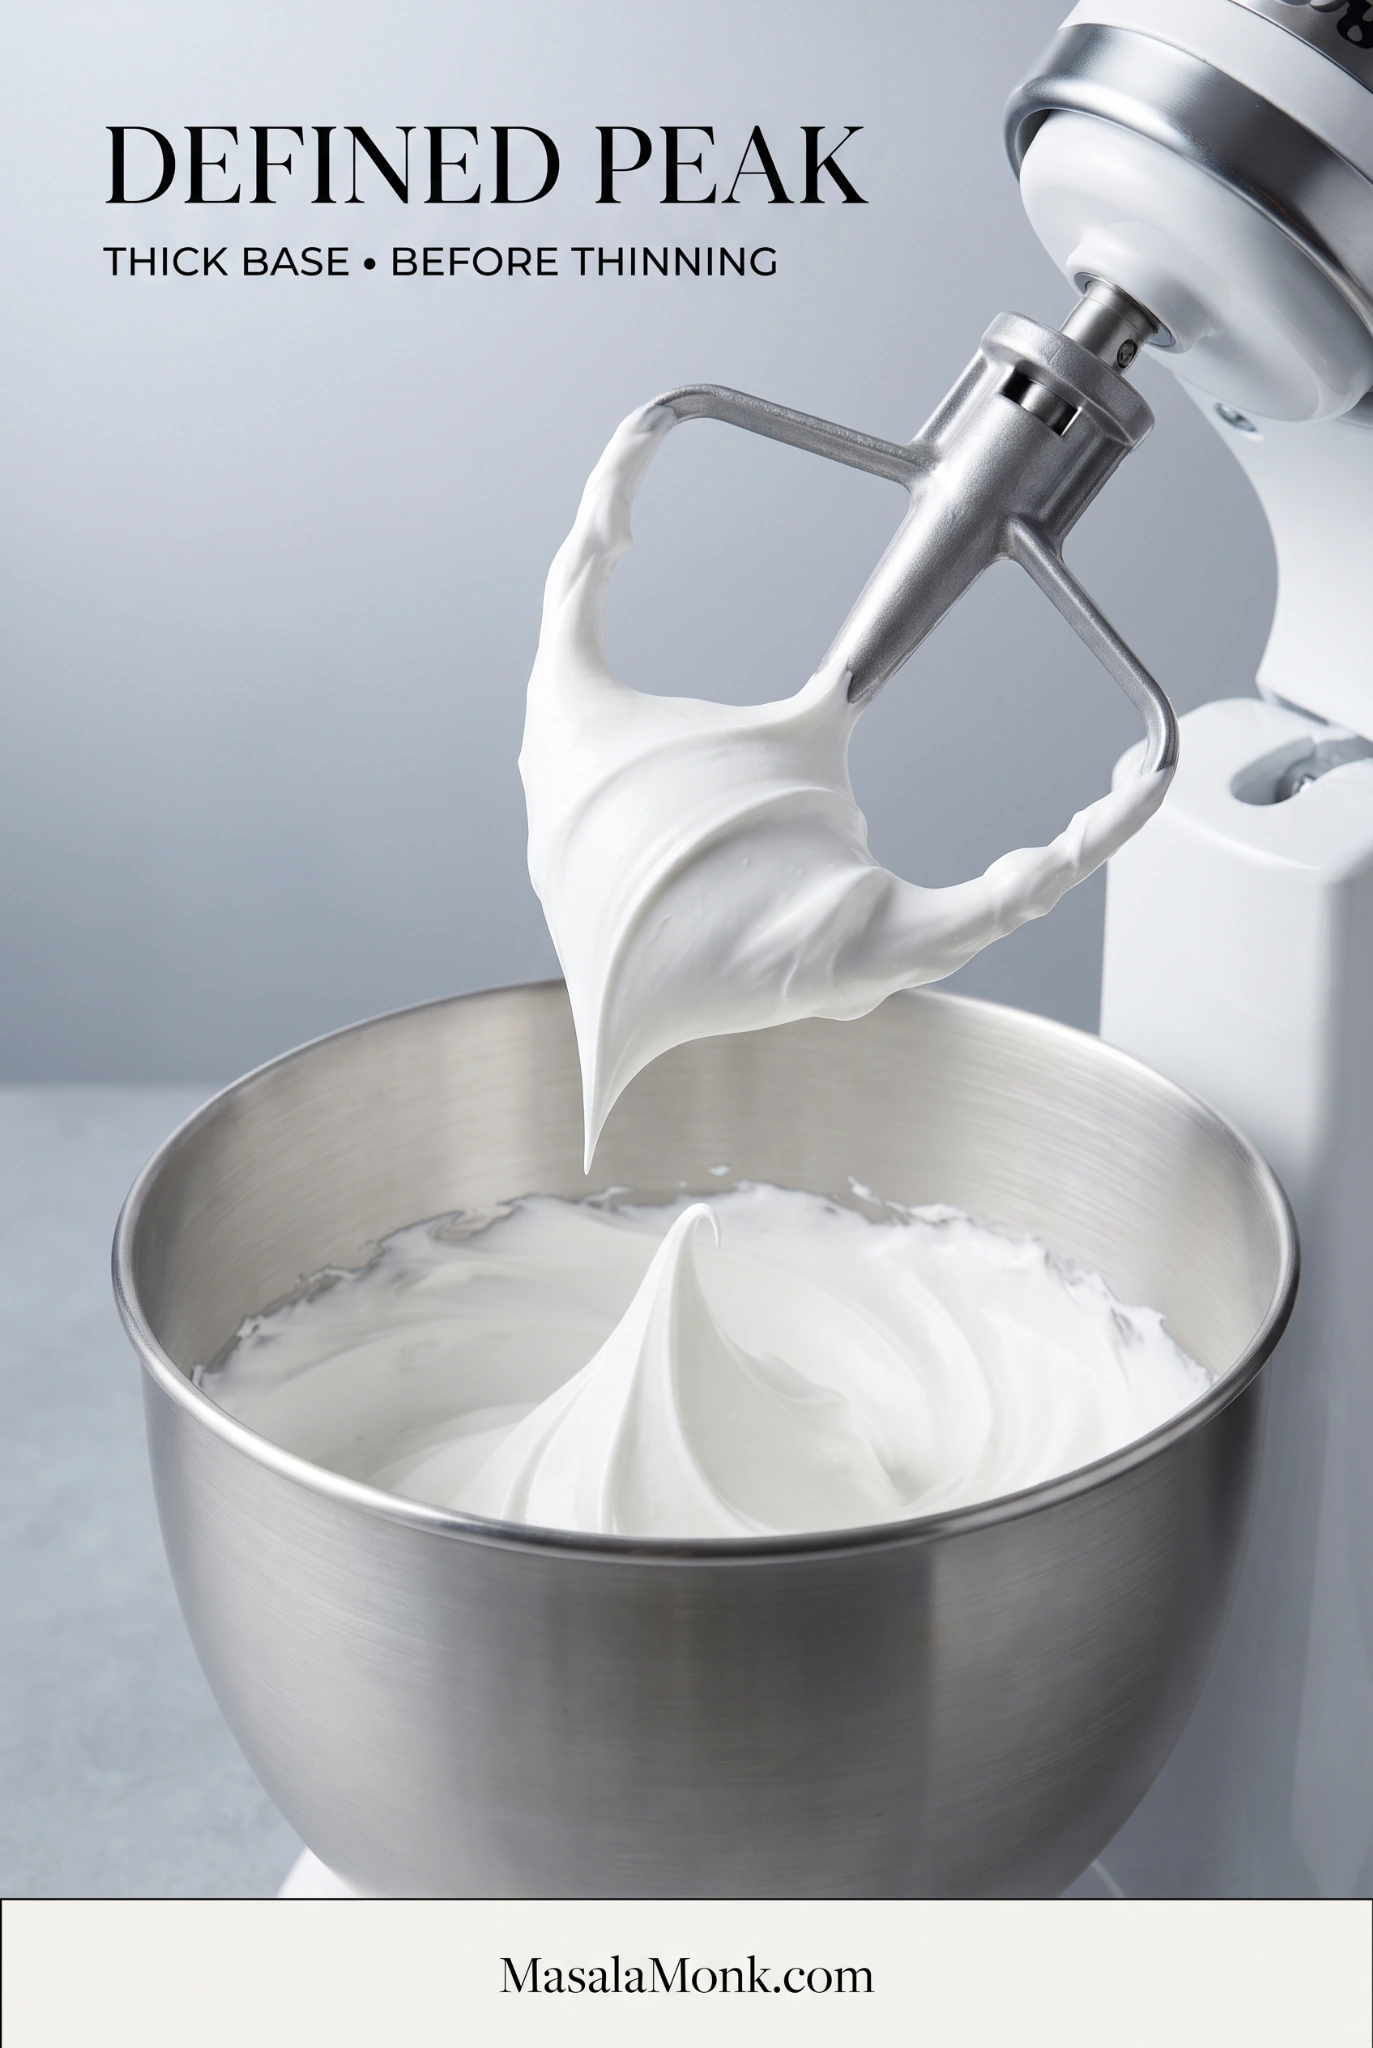
Before dividing the batch, make sure the thick base can hold a defined peak. That gives you room to loosen individual portions later without losing control of the whole mixture.
- Combine the ingredients. Add the confectioners’ sugar, meringue powder and 5 tablespoons (75 ml) warm water to the bowl. Start mixing on low so the sugar stays in the bowl. Add the optional vanilla at this stage.
- Beat until the icing holds defined peaks. With a stand mixer fitted with the paddle attachment, beat on low for 7–10 minutes; with a hand mixer and standard beaters, beat on high for 10–12 minutes. Lift the beater: the thick base should hold a distinct peak.
- Divide the base. Set aside icing for stiff details, then divide the rest for your decorating plan. Most sugar cookies need only outline and flood consistencies.
- Add the colors. Stir gel coloring into each portion gradually. Let deep shades develop before adding more pigment, and keep unused bowls covered.
- Adjust each portion for its job. Loosen the outline and flood icing with small amounts of water. Use the starting guide below, then judge how the icing flows through your piping opening and behaves on the cookie.
- Rest a bubbly batch when needed. If you can see lots of trapped air, cover the icing and let it sit for 15–30 minutes. Stir slowly afterward.
Recipe Notes
- The 5 tablespoons of water make the thick base. Additional water is used to create looser consistencies for decorating.
- Keep the bowl, paddle or beaters and other utensils clean and free from grease.
- Vanilla can be replaced with another suitable flavor extract. Added liquid may slightly change the consistency.
- The prep time covers mixing and initial preparation. Resting a bubbly batch adds another 15–30 minutes when needed.
Royal Icing Guide
Get the Consistency Right
Color and Decorate
Which Royal Icing Consistency Do You Need?
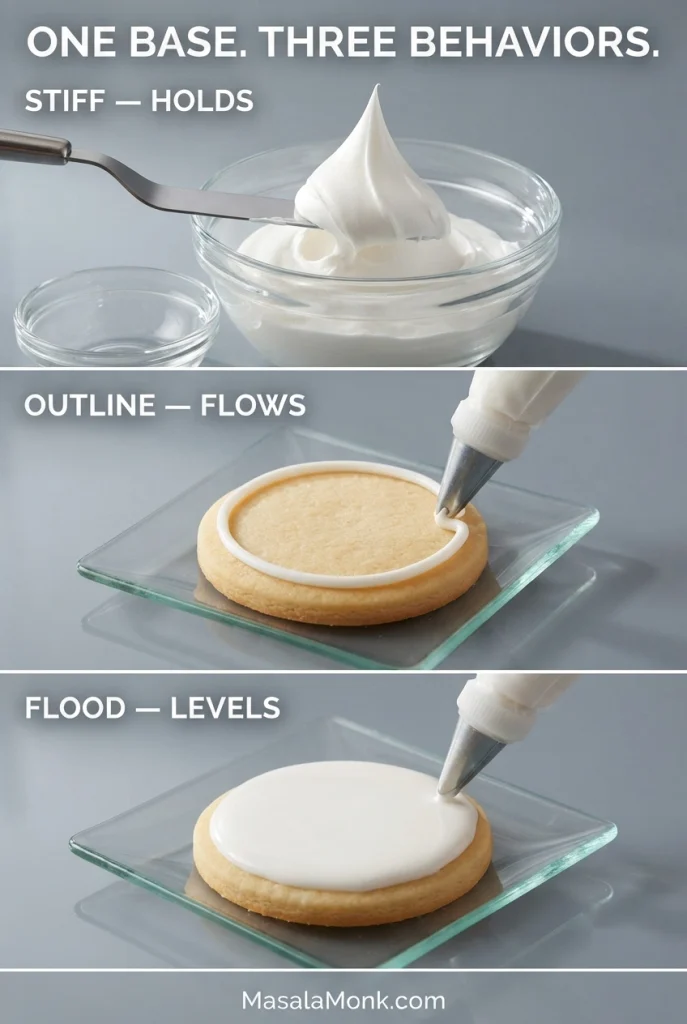
You don’t need four different bowls of icing to decorate a batch of sugar cookies. For most designs, outline and flood icing will do the job. Keep a third, stiffer portion when you’re piping flowers, lettering or raised details that need to hold their shape.
| Consistency | What it looks like | Best use |
|---|---|---|
| Stiff / detail | A distinct peak stays upright and the icing holds its shape. | Flowers, raised decorations and dimensional details |
| Outline | A line flows comfortably through the opening but remains defined on the cookie. | Borders and divided sections |
| Flood | The icing spreads within the border and gradually levels into a smooth surface. | Filling outlined areas |
Fine lettering and small details can often use the outline consistency. Make it firmer only when the design needs a raised line or shape that stays pronounced after piping.
How Much Water Should You Add to Royal Icing?
For every ½ cup of this thick base, start with about ⅛ teaspoon water for outline icing or ½ teaspoon for flood icing. These are cautious starting points, not fixed ratios. For outline icing, stop when a continuous line pipes comfortably but keeps its boundary. For flood icing, stop when it spreads within the outline and gradually levels without racing away. As you get close, adjust by drops rather than another measured pour.

The Seconds Test Helps—but the Cookie Gets the Final Vote
Lift a little flood icing with a spatula and let a ribbon fall across the surface. Count how long the line takes to disappear back into the bowl. Around 10 seconds is a useful starting reference, but it isn’t a universal rule for every design, bag or batch.

Now try the icing through the opening you actually plan to use. Pipe a short border and fill a small area. You’re looking for a line that stays put and a flood that reaches the edges, settles smoothly and loses its ridges without escaping the border.

Too thick? Add a few drops of water. Too thin? Stir in some reserved thick icing or sifted confectioners’ sugar.
Don’t forget the piping opening. A small round tip or similarly sized opening in a tipless bag works well for many outlines; finer openings suit delicate details, while a somewhat wider opening makes larger areas easier to flood. If icing looks right in the bowl but is exhausting to pipe, check the opening before automatically adding more water.

Still not behaving right? Troubleshoot royal icing.
How to Color Royal Icing
Gel food coloring builds color without adding as much liquid as many thin food dyes. Add it to the divided icing before making the final consistency adjustment.
Deep red, black and navy often need more pigment than pastel shades, and some colors deepen as they sit. Give a strong shade time to develop before reaching for more coloring, then check its consistency again.
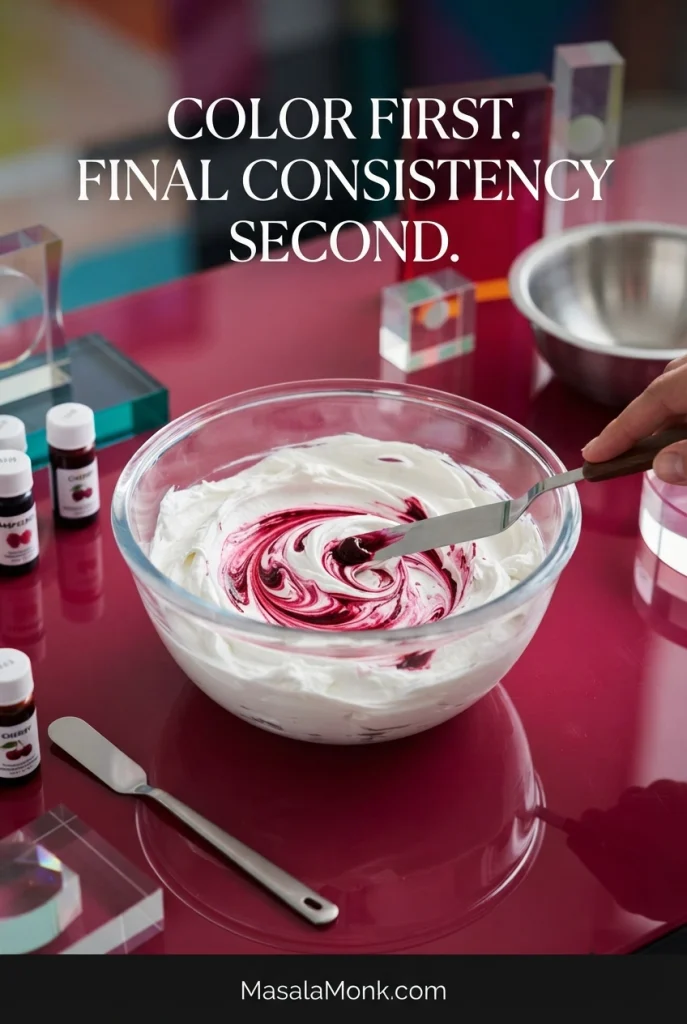
Keep a little uncolored thick base aside if you can—you’ll be glad to have it if a dark color becomes too loose or needs lightening. One color behaving differently doesn’t mean the whole batch is wrong.
Colors spreading or bleeding? See why royal icing bleeds.
How to Decorate Sugar Cookies With Royal Icing
Start with completely cooled cookies. Our sugar cookie recipe for cut-outs is a useful companion when you want clean edges and a flat surface for decorating.
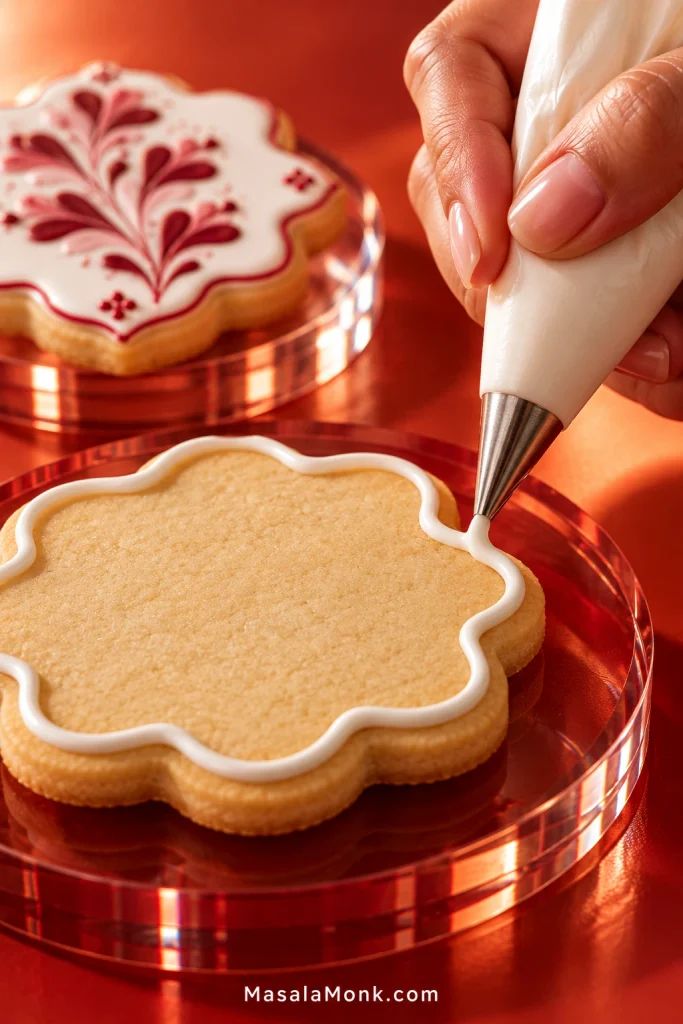
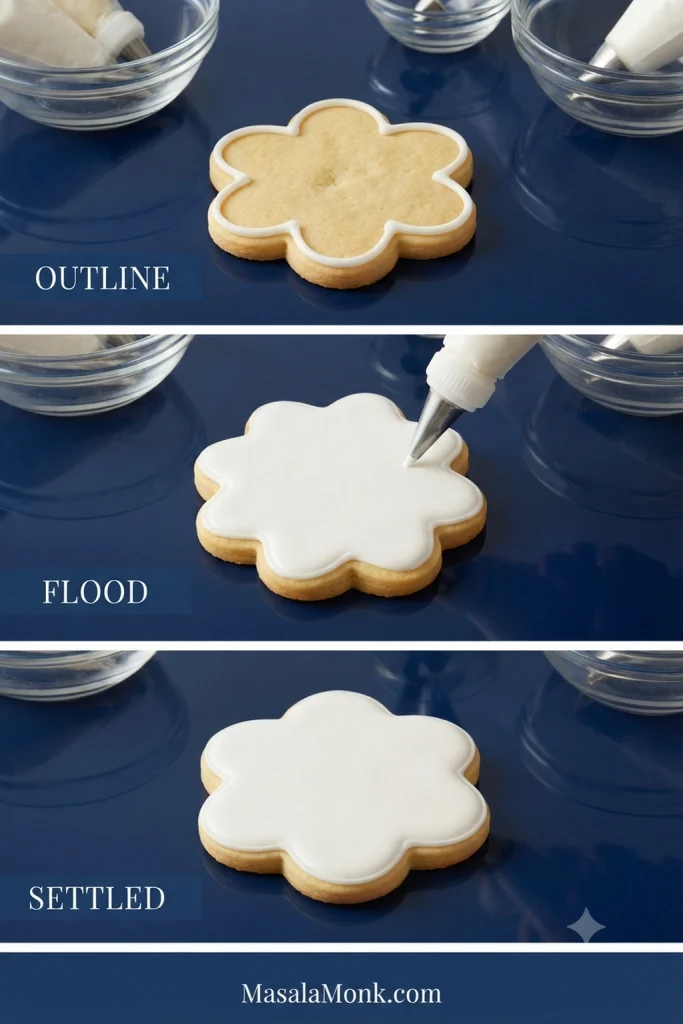
- Pipe the outline. Draw a continuous border around the area you want to fill. The icing should move comfortably through the opening while the line stays where you put it.
- Choose the finish. Flood while the outline is still wet or just beginning to set for a seamless surface. Let the border firm first when you deliberately want it to remain raised.
- Catch bubbles while the icing is wet. Pop visible bubbles before the surface sets.
- Add details at the right stage. Work into wet icing for flat dots, hearts, swirls and marbling. Let the base gain structure before adding lettering or raised decorations that need to stay sharp.

Once the flood settles, the cookie should look smooth and clean rather than bulky, with the border either melting into the surface or staying deliberately raised. The same outline-and-flood method works on our gingerbread cookies.
Why Does Royal Icing Bleed?
Royal icing can bleed in two different ways. Two colors may flow into each other while they’re still wet, or pigment may migrate into a neighboring area later during drying even though the design looked clean at first.
For crisp separation between layers, let the first color gain enough structure before adding the next. Wet-on-wet dots, hearts, swirls and marbling work the opposite way: add the second color while the flood is still fluid so both colors settle into one surface.

Bleeding that appears later points to a different set of checks. Compare the affected color with the others and look at color saturation, added liquid and drying conditions. Humidity can contribute too; simply waiting longer isn’t a guaranteed cure for every kind of bleeding.

Royal Icing Troubleshooting
When something goes wrong, start with when and how it appeared. A broken line in the piping bag points you in a different direction from a smooth wet cookie that develops craters later. Change the icing that’s misbehaving and leave the rest alone.

Problems While Mixing, Piping or Flooding

| What you see | Good first checks | What to do |
|---|---|---|
| The piping bag is hard to squeeze | Icing that is too stiff, or an opening that is too small | Try a slightly larger opening or loosen the icing with a few drops of water, then retest. |
| The outline keeps breaking | Stiff icing or difficulty passing through a narrow opening | Loosen it slightly. If comfortable pressure still doesn’t give you a continuous line, check the tip or bag opening. |
| The outline spreads flat | Icing that is too loose for the border | Stir in some reserved thicker icing and pipe another short line. |
| The flood escapes the border | Flood icing that is too thin, or an outline that isn’t containing it | Thicken the flood slightly. If the design needs a stronger barrier, give the next outline a little time to firm before filling. |
| The icing looks fluffy | Excess air introduced during mixing | Stop whipping and make later consistency adjustments by stirring slowly. |
| There are lots of bubbles | Air introduced during mixing, coloring or repeated stirring | Let the covered icing rest briefly, stir slowly and pop visible bubbles in wet flood. |
| The icing feels gritty | Lumpy sugar or meringue powder that hasn’t dispersed smoothly | Check the confectioners’ sugar and meringue powder rather than whipping longer; lumps or incomplete dispersion may be causing the texture. |
| Colors bleed | Whether the colors flowed together while wet or pigment migrated later | For wet mixing, change the timing. If bleeding appears later, compare liquid, color saturation and drying conditions. |
Need a reset? Recheck the consistency.
Problems That Appear While Drying or Packing

| What you see | Good first checks | What to do |
|---|---|---|
| Craters or dimples | Trapped bubbles or an overly deep flood | Release visible bubbles while the icing is wet and avoid an unnecessarily thick layer. |
| The surface looks rough or wrinkled | Whether it was already rough while wet or changed as it dried | Rough from the start: review mixing and consistency. Changed later: look at trapped air, flood depth and drying conditions. |
| The icing cracks or crumbles | Whether one color is affected or every color | One color: compare its coloring, added liquid and layer thickness. Every color: look back at the base and drying conditions. |
| The icing is still tacky | Flood depth, humidity and drying time | Give the cookies more time and keep them unstacked while the icing finishes drying. |
| The top feels dry but the icing underneath is soft | A surface that has set before the deeper icing | Leave the cookies longer before stacking, packaging or putting pressure on the surface. |
| Moisture appears on dried icing | Cold cookies moved into warmer, humid air | Avoid abrupt temperature changes that encourage condensation. |
| Details are dented, smudged or broken | Incomplete drying or direct pressure | Allow more drying time and protect raised details during packing. |
Need timing guidance? Go to the drying guide.
How Long Does Royal Icing Take to Dry?
Thin piped details may become touch-dry within a few hours. Flooded cookies often need several hours or overnight before they’re ready to stack or package. Flood depth, humidity and the amount of water in the icing all affect the timing.

Dry to the Touch
The exposed surface firms first. A cookie can feel dry enough to move carefully while the icing underneath remains soft, so surface dryness isn’t yet a signal to stack it.
Ready for Another Layer
Wet-on-wet details go onto a fluid base so they settle into the same surface. Crisp lettering, borders and raised decorations need enough structure underneath to remain distinct.

Ready to Stack or Package
Substantial flooded areas may need overnight drying, with longer drying possible in humid conditions. Leave the cookies unstacked until the flood has dried through.

Watch for condensation. Moving very cold cookies into warm, humid air can put moisture back onto icing that had already dried. Refrigeration isn’t a universal shortcut for drying royal icing.
Firm Doesn’t Have to Mean a Thick Shell
Royal icing is meant to set firm. The depth matters, though: a thick mound creates a much harder, sweeter bite than a neat, even flood. Too much icing can also push beyond the border, although overflow and excessive shell thickness aren’t the same problem. Aim for a smooth, level surface that stays inside the edge without building unnecessary depth.

For a soft, creamy topping rather than a firm decorating finish, buttercream frosting is a better fit.
Making these ahead? Go to the storage guide.
Make-Ahead and Storage
While You’re Decorating
Keep unused bowls covered and protect the open end of a piping bag during longer breaks. A dry crust can break into the icing and block a narrow tip in the middle of a fine border or detail.
How Long Can You Store Royal Icing?
For this meringue-powder formula, store unused royal icing in a clean, airtight container at room temperature for up to 2 weeks. Keep it tightly covered so the surface doesn’t crust.
Before reusing it, mix on low speed until the icing is smooth and back to the consistency you need. Avoid vigorous whipping, which can work unnecessary air into the icing. If it needs thinning afterward, add water a little at a time.
Storing Decorated Cookies
Let the icing dry through before stacking or tightly packaging the cookies. Protect raised details from direct pressure.
Meringue Powder vs. Egg Whites
Traditional royal icing can be made with egg whites. This version uses meringue powder because it’s convenient to store and easy to measure.
Meringue powder, liquid egg whites and plain dried egg-white powder aren’t automatic one-for-one substitutes. Their ingredients and hydration needs can differ, so use a recipe developed for the ingredient you choose rather than swapping them spoon for spoon. Follow that recipe’s ingredients and method together rather than borrowing an isolated step from another formula.
Making a gingerbread house? Flood icing is too loose for reliable construction. Walls and roof pieces need a much stiffer, construction-focused icing that stays where you pipe the joints.
You don’t need to chase a magic seconds count or prepare a row of perfectly calibrated bowls. Start with the thick base, adjust only what you need for the job in front of you, then test it on the cookie. Once you can read what the icing is doing, outlining and flooding become much less about guesswork.