
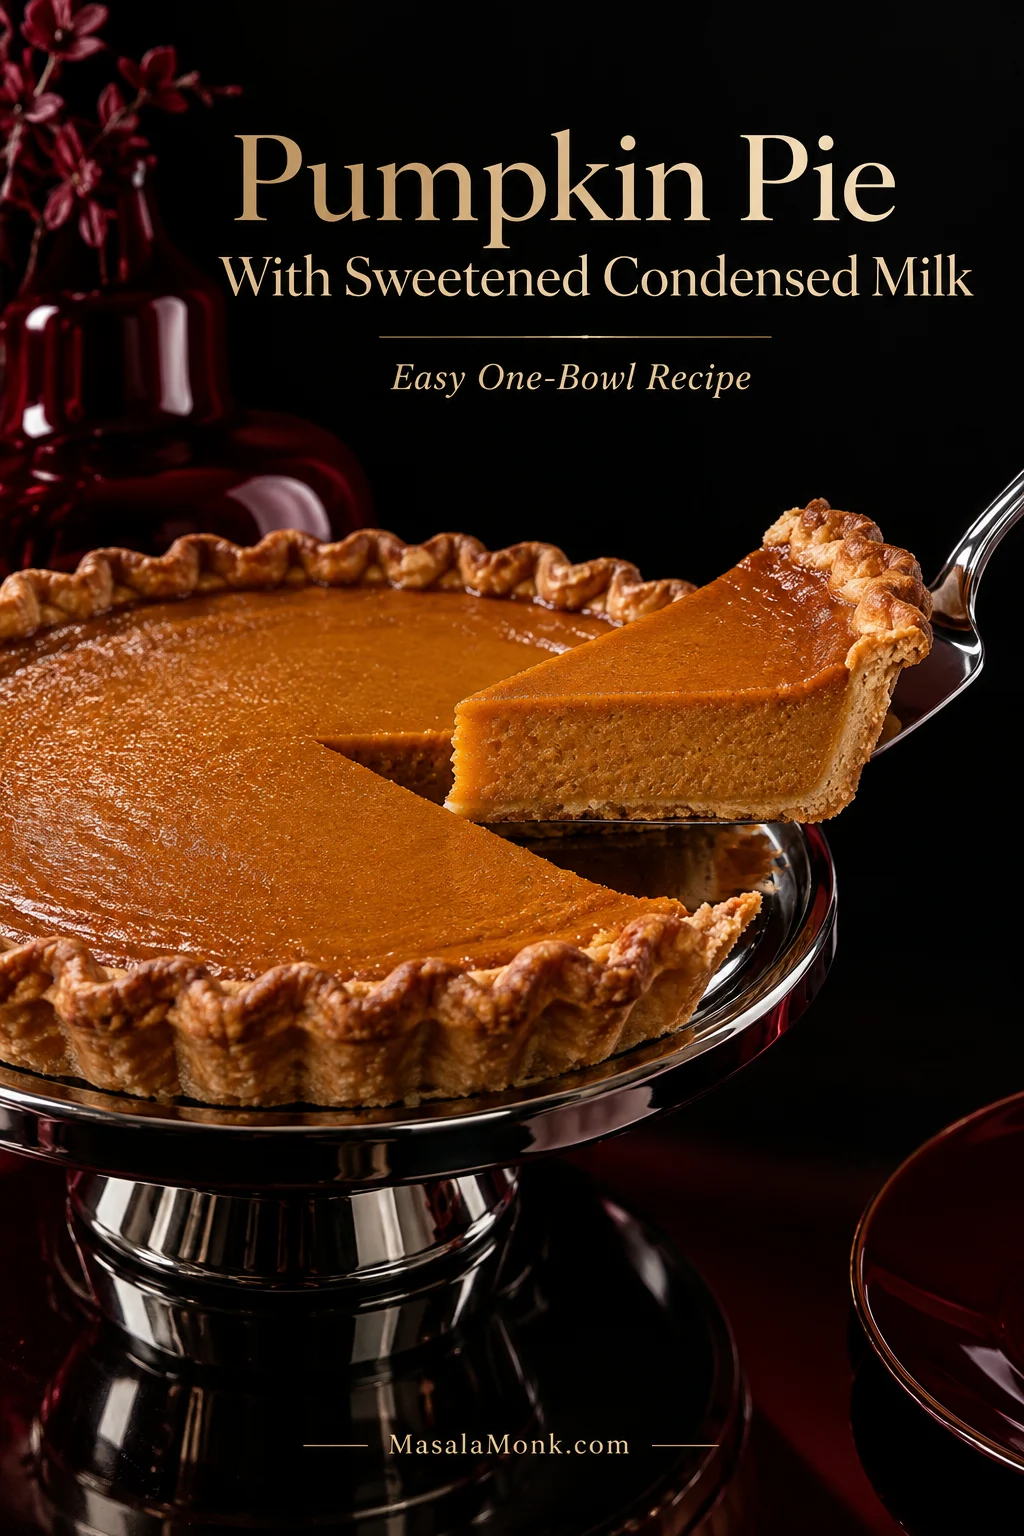
Pumpkin pie with sweetened condensed milk keeps the filling simple. If condensed milk is the can you already have, yes—it works here. Build the pie around it from the start and skip the separate sugar an evaporated-milk recipe would normally need.
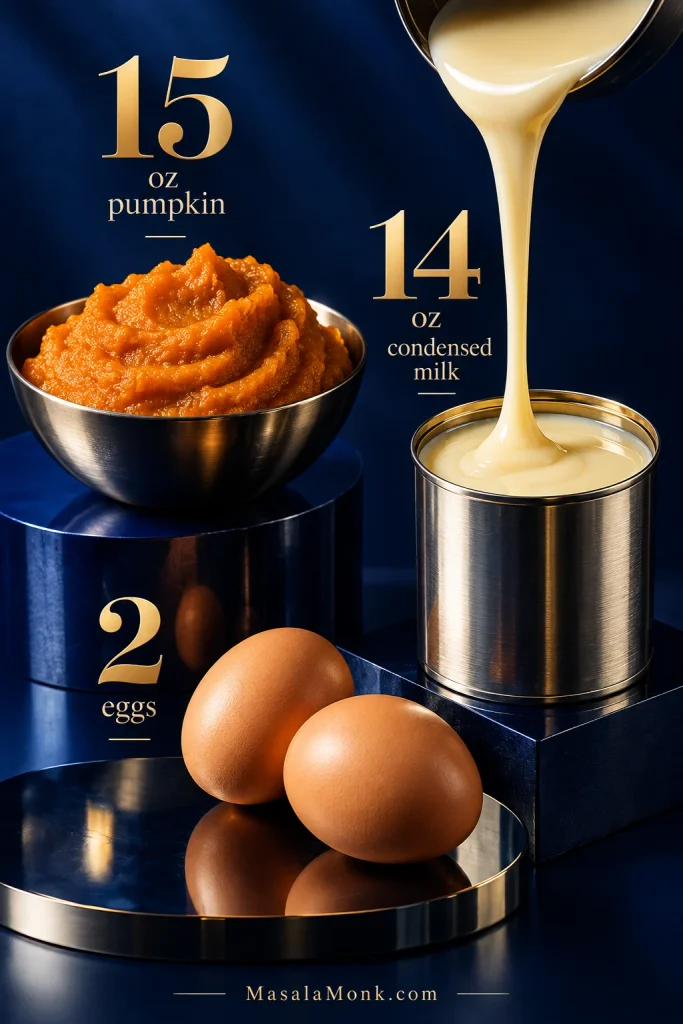
The ratio is easy to remember: 15 oz / 425 g pumpkin + one 14 oz / about 397 g can sweetened condensed milk + 2 large eggs. Add warm spices, salt, and vanilla if you like it, then pour the filling into a cold 9-inch / 23-cm pie crust.
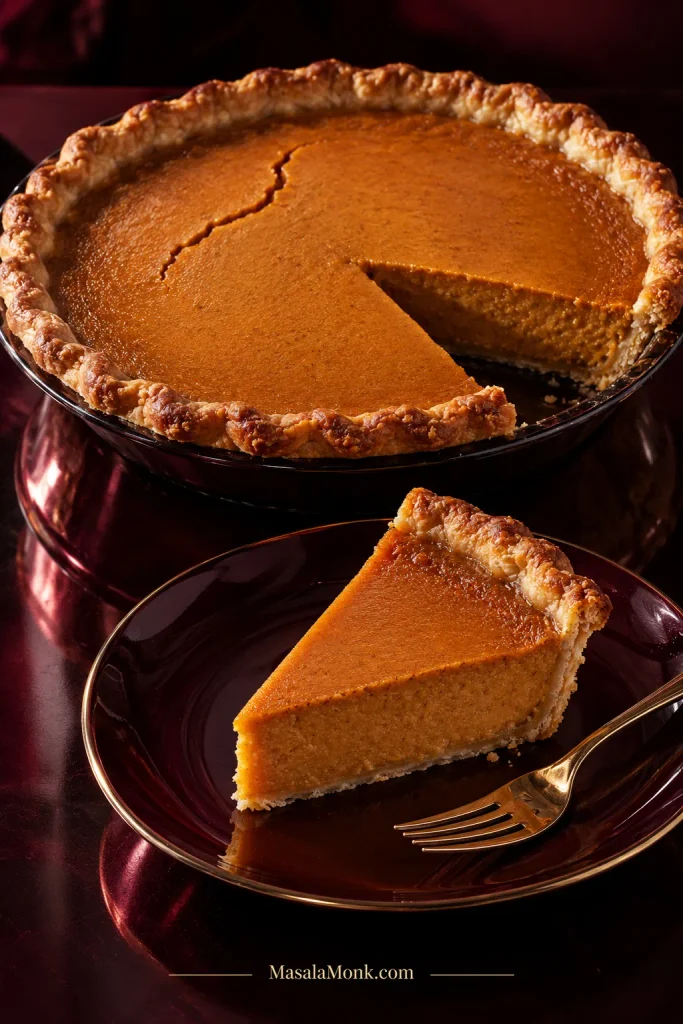
A good slice should feel like custard, not cheesecake: soft pumpkin filling once chilled, with warm cinnamon and ginger in the background. Enough pastry underneath keeps the condensed-milk richness from feeling heavy. The bake is where judgment matters most, because the filling can be ready while the bottom crust still needs help. A center that moves a little isn’t necessarily underdone, either.
See the full pumpkin pie guide
Making the pie
Make It Now: Pumpkin Pie With Sweetened Condensed Milk
The filling itself is one-bowl simple. Most of the judgment comes later, when you’re deciding whether the custard and crust are done.
| At a glance | What to know |
|---|---|
| Active prep | About 10–15 minutes |
| Bake | About 50–60 minutes: 425°F / 220°C for 15 minutes, then 350°F / 180°C for 35–45 minutes |
| Crust | Cold unbaked crust works; partially prebake if you want a crisper bottom |
| Doneness | Set outer filling + a small, controlled center wobble |
| Yield | About 8 slices |
| For slices that hold well | Cool, then refrigerate for about 4 hours; overnight is easiest |
| Optional partial prebake | Adds about 30 minutes chilling + 25–30 minutes baking |
Ingredients
- 15 oz / 425 g 100% pure pumpkin purée — about 1¾ cups; use plain pumpkin, not pumpkin pie filling
- 1 × 14 oz / about 397 g can sweetened condensed milk — different from evaporated milk
- 2 large eggs / about 100 g without shells
- 2½ teaspoons pumpkin pie spice
- ½ teaspoon fine sea salt or table salt / about 2.5–3 g
- 1 teaspoon / 5 ml vanilla extract, optional
- 1 cold, unbaked 9-inch / 23-cm single pie crust
No ready-made spice blend? Use 1½ teaspoons cinnamon + ½ teaspoon ginger + ¼ teaspoon nutmeg + ⅛ teaspoon allspice + ⅛ teaspoon cloves. You can also make a batch of homemade pumpkin pie spice and adjust it from there.
Method
- Heat the oven and ready the crust. Put a rack in the lower third and preheat fully to 425°F / 220°C. Set the cold shell on a rimmed baking sheet.
Make the Filling
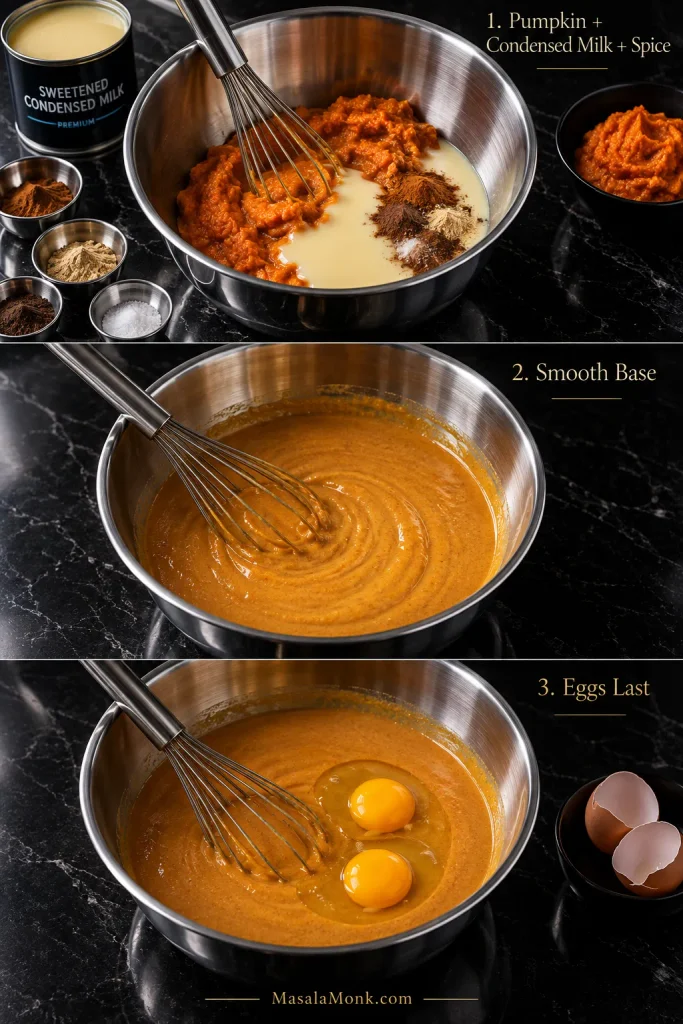
- Mix the pumpkin, condensed milk, and seasonings. Whisk the pumpkin, condensed milk, spice, salt, and vanilla until evenly colored and smooth.
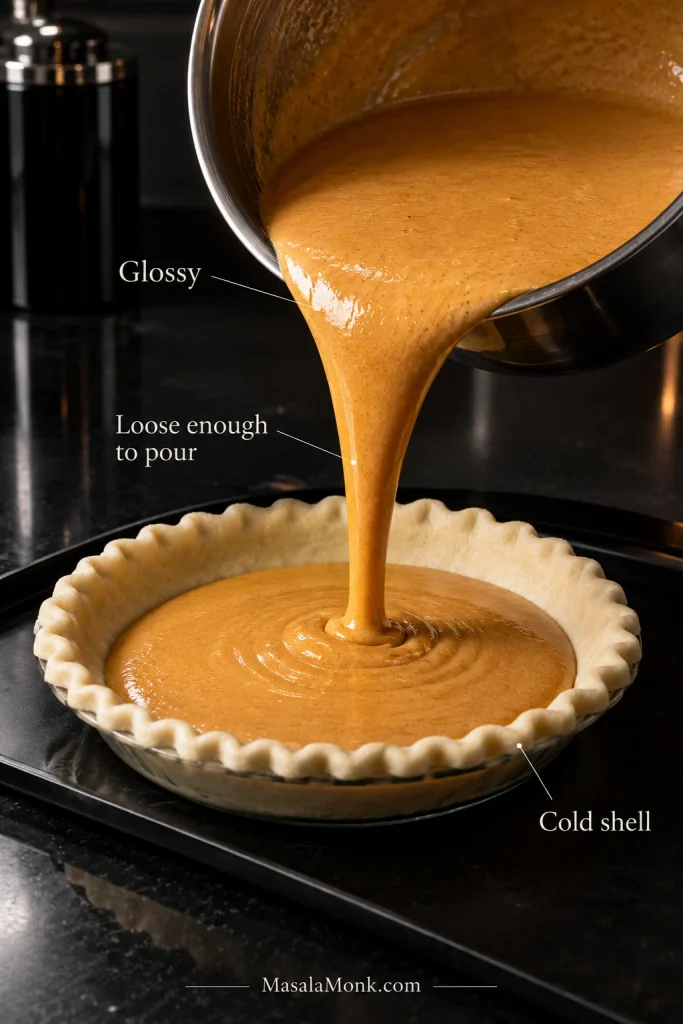
- Add the eggs last. Whisk in both eggs just until combined. The filling should look glossy and loose enough to pour easily. That’s normal; pumpkin custard is much thinner before baking than it will be once set. Tap the bowl gently and pop any large bubbles on the surface.
Pour Into the Shell
- Fill the shell. Pour in the custard, leaving a little headroom because 9-inch pie shells vary in depth. If you have extra filling, bake it in a lightly greased ramekin alongside the pie, but start checking it earlier. Take it out when the edges are set and the middle has the same small, controlled wobble.
Bake and Cool
- Start hot. Bake at 425°F / 220°C for 15 minutes. Leave the pie inside and lower the oven to 350°F / 180°C.
- Finish gently. Bake for about 35–45 minutes more, checking before the upper end of the range.
Ready: the outer filling is set and the center has a small, controlled wobble.
Needs longer: a broad section ripples or sloshes like liquid.
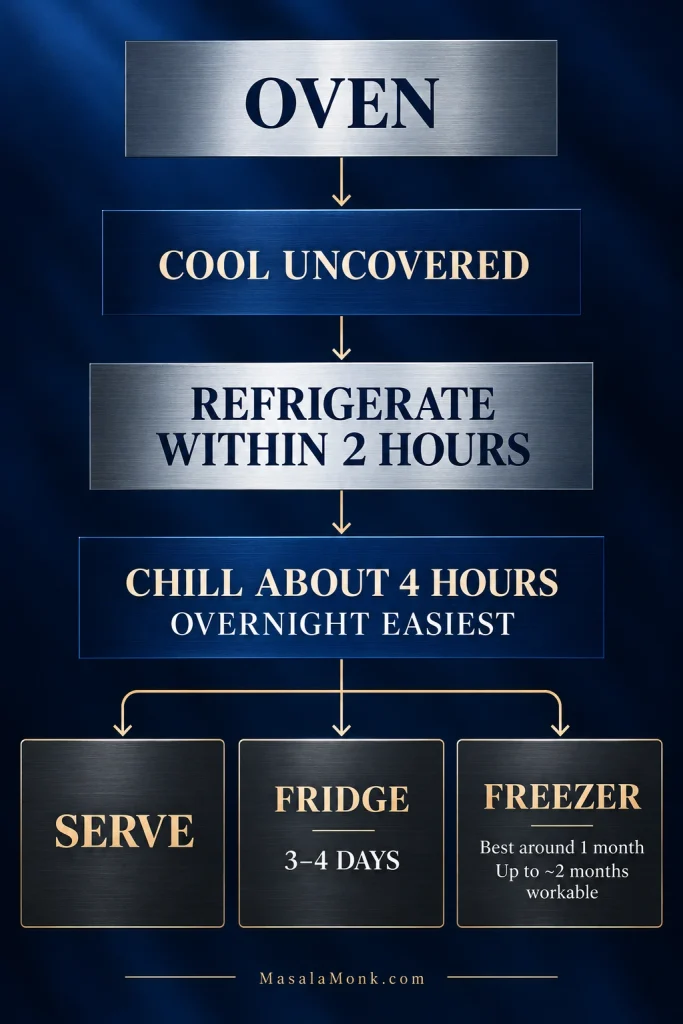
If the rim is already deep golden, cover it with foil or a pie shield while the center finishes. - Cool safely. Let the pie cool uncovered on a rack and refrigerate it within 2 hours of leaving the oven. If it is still warm when refrigerated, leave it uncovered or loosely tented until chilled, then cover it once cold.
Fan or Convection Ovens
Start around 400°F / 200°C for 15 minutes, then lower to about 325°F / 160°C. If your oven already compensates automatically for fan heat, use its normal conversion setting. Countertop ovens deserve an earlier look because the top element can sit much closer to the pie.
Ingredient questions · Check doneness · Crisp the crust · Fix a problem
Pumpkin Purée, Condensed Milk, and Spice
There aren’t many ingredients here, which makes the two common supermarket mix-ups more important than they might seem.
Use Pure Pumpkin, Not Pie Filling
Choose a can labeled 100% pure pumpkin or pumpkin purée. Pumpkin pie filling or pumpkin pie mix already contains sweeteners and seasoning, so it would make this pie sweeter and change the spice balance.
A standard 15 oz can gives the 425 g needed here. Straight from the can, the purée should be thick enough to hold soft spoon marks.
Sweetened Condensed or Evaporated Milk?
Not 1:1. In this pumpkin pie with sweetened condensed milk, the condensed milk is thick and already contains sugar; evaporated milk is unsweetened and much thinner. Each needs a recipe with a different sugar and dairy balance.
| Feature | Sweetened condensed milk | Evaporated milk |
|---|---|---|
| Sweet? | Yes | No |
| Texture | Thick and syrupy | Fluid and pourable |
| What it brings | Dairy, sweetness, richness, body | Dairy and moisture |
| Extra sugar usually needed? | No | Usually yes |
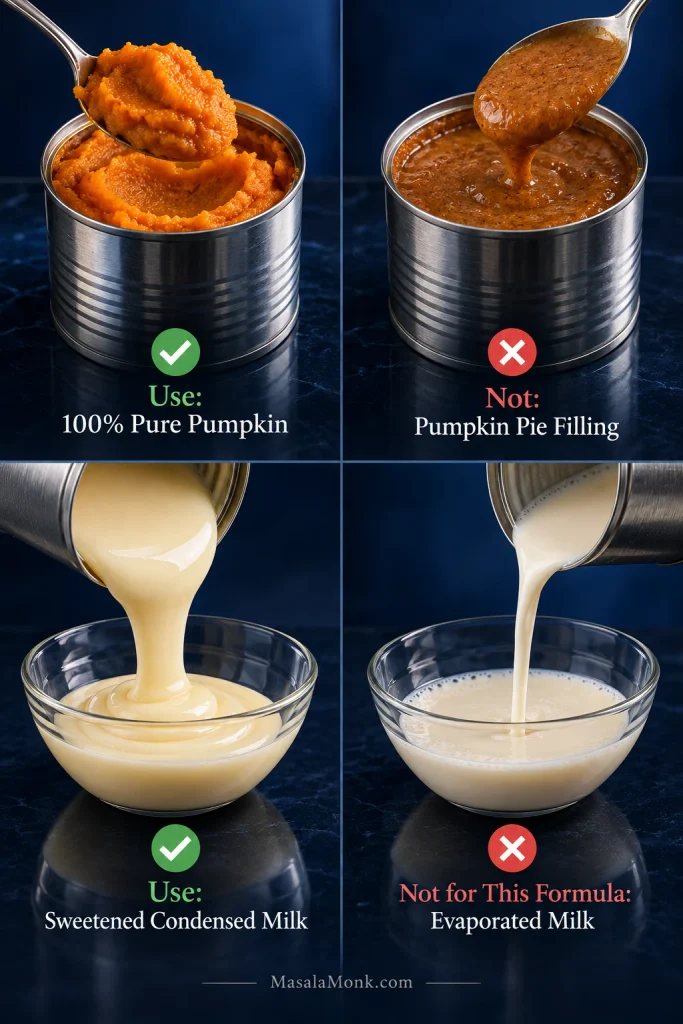
The finished pies differ too. A condensed-milk version is usually richer and sweeter; an evaporated-milk version tends to feel lighter and gives you separate control over the sugar. Either can make a soft custard—the eggs and final bake also determine how firmly it sets.
Opened sweetened condensed milk by mistake? You’re already in the right place. Use this formula and leave the separate sugar out.
Do You Need Extra Sugar?
No. The condensed milk already makes the standard filling clearly sweet. If you deliberately want a sweeter pie with a mild molasses note, taste the pumpkin-and-condensed-milk mixture before adding the eggs. Then add 1–2 tablespoons packed brown sugar only if you want it.
Once chilled, the pumpkin should lead the flavor, with cinnamon and ginger behind it and the pastry giving the soft custard some needed contrast.
Choosing Your Spice Level
The 2½ teaspoons in the recipe is a balanced starting point. Use about 2 teaspoons for a milder, more pumpkin-forward pie or 3–3½ teaspoons for something bolder. Go slowly with clove-heavy blends; the spice should sit behind the pumpkin, not bury it.
Once the cans and seasoning are right, the biggest remaining decision is when to stop baking. That matters more than another half-teaspoon of spice.
How to Tell When Pumpkin Pie Is Done
Pumpkin pie is done when the outer 2 inches / 5 cm are set. A smaller center should still wobble softly as one piece when you nudge the plate. Broad liquid ripples or sloshing mean it needs more time.
The middle will move, and the instinct is often to give it another ten minutes “just to be safe.” That’s exactly where a good custard pie can go too far. Start checking within the suggested bake-time range and let the pie itself make the decision.
Underbaked, Ready, or Overdone?
| Stage | What you see | What to do |
|---|---|---|
| Too early | A broad part of the center ripples, waves, or sloshes like liquid | Keep baking |
| Ready | Set perimeter + a contained wobble in the middle | Take the pie out |
| Too far | The center is rigid, strongly puffed, cracked, or beginning to pull from the crust | Remove it immediately |
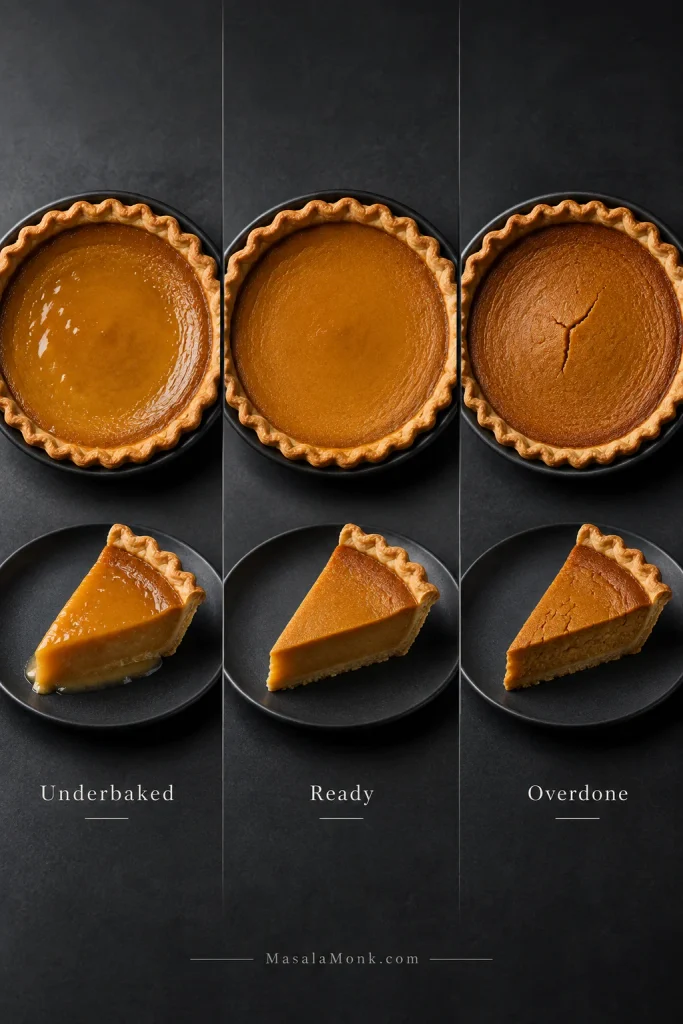
Jiggly is not the problem. Liquid is. A small, controlled movement in the middle is what you want; the pie keeps setting as it cools.
You don’t need a perfectly clean knife test. Waiting for the center to look completely firm is more likely to push the custard too far.
Use a Thermometer When the Wobble Is Hard to Read
If you’ve been staring at the center and can’t decide whether that wobble is enough, an instant-read thermometer can break the tie. Roughly 160–170°F / 71–77°C in the middle is a useful secondary check, not a replacement for looking at the pie.
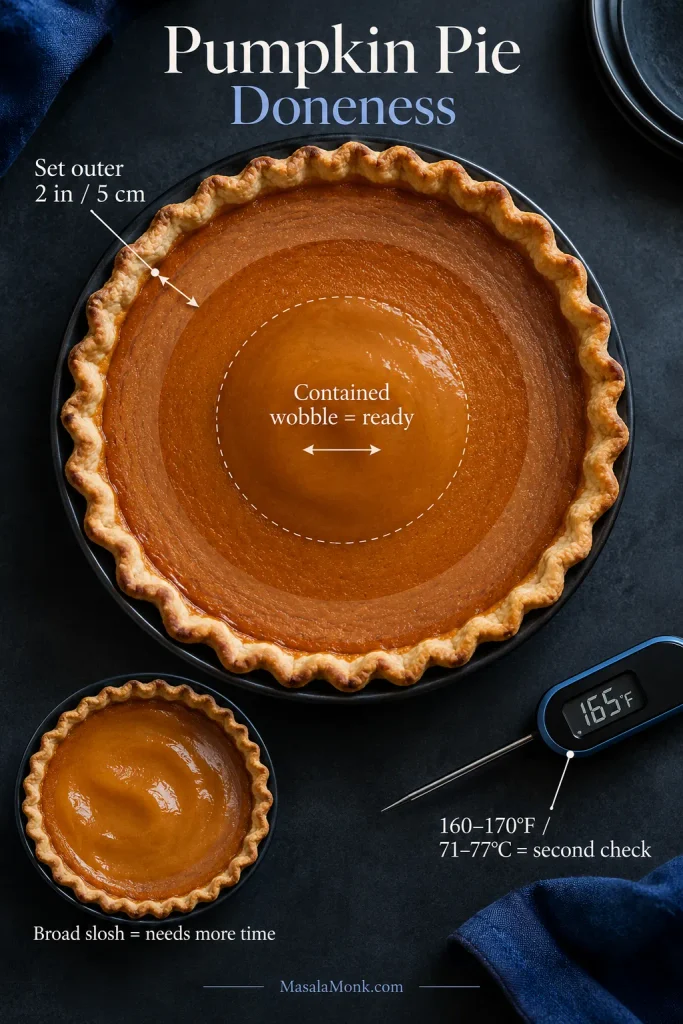
King Arthur Baking’s pumpkin pie doneness guide shows the same progression from liquid to softly wobbly to overbaked, alongside temperature cues.
What the Finished Custard Should Feel Like
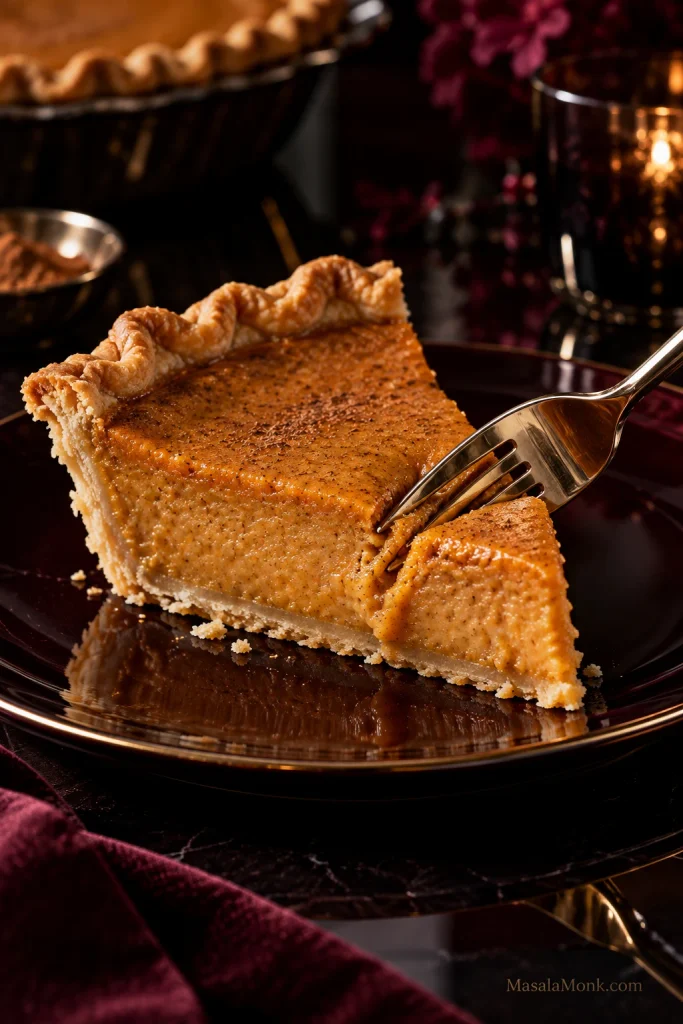
Once thoroughly chilled, that softly set center should hold a slice but yield easily under a fork. If the filling eats firm and bouncy like cheesecake, it probably went farther than it needed to in the oven.
But doneness is only half the timing problem because the pastry underneath can be on a different schedule entirely.
Recipe card · Crisp the crust · Fix a problem
The Crust and Filling Are on Different Clocks
A pumpkin pie can have an overbaked filling and a pale bottom at the same time. More baking isn’t always the answer. Once the custard is done, chasing a darker base can turn a good filling dry before the pastry catches up.
That is also why the recipe starts hot and then drops the temperature. The first 15 minutes give the cold pastry an early burst of heat and get crust browning underway; the lower oven then lets the egg custard finish more gently.
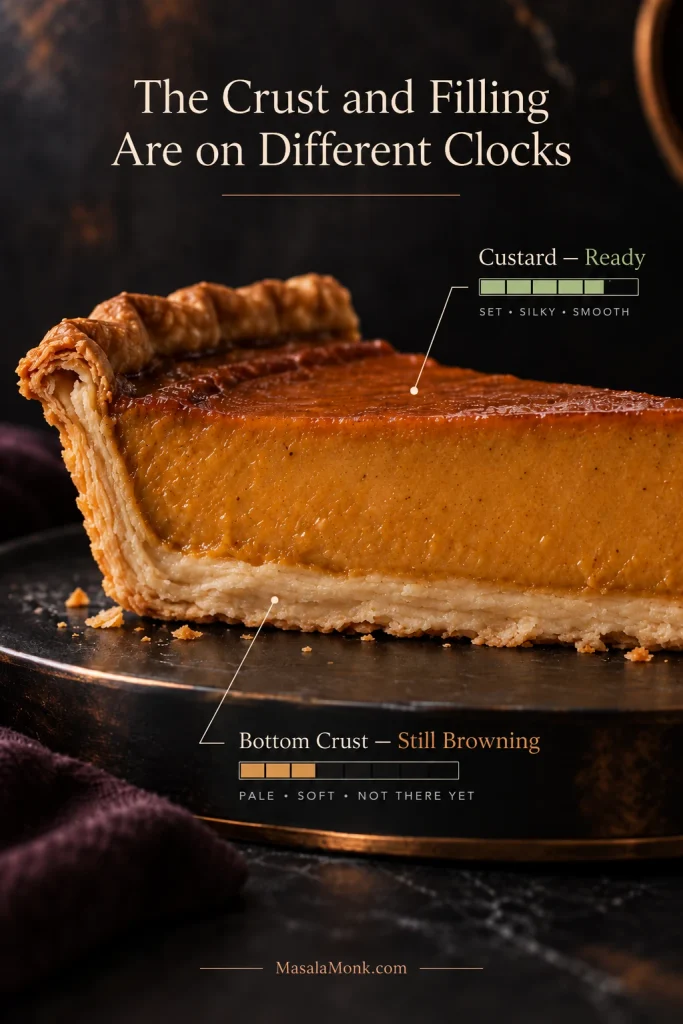
For the easiest improvement, bake the pie on a lower rack. If you want a distinctly crisper bottom, partially bake the shell first.
Cold, Unbaked Crust: The Standard Route
The main recipe uses a cold raw crust on a lower oven rack, and that isn’t the inferior version. A refrigerated or frozen store-bought shell is completely fine. Partial prebaking is an extra step for people who care especially about bottom-crust crispness; you don’t need to turn a simple pie into a project.
Prefer making the pastry yourself? This flaky homemade pie crust makes enough for two single-crust 9-inch / 23-cm pies, so one disk can go into this pie and the other can be frozen. Ease the dough into the plate instead of stretching it, then chill the shaped shell again if it has softened.
For a Crisper Bottom, Partially Bake the Shell
You do not have to prebake the crust for this pumpkin pie. Do it when a distinctly crisp bottom matters enough to add the extra step. The key is giving the base a few dry minutes after the weights come out, before wet custard goes in.
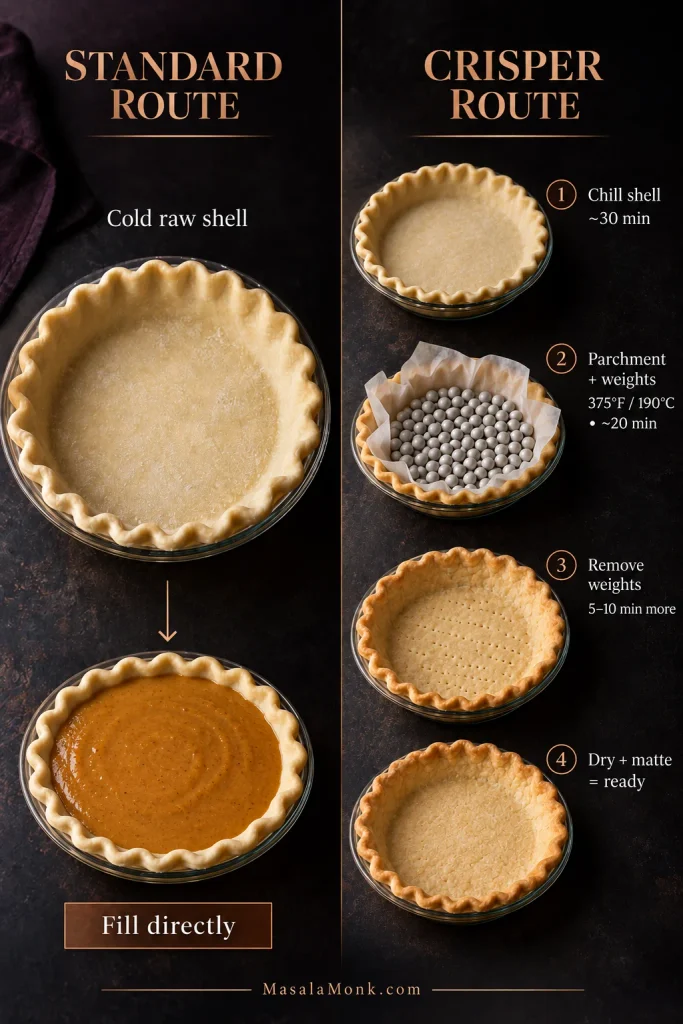
Partial Prebake, Step by Step
- Fit and crimp the pastry, then chill the shaped shell for about 30 minutes.
- Heat the oven to 375°F / 190°C.
- Line the shell with parchment and fill it about two-thirds full with pie weights, dried beans, uncooked rice, or granulated sugar. Keep the weights against the sides as well as the base.
- Bake for about 20 minutes.
- Remove the parchment and weights, then bake the empty shell for another 5–10 minutes. The bottom should lose its damp shine and look dry and matte.
- Raise the oven to 425°F / 220°C, add the pumpkin filling, and continue with the main recipe.
The rim has already had a head start, so shield it with foil or a pie shield once the color looks right.
Instead of chasing a cracker-dry bottom, aim for enough crispness underneath to give the soft custard some contrast.
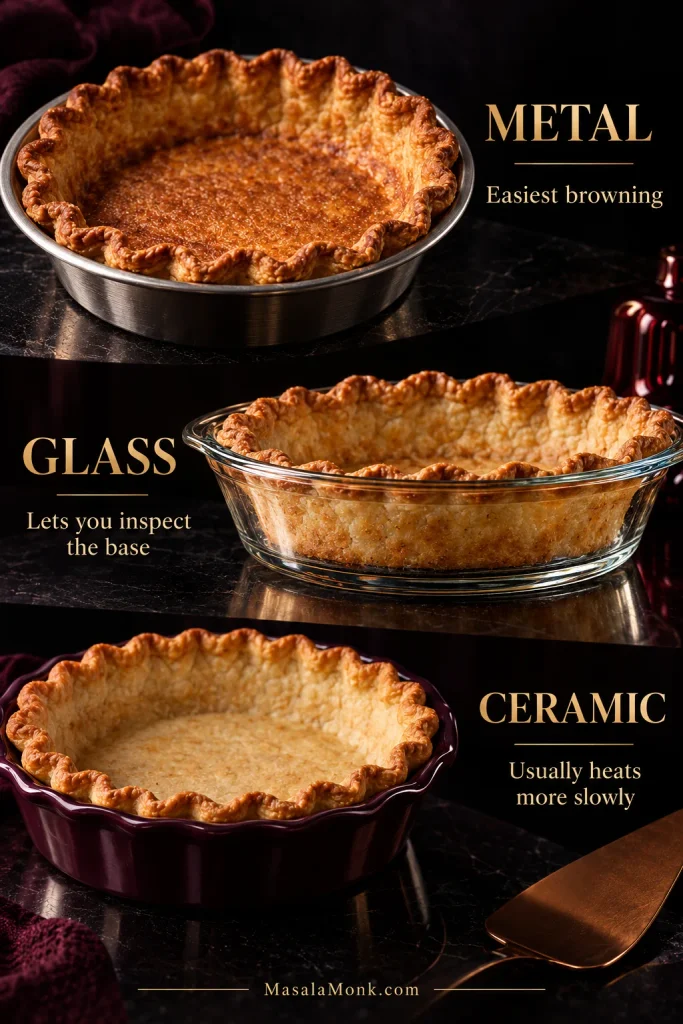
Metal, Glass, or Ceramic Pie Plates?
Pan material can help too. A metal pie plate generally gives the bottom heat more quickly and is the easiest choice when browning is the priority. Glass lets you see how the base is coloring. Ceramic works well but usually heats more slowly.
Raw, Soggy, or Simply Soft?
The pastry directly under pumpkin custard will usually be softer than the exposed rim. That doesn’t automatically mean it is raw.
Raw pastry feels gummy, floury, and dough-like. Soggy but cooked pastry has set but absorbed moisture. The layer where the custard meets the crust may simply be soft and tender.
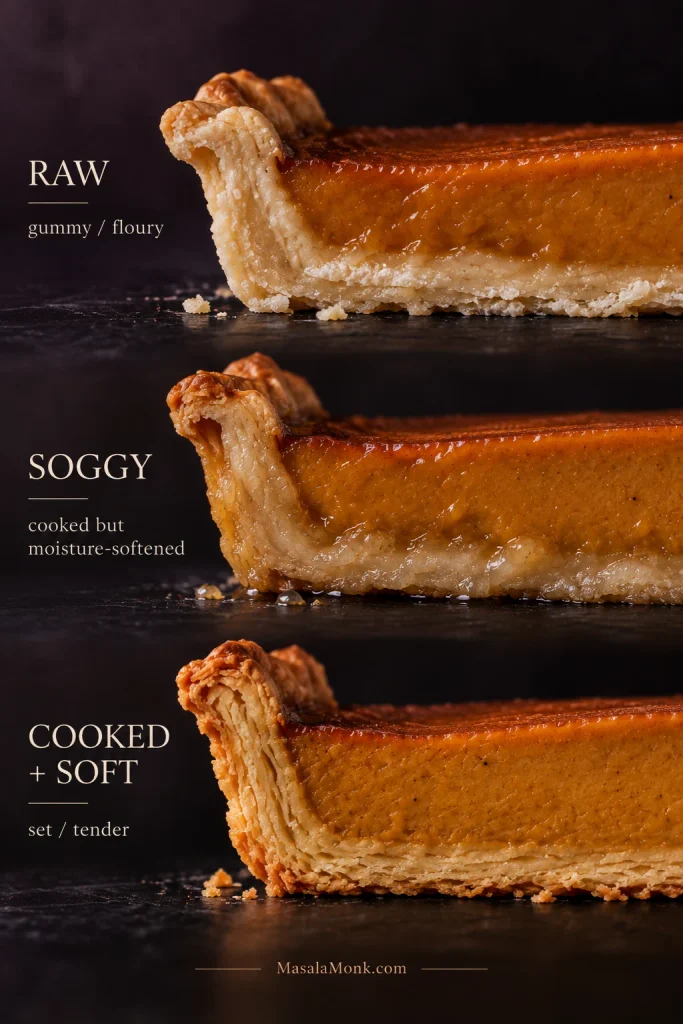
If the filling is properly done, much more oven time is unlikely to rescue the bottom without hurting the custard. Prevention works better: use a lower rack, choose a metal pie plate, or partially prebake the shell.
Recipe card · Fix a problem · Fresh pumpkin · Make ahead
If the Pie in Front of You Looks Wrong
Got set edges, a softly moving center, and a crust you’re happy with? You’re done here. This section is for the moment something looks off.
Most pumpkin-pie problems don’t ruin dessert. A crack, soft crust, or condensation can look worse than it actually is, so start with what you can see.
If the Filling or Top Looks Wrong
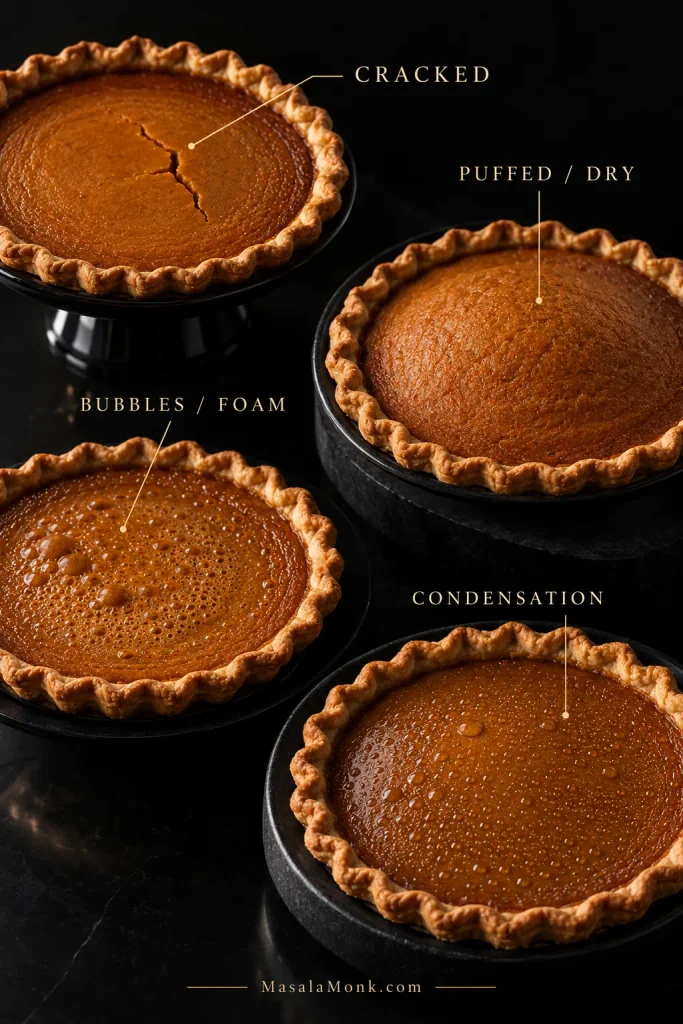
Match What You See to the Fix
| What you see | Likely cause | What to do |
|---|---|---|
| Center still sloshes | Underbaked custard. | Now: If you just removed it, return it to the oven in 5-minute increments. Next time: Wait for set edges and a smaller soft wobble. |
| A warm slice is very soft | It may only need more cooling. | Now: Chill the rest before judging it. Next time: Give the pie plenty of refrigerator time before slicing. |
| The chilled filling is runny | Underbaking, wet homemade pumpkin, or changed ratios. | Now: A cold sliced custard is difficult to repair neatly. Next time: Control pumpkin moisture and use the doneness cues. |
| The surface cracked | The custard baked too far. | Now: Chill and serve; the crack is mostly cosmetic. Next time: Pull the pie while the center moves slightly. |
| The top puffed or looks dry | Too much heat or bake time. | Now: Let it cool; mild puffing often settles. Next time: Check sooner, especially in fan or countertop ovens. |
| The top is foamy or bubbly | Too much air entered during mixing. | Now: Leave it alone; surface bubbles mainly affect appearance. Next time: Whisk gently and clear large bubbles before baking. |
| The custard is grainy | The eggs overheated. | Now: The texture can’t really be reversed. Next time: Remove the pie sooner. |
| Water droplets appeared after chilling | Steam condensed on the surface. | Now: Blot large droplets gently. Next time: Cool uncovered and cover only once thoroughly cold. |
Too sweet? Serve it cold with unsweetened or barely sweetened whipped cream. Tastes flat? Check the age of your spices before adding more; fresh cinnamon and ginger often help more than another spoonful of a tired blend.
If the Crust Isn’t Behaving
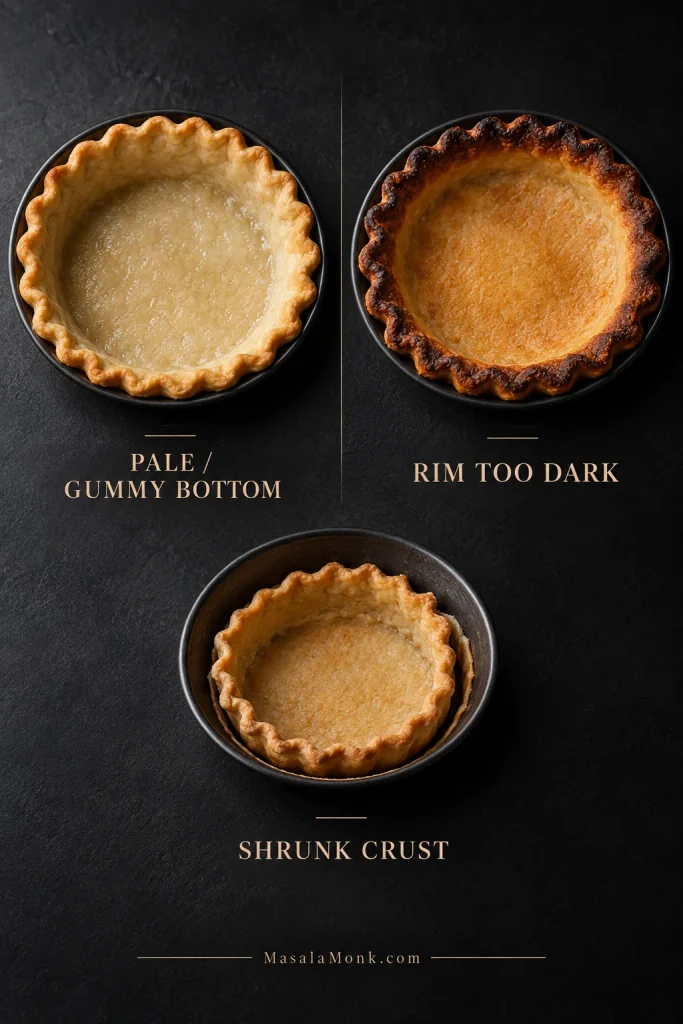
Match the Crust Problem to the Fix
| What you see | Likely cause | What to do |
|---|---|---|
| Bottom crust is pale and gummy | Not enough bottom heat. | Now: It’s hard to fix once the custard is done. Next time: Use a metal pan, lower rack, or partial prebake. |
| Bottom is soft but cooked | The custard softened the pastry. | Now: Soft doesn’t necessarily mean raw. If the pastry has set and isn’t gummy or floury, serve it. Next time: Partially bake the shell if you want more crispness. |
| Crust rim is too dark | The exposed edge finished first. | Now: Cover with foil and let the center finish. Next time: Shield the rim once the color looks right. |
| The crust shrank | The pastry was stretched, warm, or poorly supported. | Now: There isn’t much to reverse after baking. Next time: Fit gently, chill thoroughly, and support the sides with weights. |
| The filling overflowed | The shell was too shallow or too full. | Now: Let the baking sheet catch it. Next time: Leave more headroom. |
If the custard is set and tastes good, don’t let a crack or a softer-than-perfect bottom turn dessert into a post-mortem. Some problems are worth learning from without needing to rescue the pie in front of you.
Recipe card · Check doneness · Cooling & serving · Back to top
Using Fresh Pumpkin
Working with canned pumpkin? You can skip this section. With fresh pumpkin, moisture is the variable that matters most.
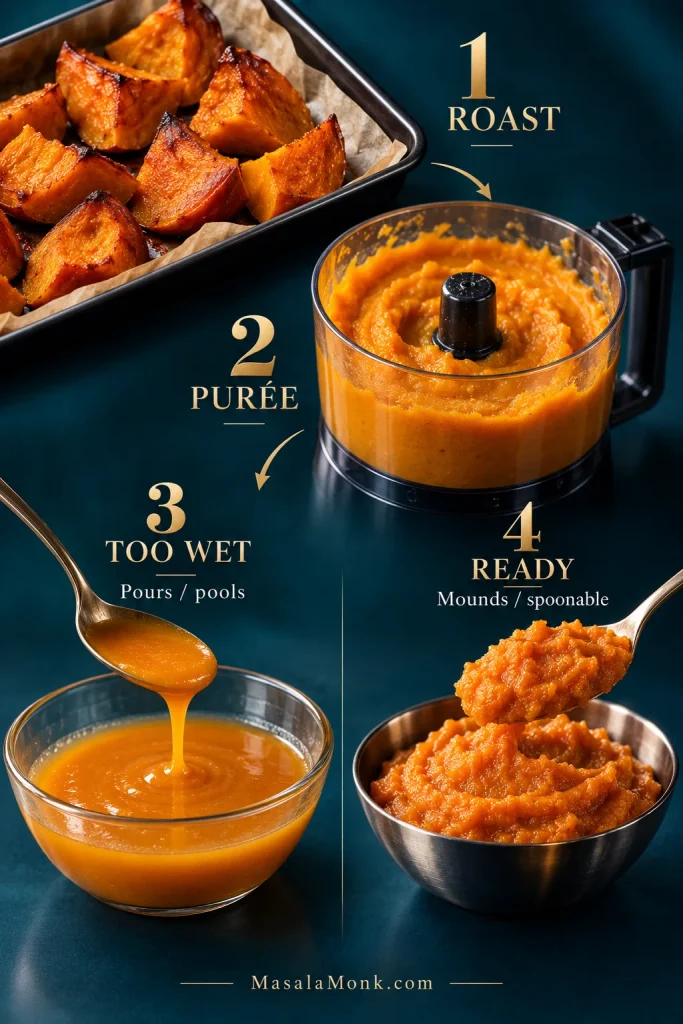
A small pie or sugar pumpkin—or another dense, sweet cooking pumpkin—is usually a better choice than a large carving pumpkin, which tends to be wetter and stringier. Roast it when possible, then purée until smooth. If liquid gathers around the purée or it pours instead of mounding from a spoon, it is too wet. Drain it through a fine sieve or cook it gently until some of that water evaporates.
You want something thick, spoonable, and spreadable, with no watery pooling. Once it reaches that point, weigh 15 oz / 425 g for the pie. Fix the excess water before mixing the custard; adding flour later changes the texture without fixing why the purée was loose in the first place.
Any thick purée left after weighing can go into this moist pumpkin bread.
Two Ways to Change the Basic Pie
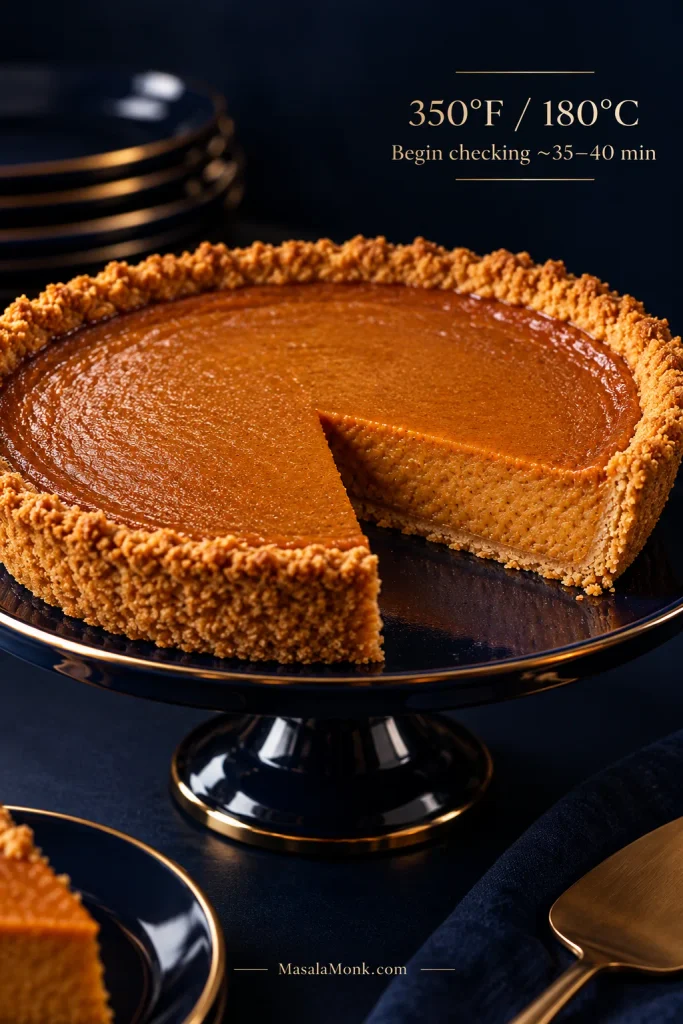
Two changes are especially useful here: swap the pastry for a graham cracker crust, or warm the pumpkin and spices first for a deeper, more concentrated filling.
Graham Cracker Crust
The same filling works with graham cracker crust. Use a prepared shell or make a simple homemade graham cracker crust for a 9-inch / 23-cm plate.
For a homemade crust, bake the empty shell at 350°F / 180°C for about 10 minutes, then cool it before adding the filling. Bake the filled pie at the same 350°F / 180°C and begin checking around 35–40 minutes. A standard prepared 9-inch shell may be ready around 40 minutes; a deeper homemade crust can take longer. Let the same set-edge and soft-center cues decide.
Prepared graham shells can be shallow, so don’t be surprised if all of the filling doesn’t fit.
Want Deeper Pumpkin Flavor? Warm the Purée First
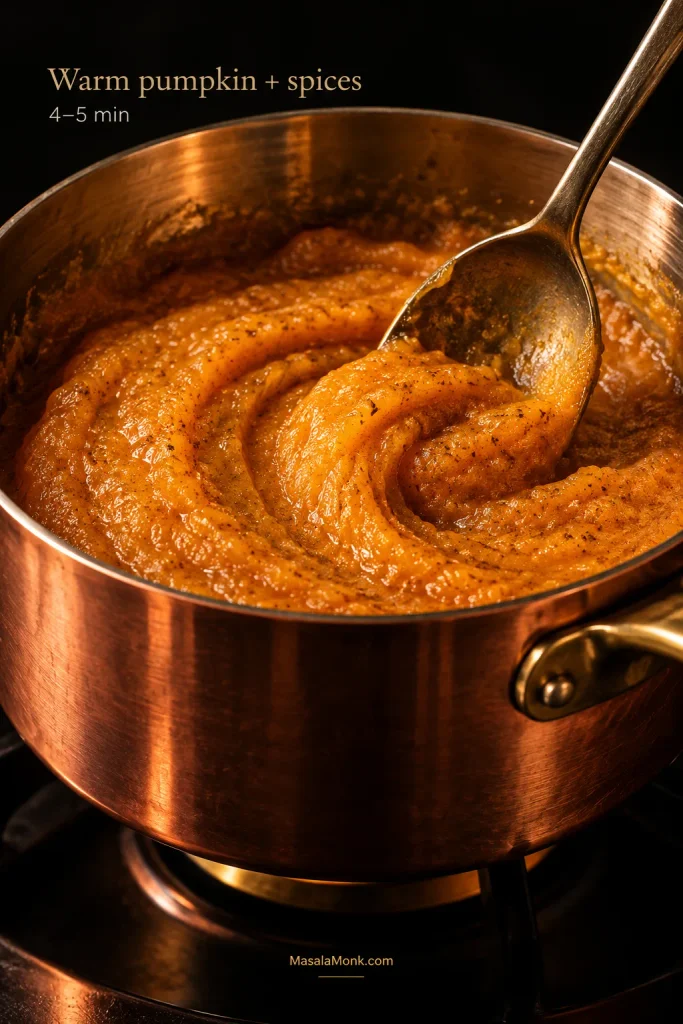
Cook the pumpkin, salt, and spices over low heat for about 4–5 minutes, stirring steadily. You’ll smell the change before you see much of one: the cinnamon and ginger become clearer as some moisture cooks away and the pumpkin loses its raw canned edge.
Let the mixture cool until it is warm rather than hot, then stir in the condensed milk. Add the eggs last and mix gently before filling the crust.
Bake Today, Slice Tomorrow
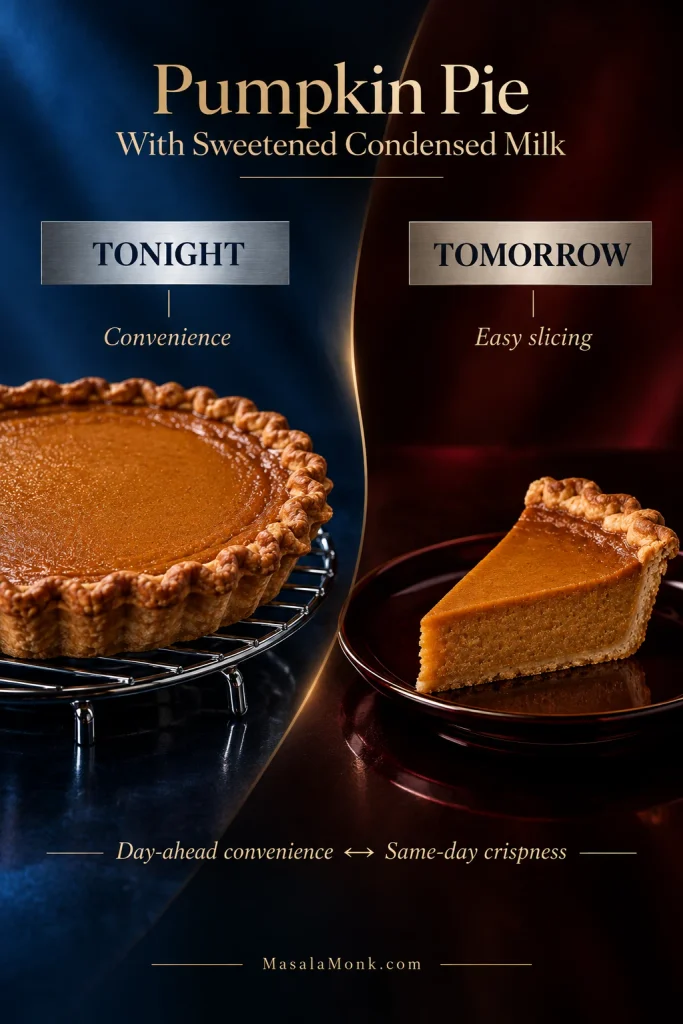
Yes, pumpkin pie can be baked a day ahead. An overnight chill gives the custard time to settle and makes the next day’s slicing much easier.
A day-ahead pie buys you convenience; a same-day bake buys you the crispest crust. If you want both, partially prebake the shell before baking the pie the day before.
When several dishes are competing for oven space, baking the pie the night before also leaves the oven free for food that needs to reach the table hot.
Can You Make the Filling Ahead?
Yes. Mix the filling the night before, cover it, and refrigerate it separately from the unbaked crust. The resting time also gives the spices a chance to meld. Give the mixture a gentle stir before pouring it into the cold shell.
Cooling and Serving
Let the baked pie cool uncovered on a rack, but refrigerate it within 2 hours of leaving the oven. It does not need to be completely cold first; if it is still slightly warm, leave it uncovered or loosely tented until chilled. Cover it once cold.
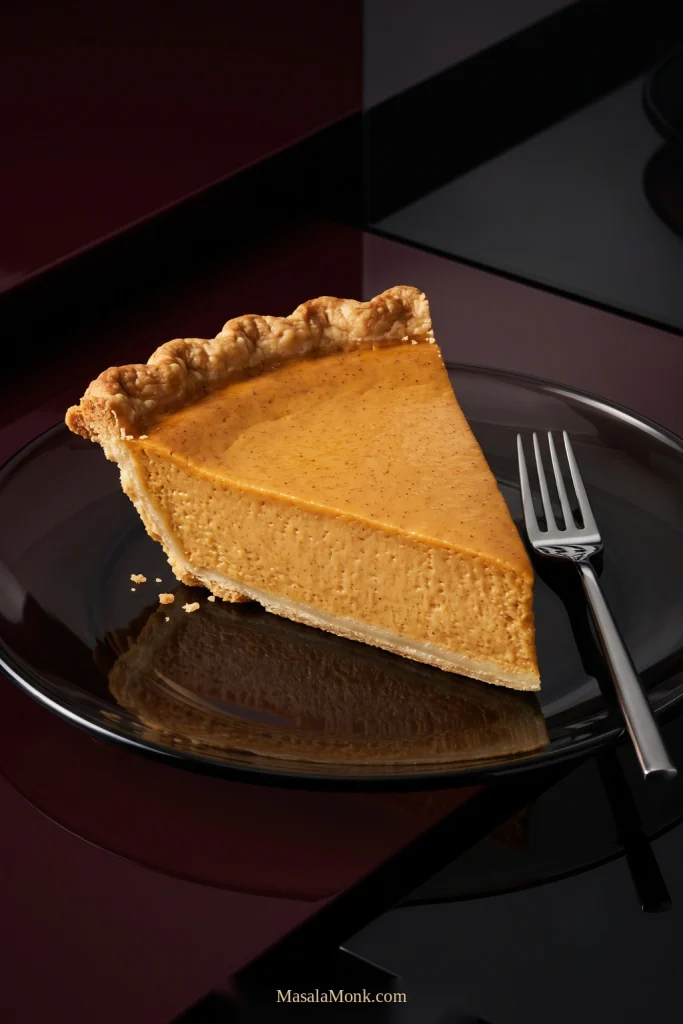
For slices that hold together well, give the pie about 4 hours in the refrigerator after that cooling period. Overnight is easiest. If you prefer the pie less cold, let individual slices stand for 15–30 minutes before serving.
By then the center should cut cleanly but stay soft under a fork, with warm spice and pastry giving the richer filling some contrast. Barely sweetened or unsweetened homemade whipped cream works especially well because it lightens the condensed-milk richness without piling on more sweetness.
Storage and Freezing
Keep the cooled pie covered in the refrigerator and use it within about 3–4 days. FoodSafety.gov gives the same refrigerator window for baked pumpkin and pecan pies in its cold food storage guidance.
You can freeze the pie too. For the best texture, aim to use it within about 1 month; roughly up to 2 months can work, but the custard may separate slightly and the crust can soften. Wrap the thoroughly cold pie well and thaw it overnight in the refrigerator.
Pumpkin Pie Questions That Still Come Up
1. Can I bake two pumpkin pies at once?
Usually, as long as both pans fit with room for air to circulate. Two cold pies can slow the oven’s recovery, so the finish time may shift. Rotate them carefully later in the bake if your oven has obvious hot spots, and check each center separately.
2. Can pumpkin pie sit out overnight?
No. Pumpkin pie is an egg-and-dairy custard, so refrigerate it within 2 hours of leaving the oven. If a baked pumpkin pie has been left at room temperature overnight, the safest choice is to discard it.
3. What if my 9-inch crust doesn’t hold all the filling?
That’s common because 9-inch pie shells vary in depth. Stop before the shell becomes awkwardly full and bake the extra custard in a lightly greased ramekin. Start checking the ramekin earlier than the pie and remove it when the edges are set and the center has the same small, controlled wobble.
Recipe card · Cooling & serving · Storage & freezing · Back to top








