
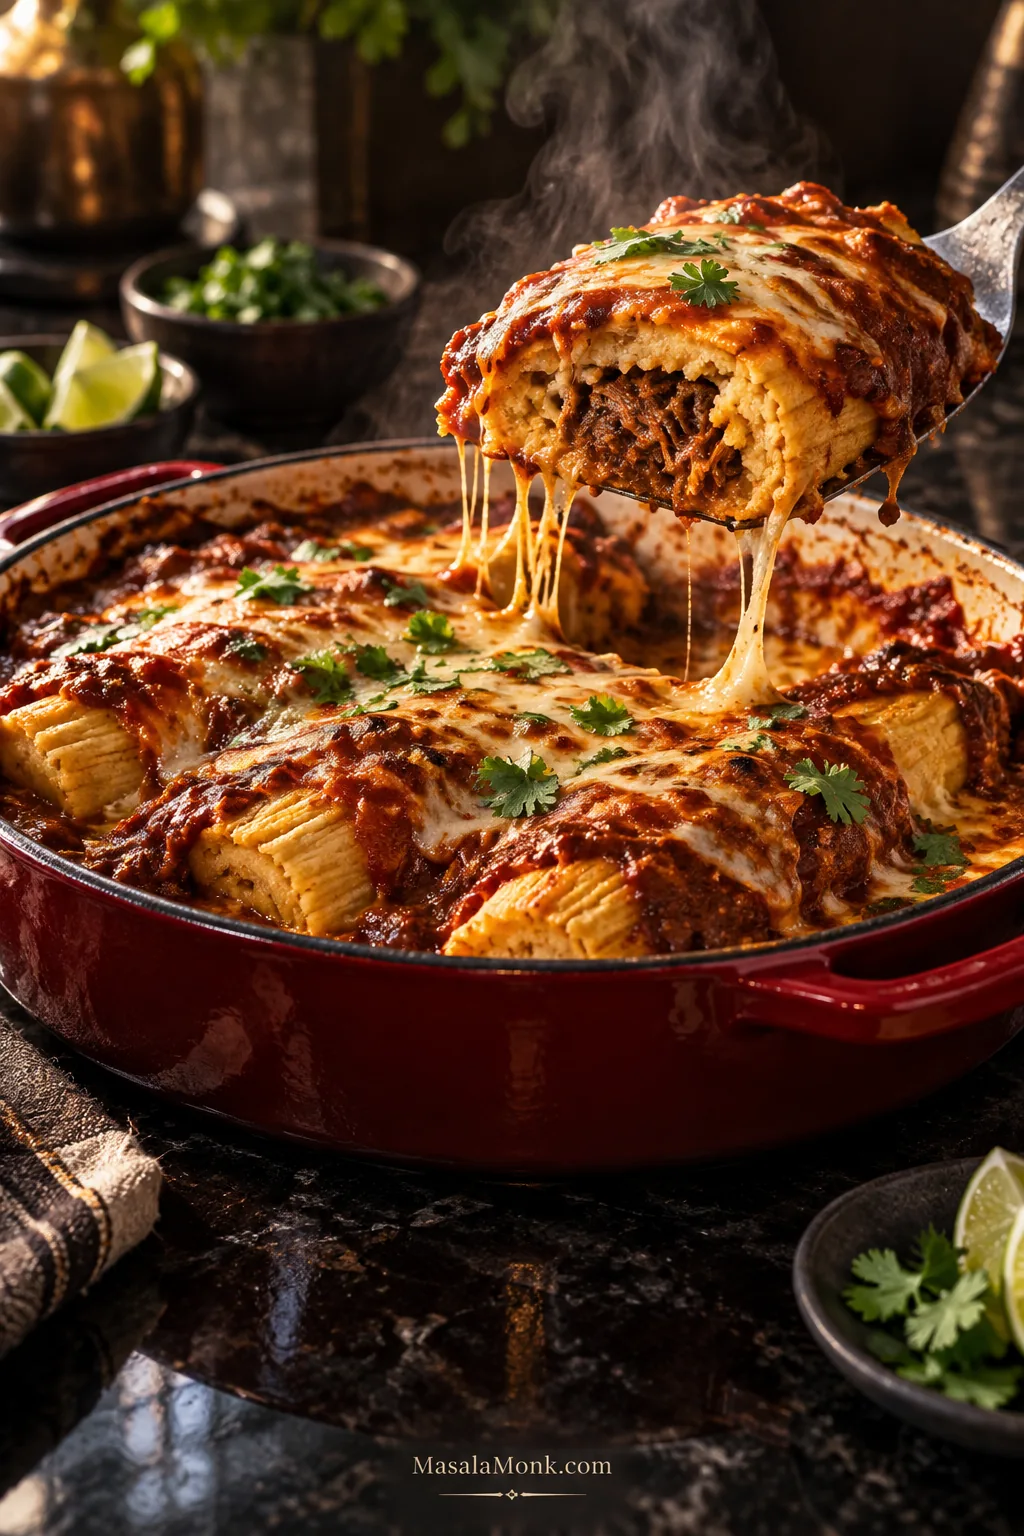
Tamales have a way of arriving by the dozen, which is wonderful until you’ve reheated them the same way for the third time. This tamale casserole with tamales turns actual cooked tamales into a different dinner: hot filling wrapped in tender masa, sauce tucked around the edges, bubbling cheese across the top, and a few exposed spots getting lightly toasted in the oven.
The basic idea is simple: arrange fully cooked tamales in a shallow dish with a modest amount of sauce and cheese, then bake until the center is hot and the top is golden and bubbling. There is no cornbread mix, cornmeal crust, or raw masa topping here; this is simply a baked way to use tamales that are already cooked.
The leftovers do not need to be perfect. One tamale split in half? Tuck the pieces into a gap. Different fillings in the same batch? That’s fine too.
Start With the Tamales You Have
Beef, pork, chicken, cheese, green chile, beans, or a mixed box can all go into the casserole. What matters more at the beginning is whether the tamales are chilled and easy to lift, freshly cooked, frozen, or delicate from a can.
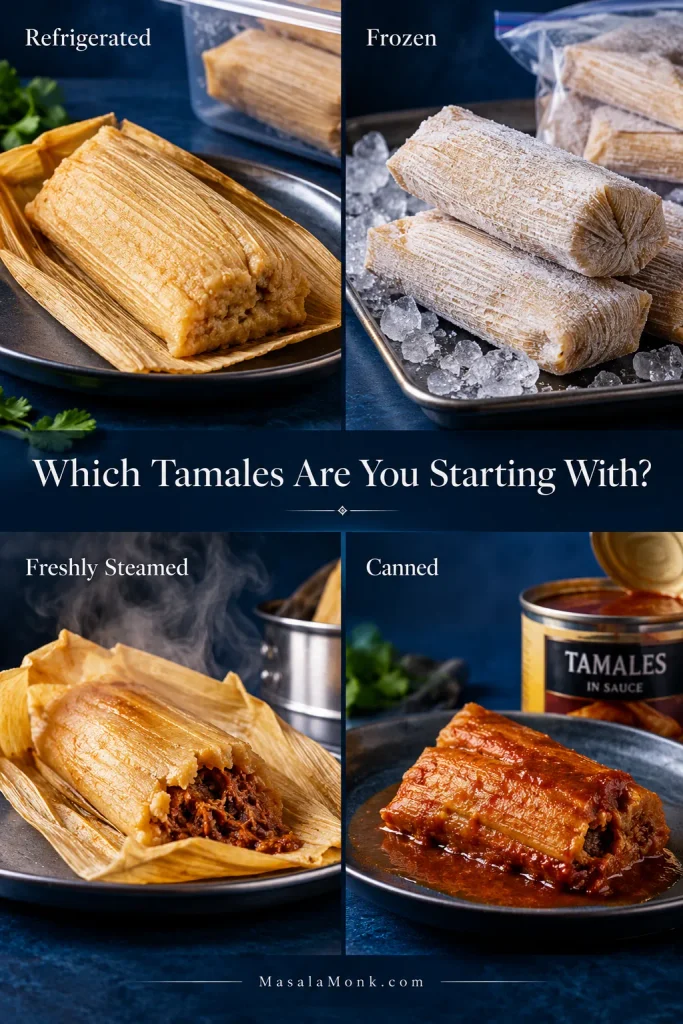
Leftover, Refrigerated or Store-Bought Cooked Tamales
The easiest kind to use. Unwrap them while they’re cold enough to hold their shape, then arrange them straight in the dish.
Frozen
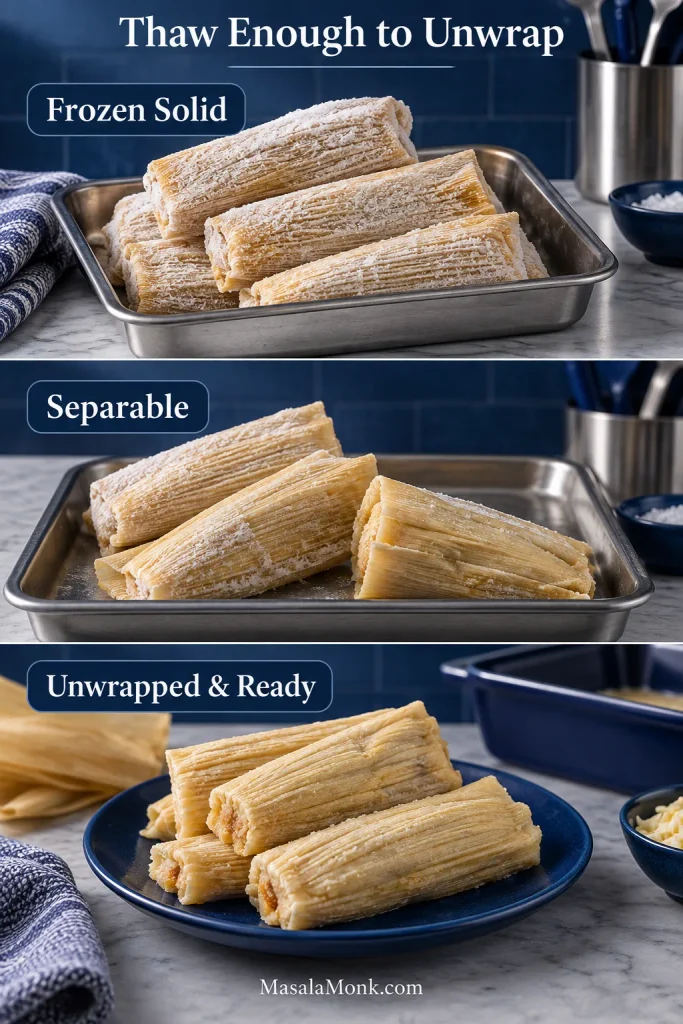
They do not need to thaw completely. Get them soft enough to separate and unwrap; a colder casserole will simply need more covered heating time.
Freshly Cooked or Steamed
Let them cool until the masa is set enough to unwrap and lift cleanly. Fresh-from-the-steamer tamales can be fragile while they’re very hot.
Canned
These behave differently. They’re usually more delicate, and their packing sauce may already provide much of the moisture the casserole needs.
If you’re starting with a fresh homemade batch rather than leftovers, these pork tamales with red chile cover the tamale-making process first.
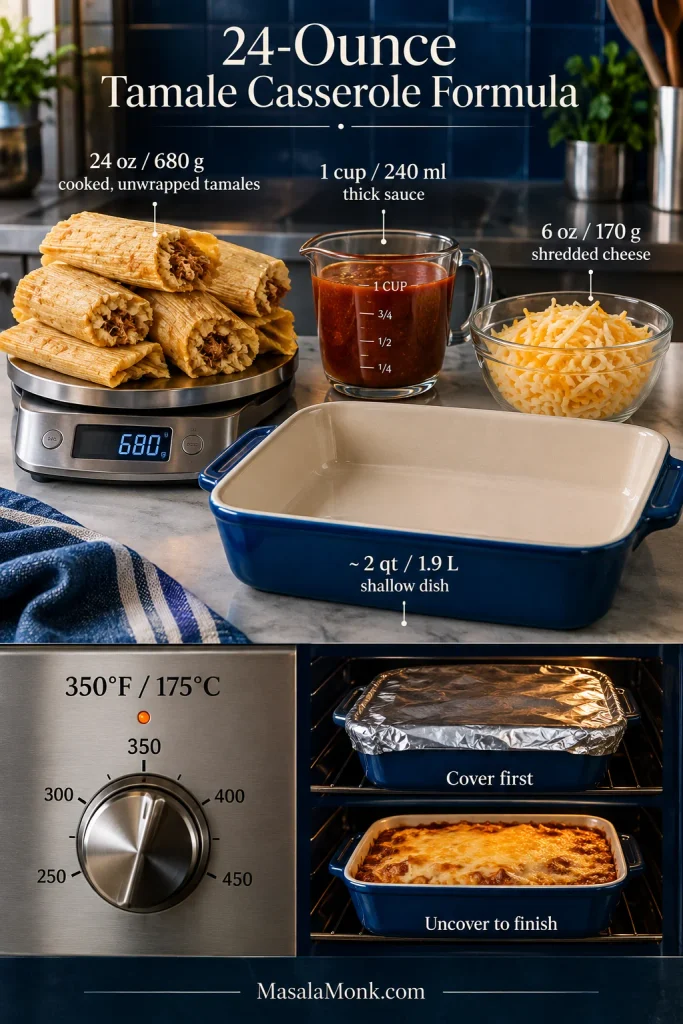
Use the formula below for fully cooked, cool or refrigerated tamales, weighed without their wrappers. Frozen tamales mostly just need more covered heating time. Canned tamales are different enough that it’s better to judge their sauce separately.
The 24-Ounce Tamale Casserole Formula
24 oz / 680 g cooked, unwrapped tamales
+ 1 cup / 240 ml thick sauce
+ 6 oz / 170 g shredded cheese
→ shallow ~2 qt / 1.9 L dish
→ 350°F / 175°C
→ cover first, uncover to finish
Weight matters more than count. Twenty-four ounces of unwrapped tamales may mean six large handmade tamales or eight to twelve smaller ones.
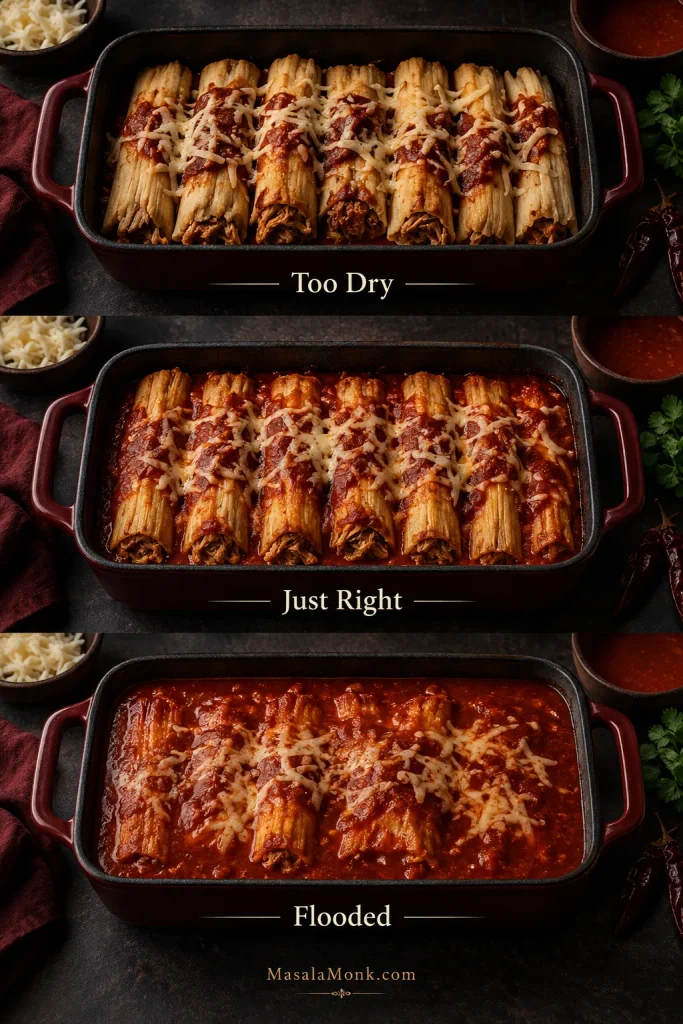
Add the first cup of sauce and look at the dish. You want a light coating over the tamales and a little sauce settling between them. Sauced, not flooded.
Easy Tamale Casserole Recipe
This base recipe assumes cool or refrigerated fully cooked tamales. Tamales that are still very cold or partly frozen will need longer under cover before the final uncovered bake.
Ingredients
- 24 oz / 680 g cooked, unwrapped tamales, roughly 6 large or 8–12 smaller tamales
- 1 cup / 240 ml thick red or green enchilada sauce, salsa roja, or salsa verde, plus up to ¼ cup / 60 ml more if the tamales are unusually dry
- 6 oz / 170 g shredded cheese, roughly 1½ cups depending on the grate; Monterey Jack, cheddar, Oaxaca, or a mixture
- To stretch the casserole, optional: up to 1 cup total well-drained corn and/or rinsed, drained black or pinto beans
- For serving, optional: guacamole or avocado, sour cream, lime, and cilantro
Green chiles, a little onion, jalapeño, or sliced olives can join the casserole if they suit the filling. Keep those as flavor additions rather than another full cup of bulk.
Monterey Jack and Oaxaca melt especially smoothly. Cheddar brings a sharper flavor and more noticeable browning, so a Jack-cheddar blend is an easy middle ground.
Hold the extra salt for now. Tamales, enchilada sauce, cheese, beans, and chiles may already bring plenty. Taste what you’re using before seasoning the whole pan.
Equipment: a shallow ~2 qt / 1.9 L baking dish, foil or an oven-safe lid, and ideally an instant-read thermometer. With the full cup of corn or beans, a roomier ~2½ qt / 2.4 L dish may be easier to work with.
How to Make It
1. Heat the Oven
Heat a conventional oven to 350°F / 175°C. Lightly grease the baking dish if yours tends to stick.
2. Unwrap the Tamales
Remove every corn husk, paper wrapper, or other wrapping. If you’re weighing the tamales yourself, the 24 oz / 680 g refers to the cooked tamales after those wrappers are removed.
Newly steamed tamales should cool until the masa is set enough to lift without slumping apart.
3. Fit Them Into the Dish
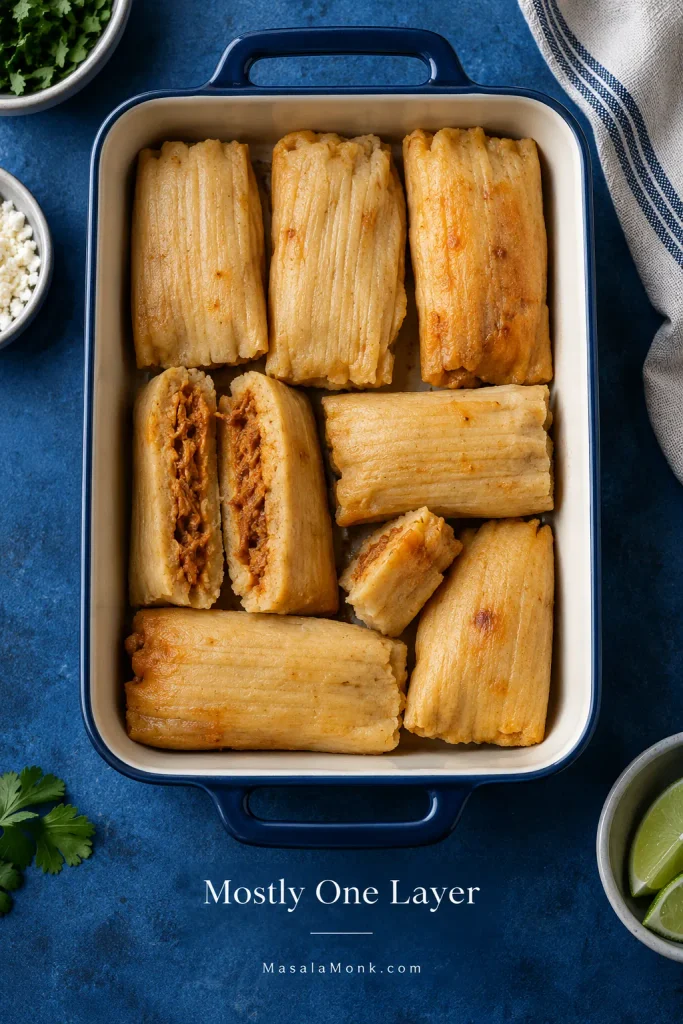
Arrange the tamales snugly, mostly in a single layer. Keep them whole when they fit. Large tamales can be halved lengthwise, and broken pieces can fill the gaps.
Don’t chase a perfectly neat arrangement. A split tamale or one lying sideways in the corner will bake just fine.
4. Add the Sauce
Spoon 1 cup / 240 ml sauce over and around the tamales. Add any well-drained corn or beans now.
The sauce should coat the tamales without collecting in a deep pool underneath. Very dry tamales may need some or all of the extra ¼ cup / 60 ml; moist tamales may need none of it.
5. Add the Cheese
Scatter the 6 oz / 170 g cheese evenly over the pan, leaving a few tamale edges exposed so they can toast a little at the end.
Quick pan check: you should still be able to see the tamales, and moving the dish should not send a wave of sauce across the bottom.
6. Cover and Bake
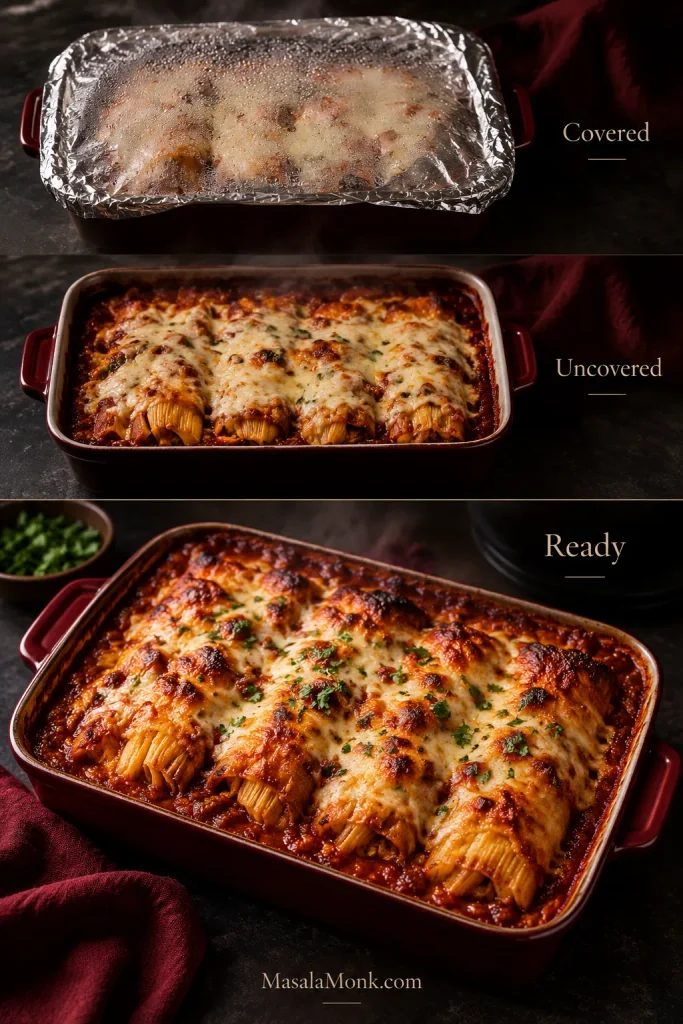
Cover and bake for about 20 minutes. Tent foil slightly so it does not sit heavily on the cheese; lightly grease the underside if the pan is very full.
7. Uncover and Finish
Remove the foil or lid and bake for another 10–15 minutes. The cheese should melt completely and pick up a few golden spots while exposed masa edges toast lightly.
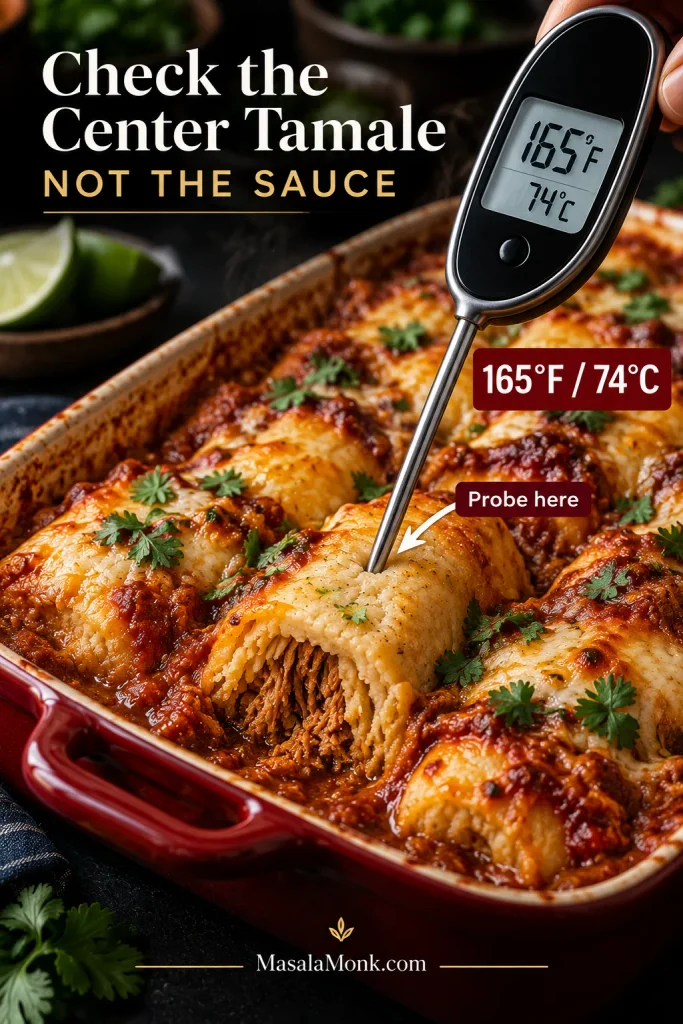
Check the temperature in the center of a tamale near the middle of the dish—not just in the hot sauce bubbling around it. It should reach 165°F / 74°C.
The tamales should still be easy to recognize beneath the cheese: tender masa, hot filling, and sauce gathered around them rather than swallowing them.
8. Rest for 10 Minutes
Let the casserole stand for 10 minutes. The bubbling settles and the tamales become easier to lift without pulling apart.
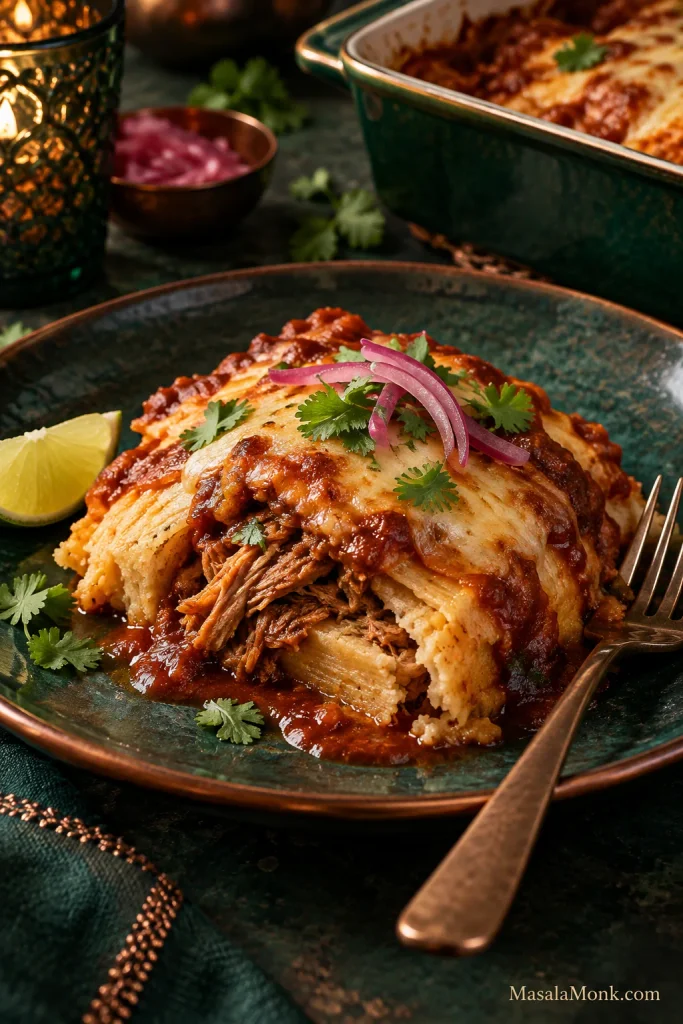
On the plate, you should still be able to recognize the tamale: tender masa around a hot filling, melted cheese above it, and enough sauce nearby to swipe up with each forkful.
Starting with canned tamales? Check the canned-tamale notes before using the full base amount of sauce.
Adjust This Batch · Frozen Tamales · Canned Tamales · Back to Top
Adjusting the Casserole
Most batches only need small adjustments: a roomier pan, a little less sauce, or more covered heating time.
Weight and Pan Fit
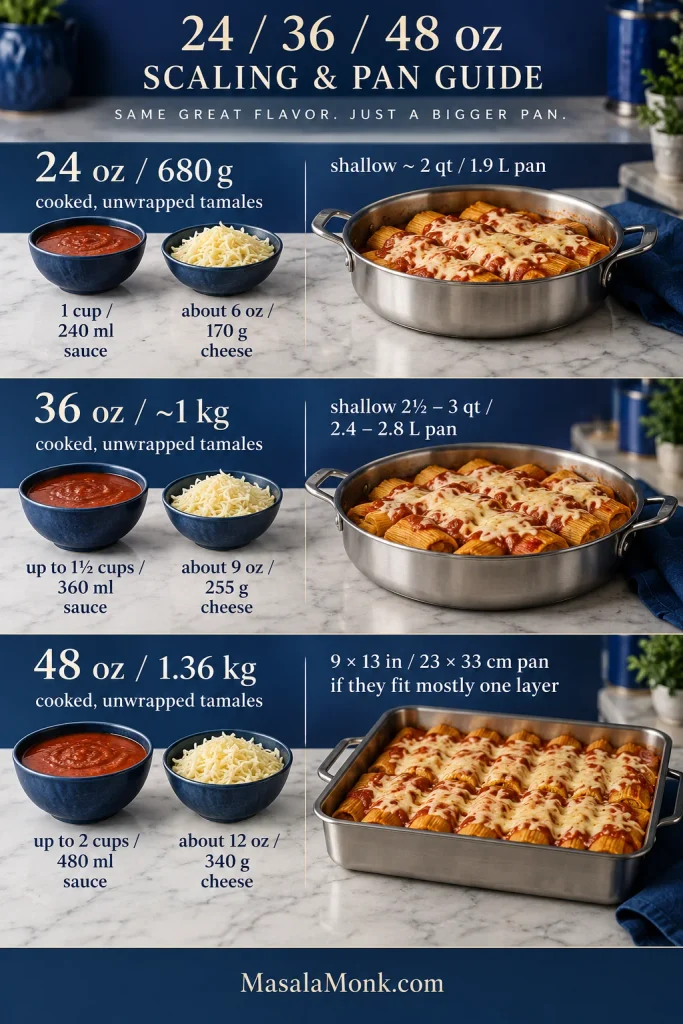
“Six tamales” can mean very different things. Six small supermarket tamales may barely fill a pan that six generous handmade tamales completely cover. That’s why the recipe scales by cooked, unwrapped weight first and count second.
| Cooked, unwrapped tamales | Sauce guide | Cheese guide | Pan |
|---|---|---|---|
| 24 oz / 680 g | 1 cup / 240 ml | About 6 oz / 170 g | Shallow ~2 qt / 1.9 L |
| 36 oz / ~1 kg | Up to 1½ cups / 360 ml | About 9 oz / 255 g | Shallow 2½–3 qt / 2.4–2.8 L |
| 48 oz / 1.36 kg | Up to 2 cups / 480 ml | About 12 oz / 340 g | 9×13 in / 23×33 cm if the tamales fit mostly in one layer |
The larger amounts scale directly from the base recipe, but that does not mean every drop of sauce belongs in the dish. Moist tamales, saucy fillings, canned ingredients, and wet add-ins can all justify holding some back.
Choose the next-size-up dish before you start stacking tamales. When very large tamales make the pan awkward, halving a few lengthwise is better than building a second layer.
Working with the base batch instead? Return to the 24-ounce formula or go back to the recipe.
Sauce and Moisture
Keep enough sauce nearby for the batch, but stop when the dish looks right. Before baking, tilt it slightly. A little sauce moving between the tamales is fine; a noticeable wave rushing to one side means the pan already has plenty.
Corn, beans, and chiles bring moisture of their own. Drain canned ingredients well and leave behind any puddle from thawed frozen corn.
Red enchilada sauce or salsa roja gives beef and red-chile pork a deeper chile note. Salsa verde works especially well with cheese and green-chile pork, while chicken is good with either.
A thicker roasted salsa verde is particularly useful here because it clings to the tamales instead of running to the bottom of the pan.
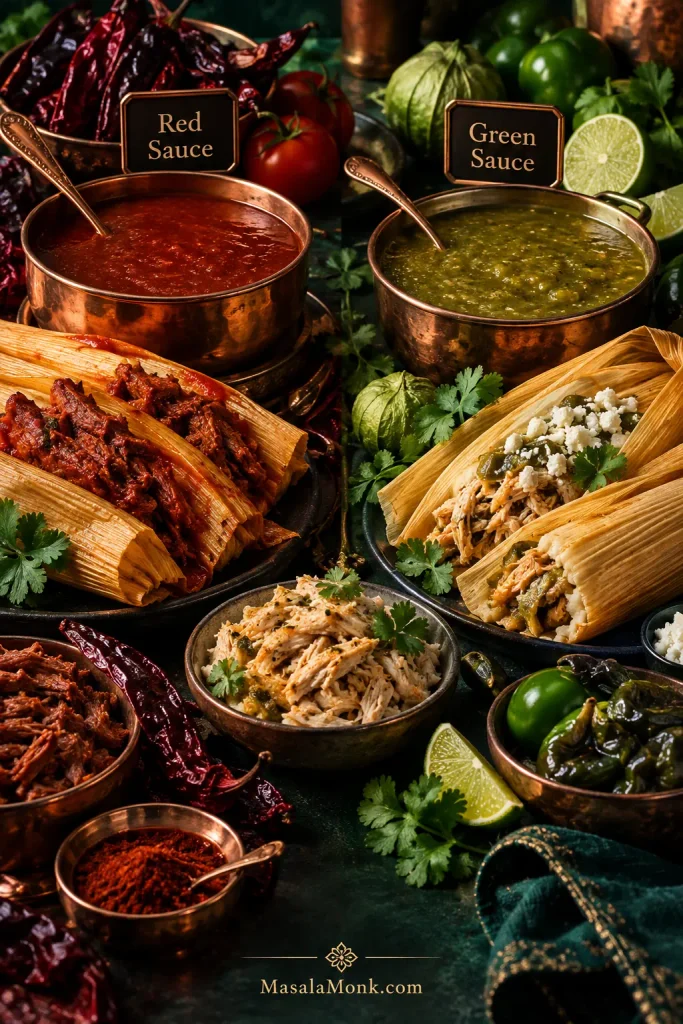
Keep the casserole moderate when different people want different levels of heat. The pepper sauce guide can help with something hotter for the table.
If the pan is already looking too wet, dry, or uneven, skip ahead to tamale casserole troubleshooting before adding more heat or sauce.
Frozen Tamales
Yes, fully cooked frozen tamales work here. They only need to thaw enough to separate, unwrap, and arrange in the dish.
Refrigerator thawing gives the neatest handling. For a quicker route, microwave-defrost only until the tamales separate, then assemble and bake the casserole immediately.
Packages labeled uncooked—or those that tell you to steam or cook the tamales before serving—need that cooking step first.
Freezer-dried edges can take a little of the reserved sauce. A cold center simply needs more covered time before the browning stage.
Canned Tamales
Yes, canned tamales can work, but they need gentler handling and usually less added sauce. They’re delicate before they ever reach the baking dish, and the sauce packed around them changes how much more moisture the casserole needs.
Two 15–16 oz cans would give roughly 30–32 oz / about 850–910 g total canned product, including the packing sauce. The weight printed on the can includes that sauce, so do not plug it directly into the 24-ounce formula for cooked, unwrapped tamales.
- Remove paper or other wrappers carefully and keep the tamales whole or in large pieces.
- Add extra sauce only after the canned tamales and their packing sauce are in the dish.
- Set the tamales into the dish gently. Stirring them through the other ingredients is more likely to break them apart.
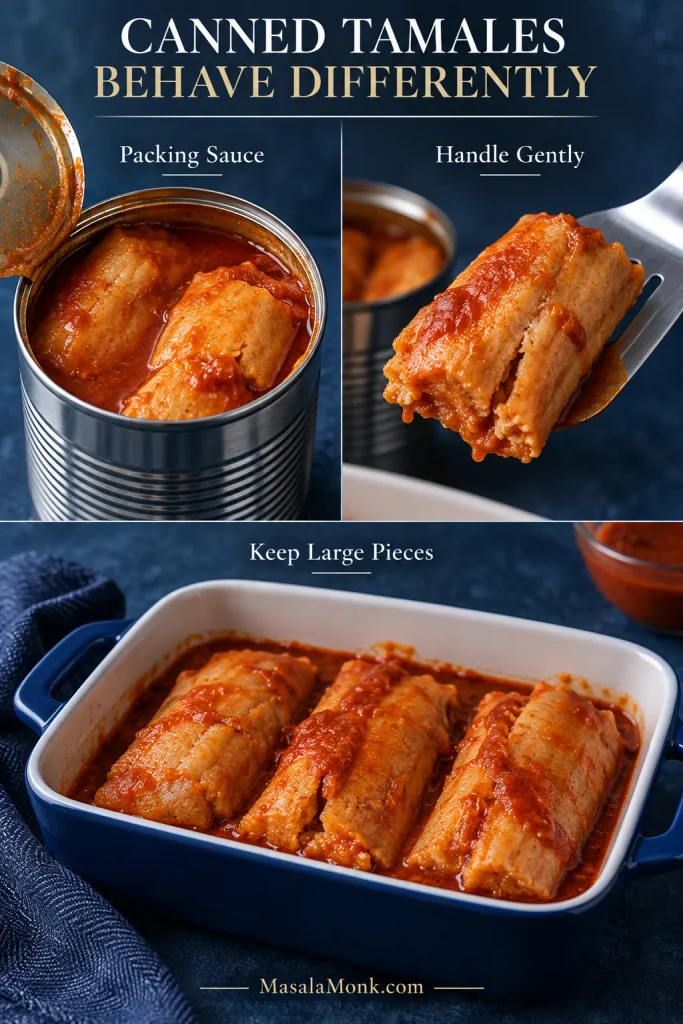
Expect a softer finished casserole than you would get from chilled husk-wrapped tamales. A side of quick refried beans from a can can make the meal more substantial without making the casserole itself heavier or wetter.
Want to Stretch the Casserole?
For the 24-ounce base casserole, ½ cup well-drained corn + ½ cup rinsed, drained black or pinto beans is about the most extra bulk worth adding if you still want the tamales to remain the point of the dish.
Or leave the casserole simpler and put homemade refried pinto beans on the side.
Cooking for a Crowd
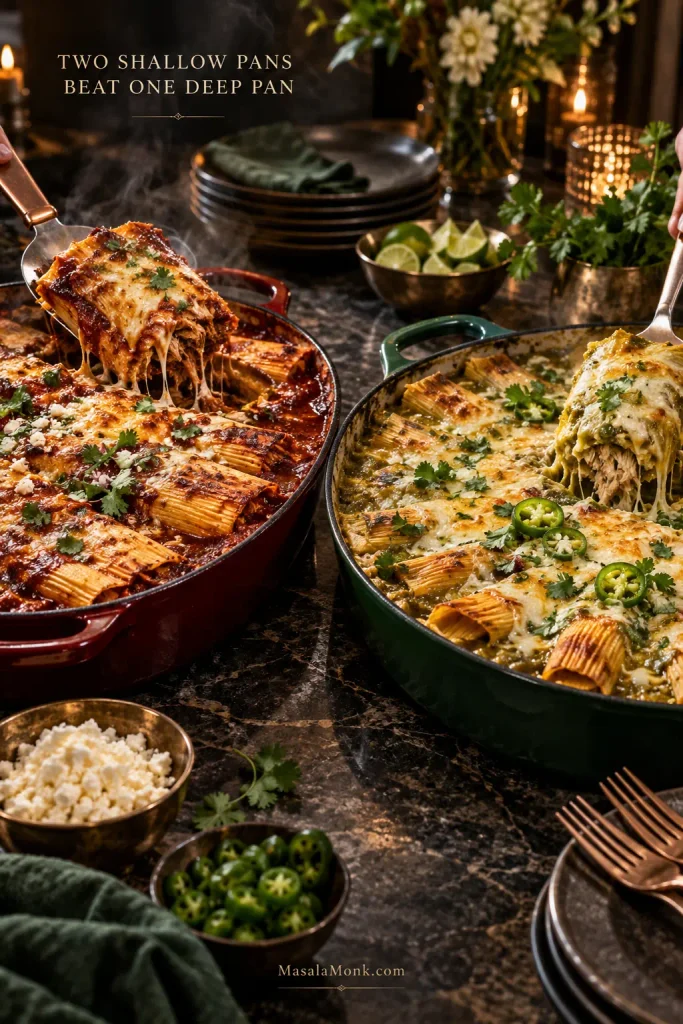
A 9×13-inch / 23×33 cm dish works for many batches around 48 oz / 1.36 kg, provided the tamales still fit mostly in one layer. Once they start piling up, use a second shallow dish instead.
Two pans also make it easy to serve different tastes: one red and one green, or a meat-filled batch alongside a cheese version.
For the exact 24-, 36-, and 48-ounce amounts, see the pan-and-weight scaling guide.
What to Serve With Tamale Casserole
The casserole already brings warm masa, melted cheese, chile sauce, and plenty of soft texture. Something fresh or crisp alongside keeps the plate from feeling heavy.
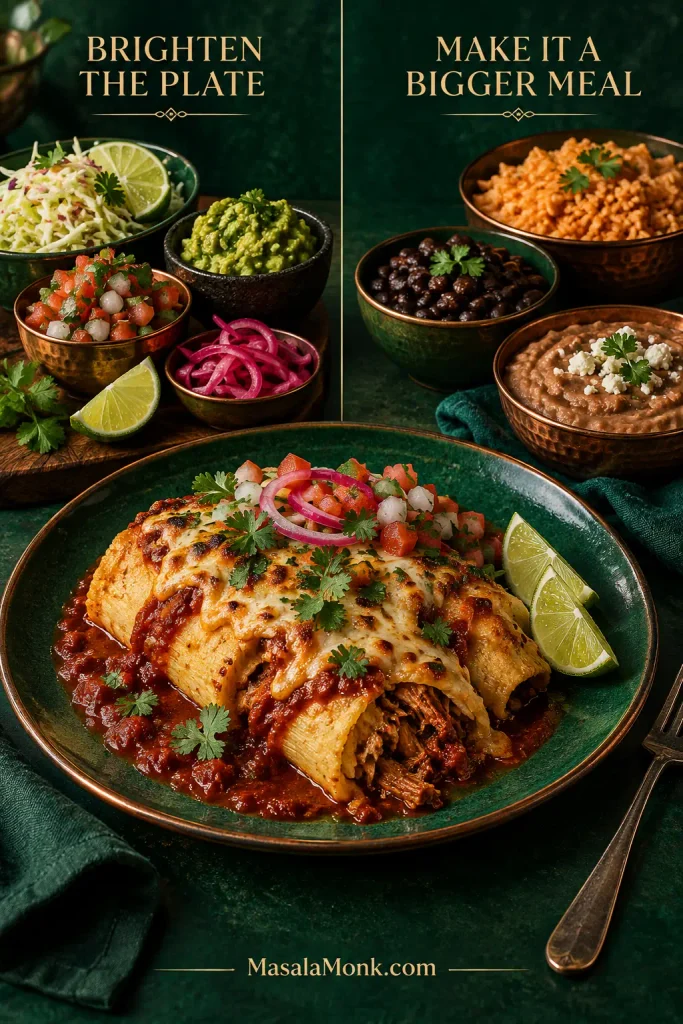
For freshness, try lime wedges, pico de gallo, pickled red onions, cilantro, jalapeños, shredded cabbage with lime, or a simple green salad. A spoonful of fresh guacamole is especially good with red chile and browned cheese.
For a more substantial meal, serve refried beans, black beans, or plain rice alongside rather than loading more into the baking dish.
Tamale Casserole Troubleshooting: What Happened to My Tamales?
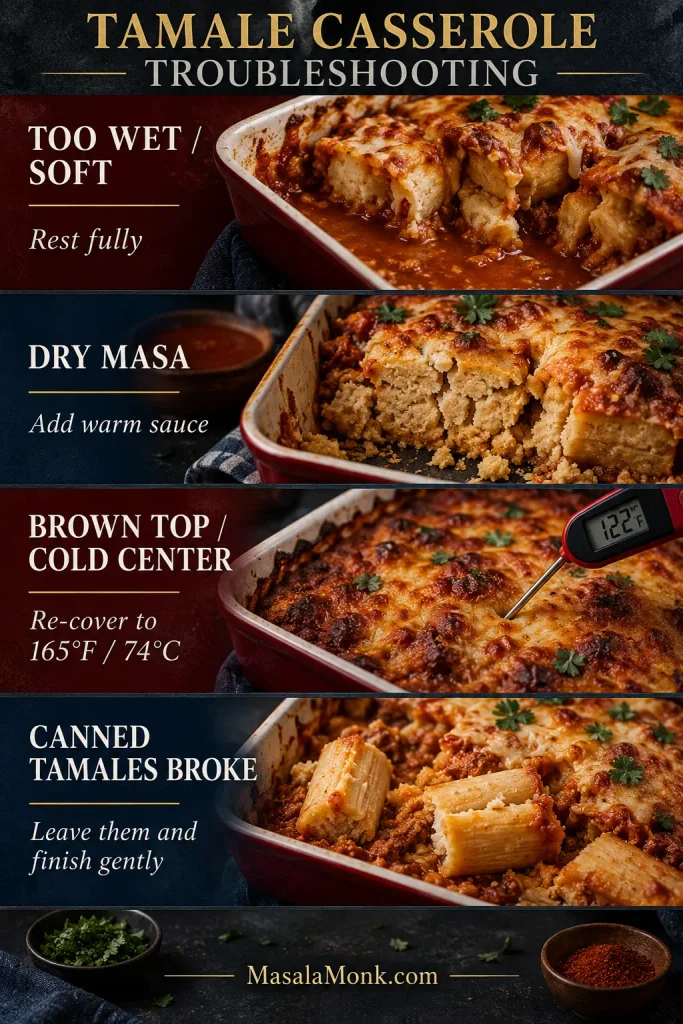
If something went sideways, start with the pan: how wet it is, how deeply the tamales are stacked, and how delicate they were before baking.
Texture and Heating Problems
| What happened | Likely reason | What helps |
|---|---|---|
| Tamales turned very soft | Too much free liquid or a long wet bake | Now: Let the casserole rest fully before serving. Next time: Use less sauce and drain add-ins more thoroughly. |
| Sauce is pooling underneath | Extra sauce or water from beans, vegetables, or frozen ingredients | Now: Give the casserole a few more uncovered minutes, then rest it. Next time: Hold some sauce back or drain the add-ins better. |
| Masa is dry and crumbly | Freezer drying or too much uncovered heat | Now: Spoon a little warm sauce or salsa over the serving. Next time: Keep the first phase covered longer or use a little more sauce. |
| Cheese is browned but the middle is cold | Very cold tamales or a deep, crowded pan | Now: Re-cover the casserole and keep heating until a center tamale reaches 165°F / 74°C. Next time: Use a shallower dish or allow more covered time. |
Handling and Flavor Problems
| What happened | Likely reason | What helps |
|---|---|---|
| Tamales broke while assembling | Fresh masa had not set enough to handle cleanly | Now: Tuck the pieces into the gaps and keep going. Next time: Let a freshly cooked batch cool longer. |
| Canned tamales fell apart | Delicate tamales plus excess handling or liquid | Now: Leave the pieces where they are and finish the casserole. Next time: Move them less and check the packing sauce before adding more liquid. |
| Casserole tastes flat | Mild filling paired with mild sauce | Now: Finish with lime, salsa, hot sauce, cilantro, or pickled jalapeños. Next time: Season the sauce with garlic, cumin, or extra chile before baking. |
| Everything tastes too salty | Salt accumulated from tamales, sauce, cheese, and canned ingredients | Now: Serve smaller portions with unsalted beans, avocado, cabbage, sour cream, or plain rice. Next time: Taste the components before adding extra salt, cheese, or salty sauce. |
A hot casserole that is simply a little loose may only need a few more uncovered minutes followed by the full 10-minute rest. Baking indefinitely will eventually dry the exposed masa while the bottom stays soft.
Back to Recipe · Storage & Reheating · Back to Top
Making Ahead, Storing and Reheating
Making It Ahead
You can assemble the casserole the night before. If firmer masa matters, wait to add the sauce until closer to baking. If convenience matters most, refrigerate the whole assembled dish and expect slightly softer tamales the next day.
Refrigerating and Freezing
Cooked leftovers are generally kept refrigerated for 3–4 days. This casserole, however, may begin with tamales that have already spent time in the refrigerator.
Keep their original cooking and storage date in mind instead of treating the casserole as a brand-new 3–4-day window. Freeze portions if you will not finish them promptly.
USDA FSIS recommends reheating leftovers to 165°F / 74°C and using frozen leftovers within about 3–4 months for best quality. Its leftovers and food-safety guidance also covers safe cooling, thawing, and reheating.
Wrap frozen portions well so exposed masa does not dry out in the freezer.
Reheating
Cover larger portions and reheat at 350°F / 175°C until the center reaches 165°F / 74°C. Keeping the dish covered for most of the reheat helps the masa stay soft; uncover briefly at the end if you want the top to pick up some color again.
For one serving, microwave it covered in shorter intervals, rotating the plate if your microwave heats unevenly, until the center reaches 165°F / 74°C.
What About Tamale Pie?
This casserole starts with cooked tamales. Tamale pie usually starts with seasoned meat, beans, or chile and adds a cornbread, cornmeal, polenta, or masa layer. The names overlap, but they solve different dinner problems.
If what you want next is another saucy baked dinner without individual rolling, a chicken enchilada casserole is a natural next stop.
By the time the cheese has browned and the exposed masa edges have toasted, the tamales you were tired of reheating have become a very different dinner.
Back to Recipe · Frozen Tamales · Canned Tamales · Troubleshooting · Back to Top








