
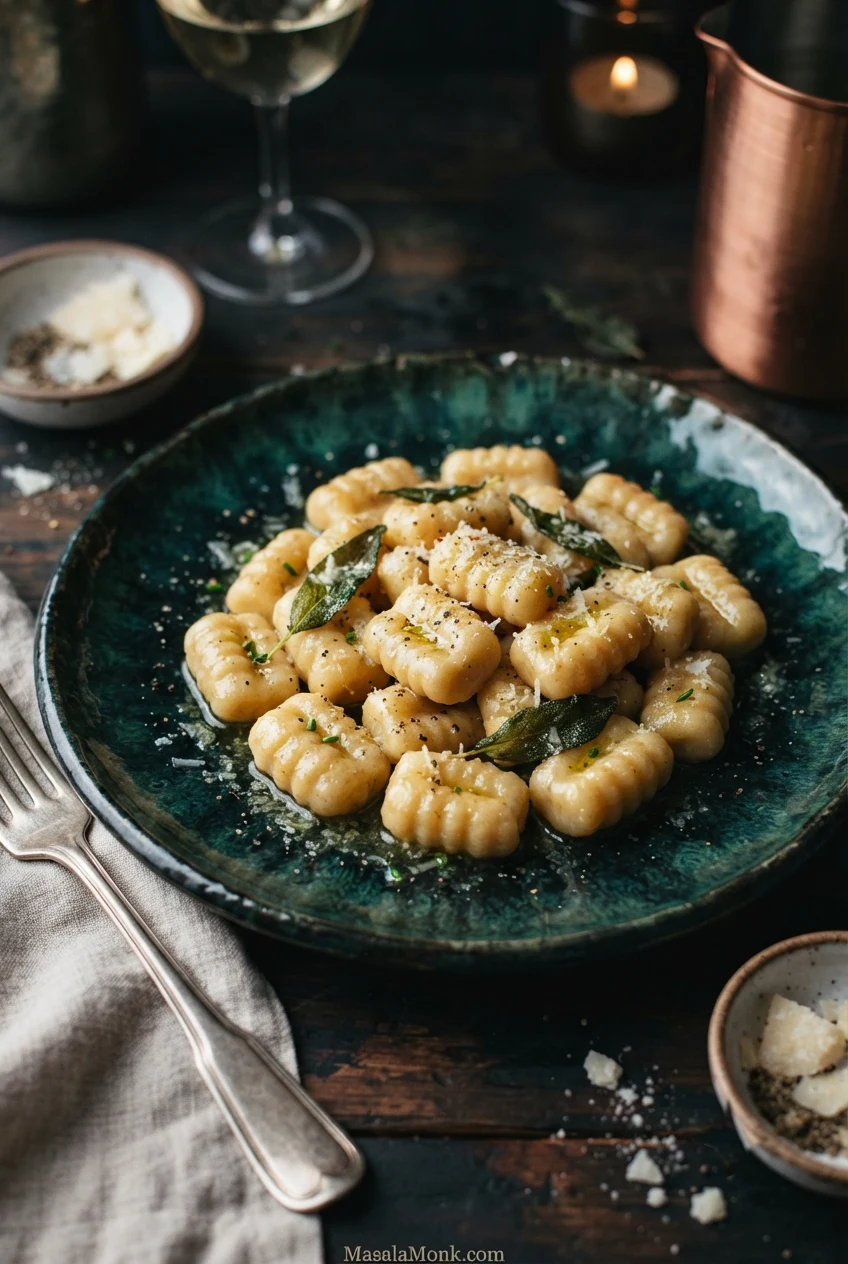
Homemade potato gnocchi are tender Italian dumplings that should taste of potato, not flour. Roll the dough into small pillows, give them fork ridges if you like, then serve them with golden sage butter and Parmesan. The ridges catch the sauce, but plain gnocchi are just as good.
Baking floury potatoes keeps the cooked flesh relatively dry, so you can use less flour in the dough. Weigh the prepared potato, fold everything together with a light hand, and cook two or three samples before shaping the rest.
Need a quick answer while cooking? Start cooking · Check the dough · Cook a test piece · Fix a problem · Freeze a batch.
Homemade Potato Gnocchi Recipe
- Yield: About 4 moderate main-course or 6 side servings; roughly 900 g–1 kg (2–2.2 lb) of uncooked gnocchi, before dusting flour.
- Time: Plan on about 2–3 hours from preheating to serving, including 45–75 minutes or longer to bake the potatoes. Hands-on work is roughly 50–75 minutes, depending on shaping speed.
- Oven: 220°C / 425°F conventional, or 200°C / 390°F fan.
- Boiling: Fresh pieces commonly take about 2–4 minutes per batch; check that one is tender through the center before lifting the rest.
Ingredients for the potato gnocchi
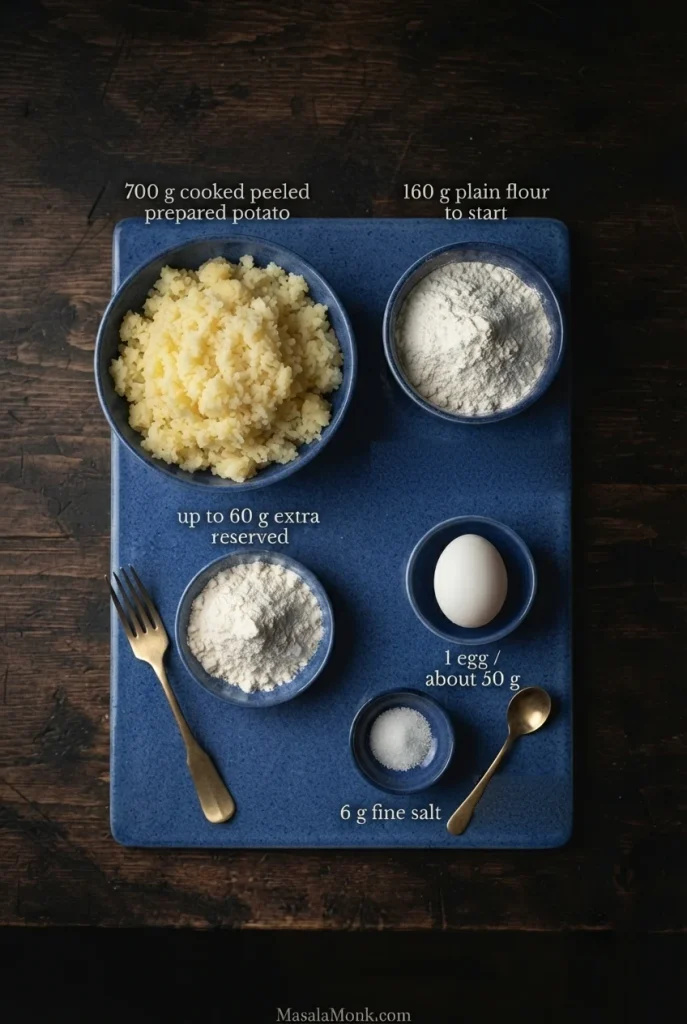
- 700 g (about 25 oz) cooked, peeled, riced floury potato. Buy roughly 1–1.2 kg (2.2–2.6 lb) raw potatoes, such as russets, with a little extra to allow for peel and moisture loss. Measure the cooked flesh, not the raw potatoes.
- 160–220 g plain/all-purpose flour. Start with 160 g (about 1⅓ cups) and reserve up to 60 g (about ½ cup) for adjustments. Use a scale if possible.
- 1 large egg, beaten: about 50 g (1¾ oz) without the shell.
- 6 g fine salt (about 1 teaspoon) for the dough.
- Extra flour for dusting the counter, fork and tray; do not count it toward the dough flour.
- 3 L (about 3.2 US quarts) water and 15 g fine salt (approximately 2½ teaspoons, depending on the salt) for boiling.
Simple sage-butter finish
- 85 g (6 tablespoons / 3 oz) unsalted butter, for a light sage-butter coating.
- 12–16 fresh sage leaves, or omit for a plain butter finish.
- Up to 120 ml (½ cup) gnocchi cooking water, reserved from the pot; use only as much as needed to lightly coat the gnocchi.
- 30 g (about 1 oz) finely grated Parmesan, optional, plus black pepper to taste.
Equipment: You need a scale, baking tray, knife, large pot, slotted spoon, wide skillet and serving platter. For a fluffier potato texture, use a ricer or food mill; a sturdy sieve or fork works too. A bench scraper makes mixing easier, while a gnocchi board remains optional. Reuse the cooled baking tray to spread the riced potato, then clear and dry it for the shaped pieces. Keep a small heatproof bowl ready for the sage butter.
Bake the potatoes and make the dough
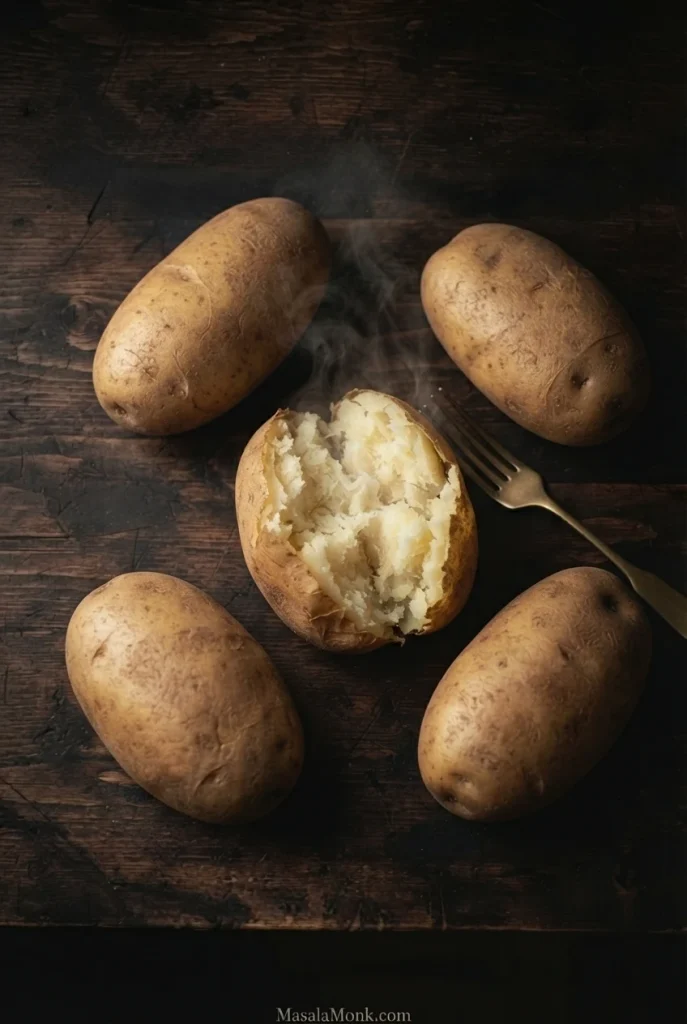
- Bake the potatoes. Heat the oven to 220°C / 425°F (200°C / 390°F fan). Choose potatoes of similar size if possible. Scrub, dry and prick them a few times, then place them unwrapped on a tray. Medium potatoes usually take 45–60 minutes; large ones can take 60–75 minutes or longer. They are ready when a skewer slips all the way through without resistance. No oil is needed.
From baked potatoes to a soft dough
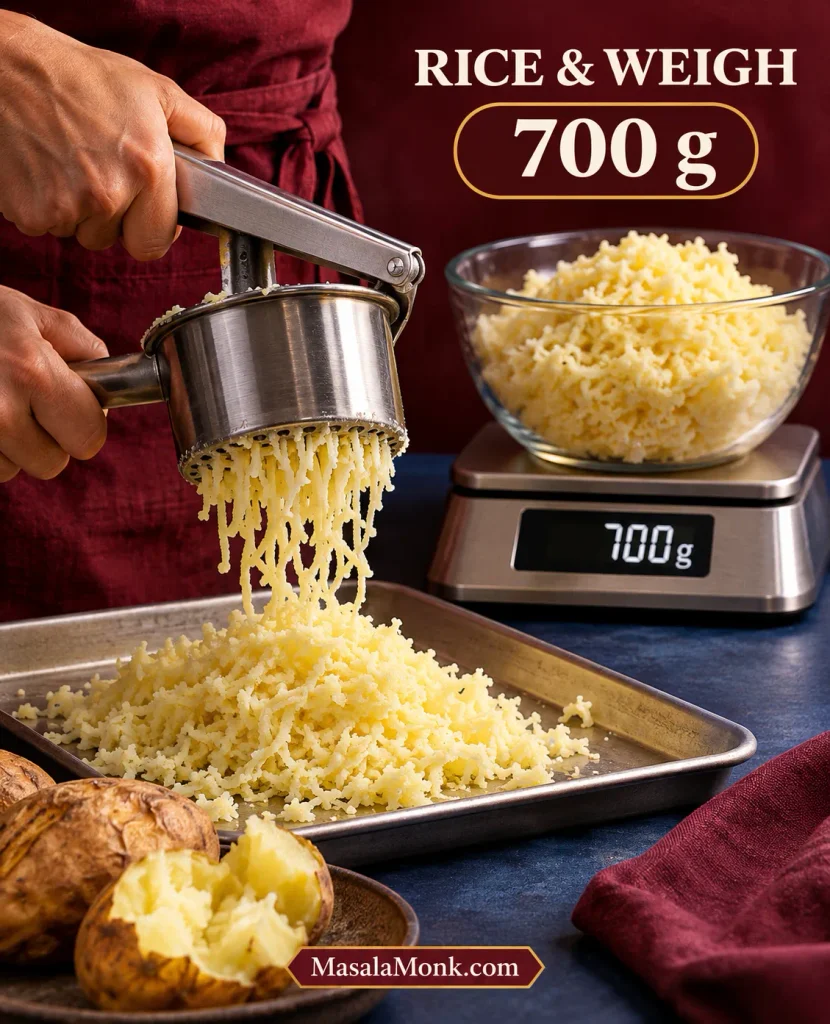
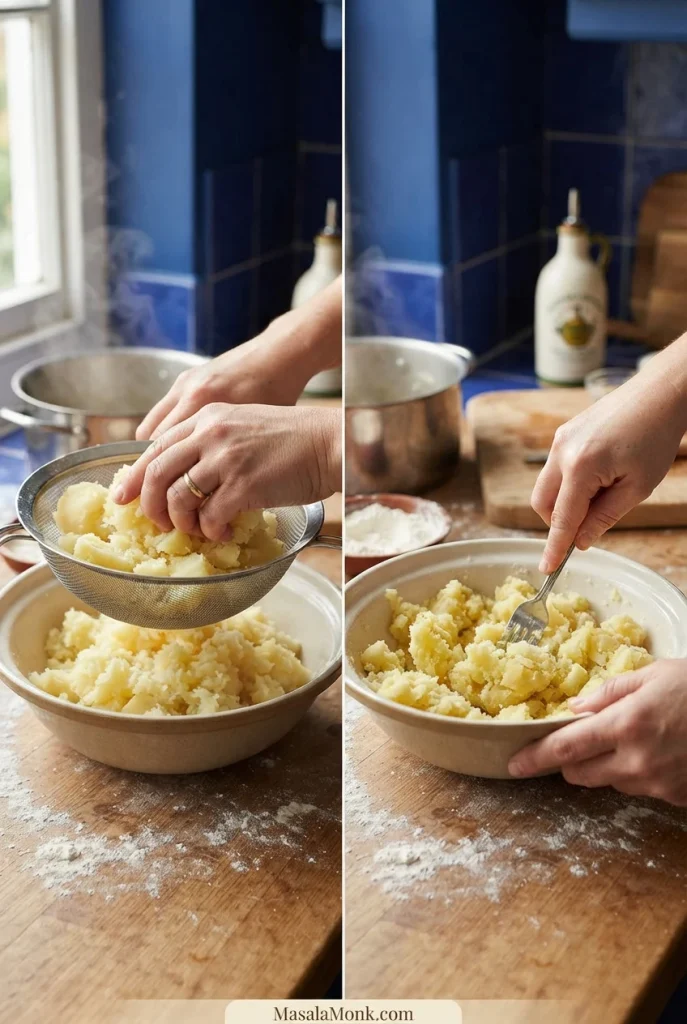
- Peel, rice and weigh. Split the hot potatoes to release steam. Once safe to handle, scoop out the flesh and rice it onto the clean, cooled tray. Spread it briefly to let more steam escape, then weigh 700 g (about 25 oz). Transfer the measured potato to a clean, dry work surface for mixing. Clear and dry the tray for the shaped gnocchi. No ricer? Press the warm potato through a sturdy sieve or mash it with a fork until no firm lumps remain.
- Mix the dough. Let the riced potatoes cool until just warm to the touch. Scatter over 160 g flour and 6 g fine salt, then add the 50 g beaten egg. Cut and fold with a bench scraper until the loose mixture gathers into a soft mound. Stop once a small piece rolls into a rope that holds its shape; slight tackiness is fine.
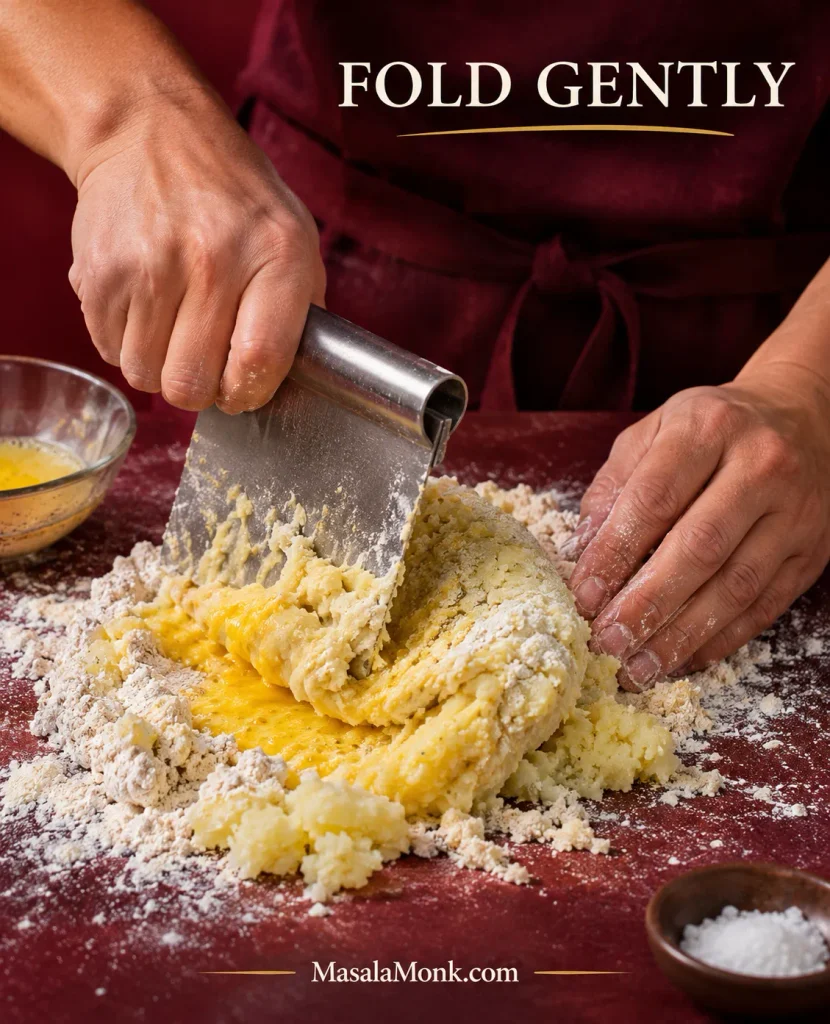
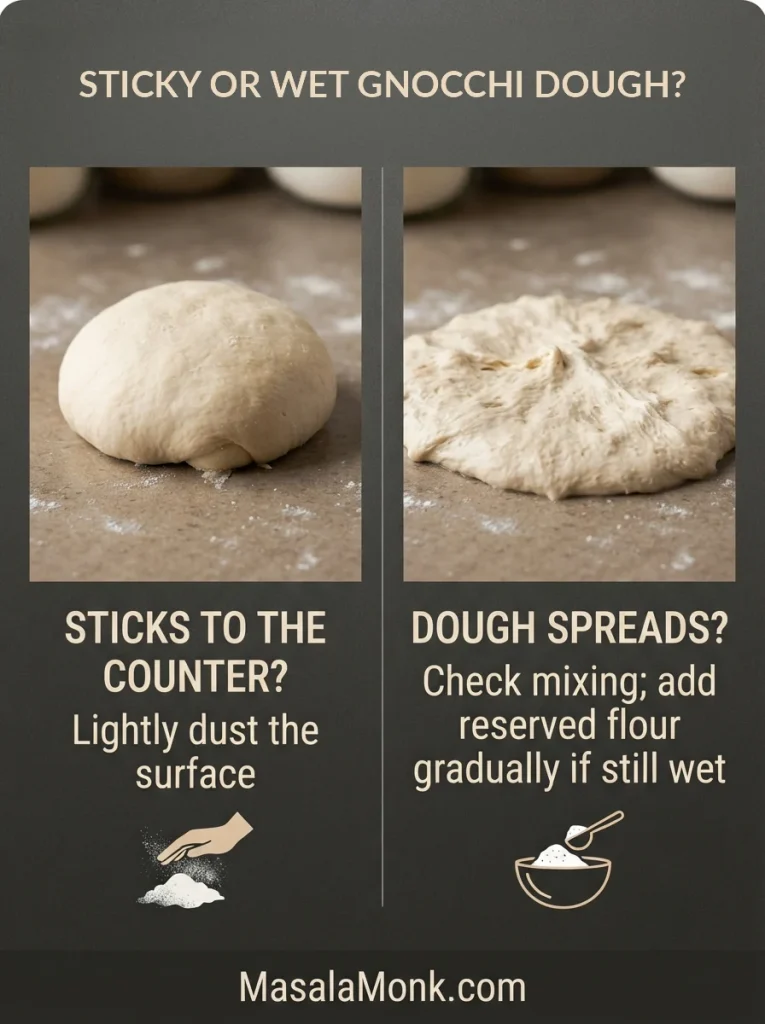
If the dough needs adjusting: First dust the counter when only the surface feels sticky. Dough that smears or spreads after mixing evenly may need reserved flour about 10 g at a time. Cracking is different: check that the egg and flour are distributed before changing anything. See the dough texture guide if you are unsure.
Cook a test batch, then shape the gnocchi
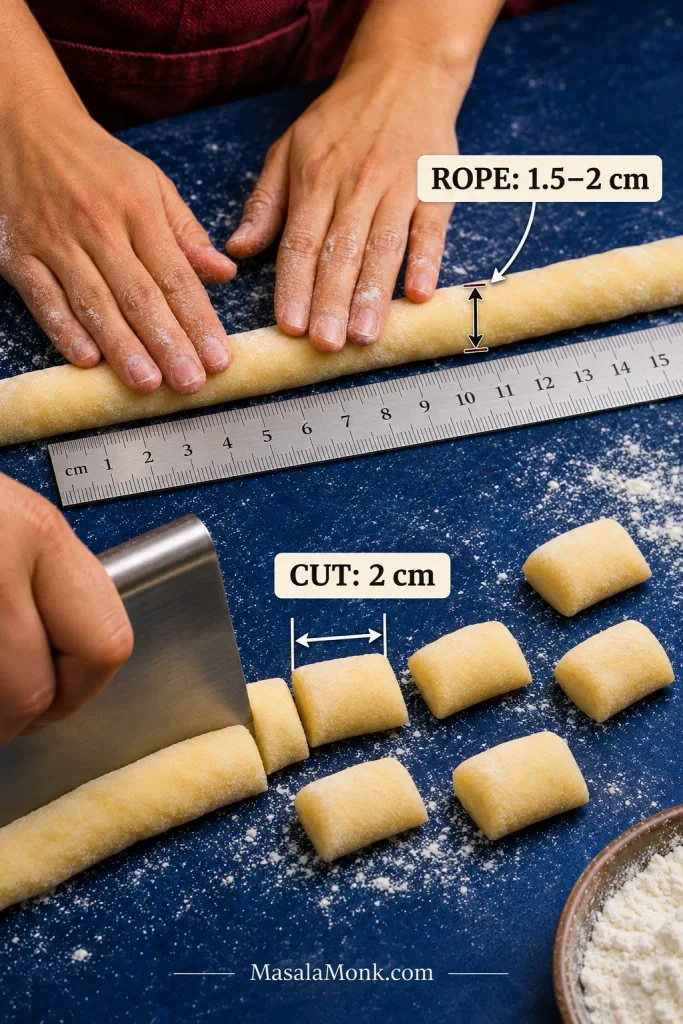
- Shape two or three samples. Bring 3 L water to the boil in a large pot. Meanwhile, roll a little dough on a floured counter into a rope about 1.5–2 cm (⅝–¾ in) thick. Cut it into 2 cm (¾ in) pillows. Leave these first samples plain.
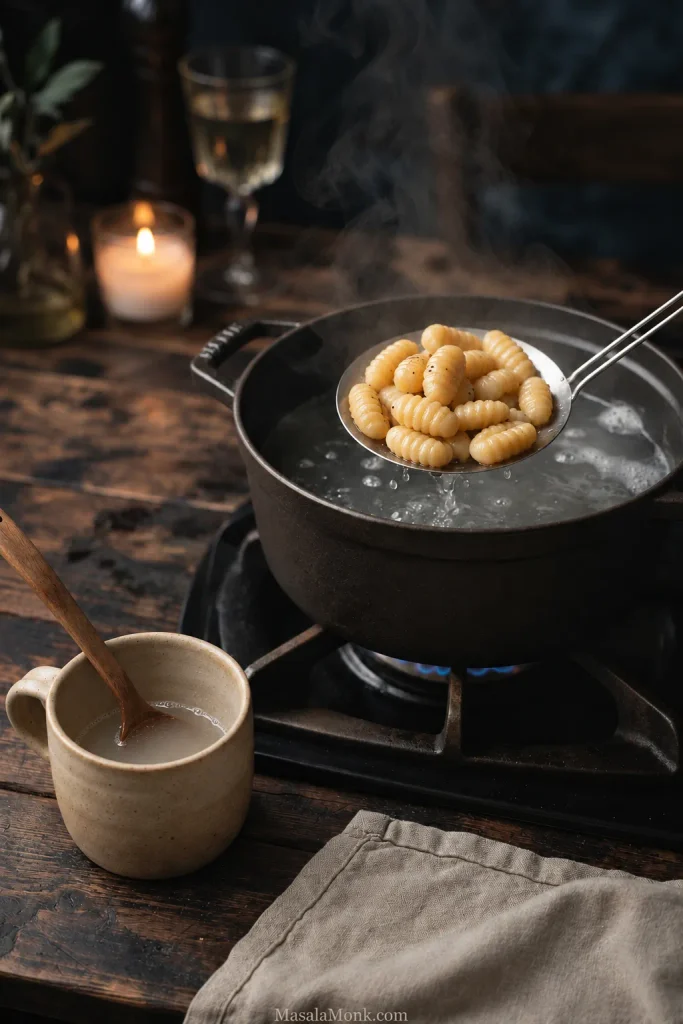
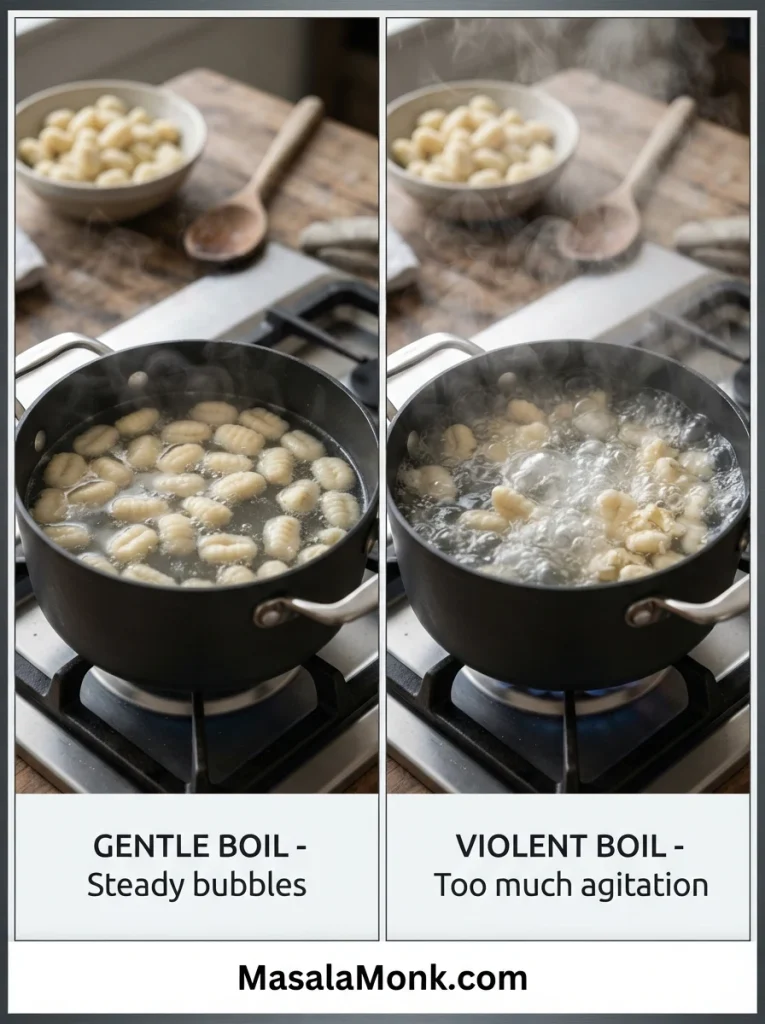
- Cook and taste them. Salt the boiling water with 15 g fine salt, then lower in the samples. Maintain a gentle boil with steady bubbles, not a rolling churn. Once they float, lift one out, let it cool briefly and taste or cut through the center. Most pieces take about 2–4 minutes in total, depending on size. A fully cooked middle feels tender and tastes neither raw nor floury.
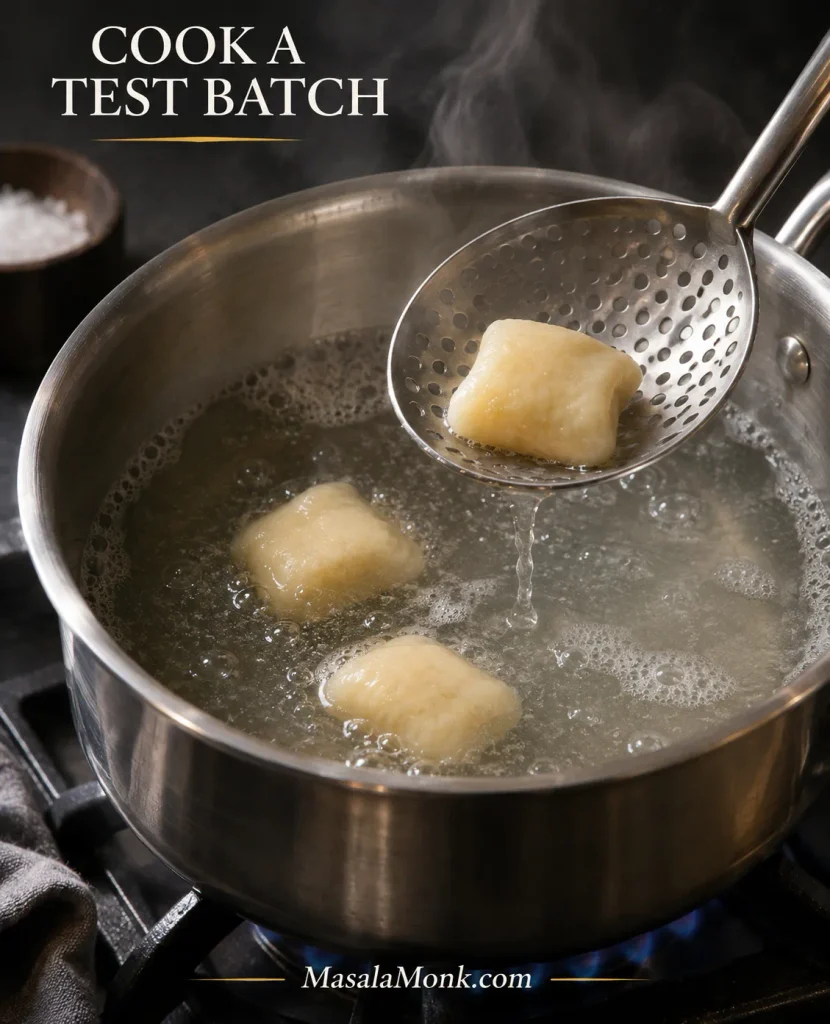
Ready to shape the rest? A sample that holds together, tastes of potato and has a tender center means the dough is ready. Go ahead and shape the remaining gnocchi.
If a sample fails: Calm the water first and cook another. Should it still break apart while the unshaped dough feels wet, fold in a little reserved flour and retest. A doughy center needs longer cooking; a piece that is cooked through but heavy or chewy will not improve with more flour. See troubleshooting for persistent problems.
Shape the full batch once the samples pass
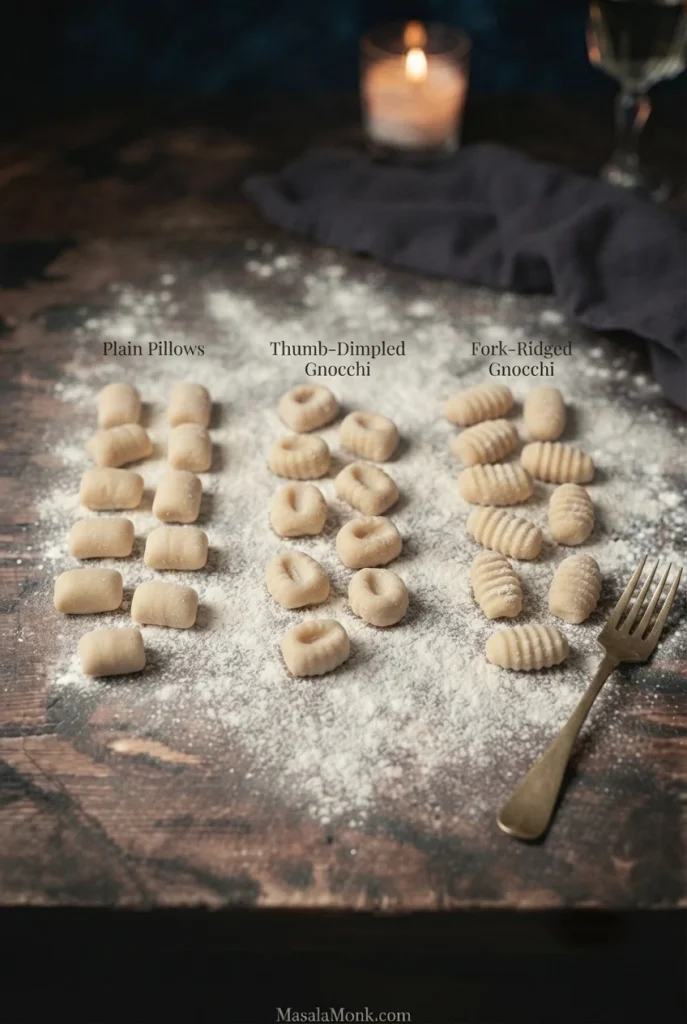
- Shape the rest. When the samples cook well, turn off the heat under the pot while you work. Divide the dough into four or five portions and keep the unused portions loosely covered. Roll and cut the ropes. Leave the pieces plain or add ridges or dimples, then space them apart on a lightly floured tray.
Boil in batches and coat with sage butter
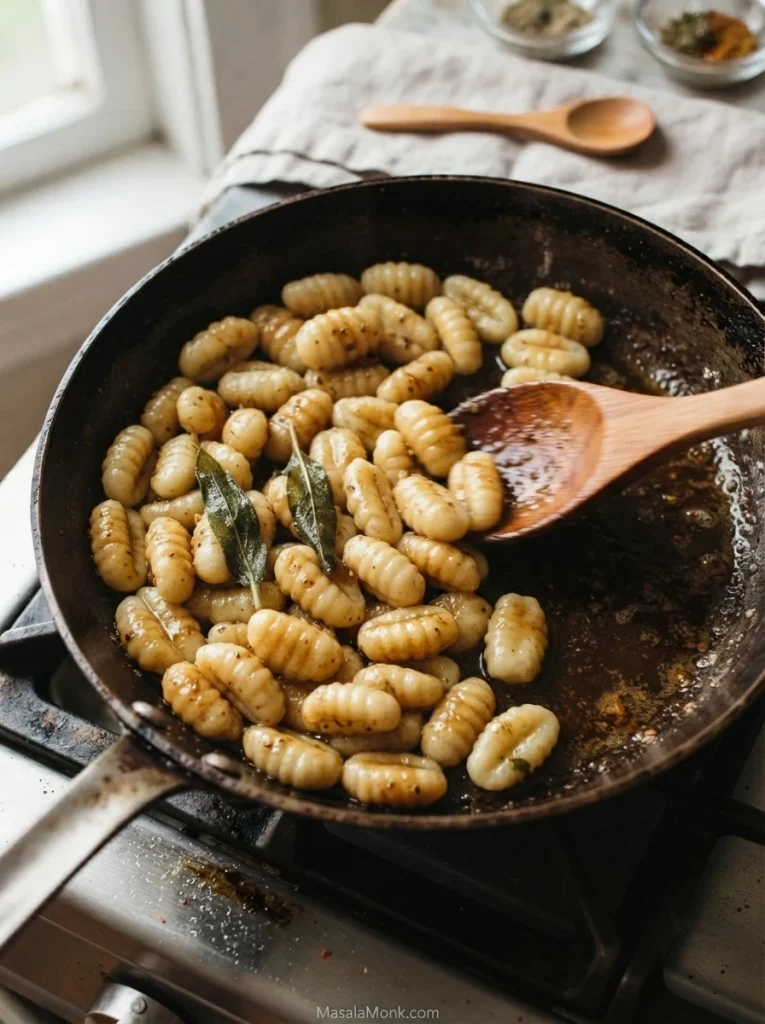
- Make the sage butter. Melt 85 g butter in a wide skillet over medium heat. Add the sage as it foams and swirl until the milk solids turn golden and smell nutty, roughly 2–4 minutes. Remove the pan immediately, before the flecks turn very dark. Pour the butter and sage leaves into a small heatproof bowl; keep the skillet ready to coat each cooked batch.

Lift and coat the cooked gnocchi in batches
- Boil the first batch. Bring the salted water back to a gentle boil. Add a manageable portion of gnocchi, leaving room for them to move, and stir if any catch on the bottom. Once they float, lift one out, let it cool briefly, then taste or cut it open. Cook the batch a little longer if the center is still doughy. Before lifting the first batch, reserve up to 120 ml (½ cup) cooking water. Lift the cooked pieces with a spider or slotted spoon and let the excess water drip off.
- Coat each batch and serve. Warm a little browned butter with a few sage leaves in the skillet over low heat, saving some for the remaining gnocchi. Add the just-cooked batch and fold carefully. A splash of reserved cooking water can help the butter cling instead of pooling in the skillet. Transfer to a warm serving platter and cover loosely. Repeat the boiling and coating with the remaining gnocchi, working in three or four batches altogether. Serve as soon as the last batch is ready, with Parmesan and black pepper. The centers should be tender, with fragrant sage butter lightly coating the hot pillows.
Finish, vary and serve
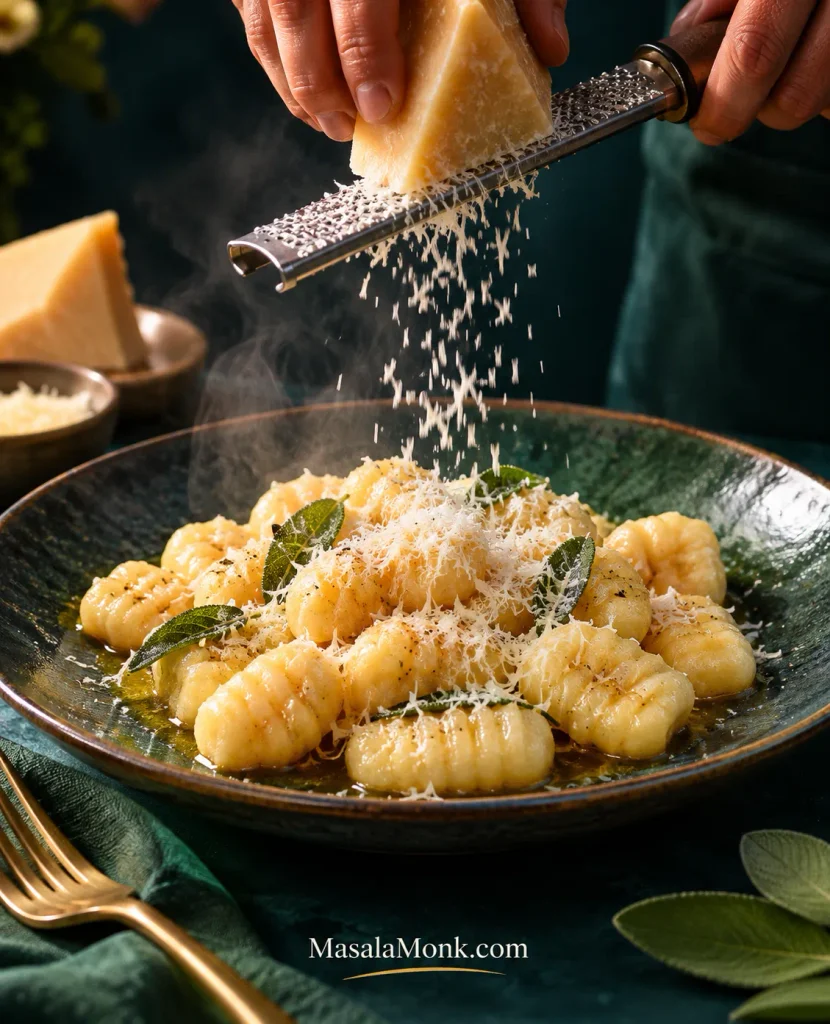
Finishing with Parmesan: Keep the cheese an accent to the potato and sage rather than turning it into another sauce. Finely grate a little over the warm plate just before serving, so it softens against the gnocchi instead of clumping in the skillet.
Prefer crisp edges? Drain the boiled gnocchi, then sauté them in a wide skillet with a little butter or oil over medium heat. Give the pieces room and let one side turn golden before gently turning them. Pan-crisping is an optional second step; it is not needed for the tender sage-butter version.
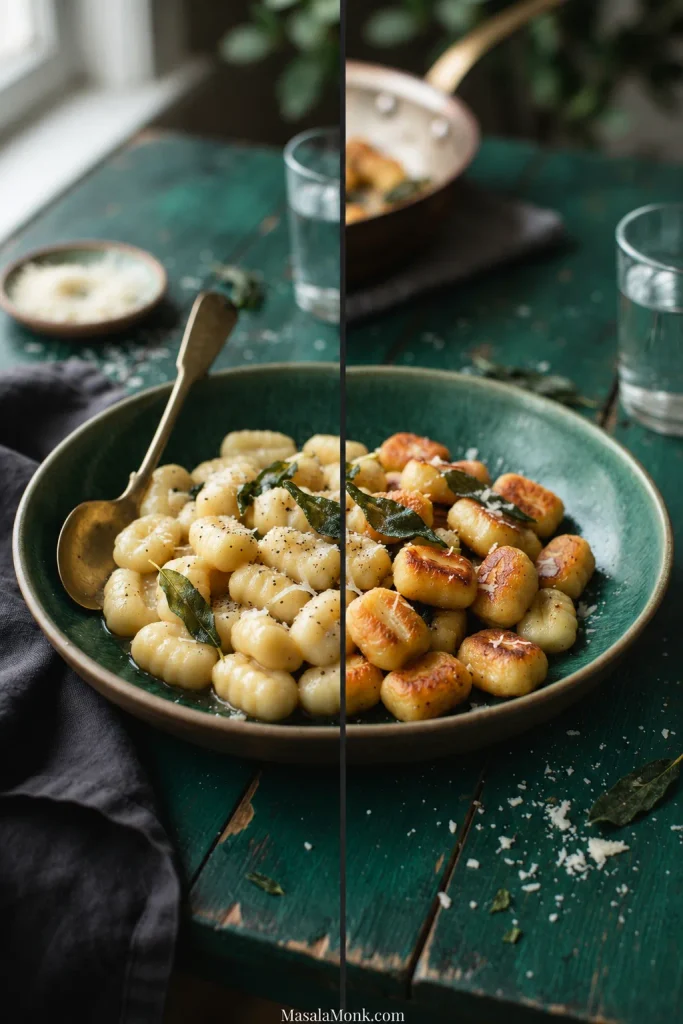
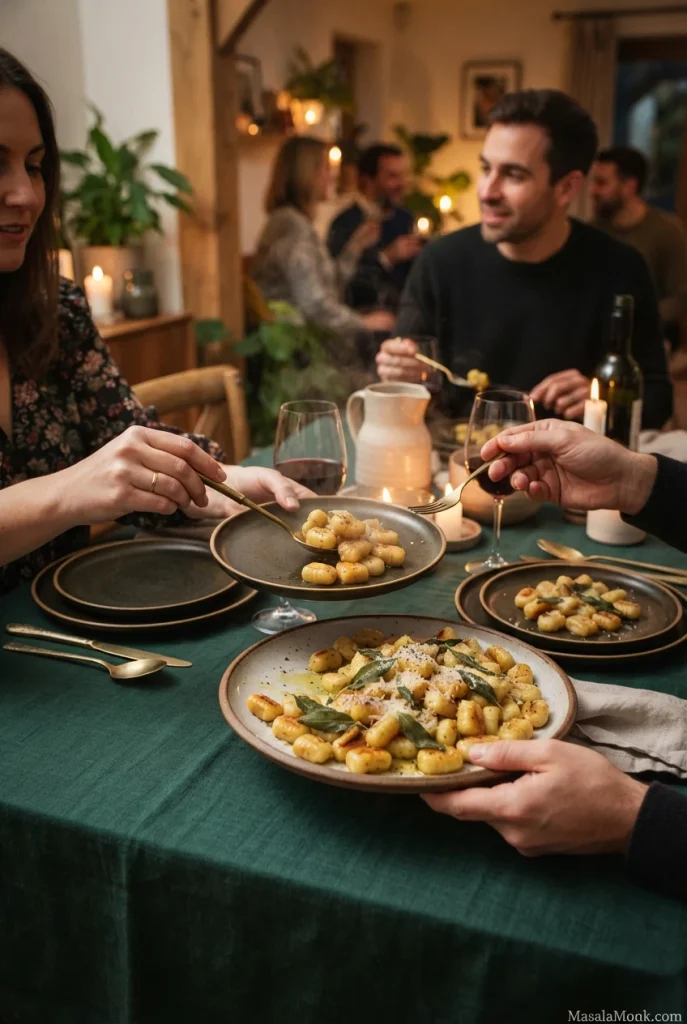
Serving homemade gnocchi family-style: Spread the finished pillows loosely across a warm, shallow serving platter rather than stacking them in a deep bowl. That leaves room for everyone to lift a portion without crushing the soft pieces; bring the platter to the table as soon as the last batch is coated.
Best Potatoes for Homemade Gnocchi
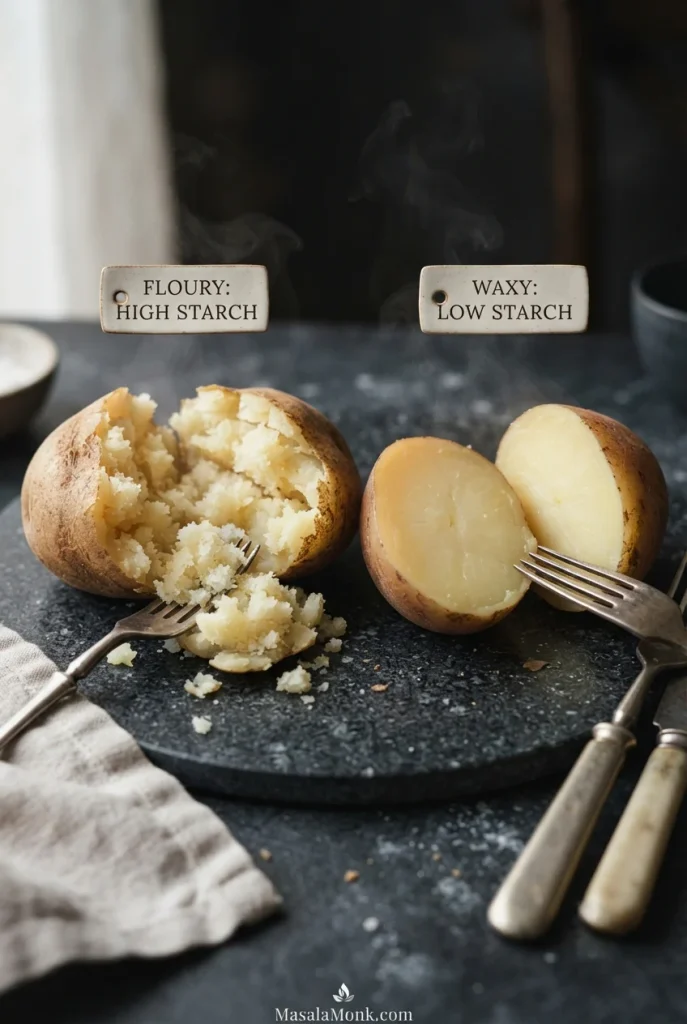
Floury, relatively dry potatoes are best for homemade potato gnocchi. Look for russets, Maris Piper, King Edward or other potatoes sold locally for fluffy baking or mashing. Their cooked flesh breaks into light pieces that need less flour to bind. Yukon Gold also works but may need a different flour adjustment; very waxy salad potatoes are less suitable.
Should you bake, boil or steam the potatoes?
Baking helps limit added moisture, making it easier to keep the dough light. Our baked potato guide covers the tenderness check; for gnocchi, skip the oil and toppings.
Boiling is traditional too. Put whole, scrubbed potatoes in their skins into cool water, bring to a simmer and cook until a skewer slips through—often 30–45 minutes, longer for large potatoes. Drain, peel while warm and let the steam escape before ricing. For another established approach, see Lidia Bastianich’s potato gnocchi recipe.
Steaming is a faster alternative. Peel the potatoes and cut them into roughly 2.5 cm (1-inch) slices. Set them in a covered steamer basket above simmering water for about 15–20 minutes, or until a fork slides through easily. Rice while warm, let excess steam escape and weigh the prepared flesh.
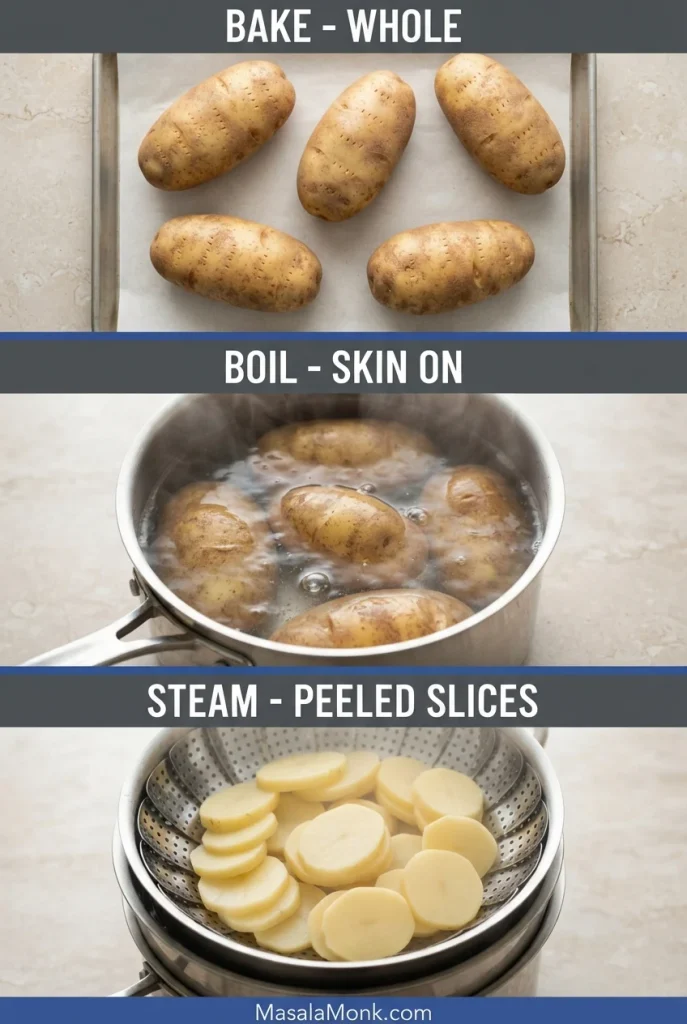
Boiled or steamed potatoes can retain more moisture than baked ones. Start with the same 700 g of prepared flesh, then judge whether the mixed dough needs any reserved flour.
Can you make gnocchi without a potato ricer?
Yes. The main recipe works with potato pressed through a sturdy sieve or thoroughly mashed with a fork. A ricer or food mill is faster for 700 g and leaves fewer lumps. For a comparison of the tools, see our mashed potatoes guide. Leave milk and butter out of the gnocchi dough, and avoid a blender or food processor, which can make potatoes gluey.
Making a smaller batch? For 350 g prepared potato, use 25 g beaten egg, 3 g fine salt and 80–110 g flour. Begin with 80 g and keep up to 30 g in reserve for a wet dough. Weigh the beaten egg rather than guessing at half an egg.
What Should Homemade Gnocchi Dough Feel Like?
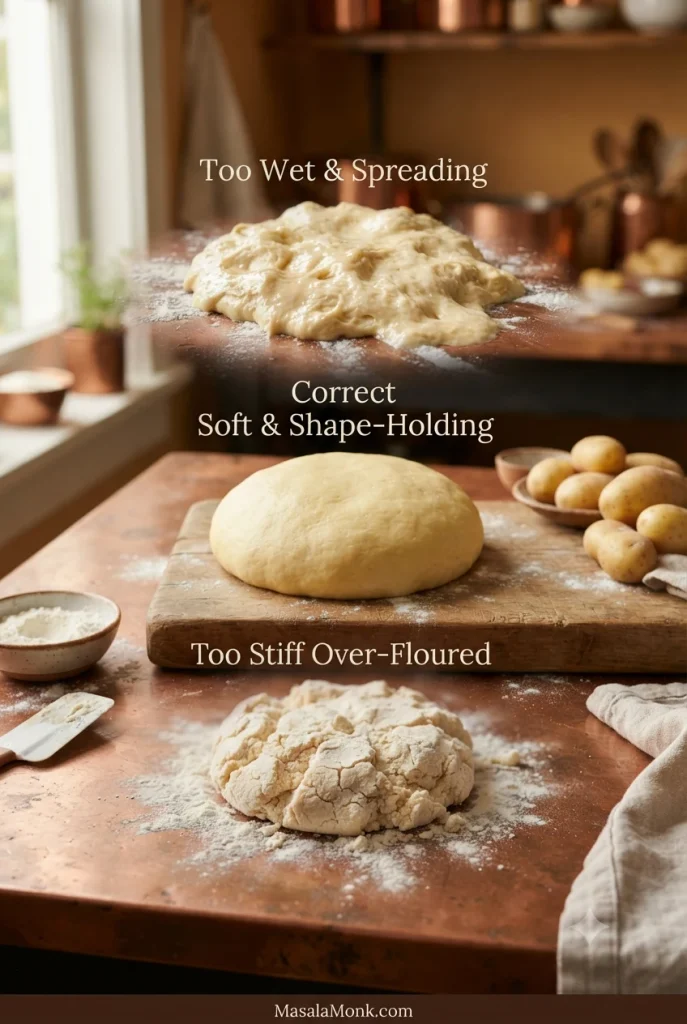
Press the dough lightly: it should yield under your fingers, gather into a soft mound and roll into a short rope without spreading. A little tackiness is normal. Very wet dough smears across the board; overworked or flour-heavy dough can become stiff and springy.
| Before cooking, the dough… | What to do |
|---|---|
| Feels soft, a little tacky and holds a rope | Dust the board lightly, shape two samples and cook them. |
| Smears or spreads across the board | Check that the ingredients are combined, then fold in reserved flour a little at a time if it remains wet. |
| Cracks or crumbles | Gather and fold briefly to distribute the egg and flour; don’t automatically add more flour. |
| Feels stiff, springy or elastic | Stop mixing and cook a sample. Further kneading is unlikely to help. |
A little flour on the board prevents sticking; flour folded into the dough changes its texture. If you still cannot tell whether the dough is ready, cook two or three test pieces before shaping the whole batch.
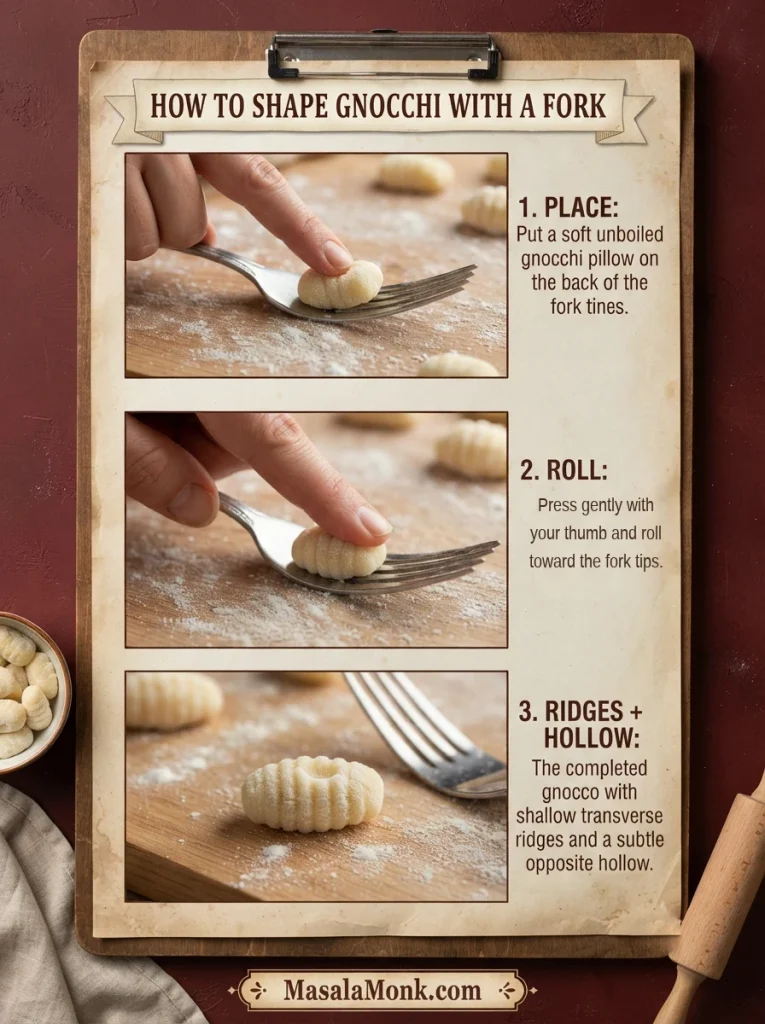
How to Shape Gnocchi with a Fork or Board
Roll the dough into ropes 1.5–2 cm (⅝–¾ in) thick and cut pieces about 2 cm (¾ in) long. Leaving the pieces plain is quickest; ridges and dimples give butter or sauce places to cling.
- Plain pillows: Leave the cut pieces as they are.
- Thumb dimples: Press a shallow indentation into each piece.
- Fork ridges: Hold a lightly floured fork at an angle with the back of the tines facing you. Place a pillow near the top, press gently with your thumb and roll it down toward the tips. The tines leave ridges outside; your thumb leaves a shallow hollow on the other side. A gnocchi board works the same way.
Use just enough pressure to leave a pattern without squashing the piece. Lightly dust the fork if the dough catches on the tines. Arrange the shaped gnocchi in a single layer on a floured tray so they keep their shape. Making them ahead? Freeze the shaped pieces uncooked rather than leaving them on the counter.
How to Tell When Potato Gnocchi Are Done
Fresh homemade potato gnocchi usually cook in about 2–4 minutes for pieces this size. They tend to sink at first and then float. Once they rise, lift out one piece and check that the middle is tender and cooked through; floating alone does not guarantee doneness.
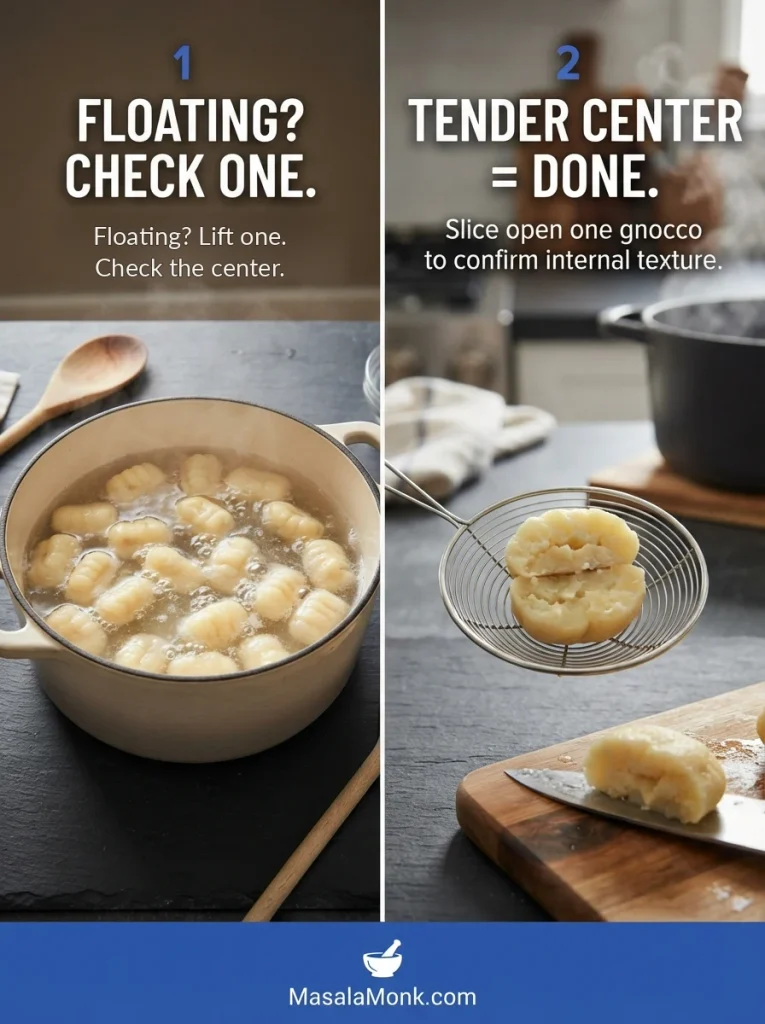
Check the cooked center: Break open one of the larger gnocchi and let it cool briefly. The middle should be tender and cohesive, without a raw floury taste. If it is still doughy, return the batch to a gentle boil and check again. Lift finished pieces with a spider or slotted spoon to keep them intact.
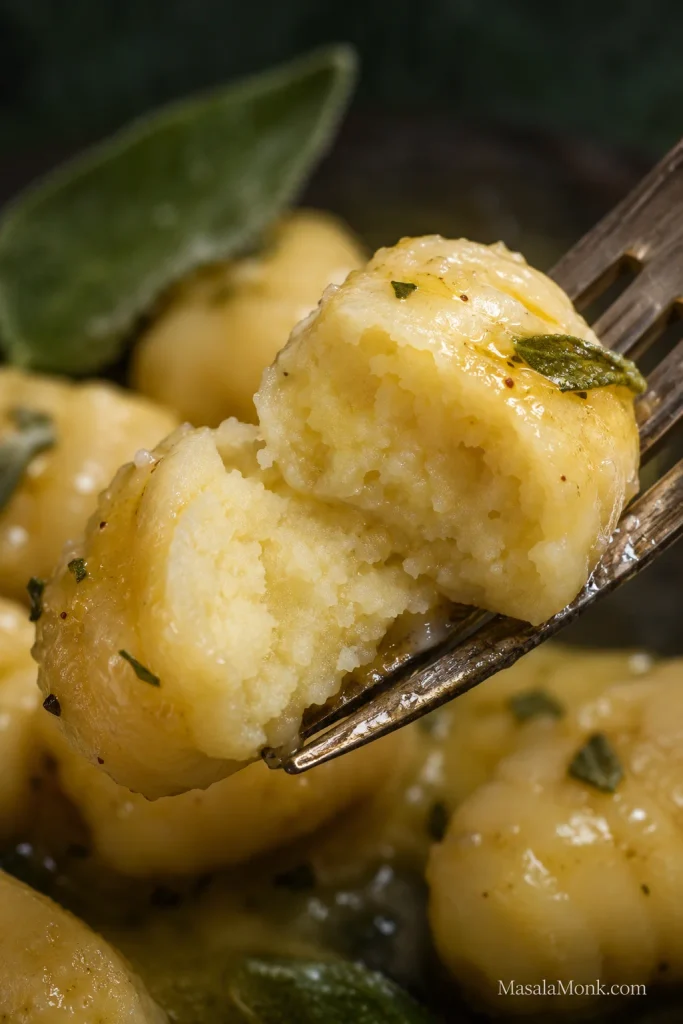
Have the sauce warm and ready as the gnocchi finish. They are less likely to clump when lifted directly from the pot into butter or warm homemade marinara than when left sitting in a dry colander. For the main recipe, return to the sage-butter coating step.
Eggs, Flour and Other Gnocchi Doughs
Do you need eggs to make potato gnocchi?
No. Some traditional potato gnocchi use only potatoes, flour and salt. This recipe includes an egg for a little more structure; leaving it out without adjusting the formula can make this particular dough fragile. Other recipes use yolks rather than a whole egg.
Which flour works best?
Plain/all-purpose flour works well here. Italian 00 flour is another option, but “00” describes how finely it is milled, not its protein content. Gluten-free blends vary enough that a formula developed for the specific blend is a better starting point than a direct swap.
Changing the egg or flour is one kind of adjustment; using mashed potatoes, sweet potatoes or ricotta creates a different dough. Their moisture and richness call for different flour and egg proportions.
What Sauce Goes with Potato Gnocchi?
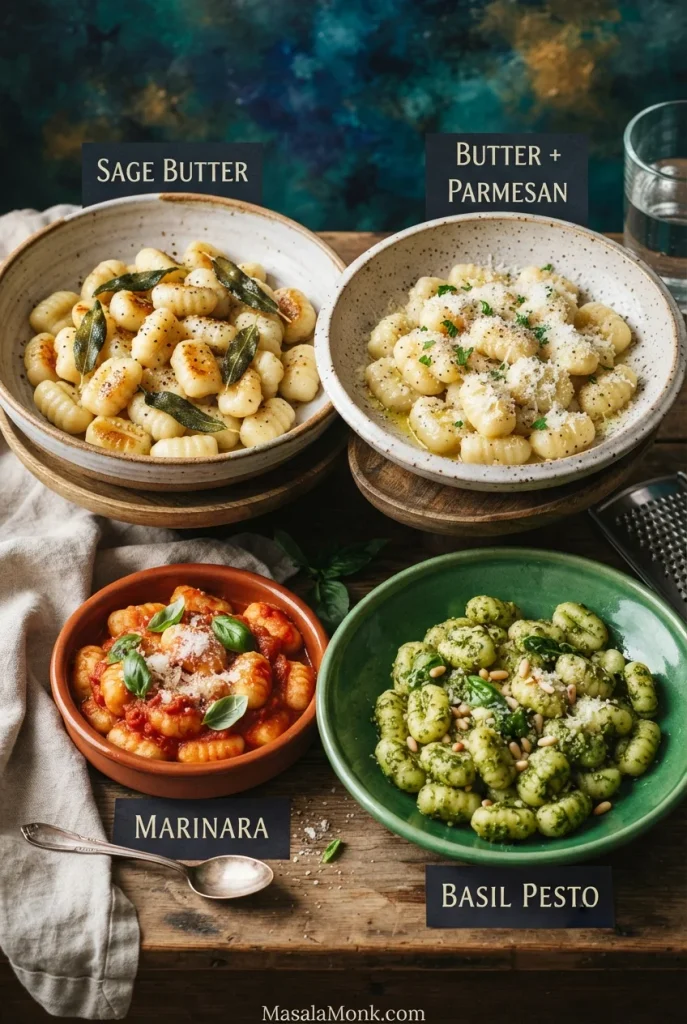
Browned sage butter lets the potato flavor stand out, with nutty butter and fragrant leaves coating the hot pillows. Tomato sauce brings brightness, while basil pesto gives the gnocchi a fresh herbal finish. Butter and Parmesan is the simplest option. Making the main version now? Return to the sage-butter method.
Why Homemade Gnocchi Go Wrong
Before boiling: wet dough, cracks and flat shapes
- The potato flesh is wet or lumpy. Lumps usually mean the potatoes were not fully tender or were not riced finely. Excess moisture is a separate problem: split hot potatoes, allow steam to escape and drain boiled potatoes thoroughly before making the dough.
- The dough smears when you try to shape it. First check that the egg and flour are evenly mixed. If the dough still spreads, fold in reserved flour a little at a time and test again. After using all 60 g of reserved flour, a dough that still will not hold its shape may be too wet for light gnocchi. More flour might bind it, but the result will be heavier; cook a small sample before shaping the rest.
- Ropes crack or crumble. Check that the flour and egg have been evenly distributed. Gently gather and fold before making a change; extra flour may worsen dry cracking.
- Ridges disappear or pieces flatten. Faint ridges may simply need firmer, but still gentle, thumb pressure. If entire pillows spread flat, the dough may be too wet; use the dough table before shaping more.
- Shaped pieces stick to the tray. Dust the tray lightly, separate the pieces and lift with a scraper. If the dough itself is sound, there is no reason to change its flour ratio.
In the water: pieces dissolve, float early or turn gummy
- Why do gnocchi fall apart in water? Vigorous boiling can break delicate pieces; very wet or poorly combined dough can also lose its shape. Calm the water first. If another sample still breaks apart and the unshaped dough is wet, fold in a little reserved flour and test again.
- They float but the center is floury. Floating signals that it is time to check one. Keep the batch at a gentle boil a little longer if its center tastes raw.
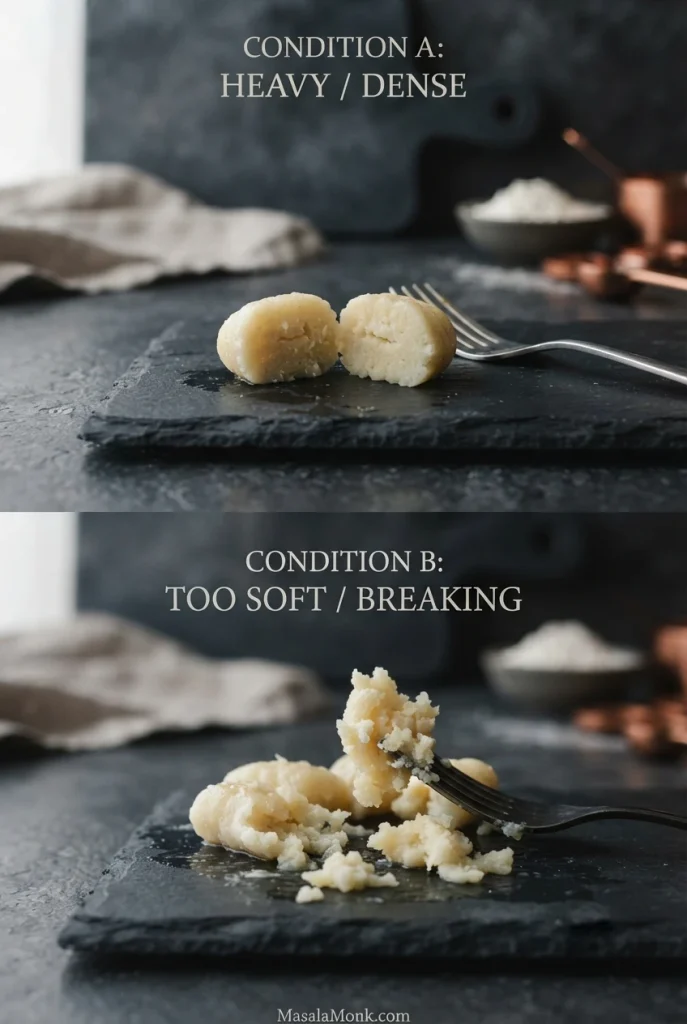
- Cooked gnocchi are dense or chewy. Excess flour or prolonged mixing can make cooked-through gnocchi heavy. With the dough you already have, stop kneading and shape the rest gently; earlier overworking cannot be undone. Next time, begin with drier potatoes and add only the flour needed for a cohesive dough.
- They are sticky, gummy or unusually soft. Potatoes that became stretchy or gluey during mashing can produce gummy gnocchi. Pieces that start tender but soften excessively while boiling are more likely to have cooked too long or absorbed too much water. Lift finished batches promptly and keep the water at a gentle boil.
After cooking: clumping and breaking
- Cooked pieces clump. Move each batch straight into warm sauce or a buttered serving bowl instead of leaving the pieces in a pile.
- They break when you add sauce. Use a broad pan and fold gently with a spoon or spatula. A hard toss can damage delicate homemade gnocchi.
For another attempt, return to the test-batch instructions before shaping the remaining dough.
How to Freeze and Make Gnocchi Ahead
Freezing uncooked gnocchi
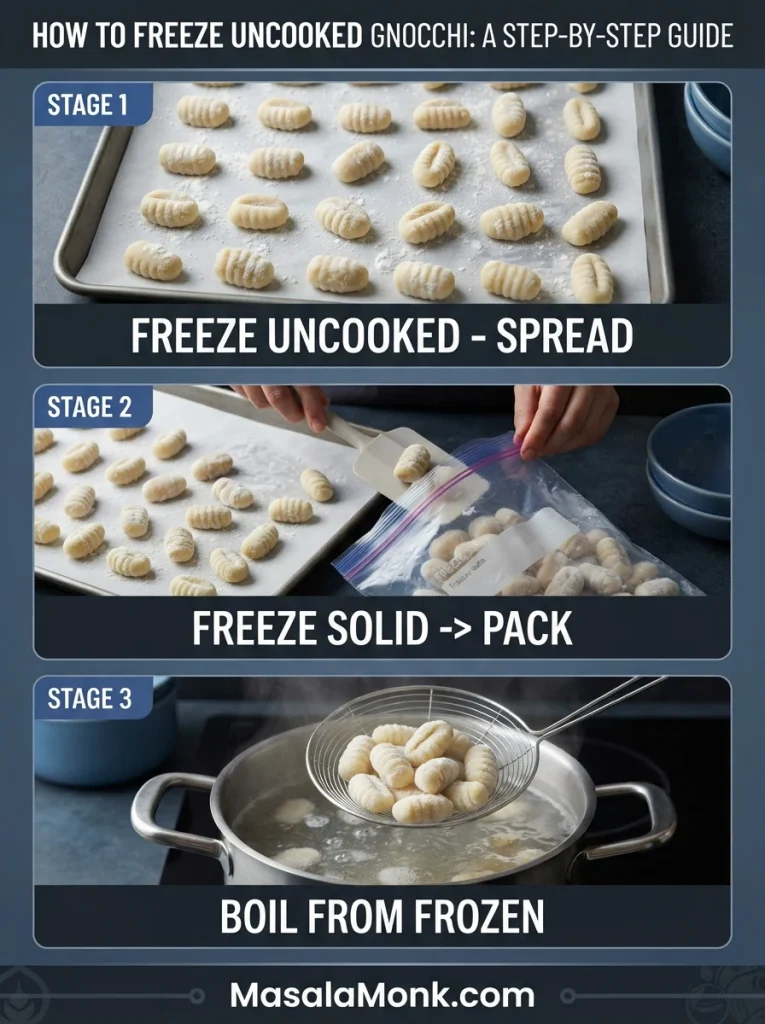
Freeze homemade gnocchi uncooked for the best texture. Cook the shaped pieces directly from frozen; no thawing is needed.
- Arrange the shaped gnocchi apart in one layer on a parchment-lined, lightly floured freezer-safe tray.
- Freeze the tray flat until every piece is solid, usually around 1–2 hours depending on its size and your freezer.
- Transfer the fully frozen pieces to a labeled freezer bag or sealed container.
- For the best texture, aim to use within 1–2 months.
- Cook straight from frozen. Do not thaw first. Boil in small batches, allow the water to recover and taste one after it rises; frozen pieces may take longer than fresh.
Frozen homemade gnocchi can also go into chicken gnocchi soup. Add them near the end, keep the broth at a gentle simmer and check one for doneness; cooking time may differ from packaged gnocchi.
Holding gnocchi for a meal and reheating leftovers
For the same-day meal, cook shaped gnocchi soon after cutting. If plans change, arrange them on trays and freeze promptly instead of leaving an egg-containing potato dough on the counter for hours.
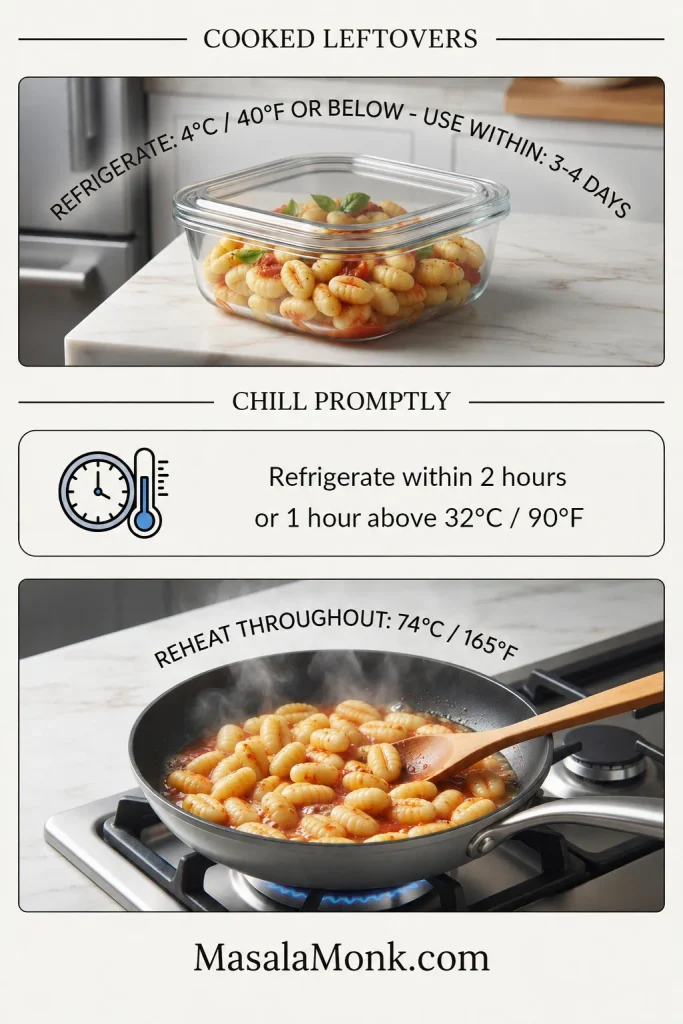
Transfer cooked leftovers to shallow covered containers and refrigerate promptly at 4°C / 40°F or below. The USDA’s leftover guidance gives 3–4 days in the fridge; the texture of gnocchi is often best sooner. Reheat gently with a little sauce or water until the food reaches 74°C / 165°F throughout.
Refrigerate or freeze perishable leftovers within 2 hours, or 1 hour if the surrounding temperature exceeds 32°C / 90°F.
Back to the recipe and ingredients
Homemade Potato Gnocchi Questions
Should the dough rest before shaping?
No lengthy rest is necessary. Once the dough holds a rope and the sample cooks well, roll and shape the rest.
Can I microwave potatoes for homemade gnocchi?
Yes. Prick medium potatoes and microwave on high, turning halfway through; begin checking at about 8–12 minutes for one or two medium potatoes, allowing longer for large potatoes or a full batch. A skewer should pass through the center without resistance. Split the potatoes to release steam before ricing. Microwaves vary, so tenderness matters more than the clock.
Can I freeze gnocchi after cooking them?
Yes, although previously cooked gnocchi tend to soften after freezing and reheating. Cool them promptly, freeze them separated on a tray and pack once firm. Reheat from frozen in a little warm sauce until hot throughout. Freezing uncooked pieces generally gives you a better fresh-cooked texture.
Which potatoes did you use, and how did your gnocchi turn out? Tell us what sauce you served—or what gave you trouble along the way.








