
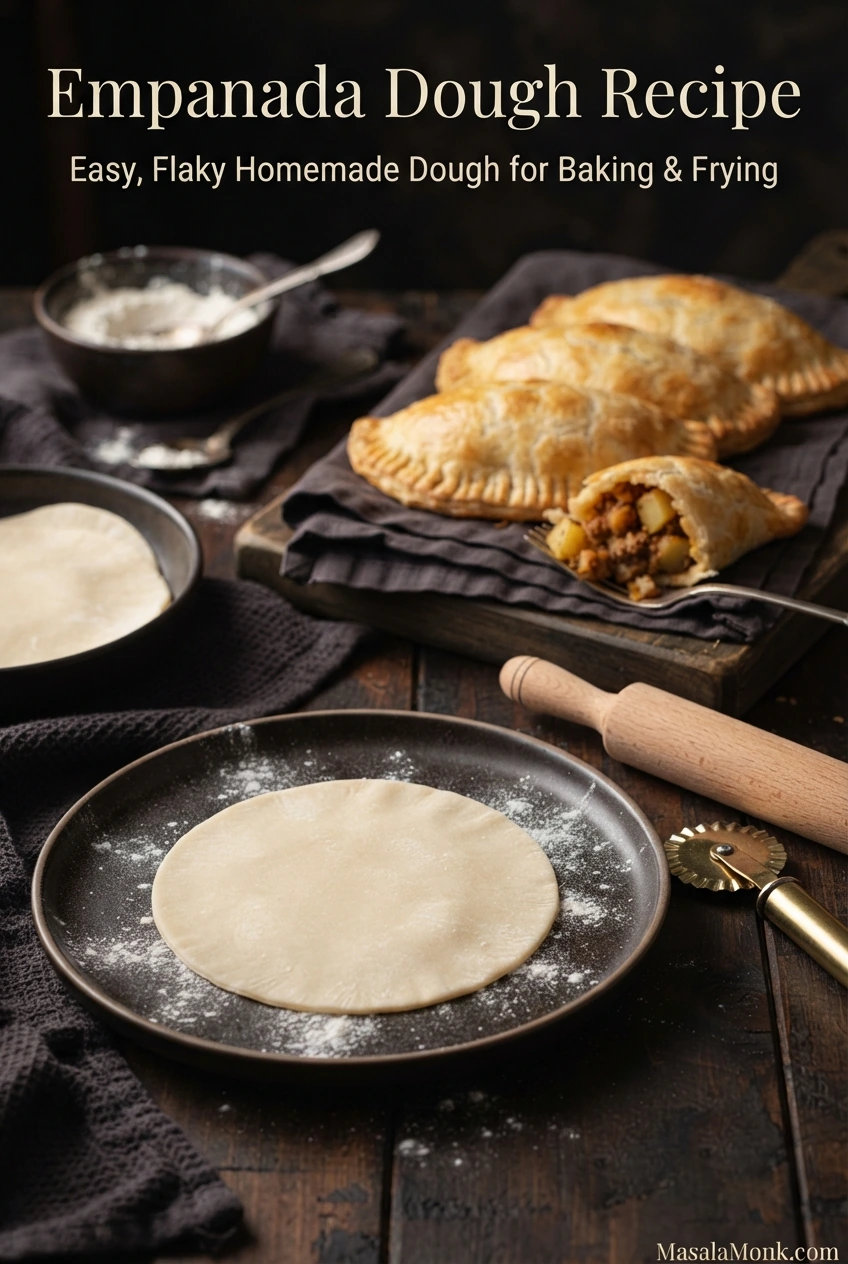
A good empanada has a thin, golden crust that gives way to the filling without leaving you chewing through a thick layer of dough. The wrapper needs to bend around the filling, hold a secure seam, and cook through even at its folded edge.
This empanada dough recipe makes 12 buttery, lightly flaky wrappers with five everyday ingredients: flour, butter, egg, water, and salt. Make the discs now and freeze them for later, or fill them and choose between baking and frying. Texture checks help you tell when the dough is ready to roll.
Quick answer: Work cold butter into flour and salt, add a beaten egg, then mix in cold water gradually until the dough holds together when squeezed. Allow roughly 75–105 ml (5–7 tablespoons) water, adjusting to the dough. Chill for 30 minutes and roll 12 discs, each roughly 5½ inches (14 cm) across and ⅛ inch (3 mm) thick. The wrappers are ready at that point. For filled empanadas, bake at 400°F (205°C) for about 20–25 minutes or fry at 350°F (175°C) for about 5–7 minutes per batch.
Roll the wrappers · Fill and seal · Bake · Fry · Troubleshooting · Storage
Empanada Dough Recipe: Ingredients and Instructions
Yield: 12 medium wrappers, roughly 5½ inches (14 cm) across and ⅛ inch (3 mm) thick. Total dough: About 620–650 g, or 52–54 g per wrapper.
Dough-only time: About 60–75 minutes, including 15–20 minutes of mixing, a 30-minute chill, and 15–25 minutes for rolling.
If filling and cooking: Allow another 20–35 minutes to fill and seal, plus about 20–25 minutes to bake. For frying, allow about 5–7 minutes per batch, with extra time for the oil to recover between batches. Preparing and cooling your filling adds time.
Ingredients for Homemade Empanada Dough
- 360 g (12.7 oz) all-purpose flour — about 3 US cups at 120 g per cup, plus a little extra for rolling
- 130 g (4.6 oz) cold unsalted butter — about 9 US tablespoons, cut into small cubes
- 1 large egg — approximately 50 g without the shell
- 75 ml (5 tablespoons) cold water to start — with another 30 ml (2 tablespoons) available, and a little more only if the dough needs it
- 5 g fine salt — roughly ¾–1 teaspoon, depending on the salt; weighing is more reliable
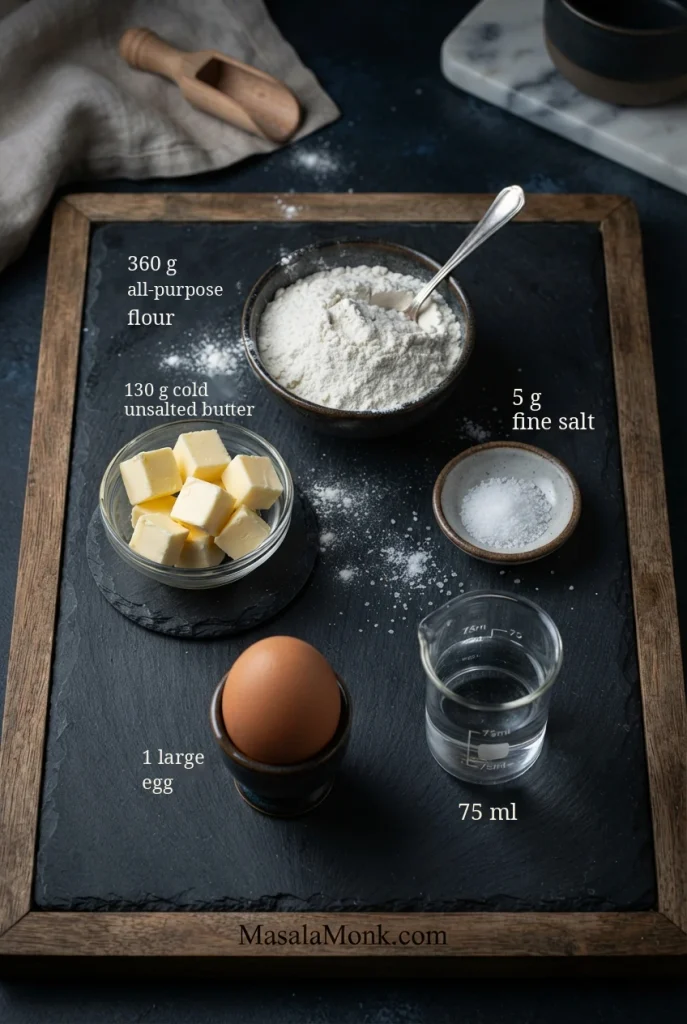
No kitchen scale? Spoon the flour into a measuring cup and level it off. Scooping straight from the bag can pack in extra flour and leave the dough dry.
Equipment: Large mixing bowl, fork or pastry cutter, rolling pin, airtight covering, and parchment paper. A scale helps with portioning but isn’t essential. For finished empanadas, have a baking sheet and wire rack or a suitable deep-frying setup ready.
Step 1: Work the Cold Butter into the Flour
- Stir the flour and salt together in a large bowl.
- Add the cold butter cubes. Cut them into the flour with a pastry cutter or fork, or work quickly with your fingertips.
- Stop when the flour looks like coarse crumbs, with pea-sized pieces of butter and a few flatter flakes still visible.
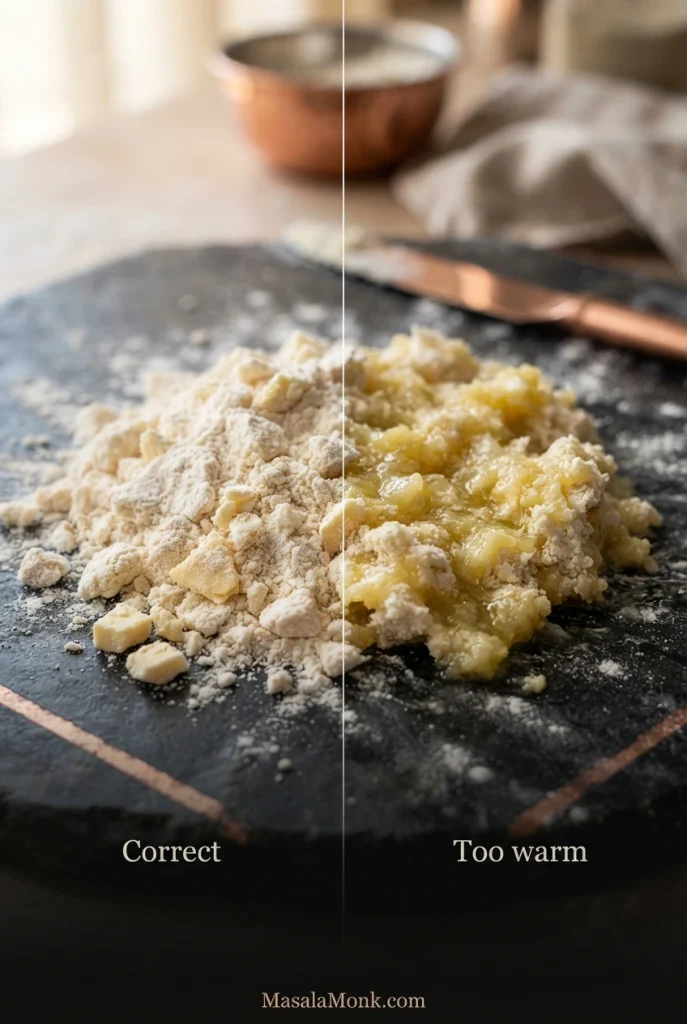
Don’t blend the butter and flour into a smooth paste. Small, distinct butter pieces create pockets as the crust cooks, making it lighter. For more about the technique, see King Arthur Baking’s explanation of butter temperature. The same principle is useful in our homemade apple pie crust.
Step 2: Add the Egg and Water
- Lightly beat the egg. Add all of it to the flour-and-butter mixture and toss with a fork.
- Pour in 75 ml (5 tablespoons) cold water. Stir just until moist clumps begin to form, scraping the bottom of the bowl to bring dry flour into the mixture.
- Squeeze a fresh handful, then open your fingers. The mixture should stay in a clump rather than fall back into dry crumbs. Check for remaining dry flour before adding more water.
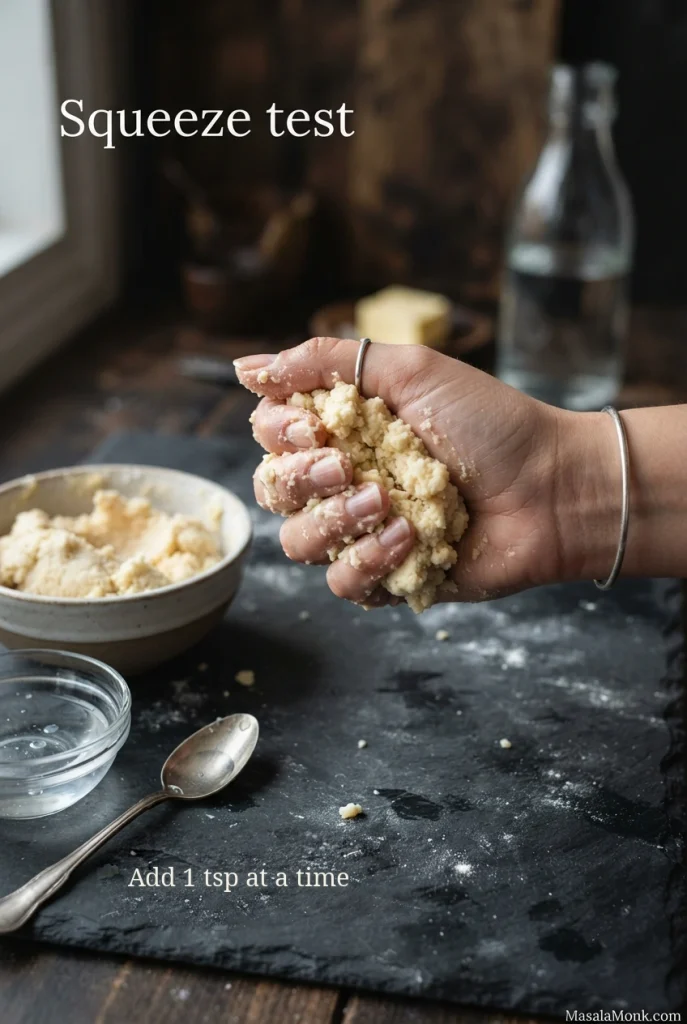
- If the mixture falls apart or has significant dry flour, add cold water 1 teaspoon (5 ml) at a time, tossing briefly after each addition. Expect roughly 75–105 ml (5–7 tablespoons) in all, but stop as soon as the mixture holds together.
Still crumbly at 105 ml? Continue in small teaspoon additions instead of forcing dry flour together. The right endpoint is dough that holds when pressed but isn’t wet or sticky; flour absorption varies.
Dough still giving you trouble? Compare common problems and fixes before you move on to rolling.
Step 3: Gather the Dough and Chill for 30 Minutes
- Tip the mixture onto a clean counter and press it together with your hands.
- Fold and gather gently until no loose pockets of dry flour remain. Some visible butter and a slightly uneven surface are fine; the next stage is wrapping and resting the dough in the refrigerator.
- Divide into two roughly equal pieces, flatten each into a thick disc, and wrap tightly.
- Refrigerate for 30 minutes.
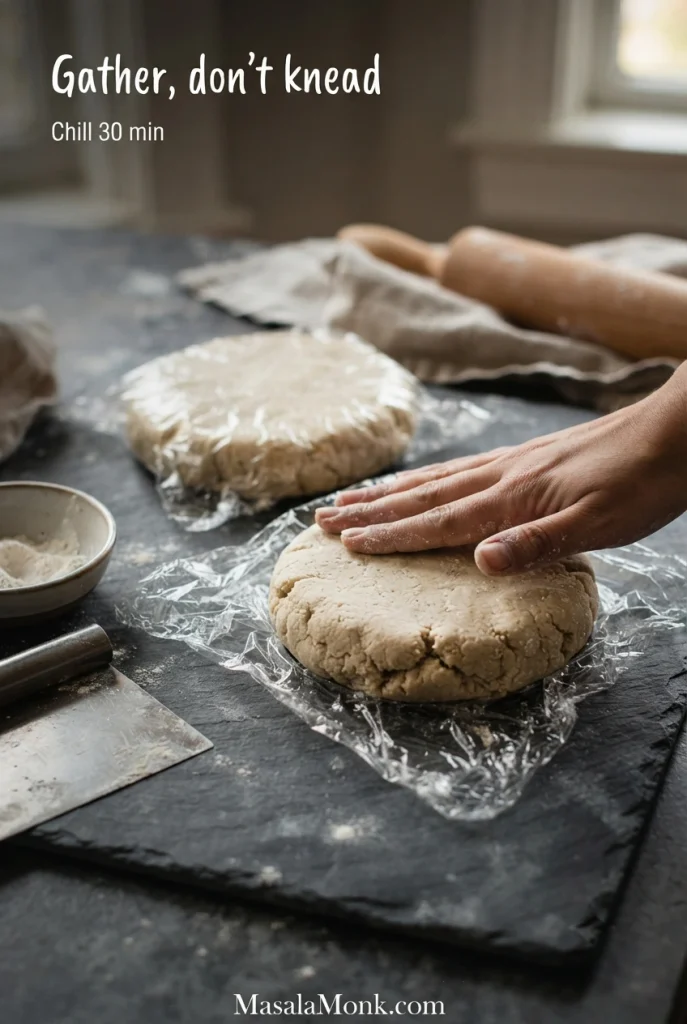
Unlike bread dough, this pastry does not benefit from repeated kneading. During the chill, the flour absorbs moisture and the dough relaxes, so the first wrapper is easier to roll without springing back.
Step 4: Roll the Empanada Wrappers
For twelve even wrappers, divide the chilled dough into equal portions first. Roll and fold-test one wrapper before shaping the rest so you can correct the thickness or texture early.
- Take one chilled disc from the refrigerator and cut it into six roughly equal pieces. Pat each wedge into a squat round before rolling to avoid thin pointed ends. Keep the second disc chilled until needed, then divide it the same way. If using a scale, aim for 52–54 g per piece.
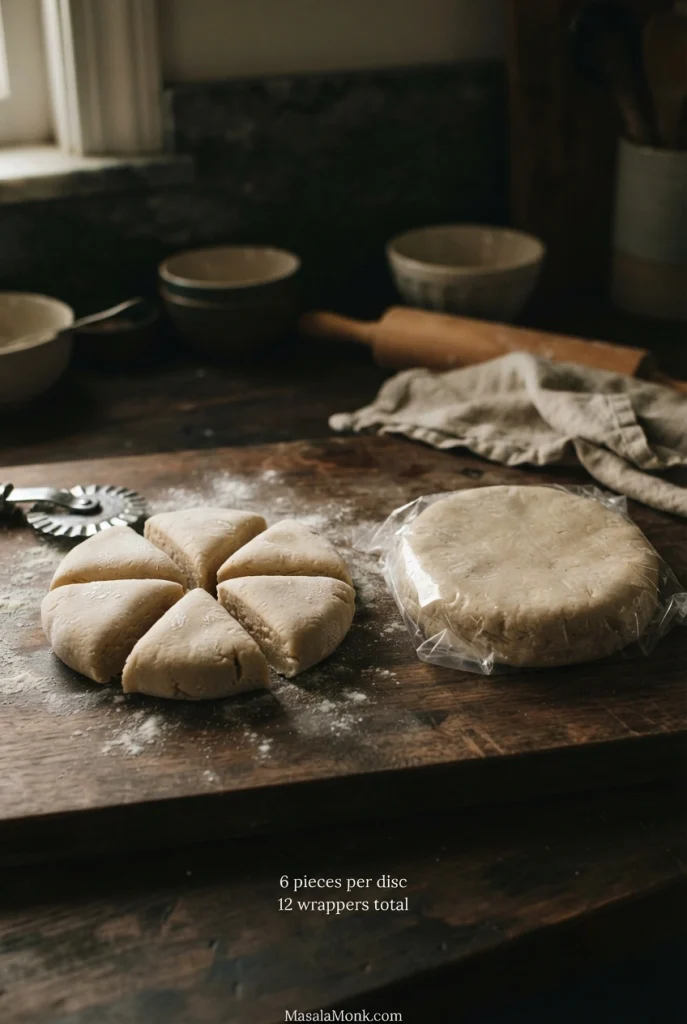
- On a lightly floured surface, roll one rounded portion outward from the center, turning it as you go for even thickness. Keep unused portions covered and cool.
- Aim for a disc about ⅛ inch (3 mm) thick and 5½ inches (14 cm) across. Even thickness matters more than exact diameter. Don’t stretch the pastry merely to reach 14 cm.
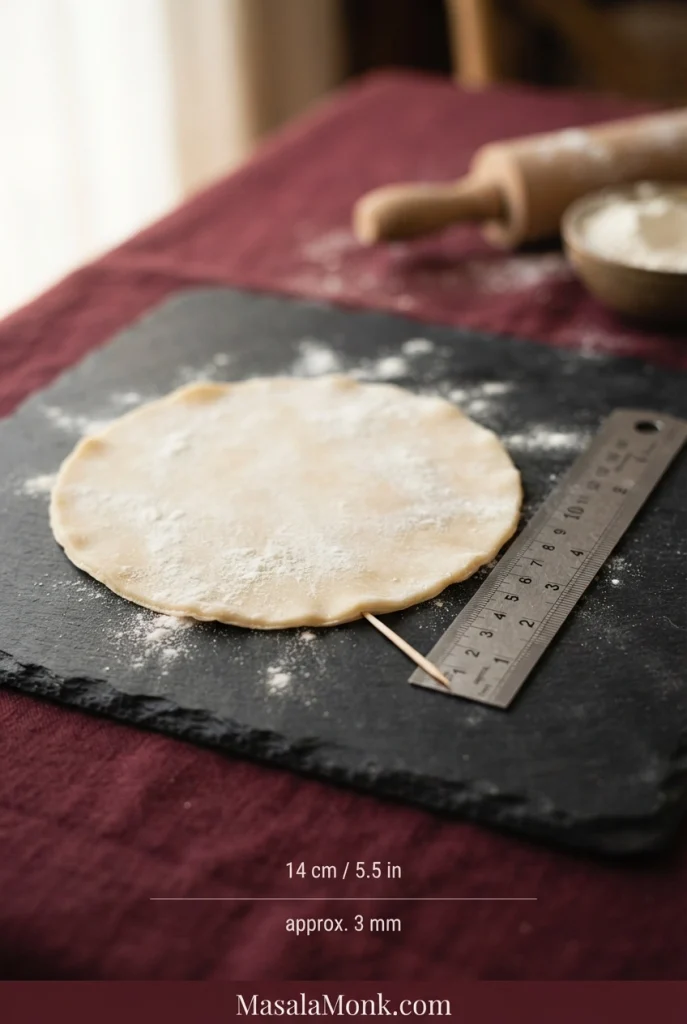
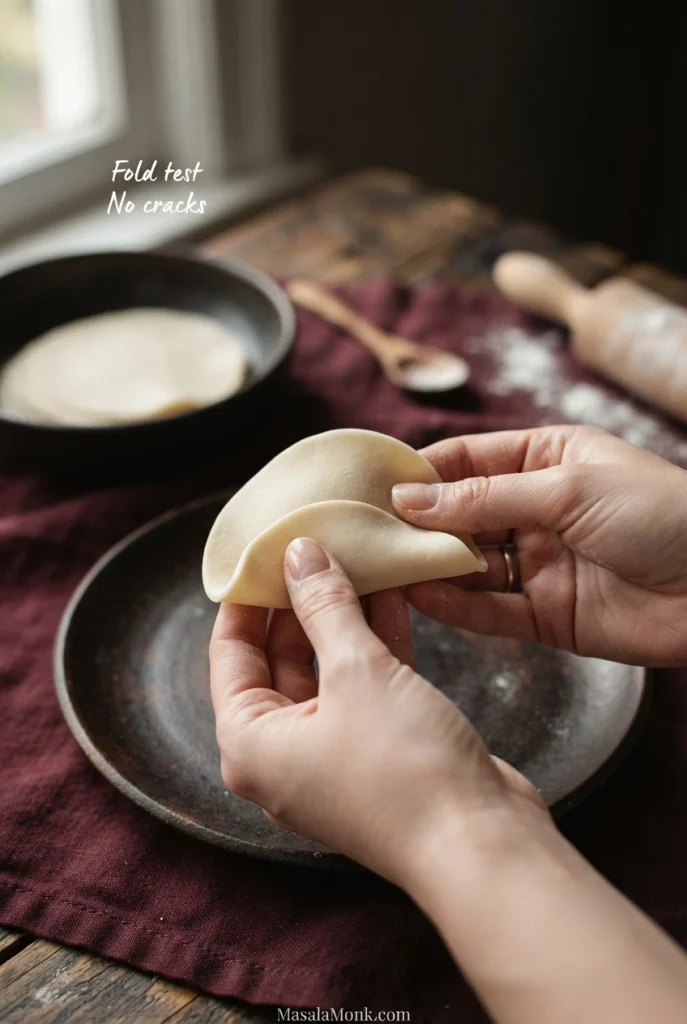
- Lift the wrapper gently. It should release without tearing or sticking heavily. Fold it loosely in half, then open it again to check flexibility.
- Inspect the curved edge for little cracks. Once the first wrapper bends without splitting, repeat the rolling and folding test with the other eleven portions to make all twelve wrappers.
Fix Rolling Problems and Finish the Wrappers
A slightly lopsided circle is fine. A thin spot that tears over the filling is what causes trouble.
Dough springing back under the rolling pin needs 10–15 minutes of covered rest. Very stiff, cold dough needs a few minutes to become flexible; warm, sticky dough needs a short chill.
Another way to shape the discs: Roll a larger sheet and cut circles with a cutter or inverted bowl. Gather scraps gently and rest them if they resist rerolling. Individual portions are easier to keep consistent and produce less waste.
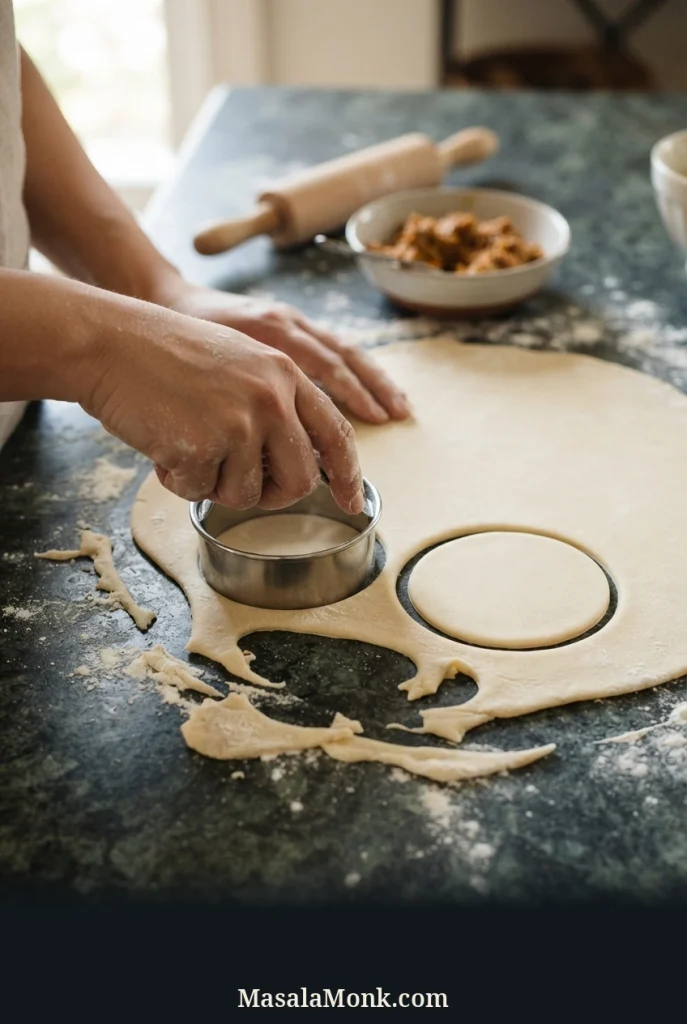
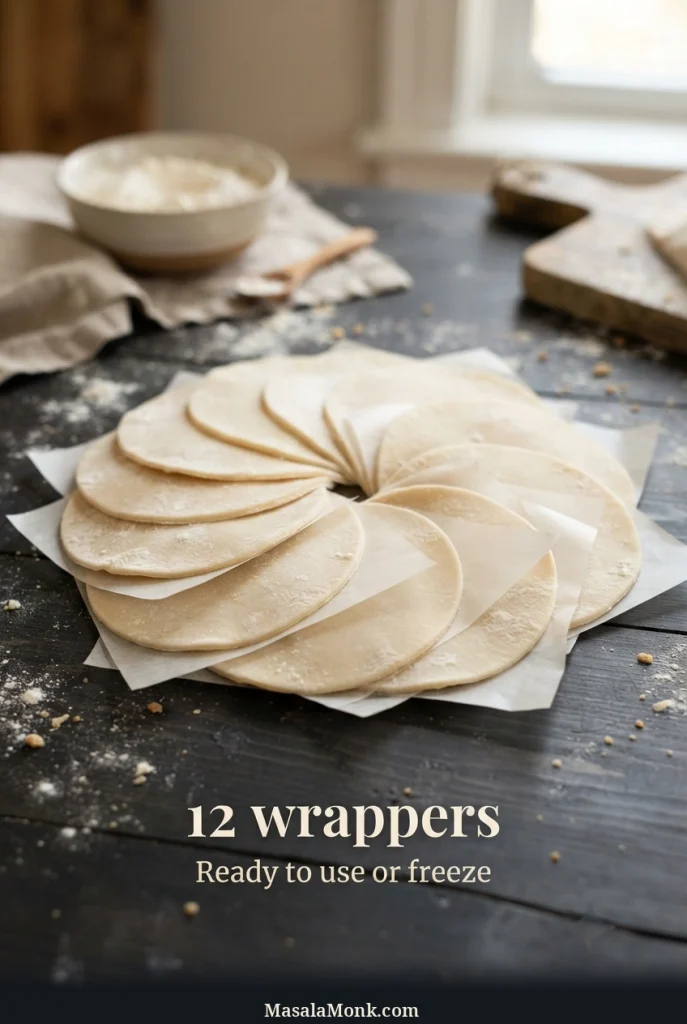
Your 12 empanada wrappers are ready. Keep them covered until filling, or separate them with parchment for refrigeration or freezing. If you want to store unrolled dough instead, wrap and chill the thick discs from Step 3; you can stop without preparing a filling.
Optional: Fill and Cook Your Homemade Empanadas
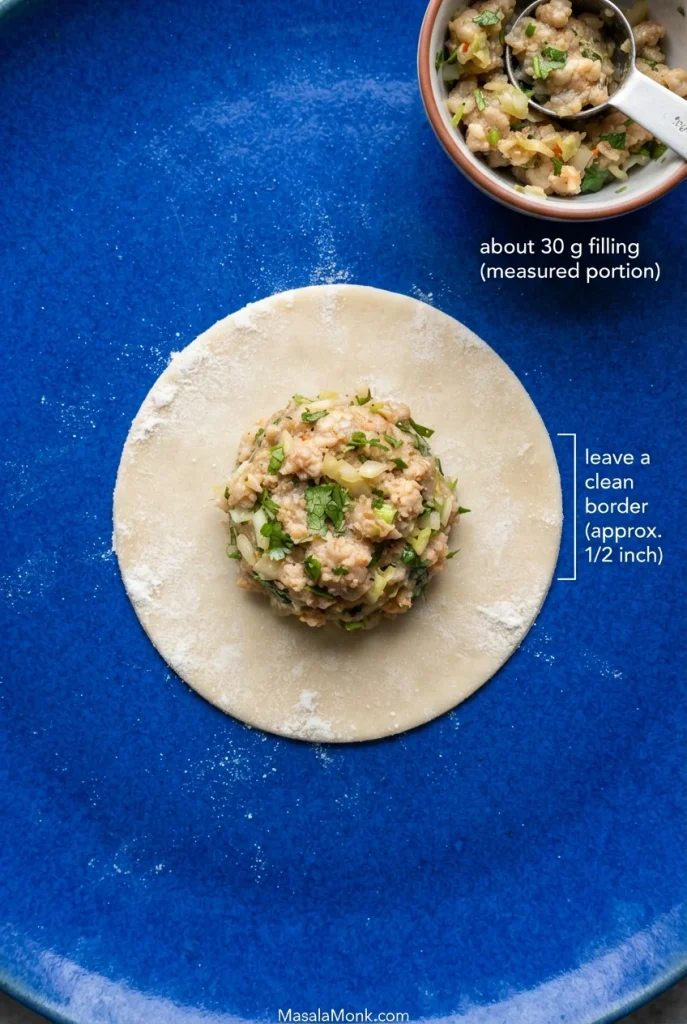
To fill twelve medium wrappers, prepare about 360–480 g (12.7–16.9 oz) of filling. Begin with 30 g per pastry and increase toward 40 g only when the edges still meet without stretching. A spoonful should hold together rather than leave liquid spreading over the pastry.
Have meat and poultry fillings fully cooked before assembly: ground beef to 160°F (71°C), poultry to 165°F (74°C). Drain excess liquid from vegetables. Cool hot perishable fillings promptly in shallow containers in the refrigerator before putting them into the dough; don’t leave a large batch on the counter to cool slowly.
Step 5: Fill and Seal the Empanadas
- Place the first wrapper on a clean surface. Add about 30 g of filling just to one side of center—roughly a modest mound of 2 tablespoons for many finely chopped fillings—leaving room for a clean sealing border.
- Leave a clean border about ½ inch (1.3 cm) wide around the edge.
- Fold the empty half over the filling to make a half-moon. The pastry should cover the filling without pulling tight.
- Press gently around the filling to push out large air pockets. Then press the pastry edges together with your fingers.
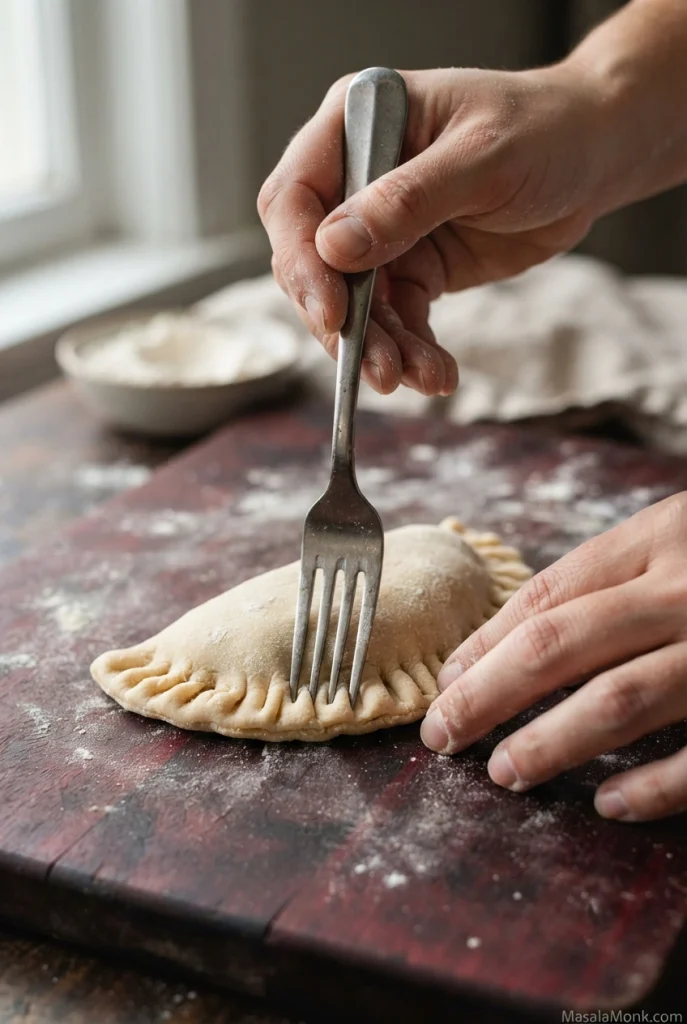
- Brush loose flour away from the seam. If the edges won’t stick, moisten them with a fingertip of water and press again. Finish with a fork crimp along the curve, pressing firmly enough to mark the sealed edge without puncturing the dough.
- Check the first empanada: the seam should stay shut without being stretched over the filling. Remove a little filling if it pulls tight; add a little more to the remaining wrappers only if there’s room.
- Fill and seal the other eleven wrappers. Set the assembled empanadas on a parchment-lined tray, with space between them.
Crimp Variations and Filling Ideas
Prefer a rope-style crimp? Seal the rim with your fingers first. Pinch a small section, fold it diagonally over itself, and press down. Repeat along the curved edge, overlapping each fold. A fork crimp is simpler and works just as well.
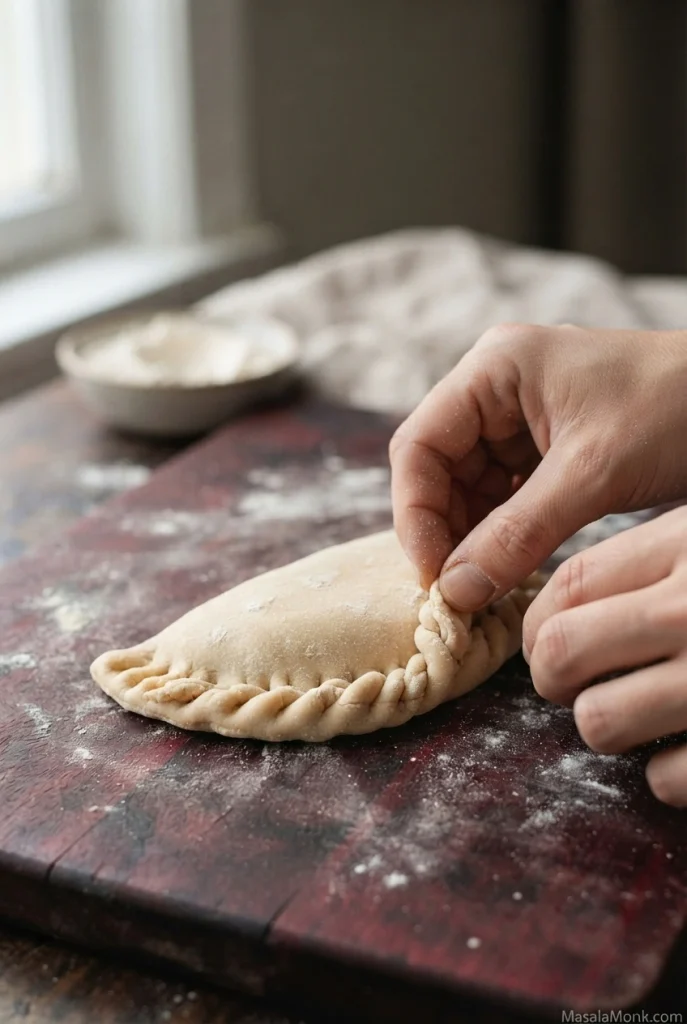
Filling ideas: Try beef with sautéed onions, paprika, and olives; shredded chicken with peppers; spinach and cheese; or a thickened apple or cherry filling for baked sweet empanadas. For a Tex-Mex variation, use seasoned meat from our ground beef tacos recipe, reducing loose sauce and leaving out fresh toppings. Cooked chicken and vegetables from our slow cooker chicken fajitas can also work once chopped, drained, and cooled.
Cooked spinach needs a firm squeeze before it meets the cheese; otherwise, the wrapper can become damp. The same lesson applies to the filling in Greek spanakopita.
Baked or Fried: Which Should You Choose?
This butter-and-egg dough can be baked or fried, though regional styles sometimes use different doughs for each method. Choose baking for a tender, lightly flaky crust and a whole tray cooked together; choose frying for a crisper shell with small bubbles on the surface.
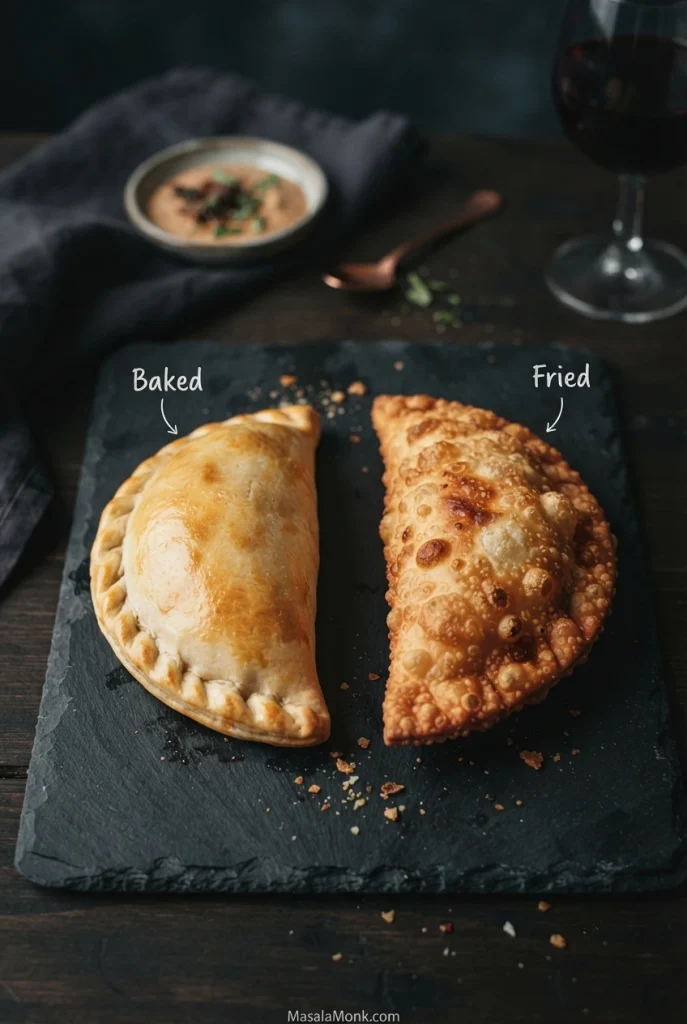
| Baking | Frying |
|---|---|
| Golden, tender crust | Crisper outer shell |
| Egg wash can add color | No egg wash needed |
| One tray, cooked together | Small batches, with oil temperature checks |
| Check the underside and folded edge | Check the seam and thickest fold |
Optional for frying: A test wrapper rolled a little thinner than 3 mm can make a lighter shell. It still needs to lift and seal without tearing. Thinner pastry may spread wider and cook faster, so check the first batch before changing the rest.
Prefer to fry? Skip ahead to the frying method; otherwise, the baking instructions are next.
Step 6A: Bake the Empanadas
Oven: 400°F (205°C) conventional or about 375°F (190°C) fan-assisted. Time: About 20–25 minutes for medium empanadas.
- Start preheating the oven while finishing the last few empanadas. If assembly is done before the oven is ready, keep the tray covered and chilled. Position a rack near the center.
- Arrange the empanadas on a parchment-lined baking sheet, leaving about 1–1½ inches (3–4 cm) between them. If using egg wash, leave room to brush each top without coating the pastry bases.
- For a deeper golden color, beat an additional egg with 1 teaspoon (5 ml) water and brush a thin layer over the tops. Egg wash is optional; don’t let it pool around the bases.
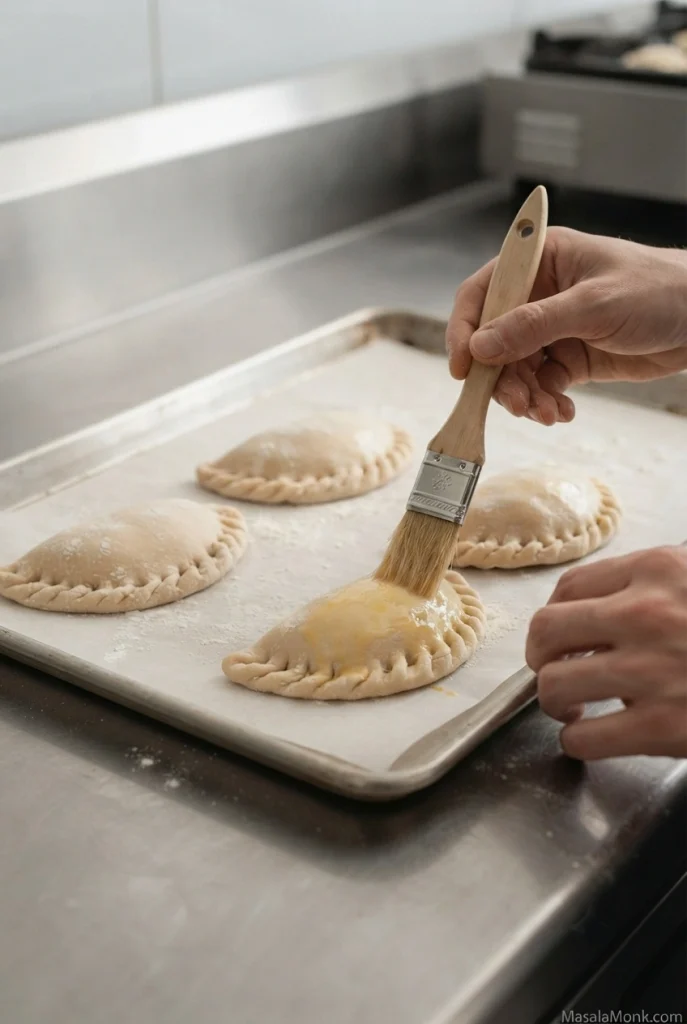
Vent, Bake, and Check the Underside
- For wetter baked fillings, especially some fruit fillings, a small vent on top may help steam escape. Drain or thicken excess free liquid before assembly; a vent won’t fix a watery filling.
- Bake for about 20–25 minutes, checking earlier for smaller pastries or an oven that browns quickly. Rotate the sheet if needed, and plan to check the underside rather than judging doneness by the top alone.
- Look for golden tops, set folded edges, and a cooked underside. Lift one carefully: the base should not be pale or doughy.
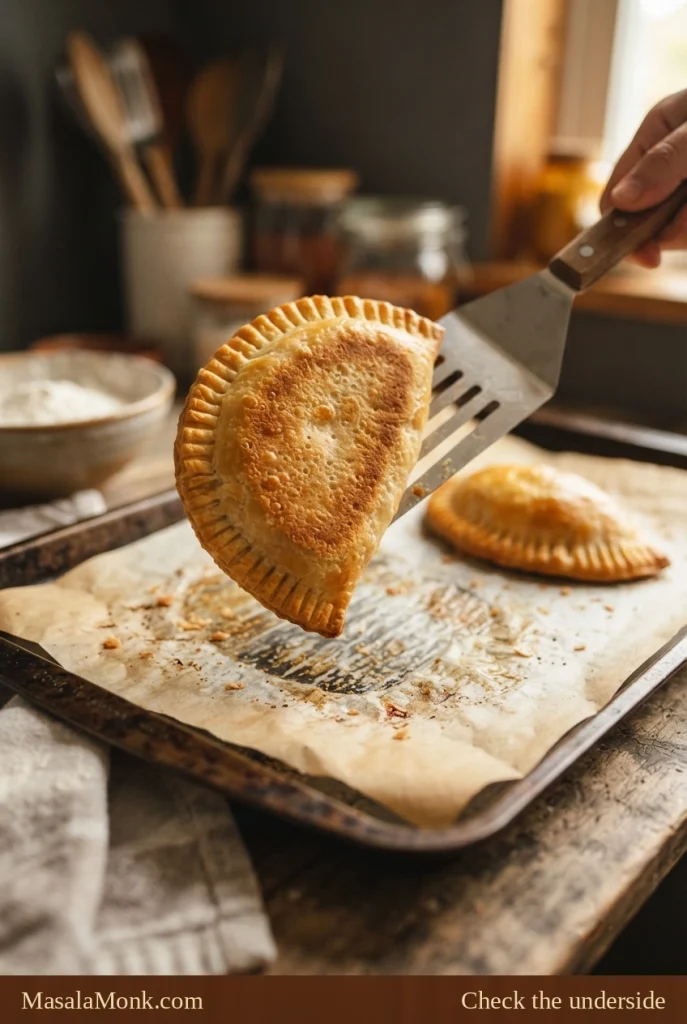
- Transfer to a wire rack and cool for several minutes before serving.
A properly baked crust is tender all the way underneath the filling, not just browned on top. The rack lets steam escape instead of softening the base. Let the hot filling cool a little before biting in.
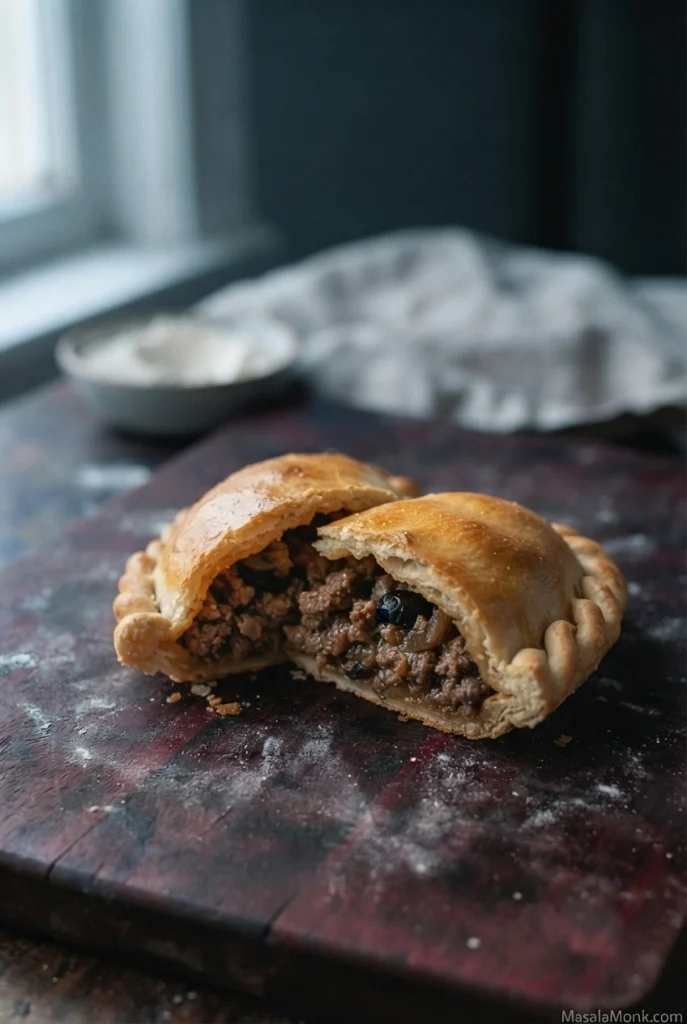
Only baking? Skip the frying instructions and go straight to serving suggestions or storage and reheating.
Step 6B: Fry the Empanadas
Oil temperature: 350°F (175°C). Time: About 5–7 minutes per batch, depending on the size and thickness of the pastry.
Hot-oil safety: Use a stable, deep pot and never fill it more than one-third with oil. Keep water and surface ice away from hot oil, and never leave frying unattended. Never pour water onto a cooking-oil fire.
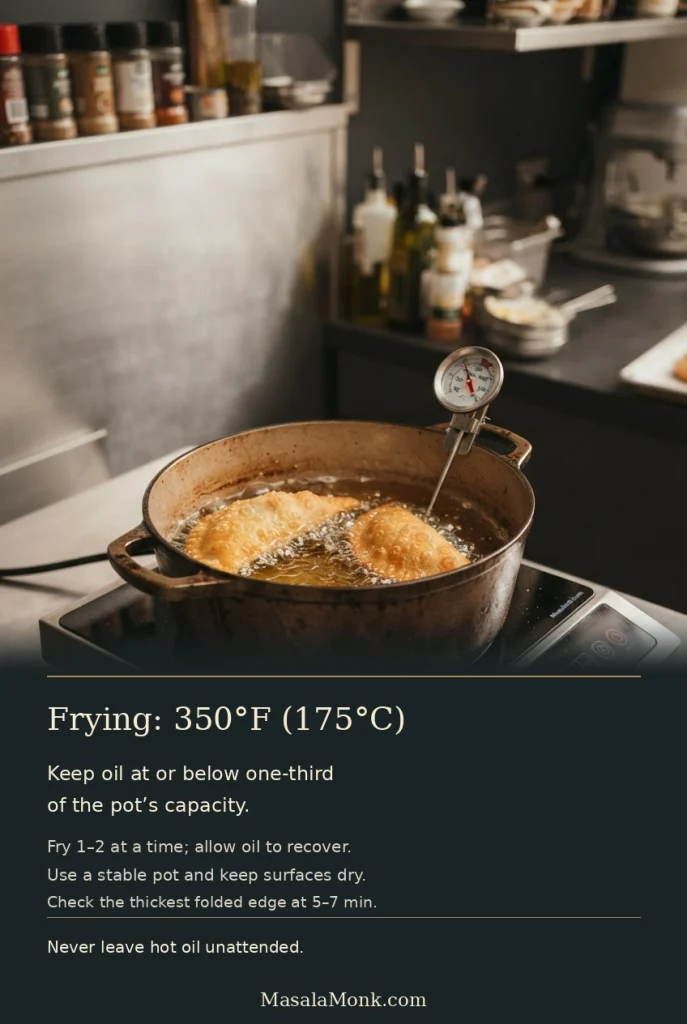
- Add neutral high-heat oil to a heavy-bottomed pot, about 2 inches (5 cm) deep and no more than one-third of the pot’s capacity. Heat gradually to 350°F (175°C), using an oil thermometer with its tip submerged but clear of the pot bottom.
- Keep the assembled empanadas chilled while the oil heats. Make sure their seams are secure and their surfaces dry. Do not cut steam vents into pastry intended for deep-frying.
- Carefully lower one or two empanadas into the oil, depending on the space available in the pot.
- Fry until golden, turning as needed. Begin checking around 5 minutes and continue until the pastry is cooked through.
- Lift out with a spider strainer or slotted spoon. Drain on a wire rack over a tray.
- Let the oil return close to 350°F (175°C) before adding the next batch.
Check the Fried Crust
Allow the first fried empanada to cool briefly, then cut it open. The thickest folded edge should be cooked through, without a gummy or floury center. A browned exterior alone isn’t proof that the fold is ready.
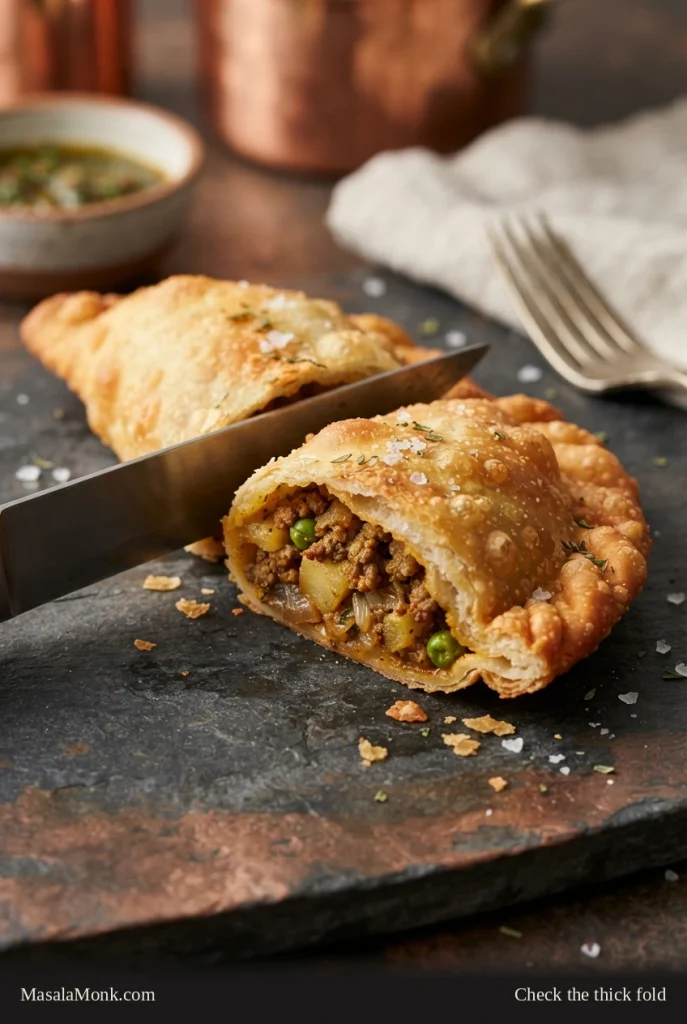
How to Serve Empanadas with Dipping Sauces
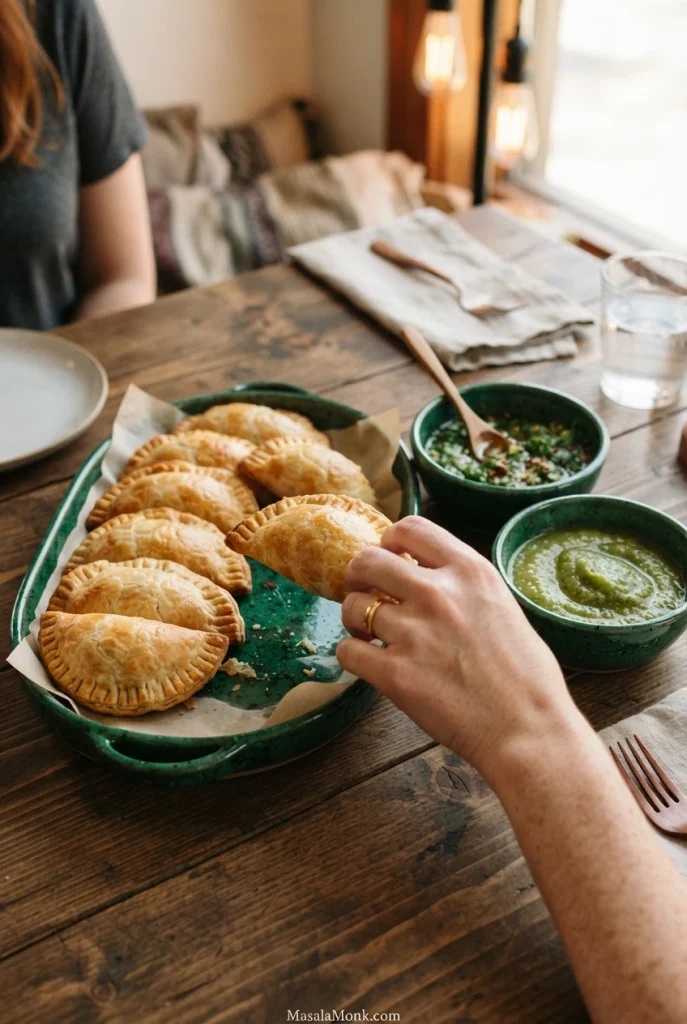
To serve: Beef empanadas pair well with homemade chimichurri; chicken, cheese, and potato fillings also work with roasted salsa verde. Both sauces suit baked or fried empanadas. Serve them on the side to protect the crust.
Empanada Dough Troubleshooting: Problems and Fixes
| Problem | What to do |
|---|---|
| Dry, crumbly dough | Add cold water 1 teaspoon at a time until it holds together. Weigh the flour next time. |
| Sticky or greasy dough | Chill briefly. Next time, keep the butter cold and add water gradually. |
| Wrapper shrinks while rolling | Cover and rest for 10–15 minutes before rolling again. |
| Wrapper cracks when folded | Let very cold dough become flexible while covered. If crumbly, check hydration. |
| Wrapper tears around filling | Remove some filling and patch small tears with thin dough. Watch for thin spots next time. |
| Seam won’t stay closed | Clear flour, grease, and filling from the edge. Moisten lightly, press, then crimp. |
| Empanada bursts | Next batch, check overfilling, trapped air, and thin pastry. Never attempt a repair in hot oil. |
| Hard or chewy crust | Next batch, handle the dough less, use less dusting flour, and check cooking time. |
| Soggy baked bottom | Check the underside and allow more bottom heat if necessary. Reduce loose filling liquid next time. |
| Greasy fried crust | Return the oil to 350°F (175°C) and cook fewer pastries per batch. |
| Frozen wrappers stick or crack | Thaw covered and separate gently. Freeze with parchment between discs next time. |
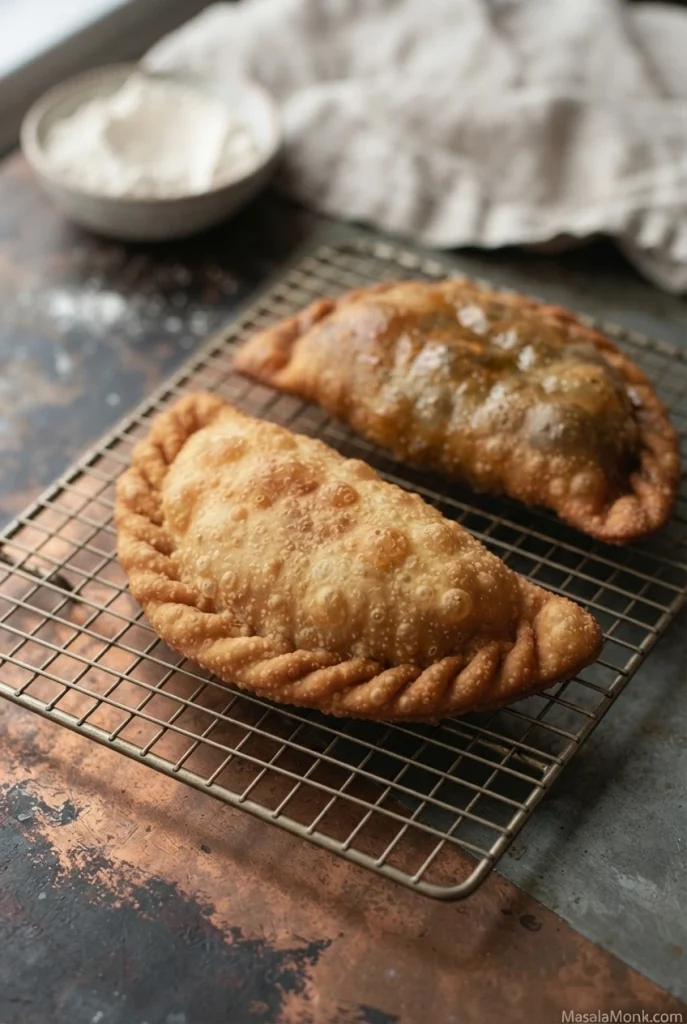
Crisp or Greasy? Compare the Fried Crust
The photograph shows differences in surface appearance, not a test of oil absorption. Neither shine nor color alone confirms greasiness. After draining on a rack, assess the actual crust texture; if it feels heavy or greasy, check the oil temperature and batch size before changing the dough.
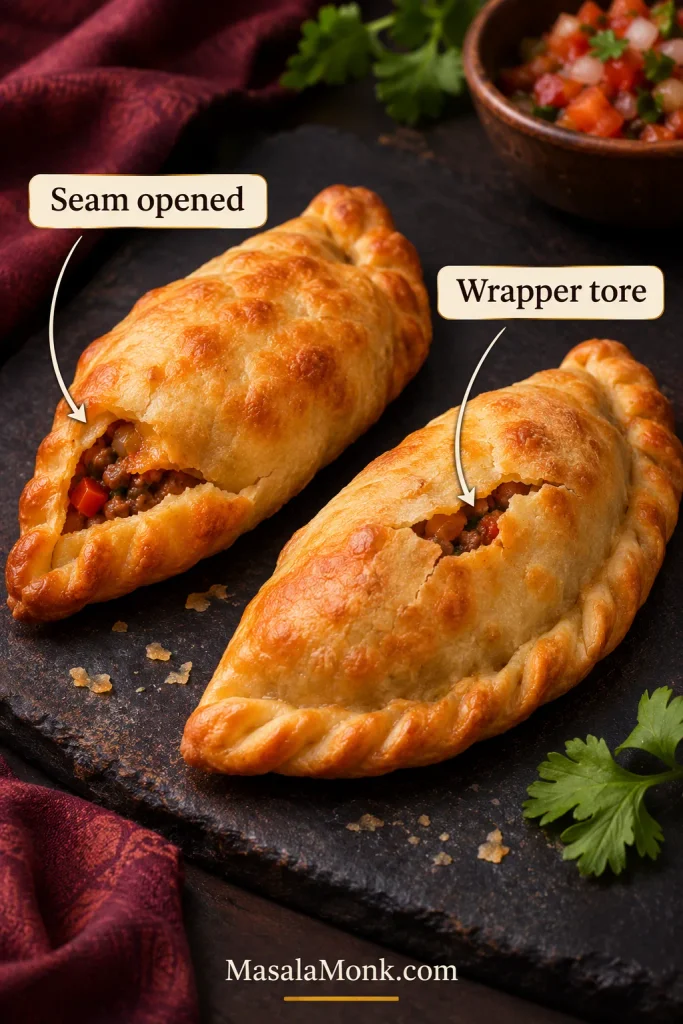
Did the seam open, or did the wrapper split? An open crimp often means flour, grease, or filling was caught between the edges, or the filling pushed against them. A tear in the middle of the pastry points more toward a thin spot or dough stretched too tightly. The location of the break tells you which adjustment to make.
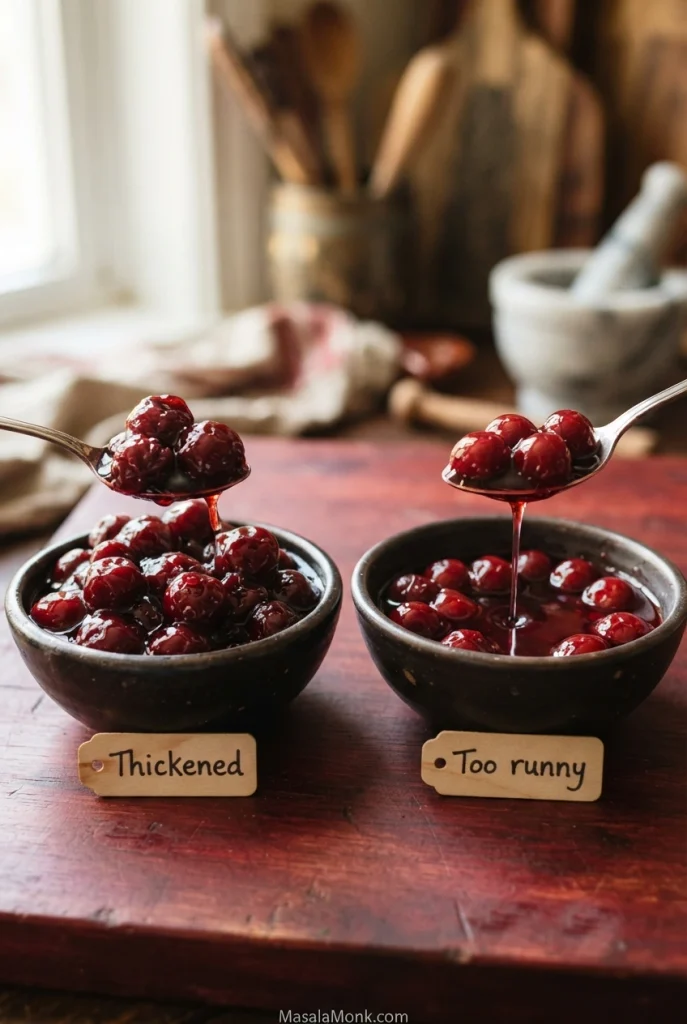
Sweet empanadas leaking? Fruit releases juice as it heats, especially when the filling has a lot of syrup. Use a thick, cooled filling, spoon in modest amounts, and leave excess syrup behind. Our homemade cherry pie filling explains how thickening the juices helps when fruit goes inside pastry.
Ready to try again? Return to rolling the wrappers, sealing the edges, or frying the empanadas.
How to Store, Refrigerate, and Freeze Empanada Dough
Plain dough, rolled wrappers, and filled empanadas can all be made ahead, but their storage periods differ. Start by identifying what you are storing; the chart and table below distinguish refrigeration guidance from best-quality freezer windows.
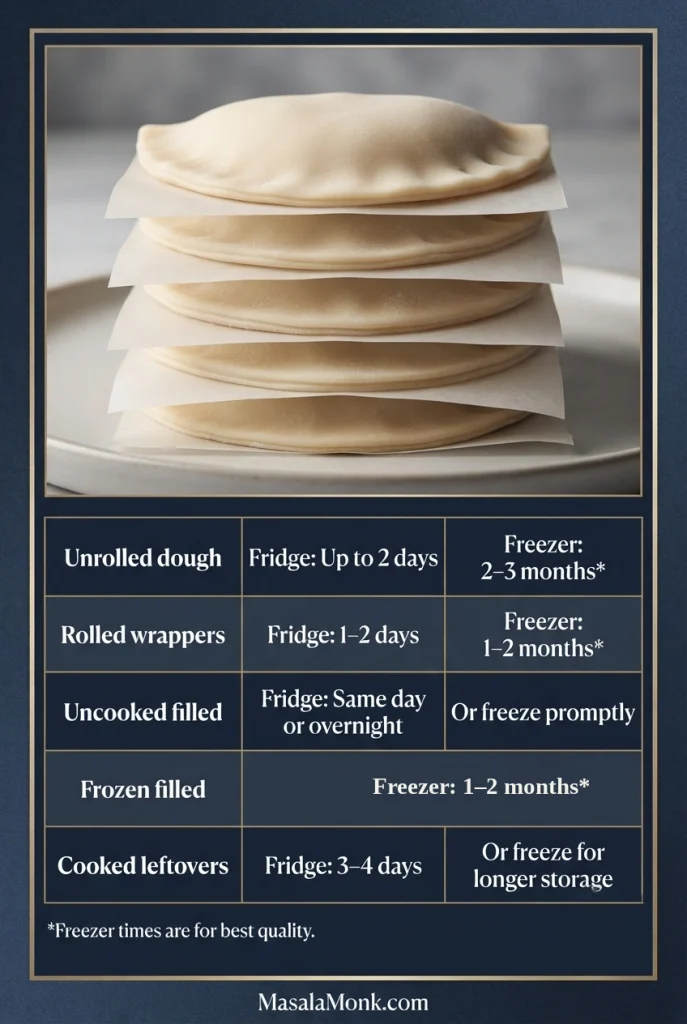
| What you’re storing | Storage guidance |
|---|---|
| Unrolled dough | Refrigerate up to 2 days; freeze around 2–3 months for best quality. |
| Rolled wrappers | Refrigerate 1–2 days; freeze around 1–2 months for best quality. |
| Assembled, uncooked empanadas | With cooked, cooled, well-drained filling, refrigerate for same-day or overnight cooking, or freeze promptly. |
| Frozen, filled empanadas | Use within around 1–2 months for best pastry quality. |
| Cooked leftovers | Refrigerate promptly and use within 3–4 days, or freeze for longer storage. |
Keep perishable refrigerated food at or below 40°F (4°C) and frozen food at or below 0°F (-18°C). These freezer periods are quality guidelines, not automatic safety cutoffs.
Freezing Plain Dough or Rolled Wrappers
For unrolled dough, flatten into thick discs, wrap tightly, and freeze. Thaw overnight in the refrigerator; keep covered while it becomes flexible enough to roll.
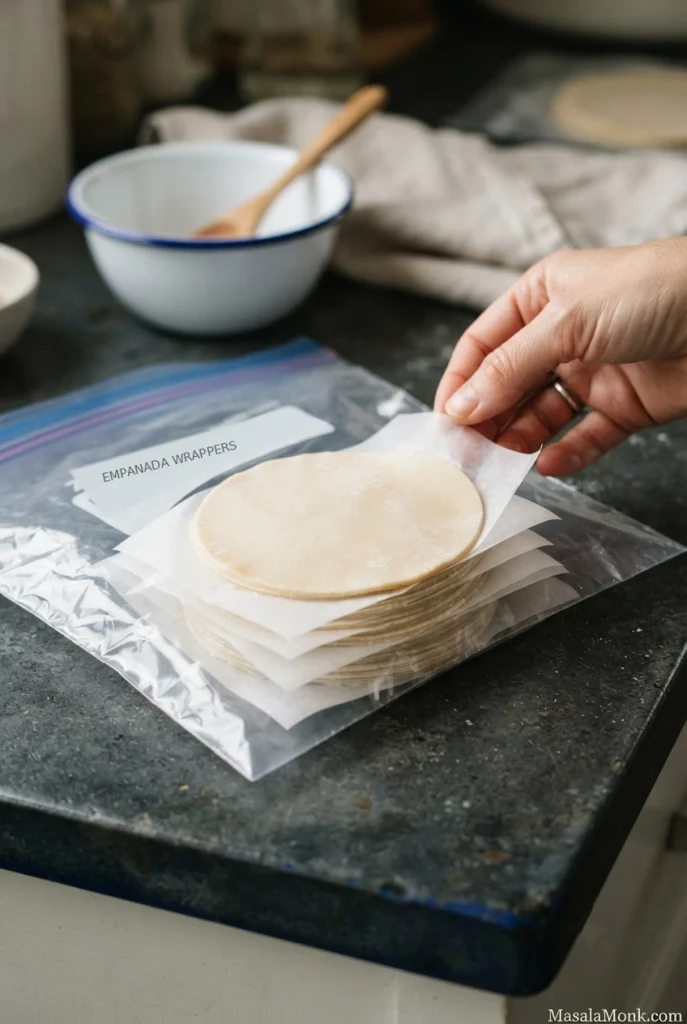
For rolled wrappers, place parchment between the circles, wrap the stack airtight, and freeze flat. Thaw in the refrigerator before separating gently.
Can You Assemble Empanadas the Night Before?
Yes. Use filling that’s fully cooked where necessary, cooled, and drained of excess liquid. Arrange the pastries in one layer, cover, and refrigerate. Very moist fillings are better stored separately from the dough until closer to cooking.
Freezing and Cooking Filled Empanadas
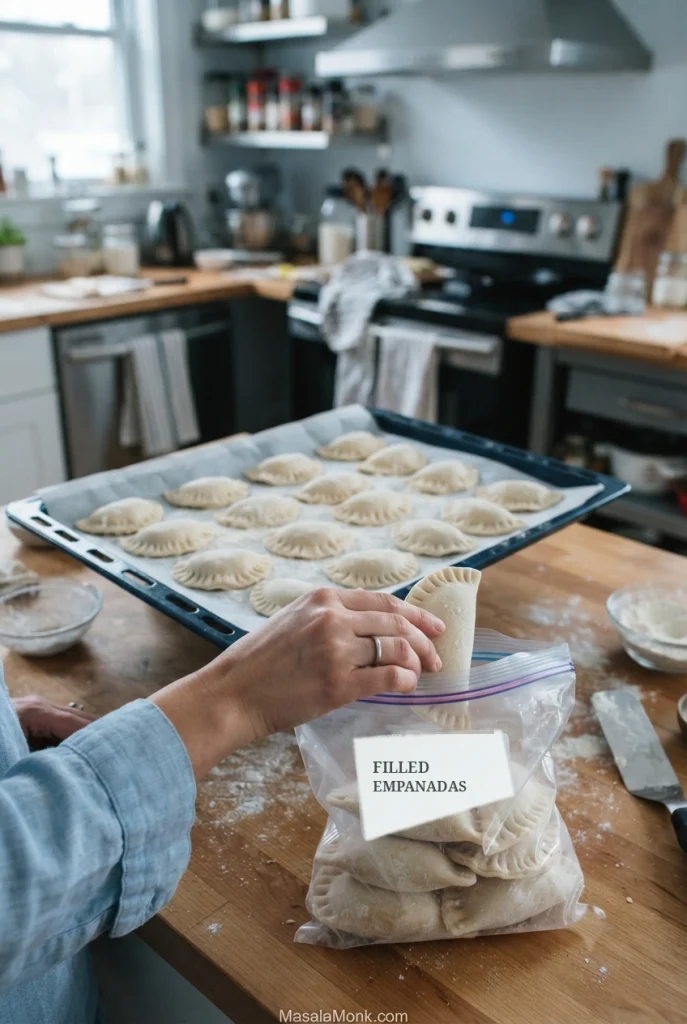
Freeze sealed, uncooked empanadas on a parchment-lined tray until firm, then transfer to airtight packaging. Keep them separated so the edges don’t break.
Empanadas made with fully cooked fillings can generally go straight from the freezer into a preheated oven. Use the usual baking temperature and start checking around the standard 20–25-minute mark, but expect extra cooking time. Continue until the pastry is cooked through and the filling is thoroughly heated. Previously cooked filling being reheated should reach 165°F (74°C) at the center.
For frying homemade filled empanadas, thaw them under refrigeration unless following a specific frozen-frying method. Keep chilled, check the seams, and make sure there’s no ice or surface moisture before lowering into hot oil. Cook until the dough is done and the filling is hot throughout.
Reheating Cooked Empanadas
To restore some crispness, reheat refrigerated empanadas on a baking sheet in a 350°F (175°C) oven. Begin checking after 10–15 minutes and allow longer for larger pastries. Reheated leftovers should reach 165°F (74°C) internally.
Refrigerate perishable leftovers within two hours, or within one hour if the surrounding temperature is above 90°F (32°C). For official guidance, see FoodSafety.gov’s safe-temperature chart.
Empanada Dough Substitutions, Shortcuts, and Regional Styles
There isn’t one universal empanada dough. This recipe is a flexible wheat-flour pastry made with butter and egg. Other styles use different fats, flours, and shaping methods.
Butter, Lard, Shortening, or Oil?
Butter gives this dough its rich flavor and light flakiness. Lard and shortening produce different results because their fat and water contents differ. If you need dairy-free pastry, choose a dough formula designed for oil instead of replacing butter gram for gram with liquid oil.
Homemade vs. Store-Bought Empanada Discs
Homemade pastry gives you control over butter flavor, thickness, and portion size. Store-bought discs save time when the filling needs more attention. Check the package: some prepared wrappers are intended for baking, others for frying.
Is Empanada Dough the Same as Pie Crust?
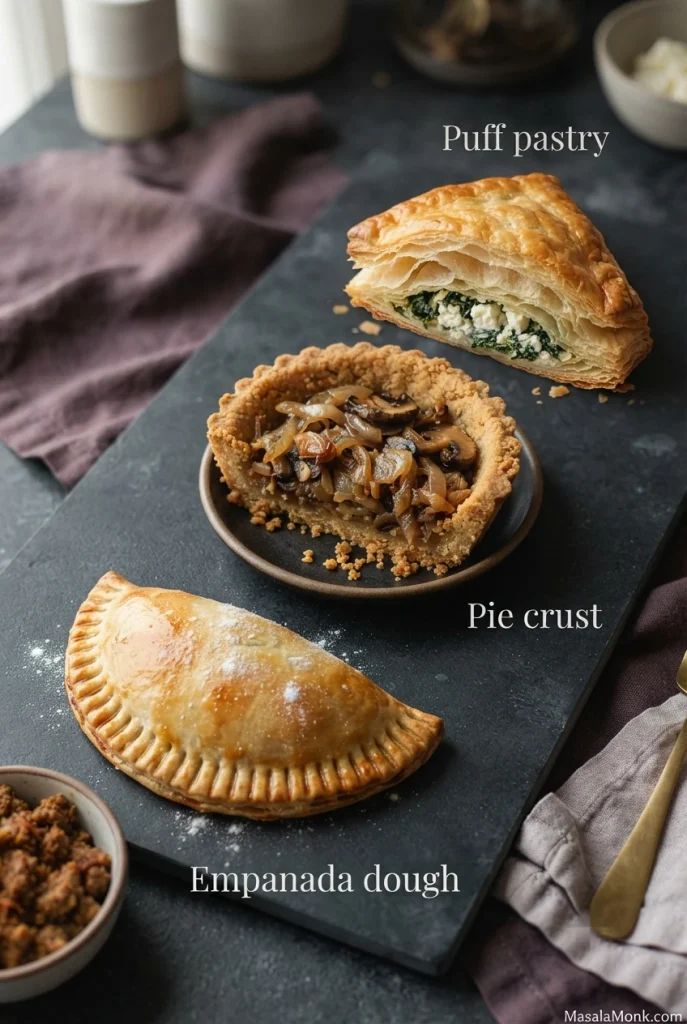
Not necessarily. Both can contain flour, fat, water, salt, and sometimes egg. Empanada pastry is formulated to roll thin, fold around individual fillings, and make a secure seam; pie crust is usually made to line or cover a larger pie. Store-bought pie crust can make baked turnover-style empanadas, while puff pastry makes a taller, more layered pocket. Neither has exactly the same texture as this dough, and not all packaged pastry is suitable for frying.
Eggless, Whole-Wheat, and Gluten-Free Dough
Eggless dough is common in some hot-water and oil-based recipes. Whole-wheat flour absorbs water differently and can make wrappers less flexible, so a whole-wheat formula is preferable for a fully whole-wheat batch. Gluten-free dough needs its own blend of flours and binders; don’t replace the all-purpose flour here directly.
Wheat, Corn, and Rice Empanadas
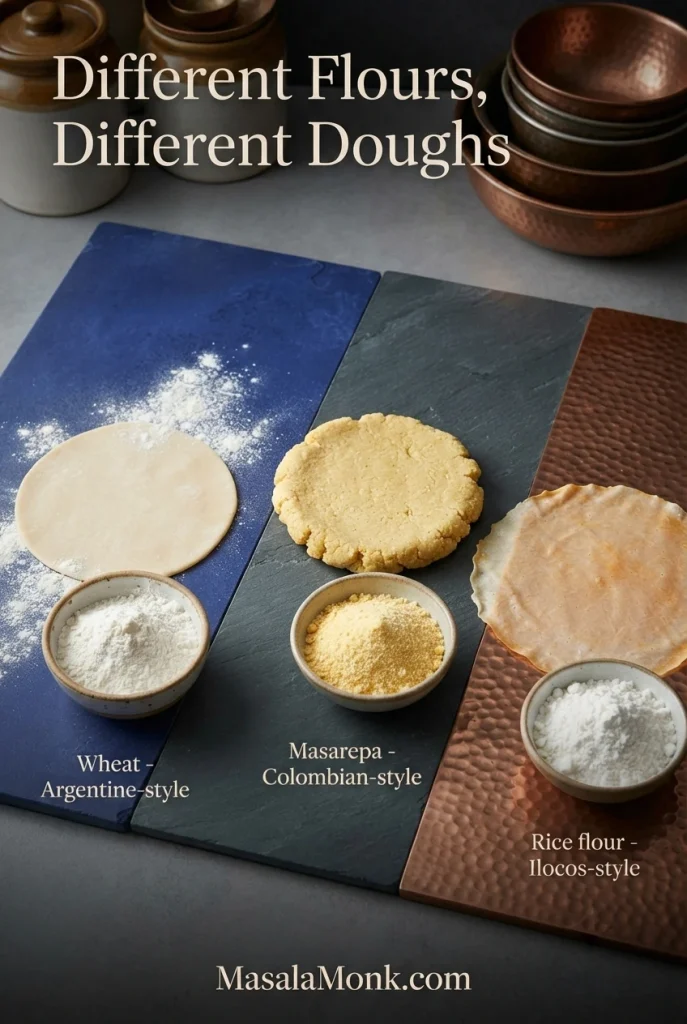
Many Argentine empanadas use wheat-flour dough. Colombian fried empanadas often use precooked corn flour such as masarepa. In the Philippines, Ilocos empanadas are known for rice-flour-based wrappers, while empanada de kaliskis uses a distinct layered pastry technique.
Masarepa isn’t the same as masa harina, the nixtamalized corn flour commonly used for Mexican corn tortillas. Our homemade corn tortilla guide explains how masa harina behaves. Neither ordinary cornmeal nor cornstarch is a direct substitute for masarepa in a Colombian-style wrapper.
Some doughs also use vinegar, citrus juice, or wine for flavor or handling characteristics. Vinegar is sometimes credited with limiting gluten development, though small amounts don’t always make a noticeable difference. None of these additions is necessary for the butter-and-egg dough here.
Frequently Asked Questions About Empanada Dough
Can I Use Salted Butter Instead of Unsalted?
Yes. Reduce the added salt to roughly 2–3 g instead of 5 g, adjusting for how salty your butter is. Salt content varies by brand.
Does Empanada Dough Need Yeast or Baking Powder?
No. This is an unleavened pastry dough, with no rising time. Other empanada recipes use leavening for different textures, but this version needs neither.
Can I Make Empanada Dough in a Food Processor?
Yes. Pulse flour, salt, and cold butter to coarse crumbs. Add the beaten egg, then pulse briefly while adding cold water gradually. Stop once moist clumps form, gather the dough by hand, and chill before rolling.
Can I Make Sweet Empanadas with This Dough?
Yes, especially baked fruit empanadas. Use a thick, cooled filling and leave room for a clean seam. Our homemade apple pie filling is an option; chop the cooked apples small and leave excess syrup behind.
Can I Make Mini or Large Empanadas?
Yes. Divide this same dough batch into approximately 24 mini, 12 medium, or 8 large portions.
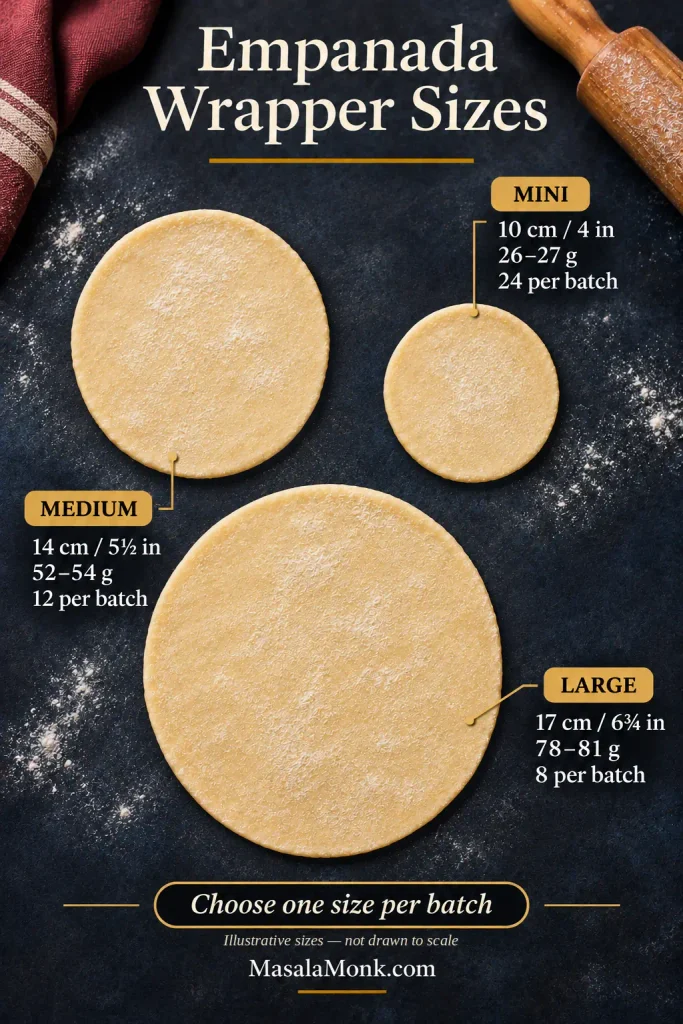
| Size and yield | Dough per wrapper | Diameter |
|---|---|---|
| 24 mini | 26–27 g | 4 inches (10 cm) |
| 12 medium | 52–54 g | 5½ inches (14 cm) |
| 8 large | 78–81 g | 6¾ inches (17 cm) |
These are sizing guides at similar thickness, not separate cooking formulas. Adjust the filling amount and check smaller pastries earlier; large empanadas may need longer. Never stretch the wrapper tight to close a seam.
Need the method again? Go to the ingredients and recipe steps · Back to top.
What did you fill your empanadas with, and did you bake or fry them? If a seam opened or you found a folding technique that helped, share what happened in the comments.








