
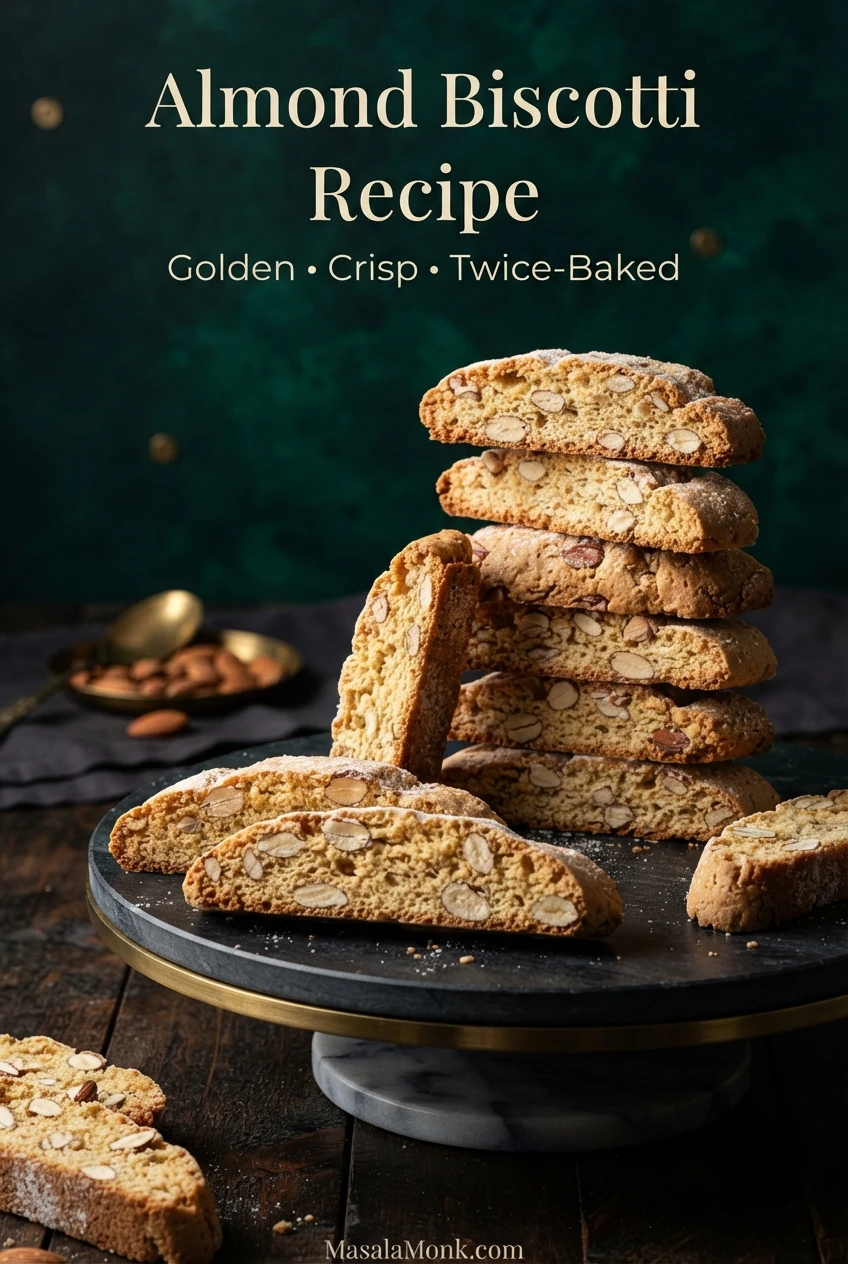
A good almond biscotti has a proper snap. Break one in half and you’ll find toasted almond pieces scattered through a crisp, golden biscuit. It’s lovely on its own, but a quick dunk in coffee softens the biscuit just enough for a bite.
This biscotti recipe makes Italian-inspired almond biscuits with a little butter for a satisfying crunch that’s somewhat more tender than very firm Tuscan-style cantucci. You can mix the dough by hand, and the finished biscuits keep well in an airtight tin or container for your next coffee break.
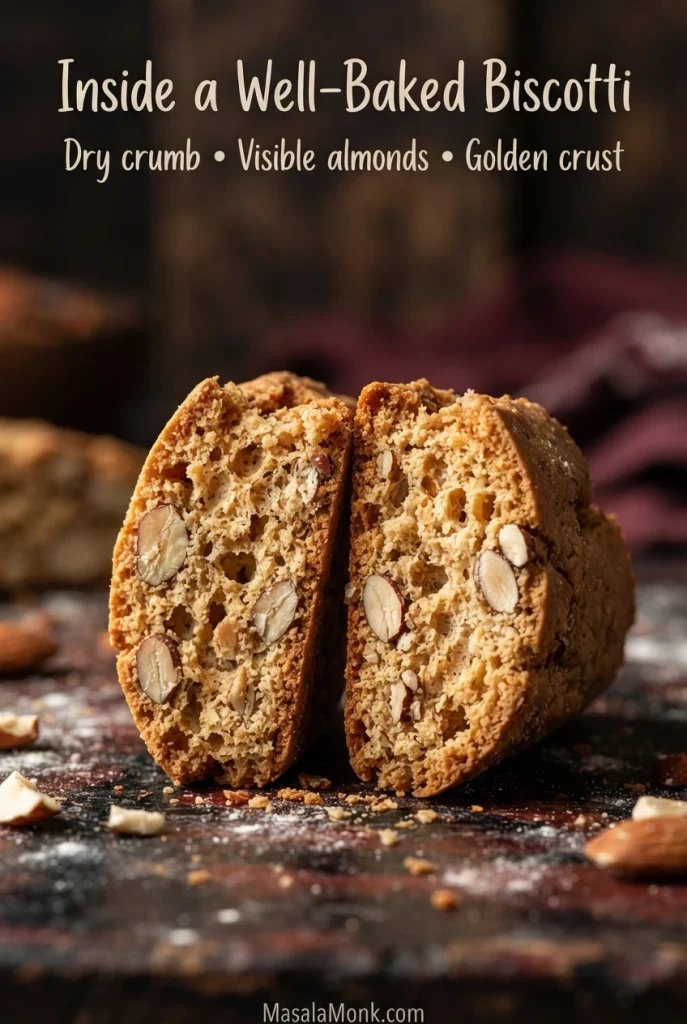
There are two bakes: the dough first becomes lightly golden logs, then the cut slices return to the oven to turn crisp. Between them comes the part worth paying attention to—slicing the logs once they’re set but still tender.
Almond Biscotti: Four Baking Checkpoints
Before moving from one bake to the next, compare the dough, the first-baked log, the exposed centre and the cooled slices. Look for how the surfaces and crumb change at each stage. Those differences are especially useful when your oven runs hot or cool.

Easy Italian Almond Biscotti Recipe
Two flattened logs make approximately 26–28 medium biscotti when sliced mostly straight across. A steep diagonal produces longer biscuits and generally fewer pieces.
| Preparation | 20 minutes |
|---|---|
| First bake | 28–33 minutes |
| Rest and slicing | 25–30 minutes |
| Second bake | 20–24 minutes per batch |
| Cooling | About 30 minutes, or until completely cool |
| Total elapsed time | About 2 hours 5–20 minutes with one round of each bake |
| Yield | Approximately 26–28 medium biscotti |
Before you start: Use a roomy baking sheet. The logs expand during the first bake, and the slices need space to lie flat for the second. A small oven or Indian OTG may require separate batches; the total time will be longer.
Ingredients
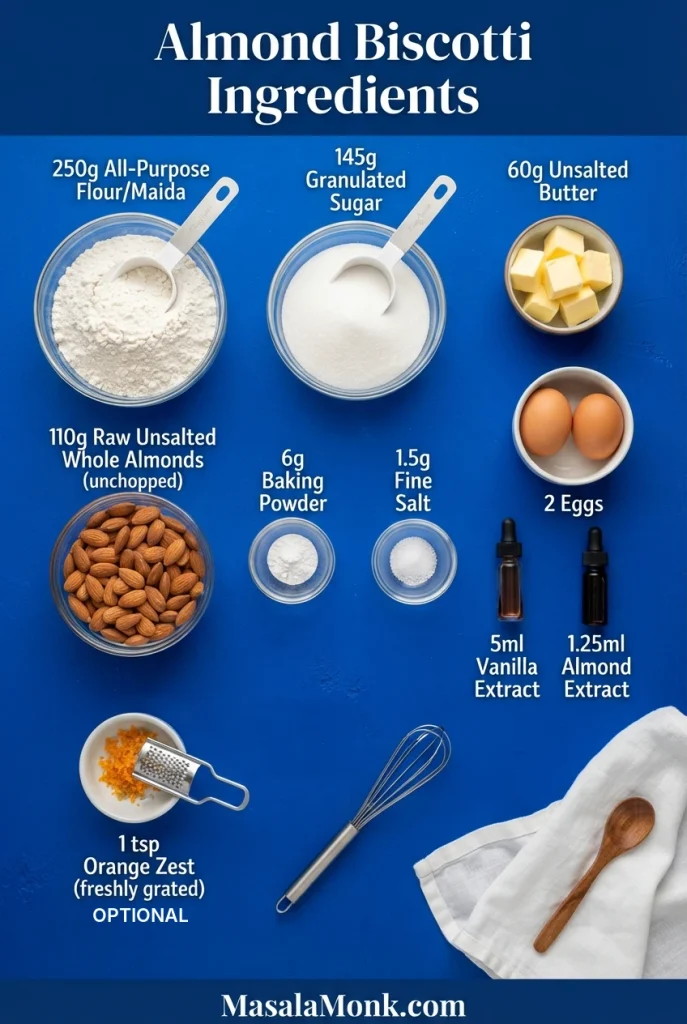
- 250 g all-purpose flour (maida) — approximately 2 cups plus 1 tbsp and 1 tsp, spooned and levelled
- 145 g granulated sugar — a scant ¾ cup
- 60 g unsalted butter — approximately 4¼ tbsp, weighed before melting
- 2 large eggs — approximately 100 g without shells
- 110 g raw, unsalted whole almonds — approximately ¾ cup before chopping
- 6 g baking powder — approximately 1½ tsp
- 1.5 g fine salt — approximately ¼ tsp, depending on the salt
- 5 ml vanilla extract — 1 tsp
- 1.25 ml almond extract — ¼ tsp
- Optional: 1 tsp finely grated orange zest
Measure the Flour and Prepare the Almonds
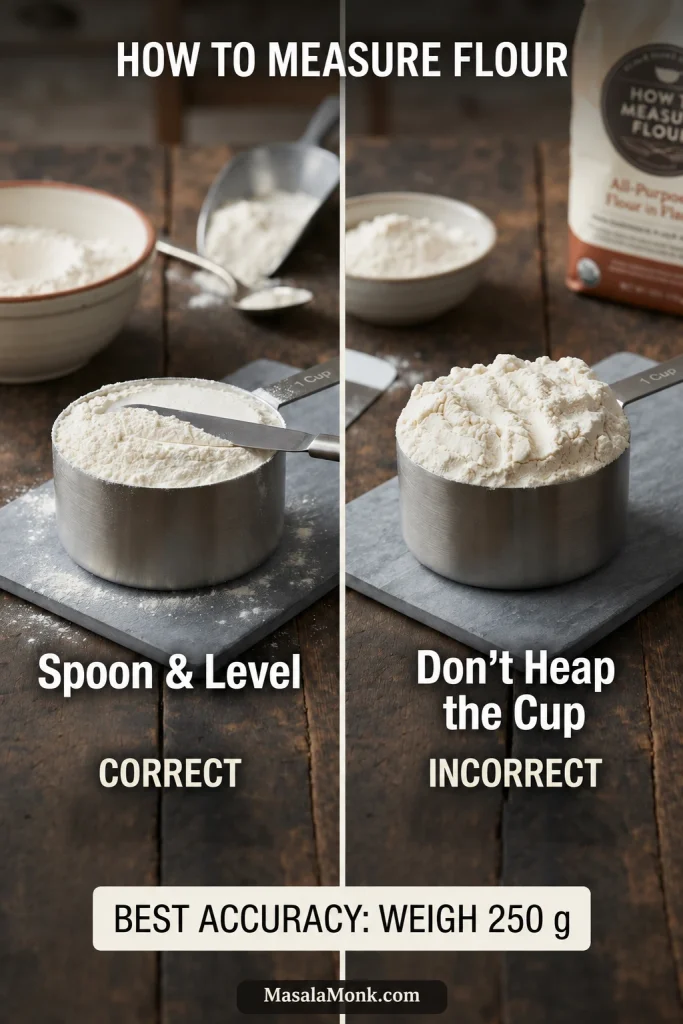
Weigh the ingredients when possible. The cup equivalents are approximate and use 120 g per cup of flour and 200 g per cup of sugar. Weigh almonds before chopping and butter before melting. If the dough later feels unusually stiff or sticky, use the dough texture guide before adjusting the flour.
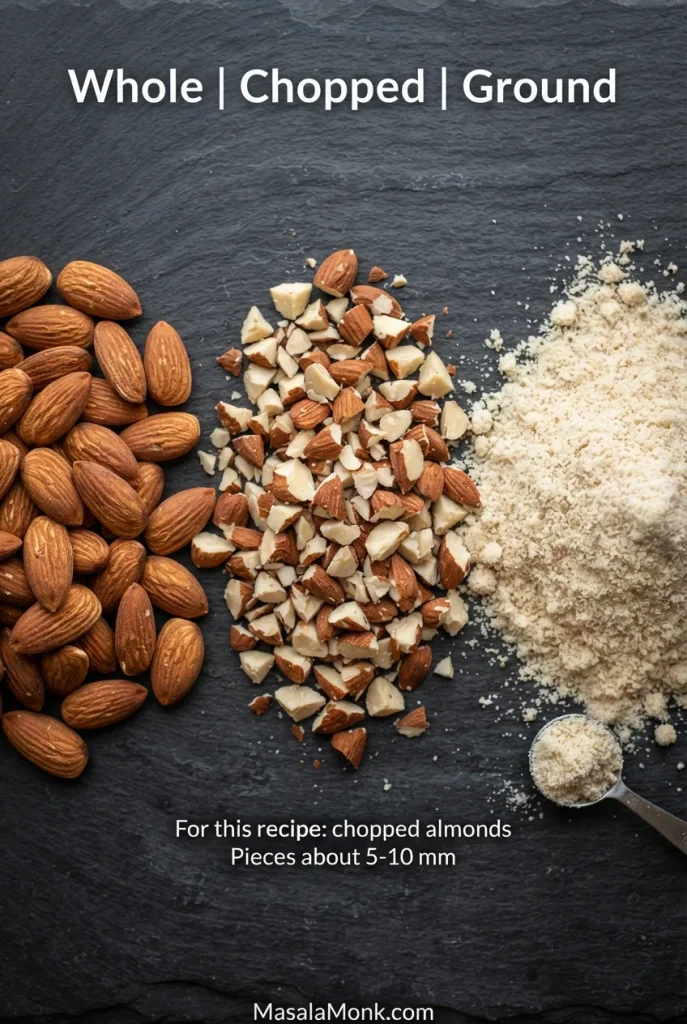
Chop the almonds into pieces about 5–10 mm across. You’ll still see them in every slice, but the knife won’t have to fight through large whole nuts. Raw almonds toast as the biscuits bake; already-roasted ones may darken a little further. Almond extract strengthens the nutty aroma without needing more nuts.
Melt the butter and let it cool until no longer hot but still liquid, so it blends easily with the eggs.
Equipment
Two bowls, a whisk, a sturdy spatula or wooden spoon, a large baking sheet, parchment paper, a stable cutting board, a sharp serrated knife, and a cooling rack. A second tray is handy when baking the sliced biscuits in batches.
Oven Temperatures
| Oven mode | First bake | Second bake |
|---|---|---|
| Conventional (no fan) | 175°C / 350°F | 160°C / 325°F |
| Fan-assisted | 160°C / 320°F | 145°C / 295°F |
Choose the settings for your oven mode; Fahrenheit settings are rounded for practical use. Preheat fully and use the middle rack. With an Indian OTG, follow its recommended baking mode and watch for unusually strong heat from the upper or lower elements.
How to Make Almond Biscotti
- Heat the oven. Preheat to 175°C / 350°F conventional or 160°C / 320°F fan-assisted. Line a large baking sheet with parchment.
- Mix the dry ingredients. Whisk the flour, baking powder and salt together.
- Mix the eggs and sugar. In a larger bowl, whisk until evenly combined and slightly lighter in colour. Stir in the cooled, still-liquid butter, vanilla, almond extract and optional orange zest.
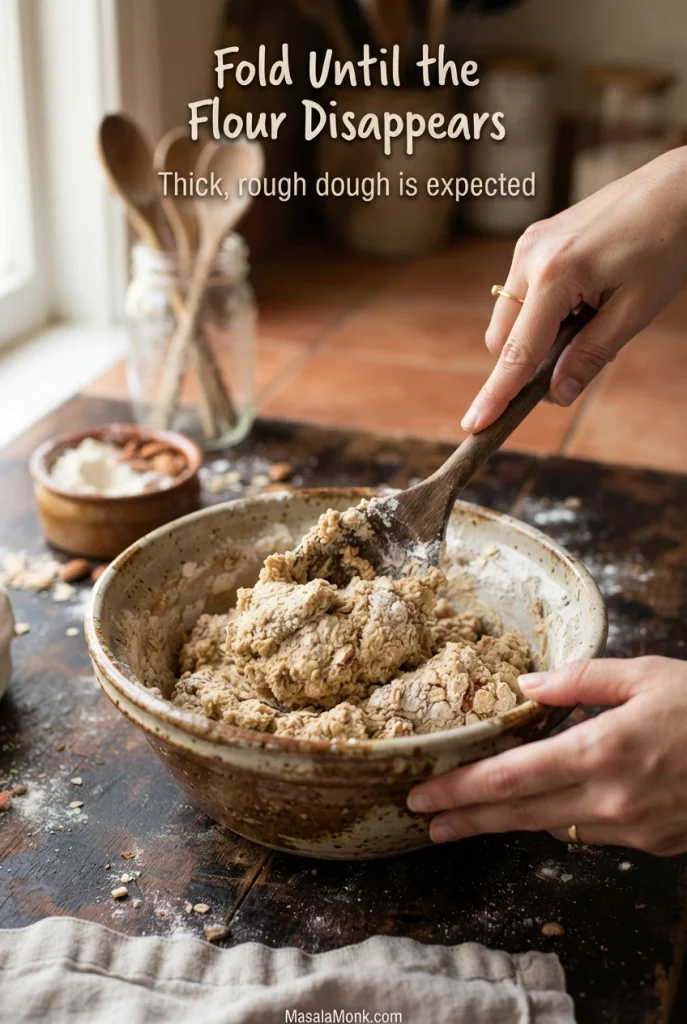
- Bring the dough together. Fold in the flour mixture until no loose flour remains, then stir in the chopped almonds. The dough will look rough and feel slightly tacky.
Check the Dough and Shape the Logs
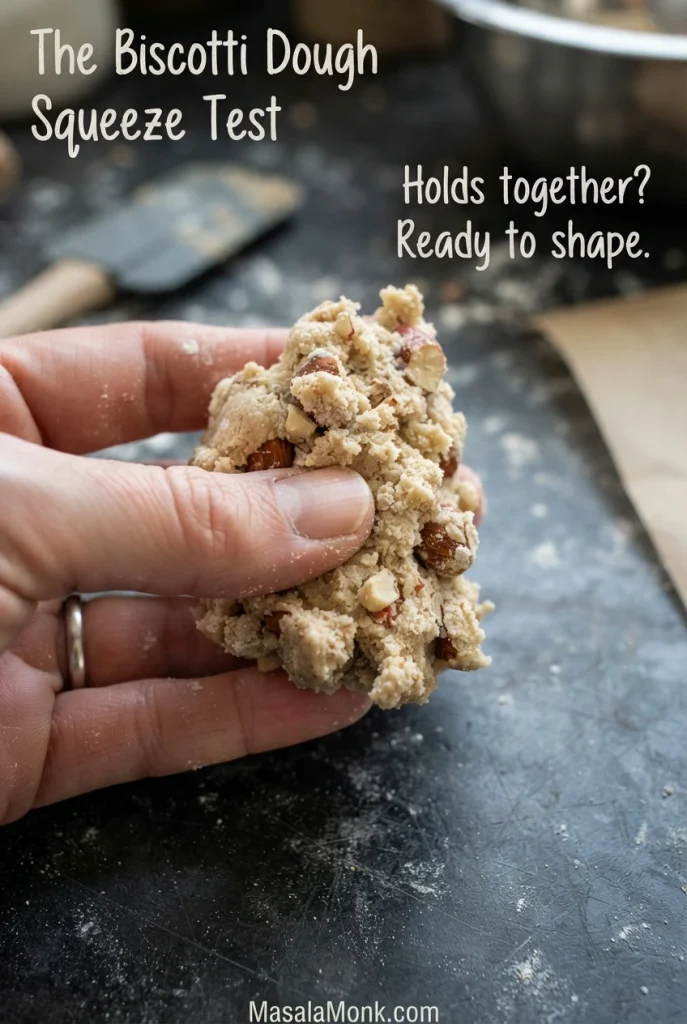
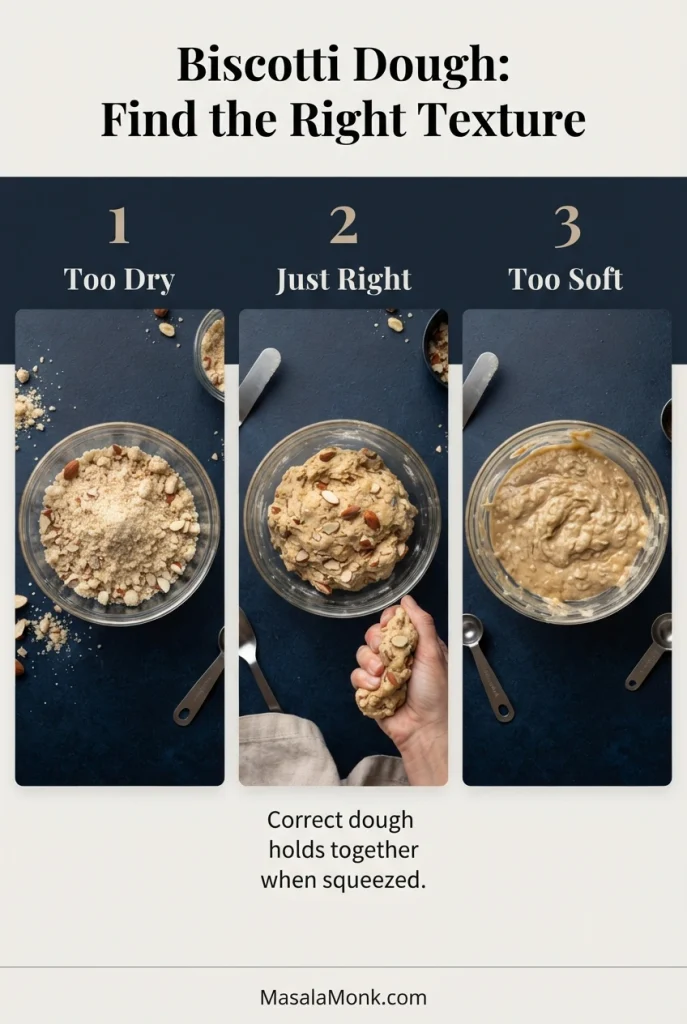
- Check the texture. Squeeze a little dough in your palm. If it holds together, you’re ready to shape it. Lightly damp hands help if it’s sticky; the short fixes below cover dough that’s unusually dry or too soft.
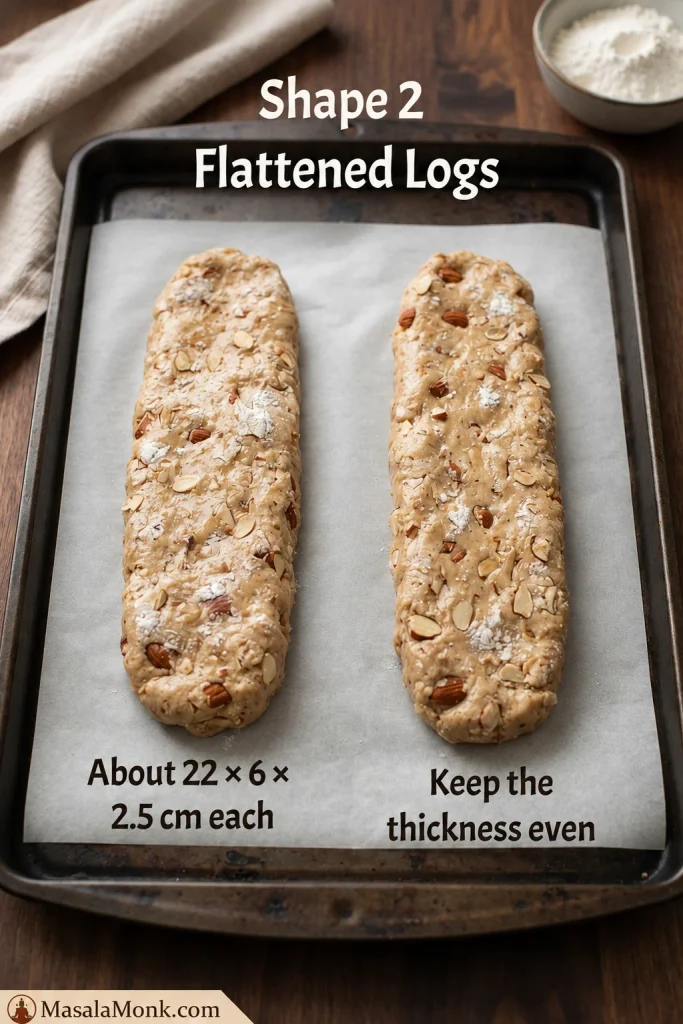
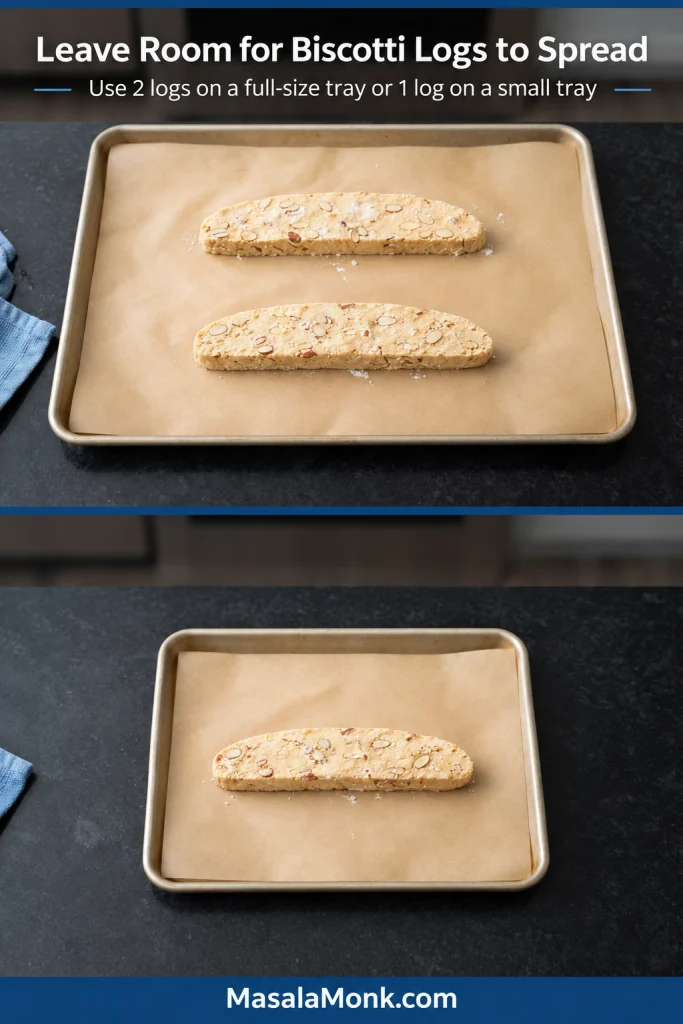
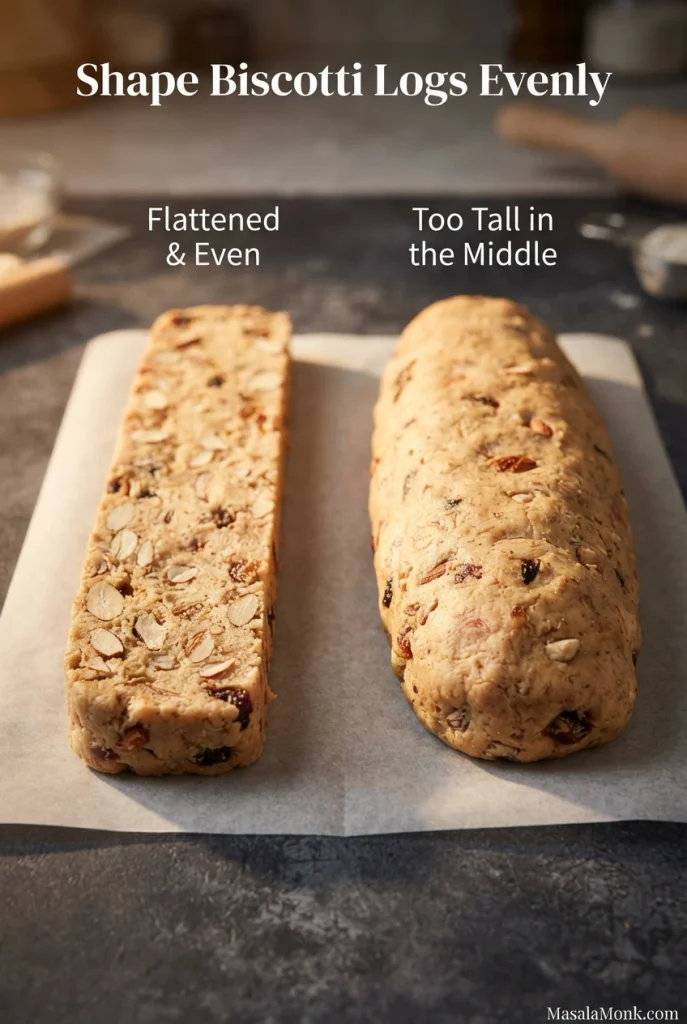
- Shape the logs. Divide the dough into two. Form flattened logs approximately 22 cm long, 6 cm wide and 2.5 cm high (8¾ × 2⅜ × 1 inches). Leave at least 7–8 cm (about 3 inches) between them and generous room at the outer tray edges for spreading. If your tray is too narrow, bake one log at a time. For the effect of log height, see the even-thickness guide.
Baking Tray Clearance and Small-OTG Arrangement
Use the same full-size log whether you bake two together or one at a time. The smaller-tray arrangement is about leaving space around the dough, not reducing the recipe or making a thinner log.
Using a small oven? Keep the waiting dough covered in the refrigerator while the first log bakes. When the oven is free, shape and first-bake the second portion. Meanwhile, arrange the slices from the first log in one layer on a clean, dry tray at room temperature and cover them loosely. Keep the oven at its first-bake setting until both logs are baked and checked. Then lower the heat and dry the slices in as many batches as necessary.
First Bake and Check the Centre
- First bake. Bake for 28–33 minutes, checking from 28 minutes. The tops should be set and lightly golden, and the sides should hold their shape. The centre will still be tender, not crisp.
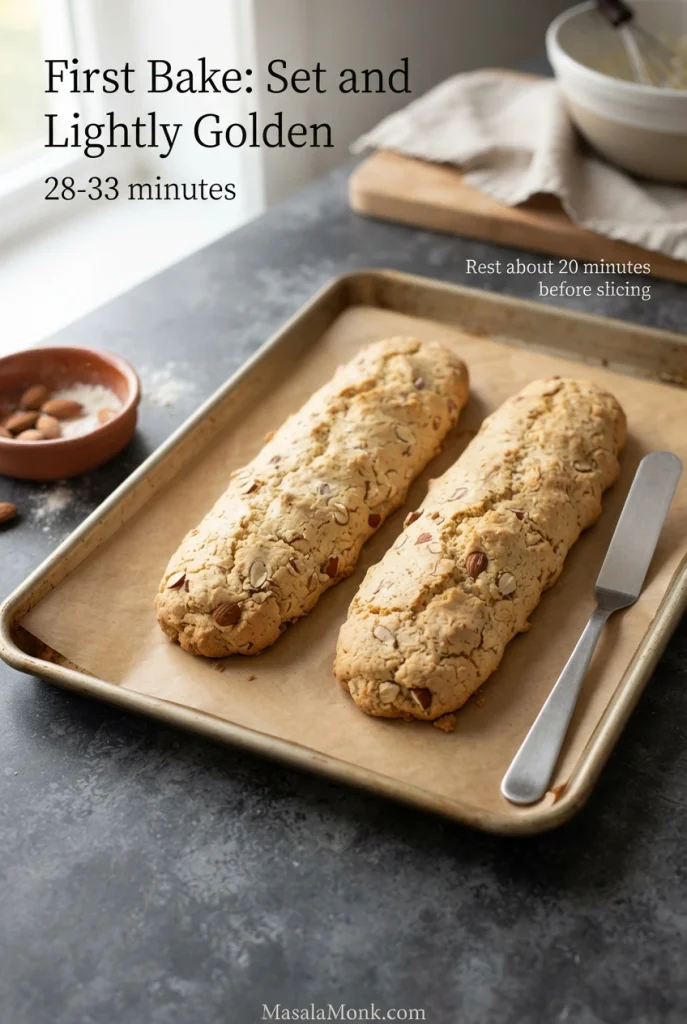
- Rest the logs. Leave them on the tray for about 20 minutes, until firm enough to move carefully with support. Keep the oven at the first-bake setting until both logs have completed their first bake and the initial cuts look properly baked.
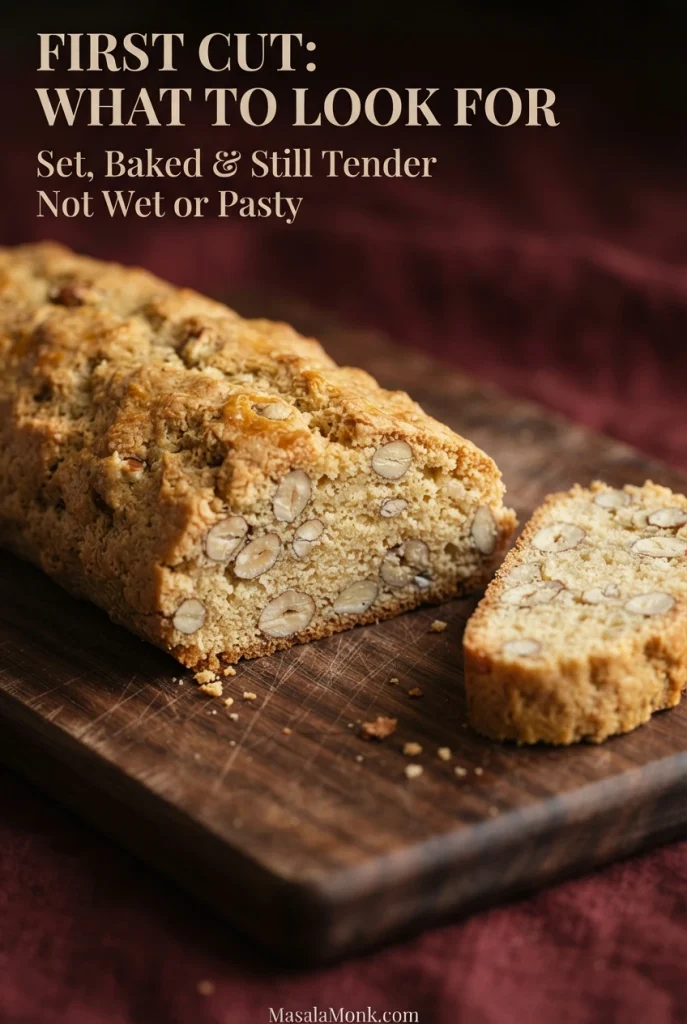
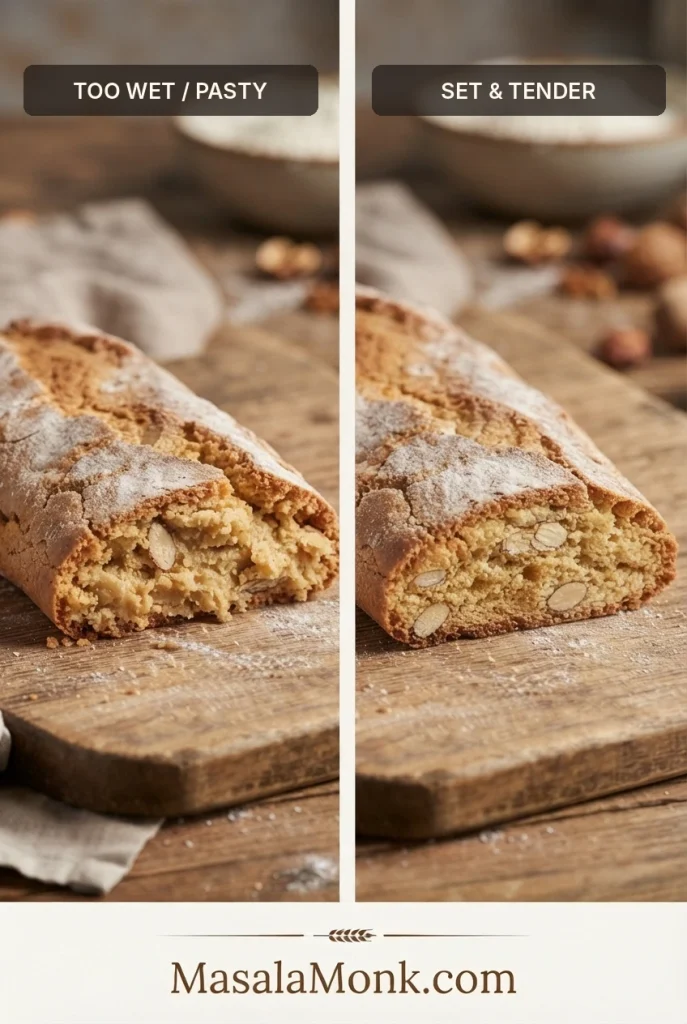
- Check the first cut. Move a log onto a stable cutting board. With a sharp serrated knife, gently saw off an end piece. The interior should look baked and hold together, though it will be tender. Watch for wet or pasty areas as you move toward the thicker middle. If you find any, follow the raw-centre rescue steps before continuing.
How Thick Should Biscotti Slices Be?
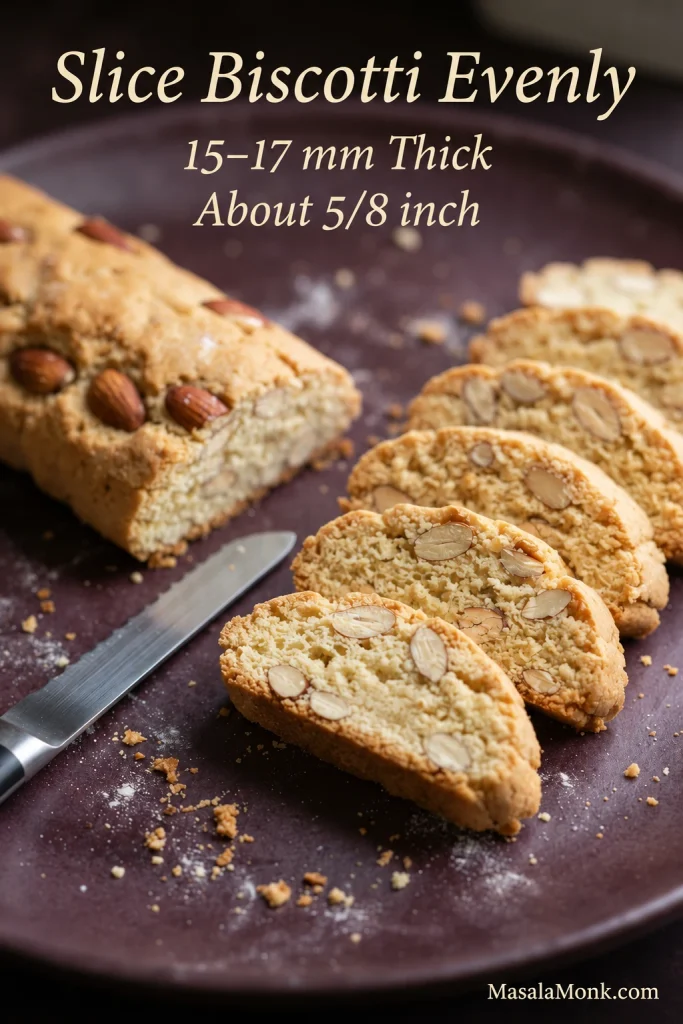
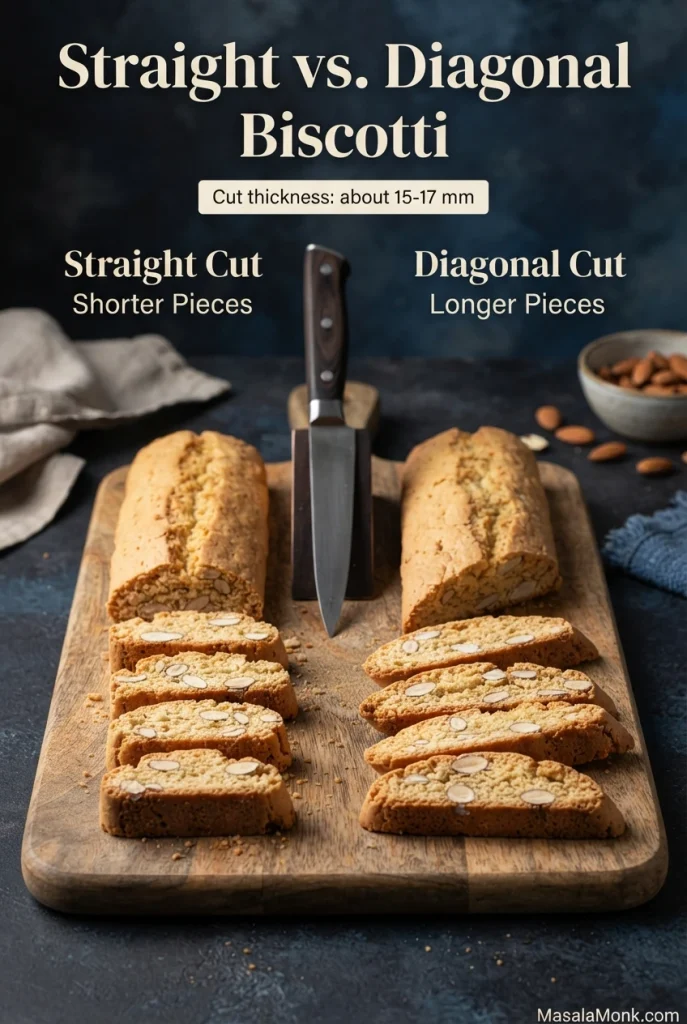
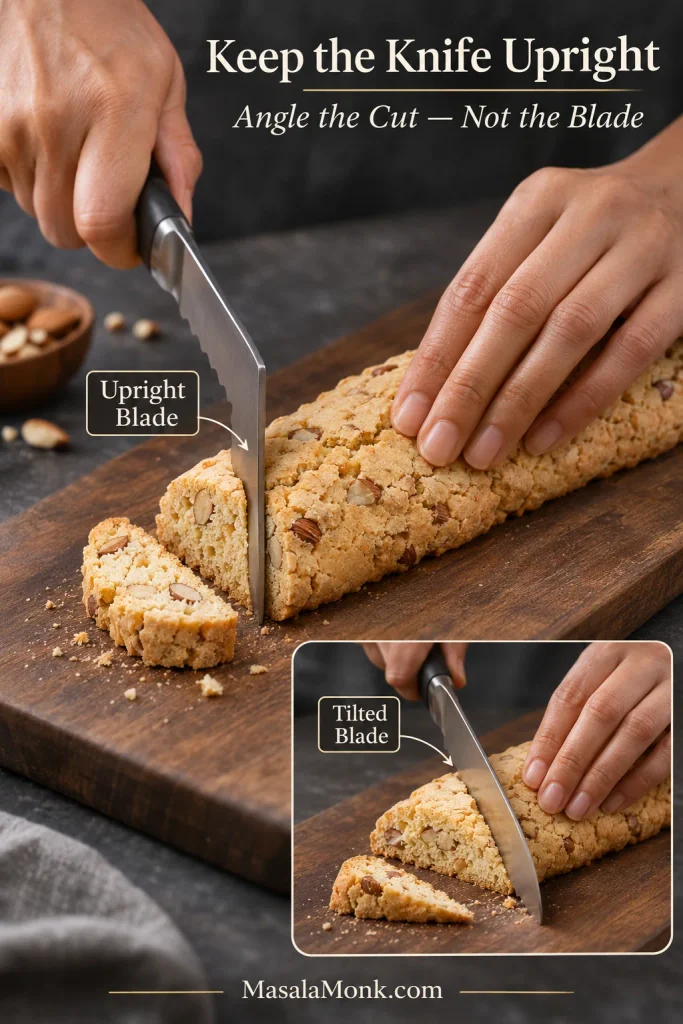
- Slice evenly. Cut pieces 15–17 mm (about ⅝ inch) thick, straight across or at a slight diagonal. Keep the blade upright and saw gently around the almonds. See straight versus diagonal slicing if you have not chosen a cut.
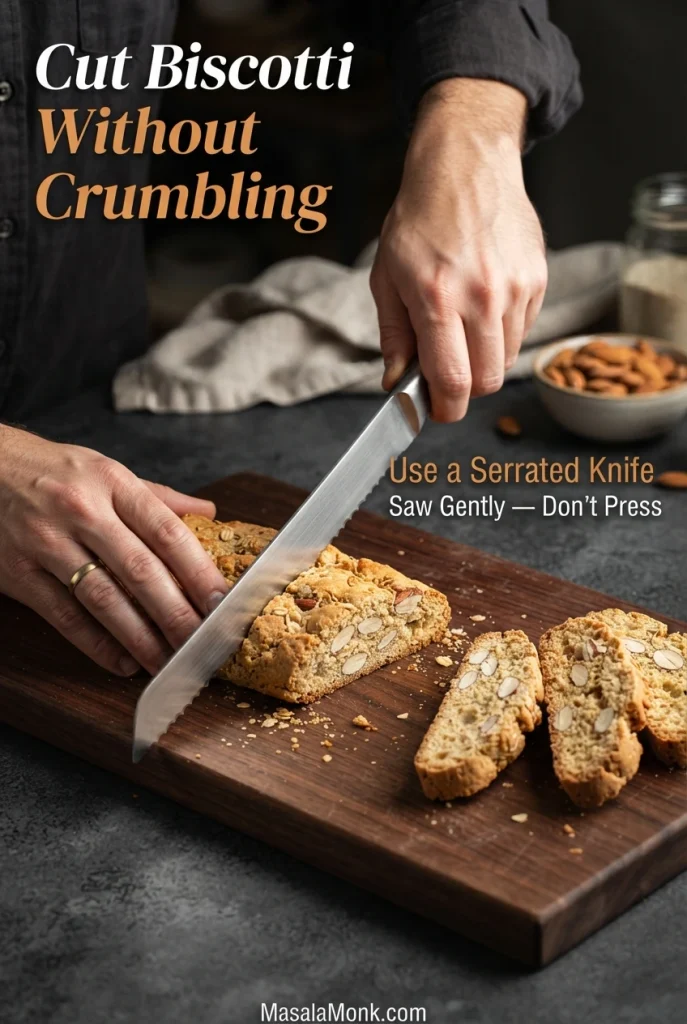
Look along the row of freshly cut pieces rather than judging one slice in isolation. If a narrow end piece is substantially thinner, check it earlier during the second bake so it does not become overly hard.
Second Bake and Cool the Biscotti
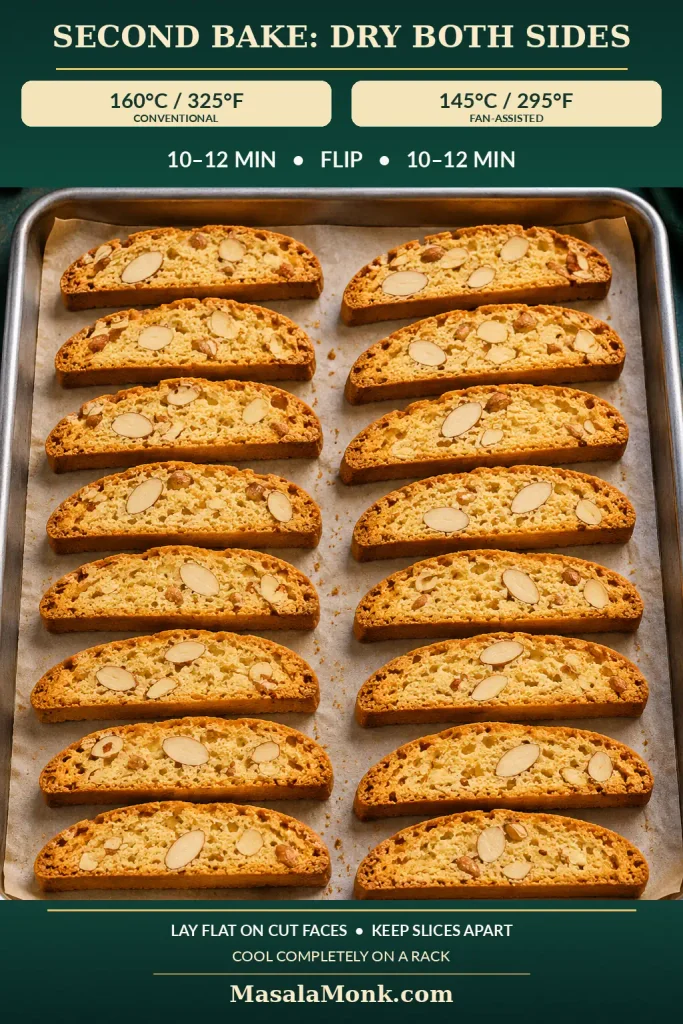
- Lower the heat. Once both logs have finished their first bake and are ready for drying, reduce the oven to 160°C / 325°F conventional or 145°C / 295°F fan-assisted. Wait until it reaches the lower setting.
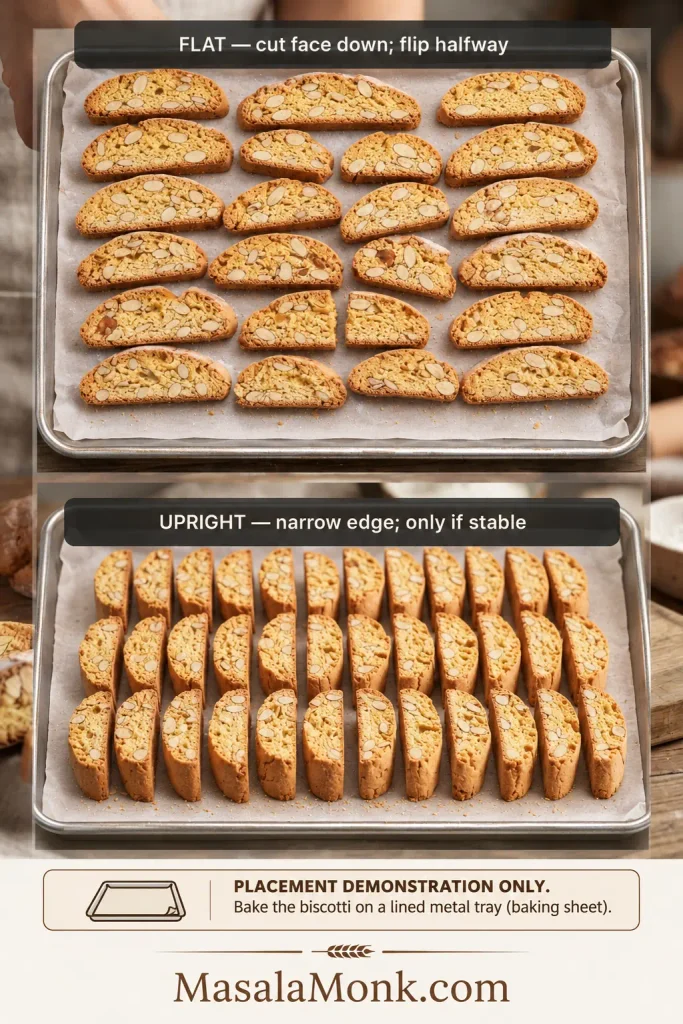
- Second bake. Place the slices flat on a lined sheet, leaving a little space between them. Bake 10–12 minutes, turn them over, and bake another 10–12 minutes. Look for dry cut sides and lightly golden edges. Work in batches rather than crowding the sheet. The second-bake crunch guide explains how to handle slices that dry at different rates.
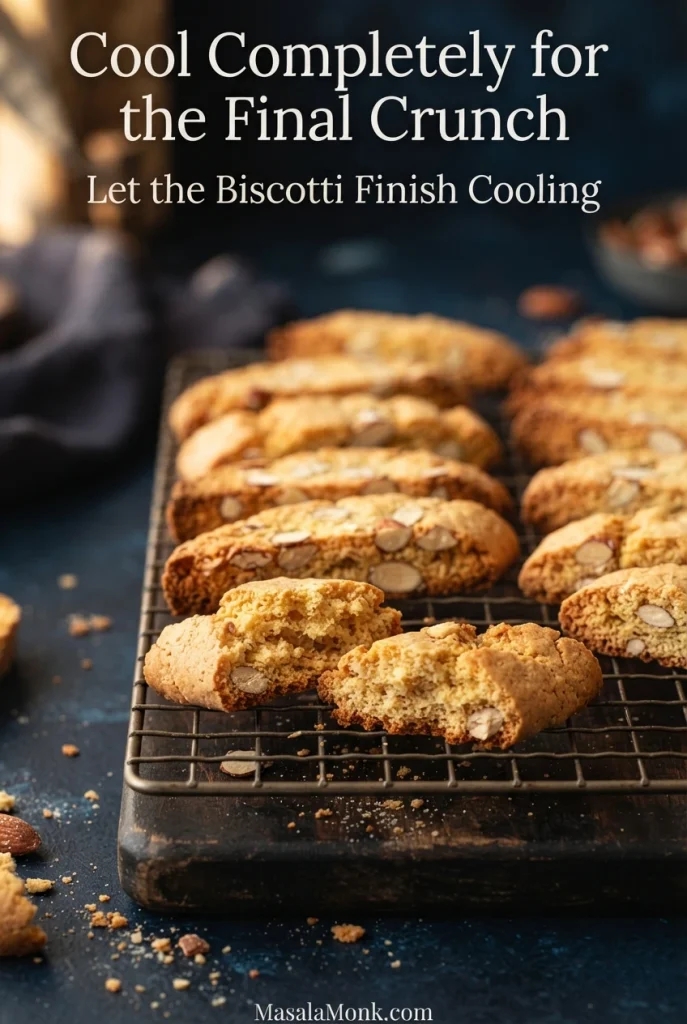
- Cool before judging the crunch. Transfer to a rack and cool completely, usually around 30 minutes. The biscuits should be crisp throughout and snap when broken. If they still feel soft after cooling, see the troubleshooting table.
If the Dough Is Too Dry or Sticky
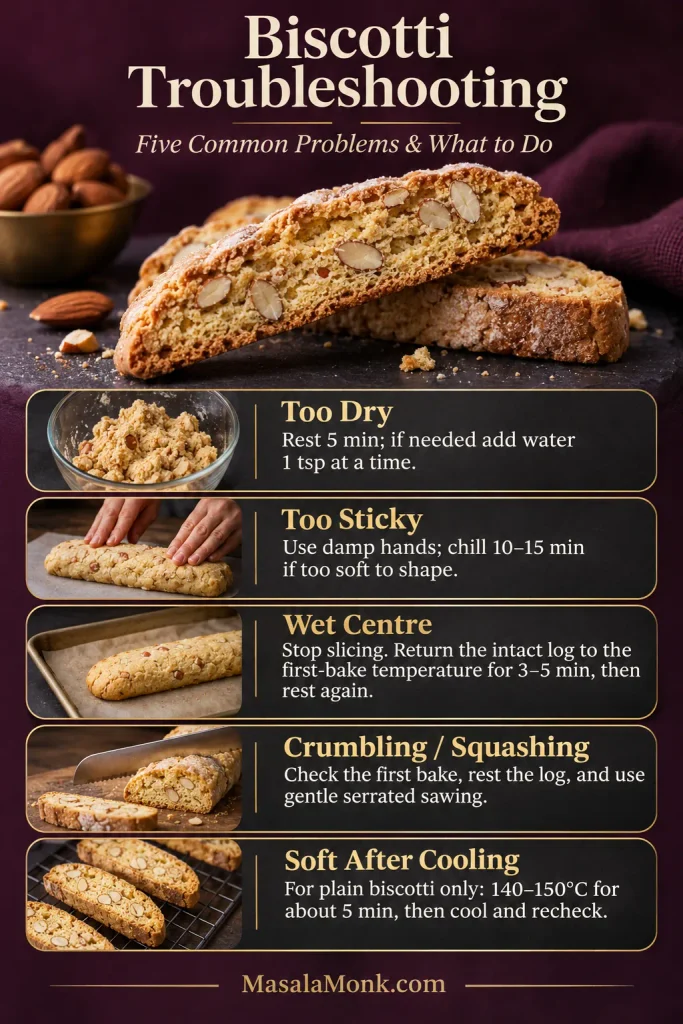
Dry and crumbly? Check that both eggs and all the butter went in, and that you measured the flour correctly. Finish mixing, wait 5 minutes, and try the squeeze test again. If it still won’t hold, add 1 teaspoon (5 ml) of water, mix, and reassess. Add another teaspoon only if needed.
Too sticky? Shape with lightly damp hands. If the dough slumps instead of holding a log, chill it for 10–15 minutes. A little tackiness is fine.
If You Find Raw Dough While Slicing
The first-baked centre can be tender, but it shouldn’t look wet or pasty. Stop slicing if you find raw dough. When most of the log is still intact, return it to the first-bake temperature for another 3–5 minutes, then reassess and let it firm up before cutting again. Repeat in short intervals if needed. A log that’s already cut into many pieces is harder to rescue neatly.
Biscotti Baking Guide: The Details That Change the Result
Two batches with the same ingredients can behave differently when the eggs are smaller, the flour is packed into the cup, or the logs have a taller centre. Knowing how those differences affect the dough and the cut is more useful than chasing an exact minute on the clock.
Dough Texture: When Not to Add More Flour
A slightly sticky dough can still be perfectly ready to shape. Adding flour just to remove tackiness makes the logs drier, and a dry log is harder to slice neatly. If the mixture is unusually stiff, first consider a packed flour cup or eggs smaller than the recipe assumes. As long as it holds together, a rough-looking dough needs no further adjustment. You can compare it with the dough squeeze test in the method.
Why Chopped Almonds Help With Slicing
Traditional cantucci often use whole almonds, and there’s nothing wrong with that choice. For this recipe, chopped nuts let the knife pass through with fewer hard obstacles while still showing almond pieces across each slice. Ground almonds, by contrast, become part of the crumb rather than remaining distinct. For a softer almond dessert, there’s also our almond cake recipe.
Can You Replace the Flour With Almond Flour?
Not one-for-one in this dough. Almond flour contains more fat and doesn’t develop wheat gluten, so the logs won’t hold or slice in quite the same way. If you want a soft cookie made with ground almonds, try our almond flour cookies recipe. For gluten-free, eggless, butter-free, or substantially lower-sugar biscotti, choose a formula designed for that change.
Why Even Log Thickness Matters
A tall, rounded centre takes longer to set than the edges. By the time it is ready, the ends may be too dry to cut cleanly. Flattening the logs to an even height helps the centre bake through while the outside remains tender enough for the knife. Colour helps, but the first cut tells you more about the interior.
How to Cut Biscotti Without Crumbling
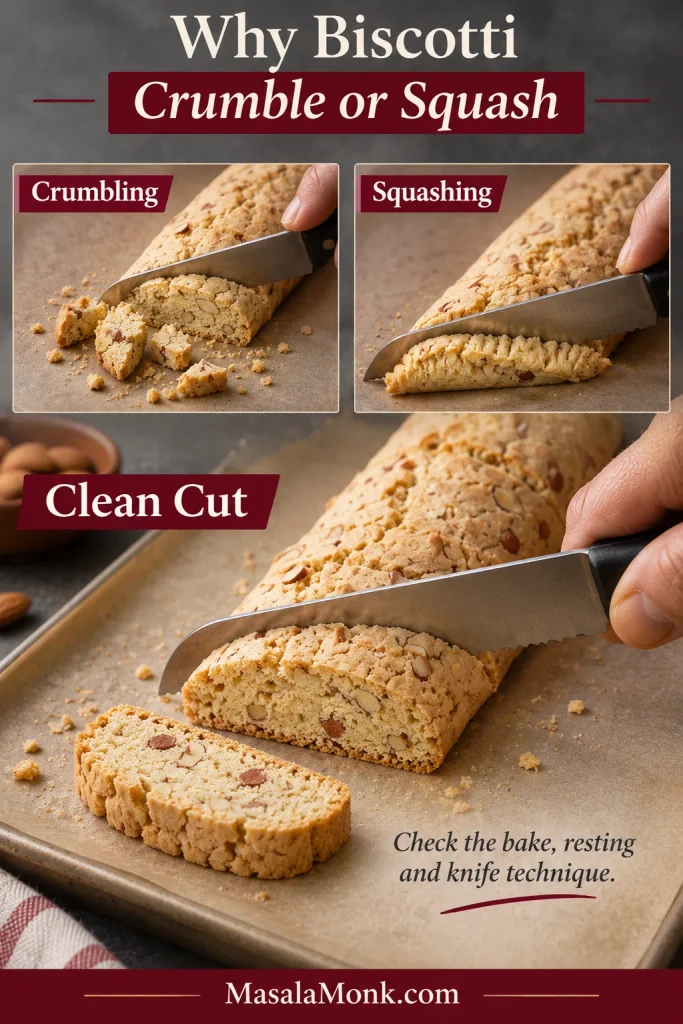
The first cut exposes a pale, almond-studded centre beneath a thin baked crust. A properly set slice holds its shape when lifted. Crumbs suggest the log may be too brittle or the knife is catching a nut; smearing suggests the interior is too soft. A broken slice isn’t wasted—if it’s baked through, dry it with the others.
Straight Cuts or Diagonal Slices?
Cutting straight across gives short, sturdy biscotti and a more predictable yield. A diagonal creates longer, bakery-style pieces; the steeper the angle, the longer and often more fragile each slice. Keep the blade vertical to the cutting board even when cutting diagonally across the log, so each biscuit has an even thickness.
Keeping the Serrated Knife Upright
The direction of the cut and the tilt of the blade are separate choices. To cut a longer diagonal biscotti, move across the log at an angle while keeping the knife vertical to the cutting board.
For additional cutting guidance, see King Arthur Baking’s biscotti tips.
The Second Bake: Slice Thickness and Final Crunch
Drying happens through the exposed sides of each slice, which is why thinner pieces usually finish first. Remove them as they become dry and lightly golden instead of leaving them in for the thickest pieces. The biscuits reach their final firmness after cooling, so test one only when it is completely cool.
Optional upright method: You can stand sturdy, evenly cut slices on their bottom edges so both cut sides dry without flipping. If they won’t stand securely, use the flat-and-flip method in the recipe. Check for dryness rather than assuming both arrangements take exactly the same time.
Why Are My Biscotti Still Soft?
First let them cool fully. If plain biscotti are still chewy in the middle, return them to a 140–150°C (approximately 285–300°F) oven for about 5 minutes, then cool and check again. Extra drying helps under-dried biscuits, not ones that are already dark or burnt.
Biscotti Troubleshooting: Quick Answers
| Problem | What to do |
|---|---|
| Dough won’t hold together | Now: finish mixing, check the amounts, and add a teaspoon of water only if needed. |
| Dough sticks too much to shape | Now: use damp hands, or chill briefly if the logs slump. |
| Logs spread too much | Now: continue if usable. Next batch: check weights, dough temperature and log shape. |
| Centre looks raw after the first bake | Now: stop cutting; rebake a mostly intact remainder briefly at the first-bake temperature. |
| Slices crumble | Now: ease pressure and support the slice. Next batch: check first-bake dryness and almond size. |
| Slices squash or smear | Now: check whether the remaining log needs more first-bake time. |
| Biscotti stay soft after cooling | Now: gently dry plain slices for a little longer, then cool again. |
| Biscotti are unpleasantly hard | Next batch: avoid excessive second-bake drying; check slice thickness and timing. |
| Stored biscotti lose their crunch | Now: re-crisp softened plain biscuits that haven’t spoiled; cool and seal airtight. |
| Almond flavour seems weak | Next batch: check the freshness of almonds and extracts. |
Biscotti vs. Cantucci: What’s the Difference?
In Italy, biscotti is a broad term for biscuits and cookies. Cantucci are the crunchy almond biscuits associated with Tuscany, particularly Prato. Smaller versions are often called cantuccini, and they’re traditionally enjoyed with Vin Santo, a sweet Italian wine.
Many Tuscan cantucci recipes contain no butter and produce deliberately firm biscuits, although versions vary. The small amount of butter here gives a somewhat more tender crunch. For a firmer alternative, see this traditional cantucci recipe.
Four Biscotti Variations Worth Trying
Keep the basic method and change the flavour: citrus or anise in the dough, chocolate after baking, or pistachios and cranberries in place of the almonds. You can return to the base biscotti recipe for the original ingredient amounts and baking method.
Chocolate-Dipped Biscotti
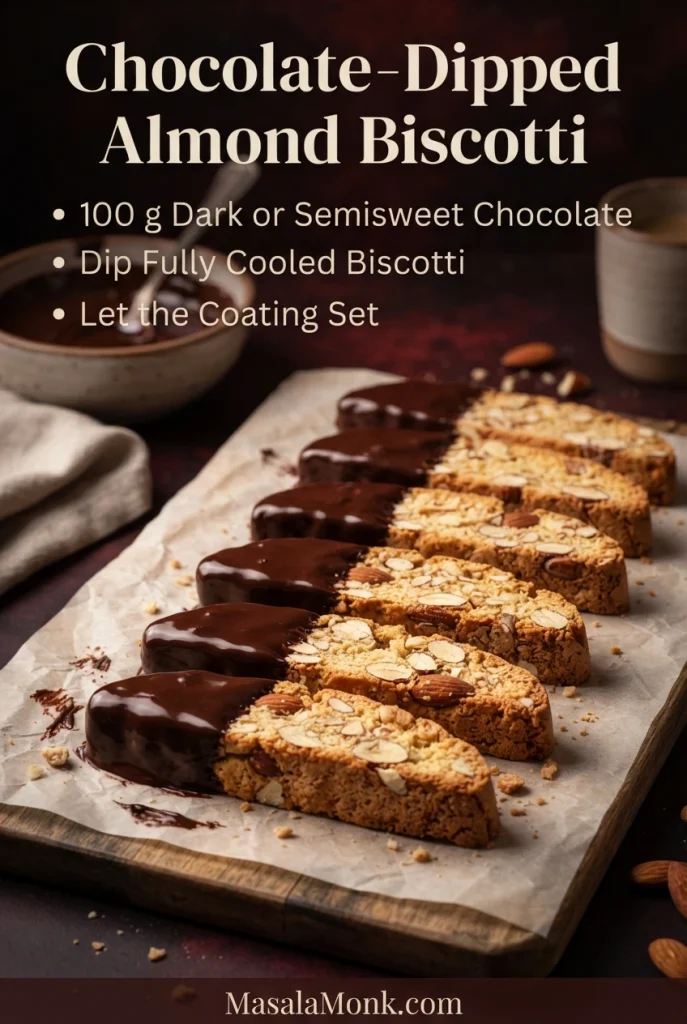
Melt 100 g (3½ oz) dark or semisweet chocolate. Dip one end of each completely cooled biscotti, or drizzle chocolate across the tops. Let the coating set on parchment before serving or packing. Leave one end uncoated if you want a clean place to hold it.
Orange or Lemon Biscotti
Add 1–2 teaspoons finely grated orange or lemon zest in total with the wet ingredients. Count the optional 1 teaspoon of orange zest from the base recipe toward that amount. Zest gives citrus flavour without the extra liquid of juice. Lemon biscotti are also good with a little homemade lemon curd served on the side; dip just before eating.

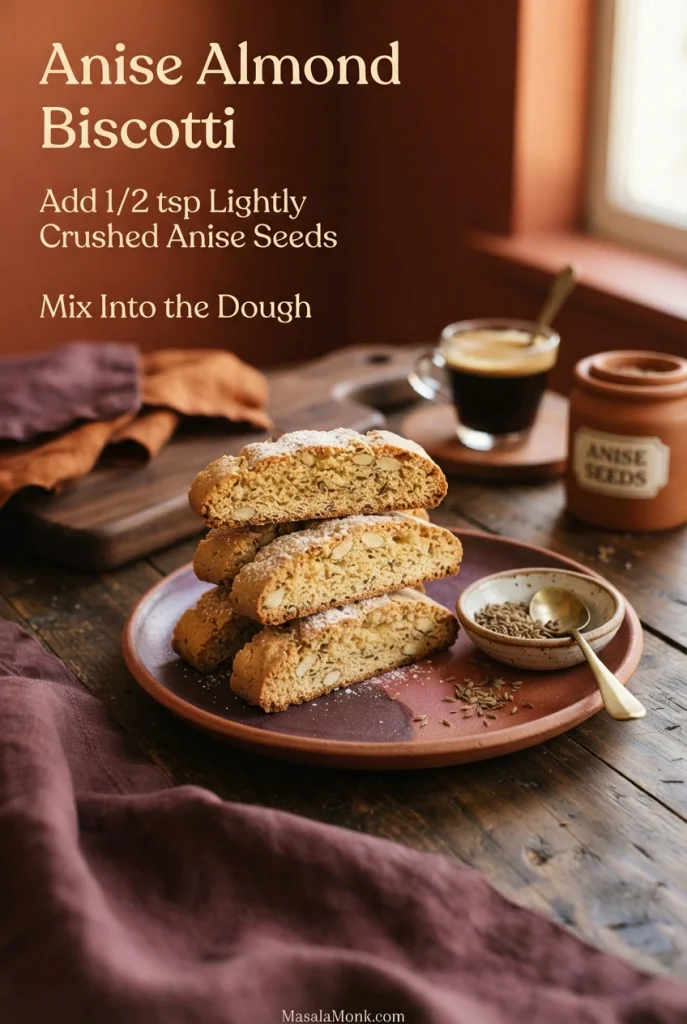
Anise Almond Biscotti
Stir ½ teaspoon lightly crushed anise seeds into the dry ingredients. They add a gently liquorice-like flavour found in several Italian biscuit traditions.
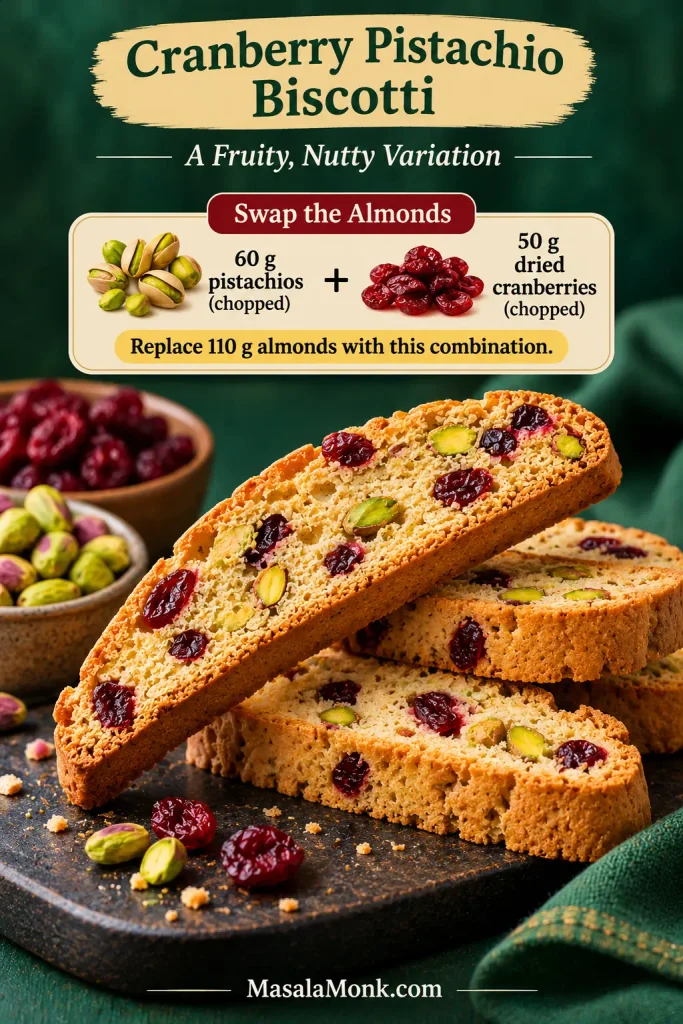
Cranberry Pistachio Biscotti
Replace the almonds with 60 g roughly chopped pistachios and 50 g dried cranberries. Cut any large cranberry pieces smaller. The cranberries may stay a little chewy; judge the second bake by the dryness of the biscuit around the fruit, then let a slice cool to test its crunch.
How to Store Biscotti and Keep Them Crisp
Plain homemade biscotti are best enjoyed within about two weeks when stored in a clean, dry, airtight container in a cool cupboard. Let them cool completely before packing. How long they stay crisp depends on humidity and how thoroughly they’ve dried. If the texture changed before storage, consult the second-bake doneness guide.
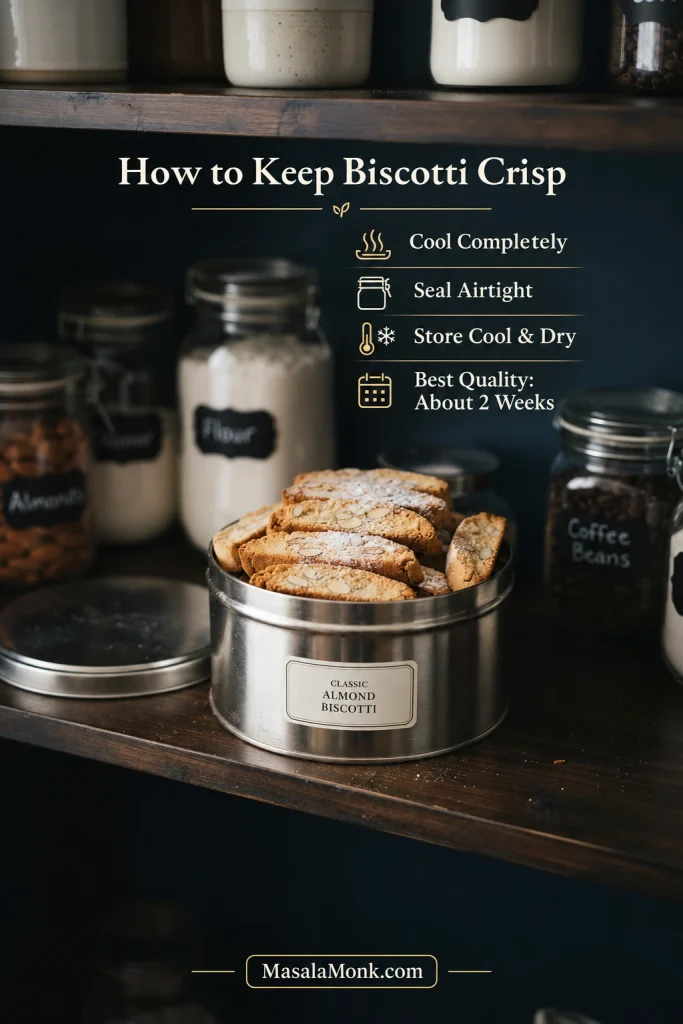
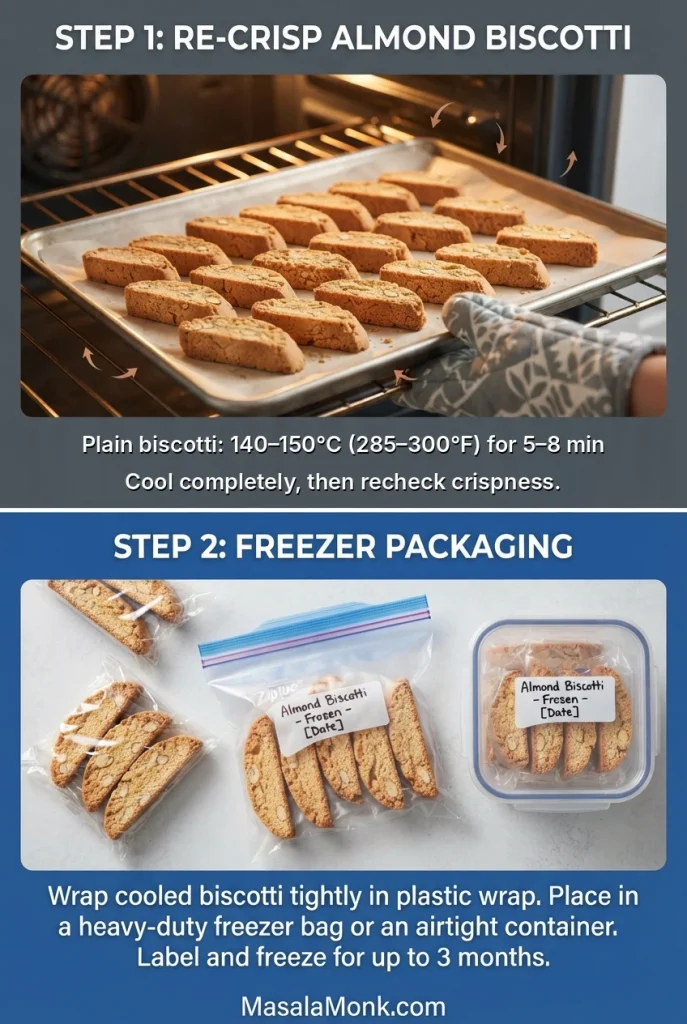
During monsoon weather, a biscuit that’s crisp one day can lose its snap the next. If plain biscotti have softened but haven’t spoiled, spread them on a baking sheet and warm at 140–150°C (approximately 285–300°F) for 5–8 minutes. Check frequently, cool completely and return them to an airtight container.
For longer storage, freeze fully cooled biscotti in airtight, freezer-safe packaging that protects them from crushing. Aim to use them within about three months for best quality. Thaw while still wrapped to reduce condensation on the biscuits.
Re-Crisping and Freezing Biscotti
These two methods address different needs: a short, gentle re-drying can restore crispness to otherwise sound plain biscotti, whereas airtight freezer packaging protects fully cooled slices during longer storage.
Don’t oven-refresh chocolate-coated biscotti; the chocolate may melt. Discard biscuits with mould, unusual odours or other signs of spoilage.
Making Biscotti for Gifts
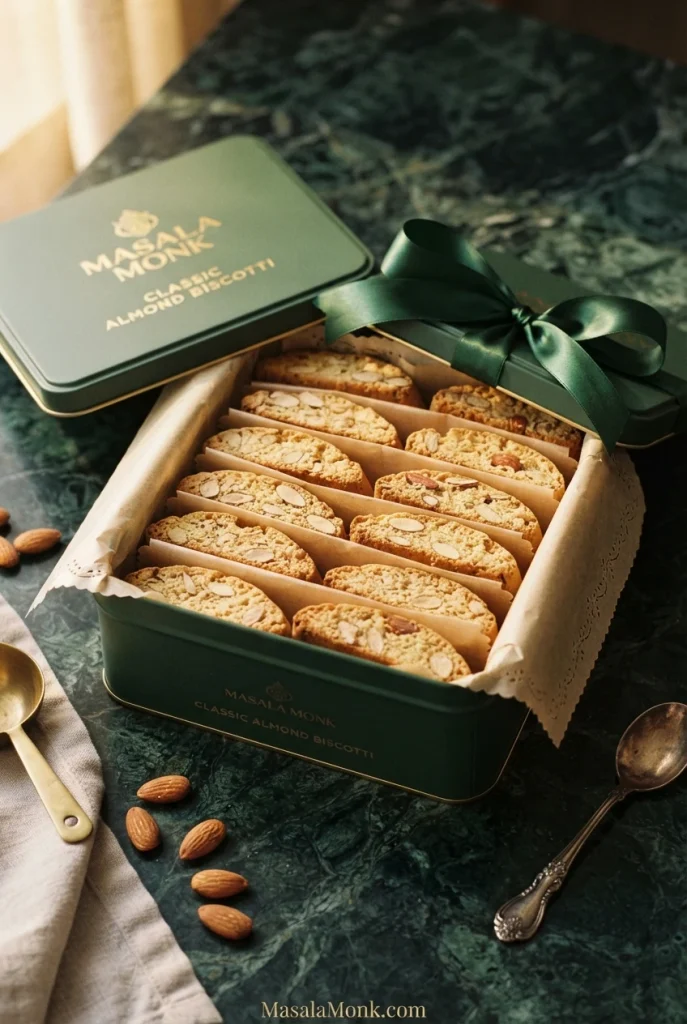
Pack intact biscotti in a sturdy tin or box, with food-safe paper between layers. Support longer slices so they don’t snap, and let any chocolate coating set before stacking. They should fit snugly without pressing against one another.
Serving Almond Biscotti with Coffee
Keep a few biscotti handy for your next coffee break. Try one with a short espresso or a creamy homemade cappuccino. A brief dunk softens the biscuit at the edges, while the toasted almonds still give you something to bite into.

Don’t overlook the shorter end pieces. They may not look as tidy as the long slices, but they’re just right for a quick dunk.
How did you cut yours—straight across or diagonally? Tell us how your biscotti turned out in the comments.








