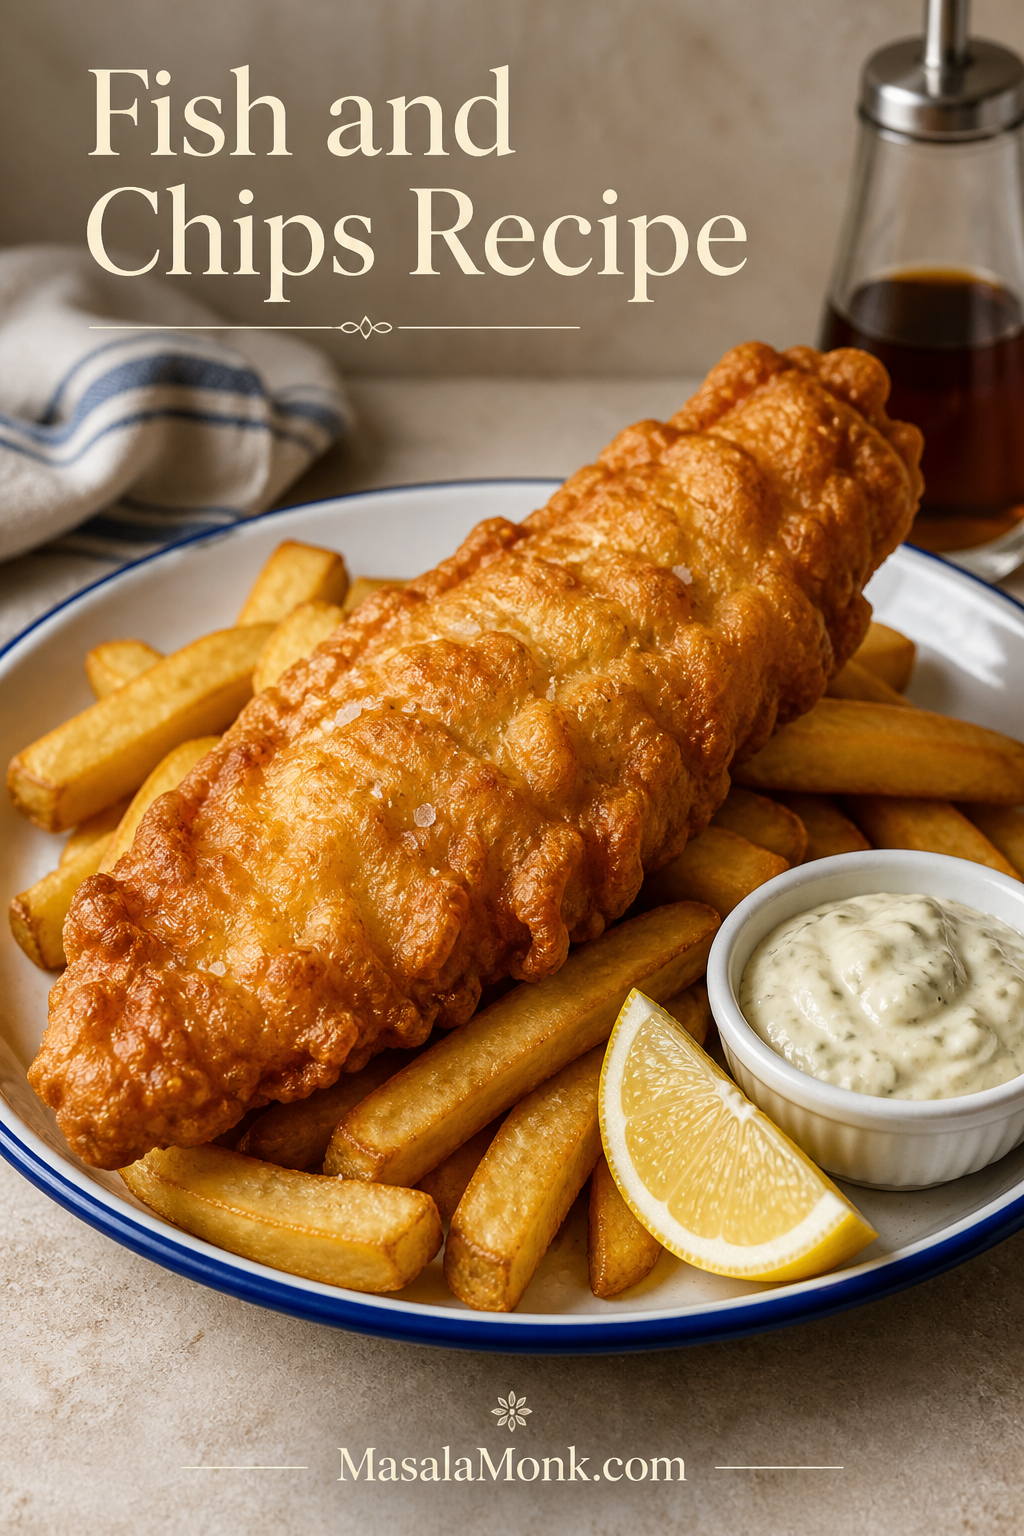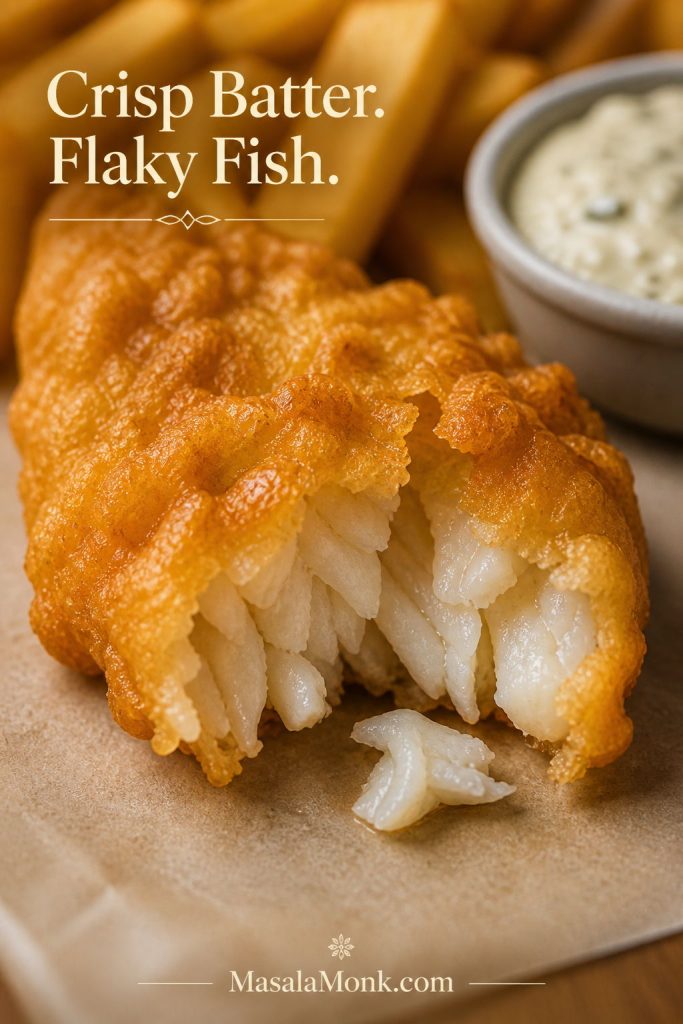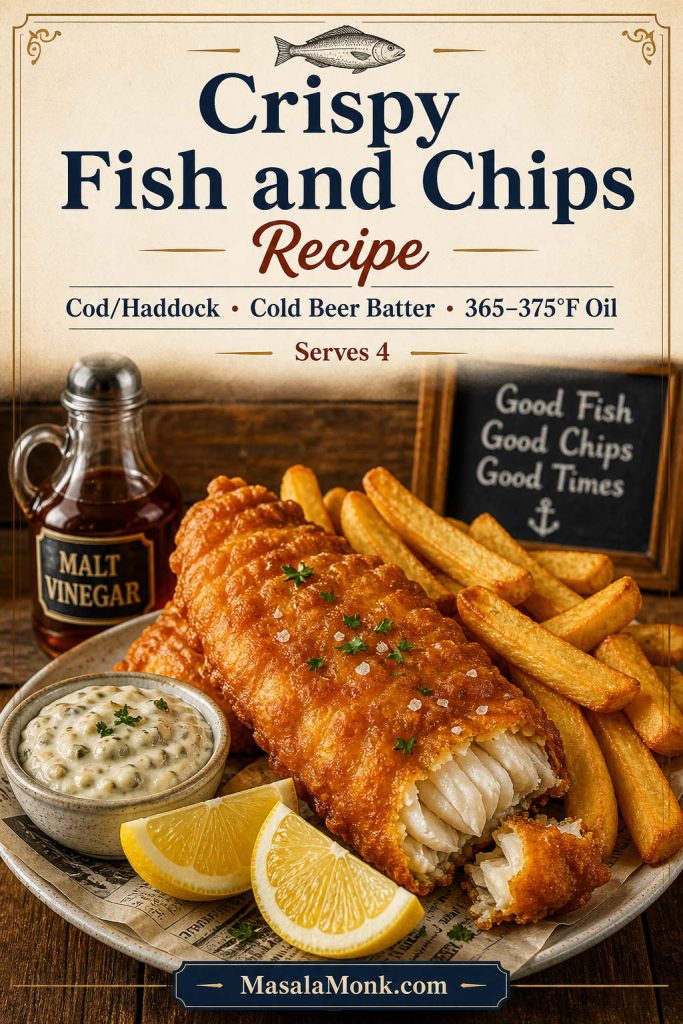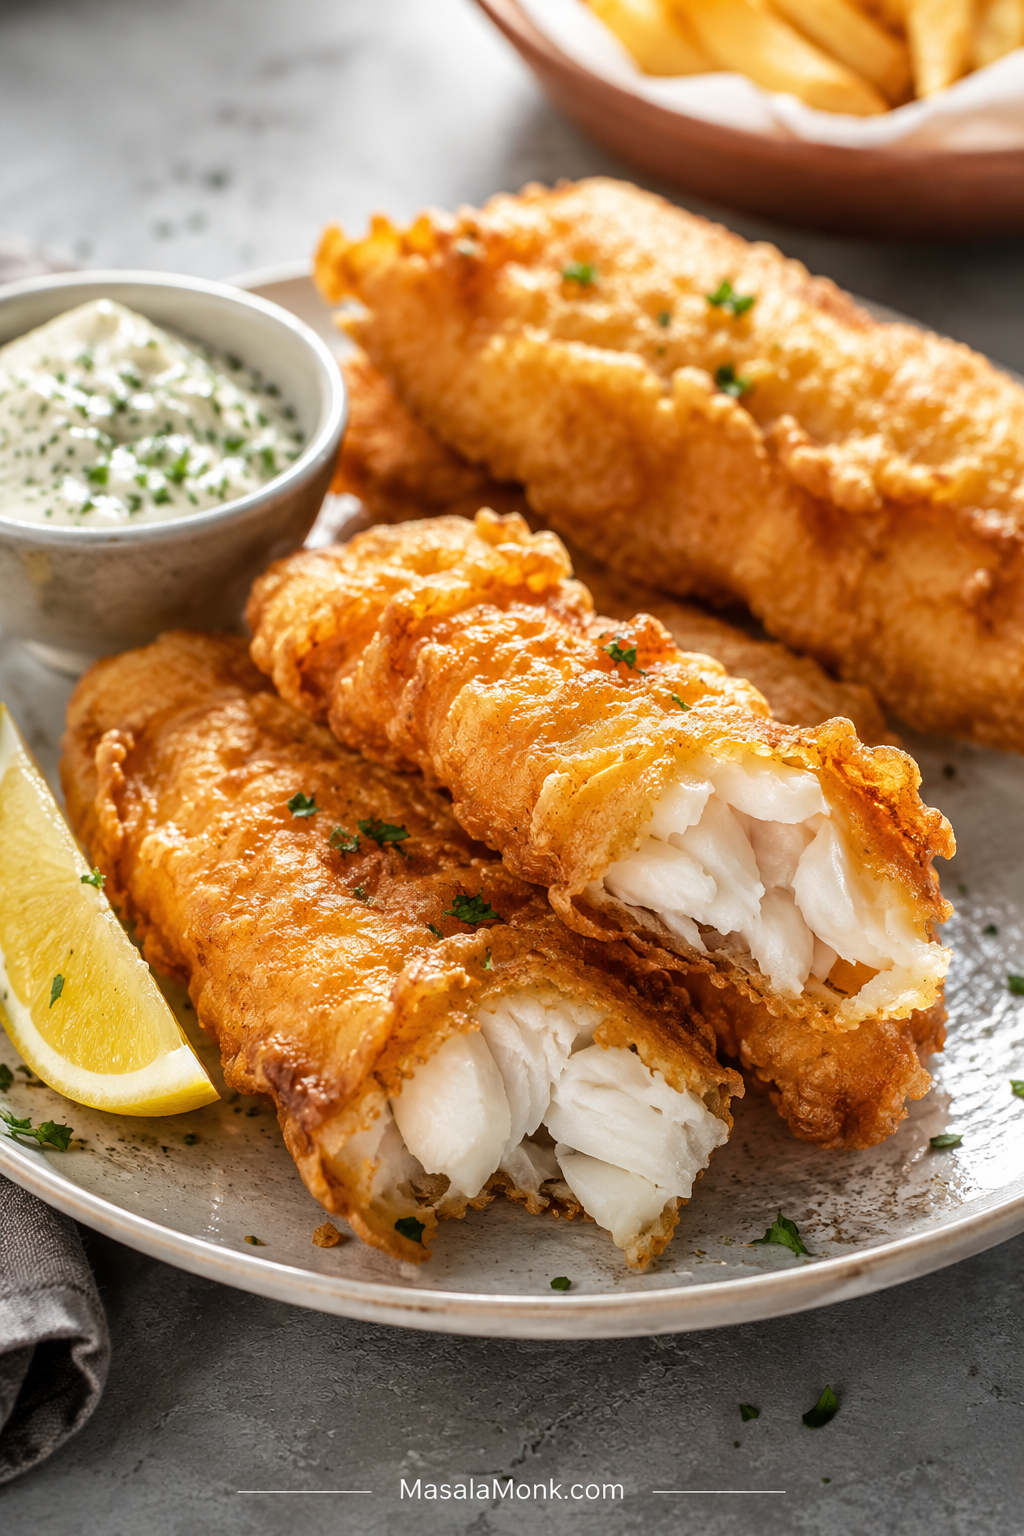
This fish batter recipe gives you crisp, golden fried fish with a light coating that actually sticks. The main version is made without beer, using flour, cornstarch, baking powder, and ice-cold sparkling water, with a beer batter option included if you want a more classic fish-and-chips-style crust.
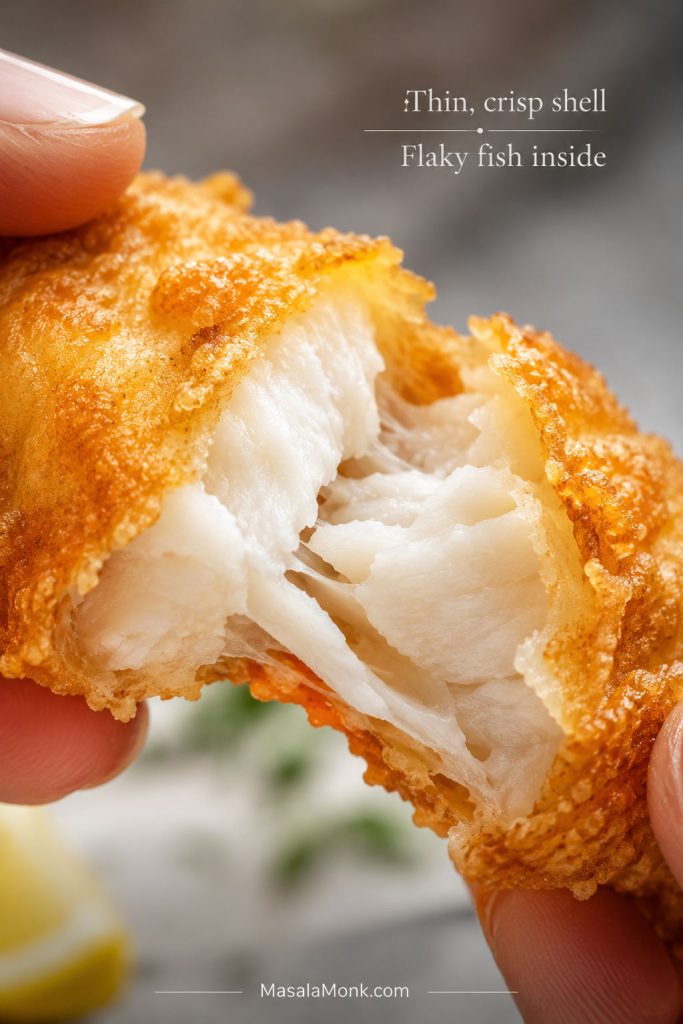
The goal is simple: flaky fish inside, a thin crunchy shell outside, and no soggy, greasy, or sliding batter. Below, you will find the exact batter ratio, cups and metric measurements, the right oil temperature, the best fish to use, and quick fixes for common problems like batter falling off, turning bready, or going soft after frying.
What you’ll find in this fish batter recipe guide
Quick Answer: What Makes This Fish Batter Recipe Crispy?
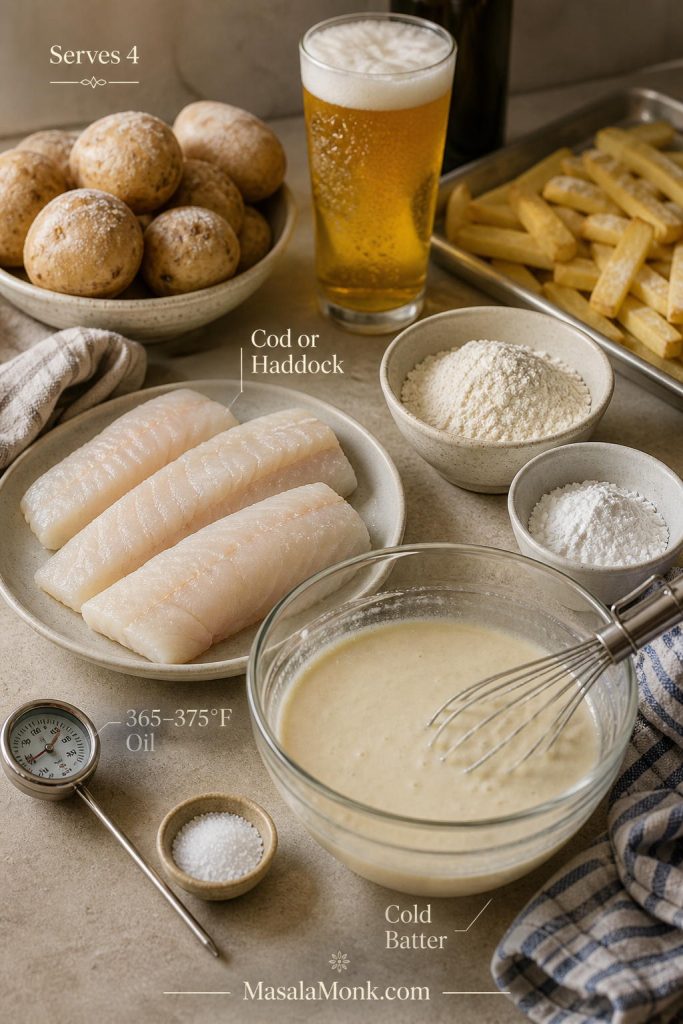
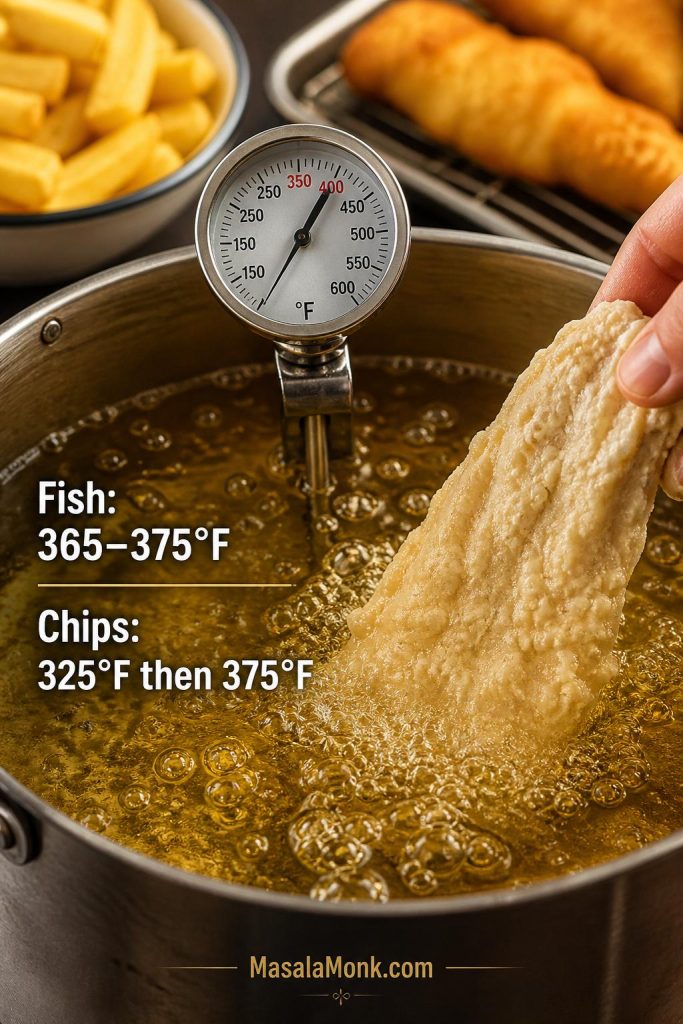
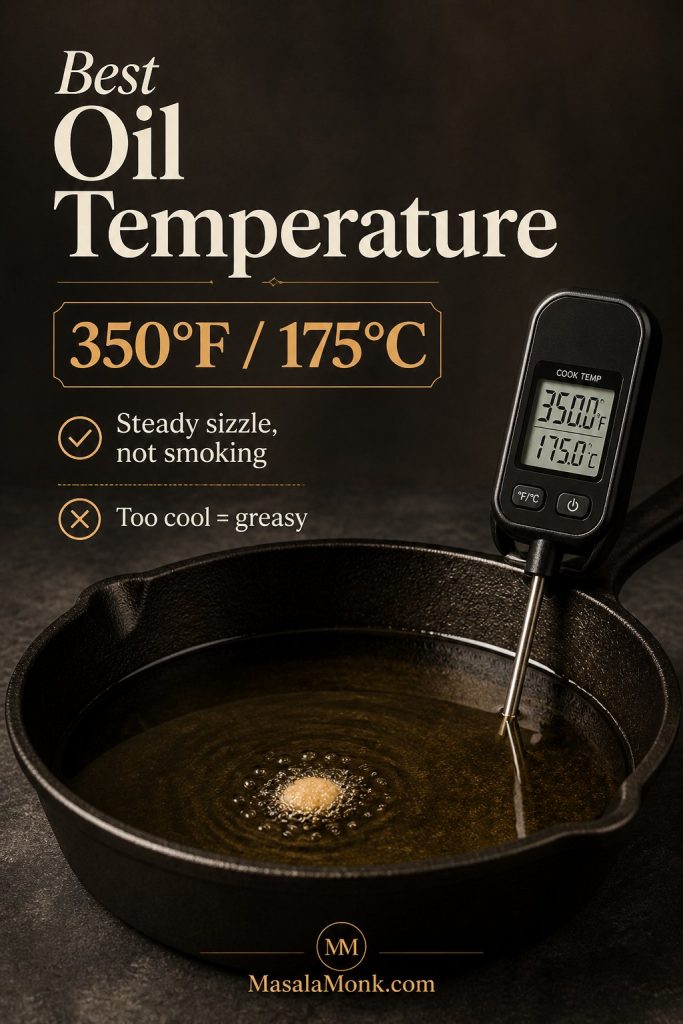
The crispiest coating comes from a mix of flour and cornstarch or rice flour, a little baking powder for lift, very cold sparkling water or beer, and hot oil. Pat the fish dry, dust it lightly with flour or cornstarch, dip it in cold batter, then fry at about 365°F / 185°C, keeping the oil between 350–375°F / 175–190°C.
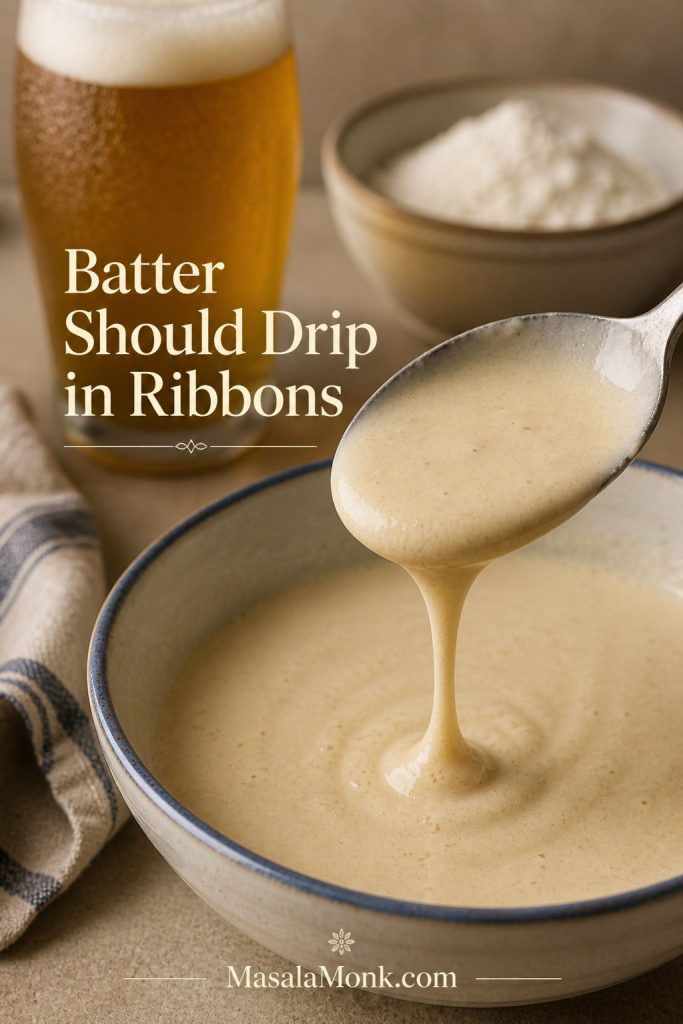
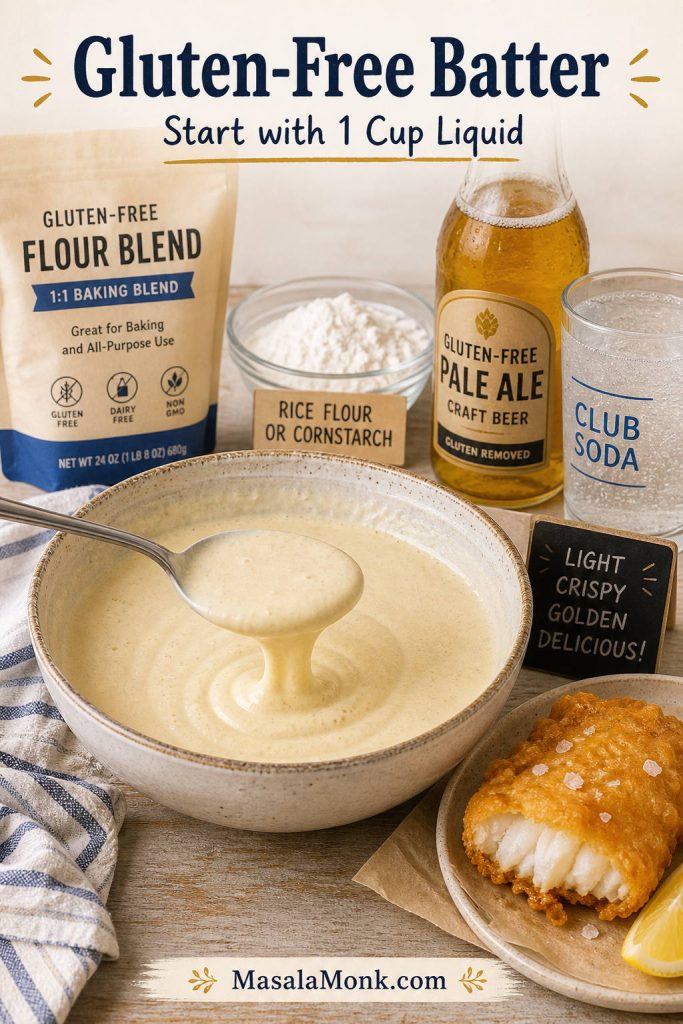
The batter should look like heavy cream or loose pancake batter. It should cling to the fish, drip slowly, and leave a thin coating instead of running off instantly or piling up in thick, bready clumps.
Already cooking? Go straight to the recipe card, or check the batter texture guide before you dip the fish.
Fish Batter Recipe at a Glance
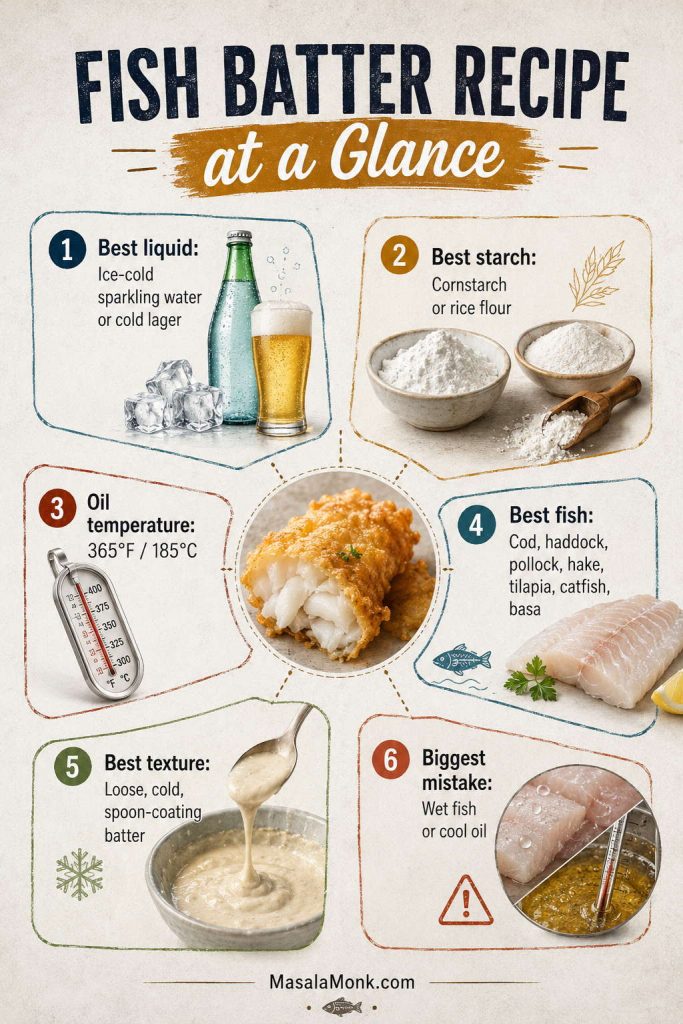
Before getting into the full method, here are the numbers and choices that matter most for this fish batter recipe: the liquid, starch, oil temperature, batter texture, and the mistake most likely to make the coating fail.
| Best liquid | Ice-cold sparkling water, club soda, or cold lager |
|---|---|
| Best starch | Cornstarch for easy crispness; rice flour for a longer-lasting crunch |
| Best oil temperature | 365°F / 185°C target, with a working range of 350–375°F / 175–190°C |
| Best fish | Cod, haddock, pollock, hake, tilapia, catfish, basa, or other firm white fish |
| Best texture | Loose, cold, lightly bubbly, and thick enough to coat the back of a spoon |
| Biggest mistake | Battering wet fish or frying in oil that is not hot enough |
Why This Fish Batter Recipe Works
The reason this fish batter recipe works is simple: it balances structure with lift. Flour gives the mixture enough body to hold around the fish, while cornstarch or rice flour keeps the finished crust from feeling heavy. Baking powder and ice-cold bubbles help the coating puff and set quickly when it hits hot oil.
The other key is technique. Dry fish, a light dusting of flour or starch, hot oil, and a wire rack after frying all help the coating stay attached and crisp. Skip any one of those, and even a good batter can turn soggy, greasy, or patchy.
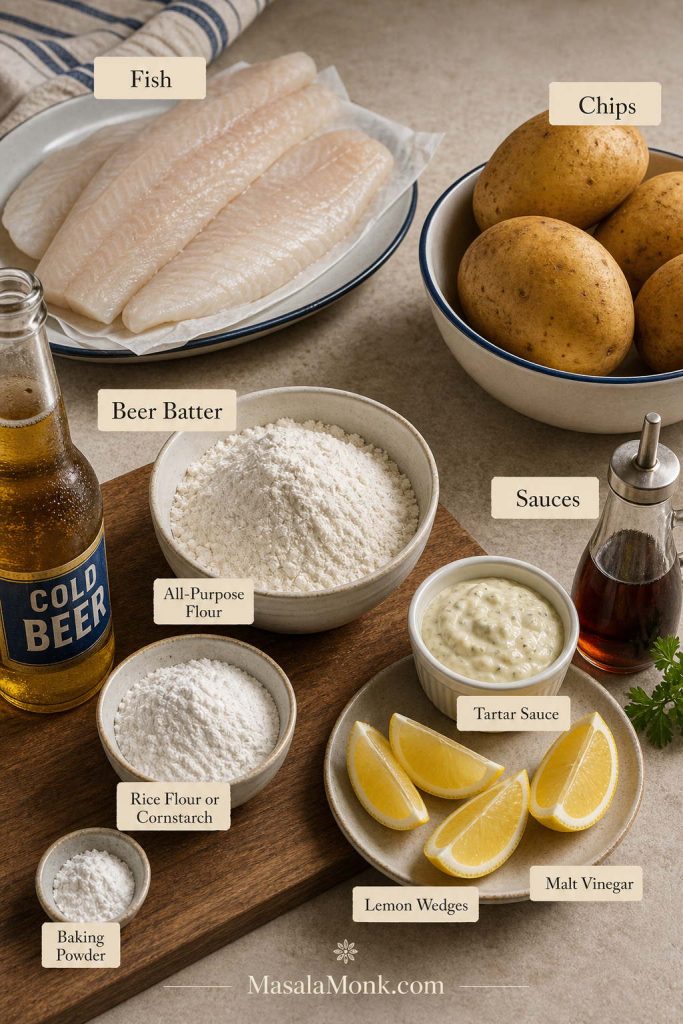
Fish Batter Ingredients You Need
The ingredient list for this fish batter recipe is short, but each part has a job. Use the table below to see what each ingredient does and where you can adjust the batter without ruining the texture.
| Ingredient | Amount | Why it matters |
|---|---|---|
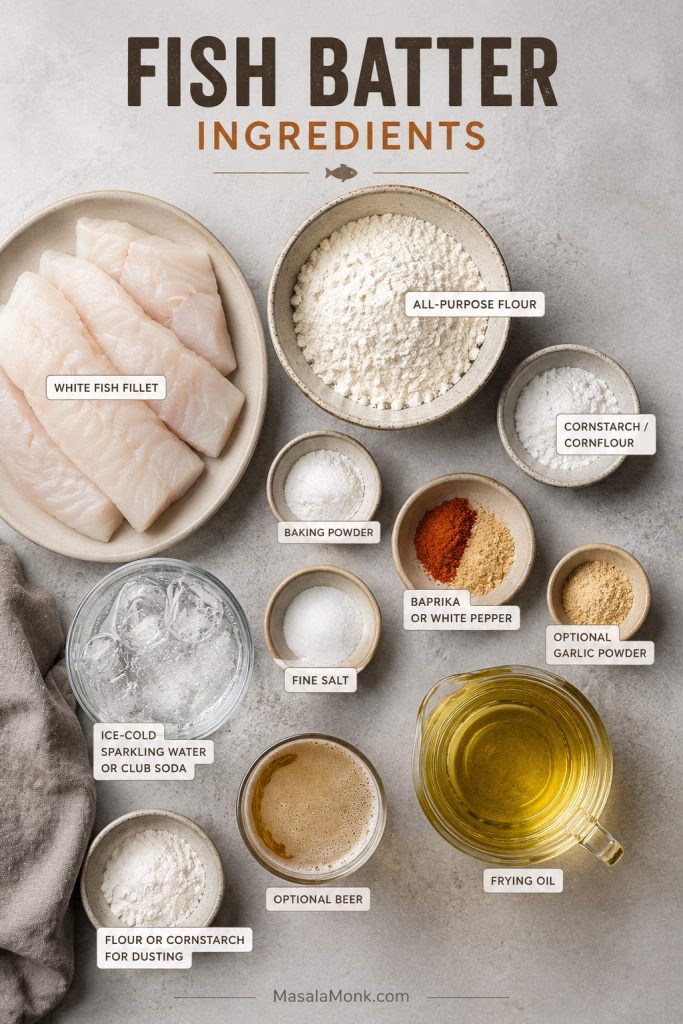
| White fish fillets | 1¼ lb / 550–600g | Firm white fish works best because it holds together and flakes cleanly after frying. |
| All-purpose flour | ¾ cup / about 90g | Builds the base of the batter and helps the coating brown. |
| Cornstarch / cornflour | ¼ cup / about 30g | Use cornstarch, also called cornflour in many countries. Do not use coarse cornmeal here. |
| Baking powder | 1 teaspoon / about 4g | Adds lift so the crust fries up airy instead of dense. |
| Fine salt | ¾ teaspoon / about 4g | Seasons the batter from the inside. |
| Paprika or white pepper | ½ teaspoon | Adds gentle flavor and color without overpowering the fish. |
| Garlic powder, optional | ¼–½ teaspoon | Adds a little savory depth, especially for fish tacos or casual fried fish plates. |
| Ice-cold sparkling water or club soda | ¾ cup / 180ml, plus more if needed | Creates a light no-beer batter. Add a little more only if the mixture feels too thick. |
| Extra flour, cornstarch, or rice flour for dusting | ¼ cup total / about 30g | Gives the wet coating something dry to grip so it does not slide off the fish. |
| Neutral oil | Enough for 2–3 inches depth | Canola, vegetable, sunflower, peanut, rice bran, or another neutral high-heat oil works well. |
Once the basic ingredients are clear, the main choice is which starch to use for the crispest finish.
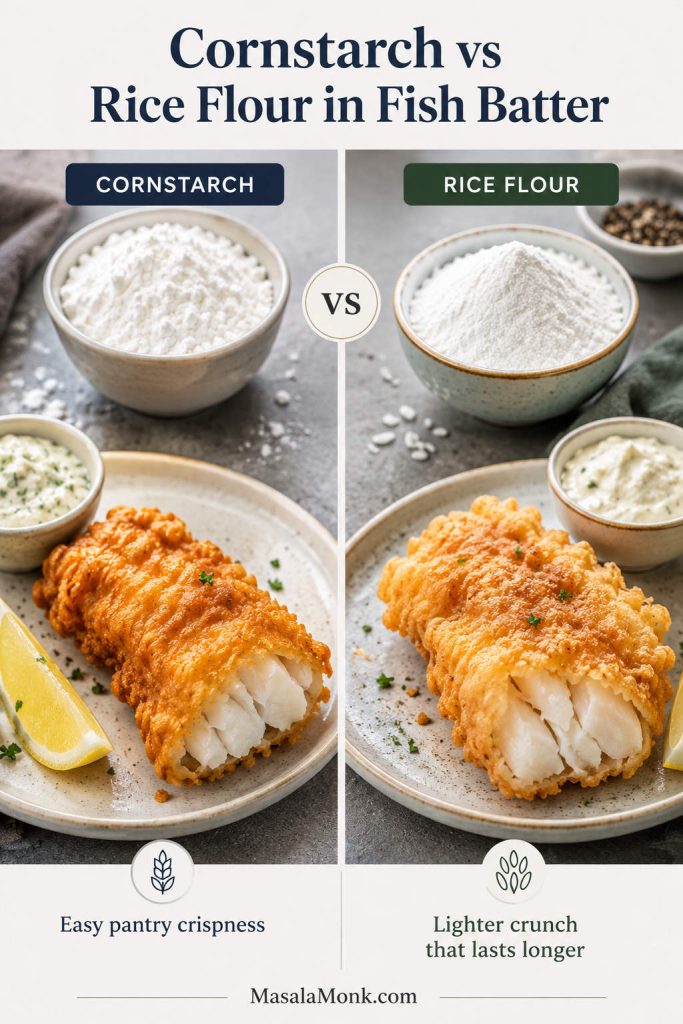
Cornstarch vs Rice Flour in Fish Batter
Cornstarch is the easiest pantry choice for a light, crisp coating. Rice flour is the upgrade when you want a more delicate crunch that stays crisp a little longer after frying. You can use either one in the same amount.
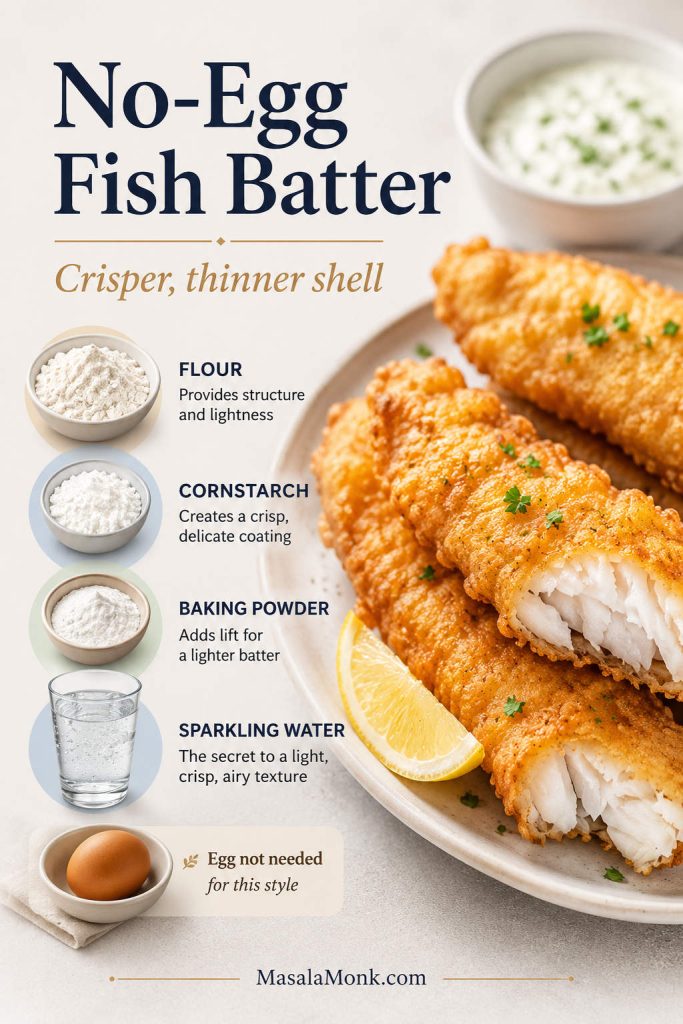
Do You Need Egg in Fish Batter?
No. For this style of no-egg fish batter recipe, skipping the egg gives you a thinner, crisper shell. Egg makes the coating richer and puffier, but it can also make the crust more cakey or chewy. Add egg only if you prefer a thicker, softer coating.
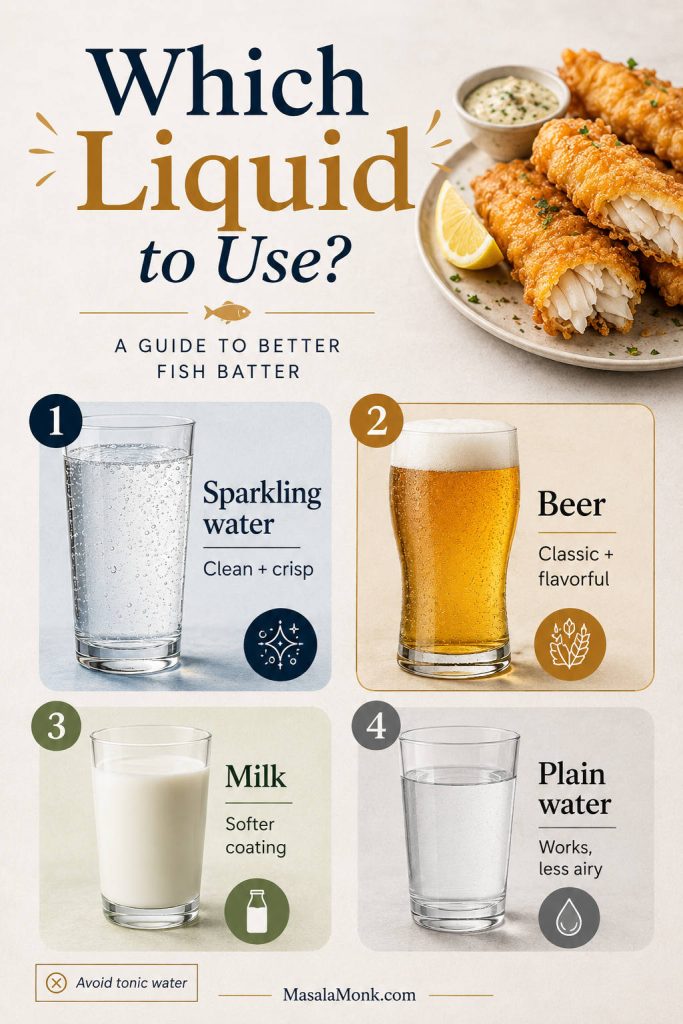
Milk, Water, Sparkling Water, or Beer?
The liquid changes the personality of the batter. Milk makes a softer, slightly richer coating, but it is not the best choice when you want the lightest crunch. Plain cold water works, but the crust is usually less airy. Sparkling water, club soda, seltzer, or cold beer gives the batter bubbles, which helps the coating fry up lighter.
For the cleanest no-beer version, use sparkling water or club soda. For a pub-style flavor, use cold lager or pale ale.
Avoid tonic water unless you specifically want bitterness and sweetness in the coating. For a neutral crispy fish batter, sparkling water, club soda, or seltzer is a better choice.
Ingredients ready? Jump to how to make the batter, or compare the no-beer version with the beer batter option.
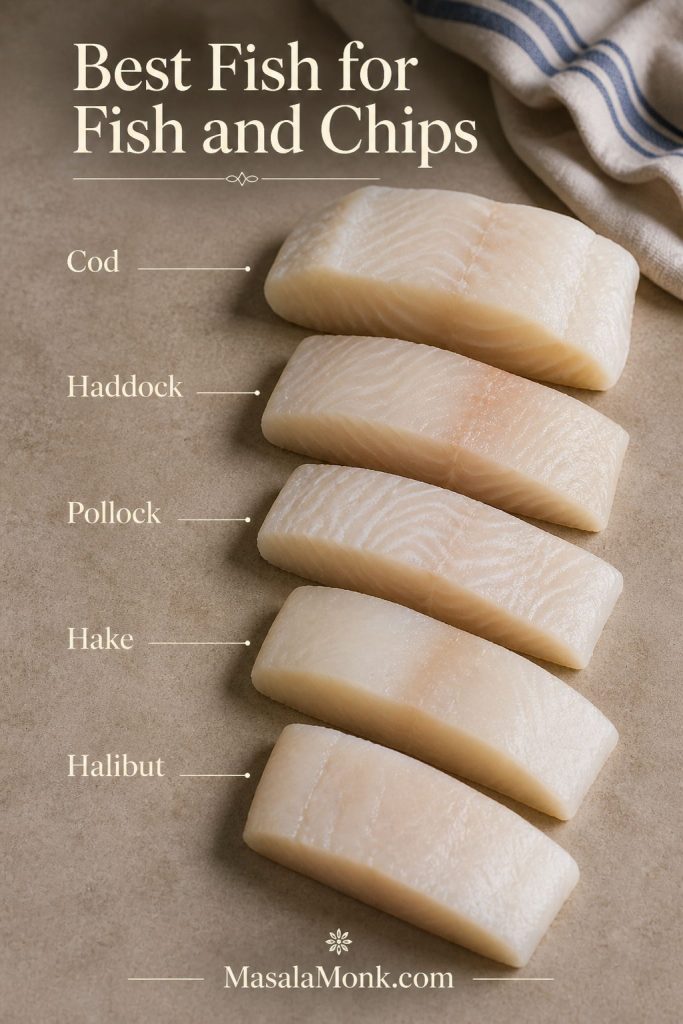
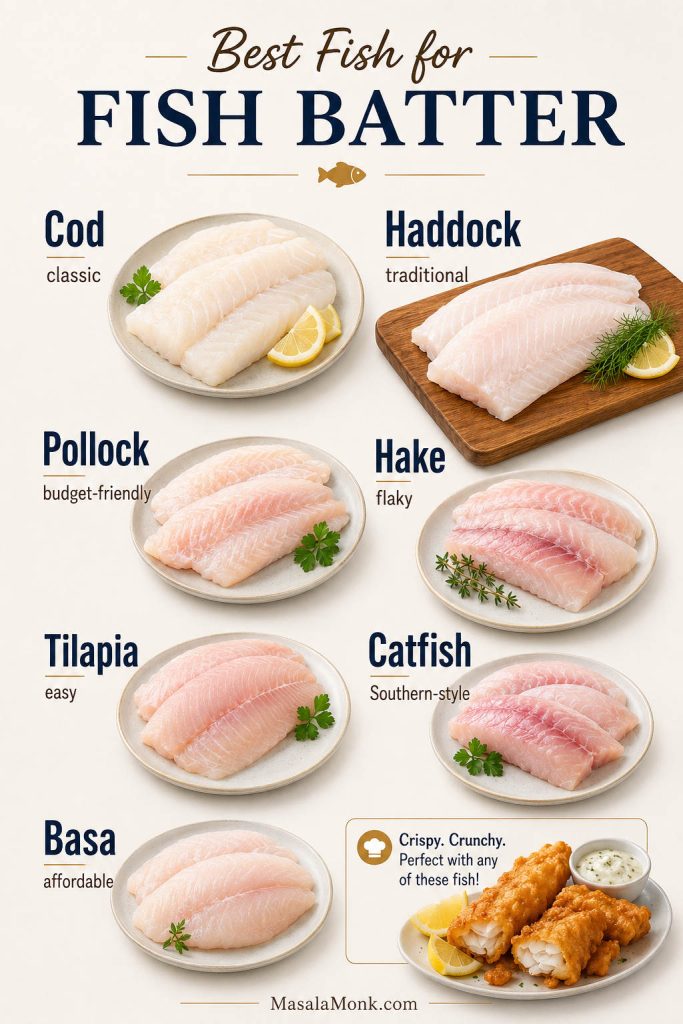
Best Fish for This Batter
The best fish for this fish batter recipe is firm, mild, and not too wet. White fish fillets are the safest place to start because they cook quickly, flake nicely, and let the golden crust stay the main event.
| Fish | Why it works |
|---|---|
| Cod | Classic choice for battered fish and fish and chips; firm, mild, and flaky. |
| Haddock | Traditional, flavorful, and excellent with a crisp golden coating. |
| Pollock | Budget-friendly, mild, and easy to fry in strips. |
| Hake | Soft and flaky, especially good for fish-and-chips-style dinners. |
| Tilapia | Accessible, thin, and quick-cooking; dry it very well before battering. |
| Catfish | Great for a Southern-style fried fish direction. |
| Basa | Mild and affordable; works well if it is patted very dry first. |
| Halibut | Firm and premium, but watch the cook time so it does not dry out. |
| Shrimp or calamari | The same batter works, but the frying time will be shorter than fish fillets. |
If you are planning to use the fried fish in tortillas instead of serving it with chips, this same coating works beautifully as a crisp base for fish tacos.
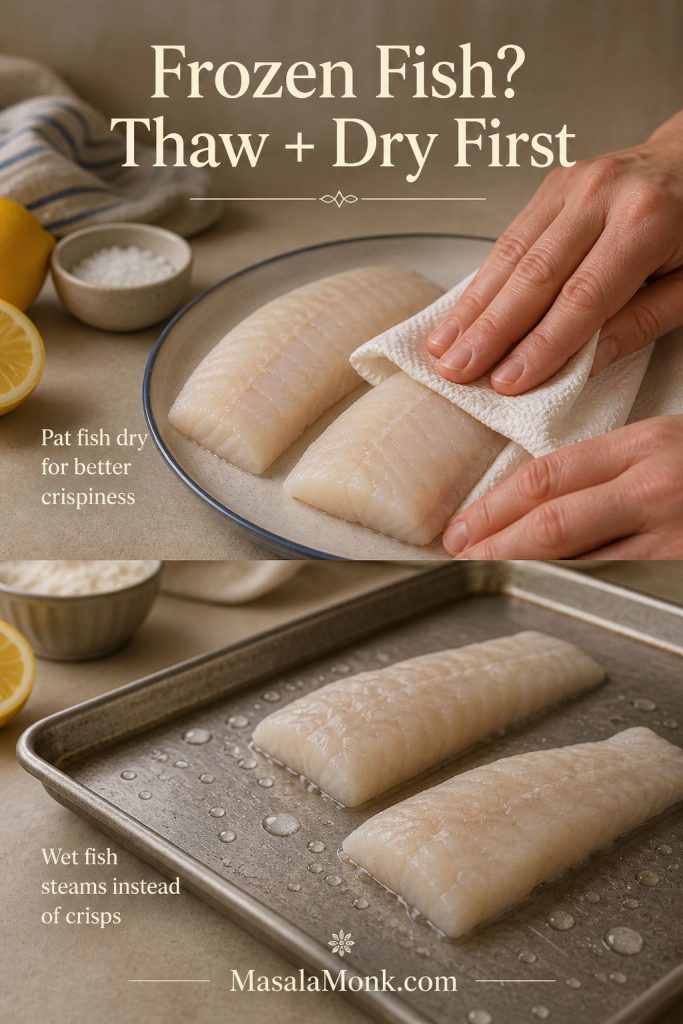
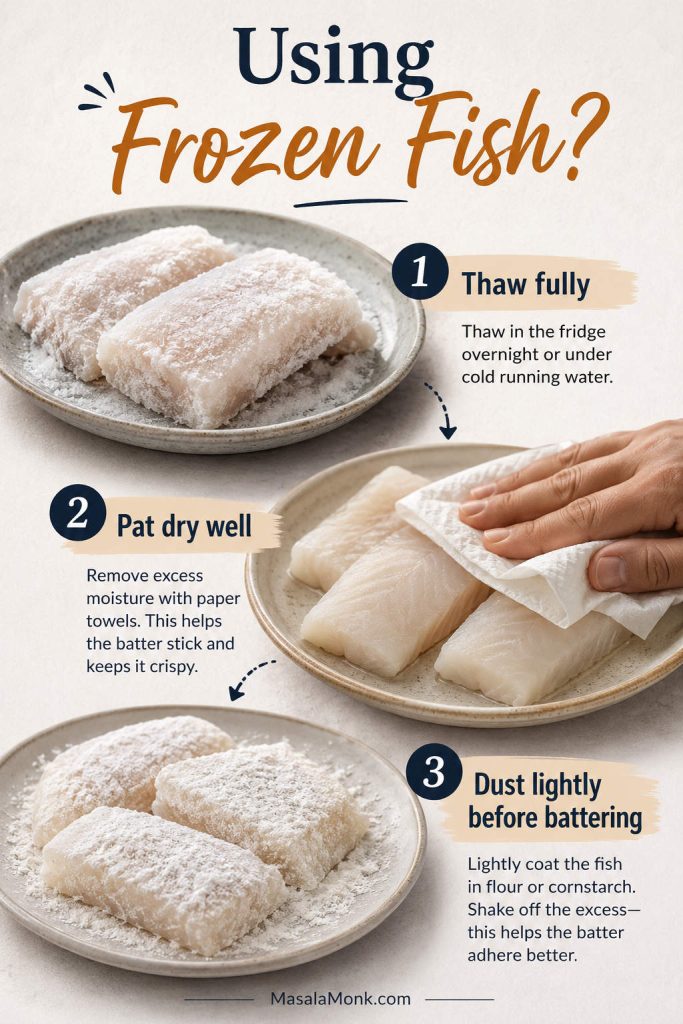
Can You Use Frozen Fish?
Yes, frozen fish can work well, but it needs extra attention before it goes anywhere near the batter.
Thaw it completely first and dry it very well. Frozen fish often releases extra moisture, and that moisture can make the batter slide off or turn soft in the oil. For best results, thaw the fish in the refrigerator, pat it dry with paper towels, let it sit uncovered for a few minutes if it still feels wet, then dust it lightly before dipping. Do not batter fish while it is still icy or partially frozen.
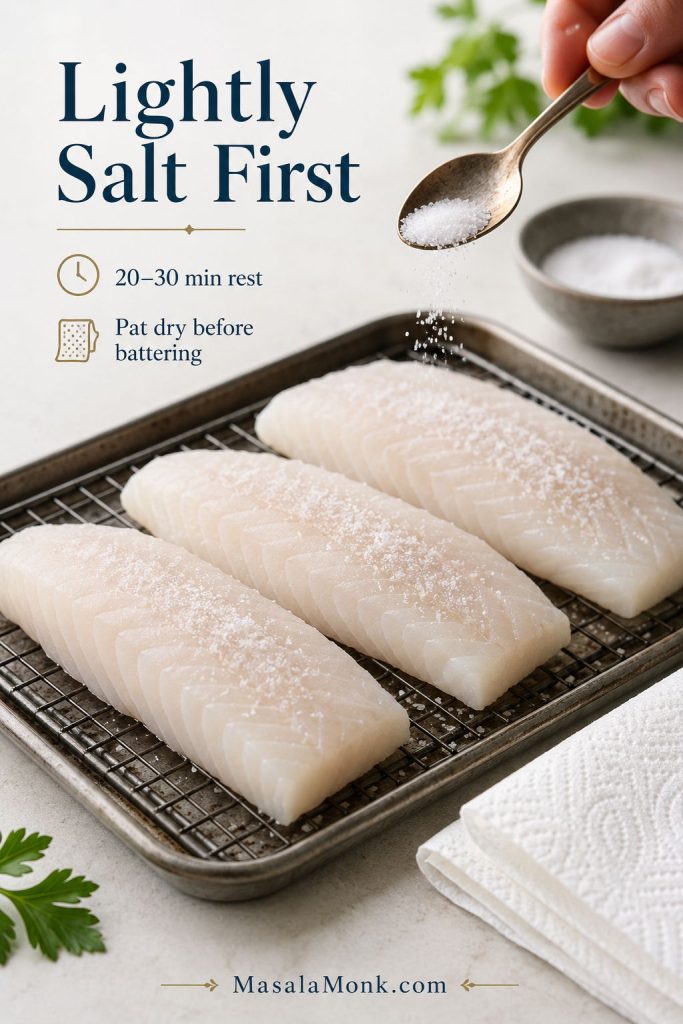
Optional Pro Step: Lightly Salt the Fish First
If you have extra time, lightly salt the fish before battering. Use about ¼ teaspoon fine salt per 1 lb / 450g fish, then let the pieces rest uncovered in the refrigerator. Even 20–30 minutes helps draw a little moisture from the surface. If you are planning ahead, you can salt thicker fillets a few hours earlier, then pat them dry before dusting and dipping.
This step is not required for a quick dinner, but it gives you firmer, better-seasoned fish and helps reduce the watery layer that can make batter slide off.
Fish ready? Head to how to make the batter, or check how to make the coating stick before frying.
How to Make This Fish Batter Recipe
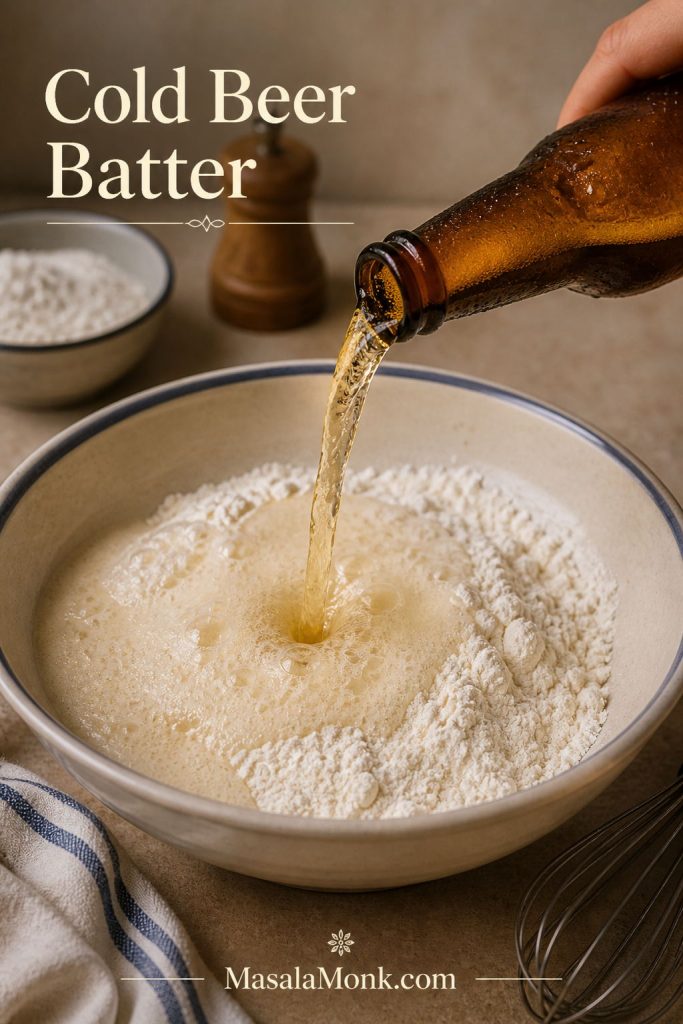
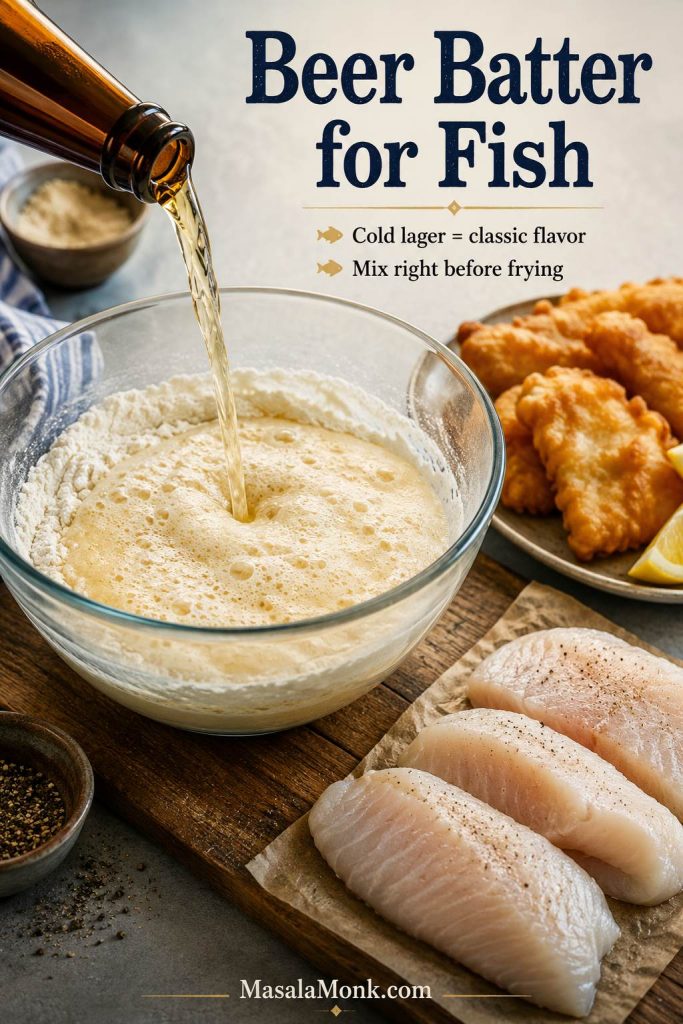
When you are ready to fry, make this fish batter recipe right before the fish goes into the oil. Once the sparkling water or beer is added, the bubbles start fading, so a freshly mixed, cold batter gives you the lightest crust.
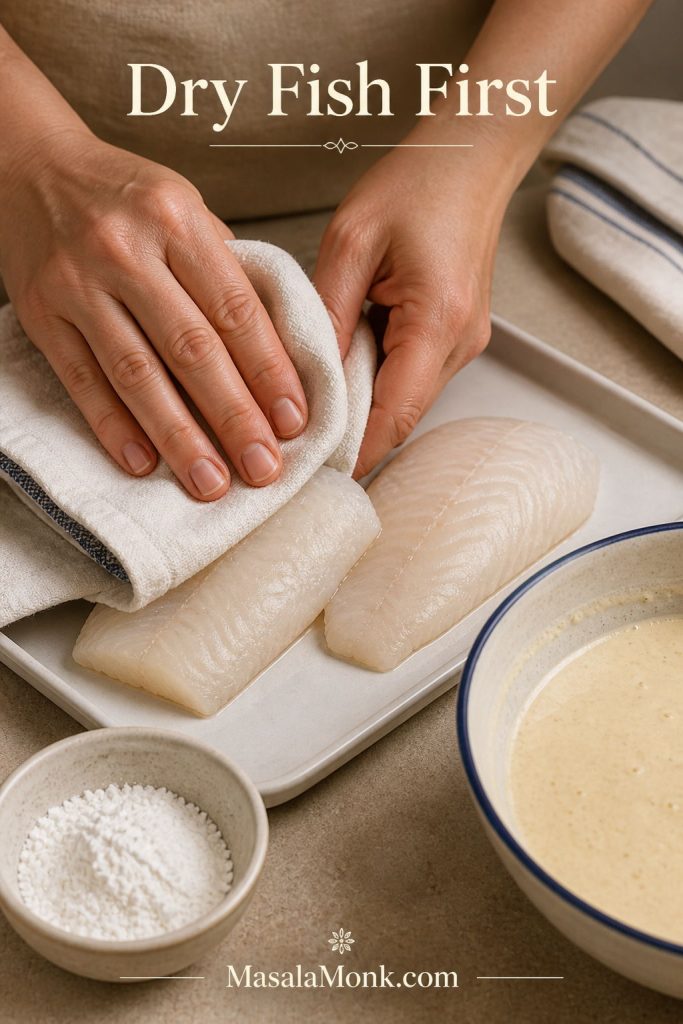
- Dry the fish well. Pat the fillets with paper towels until the surface no longer feels wet. Moisture is one of the main reasons batter slips off.
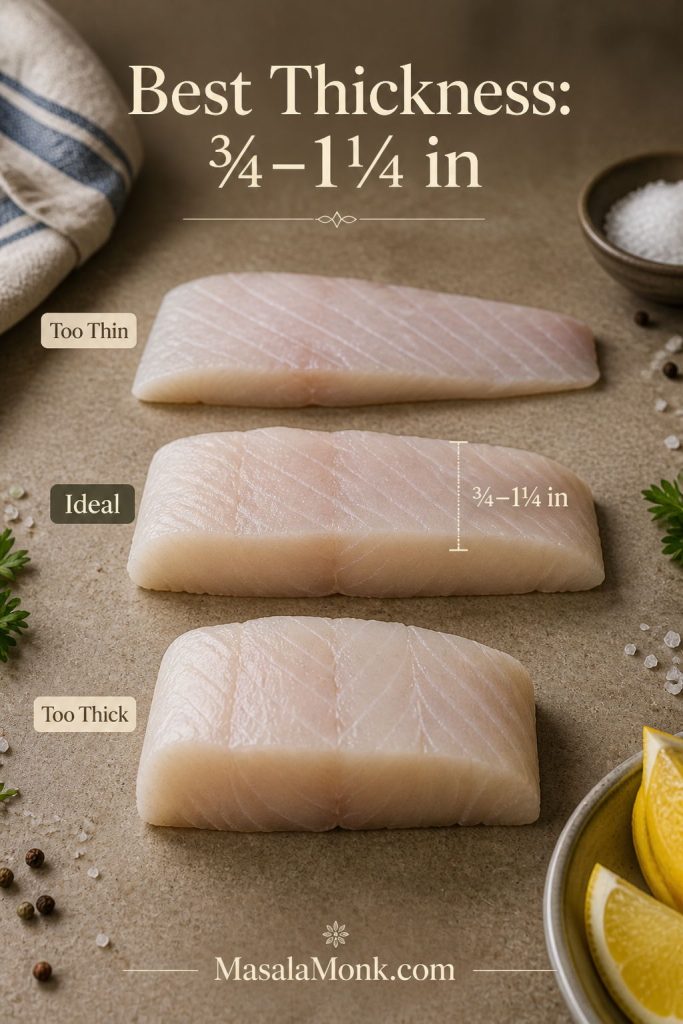
- Cut even pieces. Slice the fish into strips about 1 inch wide, or into batons around 3 x 1¼ inches / 7–8 x 3cm.
- Mix the dry ingredients. Whisk the flour, cornstarch, baking powder, salt, and seasoning in a bowl.
- Add cold liquid. Pour in ice-cold sparkling water or club soda and whisk only until combined. Small lumps are fine.
- Dust the fish. Lightly coat each piece with flour, cornstarch, or rice flour, then shake off the excess.
- Dip and coat. Lower the fish into the batter, turn to coat, and let the extra drip off for a second.
- Fry right away. Slide the fish gently into hot oil and let the crust set before moving it.

Should You Rest Fish Batter?
For this quick sparkling-water batter, use it soon after mixing. The bubbles are part of what makes the coating light, and they fade as the batter sits.
Some traditional fish-and-chips recipes rest the batter for 30 minutes or longer, especially when using beer and a thicker flour-cornflour mixture. That can work, but for the lightest no-beer version here, mix the wet batter only when the fish is dry, the oil is heating, and your rack is ready.
Before the fish goes into the oil, check the texture guide and the frying temperature tips.
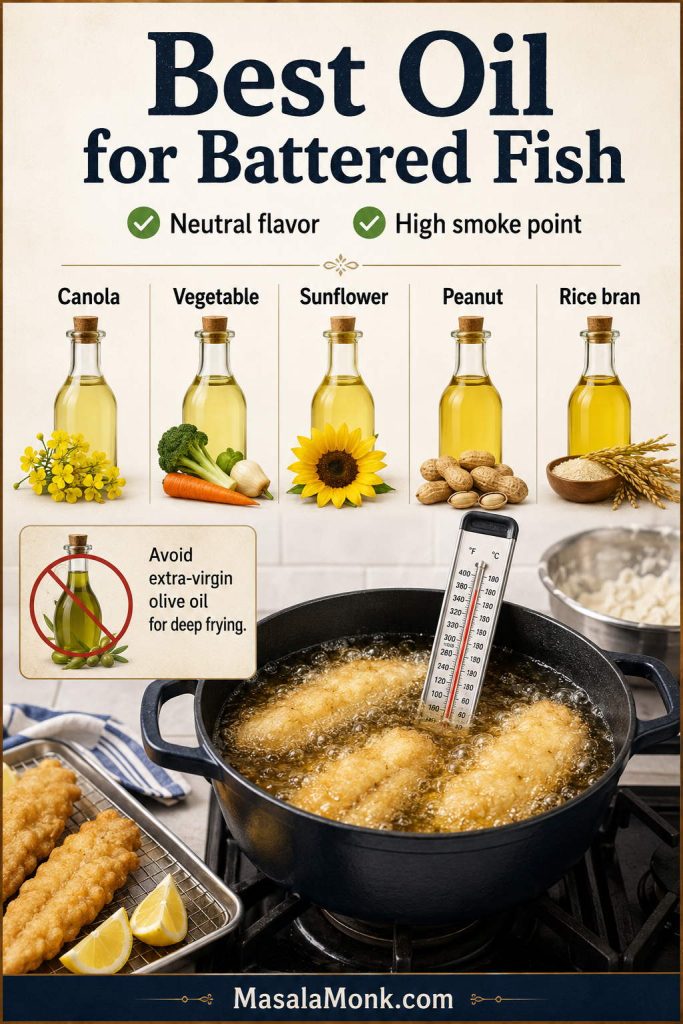
Best Oil for Frying Battered Fish
Use a neutral, high-heat oil such as canola, vegetable, sunflower, peanut, or rice bran oil. These oils let the fish and crisp coating stay the focus instead of adding a strong flavor.
Choose an oil with a high smoke point and a neutral flavor so the batter can brown cleanly without tasting heavy, burnt, or oily.
Avoid extra-virgin olive oil for deep frying this batter because its flavor is stronger and it is not the easiest choice for holding a steady frying temperature. Whatever oil you use, give it enough time to return to the right temperature between batches.
If the oil smells strongly fishy, looks dark, or has a lot of burnt batter bits floating in it, strain it carefully after cooling or discard it. Old, dirty oil can make fresh fish taste heavy and bitter.
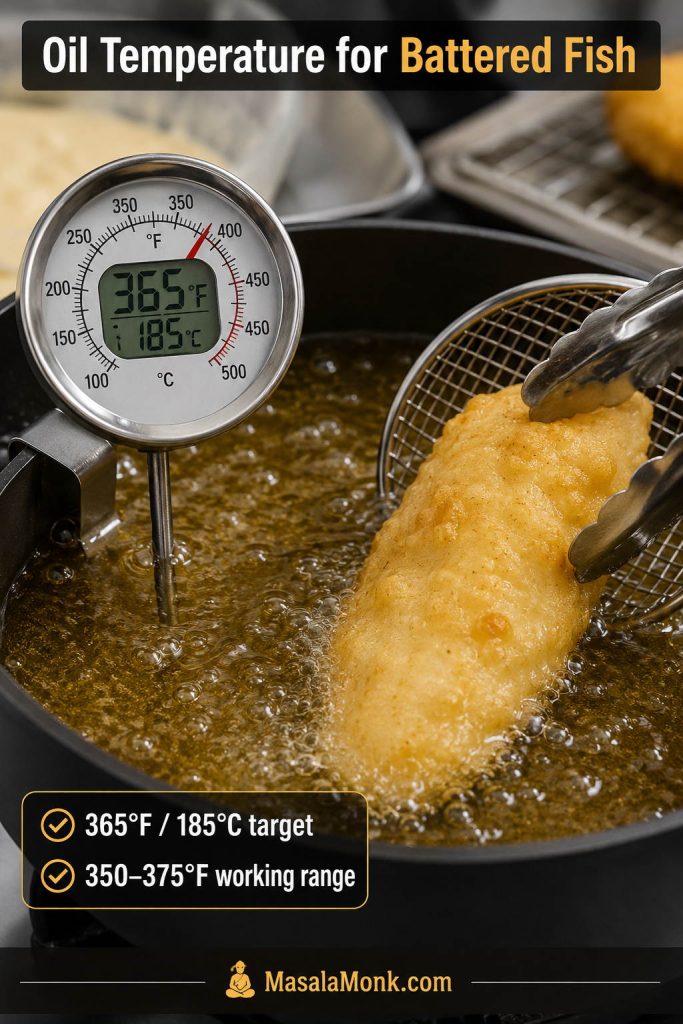
How to Fry Battered Fish So It Stays Crispy
Heat the oil to 365°F / 185°C, then keep it between 350–375°F / 175–190°C as the fish fries. Oil that runs too cool makes the coating greasy; oil that runs too hot browns the outside before the fish cooks through.
Coating sliding off or turning greasy? Check how to make batter stick or go straight to troubleshooting.
A few small habits make a big difference once the fish hits the oil.
- Use a Dutch oven, deep heavy pot, or deep fryer.
- Add enough oil for a 2–3 inch depth, without filling the pot more than halfway.
- Use a thermometer instead of guessing by sight.
- Fry in small batches so the oil temperature stays steady.
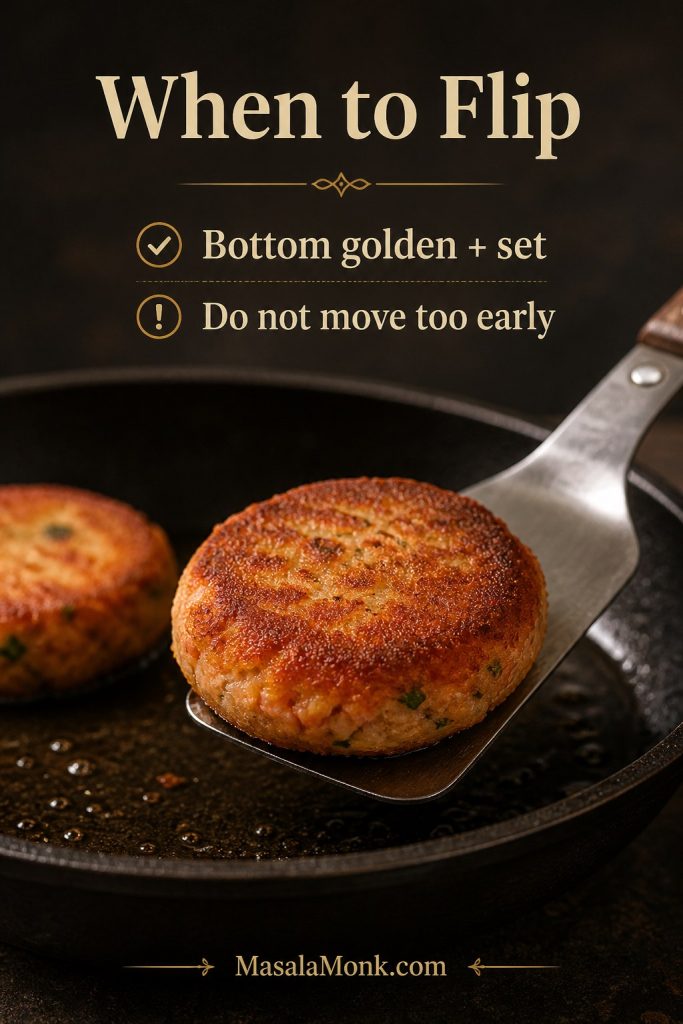
- Give the crust a moment to set before turning or moving the fish.
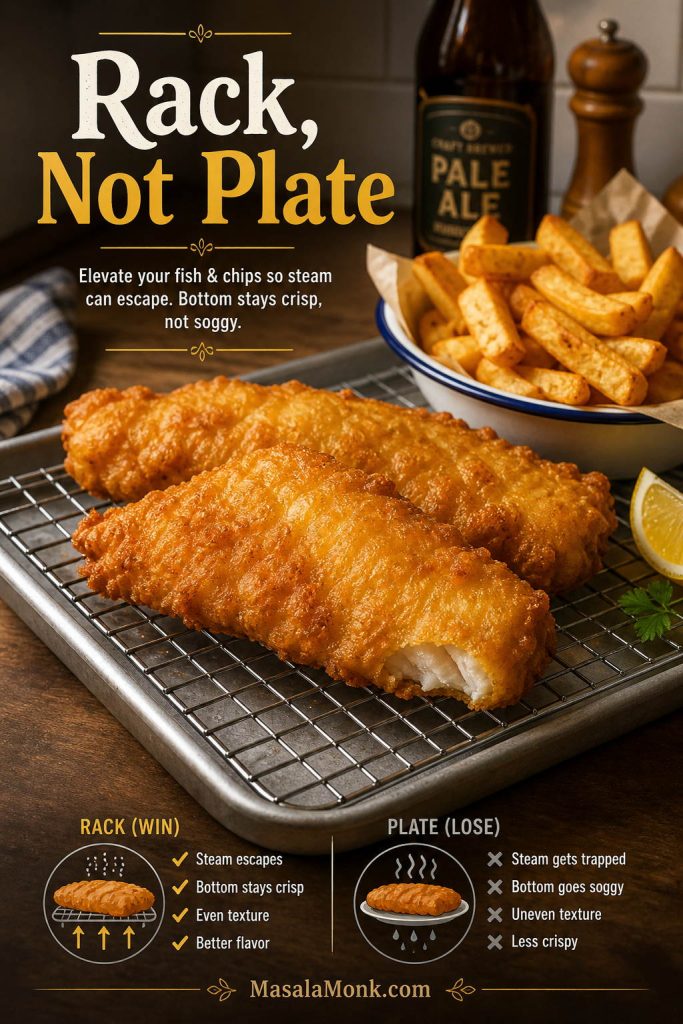
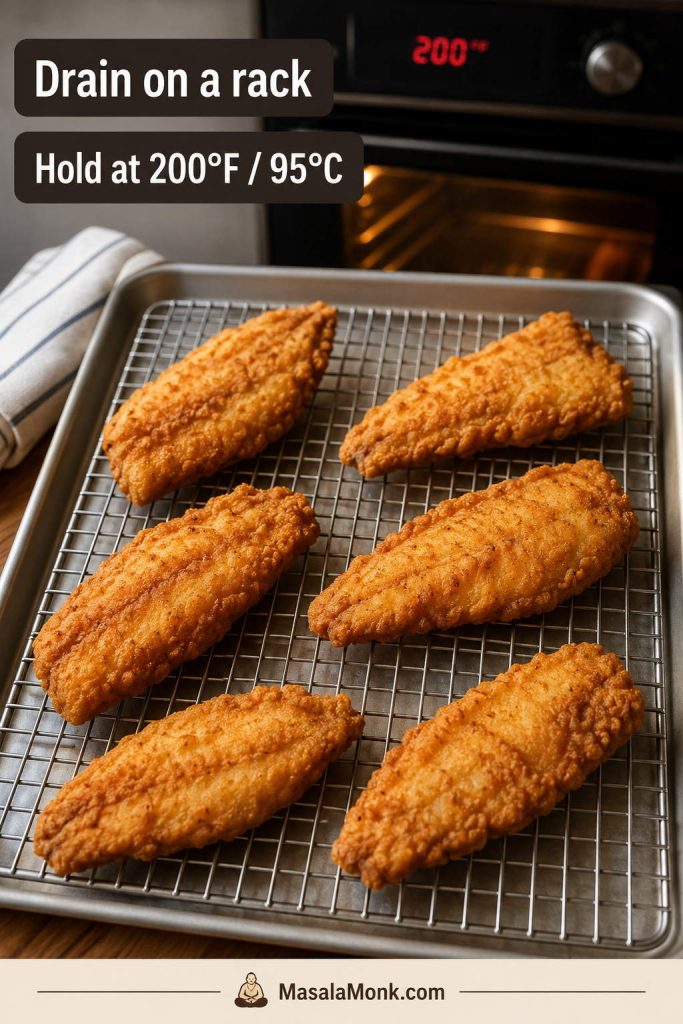
- Drain on a wire rack set over a baking sheet, not directly on a flat plate.
- Salt lightly while the fish is hot.
- Leave the fried fish uncovered so steam does not soften the crust.
For unevenly cut pieces, fry one test piece first. That first piece shows whether the oil is hot enough, whether the batter texture is right, and how long the rest of the batch needs.
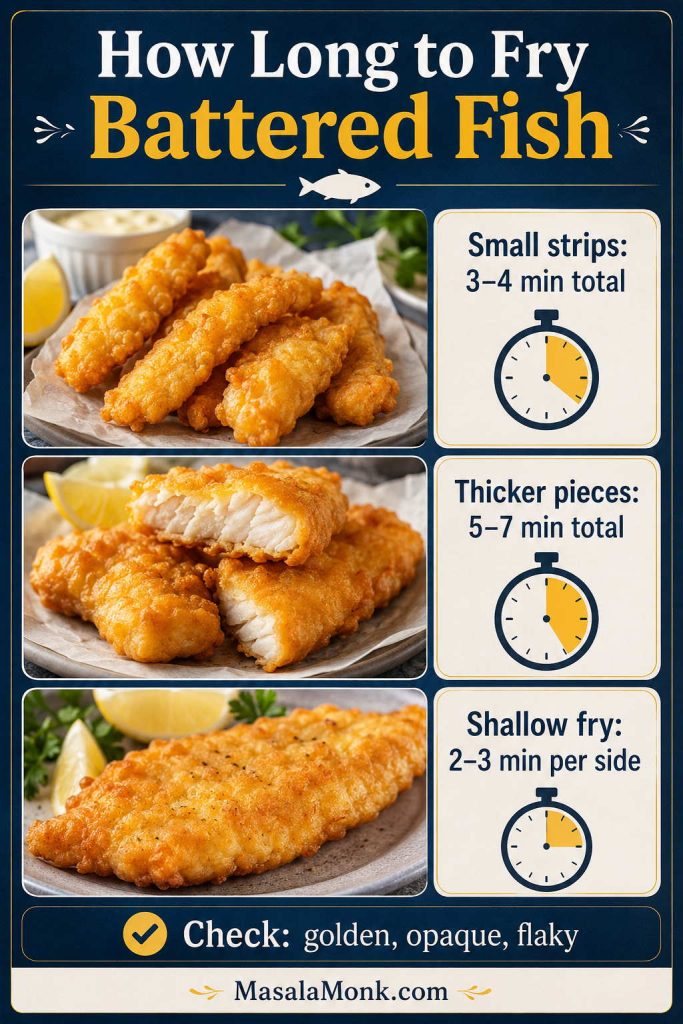
How Long to Fry Battered Fish
Most small battered fish strips take about 3–4 minutes total in deep oil. Thicker fillets or larger fish pieces may take 5–7 minutes total, depending on thickness. For shallow frying, plan on roughly 2–3 minutes per side.
Use color and doneness together. The crust should be golden and crisp, and the fish inside should look opaque and flake easily when checked with a fork.
How to Keep Battered Fish Warm Between Batches
When frying in batches, place the cooked fish on a wire rack set over a baking sheet and keep it in a 200°F / 95°C oven while the next batch cooks. Keep the pieces in a single layer and avoid covering them tightly, or steam will soften the crust.
Fish is done when it is opaque, flakes easily, and reaches 145°F / 63°C in the thickest part. For food safety guidance, you can also check the FoodSafety.gov minimum internal temperature chart.
Deep frying also needs basic safety. Use a deep pot, do not fill it more than halfway with oil, lower the fish gently, keep children and pets away from the stove, and never leave hot oil unattended. If oil ever smokes heavily, turn off the heat and let it cool; never add water to hot oil.
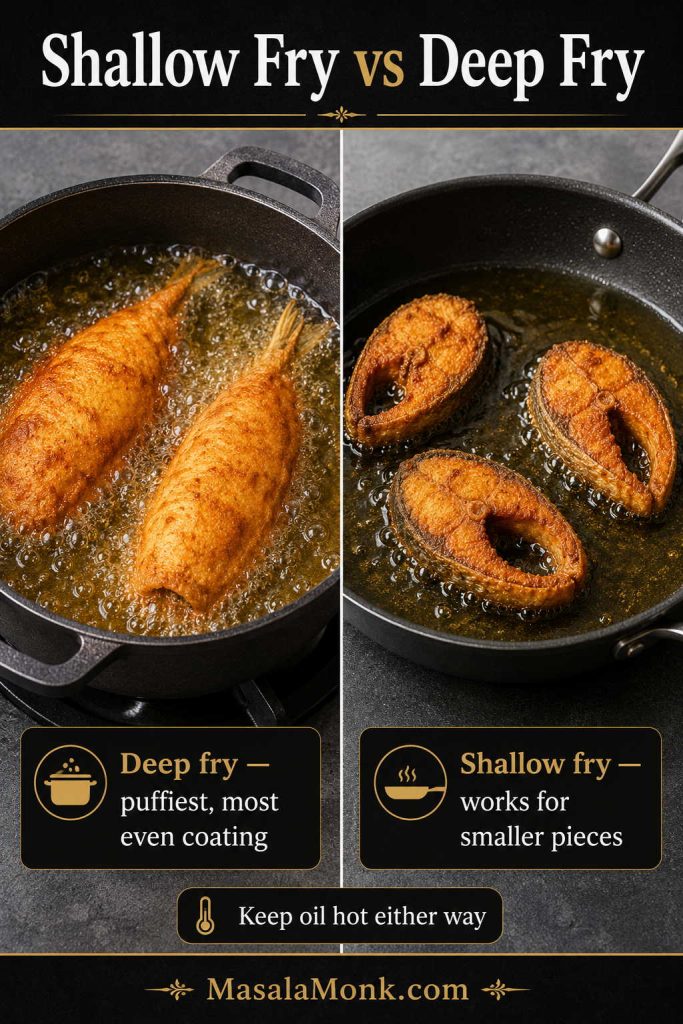
Shallow Fry vs Deep Fry for Battered Fish
For the most even coating, deep frying is the easier route because the fish is surrounded by hot oil. It is the simplest way to get a fully puffed, crisp shell on all sides.
Shallow frying can still work, especially with smaller pieces. Use enough oil to come at least halfway up the fish, let the first side set before turning, and flip gently so the coating does not tear. The crust may be a little flatter than deep-fried batter, but it can still be crisp and golden if the oil stays hot.
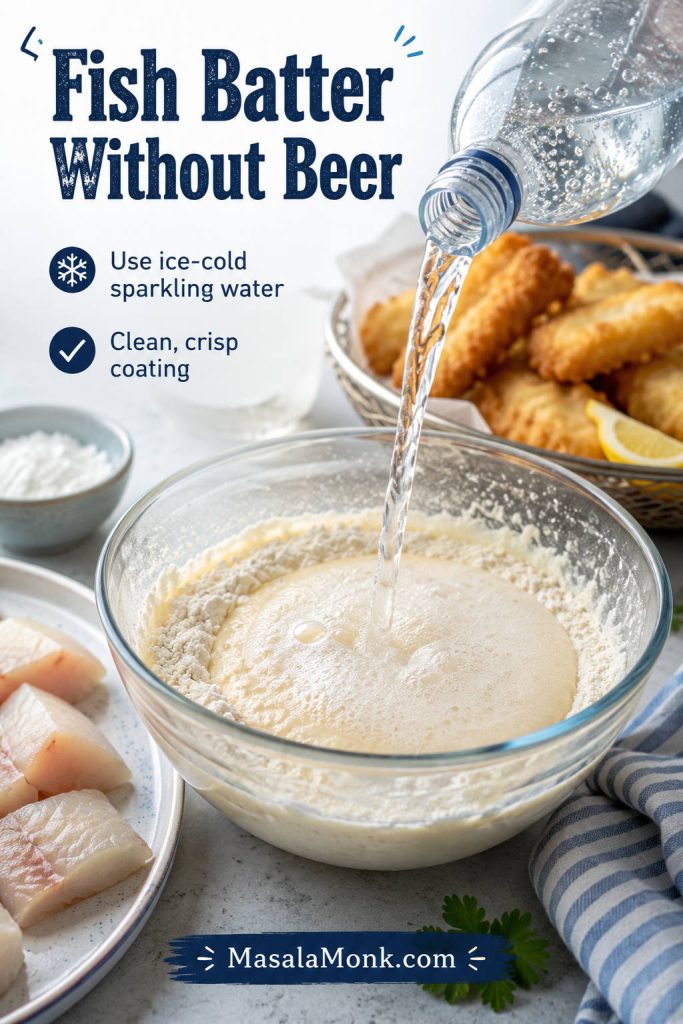
Fish Batter Without Beer
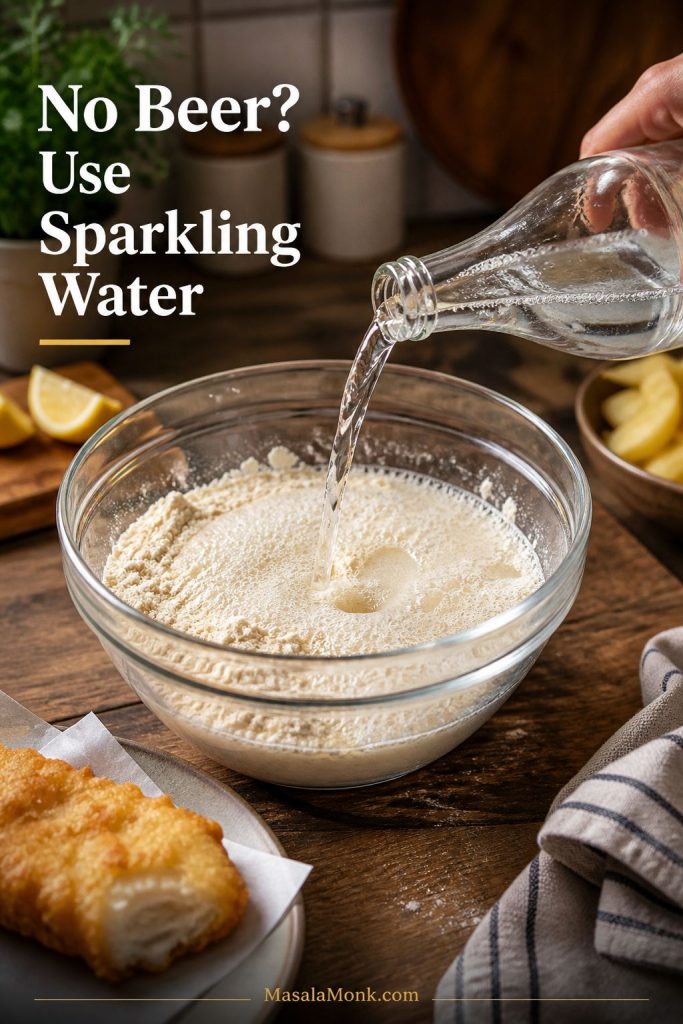
For a no-beer fish batter recipe, sparkling water is the easiest swap. Use ice-cold sparkling water, club soda, or seltzer so the batter still fries up light and delicate without beer flavor. Plain cold water works in a pinch, but the crust will usually be a little less airy.
This is the easiest version to start with because it works for fried fish, fish tacos, seafood, and fish-and-chips-style dinners. It also keeps the flavor clean, so the fish, seasoning, sauce, and sides can do more of the work.
Beer Batter for Fish
To make a beer-battered version, replace the sparkling water with ¾ cup / 180ml very cold lager or pale ale. Keep the beer cold, whisk only until the batter comes together, and fry right away while the mixture is still lively.
Lager is the safest first choice because it gives a clean, crisp finish without taking over the fish. Pale ale adds a little more flavor. Very dark beers can make the coating taste heavier or more bitter, so save them for times when you specifically want that deeper flavor.
Extra-Crisp Beer Batter Upgrade
For a more delicate, extra-crisp beer batter, use rice flour instead of cornstarch and replace 2 tablespoons / 30ml of the beer with vodka. This is not an alcohol-free option; it is simply an advanced crispness upgrade. The vodka helps the coating fry up lighter because it evaporates quickly and limits gluten development. Keep this as an upgrade, not the basic version, because the sparkling-water batter above is easier and more flexible for everyday cooking.
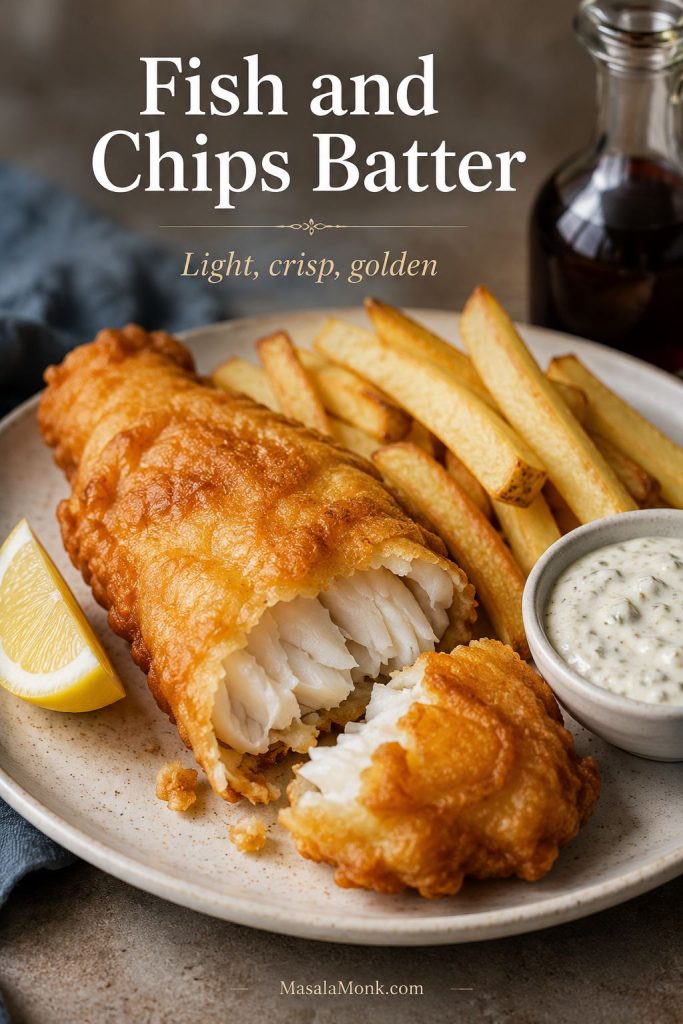
Fish and Chips Batter
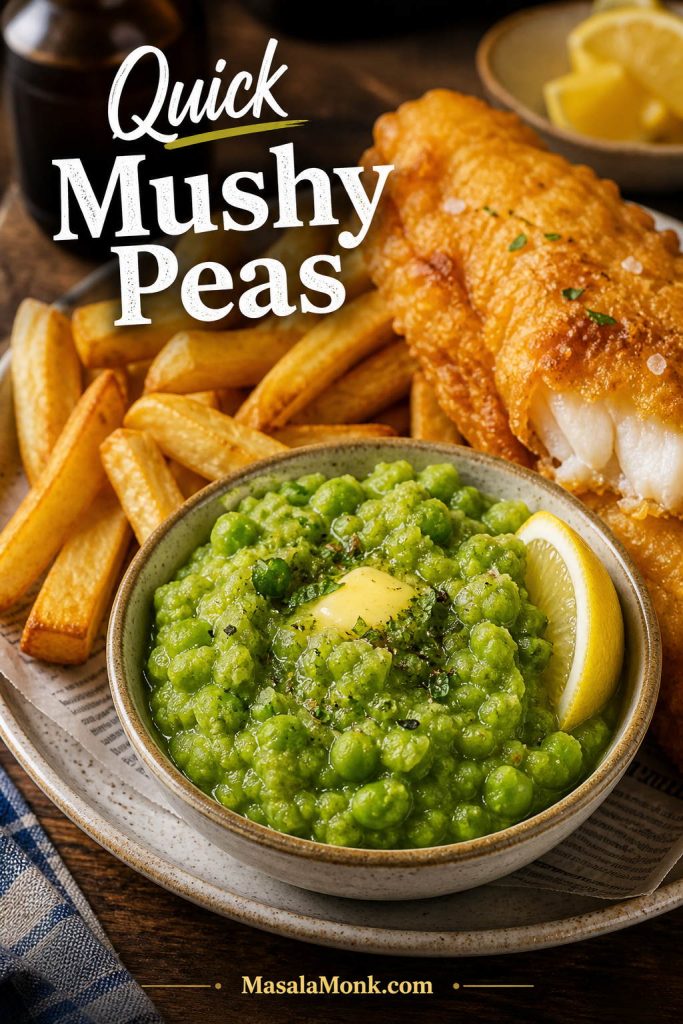
For fish and chips, the coating should be light, bubbly, and crisp enough to hold up beside hot chips and tartar sauce. Cod, haddock, and hake are especially good choices because they give you thick flakes inside a golden shell.
A fish-and-chips-style batter often uses flour, cornflour or cornstarch, baking powder, and either cold beer, sparkling water, or a mix of both. The recipe on this page works well for that style, especially if you use lager instead of sparkling water and keep the batter very cold.
If you are making the full plate with chips, tartar sauce, timing, and serving ideas, see our fish and chips recipe. For a bolder plate with chutney dips, masala seasoning, and Indian-style serving ideas, you can also try these fish and chips with Indian twists.
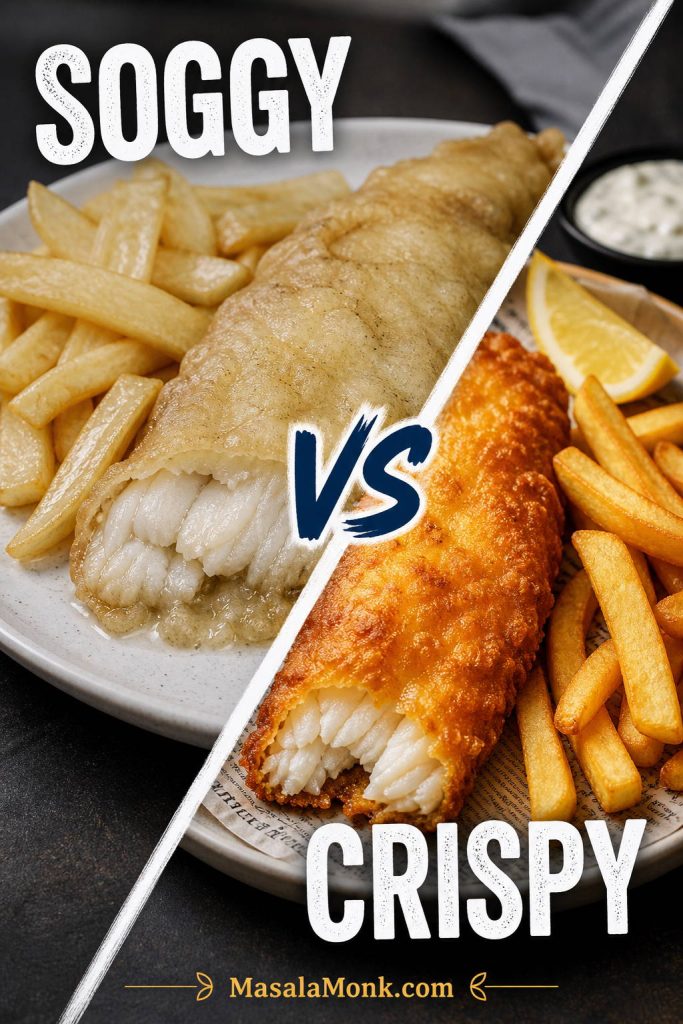
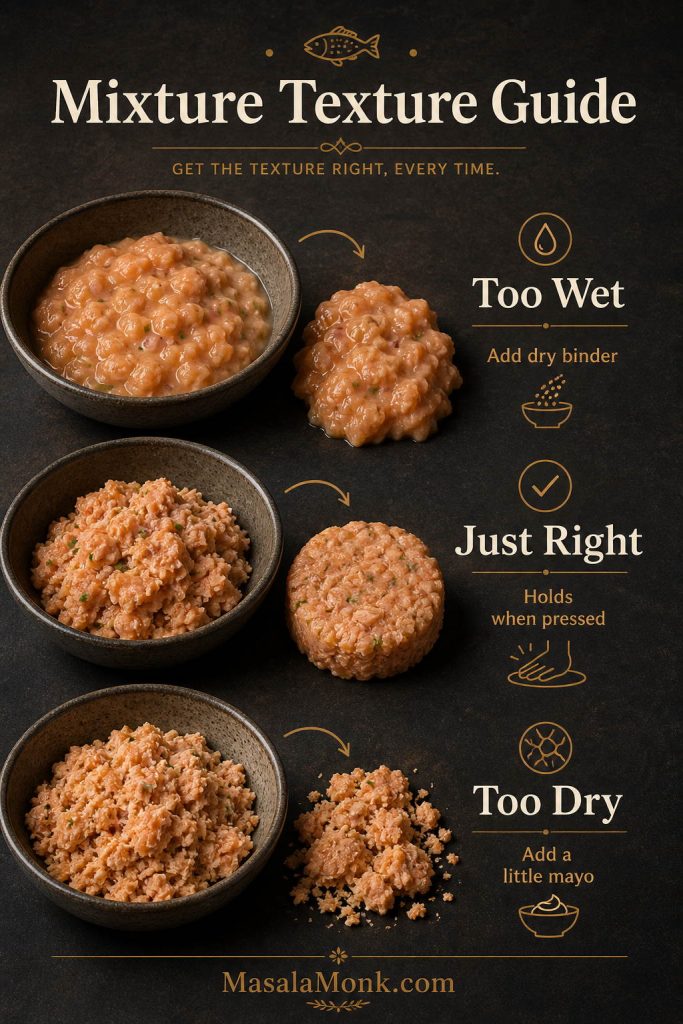
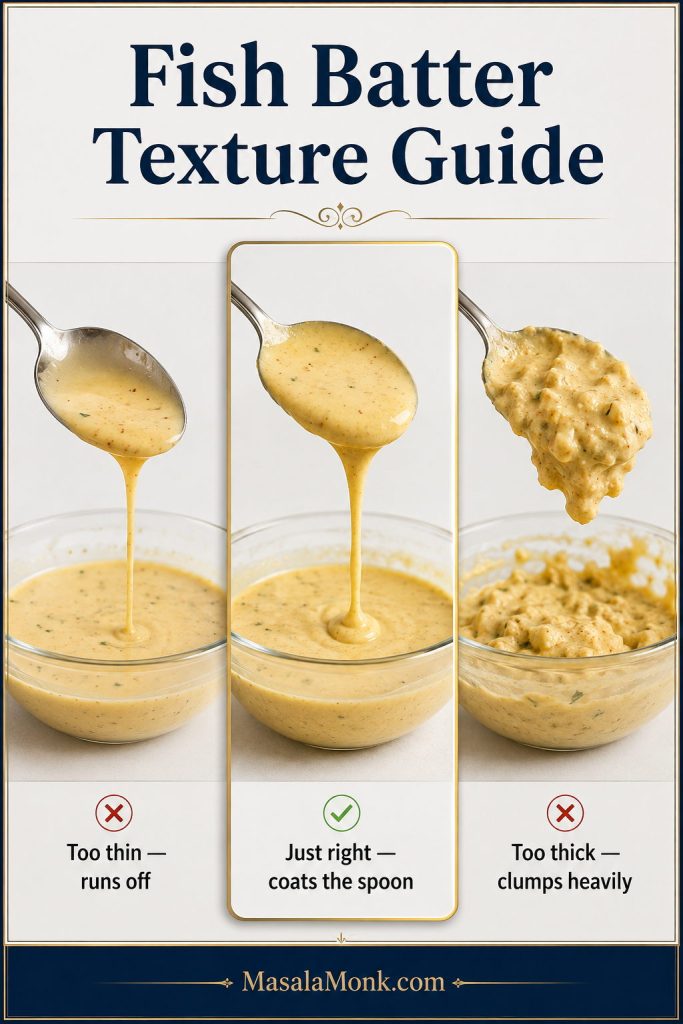
Fish Batter Texture Guide
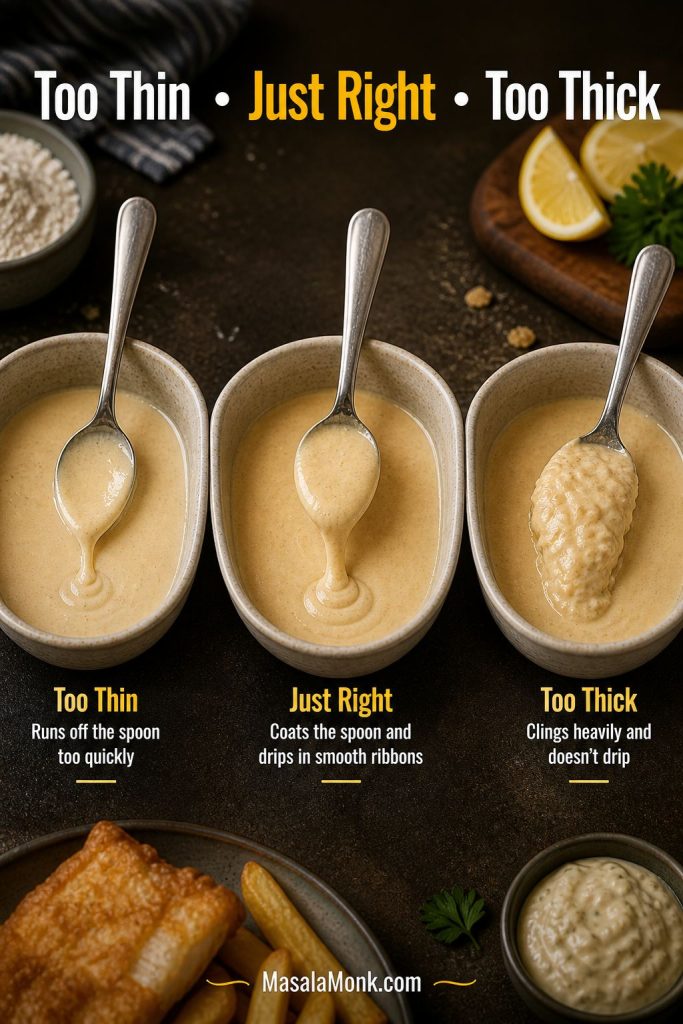
Texture matters as much as the ingredient list. If the mixture is too thin, it slides off. If it is too thick, it fries into a heavy, bready layer. Aim for a loose, cold batter that coats the fish lightly and drips slowly.
| Batter texture | What it looks like | How to fix it |
|---|---|---|
| Too thin | Runs off the fish immediately. | Add 1 tablespoon flour or cornstarch at a time. |
| Just right | Coats like heavy cream and drips slowly. | Use it immediately while cold and bubbly. |
| Too thick | Clings in heavy blobs or makes a bready crust. | Add 1 tablespoon ice-cold sparkling water or beer at a time. |
| Lumpy | Small lumps, but no dry pockets of flour. | Usually fine. Do not overmix just to make it perfectly smooth. |
| Flat or warm | No bubbles, no lift, heavy coating. | Chill briefly or remake with fresh cold fizzy liquid. |
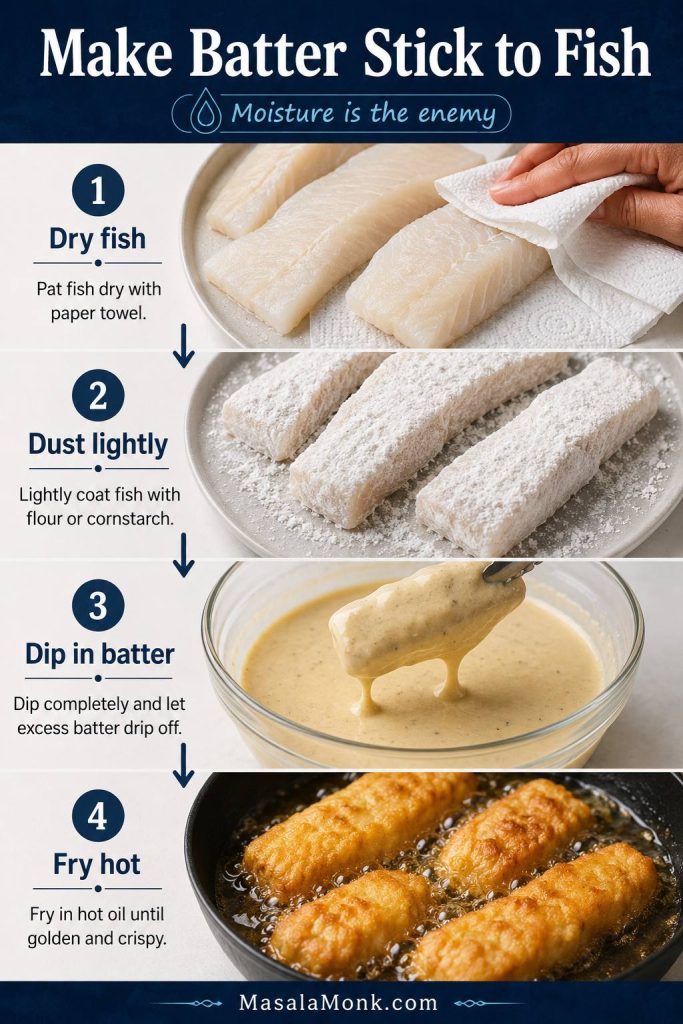
How to Make Batter Stick to Fish
When batter falls off, the recipe usually is not the real problem. Most of the time, the fish was too wet, the surface was not dusted first, the coating was too watery, or the oil was not hot enough when the fish went in.
Before dipping, dry the fish well and give it a light dusting of flour, cornstarch, or rice flour. That dry layer acts like a bridge between the fish and the wet batter, helping the crust set quickly instead of sliding away in the oil.
- Pat the fish very dry before seasoning.
- Dust with flour, cornstarch, or rice flour before dipping.
- Shake off extra dusting flour so the coating is not pasty.
- Make sure the batter is not watery.
- Keep the oil in the 350–375°F / 175–190°C range.
- Lower the fish into the oil gently and away from you.
- Do not poke, flip, or drag the fish before the crust sets.
What to Serve with Battered Fish
For the best crunch, serve the fish within a few minutes of frying. Battered fish can be held briefly in a low oven, but it is always crispiest right after it leaves the oil.
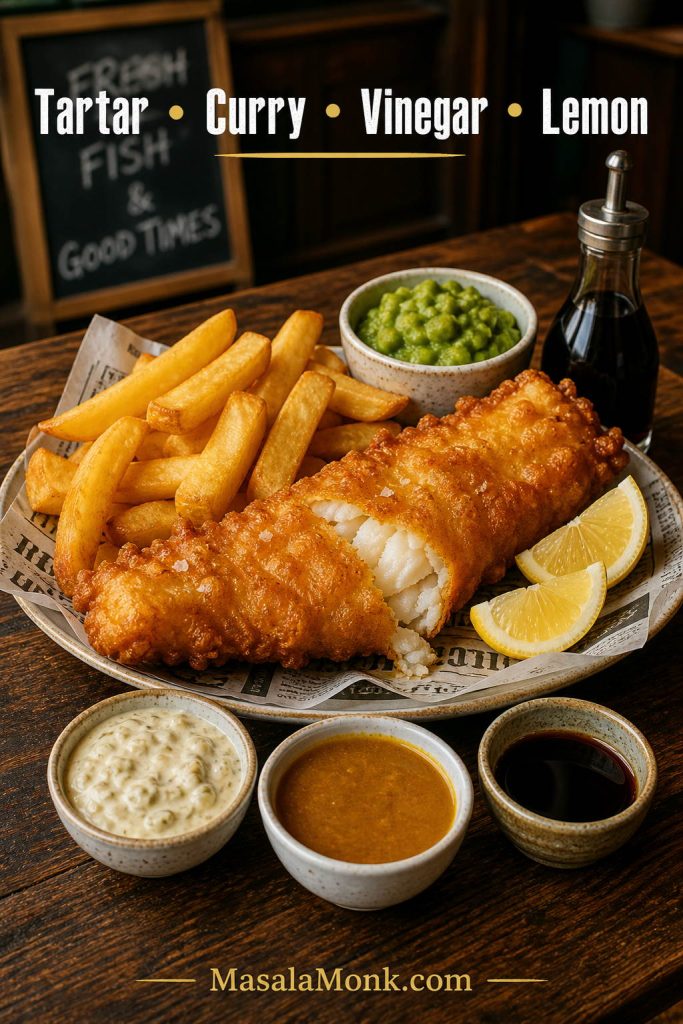
Serve battered fish hot, while the crust is still crisp. For a classic plate, pair it with chips, tartar sauce, lemon wedges, and a simple slaw. For tacos, tuck the pieces into warm tortillas with cabbage, lime, a creamy sauce, and something bright like mango salsa.
You can also serve the fried pieces with rice bowls, salad bowls, wraps, or a quick dipping sauce. The coating is mild enough to work with lemon, hot sauce, garlic mayo, tartar sauce, chutney, or a spicy yogurt dip.
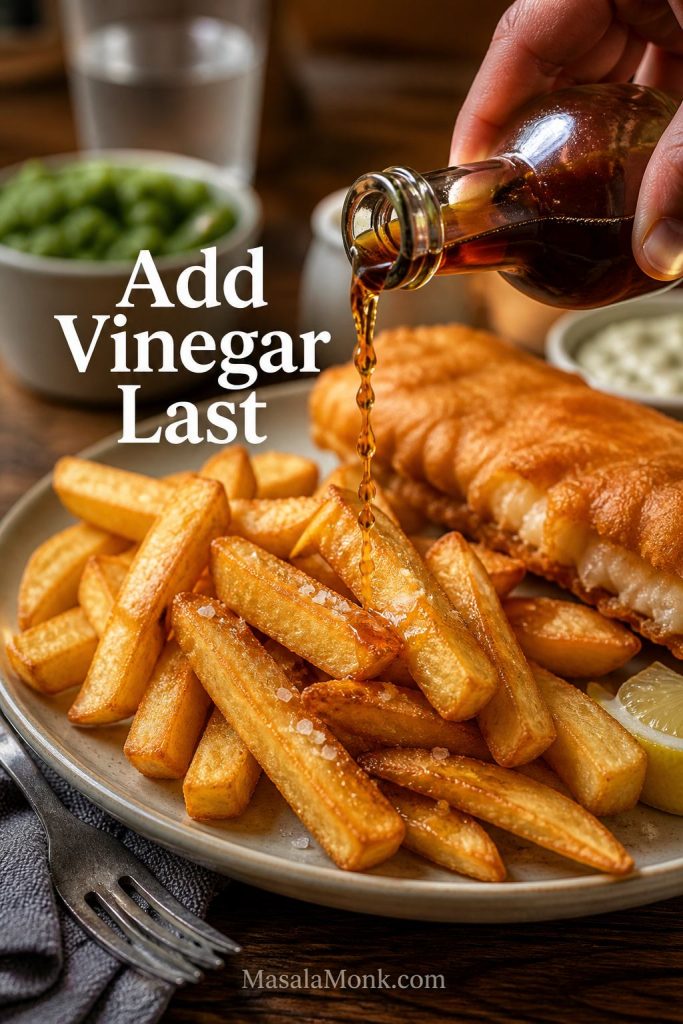
If you like malt vinegar, add it lightly right before eating instead of soaking the fish. A quick drizzle, or even a small spray bottle, gives you the classic sharp finish without softening the crust too quickly.

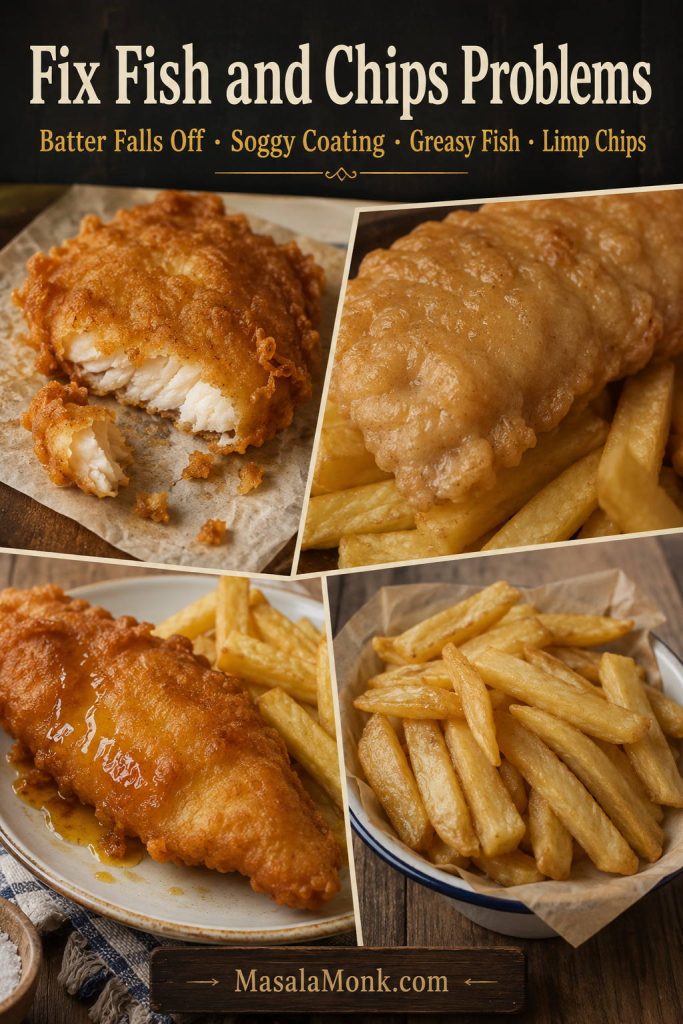
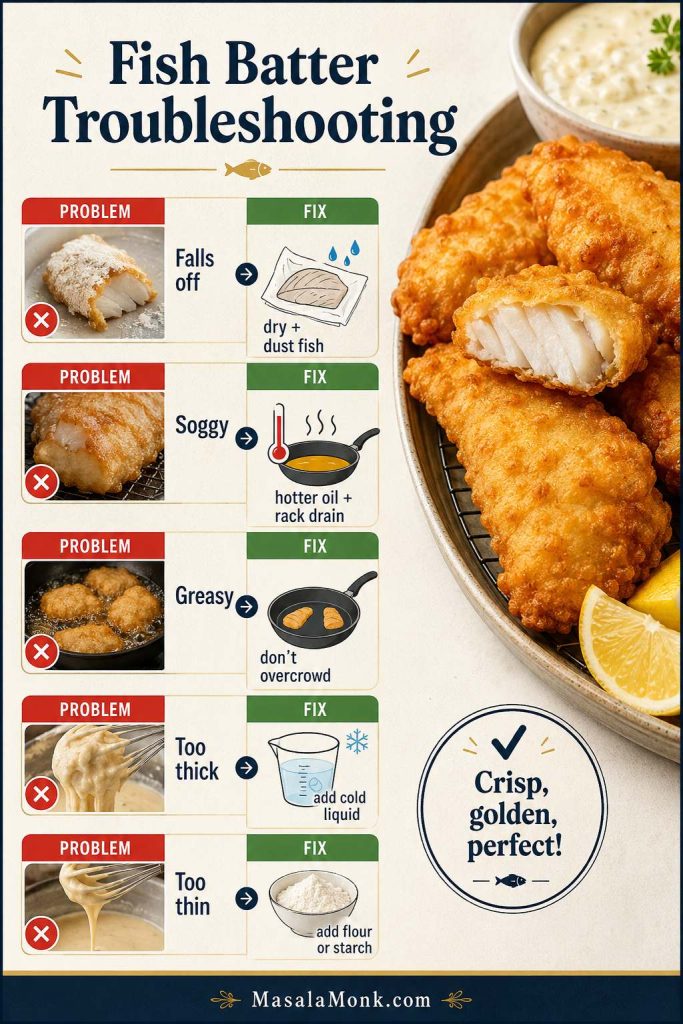
How to Fix Fish Batter Problems
A good batter is easy to adjust once you know what went wrong. Use this table before you throw out a batch or keep adding flour and liquid without a plan.
| Problem | Likely cause | Best fix |
|---|---|---|
| Batter falls off fish | Fish was wet, not dusted, or oil was too cool. | Dry fish well, dust before battering, and fry in hotter oil. |
| Batter is soggy | Oil too cool, overcrowding, or steam trapped after frying. | Fry smaller batches and drain on a wire rack. |
| Batter is greasy | Oil temperature dropped too low. | Let the oil return to at least 350°F / 175°C between batches. |
| Batter is too thick | Too much dry mix or batter sat too long. | Whisk in 1 tablespoon cold sparkling water or beer at a time. |
| Batter is too thin | Too much liquid. | Add 1 tablespoon flour or cornstarch at a time. |
| Batter browns before fish cooks | Oil is too hot or fish pieces are too thick. | Lower oil temperature slightly and cut fish into thinner pieces. |
| Batter tastes floury | Batter is too thick or underfried. | Thin the batter slightly and fry until deeply golden. |
| Batter gets soft after frying | Steam is trapped under the crust. | Use a wire rack and avoid covering the fish while hot. |
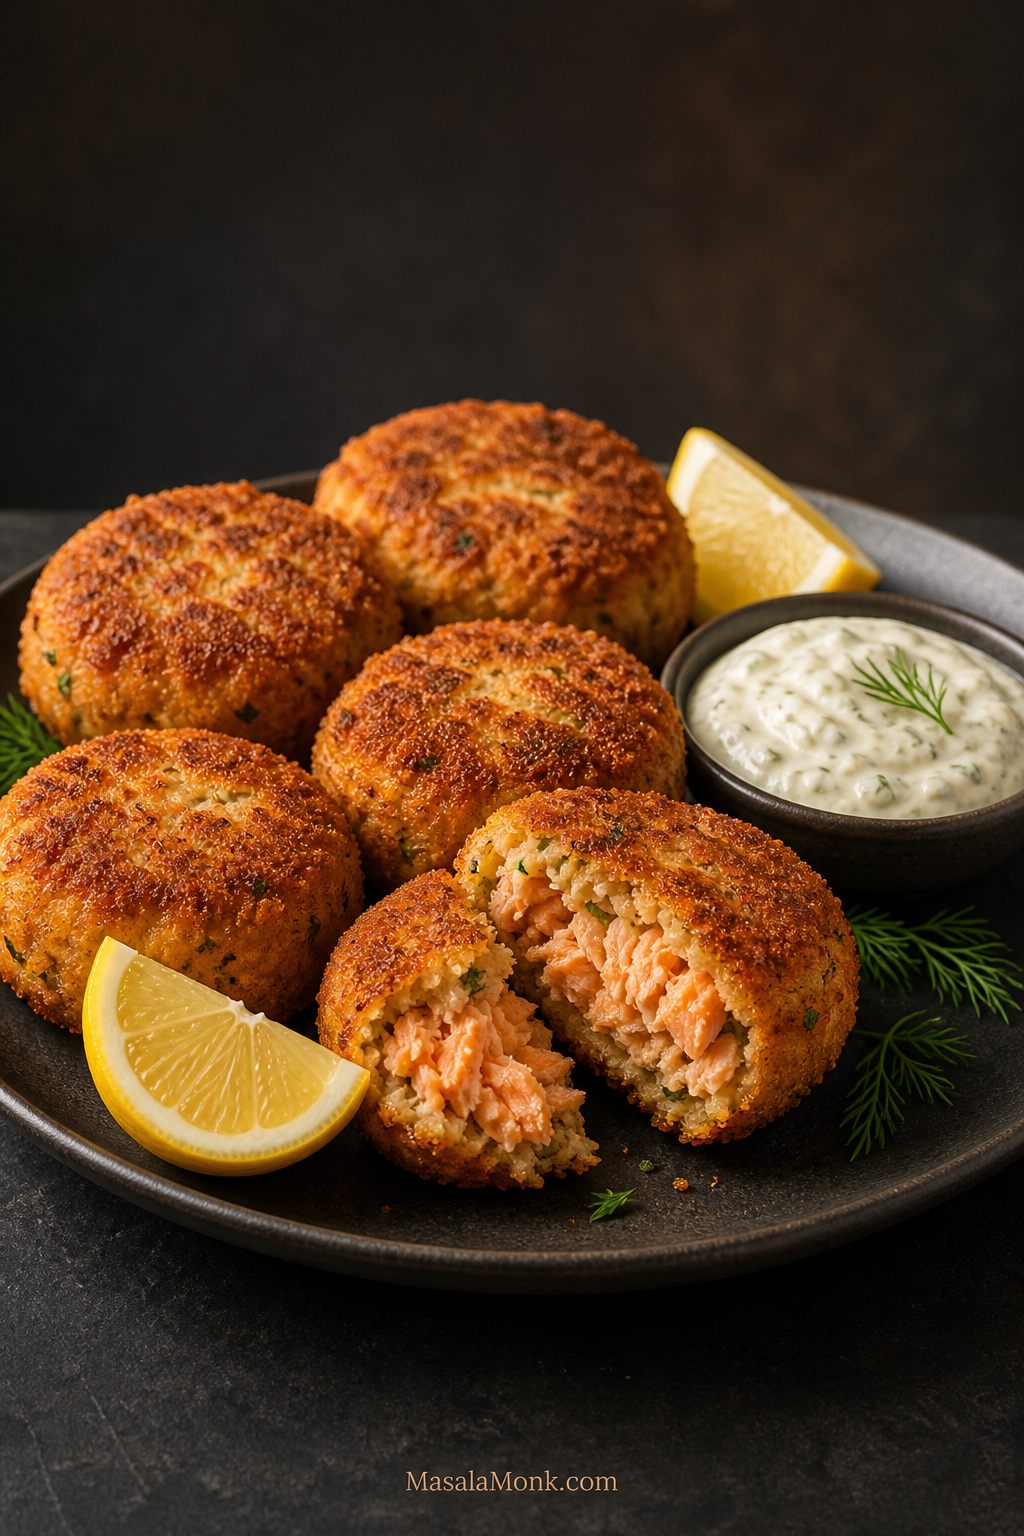
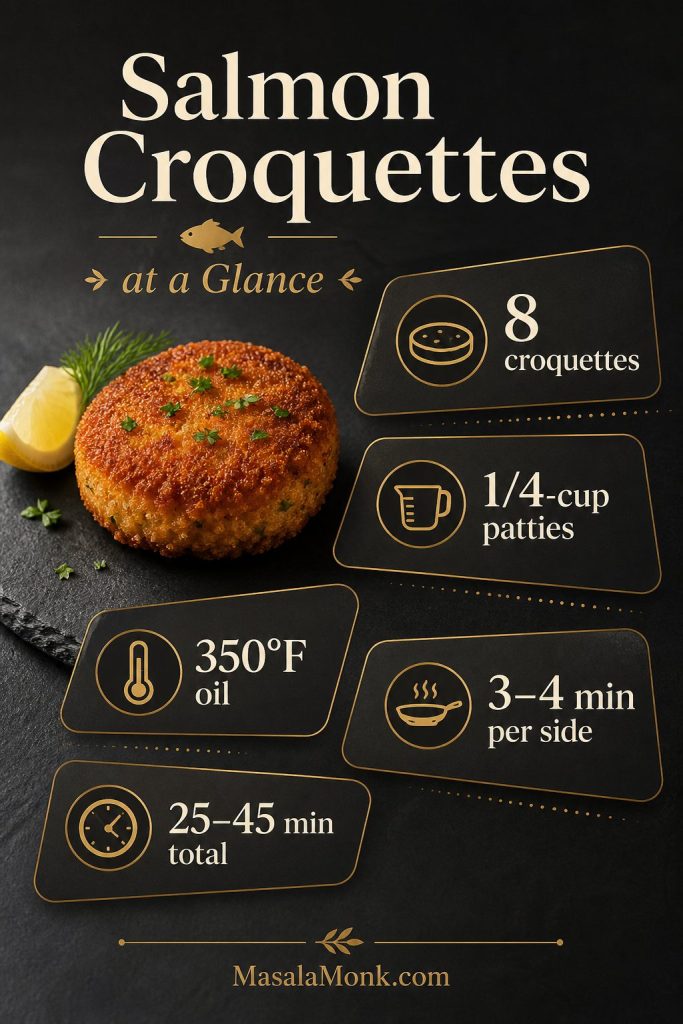
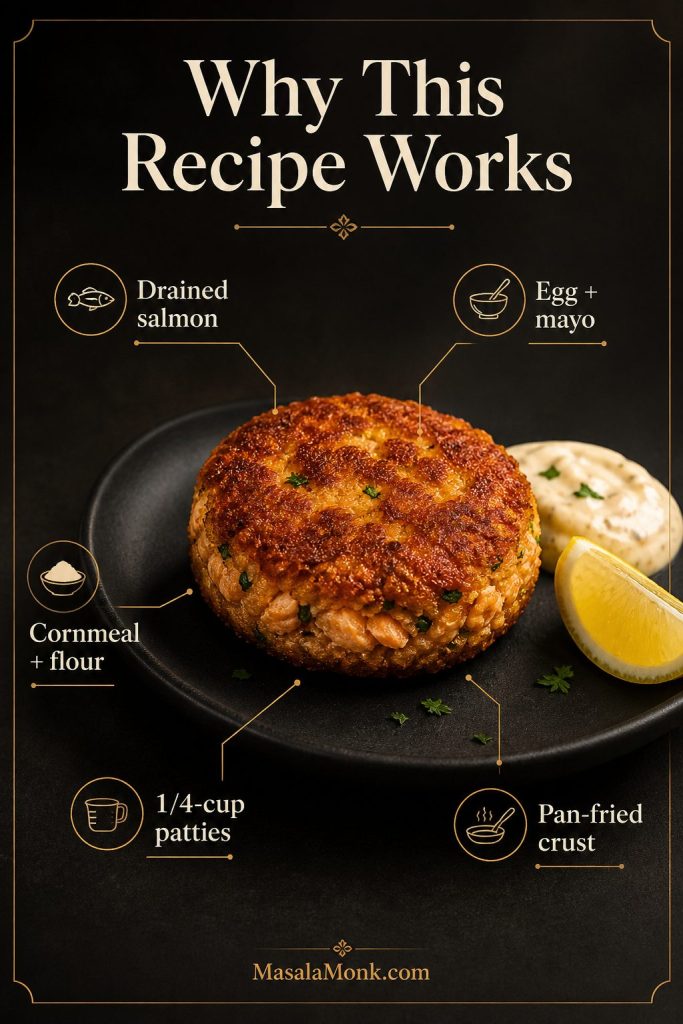
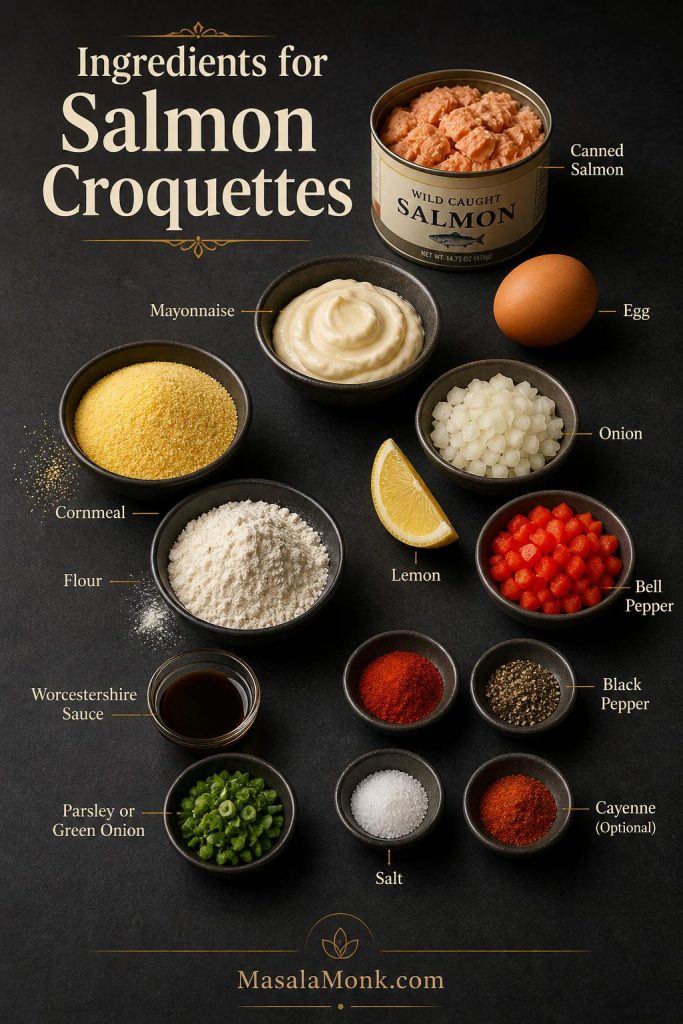
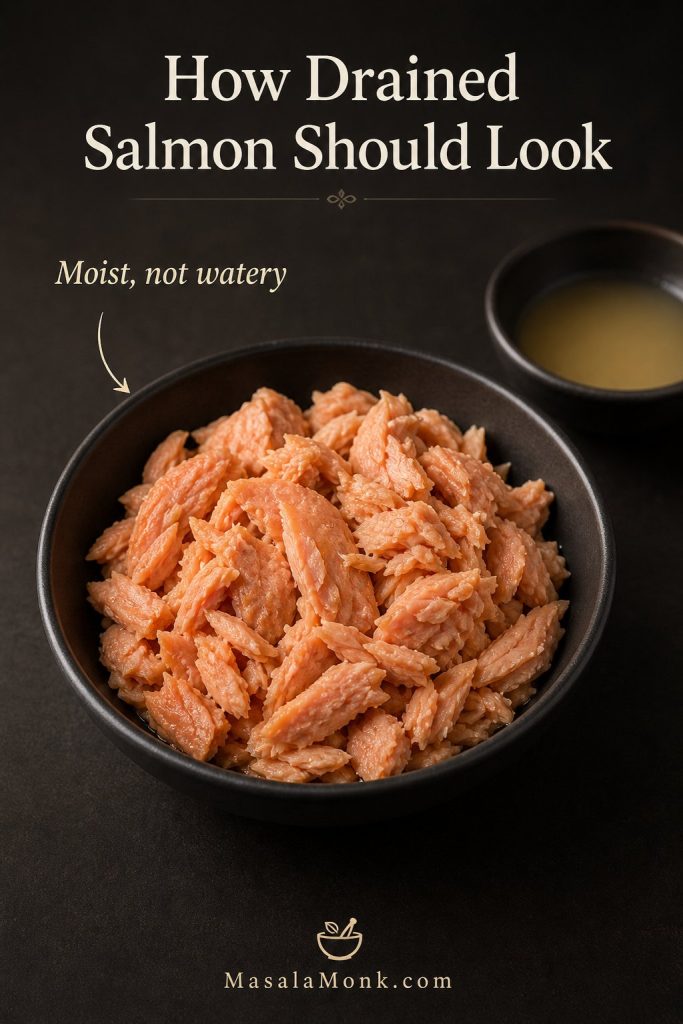
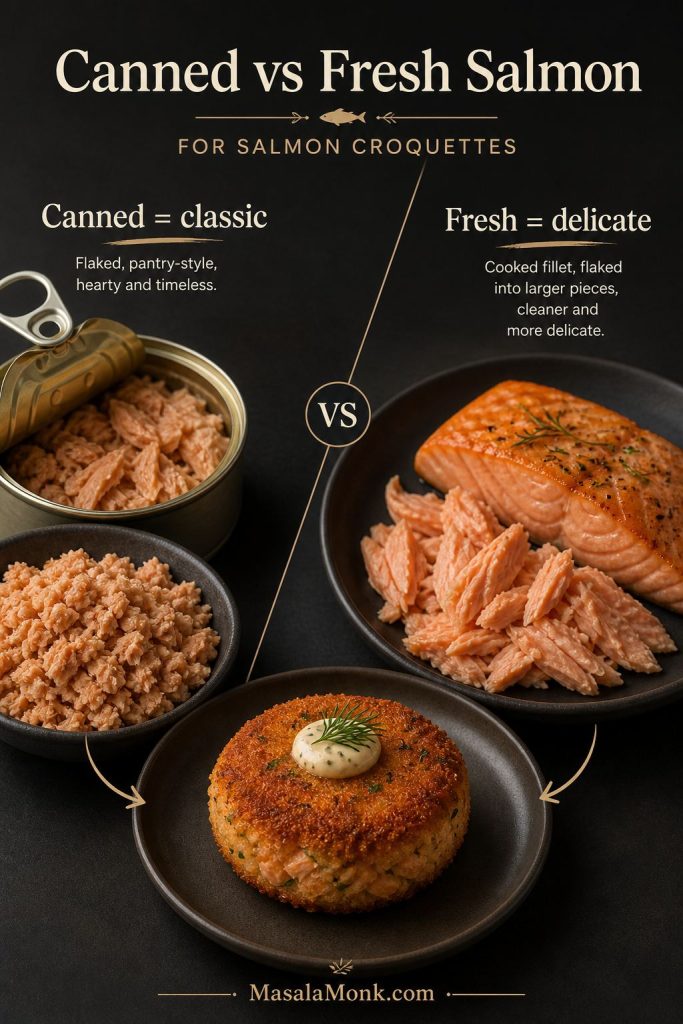
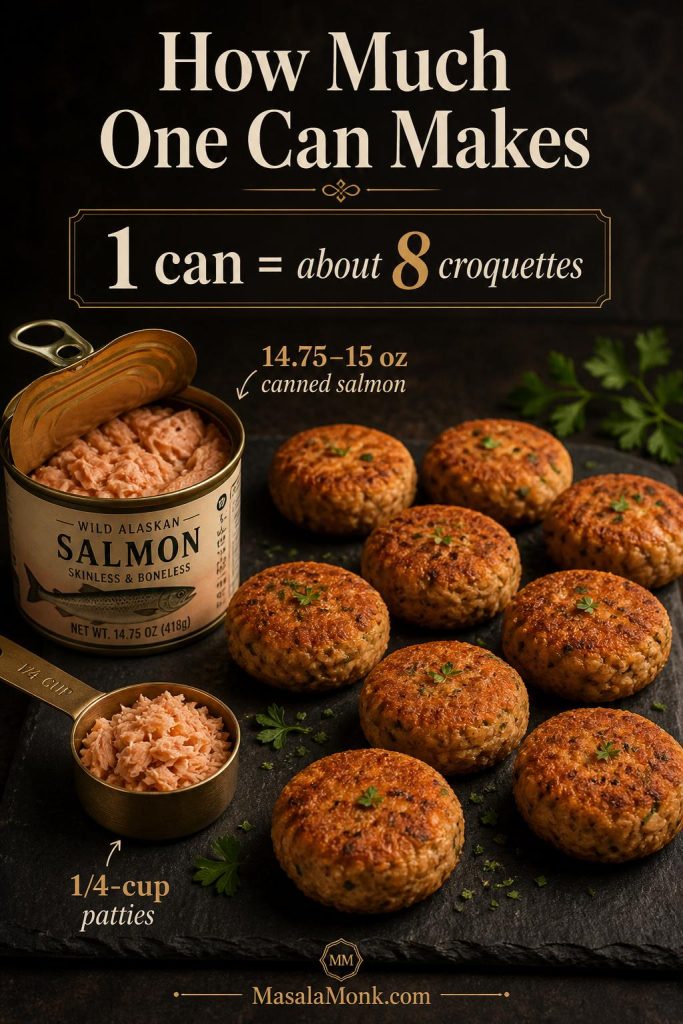
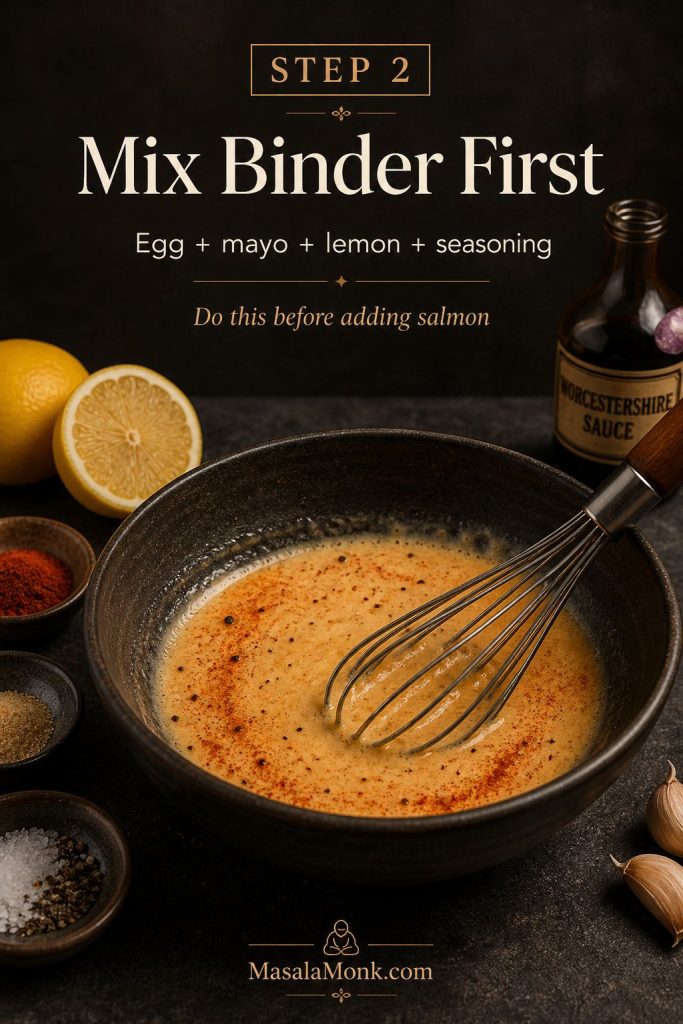
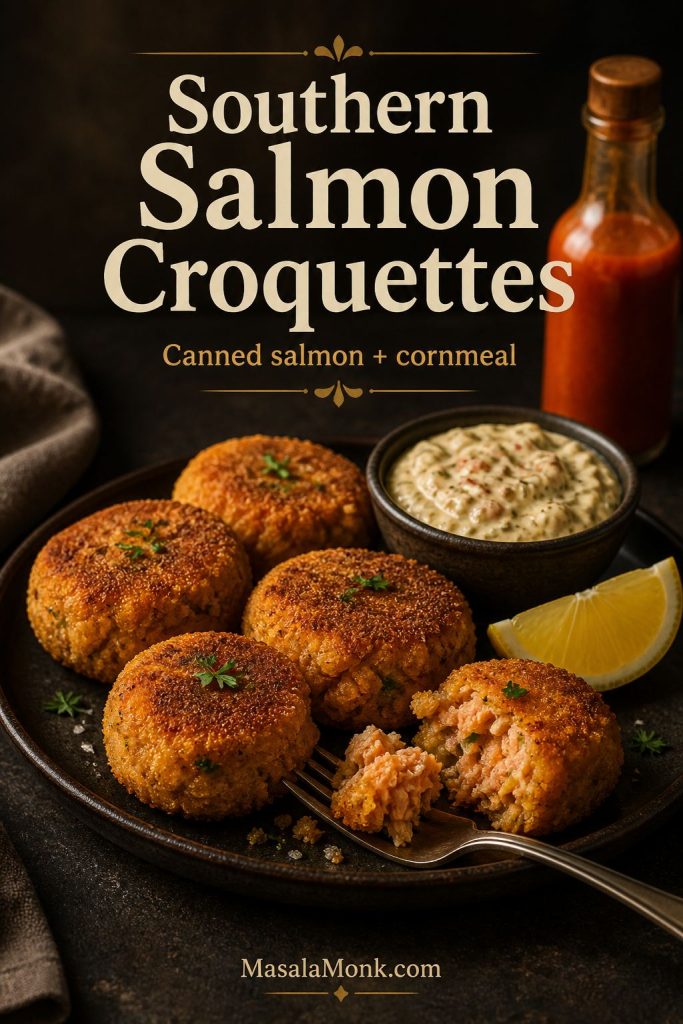
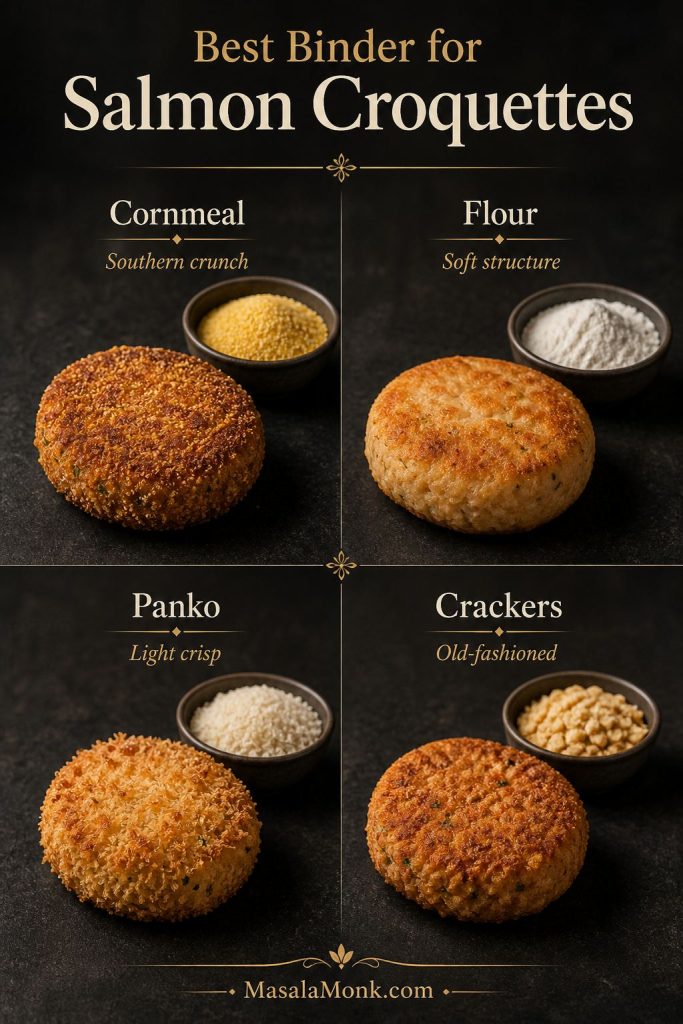
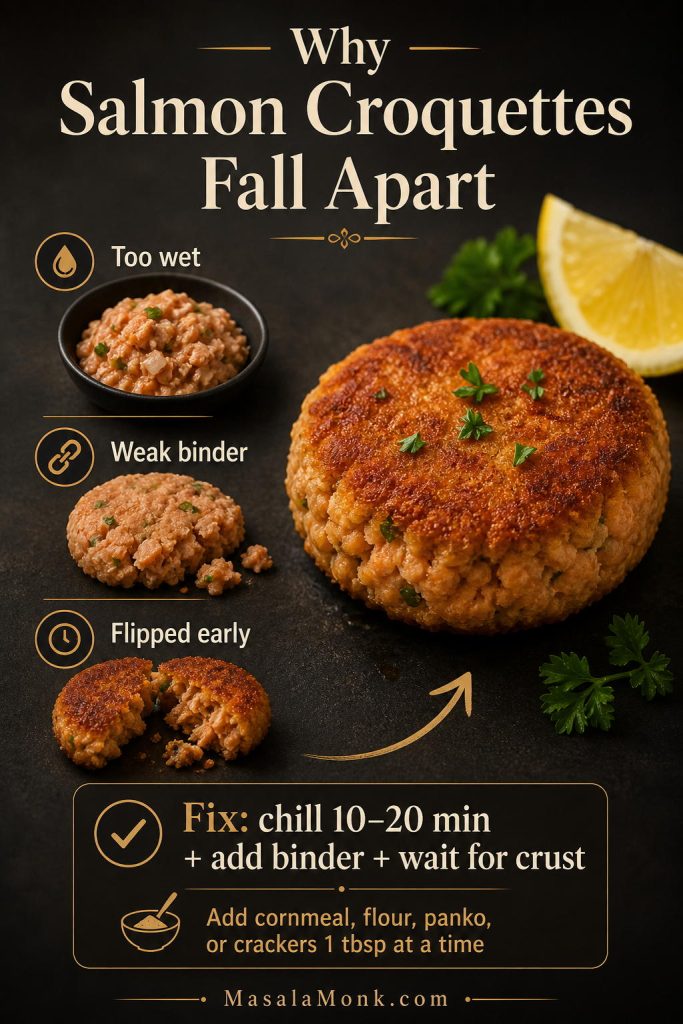
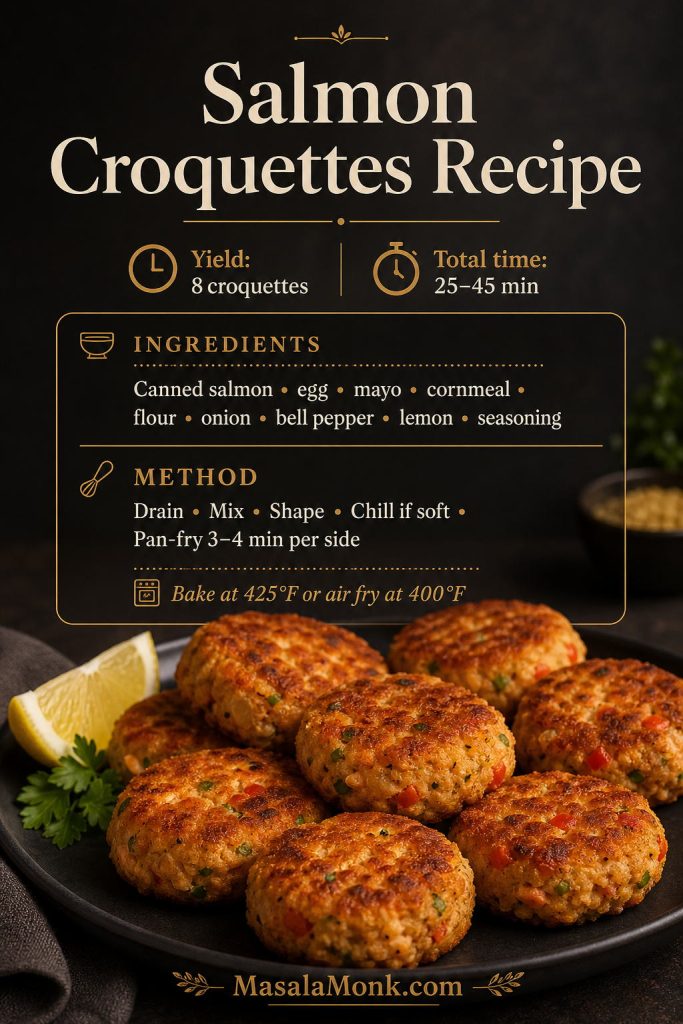
If you want another crisp fish dinner that is pan-fried instead of battered, try these salmon croquettes; they use a shaped patty method rather than a wet coating.
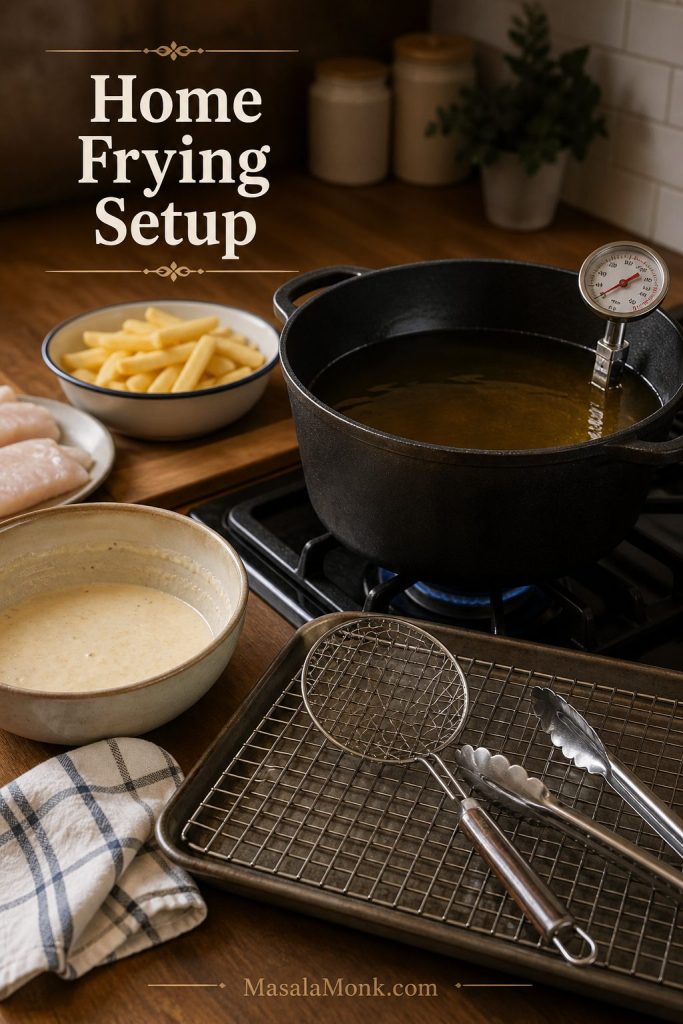
Equipment You Need
You do not need restaurant equipment, but a thermometer and a wire rack make a huge difference. The thermometer keeps the oil in the right range, and the rack keeps the crust from steaming underneath after frying.
- Deep heavy pot, Dutch oven, or deep fryer
- Deep-fry thermometer or instant-read thermometer
- Wire rack set over a baking sheet
- Tongs or spider strainer
- Mixing bowls
- Whisk
- Paper towels for drying fish and catching oil under the rack
- Kitchen scale, optional but useful for consistent batter

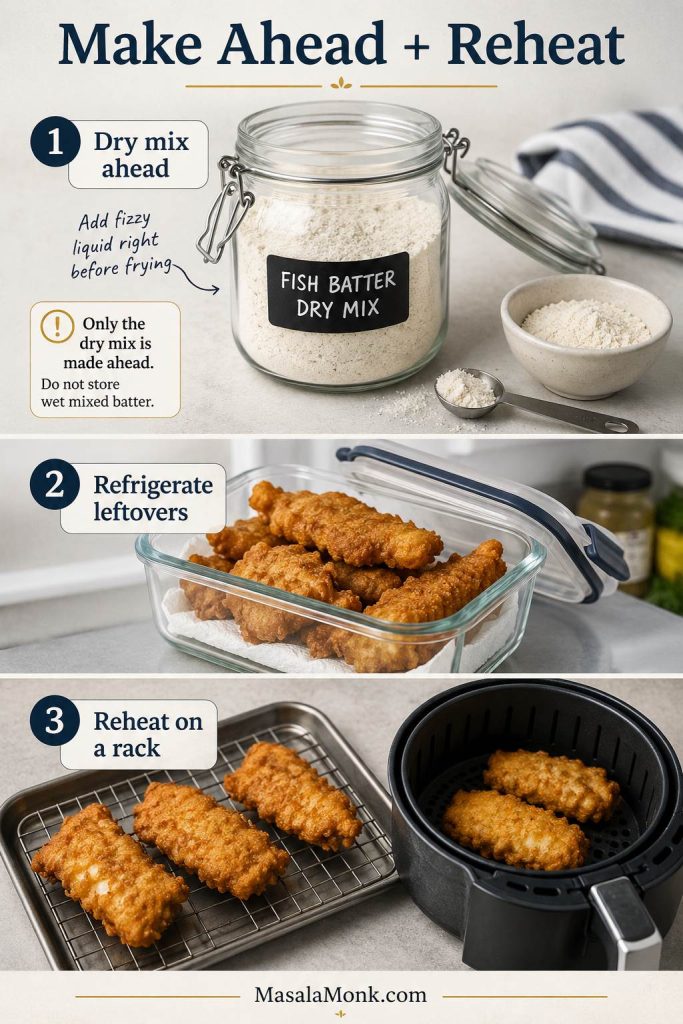
Make-Ahead, Storage, and Reheating
Can You Make the Batter Ahead?
You can mix the dry ingredients ahead, but wait to add the sparkling water or beer until just before frying. Once the liquid goes in, the bubbles start fading and the batter loses some of its lift.
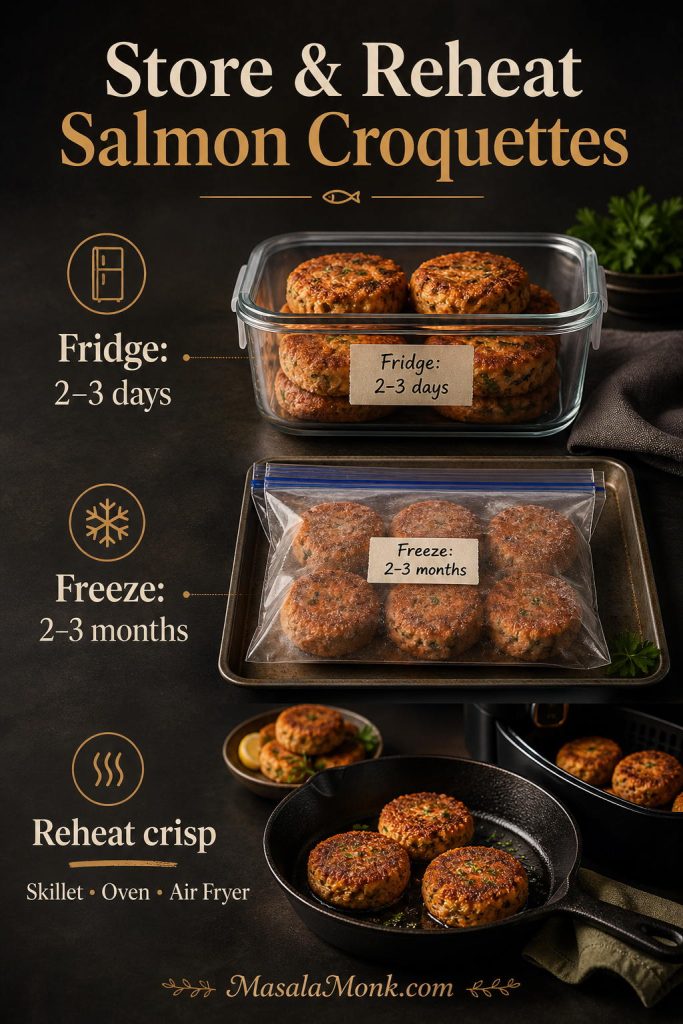
How to Store Leftover Fried Fish
Let leftover fried fish cool, then store it in an airtight container in the refrigerator for up to 2 days. The crust will soften as it sits, but it can crisp up again with the right reheating method.
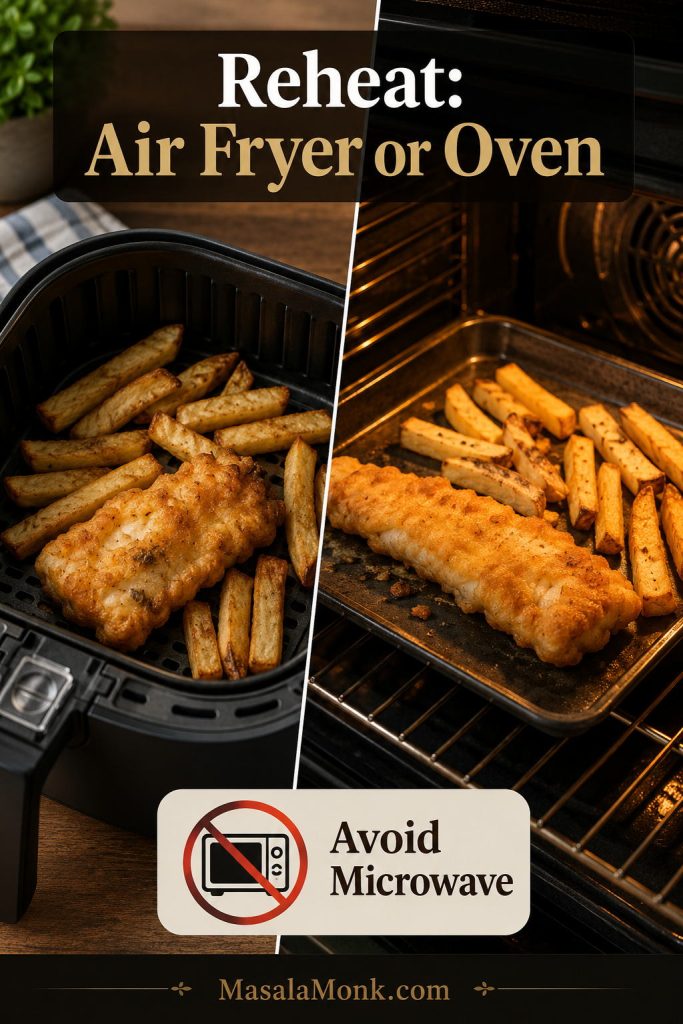
How to Reheat Battered Fish
Reheat battered fish on a rack in a hot oven or in an air fryer until the coating is crisp again. Avoid the microwave if you care about crunch, because it steams the coating and makes it soft.
Once the fish is dry, the batter is cold, and the oil is hot, the actual cooking moves quickly. Keep your rack ready before the first piece goes into the pot, then use the recipe card below for the exact amounts and steps.
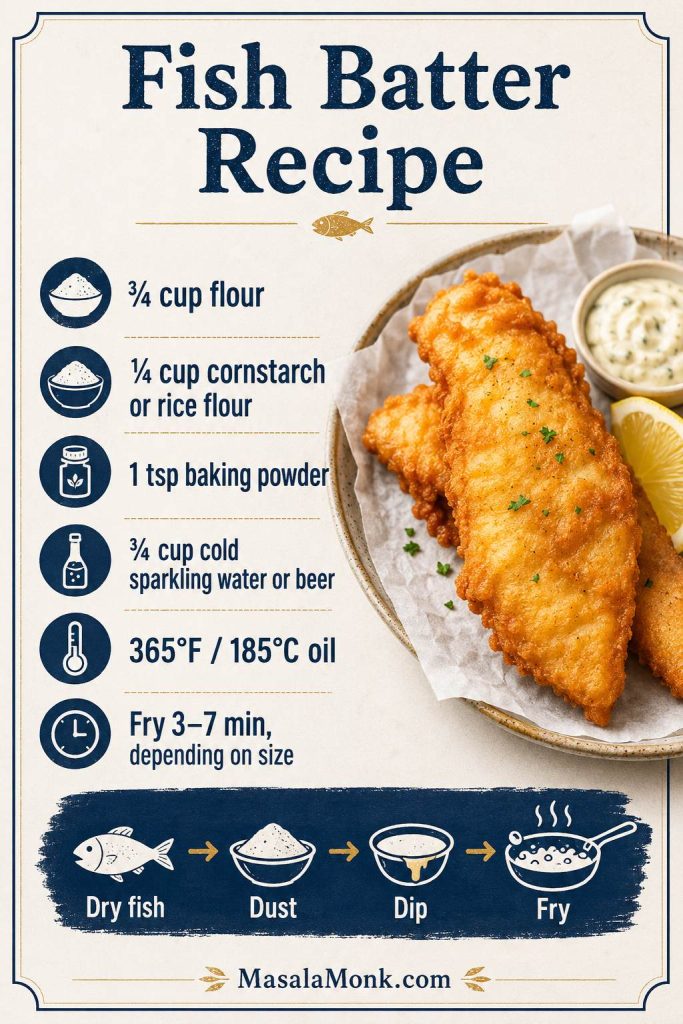
Fish Batter Recipe for Crispy Fried Fish
This fish batter recipe works with sparkling water for a clean no-beer version, or cold lager for a more classic beer-battered coating. Either way, keep the liquid cold and fry the fish as soon as the batter is mixed.
Ingredients
- 1¼ lb / 550–600g white fish fillets, such as cod, haddock, pollock, hake, tilapia, catfish, or basa
- ¾ cup / about 90g all-purpose flour
- ¼ cup / about 30g cornstarch, also called cornflour in many countries, or rice flour
- 1 teaspoon baking powder
- ¾ teaspoon fine salt
- ½ teaspoon paprika or white pepper
- ¼–½ teaspoon garlic powder, optional
- ¾ cup / 180ml ice-cold sparkling water or club soda, plus 1–2 tablespoons more only if the batter is too thick
- ¼ cup extra flour, cornstarch, or rice flour for dusting
- Neutral oil for frying, enough for 2–3 inches depth
Beer Batter Option
Replace the sparkling water with ¾ cup / 180ml very cold lager or pale ale. For an extra-crisp beer batter, use rice flour instead of cornstarch and replace 2 tablespoons / 30ml of the beer with vodka. This upgrade is not alcohol-free.
Method
- Pat the fish very dry, then cut it into even strips or batons.
- Add 2–3 inches of oil to a deep heavy pot and heat to 365°F / 185°C.
- Whisk flour, cornstarch, baking powder, salt, paprika or pepper, and optional garlic powder in a bowl.
- Add the ice-cold sparkling water or beer and whisk only until combined. Small lumps are fine.
- Dust each piece of fish lightly with flour, cornstarch, or rice flour. Shake off the excess.
- Dip the fish into the batter, let extra batter drip briefly, then lower gently into the hot oil.
- Fry in small batches for 3–4 minutes total for smaller strips or 5–7 minutes total for thicker pieces, turning as needed, until golden and crisp.
- Drain on a wire rack set over a baking sheet. Salt lightly while hot and serve immediately.
Notes
- Keep the batter cold and use it right after mixing.
- Do not overcrowd the pot or the oil temperature will drop.
- Fry one test piece first if your fish pieces vary in thickness.
- If the batter is too thick, add cold sparkling water 1 tablespoon at a time.
- If the batter is too thin, add flour or cornstarch 1 tablespoon at a time.
- Fish is done when opaque, flaky, and 145°F / 63°C in the thickest part.
- To hold batches, keep fried fish on a rack in a 200°F / 95°C oven for a short time.
- Leftover fried fish is best reheated on a rack in a hot oven or air fryer until crisp again. Avoid microwaving if you want to keep the coating crunchy.
Once you understand the texture, temperature, and dusting step, this fish batter recipe becomes easy to adjust. The answers below cover the most common swaps and problems people run into while frying fish at home.
Fish Batter Recipe FAQs
Can I make this fish batter recipe without beer?
Absolutely. Use ice-cold sparkling water, club soda, or seltzer instead of beer. The bubbles help the coating fry up light and crisp without adding alcohol or beer flavor.
Is beer or sparkling water better for fish batter?
Beer gives the batter more flavor and a classic fish-and-chips feel. Sparkling water gives you a cleaner no-beer coating that still fries up light and crisp. Both work well as long as the liquid is very cold.
What makes fish batter crispy?
A crisp coating needs starch, lift, cold liquid, and hot oil. Flour gives structure, cornstarch or rice flour adds crunch, baking powder helps the batter puff, and cold sparkling water or beer keeps the mixture light.
Should fish batter have egg?
For the crispest version, skip the egg. Egg can make the coating richer and puffier, but it can also make the crust more cakey or chewy. This no-egg fish batter recipe gives you a thinner, crisper shell.
Why does my batter fall off fish?
Batter usually falls off when the fish is wet, the fish was not dusted first, the batter is too thin, or the oil is too cool. Pat the fish dry, dust it lightly with flour or starch, and fry in properly hot oil.
Why is my fish batter soggy?
Soggy batter usually comes from oil that is too cool, overcrowding the pot, or trapping steam after frying. Fry in small batches, let the oil recover between batches, and drain the fish on a wire rack instead of stacking it.
What temperature should oil be for battered fish?
Aim for 365°F / 185°C, and keep the oil between 350–375°F / 175–190°C while frying. Oil below that range can make the coating greasy, while oil that is too hot can brown the outside before the fish cooks through.
How long do you fry battered fish?
Small battered fish strips usually take about 3–4 minutes total in deep oil. Thicker fillets may take 5–7 minutes total. For shallow frying, plan on roughly 2–3 minutes per side, then check that the fish is opaque and flakes easily.
Can I shallow fry battered fish?
Shallow frying works best with smaller pieces. Use enough oil to come at least halfway up the fish, let the first side set before turning, and flip gently so the coating does not tear.
Can I use this batter for shrimp or other seafood?
This batter also works for shrimp, calamari, and some other seafood. The frying time will be shorter than fish fillets, so remove the pieces as soon as the coating is golden and the seafood is cooked.
Can I make this fish batter recipe ahead?
Mix the dry ingredients ahead, but do not add sparkling water or beer until right before frying. Once the liquid goes in, the bubbles start fading and the batter loses some of its lift.
Can I use self-rising flour?
Self-rising flour can work, but reduce or skip the baking powder because self-rising flour already contains leavening. Plain all-purpose flour gives you more control over the final texture.
Can I use milk instead of sparkling water?
Milk gives a heavier, softer coating. For a lighter crunch, sparkling water, club soda, seltzer, or cold beer is a better choice.
Can I make this fish batter gluten-free?
The main recipe is not gluten-free because it uses all-purpose flour. For a gluten-free version, use a good gluten-free all-purpose flour blend, certified gluten-free rice flour, and sparkling water or gluten-free beer. The texture may vary by flour blend, so start with slightly less liquid and thin the batter until it coats the fish like heavy cream. If you are cooking for someone with celiac disease, make sure all ingredients, oil, tools, and surfaces are free from gluten cross-contact.
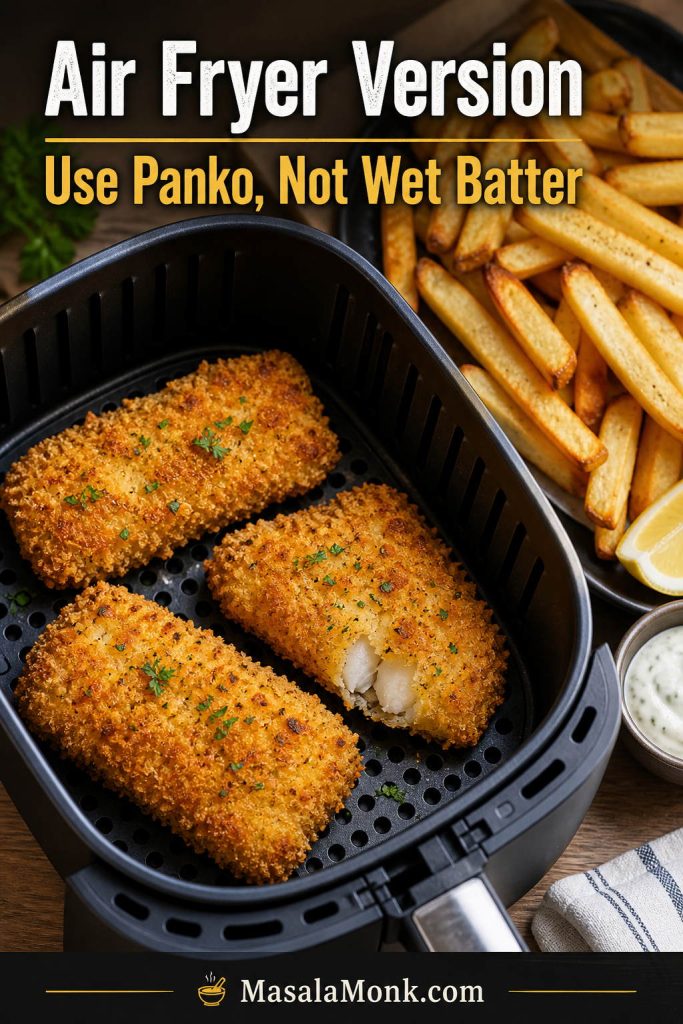
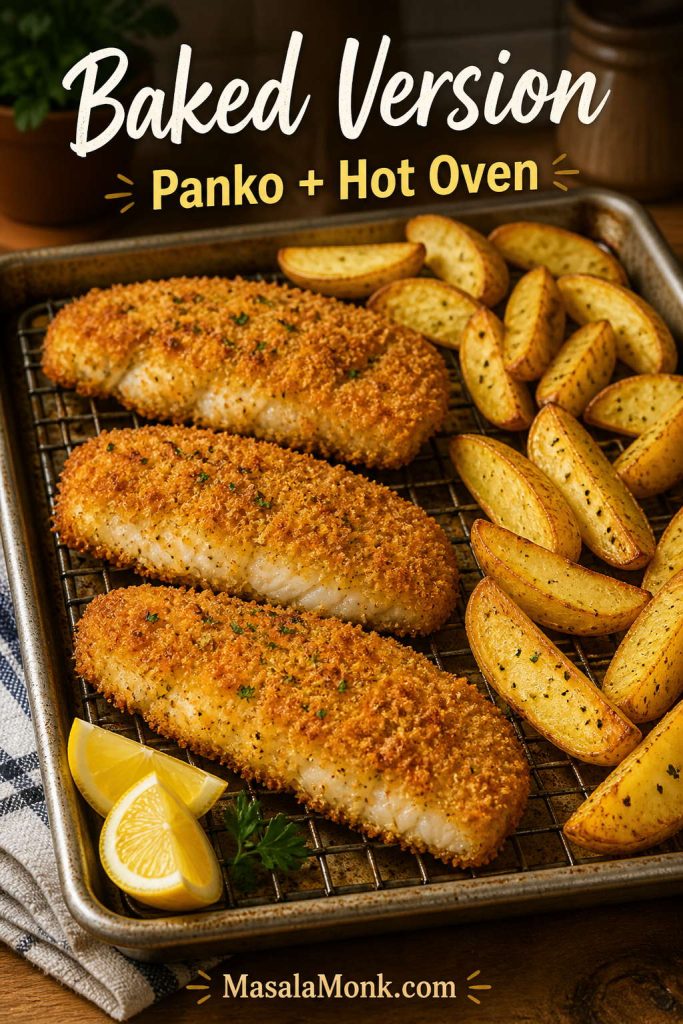
Can I bake or air fry wet battered fish?
Wet batter is designed for hot oil, not dry oven or air fryer heat. In an air fryer, it can drip before it sets and leave bare patches on the fish. For baking or air frying, use a breaded coating with flour, egg, and breadcrumbs or panko instead, and avoid the common airflow and overcrowding issues covered in this guide to air fryer mistakes.