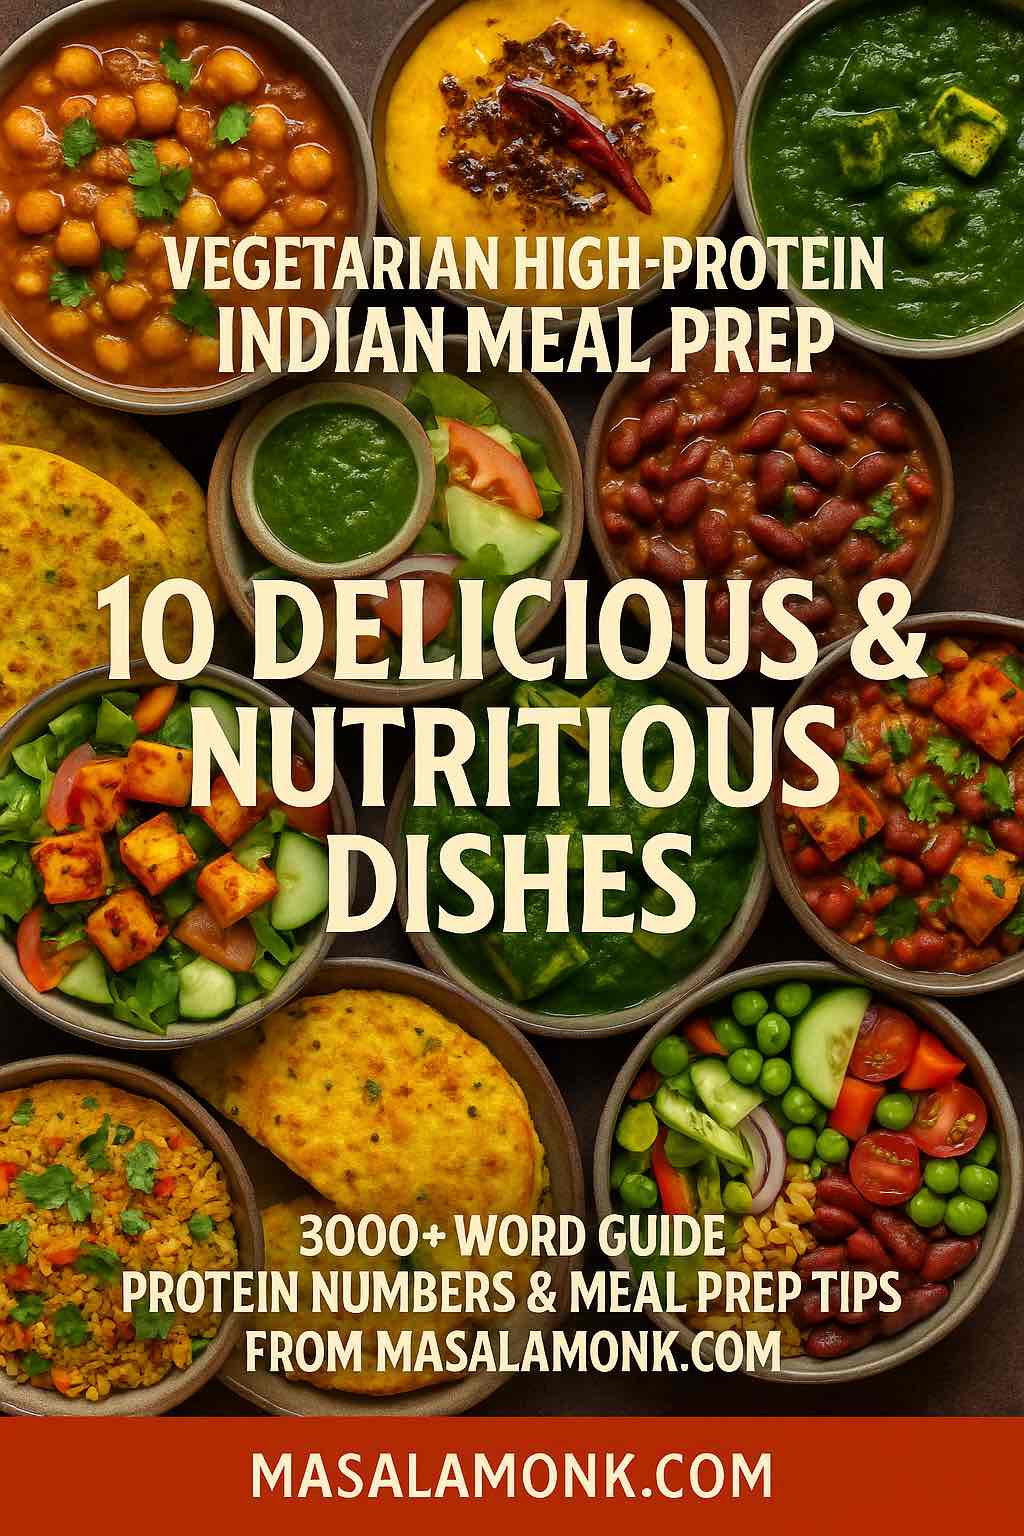
Delicious, filling, and built for busy lives — with real protein numbers
Why Indian Vegetarian Meal Prep is a Protein Goldmine
When most people think “high protein,” they picture grilled chicken, tuna, or protein shakes. But Indian vegetarian cooking has been quietly delivering balanced, protein-rich meals for centuries.
Between lentils, chickpeas, beans, soy, paneer, quinoa, and dairy, you can hit your daily protein needs while still eating the food you grew up loving — or the flavors you’re just discovering.
According to What Is Protein?, most adults need 1.2–2.0g of protein per kilogram of body weight per day for muscle repair, satiety, and steady energy. With a bit of planning, you can reach that comfortably with plant-based and dairy proteins — and without getting bored.
The beauty of Indian meal prep is that flavors deepen over time. A curry cooked on Sunday often tastes better on Tuesday because the spices have had time to mingle. That makes it perfect for prepping in batches and eating through the week.
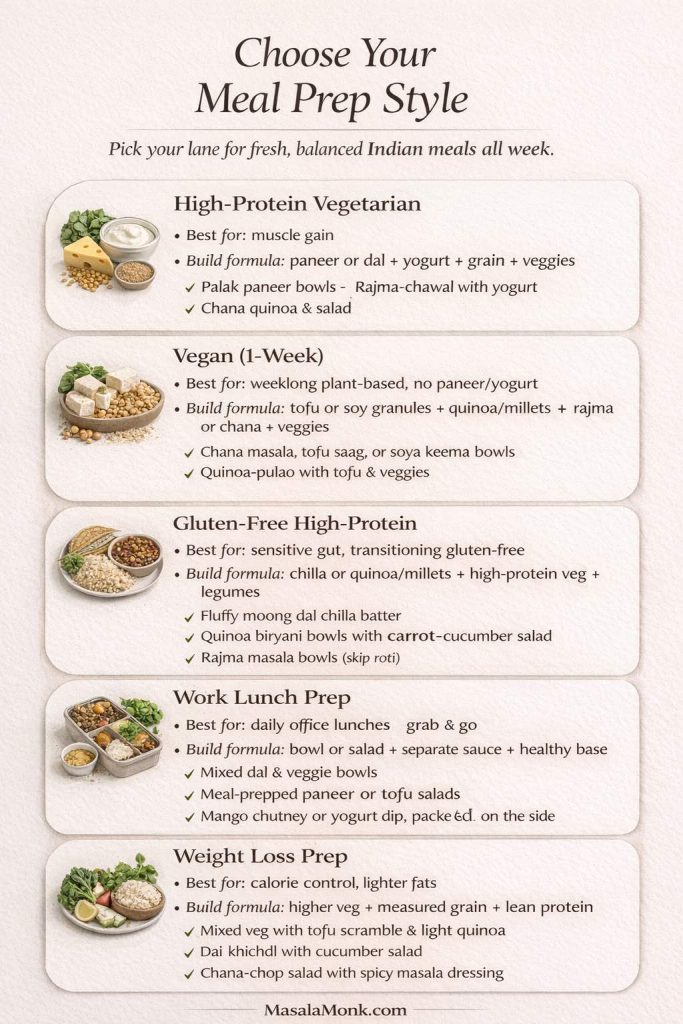
Choose Your Meal Prep Style (Vegetarian, Vegan, Gluten-Free + High Protein)
Pick the lane that matches your week. Everything in this guide works for vegetarian meal prep, and many dishes are vegan by default — you just adjust the protein and the base.
- High-protein vegetarian meal prep: dal + beans + paneer + yogurt + quinoa/millets
- Vegan meal prep (1 week): tofu + soy keema + chickpeas/rajma + quinoa + vegetables
- Gluten-free high-protein meal prep: moong chilla + quinoa biryani + rajma bowls (skip wheat)
- Work lunch meal prep: bowls + salads with sauces packed separately
- Weight loss meal prep: higher veg, measured grains, lighter fats
Protein Sources used in this Guide
- Legumes like chickpeas, kidney beans, and lentils give 12–20g protein per cup.
- Dairy like paneer and yogurt offer complete proteins and calcium.
- Soy products like tofu and soy granules are extremely high in protein.
- Quinoa is a complete protein and works beautifully with Indian spices.
Unlike some Western high-protein meal plans, these dishes are naturally fiber-rich, micronutrient-dense, and flavor-packed — which means you’ll actually look forward to eating them.
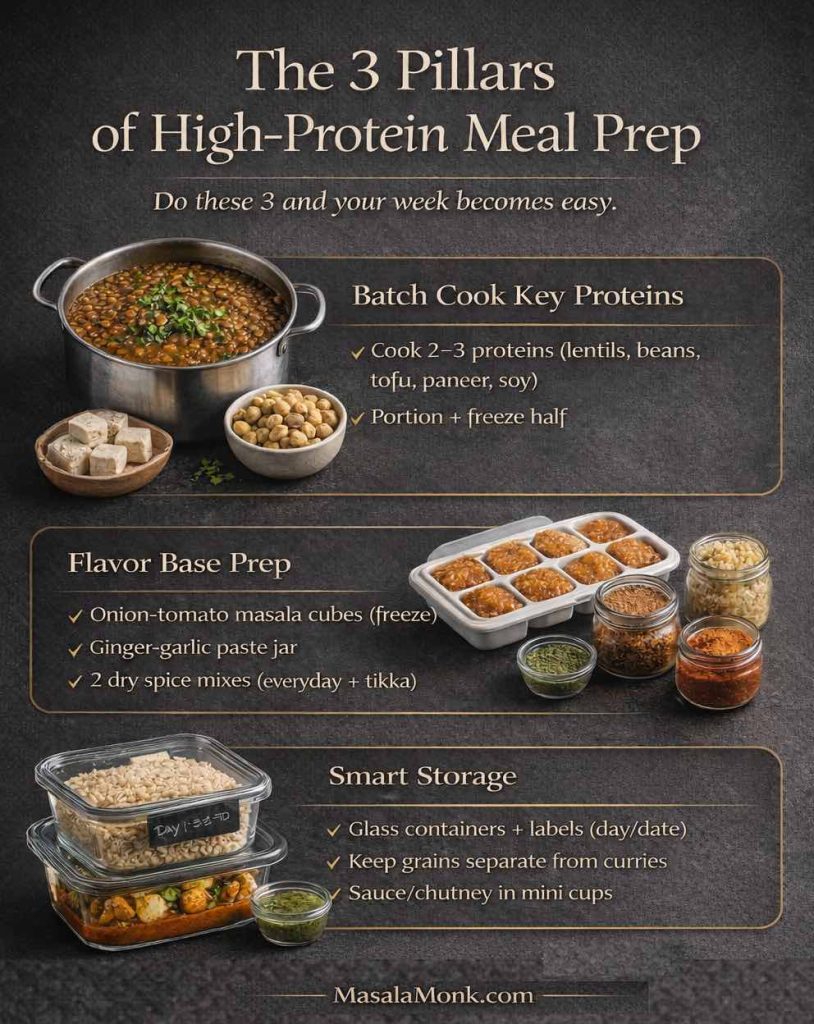
The 3 Pillars of Successful High-Protein Meal Prep
Before diving into recipes, here’s what makes meal prep work for real life:
- Batch Cooking Key Proteins
Cook legumes, tofu, and paneer in bulk once or twice a week. - Flavor Base Prep
Store ready-to-use onion-tomato masala, ginger-garlic paste, and dry spice mixes. - Smart Storage
Use airtight glass containers, label with date, and separate grains from curries to keep textures perfect.
How to Hit 30g, 40g, or 50g Protein Per Meal (Vegetarian + Vegan)
A simple way to build high-protein Indian meal prep is:
Protein base + Protein booster + Grain/base + Vegetables
Use these targets depending on your goals:
- About 30g protein: Rajma Masala + brown rice, or Chana Masala + quinoa, or Dal Tadka + roti (bigger dal portion).
- About 40g protein: Paneer Tikka Salad + roasted chana, or Palak Paneer + millet + extra paneer, or Tofu Tikka Masala + quinoa + extra tofu.
- About 50g protein: Make a “two-protein plate” — Dal Tadka + Tofu Tikka Masala with quinoa/millet, or Rajma + tofu bowl with a generous tofu portion.
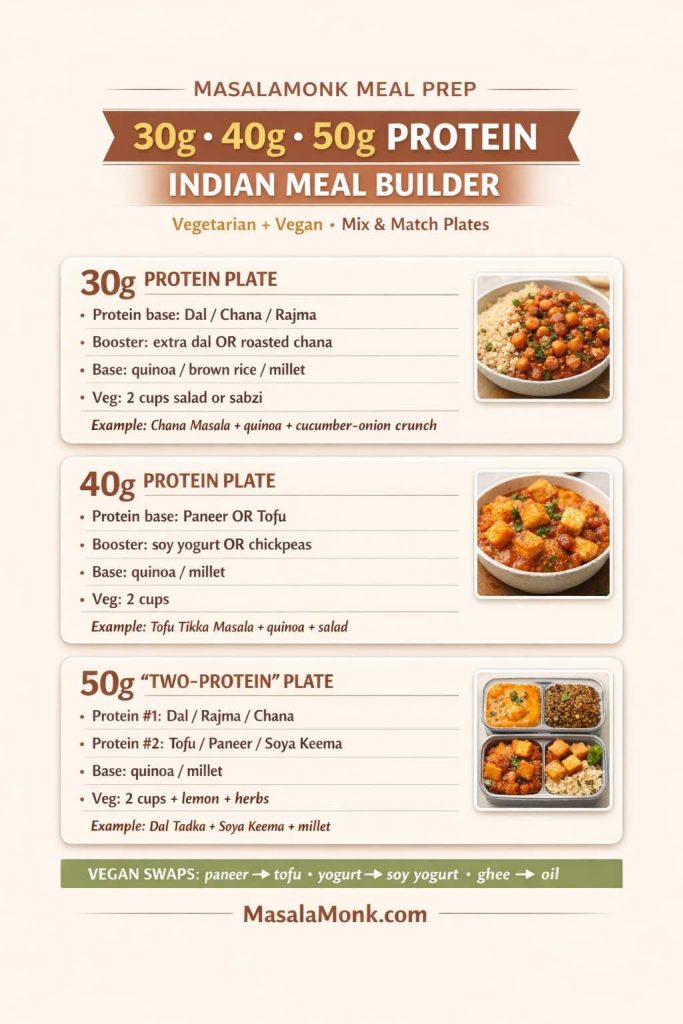
Easy vegan swaps: paneer → tofu, yogurt → soy yogurt, ghee → neutral oil (or small amount of coconut milk for creaminess).
10 High-Protein Vegetarian Indian Dishes for Meal Prep
Below, each dish includes protein per serving, storage tips, cooking advice, and serving ideas, plus internal links to related deep dives.
Meal Prep for Work Lunch: Pack It So It Still Tastes Fresh
If you’re packing these for work, a few small rules keep everything tasting fresh:
- Store grains and curries separately so rice/quinoa stays fluffy.
- Keep salad dressing and chutneys in a mini container; mix only at lunch.
- Reheat dal/rajma with a splash of water so the gravy loosens and tastes freshly cooked.
- Pack crunch separately (onions, cucumber, roasted chana, papad).
- Label containers with the day so you rotate the most perishable meals first.
1) Chana Masala — The Chickpea Classic
If there’s one vegetarian Indian dish that nails flavor, nutrition, and convenience, it’s Chana Masala. This humble chickpea curry is a global favorite for a reason — it’s hearty, naturally high in protein, and tastes even better the next day. Perfect for meal prep.
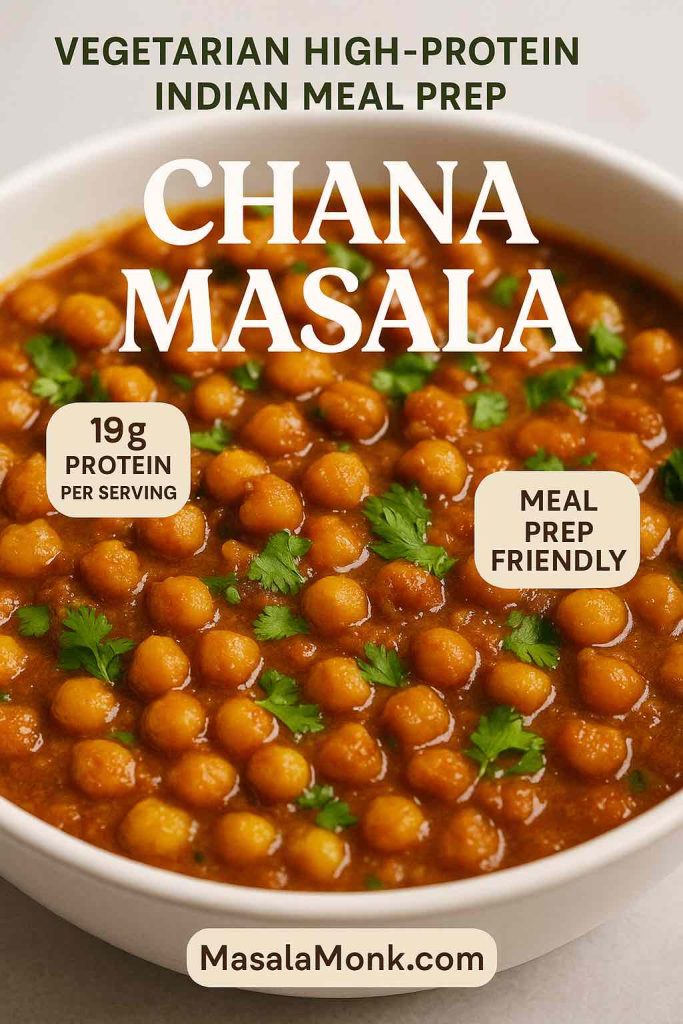
Why Chana Masala is a High-Protein Vegetarian Staple
Chickpeas (also called garbanzo beans) are one of the richest plant-based protein sources you can find. A single cooked cup has around 15g of protein — and when you add an extra scoop to your bowl, you’re hitting 18–20g per meal without breaking a sweat.
Protein aside, chickpeas are also rich in fiber, iron, magnesium, and B vitamins — making this dish not just filling, but nourishing for muscle recovery, energy, and digestion.
📚 More Chickea Ideas here 5 Vegan Protein Rich Chickpea Soups for Pregnant Women
Meal Prep Magic for Chana Masala
- Batch Cooking: Soak and cook a large pot of dried chickpeas on prep day, or use canned chickpeas for speed.
- Flavor Base: Make extra onion-tomato masala (onions, tomatoes, ginger, garlic, and spices) and freeze in portions.
- Portioning: Store curry in glass containers; freeze half for midweek freshness.
Storage & Reheating
- Fridge: 3–4 days.
- Freezer: Up to 1 month.
- Reheat: Stovetop on medium heat, adding a splash of water to revive the gravy.
Serving Ideas
- With brown rice or jeera rice for classic comfort.
- Pair with bajra (pearl millet) roti for a gluten-free, fiber-rich option.
- Stuffed into whole-wheat wraps with salad greens for a portable, protein-packed lunch.
Pro Tips for Next-Level Chana Masala
- Add a handful of fresh spinach or kale while reheating for extra micronutrients.
- Sprinkle roasted cumin powder just before serving for a burst of earthy aroma.
- Use black chickpeas (kala chana) once in a while for variety and a slightly higher protein content.
2) Dal Tadka — Comfort Food, Protein Edition
If there’s one dish that can be called the heartbeat of Indian kitchens, it’s Dal Tadka. This simple yet deeply satisfying lentil curry is more than comfort food — it’s an affordable, nutrient-packed high-protein vegetarian meal that works perfectly for meal prep.
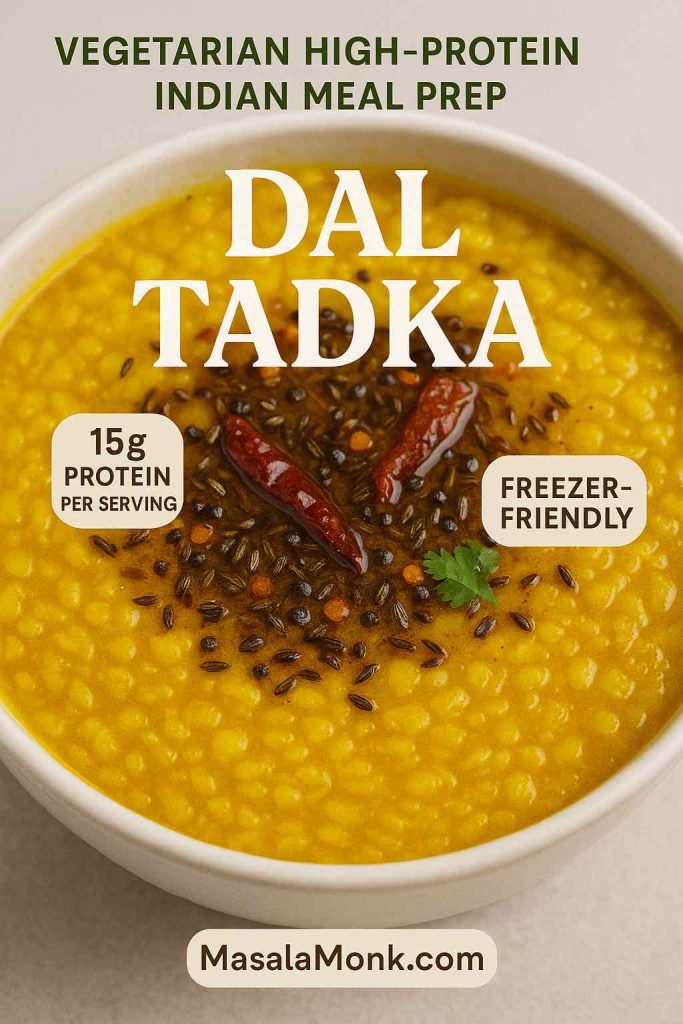
Why Dal Tadka is a Protein Powerhouse
Lentils are one of the most versatile plant-based proteins you can cook. Depending on the type you use — toor dal (pigeon peas), masoor dal (red lentils), or moong dal (yellow lentils) — you’re looking at 12–18g of protein per cooked cup.
They’re also rich in dietary fiber, folate, magnesium, and antioxidants, which help with muscle recovery, digestion, and overall energy levels. Unlike some plant proteins, lentils are quick to cook, making them a weeknight hero.
📚 For a deeper dive into lentils, check out 147 Kgs to 90 Kgs: 3 Lentils for Fat Loss Win
Meal Prep Magic for Dal Tadka
- Batch Cooking: Make a large pot of plain cooked dal (just lentils, water, turmeric, and salt) on Sunday.
- Fresh Tadka: Prepare the tempering — cumin seeds, garlic, onions, tomatoes, and spices — fresh each day when reheating for maximum flavor.
- Mix and Match: Rotate lentil varieties through the week to keep things interesting.
Storage & Reheating
- Fridge: Keeps for 3–4 days without losing texture.
- Freezer: Up to 1 month; store in individual portions.
- Reheat: Stovetop on low heat, adding hot water if it’s too thick.
Serving Ideas
- Pair with whole-wheat roti for a balanced meal.
- Serve over foxtail millet or red rice for a low-GI carb option.
- With jowar (sorghum) rotis to add extra minerals and fiber.
Pro Tips for Next-Level Dal Tadka
- Use ghee for the tadka if you want richness and better nutrient absorption.
- Add spinach, methi leaves, or drumstick leaves for added vitamins and minerals.
- Sprinkle a dash of garam masala just before serving to intensify aroma.
3) Rajma Masala — The North Indian Hearty Bowl
When you think of North Indian comfort food, one dish almost always comes to mind: Rajma Masala. This rich, slow-cooked kidney bean curry has everything you want — a creamy tomato gravy, warming spices, and enough protein to keep you full for hours.
It’s a classic weekend lunch in many Punjabi households, but it also makes a fantastic high-protein meal prep option that stores beautifully.
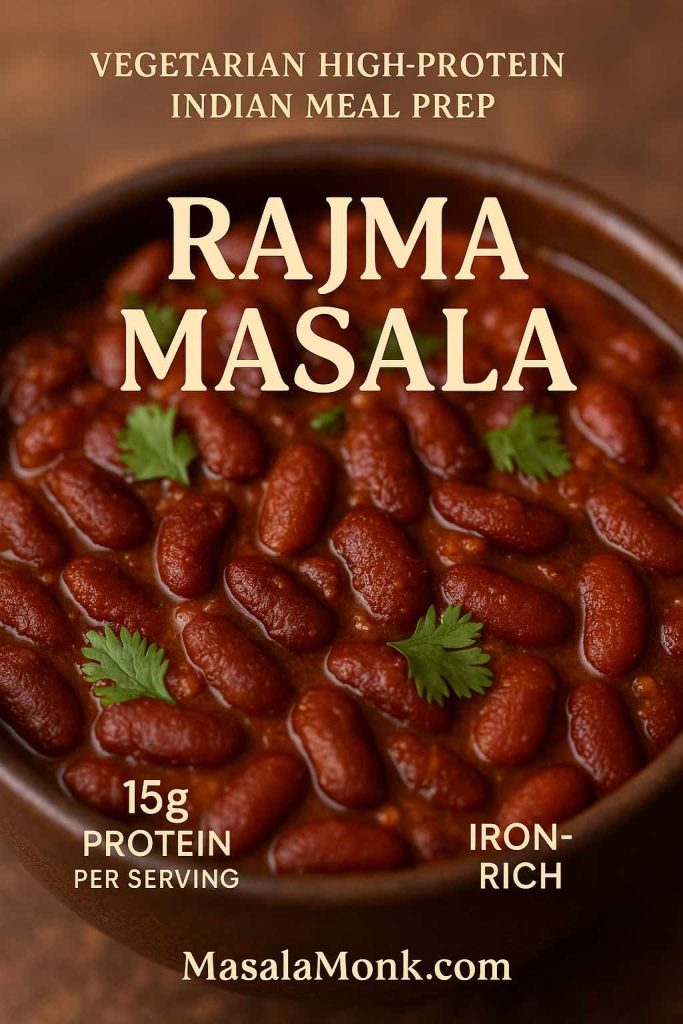
Why Rajma Masala is a Protein Superstar
Kidney beans are protein-dense legumes — one cooked cup contains around 13–15g of protein along with a hearty dose of fiber, potassium, iron, and folate. When paired with a grain like rice or quinoa, they create a complete protein profile with all essential amino acids.
This makes Rajma Masala not just tasty, but also nutritionally powerful, supporting muscle recovery, steady energy, and digestive health.
📚 Learn more about balancing plant proteins in The Science of Protein: Maximizing Muscle Growth and Recovery.
Meal Prep Magic for Rajma Masala
- Soak & Batch Cook: Soak dried kidney beans overnight and pressure cook a large batch. Freeze half for later.
- Flavor Base: Prepare a rich onion-tomato masala in bulk and portion for quick cooking.
- Consistency Trick: Keep the gravy slightly thinner when storing — it thickens in the fridge.
Storage & Reheating
- Fridge: Keeps for 3–4 days with flavor improving over time.
- Freezer: Up to 1 month; thaw overnight in the fridge before reheating.
- Reheat: Simmer gently and add a splash of water if needed to loosen the gravy.
Serving Ideas
- The classic: Rajma with jeera rice — ultimate comfort.
- Swap rice for amaranth (rajgira) to boost protein and micronutrients.
- Use as a wrap filling with chopped onions and chutney for a portable lunch.
Pro Tips for Next-Level Rajma
- Mash a small portion of beans into the gravy before serving — this thickens and enriches the texture naturally.
- Add a pinch of kasuri methi at the end for a restaurant-style aroma.
- Cook low and slow after adding the beans to allow flavors to deepen.
4) Palak Paneer — Greens + Dairy Power
Few dishes manage to be as nutritious and indulgent at the same time as Palak Paneer. Soft cubes of paneer (Indian cottage cheese) are nestled in a silky spinach puree, creating a meal that’s rich in protein, calcium, and iron.
Whether you’re aiming for muscle recovery, weight management, or simply eating healthier, Palak Paneer delivers both taste and nutrition in every bite — and it’s ideal for meal prep.
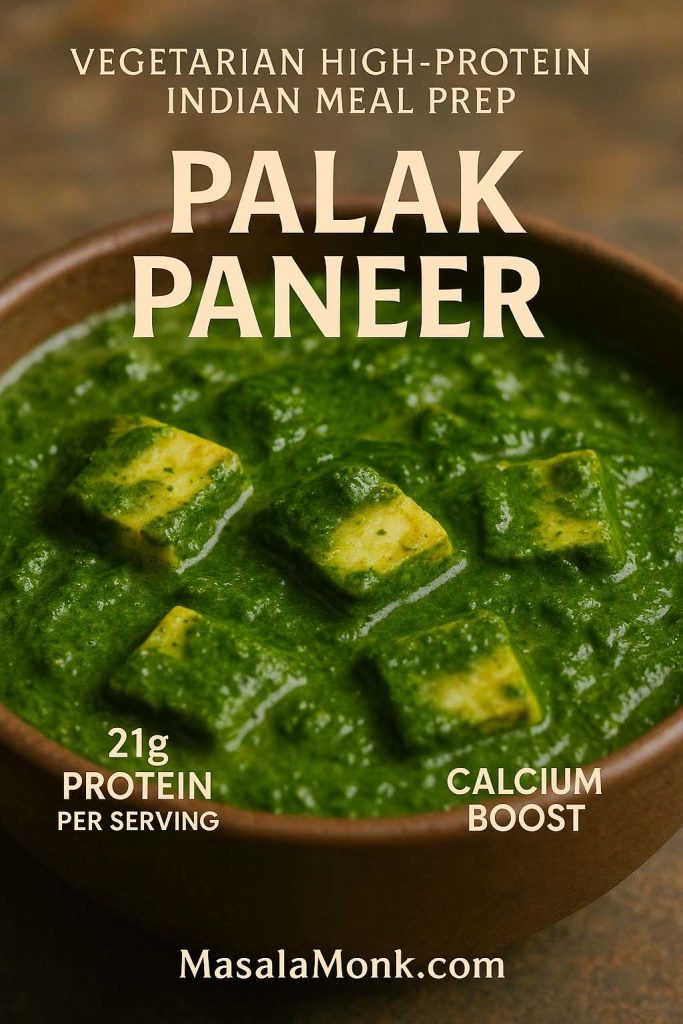
Why Palak Paneer is a Protein & Nutrient Giant
Paneer is a complete protein — meaning it contains all essential amino acids your body needs for muscle repair and overall health. A 150g serving delivers a whopping 27–31g of protein, plus calcium for bone health.
Spinach adds iron, folate, vitamin K, and antioxidants, making this dish a nutrient-dense powerhouse that supports energy levels and recovery.
📚 Understand more about The Spinach – Nutrition, Benefits, and 5 Practical Ways for Weight Loss
Meal Prep Magic for Palak Paneer
- Separate Storage: Cook spinach gravy and store paneer cubes separately. This prevents paneer from getting rubbery.
- Blanch Spinach First: This helps retain the bright green color even after reheating.
- Multi-Use Gravy: The spinach base can also be used with tofu or chickpeas for variety.
Storage & Reheating
- Fridge: 3 days for spinach gravy; 4–5 days for paneer stored dry in an airtight box.
- Freezer: Spinach gravy freezes well for up to 1 month; paneer is best made fresh.
- Reheat: Warm the gravy first, then stir in paneer cubes just before serving.
Serving Ideas
- With whole-wheat roti or paratha for a classic Indian feel.
- With barnyard millet for a gluten-free, light alternative. (Millets: The Gluten-Free Superfood)
- As a side with grilled vegetables for a low-carb meal.
Pro Tips for Next-Level Palak Paneer
- Add cashew cream to the spinach gravy for richness without heavy cream.
- Finish with a squeeze of fresh lemon juice before serving to brighten flavors.
- If using frozen spinach, drain well before blending to avoid a watery gravy.
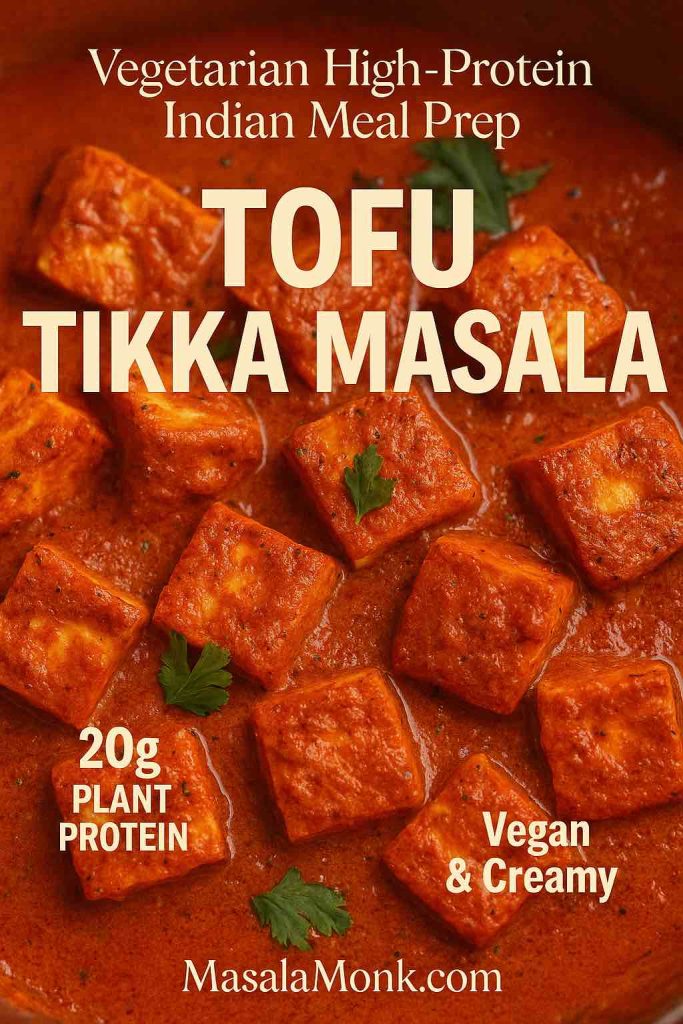
5) Tofu Tikka Masala — Vegan, Creamy, Protein-Rich
If you love the creamy, spiced comfort of Tikka Masala but want a vegan, dairy-free, high-protein option, Tofu Tikka Masala is your answer. Firm tofu soaks up bold tikka spices, is baked for a chewy bite, and then bathed in a rich tomato-based curry.
It’s indulgent enough for a weekend dinner and practical enough for weekday meal prep — plus it delivers serious plant protein without compromising on flavor.
Why Tofu Tikka Masala is a Plant-Protein Winner
Tofu, made from soybeans, is a complete plant protein, meaning it has all essential amino acids. A 200g portion provides around 17–20g of protein with very little saturated fat.
It’s also rich in iron, calcium (if calcium-set), and isoflavones — compounds linked to heart health and improved recovery from exercise.
📚 For more vegan protein ideas, check out Beyond Chicken: 5 Tofu-Tastic Breakfast-for-Dinner Meal Prep Ideas, High Protein and Plant-Based
Meal Prep Magic for Tofu Tikka Masala
- Bake Instead of Fry: Baking marinated tofu at high heat gives a chewy, meaty texture that holds up in storage.
- Make Extra Marinade: Use the leftover marinade as a spice base for the curry sauce.
- Multi-Dish Use: Pre-baked tikka tofu can be tossed into salads, wraps, or stir-fries through the week.
Storage & Reheating
- Fridge: 3–4 days without texture loss.
- Freezer: Up to 1 month; store tofu and curry separately for best results.
- Reheat: Simmer curry gently and add tofu just before serving to keep it firm.
Serving Ideas
- With brown rice or jeera rice for a comforting meal.
- Rolled into whole-wheat wraps with lettuce and onion slices for a portable lunch.
- Served alongside moong dal khichdi for a complete plant-protein combination.
Pro Tips for Next-Level Tofu Tikka Masala
- Press tofu for at least 20 minutes before marinating to remove excess moisture.
- For a creamier vegan sauce, blend cashews into the curry base.
- Add a pinch of smoked paprika to mimic the flavor of a traditional tandoor.
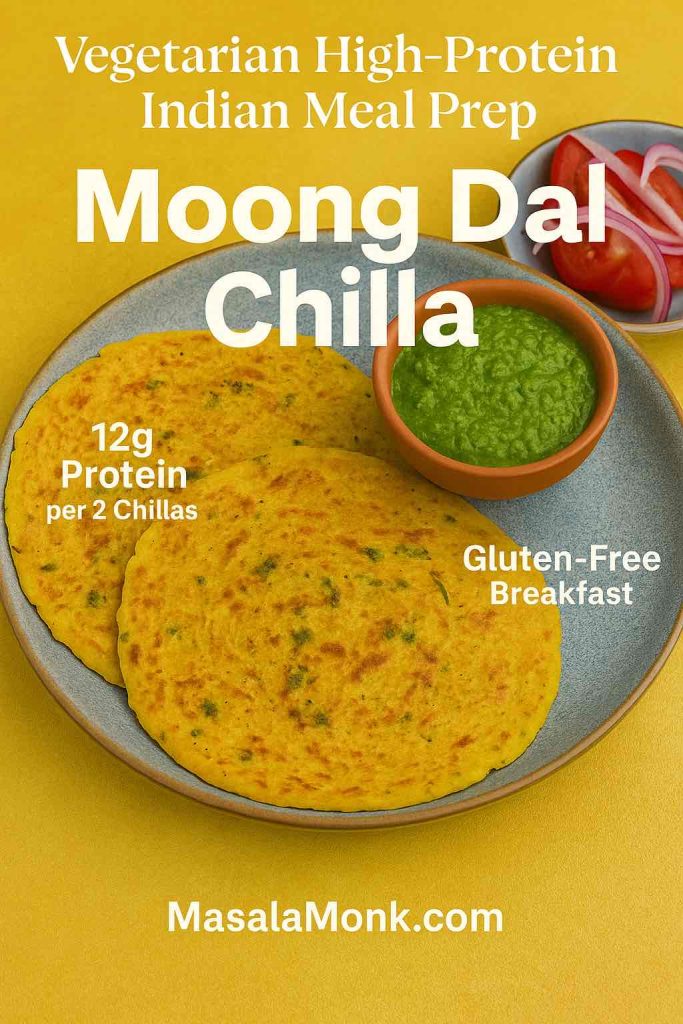
6) Moong Dal Chilla — The Savory Protein Pancake
If you’re looking for a quick, high-protein vegetarian breakfast or snack that also works beautifully for meal prep, Moong Dal Chilla is your best friend. These golden, savory pancakes are made from ground moong dal (split yellow or green gram) and spiced just right for a satisfying, healthy bite.
They’re naturally gluten-free, rich in protein, and versatile enough to work as breakfast, a tiffin box addition, or even a light dinner.
Why Moong Dal Chilla is a Meal Prep Star
Moong dal is one of the most easily digestible legumes and still packs an impressive 12–16g protein per two chillas. It’s also low in fat and high in potassium, magnesium, and folate — making it great for heart health and sustained energy.
Because the batter is stored raw, you can cook chillas fresh in minutes all week long, avoiding the sogginess that comes with reheating pancakes.
📚 Learn more about plant-based protein variety in 10 Delicious Plant-Based Protein Sources for High-Protein Meal Prep.
Meal Prep Magic for Moong Dal Chilla
- Soak & Grind: Soak moong dal overnight, grind with ginger, green chilies, and a little water for a smooth batter.
- Storage: Keep batter in the fridge for up to 3 days; stir before using.
- Pre-Mixed Spices: Add salt and dry spices only when cooking to keep batter fresh longer.
Storage & Reheating
- Batter: Refrigerated up to 72 hours.
- Cooked Chillas: Best eaten fresh; if stored, wrap in foil and refrigerate for 1 day only.
- Reheat: Quick toast on a hot tawa or skillet to restore crispness.
Serving Ideas
- With green chutney and fresh salad for breakfast.
- Stuff with paneer bhurji or sautéed tofu for extra protein.
- Serve alongside barnyard millet upma for a double hit of plant protein.
Pro Tips for Next-Level Moong Dal Chilla
- Add grated carrots, spinach, or beetroot to boost fiber and micronutrients.
- Sprinkle sesame seeds on top before cooking for a nutty crunch.
- For crisp edges, use a little ghee instead of oil.
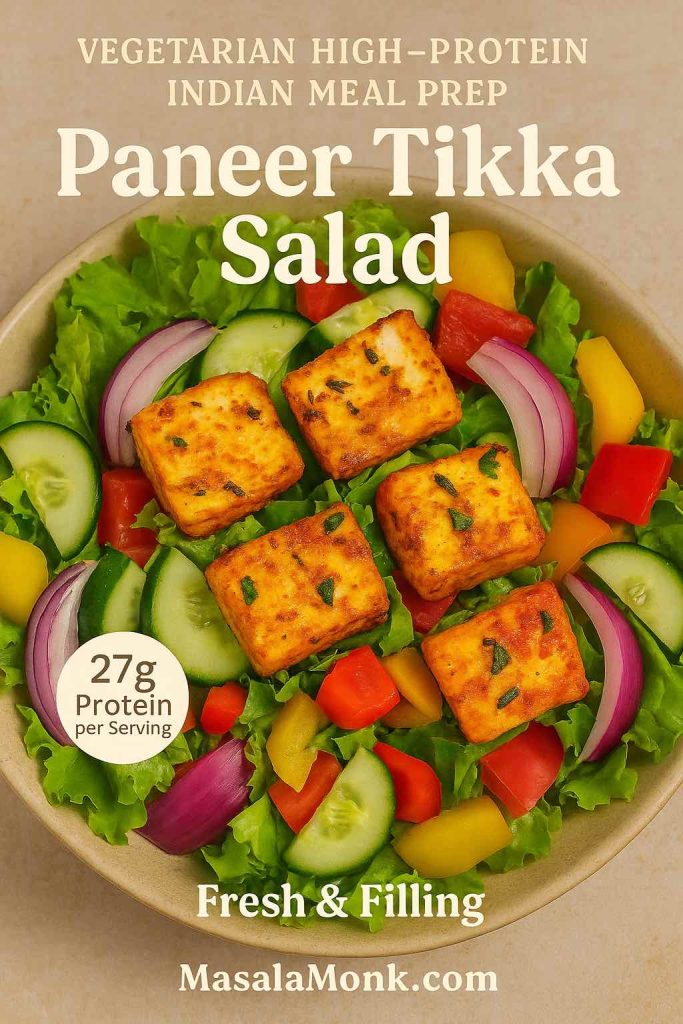
7) Paneer Tikka Salad — Fresh & Portable
If you think salads are boring, Paneer Tikka Salad will change your mind. This is where the smoky, spiced magic of grilled paneer meets the crisp freshness of raw vegetables — creating a high-protein vegetarian meal that’s as colorful as it is satisfying.
Perfect for hot days, office lunches, or post-workout recovery, this salad is meal-prep friendly and keeps you feeling full for hours.
Why Paneer Tikka Salad is a Protein Hero
Paneer is one of the richest vegetarian protein sources, with 27–31g of protein per 150g serving. The tikka marinade (yogurt + spices) adds probiotics, which can support digestion, and the fresh vegetables bring fiber, antioxidants, and crunch.
📚 For more on paneer’s nutritional profile, check out Protein in 3 Scrambled Eggs: Nutritional Insights and Benefits — it’s a great comparison for understanding dairy proteins.
Meal Prep Magic for Paneer Tikka Salad
- Grill in Bulk: Marinate and grill a large batch of paneer on prep day; store in the fridge.
- Separate Storage: Keep grilled paneer in one container and chopped veggies in another; combine before eating to keep it crisp.
- Double Duty: Use leftover tikka paneer in wraps, sandwiches, or grain bowls.
Storage & Reheating
- Paneer: Keeps in the fridge for 3–4 days; can be lightly reheated on a skillet or eaten cold.
- Veggies: Best chopped fresh every 1–2 days for maximum crunch.
- Dressing: Store separately in a small jar to prevent sogginess.
Serving Ideas
- Over a bed of baby spinach with cucumber, onions, and bell peppers.
- Toss with whole-wheat pasta for a fusion protein salad.
- Pair with jowar (sorghum) crackers for a light but filling lunch.
Pro Tips for Next-Level Paneer Tikka Salad
- Add roasted chickpeas for extra plant protein and crunch.
- Use a mix of lemon juice and chaat masala for a tangy, refreshing dressing.
- Marinate paneer for at least 2 hours for deeper flavor penetration.
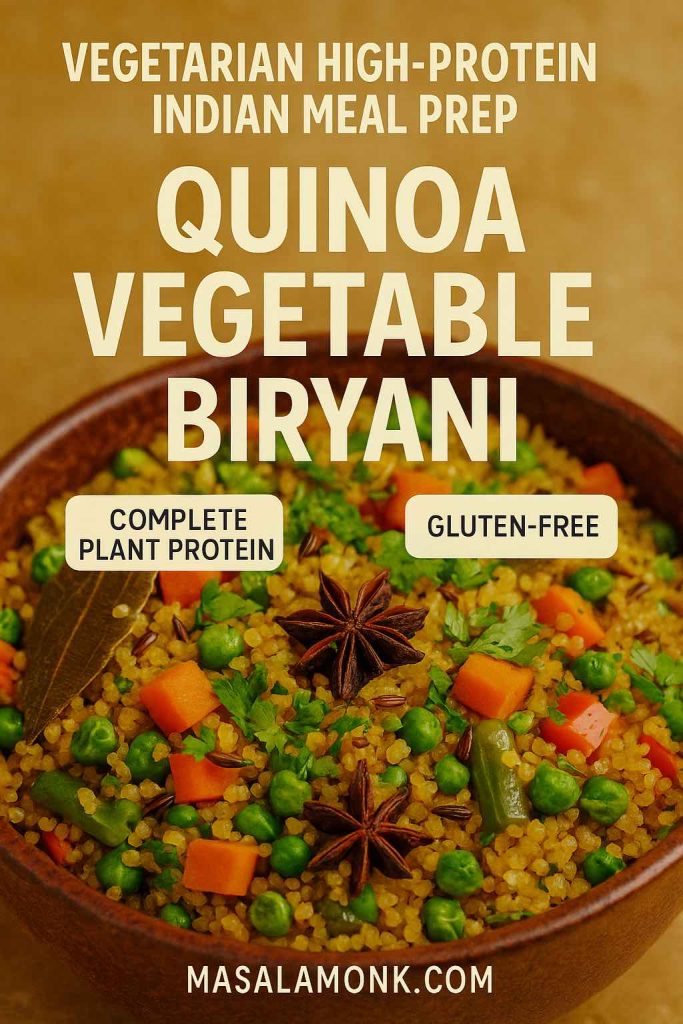
8) Quinoa Vegetable “Biryani” — Fragrant & Complete
If you love biryani but want a lighter, high-protein, gluten-free twist, Quinoa Vegetable Biryani is the way to go. It delivers all the aroma and spice of a traditional biryani while packing in complete plant protein thanks to quinoa.
This one-pot dish is perfect for meal prep — it’s quick to make, easy to portion, and tastes just as good reheated.
Why Quinoa Biryani is a Protein All-Rounder
Quinoa is one of the few plant foods that is a complete protein, offering all nine essential amino acids. One cup of cooked quinoa provides 8g of protein, and when combined with vegetables, nuts, or paneer/tofu, it can reach 15–25g per serving.
It’s also rich in magnesium, iron, and fiber, helping with energy production, digestion, and muscle recovery.
📚 For more quinoa-based ideas, check out 10 Plant-Based Meal Prep Ideas Using Quinoa.
Meal Prep Magic for Quinoa Vegetable Biryani
- Toast First: Toast quinoa in a little ghee with whole spices before adding water — it enhances the nutty flavor.
- Veggie Choices: Use a mix of carrots, beans, peas, and capsicum for color and nutrition.
- Protein Boost: Stir in paneer cubes, baked tofu, or chickpeas after cooking.
Storage & Reheating
- Fridge: Stays fresh for 3–4 days.
- Freezer: Up to 1 month in airtight containers.
- Reheat: Sprinkle with water, cover, and steam gently for fluffy grains.
Serving Ideas
- With raita (yogurt + cucumber + mint) for a cooling contrast.
- Paired with a side of dal tadka for extra protein.
- As a lunchbox meal with roasted papad and pickle.
Pro Tips for Next-Level Quinoa Biryani
- Use vegetable stock instead of plain water for richer flavor.
- Add a handful of cashews or almonds for healthy fats and crunch.
- Finish with fresh coriander and mint just before serving.
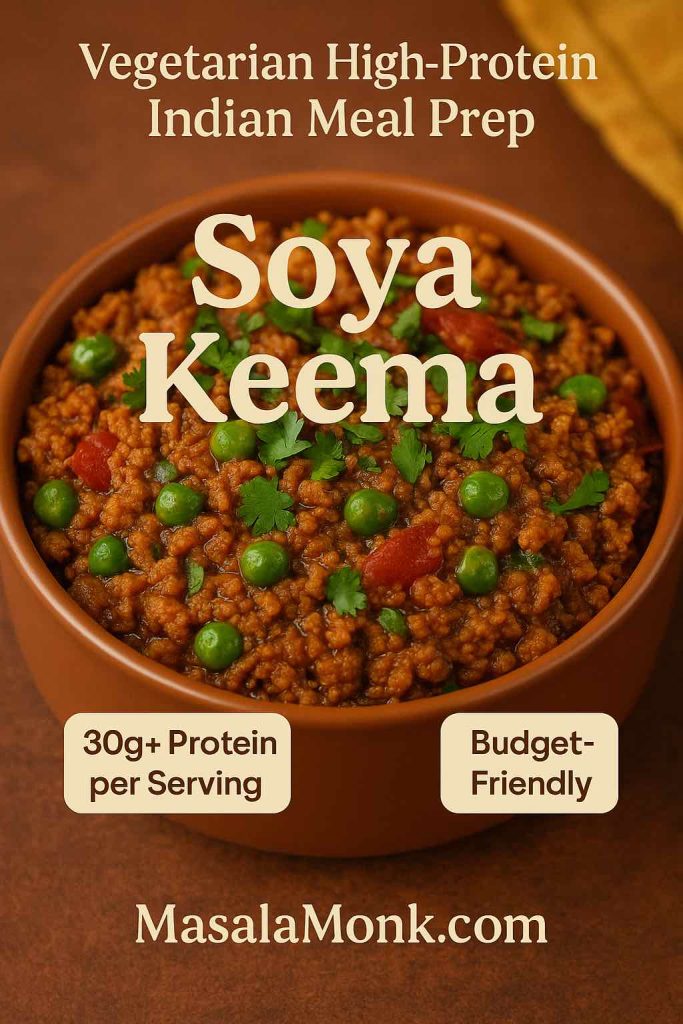
9) Soya “Keema” — Budget-Friendly Protein Boost
If you’re looking for maximum protein on a budget, Soya Keema is hard to beat. Made from textured vegetable protein (TVP) granules, this dish mimics the texture of minced meat while being entirely vegetarian — and it soaks up Indian spices beautifully.
It’s quick to cook, freezer-friendly, and perfect for adding variety to your weekly high-protein meal prep.
Why Soya Keema is a Protein Heavyweight
Textured soy protein is one of the most concentrated plant protein sources. A single cooked cup of soya granules contains 30–35g of protein while being low in fat and cholesterol-free.
It’s also rich in iron and contains all essential amino acids, making it a great meat substitute for vegetarians and vegans.
📚 For more soy-based high-protein ideas, check out The Power of Tempeh: 10 High-Protein Plant-Based Meal Prep Ideas as an Alternative to Pork.
Meal Prep Magic for Soya Keema
- Hydrate First: Soak soya granules in hot spiced water or vegetable stock for 10 minutes before cooking — this removes the raw soy taste.
- Bulk Cooking: Make a large batch and freeze in portioned containers.
- Multi-Use: Use soya keema in wraps, stuffed parathas, pasta sauces, or over rice.
Storage & Reheating
- Fridge: Lasts 3–4 days in an airtight container.
- Freezer: Keeps for 1–2 months without losing texture.
- Reheat: Warm gently in a pan; add a splash of water to prevent drying.
Serving Ideas
- With whole-wheat pav for a vegetarian take on Keema Pav.
- Stuffed inside multigrain parathas for a high-protein breakfast.
- Served over foxtail millet pulao for a complete, balanced meal.
Pro Tips for Next-Level Soya Keema
- Add peas and carrots for sweetness and extra micronutrients.
- Finish with fresh coriander and a squeeze of lemon to brighten flavors.
- For a spicier version, stir in chopped green chilies while sautéing onions.
10) Tofu–Rajma Power Bowl — Double the Protein
When it comes to vegetarian high-protein meals, why settle for just one source? The Tofu–Rajma Power Bowl brings together two protein all-stars — kidney beans (rajma) and tofu — for a nutrient-packed, muscle-friendly dish that’s perfect for meal prep.
It’s colorful, filling, and endlessly adaptable, making it a go-to option for anyone who wants balanced vegetarian protein in every bite.

Why This Bowl is a Protein Beast
- Tofu: 200g firm tofu provides 17–20g protein.
- Rajma: 1 cup cooked kidney beans adds 13–15g protein.
Together, that’s 30–35g of complete protein in a single meal — with plenty of fiber, iron, calcium, and antioxidants.
📚 For more on Tofu, read: ‘Tofu’ Instead of ‘Eggs’: 5 High Protein Plant-Based Breakfast Ideas
Meal Prep Magic for the Tofu–Rajma Power Bowl
- Batch Cook: Make a big pot of rajma masala and bake or pan-fry marinated tofu cubes in bulk.
- Separate Components: Store beans, tofu, and veggies separately to mix fresh when serving.
- Flexible Flavors: Change the spices — go classic Indian masala one day, Mediterranean herbs the next.
Storage & Reheating
- Fridge: Keeps for 3–4 days in separate containers.
- Freezer: Rajma freezes well for 1 month; tofu is best stored chilled and fresh.
- Reheat: Warm rajma gently; tofu can be lightly grilled or air-fried to restore texture.
Serving Ideas
- Over brown rice for a classic bowl meal.
- With barnyard millet for a light, gluten-free base.
- As a salad-style bowl with raw veggies, tahini dressing, and pickled onions.
Pro Tips for Next-Level Bowls
- Add roasted sweet potato chunks for natural sweetness and extra carbs.
- Sprinkle toasted sesame seeds or pumpkin seeds for crunch and healthy fats.
- Keep a jar of quick pickled onions ready — they lift the flavor instantly.
Vegan Meal Prep Plan (1 Week): Indian-Style, High Protein
If you want a fully plant-based week, use the same dishes above with a few swaps. The simplest approach is to keep two mains + one grain + fresh crunch ready, then mix and match all week.
Vegan 7-day menu idea
- Mon: Chana Masala + quinoa (lunch) | Tofu Tikka Masala + brown rice (dinner)
- Tue: Rajma Masala bowl + veggies | Dal Tadka + millet + stir-fry veg
- Wed: Soya Keema wraps (use gluten-free wrap if needed) | Quinoa Vegetable “Biryani” + cucumber salad
- Thu: Tofu–Rajma Power Bowl | Chana Masala + roasted vegetables
- Fri: Dal Tadka + rice + extra tofu on top | Soya Keema + millet
- Sat: Moong Dal Chilla + chutney | Tofu Tikka Masala + quinoa
- Sun: Quinoa Biryani leftovers | Rajma Masala + salad
Vegan upgrade tip: keep a jar of roasted seeds (pumpkin/sesame) and add 1–2 tbsp to bowls for protein + crunch.
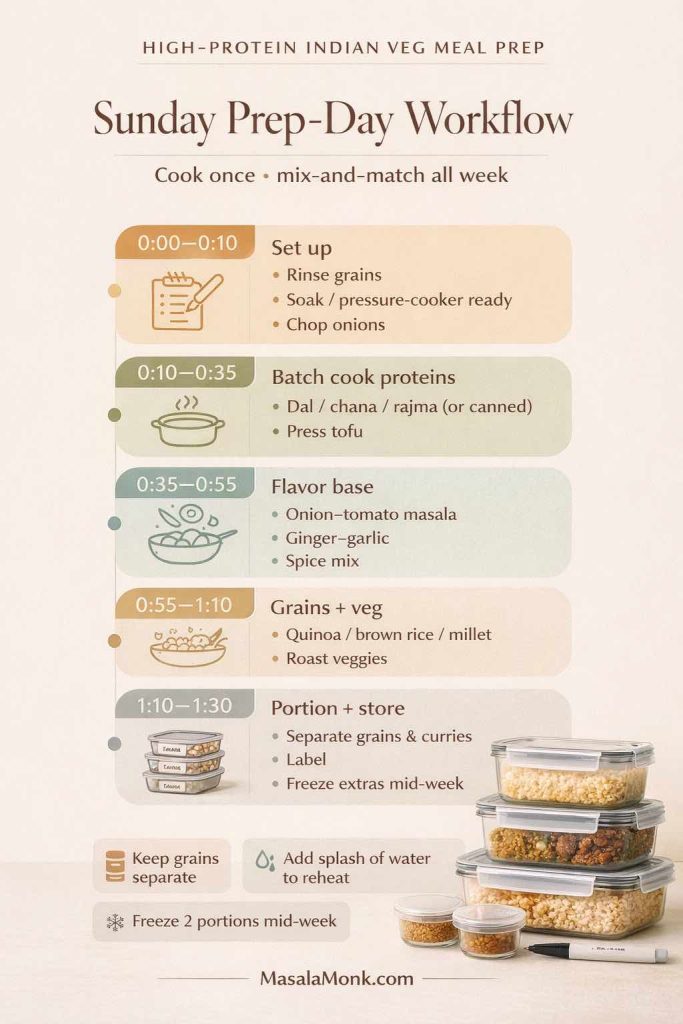
Meal Prep Workflow for the Week
- Batch cook your proteins on Sunday — chickpeas, kidney beans, lentils, tofu, and paneer.
- Prep your flavor bases: onion-tomato masala, ginger-garlic paste, and dry spice mixes in labeled jars.
- Store separately: Keep curries and grains in separate containers to avoid sogginess.
- Freeze half: For freshness and variety, freeze some portions and defrost mid-week.
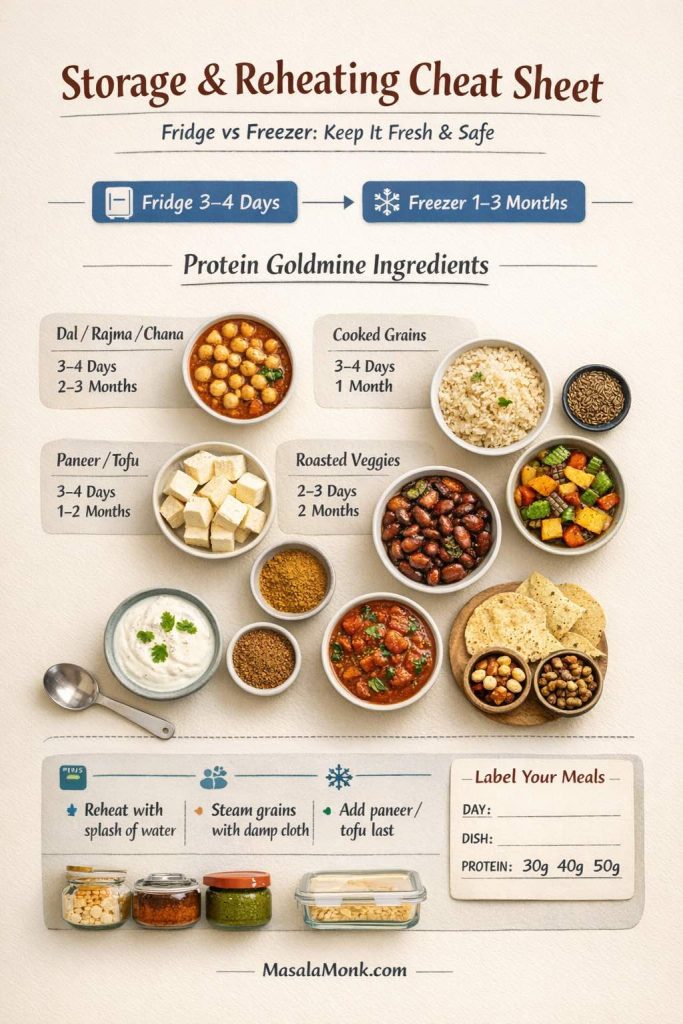
Storage & Food Safety Tips
- Curries: Last 3–4 days in the fridge; freeze for up to 3–4 months.
- Rice/quinoa: Cool quickly, refrigerate within 2 hours, and finish within 3–4 days.
- Paneer/tofu: Store in airtight boxes; refresh paneer by dunking in warm water before reheating.
- Reheating: Always heat until steaming hot to kill any bacteria.
Gluten-Free High-Protein Indian Meal Prep (Easy Swaps)
If you’re going gluten-free, you don’t need different recipes — you need different bases.
- Skip wheat roti and use rice, quinoa, or millets (jowar, bajra, foxtail, barnyard).
- Best naturally gluten-free picks from this list: Moong Dal Chilla, Quinoa Vegetable Biryani, Dal Tadka with rice/millet, Tofu–Rajma Power Bowl, Chana Masala with quinoa.
- Packable gluten-free lunches: rajma bowls, chana + quinoa, tofu tikka + rice, soya keema + millet.
- If you’re very sensitive, double-check store-bought spice blends, sauces, and hing labels.
How to Structure Your Week
Prep Day (Sunday)
- Cook legumes, tofu, paneer.
- Make onion-tomato masala.
- Chop and store veggies.
- Cook grains in bulk.
Midweek Refresh (Wednesday)
- Defrost frozen portions.
- Make a quick fresh salad or chutney to revive meals.
Portion Guide: Weight Loss vs Muscle Gain (Same Meals, Different Plates)
You can use the exact same dishes for different goals — the difference is portioning.
- For weight loss: 1–2 ladles curry + 2 cups vegetables + ½–1 cup cooked grains + lighter oil/ghee.
- For maintenance: 1–2 ladles curry + 1 cup grains + vegetables + yogurt/raita (or soy yogurt).
- For bulking: add an extra protein (tofu/paneer/soya), plus nuts/seeds, and increase the grain portion.

Sample 7-Day High-Protein Vegetarian Indian Menu
| Day | Lunch | Dinner |
|---|---|---|
| Mon | Chana Masala + quinoa | Palak Paneer + roti |
| Tue | Rajma Masala + brown rice | Tofu Tikka Masala + salad |
| Wed | Moong Dal Chilla + chutney | Paneer Tikka Salad |
| Thu | Soya Keema + millet | Dal Tadka + rice |
| Fri | Quinoa Biryani | Tofu–Rajma Bowl |
| Sat | Chana Masala wrap | Palak Paneer |
| Sun | Paneer Tikka Salad | Rajma Masala |

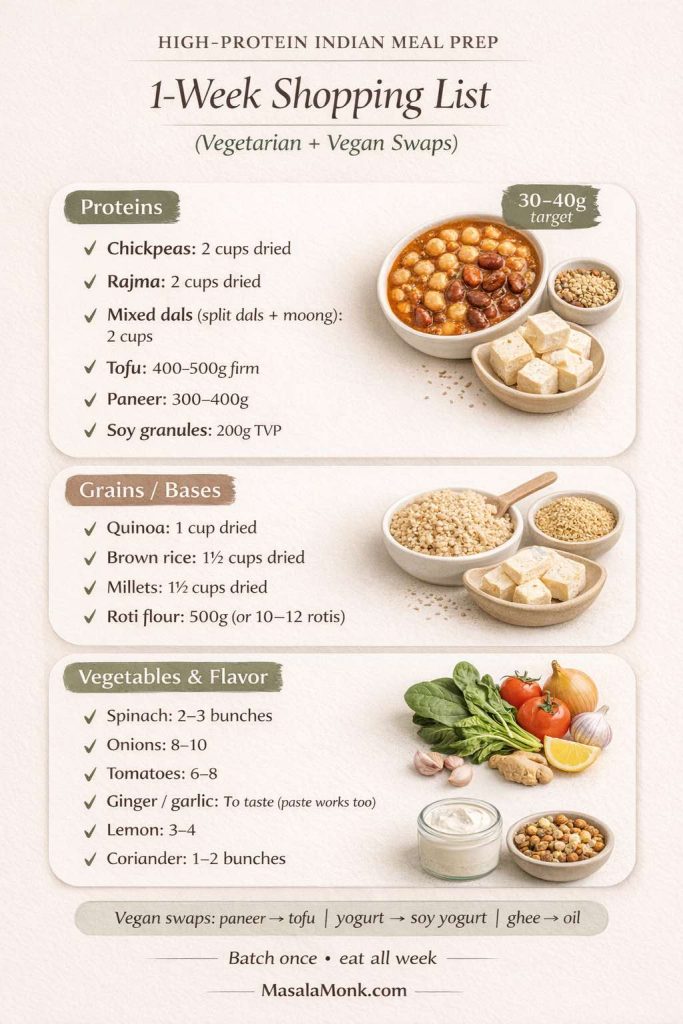
Shopping List for 1 Week of High-Protein Vegetarian Indian Meals
- Proteins: Chickpeas, kidney beans, assorted lentils (toor, masoor, moong), firm tofu, paneer, soy granules.
- Grains: Quinoa, brown rice, whole-wheat flour for roti.
- Vegetables: Spinach, onions, tomatoes, carrots, peppers, peas, kale.
- Spices: Cumin, coriander, turmeric, garam masala, kasuri methi, mustard seeds.
- Condiments: Lemons, fresh coriander, yogurt, chutneys, pickles.
If You’re Buying Prepared Vegetarian/Vegan Meals, Use This Protein Checklist
If you’re short on time and considering tiffin or prepared meals, use this checklist so you still hit your protein goals:
- Ask for protein per serving (aim roughly 25–40g for a main meal if possible).
- Choose bean/soy-based mains more often than potato/cream-heavy dishes.
- If weight loss is your goal, watch the oil level and keep grains measured.
- Freezer-friendly curries (rajma, chana, dal) usually give the best value and hold up well.
For More Protein-Packed Inspiration
- The Science of Protein: Maximizing Muscle Growth and Recovery — how to make your protein work harder.
- Benefits of Nuts and Seeds – Protein-Packed Superfoods — easy add-ons to any meal.
- How to Eat 100 Grams of Protein a Day — practical daily strategies.
FAQs – Vegetarian High-Protein Indian Meal Prep
1. What are the best vegetarian protein sources in Indian cuisine?
Some of the top vegetarian protein sources include lentils (dal), chickpeas, kidney beans (rajma), paneer, tofu, soya chunks, quinoa, amaranth, and nuts & seeds. Combining these with whole grains like brown rice or millet ensures a complete amino acid profile.
2. How much protein should I aim for in each meal?
For most adults, a balanced high-protein vegetarian meal should have 15–30g of protein depending on your goals, activity level, and total daily needs. Athletes or those looking to build muscle may need more — around 1.6–2.2g protein per kg of body weight daily.
3. Can vegetarian meals provide complete proteins?
Yes! You can create complete proteins by combining legumes with grains (e.g., rajma with brown rice, dal with roti, quinoa with vegetables). Foods like quinoa, soy, amaranth, and buckwheat are complete proteins on their own.
4. How can I make vegetarian meal prep last longer?
- Store cooked meals in airtight containers.
- Refrigerate for up to 4 days or freeze for 1–2 months.
- Keep components (gravy, rice, roti) separate until serving to maintain freshness and texture.
5. Are these high-protein Indian dishes suitable for weight loss?
Absolutely — high-protein meals help increase satiety, control appetite, and maintain muscle mass during weight loss. Choose dishes with lean protein sources, plenty of vegetables, and moderate healthy fats.
6. Can I replace paneer with tofu in these recipes?
Yes! Tofu is a great vegan substitute for paneer, offering similar protein content but with less saturated fat. Marinating tofu before cooking enhances flavor and texture.
7. What are some gluten-free high-protein Indian options?
- Quinoa Vegetable Biryani
- Moong Dal Chilla
- Soya Keema (with millet or rice)
- Tofu–Rajma Power Bowl
- Dal Tadka with brown rice or barnyard millet
8. How can I increase protein in traditional Indian dishes?
- Add lentils or legumes to curries.
- Top salads with paneer, tofu, or chickpeas.
- Use soy granules or tempeh in place of vegetables or meat.
- Replace refined grains with quinoa, millet, or amaranth.
9. Are these recipes kid-friendly?
Yes — most can be adjusted for kids by reducing spice levels and cutting protein sources into bite-sized pieces. You can also blend vegetables into gravies for picky eaters.
10. How can I prep these meals quickly during a busy week?
- Cook lentils, beans, and grains in bulk over the weekend.
- Pre-chop vegetables and store them in airtight containers.
- Make spice mixes in advance for quick seasoning.
- Freeze marinated tofu or paneer for easy weekday cooking.
11. How do I make a 50g protein vegetarian meal prep?
Use a “two-protein plate”: pair dal or rajma with tofu/paneer/soya, then add quinoa or millet. Example: Dal Tadka + Tofu Tikka Masala + quinoa is an easy high-protein setup that reheats well.
12. What’s the easiest vegan meal prep plan for beginners?
Prep two mains (rajma/chana + tofu tikka masala), one grain (quinoa/rice), and fresh crunch (cucumber/onion/lemon). Mix and match through the week so it doesn’t feel repetitive.
13. How do I pack vegan meal prep for work without sogginess?
Keep sauces separate, store grains apart from curries, and pack crunchy add-ons (onions, roasted chana, papad) separately. Combine only when you’re ready to eat.