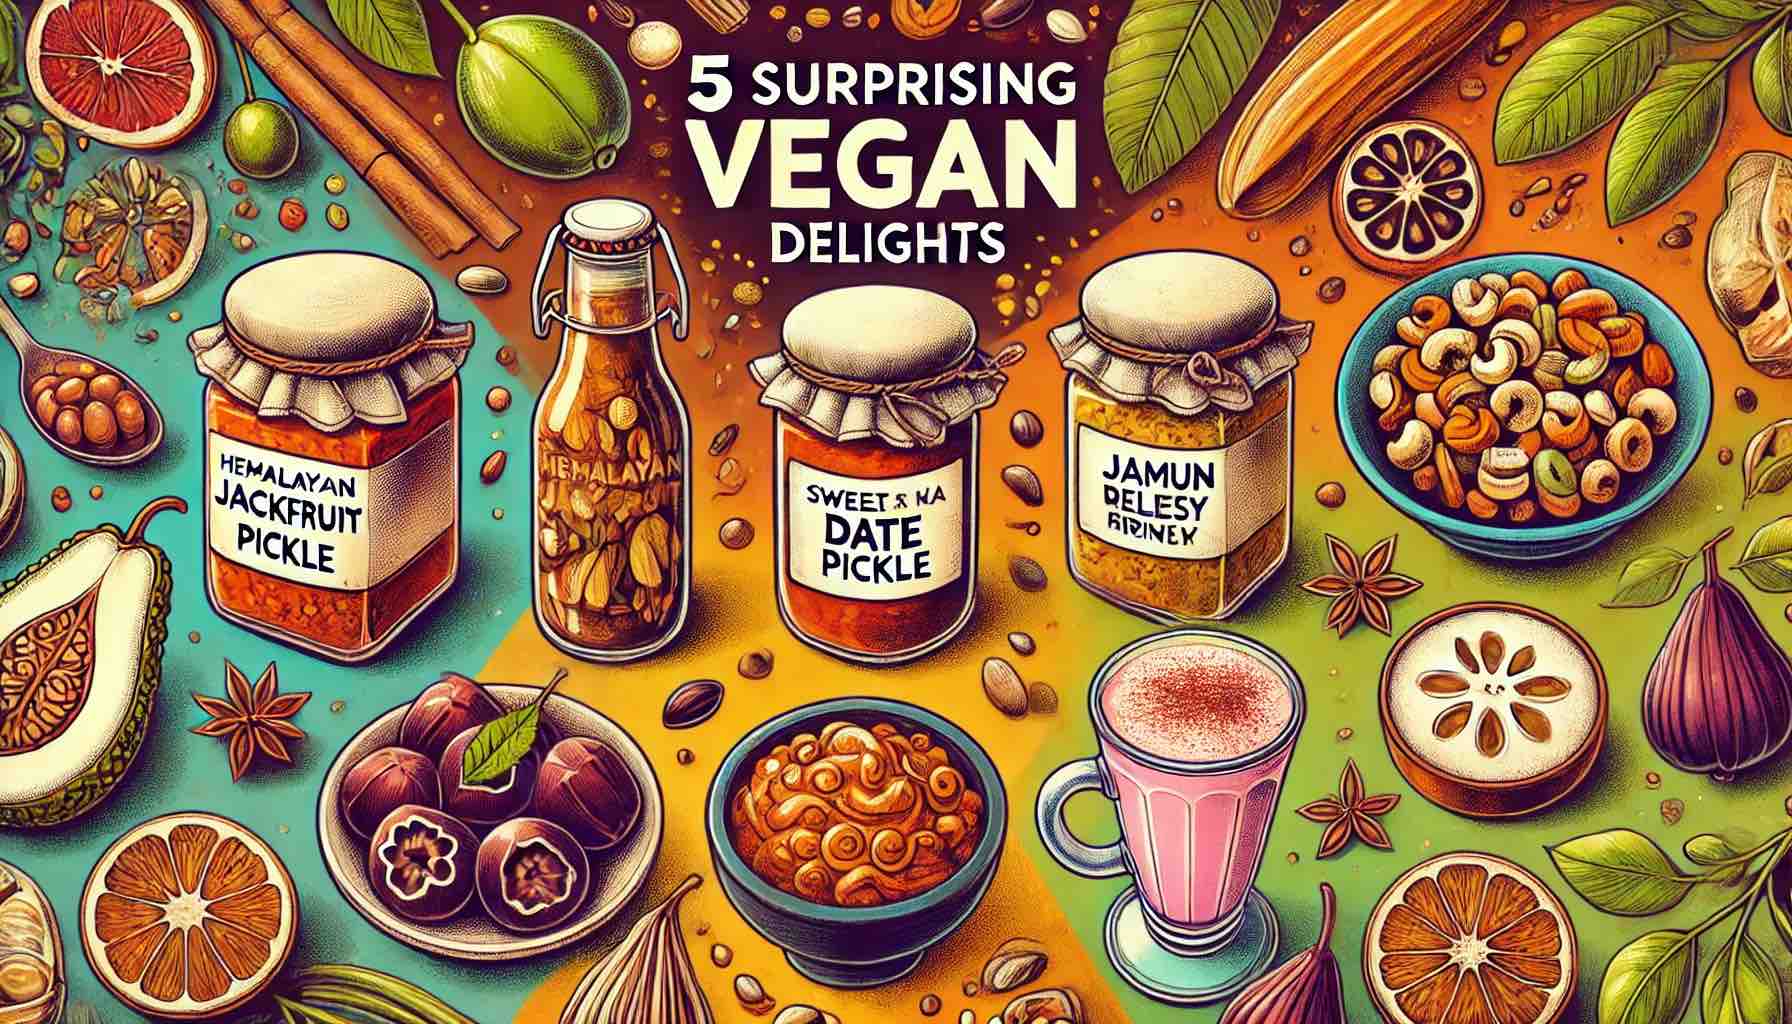
Posted on 1 Comment

Mushroom Cheese Sandwich Recipe

Dive into layers of savory goodness as we combine earthy mushrooms, gooey cheese, and toasted bread for the ultimate comfort food experience.

Ingredients:

1 cup Mushroom, sliced
1 small Onion, finely chopped
1/2 teaspoon Garam Masala powder
Cheese slices (as needed)
1/2 teaspoon Chilli flakes (adjust to taste)
Burger mayonnaise (as needed)
Butter (for grilling)
Salt, to taste
Bread slices

Instructions:

Heat a pan over medium heat and add a small amount of butter. Once the butter melts, add the finely chopped onion and sauté until they turn golden brown.

Add the sliced mushrooms to the pan and continue sautéing. Let them cook for a few minutes until they start to release their moisture.

Sprinkle garam masala powder and chilli flakes over the mushrooms. Stir well to combine and continue cooking for another 5-6 minutes, allowing the mushrooms to become tender and flavorful. Add a pinch of salt to taste.

Once the mushrooms are cooked and have absorbed the spices, turn off the heat and allow the mixture to cool slightly.

Take a bread slice and spread a layer of burger mayonnaise on one side. You can use as much or as little as you prefer, depending on your taste.

Place a generous amount of the sautéed mushroom mixture on top of the mayonnaise-spread bread slice.

Lay a cheese slice over the mushroom mixture, ensuring it covers the entire surface.

Take another bread slice and spread some mayonnaise on one side. Place this slice, mayo-side down, over the cheese layer, creating a sandwich.

Heat a pan or sandwich maker over medium heat. Spread a small amount of butter on the surface where you’ll place the sandwich.

Carefully place the prepared sandwich onto the pan or sandwich maker. Grill the sandwich for a few minutes on each side until the bread turns golden brown and crispy, and the cheese melts to oozy perfection.

Once both sides are grilled to your liking, remove the sandwich from the pan or sandwich maker and place it on a cutting board and slice it diagonally

Enjoy your delicious and flavorful Mushroom Cheese Sandwich!

Note: Feel free to customize the recipe by adding other ingredients like bell peppers, spinach, or herbs for added flavor and nutrition.

Posted on 2 Comments

Healthy Iron Rich Pancake- Kid Friendly Recipe

Kids have limited appetite. Give your child the best nutrition in that little food that they eat. The biggest struggle for vegetarians or vegans is to fulfill their child’s iron needs. While balanced diet here is the key but we all know how balanced it gets with the children especially the ones who are picky eaters.

So, I am going to share with you a simple recipe which has a great balance of protein and iron.

We all make BESAN CHEELAS at home. Sharing with you a simple way wherein you can make the best out that one Cheela that your child eats. 😊 And trust me it comes out delicious and packed with flavours. Also, this makes a great lunch box recipe too.

This recipe requires no elaborate preparations, so don’t need to plan ahead either. Just stir together the ingredients to make a batter, pour it on a hot griddle & cook up a delicious healthy meal.

What is Cheela?

Cheela is a sweet or savory Indian Pancakes made using lentils, cereal or grain flour. They are often made without any leavening agents, so they are considered to be healthy.

What is Besan?

Besan is a Hindi word which means “gram flour”. It is a pulse flour made using channa dal or chickpea flour. So besan cheela is gram flour pancakes. These pancakes are Gluten Free, vegan and nutritious. Gram flour is a fabulous source of protein, iron, magnesium, potassium, vitamin B6. Just 100 grams of gram flour can give you 22 grams of easy to digest natural protein. You can make these pancakes with basic ingredients as well but when you add green leafy vegetables to it, it not only enhances the taste but also makes it wholesome and an amazing source of iron for your kids.

Also the vegetables I have added are all homegrown. If you don’t have enough space, grow them in small pots. It’s no rocket science. Just get a few pots or grow bags, potting soil and seeds from any nursery near your house. Engage your children while planting it. The satisfaction of eating your homegrown organic vegetables is unmatchable. Try it!

Ingredients

Prep time: 5 minsServing: makes 3 Pancakes
Cook time: 5 mins
  • Besan/Chickpea flour: 1/2 cup
  • Sattu/Roasted Gram flour: 1/4th cup
  • Semolina/Suji: 1/4th cup
  • Cumin seeds/Jeera:  1/8th tsp
  • Bishop seeds/Ajwain: 1/8th tsp
  • Garam Masala: 1/4th tsp
  • Roasted Cumin powder: 1/4th tsp
  • Turmeric: 1/4th tsp
  • Salt & Black pepper to taste
  • Chat Masala to taste (optional)
  • Coriander powder: 1/2 tsp
  • Water as required 
  • Chopped Methi (Fenugreek), Spinach, Radish leaves, Mint leaves, Curry leaves & Coriander leaves: 1 cup
  • Onion: 2 tbsp, finely chopped
  • Ginger: 2” long, grated
  • Ghee or Oil as required 

Method

1 Take Besan/Chickpeas flour, Sattu or Roasted Gram flour (great source of protein) and Semolina/Suji (for crispiness) in a bowl.

2. To this add turmeric, cumin seeds, ajwain/bishop seeds, garam masala, roasted cumin powder, black pepper, salt, chaat masala and coriander powder. Mix it well. Add enough water to make a thin but not a runny batter. Start with 1/4th cup water and the gradually add more as required. Continue whisking until the batter has a smooth, flowing consistency. There shouldn’t be any lumps, so make sure to break those up while mixing the batter.

Tip: Use a wire whisk to whisk the batter. This will ensure that your batter is lump free.

3. Now add chopped methi (fenugreek) leaves, spinach leaves, onion, grated ginger (fabulous food for digestion), curry leaves, coriander & mint leaves. Use the leaves that are in season. All the green leaves are a great source of iron and this is one of the best ways to incorporate this in your child’s and your diet.

4. Keep the batter aside for 10 minutes. Heat a cast iron tawa on a medium to low heat. I have made it on normal tawa in which we make rotis but if you can’t make it on tawa then you can use a non stick pan as well.

5. Brush the tawa with desi ghee or oil. Add generously to avoid dry cheelas because besan tends to soak ghee/oil. Take a ladle or ¼ to ⅓ of a measuring cup full of the batter and pour on the pan. Spread the batter evenly with the back of your ladle to make thin cheelas.

6. Then continue to cook the chilla on a low to medium-low heat until the top begins to set. You can drizzle some more oil or ghee along the edges for a crispy cheela.

7. You can flip the chilla once or twice for even cooking.
Once the base gets golden brown, it’s time to flip the cheela. Cook the other sides till you see golden spots on cheela. You can flip the cheela once or twice for even cooking.

8. Finally, fold it and then serve it mint chutney, homemade ketchup or the way your child likes it.

Enjoy!! 😊

Notes:

  • If some of the spices mentioned above are not available, feel free to skip them.
  • Incase you don’t find sattu or roasted gram flour, feel free to skip it and add more besan or chickpea flour. However, sattu is a great source of protein and iron, so it’ll be great if you can get your hands on it.
Posted on Leave a comment

Quick Strawberry and Apple Preserve- Healthy Kid Friendly Recipe

I love making fuss free healthy recipes for my little one. Strawberries have literally become synonymous to preserves and jams. With only a few ingredients, you can whip up homemade strawberry preserves in no time and it’ll keep so well in the fridge for weeks to come!

This delightful homemade preserve is one of my son’s favourite and it is super easy to make. He enjoys it with almost anything – pancake, on a toast, parantha. It takes only 5 ingredients and tastes so much better than the store bought ones which are laden with sugar, artificial colours and preservatives.

This preserve is made in smaller batch without the use of pectin. But this recipe can be doubled or tripled to make a larger batch of preserve. If you want the preserves to last longer than three weeks in the refrigerator, you’ll need to process the jars in a hot water canning bath.

Do make this strawberry preserve when berries are in season and I am sure you will love it.
It tastes delicious. It’s healthy and its is ready in flat 20 minutes. 

This preserve does not contain any processed sugar. It is not sickly sweet. This is something your child and your family can enjoy guilt free. I have added chia seeds to it for more nutrition and also it improves the texture of the preserve.

Ingredients

Prep time: 5 minsServing: makes 2 ounces
Cook time: 15 mins
  • 100 gms Strawberries
  • 1/2 cup Apple
  • 30 gms jaggery powder or unprocessed coconut sugar
  • 1.5 tbsps Chia seeds
  • 1 tbsp Lemon juice
  • 1 tsp Vanilla extract (optional but recommended)
  • 1/4th cup Water

Method

  1. Chop strawberries and apple finely. Add them in a pan. Keep the flame low. Cook for a minute. Now add coconut sugar or jaggery powder. 
  2. Stir till sugar melts. It should take a minute or two.
  3. Now add water. Cook till apple becomes mushy and the preserve thickens. It will roughly take 9-10 minutes. 
  4. Once it thickens, add lemon juice, vanilla extract and chia seeds. 
  5. Cook for a minute and Voila!!! It’s done 🙂

Notes:

  • You can skip apple here and add 1/2 cup more of strawberries or other berries of your choice.
  • Do not skip lemon juice. Lemon juice is required to set the preserve. The acid in it neutralizes the PH level of the mixture. 
  • Store in an airtight glass jar. Refrigerate for longer shelf life. Use within 3-4 weeks
  • Use a dash of cinnamon for a warm touch.

Enjoy good health! 🙂

Posted on 5 Comments

Silky Smooth Lemon Curd- ( Totally Fool-Proof Method)

Lemon Curd is a rich, soft, buttery and custard like spread or topping that has a deliciously tart yet sweet citrus flavour.

This method of making Lemon Curd is totally fool-proof. It will ensure a perfect velvety smooth lemon curd with no lumps. I discovered this perfect trick to make Lemon Curd after few hits and trials.  It is so easy that I started calling it Fool Proof Lemon Curd Recipe. 

I can bet that you will stop buying it from the market once you use this recipe. Your store bought doesn’t even come close to this. One spoonful of this and you will literally go “mmmmmm”. It’s that good.

The trick to make perfectly smooth lemon curd is whole egg. Most cooks don’t use egg white in Lemon Curd because chances of egg white coagulating is higher but egg white gives a very light, almost custardy texture which I love. The trick to get it right is simple. You just have to whip it well, keep stirring and cook on low flameDO NOT LET IT BOIL!

How to use Lemon Curd?

Well, there are countless ways to use it. While traditionally it was used as a spread for scones. But it makes a delicious filling or topping for tarts, pies, cakes, pancakes, crepes, cheesecakes and the list goes on and on. 

How long does it last?

If stored in a refrigerator in an airtight glass jar, this can last you almost a month. And yes, this freezes well too. Just thaw before using it and it is good to go. 

Points to Remember

  • I like to use Meyer lemon for making this but you can use whatever is easily available.
  • It is always good to weigh the ingredients and not use a rough estimate in recipes like these. 
  • Always use a double boiler for this recipe. If you don’t have a double boiler, make a makeshift double boiler by placing a heatproof glass bowl on top of a larger pot. Just make sure the bottom of the bowl does not touch the water in the larger pot. 

Recipe

Prep time: 5 minsServing: makes 400 ml
Cook time: 15 mins

Ingredients

  • Egg yolks: 2 large
  • Whole egg: 1
  • Castor sugar: 80 gms
  • Cornflour: 1 tbsp
  • Lemon juice: 90 ml
  • Cold Butter: 75 gms (cut in cubes)
  • Salt: 1/4th tsp
  • Lemon zest: 1 tsp

Method

  1. Before starting, keep all the ingredients ready. Keep butter cubes in refrigerator.
  2. Make a double boiler setting. Take a pan and a heat proof bowl. Use either a glass bowl or a stainless steel bowl. No aluminium. Add some water in the pan. The bowl should not be touching the water. 
  3. In the heat proof bowl, add egg yolks, whole egg, cornstarch & sugar. Whip till it becomes light and fluffy and sugar almost melts. This should take 2-3 minutes.
  4. Heat lemons in microwave for 10-15 seconds and squeeze out 90 ml juice. Add lemon zest to the heat proof bowl and then gradually add lemon juice in 2-3 batches, whisking each time. 
  5. While you are whisking, heat the water. Do not let the water boil. Now put the heat proof bowl on top. 
  6. Cook on the lowest flame. Keep stirring continuously till it thickens. This is very important otherwise chances are the eggs will coagulate. It’ll take roughly 15 minutes. 
    In case the water beneath starts boiling, take it off heat for a few seconds then put it back. The idea is to allow it to cook & thicken on low heat.
  7. Take a wooden spoon/spatula and check after 12 minutes. It should coat the back of the spoon. Slide your finger, if the path is clear then it’s cooked. If not or you are unsure, cook it for a few more minutes. 
  8. Once off heat, add cold butter cubes one by one and keep whisking continuously till it incorporates fully. Then sieve it for a smooth lemon curd. Transfer it to an airtight glass jar and refrigerate. It’ll thicken further on cooling.
  9. It tastes much better after 1-2 days. If you plan to make a dessert using lemon curd, make it a couple of days in advance. 
Posted on Leave a comment

The Powerful Indian Probiotic- Healthy Gut Food

They say you are what you eat!! But what I like to believe is that.. You are what you can digest!!! 

With this fast pacing life, environmental pollution, erratic working hours, sleep disorders, having foods with pesticides etc, most of us today lack the digestive enzymes necessary for gut health. The Father of medicine, Hippocrates once said- “All diseases begin in the gut.” Bad digestion is the root cause of all evil. You can have all the super-foods in the world but if your body is not assimilating it well, what’s the point!!

What are Probiotics?

Probiotics are live bacteria that are good for you, especially for your digestive system. Our body is full of bacteria, both good and bad. These good microbes help you to digest and absorb nutrients from food. The ratio of your bad bacteria needs to be smaller compared to your good ones. 

What causes bad bacteria to increase?

  • Excess sugar
  • Loading on junk processed foods
  • Excessive salt
  • Sedentary lifestyle
  • GMO foods

How can you increase good bacteria in your body?

Simply by popping probiotic pills or loading on probiotic drinks available in the market which are laden with sugar, artificial flavours, preservatives and come in a plastic bottle will definitely not help you. You need to address the root cause. Make small but consistent lifestyle changes to help recover your gut health. 

Here, what I am about to tell you is an age old practice which is being followed across different regions under different names for decades.

It’s a powerful natural probiotic which is inexpensive and so convenient to prepare.

What all you need?

  • A glass, ceramic or an earthen bowl (no plastic)
  • 3-4 tbsps leftover cooked rice (make sure the rice you use is unprocessed indigenous variety to get maximum benefit)
  • Enough water to soak the rice.

How to prepare?

Put cooked rice in a  bowl. Add water. The water level should just be 2 or 3″ above the rice. Cover the bowl with a lid and leave it overnight. The rice would ferment by morning. Consume it on an empty stomach. 

The fermentation breaks down the anti-nutritional factors in rice resulting in an improved bio-availability of micro-nutrients and minerals such as iron, potassium and calcium by several thousand percentage points.

Food scientists who researched on the food practices among  various regions in the world had concluded that, this old age practice is one of the healthiest

It has the rare B6 and B12 vitamins which are not otherwise easily available in other foods. This rice generates and harbors trillions of beneficial bacteria that help digestion and  many disease fighting and immunity developing agents. The bacteria that grows in the intestines due to this rice, safeguards the internal organs and keeps them fit and ready. Consuming this rice helps in quicker digestion and wards off ageing, bone related ailments and muscular pains. It’s one of the best foods for healthy gut. 

What you need to know before consuming Probiotics?

Ever wondered what’s keeping those helpful little bacteria alive? How can you get that bacteria to work better for you? The answer is prebiotics. Probiotics will do nothing for your body if it doesn’t get prebiotics. 

Simply put, prebiotics are like food source for your gut’s microorganisms. For probiotics to work, you need prebiotics in your system. 

Some rich sources of prebiotics are: raw garlic, raw onions, bananas, unsweetened cacao powder, almonds, flaxseeds, honey, whole grains etc

This is the reason why traditionally Fermented Rice or Rice Kanji is eaten with raw onion. Some prefer to add a bit of salt and curd to it. 

The Bottom Line

It’s time to bring these traditional healthy meal practices back into our lives. Introduce your children to this goodness. All the western superfoods are great. I am not against any. But our culture and our food habits are so rich and healthy. There’s a reason why our ancestors did what they did. Doing this for 1 or 2 times will not give you any results. Make it a part of your lifestyle. Be consistent. Eat your gut friendly food and keep taking natural pre and probiotics with regular exercise. This my friend is the only way to stay healthy. 😊