Cooking is an art, but the tools you use can make all the difference—not just in flavor but in your health. With so many cookware options available, it can be overwhelming to decide what’s best for your family. This blog post is dedicated to best and worst cookware available in the market and to help you make informed decisions.
First thing first The Best Cookware Choices
✅ Ceramic Cookware Why It’s Great? Ceramic cookware is non-toxic and free from harmful chemicals often found in non-stick coatings. It can handle high temperatures, making it perfect for sautéing, baking, and frying.
Health Benefits: Since ceramic is inert, it doesn’t leach any substances into your food, ensuring the flavors remain pure and the nutrients intact. Bonus: It’s aesthetically pleasing and comes in vibrant colors to brighten up your kitchen.
✅ Stainless Steel Cookware Why It’s Great: Stainless steel is durable, resistant to rust, and can last a lifetime if cared for properly. It’s a healthy and reliable option that withstands high temperatures.
Health Benefits: Stainless steel doesn’t react with acidic foods, preserving the natural taste of your meals. It also retains nutrients better than non-stick alternatives.
Tip: Opt for high-quality stainless steel (look for 18/10 grade) to avoid low-grade metals that might leach small amounts of nickel or chromium over time.
✅ Cast Iron Cookware Why It’s Great: Cast iron is a kitchen classic. It’s incredibly durable and retains heat well, making it ideal for slow-cooked dishes, grilling, and baking.
Health Benefits: Cooking with cast iron can increase your iron intake, which is beneficial for those with iron deficiencies. Plus, it’s free from synthetic coatings. Pro Tip: Season your cast iron regularly to maintain its non-stick surface and prevent rust.
Now lets see Cookware to Avoid
❌ Copper Cookware Why It’s Risky: While copper looks stunning and heats quickly, it can leave a metallic taste in food and cause discoloration. Over time, copper can leach into your meals, which may pose health risks.
Alternative: If you love copper’s quick heating properties, opt for copper-lined cookware with a stainless steel interior.
❌ Aluminum Cookware Why It’s Risky: Aluminum cookware is lightweight and affordable but can release metal into food, especially when cooking acidic or salty dishes. Long-term exposure to aluminum has been linked to neurological issues.
Alternative: Choose anodized aluminum, which is treated to create a non-reactive surface, making it safer for cooking.
❌ Teflon (Non-Stick) Cookware Why It’s Risky: Teflon-coated cookware is convenient, but when heated above 500°F (260°C), it can release harmful chemicals into the air and your food. These fumes have been linked to health issues and respiratory problems.
Alternative: Consider ceramic non-stick or stainless steel for a safer non-stick experience without the health hazards.
By making small but informed choices, you can protect your health while elevating your culinary game. Choose Health Over Convenience. Invest in quality cookware that lasts longer and promotes better health. Avoid non-stick coatings and reactive metals that can leach harmful substances into your food.
Setting curd in winter can be a challenge, especially in the colder regions of India where temperatures drop significantly. But fear not! With a few tips and tricks, you can enjoy homemade curd that’s creamy, thick, and perfect for your meals, even during the chilliest months.
Why Is It Difficult to Set Curd in Winter?
Curd requires a warm environment for fermentation. The bacteria in the starter culture thrive at temperatures between 30°C to 40°C. In winters, the ambient temperature often falls below this range, slowing down or halting the fermentation process.
Tips to Set Curd Successfully in Winter
1. Choose the Right Container
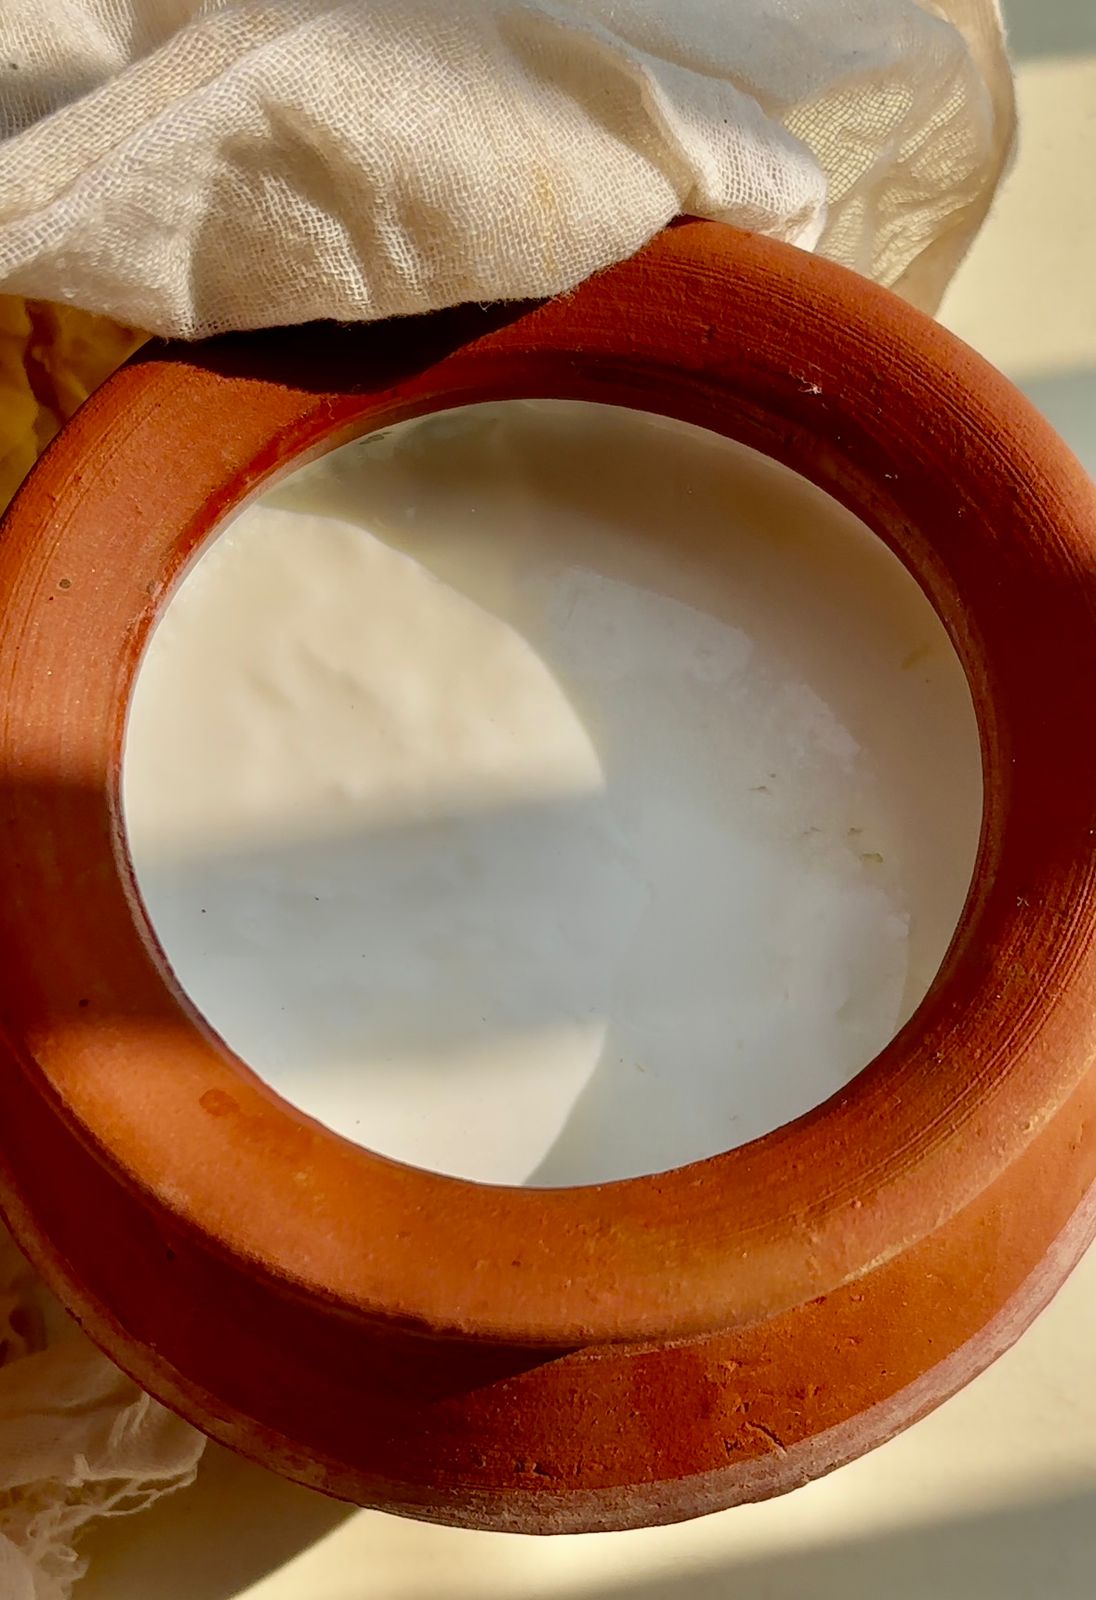
Use a ceramic, clay, glass, or stainless steel container as these retain heat better than plastic.
Pre-warm the container by rinsing it with hot water before adding the milk and starter.
2. Heat the Milk Properly
Heat the milk until it starts to simmer (do not boil). This ensures the milk is warm enough for fermentation.
Let the milk cool down to a lukewarm temperature (about 35°C-40°C) before adding the starter. A simple test: it should feel warm but not hot when you touch it.
3. Use a Good Starter
Always use fresh and active curd as a starter. Older or less active curd may not yield good results.
Add about 1-2 teaspoons of starter to 500 ml of milk. Whisk it well to mix evenly.
4. Keep It Warm
Maintaining a warm environment is the key to setting curd in winter. Here are a few tricks:
Wrap It Up: Cover the container with a thick towel or woolen cloth to retain warmth.
Use a Casserole: Place the curd container inside an insulated casserole to keep it warm for longer.
Oven Method: Preheat your oven for 5 minutes at the lowest temperature, turn it off, and place the container inside.
Hot Water Bath: Place the curd container in a larger bowl filled with warm water (not boiling) to create a warm environment.
5. Add a Warm Touch
If the milk is slightly colder than needed, add a pinch of sugar to the starter to activate the fermentation process.
You can also add a green chili stalk or a dried red chili to the milk. This traditional Indian trick boosts fermentation due to the bacteria present on the chili surface.
6. Time It Right
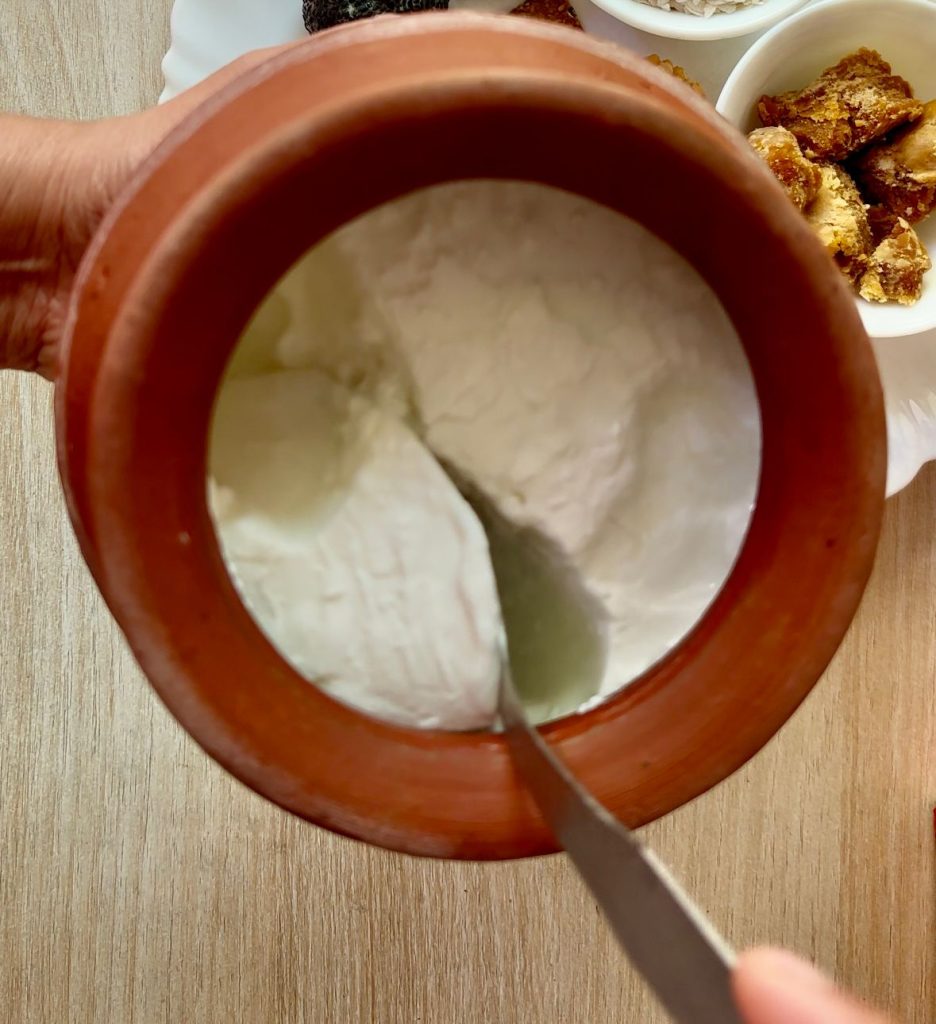
In winter, curd takes longer to set compared to summer. Leave the container undisturbed for 8-10 hours, preferably overnight. Check after this period, and if needed, give it a bit more time.
How to Store the Set Curd
Once the curd is set, refrigerate it immediately to stop further fermentation and prevent sourness. Always use a clean spoon to scoop out curd to maintain its freshness.
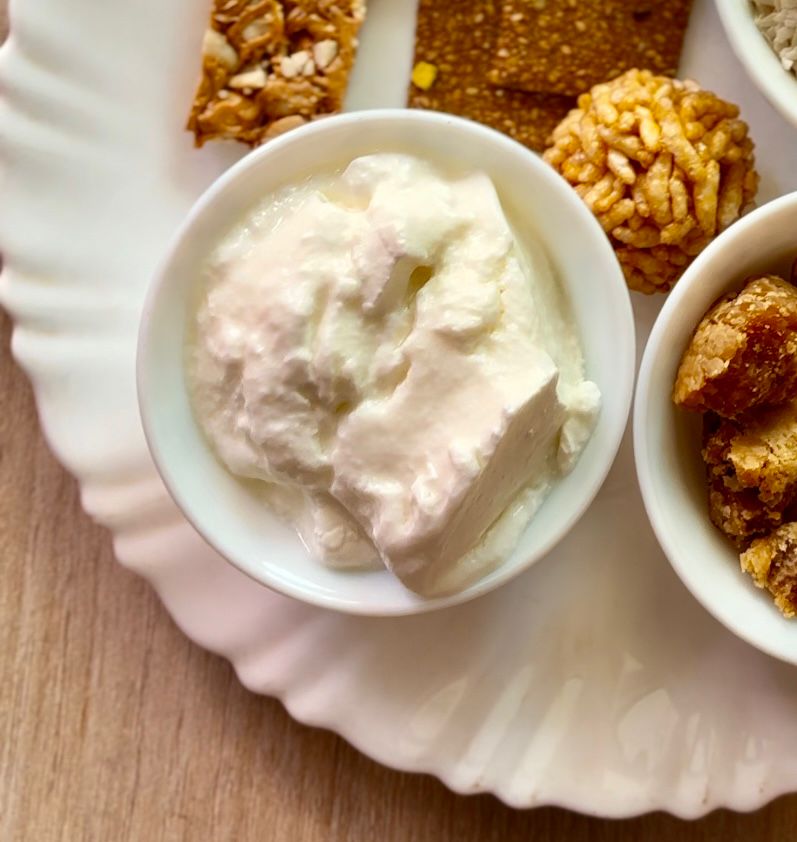
Nothing beats the satisfaction of enjoying creamy, homemade curd, even in the chilliest Indian winters. From pairing it with parathas to turning it into raita or adding it to curries, curd is a staple in Indian cuisine and an essential part of a healthy diet.
So, next time the temperature drops, don’t let the cold stop you from enjoying your homemade curd. Use these tips and relish the joy of perfectly set curd, no matter how cold it gets!
Try these tricks and let us know how they worked for you!
The ancient Indian science of Ayurveda, often revered as the oldest system of medicine, provides a unique framework to understand the myriad ways in which individuals interact with their environment and their health. Central to this understanding are the three Doshas—Vatta, Kapha, and Pitta. These Doshas are dynamic energies derived from the five fundamental elements of nature—ether (space), air, fire, water, and earth—that govern the physiological and psychological functioning of every individual.
The concept of TriDosha is the bedrock of Ayurvedic philosophy, offering a distinctive lens to discern the inherent constitution of individuals and guide them towards a life of balance and harmony. Each Dosha, with its unique set of characteristics, influences not only our physical health but also our mental and emotional well-being.
As we delve deeper into the world of Vatta, Kapha, and Pitta, we unravel a treasure trove of Ayurvedic wisdom that holds the potential to transform our approach to health and well-being. Through the prism of the Doshas, Ayurveda empowers us to take charge of our health, by aligning with the natural rhythms of our body and the world around us.
In the following sections, we will explore each Dosha in detail, shedding light on their elemental composition, their impact on our body and mind, and the pathways to balance them for optimal health and well-being. Through this exploration, we aim to provide a holistic understanding of the Doshas, offering a solid foundation for those seeking to embark on a journey of self-discovery and holistic health through the time-tested wisdom of Ayurveda.
Ayurvedic Doshas: Vata, Pitta, and Kapha – Podcast format, generated via AI hosts
How do I identify my Dosha?
Here are some of the physical and emotional signs for each Dosha:
Dosha
Physical Signs
Emotional Signs
Vata
– Dry or rough skin
– Anxiety
– Brittle nails
– Restlessness
– Constipation
– Fearful tendencies
– Insomnia or disrupted sleep
– Erratic thoughts or scattered mind
– Cold hands and feet
– Difficulty in focusing
– Gas, bloating or digestive discomfort
– Underweight or sudden weight loss
– Joint discomfort or cracking joints
Pitta
– Overheating or excessive sweating
– Irritability
– Skin irritations, acne or rashes
– Impatience or frustration
– Heartburn, acid reflux or ulcers
– Anger or hostility
– Premature graying or thinning of hair
– Critical or judgmental tendencies
– Strong body odor or excessive perspiration
– Overly competitive nature
– Sharp hunger or thirst
– Inflammation or prone to infections
Kapha
– Oily or clammy skin
– Attachment or possessiveness
– Weight gain or obesity
– Resistance to change
– Sinus congestion or excess mucus production
– Lethargy or laziness
– Slow digestion or metabolism
– Depression or melancholy
– Water retention or swelling
– Apathy
– Heavy or sluggish feeling
– Procrastination
Signs that help identify the Dosha imbalances
The signs listed in this table provide insights to readers in identifying the Dosha imbalances. It’s important to remember that Ayurveda is a holistic science and an individual may exhibit characteristics of more than one Dosha. For an accurate assessment and personalized guidance, consulting with a qualified Ayurvedic practitioner is recommended.
Vatta Dosha, often referred to as the “King of Doshas,” is a fusion of air (Vayu) and ether (Akasha) elements. The ether element endows Vatta with space, while the air element imparts motion. This unique blend bestows Vatta with qualities such as dry, light, cold, rough, subtle, mobile, and clear, mirroring the attributes of wind and space.
Core Functions
Movement and Communication: Vatta governs all forms of movement and communication within the body. It regulates blood circulation, breathing, muscle and joint mobility, and the movement of thoughts across our mind. It’s the force behind the pulsation of the heart, the flow of blood in the arteries, and the inhalation and exhalation of breath.
Nervous System Regulation: Vatta plays a pivotal role in the functioning of the nervous system. It oversees the transmission of signals within the nervous system, ensuring a seamless coordination between the mind and body.
Digestive Process: The movement characteristic of Vatta also influences the digestive process, governing the movement of food through the digestive tract and the absorption and assimilation of nutrients.
Pathways to Balance
Warm and Nourishing Diet: Incorporate a diet rich in warm, moist, and grounding foods. Root vegetables, cooked grains, nuts, seeds, and dairy products like milk and ghee are beneficial.
Consistent Routine: Establishing a regular daily routine helps to ground the erratic energy of Vatta. Consistent meal times, a regular sleep schedule, and a structured daily routine can be immensely beneficial.
Mindful Practices: Mindfulness practices like yoga, meditation, and pranayama (breath control) are excellent for grounding Vatta’s mobile energy. Engage in gentle, grounding yoga poses and meditative practices to promote stability and calmness.
Kapha Dosha emanates from the union of water (Jala) and earth (Prithvi) elements. The earth element provides structure and stability, while the water element imparts cohesion and lubrication. This amalgamation results in qualities like heavy, slow, cool, oily, smooth, dense, soft, stable, gross, and sticky, reflecting the nurturing and stabilizing attributes of earth and water.
Core Functions
Structural Integrity: Kapha lends structural integrity to the body, forming the physical mass, including bones, muscles, and fat tissues. It also provides the binding material that holds the cells together.
Lubrication and Nourishment: It offers lubrication to the joints and tissues, ensuring smooth functioning. Kapha also governs the nourishment of cells and tissues, ensuring proper growth and development.
Immune Function: Kapha plays a vital role in immune function, protecting the body against external invaders and diseases.
Pathways to Balance
Light and Warm Diet: A diet consisting of light, warm, and dry foods helps in balancing the Kapha energy. Including spices like ginger, cinnamon, and black pepper can be beneficial.
Physical Activity: Regular physical activity, especially aerobic exercises, helps in mobilizing the stagnant energy of Kapha, promoting circulation and enhancing metabolic activity.
Stimulating Environments: Engaging in stimulating and invigorating activities, surrounding oneself with vibrant colors and uplifting aromas can help in alleviating the sluggishness associated with Kapha.
Pitta, often depicted as the flame of transformation, emanates from the fusion of fire (Agni) and water (Jala) elements. The fire element lends Pitta its transformative quality, while water provides it with a fluidic base. This union bestows Pitta with qualities like hot, sharp, light, liquid, spreading, and oily, symbolizing its transformative and fiery nature.
Core Functions
Metabolic Processes: Pitta is the driving force behind all metabolic processes in the body. It governs digestion, absorption, assimilation, and the transformation of food into energy.
Temperature Regulation: It regulates the body’s temperature and ensures the optimal functioning of the body’s metabolic activities.
Intellectual Processing: Pitta also governs intellectual processing, discernment, and decision-making. It fuels our capacity for comprehension, judgment, and insight.
Hormonal Balance: It oversees hormonal balance and the endocrine system, ensuring a harmonized interplay of hormones which are crucial for various physiological processes.
Pathways to Balance
Cooling and Alkaline Diet: Incorporate a cooling and alkaline diet to counterbalance the heat of Pitta. Favor sweet, bitter, and astringent tastes, while minimizing spicy, salty, and sour foods.
Stress Management: Engage in stress-reducing activities like meditation, deep breathing, and relaxation techniques to soothe Pitta’s fiery nature.
Cooling Exercises: Opt for exercises that are cooling and refreshing like swimming, moon salutations, or gentle evening walks in nature.
Avoiding Overexertion: Refrain from overexertion and overheating, and allow ample time for relaxation and rejuvenation to keep Pitta in balance.
Dive Deeper into the World of Ayurvedic Doshas
The ancient wisdom of Ayurveda opens up a realm of holistic wellness through the understanding of Doshas – Vata, Pitta, and Kapha. Each Dosha, with its unique characteristics and balancing practices, holds the key to unlocking a harmonious state of being. Our comprehensive series on Ayurvedic Doshas provides an in-depth exploration into the essence and practical applications of each Dosha.
Mastering the Doshas: An Introduction: Unveil the foundational concepts of Vata, Pitta, and Kapha Doshas and their integral role in Ayurvedic wellness.
Vata Dosha: The Wind of Change: Discover the attributes of Vata Dosha and delve into the practices that nurture its balance.
Pitta Dosha: The Fiery Force: Uncover the fiery essence of Pitta Dosha and the Ayurvedic practices to cool and balance its energies.
Each post is a voyage into the profound wisdom of Ayurveda, providing practical insights to harmonize the Doshas and foster a life of vibrant health. Immerse yourself in this ancient knowledge by diving into each post, unfolding the tapestry of Dosha-specific wisdom and integrative practices for modern living.
Harnessing the Wisdom of TriDosha
Individualized Approach to Well-being
The TriDosha theory underscores the essence of individuality in the pursuit of well-being. Each person embodies a unique combination of Vatta, Kapha, and Pitta, which forms their inherent constitution or Prakriti. Understanding one’s Prakriti is pivotal in tailoring a personalized approach to diet, lifestyle, and wellness practices.
Dosha Assessment
A key step in harnessing the wisdom of TriDosha is to ascertain your dominant Dosha(s) through a thorough assessment by a skilled Ayurvedic practitioner. This assessment often entails a detailed discussion, observation, and sometimes, a physical examination to glean insights into your Dosha balance.
Balancing the Doshas
Balancing the Doshas entails a holistic approach that encompasses diet, lifestyle, herbal supplementation, and mindfulness practices.
Dietary Adjustments: Tailoring your diet to suit your Dosha constitution is central in maintaining balance. For instance, Vatta types benefit from warm, nourishing foods, Pitta types from cooling and alkaline foods, while Kapha types are balanced by light, stimulating foods.
Lifestyle Modifications: Adapting a lifestyle that aligns with your Dosha can significantly enhance your well-being. This includes a suitable exercise regimen, sleep routine, and stress-management practices.
Herbal Supplementation: Ayurveda offers a rich repertoire of herbal formulations that can be employed to balance the Doshas and address specific health concerns.
Mindfulness and Relaxation: Engaging in mindfulness practices like meditation, yoga, and breathwork can be instrumental in harmonizing the Doshas and fostering mental clarity and emotional resilience.
Empowerment Through Education
Educating oneself about the principles of Ayurveda and the dynamics of Doshas can empower individuals to take proactive steps towards their health and well-being. There’s a wealth of resources available, from books, online courses, to workshops and consultations with Ayurvedic practitioners.
The Timeless Relevance of TriDosha in Contemporary Wellness
Bridging Ancient Wisdom and Modern Living
The TriDosha concept, though rooted in ancient wisdom, holds a timeless relevance in the contemporary pursuit of wellness. In a modern world replete with health challenges, the holistic and individualized approach of Ayurveda provides a refreshing perspective. It bridges the gap between ancient wisdom and modern living, offering a nuanced understanding of health that transcends mere symptom management.
Personalized Wellness Journey
The personalized wellness journey advocated by Ayurveda, based on one’s Dosha constitution, is gaining recognition in the modern wellness paradigm. It aligns with the growing emphasis on personalized medicine and holistic health in contemporary healthcare discourse.
Individualized Nutrition: The Ayurvedic approach to nutrition, tailored to an individual’s Dosha constitution, resonates with the modern understanding of individual dietary needs and the movement towards personalized nutrition.
Mind-Body Harmony: The emphasis on mind-body harmony, a hallmark of Ayurvedic philosophy, finds echoes in modern wellness practices like mindfulness meditation, yoga, and stress management techniques.
Integrative Healthcare
The TriDosha theory can serve as a cornerstone for integrative healthcare, where Ayurvedic principles are combined with modern medical practices to offer a more holistic and patient-centered approach to healthcare.
Holistic Diagnosis and Treatment: Incorporating Dosha assessment in the diagnostic process can provide a more holistic understanding of health conditions, enabling tailored treatment plans that address the root causes rather than just alleviating symptoms.
Preventive Healthcare: The proactive and preventive healthcare approach advocated by Ayurveda, focusing on Dosha balance to maintain health and prevent disease, aligns well with the modern shift towards preventive healthcare and wellness promotion.
Continued Research and Validation
The validation of Ayurvedic principles, including the TriDosha theory, through modern scientific research, is paving the way for a broader acceptance and integration of Ayurveda in the global wellness landscape. Continued research and clinical trials investigating the efficacy of Ayurvedic practices can further bridge the ancient-modern divide, bringing the timeless wisdom of TriDosha to the forefront of modern healthcare.
Embarking on a TriDosha Journey: Steps Towards Holistic Well-being
Step 1: Self-awareness and Education
Understanding Ayurveda: Delve into the foundational principles of Ayurveda, acquainting yourself with its holistic approach towards health and well-being.
Learning about Doshas: Explore the characteristics, functions, and influences of Vatta, Kapha, and Pitta on your body and mind.
Step 2: Professional Assessment
Consulting Ayurvedic Practitioners: Seek a professional assessment from a qualified Ayurvedic practitioner to ascertain your Dosha constitution and receive personalized recommendations.
Step 3: Tailored Lifestyle Modifications
Dietary Adjustments: Tailor your diet to align with your Dosha type, incorporating foods and spices that promote balance and harmony.
Adopting a Balanced Lifestyle: Embrace a balanced lifestyle with a regular routine, adequate sleep, and a mix of physical activity that suits your Dosha type.
Step 4: Mindfulness and Stress Management
Regular Mindfulness Practices: Incorporate regular mindfulness practices like meditation, yoga, and pranayama to foster mental clarity and emotional balance.
Stress-Reducing Activities: Engage in activities that reduce stress and promote relaxation, aiding in Dosha balance and holistic well-being.
Step 5: Continuous Learning and Adaptation
Monitoring Your Progress: Keep track of your progress, observing how dietary and lifestyle modifications are affecting your body and mind.
Adapting to Changes: Stay flexible and open to adapting your routines as needed, under the guidance of an Ayurvedic practitioner.
Step 6: Community Engagement
Joining Ayurvedic Communities: Engage with Ayurvedic communities, both online and offline, to share experiences, learn from others, and foster a supportive environment for your TriDosha journey.
Conclusion: Embracing the TriDosha Blueprint for Holistic Wellness
A Time-Tested Framework
The TriDosha concept – Vatta, Kapha, and Pitta, stands as a time-tested framework that encapsulates the essence of Ayurvedic wisdom. It offers a profound understanding of the intricate dance between our inherent nature and the environment, guiding us on a path of holistic wellness.
A Holistic Lens
Through the lens of TriDosha, individuals are empowered to view health and wellness as a harmonious interplay of physical, mental, and spiritual facets. It encourages a shift from a symptom-centric approach to a holistic, personalized pathway that aligns with nature’s rhythm.
Empowerment Through Knowledge
The journey through the realms of Vatta, Kapha, and Pitta is not merely a quest for physical well-being but an empowering venture towards self-discovery. The knowledge of one’s Dosha constitution serves as a compass, guiding individuals towards making informed decisions that resonate with their unique nature.
The Path Ahead
The resurgence of interest in Ayurveda and the TriDosha theory, particularly in the realms of modern wellness, signals a growing recognition of its timeless relevance. It’s a promising stride towards an integrative approach in healthcare, blending ancient wisdom with modern science for a more holistic understanding of health and well-being.
Your Journey Awaits
As we stand at the cusp of a wellness revolution, the TriDosha theory beckons as a path laden with ancient wisdom waiting to be rediscovered. Your journey towards holistic wellness, guided by the principles of Vatta, Kapha, and Pitta, awaits. Embark on this enlightening journey, embrace the wisdom of Ayurveda, and unveil a life of balance, vitality, and holistic wellness.
FAQs:
What are the core principles of the TriDosha theory in Ayurveda?
The TriDosha theory is a fundamental concept in Ayurveda, representing three primary energies – Vatta, Kapha, and Pitta. These Doshas are derived from the five elemental forces of nature and govern various physiological and psychological functions within the body. Understanding and balancing these Doshas can lead to a harmonious state of health and well-being.
How can I determine my dominant Dosha?
Determining your dominant Dosha requires a thorough assessment, preferably conducted by a skilled Ayurvedic practitioner. The assessment involves understanding your physical attributes, behavioral tendencies, and medical history to ascertain your Dosha constitution, which will guide personalized recommendations for diet and lifestyle modifications.
What are some common practices to balance Vatta Dosha?
Balancing Vatta Dosha involves incorporating warm, nourishing foods into your diet, establishing a regular daily routine, and engaging in grounding exercises like yoga and mindfulness practices. These measures help to counteract the cold, dry, and erratic nature of Vatta, promoting stability and balance.
How does Pitta Dosha influence digestive processes?
Pitta Dosha plays a crucial role in governing metabolic processes including digestion. It regulates the transformation of food into energy, oversees the absorption and assimilation of nutrients, and maintains an optimal body temperature, all of which are essential for a healthy digestive system.
Can modern science validate the principles of Ayurveda and the TriDosha theory?
The principles of Ayurveda and the TriDosha theory have been a subject of interest in modern scientific research. Although Ayurveda is an ancient system of medicine, ongoing research aims to validate its principles through modern scientific methodologies, bridging the ancient-modern divide and integrating Ayurvedic wisdom with contemporary healthcare practices.
How can the TriDosha theory contribute to personalized healthcare?
The TriDosha theory lays the foundation for a personalized approach to healthcare, offering insights into an individual’s unique constitution and guiding personalized dietary, lifestyle, and wellness recommendations. It aligns with the modern shift towards personalized medicine, providing a holistic framework to understand and address individual health needs.
What resources are available for someone interested in exploring the TriDosha theory further?
There are numerous resources available for individuals keen on exploring the TriDosha theory. These include books on Ayurveda, online courses, workshops, and consultations with Ayurvedic practitioners. Engaging with Ayurvedic communities, both online and offline, can also provide valuable insights and support on this journey.
Blog Tags: Ayurveda, TriDosha, Vatta Dosha, Kapha Dosha, Pitta Dosha, Holistic Wellness, Ayurvedic Philosophy, Dosha Balance, Personalized Healthcare, Mind-body Harmony, Ayurvedic Nutrition, Ancient Wisdom, Modern Wellness, Integrative Healthcare, Mindfulness Practices
Dive Deeper into the World of Ayurvedic Doshas
The ancient wisdom of Ayurveda opens up a realm of holistic wellness through the understanding of Doshas – Vata, Pitta, and Kapha. Each Dosha, with its unique characteristics and balancing practices, holds the key to unlocking a harmonious state of being. Our comprehensive series on Ayurvedic Doshas provides an in-depth exploration into the essence and practical applications of each Dosha.
Mastering the Doshas: An Introduction: Unveil the foundational concepts of Vata, Pitta, and Kapha Doshas and their integral role in Ayurvedic wellness.
Vata Dosha: The Wind of Change: Discover the attributes of Vata Dosha and delve into the practices that nurture its balance.
Pitta Dosha: The Fiery Force: Uncover the fiery essence of Pitta Dosha and the Ayurvedic practices to cool and balance its energies.
Each post is a voyage into the profound wisdom of Ayurveda, providing practical insights to harmonize the Doshas and foster a life of vibrant health. Immerse yourself in this ancient knowledge by diving into each post, unfolding the tapestry of Dosha-specific wisdom and integrative practices for modern living.
When I was struggling with my weight, tipping the scales between 125 to 130 kilograms at just 5 feet 5 inches, finding an effective and sustainable form of exercise was critical. With knee issues making walking or running challenging, I needed a workout that was intense yet gentle on my joints. Enter battle ropes for weight loss.
Battle ropes became my go-to workout because they offer a high-intensity, low-impact solution. This means they push your cardiovascular system hard without putting excessive strain on your knees, hips, or other joints—unlike activities like jogging or running. Surprisingly, I found battle ropes to be even more effective at raising my heart rate than traditional cardio exercises. They also engage upper body muscles that are often underutilized, making them a versatile and dynamic tool in any fitness routine.
What’s more, battle ropes are affordable, low-maintenance, and portable. Unlike bulky treadmills or rowing machines, they can easily fit in your car’s trunk, making them ideal for home or outdoor workouts. The only real limitation is the need for sufficient space to use them.
In this post, I’ll focus on five powerful battle rope exercises that have helped me shed fat, improve stamina, and engage those hard-to-reach muscles. These workouts are simple yet incredibly effective, combining strength, endurance, and fat loss into one seamless routine.
Here is a video of demonstration of the 5 Battle Rope Workout for Fat Loss that we are going to discuss.
Watch quick demonstration of 5 Top Battle Rope Workout for Fat Loss
Full-Body Workout: Battle ropes target multiple muscle groups simultaneously, including your arms, shoulders, back, core, and even your legs.
High-Intensity, Low-Impact: They provide an intense cardio workout without putting stress on your joints, making them ideal for people with knee or hip issues.
Improves Cardiovascular Fitness: Ropes get your heart rate up quickly, improving your endurance and overall heart health.
Builds Strength and Power: The resistance of the ropes helps build muscle strength while improving explosiveness and stamina.
Burns Calories Fast: Battle ropes can burn a significant number of calories in a short amount of time, making them effective for fat loss.
Portable and Affordable: Unlike bulky gym equipment, battle ropes are compact, easy to carry, and relatively inexpensive.
Improves Coordination and Stability: Many rope exercises require you to engage your core and maintain balance, enhancing coordination and overall stability.
Battle ropes are a fantastic tool for anyone looking to lose fat, build stamina, and strengthen their upper body. These five exercises are just the beginning—once you master them, you can experiment with different variations and routines to keep your workouts fresh and exciting.
Remember to maintain proper form and start at a pace that feels comfortable for you. Over time, you’ll notice improved endurance, greater upper body strength, and a higher level of overall fitness.
Happy training!
Ready to give battle ropes a try? Share your progress and experiences in the comments below—I’d love to hear how they work for you!
FAQs
What are battle ropes, and how do they work for weight loss & fitness training? Battle ropes are thick, heavy ropes used for fitness training. They provide resistance during exercises, engaging multiple muscle groups and improving cardiovascular endurance.
Are battle ropes suitable for beginners? Yes, battle ropes are beginner-friendly. Start with lighter ropes and shorter sessions, gradually increasing intensity as you build stamina and strength.
How much space do I need for battle ropes? You’ll need about 10-15 feet of open space to anchor the ropes and perform exercises comfortably.
Can battle ropes help with weight loss? Absolutely! Battle ropes are a high-intensity workout that burns calories quickly and helps with fat loss while building muscle.
Do battle ropes work the lower body? While primarily an upper-body workout, many exercises like squats and lunges with ropes engage the lower body as well.
How heavy should battle ropes be for beginners? A rope weighing 1.5 to 2 inches in diameter and about 30-40 feet in length is ideal for beginners.
Can I use battle ropes at home? Yes, battle ropes are portable and can be anchored to a sturdy object, making them ideal for home use.
What muscles do battle ropes target? Battle ropes primarily target the shoulders, arms, chest, back, and core. Some exercises also engage the legs and glutes.
How often should I train with battle ropes? You can incorporate battle ropes 3-4 times per week, depending on your fitness level and goals.
Are battle ropes safe for people with joint pain? Yes, battle ropes are low-impact, making them a safe option for individuals with knee or hip issues. Always consult a physician if you’re unsure.
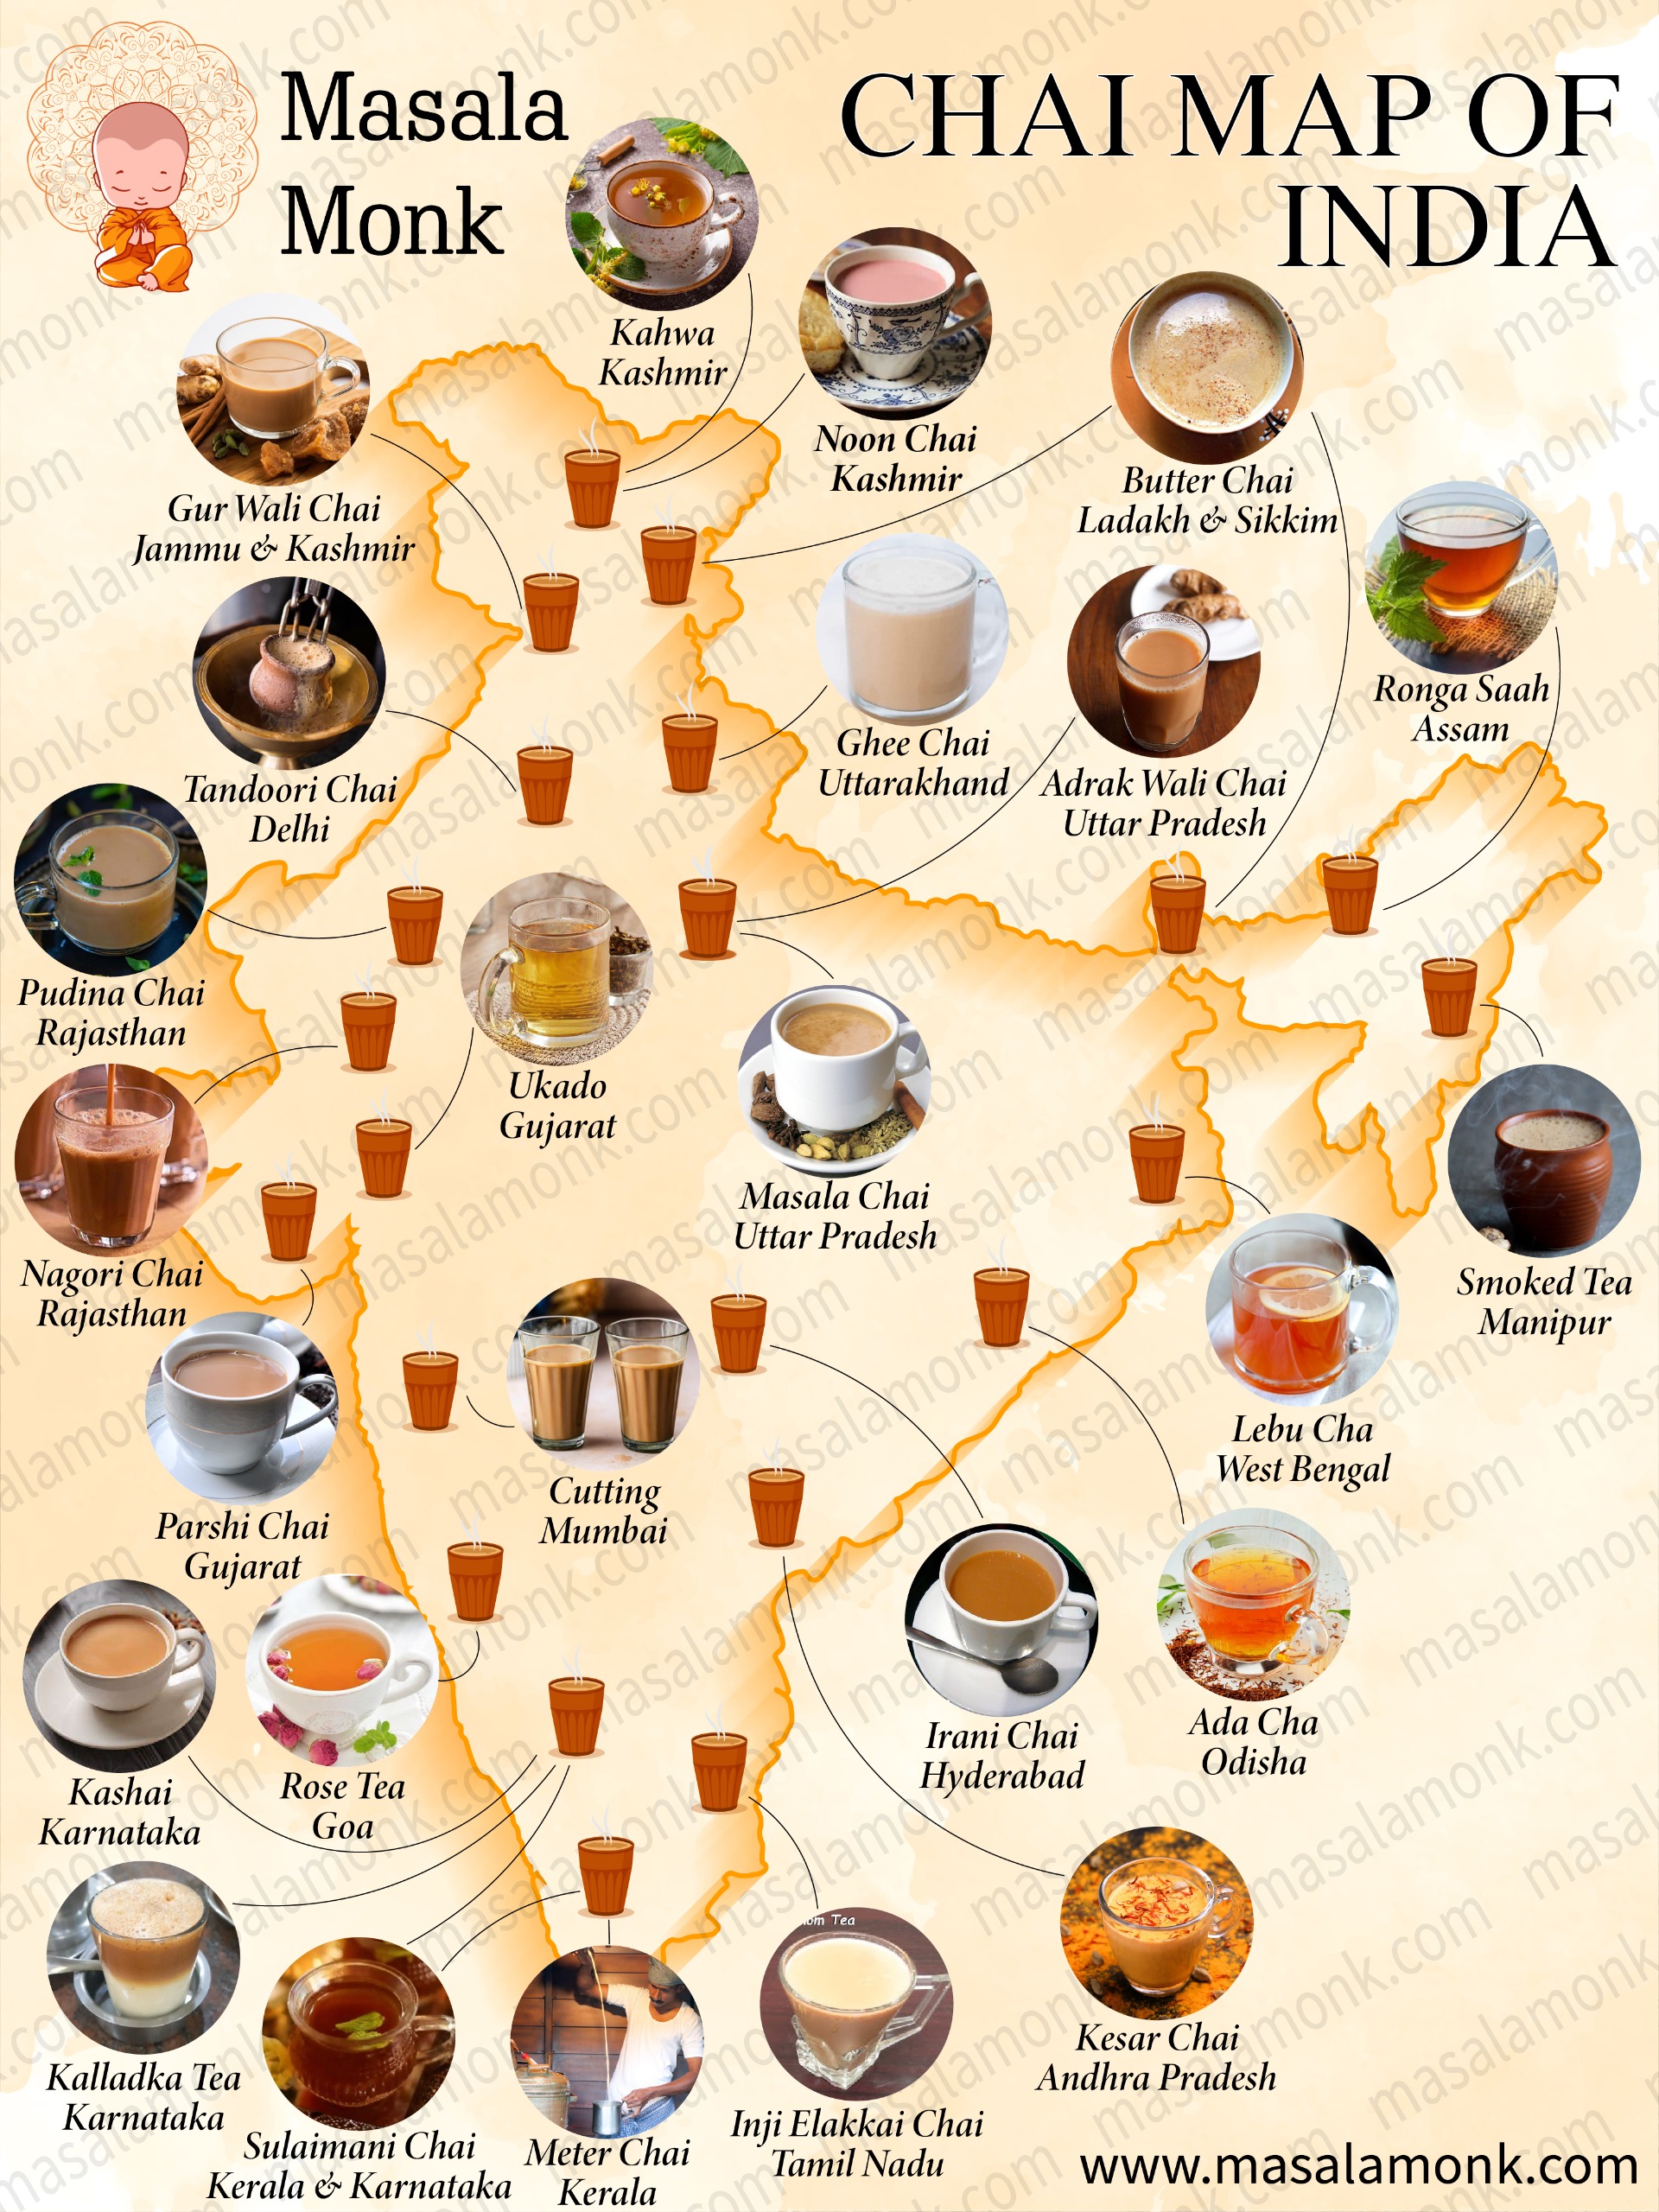
For many of us, chai isn’t just a drink – it’s an emotion. It warms our hearts, sparks conversations, and brings a sense of comfort like no other beverage. Across India, chai takes on countless forms, flavors, and traditions, each cup telling the story of a region’s culture and heritage.
The Chai Map of India beautifully captures this diversity, showcasing the rich variety of teas that span from Kashmir to Kerala. Let’s take a flavorful journey through some of India’s most iconic and lesser-known teas, as highlighted by this incredible map.
1. Kahwa (Kashmir)
A fragrant and spiced green tea, Kahwa is infused with cardamom, cinnamon, and saffron, often garnished with almonds. This rich, soul-soothing tea is perfect for cold Kashmiri winters, bringing warmth and luxury in every sip.
2. Noon Chai (Kashmir)
Ever heard of pink tea? Noon Chai, or sheer chai, is a salty, pink-hued tea made with green tea leaves, milk, and baking soda. It’s a staple in Kashmiri households, often served with bread or pastries.
3. Butter Chai (Ladakh & Sikkim)
In the cold, mountainous regions of Ladakh and Sikkim, Butter Chai is a necessity. Made with tea leaves, yak butter, and salt, this hearty tea is energizing and helps locals stay warm in freezing temperatures.
4. Masala Chai (Uttar Pradesh)
The iconic Masala Chai needs no introduction. Brewed with black tea, ginger, and a blend of spices like cardamom and cloves, this tea is a staple across North India. It’s the perfect companion for monsoon evenings and lazy afternoons.
5. Cutting Chai (Mumbai)
Mumbai’s famous Cutting Chai is strong, sweet, and served in small glasses. It’s called “cutting” because one glass is often split between two people. This tea embodies the bustling energy of Mumbai streets.
6. Kashai (Karnataka)
In Karnataka, Kashai is a herbal tea made with a blend of spices, including cumin, coriander, and black pepper. It’s known for its medicinal properties and is often consumed to boost immunity.
7. Meter Chai (Kerala)
Tea-making becomes a performance with Meter Chai. This Kerala specialty involves pouring tea from great heights to create a frothy, aerated drink that’s as entertaining to watch as it is delicious to drink.
8. Irani Chai (Hyderabad)
A legacy of Persian influence, Irani Chai is strong and milky, often served with Osmania biscuits. It’s an essential part of Hyderabad’s tea culture and a must-try for any tea lover.
9. Lebu Cha (West Bengal)
Simple yet flavorful, Lebu Cha is black tea with a squeeze of lemon and a sprinkle of black salt. It’s a street-side favorite in Kolkata, especially during hot summer days.
10. Sulaimani Chai (Kerala & Karnataka)
Sulaimani Chai is a spiced black tea with a hint of lemon, popular in Kerala and parts of Karnataka. Light and refreshing, it’s often served after heavy meals to aid digestion.
The Chai Map of India reminds us that tea isn’t just a beverage – it’s a ritual, a reflection of regional identity, and a connector of people. Whether it’s the comforting Masala Chai of the North or the refreshing Meter Chai of the South, each cup carries a piece of India’s rich cultural tapestry. You can also explore the best teas for digestion and how they can make a difference in your daily routine. Read here!
Next time you sip your favorite brew, remember that there’s an entire world of tea waiting to be explored. Which chai are you excited to try next?