
Cherry pie filling should taste like cherries first. It should be glossy, bright, thick enough to hold, and full of fruit — not watery, gummy, flat, or so sweet that it tastes more like syrup than cherries.
This cherry pie filling recipe is built for the way people actually cook. You may have fresh cherries because they looked too good to skip. There may be a bag of frozen cherries in the freezer. Or maybe you bought canned cherries, or already have canned cherry pie filling and just want it to taste more homemade. All of those can work.
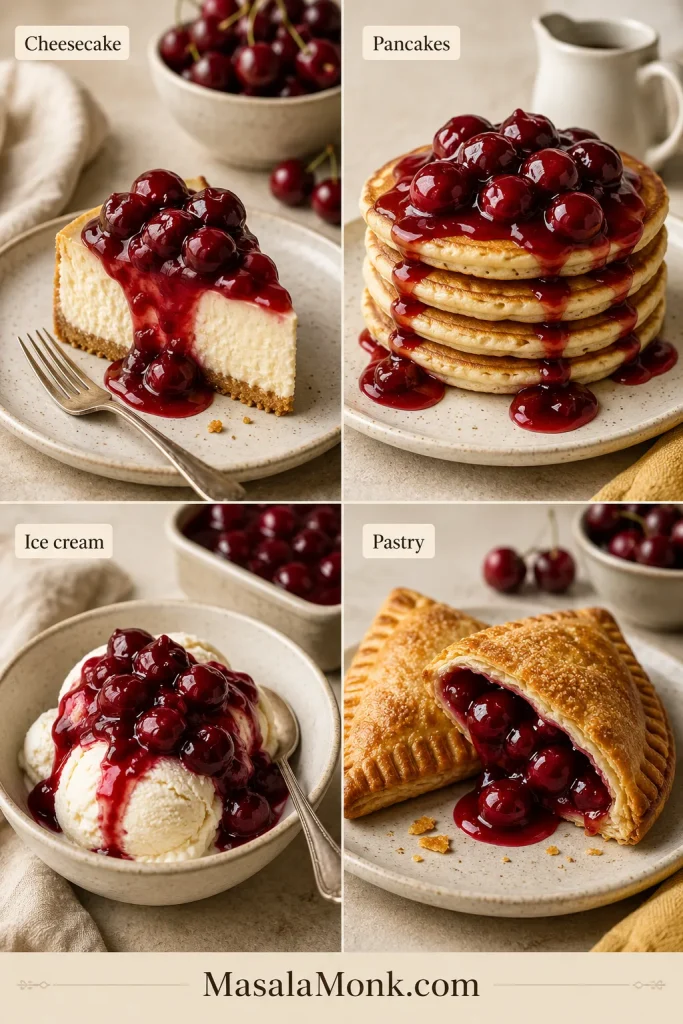
The base recipe makes about 4 cups / 950 ml, enough for one standard 9-inch cherry pie. You can also spoon it over cheesecake, pancakes, waffles, yogurt, ice cream, French toast, crepes, cakes, bars, hand pies, puff pastry turnovers, and no-bake desserts.
This is for the moment when you have cherries and a pie plan, but you are worried the filling will turn runny, dull, too sweet, or too stiff. The fix is not perfect cherries; it is knowing how much liquid, sugar, acid, and thickener your cherries need.
No-guesswork rule: sweet cherries need lemon, tart cherries need sugar, frozen cherries need patience, canned cherries need liquid control, and canned cherry pie filling needs brightening.
Quick Answer: How to Make Cherry Pie Filling
The basic method is simple: cook cherries until they release juice, then thicken those juices into a glossy, spoon-coating sauce with cornstarch.
To make one standard 9-inch pie, cook about 4 1/2 to 5 cups pitted cherries with 1/2 to 2/3 cup sugar, 1 to 2 tablespoons lemon juice, 1/4 cup water or cherry juice, and 3 to 4 tablespoons cornstarch until the sauce turns deep red and thick enough to coat a spoon.
For a softer topping for cheesecake, pancakes, waffles, yogurt, or ice cream, use 3 tablespoons cornstarch. Choose 4 tablespoons cornstarch when the filling needs to hold better inside a pie.
Finished texture should be jammy but not stiff. The cherries should sit in a glossy ruby sauce that slowly slides from the spoon instead of running like juice.
Helpful next: Jump to the recipe card · choose pie vs topping thickness · upgrade canned cherry pie filling
Cherry Pie Filling Recipe
This is the base homemade version. It makes a fruit-rich cherry filling that can be used in pie or spooned over desserts. Adjust the sugar, lemon, liquid, and cornstarch depending on the cherries you have and the texture you want.
Yield: about 4 cups / 950 ml
Enough for: one standard 9-inch pie
Prep time: 10–20 minutes
Cook time: 10–15 minutes, sometimes a little longer for frozen cherries
Total time: about 25–35 minutes, plus cooling
Storage: fridge 3–5 days; freezer up to 3 months; not for canning as written
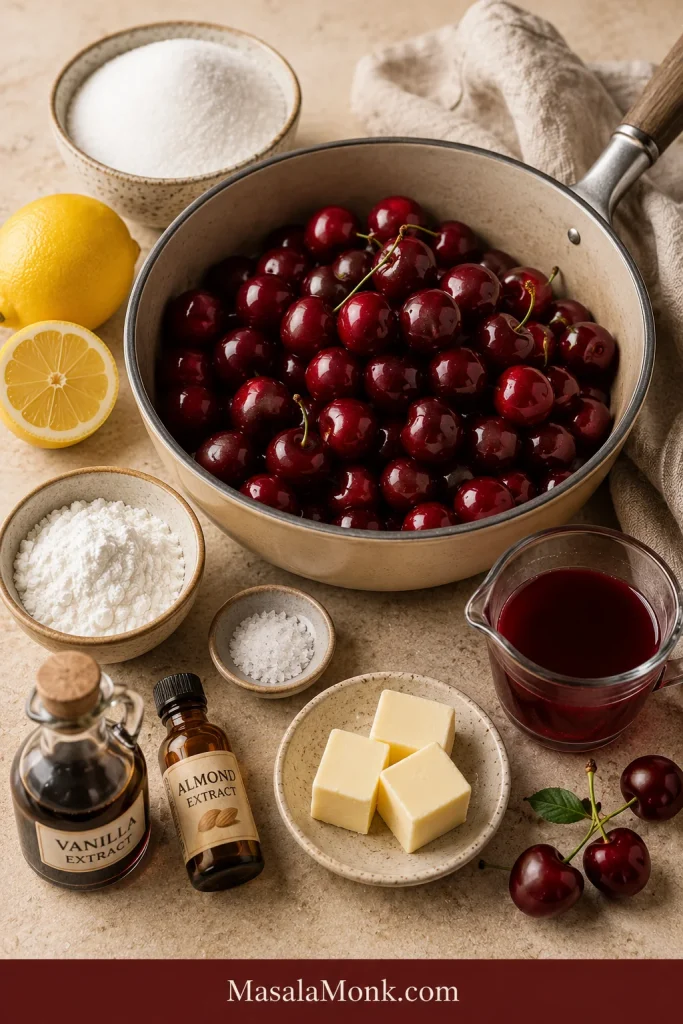
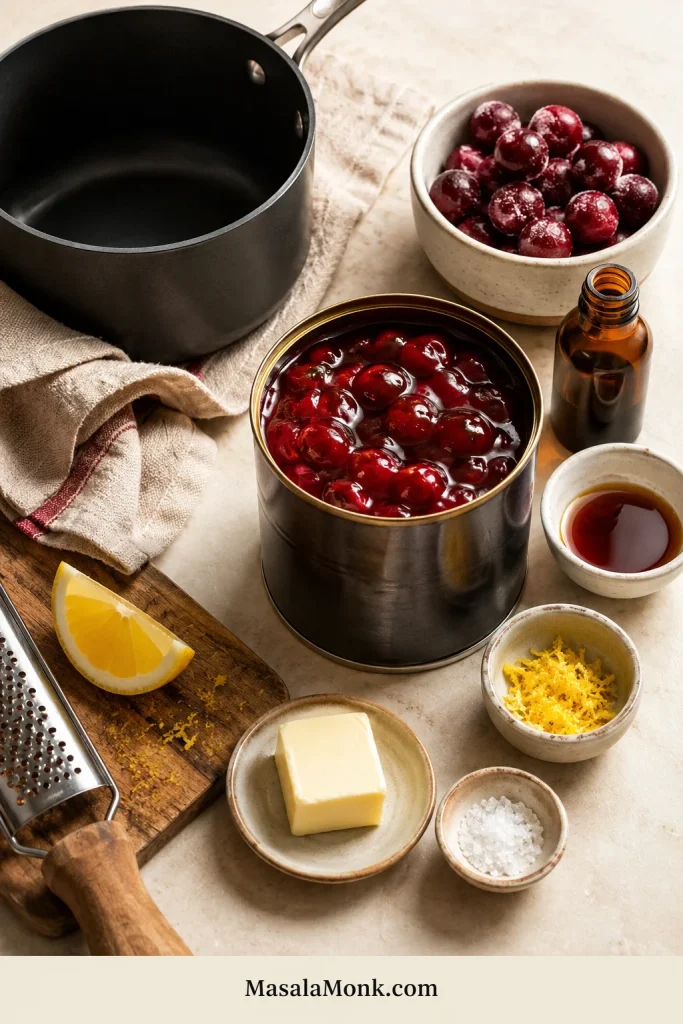
Ingredients
- Pitted cherries: 4 1/2 to 5 cups / about 690–770 g, fresh or frozen
- Granulated sugar: 1/2 to 2/3 cup / 100–135 g, adjusted to taste
- Cornstarch: 3 to 4 tablespoons / about 24–32 g
- Lemon juice: 1 to 2 tablespoons / 15–30 ml
- Water or reserved cherry juice: 1/4 cup / 60 ml, plus more only if needed
- Fine salt: 1/8 teaspoon
- Almond extract: 1/4 teaspoon, optional
- Vanilla extract: 1 teaspoon, optional
- Butter: 1 tablespoon / 14 g, optional for richer pie-style filling
For canned cherries: use about two to three 14.5 oz / 411 g cans of tart cherries packed in water or juice, depending on drained fruit amount. Aim for roughly 4 to 5 cups drained cherries when possible. Drain and reserve the liquid. Start with 1/4 cup reserved cherry liquid, then add more only if the pan looks dry. Reduce the sugar if the cherries are packed in syrup.
Drained fruit amounts vary by brand, so a batch made with canned cherries may be slightly saucier than one made with fresh or frozen fruit. Add the reserved liquid slowly instead of pouring it all in at once.
For canned cherry pie filling: do not use it as raw cherries in this recipe. It is already sweetened and thickened. Use the upgrade section below instead.
Instructions
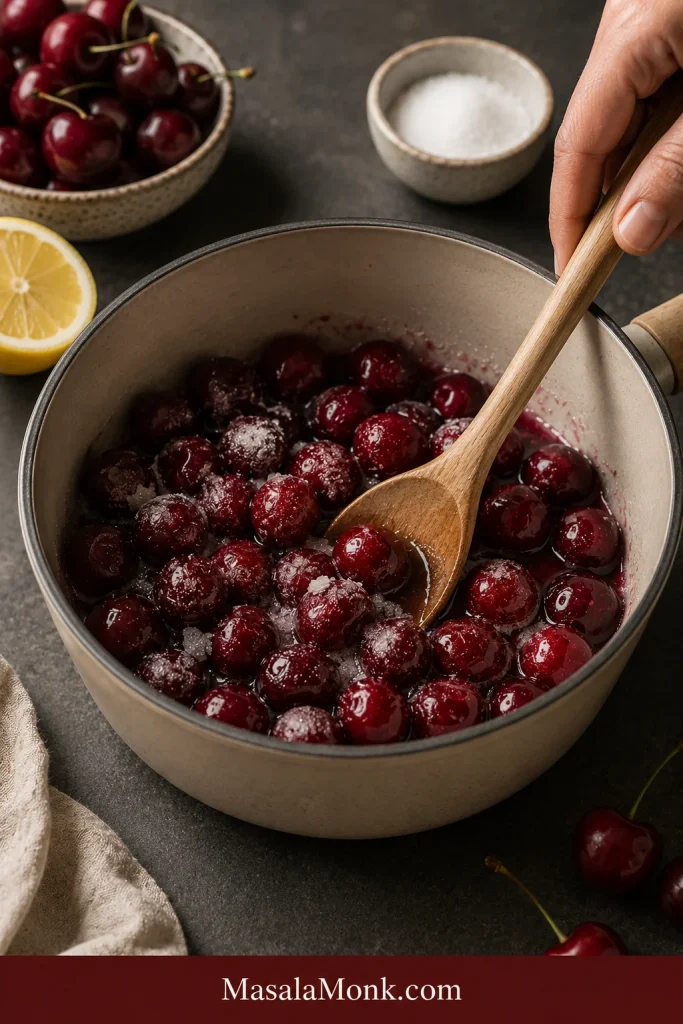
- Add the cherries, sugar, lemon juice, salt, and water or cherry juice to a medium saucepan.
- Cook over medium heat, stirring often, until the cherries release juice and the mixture begins to bubble.
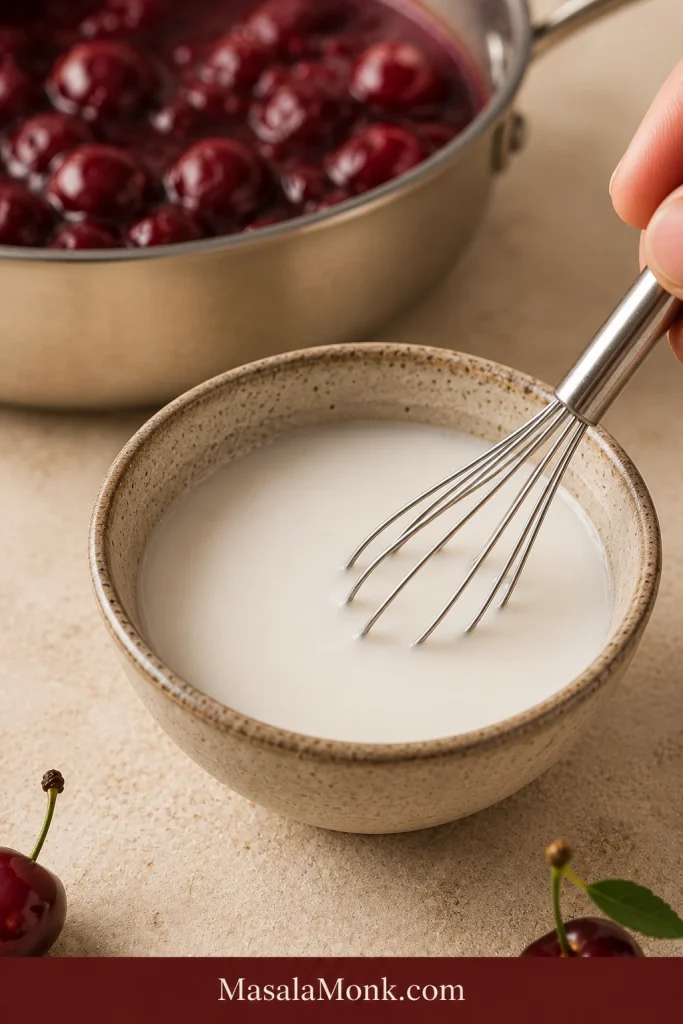
- In a small bowl, mix the cornstarch with 2 to 3 tablespoons cold water or cold cherry juice until smooth.
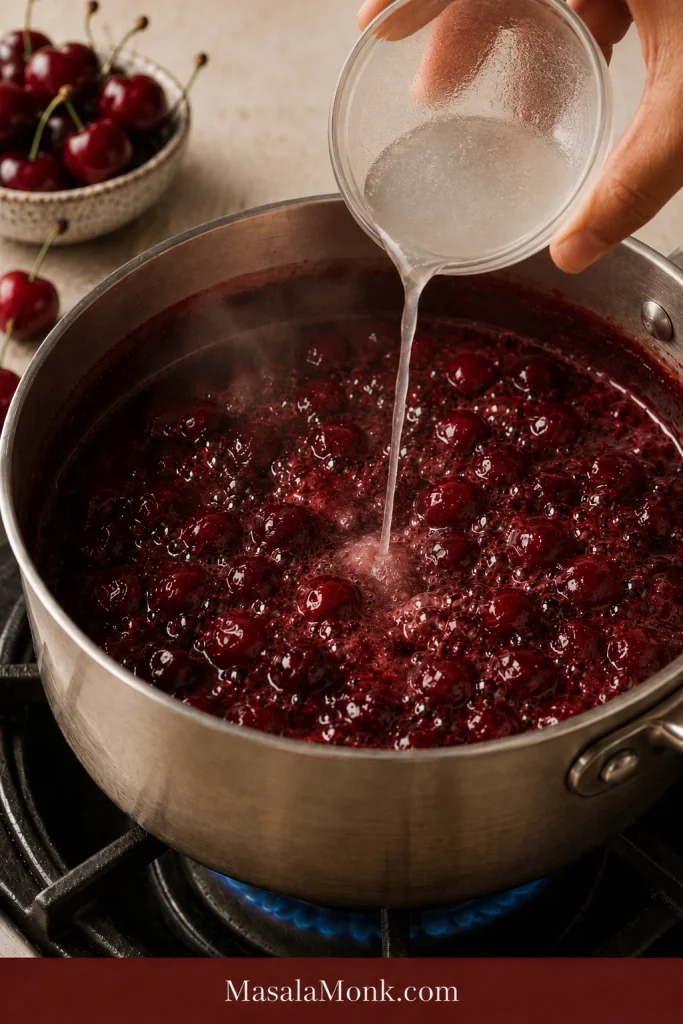
- Stir the cornstarch slurry into the bubbling cherries.
- Simmer for 3 to 5 minutes, stirring constantly near the end, until the sauce thickens and coats the cherries.
- Let the thickened filling bubble for about 1 minute to cook out the raw starch taste.
- Remove from heat. Stir in almond extract, vanilla, or butter if using.
- Cool before using. The filling thickens more as it cools.
Recipe note: use 3 tablespoons cornstarch for a softer topping and 4 tablespoons for pie filling. For frozen cherries, give the extra juices enough time to thicken. With canned cherries, use the reserved cherry liquid instead of water and adjust the sugar to taste.
Before you adjust anything: choose your cherry format · check the texture cues · fix a runny filling
Cherry Pie Filling at a Glance
| Yield | About 4 cups / 950 ml |
| Enough for | One standard 9-inch cherry pie |
| Cherry options | Fresh cherries, frozen cherries, canned cherries, or upgraded canned cherry pie filling |
| Prep time | 10–20 minutes, depending on pitting |
| Cook time | 10–15 minutes; frozen cherries may take a little longer |
| Cooling time | 30–60 minutes before pie; longer for a baked pie to slice cleanly |
| Best cue | Deep red sauce that coats a spoon |
| Common mistake | Adding too much liquid or judging the filling before it cools |
If you like this style of cooked fruit filling, this apple pie filling recipe is another useful one to keep handy for pies, toppings, and quick desserts.
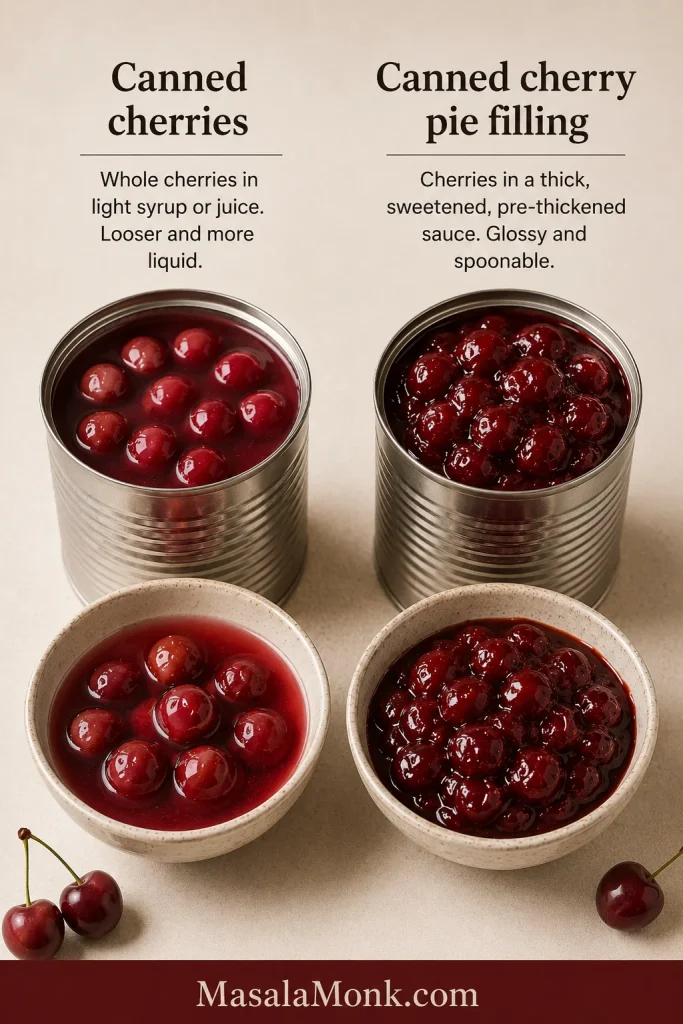
Canned Cherries vs Canned Cherry Pie Filling
This is the one shortcut detail worth checking before you cook. They are not the same thing.
| If the can says… | What you have | What to do |
|---|---|---|
| Cherries in water or juice | Plain fruit with liquid | Use in the base recipe. Reserve the liquid. |
| Cherries in syrup | Sweetened fruit | Use in the base recipe, but reduce the sugar. |
| Cherry pie filling | Already sweetened and thickened dessert filling | Do not cook it like raw fruit. Warm and upgrade it instead. |
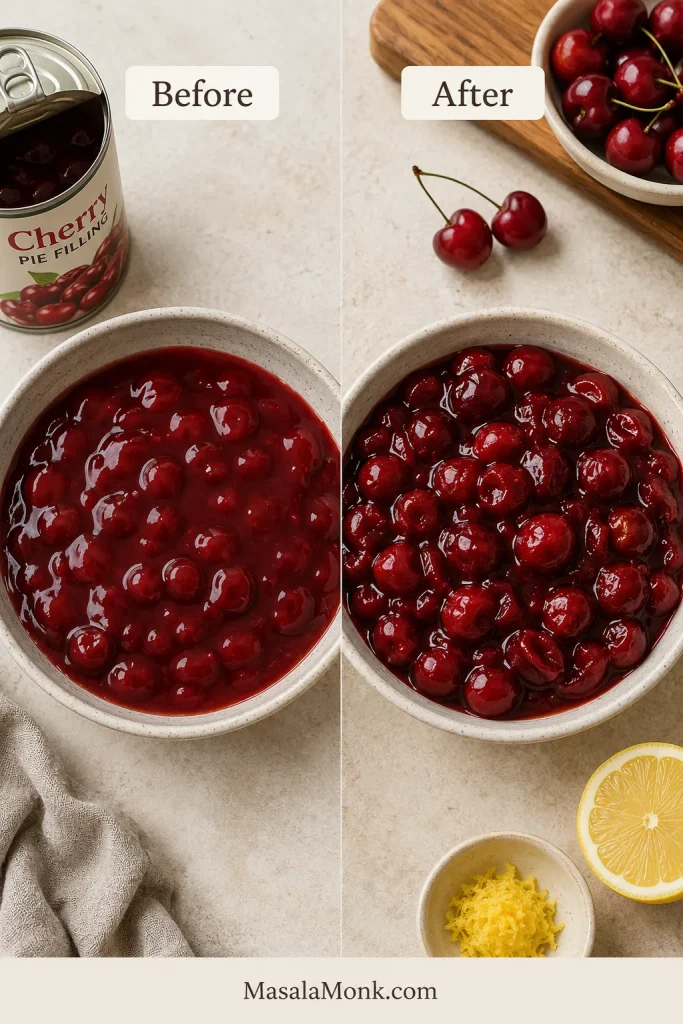
The plain canned cherries can become homemade filling. Canned cherry pie filling has already been sweetened and thickened, so it usually needs brightness, extra fruit, or a flavor boost rather than a full remake.
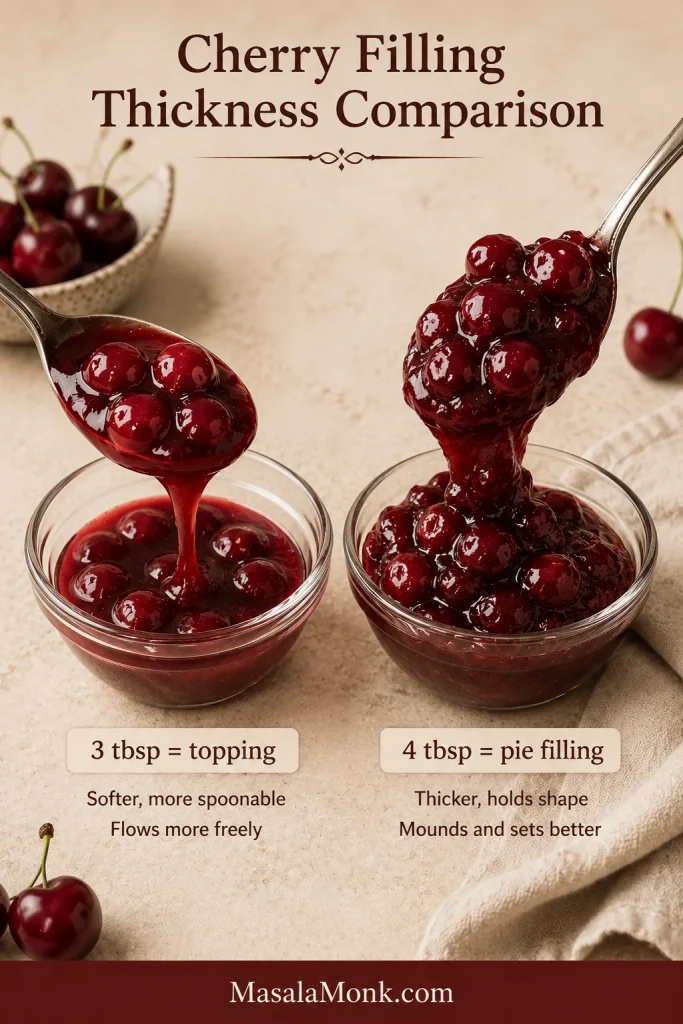
Pie Filling vs Topping: Choose the Right Thickness
Not every cherry filling needs the same thickness. A spoonable dessert topping should be softer than a pie filling that needs to hold inside a slice.
| What you want | Use this | Why |
|---|---|---|
| Soft dessert topping | 3 tablespoons cornstarch | Spoonable for cheesecake, pancakes, waffles, yogurt, or ice cream |
| Sliceable pie filling | 4 tablespoons cornstarch | Thicker set for a 9-inch pie |
| Extra juicy frozen cherries | 4 tablespoons, or simmer longer | Frozen fruit releases more liquid |
| Shortcut canned pie filling | No extra thickener unless loose | It is already sweetened and thickened |
| Shelf-stable canning | Tested Clear Jel recipe only | Regular cornstarch filling is not for canning |
When in doubt, choose 4 tablespoons for pie and 3 tablespoons for spooning over desserts. That one decision solves most texture problems before they start.
Choose Your Cherries First
Before changing sugar or starch, look at the cherries. Sweet, tart, frozen, canned, and pre-thickened filling all behave differently.
The goal is not to use the “perfect” cherries. Instead, understand what your cherries are giving you — sweetness, tartness, juice, or thickness — and adjust from there.
| What you have | How to use it | What to adjust |
|---|---|---|
| Fresh sweet cherries | Base recipe | Less sugar, more brightness from lemon |
| Fresh tart cherries | Base recipe | More sugar, modest lemon |
| Frozen cherries | Cook from frozen or thaw first | Extra liquid and a little more cooking time |
| Canned cherries in water or juice | Use like fruit | Reserved liquid, less added water, sugar to taste |
| Canned cherry pie filling | Upgrade separately | Brighten and balance; do not treat like raw fruit |
Use the table as your guide. Once you know what kind of cherries you have, the sugar, lemon, liquid, and cooking time become much easier to adjust.
Why This Cherry Pie Filling Works
This recipe works because it controls the two things that usually ruin cherry filling: extra juice and dull flavor. The cherries cook just long enough to release their juices, then the cornstarch turns those juices into a spoon-coating sauce instead of a watery syrup.
- Less added liquid keeps the filling from turning soupy. Cherries release juice as they cook, especially frozen cherries.
- Lemon wakes up sweet cherries. It does not make the filling taste lemony; it makes the cherry flavor brighter.
- Enough sugar rounds out tart cherries. Sour cherries make classic pie filling, but they need enough sweetness to taste full instead of sharp.
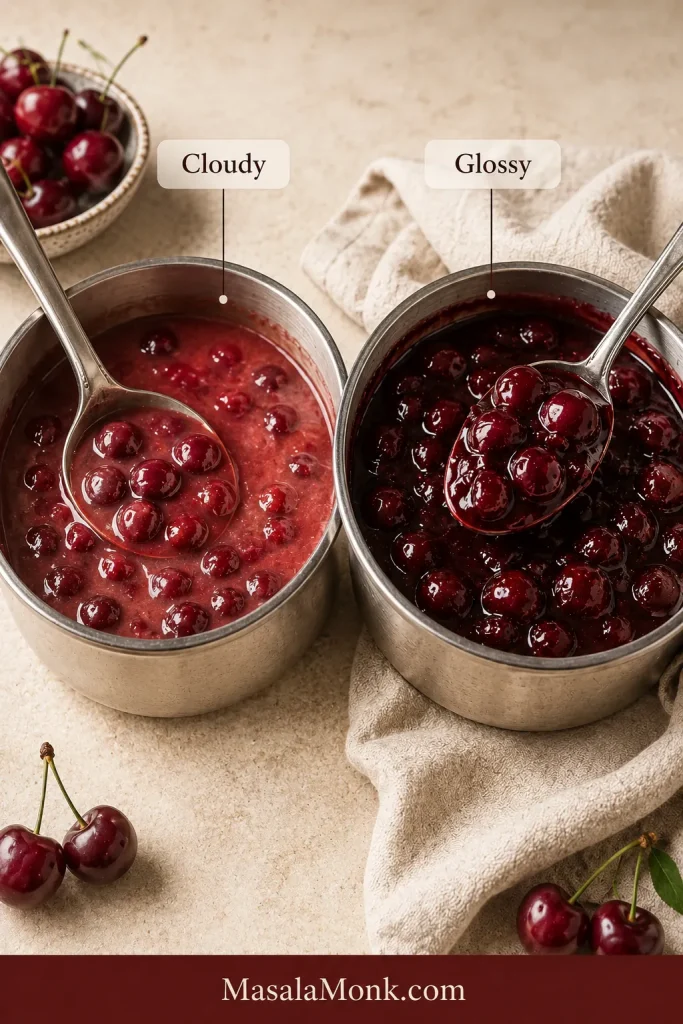
- Proper simmering removes the cloudy starch look. The sauce should look deeper red and less cloudy before you stop cooking.
- Cooling gives the filling time to settle. Warm filling always looks looser, especially when it is inside a pie.
How to Adjust the Filling to Your Cherries
Each ingredient controls something important: sweetness, brightness, thickness, or richness. Small adjustments are what make the filling taste cherry-forward instead of flat, syrupy, or heavy.
Cherries: Fresh cherries give the brightest seasonal flavor. Frozen cherries are convenient and reliable year-round. Canned tart cherries are useful when you want classic sour cherry flavor without pitting fresh fruit.
Sugar: Sugar sweetens the fruit and helps create the syrup. Use less for dark sweet cherries and more for sour or tart cherries. If using canned cherries packed in syrup, reduce the sugar and taste before adding more.
Lemon juice: Lemon juice keeps the filling from tasting flat. It is especially helpful with sweet cherries and canned cherry pie filling, which can taste heavy without a little acidity.
Cornstarch: Cornstarch thickens the cherry juices into a spoonable sauce. Use 3 tablespoons for a softer topping or 4 tablespoons for a thicker pie filling.
Water or cherry juice: Use just enough liquid to help the cherries cook and the cornstarch dissolve. Juice from thawed frozen cherries or canned cherries can replace plain water.
Salt: A tiny pinch of salt makes the cherry flavor taste fuller and less one-dimensional.
Almond extract: Almond extract gives cherry desserts that bakery-style flavor. Use a small amount because it can easily overpower the fruit.
Vanilla and butter: Vanilla softens the flavor, while butter adds richness. Both are optional, but they are especially nice if the filling is going into pie, cheesecake, or a cake layer.
Equipment You Need
The pan and spoon matter more than fancy tools. These basics make the process easier and cleaner.
- Medium heavy-bottomed saucepan: gives the fruit room to bubble and helps prevent scorching.
- Whisk: makes a smooth cornstarch slurry.
- Spatula or wooden spoon: helps stir the bottom and sides of the pan.
- Measuring cups and spoons: keep sugar, lemon, liquid, and thickener accurate.
- Cherry pitter: useful if you are starting with fresh cherries.
- 9-inch pie plate and rimmed baking sheet: useful if you are turning the filling into a full pie.
If you are turning this filling into pie and want more help with dough, this flaky homemade pie crust guide covers chilling, rolling, lattice, and soggy-bottom fixes that also apply to cherry pie.
How to Make Cherry Pie Filling
As the cherries cook, the juice and starch turn into a pie-ready sauce. Watch the pan more than the timer.
Start the Cherries Gently
Add the cherries, sugar, lemon juice, salt, and a small amount of water or cherry juice to a saucepan. Cook over medium heat until the cherries begin to soften and release juice. Stir often so the sugar dissolves and the fruit does not catch at the bottom.
Make a Smooth Cornstarch Slurry
Mix the cornstarch with cold water or cold cherry juice in a small bowl. This creates a smooth slurry. Adding dry cornstarch directly to hot filling can create lumps, so always mix it with cold liquid first.
Cook Until the Sauce Turns Glossy
Do not worry if the sauce looks cloudy right after the slurry goes in. That is normal. Keep stirring and watch for it to turn darker, glossier, and heavier on the spoon.
As the cornstarch activates, the sauce thickens and the bubbles slow down. Once it coats the cherries, let it bubble for about 1 minute. That short extra cook helps remove the raw starch taste.
Remove the pan from the heat, then stir in almond extract, vanilla, or butter if using. Let the mixture cool before using it in a pie crust, cheesecake, cake layer, or pastry. Serve it warm only when you want a softer topping.
After cooking: check the thickness · use it in cherry pie · store or freeze the filling · back to top
How Thick Should Cherry Pie Filling Be?
The fruit mixture should be thick enough to coat a spoon and mound slightly, but not so stiff that it looks like paste. For pie, it should hold together when stirred. Over pancakes, waffles, cheesecake, yogurt, or ice cream, it can stay softer and more spoonable.
Best texture cue: the sauce should change from cloudy to glossy. It should look deep red, bubble slowly, and coat the spoon. The spoon test matters more than the clock.
Bubbles should look slower and heavier, not fast and watery. For an extra check, drag a spatula across the bottom of the pan. If the sauce briefly leaves a path before flowing back, it is close.
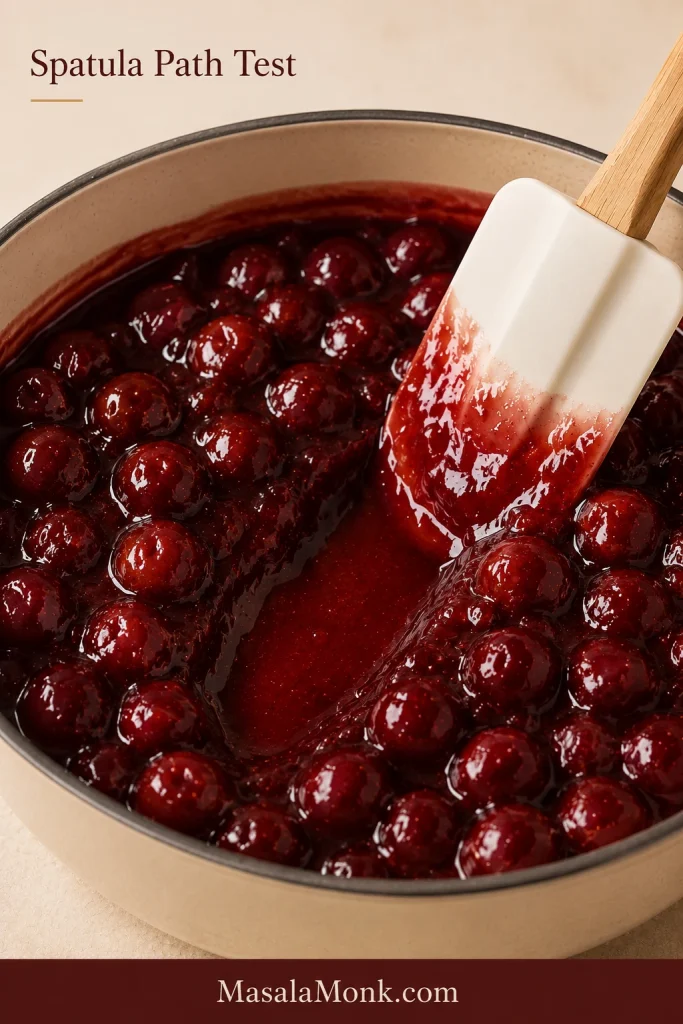
Warm fruit filling always looks looser than it really is. Let it cool before deciding whether it needs fixing. If it is going into pie, cooling is part of the set.
How Much Cherry Pie Filling for One Pie?
A standard 9-inch cherry pie needs about 4 cups / 950 ml of filling. That is the yield of this recipe. Deep-dish pies may need 4 1/2 to 5 cups.
| Use | Amount |
|---|---|
| Standard 9-inch pie | About 4 cups / 950 ml |
| Deep-dish 9-inch pie | 4 1/2 to 5 cups |
| Cheesecake topping | 1 1/2 to 2 cups |
| Hand pies or turnovers | 1 to 2 tablespoons each |
| Pancakes, waffles, yogurt, ice cream | Use warm or chilled |
Using This Filling in a Cherry Pie
This recipe makes enough for one standard 9-inch cherry pie. Let the filling cool before adding it to the crust. Hot filling can soften the dough and make the pie harder to handle.
- Use one full batch, about 4 cups / 950 ml, for a standard 9-inch pie.
- Keep the bottom crust chilled so it stays easier to handle.
- Add a lattice crust, full top crust with vents, or crumble topping.
- Place the pie on a rimmed baking sheet in case the filling bubbles over.
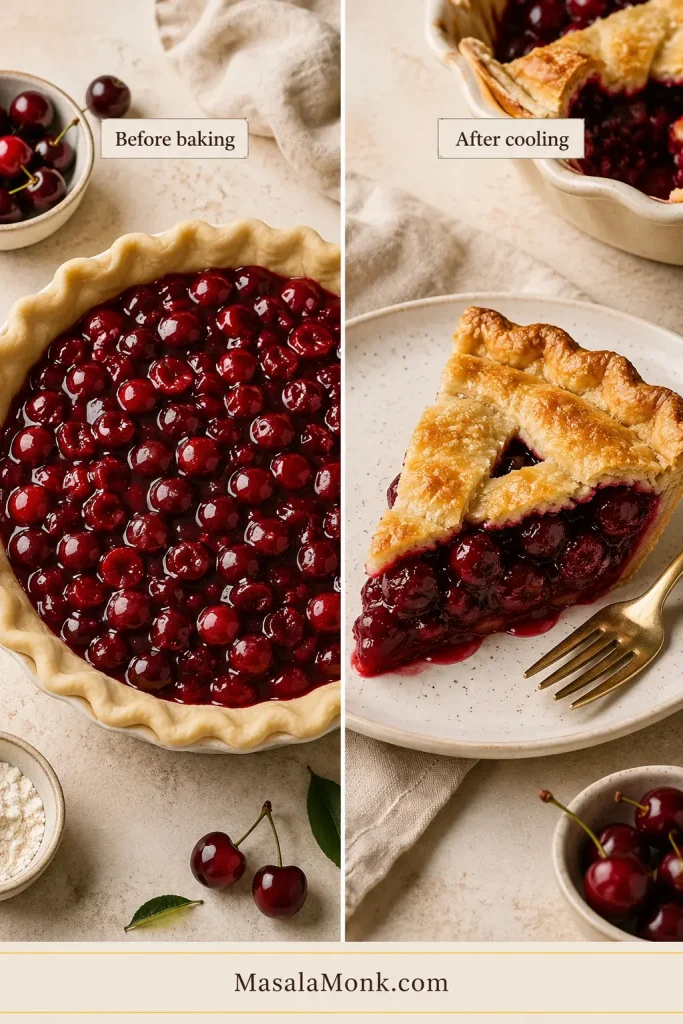
- Bake until the crust is golden and the filling bubbles through the vents.
- Cool the baked pie for at least 3 hours before slicing, and longer if you want cleaner slices.
For the full pie version with fresh, frozen, canned, or shortcut filling, use this cherry pie recipe.
A warm cherry pie will almost always look looser when sliced. That does not mean the filling failed. Fruit pies need time for the filling to settle.
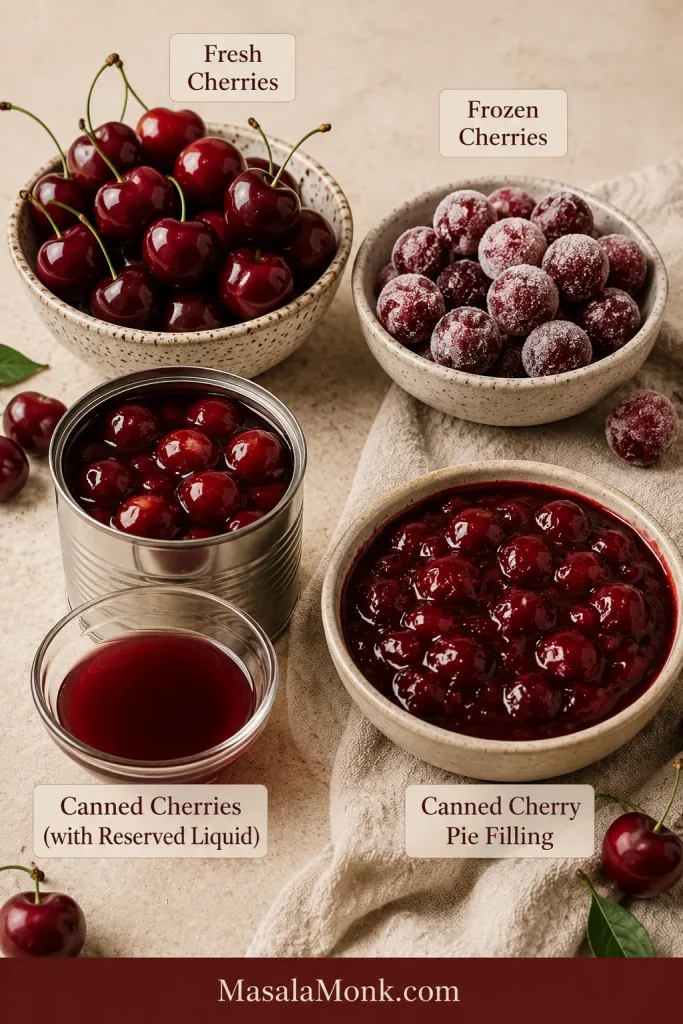
Fresh, Frozen and Canned Cherry Notes
The same method works across fresh, frozen, and canned cherries, but each one asks for a slightly different adjustment.
Using Fresh Cherries
Fresh cherries are wonderful when they are ripe, firm, and flavorful. Keep them cold until you are ready to pit them. Pit just before cooking when possible, because pitted cherries soften and release juice faster.
Measure the fruit after pitting. This gives you a more accurate amount for the filling.
Sweet cherries are easy to find and make a softer, sweeter filling. They usually need lemon juice so the flavor does not taste dull. Tart cherries give the most classic cherry pie flavor, but they need enough sugar to round out their sharpness.
Montmorency and Morello are common tart cherry names you may see for baking and pie filling.
Using Frozen Cherries
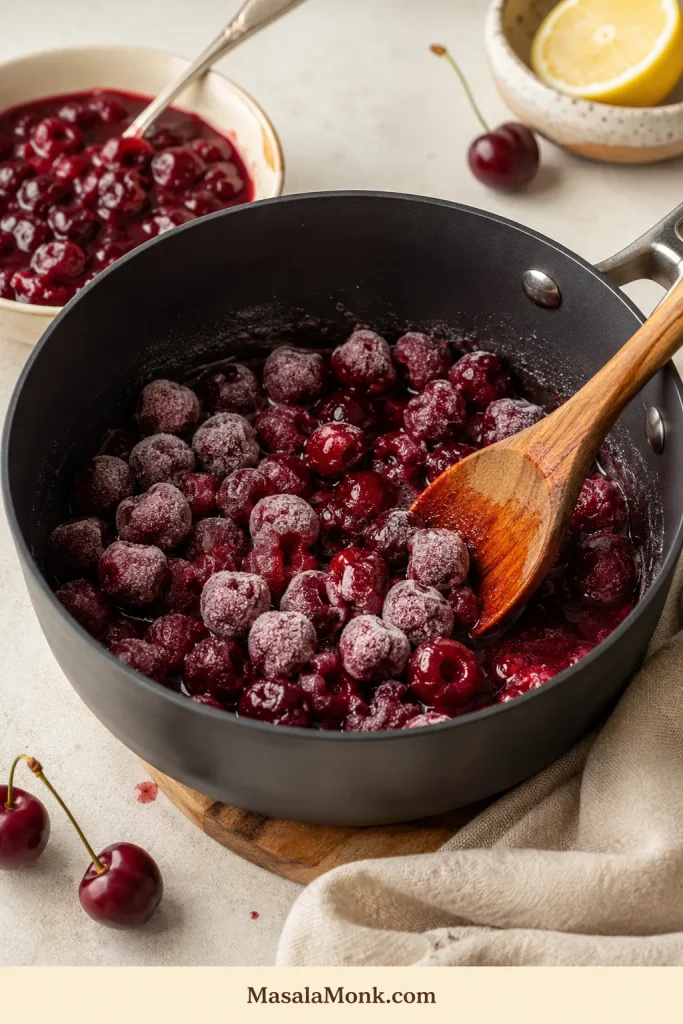
A bag of frozen cherries is one of the easiest ways to make this filling year-round. You do not have to wait for cherry season, and you do not have to pit anything. Frozen cherries are not a compromise here; they just need time for their juices to cook down.
You can cook frozen cherries straight from frozen. Start over medium-low heat until they soften and release juice, then continue with the sugar, lemon, and thickener. You can also thaw them first. If you thaw them, keep the juice and use it as part of the recipe liquid.
Frozen cherries often look like they are making the filling too watery at first. Give them time before adding more starch. Keep the heat moderate and let the fruit release juice before judging the texture.
If there is a large pool of juice after thawing, use that juice as the recipe liquid instead of adding water. For a raw fruit pie filling that bakes directly inside the crust, thawing and draining frozen cherries first gives you more control over extra liquid.
Using Canned Cherries
When plain canned cherries are what you have, use them. Just treat the liquid in the can as part of the recipe instead of adding extra water automatically.
Drain the cherries, reserve the liquid, and start with 1/4 cup of that liquid in the saucepan. Add more only if the pan looks dry. If the cherries are packed in syrup, reduce the sugar.
When the fruit is very soft, stir gently so it does not break apart too much. Canned tart cherries are especially useful for pie-style filling because they bring the bright sour cherry flavor many people expect from cherry pie.
If the canned liquid tastes thin or watery, simmer it briefly before or after thickening so the flavor concentrates. Canned cherry pie filling is different. It is already sweetened and thickened, so it should be upgraded rather than cooked like raw cherries.
How to Make Canned Cherry Pie Filling Taste Homemade
Canned cherry pie filling is a shortcut, not a failure. The usual problems are simple: it can taste too sweet, too flat, too syrupy, or slightly artificial. A few small upgrades can make it taste brighter and more homemade.
Canned filling is already thickened. You are not cooking it to set it; you are warming it gently to balance the sweetness and adjust the texture if needed. The goal is brighter cherry flavor, less syrupy sweetness, and a cleaner finish.
What to Add to Canned Cherry Pie Filling
For one 21 oz / 595 g can, warm the filling gently in a saucepan and add one or more of these:
- Lemon: 1 to 2 teaspoons lemon juice, or a little lemon zest
- Almond extract: 1/8 teaspoon
- Vanilla extract: 1/2 teaspoon
- Salt: a tiny pinch
- Butter: 1 tablespoon
- Extra cherries: 1/2 to 1 cup fresh or frozen cherries
Taste after each addition. Both lemon and almond extract can take over quickly, so add a little, stir, taste, and then decide if it needs more.
Adjust the Texture Gently
If it is too loose, mix 1 teaspoon cornstarch with 1 tablespoon cold water, stir it in, and simmer briefly until it tightens and coats the spoon. Do not boil canned filling aggressively after it thickens, or it can turn gluey.
Use the Upgraded Filling
A can of filling can still become a dessert you are happy to serve. This upgraded shortcut works well for quick pies, cheesecake topping, dump cake, puff pastry turnovers, crepes, waffles, and ice cream.
Taste and Texture Adjustments
When the batch is almost right but needs one small nudge, adjust slowly. Stir well, taste, and then add more only if it still needs help.
| Problem | Add this | Why it helps |
|---|---|---|
| Too sweet | Lemon juice and a tiny pinch of salt | Cuts syrupy sweetness and sharpens the cherry flavor |
| Too tart | Sugar, 1 tablespoon at a time | Rounds out sharp cherries without over-sweetening |
| Too flat | Lemon zest, almond extract, vanilla, or salt | Adds lift and depth |
| Too syrupy | Extra cherries or a longer gentle simmer | Adds fruit and concentrates the sauce |
| Too thick | Cherry juice or water, 1 tablespoon at a time | Loosens without flooding the filling |
| Too pale or thin-tasting | Simmer a little longer; use reserved cherry juice if available | Concentrates color and flavor |
Taste while the filling is warm, but judge the final thickness after it cools.
The best filling tastes bright, rounded, and cherry-forward. It should feel jammy but not heavy, with enough sauce to coat the fruit without drowning it.
Cornstarch vs Tapioca vs Clear Jel
Cornstarch is the easiest path, but other thickeners behave differently. The right choice depends on whether you want a quick stovetop filling, a sliceable pie filling, a freezer-friendly filling, or a tested canning recipe.
| Thickener | Best for | What to know |
|---|---|---|
| Cornstarch | Easy stovetop filling | Glossy and simple; too much can turn gummy |
| Tapioca starch/flour | Pie filling and freezing | Good texture; too much can feel stretchy |
| Flour | Backup option | Less glossy and more opaque |
| Arrowroot | Some toppings | Can thin with long cooking |
| Clear Jel | Tested canning recipes | Do not replace it with cornstarch for shelf-stable canning |
If you are replacing cornstarch, expect the texture to change. Tapioca starch is the closest everyday swap for pie-style filling. Flour works in a pinch, but it makes the sauce less glossy. Clear Jel is best kept for tested canning recipes unless you already know how to use it.
More thickener is not always better. If the filling tastes dull, pasty, or heavy, it may have too much starch. Start with the amount that matches your use: 3 tablespoons for spoonable topping, 4 tablespoons for firmer pie filling.
A loose filling is not a disaster. It usually means the sauce needs more time, more cooling, or a small slurry — not that the whole batch is ruined.
Troubleshooting Cherry Pie Filling
Why is my cherry pie filling runny?
Start by letting it cool. Hot cherry filling can look thinner than it really is. If it is still watery after cooling, return it to the saucepan and simmer for a few more minutes.
For extra help, mix 1 teaspoon cornstarch with 1 tablespoon cold water and stir the slurry into the bubbling filling. Repeat only if needed. Too much cornstarch can make the texture gummy.
Why is my filling cloudy?
A little cloudiness right after adding the slurry is normal. Keep the filling at a gentle bubble and it should turn glossier, deeper red, and less cloudy as the starch cooks.
Why is my filling too thick or gummy?
Too much thickener or too much boiling after thickening can make the texture gummy. Warm it gently and loosen it with a spoonful of cherry juice, water, or lemon juice. Add liquid slowly so it does not swing from too thick to too runny.
Why does my filling taste flat?
It probably needs balance. Add a little lemon juice, a tiny pinch of salt, or a very small amount of almond extract. Sweet cherries and canned filling often need brightness more than they need extra sugar.
Can I fix a runny cherry pie after baking?
Let the pie cool completely first. Hot fruit pies often look runny when sliced too soon. If the pie is still loose after cooling, it cannot be fully re-thickened inside the crust, but it can still be served chilled or spooned like a softer cobbler-style dessert.
Make Ahead, Storage, Freezing and Canning
Once the cherry mixture tastes right and has cooled, storing it is simple. Warm fruit filling traps steam, which can thin the texture later.
Can you make cherry pie filling ahead?
Yes. Make it 1 to 2 days ahead, cool it completely, and refrigerate it in an airtight container. Stir before using. If it is too thick from chilling, warm it gently with a spoonful of cherry juice or water.
How to store cherry pie filling
Store cooled filling in an airtight container in the fridge for 3 to 5 days. It will thicken as it chills. To use it again, warm it gently and loosen it with a spoonful of water or cherry juice if needed.
Can you freeze cherry pie filling?
Yes. Cool the filling completely, then freeze it in airtight containers or freezer bags for up to 3 months. Thaw overnight in the fridge, stir well, and reheat gently before using.
If the thawed batch looks too thick, warm it with a spoonful of water or cherry juice. When it looks too loose, simmer it briefly until the sauce tightens again.
Can you can this cherry pie filling?
This regular cornstarch cherry pie filling is for the fridge or freezer. Do not can this recipe as written for shelf-stable storage.
This is not because the filling is bad. It is because shelf-stable canning needs a tested thickener, tested acidity, and tested processing time.
For shelf-stable home-canned cherry pie filling, use a tested canning recipe with Clear Jel and bottled lemon juice. The National Center for Home Food Preservation has tested cherry pie filling guidance. Do not swap regular cornstarch or tapioca into a canning recipe unless the tested recipe specifically allows it.
Ways to Use Cherry Pie Filling
Cherry pie filling is one of those recipes that keeps working after pie day. Once you have a batch ready, it can become a quick dessert shortcut, a breakfast topping, or a cake filling.
| Use | Ideas |
|---|---|
| Pie desserts | Classic pie, lattice pie, crumble pie, hand pies, galette |
| Creamy desserts | Cheesecake, cream cheese pie, no-bake desserts |
| Cakes and bars | Dump cake, Black Forest-style cake, layer cake, cherry bars |
| Pastry | Puff pastry turnovers, danishes, strudel, crescent pockets |
| Breakfast and toppings | Pancakes, waffles, crepes, French toast, yogurt, oatmeal, ice cream |
For creamy desserts, let the filling cool completely before spooning it over cheesecake. A simple no-bake cheesecake recipe makes a good base because the cool, creamy layer balances the bright cherry topping.
For breakfast, warm the filling just enough to loosen the sauce, then spoon it over pancakes, waffles, or crepes. It also pairs naturally with these protein rich cherry pancakes.
For a quick finish, serve the filling with vanilla ice cream and a spoonful of homemade whipped cream. That is enough to make a simple dessert feel finished.
Once you understand the thickness, the cherries, and the cooling time, this filling becomes much less intimidating. The questions below cover the common last-minute doubts.
Still deciding? read the FAQ · back to the recipe card · back to top
FAQ
Can I make cherry pie filling with frozen cherries?
Frozen cherries work well. Cook them straight from frozen or thaw them first. They may look watery at first; keep cooking until the sauce thickens properly.
Do I need to thaw frozen cherries first?
Not for this stovetop filling. You can cook frozen cherries directly in the saucepan. If you thaw them, keep the juice and use it as part of the recipe liquid.
Can I use canned cherries instead of fresh cherries?
Yes. Use canned cherries packed in water or juice, reserve the liquid, and reduce added water. For cherries packed in syrup, reduce the sugar.
Is canned cherry pie filling the same as canned cherries?
No. Canned cherries are fruit packed in water, juice, or syrup. The pie filling version is already sweetened and thickened, so it should be upgraded rather than cooked like raw cherries.
How do I make canned cherry pie filling taste homemade?
Add lemon juice or zest, a tiny pinch of salt, almond extract or vanilla, and a little butter. Extra fresh or frozen cherries also make canned filling taste fuller and less flat.
What are the best cherries for cherry pie filling?
Sour or tart cherries give the most classic pie flavor. Sweet cherries also work, especially when balanced with lemon juice. Frozen dark sweet cherries are a good year-round option.
Are sour cherries or sweet cherries better?
Sour cherries are more traditional for pie because they balance sugar beautifully. Sweet cherries are easier to find and make a softer, sweeter filling. Both work when sugar and lemon are adjusted.
How do I thicken cherry pie filling?
Use cornstarch mixed with cold water or cold cherry juice. Stir the slurry into bubbling cherries and cook until the sauce is thick enough to coat a spoon.
Can I make cherry pie filling without cornstarch?
Tapioca starch, tapioca flour, arrowroot, or flour can be used in some fruit fillings, but the texture will change. For shelf-stable canning, use a tested Clear Jel recipe.
How much cherry pie filling do I need for one pie?
A standard 9-inch cherry pie needs about 4 cups / 950 ml. Deep-dish pies may need 4 1/2 to 5 cups.
Can I make cherry pie filling ahead of time?
Make it 1 to 2 days ahead, cool it completely, and refrigerate it in an airtight container. Stir before using and loosen gently with a spoonful of water or cherry juice if needed.
Can I freeze cherry pie filling?
Cool it completely, freeze it in airtight containers or freezer bags for up to 3 months, and thaw overnight in the fridge before using.
Can I can homemade cherry pie filling?
Do not can this cornstarch version as written. It is safe for the fridge or freezer, but shelf-stable canning needs a tested recipe with Clear Jel, bottled lemon juice, and proper processing instructions.
Final Tips
- Use less sugar for sweet cherries and more sugar for tart or sour cherries.
- Start with less liquid, especially with frozen or canned cherries.
- Cook until the sauce turns thick and deep red, not just until the fruit gets hot.
- Cool the filling before adding it to pie crust.
- Use almond extract sparingly because it is strong.
- Keep this cornstarch version for fridge or freezer storage, not shelf-stable canning.
You do not need perfect cherries. Instead, learn what your cherries need. Once the sweetness, liquid, and thickness are in balance, almost any cherry can become a glossy, cherry-forward filling. Spoon it into pie, chill it over cheesecake, or warm it for pancakes — it should taste bright, fruity, and homemade, not syrupy or stiff.


