If you’re curious about oat milk benefits, you’re not alone. The carton of Oat Milk has gone from a niche option to the default in cafés, largely because it’s creamy, naturally lactose-free, and usually fortified with calcium and vitamin D. But is oat milk actually good for you? In Short: it can be—especially if you pick the right carton for your goals.
Still, you deserve clear answers before you pour. Which oat milk benefits actually matter? How does oat milk affect blood sugar (GI and GL)? Is it a friendly option for GERD/acid reflux? Can it support weight loss without wrecking satiety? And when is oat milk not your best choice? This guide keeps things practical and evidence-led so you can enjoy your latte and capture the oat milk benefits that fit your goals.
Quick Take: What to Know About Oat Milk Benefits
Yes, oat milk can be a healthy choice—especially when you pick unsweetened, fortified versions. Typical “Original” oat milk clocks in near 120 kcal with ~16 g carbs and ~7 g added sugar per cup; in contrast, Unsweetened versions often sit around 40 kcal with ~6–9 g carbs and 0 g sugar. If you want a label to glance at, compare Oatly Original nutrition with Oatly Unsweetened nutrition once and you’ll see the difference immediately.
Moreover, blood sugar impact matters. Oat milk’s glycemic index (GI) is typically medium (frequently reported around ~60–69). For context across dairy and plant milks, the University of Sydney maintains a very clear consumer resource: Glycemic Index database (University of Sydney).
Heart health is another real upside. Oats contain β-glucan, a soluble fiber recognized by the U.S. FDA for helping reduce LDL cholesterol when you get ~3 g/day as part of a diet low in saturated fat and cholesterol—see the official wording here: FDA oat β-glucan health claim (21 CFR §101.81).
For GERD/acid reflux, lower-fat patterns and smart meal timing help many people. Unsweetened plant milks can be gentler. A simple, trustworthy overview is here: GERD diet overview (Johns Hopkins Medicine).
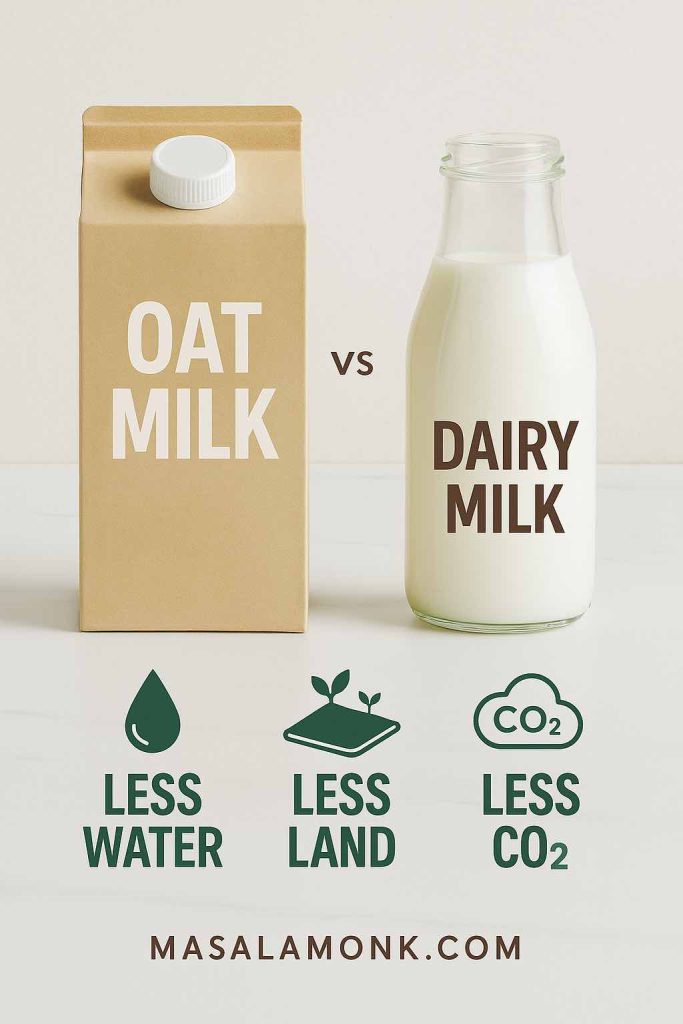
Finally, if sustainability matters, plant milks—including oat—generally beat dairy on greenhouse gases, land, and water. Here’s an at-a-glance comparison: Environmental impacts of milks (Our World in Data).
Bottom line: the most reliable oat milk benefits show up when you prefer unsweetened, check fortification, and pair your cup with protein or fiber.
Oat Milk Nutrition (Per 1 Cup)
Because marketing can distract, the nutrition panel tells the real story. Understanding it helps you unlock very specific oat milk benefits without guesswork.
Typical macros you’ll see
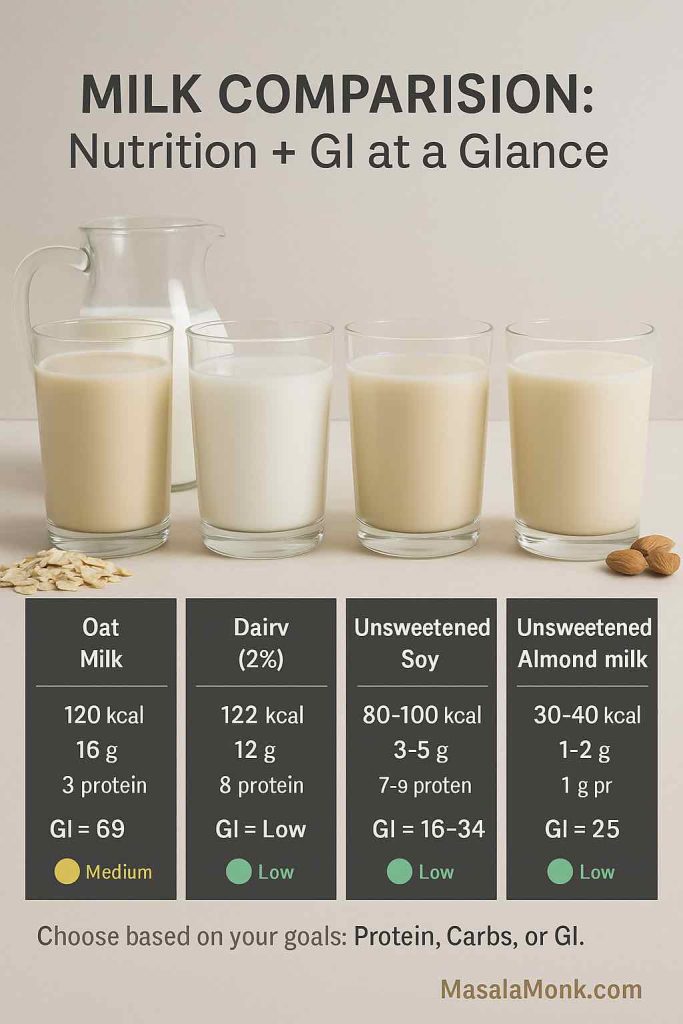
- Oat milk (Original): ~ around 120 kcal, ~16 g carbs, ~7 g sugars (added), ~3 g protein, ~2 g fiber, with fortification (calcium, vitamin D, often B12). The example above from Oatly Original is typical for the category.
- Oat milk (Barista): roughly ~ 140 kcal with similar carbs to Original but higher fat (thanks to added oils for foam). It’s a delight in coffee but adds calories. If you want one concrete reference point, skim the brand page once: Oatly Barista page.
- Oat milk (Unsweetened): often ~ 40 kcal, ~6–9 g carbs, 0 g sugars, and ~0–1 g protein, with fortification kept; see the Oatly Unsweetened example linked above.
Compared with alternative Milks (for context)
- Cow’s milk (2%): ~122–130 kcal, ~12 g carbs (lactose), ~8 g protein per cup.
- Unsweetened soy milk: roughly ~80–100 kcal, ~3–5 g carbs, ~7–9 g protein per cup.
- Unsweetened almond milk: typically ~30–40 kcal, ~1–2 g carbs, ~1 g protein.
What these numbers mean for oat milk benefits
First, oat milk is low in protein compared with dairy or soy. Therefore, if oat milk becomes your daily “milk,” add protein elsewhere—think eggs, Greek yogurt, tofu, dal, paneer, cottage cheese, fish, or legumes. Second, if your breakfast is already carb-forward (cereal, toast, fruit), choosing unsweetened oat milk keeps glycemic load (GL) in a comfortable range. Consequently, the oat milk benefits you feel—like steady energy and easier calorie control—depend less on the brand name and more on the specific carton you buy.
If you’re weighing oat drinks versus whole oats, you might also like to read our Guide to Oats: types, nutrition & how to choose.
Oat Milk Glycemic Index (GI) & Glycemic Load (GL)
Because glucose control influences energy, appetite, and focus, it helps to understand both GI and GL. For a deeper primer that would help you understand these terms better, check our post Glycemic Index vs Glycemic Load (simple explainer).
GI vs GL—what’s the difference?
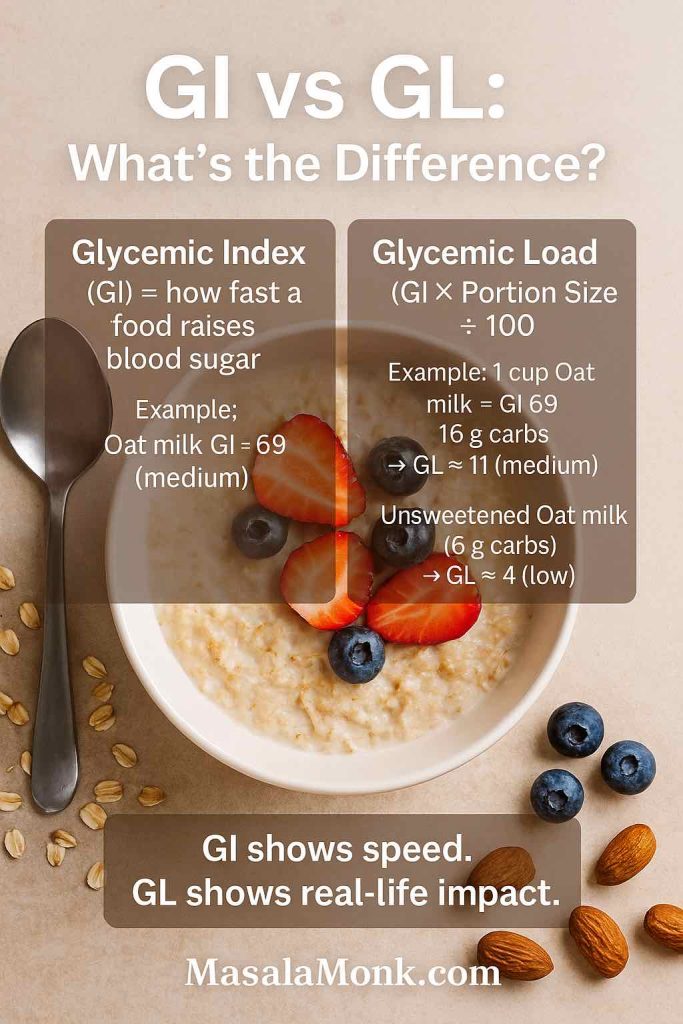
- Glycemic Index (GI) estimates how quickly a carbohydrate raises blood sugar. As a rule of thumb: low ≤55, medium 56–69, high ≥70.
- Glycemic Load (GL) brings portion size into the picture. In practice, GL is more useful day-to-day because it considers how many grams of carbohydrate you actually consume. For a clear explainer plus the standard GL formula, see: Glycemic index & glycemic load explained (Linus Pauling Institute).
Where oat milk usually lands—and why it matters
In practice, oat milk sits in the medium GI zone for many products. The actual number would depend on the maker of the product, the process they follow as most plant based alternatives are not standardised. The University of Sydney GI database is a good checkpoint if you want specific GI entries like “oat milk ≈ 69,” “almond ≈ 25,” or “rice milk high.” Meanwhile, dairy responses are often lower because lactose has a relatively modest GI, and rice milk is frequently higher. However a lot depends on what you are consuming with it and how you are consuming. Consequently, two cups of sweetened oat milk in a carb-heavy breakfast can push GL up, whereas one cup of unsweetened oat milk in a protein-rich breakfast barely moves the needle.
A quick note on dairy: the milk sugar lactose has a GI of ~46, which partly explains why dairy often produces a lower glycemic response than oat milk, even though total carb grams per cup are similar.
Turning GI into real life with GL
Use the standard formula: GL = (GI ÷ 100) × available carbs per serving.
- An Original oat milk with ~16 g carbs at a GI of ~69 has a GL ≈ 11 (moderate).
- An Unsweetened oat milk with ~6 g carbs at a similar GI has a GL ≈ 4 (low).
Your exact GL will vary with brand, added sugars, and serving size—but this range is sufficient for planning.
Because serving size matters, ¼–½ cup in coffee is negligible, while 1–2 cups in smoothies or cereal is significant. Therefore, track how much you pour, not just what you pour.
If you like to or need to track GI and GL of things you eat, you might prefer a printable copy of this list to keep handy – Download our Low-Glycemic Foods PDF.
Practical swaps that protect oat milk benefits
- Prefer unsweetened if you drink oat milk daily.
- Add protein or viscous fiber (chia, psyllium, flax, nuts) at the same meal.
- If you want protein in the glass, rotate unsweetened soy for some uses.
- When you want foam, use barista styles occasionally and budget those calories.
Why GI varies—and what maltose has to do with it
Here’s the behind-the-scenes step that explains a lot: commercial oat milks commonly use amylase enzymes to break oat starch into simpler sugars such as maltose. That “enzyming” improves sweetness and texture—especially for foaming in coffee—but it also explains why oat milk’s GI can be higher than you might expect from whole oats. If you want to see the process in plain language from a major producer, this page is unusually transparent: how enzymes break starch into maltose (Oatly process).
What to do with that info: you don’t have to avoid oat milk—just prefer unsweetened versions and build meals that include protein and fiber. Those small choices keep the overall GL reasonable and make your breakfast or coffee routine more satisfying.
Is Oat Milk Good for GERD/Acid Reflux?
GERD triggers vary person to person, but some patterns are consistent across reputable clinical guidance:
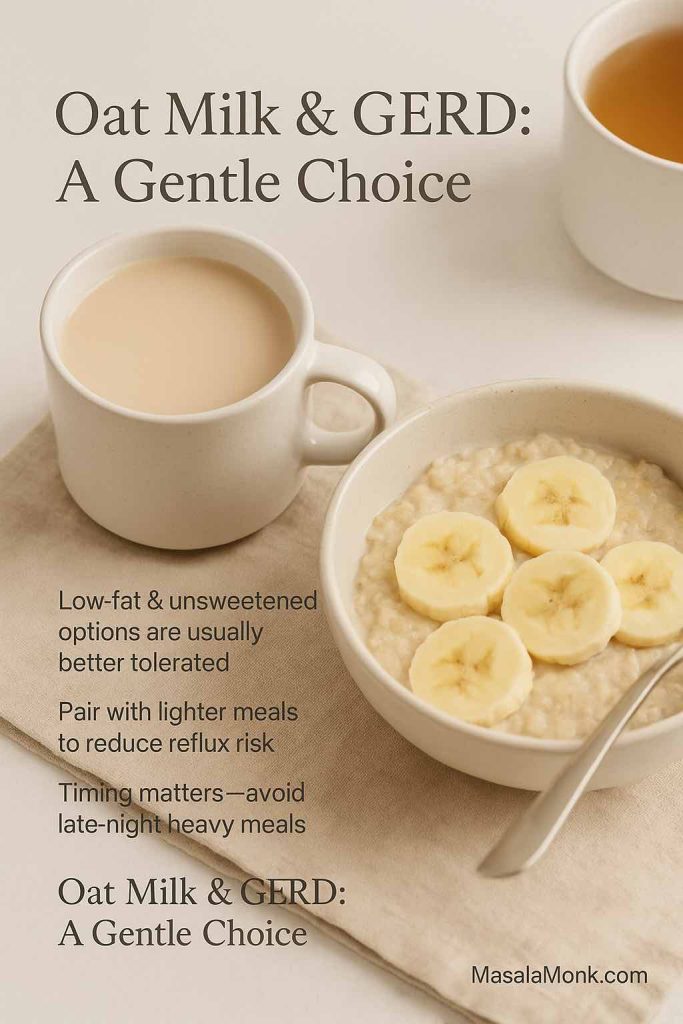
- Fat content matters. Higher-fat meals can aggravate reflux for many people, which is why low-fat or nonfat milks (including plant milks) are commonly better tolerated than full-fat dairy. For a clear overview of reflux-friendly patterns and food examples, revisit: GERD diet overview (Johns Hopkins Medicine).
- Routine beats any single swap. Smaller meals, avoiding late-night eating, and identifying personal triggers usually move the needle more than switching one milk for another. For practical “how-to” tips and lifestyle levers, it’s worth a single read of: ACG patient guidance on GERD.
For coffee-specific nuance, see Decaf coffee and GERD: does it help? or Is Coffee or Caffeine Bad for GERD?.
How to trial oat milk if you have GERD
- Start with unsweetened oat milk to avoid added sugars.
- Test ½–1 cup in coffee/tea or smoothies, away from other triggers.
- Keep the rest of the meal lighter in fat and milder in spices.
- Observe symptoms for 2–3 days before judging.
Related resources:Foods that help with acid reflux and Foods to avoid for reflux relief.
If symptoms persist, try low-fat dairy or unsweetened soy instead. Either way, you preserve many everyday oat milk benefits—like lactose-free comfort and versatility—while adjusting for your digestion.
Oat Milk for Weight Loss
Because small, repeatable choices drive results, the carton you buy—and how you use it—matters more than any headline.
Calorie math that compounds
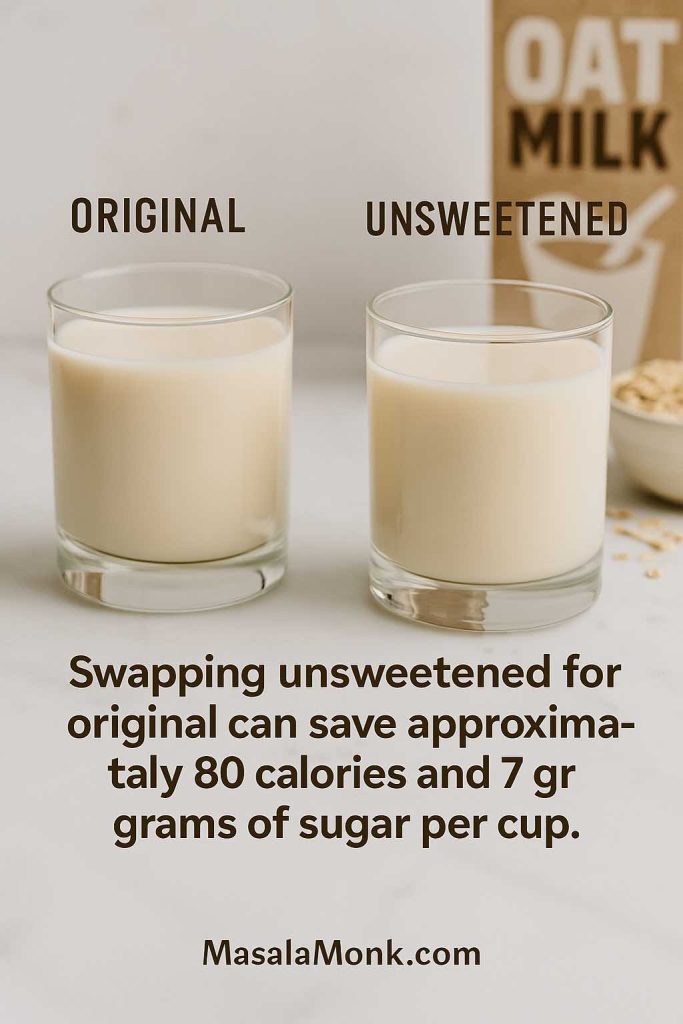
Swapping from Original (~120–140 kcal; ~16 g carbs; ~7 g sugars) to Unsweetened (~40 kcal; ~6–9 g carbs; 0 g sugars) can save ~80–100 kcal per cup. Therefore, if you enjoy two coffee drinks and pour a cup on cereal daily, this single shift can cut several hundred calories per week—without feeling punitive. That is one of the most practical oat milk benefits for fat loss.
For a second beverage habit that supports the same goal, try Green tea infusions for weight loss (evidence-guided).
The protein gap—and how to solve it
Because oat milk is low in protein, appetite control can suffer if the rest of your meal is also low in protein. Consequently, add eggs, Greek yogurt, tofu, dal, paneer, cottage cheese, fish, or a protein smoothie to keep hunger steady. Likewise, if you want protein inside the beverage, rotate unsweetened soy for some uses. This way you bank the calorie savings while maintaining fullness.
For quick ideas, see Plant-based protein sources (quick list) and, if you prefer local flavors, High-protein Indian meal-prep (vegetarian).
Smart, sustainable swaps
- Coffee/tea: use unsweetened Monday–Friday; enjoy barista on treat days.
- Cereal/porridge: pour unsweetened and add nuts/seeds for protein and fiber.
- Smoothies: when fruit is the base, choose unsweetened oat milk and add Greek yogurt or a quality protein powder.
- Baking: replace part of the liquid with unsweetened oat milk and, if desired, reduce added sugar slightly to offset natural sweetness.
Evidence-Backed Oat Milk Benefits
Broad claims deserve solid footing. These three benefits carry the strongest, most practical support.
1) Heart health via β-glucan
Oats provide β-glucan, a soluble fiber that helps lower LDL cholesterol. Under U.S. regulations, foods that deliver ~3 g/day of β-glucan as part of a diet low in saturated fat and cholesterol may carry a heart-health claim. Therefore, if heart health is a priority, look for oat milks that list fiber on the label, and use them alongside higher-fiber foods (whole oats, barley, pulses, vegetables) to reach the daily target. Over time, this is one of the most meaningful oat milk benefits for long-term health.
Many oat milks show ~0–2 g fiber per cup; actual β-glucan per serving varies and may be ~≤1 g—so the FDA threshold (~3 g/day) usually requires more than oat milk alone (e.g., whole oats, barley, pulses).
2) Support for a healthier gut pattern
Emerging studies suggest oat β-glucan and related fibers have prebiotic potential. Regular oat intake is associated with friendlier gut microbiota and improved lipid markers for many people. Admittedly, a cup of oat milk won’t match the fiber load of a bowl of porridge; nevertheless, it contributes to a fiber-forward pattern when you use it intentionally.
3) Sustainability upside
Compared with dairy, oat milk generally uses less land and water and produces lower greenhouse-gas emissions per liter. As a result, it’s a simple everyday lever for a smaller footprint. Notably, this sustainability angle complements, rather than replaces, nutrition—so you still optimize oat milk benefits by choosing unsweetened and planning protein.
Downsides & When to Be Careful
Even good options have trade-offs. Keep these in view.
Added sugars + medium GI
Many “Original” or flavored cartons include added sugar. Combined with a medium GI, that can push GL up—especially in large servings. Consequently, if you’re managing blood sugar or afternoon energy slumps, unsweetened is the easiest win. Portion size matters here too; ¼ cup in coffee is very different from two cups in a smoothie.
Low protein compared with dairy/soy
Because satiety tracks with protein, oat milk alone won’t cover breakfast protein needs. Plan protein elsewhere or rotate unsweetened soy when you need protein in the glass.
Barista calories
Those silky cappuccinos rely on added oils. Delicious, yes—but more calories. Enjoy them as part of your routine, though consider balancing the rest of the day.
Kids and plant milks
Outside of fortified soy milk, most plant milks are not nutritionally equivalent to cow’s milk for young children. For a parent-friendly overview, this one-pager is reliable: Cow’s Milk Alternatives: Parent FAQs (AAP). If you’re making child-feeding decisions, discuss protein, calcium, vitamin D, iodine, and B12 with your pediatrician.
(For completeness: U.S. public health guidance consistently groups fortified soy beverages with milk in dietary patterns for children, while other plant milks are not considered equivalent.)
Read More on USFDA site : Plant-Based Milk and Animal Food Alternatives – USFDA and Milk and Plant-Based Milk Alternatives: Know the Nutrient Difference USFDA.
Gluten sensitivity
Oats are naturally gluten-free, but cross-contact can occur. If you’re sensitive, look for certified gluten-free oat milks.
Marketing vs data
Sustainability claims in ads can be fuzzy. When you want numbers, lean on independent sources (see Our World in Data above) rather than promotional language.
Oat vs dairy vs almond vs soy (at a glance)
Use this table to match the milk to your goal—creaminess, protein, or lowest carbs—without getting lost in labels.
| Milk (per 1 cup) | Calories | Carbs | Sugars | Protein | What to remember |
|---|---|---|---|---|---|
| Oat (Original) | ~120 | ~16 g | ~7 g (often added) | ~3 g | Fortified; some β-glucan; medium GI; great everyday taste/texture. Use if you’re not chasing ultra-low calories. (Macros like the Oatly example above are typical.) |
| Oat (Unsweetened) | ~40 | ~6–9 g | 0 g | ~0–1 g | Lowest calories/GL among oaty options; still fortified; perfect for daily coffee/tea and cereal when you’re trimming calories or managing glucose. |
| Dairy (2%) | ~122–130 | ~12 g (lactose) | ~12 g | ~8 g | High-quality protein; often lower glycemic response than oat milk (lactose GI ~46). Good if you need protein in the glass. |
| Almond (Unsweetened) | ~30–40 | ~1–2 g | 0 g | ~1 g | Very low carbs/calories; usually fortified; great for ultra-light coffees and cutting GL to the floor. |
| Soy (Unsweetened) | ~80–100 | ~3–5 g | 0–1 g | ~7–9 g | Protein comparable to dairy; a strong everyday choice if you want satiety without lactose. |
How to use this:
- Want creaminess with minimal calories/GL? Choose Unsweetened Oat.
- Want protein in the glass? Rotate unsweetened soy or stick with low-fat dairy.
- Want ultra-low carbs for coffee? Unsweetened almond nails it.
- Want to compare whole-grain breakfast options too? Steel-cut vs rolled oats: which is better?
- Wondering about almond milk and blood sugar specifically? Is almond milk good for diabetics?
Homemade vs Store-Bought Oat Milk
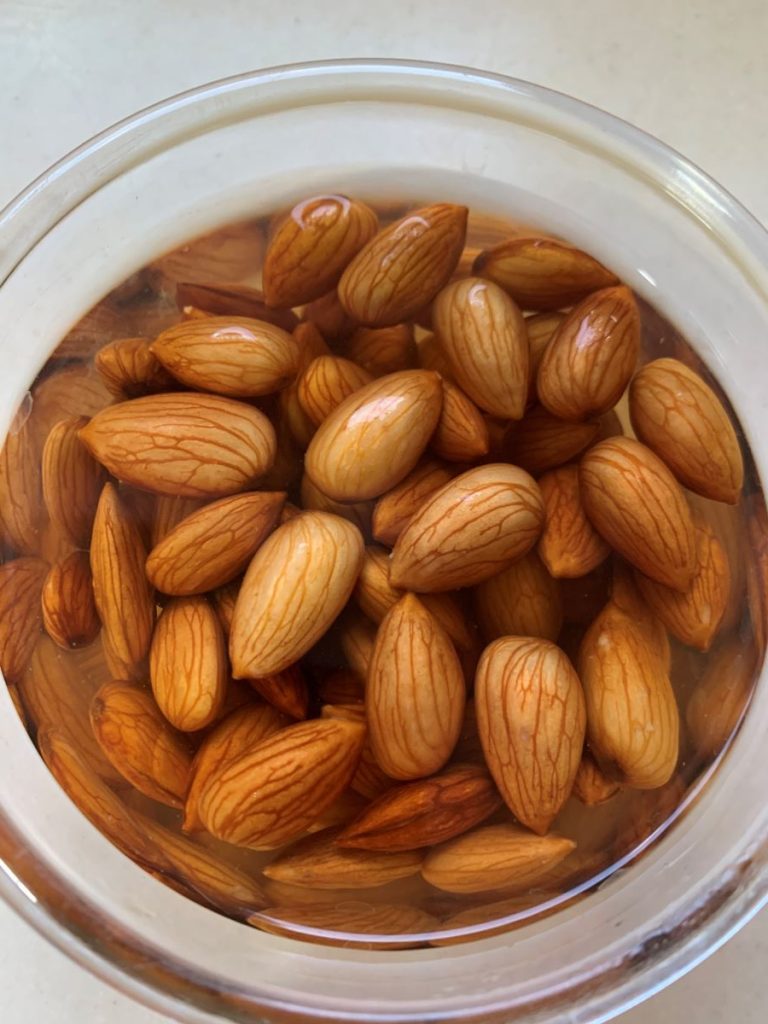
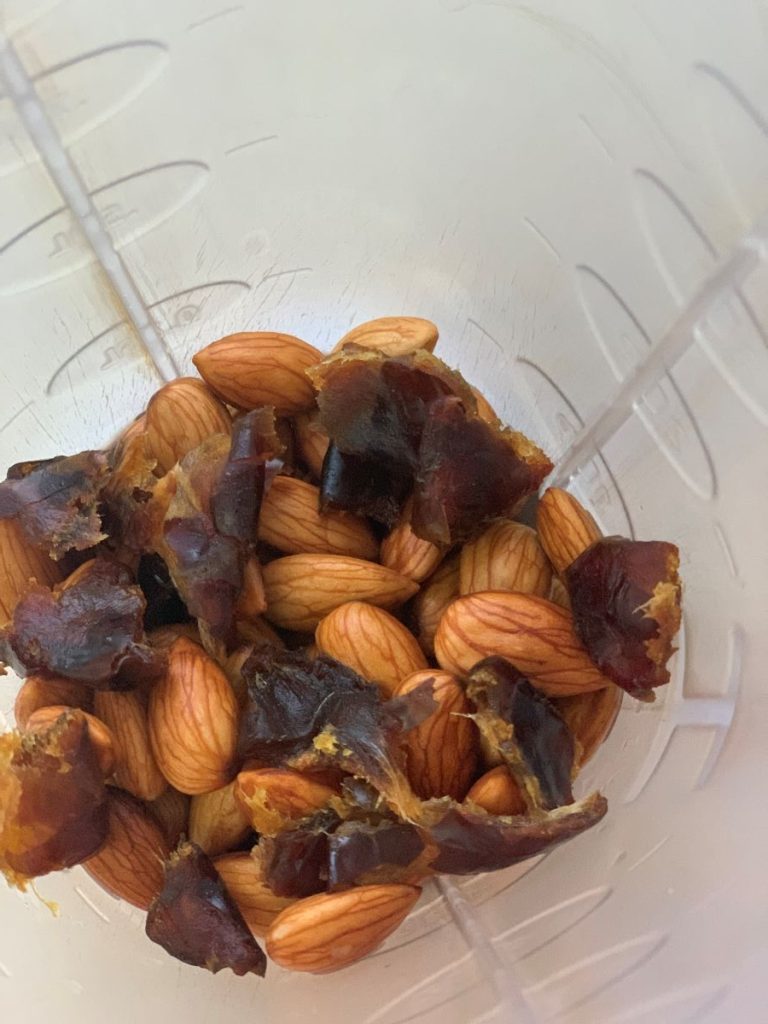
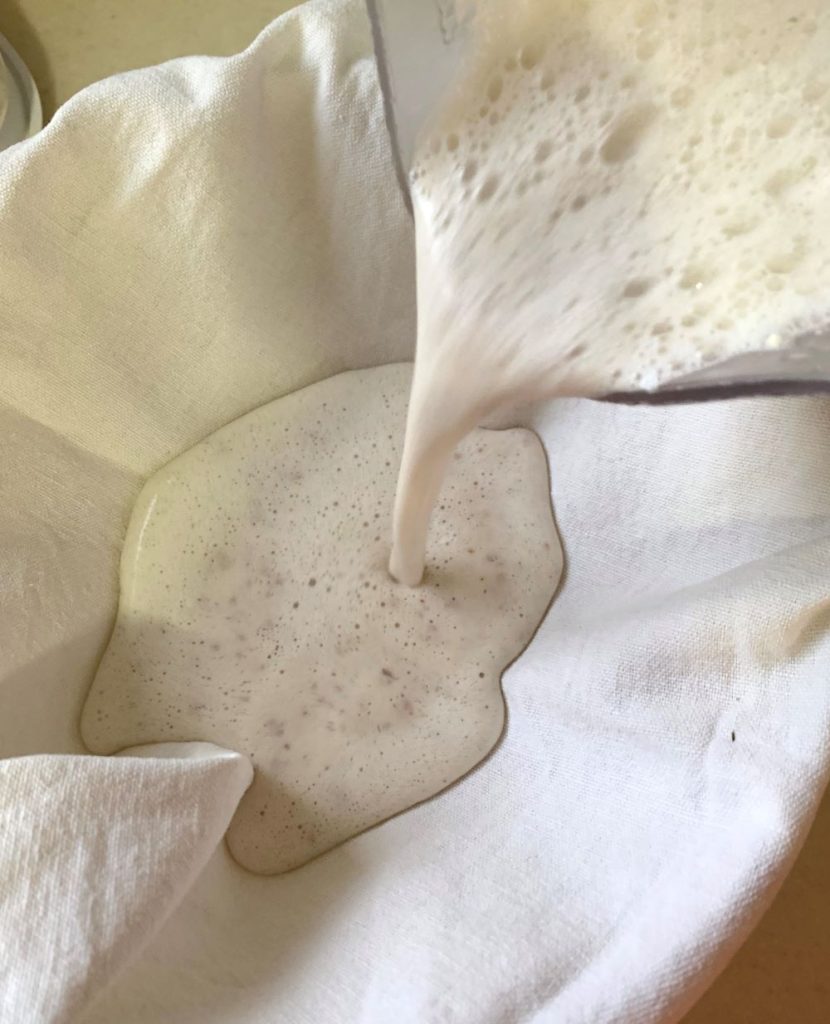
Homemade oat milk is easy and gives total control over sweetness and additives. However, it’s typically not fortified, so you miss out on calcium, vitamin D, and B12 that many commercial cartons provide. You also won’t perform the industrial enzyming step, so homemade versions can be starchier and less sweet unless you deliberately add enzymes during prep.
For real homemade option – read our post on Easy Homemade Oats Milk with just One Ingredient- Non Slimy, at last.
Store-bought fortified oat milks offer convenience, consistent texture (especially barista versions), and predictable micronutrients. If your priorities are everyday calories and blood sugar, choose unsweetened. If your priority is latte art, the barista carton earns its keep—just budget the extra calories.
Prefer DIY? Try How to make almond milk at home (step-by-step) for a simple plant-milk template.
Label-reading checklist (60-second scan in the aisle)
When you’re face-to-face with five similar cartons, this is the quickest way to pick well:
- Sugar: Prefer “0 g added sugar.” Many “Original” or flavored cartons list ~7 g added.
- Carbs per cup: Lower carbs → lower GL. If your breakfast is already carb-heavy, aim for oat milks closer to 6–9 g carbs.
- Protein: If oat milk is your main “milk,” plan protein elsewhere (or rotate unsweetened soy).
- Fortification: Look for calcium (~300–350 mg) and vitamin D (~3–5 μg) per cup; B12 is a bonus for plant-forward eaters.
- Use case: For everyday cereal and coffees, choose Unsweetened. For foamy cappuccinos, Barista is lovely—save it for when it counts.
Oat milk and gut health: realistic, not magical
You’ll see plenty of “gut-health” claims. Here’s the grounded view:
- Oats provide β-glucan and related fibers with prebiotic potential. Regular oat intake has been associated with friendlier gut microbiota and improved lipid markers in research, though dose matters.
- A glass of oat milk contributes, but it won’t match the fiber from a bowl of whole oats or other intact grains and legumes. Think of oat milk as one helpful piece in a fiber-rich pattern that includes vegetables, pulses, fruit, and whole grains.
Special note for parents and caregivers
For young children, most plant milks (outside fortified soy) are not nutritionally equivalent to cow’s milk. If there’s allergy, intolerance, or a family preference for plant-based eating, work with your pediatrician or dietitian to cover protein, calcium, vitamin D, iodine, and B12 from the rest of the diet. The AAP’s Cow’s Milk Alternatives: Parent FAQs is a clear one-page summary you can keep handy.
For infants under 12 months, milk alternatives are not appropriate replacements for breast milk or formula.
Putting it all together: an easy weekly routine
Let’s translate the science into a plan you can use immediately:
- Weekday coffee/tea: Unsweetened oat milk as the default; pair with a protein-forward breakfast.
- Weekend latte: Treat yourself to barista oat milk—enjoy the foam, log the extra calories mentally, and keep the rest of the day balanced.
- Cereal mornings: If your cereal is high-carb, keep GL in check with unsweetened oat milk and add nuts/seeds for protein and fiber.
- Smoothies: Fruit base? Stick to unsweetened oat milk and add Greek yogurt or a quality protein powder.
- GERD days: Avoid late meals; keep meals lower in fat; trial unsweetened oat milk in small amounts and note your own triggers (meal timing often matters more than the milk choice).
- Sustainability: If environmental impact is a priority, oat milk already puts you on the lighter-footprint side compared with dairy—use it where it fits, and keep the rest of your pattern plant-forward.
The verdict
Is oat milk good for you? Often, yes—especially when you choose unsweetened, fortified versions and use them strategically. For heart health, oat β-glucan is a genuine benefit., for blood sugar, respect the GI/GL by checking sugars and carbs and pairing with protein/fiber, for GERD, low-fat patterns—including unsweetened plant milks—are commonly better tolerated than full-fat dairy. And for the planet, oat milk is one of the easier low-impact swaps.
If you rely on milk for protein, rotate unsweetened soy or plan protein elsewhere. If you’re shopping for kids, follow pediatric guidance and consult your clinician. Most importantly, pick the carton that aligns with your goals today—then sip, enjoy, and move on with your day.
References & Further Reading
- Glycemic Index database (University of Sydney) — consumer-friendly GI ranges for dairy and plant milks, including oat:
https://glycemicindex.com/2020/01/your-gi-shopping-guide-9/ - Glycemic index & glycemic load explained (Linus Pauling Institute) — GI categories, GL formula, and practical examples:
https://lpi.oregonstate.edu/mic/food-beverages/glycemic-index-glycemic-load - FDA oat β-glucan health claim (21 CFR §101.81) — official language acknowledging ~3 g/day of β-glucan within a heart-healthy diet:
https://www.ecfr.gov/current/title-21/chapter-I/subchapter-B/part-101/subpart-E/section-101.81 - GERD diet overview (Johns Hopkins Medicine) — reflux-friendly patterns, triggers, and timing tips:
https://www.hopkinsmedicine.org/health/wellness-and-prevention/gerd-diet-foods-that-help-with-acid-reflux-heartburn - ACG patient guidance on GERD — lifestyle levers and clinical context:
https://gi.org/topics/acid-reflux/ - Environmental impacts of milks (Our World in Data) — emissions, land, and water comparisons across milks:
https://ourworldindata.org/environmental-impact-milks - Oatly Original nutrition — representative macros for “Original” oat milk:
https://www.oatly.com/en-us/products/oatmilk/oatmilk-32-oz - Oatly Unsweetened nutrition — representative macros for unsweetened oat milk:
https://www.oatly.com/en-us/products/chilled-oatmilk/chilled-oatmilk-unsweetened-64-oz - Oatly Barista page — barista formulation and foam performance notes:
https://www.oatly.com/en-us/products/oatmilk/oatmilk-barista-edition-32-oz - How enzymes create maltose in oat milk (Oatly process) — why commercial oat milk tastes sweet and foams well:
https://www.oatly.com/oatly-who/our-process - Cow’s Milk Alternatives: Parent FAQs (AAP) — plant milks vs cow’s milk for children:
https://www.healthychildren.org/English/healthy-living/nutrition/Pages/milk-allergy-foods-and-ingredients-to-avoid.aspx
FAQs
What are the biggest oat milk benefits in everyday life?
First, it’s creamy and lactose-free, so your coffee and cereal feel indulgent without discomfort. Moreover, fortified cartons add calcium and vitamin D, which helps bone health while keeping saturated fat low. In short, oat milk benefits show up when you choose unsweetened and use it in place of higher-calorie options.
Is oat milk good for you if you’re watching blood sugar?
Generally, yes—especially the unsweetened kind. However, original or flavored cartons can add sugar, which raises glycemic load. Therefore, use unsweetened oat milk in coffee or smoothies and, for balance, pair it with protein or fiber (think nuts, chia, eggs, or tofu).
What is the glycemic index of oat milk?
Oat milk typically sits in the medium GI range. Even so, portion size matters more day-to-day; thus, focus on glycemic load by checking carbs per cup. Unsweetened versions usually keep GL low, which is great for steady energy.
Can people with diabetes enjoy oat milk?
Yes—yet choose unsweetened and mind portions. Additionally, pair your cup with protein or viscous fiber to slow absorption. That simple combo preserves the comfort of oat milk while supporting glucose goals.
Does oat milk help with GERD or acid reflux?
It can. Because lower-fat patterns often feel gentler, many people tolerate unsweetened plant milks well. Still, triggers differ; therefore, test a small serving on a calm day, avoid heavy meals late at night, and note your personal response.
Is oat milk good for weight loss?
It can be—if you switch from sweetened to unsweetened and keep an eye on portions. Moreover, remember oat milk is low in protein; as a result, add eggs, Greek yogurt, tofu, or dal at the same meal so you stay fuller longer.
How do barista versions compare to regular oat milk?
Barista styles foam beautifully; however, they often include added oils, which increase calories. Consequently, save barista cartons for treat drinks and use unsweetened day-to-day to keep oat milk benefits without the extra energy.
What nutrients should I look for on the label?
Scan for added sugars (aim for 0 g), carbs per cup (lower keeps GL down), and fortification (calcium ~300–350 mg, vitamin D ~3–5 μg). Additionally, consider B12 if you eat plant-forward. These quick checks maximize nutrition from the same pour.
Is oat milk high in protein?
Not really. Compared with dairy or soy, protein is modest. Therefore, if you rely on milk for protein, rotate in unsweetened soy or add protein foods alongside oat milk so you don’t trade creaminess for hunger.
Are there heart-health benefits to oat milk?
Yes—primarily from oat β-glucan, a soluble fiber linked to lower LDL cholesterol as part of a balanced diet. That said, amounts vary by brand; consequently, check fiber on the panel and combine oat milk with other high-fiber foods for a real-world boost.
Is oat milk gluten-free?
Oats are naturally gluten-free; however, cross-contact can happen during processing. If you’re sensitive, choose cartons labeled certified gluten-free. That way, you preserve the comfort and convenience many list among oat milk benefits.
Is oat milk OK for kids?
Sometimes—yet context matters. Outside of fortified soy, most plant milks aren’t nutritionally equivalent to cow’s milk for young children. Therefore, speak with your pediatrician about protein, calcium, vitamin D, iodine, and B12 if you prefer plant-based options.
Does oat milk curdle in coffee?
It can, particularly in very acidic or extra-hot espresso. To help, warm the milk gently, pour coffee into the milk (not the other way around), or use a barista carton. These small tweaks protect texture—and, happily, your latte art.
Which is better: homemade or store-bought?
It depends on your goal. Homemade gives you control over sweetness and additives; however, it usually lacks fortification and may taste starchier. Meanwhile, store-bought is consistent, often fortified, and café-friendly. Choose the route that supports oat milk benefits you value most.
How should I store oat milk and how long does it last?
Unopened shelf-stable cartons sit in the pantry; once opened, refrigerate and use within 7–10 days (or as the label directs). Additionally, shake before pouring—sediment can settle and affect both taste and nutrition.
Is oat milk better than almond, dairy, or soy?
It’s different, not universally “better.” For protein, soy or dairy win, for ultra-low carbs, unsweetened almond shines, and for creaminess with simple ingredients, oat is hard to beat—especially when you want the everyday oat milk benefits of texture, convenience, and versatility without lactose.
Can I use oat milk in cooking and baking?
Absolutely. It swaps well in pancakes, porridges, soups, and sauces. However, since it’s naturally a bit sweet, you can sometimes reduce added sugar slightly—another quiet way to capture oat milk benefits while keeping flavors balanced.
Any downsides I should consider?
A few. Added sugars in “original” or flavored cartons can raise GL; protein is low; and barista styles add calories. Even so, choosing unsweetened, planning protein, and saving barista for treats keeps the balance firmly in your favor.

