Posted on Leave a comment

Sambar Recipe – Authentic South Indian Sambar for Idli, Dosa & Rice

Steaming sambar in a metal pot with drumstick, pumpkin, eggplant, shallots, curry leaves, mustard seeds and dried chilli visible in the orange lentil broth.

This sambar recipe makes a South Indian lentil-and-vegetable stew with soft toor dal, vegetables, tamarind, sambar powder and a fragrant final tadka (tempering). A good sambar tastes savoury and lentil-rich, then tangy from tamarind, with curry leaves and toasted spices rising above the broth. The chilli heat can be mild or quite assertive depending on the sambar powder.

Keep it a little fuller and it can sit at the centre of a rice meal. Loosen the same sambar for idli or medu vada and the broth sinks into every porous bite. That ability to move with the meal is part of what makes sambar so useful in a home kitchen.

The frustrating version is the one that contains all the “right” ingredients and still tastes mostly like dal. Or it comes out chilli-hot but flat, sharply sour, watery, or full of pumpkin and brinjal that disappeared while the carrots were still catching up. The method below focuses on the few things that actually decide whether the sambar comes together.

Sambar is more vegetable-heavy and tangy than a simple dal, while rasam is usually much thinner and more pepper-forward. There is no single formula that represents every South Indian region or household, so this version is a dependable mixed-vegetable method rather than a claim to represent every style. You may also see the name written as sambhar.

The Sambar Rule

Balance the sambar before reaching for more powder.

A hot but flat-tasting sambar rarely needs another spoonful of chilli-heavy masala first. Check the salt and tamarind. Make sure the dal has cooked completely, the vegetables are tender and the broth has not been diluted too far.

Once the dal is soft and the tang tastes right, don’t fuss over every last detail. Sambar is everyday food. It has plenty of room to adjust.


Everyday South Indian Sambar Recipe

Serves4
DifficultyEasy; vegetable timing is the main trick
Hands-onAbout 25–30 minutes
TotalAbout 60 minutes; typically 50–65 minutes depending on the dal and vegetables
ConsistencyMedium-thick for rice; loosen for idli, dosa or vada

With rice, count on four generous servings. Beside idli, dosa or vada, the same amount naturally feeds more.

Equipment

  • Stovetop pressure cooker or Instant Pot
  • 3–4-litre (3–4-quart) saucepan or kadai with a lid
  • Small tadka pan
  • Knife and cutting board
  • Ladle or wooden spoon
  • Whisk, dal masher or potato masher
  • Small strainer for tamarind, optional

Ingredients

Labeled sambar ingredients including toor dal, seedless tamarind, sambar powder, moringa pods, curry leaves, mustard seeds, fenugreek seeds, shallots, asafoetida and dried red chillies.
These ingredients are not interchangeable sources of “more flavour.” Toor dal builds the base, tamarind changes acidity, sambar powder brings the spice profile, while mustard, fenugreek, curry leaves and hing contribute aromas that extra chilli cannot replace.

Dal

  • 100 g toor dal (tur, tuvar or arhar dal; split pigeon peas), about ½ US cup
  • 420 ml water (1¾ cups)
  • ¼ teaspoon ground turmeric

Vegetables and Sambar Base

Use about 350 g (12 oz) vegetables in total, including the shallots, plus the tomato.

  • 100 g drumstick (moringa pod), roughly 1–2 medium pods, cut into 5 cm (2-inch) pieces; lightly scrape very tough mature fresh pods if needed
  • 70 g carrot, about 1 small carrot, cut into small chunks
  • 70 g pumpkin, cut into larger chunks
  • 50 g brinjal (eggplant/aubergine), cut into chunks
  • 60 g small onions or shallots, roughly 6–8 small shallots, peeled
  • 100 g tomato, about 1 small to medium tomato, chopped
  • 240 ml water (1 cup) to start the vegetables, plus a splash more if needed
  • 15 g (½ oz) seedless tamarind block
  • 120 ml hot water (½ cup) for soaking the tamarind
  • 1–1½ tablespoons sambar powder
  • 1 teaspoon jaggery, optional
  • 1 teaspoon fine salt to start, divided, plus more to taste
  • 120–300 ml hot water (½–1¼ cups) for the final consistency
  • 2 tablespoons chopped coriander leaves (cilantro), optional

Bottled tamarind paste and concentrate can be far stronger than block tamarind. There is no dependable spoon-for-spoon conversion, so use less to begin with.

Tempering

  • 1 tablespoon gingelly (Indian sesame) oil, neutral oil or ghee; not toasted sesame oil
  • ½ teaspoon black or brown mustard seeds
  • Small pinch fenugreek seeds, roughly 6–10 seeds
  • 1 dried red chilli, broken in half
  • 10–12 curry leaves
  • ⅛ teaspoon hing (asafoetida)

A useful cooking baseline: 100 g dry toor dal : about 350 g vegetables : 15 g block tamarind : 1–1½ tablespoons sambar powder. Taste the tamarind and powder rather than treating those last two numbers as law.

How to Make Sambar

Five-stage sambar cooking guide showing fully softened toor dal, firm vegetables cooked first, quicker vegetables added later, tamarind and sambar powder added near the end, then dal and fresh tadka combined.
This sambar recipe is easier to control when you treat the order as texture management. In particular, letting firmer vegetables soften before acidic tamarind enters gives them a better chance to cook through; meanwhile, delaying pumpkin and brinjal helps them stay intact.

Cook the Dal and Build the Vegetable Base

  1. Cook the dal until completely soft. Rinse the toor dal well. Combine it with 420 ml (1¾ cups) water and turmeric. Bring a stovetop cooker to pressure, reduce the heat as needed to maintain pressure and cook for about 8–10 minutes. Let the pressure settle naturally. Press a grain against the side of the cooker; it should smear into a paste with no chalky centre.
  2. Start the firm vegetables. Put the shallots, carrot and drumstick in a saucepan or kadai with 240 ml (1 cup) water and a pinch taken from the measured salt. Cover and simmer for about 6–8 minutes. Check once and add a small splash of water if the pan begins to dry. The carrot should be getting close to tender.
  3. Meanwhile, make the tamarind extract. Soak the tamarind in 120 ml (½ cup) hot water for 10–15 minutes. Squeeze well and strain. Keep some extract aside rather than assuming it all belongs in the sambar.
  4. Add pumpkin, brinjal and tomato. Stir them into the firm vegetables and simmer for about 3–4 minutes. The tomato should begin to slump into the broth, while the pumpkin and brinjal become almost tender without collapsing.
  5. Add tamarind and sambar powder. Stir in about two-thirds of the tamarind extract and 1 tablespoon sambar powder. Simmer gently for 4–6 minutes. Pay more attention to the pan than the clock: the tomato should no longer taste raw, the sharp smell of fresh tamarind should have faded and the powder should no longer taste dusty.

Balance, Finish and Rest the Sambar

  1. Stir in the mashed dal. Give everything another 1–2 minutes together. Press a piece of pumpkin with the side of the ladle; it should yield without disappearing into the broth.
  2. Taste for salt, sourness and spice. Add the rest of the measured salt, then taste. Use more reserved tamarind when the sambar needs extra tang. A mild powder may need up to another ½ tablespoon. Add jaggery only if you want a faint sweet-sour note.
  3. Loosen it only at the end. Add hot water in 60 ml (¼ cup) increments. Keep the sambar fuller for rice and more flowing for idli, dosa or vada. Pour a ladleful back into the pan: the mashed dal and broth should fall together instead of separating into thick lentils and thin water.
  4. Finish with the tadka. Heat the oil or ghee in a small pan and add the mustard seeds. Once they crackle, add the fenugreek and dried chilli. Add the curry leaves; when they hiss and begin to crisp at the edges, stir in the hing and immediately pour the tadka over the sambar. Burnt tadka is worth remaking; thirty seconds of fresh tempering is better than a bitter pot.
  5. Rest for 5–10 minutes. Stir and taste once more. The sambar may need a splash of hot water or another pinch of salt after resting. Finish with coriander if using.

Instant Pot: cook the rinsed dal, 420 ml water and turmeric on High Pressure for 9 minutes. Allow 10–15 minutes of natural pressure release before venting any remaining pressure.

How to Know When Sambar Is Ready

Ladle some up. The mashed dal should seem part of the broth rather than settling separately underneath it. By now, the sharp raw edge of the tamarind has mellowed. A carrot piece gives when pressed with a spoon, while pumpkin and brinjal remain visible instead of dissolving into the pan.

Ladle lifting finished sambar above a metal pot, with callouts showing integrated dal and broth, tender carrot, intact pumpkin and fresh mustard seed and curry leaf tadka.
No single cue proves the sambar is ready. Instead, look for several things at once: integrated broth, properly tender vegetables and a fresh aromatic finish. When those agree, the clock matters much less.

Pour the ladleful back. The broth and dal should move together. Then smell the sambar: fresh mustard, curry leaves and hing should reach you before the spoon does.

At that point, all it really needs is hot rice.

Hot sambar being poured over white rice, with drumstick, pumpkin, eggplant, shallots and curry leaves visible in the lentil and vegetable stew.
Judge sambar for rice on the plate rather than in the pot. It should spread slowly through the grains and carry vegetables with it; if thin broth immediately collects underneath, the consistency has probably gone too far.

Dal, Tamarind and Sambar Powder

Toor dal is the standard base here. The same lentil may be sold as tur dal, tuvar dal, arhar dal or split pigeon peas. Cook it until the grains practically disappear when mashed. Older dal may simply need more time. Moong dal makes a lighter sambar; masoor changes both the flavour and texture more noticeably.

Tamarind is less predictable. A pale seedless block may be mild, while a darker aged block can push the sambar sour much sooner. Bottled concentrates vary even more. Fresh tamarind changes as it simmers too: its sharp raw acidity settles into the broth instead of sitting on top of the other flavours.

Sambar powder varies just as much. Some blends lean towards coriander and roasted spices; others announce themselves mostly through chilli. Old powder can remain hot after much of its fragrance has faded.

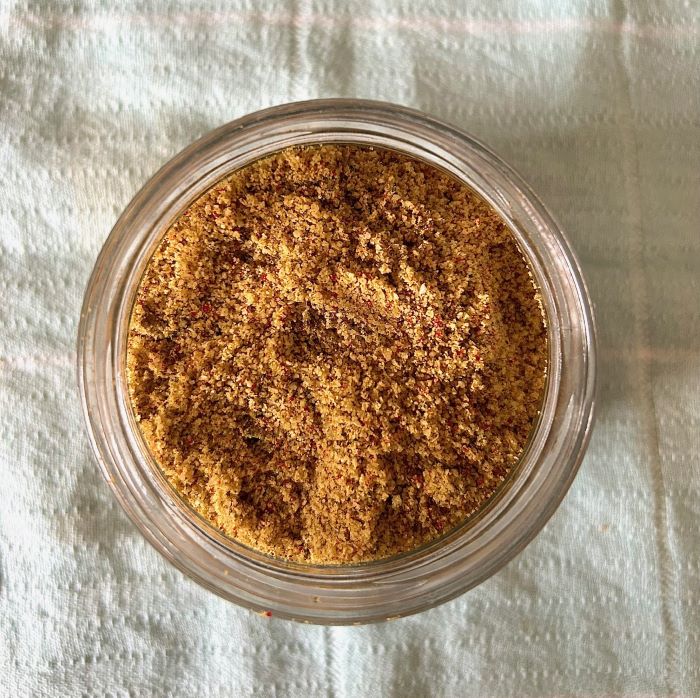
Homemade sambar powder gives you more control over both the roast and the chilli level.

Jaggery is optional; the final tadka matters much more to this version. Some Karnataka and Udupi sambars lean sweeter, while many other styles use little or no jaggery.

Best Vegetables for Sambar

Good sambar vegetables include drumstick, shallots, carrot, pumpkin, brinjal, green beans, radish, okra and bottle gourd. Three or four are plenty. There is no prize for emptying the whole vegetable drawer into one pan.

Drumstick gives the broth a distinctive green, gently earthy flavour. Pumpkin brings sweetness and can melt slightly into the liquid at the edges. Brinjal absorbs the seasoned broth and turns silky, while carrot and beans give the spoon something firmer to find.

When to Add Vegetables to Sambar

VegetableWhat it bringsWhen to add it
Drumstick (moringa)Earthy-green flavour; scents the brothFirm-vegetable stage
CarrotMild sweetness with a firmer biteFirm-vegetable stage
Small onions or shallotsSweet-savoury onion flavourFirm-vegetable stage
Green beansFresh green flavour and biteFirm-vegetable stage
Radish (mullangi)Peppery biteFirm-vegetable stage
PotatoMild starchiness; makes the bowl heartierFirm-vegetable stage
Bottle gourdMild flavour with juicy, tender piecesAfter the firm vegetables have started
PumpkinGentle sweetness; can soften into the broth at the edgesQuick-vegetable stage
Brinjal (eggplant)Silky pieces that absorb the brothQuick-vegetable stage
Okra (bhindi)Earthy-green flavour; turns silkySauté separately; add near the end

A good mixed combination might use drumstick, pumpkin, brinjal and small onions. Carrot, beans, eggplant and onion are easier to find in many supermarkets. Even onion, tomato and one substantial vegetable can make a satisfying sambar.

Cut for cooking time instead of symmetry. Smaller carrot pieces and larger pumpkin chunks have a much better chance of becoming tender together.

Vegetable timing guide showing drumstick, carrot, shallots and radish under Firm First; bottle gourd, pumpkin and eggplant under Quicker or Midway; and okra under Handle Separately.
This sambar recipe is easy to adapt when you swap vegetables by cooking speed rather than by name. Once you understand the slow, medium and quick groups, it becomes much easier to use whatever vegetables are in the kitchen.

Frozen drumstick can go straight into the simmer. No drumstick at all? Use the other vegetables and carry on.

Outside India, remember that drumstick means moringa pod, brinjal means eggplant or aubergine, hing means asafoetida, and toor/tur/tuvar/arhar are names for split pigeon peas. If drumstick is new to you, scrape or suck the soft flesh and seeds from the cooked pod and leave the fibrous outer shell behind.

Cooking with these vegetables now? Return to the step-by-step method.

Pressure Cooker, Instant Pot or Stovetop?

Choose the method according to what matters tonight: distinct vegetables, fewer dishes or speed.

MethodBest when…Trade-off
Dal and vegetables separateYou want the clearest vegetable texturesTwo vessels
Instant Pot, dal onlyYou want hands-off, repeatable dal cookingVegetables still simmer separately
Same cooker, used in stagesYou want fewer dishes without pressure-cooking tender vegetablesDal waits briefly in a bowl
True one-pot pressure methodSpeed and cleanup matter mostSofter vegetables
StovetopYou do not have a pressure cookerLongest dal cooking time

On the stovetop, soaking the dal for 1–2 hours can shorten the wait, although it is not essential. Simmer until the lentils mash without resistance; depending on their age, that may take 35–50 minutes or longer.

Sambar for Rice, Idli, Dosa and Vada

Keep sambar medium to medium-thick for rice and more flowing for idli, dosa or vada. Thin is fine; watery is not. Even when loosened, the mashed dal should travel with the broth.

Two stainless-steel plates compare thicker sambar coating white rice with more flowing sambar surrounding and soaking into soft idlis on banana leaf.
Make the final consistency decision late. It is easy to loosen sambar gradually for idli, dosa or vada; by contrast, correcting an over-thinned pot requires more simmering, which can soften the vegetables further.

With rice, spoon enough sambar over the top that the grains are coated instead of sitting dry underneath the vegetables. A dry poriyal or thoran on the side is often all the contrast the plate needs; papad, pickle and curd can round things out. This guide covers fluffy steamed rice if you need the base sorted too.

With idli, don’t be stingy. Pour the sambar over, leave the idli for a moment so the broth can soak in, then add more at the table. The separate soft idli recipe covers batter, fermentation and steaming.

Dosa wants a flowing sambar that’s easy to scoop or dip. Medu vada is even better when the outside begins to absorb the broth while the centre keeps a little of its texture. A cool South Indian coconut chutney works naturally alongside all three.

Pongal and upma are comfortable companions too. Change the pour according to the plate, not the basic balance of the sambar.

A true tiffin sambar can differ in much more than water. Some versions use moong dal or a dal blend, potato and shallots, fresh-ground masala, coconut, fried gram or a more obvious sweet note. It is its own recipe family, not diluted rice sambar.

What You Can Substitute—and What Changes

Leaving out drumstick changes one note. Replacing tamarind changes the direction of the whole sambar. No drumstick? Carrot, beans, pumpkin, brinjal and shallots can carry it perfectly well; you simply lose the characteristic moringa note.

Tomato, raw mango and other sour ingredients appear in regional sambars, but they bring their own flavour instead of imitating tamarind spoon for spoon. Treat them as a different direction for the dish, not an exact conversion.

No sambar powder? A simple emergency blend for this four-serving sambar recipe is about 2 teaspoons ground coriander, ½ teaspoon ground cumin, ¼–½ teaspoon chilli powder and a very small pinch of ground fenugreek. It moves the broth in the right direction; it does not reproduce a full roasted sambar podi. For the fuller version, use the homemade sambar powder recipe. Fresh-ground arachuvitta sambar follows another route entirely.

Curry leaves and hing shape the top notes of the finished sambar. Missing either changes the smell, but extra chilli or masala will not replace them. A simple version with few substantial vegetables also works; start with less water because the vegetables would normally contribute moisture of their own.

Why Sambar Recipes Can Look Completely Different

One recipe contains coconut. Another has no onion. One is noticeably sweet; another uses no jaggery. A third does not use packaged powder at all. Regional sambar styles vary across South India in sweetness, tang, vegetables, spice blends and serving context.

These labels point towards recipe families, not rigid formulas.

  • Everyday or rice sambar: broadly the family this recipe belongs to—dal, vegetables, tamarind and a familiar sambar-spice base.
  • Idli or tiffin sambar: usually more flowing and sometimes built with different dal, vegetables or fresh masala.
  • Arachuvitta sambar: uses freshly roasted and ground spices, often with coconut.
  • Udupi sambars: often use freshly ground spice-and-coconut mixtures; sweetness varies by recipe.
  • Kerala sambars: some styles, including varutharacha preparations, use roasted coconut and a different spice structure.
  • Sambar sadam: cooks rice and the sambar base together into a distinct one-pot dish.

Vegetable-led branches go further from there, including vengaya sambar built around small onions and mullangi sambar with radish. Authenticity makes more sense when it is attached to a place, household or particular style.

Fix My Sambar

Tastes like plain dal? Check salt and tamarind. Hot but flat? Stop adding powder. Watery? Reduce it or add mashed dal. Bitter? Suspect the tadka.

Change one thing at a time. Throwing salt, tamarind, powder and water into the pan together only hides which adjustment actually worked.

Flavour Problems

Sambar flavour troubleshooting visual showing fixes for sambar that tastes like plain dal, tastes flat, is too sour, too salty, too spicy or bitter from burnt tadka.
Flavour problems are easier to fix when you separate heat from seasoning. A sambar can be very spicy and still need salt, acidity or concentration, so adding more sambar powder may intensify the wrong thing.
ProblemLikely causeWhat to do
Tastes like dal, not sambarWeak sourness, too little salt or the sambar has not simmered together long enoughCheck salt and tamarind, then give it a brief simmer before changing anything else
Bland or flatToo much water, too little salt, stale powder or weak tadkaCorrect the salt first; reduce an over-diluted sambar; refresh the tadka when its fragrance is weak
Very hot but flavourlessChilli-heavy powder is bringing heat without much flavourLeave the powder alone and check tamarind, salt, concentration and tadka
Too sourToo much tamarind or a particularly strong productAdd unsoured cooked dal or sambar base, then rebalance the seasoning
Too saltyToo much salt or too much reductionAdd unsalted cooked dal/base and a little hot water. Sugar or extra tamarind will not remove excess salt
Too sweetToo much jaggeryAdd unsweetened base and cautiously restore sourness and spice
Too spicyStrong powder, extra chilli or bothAdd more dal/base and a little hot water, then taste again
BitterBurnt fenugreek, chilli or tadkaDiscard burnt tempering before it reaches the sambar; severe burnt bitterness is difficult to hide
Raw tamarind tasteTamarind has not simmered enoughGive it a few more gentle minutes until the sharp raw smell fades
Dusty spice tasteSambar powder needs more cooking or has gone staleSimmer a little longer; replace very dull old powder next time

Texture and Cooking Problems

Sambar texture troubleshooting guide showing watery sambar, overly thick sambar, grainy dal, vegetables cooked until they disappear, vegetables left too firm and slimy okra.
Some texture mistakes are reversible and others are not. Thick sambar can be loosened easily; however, collapsed vegetables cannot regain their shape, which is why vegetable timing matters more than chasing an exact number of minutes.
ProblemLikely causeWhat to do
WateryToo much liquid or too little mashed dalSimmer uncovered or add more cooked dal
Too thickHigh dal concentration or normal thickening as it coolsAdd hot water in 60 ml (¼ cup) increments
Dal stays grainyOlder lentils or insufficient cookingCook longer; soaking can help older dal
Vegetables disappearFirm and quick-cooking vegetables spent the same amount of time in the panAdd pumpkin and eggplant later next time
Vegetables stay hardPieces are too large, firm vegetables started late or tamarind went in too soonKeep simmering; start the firm vegetables earlier next time
Okra is very slimyToo much mucilage entered the brothSauté the okra separately before adding it
Tadka smells weakOil was not hot enough, spices were stale or the tempering sat too longMake a small fresh tadka and pour it over hot sambar

Don’t chase the colour either. Tamarind, chilli, vegetables and sambar powder all shift the final shade. If the sambar tastes balanced, don’t fix it just because another photograph looks redder or darker.

Storing, Reheating and Freezing Sambar

Sambar thickens in the refrigerator as the dal keeps absorbing liquid. The flavours often settle nicely overnight too.

Cool leftovers promptly and refrigerate them in a covered container. The USDA leftovers guidance recommends using refrigerated leftovers within 3–4 days.

How to Reheat Sambar for Idli or Rice

A little hot water brings cold, thickened sambar back quickly. Taste after loosening it because the water softens the salt and tang too. A small fresh tadka can make yesterday’s sambar smell newly made again.

Fresh mustard seed, curry leaf and dried chilli tadka being poured into reheated sambar in a steel pot, with white idlis waiting beside it.
For leftovers, reheat only as much sambar as you need when possible. Gentle reheating protects already-soft vegetables, while a small fresh tadka restores aromas that fade during chilling and reheating.

Freeze finished sambar in meal-sized portions for roughly 2–3 months for best quality. Thaw overnight in the refrigerator when practical. Eggplant and other tender vegetables become softer after freezing. Freeze the cooked dal on its own when you’d rather add fresh vegetables to a future sambar.

Dietary and Ingredient Notes

  • Vegan: use oil instead of ghee for the tadka.
  • Gluten-free: the basic dish can be gluten-free, but check packaged sambar powder and commercial hing when strict avoidance matters. Some compounded asafoetida products contain wheat flour or another carrier.
  • No onion or garlic: entirely possible; many household, temple and regional versions omit one or both. This no-onion, no-garlic peanut chutney also works well beside idli and dosa.

Back to recipe · Back to top


Your vegetables will change, one packet of sambar powder will be hotter than another, and one block of tamarind will be sharper than the next. That’s normal.

Keep the sambar a little fuller and spoon it over hot rice tonight. Loosen the leftovers tomorrow morning and let them soak into soft idli.

Posted on Leave a comment

Idli Recipe: Soft, Fluffy South Indian Idlis With Fermented Batter

Brass plate of soft South Indian idlis with one idli torn open beside sambar and coconut chutney on a dark blue set.

A really good idli feels lighter than it looks. Press one gently and it gives under your finger, then springs back. Tear it open and the middle is soft and porous, ready to drink in sambar or catch a spoonful of coconut chutney. Even ghee and podi are enough when the idli itself is right.

Most of that softness is decided before the batter reaches the steamer. Urad that never gained much air tends to stay heavy, and very stiff batter struggles to expand. Then a few unnecessary minutes of steam can firm up a batch that fermented beautifully.

That is what makes idli frustrating when it goes wrong: you soak, grind and wait overnight, then discover the problem in the first steamed plate. The finished idli usually tells you where to look. Use the 4:1 batter below as your baseline; if yours behaves differently, the later sections help trace the cause.

Quick Answer: How to Make Soft, Fluffy Idlis

Start with a 4:1 rice-to-urad ratio by weight: 400 g idli rice and 100 g urad, plus 20 g poha and ¼ teaspoon methi. Soak the rice and urad separately for about 4 hours. Grind the urad until pale, smooth and airy; grind the rice and poha separately until very fine with just a faint grain remaining.

When the two are mixed, the batter should fall from a ladle in a thick, broad ribbon and slowly settle back into the bowl. Ferment until it has risen, shows fine bubbles, feels lighter and smells clean and mildly sour.

Steam in an already hot steamer and begin checking common medium idlis around 9–10 minutes. The surface should look matte and set, and the centre should spring lightly when touched. Rest the plates for 2–3 minutes before unmoulding.

Soft & Fluffy Idli Recipe

Recipe at a Glance

YieldAbout 20–24 medium idlis, depending on mould size and fill
Rice : urad4:1 by weight
Typical hands-on prepAbout 25–35 minutes with a blender or mixer-grinder
SoakingAbout 4 hours at room temperature
FermentationFrom about 8 hours in a warm kitchen, judge by rise, bubbles, texture and aroma
SteamingBegin checking around 9–10 minutes
Plan aheadCommonly about 13–18 hours in warm conditions; cooler kitchens take longer

Making idli for breakfast? Soak in the afternoon, grind in the evening and ferment overnight. In the morning, judge the batter while the steamer heats. Most of the elapsed time is simply waiting.

Equipment

  • Kitchen scale, strongly recommended
  • Two soaking bowls
  • Wet grinder, high-speed blender or mixer-grinder
  • Large fermentation container
  • Idli plates and steamer, or another covered steaming vessel
  • Ladle and spoon for unmoulding
  • Kitchen thermometer, optional for a cold kitchen

Ingredients

Use the gram measurements when possible. Cup sizes vary between kitchens and countries; 400 g rice and 100 g urad always preserve the intended 4:1 ratio.

IngredientMetricApproximate volume
Idli rice / suitable parboiled rice400 gabout 2 cups
Whole skinned urad dal / urad gota100 gabout ½ cup
Thick poha / flattened rice20 gabout ¼ cup
Fenugreek seeds / methiabout 1 g¼ teaspoon
Fine salt6 gabout 1 teaspoon if finely ground
Cold water for urad — mixer/blender method120–150 ml½ cup to ½ cup + 2 tablespoons
Cold water for rice — mixer/blender method180–220 ml¾ cup to just under 1 cup
Oil or ghee for greasingas needed

If your salt is coarse, use the 6 g weight instead of trying to match one teaspoon exactly.

Wet-grinder note: the water quantities above are starting ranges for blade grinders. Stone grinders take water differently as the urad expands. Add it gradually and stop when the urad has become light and airy.

1. Soak the Rice and Urad Separately

Rinse the rice several times and cover it generously with fresh water. In another bowl, rinse the urad, add the methi and cover with fresh water.

Soak both for about 4 hours. About 20–30 minutes before grinding, rinse the poha and soak it separately until soft. Keep the rice and urad apart because they need different grinding textures.

Need to soak longer? Keep room-temperature soaking to about four hours. For a longer soak, refrigerate the rice and urad at 4°C / 40°F or below. The BC Centre for Disease Control’s dosa and idli food-safety guidance provides additional controls for soaking and refrigerated storage.

2. Grind the Urad Until It Looks Almost Whipped

Drain the urad and methi well. With a mixer-grinder or high-speed blender, begin with about 120 ml cold water. Grind, scrape the jar as needed and add more cold water a little at a time.

If your mixie heats quickly, chill the soaked urad first. The finished batter should be pale and smooth, but smoothness is only half the job. It should also look noticeably fuller, with fine bubbles through it, and feel light on the spoon instead of sitting there like a dense paste.

Give a warm jar a short rest before continuing.

Wet grinder: grind the urad first and add water gradually while the stones work. Stop when it is smooth, airy and clearly expanded.

Spoon lifting pale, freshly ground urad batter with a smooth, pillowy texture and fine air bubbles above a stainless-steel bowl.
Fermentation cannot fully replace aeration the grinder never built. Light, expanded urad gives the later batter more structure to work with.

3. Grind the Rice and Poha

Drain the rice and poha. For a blade grinder, start with about 180 ml cold water and add more only as needed to keep the mixture moving.

Rub a little between your fingertips. Rice is much more forgiving than the urad here. Hard pieces need more grinding, but if it went slightly smoother than intended, carry on with the batch.

Wet grinder: remove the urad first, then grind the rice and poha separately to a very fine texture with a faint grain remaining.

Thumb and forefinger rubbing a thin smear of finely ground rice batter to show its faint grainy texture.
A faint grain is enough here: once hard pieces are gone, chasing perfectly silky rice batter usually adds less than getting the urad aeration right.

4. Combine and Check the Flow

Transfer both batters to a clean container that will be no more than about half full after mixing. Add the salt and mix thoroughly.

Lift a ladleful and let it fall back into the bowl. Good batter comes down in a broad, thick ribbon, sits on the surface briefly and then slowly disappears. Heavy clumps mean it needs a little more water. Add 1 tablespoon / 15 ml at a time and stop as soon as the ribbon flows properly.

Ladle pouring idli batter in a broad, thick ribbon into a stainless-steel bowl, where it folds over itself and slowly settles.
Think of the ribbon as a hydration endpoint rather than a water measurement; rice and grinder differences can change how much water gets you there.

5. Ferment

Cover the container with a lid or plate without sealing it airtight and leave it somewhere comfortably warm.

In a warm kitchen, from about 8 hours onward, judge the batter by what has changed. It should sit higher in the bowl, show fine bubbles along the sides and feel lighter when you scoop into it with a ladle. The aroma should be gently sour and still pleasant.

Before-and-ready idli batter fermentation comparison in two clear vessels; ready batter sits higher with fine bubbles and a lighter texture.
Do not chase somebody else’s dramatic rise. Compare your own batter before and after: lift, fine bubbles, lighter body and mild tang are the useful changes.

When those signs are there, heat the steamer. Almost no movement by morning usually points to temperature first.

6. Heat the Steamer

Add enough water to create strong steam without letting it touch the idli plates. Around 1½–2 cups / 360–480 ml works as a starting point for many home steamers. Bring the water to an active simmer or boil before the filled stand goes in.

Pressure cooker: use it as a steamer with the lid on and the weight/whistle removed. Instant Pot: use a steaming setup with the valve venting. Do not pressure-cook the idlis.

7. Fill the Idli Moulds

Lightly grease the cavities. Give the fermented batter one or two gentle folds if it needs evening out, then fill the moulds about three-quarters full. For many medium plates that works out to roughly 3 tablespoons / 45 ml, but there is no need to measure each cavity.

Angled stainless-steel idli plate with the mould cavities filled about three-quarters full, leaving visible space above the batter.
Leaving headroom does more than prevent overflow: similar fill levels make the steaming time across a plate much easier to interpret.

8. Steam Until the Centre Is Set

Put the stand into the already steaming vessel and cover. Begin checking around 9–10 minutes.

Lift the lid and let the steam clear. The tops should look softly matte instead of wet and shiny. Press the middle gently; it should spring back. A skewer inserted into the thickest part should come out without raw batter.

Deeper moulds usually need a little longer. Once the centre is set, take the plate out. A cooked centre is the finish line; extra steam only makes the idli firmer.

Steamed idlis still in a stainless-steel mould with natural ivory, matte, set tops and gentle domes.
Matte, set tops and a springy centre are the cue to stop steaming; once the centre is cooked through, extra time only makes the crumb firmer.

9. Rest and Unmould

Leave the plates for 2–3 minutes. Dip a spoon in water, slide it around the edge and lift each idli gently from underneath.

Break the first one while it is warm. An open, moist crumb means the timing is right for the remaining plates.

Close-up of a freshly torn idli showing a moist, airy interior with many small, irregular interconnected pores.
Treat the first warm idli as feedback on the whole process. Open, moist crumb suggests the batter had enough structure and the steamer stopped in time.

If that first plate is already soft and airy, keep going. If not, use the shortcuts below to trace the batter, fermentation or steamer.

Need help with the batter or your finished idlis? Rice & Urad · Ratio · Grinder Guide · Batter Consistency · Fermentation · Steaming · Troubleshooting · Scaling · Storage

Choosing Rice and Urad for This Batter

Start With Idli Rice

Use idli rice or Ponni parboiled rice when available. Sona Masoori also works; adjust the water as needed and expect a somewhat different crumb. Basmati and other aromatic long-grain rice are less predictable for this style of idli.

Outside India, Indian groceries commonly carry bags labelled Idli Rice, Ponni Boiled Rice or Ponni Parboiled Rice. Idli rava belongs to a different method and should not replace the whole rice cup-for-cup.

Fresh Urad Matters More Than Whole vs Split

Whole skinned urad, often sold as urad gota, is an excellent choice, and split skinned urad works too. Buy from a shop with good turnover when possible. Fresh urad usually hydrates and expands better; older stock can become perfectly smooth in the grinder and still stay disappointingly heavy.

Markedly yellowed or tired-looking dal can suggest age, although colour by itself is not a reliable date stamp.

Five labeled bowls showing idli rice, Ponni parboiled rice, Sona Masoori, whole skinned urad gota and split skinned urad.
At the shop, get into the right rice family first; then prioritise good-turnover urad instead of obsessing over whole versus split.

About the poha and methi: excellent idlis can be made from rice, urad, water and salt alone. This version uses 20 g poha for a little extra softness and only ¼ teaspoon methi. No methi? Make the batter without it.

An ivory or off-white idli is normal. Texture matters far more than chasing a perfectly white surface.

For a millet version, use a batter designed around the grain instead of replacing the rice here. Our Fermented Ragi Idli uses its own balance of ragi, rice, poha and urad.

Why the Rice-to-Urad Ratio Can Vary

For this recipe, use 4:1 by weight: 400 g rice to 100 g urad. Other excellent idli recipes use 3:1, 5:1 and more rice-heavy ratios because urad quality, grinder performance and additions such as poha all change the way the batter behaves.

Keep the 4:1 base while you learn the recipe. Heavy idlis are better diagnosed through the grind, batter thickness and steaming before you start changing the dry ratio.

Two kitchen scales show 400 grams of rice and 100 grams of urad for a 4:1 ratio by weight, with poha, methi and water cues below.
Holding the 4:1 ratio steady makes troubleshooting easier: changes in texture are then easier to trace to grinding, hydration or steaming.

Wet Grinder, High-Speed Blender or Mixer-Grinder?

If you own a wet grinder, use it; it is the easiest of the three for building highly aerated urad. A powerful blender is the fastest. A regular mixie also works well when you keep the urad cold, avoid overloading the jar and add water gradually.

Comparison of a wet grinder, high-speed blender and mixie with short notes about water, heat, circulation and batch size.
The ingredients may be identical, but the failure points change: stone pickup, blender circulation and mixie heat each deserve a different kind of attention.

Wet Grinder

A wet grinder works slowly and generally keeps the batter cooler. Grind the urad first, adding water gradually as the stones work, until it is smooth, airy and clearly expanded. The texture is the useful endpoint here, not an arbitrary number of minutes.

Some large wet grinders struggle with only 100 g dry urad because the soaked dal forms too shallow a layer. If yours is barely being picked up by the stones, double the recipe or use a smaller grinder.

High-Speed Blender

A powerful blender moves fast, and the batter can heat fast with it. Use cold water, leave enough room for the mixture to circulate and stop when the urad is airy and noticeably larger in volume.

Regular Mixer-Grinder

An everyday Indian mixie works well for idli batter. Chill the soaked urad if the machine heats aggressively, drain it well and work in manageable batches.

Urad that stays dense even after the water, heat and batch size are under control may simply be meeting the limits of that particular jar and blade setup.

Reading the Batter When Something Looks Off

Smooth Urad That Never Became Airy

If the urad is perfectly smooth but still sits heavily on the spoon, do not let the smoothness fool you. The useful change is the extra air and volume: well-ground urad feels much lighter and contains fine bubbles throughout.

Side-by-side freshly ground urad batter comparison: smooth but dense batter on the left and more expanded, airy batter with fine bubbles on the right.
A dense urad batter can be perfectly smooth and still ferment. It simply begins with less trapped air for the mixed batter to expand around.

A small drop often floats in water when the urad has trapped plenty of air. Treat that as one clue, not a verdict on the finished batter.

Rice That Went Too Smooth—or Stayed Too Coarse

Hard rice pieces need more grinding. Completely smooth rice batter is much less worrying; continue with the batch.

Too Thick, Right or Too Thin?

StateWhat You SeeWhat It Can Cause
Too thickFalls in clumps and leaves pronounced moundsSlower expansion and dense idlis
Good rangeFalls in a thick ribbon that slowly disappearsEnough moisture while still holding height
Too thinPours quickly and levels almost immediatelyFlat, weak or sticky idlis

Too-stiff batter is easy to loosen a tablespoon at a time. Make the last water additions slowly; once the batter pours freely, taking that water back out is much harder.

Three matched ladles compare idli batter that is too thick, correct with a broad thick ribbon, and too thin with a narrow fast-flowing stream.
Use these states to choose a direction, not an exact water number: heavy ridges need cautious loosening; a fast pour means stop adding water.

Fermenting Idli Batter in Warm and Cool Kitchens

An overnight ferment in a hot kitchen and one in a cold apartment are not the same job. If you can control the temperature, around 28–30°C / 82–86°F is a useful working range.

Kitchen / Batter EnvironmentWhat to Expect
About 28–30°C / 82–86°FBegin checking around 8 hours, then judge by the batter itself
About 25–27°C / 77–81°FA slower rise is normal
Below about 24°C / 75°FGive the bowl gentle, controlled warmth
Very warm kitchenFermentation moves faster, so check earlier

For a Cold Kitchen

A switched-off oven with its light on can provide a warmer spot. With an Instant Pot, use Yogurt/fermentation mode with a loose or glass lid; do not seal the pot for pressure. The batter still decides when fermentation is finished, so do not run the full programmed cycle blindly.

A kitchen thermometer is useful when you are unsure how warm the space really is. Gentle warmth is enough.

Cold-kitchen fermentation guide showing batter in a switched-off oven with the light on and in a loose-lidded cooker on yogurt mode, with a 28–30°C temperature cue.
Use an oven light or Yogurt mode for gentle warmth, then judge readiness by the same rise, fine bubbles, lighter body and mild tang as usual.

Ready batter usually gives several clues together: it sits higher in the container, fine bubbles appear along the sides or surface, the batter feels lighter when you scoop through it, and the aroma has developed a mild fermented tang.

Does Idli Batter Have to Double?

No. A big rise is encouraging. Read it together with the bubbles, lighter texture and aroma. A lively batch can be ready without matching somebody else’s dramatic before-and-after photograph.

My Batter Didn’t Rise Overnight. What Now?

A cold kitchen may simply need more time and a warmer spot. If the batter was already kept comfortably warm, compare its consistency next. Very thick batter struggles to expand; very loose batter may bubble without building much height. Dense urad gives fermentation less airy structure to work with.

Fix those fundamentals before reaching for Eno, baking soda or yeast. Extra gas does not repair a poorly ground or badly balanced batter.

How to Steam Idli Without Guessing

Idli recipes give different steaming times because steamers and moulds differ. A shallow cavity in a compact stovetop steamer does not cook like a deep cavity halfway up a tall stack.

Start with an already hot steamer and fill the cavities to roughly the same level. About three-quarters full is a useful visual guide. Those two habits remove much of the variation before the timer starts.

Use the First Plate to Calibrate Your Steamer

With an unfamiliar steamer or mould, cook one plate before filling every rack. Begin checking the centre around 9–10 minutes.

A wet centre needs another minute or two. Dry, firm idlis mean the next plate should come out earlier. Once you know your moulds and steamer, the timing becomes routine.

Bottom plate wet while the others are fine? Its position is the first suspect, not the batter. It may be sitting unusually close to the boiling water or catching more condensation.

Three idli examples show a wet centre needing more steaming, a dry firm idli needing less time, and a just-right idli for setting the steamer timing.
Your first successful plate becomes a local calibration for that mould and steamer, so the next batch starts with evidence instead of a generic timer.

No Idli Stand?

Use shallow heat-safe cups or small bowls inside a covered steamer. Grease them lightly and leave room for expansion.

Cups are often deeper than idli moulds, so the centre usually needs a little longer. Judge doneness by the set surface and springy middle instead of treating 9–10 minutes as an exact promise.

Standard stainless-steel idli plate beside several shallow heat-safe cups and bowls used as substitutes; deeper cups may need longer steaming.
Substitute vessels do not cook by capacity alone: a deeper centre changes the steaming job even when two cups hold roughly the same amount.

What Went Wrong With Your Idli?

The cooked texture usually narrows the possibilities quickly. Change one thing at a time.

What Happened?Start HereNext Move
Hard + denseUrad aeration, thick batter, steamingLoosen the remaining batter if needed and shorten the next steaming test
Hard despite a good riseBatter thickness and steamingConfirm the batter still has a thick-ribbon flow, then take the next plate out earlier
Hard + flatFermentation and urad aerationFor the next batch, revisit warmth, dal freshness and how much volume the urad gained
Soft but flatLoose batter or heavy post-fermentation mixingAdd no more water and handle the remaining batter gently
Dry / rubberyToo much steamingShorten the next plate
Soft hot, noticeably hard once coolSteaming time and moisture lossTake the next plate out as soon as the centre sets and keep cooked idlis covered
Wet / gummy centreWeak steam, deep fill or undercookingImprove the steam and cook only until the middle sets
Sticks to the mouldRest, greasing and donenessRest 2–3 minutes and loosen with a wet spoon
Batter barely roseTemperature, consistency, uradWork through the fermentation section
Too sourContinued fermentationRefrigerate and use it for dosa or paniyaram
Four cut idlis compare a moist airy crumb, a dense compact crumb, a wetter gummy centre, and a drier more rubbery crumb.
Use the crumb to narrow the search before changing anything: weak structure, an unset centre and excess steaming leave different signatures.

My Batter Fermented Beautifully. Why Are the Idlis Hard?

If the batter rose well but the idlis are hard, consider batter thickness and steaming before extending fermentation. Urad should have been airy, not merely smooth. The mixed batter should have flowed in a thick ribbon instead of sitting in heavy lumps. Vigorous mixing after fermentation can knock out some of that volume, while idlis left over steam after the centre has set become firmer.

A nicely shaped idli that feels dry and resistant often points toward steamer calibration. By contrast, a heavy crumb from edge to centre sends you farther back toward the urad and water.

Two cut idlis compare a dry, well-shaped later-stage steaming problem with a fully cooked but heavy, dense earlier-stage batter problem.
Use the finished idli to decide how far back to investigate: dry but well-shaped points late; uniformly heavy crumb sends you back toward the batter.

Flat Idlis: Soft or Hard?

Hard, flat idlis often go with weak fermentation, poor urad aeration or batter that stayed too heavy. A flat idli that stays soft points more toward loose batter or vigorous stirring after fermentation.

Two low-profile idlis and their cut sections compare a flat idli with a soft open crumb and a flat idli with a harder, tighter crumb.
Shape alone does not diagnose a flat idli; the texture inside decides which branch of troubleshooting is worth following.

Sticky Mould or Gummy Crumb?

An idli that is cooked through but sticks to the mould may simply need another minute of rest, better greasing or a wet spoon. A gummy centre is a different problem: mould fill, steam strength and unusually loose batter are the first places to investigate.

Comparison showing a properly cooked idli sticking to its stainless-steel mould on the left and an idli with a wetter under-set gummy centre on the right.
Surface release and internal doneness are separate signals: better greasing or resting can help sticking, but it will not cure an unset centre.

Cooked Outside, Raw in the Middle?

Start with the steamer. Weak steam, unusually deep moulds or cavities filled almost to the rim can leave the middle behind. Correct the steam and fill before changing the batter.

Once you know what changed, return to the full idli recipe for the next batch.

How Much Batter Do You Need for 20, 50 or 100 Idlis?

Mould capacities vary enough that exact counts are misleading. Use these as planning quantities, then note what one batch actually gives you in your own plates.

Planning GoalRiceUradPoha
About 20–24 idlis400 g100 g20 g
About 40–48 idlis800 g200 g40 g
Plan for at least 501 kg250 g50 g
Plan for at least 1002 kg500 g100 g

Scale the methi and salt by the same factor. For a large batch, grind several normal-sized loads instead of packing one jar or wet grinder too full, and divide the mixed batter between roomy fermentation containers.

Scale the dry ingredients mathematically; add grinding water by texture. Five batches will not necessarily need exactly five times the water.

Before steaming for a crowd, make one plate first.

Five-step large-batch idli workflow showing weighing ingredients, grinding in batches, leaving fermentation headroom, judging water by batter texture and testing one idli plate before a large serving.
Scaling ingredients is arithmetic; scaling the process means protecting grinder load, fermentation headroom and steam consistency as the batch grows.

Need exactly 1 kg of finished batter? Weigh one successful mixed batch in your kitchen first. Final batter weight changes with draining and grinding water.

Fresh Batter, Day-2 Batter & Leftover Idlis

Fresh vs Refrigerated Batter

For the softest idlis, use the batter fresh or during the first day or two after refrigeration. Fermentation continues slowly in the fridge, so the batter becomes more sour and may loosen, separate slightly or occasionally become more gelled.

If the fresh batter made excellent idlis and the refrigerated portion later behaves differently, use the older batter for dosa, uttapam or Kuzhi Vegetable Paniyarams. Should this happen often in your kitchen, steaming a few extra idlis while the batter is at its best is perfectly sensible.

Three-stage storage guide showing fresh idli batter, refrigerated batter for dosa, uttapam or paniyaram, and cooked idlis stored for chilling or freezing.
When refrigerated batter remains sound but loses its best idli texture, the extra tang often suits dosa, uttapam or paniyaram better.

Keep refrigerated batter at 4°C / 40°F or below. The BCCDC guidance for controlled dosa/idli processes describes refrigerated holding of roughly 5–7 days, but those controls are not identical to every home recipe. Use the batter much earlier for the best idli texture.

Some liquid separation can happen as fermentation continues, so do not judge the batter by that sign alone. Visible fuzzy mould, unusual pink or orange patches, or a clearly rotten or otherwise off smell are reasons to discard it. If you are unsure about its safety, discard it.

Storing Cooked Idlis

Keep freshly steamed idlis covered while the next plates cook. Idlis that are wonderfully soft when hot but noticeably hard once cool often benefit from a shorter steam on the next batch.

Cool leftovers promptly and refrigerate them in a closed container. Reheat briefly with steam, or microwave under a damp paper towel in short bursts until hot throughout. Cooked idlis also freeze well and can be steamed straight from frozen until hot throughout.

Can You Make Dosa With This Idli Batter?

Yes. Scoop out only what you need and thin it gradually with water until it spreads comfortably across a hot tawa. Slightly older batter works especially well for dosa and uttapam because the stronger tang suits them.

This is an idli-first 4:1 batter, so it may not spread or crisp exactly like a batter designed specifically for very thin, crisp masala dosa.

Four-step visual showing the main idli batter left unchanged, a portion transferred to another bowl, water added gradually, and the thinner batter spread on a hot tawa.
Keeping dilution outside the main batch preserves your option to steam more idlis later instead of committing all the batter to dosa.

What to Serve With Idli

A hot idli is mild enough to work with something cool and creamy, a bowl of sambar, or a dry podi-and-ghee plate.

Coconut chutney: cool chutney against a hot idli is hard to improve upon. Make our South Indian Coconut Chutney while the final plates are steaming so both arrive fresh.

Sambar: break an idli into the hot broth and leave it for a few seconds. The edges soften first, the centre stays springy, and the open crumb fills with sambar.

Torn soft idli partly dipped into orange-red sambar, with the porous upper crumb visible as sauce soaks into the lower edge; coconut chutney sits behind it.
Those interconnected pores are functional: they hold sambar inside a soft idli while enough structure remains for the crumb to stay tender rather than dissolve.

The Next Batch Gets Easier

The second or third batch is easier because you already know how the batter moved through your grinder and how long your moulds needed over steam. If something changes, the finished idli gives you somewhere to start.

Lift the lid, let the steam clear and ease an idli from the plate while it is still warm. Spoon over chutney or sambar, or keep breakfast simple with sesame oil or ghee and our Idli Podi / Milagai Podi.

Back to recipe ↑ · Back to top ↑

Posted on 1 Comment

Perfect Dosa Idly Batter: Your Guide to Fluffy Idlis and Crispy Dosas

If you’ve ever craved the authentic taste of South Indian cuisine, you know that a good dosa and idly batter is the foundation of many delicious dishes. Making the perfect batter might seem daunting, but with a few simple steps and some patience, you can master the art at home. Here’s a step-by-step guide to help you prepare a versatile batter that will yield fluffy idlis and crispy dosas.

Ingredients:

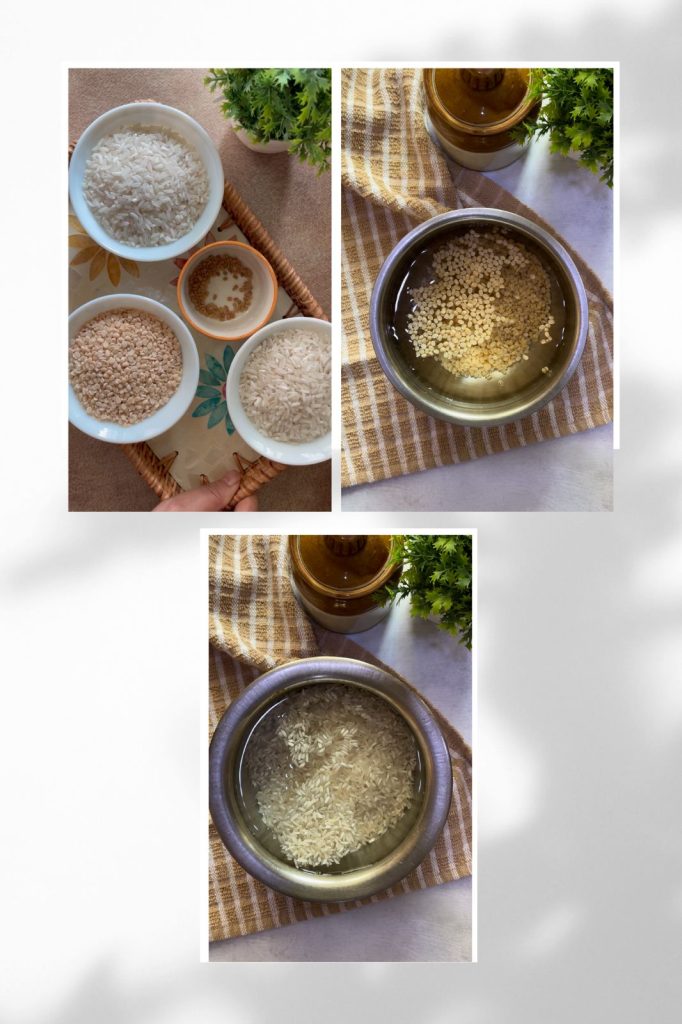
  1. 2 cups rice
  2. 1 cup urad dal (split black gram)
  3. 1/2 teaspoon methi seeds (fenugreek seeds)

Method:

Begin by washing the rice and urad dal separately under running water until the water runs clear. This helps remove any impurities. In a large bowl, soak the rice in enough water to cover it by about 2 inches. In another bowl, soak the urad dal and methi seeds together. Let them soak overnight or for at least 5-6 hours
After soaking, drain the water from the urad dal and methi seeds. Transfer them to a wet grinder or a high-powered blender. Add a little water and grind until you get a smooth and fluffy batter. Transfer this to a large mixing bowl.

Next, drain the water from the rice and grind it to a slightly coarse paste, adding water as needed to facilitate the grinding process. The rice batter should have a bit of texture and should not be completely smooth.

Combine the rice batter with the urad dal batter in the mixing bowl. Add salt as per your taste and mix well to ensure both batters are well incorporated.

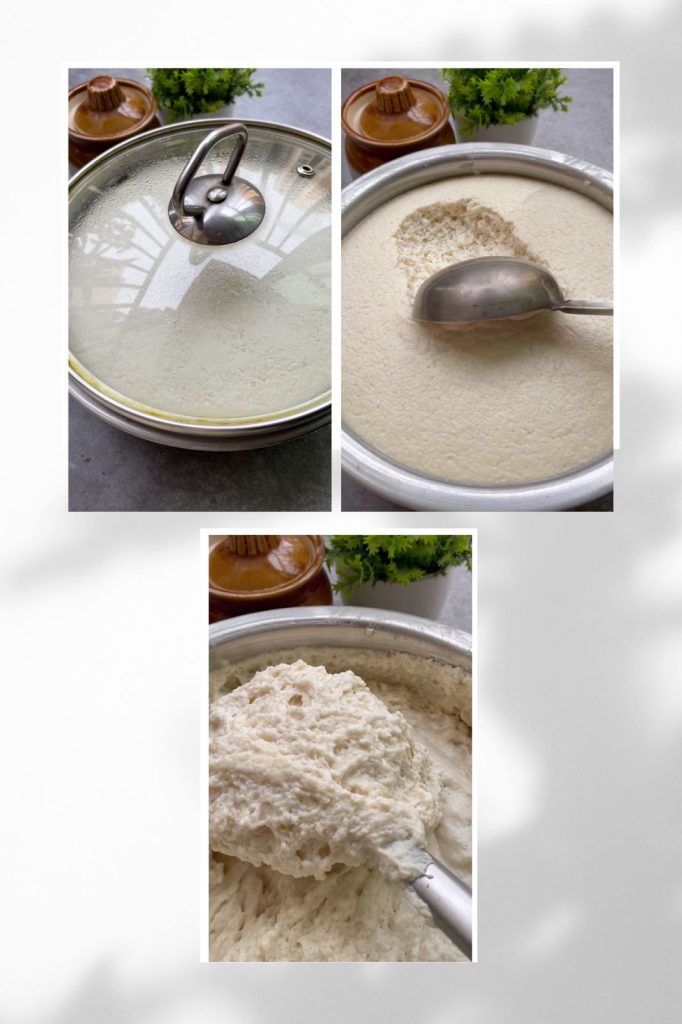
The fermentation process is crucial for achieving the right texture and taste. Cover the bowl with a lid or a clean cloth.

Place the batter in a warm spot to ferment. During warmer months, you can keep it in sunlight for 2-3 hours. Alternatively, you can place it in an oven or microwave (turned off) with the light on to create a warm environment. It typically takes about 6-8 hours for the batter to ferment fully.

You’ll know the batter is ready when it has doubled in size and has a slightly frothy, bubbly appearance. The batter should also have a pleasant, slightly sour aroma.
Tips for Perfect Dosas and Idlis:

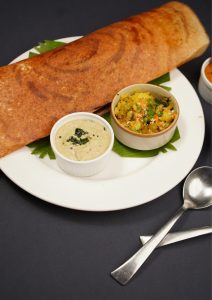
For Dosas: Ensure the batter is slightly runnier. When pouring the batter on the hot tawa (griddle), spread it thinly to achieve crispiness.
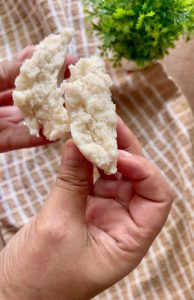
For Idlis: The batter should be thick yet pourable. Grease the idli molds with a little oil, pour the batter, and steam for about 10-15 minutes or until a toothpick inserted into the idlis comes out clean. you can also explore our other recipe of idli Fermented RAGI (Finger Millet) IDLIS- Gluten Free | Gut Friendly | Breakfast Recipe.
This homemade dosa and idly batter is versatile and can be stored in the refrigerator for up to a week. Just make sure to bring it to room temperature before using it. Whether you enjoy soft, fluffy idlis or golden, crispy dosas, this batter will help you recreate the authentic flavors of South Indian cuisine right in your kitchen. Give this recipe a try and let us know how it turns out! Share your experience and any tips you might have in the comments below.

If you try this recipe, do give us a shout out. Just click a picture and tag us on @masala.monk or use the hashtag #MasalaMonkRecipe and share on Instagram and Facebook. We would love to hear from you. 🙂Happy cooking!
Posted on Leave a comment

Idli Podi | Milagai Podi Recipe

If you have never heard of podi before, podi is a flavourful South Indian coarse spice powder condiment made with lentils, seeds and spices and served with Idlis. But for most fans, you can say podi is an emotion. It is like a flavour imbibed in every bite. Podi is a general South Indian word that means “powder”. In the Tamil language, the word milagai means red chilies and podi means powder. Idli podi is always served with ghee or sesame oil. There is a popular dish in South India where idlis are smeared with podi and ghee or sesame oil. But Idli Podi is not just limited to idlis. You can serve podi with paniyarams, sprinkle it on dosas, uttapams or make podi rice. Its main purpose is to add flavour to a meal, sometimes when certain spices are involved, podis can aid digestion too.

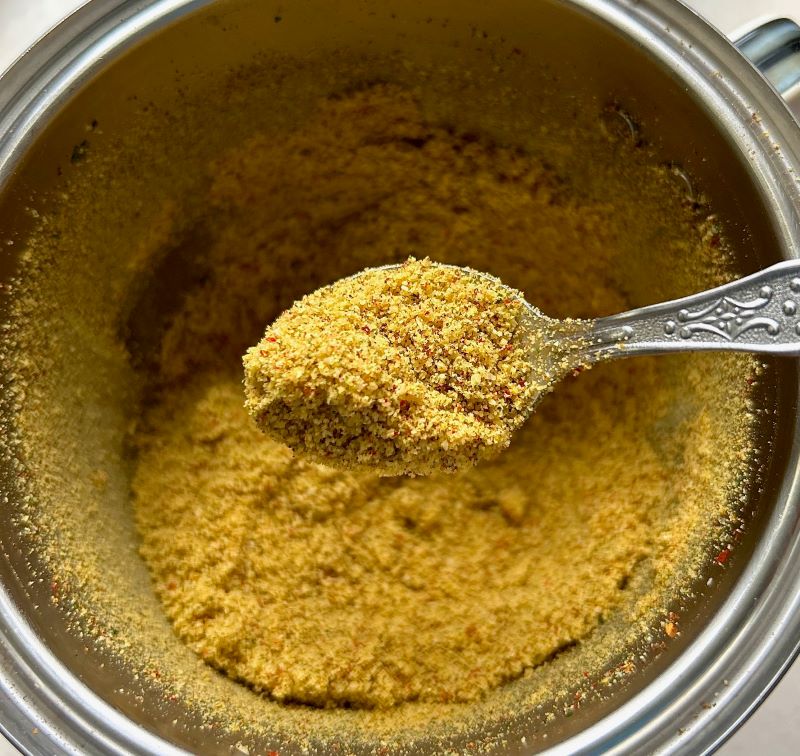
The flavour of podi is quite unique and tasty. There is a slight crunch in it that comes from roasted lentils. The nutty taste comes from sesame seeds with some smokiness and pungency from red chilies and other ingredients.

You can try serving podi with Ragi Idli. They pair beautifully with podi and other sautéed vegetables and makes a healthy, gluten free breakfast.

The recipe is pretty simple. You just have to roast the ingredients and grind everything together. There is some spiciness and heat in a typical milagai podi but you can control the heat as per your preference. There are variations to idli podi where some like to add dry coconut, curry leaves or peanuts.

There is another variation of idli podi called as gunpowder which is spicy and includes more red chilies as well as garlic.

The podi recipe that I am sharing with you is a recipe that I have been making for years now. There is always a jar of podi at my house. I like to add this powder in Masala Idli, sprinkle it on dosa, serve it with paniyarams or make podi rice with ghee. 

Tips for making Idli Podi

  1. Always use fresh spices and lentils to make podi. 
  2. It is always better to soak lentils for an hour in warm water and dry them with cotton kitchen towel before roasting. 
  3. I always add sesame seeds to make podi. It gives a great flavour and also is super nutritious. You can skip it if you like. You can use either black or white sesame seeds. 
  4. Rinse curry leaves with fresh water and then pat dry them with a kitchen towel. 
  5. Do not roast sesame seeds for long or it will taste bitter. 

Let’s see how you can make this flavour bomb.

Recipe: makes approx 200 grams

Ingredients: 

  • Urad dal: 1/2 cup
  • Channa dal: 1/4th cup
  • Curry leaves: 1/2 cup
  • Sesame seeds: 1/4th cup
  • Dried Red Chillies: 12-15 (add more if you like)
  • Mustard seeds: 2 tsps
  • Hing/Asafetida: 1/4th tsp
  • Oil: 2 tbsps
  • Salt as per taste

Method: 

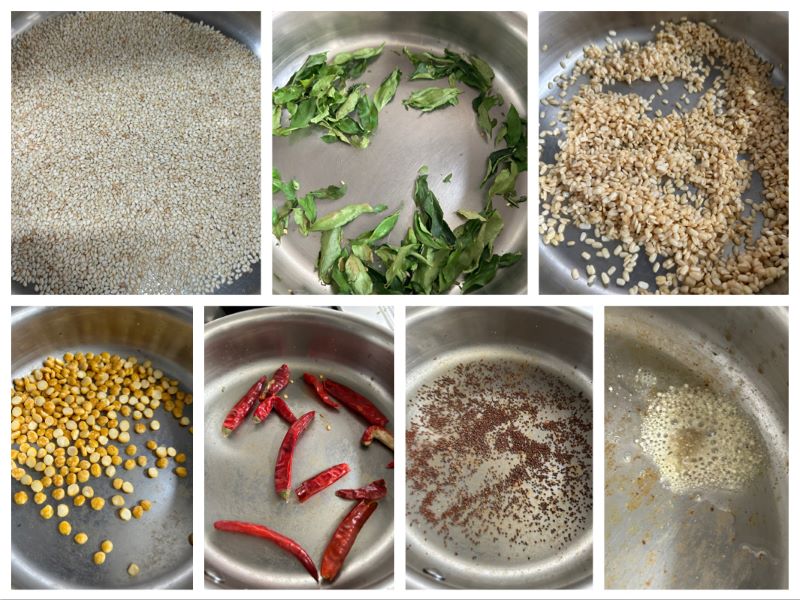
  • Wash and soak both the lentils separately for an hour in warm water. This step is optional. You can just wash the lentils, pat dry and roast them but soaking helps to soften the lentils and makes them easy to digest.
  • Bring a wide heavy bottom pan to medium heat. Add sesame seeds and roast them till they become slightly brown and start crackling and popping. Set aside in a large plate.
  • Roast curry leaves till the leaves become crisp and shrink in size. Set aside.
  • Now add washed, soaked and towel dried urad dal. Roast till golden brown and fragrant. Set aside. 
  • Add channa dal and roast. Chana dal takes longer to roast. It should get browned or golden. For uniform cooking and color, keep on stirring them often.
  • Now add a tbsp of oil and roast dry red chilies on a low flame. Roast till you get a pungent smoky aroma from chilies. Set aside
  • Next add mustard seeds and roast them till they start crackling and popping in the pan. Set aside.
  • Lastly, add a tbsp of oil and cook asafoetida or hing in it for 10-15 seconds. Mix it with the other roasted ingredients.
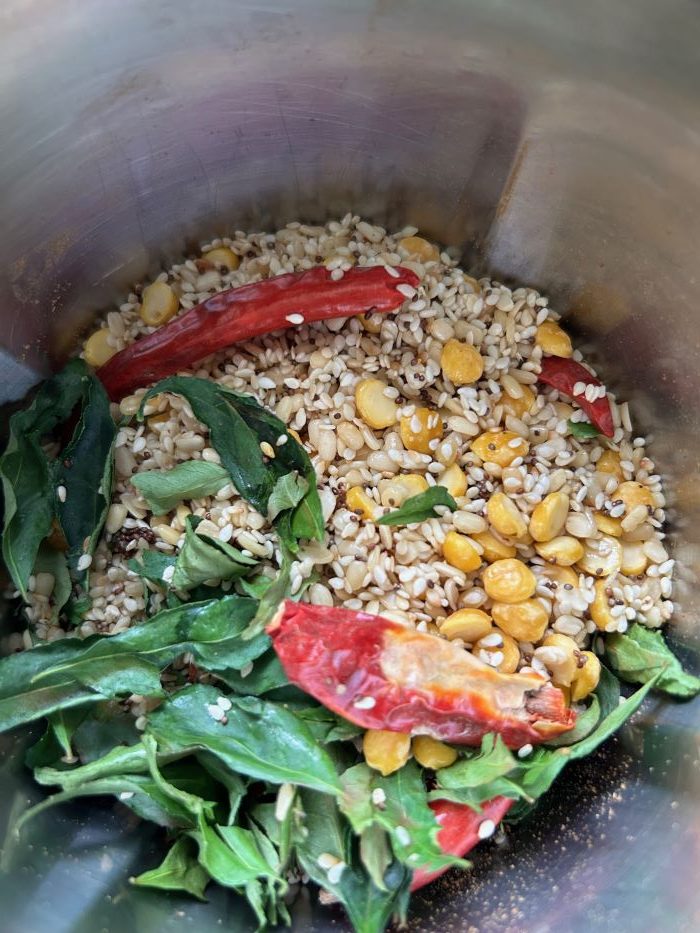
  • Once everything is well roasted, put it all in a blender. Add salt to taste and grind well. Grind in intervals of some seconds to a coarse powder. Do not grind in one go for long as the sesame seeds will release oil.
  • Store Podi in an airtight glass jar. The powder will last you almost a year.

Happy Cooking!! 🙂

Do give this recipe a shot. If you try this recipe, do give us a shout out. Just click a picture and tag us on @masala.monk or use the hashtag #MasalaMonkRecipe and share on Instagram and Facebook. We would love to hear from you. 🙂

Posted on 1 Comment

Kuzhi Vegetable Paniyarams Recipe

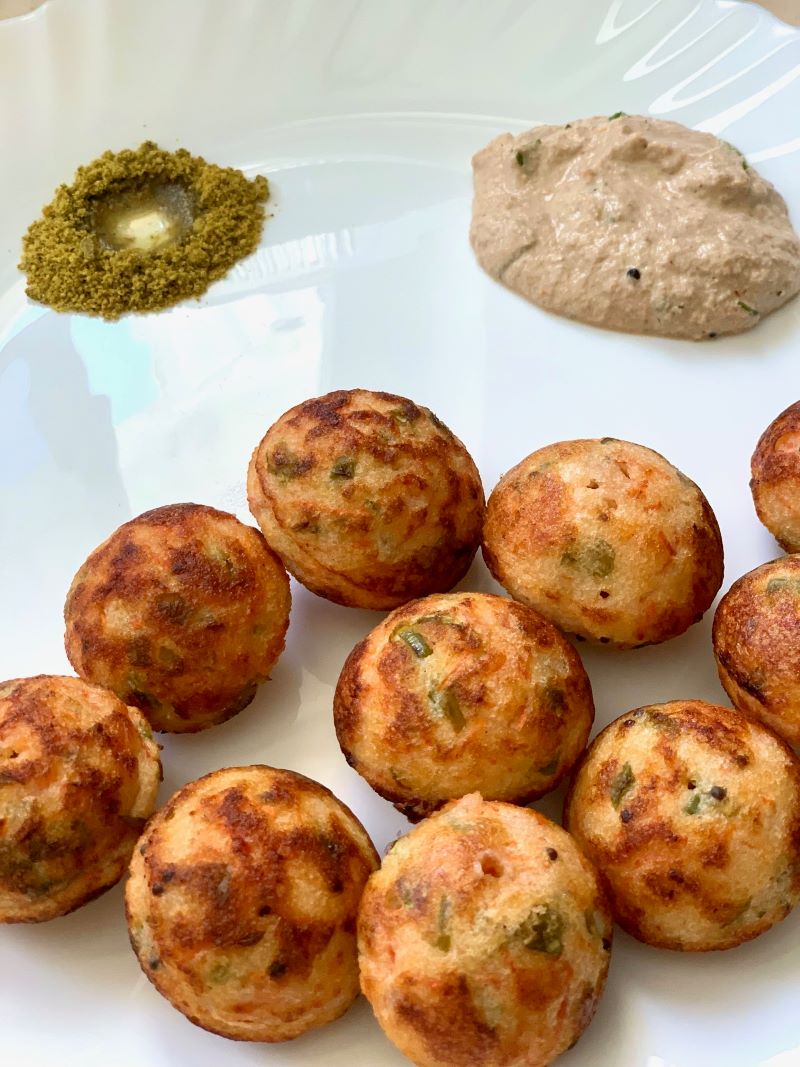
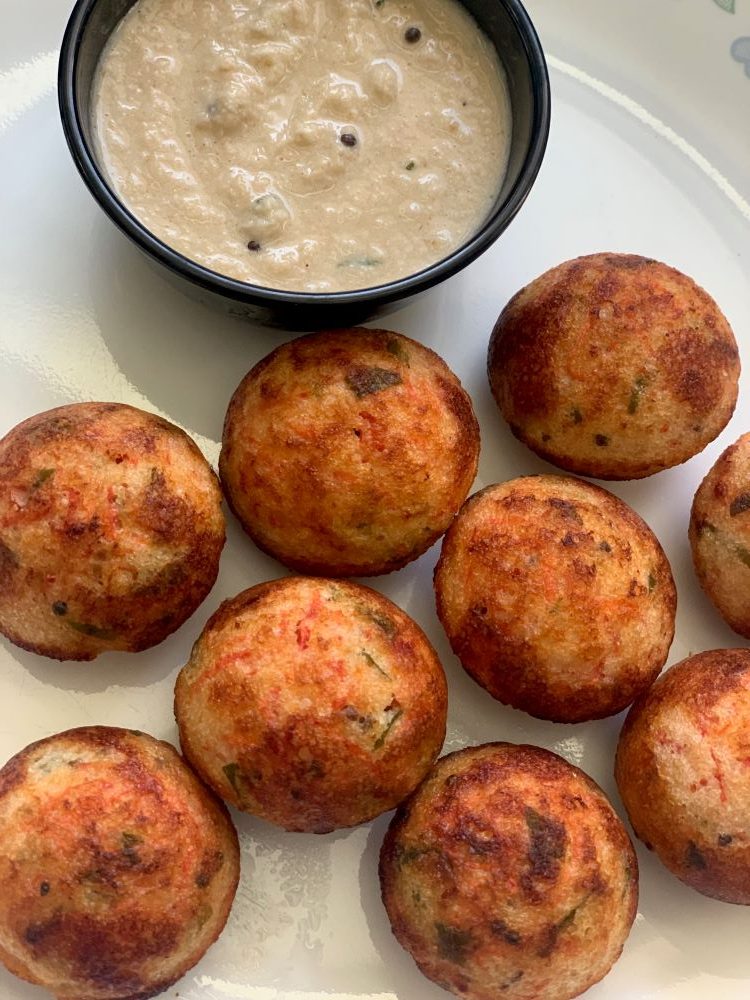
Vegetable Paniyaram or Appe/Appam as it is commonly known is a South Indian breakfast recipe made from idli/dosa batter and known as kuzhi Paniyaram in Tamil, Paddu in Kannada, and Gunta Ponugulu in Telugu. It’s the best way to use idli dosa batter if the batter has turned sour after a couple of days. It is perfect for kids too as it is extremely healthy, has a good dose of vegetables and looks colourful and attractive. My kid loves it and often asks for it especially in his school tiffin. He would take extra to school as requested by his friends. 🙂

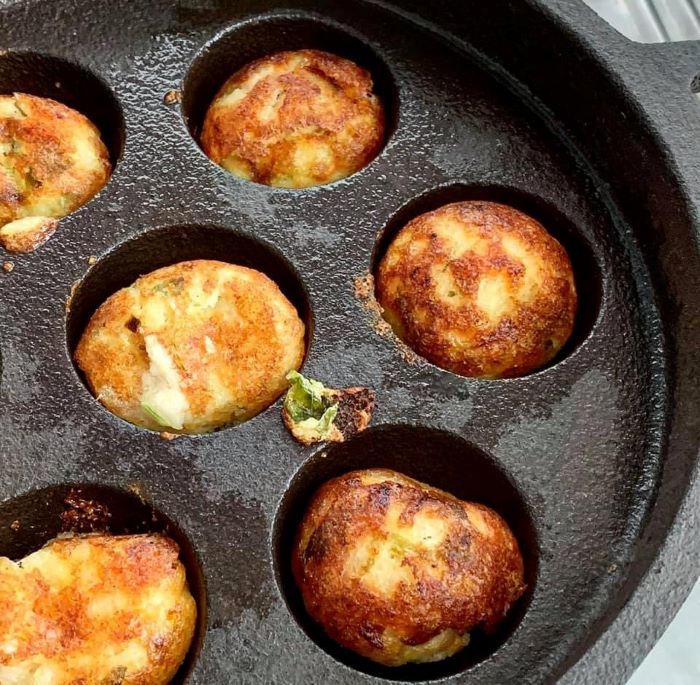
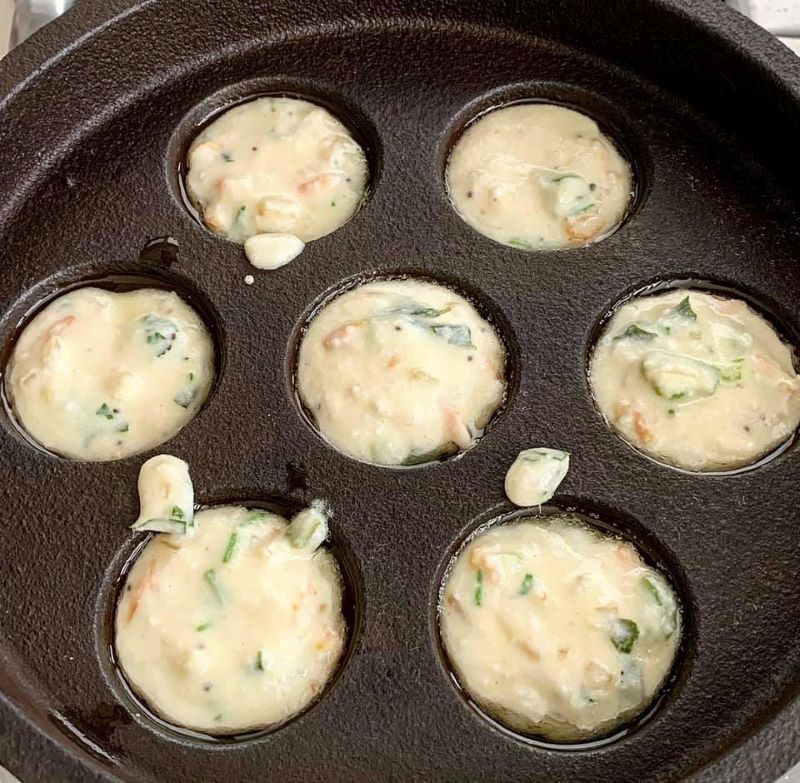
Some years back my uncle gifted this cast iron Paniyaram pan (appe pan) to me and it has been my most treasured kitchen possessions. Since then my obsession with appe pan started and I make not only paniyarams in it but also fritters, little pancake balls, patties, bread rolls, falafel, kofte and dahi bhallas. Basically, anything that you need to shallow or deep fry can be made in appe pan with much less oil. 

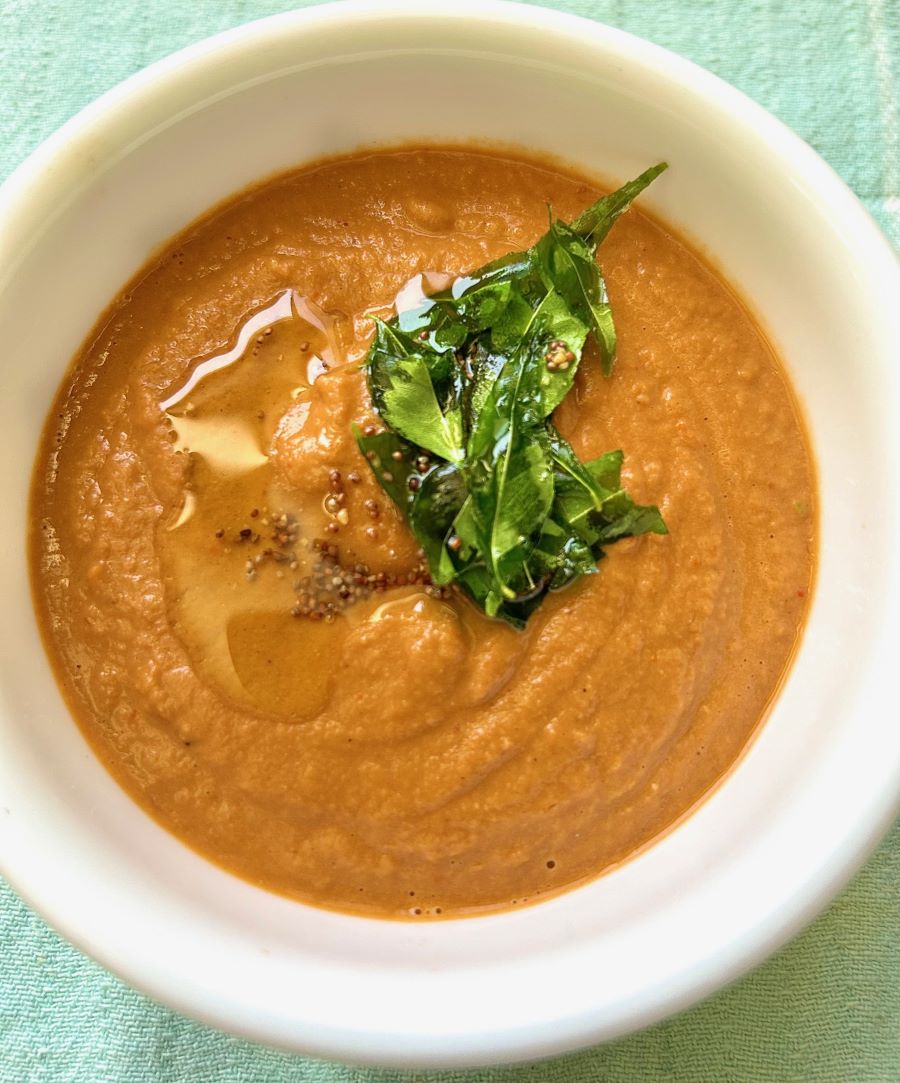
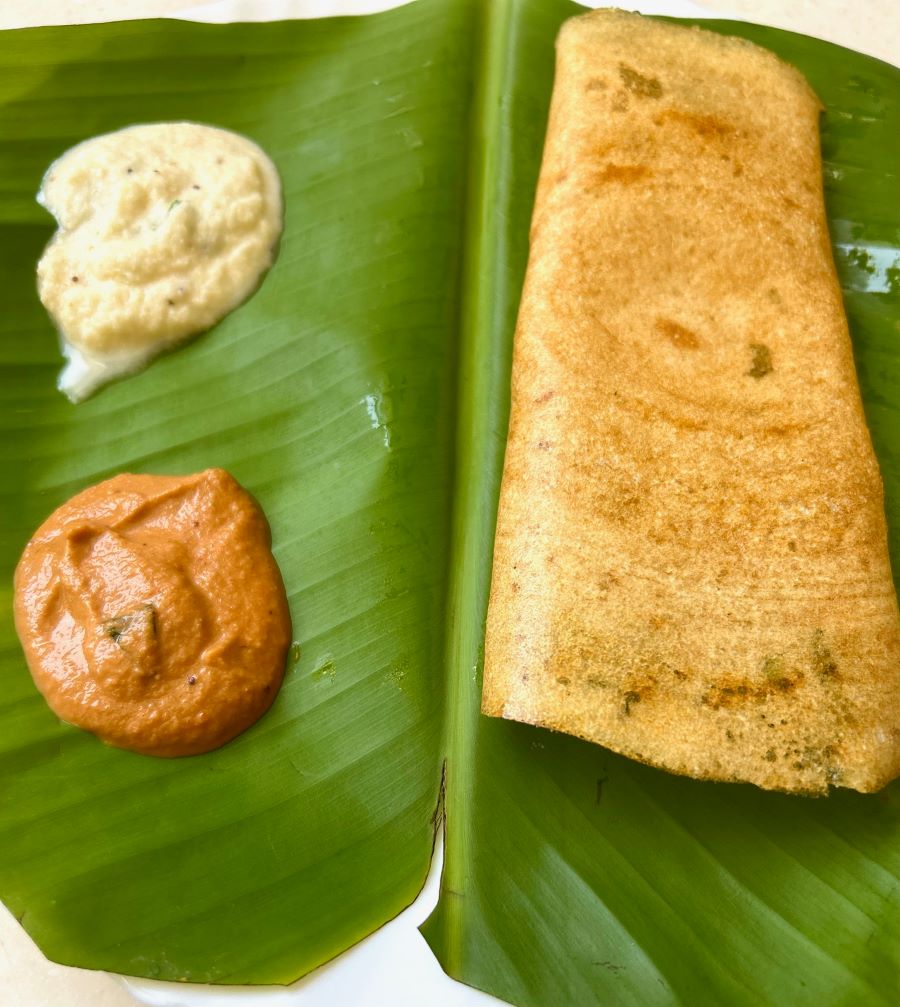
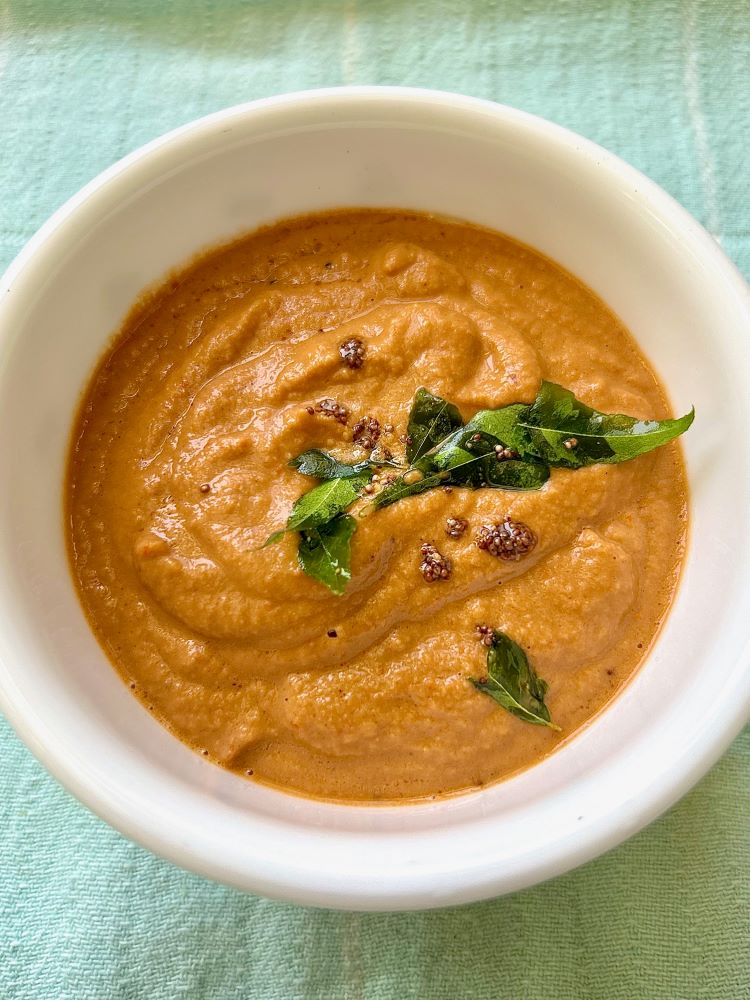
I like the instant version of Vegetable Paniyaram – it is quick to make with leftover idli/dosabatter. The last few cups of idli batter might not always yield soft idlis or make soggy dosas. I add mixed sautéed veggies with some spices into the leftover idli batter and it turns into flavourful paniyarams which I often serve with Coconut Chutney or Kara Chutney.  They are really crispy on the outside and soft on the inside.

Check out this recipe below. If you have leftover Idli batter you can use that. In the recipe below I’ll share with you the recipe of fresh batter

Recipe: makes 20-25 paniyarams 

Ingredients 

For the Batter

  1. White Split Urad Dal: 1/2 cup
  2. Bengal Gram/Channa Dal: 1/8th cup
  3. Fenugreek Seeds: 1 tsp
  4. Rice: 1 cup
  5. Flattened Rice/Poha: 1/4th cup
  6. Water as required for the batter
  7. Rock Salt: 1 tsp

For Paniyarams 

  1. Mixed Chopped or Grated Vegetables: 1 cup (I used onion, capsicum, carrot)
  2. Minced Ginger: 1 tsp
  3. Asafoetida/Hing: a pinch
  4. Mustard Seeds: 1 tsp
  5. Curry Leaves: Handful
  6. Oil/Ghee for Cooking
  7. Salt to taste
  8. Green chilies: 2 (optional)

Instructions 

  • Wash and soak urad dal, channa dal and 1 tsp of fenugreek seeds for 3-4 hours. 
  • Wash and soak rice and poha for 3-4 hours.
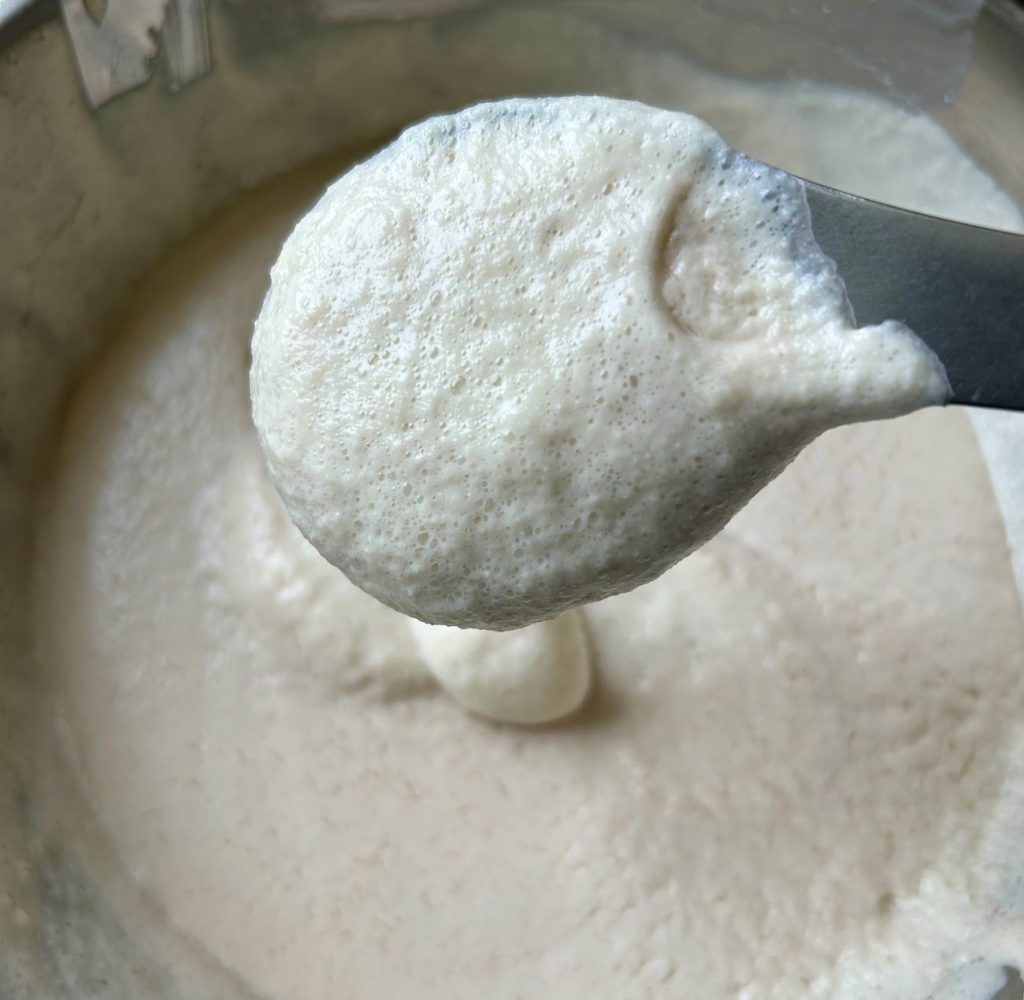
  • First grind the dals using water. Add water gradually to make a smooth thick but flowing consistency batter. 
  • Now grind rice and poha, again by adding little water at a time to make thick but flowing consistency batter.
  • Mix both the batters in a steel or a glass bowl. Add rock salt. Mix well. Leave it for fermentation for atleast 8 hours or more at a warm place. The batter will rise and will become airy with tiny bubbles. If it hasn’t then leave for some more time. 
  • In a pan, add a tbsp of oil. Add some mustard seeds & hing. Let mustard seeds splutter. Now add some finely chopped green chilies if using, curry leaves and minced ginger. Cook for few seconds then add finely chopped vegetables of your choice.
  • Season it with some salt. Cook for 2 minutes on medium flame or till they soften a bit. Allow it to cool. Then add the sauteed vegetables to the fermented batter and mix gently.
  • Now your batter is ready. The consistency of the batter is similar to idli batter. If it’s thick, add a bit of water. Check for salt. Heat Paniyaram pan to medium heat. Brush it with ghee or oil in each cavity and fill it with batter. Leave some space for paniyarams to rise.
  • Cover with a lid and cook on medium to low flame for 3 minutes or when the top has set, and edges have browned.
  • Then with a help of a skewer or a knife flip the paniyarams and cook the other side for 2-3 minutes. 
  • Serve immediately with chutney of your choice. 

Tips:

  • Cook appe on low-medium heat or else you will end up with raw batter in the middle.
  • You may use any combination of veggies minced broccoli, cauliflower, cabbage, or greens like methi or drumstick leaves works too.
  • Use a paniyaram pan that has been seasoned well and used in the past. If not the paniyarams will stick to the pan.

Do give this recipe a shot. I am sure this will be your child’s and your family’s new favourite. If you try this recipe, do give us a shout out. Just click a picture and tag us on @masala.monk or use the hashtag #MasalaMonkRecipe and share on Instagram and Facebook. We would love to hear from you. 🙂